Making a clean version of a song online can be done by using audio editing software and removing explicit lyrics. To create a clean version of a song online, you will need to use audio editing software such as Audacity or Logic Pro.
Using these tools, you can remove explicit lyrics and adjust the levels of the song to create a cleaner version. Creating a clean version of a song is crucial in many settings, such as for radio play or when performing in family-friendly environments.
Many artists create clean versions of their songs to cater to a wider audience or to avoid any potential legal issues. With the use of audio editing software, creating a clean version of a song online has become significantly easier. We will discuss the steps you need to follow to make a clean version of a song using audio editing software.
Online Tools For Cleaning Songs
Easily create a clean version of any song with online tools designed specifically for cleaning songs. These tools use artificial intelligence to remove explicit lyrics, making songs appropriate for all ages. Enjoy your favorite tunes without any questionable lyrics with simple online tools.
Do you have a favorite song that you love but cringe at a certain part of it because of bad audio quality or background noise? Fret not, because you can now clean up a song online with just a few clicks. Thanks to technological advancements, there are various online tools available to make a clean version of a song. In this article, we’ll focus on the three key online tools for cleaning songs: Online Audio Editor, Noise Remover, and Vocal Remover.
Online Audio Editor
An online audio editor is a powerful tool for cleaning up a song. It allows you to edit the audio files directly on your browser, without the need for any software installation. You can cut, copy, trim, and paste the audio easily. You can also adjust the volume, eliminate background noise, and even change the tempo and pitch of the audio. Some popular online audio editors are: – TwistedWaveAudacitySoundation Studio
Noise Remover
Background noise can be a significant distraction in an otherwise perfect song. Fortunately, noise removal tools can eliminate background noise and enhance the audio quality of the song. There are several noise remover tools available online, such as: – KrispVocalRemoverAudacity These tools use complex algorithms to identify and remove background noise, resulting in a clear and crisp audio file.
Vocal Remover
If you want to make an instrumental version of a song and do not wish to use any software, then a vocal remover is the perfect tool. Not only does it eliminate the vocals, but it also maintains the instrumental part of the song. Some popular vocal remover tools are: – Karaoke VersionVEOSYNCPhonicMind These tools offer an easy and quick solution for removing vocals from a song without compromising on the quality of the instrumental part. In conclusion, these online tools for cleaning songs make it easy and convenient for anyone to enjoy their favorite songs without any distractions or background noise. Now that you know about these tools, why not give it a try and make your own clean version of a song today!
Credit: soundcloud.com
Step-by-step Guide To Clean A Song Online
Are you looking for a clean version of your favorite song? Do you want to remove the background noise and vocals or edit the track in any other way? Fortunately, you don’t have to be an audio engineer to achieve these goals. In this blog post, we’ll share a step-by-step guide to clean a song online. With the help of the right tools and techniques, you can make your music sound exactly the way you want it to.
Select Song To Clean
The first step is to choose the song that you want to clean online. You can select a track from your computer or mobile device, or even paste a URL link to the video on YouTube or other platforms. Make sure that the file format is compatible with the online tool or software that you’re planning to use.
Upload The Song
Once you’ve decided on the song, the next step is to upload it onto the online platform. This process is usually simple, and you can do it by clicking on the “upload” or “browse” button. Depending on the size of the file and your internet speed, it may take a few seconds or minutes to upload the track.
Remove Background Noise
Background noise can be distracting, especially if you’re listening to a song in a noisy environment or with headphones. To clean the song and eliminate the unnecessary noise, you can use online noise reduction tools. These tools work by analyzing the audio spectrum and removing the sounds that don’t belong to the music.
Remove Vocals
If you want to create a karaoke version of the song or remove the vocals for any other reason, you can use online vocal remover software. These tools use algorithms to separate the music and vocals and give you the option to mute or lower the volume of the latter. Keep in mind that vocal removal is not always perfect, and some parts of the vocals may still be audible.
Save Your Clean Version
After you’ve cleaned the song to your satisfaction, it’s time to save the clean version. Most online platforms and software allow you to download the edited song as an MP3 or other audio format. Make sure that you name the file according to your preference and save it in a location that you can easily access later.
Tips To Get The Best Clean Version
Getting a clean version of a song may seem like a daunting task, but with the right tools and strategies, it is achievable. Below are some tips to help you get the best clean version:
Start With High-quality Source Audio
Starting with high-quality audio will make it easier to produce a clean version. When choosing the audio to work with, ensure that the source is of high quality. This will go a long way in helping you to produce an end-product that is clean and of high quality.
Use Headphones To Monitor Audio
Headphones are a vital tool when producing a clean version of a song. Using them will help you to monitor the audio and listen out for any unwanted sounds or content. The benefit of using headphones is that you can listen clearly, and be confident that your end product is as clean as you want it to be.
Take Breaks While Editing
Editing can be a time-consuming process, and it is easy to get caught up in trying to make the perfect clean version. Taking breaks while editing is important to maintain focus and productivity. Breaks are also good for your physical and mental well-being. Set a timer and take a short break every 30 minutes to keep your mind fresh and your work efficient.
Save Different Versions Of Your Edit
Saving different versions of your edit is crucial, especially if you want to go back to previous edits or changes. There are different reasons why you may need to do this – for instance, if you want to highlight different changes or test different approaches. Saving different versions ensures that you don’t lose any work and that you can always go back to a previous version if needed.
Credit: majormixing.com
Frequently Asked Questions Of How To Make A Clean Version Of A Song Online
How Can I Make A Clean Version Of A Song?
To make a clean version of a song, you need to use an audio editing software such as Audacity. Import the song, select the portion you want to clean, and use the “Noise Reduction” and “Equalization” tools to remove unwanted sounds and adjust the audio levels.
Finally, export the edited version as a new file.
What Is A Clean Version Of A Song?
A clean version of a song is a version without any explicit lyrics or objectionable content. It is typically edited to be appropriate for radio or public play.
How Do I Get Clean Versions Of Youtube Music?
To get clean versions of YouTube music, you can use online converters or music streaming services that offer high-quality audio. Some options include YouTube Music Premium, Tidal, and Spotify. Additionally, you can search for clean versions on YouTube by adding “clean” to the search query or by using filters.
How Do I Make A Clean Version Of A Song In Audacity?
To make a clean version of a song in Audacity, first open the song in Audacity. Next, use the Selection Tool to select the part of the song you want to keep, then go to Effect > Noise Reduction and choose “Get Noise Profile.
” Finally, go back to Effect > Noise Reduction and adjust the settings to reduce the noise.
Conclusion
Making a clean version of a song online is now easier than ever before with the use of various online resources. It’s imperative to ensure proper audio engineering techniques are used in order to eliminate any unwanted sounds and preserve the overall quality of the track.
Additionally, utilizing a variety of software tools available can aid in the process of producing a clean song. Hence, creating a clean version of any song is now an effortless task for both aspiring and professional musicians.
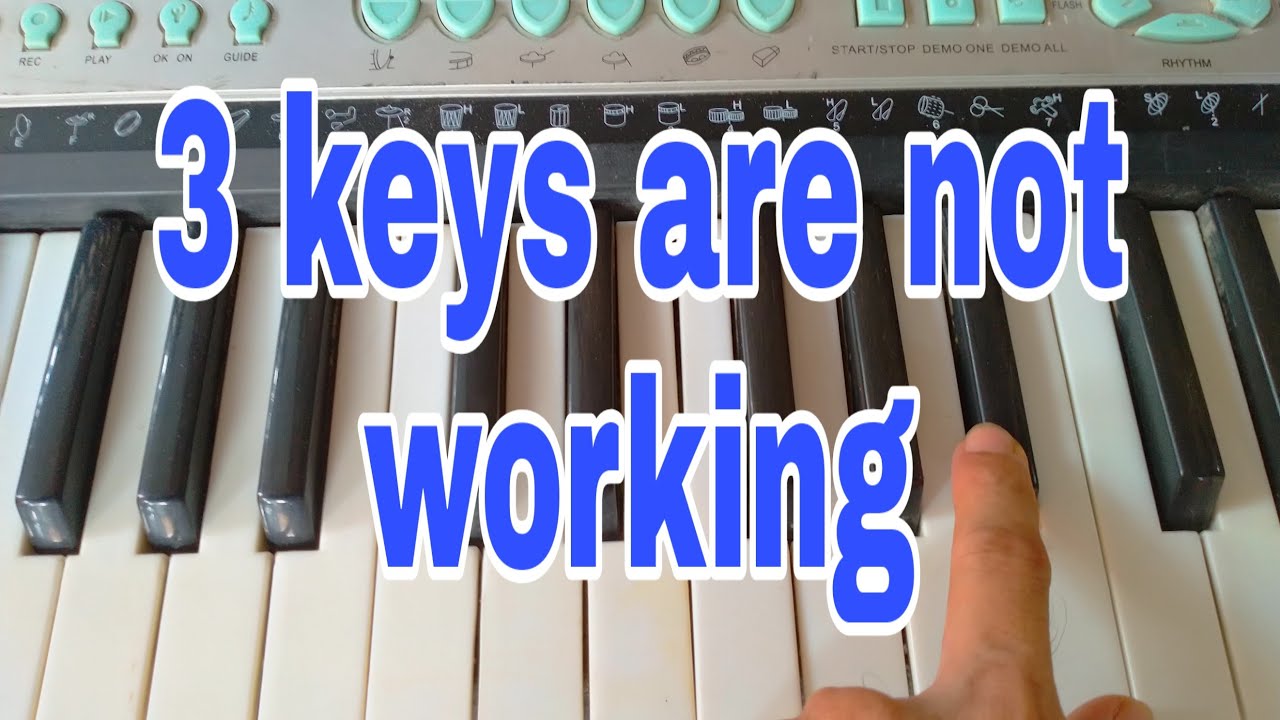
To repair music keyboard keys not working, first, determine the cause of the issue, and then either replace or repair the affected keys. If you are experiencing issues with your music keyboard keys, it can be frustrating and hinder your ability to create music.
Whether you are a professional musician or just starting, it is essential to keep your keyboard in good working condition. There can be several reasons why your keyboard keys are not working, including physical damage, dust and debris buildup, or a software malfunction.
The sooner you identify the issue, the easier and cheaper it will be to fix it. We will examine some of the common causes of keyboard key malfunctions and how to repair them efficiently.
Diagnosing The Issue
If you’re a music keyboard enthusiast, you’d know how frustrating it is to have keys not working while you’re playing your favorite melody. Most likely, the problem lies in the keyboard’s electronic circuitry, and it’s crucial to diagnose the problem before repairing it. In this article, we’ll discuss some methods that you can use to diagnose the issue at hand.
Checking Power Source
If your music keyboard is battery-powered, make sure that it has sufficient battery power before diagnosing any issues. Check the power indicator light or battery level indicator to determine if it’s time to change batteries or recharge the battery of your instrument. Also, check any power cables if you’re using an AC-powered keyboard.
Determining Specific Key(s) Not Working
The next step is figuring out which specific keys are not working. You can do this methodically by playing every key on the keyboard and testing if they produce sounds. However, this may take some time. Another quick way is to use MIDI software, which can diagnose the problematic keys automatically. Connect your keyboard to your computer using a USB cable and run the software to test each key. This will give you a report on which keys are functional and which are not.
In conclusion, diagnosing a keyboard with keys not working can be a complicated task. However, by following the steps mentioned above, you can pinpoint the root of the problem quickly and accurately. Once you have determined the issue, it’s time to proceed with repairing or replacing the affected keys.
Credit: bestdigitalpianoguides.com
Cleaning And Maintenance
Learn how to repair music keyboard keys that are not working with these simple cleaning and maintenance tips. Keep your keyboard in top condition by regularly cleaning it and addressing any key malfunction issues promptly.
Cleaning and maintenance are integral parts of any musical instrument’s longevity. Music keyboards are no exception. Keeping your keyboard clean and dust-free is essential in ensuring its smooth operation. Regular maintenance reduces the likelihood of sticky or non-functioning keys. In this post, we’ll explore how to clean and maintain your music keyboard, with a particular focus on removing debris and dust and cleaning dirty or sticky keys.
Removing Debris And Dust
Dust and debris can accumulate over time, causing your music keyboard’s keys to become unresponsive or produce unwanted sounds. To clean the keyboard, you’ll need a soft-bristled brush, a can of compressed air, and a clean cloth or microfiber towel. 1. Gently brush the keyboard’s surface and edges, taking care not to touch the keys. 2. Use the can of compressed air to blow out any debris that’s gathered between the keys or under them. Be sure to keep the can upright while spraying to avoid any harmful chemicals being released on the keyboard. 3. Finally, wipe down the keyboard with the clean cloth or microfiber towel, making sure to get into all the nooks and corners.
Cleaning Dirty/known Sticky Keys
Dirty keys can harbor germs and cause sticking, which can affect your music quality. Here’s what you should do if a key becomes sticky or dirty: 1. Turn off the keyboard and unplug it from the power source to prevent any electrical shock. 2. Use a small amount of rubbing alcohol on a clean cloth or cotton swab to gently clean the affected key. 3. Dry the key by gently tapping it with a dry cloth to avoid damaging the electronics. 4. If the key is still sticky or doesn’t work properly, you may need to remove the keycap to clean underneath it. Follow the manufacturer’s instructions for removing the keycap and be careful not to break or damage it while removing it. Keeping your music keyboard clean and well-maintained can ensure it lasts for years to come. Use these simple tips to keep your music keyboard looking and performing its best!
Replacing Keys
Replacing keys on a music keyboard may seem like a daunting task, but once you get the hang of it, the process is relatively simple. Replacing keys is often the last resort when attempting to fix a broken key. This is because replacing keys can be a bit costly and time-consuming, so it’s important to exhaust all other options before resorting to this step.
Ordering Replacement Keys
To replace a key on your keyboard, you will need to order a replacement key that matches the make and model of your keyboard. Consult the manufacturer’s website or a certified retailer to ensure you purchase the correct key.
Removing And Replacing Keys
Once you have your replacement key, it’s time to remove the broken key and install the new one. To remove the key, gently lift it off of the keyboard with your fingers or a tool. This will expose the keybed, which is the mechanism that triggers the sound when a key is pressed.
Next, you will need to align the new key with the keybed and gently press down until you hear a click. Once the key is in place, test it out by pressing down on the key and listening for the sound. Make any necessary adjustments until the key is functioning properly.
It’s important to note that some keyboards may require an expert to replace the keys. If you’re unsure of your ability to replace the keys, it’s best to consult a professional.
Credit: www.mspot.com
Repairing Internal Circuitry
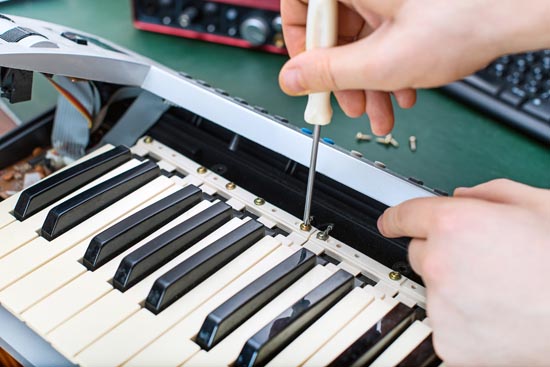
To repair music keyboard keys not working, it is necessary to understand the internal circuitry of the keyboard. This can be done by carefully opening up the keyboard, identifying the problem keys and their connections, and then repairing or replacing any damaged components as needed.
Repairing internal circuitry of music keyboard can be challenging and tricky. It requires a certain level of expertise and careful handling of sensitive equipment. If you have checked your music keyboard and have found that the keys are not working, then the next crucial step is to address the internal circuitry. Here we will discuss two crucial steps that can help Repairing Internal Circuitry: Checking Circuit Board and Replacing Switches and Components.
Checking Circuit Board
The circuit board is the main control center for your music keyboard. If there is any issue with the circuit board, your keyboard’s keys may not work correctly. Before replacing any switches and components, it is advisable to check the circuit board first. Some common signs of damage include burnt or corroded circuits, loose connections, and damaged capacitors. To check for damage, start by opening your keyboard and locating the circuit board. Visually inspect it for signs of damage such as breaks, cracks, and dark spots. Also, check for loose or disconnected wires that may be responsible for the issue. Use a multimeter to identify any areas of the circuit board that are not working correctly.
Replacing Switches And Components
After verifying that your circuit board is in good condition, the next step is to check the switches and components responsible for your keyboard’s nonfunctional keys. These elements could be damaged or worn out, causing the malfunctioning of some of your keys. Replace the damaged components with new ones, making sure that you follow the manufacturer’s instructions precisely. You can buy new switches and components from a reputable dealer or an authorized dealer of your keyboard brand. If you don’t have any experience or knowledge about replacing these components, then take help from an expert or professional who has experience in repairing electronic musical instruments. In conclusion, repairing internal circuitry of a music keyboard can be a daunting task, but it is achievable with proper expertise and careful handling of your keyboard’s sensitive components. Checking the circuit board and replacing faulty switches and components are the key steps to take to help restore your music keyboard to its perfect working condition.
Preventative Measures
To repair music keyboard keys that are not working, preventative measures can be taken by keeping the keyboard clean and free of debris. Regular maintenance and careful handling can also prevent issues with the keys.
Preventative Measures: Prevention is always better than cure, and that is true for music keyboard keys not working as well. Proper keyboard handling, storage, and regular cleaning and maintenance can go a long way in preventing any issues from arising in the first place.
Regular Cleaning And Maintenance
Keeping your music keyboard clean and maintained should be a regular task to avoid issues with keys. Dust, dirt, and debris buildup can cause problems with the sensors. Here are some tips to keep your keyboard clean and well-maintained:
Use a soft, dry cloth to clean the keys after each use. Avoid using wet or damp cloths.
Consider using a specialized keyboard cleaning solution to clean the surface of the keys and prevent buildup of dirt and grime.
Vacuum the keyboard every few months to remove any dust or debris that may have found its way into the keys.
Don’t expose your keyboard to direct sunlight or extreme temperatures. Keep it in a cool and dry place.
Proper Handling And Storage
Protecting your music keyboard from damage is important to keep the keys working properly. Mishandling or improper storage can put a strain on the keyboard and could cause keys to stop working. Here are some tips to keep in mind:
Always use a protective case to store your keyboard when not in use.
Avoid placing heavy objects on top of your keyboard or dropping it.
Transport your keyboard with care and avoid exposing it to extreme temperatures or sudden temperature changes.
Always use the power adaptor that came with your keyboard to avoid damaging the internal components.
By following these preventative measures, you can keep your music keyboard in good working order and avoid issues with keys not working. Remember to take proper care of your keyboard and it will take care of you.
Credit: m.youtube.com
Professional Repair Or Replacement
Having music keyboard keys not working can be frustrating, but professional repair or replacement can solve the issue. Experienced technicians can diagnose the problem and provide the necessary fix to ensure that you can resume playing your favorite tunes without interruption.
If you’re having issues with your music keyboard keys not working properly, there are a few things you can do. One option is to try repairing the keys yourself, which could be fairly simple if you know what you’re doing. However, if you’re not confident in your ability to fix the issue, it may be time to consider professional repair or replacement.
When To Seek Professional Help
If the issue with your keyboard keys seems to be more complex or severe than just a few faulty keys, it may be time to seek professional help. Here are a few signs that it may be time to take your keyboard to a professional:
The keys are sticking or not responding at all
The keyboard has suffered physical damage
You have tried to fix the issue yourself, but it persists
If you’re experiencing any of these issues, it’s best to take your keyboard to a professional to assess the problem. They can help you determine whether repairs are possible, or whether it’s time to replace the keyboard entirely.
Replacing The Entire Keyboard
If the issue with your keyboard keys is severe, or if your keyboard is very old, it may be time to replace the entire keyboard. While this can be an expensive option, it may be the best choice if your keyboard is no longer functioning properly. When replacing your keyboard, it’s important to do your research and choose a model that meets your needs. Consider factors such as the number of keys, available sounds, and your budget before making a decision. By taking the time to choose the right keyboard, you can ensure that you’re happy with your purchase for years to come.
Frequently Asked Questions For How To Repair Music Keyboard Keys Not Working
How Do I Fix Unresponsive Keyboard Keys?
To fix unresponsive keyboard keys, try these steps: 1. Clean the keyboard surface and keys. 2. Check for any hardware issue or loose connections. 3. Restart your computer. 4. Update or reinstall the keyboard driver. 5. If all else fails, consider replacing the keyboard or seeking professional help.
Can Musical Keyboards Be Repaired?
Yes, musical keyboards can be repaired. Whether it’s a minor issue like a broken key or a major issue with the electronics, repairs can be done. However, the cost of repairing may vary depending on the complexity of the problem and the availability of spare parts.
Why Do Some Of My Piano Keys Not Work?
There could be several reasons why some of your piano keys are not working. It could be due to loose wires, worn out or broken hammer, or dirt and debris buildup. It’s recommended to contact a professional piano technician to diagnose and fix the issue.
How Do You Fix A Dead Key On A Piano?
To fix a dead key on a piano, first, remove the key by lifting it and inspect it. Check for any debris or objects that may be stuck underneath the key. If there are any, remove them carefully. If the issue persists, it might be an internal adjustment needed, and a professional piano tuner should be contacted for further assistance.
Conclusion
To sum up, repairing music keyboard keys that are not working doesn’t have to be a daunting task. By following the steps outlined you can quickly fix the issue and get back to playing your favorite tunes. Remember to take precautions when disassembling the keyboard and double-check all connections to ensure a successful repair.
With a bit of patience and effort, you can extend the lifespan of your keyboard and continue to make beautiful music for years to come.
How often professional musicians practice varies, but routines are usually consistent. Professional musicians typically practice for several hours daily, with some even practicing up to 8 hours a day. Aspiring musicians should aim to practice at least 3-4 hours daily to improve their skills and reach professional levels.
For many people, music is an essential part of their lives, and it takes a lot of hard work and dedication to succeed as a professional musician. It’s no secret that regular practice is critical to improving one’s skills as a musician.
But just how often do professional musicians practice? This is a question that many music enthusiasts and aspiring musicians wonder about. The truth is that there is no one-size-fits-all answer to this question as different professional musicians practice for varying durations and frequency depending on their musical career, demands, and personal preference. We’ll dive deeper into how often professional musicians practice and the factors that influence their practice schedules.
Credit: ciomit.com
The Importance Of Practice In Professional Musicianship
Professional musicians are known for their exceptional skills, ability to improvise and deliver top-notch performances. However, what most people may not realize is that a lot of hard work and dedication goes into achieving this level of expertise. The backbone of a musician’s success is their practice routine. Regular practice is essential to consistently improve their skills, explore new music styles and stay relevant in the industry. This post explores how often professional musicians practice, the benefits of regular practice and how it shapes their career.
Benefits Of Practice
The benefits of practice go beyond mere skills improvement for professional musicians. Besides refining their abilities, practice:
Helps musicians overcome challenges that may arise during performances
Enhances muscle memory, which enables them to play complex pieces effortlessly
Builds confidence, which is required to perform in front of an audience or record a track
Prepares musicians to adapt to different styles, genres, and setups
How Practice Enhances Skills
Practice is the best tool for a musician to gradually enhance skills. It involves repeating the same exercises, scales, and techniques until they become second nature. The more an individual repeats a skill, the better they become at it. Furthermore, practice enables musicians to:
Practice Technique
How it enhances skill
Slow practice
Helps to perfect form and technique and correct errors
Goal setting
Assists musicians to focus on specific areas that require improvement, hence enhancing skill in those areas
Consistent and deliberate practice
Increases muscle memory, enabling musicians to play pieces without thinking
Therefore, practice is the secret ingredient to becoming a professional musician. It takes dedication, discipline, and hard work to achieve excellence in this industry.
Credit: www.liveabout.com
Factors Influencing Practice Frequency
Professional musicians practice frequency is influenced by various factors including their level of skill, type of music they play, personal goals and schedules, availability of resources and equipment, as well as their environment and support systems. These factors play a significant role in determining how often they practice to maintain and improve their skills in the competitive music industry.
Factors Influencing Practice Frequency Professional musicians are known to practice relentlessly to hone their craft. As much as talent plays a role in their success, practice is equally essential in shaping their abilities. However, various factors influence the frequency of practice among musicians. Let’s delve into these factors and how they affect the practice habits of professional musicians. Age and Level of Career The age and career level of a musician play a huge role in how often they practice. Younger musicians just starting often practice more frequently than established musicians. For instance, a young pianist just starting their career will likely spend more hours practicing their instrument than an older pianist with years of experience under their belt. As they progress, practice time may adjust with the increase in responsibilities that come with their career. Type of Instrument or Vocal Ability The type of instrument or vocal ability also influences the frequency of practice. For instance, a singer with a high range or a flamenco guitarist may require more regular practice to maintain the flexibility and agility required for these styles. On the other hand, a bassist or percussionist playing blues or jazz genres may require less practice time. Genre-Specific Norms The genre of music a professional musician is pursuing also influences practice frequency. A classical musician is expected to practice for several hours every day, while a pop artist may spend less time practicing daily. Moreover, the musician’s level of mastery also determines how much time they dedicate to practice. Motivation Finally, the motivation behind why a musician is practicing influences how frequently they practice. A passionate and driven musician may spend more time practicing than one who is practicing for external reasons such as advancing their career or earning money. In conclusion, there are various factors that influence the practice frequency of professional musicians. Age, level of career, type of instrument or vocal ability, genre-specific norms, and motivation are important when determining a musician’s practice habits. Regardless of these factors, practice remains a crucial aspect in a professional musician’s success in the industry.
Typical Practice Schedules Of Professional Musicians
Professional musicians practice daily, for hours at a time depending on their instrument and genre. It’s not uncommon for classical musicians to practice up to 8 hours a day, while others may only need a few hours of focused practice to maintain their skill level.
Consistency and dedication are key to success in the music industry.
Professional musicians are known for their impressive skills and seamless performances. They have spent years honing their craft, perfecting every note and beat. One vital aspect that sets them apart from amateur musicians is their dedicated practice schedules. Let’s take a closer look at the typical practice schedules of professional musicians.
Daily Practice Time Commitment
To become true masters of their craft, professional musicians typically practice for at least three hours every day. Some musicians may even practice for six or more hours every day. They usually split their practice routine into one or two hours of technical practice and one or two hours of repertoire. Technical practice includes working on sound quality, finger dexterity, and other skills, while repertoire practice involves learning or perfecting pieces of music.
Weekly Practice Schedule
In addition to daily practice, professional musicians usually have a set weekly practice schedule to ensure they cover everything they need to work on. They set specific goals for each practice session and make a plan to achieve them. Typically, they schedule longer practice sessions on days when they have fewer performances or other commitments.
Variations In Practice Frequency
Professional musicians also make variations in their practice frequency to avoid monotony. For example, they may practice for shorter periods of time but increase the intensity, or practice for longer periods but with breaks in between. They may also dedicate more time to practicing a particularly challenging piece or skill, or change their practice routine altogether to keep their minds and fingers fresh. In conclusion, a typical practice schedule of professional musicians includes daily commitments of at least three hours, a set weekly schedule, and variations in practice frequency. The dedication and discipline of these musicians enable them to continuously improve, perfect their craft, and deliver unparalleled performances to captivate audiences.
The Impact Of Practice Frequency On Musicianship And Career
Practice frequency can impact a musician’s career significantly. Professional musicians spend hours on daily practice and constantly strive to enhance their skills. The more they practice, the more proficient they become, leading to better career prospects and opportunities.
Examples Of Successful Musicians’ Practice Schedules
Musicians are known for their commitment to practice, with many dedicating hours to their craft every day. Successful musicians often work their way up to their level of expertise by practicing regularly for years. For example, legendary pianist Vladimir Horowitz practiced for four to five hours each day, whereas former Beatles member Paul McCartney practiced for two hours a day. On the other hand, classical cellist Yo-Yo Ma practices for at least three hours every day. While the amount of practice differs for each musician, it is clear that they all have a dedicated schedule they adhere to. It is also important to note that successful musicians don’t just practice blindly. They have specific goals that they aim to achieve during each session, which helps them to improve and stay on top of their game.
How Practice Frequency Can Affect Performance And Creativity
Practice frequency can impact a musician’s performance and creativity in several ways. In terms of performance, consistent practice can help musicians to develop muscle memory, making it easier for them to play complex passages with ease. It also helps to improve their timing, accuracy, and overall musicality. When it comes to creativity, practice can help musicians to explore new ideas and sounds. Consistent practice can help to expand their technical abilities, allowing them to express themselves more freely. It also helps them to develop new ways of playing familiar music, leading to more innovative and exciting performances. However, it is important to note that too much practice can lead to burnout, which can negatively impact performance and creativity. Therefore, finding a balance between practice and rest is essential for maintaining longevity in a musician’s career.
Balancing Practice With Other Career Demands
Professional musicians must also balance their practice schedule with other career demands, such as performances, recording sessions, and touring. This can be challenging since these activities require long hours and can be physically and mentally demanding. However, successful musicians find ways to manage their time effectively, ensuring they have enough time for practice while also fulfilling their career obligations. This could mean scheduling practice time early in the morning or late at night, using downtime during travel to practice, or using technology to stay connected with their instrument during long periods away from home. In conclusion, practice frequency plays a significant role in a musician’s career. Successful musicians have dedicated practice schedules that they adhere to, but they also find ways to balance their practice with other career demands. By finding this balance, musicians can improve their performance, enhance their creativity, and maintain longevity in their career.
Influential Factors Beyond Practice
Beyond sheer practice time, professional musicians are influenced by a multitude of factors that impact their success. These include talent, dedication, mindset, environment, and access to opportunities. While practice is an important component, it is not the only factor that determines a musician’s level of success.
Inborn Talent Vs Hard Work
While genetics may play a role in a musician’s ability to play an instrument, hard work and practice are more significant factors in achieving success in the industry. Most professional musicians practice at least three to four hours a day, honing their craft and developing their skills. However, this does not mean that someone without inherent musical talent can become a professional musician solely through hard work. Natural talent combined with dedicated practice are necessary for success.
Band Performance Schedules And Work Pressure
A band’s performance schedule and workload can affect how often a musician practices. Oftentimes, touring musicians find it challenging to dedicate as much time to daily practice as they would like due to travel time and performance commitments. Additionally, with the pressure to create new music and meet deadlines, sometimes musicians may not have enough time to practice. In such cases, it can be beneficial for musicians to utilize tools that help them practice more efficiently.
Health-related Factors
Musicians are prone to hand and shoulder injuries, which can affect their practicing schedules. They must take adequate breaks to prevent injuries and strain. Engaging in regular exercise routines, yoga, or stretches can improve a musician’s overall health and ability to practice. Furthermore, fatigue and stress can also impact a musician’s ability to practice efficiently. Therefore, it’s essential to maintain a balanced lifestyle that supports mental and physical well-being and encourages effective practice.
Tools To Help Individuals Practice More Effectively
The use of innovative tools can help musicians make the most of their practice time. For instance, apps for metronomes and backing tracks can assist in rhythm and timing development. Tools that help improve finger placement accuracy, such as finger exercises, can also enhance a musician’s skills. Additionally, using video recordings of performances can help musicians identify their shortcomings and areas of improvement. Regularly evaluating one’s performance and focusing on areas that need improvement is key to successful practice.
Credit: www.classicfm.com
Frequently Asked Questions For How Often Do Professional Musicians Practice
Do Professional Musicians Practice Everyday?
Yes. Professional musicians typically practice every day to maintain their skills, improve their technique, and prepare for performances or recording sessions. Practicing consistently is crucial for mastering an instrument and developing as a musician.
How Many Hours A Day Do The Best Musicians Practice?
The best musicians practice for about 3 to 6 hours a day. It is not about the amount of time they practice, but more about the quality and intensity of their practice sessions. Daily consistent practice is crucial for improvement.
How Many Hours A Day Does A Professional Pianist Practice?
A professional pianist typically practice 4-6 hours a day, with some practicing up to 8 hours a day to maintain their proficiency. However, the amount of practice time may vary depending on the individual’s skill level, upcoming performances, and personal preferences.
How Many Hours Did Beethoven Practice?
Beethoven practiced for several hours every day, often starting in the early morning and continuing into the night. His biographers estimate that he practiced for around 6 hours each day, although the exact number of hours is uncertain.
Conclusion
To sum it up, professional musicians dedicate ample time and effort into practicing to ensure a precise technique and sound quality. Each musician has their own routine and preference, but it is common for them to practice for several hours a day.
Those who devote themselves to constant practice are often the ones who achieve success in the industry. So, If you aspire to be a successful musician, practice, practice, and practice some more!
To use reference tracks when mastering, import them into your digital audio workstation (DAW) and compare their level, frequency balance, and stereo imaging with your mix. Using reference tracks helps you achieve a professional sound while keeping the original mix character intact.
When mastering, you want to ensure that your mix sounds good on different sound systems. Reference tracks can provide valuable insights into how a professionally mastered track sounds on different systems. By using reference tracks, you can compare your mix with commercial releases and identify any areas that need improvement.
We’ll explore how to choose reference tracks, import them into your DAW, and use them to achieve a professional sound.
Credit: www.masteringthemix.com
What Are Reference Tracks?
Reference tracks are pre-existing songs that are used to help master your own music. They can be helpful in achieving better tonal balance, dynamic range, and other elements by providing a standard for comparison. Using reference tracks can help ensure your final product meets industry standards and sounds great on any system.
Reference tracks are professionally made audio recordings of high-fidelity sound that are used as a reference or standard to compare with other tracks. They carry a lot of importance in mastering as they provide a benchmark against which you can measure the quality and loudness of your tracks. Essentially, they allow you to compare your final mix with commercial tracks and assure that your mix is up to professional standards.
Importance In Mastering
Utilizing reference tracks in your mastering process can greatly enhance the quality of your final mix. They allow you to make informed decisions about the EQ, loudness, and overall sound of your track. This ensures it matches and compares favorably to that of commercial tracks. Here are some reasons why reference tracks are an essential tool in mastering:
They provide a benchmark for both technical and artistic decisions in the mix.
They help with the tonal balance and fitting your mix to a specific genre.
They give a clear idea about the loudness level of high-quality tracks.
They allow for greater confidence in the mastering process.
They help in achieving consistency throughout different playback systems.
Example Of Using Reference Tracks In Mastering
Here is how you can use a reference track in your mastering process:
Select a reference track from the same genre or style you are working on.
Listen to the track and take note of its tonal balance, loudness, and overall sound.
Use analyzers and meters to measure the tonal balance and loudness of your reference track.
Match the tonal balance of your track with the reference track by adjusting the EQ or volume levels.
Compare your track with the reference track on different playback systems to ensure consistency.
Tweak your mix until it matches the tonal balance, loudness, and overall sound of the reference track.
By following the above steps, you can greatly improve the quality and loudness of your mix and make sure it meets the standards of commercial tracks. Reference tracks are an essential tool that every mastering engineer should use to achieve high-quality and professional-level sound.
Credit: m.youtube.com
Why You Need Reference Tracks When Mastering
Reference tracks are essential when mastering your music to ensure your final product meets the standard of professional releases. Reference tracks can help you compare your mix and identify areas of improvement. This allows you to achieve a sound that matches your desired outcome.
Why You Need Reference Tracks When Mastering Mastering is the final step in the production process, and it’s essential to ensure your music sounds incredible across all playback systems. So, one of the best ways to achieve this is by using reference tracks when mastering. Reference tracks, also known as benchmark tracks, are professionally mixed and mastered songs in the same genre as your music that you use as a guide to compare your work. Below are some reasons why you need reference tracks when mastering.
Ensuring Consistency
Reference tracks provide a constant reference point throughout your mastering process. This ensures that your music’s overall tonality, loudness, and dynamics are consistent with professional tracks. Using reference tracks can help eliminate any unwanted variations that may arise during the production process, resulting in a polished and cohesive sound that resonates with your listeners.
Making Objective Decisions
One of the significant benefits of using reference tracks when mastering is that they help you to make objective decisions. Mastering can be quite subjective, and it’s easy to get lost in the process. But with reference tracks, you’ll have a benchmark to compare your work, enabling you to identify problem areas and make decisions based on how your music compares with the industry standard.
Comparing Your Work
Another reason why you need reference tracks when mastering is to compare your work objectively. Using reference tracks to compare your work can help you identify areas that might need revision, such as frequency masking, dynamics, and clarity. Comparing your work can give you a better understanding of how your music stacks up against the competition and help you determine any necessary changes that will give your track a competitive edge. In conclusion, reference tracks are an essential tool in the mastering process. They provide consistency, help you make objective decisions and allow you to compare your work to that of industry professionals. By using reference tracks when mastering, you can create high-quality music that sounds great across all playback systems.
How To Choose The Right Reference Tracks
Choosing the right reference tracks is crucial when mastering your music. Consider the genre, instrumentation, and production techniques used in the chosen tracks to enhance your own project. Listen carefully and take notes on the details that make the reference track successful.
When it comes to mastering, it’s crucial to have reference tracks to compare your final mix with. But with so many options available, how do you choose the right reference tracks? Here’s what you need to keep in mind.
Consider Your Genre And Style
The first and foremost thing to keep in mind while selecting reference tracks is your music genre and style. It’s essential to choose tracks that align with your music style and genre. If you’re producing a rock album, listening to a hip-hop track as a reference won’t be useful. Therefore, choose tracks that match the sound, energy, and vibe of your music.
Choose High-quality Tracks
Selecting reference tracks that are of high-quality is crucial. Listening to low-quality audio can damage your ears and can even give you an incorrect perception of how your final mix should sound. Therefore, make sure to use tracks that are well-mixed, mastered, and released by reputable artists. This way, you’ll get an accurate perception of how your music should sound like at its final stage.
Use Multiple Tracks
It can be tempting to select just one reference track and stick with it throughout the process. However, it’s always best to choose multiple tracks, preferably 2-3, to give you a better idea of how your final mix should sound. This helps you identify if your mix is well-balanced, and your audio elements are working together cohesively. To conclude, selecting the right reference tracks is crucial to produce a well-polished final mix. Choose tracks that align with your music style and genre, that are of high quality, and use multiple tracks to have a better perspective on the overall sound. Happy mastering!
Credit: www.izotope.com
How To Use Reference Tracks In Your Mastering Process
Using reference tracks when mastering can greatly improve the quality of your final mix. By comparing your work to a professionally mixed track, you can identify areas that need improvement and make necessary adjustments. It’s a valuable tool for any audio engineer looking to produce a polished and competitive final product.
Mastering engineers often use reference tracks to guide them through the mastering process. A reference track is a professionally produced and mastered song that you use as a benchmark for the sound quality of your track. In this post, we will focus on how to use reference tracks in your mastering process. The following are steps you can follow to effectively use reference tracks.
Set Your Reference Level
The first step to using reference tracks is setting the reference level. Make sure the reference track is playing at a comfortable level and is not too loud or too quiet. This way, you can ensure that the settings you apply to your track do not compromise its overall sound. One way to set the reference level is to use a decibel meter to establish a benchmark for your track’s loudness.
Listen To Each Track Component Separately
The second step in using reference tracks involves listening to each component of your track separately. Pay particular attention to the bass, vocals, drums, and other elements that define your sound. This way, you can ensure that each instrumental and vocal element is well-balanced and complements each other. For instance, if your track has a strong bassline, you can use the reference track to determine whether its bass level is too high or too low. By listening to each track component, you can identify and address any inconsistencies in your sound quality.
Compare Your Track With The Reference Track
The third step in the process involves directly comparing your track with the reference track. This way, you can isolate any weaknesses in your sound quality and make the appropriate changes. Listen to your track compared to the reference track in mono and stereo to ensure that your mix sounds good in both soundscapes. For instance, you can compare your track’s highs, mids, and lows with the reference track and adjust your equalizer accordingly. You can also compare the overall loudness, stereo image, balance of instruments, and reverb to make sure that your track is well-composed. In conclusion, using reference tracks in your mastering process can help you to achieve excellent sound quality and improve your music production skills. By following these steps, you can gain a competitive edge in the music industry and produce high-quality tracks that stand out.
Tips For Using Reference Tracks Effectively
Effective use of reference tracks is key to successful audio mastering. Use them to compare your mix to other high-quality tracks, identify problem areas and refine your final sound. Use your reference tracks as a guide, but don’t copy them completely; aim to create a unique, polished final mix.
When it comes to the mastering process, reference tracks are essential tools that can help you achieve the desired sound and ensure consistency across different playback systems. However, it is important to use reference tracks effectively to avoid blindly copying them and losing your own creativity in the process. In this section, we’ll explore some tips for using reference tracks in mastering.
Don’t Blindly Follow The Reference Track
While reference tracks can serve as a guide, it is important to approach them with a critical ear. Blindly copying the EQ, compression, and other settings of a reference track can lead to a loss of originality and creativity. Instead, use the reference track as a starting point and tailor your own settings based on the specific needs of the mix you are working on. Every track is unique, so it is crucial to use your own judgment and expertise when using reference tracks.
Use Different Reference Tracks For Different Purposes
Different reference tracks have different strengths and purposes. When selecting a reference track, consider the genre, style, and intended playback system of the mix you are working on. For example, if you are mastering a pop track, a pop reference track would be more suitable than a reference track from a different genre. Additionally, it can be helpful to use multiple reference tracks for different purposes, such as checking the low-end balance, dynamic range, and stereo width.
Train Your Ears
One of the most important aspects of using reference tracks effectively is being able to discern the subtle differences between your mix and the reference track. This requires well-trained ears, so take the time to listen to a variety of music and develop your critical listening skills. Familiarize yourself with the characteristics of different genres and playback systems, and always trust your instincts when making adjustments to your mix. In conclusion, reference tracks are a valuable tool in the mastering process, but it is important to use them effectively. By keeping these tips in mind and approaching reference tracks with a critical ear, you can achieve the desired sound while maintaining your own creativity and originality in your work.
Common Mistakes To Avoid When Using Reference Tracks
When it comes to mastering, using reference tracks can be very helpful. However, there are some common mistakes to avoid. These include relying too heavily on the reference track, not considering the differences in equipment and settings, and ignoring your own creative vision.
By keeping these things in mind, you can effectively use reference tracks to improve your mastering process.
As reference tracks are essential tools for mastering, they can also lead to various common mistakes if not used correctly. Here are some of the most common mistakes to avoid when using reference tracks.
Choosing Inappropriate Tracks
One of the most common mistakes when using reference tracks is selecting the wrong track for your project. If the selected track does not match your production, it can mislead you and lead to an unsatisfactory outcome. To avoid this mistake, choose reference tracks that closely resemble your production, especially in terms of style, genre, and dynamics.
Over-reliance On Reference Tracks
Another mistake is over-relying on reference tracks. While reference tracks serve as a guide, relying too much on them can impede your creativity and ultimately make your final mix sound like a copy of the reference track. To avoid over-relying on reference tracks, use them as a reference point and not a definitive guide, and tailor your mix to your unique project’s sound.
Ignoring Your Own Creativity
As an artist, it is essential to recognize and appreciate your own creativity. While using reference tracks, you may forget that every artist and production is unique. If you solely use reference tracks, you may undervalue your own creativity and ultimately create a track lacking in originality. To avoid this mistake, continually nurture your creativity, use reference tracks as guidelines, and aim to create a distinctive sound for your productions. In conclusion, using reference tracks for mastering can bring numerous benefits. However, to make the most out of these tracks, you must avoid common mistakes such as choosing inappropriate tracks, over-relying on them, and ignoring your creativity. By following the above tips, you will easily navigate through using reference tracks and elevate your productions to a higher level of quality and uniqueness.
Frequently Asked Questions For How To Use Reference Tracks When Mastering
How Do You Use Reference Tracks When Producing?
Reference tracks can be used when producing by listening to them as a comparison for your own work. You can use them to get an idea of how certain elements should sound, such as the mix, EQ, and dynamics. This can help you achieve the desired sound and quality for your own production.
Do Professionals Use Reference Tracks?
Yes, professionals use reference tracks frequently to ensure that their work meets industry standards and sounds as good as possible. By comparing their own work to a high-quality reference track, they can identify areas for improvement and fine-tune their own productions to sound professional and polished.
How Do I Choose A Reference Track For Mastering?
To choose a reference track for mastering, consider the genre, instruments, and overall sound of your own mix. Select a high-quality track with a similar style and aim for a similar level of volume and dynamic range. Use your reference track as a guide to adjust your mix so it matches the desired sound and tone.
How Do You Level Match A Reference Track?
To level match a reference track, use a loudness meter to measure the volume. Adjust the gain of your own track until it matches the reference in loudness. Then, compare the tracks on different sound systems to ensure the levels remain consistent.
Conclusion
In mastering, using reference tracks can make a world of difference in the final results of your mixes. It’s essential to have a clear understanding of the style and sound you’re aiming for. Reference tracks can help you achieve your desired sound and ensure your music meets industry standards.
Remember to listen critically and focus on what works for your mix. Utilizing reference tracks is a valuable tool and can help you elevate your sound to new heights. So, start using reference tracks in your mastering process today for a more professional and polished final product.
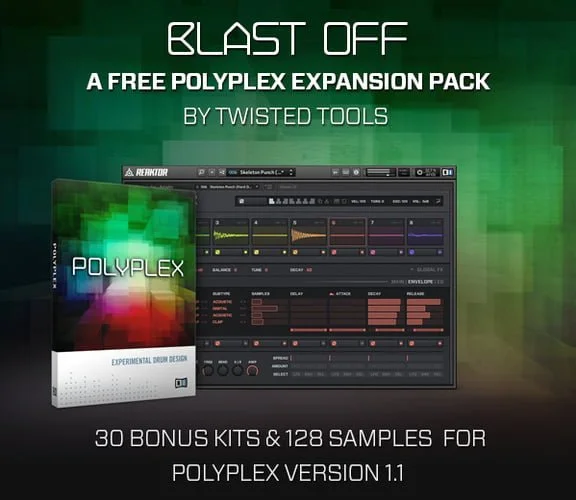
Native Instruments Polyplex is a versatile drum sampler that allows users to create custom percussion sounds by combining samples and effects. This tool features an intuitive interface that makes it easy to layer sounds, create complex rhythmic patterns, and tweak parameters in real-time.
The sampler is compatible with most popular DAWs and includes a library of over 500 sounds, as well as the ability to import your own samples. Also, beginners and seasoned producers alike can use it. Also, it improves drum programming and adds unique textures.
Moreover, try it out today and see what kind of beats you can create!
Introduction To Native Instruments Polyplex Drum Sampler
In addition, the Native Instruments Polyplex Drum Sampler is a powerful tool for creating intricate drum patterns. In addition, its intuitive interface allows users to easily layer and manipulate up to 8 samples at once. Its built-in effects offer even more creative control.
Furthermore, whether you’re an experienced producer or a beginner looking to add some flare to your tracks, the Polyplex’s engine has something to offer.
Additionally, Native Instruments Polyplex Drum Sampler is a powerful tool for drum programming and a go-to solution for producers worldwide. For example, it is a powerful virtual instrument that gives you access to a vast sound library of acoustic and electronic drum sounds. The software lets you mix and match samples, tweak parameters and create unique drum grooves in no time. The sampler is the perfect solution for beat-making enthusiasts who want to explore new possibilities in their drum programming.
Overview Of Polyplex’s Capabilities
Also, this instrument offers a range of features designed to enhance your drum programming experience. As a result, here are some of the capabilities Polyplex’s engine has to offer:
16 Drum Slots – Create unique and complex beats using the sampler’s 16 drum slots.
Moreover, sample Browser – Easily search through Polyplex’s engine’s vast sample library and import your own samples.
In addition, Kit Randomizer – Quickly create new kits by randomly selecting from the available samples within Polyplex’s engine.
Effects – Add effects within Polyplex’s engine’s internal mixer to further enhance your drum sounds.
Furthermore, step Sequencer – Easily program complex drum patterns using this instrument’s built-in step sequencer.
How Polyplex Can Enhance Your Drum Sound
Additionally, polyplex’s engine can take your drum sound to the next level by allowing you to create unique drum grooves that stand out. However, you can mix acoustic and electronic samples to create hybrid beats that are tailored to your style. With just a few clicks, you can tweak the individual sound parameters, such as pitch, decay, and volume, to transform your drum sounds. Furthermore, the integrated effects within Polyplex’s engine’s mixer can add depth and character to your drum sounds. This ensures your productions sound professional and inventive. This instrument is an all-in-one solution for your drum programming needs that you won’t regret investing in.
Credit: www.native-instruments.com
Getting Started With Polyplex
Also, polyplex’s engine by Native Instruments is a powerful drum sampler that lets users create custom beats with ease. Then, with its intuitive interface and extensive library of sounds, getting started with the sampler has never been easier. Explore the endless possibilities and unleash your creativity with this versatile and powerful tool.
Moreover, if you are a music producer looking to incorporate dynamic drum sounds into your productions, Native Instruments Polyplex Drum Sampler is an excellent choice. In short, this powerful software instrument features a vast collection of diverse drum sounds. This allows you to create complex rhythms and beats with ease. Before you begin creating, it’s essential to familiarize yourself with the installation and setup process, as well as MIDI mapping and controller integration.
Installation And Setup Process
In addition, installing Polyplex’s engine is a straightforward process that requires enough disk space and a compatible computer operating system. Once you’ve downloaded the installer, double-click it, and follow the on-screen instructions. After the installation is complete, launch your DAW or standalone version of Polyplex’s engine and begin creating.
Midi Mapping And Controller Integration
The sampler is compatible with many MIDI controllers, such as the Maschine, Komplete Kontrol, and other hardware controllers. However, the MIDI mapping process may differ depending on the controller you are using. Also, the first step is to verify that your controller is compatible with this instrument. You can then proceed to configure the controller to your preferred mapping settings. In conclusion, getting started with Native Instruments Polyplex Drum Sampler is easy. By following the installation and setup process, as well as MIDI mapping and controller integration, you’ll be creating dynamic drum sounds in no time. With a vast array of sounds and compatibility with various MIDI controllers, Polyplex’s engine is an excellent choice for producers of all skill levels.
Polyplex Interface And Navigation
The sampler, the Native Instruments drum sampler, offers an intuitive interface and smooth navigation that allows for effortless sound manipulation. In addition, it’s a versatile tool for creating unique and complex beats suitable for various musical genres.
If you are a music producer who loves using drum samples, Native Instruments Polyplex’s engine is a great tool to explore. For example, polyplex’s engine has an intuitive interface and navigation that allows you to create unique drum patterns and beats. In this section, we will discuss how to explore the drum pad interface, adjust sound parameters, and effects.
Exploring The Drum Pad Interface
When you open Polyplex’s engine, the first thing you’ll notice is its clean interface, consisting of 16 drum pads and a variety of sound-shaping controls. As a result, each of the drum pads has a unique sound. You can drag and drop samples onto them to create your own kit. Additionally, you can use MIDI controllers or your computer keyboard to play the drum pads.
Adjusting Sound Parameters And Effects
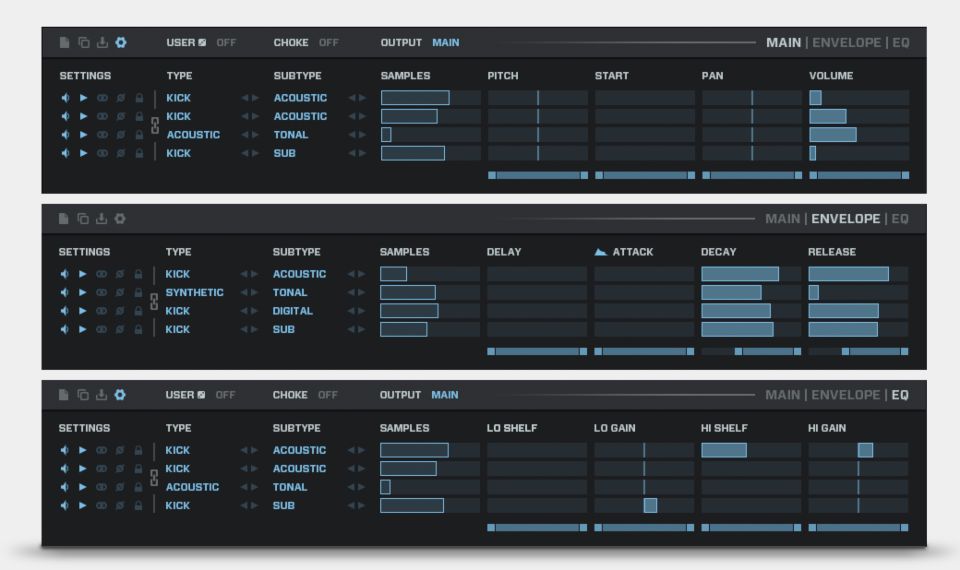
This instrument has a range of tools to adjust sound parameters and effects. However, this gives you the ability to create unique drum sounds. The “Layer” section allows you to adjust the pitch, volume, and pan of each layer. The “FX” section includes a range of effects like reverb, delay, and chorus, which you can use to add further depth to your sound. Additionally, Polyplex’s engine has a unique “Random” feature that generates random sounds and effects. This gives you endless possibilities to create unique beats.
Final Thoughts
Exploring the sampler interface and navigation can unlock unique drum patterns and beats. Then, with its clean interface and range of tools, this instrument is a drum sampler that is definitely worth checking out. So, start exploring and unleash your creativity!
Credit: rekkerd.org
Creating Custom Drum Kits With Polyplex
Create unique and customizable drum beats with Native Instruments Polyplex Drum Sampler. In short, with its intuitive interface, users can easily mix and match their own drum kits. This adds depth and complexity to their music compositions. Get creative with Polyplex’s engine and produce truly unique beats.
Creating Custom Drum Kits with the sampler is one of the strengths of Native Instruments’ Polyplex Drum Sampler. Similarly, this feature allows you to build your own drum kits. This gives you the flexibility to create unique sounds for your music. This article shows how to build custom drum kits with this instrument. It covers drag-and-drop kit creation and tweaking each drum sound.
Using The Drag And Drop Kit Creation Method
The drag and drop kit creation method in Polyplex’s engine allows you to create custom drum kits easily. Also, to get started, simply click on the “Create New Kit” button in the interface. You will be taken to the kit creator mode. Here you will see various drum sound sources, including noise generators, synthesizers, and samplers. You can select these sound sources and drag them onto the kit view to create your custom kit.
Adjusting Individual Drum Sounds And Effects
Once you have created your custom drum kit using the drag and drop method, you can start adjusting individual sounds and effects. In addition, the sampler offers many sound shaping and processing tools that allow you to tweak each sound to your liking. With simple controls like filters, envelopes, and pitch modifiers, you can transform each drum sound and create the desired effect. Additionally, you can apply global effects like reverb, delay, and distortion to further enhance your drum kit.
In conclusion, creating custom drum kits with this instrument is a straightforward process that allows you to build unique sounds for your music. For example, drag-and-drop kits and per-drum effects give you full control over your sound. Polyplex’s engine is a powerful tool that can help you take your drum programming to the next level.
In-depth Sound Design With Polyplex
When it comes to creating unique and engaging drum sounds, Native Instruments Polyplex Drum Sampler is one of the most versatile tools available. The Polyplex instrument offers endless possibilities for drum sound design with a range of features and parameters to tweak to your heart’s content. In this article, we will explore the ins and outs of using this instrument for in-depth sound design and shaping.
Modulating And Automating Sound Parameters
Polyplex’s engine offers a range of modulation options. However, this allows you to create evolving and dynamic drum sounds that can add excitement and interest to your tracks. With the sampler, you can modulate various sound parameters including pitch, filter cutoff, and distortion levels. This modulation can be achieved through several methods. This includes using LFOs, envelopes, and MIDI controllers to automate the modulation over time.
One of the advantages of this instrument’s modulation options is that the interface is very user-friendly. Then, the modulation sources are color-coded to match the modulation targets. This makes it easy to understand the relationships between the different parameters and set up automated modulation with just a few clicks.
Adding External Effects And Processing
In addition to the internal effects offered by Polyplex’s engine, you can also apply external effects to your drum sounds to further shape and customize them. In short, this can include using third-party plugins such as EQs or compressors, or routing the sampler output to send effects like reverb or delay.
Using external effects with this instrument can help you achieve a more polished and professional sound. It can also allow you to add more depth and dimension to your drum sounds by placing them in different spaces and environments. Similarly, by combining internal and external effects and processing, you can create truly unique and one-of-a-kind drum sounds that will help your tracks stand out.
Credit: m.youtube.com
Using Polyplex In Your Production Workflow
Polyplex’s engine, Native Instruments’ drum sampler, is a powerful tool for adding dynamic and intricate rhythms to your music production workflow. Also, with its intuitive interface and vast library of samples, the sampler offers endless possibilities for creating unique sounds and beats.
Native Instruments Polyplex Drum Sampler is a powerful tool for music producers and composers, offering versatile drum sound design and sequencing capabilities. In addition, this instrument lifts your drum programming in the studio and on stage.
Integrating Polyplex With Your Daw
Polyplex’s engine seamlessly integrates with all major digital audio workstations (DAWs). This makes it easy to incorporate its unique drum sounds into your production workflow. Simply load it as a VST or AU plugin in your DAW and you’re ready to go. The sampler supports MIDI and host sync, allowing you to easily sync it with your project tempo.
Steps to integrate Polyplex with your DAW:
Open your DAW and create a new project
Load Polyplex’s engine as a VST or AU plugin in your DAW
Import or record MIDI data into Polyplex’s engine to trigger the individual drum sounds
Adjust the sound parameters in the sampler to achieve your desired sound
Save and export your drum sequence as you normally would in your DAW
Using Polyplex In Live Performance Scenarios
This instrument is not just limited to studio use. You can also incorporate it into your live performance setups, allowing you to trigger unique drum sounds on the fly. To do this, you can use a MIDI controller or a drum pad to trigger the individual sounds in Polyplex’s engine.
Steps to use Polyplex in live performance scenarios:
Connect a MIDI controller or a drum pad to your computer running your DAW and the sampler
Assign each drum sound in this instrument to a specific MIDI note or pad on your controller
Use your controller or drum pad to trigger the drum sounds in real-time during your live performance
Adjust the sound parameters in Polyplex’s engine to achieve your desired sound and create dynamic drum sequences
The sampler allows you to create dynamic and unique drum sounds for any production or live performance. By integrating it with your DAW or incorporating it into your live setup, you can take your drum programming and sound design to the next level.
Advanced Tips And Tricks With Polyplex
Discover the power of Native Instruments Polyplex Drum Sampler with these advanced tips and tricks. Elevate your drum tracks and create unique rhythms with the wide range of features this powerful tool offers.
Native Instruments Polyplex Drum Sampler is a powerful tool for creating electronic drum sounds. While Polyplex’s engine can be used out of the box, there are advanced tips and tricks that can enhance your sound design using this tool. In this section, we will discuss two important aspects of Polyplex’s engine. Optimizing performance and CPU usage, and Creative sound design techniques.
Optimizing Performance And Cpu Usage
When working with complex drum samples, it is essential to optimize your performance and CPU usage. Here are some tips that can help you achieve this:
Free up your RAM before opening Polyplex’s engine.
Reduce the voices and polyphony settings of this instrument to reduce CPU usage.
Activate the “Eco” setting for a more resource-efficient mode.
Experiment with different buffer sizes to obtain the best performance.
Creative Sound Design Techniques
Polyplex’s engine is a great tool for designing unique drum sounds. Here are some tips and tricks that can help you create more complex and interesting sounds:
Mix and match sound sources from different kits to create your own custom kits.
The “Random” function can provide unexpected sound variations that can be useful.
Automate the sound parameters in a DAW to evolve the drum beat over time.
Use the “MIDI Link” function to trigger different sounds from a controller.
Employ the “FX” section to add processing like distortion, delay, and reverb.
With these advanced tips and tricks, you can push Native Instruments Polyplex Drum Sampler’s boundaries and create impressive and unique drum sounds.
Conclusion And Future Developments For Polyplex
The sampler by Native Instruments is a powerful drum sampler that offers a vast range of possibilities for music producers. The future developments for this instrument are promising, as it continues to provide new and innovative ways to create unique drum sounds and patterns.
Review Of Polyplex’s Features And Benefits
The Native Instruments Polyplex Drum Sampler is a powerful tool designed to enhance your drum sound creation process. This incredible software comes with several features that make it a must-have for music producers and anyone looking to create amazing rhythms. Polyplex’s engine boasts a user-friendly interface, extensive sound library, the ability to manipulate samples, morph sounds, and so much more. With the sampler, you can create complex rhythms and grooves with ease. The upsides of using this instrument are numerous, including: – Pre-programmed and original drum kits with unique sound sequences – Easy integration with other Native Instruments products – Ability to customize sounds using sophisticated sound-design tools – User-friendly interface for ease of use – A wide range of sounds that are ready to use
Looking Ahead To Future Updates And Expansions
Native Instruments is always looking for ways to improve their products and Polyplex’s engine is no exception. In the future, we can expect to see even more updates and expansions for this powerful drum sampler. Native Instruments has a long-standing history of delivering high-quality software products, and the sampler is no exception. The company is continuously expanding and improving their product line. This means we can expect to see even more features and benefits added to this instrument in the future.
Future updates may bring a bigger sound library and new sound-design tools. They may also add more ways to customize patterns. Furthermore, we can expect Native Instruments to ensure compatibility with new versions of popular Digital Audio Workstations (DAWs). We can also expect Native Instruments to continue to update and provide new sound kits that are relevant to the latest musical trends. In conclusion, with the sampler, users get a powerful and feature-rich drum sampler that is easy to use. It is backed by Native Instruments’ notorious reputation for high-quality products.
As we look forward to future updates and expansions, we can be sure that this instrument is only going to get better with time.
Frequently Asked Questions On Native Instruments Polyplex Drum Sampler
What Is Native Instruments Polyplex?
Native Instruments Polyplex’s engine is a powerful drum-design tool for music makers. It allows users to create unique drum sounds by blending samples and patterns, and manipulating numerous parameters like filters and effects. The sampler is convenient for composers who want to experiment with unusual percussive sounds in their productions.
What Is The Difference Between Drum Machine And Drum Samples?
The main difference between a drum machine and drum samples lies in their function. A drum machine generates percussion sounds electronically, while drum samples are actual recorded sounds of drums and percussion instruments.
What Is Polyplex Drum Sampler?
This instrument is a drum sampler software designed by Native Instruments. It offers a wide range of sounds and samples, drum kits, and customizable drum beats. It is a virtual instrument that can be used in music production.
What Are The System Requirements For Polyplex?
Polyplex’s engine requires a computer with at least a 2 GHz processor, 4GB of RAM, and 1GB of free hard drive space. It is compatible with Mac and Windows operating systems and can be used with most music production software.
Conclusion
Overall, Native Instruments Polyplex Drum Sampler is an impressive tool for musicians and producers. It allows for endless possibilities when creating and customizing drum samples. The interface is intuitive and packed with options. Users of every skill level can reach their desired sound.
With its compatibility with other Native Instrument products, the sampler is an excellent addition to any music production setup. Its versatility and quality make it a must-have tool for any producer or musician looking to enhance their work.
To make your songs sound professional, focus on the quality of your recording, mixing, mastering, and arrangement. A professional-sounding song starts with proper recording techniques, well-mixed tracks, and mastered audio that enhances the overall sound.
By following these steps, you can ensure that your music stands out from the crowd in an oversaturated industry. As a musician, you want your songs to be heard and appreciated by as many listeners as possible. To achieve this goal, you must make your music sound professional.
A professional-sounding song can be the difference between a fleeting hobby and a successful career in music. However, achieving this level of quality can be challenging, especially if you don’t have any recording or mixing experience. We’ll provide you with some practical tips on how to make your songs sound professional, even if you’re working on a limited budget.
Credit: majormixing.com
Start With High-quality Recordings
If you want your music to sound professional, you need to start with high-quality recordings. The foundation for any great song is a good recording, and if you don’t get this right, everything else will suffer as a result. Here are a few tips to help you get started:
Choose The Right Equipment
One of the most important aspects of making a high-quality recording is having the right equipment. This doesn’t mean that you need to go out and spend thousands of dollars on the latest gear, but it does mean that you need to have a good microphone, headphones, and an audio interface. A good microphone is essential, as it will capture the nuances of your voice or instrument. Headphones are also important so you can hear what you’re recording. An audio interface is necessary to convert the analog sound into digital
Optimize Your Recording Space
If possible, set up your recording space in a separate room from where you will be listening to playback. Choose a quiet room that has good acoustics and remove any unnecessary clutter, furniture, or objects that can create unwanted background noise. You can also place acoustic panels or blankets on the walls to deaden the sound.
Use Proper Microphone Techniques
Using proper microphone techniques can make a big difference in the quality of your recordings. A few tips to keep in mind include:
Speak or sing directly into the microphone, keeping it about 6-8 inches away from your mouth.
Avoid plosives (the popping “p” or “b” sounds) by using a pop filter or angling the mic.
Try different mic positions and angles to find the best sound.
By following these tips, you can ensure that your recordings sound professional and make your songs stand out from the crowd.
Credit: www.youtube.com
Edit And Mix Your Tracks
Elevate your music to the next level by editing and mixing your tracks to sound more professional. Utilize the power of software and techniques like compression, EQ, and editing to enhance the quality and appeal of your songs.
Editing and mixing are essential steps in making your songs sound professional. These tasks can take your music to the next level by enhancing the timing, pitch, frequencies, and clarity. In this post, we’ll dive into four crucial steps to edit and mix your tracks effectively: edit for timing and pitch, use EQ to balance frequencies, add effects and processing, and mix for clarity and depth.
Edit For Timing And Pitch
Editing for timing and pitch ensures that your music sounds polished and in sync with the beat. You can use a digital audio workstation (DAW) to adjust timing and pitch. It’s essential to pay close attention to the elements in the mix and avoid over-editing to maintain the natural feel of the song. Some tools for editing pitch and timing include Flex Time, Quantize notes, and Time Stretching.
Use Eq To Balance Frequencies
Balancing frequencies is crucial to make sure that your tracks sound clean, clear, and well-balanced. Using an equalizer (EQ) enables you to adjust the levels of various frequencies – including bass, midrange, and treble – to achieve a balanced mix. You want to ensure that each instrument and sound in the mix has its space to shine. For instance, boost the bass for the kick drum, lower the mids for the snare, or reduce harsh frequencies from vocals.
Add Effects And Processing
Effects and processing can bring depth and character to your tracks. You can use a variety of effects, such as reverb, delay, compression, and distortion, to add texture and interest to your mix. However, be careful not to overdo it. Too many effects can cause the mix to become cluttered and distorted. Always aim for natural-sounding effects that complement each other and the overall feel of the song.
Mix For Clarity And Depth
Mixing is the final step in making your music sound professional, where all elements of your track come together harmoniously. The right mix allows your music to stand out and have depth and clarity. Ensure each instrument has its space and isn’t competing with other sounds in the mix. Use volume, panning, and automation to place each element in the mix, making sure it’s balanced and well-spaced. In conclusion, editing and mixing are crucial steps in producing professional-sounding tracks. Follow the above steps, experiment, and keep a balance to create something that you can be proud of. Remember, the mix is subjective, so trust your ears, make changes until you’re satisfied with the result.
Add Dynamics With Automation
Automate your music production process to add dynamics to your songs and make them sound more professional. With the help of advanced tools and software, you can streamline your workflow and create high-quality music tracks that stand out.
Automation can be a powerful tool in making your songs sound professional. It allows you to add dynamics, create changes and sculpt effects, all of which can take your music to the next level. Here are some ways you can incorporate automation into your music production process:
Automate Volume Levels
One of the easiest and most effective ways to add dynamics to your music is by automating volume levels. By automating the volume of certain tracks or instruments, you can ensure that they are heard at the appropriate times and don’t overpower other elements in the mix. You can also use automation to create crescendos and decrescendos, which can add a real sense of emotion and drama to your music.
Create Dynamic Changes With Panning
Panning is another great way to create dynamic changes in your music. By automating the panning of certain instruments or elements in the mix, you can create a sense of movement and space that can make your music feel more alive. For example, you could have a guitar solo pan from left to right as it progresses, or you could create a “call and response” effect by having two instruments pan back and forth across the stereo spectrum.
Use Automation To Sculpt Effects
Finally, automation can be used to sculpt effects in a way that would be impossible to achieve manually. For example, you could use automation to gradually increase the amount of reverb on a vocal track, creating a sense of space and atmosphere. You could also automate the cutoff frequency of a filter to create a sweeping effect. The possibilities are endless, and by experimenting with automation, you can find new and creative ways to add depth and texture to your music. In conclusion, adding dynamics with automation is essential to make your songs sound professional. By automating volume levels, create dynamic changes with panning, and using automation to sculpt effects, you can elevate your music to a whole new level. So why not experiment with automation today and see what kind of magic you can create?
Master Your Tracks
Master Your Tracks is a comprehensive guide to help you achieve professional-sounding songs. From mixing and mastering to utilizing top-notch equipment and software, this resource will help take your music to the next level.
As a music producer or a singer, mastering your tracks is key to making your songs sound professional. While recording, the individual tracks will have different volume levels, which need to be adjusted to produce a balanced final mix. Mastering involves the manipulation of audio signals to produce a final stereo mix suitable for distribution. Let’s explore some tools and techniques you can use to master your tracks.
Use Compression To Control Dynamics
Compression is a technique that reduces the dynamic range difference between the loudest and quietest parts of the music. By balancing the levels, the track sounds more cohesive. Compression also helps to stabilize the volume of a song. To use it in your track, choose a compressor that best suits your music type, set the threshold level, and ratio. Avoid over-compression, as it can produce a flat, lifeless sound.
Apply Eq To Enhance Tonal Balance
Equalization (EQ) involves altering the frequency response of a track to improve sound quality. With EQ, you can boost or attenuate specific frequencies to create balance. For instance, you can reduce the low-end frequency to reduce muddiness, boost the high-frequency to make your tracks sound brighter, and more. Use a high-Q factor to make precise adjustments to the frequencies.
Add Limiting To Increase Volume
Limiting is a technique used to increase the overall volume of a track. It balances the loud and soft parts without clipping or distortion. To use it, set the threshold to catch any peaks, and adjust the output level of the limiter. Careful use of limiting will add more volume to your tracks without sacrificing dynamic range.
Add Stereo Widening For Depth
Stereo widening is a technique that alters the stereo field of a track, making it sound broader and more spacious. By using stereo widener effects, you can add depth and dimension to your music. To achieve a wider stereo image without overdoing it, use moderate stereo wideners instead of extreme settings.
Add Dithering For Final Export
Dithering is the final technique, used to reduce the bit-depth in a signal. This technique masks low-level noise and yields a cleaner final mix. It helps to maintain quality when exporting your music from a higher bit depth to a lower one. When exporting, add a dithering plugin to ensure cleaner audio quality in your final mix. In conclusion, mastering your tracks is crucial to making your songs sound professional. By using compression, EQ, limiting, stereo widening, and dithering as outlined above, you can ensure your tracks are well-balanced, polished, and ready for release.
Final Tips
To make your songs sound professional, focus on quality production, proper mixing and mastering, and creating memorable hooks and melodies. Utilize various tools and techniques, such as EQ, compression, harmonies, and effects, to enhance the overall sound and impact. Continuously refine and perfect your craft through hard work, dedication, and collaboration with other musicians and industry professionals.
Final Tips: Now that you have learned the nitty-gritty of how to make your songs sound professional, it’s time to wrap it up with some final tips. These tips will help you give the finishing touches to your music and take it to the next level. Use reference tracks: One of the best ways to make your music sound professional is by comparing it to other commercially successful tracks. You can analyze their production, mixing, and mastering techniques, and try to replicate them in your own music. This process is called using reference tracks, and it can be a game-changer for your music. However, it’s essential to ensure that you’re not copying or imitating anyone’s work but learning from it. Consider hiring a professional: Mixing and mastering your music can be a daunting task, especially if you’re new to it. It’s highly recommended to consider hiring a professional and letting them handle the technical aspects of your music. This will not only save you time and effort, but it will also give you the best possible output. Professional engineers have the expertise and equipment to bring out the best in your music and make it sound flawless. Don’t overdo it: While it’s important to put in the effort to make your music sound professional, it’s equally crucial not to overdo it. Sometimes, we get carried away with using too many effects, plugins, or techniques in our music, which can make it sound cluttered and unnatural. It’s vital to ensure that every element in your music has a purpose and adds value to the overall feel of the track. Keep it simple and classy, as they say, less is always more. In conclusion, following these final tips will help you make your songs sound professional and polished. Using reference tracks and hiring a professional can take your music to the next level. Simplicity and purpose are key to achieving a clean and professional sound. Incorporate these tips in your music-making process, and you’ll see the difference they make.
Frequently Asked Questions For How To Make Your Songs Sound Professional
How Do I Make My Song Sound Professional?
To make your song sound professional, you need to focus on the quality of your lyrics, composition, and production. Make sure that your song has a clear structure, with a catchy hook and engaging verses. Work with experienced producers who can help you achieve the sound you’re looking for.
Pay attention to the mix, mastering, and overall sound quality. Finally, promote your song effectively to reach your target audience.
What Makes A Song Professional?
A professional song typically has clear, well-structured lyrics that evoke emotion and a distinct melody. The sound quality should be high, befitting of a professional recording, and the instrumentals and vocals should be properly balanced. Ultimately, a professional song seamlessly blends various musical elements to transport listeners to a specific emotional space.
How Do You Make Music Like A Professional?
To make music like a professional, you need to have a deep understanding of music theory and different instruments. You also need to have access to high-quality recording and production equipment, as well as a good understanding of mixing and mastering techniques.
It’s important to continuously improve your skills and stay up to date with industry trends. Collaborating with other musicians and seeking feedback from professionals can also help improve your music.
How Do I Make My Audio Recording Sound Professional?
To make your audio recording sound professional, follow these guidelines: 1. Use a high-quality microphone to capture clear audio. 2. Record in a quiet and controlled environment. 3. Avoid background noise and other interruptions. 4. Edit your recording to remove any unwanted noises or mistakes.
5. Apply EQ, compression, and other effects to enhance the overall sound quality.
Conclusion
To sum it up, making your songs sound professional demands attention to detail. It’s essential to have a clear vision of the sound you want and equip yourself with the right tools to materialize it. Understanding the importance of pre-production, selection of suitable software and plugins, and proper mixing and mastering strategies can take your music to the next level.
So, follow these guidelines with determination and patience, and you may find yourself with a hit album sooner than you imagined!
To mix vocals in Logic Pro X with stock plugins, simply add the desired plugins to each vocal track and adjust accordingly. Utilize tools such as EQ, compression, and reverb to create a balanced, polished sound.
Mixing vocals is an essential aspect of music production. With Logic Pro X’s built-in stock plugins, achieving a professional sound is a simple and accessible feat. By utilizing tools such as EQ, compression, and reverb, the vocals can be balanced and polished.
Applying these plugins to individual tracks allows for an extremely customized sound, tailoring each vocal to fit the track’s specific needs. In this guide, we will go over the basics of mixing vocals in Logic Pro X with stock plugins, providing essential tips to elevate your productions. So, let’s dive in!
Preparing The Vocal Track
Prepare your vocal track by cleaning up background noise and adjusting levels before applying stock plugins for the best mixing results in Logic Pro X. Use EQ, compression, and reverb to enhance the vocals and make them stand out in your mix.
When it comes to mixing vocals in Logic Pro X, preparing the vocal track is a crucial step. To achieve an outstanding sound quality, some essential steps need to be followed. This article will provide detailed information on how to prepare the vocal track using stock plugins in Logic Pro X.
Cleaning Up The Track
Before diving into mixing, it is necessary to clean up the vocal track. A clean vocal track provides a better foundation for the mixing process. Here are some of the essential tips to clean up the vocal track:
Delete any unwanted regions
Delete background noise
Adjust the vocal levels
Remove any unwanted background vocals
Setting Up The Channel Strip
After cleaning up the track, it’s time to set up the channel strip. The channel strip in Logic Pro X provides an excellent starting point for processing the vocal signal. Here are some essential tips to set up the channel strip:
Insert the Channel EQ and set a high-pass filter to remove any low-end rumble.
Add the Compressor to control the dynamic range and create a consistent vocal level.
Next, insert the Space Designer to add reverb and create a sense of space in the mix.
Choosing The Right Plugins
Choosing the right plugins is essential in mixing vocals in Logic Pro X. The stock plugins offer excellent sound quality and provide a vast array of options for processing vocals. Here are some of the essential stock plugins for mixing vocals:
Plugin Name
Function
Channel EQ
Equalization
Compressor
Dynamic Range Control
Spatial Designer
Reverb and Space Creation
DeEsser
De-Essing
Tape Delay
Delay
In conclusion, preparing the vocal track before mixing in Logic Pro X is an essential step. Cleaning up the track and setting up the channel strip can provide a better foundation for the mixing process. Choosing the right plugins is also crucial in achieving an outstanding sound quality. By following these tips and using the stock plugins, anyone can achieve a professional-sounding mix.
Equalizing The Vocals
Achieving a balanced and professional sound when mixing vocals in Logic Pro X can be challenging, but with the use of stock plugins and proper equalization techniques, it can become more manageable. Equalizing the vocals can help to remove unwanted frequencies, enhance necessary ones and create a pleasant listening experience.
Adjusting The Low Frequencies
When mixing vocals, adjusting the low frequencies is essential to give them warmth and weight. In Logic Pro X, use the Channel EQ plugin to modify the low end of the vocals. First, identify any problematic frequencies that are clashing with the instruments in the mix. Then, use a low-cut filter to remove any unnecessary low-end rumble and mud. Boosting frequencies around 100-200 Hz can add warmth to the vocals, while reducing around 400-500 Hz can help reduce boxiness or muddiness in the vocals.
Tweaking The Mid Frequencies
Equalizing the mid frequencies can help bring out the clarity and presence of the vocals. In Logic Pro X, use the Channel EQ plugin to adjust the mid frequencies. Start by identifying any harsh or nasal frequencies in the vocals, which can typically be found around the 1-2 kHz range. Use a narrow Q-factor and reduce those frequencies slightly to smooth out any harshness. Boosting frequencies around 2-5 kHz can add clarity and cut-through to the vocals, while reducing around 500-800 Hz can remove any muddiness in the mid-range.
Enhancing The High Frequencies
Finally, enhancing the high frequencies can add brightness and air to the vocals. Use the Channel EQ plugin to adjust the high frequencies in Logic Pro X. Start by boosting frequencies around 10 kHz to add sparkle and presence to the vocals. You can also use a shelving filter to adjust the frequencies above 10 kHz for a natural-sounding high-end boost. Be careful not to overdo it, as too much high-end boost can result in a harsh or sibilant sound. Overall, equalizing the vocals is an important step in mixing. With these tips and techniques, you can achieve a well-balanced and professional-sounding vocal mix using only Logic Pro X’s stock plugins.
Dynamic Processing
Achieving a professional vocal mix is possible with Logic Pro X’s stock plugins through dynamic processing. Using the compressor and EQ plugins, you can reduce unwanted frequencies and balance the vocal’s levels, making it fit seamlessly into your mix.
Dynamic Processing is an essential step to achieve a well-balanced vocal mix. It involves using a combination of compression, de-essing, and limiting to control and even out the dynamic range of the vocal track. In Logic Pro X, using stock plugins, dynamic processing can be done with ease. Here are some of the techniques you can use for dynamic processing.
Using Compression
Compression is the most crucial tool in vocal mixing. It helps to reduce the dynamic range of the voice, making the quiet parts louder and the loud parts softer. In Logic Pro X, the stock compressor plugin is excellent for this purpose. To use it, insert the compressor on the vocal channel and adjust the threshold to around -15dB. Then set the ratio at 2:1 and adjust the attack and release times to taste. You’ll want to aim for a reduction of around 5dB to 6dB on the vocal track.
Adding De-essing
De-Essing is the process of reducing the harsh, sibilant sounds that can be present in vocals when the artist pronounces ‘s’ and ‘sh’ sounds. Logic Pro X comes with a stock de-esser plugin that makes this process easy. After inserting the plugin on the vocal channel, adjust the frequency band to target the offending sibilance and set the range so that it only reduces the harshness by around 3dB.
Applying Limiting
Limiting is the process of reducing the peaks in the vocal track, ensuring that it never exceeds a specific level. Logic Pro X’s Limiter plugin is an excellent tool for this purpose, with a transparent character that will not color your sound. Insert the limiter on the vocal channel and set the threshold to -0.1dB, then adjust the release time to ensure that the limiting is smooth and transparent. However, be careful not to overuse limiting as it can harm the dynamics of the vocal performance. In conclusion, using dynamic processing to mix vocal tracks is an essential part of achieving a well-balanced mix. Using stock plugins in Logic Pro X, you can achieve excellent results with compression, de-essing, and limiting. With the right adjustments and a careful ear, your vocal tracks can sound amazing without the need for expensive third-party plugins.
Credit: seandivine.com
Adding Effects
By using stock plugins in Logic Pro X, you can easily mix vocals and add effects to your tracks. From EQ, compression to reverb and delay, Logic Pro X provides a range of tools that help you create a professional-sounding mix.
So, explore the stock plugins and experiment with different effects to add depth and dimension to your vocals.
Adding Effects Adding effects is an essential step in producing a great vocal mix. Logic Pro X offers several stock plugins that can be utilized to make your vocals sound professional and polished. In this article, we will discuss how to use reverb, delay, and modulation effects to create depth and space in your vocal mix. Creating a Space with Reverb Reverb is a powerful tool that can be used to create a sense of space in your vocal mix. It simulates the sound of a room or hall, giving your vocals a natural and organic sound. To add reverb to your vocals in Logic Pro X, follow these steps: 1. Add a Space Designer plugin to your vocal track. 2. Choose a preset that matches the vibe of your song. 3. Adjust the Wet/Dry control to determine the amount of reverb that is applied to your vocals. 4. Use the Decay and Predelay controls to fine-tune the reverb sound. Adding Depth with Delay Delay is a classic effect that can add depth and dimension to your vocals. It can be used to create echoes, doubling effects, and more. Here’s how to add delay to your vocals in Logic Pro X: 1. Add a Delay plugin to your vocal track. 2. Choose a delay time that matches the tempo of your song. 3. Adjust the Feedback and Mix controls to create the desired effect. 4. Experiment with the various delay modes, such as Ping Pong or Tape Delay. Using Modulation Effects Modulation effects such as chorus, flanger, and phaser can add movement and interest to your vocal mix. They work by altering the pitch and timing of the vocal signal. To use modulation effects in Logic Pro X, follow these steps: 1. Add a Modulation plugin to your vocal track. 2. Choose the effect type that you want to use (e.g. chorus). 3. Adjust the Rate, Depth, and Mix controls to create the desired effect. 4. Experiment with different effect types and settings to find the perfect sound. By using reverb, delay, and modulation effects in Logic Pro X, you can create a professional-sounding vocal mix that will stand out in any genre. Don’t be afraid to experiment with different settings and plugins to find the perfect sound for your vocals.
Automation
Automating vocal mixing in Logic Pro X with stock plugins simplifies the otherwise tedious task of leveling and processing the vocals. By utilizing tools such as Compressor, EQ, and De-Esser, the vocal tracks can be refined to achieve a polished sound.
Automating Volume
Automation is a great tool for mixing vocals in Logic Pro X. Automating volume is one of the most common uses of automation. By automating the volume of your vocal tracks using the built-in Flex tool, you can adjust the levels of the vocals throughout the track as needed. Here are the steps you can follow to automate the volume of your vocal tracks:
First, select the track you want to automate and click on the “A” button to reveal the automation controls.
Click on the track’s volume bar and select “Create Track Automation” to create a new automation lane.
Choose the “Flex” tool from the toolbar and drag over the automation points to create a smooth curve in the automation lane.
Automating Effects Parameters
In addition to automating volume, you can also automate effects parameters. Automation of effects parameters is a powerful way to create dynamic vocal effects throughout your track. For example, you can automate the reverb or delay amount to create a sense of space for your vocals. Here are the steps for automating effects parameters in Logic Pro X:
Select the track you want to automate and click on the “A” button to reveal the automation controls.
Choose the effect you want to automate from the track’s insert section and click on the effect’s parameter you want to change.
Select “Create Track Automation” from the parameter’s drop-down menu.
Use the Flex tool to create a smooth curve in the automation lane to automate the effect parameter.
Creating Fades
Fades are an essential part of mixing vocals in Logic Pro X. They help to smooth out the transitions between different sections of the track and can also be used to create more space for other elements of the mix. Here are the steps to create fades in Logic Pro X:
Select the area of the track you want to fade.
Click on the “F” button in the track’s Header to reveal the fade controls.
Click and drag to create a fade-in or fade-out on the track.
In conclusion, automation is a powerful tool for mixing vocals in Logic Pro X. It can be used to create dynamic effects, adjust volume levels, and create smooth fades. By mastering the automation features in Logic Pro X, you can take your vocal mixing to the next level.
Credit: seandivine.com
Finalizing The Mix
In Logic Pro X, mixing vocals with stock plugins can produce professional-sounding results. Finalizing the mix involves adjusting the EQ, compression, reverb, and other effects to achieve a balanced and dynamic sound. With the right techniques and patience, it is possible to achieve a great sounding vocal mix without expensive third-party plugins.
Checking The Balance
Once you’ve added effects to your vocals, it’s time to check the balance to ensure they can be heard and understood clearly. The first thing to do is to solo the vocals and adjust the levels to make sure they sit well in the mix. You can then gradually bring the other instruments back in, adjusting their levels until the vocals can be heard comfortably without being drowned out by the other sounds.
A/b Testing
A/B testing is an important technique that can help you ensure the quality of your final mix. This involves creating two versions of the mix for comparison. You can then switch between the two versions of the mix to hear any differences and make necessary adjustments accordingly. This way, you can be sure that the final mix will sound great regardless of the device it’s played on.
Preparing For Mastering
After you’ve checked the balance and performed A/B testing, it’s time to prepare your mix for mastering. Before you send your mix for mastering, you want to make sure that all the audio files are consolidated and that there are no effects or plugins on the master track. You can also add fades and crossfades between each track to smoothen out any transitions. This way, the mastering engineer will be able to easily work with your mix to create the best possible master.
Conclusion
Mixing vocals in Logic Pro X may seem daunting at first, especially if you’re new to the software. However, by following the steps outlined here and using the stock plugins available, you can create a professional-sounding mix that stands out.
Credit: www.youtube.com
Frequently Asked Questions For Mixing Vocals In Logic Pro X With Stock Plugins
What Plugins Are Needed To Mix Vocals?
The necessary plugins for mixing vocals vary depending on the digital audio workstation (DAW) being used. However, some common plugins include EQ, compression, reverb, delay, and de-esser. It is important to use high-quality plugins and adjust settings according to the specific vocal recording.
What Are Logic Stock Plugins For Vocals?
Logic stock plugins for vocals are software tools pre-installed in the Logic Pro software used for enhancing and improving vocals in music productions. These plugins have built-in algorithms that correct pitch, equalize, compress and add effects to make vocals sound better and more polished.
What Order Should Plugins Go In For Mixing Vocals?
The order of plugins for mixing vocals depends on personal preference. However, a common recommendation for a starting point is EQ, compression, de-esser, reverb, and delay. It is important to use plugins in a way that enhances the vocals without overpowering or distorting them.
Experiment with different orders to find what works best for your vocals.
How Do I Master Stock Plugins In Logic Pro X?
To master stock plugins in Logic Pro X, practice their use in different settings and experiment with their settings. Take advantage of Logic Pro X’s user manual and online resources to learn more about each plugin. Utilize key commands to streamline your workflow and save time.
Regularly update your software to access new features and plugins.
Conclusion
Effective vocal mixing is a crucial aspect of producing a high-quality track. With Logic Pro X’s stock plugins, you can easily achieve professional-sounding vocals. Applying compression, EQ, and reverb can enhance the vocals and make them stand out in the mix.
Experiment with different settings until you find the perfect sound. With these tips, you can take your vocal mixing skills to the next level and create impressive tracks that will capture your audience’s attention.
Midnight punch drums are ideal for melodic house techno, adding depth and complexity to the music. In addition to traditional kick and snare drums, these unique percussion instruments bring a new dimension to electronic dance music.
For electronic music producers, finding the perfect sounds to enhance their tracks is essential. While traditional drum kits and synthesizers offer a solid foundation, sometimes more exotic sounds are needed to add depth and complexity to the music. That’s where midnight punch drums come in.
These unique percussion instruments offer a distinctive sound that can help electronic music stand out from the crowd. Whether you’re working on melodic house techno or any other genre, incorporating midnight punch drums into your tracks can elevate them to the next level. We’ll take a closer look at what makes midnight punch drums so special and how they can be used in electronic music production.
Introduction To Midnight Punch Drums
Midnight Punch Drums is a rhythmic pattern that has become increasingly popular in the Melodic House Techno world. It consists of three main elements: the kick, the snare, and a percussion sound that can vary depending on the producer’s preference. The purpose of this blog post is to explore the concept of Midnight Punch Drums and explain how they add energy to Melodic House Techno tracks.
Exploring The Concept Of Midnight Punch Drums
Midnight Punch Drums are characterized by a crisp, punchy sound that cuts through the mix and grabs the listener’s attention. The kick drum is the foundation of the pattern, usually playing on the downbeat of every measure. The snare, on the other hand, is placed on the offbeat, giving the pattern a syncopated groove. The percussion sound can vary but is often a hi-hat, shaker, or clap, playing quick, energetic patterns that fill out the groove.
Elements of Midnight Punch Drums
Description
Kick
The foundation of the pattern, playing on the downbeat of every measure.
Snare
Placed on the offbeat, giving the pattern a syncopated groove.
Percussion
Varying sounds like hi-hats, shakers or claps that play quick, energetic patterns and fill out the groove.
How Midnight Punch Drums Add Energy To Melodic House Techno
Midnight Punch Drums add energy to Melodic House Techno in various ways. Firstly, the punchy kick and snare provide a strong rhythm that drives the track forward. The offbeat snare gives the pattern a lively bounce, while the kick anchors the beat. Secondly, the energetic percussion patterns help to fill out the frequency spectrum, creating a sense of movement and flow. Thirdly, the dynamic range of the pattern, with its sharp transients and deep resonance, creates a sense of excitement and anticipation as the listener is drawn towards the drops and climaxes of the track.
Midnight Punch Drums add energy to Melodic House Techno by providing a strong, driving rhythm.
The pattern’s energetic percussion fills out the frequency spectrum, creating a sense of movement and flow.
The dynamic range of the pattern creates excitement and anticipation, drawing the listener towards drops and climaxes.
In conclusion, Midnight Punch Drums are an essential element of Melodic House Techno that provide energy, movement, and excitement. Whether you’re a producer looking to create dynamic tracks or a listener looking for music to dance to, understanding the concept of Midnight Punch Drums is essential to enjoying the genre.
Building The Foundation Of Your Track
Building the foundation of your track is essential in creating a solid and memorable piece of music. To achieve this in Melodic House Techno, incorporating Midnight Punch Drums can add an edgy and dynamic element to your sound. These drums create a unique depth and drive that will keep your listeners engaged from start to finish.
Starting a new track can be an exciting and overwhelming process. As a producer, you want to create something that moves people, sends them into tantalizing new territories, and keeps them coming back for more. To achieve this, you need to build the foundation of your track. This means creating a strong backbone that can support your melodies, vocals and other elements.
Choosing The Right Kick Drum Sample
The kick drum is the foundation of almost every dance track, and choosing the right one is crucial. A good kick can make or break your track. When selecting a kick, focus on finding one that suits the genre of your track. If it’s a melodic house track that you’re working on, you want a deep, thumping kick that is clean and punchy, with sustained low frequencies that will keep the groove moving.
Layering Your Kick And Percussion Elements
To create a more complex and interesting rhythm, it is essential to layer your kick and percussion elements. Combining different samples can add character and help you achieve a unique sound for your track. Layering can also provide a greater sense of depth and can help fill out the lower frequencies of your track.
Using The Right Rhythm To Create A Sense Of Urgency
Having the right rhythm is crucial in creating a sense of urgency and energy in your track. To achieve this, select percussion elements that complement your kick drum. It is essential to consider the overall pace and energy of your track to ensure you create a sense of momentum and keep the listener engaged. Building the foundation of your track is crucial in creating a successful melodic house techno track. The correct application of kicks, layering your percussion elements, and setting the right rhythm can help create an engaging and unique sound that leaves a lasting impact on the listener.
Choosing The Right Sounds For Your Drums
Selecting the perfect drums can elevate your Melodic House Techno track. When it comes to Midnight Punch Drums, they’re designed for melodic and energetic productions, making them an ideal choice for this genre. The right sounds will help you achieve a unique and captivating sound.
As a producer looking to create the perfect melodic house techno track, choosing the right drum sounds is crucial. The sound of your drums can make or break your track, and it’s important to choose samples that fit well with the overall vibe of your song. So how do you go about selecting the right drum sounds for your track? Let’s explore some tips and tricks.
Exploring Different Drum Samples And Their Tonal Characteristics
When it comes to selecting drum samples, it’s important to understand the tonal characteristics of each sound. Kick drums, for example, are typically the backbone of your track and should have a strong bottom end with a tight transient. Snare drums, on the other hand, should be cutting and have a good mid-range presence. Explore different sample packs and listen to each sound individually. Pay attention to the attack, decay, sustain, and release of each sample to ensure it fits well with your track. Here are some tonal characteristics to consider when selecting drum samples:
Drum Sound
Tonal Characteristics
Kick Drum
Strong bottom end, tight transient, good sustain
Snare Drum
Cutting, good mid-range presence, crisp attack
Hi-Hat
Bright, tight, and crisp sound with a quick decay
Clap
Fat sound with a strong mid-range, good sustain, and reverb
Using Foley Sounds To Add Texture And Interest
Incorporating foley sounds into your drums is an excellent way to add texture and interest to your tracks. Foley sounds are essentially sounds recorded from real-world objects such as keys, coins, and household items, and can be used to add a unique character to your drums. Try recording and incorporating your own foley sounds, or explore sample packs specifically focused on foley percussion. Adding a shaker, tambourine, or wooden block hit can add a touch of organic and human-like feel to your drums.
Incorporating Unique Drum Machines To Create A Signature Sound
Incorporating unique drum machines is an excellent way to create your signature sound. Drum machines such as the Roland TR-909, TR-808, and Elektron Analog Rytm can add a unique character to your drums, allowing you to stand out in a crowded genre. Experiment with different combinations of drum machines and samples to find your perfect blend. Don’t be afraid to tweak and customize your drum sounds using filters, EQs, and other processing tools to make them fit perfectly in your track. Remember, selecting the right drum sounds is essential in making your melodic house techno track stand out. Follow these tips and tricks to find the perfect sounds and start creating your masterpiece today.
Credit: www.productionmusiclive.com
Building Groove And Forward Motion
Building groove and forward motion has never been easier with Midnight Punch Drums. This sample pack offers a collection of melodic house techno drums that will take your track to the next level. Get ready to impress with the perfect combination of rhythm and melody.
Building groove and forward motion are crucial elements in creating a driving and immersive music track, and Midnight Punch Drums For Melodic House Techno provides just the tools you need to achieve that. With its extensive range of drum samples, you can add depth, complexity, and movement to your beat. In this section, we will discuss how to program hi-hat and cymbal patterns, create ghost notes and off-beat rhythms, and use percussion to create a sense of space and movement.
Programming Hi-hat And Cymbal Patterns To Drive Your Track
One of the best ways to drive your track is by programming hi-hat and cymbal patterns. These sounds add a punchy element to your rhythm section, and when used correctly, they can create a lively and dynamic beat. Try opening and closing the hi-hat at different intervals to add variation and depth to your beat. You can also use different cymbals, such as ride and crash cymbals, to add emphasis to specific parts of your track. Be creative with these sounds, and don’t be afraid to experiment.
Creating Ghost Notes And Off-beat Rhythms To Add Complexity
Another way to add complexity to your beat is by creating ghost notes and off-beat rhythms. Ghost notes are quiet, subtle percussive sounds that are played in between the main beats. They add texture and depth to your track, and when used sparingly, they can make a big difference. Off-beat rhythms, on the other hand, involve playing the snare drum on the off-beat, which creates a syncopated feel. This technique adds complexity to your rhythm section and helps to keep your listeners engaged.
Using Percussion To Create A Sense Of Space And Movement
Percussion is an essential ingredient in creating a sense of space and movement in your track. By adding shakers, congas, and other percussion elements, you can create a sense of movement that makes the listener feel as if they are being taken on a journey. Use these sounds to fill in the gaps between the main beats and create a groove that is irresistible to dance to. Combine different percussion sounds to create a unique sound that is specific to your track. In conclusion, building groove and forward motion with Midnight Punch Drums For Melodic House Techno is the key to creating a dynamic and immersive track. Program hi-hat and cymbal patterns, create ghost notes and off-beat rhythms, and use percussion to create a sense of space and movement. By experimenting with different sounds and techniques, you can add complexity to your beat and keep your listeners engaged throughout your track.
Processing Your Drums For Maximum Impact
Achieving maximum impact in melodic house techno requires expertly processed drums, and Midnight Punch Drums delivers just that. Using techniques like parallel compression and frequency shaping, these drums will add the perfect punch to your tracks.
As a producer of Melodic House Techno, your drums are the backbone of your music. Your drums should be processed in a way that brings out the best in every element, creating a powerful and distinct sound. Here are some tips on processing your drums for maximum impact.
Adding Saturation And Distortion To Create Warmth And Depth
Adding saturation and distortion to your drums can add warmth and depth to your sound. This technique will give your drums a fuller and more dynamic sound. Use a saturator or a distortion plug-in and apply it to your drum bus to create the desired effect. Be careful not to overdo it, as it can easily distort your audio.
Using Parallel Compression To Bring Out Detail And Punch
Parallel compression is a technique that can help bring out the detail and punch in your drums. By creating a separate track with compressed audio and blending it with the original track, you can achieve a fuller and more explosive drum sound. This technique can be a game-changer for your drums.
Using Eq To Carve Out Space And Eliminate Muddiness
Using EQ to carve out space in your mix can help eliminate muddiness in your drums. With EQ, you can adjust the frequency range of each drum element, creating a cleaner and more defined sound. Take some time to experiment with EQ settings to find the perfect balance for your drums. These processing techniques will help your drums stand out in the mix and give your Melodic House Techno productions that extra edge. With some practice and experimentation, you can create a powerful and dynamic drum sound that is both unique and impactful.
Arrangement Techniques For Effective Drum Builds
Arranging drums for melodic house techno can be challenging. Many producers struggle to build suspense and create memorable transitions that keep the dancefloor moving. Effective drum builds can help create tension and add excitement to your tracks. In this blog post, we’ll explore some practical Arrangement Techniques for Effective Drum Builds for melodic house techno producers.
Creating Tension Through Drum Fills And Builds
One way to create tension in your drum arrangement is through the use of drum fills and builds. These elements can add excitement and anticipation to the track and create a sense of climax leading to a drop. Effective drum fills are those that channel the energy of the track, filling the spaces between different drum hits or other elements with variations and rhythmic complexity.
Using Automation To Create Builds And Drops
Automation is another trick to create effective drum builds. By automating certain parameters, you can create gradual build-up and breakdowns that add excitement and anticipation for the drop. For instance, you can automate the reverb on the drums, increasing it gradually until it reaches a peak, then dropping suddenly as the beat comes back in.
The Importance Of Creating Contrast In Your Drum Arrangement
To ensure your drum arrangement has the right impact, it is critical to create contrast. The idea is to make each section of the track sound different from the previous one while still maintaining cohesion and flow. For example, you can switch from a kick-heavy groove to a frenzied drum break, or strip back the drums entirely before bringing them back in suddenly.
By using these Arrangement Techniques for Effective Drum Builds, you can create unique drums for your melodic house techno tracks that engage and excite the listener, ensuring they keep coming back for more.
Mixing Your Drums For Maximum Impact
Achieving a hard-hitting sound with your drums is crucial for making your melodic house techno track stand out. Using Midnight Punch drums can provide you with the necessary impact. Mixing them properly is key to maximizing their potential and creating a dynamic, engaging sound.
When it comes to Melodic House Techno, the drums are the backbone of the track. Laying down a solid drum mix is crucial to creating a track that engages and excites your listeners. In this post, we’re going to explore how to mix your Midnight Punch Drums for Melodic House Techno and get the maximum impact out of your drum track.
Creating Space In Your Mix For Your Drums To Breathe
One of the most important things to remember when mixing your drums is to create space in your mix for them to breathe. This means allowing enough room in the frequency spectrum for your drums to shine. If you have too many elements competing for the same frequency space, your mix will sound cluttered and muddy. Here are some tips for creating space in your mix:
Use EQ to carve out space for your drums in the mix.
Remove any conflicting frequencies from other elements in the mix.
Consider lowering the volume of other elements in the mix to make room for your drums.
Using Panning To Add Width And Depth To Your Drum Sounds
Another way to get the most impact out of your drum mix is to use panning. Panning is a technique that allows you to position sounds in the stereo field, creating a sense of width and depth. By panning your drum sounds, you can create a more immersive and engaging listening experience for your listeners. Here are some tips for using panning in your drum mix:
Pan your hi-hats slightly left or right to create a sense of movement.
Pan your kick drum and bass sounds to the center for a solid foundation.
Try panning your percussion sounds in a circular motion around the stereo field.
Using Fx To Create Interest And Excitement In Your Drum Patterns
Finally, using FX is a great way to add interest and excitement to your drum patterns. FX can be used to create builds, drops, and transitions, making your Melodic House Techno track more engaging for your listeners. Here are some tips for using FX in your drum mix:
Add reverb to your snare hits and clap sounds to create a sense of space.
Use delay to create interesting rhythmic effects on your percussion sounds.
Add a filter sweep to create a dramatic build before a drop.
In conclusion, mixing your Midnight Punch Drums for Melodic House Techno requires careful attention to detail. By creating space in your mix, using panning, and adding FX, you can create a drum mix that really packs a punch.
Bringing It All Together
Explore the harmonious and entrancing Midnight Punch Drums for Melodic House Techno, bringing together a fusion of techno and house beats. Utilize these intricate drum loops to enhance your melodic tracks with a unique depth and complexity.
Putting all the pieces together to create a finished track with Midnight Punch Drums can be a daunting task, especially for those new to producing Melodic House Techno. However, with enough practice and patience, it’s possible to create professional-sounding tracks that stand out from the rest. A good starting point is to focus on the drum patterns and ensure that they complement the melodic elements of the track. Here are some tips to help you bring it all together and create a finished track that shines.
Putting All The Pieces Together To Create A Finished Track
Creating a finished track with Midnight Punch Drums involves several steps that must be carefully coordinated to ensure a cohesive final product. Here are some key steps to follow:
Start by laying down the foundation of your track with the kick and bass patterns. This will set the tone for the rest of the track and provide a solid groundwork for the other elements.
Add your melodic elements, such as synths, pads, and arpeggiators. Experiment with different sounds and patterns until you find the right fit for your track.
Add your percussion elements, including the Midnight Punch Drums. Use these to add rhythm and texture to the track, ensuring that they complement the melodic elements and don’t overpower them.
Focus on transitions between different sections of the track, such as breakdowns and drops, to ensure a seamless flow from start to finish.
Finish off your track by mastering and mixing it to create a polished final product.
Final Tips For Getting The Most Out Of Your Midnight Punch Drums
Here are some final tips to help you get the most out of your Midnight Punch Drums:
Experiment with different rhythms and patterns to find what works best for your track.
Use effects like reverb and delay to add depth and texture to your drums.
Layer your drums to create more complex patterns and add interest to your track.
Don’t be afraid to chop up your drum loops and rearrange them to create new patterns and variations.
Use automation to add movement and variation to your drum patterns.
Additional Resources For Learning And Exploring Melodic House Techno
If you’re looking to expand your knowledge of Melodic House Techno and take your production skills to the next level, here are some resources to check out:
Online courses and tutorials on platforms like Udemy and YouTube.
Forums and communities like Reddit, where you can connect with other producers and get feedback on your tracks.
Books and ebooks on topics like music theory, sound design, and production techniques.
Sample packs and VST plugins designed specifically for Melodic House Techno production.
Frequently Asked Questions For Midnight Punch Drums For Melodic House Techno
Are Pml Samples Royalty Free?
Yes, PML samples are typically royalty-free.
What Are Midnight Punch Drums?
Midnight Punch drums are a set of drum samples designed particularly for melodic house techno. These drums give a futuristic and energizing vibe, which can take your music production to the next level. They come with a variety of unique drum loops and one-shots perfect for techno producers.
How Can Midnight Punch Drums Enhance My Music Production?
Midnight Punch drums provide a futuristic and lively atmosphere to your music. They are specifically designed for melodic house techno, adding more depth and complexity to your music. These samples come with a wide range of percussive patterns and loops that can give your tracks a unique flavor.
Can I Customize The Midnight Punch Drum Samples?
Yes, you can customize these drum samples based on your preferences. The package comes with one-shots and loops which can be layered, edited, or mixed to create your unique beat. You can combine them with other samples or effects to create something different and innovative.
Conclusion
As we have seen, the midnight punch drums play a vital role in creating an exhilarating and exciting melodic house techno music. By using these drums, DJs and music producers can add a unique flavor to their tracks and make them stand out in the competitive world of electronic dance music.
Whether you are a seasoned professional or a budding amateur, the midnight punch drums are a must-have tool in your arsenal. Happy producing!
Using a music studio can cost anywhere from $25 to $200 per hour. For musicians and artists, using a professional music studio can bring their creations to life.
The cost of using a music studio varies depending on the location, equipment, and services offered. In general, hourly rates for using a music studio range from $25 to $200 per hour. However, some studios may require a minimum booking time or offer package deals for longer sessions.
Additionally, studios may charge extra fees for additional technical assistance, instrument rentals, or mixing and mastering services. For those who are serious about creating professional-quality music, using a music studio can be a worthwhile investment.
Credit: www.peerspace.com
Factors That Affect Music Studio Rental Costs
The cost of renting a music studio depends on several factors, including location, studio size, amenities, and equipment. These factors make studio rental prices vary widely, so it’s important to do your research before committing to a rental.
Factors that Affect Music Studio Rental Costs When planning to use a music studio to record your next album, one of the essential factors to consider is the cost. Understanding the factors that affect music studio rental costs enables you to budget adequately. Here are the primary factors that affect the rental cost of music studios. H3 heading: Location The location of the music studio plays a crucial role in determining the rental cost. Generally, studios located in major cities or more densely populated areas tend to be more expensive compared to those in suburbs or rural areas. If you choose a music studio located in an area with high rent, you should expect to pay more. H3 heading: Studio Size Music studio size is another vital factor that affects the rental costs. Larger studios with more rooms, equipment, and acoustic treatment are often more expensive than smaller ones. However, if you don’t need a lot of space or equipment, you may be able to save on rent by choosing a smaller studio. H3 heading: Equipment The type and quality of equipment in a music studio can significantly impact the rental cost. A studio with higher-end equipment, such as microphones, preamps, and speakers, is likely to charge more than one with lower-end equipment. However, if you have your equipment, you might be able to negotiate a lower rental rate. H3 heading: Additional Amenities Music studios may offer additional amenities such as soundproofing, instrument rentals, backline gear, and engineer services, among other things. These amenities can be convenient, but they also come at an additional cost. Studios with more amenities tend to charge more than those with fewer or no amenities. In summary, when searching for a music studio to rent, several factors can affect the cost. Location, studio size, equipment, and additional amenities are the primary factors that affect the rental cost. Understanding these factors can help you make an informed decision and budget accordingly.
Hourly Vs Daily Rates
Music studios are essential for artists looking to record their music professionally. But before you step into a music studio, it’s important to understand the costs involved. One of the biggest factors that determine your music recording costs is the type of rate you choose – hourly or daily. In this post, we will look at the pros and cons of each option for better clarity.
Pros And Cons Of Hourly Rates
The hourly rate is calculated based on the number of hours you use the music studio. Typically, the hourly rate starts from $50 to $100 per hour, but this can vary from one studio to another. Here are the pros and cons of hourly rates:
Pros
Cons
You pay only for the time you use and can save money if you finish recording early.
You can use the studio for shorter periods if you have a tight schedule.
If you run over your time, it could end up being more expensive than a daily rate.
You might feel rushed to complete your recording before time runs out.
You may not be able to book the studio for consecutive days due to high demand.
Pros And Cons Of Daily Rates
The daily rate is another option offered by music studios. It’s a flat fee charged for a full day’s use of the studio. The daily rate usually starts at around $250 to $500 per day but can vary depending on several factors, such as studio quality and location. Here are the pros and cons of daily rates:
Pros
Cons
You can use the studio for a more extended period, giving you more time to complete your recording.
You can book the studio for consecutive days for more extensive projects without worrying about availability.
Daily rates might work out cheaper if you need the studio for more than a few hours.
If you finish your recording early, you may end up paying more for the studio than you would have with an hourly rate.
You need to book the studio in advance to ensure its availability on the chosen date.
Ultimately, choosing between hourly and daily rates depends on your specific needs. If you have a tight schedule and do not require studio time for an extended period, then going for an hourly rate may be the better option. But if you have a more significant project that requires extended time, then going for a daily rate is a more cost-effective option.
Types Of Music Studios
When it comes to recording music, the quality of the recording can make or break an artist’s career. That’s why finding the right studio is crucial to ensure the best possible sound quality for your music. However, with so many different types of music studios available, it can be difficult to know which one is right for you. In this article, we will explore the different types of music studios and the associated costs.
Traditional Recording Studios
Traditional recording studios are fully equipped with state-of-the-art recording equipment and offer the highest quality sound. These studios typically offer services such as audio engineering, mixing and mastering, and equipment rental. They are ideal for professional artists or bands looking to produce a high-quality album.
However, the costs associated with traditional recording studios can be high, ranging from $50 to $500 per hour depending on the studio and the services required. Additional costs may include hiring a producer or engineer, equipment rental, and studio fees.
Home Recording Studios
Home recording studios are becoming increasingly popular due to the availability of affordable recording equipment. These studios typically consist of a computer, recording software, and a few microphones. They are ideal for independent artists or bands working on small projects.
The costs associated with home recording studios can vary depending on the equipment and software used. The initial cost of setting up a home recording studio can range from $500 to $5,000 and ongoing costs may include software updates and equipment maintenance.
Rehearsal Studios
Rehearsal studios are designed for musicians to practice and play their music without the distractions of the outside world. These studios typically provide a basic sound system, drum kit, and other equipment such as guitar amps and microphones.
The costs of rehearsal studios are usually lower than traditional recording studios and can range from $10 to $50 per hour. Additional costs may include equipment rental and studio fees.
Type of Music Studio
Costs
Traditional Recording Studios
$50 to $500 per hour
Home Recording Studios
$500 to $5,000 initial setup cost
Rehearsal Studios
$10 to $50 per hour
Overall, the costs of using a music studio will vary depending on the type of studio and the services required. Whether you are a professional musician or an independent artist, there are different types of music studios available to suit your needs and budget.
Comparing Prices Of Different Music Studios
Are you an aspiring musician looking to record your music in a professional studio but worried about the cost? Knowing the price range of different music studios can help you plan your budget and get the best value for your money. Here we will compare the prices of different music studios so that you can make an informed decision about which studio best suits your needs.
Local Vs Chain Studios
Local and chain music studios have some similarities and differences in their pricing. Local studios are typically smaller and may have fewer amenities compared to chain studios. However, they may offer more personalized services and have a local reputation that can work in your favor. On the other hand, chain studios are more established and may have more modern equipment and facilities.
Chain studios typically charge more than local studios for the same services. However, they may offer packages that include additional services such as marketing and promotion that can make them a better value overall.
Premium Vs Budget Studios
Music studios can also be classified as premium or budget based on the quality of facilities, equipment, and services offered. Premium studios usually offer high-end equipment, a professional recording environment, and experienced engineers and producers. They often charge higher prices for these premium services.
Budget studios, on the other hand, may have less up-to-date equipment or fewer amenities. However, they can be affordable for musicians who are just starting and have a tighter budget. Budget studios typically charge less than premium studios, but be sure to check their reputation and quality of services before making a booking.
Conclusion
Comparing prices of music studios is a crucial step in planning and budgeting your music recording project. Consider the services and amenities offered by local vs chain and premium vs budget studios before making a booking. Know what you need and what you want to achieve with your recording project and select a studio that can help you achieve your goals effectively.
Extra Costs Associated With Music Studio Rentals
Music studio rentals come with extra costs beyond the hourly rate. These can include equipment rental, additional sound engineers, cleaning fees, and instrument rentals. These costs can add up quickly, so it’s important to plan ahead and budget accordingly when using a music studio.
Renting a music studio is a cost-effective way for musicians to record their music and produce their albums. However, there can be certain extra costs associated with music studio rentals. It’s essential to understand these extra costs before renting a music studio to avoid any unwanted surprises. Below are some of the extra costs that you should be aware of:
Engineer Fees
When you rent a music studio, you may be required to hire an audio engineer to help you record your music professionally. These professionals have the experience and knowledge to assist musicians in producing their music. The fees charged by an audio engineer usually depend on their level of experience and the equipment they use. To prevent any discrepancies, it’s essential to inquire about these fees before you sign the rental agreement.
Instrument Rentals
Musicians who require specific instruments or equipment for their recording sessions may need to rent them. In most cases, music studios have a limited range of instruments for use. Therefore, musicians may require additional equipment that is not available in the studio. Rental fees for music equipment usually vary depending on the instrument’s uniqueness and the rental duration.
Overtime Fees
Music studios might impose overtime fees if your recording session lasts longer than the agreed-upon time frame. Therefore, it’s essential to discuss the overtime policies with the studio before renting it. It’s better to have an understanding of all fees beforehand to avoid any surprises.
Cancellation Fees
If for any reason, you need to cancel your music studio reservation or postpone it, you may be required to pay cancellation fees. Ensure you are aware of the cancellation policy before signing the rental agreement. In summary, music studio rentals can incur additional charges, and it’s essential to understand them before signing the rental agreement. Understanding these costs beforehand will help you plan your budget accordingly and avoid any surprises.
Credit: www.peerspace.com
Tips For Saving Money On Music Studio Rentals
If you want to record music in a studio but don’t want to spend a lot of money, you’re in luck. There are several ways to cut costs and still produce high-quality sound. Here are some tips for saving money on music studio rentals:
Booking During Off-peak Hours
Some studios charge more during peak hours, so it may be helpful to book your sessions during off-peak hours. This includes weekdays and late-night hours. If you’re able to record during these times, you could save a good amount of money.
Choosing A Studio Without An Engineer
If you have the technical expertise to record your own music and don’t need the assistance of an engineer, you can save money by choosing a studio that doesn’t include one in the rental fee. This will give you more control over the recording process and lessen the expense of hiring an engineer.
Bringing Your Own Equipment
You can also save money on studio rentals by bringing your own equipment. This includes microphones, cables, stands, and other accessories. If you’re able to bring what you need, you won’t have to pay extra for the studio’s equipment rental fees.
Summary
Book off-peak hours to save money
Choose a studio without an engineer for more control
Bring your own equipment to avoid rental fees
By utilizing these tips, you can record your music in a studio at a more affordable price. Keep in mind that price shouldn’t compromise quality. Look for a studio that suits your needs and budget, so you can produce the best music possible.
Credit: recording.org
Frequently Asked Questions On How Much Does It Cost To Use A Music Studio
How Much Does A Basic Music Studio Cost?
The cost of setting up a basic music studio can range from $500 to $5,000 depending on the equipment and space required. This may include a computer, speakers, headphones, a microphone, and audio interface. It is important to research and compare prices to get the best deal.
How Much Is 1 Hour Of Studio Time?
The cost of 1 hour of studio time varies depending on the location, features and quality of the studio. Generally, prices range from $30 to $150 per hour. It’s best to check with your preferred studio for an accurate and updated pricing.
How Much Does A Small Music Studio Cost?
A small music studio typically costs between $2,000 to $10,000 depending on the equipment, size of the space, and location. However, costs can vary considerably depending on a range of factors. It’s best to research and consult with experts before investing in a music studio.
How Much Does It Cost To Make One Song In The Studio?
The cost of making one song in a studio varies depending on the location, equipment, and experience of the producer. On average, it could cost anywhere from $100 to $5000 per song.
Conclusion
After going through this article, we can easily conclude that the cost of recording music at a studio can vary significantly depending on numerous factors such as the location, studio quality, engineer’s experience, gear used, and many others. It’s important to research and compare various options before making a final decision.
However, investing in a good studio can provide invaluable and professional results that can elevate an artist’s career and reputation in the music industry.
What is the Technique for De-Essing Vocals in Audio Production?
In audio production, de-essing is an essential technique used to reduce or eliminate sibilance in vocal recordings. Sibilance refers to the harsh, hissing sounds that occur when certain consonant sounds, particularly S, Z, SH, CH, and J, are pronounced. These sounds can be quite distracting and unpleasant to the listener, so it’s crucial to address them during the mixing and mastering stages.
De-essing involves selectively attenuating the frequencies that contribute to sibilance while leaving the desired vocal frequencies intact. This technique allows for a more polished and professional-sounding vocal performance. Now, let’s dive deeper into the techniques used for de-essing vocals in audio production.
Credit: www.soundonsound.com
1. Frequency-based De-Essing
One common way to de-ess vocals is by using a frequency-based approach. This involves identifying the frequency range where the sibilant sounds occur most prominently and applying dynamic equalization to reduce those specific frequencies. Typically, de-essers have built-in frequency detectors that automatically detect the sibilant frequencies and apply compression to them, effectively reducing their impact.
By setting the threshold and ratio appropriately, you can achieve a balance between reducing sibilance and maintaining the natural character of the vocal. Be careful not to overdo it, as excessive de-essing can make the vocals sound dull or unnatural.
2. Dynamic Range Compressor Techniques
Another approach to de-essing involves using multiband or wideband compressors. With this technique, you split the vocal signal into multiple frequency bands and apply individual compression settings to each band. By adjusting the threshold, attack, and release parameters, you can selectively compress the sibilant frequencies, effectively reducing their intensity without affecting the rest of the vocal performance.
This technique allows for precise control over the de-essing process, as you can focus on specific frequency ranges where sibilance is most prominent. Experimenting with different compressor settings and band placement can help achieve the desired balance between reducing sibilance and maintaining a natural-sounding vocal performance.
Credit: producelikeapro.com
3. Manual Volume Automation
In certain cases, manual volume automation can be an effective technique for de-essing vocals. This involves manually reducing the volume of the sibilant sounds by adjusting the fader or using a gain envelope tool in your digital audio workstation (DAW). By visually identifying the sibilant peaks in the waveform display, you can manually attenuate their volume, effectively taming the sibilance.
This technique requires some patience and precision, as you need to carefully adjust the volume automation to maintain a natural-sounding vocal performance. However, it can be a useful approach when dealing with challenging or unique vocal recordings that may not be effectively addressed by automatic de-essing plugins.
Frequently Asked Questions For What Is The Technique For De-essing Vocals In Audio Production?
What Is De-essing In Audio Production?
De-essing is a technique to reduce harsh sibilant sounds in vocal recordings.
Why Is De-essing Important In Audio Production?
De-essing is important to maintain a balanced, smooth vocal sound without harsh ess sounds.
When To De-ess Vocals In Audio Production?
De-ess vocals during post-recording or mixing to address excessive sibilance.
How Does De-essing Work In Audio Production?
De-essing works by selectively compressing high-frequency sounds to reduce the intensity of sibilant consonants.
Conclusion
De-essing vocals is a crucial step in audio production to ensure a polished and professional-sounding vocal performance. Whether you opt for frequency-based de-essing, dynamic range compressor techniques, or manual volume automation, it’s essential to strike the right balance between reducing sibilance and maintaining the natural character and clarity of the vocals.
Remember to experiment with different settings, listen carefully, and make adjustments as needed. With practice and attention to detail, you can effectively de-ess vocals and achieve a professional mix that sounds great across various playback systems.