Categories
Archive

What Is Dolby Atmos Mixing And Mastering

Dolby Atmos mixing and mastering is a surround sound technology that creates a 3D audio experience by positioning sounds in different locations. It adds height and depth to traditional surround sound setups, allowing sound engineers to place individual sounds not only around the listener but also above and below them.


This technology, pioneered by Dolby Laboratories in 2012, has revolutionized the movie and music industry. With more and more productions being produced in Atmos, the demand for engineers with expertise in Atmos mixing and mastering has surged. We’ll take a closer look at what Atmos technology is, how it works, and why it matters for music and film production.


The Evolution Of Surround Sound

The Evolution of Surround Sound has been a fascinating journey in the world of audio engineering. The way we listen to music and watch movies has transformed significantly over the years. With innovative technologies and advancements in software, the sound quality has improved drastically. The latest technology to revolutionize the audio industry is Dolby Atmos – a new standard in immersive audio.

From Stereo To Dolby Atmos

Dolby Atmos is a significant leap forward in customizing and creating an immersive auditory experience. Traditional surround sound technology is limited to specific channels such as left, right, center, and (at a push) rear speaker placement. It delivers an adequate listening experience, but it lacks the realism of being in a live venue.

  • Dolby Atmos introduces the third dimension to audio by allowing sound to move in any direction.
  • The sound is not restricted to individual channels but is placed and moved within a three-dimensional space – around, above, and below.
  • It provides a more accurate representation of sound perception and depth, resulting in a more engaging and realistic experience for the audience.

Dolby Atmos requires state-of-the-art hardware and software and it’s a complicated process. Dolby Atmos mixing and mastering require not only a more complex setup, but it demands a new approach to workflow and mixing techniques for the sound professionals.

What Is Dolby Atmos Mixing And Mastering


Credit: www.production-expert.com


Overview Of Dolby Atmos


Dolby Atmos is an advanced audio technology that enables mixing and mastering of soundtracks in a three-dimensional space. It allows the sound to be placed and moved anywhere in a room, creating an immersive and realistic audio experience. With Dolby Atmos, a listener can hear sound objects moving around them, including from above.

Dolby Atmos is a popular audio format that creates a three-dimensional sound experience. It was first introduced in the year 2012, and since then, proved to be revolutionary in terms of sound engineering and audio mixing. In contrast to typical 5.1 or 7.1 surround sound systems, which require specific channels for sound, Dolby Atmos uses the concept of “object-based audio.” This technology enables sound mixers to place or move sounds in a specific location in a room, creating a more realistic and immersive audio experience. In this blog post, we’ll give readers an in-depth understanding of the different aspects of Dolby Atmos, focusing on the following subheadings:

Object-based Audio

Unlike traditional audio formats, which only distinguish sound channels, Dolby Atmos enables sound mixers to create separate audio objects that can move from one place to another within a room. Every sound source, such as footsteps or gunshots, can be placed in a specific location as per the mixer’s preference. The Dolby Atmos system then renders the sound through the available speakers, providing the most accurate placement and movement of sound. This feature gives the listener a more immersive audio experience, creating a complete 360-degree sound environment around them.

Channels And Speakers

In a typical Dolby Atmos setup, sound mixers can use up to 128 audio tracks, each of which is then mapped across a maximum of 64 individual speakers. The speaker setup may vary depending on the room size and acoustics, but the recommended setup comprises ten speakers, including two height speakers. The ten speakers are placed around the room, with four placed adjacent to the listener at ear level and the remaining six placed overhead. This arrangement makes it possible to create a sound experience that moves in any direction, as if the listener is present within the scene.

Benefits Of Dolby Atmos

The primary benefit of Dolby Atmos is the immersive audio experience it provides. With sounds placed and moved precisely around the listener, the experience is closer to real life, making it an ideal technology for sound mixing in movies, games, and music. Another advantage of Dolby Atmos is its backward compatibility, as it can play in traditional sound systems without comprising the overall audio quality. Due to its popularity, Dolby Atmos has become the industry-standard for sound mixing and is now available in various devices such as soundbars, headphones, and mobile phones, providing a more immersive audio experience to the listener on the go. In conclusion, Dolby Atmos is a groundbreaking technology that revolutionized sound engineering and mixing. The unique feature of “object-based audio” and the ability to move sound in any direction makes it an ideal technology for creating high-quality audio content. The setup, with speakers surrounding the listener, provides a more immersive and realistic audio experience. With its increasing demand, Dolby Atmos is becoming more accessible to consumers, providing a more enjoyable listening experience.

The Dolby Atmos Mixing Process


Dolby Atmos mixing and mastering is an advanced audio technology that allows sound engineers to create a three-dimensional soundscape. The process involves mixing and placing sounds in a virtual environment, resulting in a more immersive listening experience for the audience.

If you’ve ever wondered how filmmakers create those rich, multidimensional soundscapes in movies, then you’re in luck. With the invention of Dolby Atmos, audio engineering has come a long way. In simple terms, Dolby Atmos is a surround sound technology that brings a new level of depth and realism to the audio experience. But what exactly goes into this process? Here we’ll explore the Dolby Atmos mixing process, including how sound engineers create a 3D soundstage and add height to sound elements to make the audio experience as immersive as possible.

Creating A 3d Soundstage

One of the most fundamental aspects of the Dolby Atmos mixing process is creating a 3D soundstage. This means that when you listen to audio mixed in Dolby Atmos, you can clearly hear where each sound is coming from. Whether it’s the sound of a car racing by, or a character speaking from off-screen, you’ll be able to pinpoint the exact location of each sound. So how do sound engineers achieve this effect? First, they start with a multi-track audio recording. Each individual sound element is isolated and assigned to a separate track. Then, using specialized software, sound engineers can place each sound element in a specific location within the 3D soundstage. This means that when you listen to the final mix, you’ll hear a fully realized sound environment where every sound has its own distinct place.

Adding Height To Sound Elements

The next step in the Dolby Atmos mixing process is adding height to sound elements. This means that sound engineers can create the illusion that sounds are coming from above you as well as around you. This effect is achieved by adding speakers to the ceiling of a movie theater or home entertainment system. To make use of these speakers, sound engineers assign specific sounds to be heard from above, such as the sound of a helicopter flying overhead or rain falling from the sky. By adding height to sound elements, the audio experience becomes even more immersive, making you feel like you’re truly in the middle of the action. In conclusion, the Dolby Atmos mixing process is an intricate and highly technical process that requires a great deal of skill and expertise from sound engineers. By creating a 3D soundstage and adding height to sound elements, they can create an audio experience that truly transports the audience to another world. Next time you’re at the movies or listening to music at home, take a moment to appreciate the work that goes into creating such rich and complex soundscapes.
What Is Dolby Atmos Mixing And Mastering


Credit: www.audioanimals.co.uk


The Importance Of Monitoring In Dolby Atmos Mixing


Dolby Atmos mixing and mastering is an advanced audio production technique that requires constant monitoring. Monitoring allows for precise adjustments to the positioning, movement, and overall sound quality of each element in the mix. With Dolby Atmos, every sound element is important to creating an immersive listening experience, making monitoring a crucial aspect of the production process.

Dolby Atmos is a unique technology that enables sound engineers to create an immersive, multi-dimensional audio experience for their audience. Mixing and mastering this technology requires careful attention to detail, especially when it comes to monitoring.

The Role Of A Dolby Atmos Certified Studio

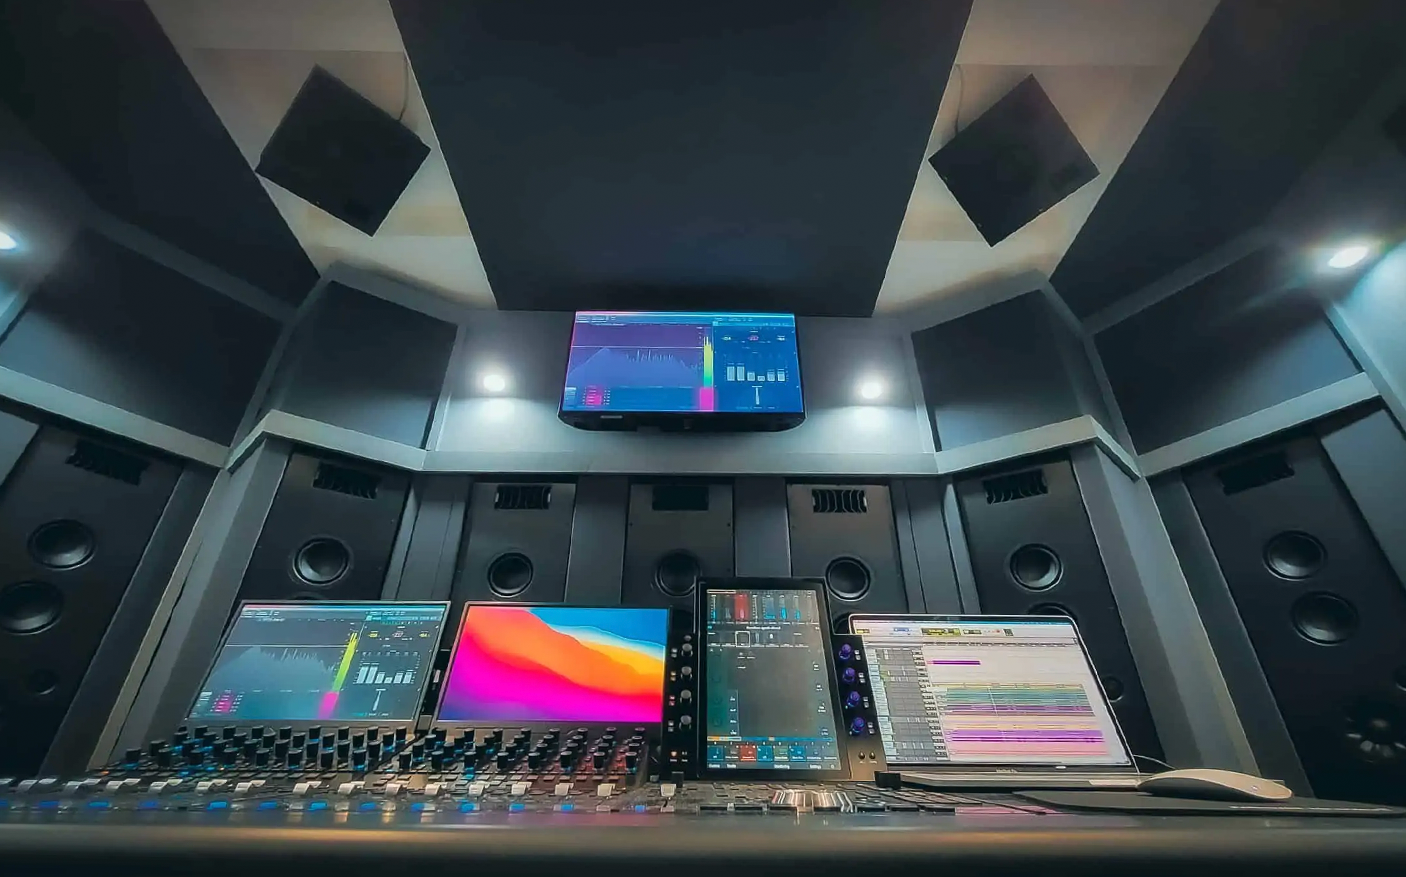
A Dolby Atmos certified studio is essential for ensuring accurate sound reproduction. These studios employ advanced technology and equipment to deliver the highest quality audio experience. Before mixing and mastering a project, it’s crucial to choose a studio that is certified by Dolby Atmos to ensure that your final product meets Dolby’s high standards.

Use Of Near-field And Mid-field Monitors

When mixing and mastering Dolby Atmos content, it’s essential to use the correct monitoring setup. Near-field and mid-field monitors are preferred for Dolby Atmos as they allow for accurate and precise monitoring in a smaller environment. These monitors are typically placed at ear-level, allowing the sound engineer to hear the most accurate representation of the audio. In conclusion, monitoring plays a crucial role in the mixing and mastering process of Dolby Atmos content. It’s essential to work with a certified studio and use the appropriate monitoring setup to ensure that the final product is of the highest quality.


Challenges In Dolby Atmos Mastering


Dolby Atmos mastering presents unique challenges for audio engineers due to the complexity of mixing and mastering in a 3D sound space. Mastering for Dolby Atmos requires careful attention to detail in order to properly balance and position sounds in a way that enhances the listener’s experience.

Dolby Atmos is a revolutionary audio technology that delivers immersive, three-dimensional sound to the audience. However, mastering audio for Dolby Atmos comes with its own unique set of challenges. Balancing sounds for different playback environments and matching audio levels across different devices are two crucial aspects of Dolby Atmos mastering that audio engineers must take into account.

Balancing Sounds For Different Playback Environments

Balancing sounds for different playback environments is crucial when mastering audio for Dolby Atmos. With Dolby Atmos, the audio is not just confined to left and right channels but also includes sounds from above and below the listener. This means that audio engineers must pay particular attention to the balance of sounds to ensure that the audio translation is consistent across multiple devices.

Matching Audio Levels Across Different Devices

Matching audio levels across different devices is another significant challenge in Dolby Atmos mastering. Since the audio is balanced for a 3D sound experience, it’s essential to ensure that the audio levels are consistent across all the devices on which the user will play the content. This is particularly important for home theatre systems, gaming consoles, and other devices that support Dolby Atmos playback. To make audio levels consistent across different devices, audio engineers must ensure that the content is mixed and mastered to meet the Dolby Atmos specifications. One way to ensure consistent playback quality is by using Dolby Atmos-compatible devices, which adjust the playback volume to match the content’s intended level. In conclusion, Dolby Atmos mastering is complex, but with the right techniques, audio engineers can ensure consistent, high-quality sound across multiple devices. By balancing sounds for different playback environments and matching audio levels across different devices, audio professionals create an immersive, three-dimensional audio experience that engages and captivates audiences at home and in the cinema.

Specific Use Cases For Dolby Atmos


Dolby Atmos is a cutting-edge technology that has revolutionized the music industry by enabling music producers to create 3D sound experiences. The Dolby Atmos mixing and mastering technique allows precise audio placement and directionality for a more immersive sound. Specific use cases include movie soundtracks, live events, and video games.

Specific Use Cases for Dolby Atmos Dolby Atmos has made significant inroads both in film and television sound design and music production. This technology enables the creation of more immersive, 3D soundscapes that make the experience for the audience much more immersive and satisfying. Below are specific use cases for Dolby Atmos in music production and film and television sound design.

Music Production

Dolby Atmos has pushed the boundaries of music production by introducing 3D mixing and sound panning technology. With 3D soundscapes, producers can pan sounds around the listener in a 3D space, creating an immersive listening experience that can transport the listener into a different world. By utilizing Dolby Atmos technology, music producers can also add dimensionality to a mix, making it sound much more lifelike and dynamic. As a result, the listeners get a more engaging and fuller sound experience.

Film And Television Sound Design

In the film and television industry, Dolby Atmos has quickly become the go-to option for sound mixing and mastering. It allows producers to position sound objects accurately around the listener, creating a more realistic and immersive audio experience. Producers can accurately create sounds that move around the room, creating a heightened sense of realism to both visual and auditory cues. For instance, if an airplane is flying over a listener’s head, the sound can be placed in an appropriate position to give the feeling of something moving over the head. By using 3D soundscapes in film and television, viewers can become more involved in the story, and the story can be much more actively engaging. In summary, Dolby Atmos technology has revolutionized both music production and film and television sound design. It gives producers the tools they need to create more immersive and engaging storytelling experiences.

What Is Dolby Atmos Mixing And Mastering


Credit: www.audioanimals.co.uk


Frequently Asked Questions On What Is Dolby Atmos Mixing And Mastering


Is Dolby Atmos Mixing Or Mastering?


Dolby Atmos is a type of audio mixing used in sound production. It involves placing sounds in a three-dimensional space, creating a more immersive audio experience for the listener. It is not considered to be part of the mastering process.


Does Dolby Mastering Make A Difference?


Yes, Dolby mastering can make a significant difference in the audio quality of your content. It enhances sound clarity, depth and dynamics while reducing noise and distortion. Overall, it improves the listening experience and makes it more enjoyable.


What Is Needed For Dolby Atmos Mixing?


To mix audio in Dolby Atmos, you need a Dolby Atmos-ready studio with speakers mounted on the ceiling. The mix should be created using a Dolby Atmos spatial audio workstation equipped with appropriate software and hardware. You’ll also need to follow Dolby’s guidelines for mixing and mixing personnel certification.


Finally, the output must be encoded using Dolby Atmos encoded technology for distribution.


How Much Does It Cost To Mix In Dolby Atmos?


The cost of mixing in Dolby Atmos depends on various factors like the size of the project, sound engineer’s experience, studio location, etc. Generally, it can range from $500 to $2000 per hour. However, it’s best to contact a certified Dolby Atmos studio near you to get an accurate quote.


Conclusion


Dolby Atmos mixing and mastering is a game-changer in the entertainment industry. With the ability to create immersive audio landscapes, this technology is transforming how we experience sound in movies, music, and even video games. Dolby Atmos is rapidly becoming the industry standard, and it’s clear to see why.


Whether you’re a filmmaker, musician, or just a lover of great sound, Dolby Atmos is a must-have tool in your arsenal. So, take the time to learn this technology, and see where it can take you.

Categories
Archive

What is the Difference between Piano And Casio

The difference between piano and Casio is that a piano is an acoustic instrument that produces sound through strings and hammers, while Casio is an electronic keyboard that uses digital samples to create its sounds. Playing the piano has been a time-honored tradition for centuries, and its unmistakable sound is a cornerstone of many genres of music.


Casio, on the other hand, is a more modern alternative that offers a range of features that pianos do not. Casio keyboards are much more portable and lightweight, making them an ideal option for gigging musicians or those who want to practice on the go.


They also offer a wide range of sounds, including different styles of pianos, organs, synths, and drums. In this guide, we will explore the key differences between these two instruments.

What is the Difference between Piano And Casio


Credit: pickmypiano.com


Piano Vs. Casio

Choosing between a piano and a Casio keyboard can be quite challenging, especially if you are a beginner. While a piano is a traditional instrument that has been around for centuries, Casio keyboards are relatively new to the music world. In this article, we will examine the key differences between piano and Casio, including their sound quality, key action, polyphony, portability, cost, and suitability for different skill levels.

Key Differences

The most notable difference between an acoustic piano and a digital Casio keyboard lies in the way they produce sound. An acoustic piano produces sound through the resonance of strings, whereas a Casio keyboard produces sound digitally. The different methods of sound production result in a variation of overall sound and the quality of the sound.

Sound Quality

Acoustic pianos tend to have an exceptional sound quality with each note having a unique tone and quality, making them the preferred choice of concert pianists. While Casio keyboards can produce great sound quality, they use digital sound samples to emulate the sound of an acoustic piano which while good, still falls short in comparison with the natural sound of an acoustic piano.

Key Action

The key action refers to how the keys respond and feel beneath the fingers. An acoustic piano has hammer action keys, meaning the keys have actual hammers that strike the strings inside the piano, which creates a tactile and responsive feel that is hard to imitate. On the other hand, Casio keyboards use electronic keys that have weighted or semi-weighted action for the keys to mimic the feel of an acoustic piano.

Polyphony

Polyphony refers to how many notes a digital piano can produce at any one time. An acoustic piano can play an infinite number of notes, whereas with digital Casio pianos, there are limitations on the maximum number of notes that can be played at once. This limit usually ranges up to 128 for high-end models.

Portability

Casio keyboards are designed for portability, making them very mobile and easy to transport compared to acoustic pianos that are often large, heavy, and difficult to move around. Casio keyboards are suitable for gigs, travel, and gigs on the go.

Cost

The price of pianos varies widely depending on the brand, quality, and type. Traditional acoustic pianos are typically more expensive, with grand pianos costing tens of thousands of dollars. The digital Casio keyboard, on the other hand, is more affordable with high-quality models ranging from just a few hundred to thousands of dollars.

Suitability For Different Levels

Acoustic pianos are better suited for advanced piano players, and in serious music education Casio keyboards, provide a great affordable option for beginners, intermediate and lower grade music education. As a beginner, it’s always best to start with a keyboard.

Maintenance

Maintaining an acoustic piano can be costly with the need for regular tuning and repairs, while Casio keyboards require minimal maintenance. A Casio keyboard simply needs to be kept clean and dust-free, so they are a more practical option, especially for people who don’t have a lot of money and time to spare for maintenance.

What is the Difference between Piano And Casio


Credit: www.quora.com


What is the Difference between Piano And Casio


Credit: www.differencebetween.net


Frequently Asked Questions Of What Is The Difference Between Piano And Casio


Is Piano And Casio The Same?


No, piano and Casio are not the same. While a piano is an acoustic musical instrument, Casio is a brand of electronic keyboards. Pianos produce sound through strings and hammers, while Casio keyboards simulate various instruments, including piano sounds, through digital technology.


Is Casio Good For Pianos?


Yes, Casio is a good brand for digital pianos. They offer a range of products that cater to different skill levels, budgets, and needs. Casio pianos have realistic sound, touch, and feel, making them suitable for beginners and professional players alike.


Their products are also affordable and user-friendly.


Can You Learn Piano On A Casio?


Yes, you can learn piano on a Casio. Casio keyboards have weighted keys and touch-sensitive technology, like a real piano. Casio keyboards also have built-in lessons and features that can help you learn to play the piano. With practice, dedication, and a Casio keyboard, you can become a proficient pianist.


Is Casio Piano Good For Beginners?


Yes, Casio pianos are good for beginners. They offer affordable and reliable options with features like touch-sensitive keys and built-in lesson modes for learning. Casio pianos are also lightweight and easily portable for practice or performance.


Conclusion


Piano and Casio have their unique features and benefits that cater to different needs and preferences. While Piano is an acoustic instrument that offers an authentic playing experience, Casio is a versatile digital keyboard that provides added functionalities and convenience.


Ultimately, the decision between Piano and Casio comes down to your budget, skill level, and musical goals. So, whether you choose Piano or Casio, remember to enjoy the process of learning and playing music.


Categories
Archive

Mixing Vocals With Plugin Alliance Plugins

Mixing vocals with Plugin Alliance plugins is a precise and efficient process. With a wide range of advanced plugins available, users can achieve professional level vocal mixing results with ease.


Plugin Alliance plugins offer a plethora of top-quality options to comprehensively mix vocals. From EQs to dynamic processors and delays to reverbs, these plugins offer a comprehensive range of versatile options that can help you to achieve superior vocal mixing.


The collection of tools and intuitive user interface make the entire mixing process a lot smoother and more accessible than ever before, while producing studio-level output. The most popular plugins from Plugin Alliance include bx_console SSL 4000 E, bx_neve, and bx_rooMS. By using these powerful plugins, you no longer need to spend a ton of money on hardware processing, leaving you more time and resources to concentrate on creating more consistent and better-sounding vocal tracks.

Mixing Vocals With Plugin Alliance Plugins


Credit: www.plugin-alliance.com


Preparing Your Vocals

Mixing vocals can make or break a recording. It requires a critical ear, a meticulous approach, and the right tools. One of the most critical phases of mixing vocals is preparing them. Before applying any plugins, it is essential to clean up, correct pitch and timing and get rid of background noise in the vocals. In this blog post, we will explore how to use Plugin Alliance plugins to ensure your vocal tracks are optimized, polished, and ready for mixing.

Cleaning Up Vocals With Bx_cleansweep Pro

Before applying any dynamic processing, it is important to remove any unwanted frequencies from the vocal track. bx_cleansweep Pro is an excellent tool for this. It is a high-pass and low-pass filter plugin that lets you clean up the track by eliminating unwanted frequencies.

Steps Description
Step 1 Open the bx_cleansweep Pro plugin in the DAW.
Step 2 Set the high-pass filter to remove any low-end rumble below 100Hz.
Step 3 Set the low-pass filter to remove any harshness or sibilance above 10kHz.
Step 4 Adjust the filters to taste.

Correcting Pitch And Timing With Melodyne

One of the most challenging aspects of mixing vocals is correcting pitch and timing issues. Melodyne is a powerful plugin that allows you to make precise adjustments to pitch and timing.

  1. Open Melodyne in the DAW.
  2. Import the vocal track.
  3. Select the notes that need pitch or timing correction.
  4. Use the pitch and timing tools to make the necessary adjustments.
  5. Export the corrected vocal track.

Getting Rid Of Background Noise With Unfiltered Audio Byome

Background noise can make the vocal track sound muddy and unclear. Unfiltered Audio Byome is a powerful plugin that allows you to remove unwanted frequencies and noise.

Steps Description
Step 1 Open Unfiltered Audio Byome in the DAW.
Step 2 Select the section of the track with unwanted background noise.
Step 3 Enable the noise reduction function in Byome.
Step 4 Adjust the settings to remove the background noise.

Preparing vocals for mixing can be a time-consuming task, but it is essential for getting a polished and professional sound. By using the right tools and techniques, you can ensure that your vocals are optimized and ready for mixing.

Eq And Compression


Plugin Alliance offers a wide range of EQ and compression plugins to help enhance the quality of vocal mixing. With their advanced features, these tools allow for precise adjustments to optimize the sound of the vocals.

When it comes to mixing vocals, using the right combination of equalization (EQ) and compression can make all the difference. With Plugin Alliance’s powerful suite of plugins, you have access to some of the best tools on the market for shaping and controlling vocal tracks. In this post, we’ll explore two key areas of vocal mixing – EQ and compression – and take a closer look at the plugins within the Plugin Alliance collection that can help take your vocal mixes to the next level.

Equalizing Vocals With Millennium Eq And Bx_console N

Equalization is an essential tool for creating clarity and presence in vocal tracks. Plugin Alliance offers a range of EQ plugins that can help you achieve the perfect vocal sound. Two of our favorites for vocal mixing are the Millennium EQ and bx_console N. The Millennium EQ is a powerful parametric EQ that offers precise control over every aspect of the frequency spectrum. With its high-resolution graphical interface and intuitive controls, you can easily boost or cut specific frequencies to bring out the best in your vocals. The bx_console N, on the other hand, is modeled after the renowned Neve VXS console and offers a warm, analog-style EQ that can add depth and richness to your vocal tracks.

Compressing Vocals With Purple Audio Mc77 And Vertigo Vsc-2

Compression is another key element in vocal mixing, allowing you to control the dynamics of a vocal track and ensure a consistent volume level throughout. Plugin Alliance offers a range of compressor plugins that can help you achieve the perfect balance of control and transparency in your vocal mixes. Two of our top picks are the Purple Audio MC77 and Vertigo VSC-2. The Purple Audio MC77 is based on the legendary Urei 1176 compressor and is known for its fast attack time and aggressive sound. It’s great for adding character and punch to vocals that need to cut through a mix. The Vertigo VSC-2, on the other hand, offers a more transparent sound and is designed to bring out the subtle nuances and details in a vocal performance.

De-essing With Spl De-esser

One of the biggest challenges in vocal mixing is dealing with sibilance – the hissing or whistling sounds that can occur when a singer pronounces words with “s” and “sh” sounds. De-essing plugins are essential for taming these high-frequency spikes and ensuring a smooth, natural-sounding vocal performance. The SPL De-Esser is a top pick for many mixers, thanks to its intuitive interface and transparent sound. With its precise frequency detection and adaptive threshold, it can effectively reduce sibilance without sacrificing clarity or tone. In summary, with the right combination of EQ, compression, and de-essing plugins, you can achieve a polished, professional sound for your vocal mixes. With Plugin Alliance’s comprehensive suite of tools, you have all the tools you need to create great-sounding vocal tracks.


Creative Effects


Achieve brilliant vocal mixes with Plugin Alliance Plugins. Enhance pitch, tone, and clarity for professional-sounding vocals that stand out in any mix. Get creative with a range of effects and take your vocals to the next level.

As a mixing engineer, it’s essential to have a toolbox that offers an array of options to add creativity and authenticity to your mix. Plugin Alliance offers an extensive selection of plugins to help you achieve just that. In this post, we’ll explore two plugin options that provide unique creative effects and enhancing vocals through their distinctive sound characteristics. ###Adding character with Black Box HG-2 and ENGL E765 RT One of the keys to achieving authentic vocal recordings is adding warmth, character, and grit. Plugin Alliance provides two perfect plugins to add just that – the Black Box HG-2 and the ENGL E765 RT. The Black Box HG-2 is a tube saturation plugin designed to add character and warmth to your vocals. It provides a harmonics section and mix controls that allow you to fine-tune your process. The ENGL E765 RT, on the other hand, offers a different color and is great for rock and metal vocals. It delivers tube-driven saturation with a unique character that makes your vocals cut through the mix. ###Creating space with Lindell Audio 80 Series and ProAudioDSP DSM V3 Spatial effects are fundamental, especially when it comes to vocals. The Lindell Audio 80 series and the ProAudioDSP DSM V3 offer a rich and clear sound that adds an illusion of space to your vocals. The Lindell Audio 80 series offers emulation of classic Neve Consoles with a modern twist that allows you to create a sense of depth by spreading your mixes wider. The ProAudioDSP DSM V3 offers a detailed-style reverb that influences the spatial impression of your mix, adds clarity to your vocals and enhances the stereo spread. ###Artistic processing with ADPTR Audio Streamliner and Unfiltered Audio Indent Artistic processing is necessary when it comes to vocals, as it adds a unique character to your mix. ADPTR Audio Streamliner and Unfiltered Audio Indent plugins offer artistic processing of your vocals, that adds a unique and authentic touch. The ADPTR Audio Streamliner plugin is an automatic level riding plugin that ensures that your vocals are at the right level during mixing. It also adds a character that enhances your vocal, flaws and all. The Unfiltered Audio Indent, on the other hand, introduces an innovative mechanism for editing your vocals. It adds distortion, generates harmonics, and can be used for vintage vibes and lo-fi effects. Plugin Alliance offers a broad range of plugins that can dramatically change any vocal recording. The Black Box HG-2, ENGL E765 RT, Lindell Audio 80 series, ProAudioDSP DSM V3, ADPTR Audio Streamliner and Unfiltered Audio Indent are some of the most effective plugins that can transform your vocal and bring them to life.

Mixing Vocals With Plugin Alliance Plugins


Credit: www.plugin-alliance.com


Automation And Mixing Techniques


Achieving a balanced vocal mix can be challenging, but Plugin Alliance plugins make the process easier with their automation and mixing techniques. With features like dynamic EQ and compression, you can achieve a polished vocal sound that stands out in a mix.

Automation For Dynamics Control

Using automation is crucial for controlling dynamics in a vocal mix. Plugin Alliance offers several plugins that enable dynamic control, like the SPL Transient Designer Plus, the Vertigo VSM-3, and the Lindell Audio 254E. It is essential to use automation to adjust the plugin’s parameters over time. For example, if a vocal has a powerful chorus, it can be useful to automate the gain reduction on the compressor plugin for that part.

Balancing Vocals With Other Instruments

One challenge of mixing vocals is balancing them with other instruments. The vocals should be clear and upfront without overpowering other instruments like drums and bass. Plugin Alliance offers various plugins that can help in this regard, including the bx_control V2, which allows for precise stereo imaging and balance, while the bx_cleansweep V2 can clean up the low-end frequencies that may clash with the bass.

Creating Depth With Reverb And Delay

To create a sense of depth and space in a vocal mix, reverb and delay plugins are essential. Plugin Alliance has many plugins that offer a wide variety of reverbs and delays, like the bx_rooms, which provides robust algorithmic reverbs, or the SPL De-Verb Plus, which removes problematic reverb from a recording. Automation can be used to adjust the reverb and delay sends to provide an immersive listening experience. In conclusion, Plugin Alliance has various plugins that can help with automation and mixing techniques of vocals. Using plugins for dynamic control, balancing vocals with other instruments, and creating depth with reverb and delay can enhance the overall mix. By experimenting with automation and settings, you can create a unique and impactful vocal mix.

Collaborating With Others

When it comes to music production, collaboration is key. Working with others allows you to bring new ideas and perspectives to your work, allowing you to create something truly unique. Mixing vocals is often one of the most important parts of the process, and having the right tools can make all the difference. By using Plugin Alliance plugins, you can easily collaborate with others and create high-quality vocal tracks.

Sending And Receiving Tracks

When collaborating with others, it is important to be able to send and receive tracks easily. With Plugin Alliance, this process is simple. You can easily export your vocal tracks to send to others, and import new tracks into your project. This allows you to work with others seamlessly, without any delays or complications.

Sharing Presets For Consistency

Using presets can be a great way to maintain consistency between different vocal tracks. With Plugin Alliance, you can easily share presets with others to ensure that all of the vocals in your project sound cohesive. This can save you time and ensure that you are able to create the best possible sound.

Working With Different Daws

When working with others, it is crucial to be able to work with different DAWs. With Plugin Alliance, you can seamlessly integrate your plugins with other DAWs, allowing you to work with a wide range of artists and producers. This ensures that you are able to collaborate with anyone, regardless of the software they use.

Mixing Vocals With Plugin Alliance Plugins


Credit: m.youtube.com


Final Thoughts


Achieving a professional-sounding vocal mix can be a challenge, but Plugin Alliance offers a range of powerful tools to help you get there. With their intuitive interfaces and powerful algorithms, these plugins can add clarity, warmth, depth, and character to your vocals, making them stand out in the mix.

Mixing vocals can be a daunting process, but with the right tools, it can be enjoyable and rewarding. Plugin Alliance offers some of the best plugins in the industry, making it easier for you to achieve a professional sound. However, it’s important to avoid common mistakes that could ruin your mix, experiment with different plugins and find your own style.

Common Mistakes To Avoid

Mixing vocals is a delicate process that requires attention to details. Here are some common mistakes to avoid when mixing vocals with Plugin Alliance plugins:

  • Overprocessing – Avoid using too many plugins on your vocal track, as this could lead to muddiness and a lack of clarity.
  • Lack of EQ – Your vocal track should have the right balance of highs, mids, and lows to cut through the mix and sound clear.
  • Ignoring dynamics – Compression is essential when mixing vocals, as it helps to even out the dynamics and make the vocals sound consistent.

Achieving A Professional Sound

Achieving a professional sound when mixing vocals is the ultimate goal. With Plugin Alliance plugins, you can achieve a polished and professional sound that stands out. Here are some tips to help you achieve a professional sound:

  1. Choose the right plugins – Plugin Alliance offers a wide range of vocal plugins that can help you achieve different sounds and styles. Choose the plugins that best suit your needs and workflow.
  2. Use automation – Automation is an effective way to add movement and dynamics to your vocal track. Automate your plugins, volume, and panning to create a more interesting mix.
  3. Reference your mix – Always reference your mix against commercial tracks that have the same vibe and style as your mix. This will help you identify areas that need improvement and make necessary adjustments.

Experimenting And Finding Your Own Style

Plugin Alliance plugins offer a wide range of options to help you create a unique and personal vocal sound. Experimenting with different plugins and techniques can help you find your own style and sound. Here are some tips to help you experiment and find your own style:

  • Try different combinations of plugins – Don’t be afraid to try new combinations of plugins to create a unique sound.
  • Use effects creatively – Experiments with delay, reverb, and other effects to add depth and character to your vocal track.
  • Be open-minded – Be open to new ideas, techniques, and feedback from others. This will help you grow as a mixer and artist.

In conclusion, mixing vocals with Plugin Alliance plugins can be an enjoyable and rewarding experience. Avoid common mistakes, experiment with different plugins, and find your own style to achieve a unique and professional sound.

Frequently Asked Questions On Mixing Vocals With Plugin Alliance Plugins


What Plugins To Use For Mixing Vocals?


Some recommended plugins for mixing vocals include Waves Vocal Rider, FabFilter Pro-Q 3, iZotope Nectar 3, and Antares Auto-Tune Pro. These plugins offer advanced features that enable you to capture clear and professional-sounding vocals.


What Order Should Plugins Go In For Mixing Vocals?


The order of plugins for mixing vocals can vary depending on the preferences of the sound engineer and the material being mixed. However, a common order is EQ, compression, de-essing, saturation, and reverb. Each plugin serves a specific purpose in improving the vocal sound, and the order can affect the overall outcome.


It’s best to experiment with different arrangements to find the best order for your specific project.


What Is The Best Vst Plugin For Vocals?


Some popular VST plugins for vocals are the Waves Tune Real-Time, Antares Auto-Tune Pro, and Nectar 3. Ultimately, the best plugin depends on personal preference and the specific needs of the vocal recording.


What Is The Best Way To Mix Vocals?


To mix vocals, use EQ to cut out any unwanted frequencies, add compression to smooth out the sound, and apply reverb or delay for depth. Use panning to create space and volume adjustments to balance out the levels. Always listen critically and make small adjustments until the vocals sit well in the mix.


Conclusion


Using Plugin Alliance plugins for mixing vocals can be a game changer. With their advanced algorithms, intuitive interfaces, and versatile features, these plugins give you the power to shape and polish your vocal tracks in unprecedented ways. Whether you’re a seasoned professional or a beginner, Plugin Alliance offers a range of tools to help you achieve the perfect vocal sound.


So why settle for less when you can have the best? Give Plugin Alliance plugins a try and take your vocal mixing to the next level!

Categories
Archive

How To Create Analog Sounding Bass With Vst

To create analog sounding bass with VST, use a program that emulates analog synths and manipulate the settings until you achieve the desired sound. Analog bass is a classic sound that many producers still desire. But finding an actual analog synth can be costly or difficult to maintain.


Also, with the advancements of virtual instruments, creating analog sounding bass is now possible with just a few clicks of a mouse. We will explore how to create analog sounding bass using VST plugins and tips to make it sound more authentic.

Related reading: How To Get Great Sounding Bass Using Reference Tracks and Bass Guitar Eq. For background, see the Wikipedia article on Analog synthesizer.


Whether you’re a beginner or an experienced producer, you can achieve professional sounding bass with VST.

How To Create Analog Sounding Bass With Vst


Credit: play.google.com


Selecting The Right Vst for Analog Sounding Bass


Selecting the right VST is essential to create an analog sounding bass. Look for a VST that emulates the sound of classic analog gear and has adjustable parameters to shape the sound according to your preferences.

When it comes to creating analog sounding bass with VSTs, selecting the right VST is crucial. With so many VST options available, it can be overwhelming to know where to start. This post will provide you with some tips on how to select the best VST to achieve your desired sound.

Researching Analog Sounding Vsts

One of the first things you should do is research which VSTs are known for producing analog sounding bass. This can be done through online forums, social media groups, or by asking for recommendations from other producers. Make a list of the VSTs that you are interested in and start comparing them.

Comparing Vsts To Select The Best One

When comparing VSTs, there are a few things to consider. Firstly, you want to make sure that the VST has the features you need to achieve the sound you are after. This could include multiple filter options, envelope controls, or distortion effects. Another important factor to consider is the user interface. You want a VST that is user-friendly and easy to navigate. It should be intuitive and not require too much time to figure out how the controls work. It’s also worth checking out reviews and demos of the VST before making a purchase.

This can give you an idea of the sound quality and ease of use. Keep in mind that what works for one producer may not work for you. So it’s essential to test out different options to find the best one for your needs. Overall, selecting the right VST is a vital step in creating analog sounding bass. By doing your research and comparing different options, you can find a VST that meets your specific requirements and helps you achieve the sound you’re after.

How To Create Analog Sounding Bass With Vst


Credit: www.amazon.com


Creating The Bass


Learn how to create an authentic analog sounding bass using virtual instruments (VST). By following basic synthesis techniques and tweaking settings, you can produce deep, rich bass tones that sound like they were created with physical instruments.

Creating a bassline for your music can be challenging, especially if you are striving for an analog sound. Fortunately, you can achieve an analog sound by using a VST. In this post, we will be discussing how to create analog-sounding bass with a VST. We will look at different ways to achieve this sound. Let’s dive in.

Starting With A Simple Waveform for Analog Sounding Bass

The first step in creating an analog-sounding bass is to start with a simple waveform. A sine wave is a good starting point. Once you have selected your waveform, you can begin to add more complexity by adjusting the oscillator settings. Experiment with different waveforms until you find one that produces a sound similar to an analog synthesizer.

Adjusting Envelope Settings in Analog Sounding Bass

The next step is to adjust the envelope settings. The envelope controls the way the sound is shaped over time. You can adjust the attack, decay, sustain, and release settings to create the desired effect. For an analog sound, try setting the attack to zero and adjusting the decay and release times to create a smooth sound.

Applying Filters And Modulation for Analog Sounding Bass

Filters and modulation are important elements in creating an analog-sounding bass. You can use a low-pass filter to remove unwanted high frequencies and create a warmer, more rounded tone. Modulation effects like chorus, flanger, and phaser can add movement and depth to the sound.

Adding Harmonic Distortion for Analog Sounding Bass

Finally, adding harmonic distortion can add grit and warmth to the sound, helping to create an analog feel. You can use plugins like distortion, saturation, or overdrive to achieve this effect. Be careful not to overdo it, as too much distortion can result in a muddy sound. In conclusion, creating an analog-sounding bass with a VST is possible. By starting with a simple waveform, adjusting envelope settings, applying filters and modulation, and adding harmonic distortion, you can achieve a warm, analog sound. Use these tips as a starting point and don’t be afraid to experiment to find your perfect tone.

Tweaking And Refining for Analog Sounding Bass


By tweaking and refining your VST settings, you can create an analog-sounding bass. Play with the attack, decay, sustain, and release levels to achieve the perfect tone without needing a physical bass instrument.

Once you have created a basic analog sounding bass with your VST, the next step is to tweak and refine the sound. This is where you’ll spend most of your time, playing around with different settings and effects to get the precise sound you want. In this section, we’ll explore some techniques for fine-tuning the settings and adding effects to enhance your bass sound further.

Fine-tuning The Settings:

To fine-tune your analog sounding bass, you can start by playing around with the filter and resonance controls. Adjusting the filter cutoff will change the tone of your bass, while changing the resonance will add emphasis to specific frequencies. Don’t go overboard with these settings, as too much resonance can result in an overpowering, muddy sound. Fine-tune the envelope settings as well to adjust the attack, decay, sustain, and release of the bass notes. Tweaking these settings can give your bassline more character and help it fit better with the rest of your track’s instrumentation.

Adding Effects To Enhance The Sound:

With your analog sounding bass sounding great on its own, it’s time to add effects to enhance its sound further. Chorus, flanger, and phaser effects can add a subtle, swirling movement to your bassline, while distortion or overdrive can give it a more aggressive edge. A touch of reverb can add a sense of space, making the bass more prominent in the mix. Don’t be afraid to experiment with different effects and combine them to find the perfect sound that complements your song.

Conclusion:

Tweaking and refining your analog sounding bass can be a time-consuming process. But it’s well worth it to create a bassline that perfectly fits your track. Remember to fine-tune the filter, resonance, and envelope settings to give your bassline character, and experiment with different effects to enhance the sound further. By putting in the time and effort to refine your bass, you’ll create a track that is memorable, engaging, and will keep your listeners coming back for more.

Using Midi Controllers for Analog Sounding Bass


Using MIDI controllers, you can create an analog sounding bass with VST plugins. By mapping the MIDI controller knobs to the parameters of the VST, you can manipulate the sound in real-time to achieve the desired analog bass sound.

Linking The Controller To The Vst for Analog Sounding Bass

If you want to create analog-sounding bass with VST using MIDI controllers, the first step is to link the controller to the VST. This process will differ based on the controller and VST being used. However, generally, the process involves opening the settings of the VST plug-in and selecting the MIDI controller’s input as the control source.

You can also link a specific MIDI parameter to a particular control on your MIDI controller.

Mapping Controls To Specific Parameters for Analog Sounding Bass

Once the MIDI controller is linked to the VST, the next step is to map controls to specific parameters. This process allows you to assign specific knobs and sliders on the controller to control particular parameters in the VST software.

To map controls, you need to open the mapping editor in the VST, select the parameter you want to control. Then move the knob or slider on the controller you want to map to that parameter.

Playing And Recording The Bassline

With the mapping completed, you can now start playing and recording the bassline using your controller. You can play in real-time or record the bassline into your VST software for further editing later.

Remember, the MIDI controller gives you the ability to control the sound in real-time. So experiment with different controls to create the perfect analog-sounding bass.


Tips And Tricks for Analog Sounding Bass


Learn how to create an analog-sounding bass with a VST and level up your music production game. Get tips and tricks from experts in the field, and start creating professional-quality music today!

Are you tired of your bass sounding too digital and lifeless? Creating an analog-sounding bass can add warmth and depth to your music. In this guide, we’ll share some tips and tricks to help you achieve that analog sound you’re looking for.

Experimenting With Different Settings

One of the most effective ways to create an analog-sounding bass is by experimenting with different settings. Start with the basic settings such as cutoff, resonance, and envelope, then tweak them to suit your taste. By adjusting these settings, you can achieve a warm and rich tone that mimics the sound of analog hardware. For example, try reducing the cutoff frequency to add more harmonics to your sound. Additionally, adding a touch of distortion can also help to create that warm analog sound. Don’t be afraid to play with different settings until you find what works for you.

Layering Multiple Bass Sounds

Another way to create an analog-sounding bass is by layering multiple bass sounds. This technique involves using different bass sounds and layering them on top of each other to create a single, rich sound. For instance, you can combine a low-frequency sine wave with a more percussive bass sound to create a unique and interesting bass tone. Experiment with different combinations of bass sounds to find the perfect blend that meets your needs.

Duplicating The Patch For Variation

To add variation to your bassline, try duplicating the patch and making slight adjustments. This technique can help you create variations of your bass sound while maintaining its analog tonality. For instance, you can duplicate the patch and adjust the resonance, cutoff, or envelope settings to create a variation. Additionally, you can apply effects such as reverb, delay, or chorus to the duplicated patch to add depth and richness to your sound. In conclusion, creating an analog-sounding bass with Vst requires some experimentation and creativity. By following these tips and tricks, you can achieve a warm and rich bass tone that adds depth and character to your music. Happy experimenting!

How To Create Analog Sounding Bass With Vst


Credit: audioplugin.deals


Frequently Asked Questions Of How To Create Analog Sounding Bass With Vst


How Do You Make A Digital Synth Sound Analog?


To make a digital synth sound analog, you can use techniques such as using low-pass filters. This adds noise, reducing bit-depth, and emulating vintage circuitry. You can also use effects like distortion, chorus, and reverb to create the warm, organic sound associated with analog synths.


How To Make Vst Synth Sound Real?


To make a VST synth sound real, use sound design techniques to add realistic articulations, such as pitch bends, vibrato, and velocity changes. Enhance dynamic range with subtle changes in volume and play style. Use EQ to create individualized sound signatures.


Choose quality samples or presets and use realistic effects to mimic real-world acoustics. Finally, vary performances to add human touch.


How Do You Make An Electric Bass Sound Like A Synth Bass?


To make an electric bass sound like a synth bass, you need to use effects such as distortion, chorus, and filter, among others. A bass synth pedal can also achieve the desired sound. Experimenting with the tone and EQ settings can further enhance the synth-like qualities of the electric bass.


What Is An Analog Bass?


An analog bass refers to a type of bass instrument that uses analog circuitry to produce sound. It typically produces a warmer, more organic sound compared to digital bass instruments. The analog circuitry allows for more natural and varied sound manipulation.


Conclusion


Creating an analog sounding bass using VST might seem like a complex task. But with some basic knowledge and a few tips, it can be done with ease. With the use of the proper plugins like those we have discussed. A good ear for the right sound, your bass can add more warmth and depth to your music.


Always remember to experiment and don’t be afraid to try new things when creating music. Keep practicing and refining your skills, and soon enough, you’ll have mastered the art of creating analog sounding bass with VST.

Categories
Archive

Difference Between Producing And Mixing Music

Producing and mixing music are distinct processes in the music industry. Producing involves creating and arranging musical ideas, while mixing involves balancing and refining recorded music for the final product.


Overall, producing sets the creative direction and vision for a song, while mixing ensures its technical quality and coherence. As a result, both processes are critical in the making of any music production, be it a single, an EP, or an album.

Related reading: Mixing: The Complete Guide Hub and Mixing Piano. For background, see the Wikipedia article on Record producer.


Also, producing and mixing music are vital aspects of the music industry. While producing entails coming up with creative ideas, mixing involves perfecting the technical aspects of recorded music. In music production, these are two separate processes that require unique skill sets. Simply put, producing shapes and arranges the music. Mixing balances and refines it for technical quality. This article will delve into the differences between the two processes and provide a more in-depth understanding of their importance in music production.

Difference Between Producing And Mixing Music


Credit: www.productionmusiclive.com


Producing Music


Producing and mixing music are two distinct processes: producing involves creating and arranging musical elements while mixing focuses on adjusting levels and sound quality. Moreover, both roles require unique skills and are crucial in the production of any great track.

In addition, aspiring musicians’ world may seem glamorous and glitzy. But the reality is that producing music is a complex process that involves several steps. One of the primary stages is producing music, followed by mixing, mastering, and publishing. This blog post will focus on the first step – music production. We will explore its definition, roles of a music producer, and the techniques and tools used in music production.

Definition Of Music Production for Producing and Mixing

Furthermore, Music production involves the creation, development, and recording of music. It encompasses every aspect of the music-making process, from songwriting to recording vocals and instruments, selecting beats, and adding sound effects and post-processing. The music producer is responsible for overseeing the entire music production process and ensuring that the final product meets the vision of the artist.

Roles Of A Music Producer for Producing and Mixing

Additionally, a music producer plays a crucial role in the music-making process. Here are some of the responsibilities of a music producer:

  • Also, collaborating with the artist to conceptually develop and shape their creative ideas
  • Assessing and selecting the musical talent necessary for the recording, such as musicians and vocalists
  • Moreover, directing and producing the recorded tracks to align with the artist’s vision and style
  • In addition, managing the budget and timeline to ensure the project is completed within the set parameters
  • Furthermore, Using their musical expertise to guide the arrangement, composition, and instrumentation of a recording
  • Additionally, overseeing valuable innovative techniques, including the use of synthesizing software, effects processors, and digital audio workstations to edit and produce music.

Techniques And Tools Used In Music Production

Also, Music producers use a variety of techniques and tools to ensure the best quality of the final product. They include, but are not limited to:

  • Song arrangement: This involves selecting the order and structure of different parts of a song, such as verse, chorus, and bridge, to create movement, momentum and excitement in the overall song
  • Instrumentation: The process of selecting and blending various sound sources to create layers and textures of sound. Each instrument has its own colour. The producer picks which ones to feature based on the song style.
  • Music notation: A music producer is required to write music notation, which helps in song guidance and recording tracking sheets.
  • Editing and Mixing: The music producer oversees all recording sessions to remove unwanted noise, edit tracks, and blend the song elements effortlessly.
  • Music software: To record and edit music, music producers use digital audio workstations (DAWs) such as Ableton live or Logic Pro, among others. These DAWs are great tools to create quickly and efficiently, turning ideas into reality.

Now that we have explored producing music in detail, the next step is mixing. This involves combining different recorded tracks into a final stereo track. Stay tuned to learn about the various techniques involved in this crucial stage.

Difference Between Producing And Mixing Music


Credit: blog.academyart.edu


Mixing Music


Mixing music is a crucial step in music production, but it’s often confused with producing. The difference is simple. Producing builds the track from scratch, while mixing gives a recorded track a professional finish.

When it comes to music production, mixing is a critical step in the overall process. Mixing is the stage where everything comes together to create a cohesive and balanced sound. It involves combining all the individual tracks of a song, adjusting their levels, and using various techniques to place instruments and vocals in their own space. In this post, we will explore the definition of music mixing, the role of a music mixer. The various techniques and tools used in music mixing.

Definition Of Music Mixing

Music mixing is the process of combining multiple audio tracks into a stereo or multi-channel audio file. It involves enhancing the quality of the recorded audio tracks by adjusting levels, EQ, compression, effects, and panning. The goal of mixing is to create a balanced and harmonious sound where every element of the music is heard clearly.

Roles Of A Music Mixer for Producing and Mixing

The role of a music mixer is to take the individual tracks created during the recording process and blend them together into a single cohesive mix. The mixer uses their skills and knowledge to adjust levels, EQ, compression, and other processing to balance each component of the song. This creates an overall sound that is pleasing to the ear. Some of the roles of a music mixer include:

  • Enhancing the clarity of individual tracks
  • Balancing volume levels between tracks
  • Creating a sense of space by adjusting panning and reverb
  • Adding effects such as EQ and compression
  • Making sure the mix is suitable for different listening environments

Techniques And Tools Used In Music Mixing

There are various techniques and tools used in music mixing, and the mixer’s creativity and skill are also important factors. Some of the methods used during music mixing include:

Techniques Tools
Volume balancing Volume faders and automation
Equalization (EQ) Equalizers, filters, and spectral processing tools
Compression and limiting Compressors and limiters, sidechain compression, and multiband compression
Panning Pan knobs, stereo imaging, and spatial processing tools
Reverb and delay Reverb and delay processors, convolution reverbs, and echo effects
Automation Automation tools and breakpoints

With these tools and techniques, the music mixer can shape the music into a polished and professional final mix that reflects the artist’s vision. In conclusion, music mixing is an important step in the music production process, requiring creativity, skill, and technical knowledge to create a high-quality final mix. The mixer balances tracks, sets levels and applies effects. The result is a cohesive mix that pleases the ear.

Differences Between Music Production And Mixing


Producing covers the composition, arrangement and recording. Mixing adjusts and balances each track for the desired sound. Production is the creative aspect while mixing is the technical aspect of music-making.

Music production and mixing are two crucial processes in the recording and release of music. Although these terms are often used interchangeably, they refer to separate stages in the creation of an album or single. In this article, we will look at the main differences between music production and mixing.

Definition

Music production covers the whole process of making a song or album. It runs from writing to recording and arranging. The music producer is responsible for overseeing every aspect of the production process, including selecting the right studio, musicians, and engineers. Mixing, on the other hand, is the process of combining different audio tracks into a final stereo mix. At this stage, the mixing engineer balances instruments and vocals and adds effects and EQ. The goal is a pleasing overall sound.

Purpose

The purpose of music production is to create a finished product that reflects the artist’s vision. The producer ensures that all aspects of the song, from the lyrics to the instrumentation, are working together to create a cohesive whole. They may also be involved in marketing and promoting the song or album once it is complete. Mixing, on the other hand, is focused on creating a final mix that is polished and ready for distribution. The mixing engineer aims to create a balanced and cohesive sound that showcases all the different elements of the song.

Process

The music production process typically begins with songwriting and composition. Once the basic structure of the song is in place, the producer will select the right instrumentalists and vocalists to bring the song to life. They may also work on pre-production, which involves rehearsing and refining the song before recording. The mixing process, on the other hand, typically takes place after all the tracks have been recorded. The mixing engineer imports the tracks into a DAW. Then they set levels, pan instruments and add EQ and effects.

In conclusion, while music production and mixing are both crucial components of the music-making process, they serve different purposes and involve distinct processes. The distinction between these two stages is important to ensure that the final product meets the artist’s vision and is polished and ready for distribution.

Why Is It Important To Understand The Difference?


Understanding the difference between producing and mixing music is crucial for any musician or producer. While producing involves composing, arranging and recording a song, mixing is the process of blending tracks together to create a final mix. Knowing the distinction between the two can help achieve a polished end result.

Impact On The Final Product for Producing and Mixing

Producing and mixing music are two of the most important stages in the music production process. While producing involves creating the structure and melody of the song, mixing deals with the technical aspects such as balancing sound levels. This adds effects, and adjusting EQ. Understanding the difference between producing and mixing is crucial as it determines the overall quality of the final product. A well-produced track but poorly mixed audio can spoil the listening experience. Therefore, it is essential to have a basic understanding of these two processes to avoid any discrepancies in the final product.

Career Prospects for Producing and Mixing

In the music industry, it is essential to have a particular skill set depending on the role you take. Music producers and mixers are highly in demand. However, both need versatile skills and a keen ear for music to create excellent quality products. So if you are considering venturing into the music industry, it is essential to understand the difference between producing and mixing. Having this knowledge can help you determine which area you specialize in, enhancing your career prospects.

Collaboration In Music Industry for Producing and Mixing

Collaboration is a vital aspect of the music industry. Music producers work with recording artists and songwriters to create musical pieces. On the other hand, a mixer works with tracks that are already recorded to create a final product. Understanding the difference between producing and mixing can teach you how each role affects the music production process. This knowledge can make working with a team more comfortable. This allows everyone involved to contribute to the project, thus delivering better results. In conclusion, understanding the difference between producing and mixing is crucial. Knowing the ins and outs of music production can lead to better quality products, improved career prospects, and positive collaborations within the industry.


Tips On Producing And Mixing Music


Producing and mixing music are two different production stages in the music industry. Production involves creating, arranging, and recording a song, while mixing is the process of adjusting levels. This adds effects, and finalizing the song’s tonality. It is vital to understand the differences between the two to become an expert in music production.

Creating music is an artistic process that starts from the idea stage through production, mixing, and mastering. While producing music involves composing and sequencing of sounds, mixing involves manipulating different elements to achieve a balanced and enjoyable sound. In this blog post, we’ll be discussing some expert tips on producing and mixing music.

Choosing The Right Tools for Producing and Mixing

When it comes to music production and mixing, choosing the right tools is vital. From the Digital Audio Workstation (DAW) to the plugins, instruments, mixing desk, and even the speakers, every tool has a significant impact on the final output. Therefore, it is essential to invest in high-quality tools to achieve a professional and enjoyable sound.

Understanding The Basics Of Both for Producing and Mixing

Producing and mixing music are two different processes that require different skill sets. Producing involves composing, arranging, and recording while mixing involves changing different elements such as volume, panning, EQ, and effects, among others. To become an expert in both, you need to have a good understanding of the basics of music theory, audio signal flow, and mixing techniques.

Collaborating With Others for Producing and Mixing

Collaborating with other music producers and mixers can help you learn new skills and techniques. It can also help you enhance your creativity and learn how to work with other people. When collaborating, make sure that you have clear communication with your partner, agree on the goals and expectations, and be open to feedback and suggestions.

Conclusion

In conclusion, producing and mixing music are creative and technical processes that require patience, dedication, and good time management skills. By following the above tips, you can enhance your music production and mixing skills and achieve a professional and enjoyable sound. Remember, practice makes perfect!

Difference Between Producing And Mixing Music


Credit: www.izotope.com


Frequently Asked Questions For Difference Between Producing And Mixing Music


Do Producers Do Mixing?


Yes, producers can do mixing as it is a crucial part of the music production process. Mixing involves adjusting levels, panning, EQ, and adding effects to create a balanced and cohesive sound. However, some producers may choose to work with a dedicated mixing engineer to ensure the highest quality outcome for their project.


How Do You Mix And Produce Music?


Both roles shape the final product. Together they balance tracks, add effects and arrange parts. The process includes using software and hardware tools to control volume, tone, reverb, compression, and more.


It’s important to have a trained ear and experience to successfully mix and produce music.


What’s The Difference Between Recording And Mixing?


Recording captures the audio. Mixing combines and balances those tracks into one cohesive piece. Recording involves setting up microphones and recording equipment to capture sounds, while mixing involves adjusting the levels. This adds effects, and creating a final mix that sounds good.


What Is The Difference Between Music And Music Production?


Music is a broad term that encompasses various aspects of sound and rhythm. Music production, on the other hand, uses software and hardware to record, edit and shape tracks.


Conclusion


In essence, producing and mixing are two different and equally important aspects of music creation. Their roles might overlap at times, but they have different goals and require different skills. While producing focuses on creating the musical idea and bringing it to life, mixing gives the finishing touches to refine the sound quality.


Both play a critical role in creating an engaging and seamless listening experience for the audience. Aspiring producers and mixers must understand the fundamental differences between these two domains to excel in the music industry.

Categories
Archive

Mastering Tip The End Of Loudness War

To master the end of loudness war, use normalization plugins and meter your tracks accurately. The loudness war in music production has been ongoing for decades, with many producers pushing their tracks to be as loud as possible.


However, this leads to a loss in dynamic range and can result in a distorted and unpleasant sound. The solution to this is to use normalization plugins, such as loudness meters and limiters, to accurately meter your tracks and ensure they have a healthy dynamic range.


By doing so, you can achieve a more natural and enjoyable listening experience for your audience. We will explore the concept of loudness war, its effects on music production and why it is crucial to break away from this trend and move towards mastering the end of loudness war for the betterment of the music industry.

Mastering Tip The End Of Loudness War


Credit: m.youtube.com


The Loudness War

The Loudness War is a phenomenon that has plagued the music industry for years. It is a competition to see who can have the loudest recording, to stand out among other songs. This battle for volume has led to excessive compression, resulting in poor sound quality and a disappointing listening experience for many music fans. Fortunately, there is a solution. By mastering at the end of the production process, you can avoid the negative effects of the Loudness War and create a better listening experience for your audience.

What Is The Loudness War?

For decades, music mastering has been about creating a balanced and dynamic sound that captures the emotions of the performer and the listener. However, with the Loudness War, this goal has been compromised. Instead of focusing on the quality of the sound, engineers and producers have been competing to make their music the loudest. To achieve this, they use excessive compression and limiting on their recordings, which reduces a song’s dynamic range, making it sound flat and lifeless.

Why Is It A Problem?

The problem with the Loudness War is that it sacrifices sound quality for volume. When a song is compressed too much, it loses its dynamics, making it challenging to distinguish between different instruments or hear the subtle nuances of the music. This creates listening fatigue and a poor user experience. Moreover, when songs are equally loud, they lose their impact, and the overall effect is diminished. This is why it’s essential to maximize the dynamic range in music and not simply the volume.

Musicians, engineers, and producers have recognized the problem and realized that it’s essential to master at the end of the production process. By doing this, they can avoid the negative effects of the Loudness War and create a more balanced and enjoyable listening experience for their audience. By mastering at the end, you can achieve a more dynamic and well-balanced sound that enhances the impact of your music.

Mastery at the end can help you win the war, not by making your music the loudest but by making it the most dynamic. Let your music speak for itself, not just through volume, but through the quality of sound.

Mastering Tip The End Of Loudness War


Credit: www.productionmusiclive.com


The Need To End The Loudness War

The loudness war in music production has been raging for years, with the end result being poor-quality, distorted, and fatiguing music. The desire to make music sound louder has led to producers engaging in extreme processing techniques that suck dynamics and detail out of a track. The music industry has recently come to realize that this war must come to an end. The pursuit of loudness is adversely affecting the quality of music and, more importantly, the listener’s experience. That’s why it’s important to focus on mastering tips to end the loudness war.

Creating Dynamics

One of the essential tips for mastering a track is to restore dynamics, emphasizing the differences between the soft and loud parts of the song. This is essential because emphasizing dynamics ensures the music feels natural and livelier. Applying compression to gain control over the song’s peaks and troughs brings balance to the music, making it more exciting and dynamic.

Making Music Enjoyable Again

The loudness war has made music unlistenable, especially for extended periods. It’s not surprising that listeners may shut off their radios or even leave events with sound systems playing distorted audio tracks. Improving your mastering skills can make music more enjoyable for listeners. For instance, removing too much low end in the mix will make music sound thin and unappealing. Employ techniques like spectral balance to ensure you get a good mix of highs, mids, and lows, providing better listening experiences for fans.

Protecting Listeners’ Hearing

Listeners often have to endure overcompressed music that can cause long-term damage to their hearing. Mastering tips that prioritize listener’s comfort and safety should be considered. Sound engineers should protect listeners’ hearing by limiting the volume of the music, protecting the dynamics and clarity of the music. This is one way of ensuring the music is safe and comfortable, especially when listening over long periods.

Tip for Mastering music to end the loudness war Explanation
Emphasizing Dynamics Restoring dynamics to the music enhances its liveliness and makes it sound more natural.
Spectral Balance Spectral balance which seeks to ensure there is a proper mix of mids, highs and lows to give a better listening experience
Limiting Volume This ensures that the music is safe and comfortable for the listeners, especially when listening over extended periods.

It’s time to take a conscious step towards ending the loudness war and producing high-quality music that excites, entertains, and lasts forever. The above mastering tips are actionable and can improve the quality of your music production, balancing the underlying nuances of the music. With these tips, you can look forward to producing good quality music that excites and entertains with clarity and dynamics that amaze and astound listeners.


How To End The Loudness War

If you’ve listened to music in the last decade, you may have noticed that many songs sound louder than they used to. This is due to something called the “loudness war,” where producers and engineers compete to make their tracks as loud as possible. While some may think louder is better, it often results in a loss of dynamic range, making music sound flat and lifeless. So, how can we put an end to this war? Here are some ways:

Educating Producers And Engineers

One way to end the loudness war is to educate producers and engineers about dynamic range and the negative effects of excessive compression. Many may not even realize they are contributing to the loudness war and the impact it has on the quality of music. By teaching them about how dynamic range affects the emotional impact of a song, we can help them understand the importance of preserving it.

Using Lufs Instead Of Rms

Another way to end the loudness war is to use LUFS (Loudness Units Full Scale) instead of RMS (Root Mean Square) to measure the loudness of music. Unlike RMS, LUFS measures perceived loudness and takes into account the entire track, resulting in a more accurate measurement. By using LUFS, we can prevent the need for excessive compression and limit the overall volume of a track, resulting in a more dynamic and enjoyable listening experience.

Applying Dynamic Range Compression Responsibly

Although compression can help even out the levels of a track, it should be applied responsibly and in moderation. Using too much compression can create an artificial-sounding track and result in a loss of dynamic range. By applying compression sparingly and carefully, we can improve the overall mix while preserving the natural dynamic range of the music.

Collaboration Between Artists And Engineers

Collaboration between artists and engineers is also essential in ending the loudness war. By working together, they can ensure that the final mix accurately represents the artist’s creative vision while preserving the quality and dynamic range of the music. By finding a balance between loudness and dynamic range, we can create music that not only sounds great but also connects with listeners emotionally.

The Benefits Of Ending The Loudness War

The loudness war is a phenomenon where song producers and mastering engineers compete to make their tracks louder than their competitors, resulting in volume increase at the expense of the dynamics and sound quality of the music. However, many people in the music industry are now pushing to end the loudness war, and there are many benefits to doing so.

Better Sounding Music

When songs are made louder, the dynamics and natural range of instruments are often compromised, making music sound harsh and distorted. By ending the loudness war, music will have more balance and space to breathe, resulting in a more pleasant and natural listening experience. Music will have more depth and clarity instead of being a wall of sound, improving the overall quality of the songs.

Longer Lasting Hearing

Listening to overly loud music for an extended period can cause hearing damage and other health problems. By opting for a more moderate loudness level, producers can help ensure their listeners’ safety and wellbeing. Longer lasting hearing will benefit music enthusiasts, musicians, and industry professionals alike as they’ll be able to continue enjoying the music they love without any performance hindrances in the future.

Improved Listening Experience

Excessive loudness can be ear-fatiguing and cause discomfort. By ending the loudness war, listeners can enjoy music at a more comfortable volume level and pay attention to details they perhaps would not have noticed otherwise. With improved listening quality, they can connect with the music on a deeper level, creating a more enjoyable experience.

Increased Artistic Freedom

Artists and producers sometimes feel compelled to increase their songs’ volume to meet market demands and compete with other artists. With the end of the loudness war, there will be scope for producing music the way they conceptualize it. Artists will be free to make music based on the mood, concept, or feeling of the song rather than force-fitting into the current loudness standard to promote chart numbers and compete with their peers.

Obstacles To Ending The Loudness War

The loudness war has been a contentious issue in the music industry for decades. However, the implementation of streaming platforms and their loudness normalization algorithms has increased the urgency to address the problem. Unfortunately, ending the loudness war is not a straightforward process and requires overcoming numerous obstacles.

Resistance From Labels And Streaming Platforms

Major record labels and streaming platforms have a vested interest in the loudness war and often resist any attempts to end it. The labels believe that the louder the music, the more attention it will receive from listeners, which translates into higher sales. Streaming platforms use loudness normalization algorithms that artificially boost the volume of quieter tracks, which means that loudness is still a factor in attracting listener attention.

Consumer Expectations

Listeners have become accustomed to music that is overly loud, and many demand it. In a consumer-driven industry, catering to the desires of the audience is necessary for success. If artists and producers release music that is quieter than the norm, it may result in negative feedback and lost sales.

Budget Constraints For Independent Musicians

Independent musicians and producers often lack the resources necessary to compete in the loudness war. Creating loud music requires expensive equipment and experienced professionals, which many independent musicians cannot afford. As a result, they are often left behind in the race to be heard.

Mastering Tip The End Of Loudness War


Credit: hyperbits.com


Frequently Asked Questions On Mastering Tip The End Of Loudness War


What Is The Best Mastering Loudness Level?


The best mastering loudness level is -14 LUFS for music streaming platforms such as Spotify, Apple Music, and Tidal. This standard level ensures that the music sounds good and maintains consistency across various devices. However for CDs or vinyl, loudness levels vary and depend on personal preference.


What Db Should A Final Master Be?


The ideal dB level for a final master depends on the medium it will be played on and the genre of music. For CDs and streaming services, a range of -9dB to -14dB is recommended. For vinyl, it should be kept between -12dB and -14dB.


However, a dynamic range of at least 8dB is essential for any master.


What Is The Peak To Loudness For Mastering?


The peak to loudness ratio is the difference between the highest level of audio in a track and its overall loudness. It is typically recommended to stay within a range of -1 dBTP to -0. 5 dBTP for commercial mastering.


However, it ultimately depends on the specific track and its intended use.


How Do I Get Max Loudness Mastering?


To achieve maximum loudness in mastering, you need to keep in mind these 5 rules. Firstly, use a limiter to increase loudness without distortion. Secondly, maintain optimal levels without clipping. Thirdly, carefully balance EQ and compression settings. Fourthly, use high-quality audio converters.


Finally, hire a professional mastering engineer for optimal results.


Conclusion


In closing, the loudness war has been a long-standing issue in the music industry. But, with mastering tip, we can put an end to this battle and bring about a new era of music production. By utilizing the right techniques and avoiding over-compression, we can produce high-quality, dynamic tracks that stand out from the crowd.


Let’s make a conscious effort to prioritize audio quality and dynamics, and put an end to the loudness war once and for all. It’s time to take back the power and focus on creating music that truly resonates with listeners.

Categories
Archive

How To Structure Your Music For The Dance Floor

To structure your music for the dance floor, you must focus on the rhythm, energy level, flow and musicality. These elements ensure that your beats align with the dancers’ movements, keeping them engaged and entertained throughout the night.


As a DJ or producer, creating a danceable and enjoyable music playlist goes beyond just picking the latest hits or popular songs. It’s about crafting a cohesive journey that flows seamlessly from one track to another, building energy throughout the night.


To achieve this, you need to understand the rhythm, tempo and musicality of each track, selecting those with a strong beat that drives the dancers’ movement. Additionally, you need to maintain balance and variation in the playlist, alternating between genres and pacing to keep things fresh and interesting. By following these principles, you can structure your music for the dance floor and create an unforgettable experience for your audience.


Understand The Dance Floor

If you’re a music producer making dance tracks, you already know that the dance floor is the ultimate judge of what works and what doesn’t. The success of your track depends on how it moves people on the dance floor, and that’s why understanding the dance floor is crucial.

Music For Different Styles Of Dance

Different styles of dance require different types of music. For example, if you’re producing a track for a salsa dance floor, you’ll need to create music that is lively and rhythmic, with a strong beat that is easy to follow. On the other hand, if you’re producing music for a ballet performance, the music needs to be more delicate and graceful.

Below is a table outlining different music for different styles of dance.

Style of Dance Music Characteristics
Ballet Delicate, graceful, romantic
Salsa Lively, rhythmic, strong beat
Hip-Hop Heavy bass, strong beat, energetic
Ballroom Classic, melodic, graceful

Matching Music To Energy Levels

It’s also crucial to match the energy levels of the music to the energy levels of the dance floor. A good DJ knows that you can’t start a set with high energy music – you need to build up to it so that people are ready to go crazy when the time comes. Similarly, you can’t play high energy music for the whole night – you need to bring it down and give people a breather.

Consider planning your setlist so that you’re gradually increasing the energy level until you reach the climax, and then bring it back down again slowly.

The Importance Of Timing

Timing is key when it comes to music for the dance floor. Knowing when to bring in a new section or drop the bass can make or break a track. A sudden change in tempo or instrumentation can throw dancers off balance, so make sure you’re transitioning smoothly and logically from one section to the next.

Think about the different parts of a track: the intro, verses, choruses, breakdowns, and buildups. Each section should have its own identity and purpose, and your transitions between them should be seamless.

Conclusion

Understanding the dance floor is essential for creating music that moves people. Consider the style of dance, match the energy levels, and think about the timing of each section to build a setlist that takes your audience on a journey they won’t forget.

How To Structure Your Music For The Dance Floor


Credit: mixedinkey.com


Building A Groove

When it comes to producing music that gets people moving on the dance floor, building a groove is essential. This means creating a rhythm that is infectious and irresistible, and layering melodic elements on top of it to create a cohesive and dynamic track.

Start With A Rhythm

The first step in building a groove is to establish a strong rhythm. This can be achieved by creating a drumbeat that is simple and repetitive, but also has enough variation to keep things interesting. It’s important to consider the tempo and time signature of your track, as well as the overall vibe you are trying to create. A kick drum and snare drum pattern is a great place to start, and you can add in other percussion elements like hi-hats, shakers, and claps to give your rhythm some depth and texture.

Adding Melodic Elements

Once you have your rhythm established, it’s time to start adding melodic elements to build a full and engaging track. This can include basslines, chord progressions, and lead melodies. It’s important to make sure that these elements complement your rhythm and don’t clash with each other. You can experiment with different sounds and instruments to find the right combination that works for your track. Don’t be afraid to add in unexpected elements that will surprise and captivate your listeners.

Arranging Your Track

After you have your rhythm and melodic elements in place, the next step is to arrange your track. This involves structuring your song in a way that builds tension and release, and keeps your listeners engaged. You can use techniques like drops, breakdowns, and builds to create moments of excitement and anticipation. It’s important to ensure that each section of your track flows seamlessly into the next, and that your arrangement is cohesive and logical.

In conclusion, building a groove is essential for any music producer who wants to create tracks that move people on the dance floor. By starting with a rhythm, adding melodic elements, and arranging your track in a cohesive and engaging way, you can create music that is not only catchy, but also emotionally resonant and inspiring.

The Importance Of Breaks


Taking breaks while structuring your music for the dance floor is crucial. Implementing pauses can help create anticipation and excitement for the next beat drop, enhancing the overall club experience for your audience.

As a DJ or music producer, one of the most important tools in your arsenal is the ability to structure your music for the dance floor. One of the key elements of this structure is the use of breaks. Breaks are short periods of silence or reduced sound levels that can help to create tension and build excitement on the dance floor. In this post, we’ll explore the importance of breaks in creating a successful dance track and how you can use them to elevate your music to the next level.

Creating Tension And Release

One of the most effective ways to use breaks in your dance music is to create tension and release. By introducing a break after a buildup or during a high energy section of your track, you can create a sense of anticipation and build excitement for the next section. This technique is often used in genres like techno and house music where the emphasis is on creating a hypnotic and repetitive groove that gradually builds in intensity. By using breaks to create tension and then releasing it with a drop or a change in the melody, you can keep your audience engaged and energized throughout your set.

Adding A Drop To Increase Energy

Another way to use breaks in your dance music is to add a drop. A drop is a sudden reduction in sound or complete silence, often followed by a punchy, high-energy section of your track. Drops are an effective way to increase the energy and excitement of your music, and they can be a powerful tool in creating a memorable dance floor experience. By using a break before your drop, you can build anticipation and create a sense of excitement that makes your drop even more impactful. In conclusion, breaks are an essential tool for any DJ or music producer looking to create a successful dance track. By using breaks to create tension and release or to add a powerful drop, you can keep your audience engaged, energized, and moving on the dance floor. So the next time you’re working on a track, don’t forget the importance of breaks in creating an unforgettable dance music experience.

Using Effects To Enhance Your Track

Using effects is one of the most crucial elements of structuring your music for the dance floor. They can take your track to the next level, bringing out the best in your production. With the right use of effects, you can add depth, emotion, and dimension to your music that keeps the dance floor moving. In this post, we’ll explore how to use reverb and delay, filters and EQ, and compression to enhance your tracks.

Reverb And Delay

Reverb and delay are two powerful effects that can add depth and dimension to your music. Reverb creates a sense of space, making it the perfect tool to add character to your music. Delay, on the other hand, can bring energy and excitement to your sound.

Here are some tips on how to use these effects:

  • Use reverb to add depth and atmosphere to your music. A long reverb can create a sense of space, while a short reverb can add character to individual elements in your track.
  • Use delay to create excitement and energy in your music. A single delay can add a rhythmic element to your track, while multiple delays can create a complex, textured sound.
  • Try using both reverb and delay together to add depth and excitement to your music. Experiment with different settings to find the perfect balance for your track.

Filters And Eq

Filters and EQ are essential tools for shaping the tonal characteristics of your music. They allow you to carve out space in your mix, creating separation between different elements.

Here are some tips on how to use these effects:

  • Use filters to remove unwanted frequencies from your track. A high-pass filter can remove rumbling low-end frequencies, while a low-pass filter can filter out harsh, high-end frequencies.
  • Use EQ to shape the tonal characteristics of your music. Boosting the low-end frequencies can add warmth and depth to your track, while boosting the high-end can add sparkle and brightness.
  • Use EQ to create separation between different elements in your mix. By cutting certain frequencies from one element, you can make room for another element to shine through.

Adding Impact With Compression

Compression is an essential tool for adding impact to your music. It helps to control the dynamic range of your track, making the quieter parts louder and the louder parts quieter.

Here are some tips on how to use compression:

  • Use compression to add punch and impact to your drums. By compressing the drums, you can make them sound more powerful and upfront.
  • Use compression to control the dynamic range of your track. By compressing your entire mix, you can make it sound more cohesive and balanced.
  • Experiment with different attack and release times to find the perfect setting for your track. A faster attack time can add more punch to your sound, while a slower release time can make your sound more sustained.

By using reverb and delay, filters and EQ, and compression, you can enhance your tracks and take them to the next level. Experiment with different settings to find what works best for your music, and remember to have fun!

Testing Your Track


Structuring your music for the dance floor involves testing your track to ensure it keeps the energy high. Analyzing how it flows and transitions can help identify any areas that may lose traction. Consistency and balance are key to keep the crowd moving.

As a musician, once you’ve created your track, the next important step to finalize it for the dance floor is testing. Testing your music before releasing it is crucial in determining whether it will be a hit or a miss in the club setting. Testing helps you identify and fix any weak spots that could leave your listeners bored and uninterested. This blog post will guide you on how to test your music for the dance floor, and the importance of getting feedback from DJs and dancers.

Listening In The Club Setting

Listening to your music in the club setting is a necessary step to understand if it will get people moving. Being present in the party scene helps you get a feel of the crowd’s energy and what they like. At the club, observe the reaction of the listeners to your music. Does it make them dance? Do they show interest and enthusiasm? If your music does not create a buzz, then there is a need for a rework. Test out different parts of your track, experiment with the tempo, and get a feel of what the dancefloor wants.

Getting Feedback From Djs And Dancers

DJs and dancers are the best people to give feedback on your music. They will judge how easy it is to dance to your track and whether it matches the vibe of the party. Reach out to DJs and dancers in the club and ask for their opinion on your track. Their feedback is invaluable, as they will hone in on what the right tempo, bass, and melody should be. It’s also recommended to take note of critiques, even if they are hard to swallow, as they offer room for improvement. Testing your music to suit the dancefloor is a crucial step in finalizing your track before release. Listening to your song in the club setting and getting feedback from DJs and dancers gives you an unbiased opinion of your music. It is important to be open to criticism and willing to make changes if necessary. Remember, the ultimate goal is to make music that not only sounds good, but also brings the crowd to their feet.

How To Structure Your Music For The Dance Floor


Credit: www.youtube.com


Final Touches


Add the final touches to your music by structuring it for the dance floor. Consider the tempo, rhythm and energy of the track, ensuring it builds up and has a climax for maximum impact. Get the crowd moving with the right structure.

Mastering Your Track

Mastering is the final step in the music production process. It is important to ensure that your music sounds its best before releasing it to the world. Mastering involves making minor adjustments to levels, EQ, compression, and stereo width to ensure that your music is balanced and cohesive. Some tips to consider when mastering your tracks include ensuring that your levels are consistent throughout the track, avoiding overly compressed and distorted sounds, and checking your mix on different sound systems. Consider using plugins such as Izotope’s Ozone or Waves’ L2 Ultramaximizer to enhance the sound of your tracks.

Preparing Your Music For Release

Once you’ve mastered your track, it’s time to prepare it for release. This involves exporting your audio file in the correct format and ensuring that all metadata is complete. Metadata includes details such as the track title, artist name, and release date, which are important for publishing and promoting your music. Some common audio file formats to consider include WAV or AIFF for high-quality audio, and MP3 for smaller file sizes. Ensure that your audio files are labeled correctly, and consider using a digital audio distribution service such as DistroKid or TuneCore to release your music on popular streaming platforms like Spotify and Apple Music. Before releasing your music, there are a few final touches you should make to ensure that your track is ready for the dance floor. It’s a good idea to test your music in different environments, such as on a club sound system or in a car, to ensure that it sounds good on different sound systems. Consider adding a short intro and outro to your track to increase its versatility for DJ mixing. Finally, ensure that your track is properly labeled with the correct bpm and key information, making it easier for DJs to mix. With these final touches, your music will be ready to shine on the dance floor.


Frequently Asked Questions Of How To Structure Your Music For The Dance Floor


How Do You Structure Dance Music?


Dance music has a basic structure of intro, buildup, drop, breakdown, and outro. The intro sets the mood, buildup increases energy, the drop is the climax, breakdown slows things down, and the outro closes the song. It’s important to add variety to each part to keep the listener engaged, through melody, rhythm, or arrangement changes.


How Do You Put Music Together For A Dance?


Creating music for a dance requires careful consideration of the genre, tempo, and rhythm of the dance style. It’s important to select music with a consistent tempo, clear beat, and dynamic range that matches the choreography. You can mix and edit different tracks to create transitions and build-ups that complement the dance moves.


Lastly, you should always prioritize the dancers’ expressive movement over the music.


What Is The Breakdown Of Dance Music?


The breakdown of dance music includes different elements such as rhythm, melody, bassline, and vocals. These elements combine to create a unique sound that sets dance music apart from other genres.


What Is The Format Of Dance Music?


Dance music has a 4/4 time signature with a steady beat of 120-140 BPM. It typically features a repetitive structure of intro-verse-chorus-breakdown-drop. Genres like techno, house, and EDM follow this format, and instruments like synthesizers and drum machines are commonly used.


Conclusion


To sum it up, structuring your music for the dance floor can make or break your performance. Understanding the importance of beatmatching, energy levels, and transitions can help you seamlessly blend tracks and create a memorable experience for your audience.


With these tips, you can take your DJ game to the next level and keep the crowd on their feet all night long. Keep practicing and experimenting to find your unique style and don’t forget to have fun!


Categories
Archive

How To Make Virtual Synths Sound Warmer

To make virtual synths sound warmer, adjust the filter cutoff and resonance to add warmth and bring out harmonics. To further enhance warmth, use saturation plugins and add subtle reverb and delay.


Virtual synths are an essential tool for producers and musicians, offering endless sonic possibilities, but finding the right warmth can be a challenge. Achieving warmth in virtual synths involves understanding how to manipulate the sound and add character with a combination of techniques.


We will explore how to make virtual synths sound warmer, including adjusting filter cutoff and resonance, using saturation plugins, adding subtle reverb and delay, and other tricks to help enhance the sound. By the end of this article, you will be able to apply these techniques and make your virtual synths sound more organic and pleasing to the ear.

How To Make Virtual Synths Sound Warmer


Credit: mixandmastermysong.com


Understand Frequency Range


To make virtual synths sound warmer, understanding the frequency range is crucial. Adjusting the frequency carefully can bring out warmth in the sound, and avoiding sharp boosts on higher frequencies can prevent it from sounding harsh.

Understand Frequency Range: As music producers, we always strive to make our virtual synths sound warmer. One way to accomplish this is by manipulating the frequency range of each individual sound. Understanding the frequency range is crucial, as it allows us to enhance certain elements of a sound while reducing others. Let’s take a closer look at the importance of bass frequencies and how mid-range frequencies can be manipulated to make virtual synths sound warmer. Bass Frequencies Importance: Bass frequencies are the lower range of audible sound waves, and they add depth and warmth to a sound. To make virtual synths sound warmer, it’s important to ensure that the bass frequencies are not overpowering the rest of the sound. This can be achieved by adjusting the EQ to reduce the bass frequencies slightly. By doing this, we allow other elements of the sound to be heard more distinctly. Additionally, adding subtle harmonic saturation or distortion to the bass frequencies can also contribute to making virtual synths sound warmer. This technique adds depth and character to the overall sound, making it more pleasing to the ear. Mid-range Frequencies Manipulation: Mid-range frequencies are the frequency range where most of the harmonics and tonal information occur. Manipulating these frequencies is crucial in making virtual synths sound warmer. Boosting the mid-range frequencies can add clarity and warmth to a sound, making it more present in the mix. On the other hand, reducing the mid-range frequencies can help to create a warmer and more relaxed sound. Moreover, using compression on the mid-range frequencies can help to smooth out any unwanted peaks and bring out the desired tonal characteristics of the sound. It’s important to experiment with different combinations of EQ, harmonic saturation, and compression to find the right balance for each individual sound. In conclusion, understanding the frequency range of virtual synths is crucial in making them sound warmer. By manipulating the bass frequencies and mid-range frequencies, we can enhance the overall sound, making it more pleasing to the ear. So, next time you’re producing music, be sure to experiment with the frequency range to make your virtual synths sound warmer.

How To Make Virtual Synths Sound Warmer


Credit: asia-latinamerica-mea.yamaha.com


Layering Synths

If you’re into creating electronic music, you’re probably familiar with virtual synths. Even though virtual synths sound great by themselves, sometimes they can sound a bit cold and digital. However, you can make them sound warmer by layering synths.

Why Layering Synths Is Important

Layering synths is important because it can add warmth and depth to your sound. It can also make your sounds more interesting and unique. By layering multiple synths, you can create a complex and rich sound that’s much more enjoyable to listen to.

Different Types Of Synths You Can Layer

Types of Synths Description
Pad Synths These synths are designed to create warm, sustained sounds. They’re great for creating ambient and atmospheric sounds.
Lead Synths Lead synths create bright and cutting sounds. They’re great for creating melodies and hooks.
Bass Synths As the name suggests, these synths are used to create basslines. They’re great for adding depth and a solid foundation to your tracks.

By layering different types of synths, you can create a more complex and interesting sound. For example, you could layer a warm pad synth with a bright lead synth to create a sound that’s both warm and cutting.

You can also layer multiple copies of the same synth and detune them slightly to create a warmer and richer sound. You can also add effects like reverb and delay to make your sound even more interesting.

In conclusion, layering synths is a great way to make virtual synths sound warmer and more interesting. It’s a technique that’s used by many electronic music producers, and it’s definitely worth trying out. By experimenting with different types of synths and effects, you can create a unique and complex sound that’s all your own.


Using Saturation Plugins


Saturation plugins can add warmth to virtual synths and enhance their sound quality. By adjusting the harmonic distortion and soft clipping in the mix, you can achieve a richer, more analog-sounding tone.

Different Types Of Saturation Plugins

Using saturation plugins is a great way to add warmth and harmonics to your virtual synth sounds. But with so many types of saturation plugins out there, how do you know which one to choose? Here are a few different types of saturation plugins to consider:

  • Tape Saturation: This type of plugin emulates the sound of analog tape machines, often adding a colorful distortion and warmth to your sound.
  • Tub Saturation: Similar to tape saturation, tub saturation plugins simulate the sound of tubes in analog equipment, adding a smooth harmonic distortion to your sound.
  • Transistor Saturation: This type of plugin simulates the warmth and crunch of analog circuits, often used to add a gritty edge to your sound.
  • Transformer Saturation: Transformer saturation plugins emulate the sound of transformers in analog gear, adding a rich, full-bodied sound to your synth.

Tips For Using Saturation Plugins

While saturation plugins can add warmth and character to your virtual synth sounds, it’s important to use them judiciously. Here are a few tips for using saturation plugins effectively:

  • Start with a clean signal: Make sure your virtual synth sound is clean and free of any unwanted noise or distortion before applying a saturation plugin.
  • Use subtle settings: Saturation plugins can quickly overwhelm your sound if used too aggressively. Start with subtle saturation settings and increase the intensity gradually until you achieve the desired effect.
  • Try different saturation types: Experiment with different types of saturation plugins to find the one that best matches the sound you’re going for.
  • Use EQ to balance: After applying saturation, use EQ to balance your sound and remove any harsh or muddy frequencies that might have been introduced.
  • Consider layering: Saturation can be even more effective when used in combination with other effects. Consider layering your saturation plugin with other effects like reverb, delay or chorus to create a truly unique sound.

With these tips and techniques, you’ll be well on your way to making your virtual synth sounds warmer, richer, and more harmonically complex than ever before.

Applying Reverb

One of the most important techniques to make virtual synths sound warmer is by applying reverb. Reverb helps to simulate the natural acoustics of the physical space and add depth to the sound. In this post, we will discuss the importance of reverb in warmth and how to apply reverb to virtual synths effectively.

Importance Of Reverb In Warmth

Reverb creates a sense of space around the sound and helps to blend it with the mix. It softens the edges and smooths out the harshness, making the sound more pleasant to the ears. Without reverb, virtual synths can sound dry and lifeless, lacking the warmth that we associate with natural instruments.

Applying Reverb To Virtual Synths

To apply reverb to a virtual synth, you need to add a reverb plugin to the track or the master bus. There are different types of reverb plugins available, including plate, room, hall, and spring. Each plugin has a unique sound, and you need to choose the right one that fits your mix.

When applying reverb, you should consider the following:

  • Level: The amount of reverb should not overpower the dry signal. Start with a small amount and increase it gradually until you find the right balance.
  • Decay: This controls how long the reverb tail lasts. A longer decay time will create a bigger sense of space, whereas a shorter decay time will create a tighter sound.
  • Pre-delay: This controls the time between the dry signal and the start of the reverb. A longer pre-delay time will create a sense of distance between the sound source and the reflective surface.
  • EQ: You can use EQ to shape the reverb and blend it with the mix. You can cut or boost specific frequencies to make the reverb more or less pronounced.

By applying reverb with the right settings, you can make virtual synths sound warmer and more natural. Reverb is an essential tool in every producer’s arsenal, and it can add a lot of character and depth to your mix.

Utilizing Panning Techniques


Achieving a warmer sound with virtual synths can be done by utilizing panning techniques. By placing different synth parts in different areas of the stereo field, you can create a more dynamic and spacious mix. Try experimenting with panning to add warmth and interest to your virtual synth tracks.

Virtual synths are fantastic tools for creating music, but sometimes you may find that they sound too cold or digital. If you’re looking to add some warmth to your virtual synths, one technique to try is utilizing panning. By utilizing different panning techniques, you can create a spacious sound that is both warm and immersive. Here, we’ll discuss how to use panning techniques to make virtual synths sound warmer.

Setting Up In Stereo Imaging:

To use panning techniques effectively, you will first need to ensure that your stereo imaging is set up correctly. Make sure that you have a firm grasp on the different stereo imaging techniques available, such as wide or narrow stereo imaging. By understanding the different techniques, you will be able to create a soundscape that sounds natural yet immersive.

Panning Techniques To Create Warmth:

Now, let’s get started with using panning techniques to create warmth in your virtual synths. One technique to try is using the stereo width control in your plugin. By adjusting this control, you can widen or narrow the stereo field of your virtual synths to create a warm, immersive sound. Additionally, you can use the pan control to move the sound away from the center, creating a spacious sound that engulfs the listener. Another technique to try is using stereo delays. By adding a stereo delay to your virtual synth, you can create a spacious sound that feels warm and natural. Experiment with different delay times and feedback settings to find the right balance for your sound. Overall, utilizing panning techniques is an excellent way to add warmth and spaciousness to your virtual synths. By setting up your stereo imaging correctly and experimenting with different panning techniques, you’ll be able to create a soundscape that is both immersive and natural.

How To Make Virtual Synths Sound Warmer


Credit: www.sonicbits.com


Eq Tweaks


This article explores effective EQ tweaks to warm up virtual synth sounds. Try using high-pass and low-pass filters, adding saturation and distortion, and adjusting the envelope parameters to achieve a more organic and analogue-like quality in your digital synthesizers.

Making virtual synths sound warm can be a tricky task, but with the right EQ tweaks, it can be achieved. EQ can help to enhance the warmth of your virtual synth by adjusting the levels of frequencies. In this post, we will focus on how to EQ lower frequencies to make your virtual synths sound warmer.

How To Eq Lower Frequencies

The lower frequencies of your virtual synth are responsible for the warmth in the sound. To make your virtual synth warmer, you need to boost the lower frequencies and cut the upper frequencies. Start with a low shelf EQ and boost the low frequencies by around 3-6dB. This will bring warmth to your sound. Next, use a high pass filter to cut the upper frequencies that are not needed. This will ensure that the warmth of your virtual synth is not lost.

Using High-pass Filtering To Make Synths Warmer

High-pass filtering is an excellent way to make your virtual synths sound warmer. It removes the unnecessary high-end frequencies and ensures that the warmth of your sound is retained. When using a high-pass filter, set the cutoff frequency to around 100-200Hz. This will remove the upper frequencies that are not essential. In conclusion, employing EQ tweaks can be helpful in making your virtual synths sound warmer. Adjusting the lower frequencies and using high-pass filtering are great ways to enhance the warmth of your sound. Experiment with different EQ settings to find the perfect warmth for your virtual synth sound.

Frequently Asked Questions On How To Make Virtual Synths Sound Warmer


How Do You Make A Synth Sound Warmer?


To make a synth sound warmer, add some low-pass filtering to remove high frequency harmonics and boost the bass frequencies slightly. Additionally, consider adding saturation or distortion for added warmth and character. Adjusting the envelope can also help soften the sound.


Finally, experimenting with different reverb types can give the sound a warmer, more spacious feel.


How Do You Soften Synth Sounds?


To soften synth sounds, try reducing the attack and increasing the release. Add a bit of reverb and delay to give it a more natural feel. Additionally, you can use filters to tame harsh frequencies and add warmth. Experiment with different combinations to find what works best for your sound.


How Do You Add Warmth To A Mix?


To add warmth to a mix, try adjusting the EQ levels to boost the lower frequencies and reduce the higher frequencies. You can also add compression to give the mix more body and sustain, and use subtle reverb to create a sense of space.


Lastly, try adding some subtle distortion or saturation to add warmth and harmonics.


How To Make Vst Synth Sound Real?


To make a VST synth sound real, you need to focus on adjusting the sound parameters, including the filter cutoff, envelope rates, and attack times. You should also use effects such as reverb and delay to add depth and space to the sound.


Additionally, using realistic samples or virtual instruments can help create a more realistic sound. Experimentation with the settings is key to achieving a realistic sound.


Conclusion


Warming up your virtual synths can add a whole new dimension to your music. By experimenting with techniques like saturation, EQ, and subtle effects, you can achieve a warm, vintage sound that is full of character. Don’t be afraid to try new things and think outside the box.


With a little creativity and some practice, your virtual synths can sound just as warm and inviting as the real thing. So, go ahead and give it a try!

Categories
Archive

Character Seperation Effects And More Using Eq

Character separation effects can be achieved using EQ, allowing for accurate audio adjustments. EQ can be used to isolate and manipulate specific frequencies within a sound waveform.


EQ is a powerful tool when it comes to shaping the overall tone of an audio recording. Whether you are looking to enhance the bass or accentuate the treble, the right EQ settings can make a significant difference. One of the key benefits of EQ is the ability to isolate specific frequencies in a sound waveform, which can be essential for achieving separation between different instruments or vocal tracks.


We will explore some of the techniques and strategies for using EQ to achieve character separation effects in your recordings. From subtle tweaks to more drastic adjustments, we will show you how to use EQ to take your audio production to the next level.


How To Use Eq For Character Separation?

Equalization (EQ) is an essential tool for audio engineers and producers to achieve a well-balanced mix. Using EQ for character separation is crucial, especially in situations where multiple instruments or vocals are competing for the same frequency spectrum. In this section, we’ll discuss how to use EQ for character separation effectively.

Choosing The Right Eq

Before diving into the actual EQ settings, it’s essential to choose the right EQ plugin. EQ plugins vary in their sound and functionality, which affects the final outcome of your mix. Select an EQ plugin with a high-pass and low-pass filter, gain control, and parametric EQ bands for more precision. Some popular EQ plugins include FabFilter Pro-Q3, Waves SSL E-Channel, and Izotope Ozone EQ.

Identifying Problem Frequencies

Identifying problem frequencies is critical when using EQ for character separation. These are the frequencies that cause instruments or vocals to clash in the frequency spectrum. One way to identify problem frequencies is to use a spectrum analyzer. A spectrum analyzer visually represents the frequency spectrum level of your mix. You should look out for frequency spikes that cause your mix to sound muddy or cluttered.

Using High Pass And Low Pass Filters

High pass and low pass filters are essential tools when using EQ for character separation. The high pass filter removes low-frequency sounds from your audio signal, making room for other instruments or vocals. On the other hand, low pass filters remove high-frequency sounds, allowing other elements to cut through in the mix. Use these filters to shape the frequency spectrum of each instrument or vocal and ensure they don’t compete with each other.

Using Eq To Enhance Character Separation

After identifying problem frequencies and using high-pass and low-pass filters, it’s time to use EQ bands to enhance character separation. Parametric EQ bands allow you to boost or attenuate specific frequency ranges and shape the overall sound of each instrument or vocal. For instance, you can boost the midrange frequencies of a guitar to make it stand out in the mix or attenuate the high frequencies of a cymbal to prevent it from clashing with other elements. Experiment with different EQ settings to achieve the desired character separation.

Character Seperation Effects And More Using Eq


Credit: www.sciencedirect.com


Other Uses Of Eq In Audio Production


Eq has many other uses in audio production, including character separation effects. By using eq, it’s possible to separate individual instruments or vocals from a mix. This technique can add depth and dimension to a track, making it sound more professional.

Aside from character separation effects, EQ is also used in audio production to enhance clarity, control frequency balance, and create space in the mix.

Enhancing Clarity

EQ can be used to boost certain frequencies that are essential for the clarity of a sound. For example, boosting the mid-range frequencies of a vocal track can help it stand out in a mix. Similarly, by decreasing the low-end frequencies of a guitar track, the clarity of the higher notes can be emphasized.

Controlling Frequency Balance

EQ can also be used to balance the frequencies in a mix. For example, if there are too many low-end frequencies in a song, the bass and drums may overpower the other instruments. By lowering the bass frequencies and boosting the higher frequencies of the other instruments, a better frequency balance can be achieved.

Creating Space In The Mix

Sometimes, the frequencies of different tracks may overlap, creating a cluttered sound. EQ can be used to create space in a mix by cutting some frequencies on one track while boosting similar frequencies on another track. For example, cutting the low-end frequencies on a piano track while boosting the same frequencies on a bass track can create a clean and defined mix. In conclusion, EQ is a fundamental tool in audio production that can be used for much more than just character separation effects. By utilizing EQ for enhancing clarity, controlling frequency balance, and creating space in the mix, a cleaner and more balanced sound can be achieved.


Types Of Eq

EQ or equalization is the process of adjusting the balance between frequency components within an audio signal, which enables the listener to hear sounds more clearly. There are different types of EQ to choose from, depending on the audio sources and the desired outcome. Let’s take a closer look at the most popular ones.

Graphic Eq

Graphic EQ is the most commonly used type of EQ. It uses sliders or faders to adjust the sound to specific frequency bands. The sliders represent the frequency ranges, and moving them up or down boosts or cuts a particular frequency. Graphic EQ is user-friendly and intuitive, making it an excellent choice for beginners.

Parametric Eq

Parametric EQ is more advanced than graphic EQ. It allows you to adjust the gain, frequency, and bandwidth of each frequency band individually. The frequency response curve is a bell shape, allowing for more precise and natural adjustments. Parametric EQ is ideal for professionals and those who want more control over their sound.

Dynamic Eq

Dynamic EQ is a combination of equalizer and dynamic processor. It adjusts the sound across the frequency spectrum and uses dynamic processing to control the output level. Dynamic EQ can adapt to changing frequency ranges, which makes it perfect for complex audio sources like vocals or instruments.

In conclusion, choosing the right type of EQ is crucial in achieving the desired sound quality. Whether you’re a beginner or a professional, there is an EQ out there that will suit your needs. Understanding their differences will enable you to make an informed decision and get the best possible results.

Eq Tips And Techniques


Learn how to create unique character separation effects and more using EQ with our helpful tips and techniques. Make your music stand out with EQ techniques that will bring depth and clarity to your mix.

As a content creator, you want your work to be unique, engaging, and professional, but there are times when you’re not satisfied with the sound quality of your content. In such cases, using Equalizer (EQ) can prove to be an essential tool in your audio toolbox. Besides correcting frequencies, it can also be used to create numerous audio effects. This article will cover some EQ tips and techniques, such as using EQ in parallel, using EQ to create lo-fi effects, and using EQ to enhance stereo width.

Using Eq In Parallel

One of the most popular ways to use EQ is to create parallel processing. This is done by duplicating a track and applying EQ to only one of the copies. Parallel processing allows you to have the original sound and its processed version, which you can then blend together to get a balance between the two. Although it is not a beginner’s technique, it can lead to some exciting sounds with experimenting.

Using Eq To Create A Lo-fi Effect

Lo-fi is a type of sound production that intentionally degrades the quality of the sound to give it a more compressed, vintage feel. If you want to achieve this type of sound, using EQ can be an excellent option. By reducing the high and low frequencies of your audio, you can give it a more muffled or distant sound, which can be great for creating an atmospheric and nostalgic effect. You can also use a bit-crusher plugin or decimate effect to add more vintage vibes to your audio.

Using Eq To Enhance Stereo Width

EQ can also be used to enhance the stereo width of your audio by making the left and right channels sound wider. To achieve this effect, you can boost the high frequencies in one channel and lower them in the other channel. You can also boost the mid frequencies in one channel and lower them in the other. This will create a more jagged frequency response and give your audio a wider stereo effect. Be careful not to overdo it and make sure that the audio remains balanced on both sides. In conclusion, using EQ can open up endless possibilities for enhancing and improving your audio content. By using these EQ tips and techniques such as parallel processing, creating lo-fi effects, and enhancing stereo width, you can make your audio more engaging and unique. Experiment with different settings and effects to see what works for you and have fun!

Common Eq Mistakes To Avoid


Avoiding common EQ mistakes is essential for enhancing the sound quality of your audio tracks. When it comes to character separation effects and more using EQ, it’s crucial to avoid overusing EQ, not paying attention to phase issues, and not filtering out unnecessary low-frequency content.


By keeping these tips in mind, you can achieve a professional sounding mix with properly applied EQ.

Common EQ Mistakes to Avoid Equalization or EQ is a powerful tool for any music or audio producer. With its ability to modify the frequencies of an audio signal, it can help creators get rid of unwanted noise or enhance particular audio elements to create an excellent end-product. However, even with its many advantages, there are common mistakes that beginners or even seasoned audio engineers can make when it comes to EQ. In this section, we will explore these common mistakes to ensure that your music production or podcast creation is top-quality. Overusing EQ EQ is a delicate tool that requires careful application. Overusing it can lead to a thin or weak signal that can negatively affect your audio. It can be tempting to apply EQ to every track or frequency, especially when you are still learning the ropes of mixing. However, it is important to remember that less is often more, and EQ should not be used to compensate for poor recording quality. Masking important frequencies Masking happens when a frequency occupies the same sonic space as another frequency and makes it harder to hear one or both. This is particularly relevant when dealing with overlapping frequencies such as the bass guitar and kick drum. Masking can occur when EQ is over-applied to a channel or can be a problem during the recording process. It is essential to listen to your mix critically to identify any masking issues and to use EQ judiciously to ensure that all essential frequencies are audible. Not listening critically Perhaps the most significant mistake when it comes to EQ is not listening to the mix critically. This is particularly important when identifying masking and other EQ issues. It may seem obvious, but ensure that you are listening through quality audio equipment, as poor quality speakers or headphones can mask issues. Additionally, taking breaks can help refine your listening skills and gives you a fresh perspective when you resume. In conclusion, EQ is a crucial tool in audio production, helping to shape the sound of music, podcasts, and other audio projects. However, its power needs to be used judiciously to ensure that all frequencies are appropriately balanced. This means avoiding common mistakes such as overuse, frequency masking, and insufficient critical listening. By avoiding these errors, you can create an optimal audio mix that will leave your audience entertained and impressed.

Character Seperation Effects And More Using Eq


Credit: www.mixinglessons.com


Frequently Asked Questions On Character Seperation Effects And More Using Eq


How Does Using Eq Allow For More Separation In A Mix?


EQ allows for more separation in a mix by allowing you to adjust and shape the frequencies of individual tracks. By cutting or boosting specific frequencies, you can prevent instruments from overlapping and clashing, resulting in a cleaner and more defined mix.


How Do You Separate Instruments With Eq?


Separating instruments with EQ involves adjusting the levels of specific frequencies to enhance or reduce certain sounds. By isolating and boosting or cutting particular frequencies, you can reduce unwanted instrument overlap and create a clearer, more distinct mix.


How Do You Get More Separation In A Mix?


To get more separation in a mix, you can try these techniques: use EQ to carve out space for each instrument, use panning to create space in the stereo field, use compression to level out dynamics and create more space, use reverb and delay to add depth and create space, and consider layering and arranging instrumental parts to give each instrument its own space and role.


What Does An Eq Do?


An EQ or equalizer is a device that adjusts and balances the frequency levels of audio signals. It works by boosting or cutting specific frequencies to improve the sound quality of music or other audio content. An EQ can be used to enhance the bass, treble, midrange, or other frequencies to achieve a desired audio output.


Conclusion


Utilizing EQ can bring significant improvements to the separation and quality of individual instruments in your music. With its powerful frequency management capabilities, you can effectively boost or reduce certain frequencies to bring out the desired sound you are looking for.


Experiment with different settings to find the perfect balance and enhance the overall sonic experience for your listeners. Incorporating EQ into your production process can truly take your music to the next level.

Categories
Archive

Pre Sale Mastering A Track From Start To Finish

“Pre Sale Mastering A Track From Start To Finish is a comprehensive course that shows you how to perfect your tracks for commercial release. Learn the necessary skills to deliver a polished and professional sound.”


As an aspiring music producer, you need to master the art of track mastering if you want to make it big in the music industry. Mastering is the final stage of music production, where engineers apply the finishing touch to a track to make it sound polished and professional.


Pre Sale Mastering A Track From Start To Finish is an online course that takes you through the steps required to perfect your tracks for commercial release. The course covers everything from understanding how mastering works to acquiring the necessary technical skills to deliver a well-mastered track. The course also provides you access to mastering tools and techniques used by professional sound engineers. We’ll review what the course offers and how it can benefit you as a music producer.


Tools And Software For Pre-sale Mastering


Mastering a track from start to finish requires the right tools and software. Pre-sale mastering tools like iZotope Ozone, Waves API Collection, and Fabfilter Pro-Q 3 are popular choices for producing high-quality music. These tools allow producers to fine-tune audio to perfection and create a polished final product.

Tools and Software for Pre-Sale Mastering When it comes to mastering a track from start to finish, having the right tools and software is crucial. Pre-sale mastering entails perfecting a track before it is released for sale or distribution. It involves balancing and enhancing the various elements of a song to ensure that it sounds polished and professional. Here are some of the essential tools and software that you need to have to achieve pre-sale mastering excellence.

Daw Software

A Digital Audio Workstation or DAW software is a critical component of your pre-sale mastering process. It is a software program that enables you to create, edit, mix, and master audio tracks. Some of the popular DAW software includes Logic Pro X, Pro Tools, Ableton Live, and FL Studio. Each of these software programs has its unique features, such as powerful tools, plugins, and effects, and it would be best to choose one that suits your style.

Plugins And Vsts

Plugins and VSTs stand for Virtual Studio Technology, and they provide additional effects and tools to add uniqueness to your sound. They are essential in pre-sale mastering, as they enable you to enhance the quality and increase the level of your audio. Some popular plugins and VSTs include Waves, FabFilter, iZotope, and Native Instruments. Each plugin has its unique features, and it would be best to experiment with different plugins to find the perfect match for your music.

Metering Tools

Metering tools are essential in pre-sale mastering, as they help you to analyze and master the different levels of your audio. They are essential in determining the loudness levels, frequency distribution, and stereo image of your track. Some of the popular meter plugins include Waves WLM, FabFilter Pro-L, and iZotope Tonal Balance Control. These tools provide a visual representation of your audio levels and allow you to make adjustments to achieve the perfect balance. In conclusion, pre-sale mastering is a crucial step in the music production process. Having the right tools and software is vital in ensuring that your tracks are polished and professional. DAW software, plugins, and VSTs, and metering tools are essential components of pre-sale mastering, and using them correctly can help take your music to new levels.

The Process Of Pre-sale Mastering

Pre-sale mastering is an essential step in preparing a track for release. It involves taking an unfinished mix and refining it to achieve a polished, balanced sound that will translate well across all playback systems. Pre-sale mastering is all about creating a final product that appeals to your intended listeners while adhering to technical requirements for the platforms the track will be released on.

Setting Up Your Workspace

Before starting the pre-sale mastering process, it’s essential to create the ideal workspace. This involves setting the room up for optimal listening and positioning the speakers correctly. The speakers should be at ear-level and equidistant from the listener, and the room should be treated for any acoustic issues that could affect the mix’s accuracy.

Analysis Of The Mix

The first step in pre-sale mastering is to analyze the mix to identify any issues that need to be addressed. You should listen to the mix critically, paying attention to things like balance, frequency masking, and dynamic range. You can also use frequency analyzers, phase meters, and stereo imaging tools to gain a better understanding of the mix’s technical qualities.

Corrective Eq And Compression Techniques

Once you’ve analyzed the mix, it’s time to start making corrections. You can use corrective EQ and compression techniques to fix issues like frequency imbalances, dynamic inconsistencies, and unwanted noise. Corrective EQ involves cutting or boosting certain frequencies to achieve a better balance, while compression helps even out the mix’s dynamics.

Reference Track Analysis

As you work on the pre-sale mastering process, it’s crucial to use reference tracks that you’re familiar with to ensure you’re achieving a balanced and competitive sound. A reference track analysis involves comparing your mix to a reference track and making adjustments to achieve a similar level of balance and loudness while retaining your mix’s unique character.

In conclusion, pre-sale mastering is a crucial step in the music production process that ensures your track is polished and ready for release. By setting up your workspace correctly, analyzing the mix, using corrective EQ and compression techniques, and conducting reference track analysis, you can achieve a track ready for worldwide distribution.

Techniques For Pre-sale Mastering


Learn effective techniques for pre-sale mastering with this comprehensive guide, which covers everything from track selection to editing tools and EQ settings. Follow step-by-step instructions for mastering a track from start to finish and ensure your music stands out in a highly competitive industry.

Mastering a track before releasing it for sale is crucial to ensure that the final product is polished and of high-quality. Pre-Sale Mastering involves several techniques that enhance the sound quality of the track. This post will focus on some of the most important techniques that can be used in Pre-Sale Mastering.

Stereo Width Control

Stereo Width Control refers to adjusting the stereo image of the track to make it sound wide and spacious. By adjusting the stereo width, we can create a better listening experience. However, it is important to keep in mind that too much stereo width can negatively impact the mono compatibility of the track. Therefore, it is important to find the right balance while adjusting the stereo width.

Excitement And Saturation Techniques

Excitement and Saturation Techniques are used to enhance the overall sound of the track. These techniques add warmth, depth, and character to the sound. Excitement techniques include EQ boosts, Stereo Imaging, and Dynamic Processing. Saturation techniques involve the use of harmonic distortion, tape saturation, and tube saturation. These techniques add a subtle distortion to the sound, giving it a more organic and natural feel.

Transient Control

Transient Control involves adjusting the transient response of the track to make it sound more punchy and dynamic. Transient Control techniques include the use of Transient Shapers, Compressors, and Limiters. These techniques ensure that the transient peaks are controlled and the sustain of the sound is enhanced.

Loudness Maximization

Loudness Maximization is the final step in Pre-Sale Mastering. This step involves adjusting the loudness of the track to ensure that it competes with other tracks in the market. However, it is important to keep in mind that too much loudness can negatively impact the dynamic range of the track. Therefore, it is crucial to find the right balance while adjusting the loudness of the track. In conclusion, Pre-Sale Mastering involves several techniques that are used to enhance the sound quality of the track. By using the techniques mentioned above, you can ensure that your track sounds polished and of high-quality.


Dos And Don’ts Of Pre-sale Mastering

Pre-sale mastering is a crucial process that ensures a final track has the highest quality possible before it goes on sale. It involves careful attention to detail, technical expertise and an excellent ear. While there are many dos and don’ts of pre-sale mastering, this post will focus on the most important aspects that you should keep in mind when mastering a track from start to finish.

Dos

  • Do listen to the track carefully: Before you start the mastering process, make sure you listen to the track carefully. Pay attention to the dynamic range, balance, and tone of the mix.
  • Do use reference tracks: Reference tracks provide a guide for ensuring consistency in sound quality. Use reference tracks that have a similar style, genre, and loudness to the track you’re mastering.
  • Do use high-quality equipment: Ensure that your equipment is of high quality, and you’re using the best tools for mastering. Poor quality equipment can affect the sound quality of your final track.
  • Do apply subtle processing: Apply subtle processing to the track, such as EQ, compression and limiting. Make adjustments carefully to avoid ruining the track’s dynamics.
  • Do test on different speakers: Test the track on different speakers to ensure its quality is consistent across different systems and platforms.

Don’ts

  • Don’t focus too much on loudness: While loudness is crucial in mastering, ensure it doesn’t compromise the track’s dynamics. Avoid overcompression and limiting, which can affect the track’s overall sound quality.
  • Don’t over-process the track: Over-processing the track can lead to a distorted and unnatural sound. Apply effects and processing subtly to retain the track’s quality.
  • Don’t ignore the mix: It’s essential to strike a balance between the mixing and mastering processes. Ensure that the mix is solid and balanced before you start the mastering process.
  • Don’t skip quality checks: Ensure that you carry out multiple quality checks to ensure that the master sounds perfect. Skipping quality checks can lead to significant mistakes that could ruin the track.
  • Don’t be too confident: Confidence is essential in mastering, but avoid being too confident. Listen to the track objectively and make changes where necessary.

By adhering to these dos and don’ts of pre-sale mastering, you can ensure that your final track is of excellent quality. Remember to take your time and approach the mastering process with a sharp ear.


Tips And Tricks For Pre-sale Mastering


Learn how to master a track from start to finish with these expert tips and tricks for pre-sale. From creating a clean mix to adding final touches, this guide will help take your music to the next level.

When it comes to music production, mastering is often the most overlooked step. However, it is an essential process that can make or break the sound quality of your tracks. Pre-sale mastering is the process of finalizing a track before it’s released for sale. In this article, we will be giving some tips and tricks for pre-sale mastering to help you achieve the best sound quality possible.

Mastering For Different Genres

Different genres of music require different pre-sale mastering techniques. For example, the mastering process for a hip-hop track will differ from that of a classical piece. While mastering for hip-hop focuses on enhancing the bass and kick, mastering for classical music aims to preserve the dynamics of the instruments. It is important to understand the unique features of each genre and tailor your mastering accordingly.

Mastering For Different Distribution Platforms

Different distribution platforms have their own specifications regarding file format, loudness levels, and dynamics. For instance, streaming services such as Spotify and Apple Music use a loudness normalization algorithm. It is recommended to master your track in a way that is compliant with the platform’s mastering guidelines to ensure the best possible listening experience for your audience. Here are some additional tips for pre-sale mastering:

  • Use reference tracks to compare your track’s sound quality
  • Avoid excessive compression and limiting
  • Correct any phase issues before mastering
  • Use high-quality studio monitors or headphones for accurate listening
  • Test your track on different playback systems
  • Leave enough headroom for the mastering engineer to work with

In conclusion, pre-sale mastering is an essential step for any music producer who wants their tracks to sound the best they possibly can. By taking into account the genre and distribution platform, following best practices, and using helpful tools and techniques, you can ensure that your tracks are ready for release and will sound great on all playback systems.


Frequently Asked Questions Of Pre Sale Mastering A Track From Start To Finish


How Do You Master A Song From Start To Finish?


To master a song, you need to have a fully mixed and edited track. Then, you must use mastering software to adjust EQ, compression, and loudness levels for a polished final sound. It’s important to pay close attention to the overall dynamics of the track and make sure it sounds good across all audio systems.


It’s also important to reference your final mix with other tracks to make sure it’s competitively loud and clear.


How Do You Pre Master A Track?


“Pre mastering a track involves preparing the audio before it’s mastered for distribution. This includes equalizing, compressing, and adjusting levels to ensure the track sounds its best. It also involves addressing any unwanted noises or imperfections. It’s best to leave this process to a professional audio engineer.


“


What Are The Stages Of Mastering A Track?


There are typically four stages to mastering a track. The first stage involves making sure that the levels and EQ are balanced. The second stage involves applying compression and other dynamics effects. The third stage involves adding stereo widening and other imaging effects.


The final stage involves exporting the finished track to the desired format.


How Do You Mix Tracks From Start To Finish?


To mix tracks from start to finish: 1. Set levels and pan positions for each element 2. Apply EQ, compression, and effects 3. Use automation to create dynamic changes 4. Listen to the mix in different environments 5. Evaluate and make final adjustments before mastering.


Conclusion


Mastering a track from start to finish can be a daunting task, but by following the tips and techniques outlined in this blog post, you can take control of the process and create a professional-sounding track that will stand out in the crowded music industry.


Remember to always experiment and trust your ears, and never be afraid to adjust your settings until you achieve the desired result. By taking the time to properly master your tracks, you can ensure they sound the best they possibly can and truly impress your audience.