Categories
Archive

Can Artists Learn To Do Their Own Music Mixing

Yes, artists can learn to do their own music mixing with the right tools and practice. In fact, many successful artists have taken on the task of mixing their own music to save money and have more creative control over their sound.

With the accessibility of digital audio workstations and online tutorials, learning how to mix music has never been easier. Mixing music is a crucial step in the music production process that involves balancing and adjusting individual tracks to create a cohesive sound.

It can have a significant impact on the final product, affecting factors such as volume, EQ, and effects. While many artists may opt to hire professionals to mix their music, some choose to learn how to do it themselves. We will explore whether artists can learn to do their own music mixing and discuss the tools and resources available to them.
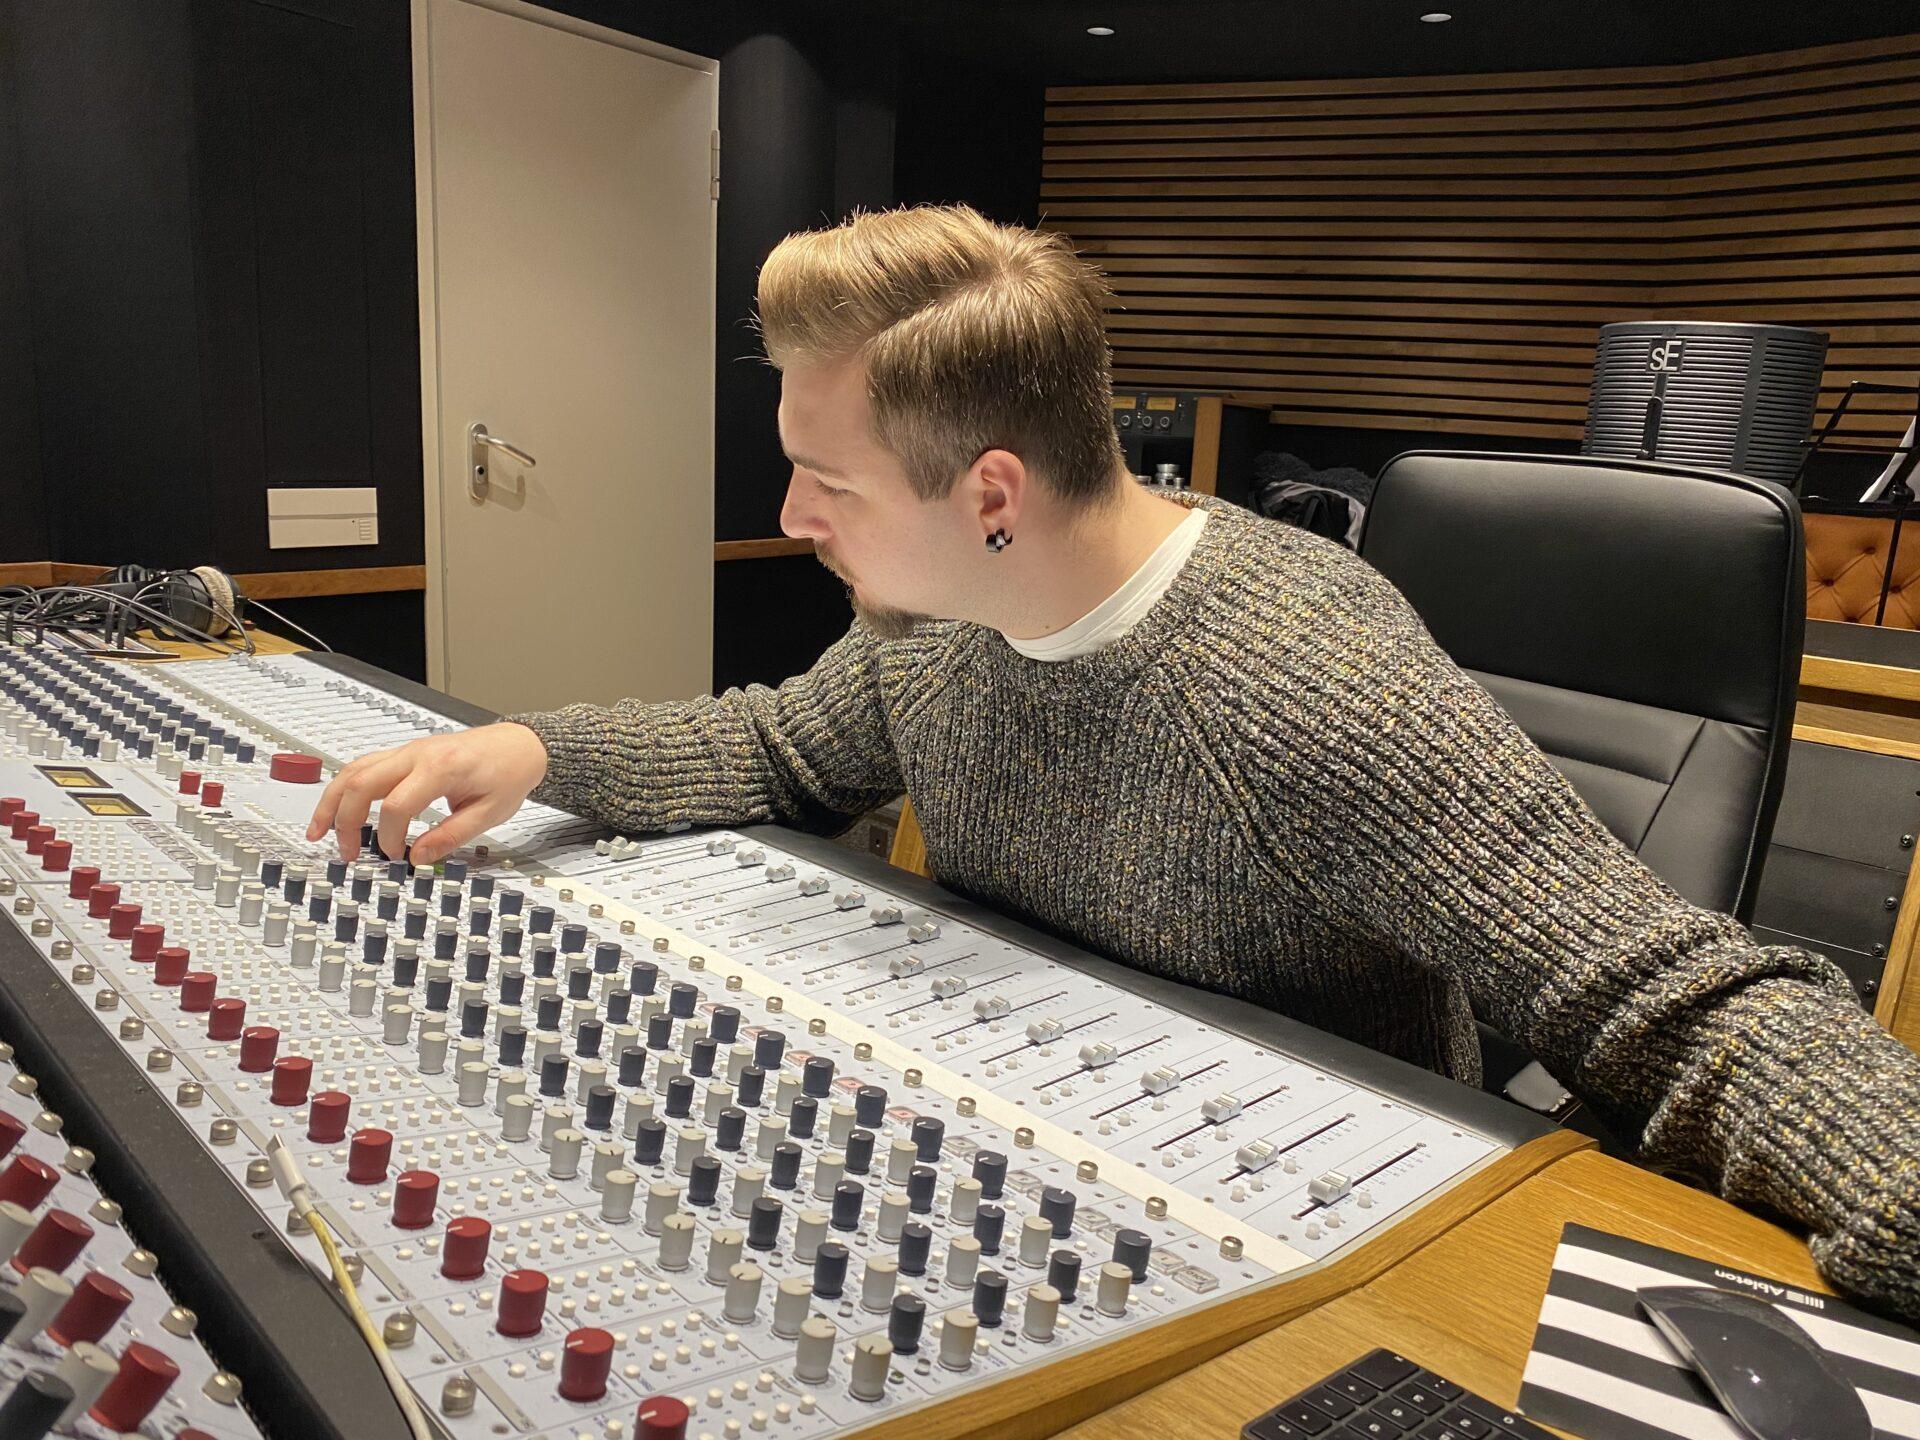
Can Artists Learn To Do Their Own Music Mixing

Credit: majormixing.com

The Benefits Of Artists Learning Music Mixing

Artists who learn music mixing can benefit in many ways, from gaining more control over their sound to saving time and money. With the right tools and practice, artists can create high-quality mixes that showcase their unique style and vision.

Better Control Of The Sound Production

One of the foremost benefits of artists learning music mixing is that they get a better control of the sound production process. By being able to mix their own music, artists can better communicate their creative vision to the audience. As artists themselves, they have a better understanding of the type of sound required for their music. They can experiment with various elements of music production, such as EQ, compression, and reverb, to enhance the overall quality of the sound.

Greater Freedom To Experiment With Different Sounds

Learning music mixing also gives artists the freedom to experiment with different types of sound. By self-mixing, artists can explore new and innovative ways to present their music to the audience without being dependent on others for making the necessary changes. They can tweak the sound according to their taste and explore different genres and sounds, making their music more unique, and attractive to a diverse audience.

Cost Efficiency And Time Savings

Music production can be a costly affair, especially when artists outsource the mixing to professionals. But when they learn music mixing themselves, artists can cut down on the cost of hiring sound engineers. Additionally, the process can also save time as artists can experiment with different sound elements directly in their home studio, without needing to visit a professional sound studio. This not only saves time but also allows artists to make changes faster and more efficiently thus producing high-quality mixes in much less time.

Opportunity To Develop Additional Skills

When artists learn music mixing, they increase their skillset, knowledge and experience in the field of music production. This opens doors for them to take up new projects and collaborate with other artists and producers in the industry, thus expanding their creative horizons. With this knowledge, they can also create lucrative business opportunities for themselves by offering music mixing services to other artists, adding an extra source of income outside of their music career.

The Basics Of Music Mixing For Artists

Artists can definitely learn to do their own music mixing, but it takes practice and patience to master the basics. Mixing involves adjusting volumes, frequencies, and effects to make the different elements of a song blend together seamlessly. With the right tools and techniques, independent artists can create professional-quality mixes on their own.

Music mixing is a crucial aspect of music production that makes a significant difference in the overall quality of a song. Getting the right mix may seem like an impossible task, but artists can learn to do their own music mixing by practicing the basics of music mixing.

Understanding The Components Of The Mix

To get started with music mixing, artists must first understand the different components of a mix. These components include:

  • Balance
  • Equalization
  • Panning
  • Effects
  • Compression/Limiting
  • Spatial effects

Knowing these components is crucial as they help artists to create a cohesive sound and ensure that each instrument is given the right amount of attention.

Identifying Common Mixing Techniques

When it comes to music mixing, certain techniques are commonly used to achieve a polished mix. These include:

  • Level balancing
  • Panning
  • Equalization (EQing)
  • Compression
  • Reverb and delay
  • Saturation and distortion

Artists must identify these techniques to create a well-rounded mix. These techniques help to enhance the sound, giving each instrument the right amount of space and ensuring that the mix is coherent.

Mastering The Art Of Equalization

Equalization or EQ is one of the most important components of a mix as it allows an artist to adjust the frequencies of each instrument in a track. EQ ensures that instruments don’t clash and create unwanted frequencies that affect the sound quality. Here are some basic tips for mastering EQ:

  • Identify the frequency range of each instrument
  • Use frequency cuts and boosts to balance the mix
  • Use EQ to create space in the mix
  • Avoid over-EQing

Working With Dynamic Range And Compression

Dynamic range is the difference between the loudest and softest parts of a song. Compression is a mixing technique that helps to regulate the dynamic range and ensure that all parts of a song can be heard clearly. Here are some tips for working with dynamic range and compression:

  • Use compression to regulate the levels of each instrument
  • Avoid over-compressing
  • Use compression to emphasize elements that need more attention

Overall, music mixing is a skill that artists can learn with practice. By understanding the basics of music mixing, identifying common mixing techniques, mastering EQ, and working with dynamic range and compression, artists can create polished mixes that sound professional and showcase their musical talents.

Tools And Software For Music Mixing

Artists can use various tools and software for music mixing. Learning music mixing can help artists understand their production and sound better, leading to better quality music.

Musicians and artists have a lot to juggle in their line of work, and mixing music is one of those tasks that can be time-consuming and daunting. While hiring a professional sound engineer is always an option, it’s not always feasible – especially if artists are just starting out or operating on a tight budget. Luckily, with advances in technology, there are now many tools and software available for artists who want to learn how to do their own music mixing. Here we take a look at the most essential mixing tools for artists, the popular mixing software in the music industry, and online resources for learning music mixing.

The Most Essential Mixing Tools For Artists

Before delving into software, it’s important to note that some basic equipment is necessary for music mixing. Here are the most essential mixing tools for artists:

EquipmentDescription
Audio InterfaceAn audio interface is necessary to record and playback audio signals.
Studio Monitors or HeadphonesHigh-quality speakers or headphones are necessary to ensure accurate playback.
Midi ControllerA midi controller can help with mixing and arranging music.
MicrophoneA microphone is necessary for recording vocals and acoustic instruments.

Popular Mixing Software In The Music Industry

Once you have the basic equipment, it’s time to look for mixing software. Here are some of the most popular mixing software in the music industry:

  1. Ableton Live: a powerful software used by many producers and DJs for both live performances and studio production.
  2. Logic Pro X: a comprehensive software that is perfect for recording, mixing and mastering. It’s a product of Apple and is only available for Mac users.
  3. FL Studio: it is a popular digital audio workstation that is widely used for electronic music production. It’s also quite affordable.
  4. Pro Tools: Its popularity lies in its ability to handle large sessions and editing tasks. It’s a widely-used software in the professional audio industry.
  5. GarageBand: a free software that is pre-installed on all Macs and used by many beginners as well as experienced musicians. It’s great for recording and arranging tracks.

Online Resources For Learning Music Mixing

Now that you have the tools and software, it’s time to learn how to use them. Here are some online resources for learning music mixing:

  • PureMix.net: an online tutorial site dedicated to audio mixing.
  • YouTube tutorials: there are countless tutorials on YouTube that offer step-by-step instructions on music mixing.
  • Courses on Udemy, Coursera, and Skillshare: these online learning platforms offer courses that focus on music mixing as well as the use of specific software like Logic Pro X, Ableton Live, FL Studio, and more.
  • Books on music mixing: there are several books that go in-depth on the subject of music mixing. An example is “Mixing Secrets for the Small Studio” by Mike Senior.

With the above tools and software, and online resources, artists can learn how to do their own music mixing. This can help them save money, time, and allow them to have more creative control over their music.
Can Artists Learn To Do Their Own Music Mixing

Credit: www.indiloop.com

Tips For Successful Music Mixing By Artists

Artists can definitely learn to do their own music mixing with the right tools and techniques. Some useful tips for successful music mixing include understanding the importance of EQ, compression, and reverb, listening intently to individual tracks, and utilizing automation to create dynamic changes in the mix.

Start With Clear Objectives For The Mix

Before beginning the mixing process, it’s essential to know what you want to achieve from the music mix. Starting with clear objectives helps in setting a direction for the mixing process. You should identify the essential elements of a sound mix and place them in order of significance. It’s essential to understand what elements are critical and what elements need adjusting. It also helps to make notes of the specific areas that require adjusting, such as rhythm, tone, or melody.

Use Appropriate Equipment For Accurate Mixing

Having appropriate mixing equipment is essential to achieving a successful sound mix. Artists should invest in good quality sound equipment that gives accurate monitoring. If your headphones or studio speakers are not providing accurate monitoring, you can end up with a sound mix that isn’t true to your intentions. Investing in good quality mixing equipment saves time and provides accurate results.

Create A Structured Workflow For Mixing

A structured workflow is critical when mixing music. This involves planning out the mixing process from start to finish to avoid becoming lost or when distracted. The workflow should include creating a rough mix, editing and aligning tracks, balancing and panning tracks, equalizing tracks, compressing tracks, and adding effects. Once you have a workflow, you can stick to it for every mix and ensure consistency in your sound mixing.

Practice Makes Perfect: Learning Through Iteration

Like with anything, practice makes perfect. The more you mix your music, the better you become at perfecting it. It’s essential to learn from your mistakes and take feedback from other musicians or sound engineers. Listening to music mix comparisons helps you identify your strengths and weaknesses as well as improve your sound mixing skills. Iterate the process until you achieve the intended sound mix. In conclusion, artist learning music mixing is the best way to have control over their music quality. Following these tips can help you achieve a successful sound mix, even as a beginner. So, understand your objectives, invest in good quality sound equipment, create a structured workflow, and keep practicing, and you’ll improve your music mixing skills over time.

Challenges And Limitations Of Learning Music Mixing By Artists

Learning music mixing can be a challenge for artists, as it requires technical expertise and experience. While some may be able to learn the basics, limitations exist in mastering complex techniques and maintaining industry-standard quality. Nonetheless, artists can benefit from understanding music production processes to enhance their creativity and collaborations.

Artists who want to create their own music need to learn the art of music mixing. While it may seem like a good idea to mix your own tracks, there are several challenges and limitations that come with the territory.

Steep Learning Curve For Beginners

One significant challenge of learning music mixing is that it has a steep learning curve for beginners. Mixing involves complex processes that require a good understanding of music theory and sound engineering. It takes time, effort, and dedication to master music mixing. There are various music mixing tutorials available online, but they cannot beat hands-on experience.

Need For Well-equipped Studio Space For Effective Mixing

Another challenge of artists learning music mixing is the need for a well-equipped studio space. A good music mixing studio is equipped with high-quality hardware and software, which can be costly. An artist needs to have a comfortable, well-ventilated, and acoustically treated space to do effective music mixing. Although some mixing software is available online at no cost, they often lack the quality that is required for effective mixing.

Time-intensiveness Of The Mixing Process

Music mixing is a time-intensive process that requires patience, focus, and concentration. It is not a simple process of just mixing the tracks; it involves taking each track, removing unwanted noises, adjusting levels, reverb, equalizing, and panning. Even the smallest mistake can impact the entire track. Artists should be ready to invest the necessary time and energy into the process to deliver a high-quality output. Learning music mixing by oneself can be challenging and time-consuming, but it is still a valuable skill. It helps an artist understand the mixing process better and the nuances involved in producing a great track. By understanding these challenges and limitations, artists can take steps to ensure their success in the music industry.

Frequently Asked Questions For Can Artists Learn To Do Their Own Music Mixing

Can You Mix And Master Your Own Music?

Yes, you can mix and master your own music. However, it requires a significant amount of knowledge and experience in audio engineering and production. It is recommended to have professional software and equipment to achieve the desired results. Additionally, utilizing online courses and tutorials can aid in the process.

How Do I Start Mixing My Own Music?

To start mixing your own music, you’ll need a DAW (digital audio workstation) software. Then, import your audio files into the software and create separate tracks for each instrument or vocal. Use effects and EQ to adjust levels and tone.

Finally, balance and adjust volumes for a cohesive sound. Practice and experimentation will improve your mixing skills over time.

Is It Hard To Learn How Do You Mix Music?

Learning how to mix music can be challenging at first, but it becomes easier with practice and dedication. The key is to understand the basics of music production and master the necessary tools and techniques. With patience and consistent effort, anyone can learn how to mix music effectively.

Can I Learn Mixing And Mastering?

Yes, you can learn mixing and mastering. There are numerous resources available online such as tutorials, courses, and YouTube videos that can help you learn the basics and advanced techniques of mixing and mastering. With consistent practice and dedication, you can develop the skills and knowledge required to produce high-quality music.

Conclusion

To sum up, artists can indeed learn to do their own music mixing with a little effort and dedication. There are numerous resources available online to equip them with the necessary skills. With practice and patience, they can achieve a quality mix that reflects their artistic vision.

Doing their own mixing can also give them more creative control and save them money in the long run. So, why not give it a try? With the right mindset, anyone can learn to create professional-level mixes that truly represent their artistry.
Categories
Archive

How To Export Multiple Tracks In Cubase

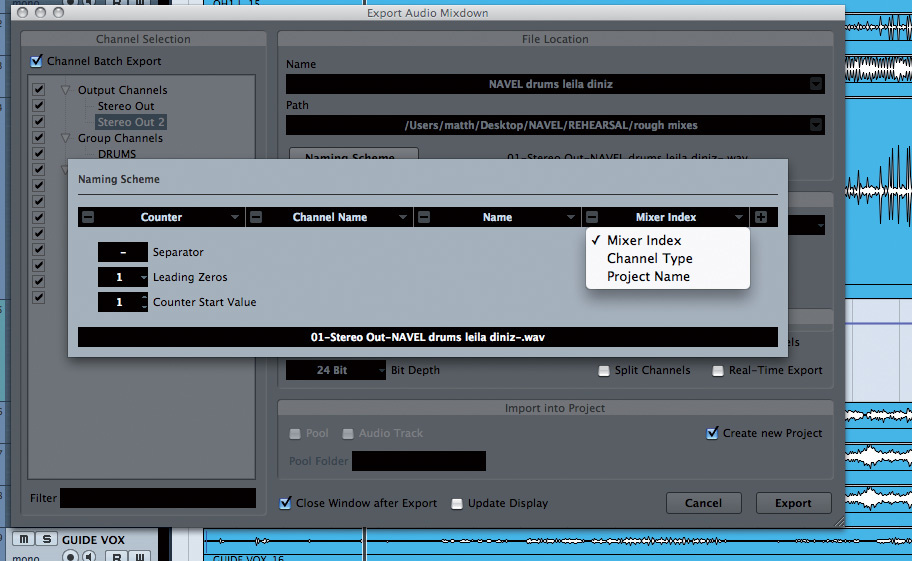
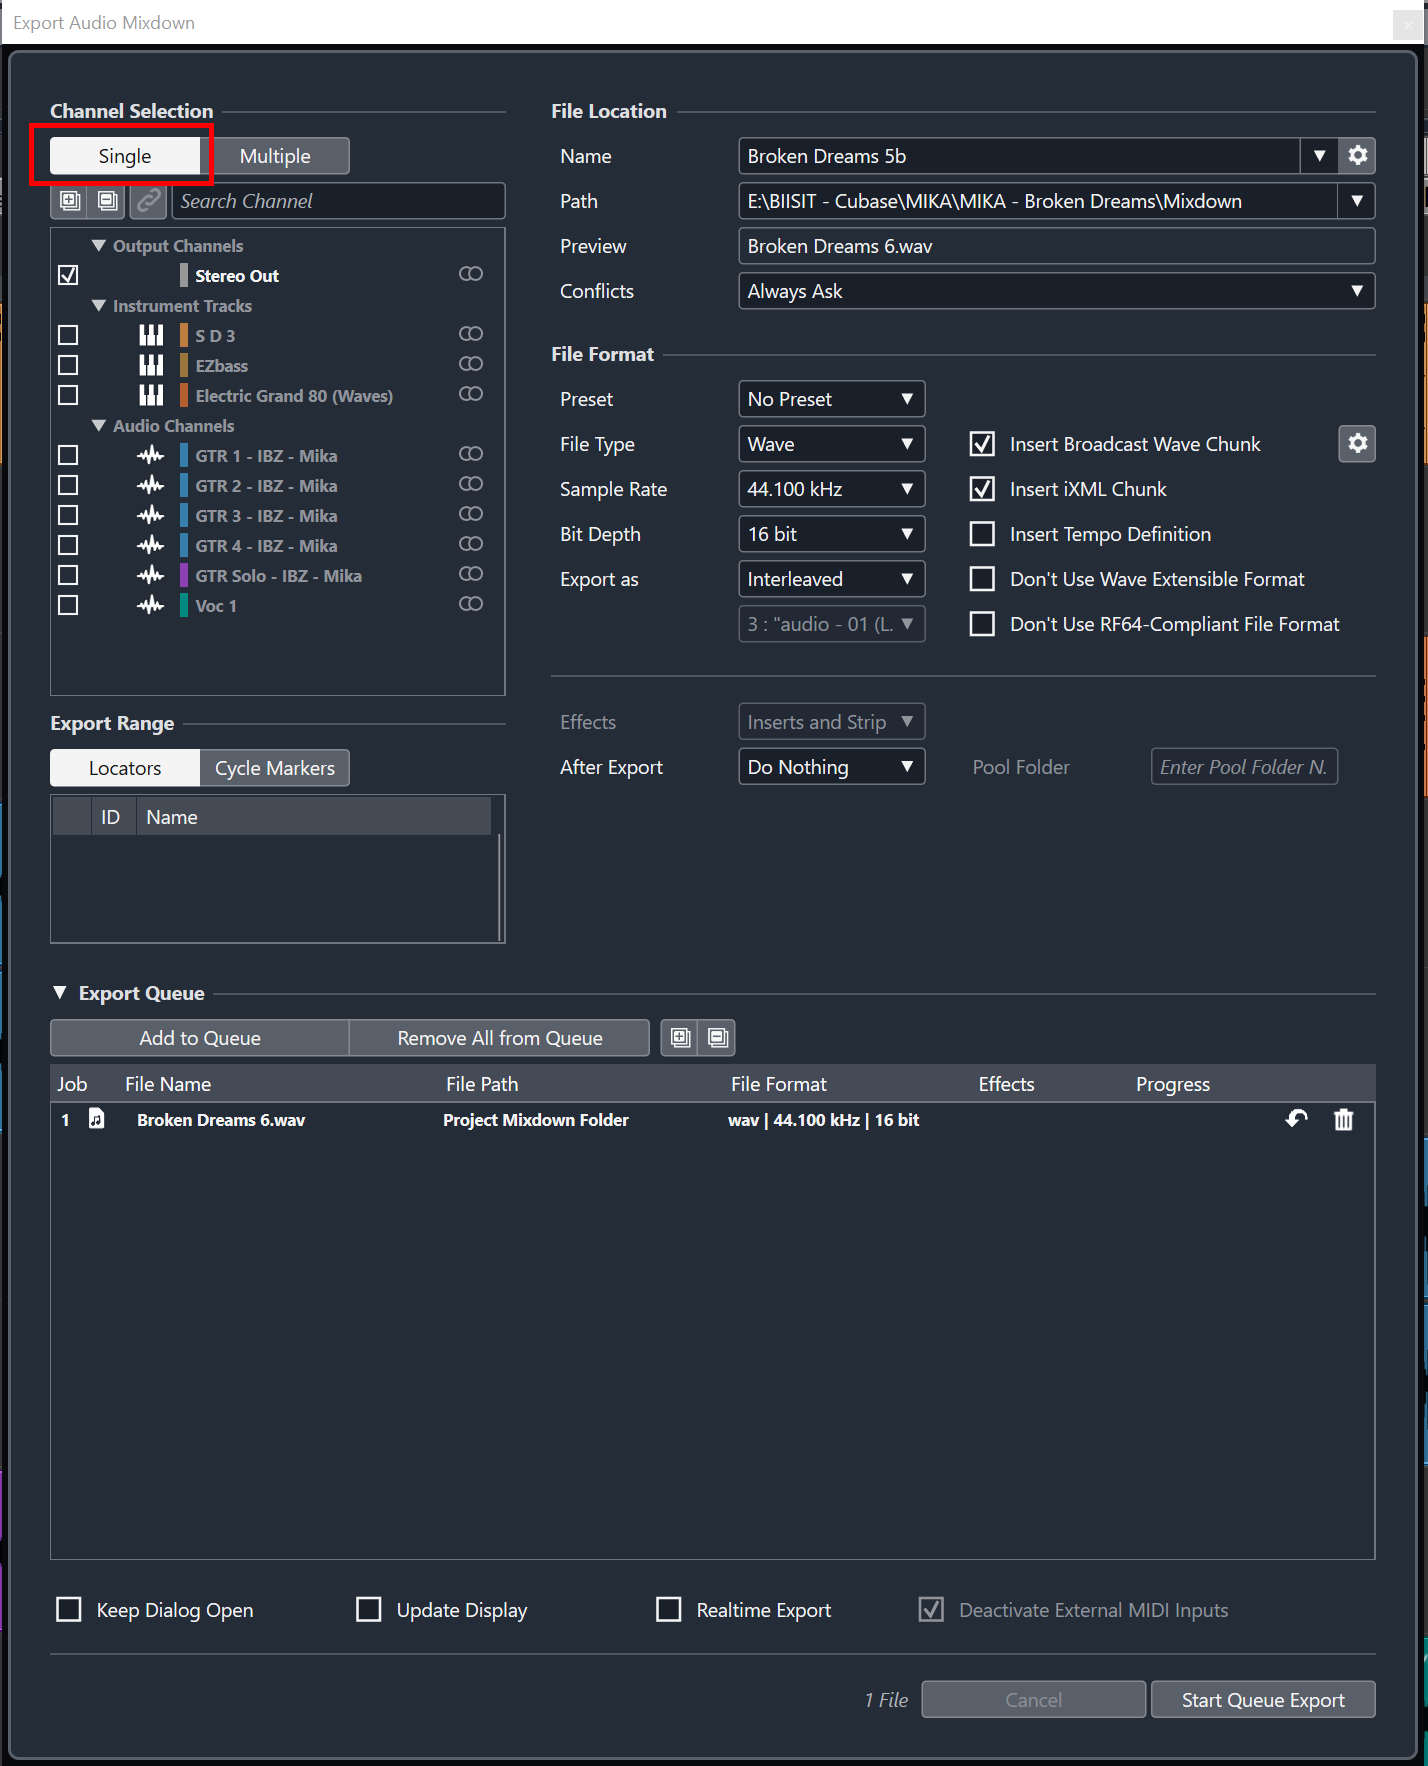
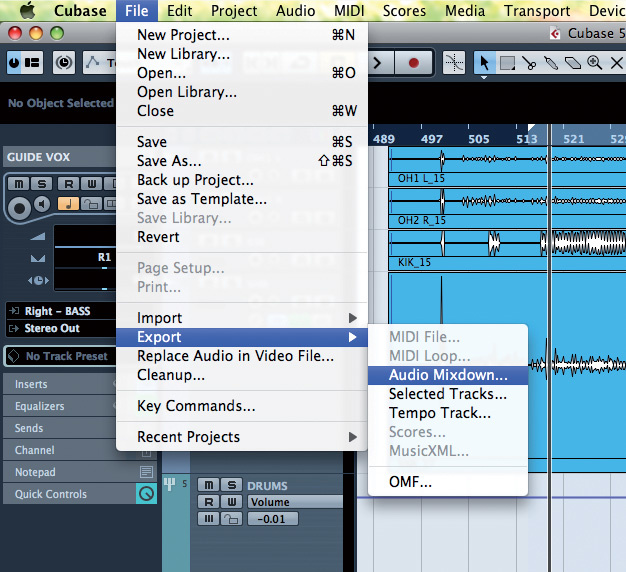
To export multiple tracks in Cubase, select the tracks you want to export and go to File > Export > Audio Mixdown. In the Export Audio Mixdown window, select “Multiple” in the “Channel Selection” section and choose your desired export settings.

Cubase is a popular digital audio workstation that is used by musicians and producers to create music and audio content. Often, creators will have multiple tracks that they want to export at once, either to share with collaborators or to use for different purposes.

We will explore how to export multiple tracks in Cubase, step by step. Whether you are new to the software or a seasoned user, this guide will help you streamline your workflow and get your music out into the world more efficiently.

Set Up Export Settings

To export multiple tracks in Cubase, first, open the Export Audio Mixdown window. Then, select the tracks and channels you want to export and set up the export settings, including file type, bit depth, sample rate, and destination folder. Finally, hit the Export button to save your audio files.

Select Multiple Tracks

To export multiple tracks in Cubase, the first step is to choose which tracks you want to export. You can choose tracks by selecting them in the Mixer or the Project window. To select multiple tracks, hold down the Ctrl key (Windows) or the Command key (Mac) and click on each track you want to export. You can also click and drag to select adjacent tracks.

Choose Export Audio Mixdown

Once you have selected the tracks you want to export, the next step is to choose the Export Audio Mixdown option. This option can be found in the File menu or by using the keyboard shortcut Ctrl+Shift+E (Windows) or Command+Shift+E (Mac).

Configure Export Settings

The final step is to configure the Export Settings. This includes choosing the file format, the bit depth, the sample rate, and the location where the exported files will be saved. You can access the Export Settings dialog box by clicking on the Settings button or by pressing the F11 key. When configuring the Export Settings, it’s important to ensure that the settings match your project settings to avoid any unwanted alterations to the audio. You can also choose to export your tracks as a single file or as multiple files by selecting the ‘Split Channels’ option in the Export Settings dialog box. Once you have configured the Export Settings, you can click on the Export button to start the export process and create your audio files. Exporting multiple tracks in Cubase may seem complicated, but by following these simple steps and keeping the Export Settings in mind, you’ll be able to easily export your project audio files.

How To Export Multiple Tracks In Cubase

Credit: forums.steinberg.net

Exploring Export Options

When it comes to exporting multiple tracks in Cubase, the possibilities are endless. Exploring export options enables us to have more control over how we want our music to be exported. In this blog post, we will explore different export options and their functionalities.

Export Individual Tracks

Exporting individual tracks allows us to keep each track as a separate file. This option comes in handy when working on larger projects with multiple tracks or if you need to mix and master tracks separately. We can export individual tracks by following these simple steps:

  1. Select the tracks you want to export.
  2. Go to File and select Export Audio Mixdown.
  3. Select the individual track option.
  4. Choose the format and destination folder.
  5. Click Export.

Export Groups

Exporting groups allows us to export specific groups of tracks as a single file. This option is useful when exporting audio for different sections of the song, like the intro, verse, and chorus. We can export groups by following these simple steps:

  1. Select the group you want to export.
  2. Go to File and select Export Audio Mixdown.
  3. Select the group option.
  4. Choose the format and destination folder.
  5. Click Export.

Export Stems

Exporting stems is the process of exporting a group of tracks but with all the signal processing and effects intact. When exporting stems, it’s crucial to have all the effects in the mix, so the exported files can be used in other projects without any issues. We can export stems by following these simple steps:

  1. Select the tracks you want to include in the stem mix.
  2. Go to File and select Export Audio Mixdown.
  3. Select the stem option.
  4. Choose the format and destination folder.
  5. Click Export.

Export Cycle Markers

Exporting cycle markers allows us to export different sections of the song quickly. We can set cycle markers at different sections of the song and export them as separate files. This option comes in handy when exporting audio for different sections of the song, like the verse and chorus. We can export cycle markers by following these simple steps:

  1. Set the cycle markers to the sections you want to include in the export.
  2. Go to File and select Export Audio Mixdown.
  3. Select the cycle marker option.
  4. Choose the format and destination folder.
  5. Click Export.

Exporting Using Batch Export

If you are working on a project with several tracks in Cubase, exporting them one by one can be quite tedious. However, with the ‘Exporting Using Batch Export’ feature, you can export multiple tracks at once, saving you time and effort. In this article, we will focus on the steps to follow when exporting using Batch Export in Cubase. We will also explore the different H3 headings that will guide you through the process.

Setting Up Batch Export

Before you begin exporting multiple tracks, it’s important to set up Batch Export in Cubase. Here’s how to do it:

  1. Go to the ‘File’ tab and select ‘Export’.
  2. Click on ‘Batch Export’ on the options window that appears.
  3. In the Batch Export window, select the audio engine you wish to use.
  4. Choose the format you want for your exported files.

Select Tracks To Export

After setting up Batch Export, you can then select the specific tracks you want to export. Here’s how to do this:

  • Go to the ‘Project’ window and select the tracks you want to export.
  • Hold the ‘Shift’ button and click on each track you wish to export.
  • You can also hold the ‘Ctrl’ button and click on the individual tracks you want to export.

Customize Export Settings

Once you’ve selected the tracks to export, you can customize the export settings to suit your preferences. Here are the steps to follow:

  1. On the Batch Export window, click on ‘Customize’.
  2. Choose the export preset you want to use from the dropdown menu.
  3. Make any necessary adjustments to the export settings.
  4. Click ‘Add Preset’ to save the custom settings for future use.

Batch Export All Tracks

Once you’ve selected your tracks and customized the export settings, you can now use Batch Export to export all tracks at once. Here’s how to do it:

  1. On the Batch Export window, select ‘All Tracks’.
  2. Click on ‘Export’.
  3. Choose the folder you want to save the exported tracks in.
  4. Click ‘Export’ to begin the process.
How To Export Multiple Tracks In Cubase

Credit: www.soundonsound.com

Exporting Using Generic Remote

To export multiple tracks in Cubase, using the Generic Remote is an effective method. This allows for the customization of parameters and the ability to export individual channels or groups of tracks.

If you’re a Cubase user, you know how important it is to have a versatile and efficient exporting capability. Thankfully, with the introduction of Cubase 10, there’s a new option for exporting multiple tracks quickly and easily – “Export using Generic Remote.” This feature is an excellent choice for users who have multiple tracks that they want to export all at once, without having to select each one manually.

Configure Generic Remote

Before we start exporting multiple tracks using Generic Remote feature, it is essential to configure it properly. Here are the steps to configure Generic Remote:

  1. Open the studio setup in Cubase
  2. Click on the “Add Device” option
  3. Select “Generic Remote” from the list
  4. Configure the ports and settings according to your needs

Once you’re done with the configuration, let’s move to export.

Export Using Generic Remote

Exporting multiple tracks using Generic Remote is easy. Here’s what you need to do:

  1. Select the tracks you want to export
  2. Go to “File” and then select “Export”
  3. From the Export window, choose “Audio Mixdown”
  4. Next, select “Generic Remote” from the “Audio Mixdown Export Options” window
  5. Finally, press “Export” to save your exported tracks to your desired location

One of the biggest advantages of using the Generic Remote feature is that you can export multiple tracks with just a few clicks. It saves you time and effort, and you can even export them with different settings in one go. In conclusion, the Generic Remote feature in Cubase is an excellent option for users who want to export multiple tracks quickly and easily. By following the steps outlined above, you can configure Generic Remote and start exporting multiple tracks in just a few clicks.

How To Export Multiple Tracks In Cubase

Credit: www.soundonsound.com

Frequently Asked Questions Of How To Export Multiple Tracks In Cubase

How Do I Export Different Tracks In Cubase?

To export different tracks in Cubase, click on “File” and select “Export” from the dropdown menu. In the export window, select the desired format and then select the tracks you want to export by checking the corresponding boxes. Finally, click “Export” to save the tracks to your desired location.

How Do I Export Stems In Cubase 12?

To export stems in Cubase 12, go to “File” and select “Export” and then “Audio Mixdown. ” Choose the settings you prefer and then select the tracks or channels you want to export as stems. Finally, click “Export” and choose the location to save your stems.

How Do I Send Multiple Tracks To A Group In Cubase?

To send multiple tracks to a group in Cubase, simply select the desired tracks, right-click and choose “Add to Group. ” Then, select the group you want to add them to. Alternatively, you can create a new group track, select the tracks you want to add, and drag and drop them onto the new group track.

How Do I Export Selected Events In Cubase?

To export selected events in Cubase, click on the events you want to export and select “Export> Selected Tracks” from the File menu. You can then choose your preferred export settings and save the files to your desired location.

Conclusion

Exporting multiple tracks in Cubase can be a tricky task for beginners, but with the right guidance, it can become a seamless process. Follow the steps mentioned and you’ll be able to export your multiple tracks in no time.

Keep in mind the importance of choosing the right file format, bit-depth, and sample rate to ensure the highest quality. Practice these techniques and enjoy the pride of sharing your music with the world!

Categories
Archive

Secrets To Writing Better Music Faster

Writing better music faster is achieved through proper planning and preparation. It entails honing in on a clear idea, using shortcuts, and developing a habit of consistent writing.

As a musician or aspiring songwriter, you may encounter times when you need to create quality music within a shorter timeframe. Writing music can be a labor-intensive and time-consuming process, but with the right techniques, you can increase your speed and productivity.

We will explore the secrets to writing better music faster. These tips include proper planning and preparation, honing in on a clear idea, using shortcuts, and developing a habit of consistent writing. By incorporating these strategies into your work process, you can create great music more efficiently.

Secrets To Writing Better Music Faster

Credit: www.productionmusiclive.com

Set Yourself Up For Success

When it comes to writing music, inspiration can strike at any moment. It’s important to take advantage of that creative energy and get your ideas down quickly. That’s why it’s crucial to have a system in place for writing better music faster. One of the first steps to achieving this is by setting yourself up for success. In this section, we’ll go over a few ways to do just that.

Organize Your Workspace

In order to write music efficiently, you need to create an environment that fosters creativity. This means keeping your workspace clean and organized. Start by getting rid of any clutter that could be distracting. Clear your desk of unnecessary papers or items that don’t have anything to do with your music-making process. Invest in some storage solutions to help keep everything tidy and in its proper place.

You can also organize your digital workspace by creating a system for naming and storing your files. This can be as simple as using a consistent naming convention or as elaborate as creating a folder hierarchy. Whatever you choose, make sure it’s something that works for you and your workflow.

Eliminate Distractions

It’s easy to get distracted when you’re trying to write music. Social media, email, and other notifications can pull your attention away from the task at hand. To combat this, try eliminating as many distractions as possible. Turn off your phone or put it on silent. Close out any unnecessary tabs or applications on your computer. If you find yourself getting distracted easily, try using a site-blocking app to keep you focused.

Another way to eliminate distractions is by creating a schedule and sticking to it. Set aside specific times during the day for writing music and make it a habit. This will help you stay focused and be more productive in the long run.

Conclusion

By organizing your workspace and eliminating distractions, you can set yourself up for success when it comes to writing music. These may seem like small steps, but they can make a big difference in how efficiently you’re able to create music. Start implementing these tips today and see how they can help you write better music, faster.

Secrets To Writing Better Music Faster

Credit: speedsongwriting.com

Tap Into Your Creativity

Unleash your inner musician with these secrets to writing better music faster. From tapping into your creativity to developing a strong foundation, these tips will help you elevate your music writing skills. With these techniques, you’ll be able to create music more efficiently while maintaining quality.

Music creation is a challenging task that requires creativity, patience, and dedication. Most musicians often struggle to find inspiration, resulting in poor-quality music and wasted time. However, tapping into your creativity can help you create better music faster and efficiently. In this post, we will discuss the secrets to writing better music faster by exploring how to find inspiration from other artists and experimenting with new techniques.

Find Inspiration From Other Artists

Finding inspiration is the first step to tapping into your creativity. As a musician, you need to listen to a wide range of music genres to expand your musical horizons. Listening to different styles of music can spark ideas for your own creations. Additionally, examining the techniques used by other artists can also provide a new perspective that can enhance your music.

Experiment With New Techniques

Experimenting with new techniques is another way to tap into your creativity. As a musician, it is essential to explore new approaches to music creation continually. You can experiment with different instruments, sounds, software, and even lyrics to create unique pieces of music. Additionally, trying new methods can give you a renewed sense of creativity, helping you write better music faster while improving your skills. In conclusion, tapping into your creativity is crucial to writing better music faster. By finding inspiration from other artists and experimenting with new techniques, you can ignite your creativity, leading to high-quality music pieces.

Create A Plan Of Action

To improve your music-writing efficiency, it’s essential to create a plan of action. By setting specific goals, having a clear idea of your target audience and using tools such as mind-mapping, you can write better music faster. Stick to your plan and track your progress regularly to achieve success.

Creating a plan of action is a vital step in writing better music faster. Without a plan, you may quickly become overwhelmed and find it difficult to make progress. In this section, we’ll explore the importance of identifying your goals and breaking down the process when creating a plan of action.

Identify Your Goals

Before you can create a plan, you must identify your goals. Ask yourself what you hope to achieve with your music and what steps you need to take to reach those goals. Be specific and realistic with your goals and consider the following:

  • Your audience: Who are you writing for, and what do they want to hear?
  • Your style: What genre of music do you want to write, and what elements do you want to incorporate?
  • Your timeline: When do you want to complete your music, and how much time do you have to work on it?

By identifying your goals, you can create a plan that is tailored to your specific needs and helps you stay focused and on track.

Break Down The Process

Once you have identified your goals, break down the process of writing your music into smaller, achievable steps. This approach will help you to focus on one task at a time, making the process feel less daunting. Here are a few tips to help you break down the process:

  1. Create a timeline: Determine when you want to achieve each step of the process and set deadlines for each task.
  2. Start with the basics: Focus on the underlying elements of your music, such as the chord progression or melody, before diving into the details.
  3. Experiment: Allow yourself to experiment with different ideas and approaches. Don’t be afraid to break away from your original plan if a new idea presents itself.
  4. Get feedback: Share your music with others and get feedback. Use their input to refine your work and move forward with the process.

Breaking down the process can help you achieve your goals efficiently and effectively. A plan of action will help you stay on track, be more productive, and reach your music writing goals in no time.

Secrets To Writing Better Music Faster

Credit: speedsongwriting.com

Improve Your Musical Skills

Improve your musical skills with the secrets to writing better music faster. Enhance your creativity and productivity with tips such as setting deadlines, analyzing successful songs, and embracing the editing process. With practice and dedication, you can unlock your full musical potential.

If you’re a musician, then you know just how important it is to keep improving your skills. Not only does it help you stand out, but it also enables you to write music faster. In this post, we’ll explore some techniques that can help you improve your musical skills.

Master Your Instrument

The first step in improving your musical skills is to master your instrument. Regardless of which instrument you play, you need to know it inside and out. This includes understanding its basic mechanics, how it produces sound, its range, and how you can make the most of it. Here are three ways to master your instrument:

  1. Practice regularly: Dedicate a specific amount of time each day to practice your instrument. Even 15-30 minutes can make a noticeable difference.
  2. Challenge yourself: Try playing a piece that’s slightly difficult than what you’re used to. This will help you push your boundaries and improve your playing skills.
  3. Get feedback: Ask for feedback from other musicians or your music teacher. They may provide valuable insights on how to improve your playing technique.

Study Music Theory

Music theory may seem like a daunting subject, but it’s vital in helping you understand how music works. Learning music theory will allow you to analyze compositions, write your chord progressions, and create melodies that belong. Here are three ways to study music theory:

  • Read books: Plenty of books are available that explain music theory. Start with the basics, and work your way up.
  • Take lessons: Look up music teachers who specialize in teaching music theory. You can also enroll in an online course that covers the subject.
  • Analyze songs: Take apart your favorite songs and figure out how they’re constructed. This will give you insight into how different elements come together to form a melody.

Improving your musical skills is a continual process that requires patience and dedication. However, by following these techniques, you’ll be well on your way to becoming a better musician.

Collaborate With Other Musicians

Collaborating with other musicians is a great way to improve your music writing skills and speed. By sharing ideas and working together, you can learn new techniques and gain inspiration. Plus, the collaborative process can lead to more creative and dynamic results.

Collaborating with other musicians is not only a great way to improve your music writing skills, but it can also help you write music at a faster pace. Below, we’ve listed some tips on how to collaborate with other musicians effectively.

Join A Band Or Music Community

Joining a band or music community is a great way to collaborate with other musicians. You’ll have the opportunity to work with other musicians who share your passion for music, learn from them, and also contribute your own unique skills to the group. Being part of a group can also encourage you to write music faster, as you’ll have regular meetings, rehearsals, and performances.

Network And Build Connections

Networking with other musicians is crucial if you want to collaborate with them. Attend local music events, open mic nights, and workshops to meet other musicians and build connections. Once you’ve made some connections, make sure to follow up with them to discuss potential collaborations. You can also use social media platforms like Facebook, Twitter, and Instagram to network with other musicians online.

Consider Online Collaborations

In today’s digital world, collaborating with other musicians online has become easier than ever. Platforms like SoundCloud, BandLab, and Splice allow musicians to collaborate remotely and share their work with each other. Collaborating online can help you work with musicians from different parts of the world, who you may not have had the chance to work with otherwise.

Be Open To New Ideas

Collaborating with other musicians can bring different perspectives and musical tastes to the table. Be open to new ideas and approaches to music writing, as they can help you grow and improve as a musician. Listen to constructive criticism and use it to enhance your music writing skills.

Celebrate Each Other’s Successes

Collaborating with other musicians should be a fun and rewarding experience. Celebrate each other’s successes and achievements, whether it’s finishing a new song or landing a gig. Acknowledging and supporting each other’s accomplishments can help build strong collaborative relationships and inspire more music writing. Incorporating collaboration into your music writing process can lead to better and faster results. By joining a band or music community, networking with other musicians, considering online collaborations, being open to new ideas, and celebrating each other’s successes, you’ll be well on your way to writing better music at a faster pace.

Streamline Your Workflow

As a music writer, you need to streamline your workflow to be more productive and efficient. Here are three ways to do that:

Utilize Technology Tools

Technology can help you write better music faster. You can use a digital audio workstation (DAW) to record your ideas and create demos. There are also many plugins and virtual instruments that can help you create more complex sounds without the need for expensive gear. Some popular options include:

ToolDescription
Ableton LiveA popular DAW with a unique session view for loop-based composition
Native Instruments KompleteA suite of plugins and virtual instruments for a wide range of sounds
iZotope OzoneA mastering suite with tools for EQ, compression, and more

Develop A Routine

Creating a routine can also help streamline your workflow. By establishing a routine, you can establish good habits and minimize distractions. Some things you might include in your routine are:

  • Setting aside a specific time and space for writing
  • Establishing a warm-up routine to get your creative juices flowing
  • Starting with a clear goal or idea in mind
  • Blocking out time for specific tasks, such as experimenting with sounds or fine-tuning arrangements

Collaborate And Share

Collaborating with other musicians can help you write better music faster as well. By working with others, you can bounce ideas around and get feedback on your work. You can also leverage the strengths of others to fill gaps in your own skills.

Sharing your work with others can also help you improve your productivity. By posting your work online or sharing it with friends and family, you can get constructive feedback and motivation to keep creating.

By utilizing technology tools, developing a routine, and collaborating and sharing, you can streamline your workflow and write better music faster. Start implementing these tips today and see the results for yourself!

Turn Setbacks Into Progress

Discover how to turn setbacks into progress and unlock the secrets to writing better music faster. By following proven techniques and practicing consistently, you can overcome challenges and achieve your goals as a musician.

Learn From Your Mistakes

Making mistakes is a natural part of the creative process, and it’s important to understand that every musician has setbacks. Fortunately, these setbacks can be turned into progress by learning from them. Start by analyzing what went wrong and why, and use that information to make better decisions next time. Don’t be afraid to experiment and take risks – mistakes can lead to new and interesting creative avenues.

Stay Persistent And Motivated

Staying motivated is key to writing better music faster. Set regular goals and milestones for yourself, and make sure to celebrate when you reach them. It’s also important to stay persistent even when things aren’t going as planned. Don’t get discouraged if you hit a roadblock – instead, take a step back and come back to the problem with fresh eyes.

Code Example

Keeping track of your progress and goals can be helpful in staying persistent and motivated. Consider using a tool like the following code example to help you stay organized: “`html

  • Set goals for each writing session
  • Celebrate when you hit a milestone
  • Use setbacks as an opportunity to learn
  • Experiment and take risks
  • Stay persistent even when it gets tough

“` By following these steps, you can turn setbacks into progress, learn from your mistakes, and stay motivated to write better music faster. Remember, it’s all about enjoying the process and keeping your creativity flowing.

Find Your Own Voice

One of the biggest challenges for any aspiring musician or composer is finding their own voice. It’s easy to get caught up in trying to mimic the style of your favorite artists or conform to industry trends, but the real magic happens when you embrace your own unique style and let it shine through in your music. In this blog post, we’ll discuss the importance of finding your own voice in music and share some tips for exploring and embracing your personal style.

Explore Your Personal Style

The first step in finding your own voice in music is to explore your personal style. Take some time to reflect on the music that you love and the elements that resonate with you. Do you gravitate towards a particular genre? Do you prefer certain chord progressions or rhythms? Take notes on these and begin to incorporate them into your own compositions.

It’s also important to experiment with different instruments and production techniques. Don’t be afraid to try new things and push the boundaries of your creativity. This process of exploration is key in helping you discover your own unique sound.

Embrace Your Uniqueness

Once you’ve explored your personal style, the next step is to embrace your uniqueness. Don’t try to conform to industry standards or copy the style of other artists. Instead, focus on what makes your music unique and find ways to highlight those elements.

One way to do this is to incorporate personal experiences and emotions into your music. Your individual experiences and perspectives are what make your music unique, so don’t be afraid to infuse them into your compositions.

Another way to embrace your uniqueness is to collaborate with other musicians who share your vision and values. This can spark new ideas and help you refine your sound even further.

Conclusion

Finding your own voice in music is a continuous journey of self-discovery and exploration. It takes time and effort to develop a unique style that stands out from the crowd, but the rewards are well worth it. By exploring your personal style and embracing your uniqueness, you can create music that is truly one-of-a-kind and reflects your individuality.

Frequently Asked Questions On Secrets To Writing Better Music Faster

How Can I Get Better At Writing Music?

Improving your music writing abilities requires practice, determination, and self-motivation. You can start by studying music theory, listening to different genres, and experimenting with different musical styles. Collaborating with other musicians and seeking feedback on your work can also help you enhance your skills.

Additionally, attending workshops, taking classes, and reading books on music writing can provide valuable insights and improve your technique. Consistency is key, so keep practicing and refining your craft.

How Long Does It Take To Get Good At Writing Music?

Becoming good at writing music takes time and effort. There is no fixed timeline as it depends on the individual’s talent, dedication, and practice. Some may show improvement in a few months, while others may take years to perfect their craft.

However, consistent practice and seeking feedback can help improve one’s writing skills over time.

What Is The Secret To Writing A Song?

The secret to writing a song lies in the inspiration you find, the emotions you feel and the way words and music blend together. You need to create a melody, choose a simple chord progression and find lyrics that convey your message.

Experiment with different ideas until you find the perfect combination that resonates with your audience.

How Fast Can You Write A Song?

A song can be written in as little as 20 minutes or may take several days or weeks to complete, depending on the songwriter’s inspiration, creativity, and skill level. However, the quality and depth of the song may suffer if rushed.

It is best to take the necessary time to fully develop and polish the song.

Conclusion

Speedy music writing is a skill that anyone can develop. To hone your craft, start by finding your inspiration and then taking the time to cultivate it. Work smarter, not harder with various songwriting techniques, and utilize both analog and digital tools to streamline your process.

It can be challenging at first, but with regular practice, you can develop your own unique style and voice. Keep in mind, writing great music is a journey, not a destination, and it takes dedication and determination to master. So, keep pushing your boundaries, exploring new sounds and styles, and always strive to improve your craft.

Categories
Archive

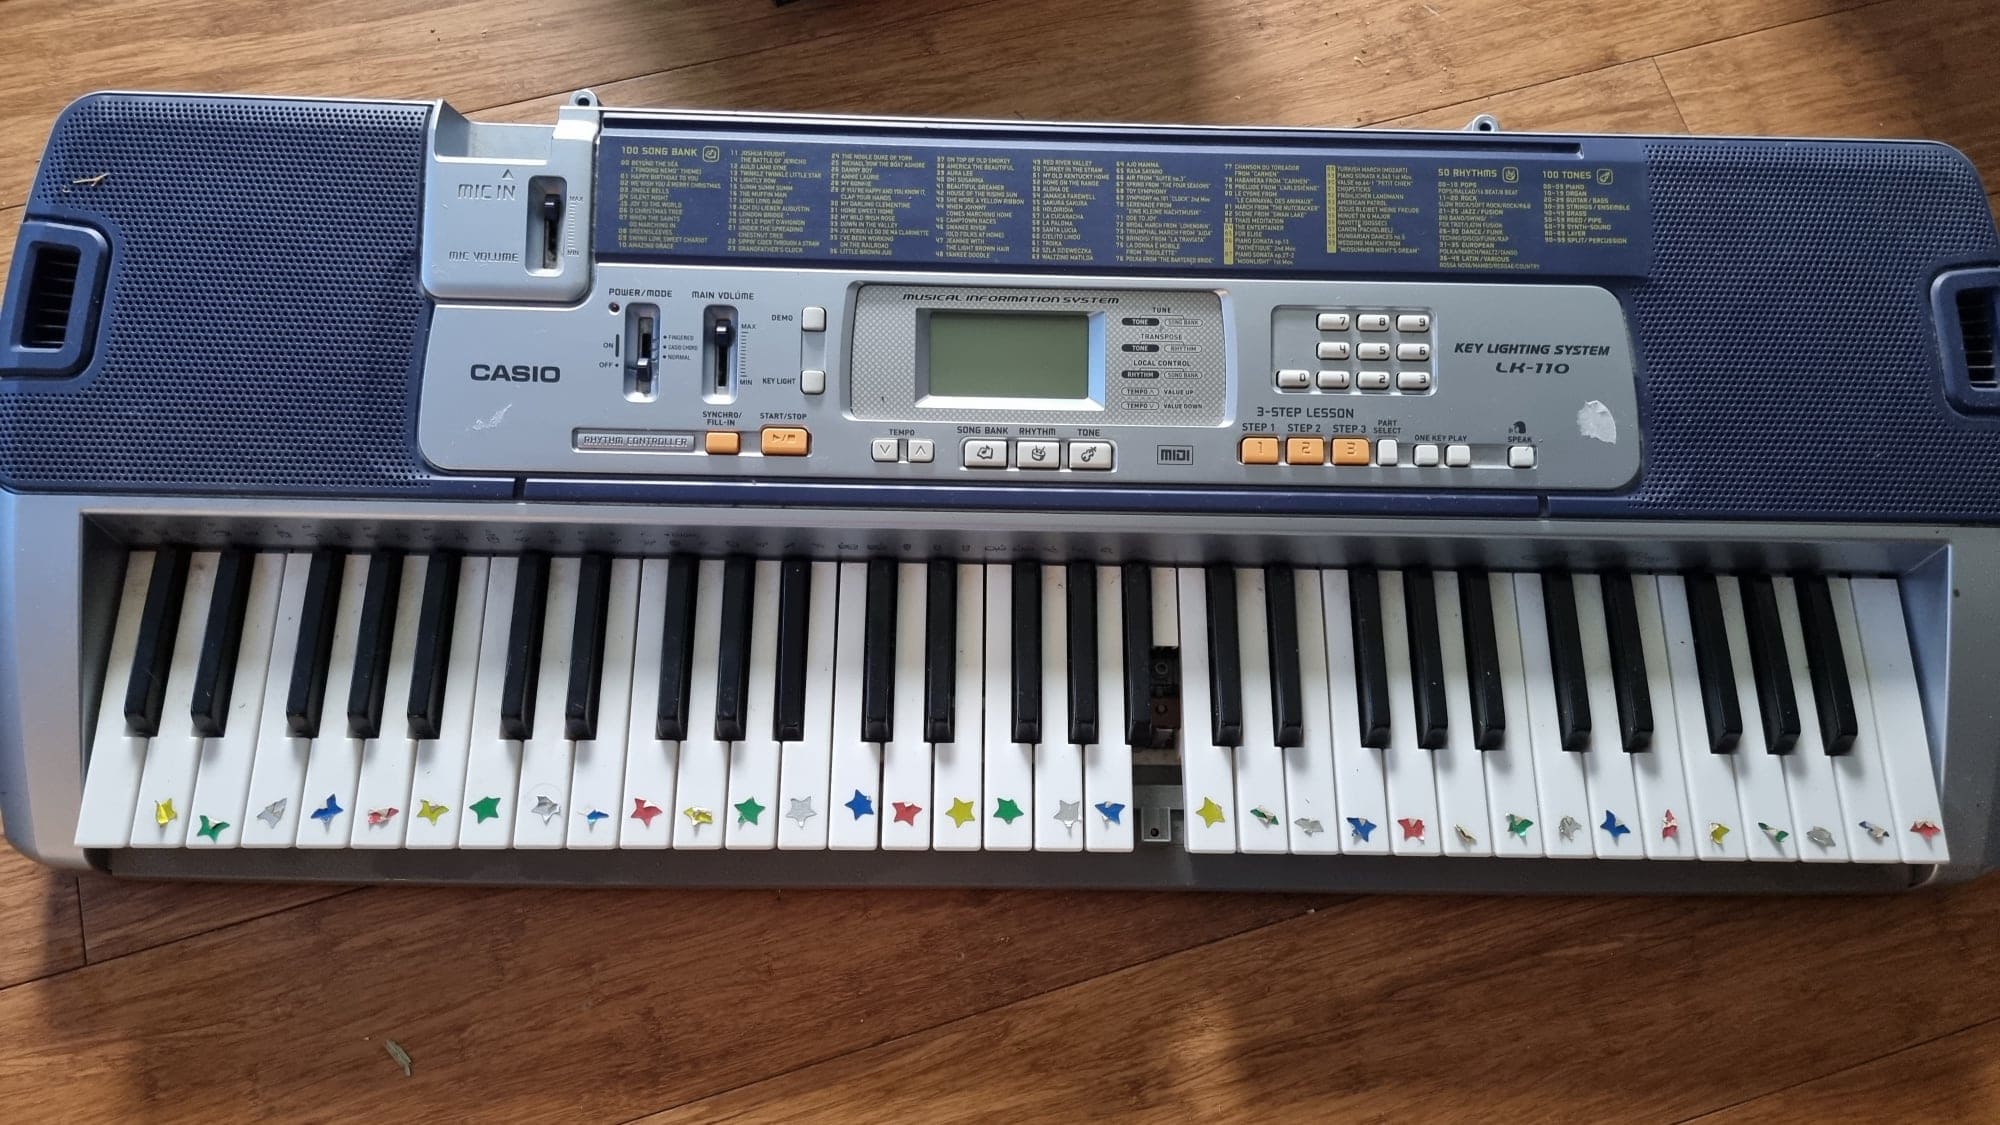
What to Consider When Buying a Keyboard Piano

Consider the size, sound quality, features, and price when buying a keyboard piano. When purchasing a keyboard piano, there are several crucial factors to consider.

Size is important, particularly if you have limited space. Sound quality is critical, and options such as touch sensitivity, weighted keys, and polyphony should be considered. Additionally, you should consider features such as the ability to record or use headphones.

Related reading: Icon Ikeyboard Review and Best Midi Keyboards Under 500. For background, see the Wikipedia article on Electronic keyboard.

Finally, like all purchases, affordability is a consideration. We will go through these factors in detail to help you choose the best keyboard piano for your needs. Whether you are looking for a beginner or professional instrument, having a good understanding of these factors will help make your decision-making process more comfortable.

Types Of Keyboard Pianos

If you are looking to buy a digital piano, it can be an overwhelming experience. With so many brands, models, and features to consider, it’s important to narrow down your options based on your individual needs. One of the most important decisions you will have to make is choosing the type of keyboard piano that suits you best.

Digital Keyboard Pianos

Digital your keyboards are electronic instruments that replicate the sound and feel of an acoustic piano. They come in various sizes and types, from compact keyboards to full-sized 88-key instruments.

  • Pros:
  • Portability –digital your keyboards are lightweight and easy to move around.
  • Lower cost – compared to acoustic pianos, digital your keyboards are generally more affordable.
  • Variety of sound options – digital your keyboards have many sounds, from piano and organ to string and brass.
  • Cons:
  • Sound quality – While some digital pianos have exceptional sound quality, it can’t match the tonal range and quality of an acoustic piano.
  • Touch – the weighted or hammer action keys of digital pianos aren’t exact as acoustic pianos.

Acoustic Keyboard Pianos

Acoustic your keyboards produce sound through a hammer striking a string within the instrument. They come in two varieties: grand and vertical (upright). Both have distinct sound qualities and aesthetics.

Pros:Cons:
Superior sound quality – The sound quality of an acoustic keyboard is incomparable.Touch – The touch of an acoustic keyboard is unmatched, giving the pianist more precise control over the tonal changes in their playing.Steady depreciation – When an acoustic piano is cared for correctly, they tend to retain its value.Cost – Acoustic keyboards can be exponentially more expensive compared to digital keyboards.Bulkiness – Acoustic pianos tend to be bulky and tricky to move around, requiring ample space.Specific maintenance – regular maintenance, like tuning, is essential for great acoustic sound.
What to Consider When Buying a Keyboard Piano

Credit: www.schoolofrock.com

Number Of Keys for Keyboard Piano

When purchasing a digital piano, one of the factors to consider is the number of keys. Options range from full-sized 88-key keyboards to smaller versions with only 61 or 76 keys. It’s important to consider your skill level and the type of music you’ll be playing.

What to Consider When Buying a Keyboard Piano: Number of Keys If you’re in the market for a keyboard piano, one of the most important factors to consider is the number of keys the instrument has. Most your keyboards typically have either 61 or 88 keys, although some may have as few as 25 or as many as 120. The number of keys you choose will depend on your needs and preferences, as well as the type of playing you plan to do.

Full-sized Keyboard Pianos

Full-sized your keyboards typically have 88 keys, making them the best choice for serious pianists. The keys are weighted, which means they feel like those on an acoustic piano. They provide a wider range of notes than smaller keyboards. Full-sized pianos are also great for individuals who plan to use them for classical or traditional music.

Compact Keyboard Pianos

If you’re short on space or you plan to travel with your your keyboard, a compact model may be a better choice. Compact your keyboards can have as few as 25 keys for a portable design. While they’re not suitable for playing full songs, they’re great for beginners who want to learn scales or for musicians who want to practice on the go. Compact models may also have features like built-in speakers, touch-sensitive keys, and multiple voices, making them versatile instruments.

When choosing the number of keys for your your keyboard, consider your level of experience, the type of music you want to play. Your space and budget constraints. Remember, while full-sized models may be more expensive, they offer a more authentic playing experience and may be better suited for serious musicians. On the other hand, compact keyboards are affordable and portable. This makes them a great option for beginners or those who want to learn on the go. In conclusion, your choice of the instrument will depend on your individual needs, preferences, and budget.

By understanding the number of keys available and how they affect your playing experience, you can choose the right model for your unique needs.

Action And Touch Sensitivity for Keyboard Piano

When it comes to your keyboards, one of the most crucial components to consider is the action and touch sensitivity. These features impact how the keyboard feels and responds when you play. Here’s what you should know:

Weighted Hammer Action

A weighted hammer action is the most realistic and responsive keyboard action available. It mimics the feel of playing a traditional piano by using weighted keys and mechanical hammers. This type of action is the preferred choice for experienced pianists and those who want the most authentic piano playing experience.

Semi-weighted Action

A semi-weighted action keyboard is a good compromise between a weighted hammer action and a non-weighted action. It has some resistance when you press the keys but not as much as a weighted hammer action. This type of keyboard is ideal for pianists who want a balance between an authentic piano feel and the ability to play other sounds and styles.

Non-weighted Action

A non-weighted action keyboard does not have any resistance when you press the keys. This type of keyboard is typically found in cheaper, more basic models. While it may be suitable for beginners or those who prioritize portability over authenticity, experienced pianists will likely find it unsatisfactory.

Touch Sensitivity

Touch sensitivity refers to how soft or hard you press the keys, and how the keyboard responds to the pressure you apply. Some keyboards have adjustable touch sensitivity settings that allow you to customize the playing experience. Having touch sensitivity improves dynamic range, allowing you to express more emotions in your playing.

Overall, the action and touch sensitivity of a digital piano are crucial considerations when making a purchase decision. Think about your needs and preferences, your level of expertise. The type of music you want to play before selecting the perfect keyboard.

What to Consider When Buying a Keyboard Piano

Credit: amusicmom.com

Voicing And Sound Quality for Keyboard Piano

Choosing the right your keyboard can be a daunting task, especially if you are a beginner. Over the years, the market has seen a tremendous influx of keyboard pianos with different features, both basic and advanced. However, one of the most important factors that can severely impact your playability and sound is the voicing and sound quality of the keyboard piano.

Polyphony

Polyphony refers to the ability of the keyboard piano to produce multiple notes simultaneously. It is crucial to consider this factor as different types of music require varying amounts of polyphony, such as classical music. This demands more polyphony compared to pop music. A polyphony of at least 64 notes would be a reasonable starting point for any beginner keyboard piano.

Sampling And Sound Library for Keyboard Piano

The sampling and sound library are significant factors in determining the quality of sound produced by a keyboard piano. A good sound library provides you with an array of sounds, such as drums, strings, and brass, that can enable you to create different genres of music. Additionally, sampling involves recording and storing sounds that can be used to reproduce the same sounds accurately.

Speakers And Amplifiers

Speakers and amplifiers are vital components that contribute to the quality of sound produced by your keyboard piano. It is essential to ensure that the speakers and amplifiers are powerful enough to produce a clear and balanced sound. A quality keyboard piano should have a power output of about 10 watts per speaker.

Headphone Jack

A headphone jack is an essential feature in a keyboard piano, especially if you live in a shared house or have neighbors that need quiet time. It allows you to practice without disturbing others. Ensure that the headphone jack’s sound quality is as good as the speakers’ quality. Meanwhile, this can impact the sound produced by your keyboard piano.

In conclusion, selecting the right keyboard piano with the appropriate sound quality and voicing is a crucial component of becoming a great pianist. The above-listed factors should guide you in making an informed decision and enable you to enjoy your playability experience to the fullest.

Portability And Storage

Portability and storage are essential factors to consider when buying a keyboard piano. Whether you are a musician who travels a lot or someone who has limited space at home, you need to find a keyboard piano that is easy to transport and store. In this article, we will explore the various features that you need to consider when looking for a portable keyboard piano.

Weight And Dimensions

The weight and dimensions of your keyboard piano are crucial when it comes to portability. You want a keyboard that is lightweight and compact enough to transport easily from one place to another. The weight of your keyboard is especially important if you plan to travel with it. Keyboards with weighted keys are generally heavier since they have more components than basic keyboards.

If you plan to store your keyboard piano in a tight space, then the dimensions are equally important. Keyboards with a smaller profile are easy to store in small rooms or apartments. In contrast, larger keyboards take up more space and can be a challenge to store away neatly.

Portability Features

The portability features of your keyboard piano dictate just how easy it is to transport. When buying a keyboard, look for features such as handles or straps that allow you to carry the keyboard comfortably. These can be especially useful if you plan on carrying the keyboard for over a few minutes.

You could also consider the power supply of your keyboard piano. Battery-powered keyboards are more portable since they don’t require a direct power source. This allows you to play your music wherever you go.

Storage Options

Storage options are essential if you plan on keeping your keyboard piano neatly stored away when not in use. One of the simplest ways to store your keyboard piano is to invest in a carrying case that is designed for keyboard pianos. These cases usually come with handles or straps that make them easy to carry around when traveling.

You could also consider purchasing stands or mounting systems that allow you to store your keyboard vertically, taking up less space. These options are useful if you have limited floor space or if you want to keep your keyboard out of the way of pets or children.

Conclusion

When looking for a portable keyboard piano, there are various features you need to consider carefully. Weight, dimensions, portability features, and storage options all play a role in determining how suitable a keyboard is for travel and storage. By considering all these factors, you can find a keyboard that is not only compact and lightweight but also suitable for your specific needs.

What to Consider When Buying a Keyboard Piano

Credit: yousician.com

Connectivity Options

When purchasing a keyboard piano, it is important to consider the various connectivity options available. Look for models with USB ports, headphone jacks, and MIDI compatibility to ensure easy integration with other devices.

When it comes to buying a keyboard piano, there are several things to consider. One of the most important aspects is the type of connectivity options available. The connectivity of your keyboard piano can have a significant impact on how you learn, create, and play music. In this post, we will discuss the various connectivity options available for keyboard pianos. This includes MIDI, USB, Bluetooth, and Audio Inputs and Outputs.

Midi

MIDI (Musical Instrument Digital Interface) is a standard protocol that allows electronic musical instruments, computers, and other devices to communicate with each other. Most keyboard pianos come with a MIDI port that enables the instrument to be connected to other MIDI devices such as computers, synthesizers and other keyboards. MIDI connectivity provides a wide range of advantages, such as the ability to use digital audio workstations, record music, and access a vast array of sounds and instruments.

Usb

USB (Universal Serial Bus) is a popular connectivity option for keyboard pianos. This allows easy connection to a computer or other USB-compliant device. Many modern models feature USB connectivity, which means that you can transfer data easily and quickly. With USB connectivity, you can record your performance, use various software synthesizers, or use your keyboard piano as a MIDI controller, offering even more versatility.

Bluetooth

Bluetooth is a wireless technology that has become increasingly popular. Modern keyboard pianos feature Bluetooth connectivity, enabling you to connect your keyboard to a mobile phone, tablet, or computer. With Bluetooth connectivity, you can stream music from your mobile phone or tablet, use your keyboard as a MIDI controller, or access a variety of apps and software.

Audio Inputs And Outputs

Audio inputs and outputs are essential components of a keyboard piano. Most models feature at least one 1/4″ audio output and a headphone jack. Audio inputs are less common, but they can be useful for connecting external instruments such as guitars or microphones. Audio inputs and outputs allow you to connect your keyboard to an amplifier, mixer, or speaker system while providing easy access to your music. In conclusion, Connectivity Options are an essential aspect to consider when buying a keyboard piano. Ensure you pick an option that suits your needs, preferences, and budget. MIDI, USB, Bluetooth, and Audio Inputs and Outputs offer different advantages. So select the one that best fits your intended use.

Accessories

Aside from the keyboard piano itself, accessories are an essential aspect to consider when making a purchase. Whether you’re a beginner or a professional, the right accessories can enhance your playing experience. Here are some accessories to consider:

Stands And Mounts

A keyboard stand or mount is crucial in providing a comfortable playing position. A sturdy stand reduces slippage while playing, which can cause inaccurate notes and disrupt your rhythm. You can choose from different types of stands, including X-stands, Z-stands, and table mounts. Each type features varying adjustability options, weight limits, and portability.

Pedals

A sustain pedal or footswitch is a critical accessory that amplifies the performance of a keyboard piano. It keeps notes ringing or carries them over into the next measure, creating smooth transitions between chords. Different types of pedals include sustain, volume, and expression pedals. Look for pedals with non-slip grip, polarity reversal, and customizable functionality.

Bags And Cases

A keyboard bag or case is necessary for transporting and storing your keyboard piano. A padded bag protects your instrument from scratches, dust, and moisture while on the go. A hardshell case adds an extra layer of security against physical damage or impact during extensive travel. Consider factors like size, material, strength, and storage compartments when choosing a bag or case.

Learning Materials for Keyboard Piano

Learning materials are helpful accessories, especially for beginners. These include music books, software, and online courses. Music books offer scores, notation, and theory lessons to help you practice and improve your skills. Software and teaching apps include interactive lessons, tutorials, and exercises to guide you through the learning process. Evaluate your learning style and level of expertise when choosing the right accessory.

Maintenance Tools

Maintenance tools are essential accessories in preserving the quality and longevity of your keyboard piano. These include cleaning kits, tuning forks, and screwdrivers. Cleaning kits remove dirt, grime, and fingerprints from the keyboard surface, while tuning forks help ensure pitch accuracy. Screwdrivers help tighten loose screws and adjust parts for optimal sound quality. Choose tools that are compatible with your keyboard model and easy to use.

Budget Considerations

Before purchasing a keyboard piano, it’s essential to consider your budget. Decide how much you’re willing to spend and look for options that offer good value for money. Keep in mind that while cheaper options might seem appealing, they may not offer the same quality and features as more expensive models.

Purchasing a keyboard piano can be a significant investment. However, there are a variety of options available to suit your budget. Regardless of your budget, it’s essential to consider factors such as the piano’s longevity, sound, touch, and functionality.

Entry-level Keyboard Pianos

Entry-level keyboards are affordable and ideal for beginners who want to test the waters. If you’re not ready to commit financially, an entry-level keyboard can be a good starting point. These keyboards have fewer keys and often lack features present in more expensive models.

Mid-level Keyboard Pianos

Mid-level keyboards offer the right balance between price and functionality. These keyboards usually come with more features and better sound than entry-level keyboards. Additionally, they often have more keys and weighted keys that offer a more authentic piano feel than non-weighted keys.

High-end Keyboard Pianos

High-end keyboards are top-of-the-range models designed for professionals and serious musicians. They have the most advanced features and offer the best sound quality. High-end models have weighted keys that offer a realistic piano touch and feel. Regardless of your budget, consider purchasing a keyboard piano from a reputable brand. Well-known brands have a reputation for producing quality instruments that offer value for money. Additionally, read reviews online and seek advice from experienced musicians to help guide your purchasing decision. In conclusion, when purchasing a keyboard piano, there is a range of options available to suit your budget. Consider factors such as sound, touch, and functionality to make an informed decision. Remember, investing in a quality keyboard piano will provide years of musical enjoyment.

Frequently Asked Questions For What To Consider When Buying A Keyboard Piano

How Do I Choose A Piano Keyboard?

Choosing a piano keyboard involves considering the number of keys suited to your playing needs, the size and type of keys, the sound quality, the touch sensitivity, and your budget.

What To Look For When Buying A Used Piano Keyboard?

When buying a used piano keyboard, look for any visible damages, age of the instrument, and the brand reputation. Check the keyboard’s touch response, sound quality, and check all the keys and buttons are functioning properly. It is also advisable to have an expert check the instrument before purchase.

Should I Learn On A 61 Or 88 Key Piano?

The answer depends on your goals and needs. A 61-key piano is ideal for beginners and those who want to play pop music. If you are serious about classical music or want to pursue a career in music, an 88-key piano is a better choice as it gives you a wider range and more options in sound and expression.

How Do I Know If My Piano Keyboard Is Good?

To determine if your piano keyboard is good, you should consider its key size and action, the sound quality, the durability and warranty, the brand reputation, and price. Testing the keys in person or reading reviews from verified buyers can help make an informed decision.

Conclusion

To conclude, getting the right keyboard piano requires careful consideration of various factors. Besides the budget factor, other essential aspects like the size, weight, features, and tonal quality matter. Always try out a keyboard piano before buying and read customer reviews to make an informed purchase decision.

Remember to focus on your needs and preferences to get the best value for your money. With these tips, you can acquire a keyboard piano that is perfect for your music goals.

Categories
Archive

My Mix Feels Like Its Missing Something

If your mix feels like it’s missing something, try adjusting the levels or adding different elements to fill the gaps. A mix can easily feel empty if there are frequency imbalances or if there are not enough layers or variations in the sound.

Making these adjustments and adding more layers can bring your mix to life and make it feel complete. Creating a well-rounded mix can be a challenging task. Despite your best efforts, it’s common to feel as if something is missing.

This sensation can leave you feeling frustrated and unsure of how to proceed. A properly balanced mix is a critical element of music production, and it can be the difference between an amateurish and a professional recording. There are several reasons why your mix may need improvement. It could be that you need to adjust the levels or re-evaluate the chosen sounds. Whatever the reason, several techniques can help fill in the gaps and contribute to a more complete sound.

My Mix Feels Like Its Missing Something

Credit: www.reddit.com

Diagnosing The Problem

Diagnosing a problem while mixing is critical to ensure that you create a cohesive and well-rounded track. If you feel like your mix is missing something, it’s essential to pinpoint the issue and resolve it. In this article, we’ll discuss how to diagnose the problem with your mix and determine the missing element. This knowledge will help you elevate your mixing skills and deliver exceptional results. Let’s get started!

Identifying The Missing Element

Identifying what’s missing in your mix can be challenging, especially if you’re a beginner. However, with experience and practice, you can quickly identify the missing element. Here are some pointers to help you in the process:

  • Listen to your track repeatedly and identify the elements that sound weak or underwhelming.
  • Compare your mix with similar songs in the same genre to identify the missing elements.
  • Use a reference track and compare it with your mix to identify the differences.
  • Experiment by adding various elements to your mix to see how they sound.

Determining The Source Of The Problem

Once you’ve identified the missing element, it’s time to determine the source of the problem. Here are some possible reasons why your mix feels like it’s missing something:

Possible reasonsSolutions
You haven’t mixed your track correctlyRevisit the fundamentals of mixing and ensure each element is balanced correctly.
You haven’t created enough contrast between the elementsExperiment with EQ, panning, and volume to create more contrast and separation between each element.
Your arrangement is not optimalRearrange the elements in your track, emphasizing the critical elements and removing unnecessary ones.
The arrangement lacks variety and evolutionAdd more variation to your arrangement, experiment with fills, transitions, and different types of sounds.
The mix lacks effects and processingExperiment with effects like reverb, delay, and compression to enhance the individual elements and create depth in the mix.

By using the above table, you can quickly identify the problem and its solution. Remember, every mix is different, and there are no fixed rules for creating a great mix. Therefore, experimenting with different solutions and techniques will help you achieve the desired mix.

Possible Causes

Possible causes for a mix feeling like it’s missing something may include an imbalance in levels, lack of depth or texture, or inadequate use of effects and plugins. A proper mixing process can help identify and address these issues.

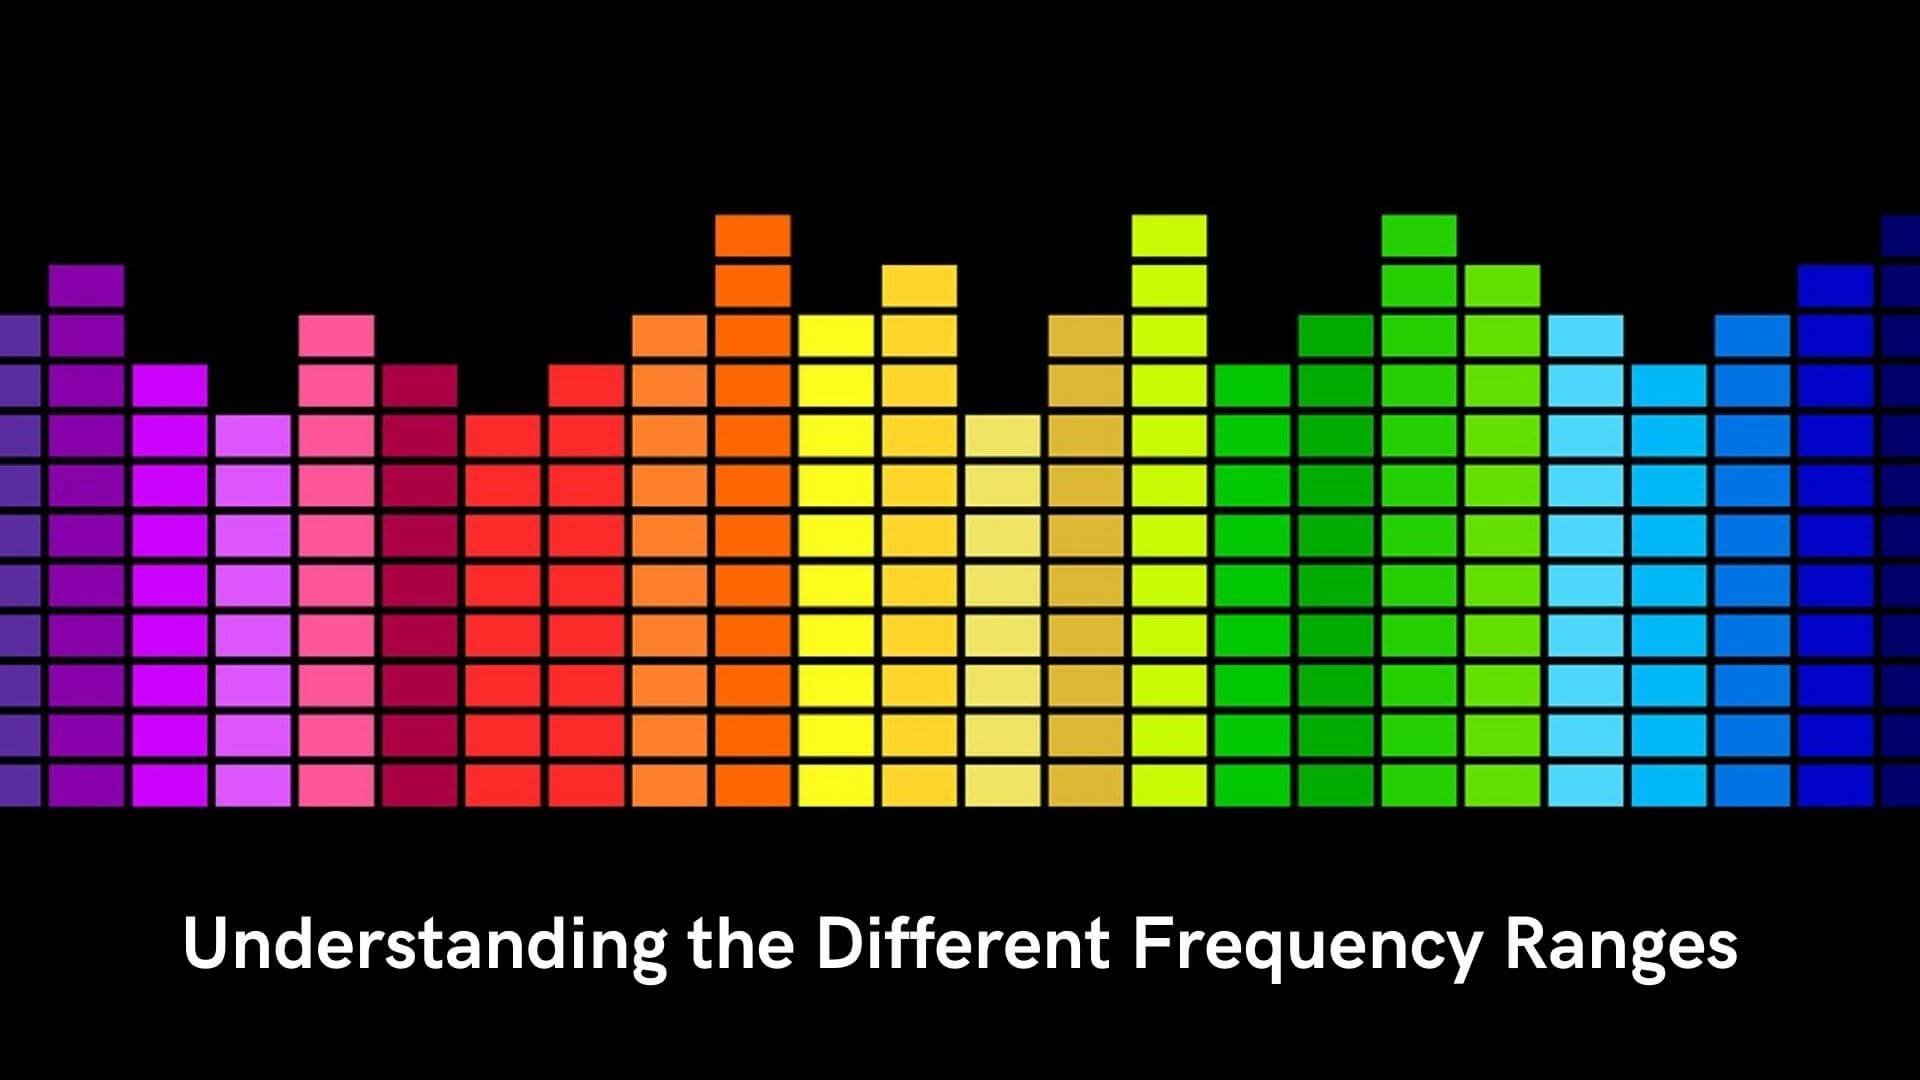
Possible Causes: Are you one of those music producers who feel like their mix is lacking something but can’t seem to put their finger on what’s missing? Don’t worry; you are not alone! This feeling is common in the music production industry, and identifying the possible causes is the first step towards a better mix. Lack of frequency range: One of the most common causes of a mix feeling like it’s missing something is the lack of frequency range. This happens when there is not enough balance between the low, mid and high frequencies. Low frequencies give the mix depth and punch, while high frequencies give it sparkle and clarity. Mid-range frequencies help bring out the vocals, guitars and other important instruments in the mix. To ensure that your mix has adequate frequency range, use an equalizer to balance the frequencies and make sure that each instrument has its own space. Try cutting some frequencies that are not necessary for the particular instrument to create a more defined sound. Inadequate stereo image: Another possible cause of your mix feeling like it’s missing something is an inadequate stereo image. This happens when there is not enough differentiation between the left and right channels, resulting in a flat and mono-sounding mix. A proper stereo image gives the mix more depth and creates a more realistic sound field. To achieve a better stereo image, try panning instruments to different positions in the mix. You can also use stereo widening plugins to make the mix sound broader. However, be careful not to overdo it, as too much stereo widening can result in a messy and unnatural sound. Poor arrangement: Finally, poor arrangement can also cause a mix to feel like it’s missing something. When instruments are competing for the same frequency space or when an instrument plays throughout the entire mix without any variation, the mix can become cluttered and less interesting to the listener. To improve your arrangement, ensure that each instrument has its own space in the frequency range and only plays when necessary. You can also try adding some variation to the instrumentation and dynamics to make the mix more engaging. In conclusion, identifying the possible causes of a mix feeling like it’s missing something is the first step towards a better mix. By balancing the frequency range, improving the stereo image, and arranging the instruments properly, you can create a more compelling and well-rounded mix.

Solutions

Are you feeling like your mix is lacking that special something? Our solutions can help! We offer a range of options to elevate your sound and bring your music to the next level. Let us help you create something truly special.

As a music producer, there’s nothing more frustrating than feeling like your mix just isn’t coming together. You’ve spent hours tweaking levels, adding effects, and moving things around, but it still doesn’t sound quite right. If you’re in this situation, don’t worry – there are plenty of solutions to try. Here are a few things to consider when your mix feels like it’s missing something.

Eq Adjustments

One of the most common reasons your mix might be lacking is due to poor EQ balance. EQ (Equalization) refers to adjustments made to the frequency balance of your mix. If you’re finding that some elements of your mix are disappearing or getting buried, try making EQ adjustments to either boost or cut certain frequencies. For example, if your bass isn’t coming through, try boosting the low-end frequencies. On the other hand, if your mix is too bass-heavy, try cutting some of the lows.

Adding/removing Elements

Sometimes, the solution to a lackluster mix is simply adding or removing certain elements. Think about what might be missing from your mix – perhaps you need a catchy melody to tie everything together, or maybe you need to get rid of a particular instrument that’s cluttering up the mix. Try adding or removing different elements until you find the right balance.

Stereo Adjustment

Another option to consider is adjusting the stereo field of your mix. If your mix feels too narrow or congested, try panning elements out to the sides. On the other hand, if your mix feels too wide, try bringing some elements to the center. Stereophonic sound is a powerful tool, so use it to your advantage to create a balanced mix.

Re-arrangement

Finally, if you’ve tried all of the above solutions and you’re still not happy with your mix, consider re-arranging the elements. Sometimes, just moving things around can make a big difference. Experiment with different arrangements until you find one that works. In conclusion, there are many solutions to try when your mix feels like it’s missing something. From EQ adjustments to re-arranging elements, don’t be afraid to experiment until you find the perfect balance.

Common Mistakes To Avoid

If you’re an aspiring musician or producer, you’ve likely experienced the frustration of feeling like your mix is missing something. A balanced mix can make or break a song, so it’s crucial to avoid common mistakes that can hinder your progress.

Over-mixing

It’s easy to get caught up in the mixing process and spend countless hours tweaking every element. However, too much mixing can do more harm than good. Over-mixing can lead to an overly compressed sound, loss of dynamics, and even ear fatigue. The key is to find the right balance and trust your instincts.

Under-mixing

On the other hand, under-mixing can result in an unpolished and amateur sound. Neglecting important elements such as vocals or lead instruments can create an unbalanced mix. Make sure to give each element the attention it deserves and don’t be afraid to make bold decisions.

Cluttered Mix

Too many elements competing for space in the mix can create a muddy and cluttered sound. It’s important to prioritize the most essential elements and carve out space for each one. Consider using EQ and panning techniques to create separation in the mix.

Overlapping Frequencies

Overlapping frequencies can create phase issues and result in a messy sound. Make sure to use EQ to cut unnecessary frequencies and create space for each element to sit comfortably in the mix. You can also use a spectrum analyzer to identify areas of overlap and adjust accordingly.

Avoiding these common mistakes can help you achieve a more professional and polished mix. Remember to trust your instinct, give each element attention, and find the right balance.

Preventative Measures

Creating a seamless and perfect mix is never an easy task. Even the most experienced sound engineers may face situations where their mix doesn’t sound quite right. However, there are certain preventative measures that one can take to minimize the chances of a mix that feels incomplete. Here we discuss some crucial measures that, if taken during the recording and mixing process, can improve the quality of a mix remarkably.

Monitoring Levels During Recording

A common mistake that many sound engineers make during recording is setting the levels too high. This results in distorted and noisy recordings. Therefore, monitoring levels during recording is a crucial preventative measure that can help you save time and improve the quality of your mix. Use level meters to monitor the input and output levels throughout the recording process. This helps avoid clipping, which occurs when the input level is too high. Too much clipping can ruin the quality of the track, making it difficult to mix.

Taking Breaks During Mixing

It’s not uncommon for sound engineers to get lost in the process of mixing and end up spending hours on a single track. While this might seem like a great way to make progress, it can actually cause ear fatigue, affecting your ability to recognize subtle changes. Take breaks during your mixing sessions. This helps reduce ear fatigue and gives you a fresh perspective when you return to mixing. Also, make sure you take a good 10 to 15-minute break every hour or so. This helps improve productivity and ensures you don’t miss anything important.

Applying The 80/20 Rule

When mixing, it’s essential to remember that not all tracks are equally important. Some might require more attention than others. Applicable to mixing as well, the 80/20 rule means that 80% of the results come from 20% of the efforts you put in. In other words, focus on the 20% of elements that are most important and work on making them sound as good as possible. Don’t get lost in the details that don’t matter. This helps you to mix effectively and efficiently and saves you time and energy.

By applying these three preventative measures, you can improve the quality of your mix dramatically. These actions can save you time, increase productivity, and reduce ear fatigue while mixing – all while making your mix sound better.

Advanced Techniques

Enhance your mixing skills with advanced techniques like EQ and compression adjustments. Don’t ignore the importance of panning and volume levels. Sometimes the missing element is just a subtle tweak away.

As a music producer, you know how frustrating it can be when your mix feels like it’s missing something. You’ve tried everything you know, but nothing seems to work. Don’t worry; advanced techniques like parallel compression, multi-band compression, advanced EQ, and automation can help you achieve that missing element in your mix.

Parallel Compression

Parallel compression, also known as New York compression, can add some depth and punch to your tracks. It’s a straightforward technique that involves duplicating a track, compressing the duplicate heavily, and then blending it with the original track. This technique evens out the dynamics while retaining the transient’s punch.

Multi-band Compression

Multi-band compression is a technique that helps you control the dynamics of a track’s frequency range. It works by splitting the audio frequencies into different bands, compressing each band differently, and then mixing them. This technique can help you balance the levels of individual frequencies and add some warmth and cohesion in your mix.

Advanced Eq

Advanced EQ is a technique that involves more than just boosting or cutting frequencies. It’s about using different EQ types, such as parametric, graphic, and linear phase EQs, to shape a track’s tone. These types of EQs offer various ways to control specific areas of sound and can help you create a much more balanced and detailed mix.

Automation

Automation is an essential technique that can help you add some movement and interest to your mix. You can automate individual track’s volume, pan, EQ, or any other parameter to create a dynamic and engaging mix. By automating different aspects of your mix, you can ensure that each element has its moment to shine and contribute to the overall track. In conclusion, implementing these advanced techniques into your mix can help you achieve a more professional and polished sound. Don’t be afraid to experiment and use them creatively to add your unique flavor to your mix.

Asking For Help

My Mix Feels Like Its Missing Something

Credit: www.supremetracks.com

Frequently Asked Questions Of My Mix Feels Like Its Missing Something

Why Does My Mix Feel Empty?

Your mix may feel empty due to lack of balance in frequencies or use of too many similar sounds. Try adding layers of different instrument tones and EQing the mix to emphasize frequencies that need more presence. Use panning to create a sense of space and depth.

Avoid cluttering the mix with unnecessary sounds.

Why Do My Mixes Lack Clarity?

To achieve clarity in your mixes, you need to focus on proper EQing, separation of frequencies, using high-quality samples and sounds, ensuring proper levels and gain staging, and incorporating proper panning techniques. These must be done with care to create an accurate balance and separation of elements and frequencies across the stereo field, resulting in a clear and professional sound.

Why Does My Mix Sound Lifeless?

A mix can sound lifeless due to several reasons like poor EQ balance, lack of proper dynamics, and absence of space and depth. To fix the issue, adjust the levels, add reverb or delay, and use panning techniques. Ensure your tracks complement each other and avoid overusing compressors and limiters.

What Causes Muddiness In A Mix?

Muddiness in a mix can occur due to several reasons, such as overuse of reverb or EQ, poor arrangement, or improper gain staging. To avoid muddiness, use minimal reverb and EQ and ensure proper arrangement and gain staging techniques.

Conclusion

After reading this post, you’re now aware of the common reasons why your mix may feel like it’s missing something. From balancing levels to carving out the right space for each element, there are plenty of ways to ensure your mix sounds full and complete.

The key is to stay patient, experiment, and keep your ears fresh. With time and practice, your tracks will consistently come out sounding balanced and satisfying. Keep these tips in mind for your next production project, and take your mixes to the next level.

Categories
Archive

Understanding The Different Frequency Ranges

Understanding the Different Frequency Ranges is crucial in audio production. Simply put, frequency ranges refer to the different parts of the sound spectrum within which different instruments, voices, or frequencies lie.

They help in creating separation between different elements of sound and achieving a balanced, clear mix. In audio production, it is critical to learn how specific frequency ranges work together to affect the overall sound as the ear can detect frequencies ranging from 20 Hz to 20 kHz.

Related reading: Eq frequency guide and Note to frequency chart. For background, see Audio frequency.

By knowing the frequency ranges of different instruments and understanding how they interact with one another, audio engineers can create a better, more refined mix. In addition, we will take an in-depth look at the different frequency ranges and how they affect sound in audio production.

Low Frequency Ranges

Vibrations that travel through the air at different frequencies produce the sounds we hear. Moreover, understanding the different frequency ranges can help us identify and appreciate different sounds. The low frequency range, which ranges from 20Hz to 250Hz, is an important part of the sound spectrum.

What Are Low Frequencies?

Generally, low frequencies are sounds that have a low pitch. They bring deep bass sounds, and you often feel them as vibrations rather than hear them as distinct tones. The human ear is less sensitive to low frequencies than it is to higher frequencies. Furthermore, this is why it can be difficult to hear low-frequency sounds if they are not loud enough.

Also, low-frequency sounds come from many sources, from musical instruments to natural phenomena. For example, thunder and earthquakes produce low-frequency sound waves. Meanwhile, musical instruments like the bass guitar and drums produce low-frequency notes.

Examples Of Low Frequency Sounds

Here are some examples of low-frequency sounds:

FrequencySound Source
20-60HzThunder, earthquakes, explosions
60-200HzBass guitar, drums, male vocals
200-250HzDeep hum, sub-bass frequencies

As you can see, low-frequency sounds come from many different sources. Also, they play an important role in music production, cinema sound effects, and everyday life.

In conclusion, understanding the different frequency ranges can help us appreciate and identify different sounds. In addition, the low frequency range is an important part of the sound spectrum and is responsible for many sounds we hear every day.

Understanding The Different Frequency Ranges

Credit: www.researchgate.net

Mid Frequency Ranges

The mid frequency range is an important aspect of understanding the different frequency ranges. Specifically, it sits between the low and high frequency ranges and plays a crucial role in delivering a well-balanced sound. Properly managing this range can help achieve an ideal audio experience.

Specifically, the mid frequency range covers the audio frequencies between the low and high frequency ranges. In fact, it is a crucial range that lets us hear sounds in their most natural form. The mid frequency range is often used to enhance or reduce certain characteristics in songs. Understanding the mid frequency range is important not just for musicians, but also for sound engineers and enthusiasts.

What Are Mid Frequencies

Mid frequencies are the frequencies that fall between the low and high frequency ranges. In particular, it includes sounds that are essential for human speech and music. Mid frequencies range from 300Hz to 3000Hz, but this may vary depending on the instrument or sound. Moreover, the human ear is most sensitive to mid frequencies. Indeed, it is the range that allows us to distinguish between different sounds.

Examples Of Mid Frequency Sounds

Many different types of music and sounds rely on the mid frequency range. To illustrate, here are some examples of mid frequency sounds within various instruments and types of music:

InstrumentMid Frequency Range
Bass Guitar500Hz – 2kHz
Snare Drum500Hz – 2kHz
Electric Guitar1kHz – 4kHz

Some examples of mid-frequency-heavy music genres include rock, pop, and hip-hop. Similarly, vocals, guitars, and drums often contain mid frequencies that make them sound full and rich. Moreover, understanding the mid frequency range is crucial for anyone involved in music or audio production. Using EQ techniques to manipulate the mid frequency range can help enhance or reduce certain aspects of the sound, leading to a much better overall listening experience.

High Frequency Ranges

The High Frequency Range is the part of the frequency spectrum that includes higher-pitched sounds, typically between 2,000 and 20,000 Hz. Furthermore, these frequencies are often associated with sensations of brightness, crispness, and clarity in sound. Understanding this part of the frequency spectrum can help you to identify and appreciate different sounds in your environment.

What Are High Frequencies?

High Frequencies are sounds that are higher in pitch, typically above 2,000 Hz. Also, they are often associated with sensations of brightness, clarity, and sharpness in sound. Furthermore, high frequencies are important in many types of music and sound design, as they can add a sense of energy, excitement, or clarity to a mix.

Examples Of High Frequency Sounds

Here are some examples of High Frequency Sounds:

SoundFrequency (Hz)
Whistling2,000 – 9,000
Bird chirping2,000 – 8,000
Cymbals5,000 – 15,000
Synthesizer tones2,000 – 10,000
Electronic beeps2,000 – 5,000

By understanding the different frequency ranges, including the High Frequency Range, you can gain a deeper appreciation for the sounds around you and how they contribute to music and sound design.

How Frequency Ranges Are Measured

To understand different frequency ranges, engineers take measurements with specialized equipment such as spectrum analyzers. For reference, we measure frequencies in hertz (Hz), kilohertz (kHz), megahertz (MHz), and gigahertz (GHz). The equipment can display various types of signals, frequencies, and amplitudes, making it easier to distinguish different frequencies.

Frequency range is the range of frequencies that an audio system can reproduce or detect. When measuring frequency range, we are trying to determine the lower and upper limits of the range that an audio system can produce or detect. There are different ways to measure frequency range, and the most common method is by using octave bands. Octave bands divide the frequency range into smaller, more manageable sections.

Each octave band represents a doubling of the previous frequency. For example, if the first octave band starts at 20 Hz, the second octave band will start at 40 Hz, the third octave band at 80 Hz, and so on. Another way of measuring frequency range is by using 28-day averages. This method takes into account the time-averaged sound levels over a period of 28 days. Engineers measure sound levels at different frequencies, then use the data to determine the frequency range.

Octave Bands

Octave bands are a commonly used method to measure frequency ranges. Specifically, octave bands divide the frequencies into bands one octave apart. In other words, each octave band represents a doubling of the frequency in the previous band. Octave bands are often used in the field of acoustics to measure the frequency response of speakers, amplifiers, and other audio components. They are also used to measure the frequency of sound waves in the environment and to determine noise exposure levels.

28 Day Averages

Another method of measuring frequency range is through the use of 28-day averages. This method takes into account the time-averaged sound levels over a period of 28 days. During this process, engineers measure the average sound level at different frequencies and use the data to find the frequency range. This method is useful for measuring noise exposure levels and determining the impact of noise on human health and the environment.

Sound Exposure Limits

Sound exposure limits are the safe levels of exposure to sound that organizations such as OSHA set. These limits depend on the frequency range of the sound as well as the intensity and duration of the exposure. Exceeding these sound exposure limits can lead to temporary or permanent hearing loss, tinnitus, and other hearing-related issues. Therefore, it’s important to be aware of these limits and take steps to protect yourself from excessive noise exposure.

Why Understanding Frequency Ranges Is Important

Frequency ranges refer to the different bands of audio frequencies that humans can hear. Understanding these frequency ranges is essential in many fields, including music production, acoustics design, audio engineering, and environmental noise monitoring. In this blog post, we will discuss why understanding frequency range is important in these areas and how it can impact the quality of the output.

Frequency Ranges In Music Production

Music production involves creating and manipulating sound recordings to produce a final product that is pleasing to the ears. Understanding the different frequency ranges is essential in this process because it allows producers to adjust and tweak audio elements to achieve the desired sound. For example, bass frequencies are responsible for driving the rhythm and energy of the track. Meanwhile, high frequencies can add clarity and brightness.

By understanding the frequency ranges, producers can identify problem areas and take corrective measures. Also, they can use equalizers to boost or cut frequencies, compressors to control dynamic range, and limiters to prevent distortion. By tweaking these parameters, producers can create a mix that sounds good on all playback systems, from speakers to headphones to earbuds.

Frequency Ranges In Acoustics Design

Acoustics design involves the manipulation of sound waves in a given space to achieve the desired listening experience. Understanding frequency ranges is vital in this process because it can help you design a room that has the ideal acoustics for its intended use. For example, a movie theater requires a different acoustic treatment than a recording studio because they have different purposes and produce different sounds.

By understanding frequency ranges, acousticians can create a room that has the desired balance of reflected and absorbed sound waves. Additionally, they can use diffusers to scatter sound waves, absorbers to dampen them, and reflectors to redirect them. By balancing these elements, they can create a space that sounds good and allows the listener to hear everything clearly.

In Audio Engineering

Audio engineering involves the technical aspects of recording, mixing, and mastering audio tracks. Understanding frequency ranges is essential in this process because it allows engineers to create a mix that is well balanced, clear, and pleasing to the listener. By analyzing the frequency spectrum of each track, they can identify problem areas and make corrective actions.

By understanding the frequency ranges, audio engineers can use equalization, compression, and other tools to make each track sound its best. Furthermore, they can reduce or eliminate unwanted noises, prevent clipping and distortion, and create a mix that sounds good on all playback systems, from car speakers to high-end headphones.

In Environmental Noise Monitoring

Environmental noise monitoring involves measuring and analyzing the sound levels in a particular environment to ensure compliance with noise regulations. Understanding frequency ranges is crucial in this process because it allows analysts to identify the sources of noise and take corrective measures to reduce them.

By understanding frequency ranges, analysts can use sound level meters and other equipment to measure the sound levels at different frequencies. This can help them identify the sources of noise, such as traffic, industrial machinery, or airplanes. By understanding the frequency spectrum of the noise, they can take corrective actions, such as adding noise barriers, using quieter machinery, or adjusting traffic flow.

Understanding frequency ranges is essential in many fields, including music production, acoustics design, audio engineering, and environmental noise monitoring. By understanding the frequency spectrum of sound, professionals can create a product or environment that sounds good and meets the desired criteria.

Understanding The Different Frequency Ranges

Credit: www.masteringthemix.com

Frequently Asked Questions On Understanding The Different Frequency Ranges

How Do You Read Frequency Range?

To read frequency range, you need to look at the numbers on the spectrum analyzer and understand the range of frequencies it displays. The horizontal axis shows the frequency range from low to high, while the vertical axis shows the signal strength.

By analyzing the peaks and valleys on the graph, you can determine the frequency range of a signal.

What Are The Main Frequency Ranges?

Frequencies are ranges of audio, radio, and electromagnetic signals. Scientists classify these ranges of frequencies by wavelength, and they include extremely low frequencies (ELF), very low frequencies (VLF), low frequencies (LF), medium frequencies (MF), high frequencies (HF), very high frequencies (VHF), ultra-high frequencies (UHF), and microwave frequencies.

What Are The Different Levels Of Frequency?

Frequency levels refer to the number of times a particular event or occurrence happens within a specific period. Different levels of frequency include high-frequency occurrence (HFO), low-frequency occurrence (LFO), and very low frequency (VLF) occurrence. These varying levels enable the identification and classification of events for further analysis and action.

What Do The Hz Levels Mean?

Hz levels refer to the frequency at which a device or system operates. It measures the number of cycles per second, and people typically use it to describe sound and electrical waves. Thus, the higher the Hz level, the more cycles per second and the faster the device or system operates.

Conclusion

Understanding the different frequency ranges can help you make better-informed decisions when it comes to sound systems. By knowing the characteristics of different frequency ranges, you can design a system that will reproduce sound accurately and effectively. Properly understanding the different frequency ranges is essential to getting the most out of your audio system.

With the knowledge gained, you can now make informed buying decisions and achieve the best performance from your system. Finally, keep this knowledge on hand, and you’ll be well on your way to creating unparalleled audio experiences for you and your audience.

Categories
Archive

How to Fix Broken Keys on a Music Keyboard

To fix broken keys on a music keyboard, remove the broken key and replace it with a new one. A damaged or broken key on your music keyboard can be a frustrating and discouraging experience for any musician.

Thankfully, repairing it is easier than you might think. The process involves removing the broken key and replacing it with a new one. Before beginning, it is important to determine the type of keyboard you have and the appropriate tools needed for the repair.

This article will guide you through the necessary steps to fix a broken key on your music keyboard, helping you get back to playing the music you love.

How to Fix Broken Keys on a Music Keyboard

Credit: www.mspot.com

Assessing The Damage

If you’re a musician, you know how frustrating it can be to have broken keys on your keyboard. Not only does it affect your ability to play, but it can also be costly to replace the whole keyboard. However, if you know how to fix broken keys on a music keyboard, you can save yourself both time and money. In this article, we’ll discuss the process of fixing broken keys, starting with assessing the damage.

Identifying The Broken Keys

The first step in fixing your broken music keyboard is to identify which keys are broken. Before you start taking your keyboard apart, you need to know which keys to focus on. Start by playing each key on the keyboard and then determine which keys are unresponsive or have a strange sound.

You can easily identify which keys are broken by visually looking at the keys. Usually, when a key is broken, it doesn’t return to its original position or has a crack. So, check each key carefully and mark the keys that are broken with a piece of tape or marker. This way, when you start fixing the keyboard, you’ll know which keys need attention.

Checking For Any Loose Or Missing Pieces

After identifying the broken keys, the next step is to check for any loose or missing pieces that may have caused the keys to break. Check the surrounding area of the broken keys and see if there are any loose or missing pieces. You should also check the keys adjacent to the broken ones, as they may also be affected by the damage.

If you find any loose or missing pieces, remove them and keep them safe. You can use these pieces later when fixing the keys. If you’re unsure how to proceed, consult your keyboard’s manual or look for online resources for your specific model.

Once you have identified the broken keys and checked for any loose or missing pieces, you’re ready to start fixing your music keyboard. In the next section, we’ll discuss the process of fixing your broken keys.

Cleaning The Affected Area

To fix broken keys on a music keyboard, start by cleaning the affected area with a soft cloth to remove any debris or dust that may be causing the issue. This simple step can often resolve the problem without the need for further repairs.

One of the most common issues that musicians encounter when playing the keyboard is broken or sticky keys. These can result from various reasons, including dust, dirt, or grime buildup. The good news is that you don’t have to replace the entire keyboard if a key seems to be stuck. Instead, you can follow these steps to clean and disinfect the affected area of the keyboard.

Removing Dirt Or Debris

To get started, you will need a few supplies such as a microfiber cloth, compressed air, and a soft-bristled brush. Begin by unplugging the keyboard from the power source and turning it over to access the keys. Wipe the surface of the keys with the microfiber cloth to remove any loose dirt or debris. For stubborn dirt or debris, you can use the soft-bristled brush to dislodge it. Avoid using a sharp object or excessive force as it could cause damage to the keys. Once you’ve removed the visible dirt or debris, use the compressed air to blow out any remaining particles.

Disinfecting The Keys

Now that you’ve removed the dirt and debris from the keys, it’s time to disinfect them. In light of the ongoing COVID-19 pandemic, it’s essential to keep your keyboard clean and disinfected regularly. You can use a disinfecting wipe or a solution that contains at least 70% isopropyl alcohol. Simply apply the solution onto a clean microfiber cloth and wipe each key individually. Be careful not to oversaturate the cloth as moisture can seep through the gaps and affect the keyboard’s electronics. After wiping each key, leave the keyboard to dry completely before using it again. In summary, cleaning and disinfecting a music keyboard is a simple process that can help restore broken or sticky keys. By following these steps, you can save yourself the cost of replacing the keyboard and keep your instrument in good working condition.

Replacing The Broken Keys

Fixing broken keys on a music keyboard is a simple task. First, remove the broken key and assess the damage. Then, carefully position the replacement key in its place and secure it in with the screws provided.

If you have a music keyboard and a key has broken, you may be wondering how to replace it. One option is to take your keyboard to a professional for repair, but if you’re looking to save money and enjoy some DIY, you can replace the broken key on your own. In this section, we’ll walk you through the steps to order replacement keys, remove the broken key, and install the new one.

Ordering Replacement Keys

The first step to replacing a broken key on your music keyboard is to order a new key. You can often order replacement keys directly from the keyboard manufacturer or from a third-party retailer. Be sure to order the correct key for your keyboard model, as each key may be shaped differently. Once you have your replacement key, you’re ready to get started.

Removing The Broken Key

Now that you have your replacement key, it’s time to remove the broken key. Begin by locating the broken key and gently wiggling it to see how it is attached to the keyboard. Once you have a good idea of the attachment method, you can use a small tool such as a screwdriver or pliers to carefully remove the broken key from the keyboard. Be sure not to damage any surrounding keys or components while removing the broken key.

Installing The New Key

With the broken key removed, you’re ready to install the new one. Begin by aligning the new key with the attachment method on the keyboard. Gently press the key into place and ensure it is securely attached. Test the key by playing a note on your keyboard to ensure it is functioning properly. If the new key is not functioning correctly, check the attachment method and adjust as needed. Replacing a broken key on your music keyboard may seem daunting, but with a little patience and some DIY know-how, you can do it yourself. Remember to order the correct replacement key, remove the broken key carefully, and ensure the new key is securely attached and functioning properly. Happy playing!

How to Fix Broken Keys on a Music Keyboard

Credit: m.youtube.com

Repairing The Broken Keys

Broken keys on a music keyboard can be frustrating. Luckily, fixing them can be a straightforward task. Start by identifying the issue and then follow the necessary steps to repair or replace the broken key.

Repairing the Broken Keys on your music keyboard is a task that can seem daunting at first, but with the right tools and techniques, it can be easily accomplished. When a key breaks on your keyboard, it is crucial to repair it as soon as possible. This is because broken keys not only impede your playing experience but can also damage other components of your keyboard. In this section, we will discuss three methods that can be used to repair broken keys: Reattaching broken pieces, Applying glue or resin, and Sanding or filing down rough edges. Reattaching Broken Pieces: 1. Remove the keycap and examine the key to see where it is broken. 2. If you have the broken piece, try to match it up with the broken area of the key. 3. Apply a small amount of glue on the broken area and reattach the broken piece onto the key. 4. Hold the broken piece in place until the glue dries completely. 5. Replace the keycap and test the key to ensure it is functioning correctly. Applying Glue or Resin: 1. Remove the keycap and examine the key to see where it is broken. 2. Apply a small amount of glue or resin to the broken area of the key. 3. Use a small brush to spread the glue or resin evenly over the broken area. 4. Hold the key in place until the glue or resin dries completely. 5. Replace the keycap and test the key to ensure it is functioning correctly. Sanding or Filing Down Rough Edges: 1. Remove the keycap and examine the key to see where it is broken. 2. Use sandpaper or a file to sand or file down the rough edges on the broken area of the key. 3. Be sure to sand or file the edges down evenly, so the key maintains its original shape. 4. Replace the keycap and test the key to ensure it is functioning correctly. In conclusion, Repairing the Broken Keys on your music keyboard can be done quickly and easily with the right tools and techniques. Whether it is reattaching broken pieces, applying glue or resin, or sanding or filing down rough edges, these methods can help you get back to playing your music in no time.

Preventing Future Damage

Imagine you have fixed your broken key on your keyboard, but it breaks again, and you have to go through the same process again. Sounds frustrating, right? That is why you need to take proper care of your keyboard to prevent future damage. In this section, we will discuss some preventive measures to ensure your keyboard stays in a good working condition for a long time.

Proper Handling And Care

Proper handling and care is crucial to extending the lifespan of your keyboard. Consider the following:

  • Always unplug your keyboard when it is not in use.
  • Handle your keyboard carefully. Avoid dropping it or putting heavy objects on top of it.
  • Avoid exposing your keyboard to dust, moisture, and direct sunlight.
  • Always use the correct power supply when using your keyboard. Using a different power supply can damage your keyboard.

Cleaning And Maintenance Tips

Regular cleaning and maintenance can help prevent damage to your keyboard, as well as prolong its lifespan. Here are some tips for keeping your keyboard clean:

  • Use a microfiber cloth to remove dust and debris from the keyboard surface.
  • Avoid using harsh chemicals to clean your keyboard. Instead, use a specialized cleaning solution designed for use on electronics.
  • A handheld vacuum can be used to remove debris from between the keys.
  • Consider using a keyboard cover to protect your keyboard from spills and debris.

By following these cleaning and maintenance tips, you can ensure that your music keyboard stays in good working condition for a long time, preventing any further damage to your keys.

Frequently Asked Questions On How To Fix Broken Keys On A Music Keyboard

Can Musical Keyboards Be Repaired?

Yes, musical keyboards can be repaired. Most common issues that occur in keyboards such as non-functioning keys, damaged cords, or software issues can easily be fixed with proper knowledge and tools. Seeking assistance from a professional repair service is also an option.

Can You Fix A Broken Key On A Keyboard?

Yes, a broken key on a keyboard can be fixed. Depending on the extent of the damage, the key may need to be replaced or reattached. It is best to contact a professional if you are not familiar with repairing keyboard keys yourself.

Can You Repair Broken Piano Keys?

Yes, broken piano keys can be repaired. A piano technician can repair or replace broken keys by assessing the damage and making necessary repairs or replacements. It is important to have a professional handle the repair to ensure the piano is not further damaged.

How Do You Fix A Dead Key On A Keyboard?

To fix a dead key on a keyboard, first try cleaning under the key with compressed air or popping the key off to clean the contacts. If that doesn’t work, replace the key or the entire keyboard.

Conclusion

Fixing broken keys on your music keyboard is a simple process that requires minimal technical knowledge. Whether it’s a faulty contact or a stuck key, there are easy DIY solutions that can help you get your keyboard back in optimal condition.

Remember to take the necessary safety measures when you’re opening up your keyboard, and follow the recommended steps to avoid causing further damage. With these tips, you can enjoy playing your music keyboard like new again, without having to break the bank for expensive repairs.

Categories
Archive

Understanding Audio Compressors Meters

Audio compressors meters provide a visual representation of an audio signal’s energy level and gain reduction. Understanding these meters is essential for proper compressor usage.

Compressors are one of the most important tools in audio engineering, used to control dynamics and level inconsistencies in recordings. Understanding how to read and use compressors is crucial for achieving a polished and professional sound in music production, podcasting, and other audio applications.

However, compressors can be a daunting topic for beginners, especially when it comes to reading and understanding compressor meters. This article will demystify compressor meters and help you confidently harness the power of compressors in your audio projects. We’ll cover the different types of compressor meters, what they measure, and how to use them effectively. Let’s dive in.

Understanding Audio Compressors Meters

Credit: www.don-audio.com

Types Of Compressor Meters

Compressors are essential tools in audio processing. They help control dynamic range and provide consistency to audio signals. There are different types of compressor meters that measure audio signals and provide feedback to the user. Each type has a specific purpose, and understanding them can help in better audio processing.

Vu Meter

The VU (Volume Unit) meter is one of the most commonly used types of compressor meters. It helps measure the average level of an audio signal in relation to a reference level. The VU meter is designed to respond slowly to the signal changes and is calibrated to 0dB VU at an RMS level of -20 dBFS. The meter readings are typically represented by a needle pointing to a scale, representing the loudness of the audio signal. A VU meter is handy when setting input levels and applying compression to achieve desired levels for broadcast or mastering.

Gain Reduction Meter

A Gain Reduction Meter helps measure the amount of gain reduction being applied by the compressor. The meter displays information on how much the compressor is attenuating the signal level based on the ratio setting. It is designed to provide an accurate visual representation of the compressor’s action, enabling users to make informed decisions regarding ratio and threshold settings. In some compressors, the Gain Reduction Meter is integrated into the VU meter, providing a more comprehensive view of the audio signal.

Multi-functional Meter

A multi-functional meter combines both VU and Gain Reduction meters, providing users with more detailed feedback on the audio signal. It enables users to monitor the signal level, gain reduction amount and ratio simultaneously and helps in setting the parameters correctly. A multi-functional meter is handy in complex projects and can help in achieving a more refined audio output.

Understanding The Vu Meter

Understanding the VU Meter is crucial in comprehending the dynamics of Audio Compressors Meters. The VU Meter tracks the average audio level, providing an accurate representation of the audio signal and allowing efficient compression of the audio.

Audio compression is vital in music production and engineering, and understanding the meters used to evaluate it is essential. One of the most commonly used meters is the VU meter, which stands for Volume Unit meter. The VU meter was introduced in the 1930s as part of the effort to standardize broadcast audio levels. Since then, it has become a staple tool for measuring and evaluating audio levels.

History Of The Vu Meter

The VU meter was first introduced in the 1930s by the company Western Electric as a way to standardize broadcast audio levels. It was created to help engineers and technicians monitor the average levels of audio signals. The original design included a needle that moved in response to the audio signal, displaying the average volume level in decibels.

Features Of The Vu Meter

The VU meter is a simple but effective tool that provides a visual representation of audio levels. It has a range of features that make it ideal for measuring and evaluating audio levels. The most notable feature of the VU meter is its ability to display an average volume level, rather than a peak volume level. This is important because it gives a more accurate representation of how loud a signal is over a longer period of time. Other important features of the VU meter include its ability to handle both AC and DC voltages, and its logarithmic scale. The logarithmic scale of the VU meter allows for more precise measurements of audio levels, as it takes into account the way our ears perceive sound.

Uses Of The Vu Meter

The VU meter has a wide range of uses in music production and engineering. It is used to set input levels during recording, monitor output levels during mixing, and control levels during mastering. The VU meter is also used to evaluate the dynamic range of a recording, and to monitor the level of compression being applied to a signal. In conclusion, the VU meter is an essential tool for anyone working with audio. Understanding its history, features and uses can help to improve the quality of any recording or production.

Understanding The Gain Reduction Meter

Audio compression is an important tool for enhancing the overall sound quality of a recording. One crucial aspect of audio compression is understanding the gain reduction meter, which displays the amount of signal reduction that occurs when the compressor is active. In this article, we will focus on understanding the gain reduction meter and its features.

How The Gain Reduction Meter Works

The gain reduction meter provides a visual representation of how the compressor is affecting the audio signal, measuring the amount of gain reduction applied to the incoming audio. When the compressor is active, the gain reduction meter will display the amount of reduction in decibels (dB). The meter typically ranges from 0dB to 20dB or more, depending on the compressor device.

In general, the greater the amount of gain reduction, the more compressed the audio signal will be. By monitoring the gain reduction meter, audio engineers can ensure that their signal stays within the desired range, avoiding clipping or distortion.

Features Of The Gain Reduction Meter

The gain reduction meter is a simple but essential tool for audio compression. Some of its features include:

  • Displays the amount of gain reduction in decibels
  • Helps maintain signal levels within the desired range
  • Prevents distortion or clipping
  • Offers a visual representation of the compressor’s impact on the audio signal

Uses Of The Gain Reduction Meter

The gain reduction meter is used in a variety of audio engineering contexts, including:

  • Music production and recording
  • Live sound engineering
  • Podcast or video production

By monitoring the gain reduction meter, audio engineers can ensure that their audio is compressed and adjusted to the desired level, resulting in a more polished and professional sound. When used in conjunction with other tools like limiters and equalizers, the gain reduction meter can help take audio quality to the next level.

Understanding The Multi-functional Meter

Audio compressors meters are vital tools in understanding the multi-functional meter. These meters enable sound engineers to monitor and control the levels of audio signals for better sound quality. Understanding their functions is essential in achieving the best audio output.

Understanding the Multi-Functional Meter: Audio compressors are fundamental tools used in music production, and they come with meters that allow you to monitor the audio signal being processed. One essential meter you’ll come across is the multi-functional meter. This meter provides various features that help you achieve the desired compression level. Understanding how to use this meter will make a massive difference in the quality of music production you’ll deliver. So let’s dive deeper into the features and uses of this meter. Features of the Multi-Functional Meter: The multi-functional meter has three features that are essential in controlling the compressor. These are: 1. Input Level Meter: The input level meter helps you monitor the incoming signal level in dB. This is crucial in setting the compressor’s threshold level. If the signal is too low, it won’t trigger the compressor, and if it’s too high, it might distort the sound. 2. Gain Reduction Meter: This meter measures the amount of gain reduction applied to the audio signal. It helps you know how much compression is occurring and if you’re achieving the desired level of dynamic control. 3. Output Level Meter: The output level meter displays the output signal level in dB. It is vital in level matching the pre and post-compression signals. Uses of the Multi-Functional Meter: The multi-functional meter has several uses in audio compression, and some of these are: 1. Setting the Threshold Level: The input level meter helps in setting the threshold level. The ideal threshold level is -20dB to -10dB, depending on the track’s dynamic range. 2. Controlling the Gain Reduction: The gain reduction meter helps in controlling the amount of compression applied to the audio signal. You should aim to have a gain reduction of 3dB to 6dB for vocals and 6dB to 10dB for instruments. 3. Adjusting the Output Level: The output level meter helps in matching the pre and post-compression levels. This ensures consistency in the overall audio level and ensures the final mix is a coherent and balanced piece of music. In conclusion, understanding the function of the multi-functional meter is essential in achieving the desired compression level. You need to take time and understand every feature and usage of this meter, as it contributes significantly to the overall audio quality. Take advantage of this tool, and you’ll be sure to deliver top-notch music productions.

Applications Of Audio Compressor Meters

Understanding audio compressor meters is essential for every sound engineer and music producer. It provides an insight into the sound level and dynamic range of the audio signal, ensuring that the audio output is of high quality. Different industries and applications rely on audio compressor meters for various purposes. Let’s explore some of these applications.

Professional Recording Studios

Recording studios are the primary users of audio compressor meters. These meters are used to maintain consistent audio levels and prevent clipping during recording sessions. A recording studio’s compressor meters have specific controls, such as threshold, attack, release, and ratio ratios. They help engineers manage the dynamic range of the audio signal, ensuring that each instrument sits perfectly in the mix.

Live Sound Reinforcement

Audio compressor meters are essential in live sound reinforcement too. It helps in controlling the dynamic range of the audio signal and ensures consistent sound levels during concerts, music festivals, and other live events. The audio compressor meters in live sound applications are calibrated to protect the audience from damaging sound levels. Moreover, it helps to maintain a balance between the low and high-frequency sounds, ensuring that every sound is heard crystal clear by the audience.

Broadcasting

Audio compressor meters are crucial in broadcasting, such as radio and television broadcasting. In broadcasting, audio signals pass through various devices before being transmitted. Audio compressor meters are used to ensure that the transmitted sound signal is of the highest quality. It helps to maintain a consistent level of volume and prevents sudden spikes and low or high-frequency sounds that could damage equipment and annoy listeners or viewers. Broadcasting audio compressor meters help in managing noise and reverberation and ensuring that every sound is well balanced.

Understanding Audio Compressors Meters

Credit: www.123rf.com

Tips For Properly Using Audio Compressor Meters

If you are familiar with audio production, then you know how important it is to use an audio compressor. An audio compressor is a device that helps to ensure that the loud and quiet parts of an audio recording are balanced for clarity and consistency. However, getting the best results from a compressor can be a bit of a challenge, particularly when it comes to using the compressor meter. In this section, we will explore some tips for using audio compressor meters to achieve the best results in your production.

Setting The Threshold

The threshold control sets the level at which the compressor starts to work. The level is measured in decibels (dB), and it is usually set by the user. The threshold level will vary depending on the dynamic range of the recording. To set the threshold, adjust the control until the compressor starts to work only on the loudest parts of the audio.

Setting The Ratio

Setting the ratio is crucial in determining how much sound will be compressed once it exceeds the threshold. The ratio is usually expressed as a ratio of the input signal level to the output signal level. For instance, a ratio of 2:1 means that for every two decibels over the threshold, the output is increased by one decibel. Determine the appropriate ratio for your recording by adjusting the control until the sound is even and smooth.

Adjusting Attack And Release Times

The attack and release times determine how quickly the compressor reacts to changes in audio dynamics. The attack time controls how quickly the compressor starts to work after a sound exceeds the threshold, while the release time regulates how quickly the compressor stops working once the audio falls below the threshold. The attack time should be slow for strong vocals, while faster attack times are suitable for percussion instruments. Adjust the release time until the audio sounds natural and balanced.

Understanding audio compressors is essential for audio production. By properly using compressor meters, you can achieve a balanced and polished audio recording. Setting the threshold, ratio, and adjusting attack and release times are the key tips for getting the best results from your compressor meter.

Frequently Asked Questions Of Understanding Audio Compressors Meters

What Is A Good Db For A Compressor?

A good dB level for a compressor depends on the audio source and the desired result. Typically, a range of 2-6 dB gain reduction is considered good for most audio signals. However, it ultimately depends on what sounds good to the individual user and the specific context in which the audio will be used.

What Is A Good Compressor Setting For Audio?

A good compressor setting for audio is subjective and can vary based on the specific needs of the project. Generally, a compressor ratio of 2:1 to 4:1, a threshold set to the average volume level, and a medium attack and release time can provide a good starting point.

However, it’s important to adjust the settings based on the type of audio and desired outcome.

How Do You Calculate Audio Compression?

To calculate audio compression, determine the difference between the loudest and quietest parts of a track. This is known as dynamic range. Compression reduces the dynamic range, making quieter sounds louder and louder sounds quieter. The amount of compression is typically measured with a ratio, such as 2:1 or 4:1.

What Threshold Should A Compressor Be At For Mastering?

The threshold level for a compressor during mastering varies depending on the track and the desired result. It’s important to consider the dynamic range, genre, and overall loudness. Aim for a threshold that achieves the desired amount of compression while preserving the integrity and character of the original track.

Experimentation and critical listening are crucial in finding the right threshold for each individual track.

Conclusion

Understanding audio compressor meters is crucial for achieving balanced and professional sound in your music productions. The Threshold, Ratio, Attack, and Release parameters come in handy when setting up your compressor for optimal results. Remember to use your ears, experiment, and trust your instincts when mastering audio compression.

With practice, you’ll become a skilled producer who knows how to use audio compressors to add dynamics and energy to your music. Happy producing!

Categories
Archive

How To Live Stream A Music Performance

To live stream a music performance, use a platform like Facebook Live, Instagram Live, or YouTube Live. These platforms allow you to connect with your audience in real-time and share your music with a wider audience.

As a musician, getting your music in front of an audience is essential for building a following and growing your career. One of the best ways to do this is by live streaming your performances. Live streaming allows people from all over the world to tune in and watch your music in real-time, no matter where they are.

The key to successful live streaming is choosing the right platform and having the right setup. We’ll walk you through the steps to live stream your music performance, so you can connect with your fans and grow your career.

Choose The Right Live Streaming Platform

To effectively live stream a music performance, it is crucial to choose the right live streaming platform. Consider factors such as the platform’s compatibility with your equipment, ease of setup, and audience engagement features. Selecting the optimal platform can significantly enhance your live streaming experience.

If you’re thinking about live streaming a music performance, one of the most important decisions you’ll need to make is choosing the right platform. There are a lot of options out there, each with its own set of features and benefits. Here’s what you need to keep in mind when evaluating different platforms.

Evaluate Different Platforms

The first step in choosing a live streaming platform is to evaluate your options. Some of the most popular platforms include Facebook Live, YouTube Live, Twitch, and Instagram Live. Each of these options has its own strengths and weaknesses, so it’s important to carefully consider what each platform has to offer. Here are some things to keep in mind as you evaluate different platforms:

  • The user base: Does the platform have a large and engaged user base that’s interested in music?
  • The ease of use: How easy is it to set up and start streaming on the platform?
  • The quality of the stream: What kind of video and audio quality can you expect from the platform?
  • The cost: Is the platform free, or does it require a subscription or other fees?

By considering these factors, you can narrow down your list of potential live streaming platforms and choose the one that’s right for your needs.

Consider Specific Features

Once you’ve narrowed down your list of potential platforms, it’s time to take a closer look at the specific features that each option offers. Here are some things to keep in mind as you compare different platforms:

  • Interactivity: Does the platform allow for real-time interaction with viewers, such as through chat features?
  • Monetization: Can you make money from your live stream through ads, donations, or other means?
  • Customization: How much control do you have over the look and feel of your live stream?
  • Integration with other platforms: Can you easily share your live stream on social media or other channels?

By considering these specific features, you can choose a live streaming platform that not only meets your basic needs but also offers the specific features you need to make your music performance a success. Ultimately, the key to live streaming a successful music performance is to choose the right platform. By evaluating different options and considering the specific features of each, you can make an informed decision and give your audience the best possible viewing experience.

Prepare Your Equipment

Prepare all the necessary equipment beforehand to ensure a smooth live stream of your music performance. Check your internet connection, sound system, camera angles, and lighting to deliver an enjoyable and captivating experience for your audience.

When it comes to live streaming a music performance, the success of your live stream depends on the quality of the equipment you use. Before you go live, it is crucial to make sure you have the right equipment and that everything is working correctly. In this article, we will discuss how to prepare your equipment for live streaming your music performance.

Select Proper Audio And Visual Equipment

The first step in preparing your equipment is to select the proper audio and visual equipment. Your sound and video quality are the most important aspects of your live stream. You need to ensure that your audience can hear and see you clearly. For audio, consider investing in a good quality microphone and an audio interface to capture and transmit clear sound. For video, use a high-resolution camera that’s capable of capturing your performance in high definition.

Test All Equipment And Connections

Before going live, testing your equipment is essential. You must test all equipment and connections thoroughly to ensure that everything is working correctly. Check the quality of the sound and video by running a few test streams to various channels. It is important to note that you should check each piece of equipment individually and test all connections to detect any technical issues that might impact your final stream.

Use Stable Internet Connection

Finally, a stable internet connection is crucial for a successful live stream. Your internet connection should be fast and reliable to ensure that the stream is smooth for your audience. A wired connection is preferred over Wi-Fi because it is more stable and less prone to signal distortion. We recommend that you run a speed test to make sure that your upload speed is sufficient for a seamless live stream experience. In conclusion, preparing your equipment is the first and most crucial step in live streaming your music performance. Selecting proper audio and visual equipment, testing all equipment and connections, and using stable internet are key elements to ensure that your live stream is successful. With these tips, you can be sure that your live stream will be of high quality and enjoyable to your audience.

Choose An Engaging Location

Select a captivating location for your music live stream to engage your audience. Ensure it is visually appealing, has good acoustics and suitable lighting to enhance the performance. A unique location can contribute to a memorable and enjoyable experience for your viewers.

When it comes to live streaming a music performance, the location you choose plays a significant role in the overall experience for the viewers. Choosing an engaging location can make a big difference in attracting and retaining your audience. In this post, we’ll cover some key factors to keep in mind when selecting an ideal location and explore how you can optimize your live stream setup to create an immersive virtual experience.

Consider Acoustics And Lighting

Acoustics and lighting are two vital elements that can make or break a live streaming experience. As you plan your location, pay close attention to how sound resonates and how lighting affects the visuals. Here are some tips:

  • Choose a room that has good acoustics. Look for a space with high ceilings, carpeted floors, and sound-absorbing materials like curtains.
  • Assess your lighting requirements. You need enough light for your viewers to see you and your performance, but not so much that it causes harsh shadows or glare.
  • Experiment with different lighting setups and camera angles to find the optimal balance. Consider using a combination of natural and artificial light if possible.

Maximize Visual Appeal

Since your live stream audience only sees what’s on camera, it’s essential to maximize your visual appeal. It means curating your background, sets, clothing, and overall presentation to create a cohesive and engaging visual experience. Here are some tips:

  • Design a backdrop that enhances the mood and tone of your music performances. It should reflect your personality, style, and genre.
  • Recruit a stylist or collaborate with a friend to select suitable clothing and styling that supports your brand image.
  • Keep your camera setup in mind and ensure that you’re visible throughout your entire performance.

To sum up, selecting an engaging location that appeals to your audience requires a lot of thought and planning. Keep in mind the acoustics, lighting, and visual appeal when choosing a location, and remember to experiment with different setups to find the optimal balance. By paying attention to these critical factors, you’ll create an immersive, entertaining, and successful live streaming experience for your audience.

Promote Your Live Stream

Learn how to promote your live stream and reach a larger audience for your music performance with these effective tips. Utilize social media, collaborate with other musicians, and engage with your viewers to create a successful live streaming experience.

Create Promotional Content

Creating a buzz around your upcoming live stream is crucial. To ensure maximum participation, you need to create effective promotional content. This includes posters, flyers, and emails. Create eye-catching graphics and make sure to highlight the date and time of the event. Use bright colors and bold fonts to grab people’s attention. Ensure that your content is informative and provides essential details, such as where to watch the stream, links to your website and social media handles, and contact information.

Use Social Media Effectively

Social media platforms are an excellent way to reach a broad audience. Promote your live music performance by using social media effectively. Create events on Facebook, and share updates regularly on all your social media handles such as Twitter, Instagram, and YouTube. Use catchy captions and hashtags to attract more people to your event. Don’t just update your followers about the performance; give them a behind-the-scenes look at your preparation process. Live stream any practice sessions or warm-up shows to keep your audience engaged. While you promote your live stream, make sure you give enough importance to your audience. Engage with them regularly and answer any queries they have in the comments section of your social media posts. During your live stream, respond to any questions or comments you receive from viewers. Make your audience feel like they are a part of the performance by mentioning them or their messages during the stream. Ask for their requests, and try to fulfill them during the session. For instance, you can invite viewers to pick a song for you to perform or add their name to your shoutout list. In conclusion, promoting your live stream is essential to make it a success. Creating effective promotional content, utilizing social media, and engaging with your audience are significant aspects to make it happen. Follow these tips, and you will see an increase in views/subscriptions, bookings, and revenue.

Engage With Your Audience

When it comes to live streaming music performances, engaging with your audience is a crucial element to make your stream successful. It is the best way to build a strong community and gain new followers and fans. By interacting with your audience, you can establish a personal connection with them and make them feel more invested in your music.

Interact With Comments And Questions

During your live stream, keep an eye out for any comments or questions your viewers may have. Responding to your audience’s comments and questions is a great way to involve them in the performance and make them feel heard. You can address these comments between songs or during breaks in your set. This way, your audience can feel like they’re a part of the show and not just passive viewers.

To make sure you don’t miss any comments or questions, consider appointing someone from your team to monitor the chats. They can either alert you to any important questions or comments, or they could respond to some of them themselves.

Encourage Sharing And Tagging

Another essential way to engage your audience during a live stream is to encourage them to share your stream on social media platforms like Twitter, Instagram, or Facebook. Give them a good reason to share, such as a shout-out during your live stream or a chance to win a prize.

You can also encourage your viewers to tag you in their posts by creating a unique hashtag for your live stream or for your band. This way, your audience can spread the word about your show and help you reach a wider audience.

Remember, the more engagement your live stream generates, the more likely it is that you will gain more followers and fans. So, make sure to interact with your audience whenever possible and encourage them to share your live stream with their friends and followers.

How To Live Stream A Music Performance

Credit: www.youtube.com

Ensure Copyright Compliance

If you’re planning to live-stream a music performance, it’s important to ensure copyright compliance by obtaining the necessary licenses for any copyrighted songs you plan to play. Failure to do so could result in legal issues and damage to your reputation as a performer.

Do your research and obtain the proper permissions before going live.

As you prepare to live stream your music performance, it’s essential to ensure you’re adhering to all copyright laws and regulations. Failure to do so can result in severe consequences, including legal action. Therefore, to protect yourself and your musical content, you need to understand copyright law, secure necessary permissions, and take other precautions to prevent infringement issues.

Understand Copyright Law

Copyright law serves the purpose of protecting intellectual property owners from unauthorized use of their work. Whether it’s a song, music video, or any other creative content, it’s essential to educate yourself on how copyright law works. You must understand the nature of your work’s copyright and the type of permissions needed to live stream your music performance.

Secure Necessary Permissions

To live stream your music performance, you’ll need to secure the necessary permissions from the copyright owner or licensing agency. You must determine the copyright owner of your music, which can be done by contacting your music distributor or digital streaming platform. You can also use copyright clearances, which enable you to use copyrighted material legally by obtaining permission from the respective copyright holders.

Take Other Precautions

Apart from understanding copyright law and securing necessary permissions, there are other precautions you can take to ensure you’re compliant with copyright laws. For instance, you should avoid using any copyrighted material without the owner’s permission, such as background music, visual content, or other audio effects. You can also consider using royalty-free music or creative commons licensed music. These types of music aren’t subject to copyright restrictions, and you can use them freely without any legal hassle. In conclusion, ensuring copyright compliance when live streaming your music performance is essential to avoid unnecessary legal troubles. By understanding copyrights, securing permissions and taking other necessary precautions, you can protect yourself and your content while still entertaining your audience.

Test And Troubleshoot

If you’re planning to live stream your music performance, it’s essential to conduct practice runs and troubleshoot any technical issues you may encounter. This way, you can ensure that everything runs smoothly and your audience has a great viewing experience.

Conduct Practice Runs

Before the actual live stream, it’s crucial to conduct several practice runs to ensure that everything is working correctly. During the practice runs, you can check the connection, lighting, sound quality, and camera angles. This gives you a chance to make any necessary adjustments to enhance the viewing experience.

  • Check the internet connection speed
  • Test the lighting quality
  • Check the sound quality
  • Test the camera angles

Address Technical Issues In Real-time

Despite conducting practice runs, you may still encounter technical issues during your live stream. In such cases, it’s crucial to address the issues in real-time to avoid frustrating your viewers. Here’s what you can do:

  1. Have a backup internet connection in case of an outage
  2. Mute your microphone when you’re not speaking to avoid feedback and background noise
  3. Have another device ready to troubleshoot any technical issues that may arise
  4. Have someone stationed in the comments section to respond to viewers’ questions and concerns

By following these steps, you can ensure that you provide your viewers with a seamless viewing experience. Remember to have fun and enjoy your performance while taking the necessary steps to ensure your live stream is a success!

How To Live Stream A Music Performance

Credit: www.masteringthemix.com

Follow Up And Analyze

To ensure success when live streaming a musical performance, it is important to follow up and analyze the results. This can be done by reviewing viewer comments, engagement metrics, and overall feedback. By taking this approach, you can refine your strategy and improve future performances for your audience.

After live streaming your music performance, don’t forget to follow up and analyze the results to improve future streams. Engaging with feedback and comments and analyzing metrics are two crucial steps to take.

Engage With Feedback And Comments

Your audience’s feedback and comments can help you gain insight into what they liked or didn’t like about your performance. Responding to comments and actively engaging with your audience can also help to build a loyal following. Consider thanking your viewers, answering questions, and acknowledging feedback in real-time during your next stream.

Analyze Metrics And Improve For Next Time

Analyzing metrics such as viewership, engagement, and watch time can give you valuable information about the success of your stream and what areas need improvement. Use this data to evaluate what worked well and what didn’t and make changes for your next stream. For example, if you notice a drop in viewership at a certain point of the stream, consider changing the setlist or performance style to keep your audience engaged. Overall, following up and analyzing metrics after your live stream can help you to fine-tune your performance and create a better streaming experience for your audience. Don’t underestimate the importance of engaging with feedback and comments and analyzing metrics in improving your future streams.

How To Live Stream A Music Performance

Credit: www.bu.edu

Frequently Asked Questions On How To Live Stream A Music Performance

How Do I Stream Music Performance?

To stream a music performance, you need a reliable internet connection, a device to stream on such as a computer or phone, and a streaming platform such as YouTube or Twitch. You can then set up the stream, invite your audience, and hit play to start the performance.

Don’t forget to promote your stream beforehand to attract viewers!

Is It Legal To Live Stream A Concert?

Yes, it is legal to live stream a concert only if the artist/label has given their permission and you have obtained the necessary licenses and permissions for the music and performance. Without these, live streaming a concert can result in copyright infringement and legal repercussions.

How Can I Stream A Concert Live?

To stream a concert live, you can go to the official website of the artist or check streaming platforms such as YouTube Live, Facebook Live, and Twitch. You may need to purchase a ticket or pay a fee for access to the stream.

Ensure that you have a stable internet connection and the necessary devices to stream the concert.

How To Do Live Streaming Of An Event?

To live stream an event, you need a video camera, a stable internet connection, and a streaming platform or service like Facebook Live or YouTube Live. Set up your camera and internet connection, choose your streaming platform, and start your stream.

Make sure to promote your stream in advance and engage with your audience during the event.

Conclusion

To conclude, live streaming a music performance can seem daunting at first, but with the right tools and preparation, it can be a great way to connect with fans and reach a wider audience. Remember to choose a good streaming platform, ensure a stable internet connection, and use quality equipment for both audio and video.

Engage with your viewers and create a unique experience that showcases your talent and personality. By following these tips, you can successfully live stream your music performances and take your career to the next level.

Categories
Archive

Reasons You Should Hire A Mixing Engineer

A mixing engineer can help enhance the sound quality and balance of your music, making it more polished and professional. Hiring a mixing engineer can take your music to the next level.


With their expertise, they can help you achieve a sound that is balanced, polished, and professional. Mixing can be a complicated and time-consuming process, especially for those without experience or knowledge in the field. By hiring a mixing engineer, you can save a significant amount of time and energy while ensuring that your music is of the highest quality possible.


Mixing engineers use specialized software and technical equipment to make adjustments to the levels, frequencies, and effects of your music, resulting in a powerful and cohesive final product. We’ll explore some of the key benefits of hiring a mixing engineer for your music production needs.


Save Time And Money


Hiring a mixing engineer for your music production can save you both time and money. They have the expertise and equipment needed to produce high-quality music, allowing you to focus on other aspects of your project while they handle the technicalities.

Save Time and Money As a music artist or producer, your main focus is on creating good music. However, mixing is an essential aspect of the music production process that requires a lot of time, attention, and technical skills. Hiring a mixing engineer can save you time and money in the long run. Efficient Workflow Mixing engineers have developed workflows and processes that allow them to work efficiently and effectively. They are equipped with the necessary tools and equipment that help them achieve the desired sound quality. They can help you accomplish the mixing process in a shorter period of time, allowing you to concentrate on other important areas of your music production. Prevent Costly Mistakes Mixing engineers have the technical skills and experience to identify and correct any potential mistakes that could cost you time and money. They have an excellent ear for music and can pick up on problems that you may not be able to hear. By hiring a mixing engineer, you can prevent costly mistakes that could potentially set back the entire production process. In conclusion, hiring a mixing engineer can save you time, money, and prevent costly mistakes. Their efficient workflow and ability to identify potential issues can help you achieve the best sound quality possible, allowing you to focus on creating excellent music.

Experience And Expertise

When it comes to recording music, mixing is one of the most crucial processes. It involves blending individual sounds and instrument tracks to produce a final mix that gives the song a polished sound. To get the perfect mix, you need to hire a mixing engineer who has the experience and expertise in this field.

Trained Ears

A mixing engineer’s job is to ensure that every element of a song sounds good together by using a critical ear. They can distinguish the frequency range of different instruments and know how to make each instrument sound good in the final mix. Mixing engineers have been trained to differentiate between good and bad sounds and can EQ accordingly.

Technical Knowledge

Mixing engineers are equipped with the technical knowledge to use the right tools and software to achieve the desired sound. They know how to use compressors, limiters, EQs, and other effects to make the song sound polished and professional. With their technical know-how, you can trust a mixing engineer to produce a mix that sounds good in any environment, be it radio, TV or streaming platforms.

If you’re looking to produce high-quality music and want it to stand out from the crowd, then hiring a mixing engineer is a must. They have the experience and expertise in mixing music that will take your music to another level.

Professional Sound Quality


Hiring a mixing engineer guarantees professional sound quality in your music production. With their expertise and advanced tools, they can enhance the audio and make it sound polished and studio-worthy. Trusting an expert to handle the mixing process is essential for any serious musician.

As a musician or producer, you know how important it is to have a high-quality sound recording. It’s the foundation of your music and can make or break the success of a song. However, achieving that professional sound quality can be challenging, especially if you’re working with a limited budget or don’t have the technical skills required. This is why hiring a professional mixing engineer should be the first step you take.

Balanced Mixes

One of the most significant benefits of hiring a mixing engineer is that they have the expertise and equipment to create a balanced mix. This means that all the elements of a song, such as drums, bass, guitars, vocals, and synths, are correctly leveled and panned to create a cohesive and dynamic sound structure. A balanced mix ensures that each instrument is audible and working together to create a cohesive sound. An experienced mixing engineer can accomplish this with ease, giving your music a professional edge.

Polished End Product

A mixing engineer can make all the difference when it comes to the overall sound of a song. Not only can they create a balanced mix, but they can also add the finishing touches to make sure that every aspect of your music sounds polished. This includes making sure that all the frequencies are equalized and compressed, removing any unwanted noise or pops, and enhancing the overall tone to match the genre of your music. A polished end product can help your music stand out from the crowd and catch the attention of listeners and potential clients.

Conclusion

Hiring a mixing engineer can make a significant difference in the quality and success of your music. With their technical skills and expertise, they can create balanced mixes and polish your music to a professional standard. Consider hiring a mixing engineer for your next project and take your music to the next level!

Creative Input

If you’re someone who loves music, then you must know how important it is to have a good sound quality. It doesn’t matter whether you are a professional musician, or just someone who likes to create music in their free time, getting the perfect sound is key to expressing your creativity.

Fresh Perspectives

One of the most significant reasons why you should hire a mixing engineer is because of the fresh perspective they bring to your music. As a songwriter or musician, it’s easy to get caught up in the creation process, and sometimes you could miss out on some vital aspects. However, when you bring a mixing engineer on board, they can listen to your music with a fresh ear, identify areas that can be improved, and bring a new perspective to your work.

Innovative Techniques

Another reason why you should hire a mixing engineer is that they bring innovative techniques to the studio. Over time, mixing engineers have learned lots of tricks and techniques that can significantly transform your music. Hiring a mixing engineer means you’re getting someone with specific skills and expertise that can enhance the quality of your music and make it sound more professional.

Overall, hiring a mixing engineer is an investment that can significantly change the quality of your music. With fresh perspectives and innovative techniques, these professionals can transform your work, giving it the sound that it deserves.

Frees Up Your Time


Hiring a mixing engineer can save you a lot of time on the technical aspects of music production. This allows you to focus on your creative process and make the most out of your music.

Focus On Other Areas

Hiring a mixing engineer not only frees up your time but also gives you an opportunity to focus on other aspects of your music career. It allows you to concentrate on songwriting, production, and marketing while leaving the technical work to the experts. You can trust the mixing engineer to take care of the mixing and mastering process and provide you with high-quality tracks that will impress your audience.

Peace Of Mind

Knowing that your music is in the hands of a professional mixing engineer gives you peace of mind. You don’t have to worry about the technical aspects of mixing and mastering, which can be time-consuming and stressful. By outsourcing this task to an expert, you can be confident that your music will sound the best it possibly can, and you can focus on creating more music. Hiring a mixing engineer saves time, allowing you to focus on other areas of your music. You can also have peace of mind knowing that your music is in the hands of an expert. So, don’t hesitate to hire a mixing engineer if you want your music to stand out from the rest.

Reasons You Should Hire A Mixing Engineer


Credit: davidmohacsi.com


Collaboration And Communication


Collaboration and communication between a musician and mixing engineer are crucial for a high-quality music production. Hiring a mixing engineer can provide professional sound, save time and reduce frustration for the artist, and ensure a cohesive final product.

Hiring a mixing engineer for your music project can be one of the best decisions you make- especially if you’re looking to take your project to the next level. One of the primary benefits of hiring a mixing engineer is the collaboration and communication they bring to the project. Mixing engineers specialize in ensuring all the sounds in a track fit together like a puzzle, and they do so by working closely with the artist or producers. This collaboration process nurtures and optimizes the creative process, resulting in a better final product.

Feedback And Adjustments

Working with a mixing engineer also provides you with the opportunity to receive feedback on your project and make necessary adjustments. Mixing engineers are experienced professionals, and they can identify areas in the mix that need improvement. This feedback enables you to refine your music, make it more appealing to your target audience, and make the necessary changes to achieve the sound you desire.

Clear Goals And Expectations

Communication is key in any collaboration, and working with a mixing engineer will help you achieve the clearest understanding possible regarding your goals and expectations for the project. A skilled mixing engineer will listen to your input and ideas and work with you to create the exact sound you’re aiming for. In addition to this, they will constantly update you on the progress of the project and ensure that you’re pleased with the final product. To sum up, collaboration and communication are essential components of working with a mixing engineer, as they are committed to achieving the sound you desire. Their feedback and adjustments and emphasis on clear goals and expectations help maximize the quality of the final product, making the investment of hiring them worthwhile.

Industry Standard Equipment

If you’re a recording artist or producer, you know how important it is to have industry-standard equipment. Having the best gear not only ensures that your music sounds professional but also sets the stage for success. One of the most important pieces of equipment for a recording session is a mixing engineer. In this post, we will discuss why hiring a professional mixing engineer with specialized tools and top-of-the-line gear is crucial for your musical career.

Specialized Tools

A mixing engineer has access to a range of specialized tools that can help polish and refine your music. From top-quality plug-ins to advanced software, they can take your sound to the next level. Some of their specialized tools you can benefit from include:

  • Creative EQ and compression
  • Reverbs and delays
  • De-essers and noise reduction
  • Mastering tools

Their mastery of these tools can give tracks an added level of clarity, depth, and fullness that may not have been otherwise achieved.

Top-of-the-line Gear

Mixing engineers invest in top-of-the-line gear to deliver the best results possible. This gear includes high-end studio monitors, headphones, and analog gear like mixers and preamps. With the right gear, they can pick up subtle nuances in your music and make well-informed decisions when mixing.

Moreover, they have large-format consoles, which can make the mixing process easier and give you more control than computerized mixing. With the engineer’s skill and specialized equipment, your music can shine and be ready to hit the airwaves.

In Conclusion

It’s easy to think that you can do it all, especially with modern technology, but nothing beats a mixing engineer’s expertise with specialized tools and advanced gear. A professional mixing engineer will not only enhance your recording quality but help you unleash the full potential of your music.

Build Relationships And Network

If you are a music producer or artist, you know how essential quality mixing and mastering can be for the success of your music. Hiring a professional mixing engineer can take your music to the next level and ensure that your music reaches its full potential. In this blog, we will discuss the benefits of hiring a mixing engineer, focusing on the subheading “Build Relationships and Network.”

Long-term Partnerships

When you hire a mixing engineer, you are not just paying for a one-time service, but building a long-term relationship with a professional who can help you achieve your musical goals. A mixing engineer who understands your music style and preferences can provide consistency in the quality of your music. Also, a long-term partnership with a mixing engineer can help to streamline the mixing process, avoid miscommunication, and save money over time.

Connections In The Industry

Working with a professional mixing engineer gives you access to their network and connections in the music industry. They have worked with other artists, producers, and record labels, and they can recommend you or even introduce you to potential collaborators or clients. Networking is essential in the music industry, and a mixing engineer can help expand your network and open doors to opportunities that might not have been possible otherwise.

Overall, hiring a mixing engineer not only improves the quality of your music but also provides many other benefits, “Build Relationships and Network” being one of them. Don’t hesitate to contact a mixing engineer and explore how they can help you grow your music career.

Reasons You Should Hire A Mixing Engineer


Credit: tommydecibel.com


Frequently Asked Questions For Reasons You Should Hire A Mixing Engineer


Should I Hire A Mixing Engineer?


Yes, if you want your music to sound professional and polished, you should consider hiring a mixing engineer. A mixing engineer can help blend all the elements of your music together, improve the overall quality of the sound, and make sure it translates well on different devices and platforms.


A professional mixing engineer will save you time, hassle, and potentially help you get discovered by more listeners.


Why Are Mixing Engineers Important?


Mixing engineers are important because they are responsible for balancing and adjusting the levels, tone, and effects of audio recordings for an optimal listening experience. They ensure that every instrument and element of a track is heard clearly and that the final product sounds polished and cohesive.


What Should I Look For In A Mixing Engineer?


When choosing a mixing engineer, it’s important to consider their experience, portfolio, communication skills, work process, and rates. Look for someone who has worked on similar projects and has a proven track record of delivering high-quality mixes. Communication is key, so find someone who is easy to work with and listens to your needs.


Make sure you understand their process and rates upfront to avoid any surprises.


How Much Does A Good Mixing Engineer Cost?


The cost of a good mixing engineer varies depending on their experience and reputation. Generally, you can expect to pay between $100 to $300 per hour for a top-tier mixing engineer. Keep in mind that prices may differ based on factors such as studio location and the type of music you are working on.


Conclusion


Hiring a mixing engineer ensures that your music sounds amazing. They can offer a fresh perspective and bring out the best in your tracks, making them stand out from the crowd. Trusting a professional to handle the technical aspects of your music allows you to focus on the creative side.


In today’s competitive music industry, investing in a mixing engineer can make all the difference. Don’t hesitate to take your music to the next level by hiring a mixing engineer now!