Categories
Archive

Optimize Computer For Recoding Mixing Mastering

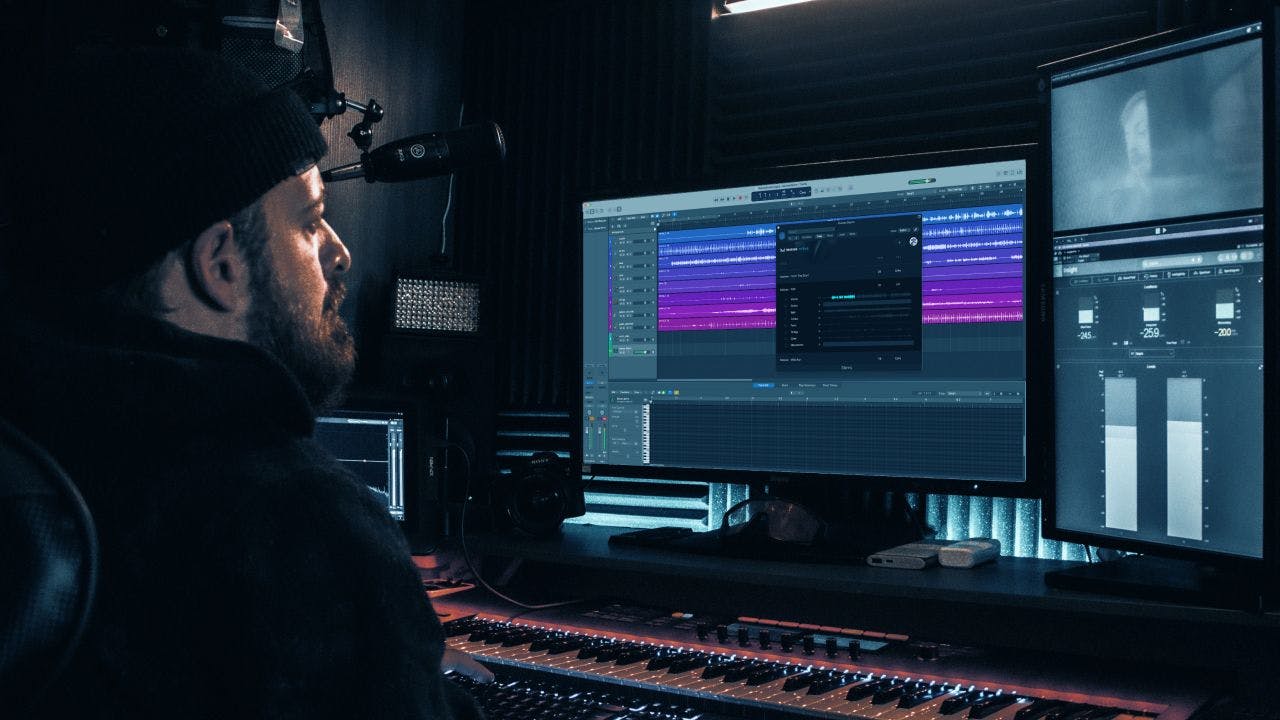
To optimize a computer for recording, mixing, and mastering, prioritize RAM, CPU, and storage upgrades. Upgrading your computer’s hardware is integral to getting the most out of your recording and production process.

RAM and CPU upgrades will help your computer handle large sessions, while storage upgrades ensure you have plenty of space for new files. Optimizing your computer is necessary for efficient recording sessions and smooth mixing/mastering processes. When it comes to upgrading RAM and CPU, prioritize faster and higher-capacity options.

For storage, invest in SSDs or hard drives that are fast, reliable, and have ample storage space. Additionally, ensure that your computer is free of software bloat and unnecessary background processes to remove any hindrances and optimize your system’s performance. With an optimized computer, you can focus on creating high-quality music without hardware-related setbacks.

Why Optimization Is Necessary

Optimizing your computer for recording, mixing, and mastering is essential for achieving optimal performance, minimizing latency, and ensuring a stable system. Whether you’re a professional audio engineer or a hobbyist, optimization can help you achieve outstanding results. Let’s dive into why optimization is necessary for recording, mixing, and mastering audio.

Maximizing Performance

When recording, mixing, and mastering, a computer’s performance plays a crucial role in achieving excellent results. If your system isn’t optimized, it may struggle with the heavy processing demands of audio production, leading to frustrating glitches, lagging, and lost work. Optimizing your system for audio production can help you maximize your computer’s performance while reducing the risk of crashes and other issues.

Minimizing Latency

Latency is the delay between recording or playing back an audio file and hearing it in real-time. Optimizing your computer for recording, mixing, and mastering can help you reduce latency, resulting in a tighter performance and better overall sound. Lower latency means that you won’t hear a delay when monitoring your input, making it easier to get the timing and placement of your recordings just right.

Ensuring A Stable System

Stability is vital when working with audio, as a crash or system failure can ruin hours of work. Even with regular backups, lost time can be challenging to recover. Optimizing your system can help ensure that your computer is stable, reducing the risk of crashes and other issues that could jeopardize your work. Additionally, a stable system will give you the confidence to push your computer to its limits without worrying about losing progress.

Optimizing your computer for recording, mixing, and mastering is critical for achieving the best possible results. By maximizing performance, minimizing latency, and ensuring a stable system, you’ll be able to create professional-quality audio without worrying about system issues getting in the way. Next time, we’ll take a closer look at how to optimize your computer for audio production.
Optimize Computer For Recoding Mixing Mastering

Credit: moises.ai

Hardware Upgrades

HTML:

When it comes to optimizing your computer for recording, mixing, and mastering, one of the most crucial aspects is hardware upgrades. Without the right hardware, your computer might struggle to keep up with the demands of music production software and plugins.

Upgrading Ram

RAM is one of the most crucial components when it comes to recording, mixing, and mastering. The more RAM you have installed in your computer, the more fluidly it can handle large audio files and music software. Consider upgrading your computer’s RAM from 8 GB to 16 GB or even 32 GB.

Upgrading Processor

The processor is the brain of your computer, and it’s responsible for processing all the data necessary for music production. The more powerful your processor, the faster and more efficiently your computer can handle recording and production tasks. Consider upgrading your processor to an Intel Core i7 or i9 to keep up with the demands of music production.

Upgrading Hard Drive

Upgrading your hard drive can make a significant difference in the speed and efficiency of your computer. Consider swapping out your traditional hard drive for a solid-state drive (SSD) or a hybrid drive. SSDs are faster and more reliable than traditional hard drives, which can help your music production software run smoothly. A hybrid drive combines the speed of an SSD with the larger storage capacity of a traditional hard drive.

By upgrading RAM, processor, and hard drive, you can significantly enhance your computer’s performance, making it easier to produce and mix high-quality music.

Software Tweaks

When it comes to optimizing your computer for recording, mixing, and mastering music, there are several software tweaks you can make to ensure you get the best performance possible. In this section, we’ll take a look at three key tweaks:

  • Optimizing Buffer Size
  • Disabling Unnecessary Programs
  • Updating Software And Drivers

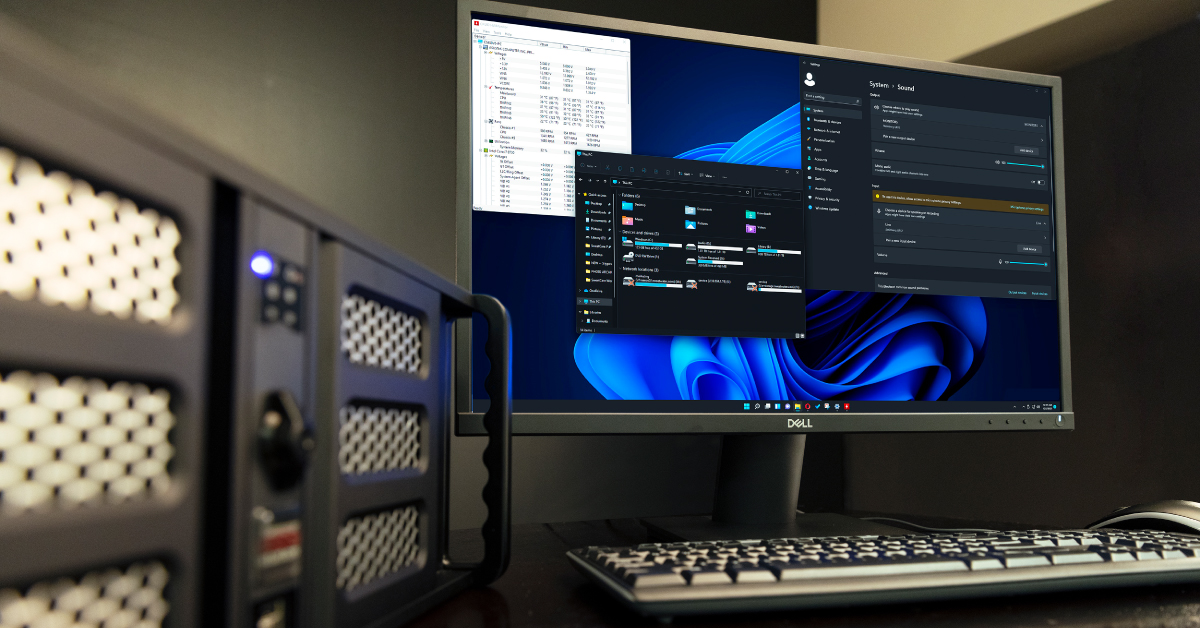
One important tweak you can make to ensure optimal performance is by adjusting the buffer size of your audio interface. The buffer size determines the amount of time your computer takes to process audio data, so it’s important to find the right balance for your specific setup.

Buffer SizeOptimal Use Case
64 SamplesLow Latency Monitoring
256 SamplesMixing and Recording
512 SamplesMastering and Playback

Keep in mind that the optimal buffer size may vary depending on your computer’s hardware and the specific software you’re using.

Another important tweak is to disable any unnecessary programs and processes running on your computer while recording, mixing, or mastering. This can help free up valuable system resources and reduce the risk of audio dropouts or other performance issues.

  • Close any open programs that are not needed for the recording, mixing, or mastering process.
  • Disable any background applications or system processes that may interfere with audio performance.

Finally, it’s important to keep your software and drivers up to date. Updates may include bug fixes, performance improvements, and new features, so it’s a good idea to always have the latest version installed.

  • Update your operating system regularly.
  • Update your digital audio workstation (DAW) software to the latest version.
  • Update your audio interface drivers to the latest version.
Optimize Computer For Recoding Mixing Mastering

Credit: www.sweetwater.com

Audio Hardware Setup

To optimize your computer for recording, mixing, and mastering, it’s crucial to have a high-quality audio hardware setup. Invest in a proper audio interface, studio monitors, and headphones to ensure accurate sound reproduction and efficient workflow. Make sure to also adjust your audio settings and update your drivers for optimal performance.

Optimizing your computer for recording, mixing, and mastering requires a properly configured audio hardware setup. This includes audio interfaces, monitors, interconnects, and cables. Here are some tips to ensure you have the best audio hardware setup that will maximize your computer’s capabilities for audio production.

Optimizing Sample Rates And Bit Depth

When recording or working with digital audio, sample rates and bit depth are key components that affect the quality of your audio output. Higher bit depths and sample rates allow for more detail and accuracy in your recordings. It is important to ensure that your audio interface and software are set to match your desired sample rate and bit depth settings. In general, higher sample rates and bit depths will result in better-sounding recordings, but will also require more computer resources.

Calibrating Monitors

Calibrating your monitors is crucial to ensure that the audio you are producing sounds accurate and consistent. This involves setting up a flat frequency response curve and adjusting the different settings on both the speakers and your audio interface. It’s also important to test your monitors in different room conditions to ensure that they sound consistent and accurate under different listening environments.

Quality Cables And Interconnects

Using high-quality cables and interconnects is crucial to ensure that your audio signal is not degraded or lost during the recording, mixing, and mastering process. This includes speaker cables, audio cables, and interconnects between your audio interface and computer. Using poorly made cables can lead to signal loss, noise, and interference. It’s worth investing in high-quality cables to ensure that your audio remains clear and clean throughout the production process. In conclusion, optimizing your computer for recording, mixing, and mastering requires a proper audio hardware setup that includes optimizing sample rates and bit depth, calibrating your monitors, and using high-quality cables and interconnects. By following these tips, you can ensure that your audio output remains accurate and consistent throughout the production process.

Workflow Optimization

To optimize your computer for recording, mixing and mastering, you need to ensure your hardware meets the software specifications, close unnecessary programs and processes, and organize your workflow for efficiency. By optimizing your computer, you can enhance your music production process and achieve better results.

Organizing Files And Folders

One of the essential steps to optimizing your workflow is to organize your files and folders. Keeping a well-organized folder system is crucial for multiple reasons. First, it saves you time, as you won’t spend precious minutes searching for files. It also helps you keep track of the various versions of your work, making it easier to revise and apply any necessary changes. Creating a folder structure that works for you is crucial. A common way to structure folders is to have each song you’re working on in a specific folder. Inside that folder, you can create subfolders for each element of the song, such as audio files, sample libraries, and presets. Additionally, you can create another folder that has all the files related to the session, like session notes and bounced versions.

Customizing Keyboard Shortcuts

Customizing keyboard shortcuts is a great way to speed up your workflow. DAWs often have hundreds of commands and shortcuts that can be difficult to remember. By taking the time to customize your shortcuts and creating a cheat sheet, you can speed up your editing and mixing processes just by pressing a few keys. Take inventory of the commands you use most often and assign them a keyboard shortcut. Try to group similar commands together, like all of the zooming functions, or all of the editing functions. This way, your muscle memory will begin to associate a particular keyboard shortcut with a particular function, making it easier to speed up your workflow.

Using Templates

Using templates is a great way to save time, as you won’t have to recreate the same settings each time you start a new project. For example, you could use a template for drums that already has EQ, compression, and reverb settings that are set up in a way that works for you. You can create templates for each stage of your workflow, whether you’re recording, mixing, or mastering. Creating templates is easy. Simply start with a project that has the settings that you want to use, remove any tracks independent to each project, save as a template, and name it.

Conclusion

Workflow optimization is an essential part of creating a productive environment for recording, mixing, and mastering. By organizing files and folders, customizing keyboard shortcuts, and using templates, you’ll be able to save hours of your time. These three optimization techniques will improve your workflow and let you spend your time focusing on the many creative aspects of music production.

Mixing And Mastering Techniques

Optimizing your computer is essential for recording, mixing, and mastering tracks. This includes ensuring you have enough RAM, using an external hard drive, updating your software, and closing unnecessary programs to prevent lag and optimize your system’s performance.

Mixing and mastering are two very important stages in the production process of music. While recording is crucial, the final output of the music is dependent on how well the mixing and mastering is done. In this blog post, we will explore some tips and tricks to help optimize your computer for recording, mixing, and mastering music. In particular, we will look at using EQ and compression effectively, creating a dynamic mix, and some mastering tips and tricks to take your music to the next level.

Using Eq And Compression Effectively

EQ and compression are two of the primary tools used to shape the sound of a mix. EQ allows you to boost or cut certain frequencies, while compression helps to control the dynamics of the track. To use these tools effectively, it is important to know what frequencies you need to boost or cut to achieve the desired sound. A good rule of thumb is to cut frequencies that are not contributing anything to the track, and boost frequencies that are making the track sound thin or unbalanced. When applying compression, make sure to use it sparingly and only where necessary to maintain the natural dynamics of the track.

Creating A Dynamic Mix

A dynamic mix is one where the levels of each element in the track (drums, bass, vocals, etc.) are balanced and contribute to the overall sound of the track. To achieve a dynamic mix, start by setting the levels of each element in the mix. Then, use EQ to remove any unwanted frequencies that are not contributing to the overall sound. Finally, use compression to control the dynamics and make sure each element sits nicely in the mix. Be careful not to over-compress, as this can make the track sound flat and lifeless.

Mastering Tips And Tricks

Mastering is the final stage of the production process, where the final touches are added to the track to make it ready for release. Some tips and tricks to take into consideration when mastering are to ensure the track has a consistent volume throughout, to use a limiter to prevent clipping, and to apply stereo imaging to give the track a wider and more vibrant sound. Another important tip is to test the track on a variety of speakers to make sure it sounds good across different playback systems. In conclusion, using EQ and compression effectively, creating a dynamic mix, and mastering your tracks properly are all essential components to producing a high-quality musical piece. By optimizing your computer for recording, mixing, and mastering scenarios, the process can be made easier, and the output can be improved significantly. With the right techniques and tools, you can take your music to the next level and achieve the sound you want.

Tips For Troubleshooting

If you’re experiencing issues with your computer while trying to record, mix, or master audio, there are several troubleshooting tips you can follow to optimize your system. Firstly, ensure that you have sufficient disk space and memory available. Secondly, close any unnecessary programs running in the background.

Finally, update your audio drivers and software to their latest versions for optimal performance.

Optimizing your computer for recoding, mixing, and mastering is the key to achieving high-quality audio production. However, even well-equipped computers can face issues that can disrupt workflows and hamper productivity. Here are some essential tips for troubleshooting your computer to ensure it’s running efficiently, and prevent any potential problems from affecting your projects.

Identifying The Issue

The first step in troubleshooting is identifying the problem. It could be anything from connectivity issues with external devices, system performance bottlenecks, or a software malfunction. Check your system, hardware and software specifications to assess if your computer meets the minimum requirements of your digital audio workstation (DAW). A quick search online should provide valuable insights on the common issues experienced by other users of your specific DAW. If that doesn’t help, some DAW’s have built-in troubleshooting tools that can diagnose the issues by providing detailed reports of factors such as CPU and RAM usage.

Solving Common Problems

One of the most common problems in audio production is latency, which occurs during recording or playback, causing delays that affect the timing of your tracks. There are various things to do to reduce latency, such as increasing buffer size, disabling unused plugins, closing unnecessary applications, and working at lower sample rates. Other common issues include distorted audio, crackling, or freezing screens. These can mostly be solved by closing and reopening the software, restarting your computer, changing sample rates or buffer size, and checking for updates.

Finding The Right Resources

If you’ve tried all the troubleshooting tips and still experiencing issues with your computer, perhaps it’s time to look for professional help. Contacting the DAW’s support team can provide a more in-depth report on the problem, and they might be able to fix the problem with remote assistance. The internet has various forums and online communities dedicated to music production where users share their experiences and offer solutions to common problems. Alternatively, you can employ the services of specialized tech support companies that focus on solving issues related to audio production. In conclusion, optimizing your computer for audio production is essential, and with these troubleshooting tips, you can easily fix any problems that arise while keeping your workflow uninterrupted.

Frequently Asked Questions Of Optimize Computer For Recoding Mixing Mastering

How Much Ram Do I Need For Mixing And Mastering?

For mixing and mastering, you’ll need at least 8GB of RAM. However, having 16GB or more can provide better performance and allow you to work with larger files and more plugins.

How Do I Optimize My Computer For Audio Recording?

Optimizing your computer for audio recording involves several steps. First, ensure your computer meets the minimum system requirements for audio recording software. Next, disable unnecessary programs and services running in the background. Use a dedicated hard drive for recording and use a high-quality sound card.

Finally, always keep your operating system and drivers updated to ensure smooth recording performance.

How Do I Optimize My Computer For Pro Tools?

To optimize your computer for Pro Tools, make sure you have a compatible operating system and hardware. Check that your computer meets the recommended requirements for Pro Tools. Close all unnecessary programs and turn off any power-saving settings. Make sure your audio interface and drivers are up to date.

Finally, defragment your hard drive and free up some space.

What Is The Best Computer For Mixing Music?

The best computer for mixing music is one with a powerful processor, at least 8GB RAM, a solid-state drive, and high-end audio interface. It’s recommended to have a dedicated graphics card. Apple iMac, MacBook Pro, and PC’s from brands like Dell, HP, and Asus are good options.

It ultimately depends on your budget and personal preferences.

Conclusion

Optimizing your computer for recording, mixing, and mastering can greatly improve your music production experience. By following these tips and tricks, you can ensure that your setup is efficient, effective, and capable of delivering high-quality results. Remember to keep your computer clean and organized, customize your settings, invest in quality hardware and software, and regularly update and maintain your system.

With these best practices in mind, you can maximize your creativity and achieve your musical goals with ease.

Categories
Archive

Cubase Pro 8 Multiband Envelope Shaper

Cubase Pro 8 Multiband Envelope Shaper is a feature that allows you to edit multiband envelope shaping. This feature is precise and effective in shaping your audio sounds with precision.

Cubase Pro 8 Multiband Envelope Shaper is a powerful and precise tool for editing multiband envelope shaping. This feature works by allowing you to focus on specific frequency ranges and then shaping those ranges individually. It is an effective way to sculpt your sounds and bring out the specific aspects you want to highlight.

With this tool, you can achieve precise shaping of multiple frequencies without affecting the entire mix. You can also adjust the attack, decay, sustain, and release of each frequency range. Multiband Envelope Shaper is a useful addition to the already impressive set of tools offered in Cubase Pro 8.

Multiband Envelope Shaper

The Multiband Envelope Shaper in Cubase Pro 8 allows for detailed control over the dynamics of individual frequency bands in a mix, resulting in a polished sound with a professional edge. This powerful tool can enhance the impact of basslines, tighten up drums, and help shape the overall tone of a track.

Overview

Cubase Pro 8 Multiband Envelope Shaper is a feature-rich tool that allows users to shape and mold their audio with precision. It is designed to enhance the dynamic range of audio by controlling the attack and release phases of each frequency band. With the Multiband Envelope Shaper, you can make your audio sound more lively and polished. This tool is suitable for anyone from music producers to sound designers who wants to take their audio to the next level.

Functionality

The Cubase Pro 8 Multiband Envelope Shaper works by dividing the audio into multiple frequency bands. Each frequency band can be shaped and molded independently by adjusting the attack and release phases. The attack phase affects the onset of the audio signal, while the release phase influences its decay. This makes it possible to enhance the overall transient response of the audio and give it more punch. The Multiband Envelope Shaper features a user-friendly interface that makes it easy to adjust the parameters. The interface displays a graphical representation of the audio waveform, allowing you to see the changes in real-time. It also provides a range of presets that can be applied to the audio for quick results. Users can create, save, and load their own presets as desired. The Multiband Envelope Shaper also includes a range of advanced features such as side-chain input, mix mode, and a solo function that enable users to fine-tune their audio with precision. In conclusion, the Cubase Pro 8 Multiband Envelope Shaper is an excellent tool for anyone looking to enhance the dynamic range of their audio. With its advanced features and user-friendly interface, this tool is suitable for both beginners and professionals. Whether you are a music producer or a sound designer, the Multiband Envelope Shaper can help take your audio to the next level.

Cubase Pro 8 Multiband Envelope Shaper

Credit: www.soundonsound.com

How To Use The Multiband Envelope Shaper?

To effectively utilize the Multiband Envelope Shaper in Cubase Pro 8, it’s important to understand how to adjust the various parameters for each band individually. By adjusting the Attack, Hold, Decay, and Sustain parameters, you can shape the dynamics of your sound to achieve the desired result.

Cubase Pro 8 offers a powerful Multiband Envelope Shaper tool that allows you to shape the envelope of each frequency band separately. This gives you complete control over the dynamic range of your mix. In this article, we will take you through the steps to use the Multiband Envelope Shaper effectively.

Step 1: Select The Multiband Envelope Shaper

The first step is to select the track you want to apply the Multiband Envelope Shaper. Open the MixConsole and select the track that you want to modify. Then, click on the “Inserts” tab in the top left corner of the screen to see the insert effect slots. You can also use the keyboard shortcut “Ctrl + E” (Windows) or “Cmd + E” (Mac) to open the Inserts section. Once you have the Inserts section opened, scroll down and look for the “Multiband Envelope Shaper” effect. It should be under the “Dynamics” effects category. Double click on the effect to add it to the insert slot of your track.

Step 2: Adjust The Parameters

With the Multiband Envelope Shaper added to the track, it’s time to adjust the parameters. First, you need to select the frequency bands that you want to shape. You can do this by clicking on the “Select Band” buttons in the top left corner of the effect window. You can select up to 4 bands. Next, you can adjust the parameters for each band separately. The main parameters are “Attack”, “Sustain”, and “Release”. You can use these parameters to shape the envelope of each frequency band.

Step 3: Apply The Effect

Now that you have adjusted the parameters for the Multiband Envelope Shaper, it’s time to apply the effect. To do this, play your track and adjust the parameters until you get the desired effect. You can use the Bypass button in the top left corner of the effect window to hear the difference between the original and modified version. Once you are happy with the effect, you can save the preset for future use. Click on the “Presets” button in the top right corner of the effect window and select “Save Preset”. In conclusion, the Multiband Envelope Shaper is a powerful tool that gives you complete control over the dynamic range of your mix. By following the above steps, you can use the Multiband Envelope Shaper effectively and take your mixes to the next level.

Benefits Of Using The Multiband Envelope Shaper

The Multiband Envelope Shaper is an essential tool for professional music producers who are looking to enhance their audio quality and take control of their dynamic range. This plugin is a part of the Cubase Pro 8 software and can be used with any audio material, whether it’s a vocal recording or an instrument track.

Improved Audio Quality

The Multiband Envelope Shaper is designed to improve the audio quality of your recordings and mixes by allowing you to shape the transients of individual frequency bands. This means that you can adjust the attack, sustain, and release of specific frequency ranges, resulting in a more defined, punchy, and clear sound. By using this tool, you can achieve a professional-sounding mix that is free from unwanted transient distortion and harshness.

Greater Control Over Dynamic Range

The Multiband Envelope Shaper gives you greater control over the dynamic range of your audio material. This means that you can tailor the dynamic response of each frequency band, making it louder or quieter depending on your needs. This level of control ensures that your audio material sits in the mix exactly where you want it to, without interfering with other elements of the track. The plugin also allows you to manipulate the sustain of specific frequency ranges, allowing you to create unique and dynamic soundscapes.

Increased Creativity And Workflow

Using the Multiband Envelope Shaper can also improve creativity and workflow. With the ability to shape specific frequency ranges, you can take your sound design to the next level and create complex and interesting sounds. This plugin is especially useful when working with electronic music, where the ability to manipulate sound is a crucial element. Additionally, with its intuitive user interface, the Multiband Envelope Shaper allows you to streamline your workflow and focus on the creative process.

Conclusion

Overall, the Multiband Envelope Shaper is an essential tool for any music producer looking to enhance their audio quality and improve their workflow. With its ability to shape specific frequency ranges and control dynamic response, this plugin is the perfect addition to any producer’s toolkit.

Cubase Pro 8 Multiband Envelope Shaper

Credit: www.youtube.com

Frequently Asked Questions For Cubase Pro 8 Multiband Envelope Shaper

What Is Envelope Shaper?

Envelope shaper is an audio effect that controls the volume of a sound over time. It shapes the level contour of the sound, creating dynamic changes in the sound’s character. It is often used in music production and sound design to create percussive sounds, emphasize the attack of a sound, or add more sustain to a sound.

What Are Envelopes In Cubase?

Envelopes in Cubase refer to the graphical representation of a parameter over time, such as the volume, panning, or any other effect setting. They allow users to create more dynamic and complex changes in their music, altering the sound of specific tracks or the entire mix.

What Is Multiband Envelope Shaper In Cubase Pro 8?

Multiband Envelope Shaper in Cubase Pro 8 is an audio processing tool that enables you to shape the dynamics of your audio by selectively applying different envelope shapes to different frequency bands.

How Does Multiband Envelope Shaper Work In Cubase Pro 8?

Multiband Envelope Shaper in Cubase Pro 8 works by allowing you to adjust the attack, sustain, and release times of individual frequency bands in your audio signal. This enables you to sculpt the dynamics of your audio in a precise and targeted way to achieve the desired sound.

Conclusion

The Cubase Pro 8 Multiband Envelope Shaper is an incredibly versatile tool that allows producers and musicians to shape their sound in unique ways. Whether you’re looking to add a little extra punch to your drums or add some warmth to your bassline, this plugin has you covered.

With its intuitive interface and powerful features, it’s no wonder why so many people rely on it to take their music to the next level. By using the Multiband Envelope Shaper, you can achieve a level of control over your sound that was previously impossible, making it an essential tool for any serious music producer.

Categories
Archive

Why Should You Get Your Song Mixed And Mastered

Getting your song mixed and mastered is crucial to ensure its professional quality and competitiveness in the music industry. A well-done mix and mastering can enhance the overall sound, dynamics, and volume of your song, giving it a clear and polished finish that can make it stand out among other tracks.

In today’s digital age, where anyone can record and produce music from home, it’s essential to go the extra mile and invest in mixing and mastering services to elevate the quality of your work. Professional mixing and mastering can bring out the best in your music and make it sound like it was created in a top-tier studio.

Whether you’re an aspiring musician or a seasoned artist, getting your song mixed and mastered is a must to make your music sound its best.

Improving Sound Quality

Getting your song professionally mixed and mastered can significantly improve the sound quality. By enhancing the levels, frequency balance, and stereo imaging, the overall sound becomes richer and fuller, making it stand out in today’s highly competitive music industry.

Better Balance

When you mix and master your music, you’re ensuring that the sound is perfectly balanced. This means that all elements of the track, from the vocals to the instruments, are given their rightful place in the mix. When a song is well-balanced, no one element overpowers another, providing a more enjoyable listening experience.

Clearer Sound

Mixing and mastering can make a huge difference in how clear your music sounds. Without proper mixing and mastering, some elements of your track might be muddled and unclear. A well-mixed and mastered track allows each instrument and sound to shine through, making it more enjoyable for listeners.

Defined Frequency Spectrum

Another benefit of mixing and mastering your music is that it can help to define the frequency spectrum. This means that each sound is placed in a specific frequency range where it can be heard clearly without competing with other sounds. When your music has a defined frequency spectrum, it sounds fuller and more professional. When it comes to creating great music, mixing and mastering are essential. By improving sound quality, achieving better balance, and clarifying the frequency spectrum, you can take your tracks to the next level. Don’t underestimate the power of professional mixing and mastering when creating your next masterpiece.

Why Should You Get Your Song Mixed And Mastered

Credit: majormixing.com

Optimizing Playback Across Devices

As a music artist, you put in a lot of effort and resources into creating your art. However, that effort could go to waste if your music is not heard in the best way possible. That is where mixing and mastering come in. They ensure that your music sounds great across different listening devices, platforms and environments. In this article, we will take a closer look at optimizing playback across devices.

Consistency Across Platforms

One of the benefits of mixing and mastering your music is that it ensures consistency across different platforms. When your song is played on different devices, it should sound the same or at least near enough to the original. This consistency is essential because it ensures that your listeners get the same experience regardless of the platform they use.

Compatibility With Various Listening Environments

When you release your music, you want it to be accessible to as many listeners as possible. However, different listening environments can affect how your music is perceived. For instance, a song that sounds great on speakers might not sound as good on headphones, and vice versa. By mixing and mastering your music, you can ensure that your music sounds great on different devices as well as in different listening environments.

Optimizing playback across devices is an essential part of mixing and mastering your music. Consistency across platforms and compatibility with various listening environments are just two of the benefits of mixing and mastering. By investing in mixing and mastering, you can ensure that your music sounds great, regardless of the platform or the listening environment.

Competitive Edge And Commercial Viability

A professionally mixed and mastered song provides a competitive edge and commercial viability that sets it apart from amateur productions. The clarity, balance and overall quality of the sound can make a huge difference in attracting and retaining an audience, and increasing revenue potential.

Stands Out From Competitors

Having your song mixed and mastered can give you a competitive edge in the music industry. As a musician, you want your music to stand out from others. Consenting to proper mixing and mastering can take your music to the next level. Your music will have an overall balance, which will make it easier for the listener to follow along with. This professional touch will make your song distinct and more appealing to your listeners. Therefore, it’s an excellent way to increase your chances of gaining more fans.

Professionally Polished Sound

When it comes to making music, mixing and mastering are essential processes that take your music to the next level. Mixing and mastering provide the finishing touches that help to create that polished sound that every musician desires. It is the final step that balances all the levels of your track, making each element clear and high-quality. This polishing will eliminate any unwanted background sounds, making your track clean and polished.

Increased Chances Of Success

As a musician, the primary goal is to have your music heard by many people. The success of your music relies on how it sounds to your audience. Good mixing and mastering can enhance your chances of getting that success you’ve always dreamed of. Having a good mix and master can make your track sound more professional and commercial-friendly, which can help it get more exposure. With a professionally polished sound, your song will undoubtedly have more chances of success on the radio, streaming sites, and music charts. In conclusion, getting your song mixed and mastered can give you a competitive edge and lead you to a path of commercial viability. It’s an excellent way to differentiate yourself from your competitors, create a professionally polished sound and increase the chances of success. Ensure to choose an experienced and skilled mixing and mastering engineer to help you achieve the desired results.

Professional And Experienced Touch

A professional and experienced touch is crucial when it comes to getting your song mixed and mastered. While you may be able to handle the basics of mixing and mastering, it takes an expert to perfect it and ensure it sounds incredible. So why is it important to seek this expertise?

Expertise And Knowledge Of Engineers

When you work with a professional engineer, you’re not just hiring someone to mix and master your song – you’re working with someone who understands the ins and outs of audio production. Experienced engineers have the technical knowledge and expertise to enhance your music and make it sound polished and professional.

Equipment And Tools Used

Professional engineers not only have the expertise and skills, but also use high-end equipment and tools to achieve the desired sound quality. They have access to a wide range of high-quality hardware and software that help them improve the overall sound quality of your music, making it sound crisp, clear, and polished.

Attention To Detail

Attention to detail is everything in music production, and this sets professionals apart from amateurs. Engineers pay close attention to every detail of your music, from adjusting the levels of instruments to eliminating unwanted noise and frequencies. They ensure that every sound is perfectly balanced and blended, creating a cohesive and enjoyable listening experience for your fans.

In conclusion, if you want your song to stand out and make an impact, you need a professional and experienced engineer to mix and master it. Their expertise, knowledge, equipment, and attention to detail will make your music sound its best and help you achieve your goals as a musician.

Cost-effective Strategy

Achieving a professional sound quality for your music is important to stand out. Getting your song mixed and mastered is a cost-effective strategy that results in better sonic clarity, consistency, and overall appeal. Don’t overlook the benefit of investing in the quality of your music.

Are you an aspiring artist looking to blow up big and get noticed or an established musician looking to create a hit record? Whatever your goals, it’s essential to have your song mixed and mastered by professional engineers before releasing it to the world. Many budding artists wonder if hiring mixing and mastering services is worth the money. In this post, we’ll explore the benefits of getting your song mixed and mastered from a cost-effective perspective.

Save Time And Money In The Long Run

Not having your song mixed and mastered could cost you more money and time in the long run. You might think that mixing and mastering your song is an unnecessary expenditure, but it’s probably the opposite. Professional mixing and mastering guarantees the error-free production of your track that will resonate with your audience seamlessly. If you don’t get your song mixed and mastered, your bank account could significantly suffer from the cost of having to fix something you could have avoided in the first place.

Avoid Amateur Mistakes

You may be thinking of giving it a go and spending your resources to mix and master your song yourself. However, this approach could lead to amateur mistakes that may end up ruining the quality of your track. Getting a professional mix engineer with years of experience and expertise in the music industry is crucial. They have trained ears that can identify specific problems, giving you valuable feedback to create a polished, studio-quality song that you are proud of. In conclusion, getting your song mixed and mastered professionally may seem like a luxury cost, but it’s well worth it. Before you decide to release your song, think about getting professional mixing and mastering services. You’ll save more money and time in the long run, and you’ll avoid amateur mistakes that could significantly impact the quality of your track. So, invest in yourself, and let the pros help you create the polished and professional sound you need to succeed in the music industry.

Frequently Asked Questions Of Why Should You Get Your Song Mixed And Mastered

Should I Get My Songs Mixed And Mastered?

Yes, you should get your songs mixed and mastered to ensure the best quality sound for your listeners. Mixing combines all the individual sounds of each instrument and vocal into a final stereo mix, while mastering adds final touches and adjustments to the overall mix, making it ready for distribution.

Professional mixing and mastering services can greatly enhance the quality of your music.

Why Is Mixing And Mastering Important In Music?

Mixing and mastering are crucial steps in music production that ensure the final sound quality meets professional standards. Mixing balances the individual tracks and elements, while mastering enhances the overall sound, adding loudness, clarity, and consistency. Failing to do so can result in a weak and inconsistent sound, affecting the final product’s reception and success.

Why Does A Song Need To Be Mastered?

Mastering is the final step in the music production process and is essential for ensuring that the song sounds consistent, balanced, and dynamic across different playback systems. It involves applying various audio processing techniques to enhance the overall sound quality and loudness of the song while maintaining the integrity of the original mix.

Why Do Songs Need To Be Mixed?

Mixing is important for songs as it is the process of balancing all the different elements in a track, such as the vocals, instruments, and effects, to create a cohesive and polished sound. It ensures that everything is heard clearly and nothing is overpowering or lost in the mix.

Conclusion

With the ever-increasing competition in the music industry, song mixing and mastering have become the determining factors of a song’s success. Neglecting this essential step in music production will only limit the potential impact of your song. A well-mixed and mastered track has the potential to stand out and become a chart-topper.

So, if you want your music to get the attention it deserves, invest in professional mixing and mastering services. Let your music speak volumes with the right mix and mastering techniques.

Categories
Archive

Using Different Kinds Of Reverbs In A Mix

Using different kinds of reverbs in a mix adds depth and dimension to the audio. Reverb types can include convolution reverb, plate reverb, spring reverb, and chamber reverb.

Each type can be used to achieve specific goals, such as simulating a realistic acoustic environment or adding a unique character to the sound. Varying the wet/dry mix and decay time can further enhance the effect. By understanding the different types of reverbs and how to use them effectively, a mix can be transformed from flat to professional-sounding.

Reverb is an essential tool for mix engineers and producers. It allows them to artificially simulate the ambience of a room, adding a sense of space to the audio. Audio professionals can create an infinite number of sonic landscapes by combining different types of reverb and adjusting their parameters. We will explore the different types of reverbs and their specific characteristics. We’ll also discuss how reverb can be used in a mix to create depth, dimension, and a sense of realism. So, whether you’re a seasoned pro or just starting, read on to learn how you can use reverbs to take your mix to the next level.

Types Of Reverbs

When mixing music, it’s important to use different types of reverbs to create a balanced and cohesive sound. Plate reverbs add warmth and depth, while hall reverbs provide a spacious and natural sound. Room reverbs work well for small intimate settings, and spring reverbs add a retro vibe.

Experimenting with different types of reverbs can bring a mix to life.

Reverb is key to adding depth and dimension to mixes. It creates the illusion of space and helps glue elements together. There are different types of reverb plugins available, each with its unique sonic character. Let’s look at the different types of reverb plugins:

Plate

Plate is a classic type of reverb that simulates the sound of a metal plate vibrated by an audio signal. It has a warm and smooth sound that adds subtle depth to vocals, drums, and guitars. It’s useful for creating a natural-sounding ambience around a source. It’s characteristically a little less natural than other types of reverb and is great for adding distinct character.

Spring

Spring reverb simulates the reverb created by a traditional spring mechanism. It has a bright, twangy sound that’s well-suited for guitar amps or used creatively to add a retro vibe to your mixes. Spring reverb is available in both hardware and software formats and is especially useful for integrating acoustic instruments into a mix.

Hall

Hall reverb is designed to simulate the acoustics of large concert halls. It has a rich, full-bodied sound and is great for creating a sense of space and depth. It’s a staple of mixing classical music to make it sound like it’s being played in a concert hall. Hall reverb works great on vocals and orchestral instruments.

Chamber

Chamber reverb simulates the sound of a small, ambient recording environment like a studio chamber. It’s closer than hall reverb and gives a more natural sense of space. It wraps around the instrument or vocalist a bit tighter than other types of reverb. Chamber reverb is great for bringing mid-range and low-frequency sounds like drums and acoustic guitar to the front of the mix.

Room

Room reverb simulates the sound of a small room, perfect for adding space to an instrument or vocal track without taking up too much of the mix. It’s often used to give the impression of a vocal booth to vocals. Room reverb is a subtle way to add depth without making an instrument sound like it’s in an overly large space.

Convolution

Convolution reverb is a type of plugin that uses impulse responses to create reverb environments. It simulates the acoustics of different spaces and can create very natural-sounding environments. Convolution reverb can sound like a real event, like you are in the exact space the sound is coming from. It’s great for adding specific spaces to a mix and the natural sound created by this type of reverb is hard to match. Different types of reverb plugins have specific applications depending on the type of music you’re mixing and the specific sound you’re going for. Experiment with different types to find the right reverb for your mix and use them creatively to bring out the best in your music.

Using Different Kinds Of Reverbs In A Mix

Credit: www.izotope.com

Choosing The Right Reverb

Reverb is an essential tool for music producers, mixers, and engineers. It adds life, depth, and character to audio tracks, making them sound more natural and pleasing to the ear. However, not all reverbs are created equal, and it’s vital to choose the right type of reverb for your mix.

Matching Your Mix Goals

The first step to choosing the right reverb is to identify your mix goals. Different types of reverbs can create different moods and atmospheres. For example, a bright and short reverb can add clarity and definition to vocals, while a warm and long reverb can create a spacious and immersive sound for a ballad or a cinematic track. Knowing what you want to achieve with your mix can help you select the suitable reverb and adjust its parameters accordingly.

Matching The Instrument

Another factor to consider when choosing a reverb is the instrument or sound source. Different instruments and sounds have different spectral characteristics and tonal qualities, which can affect how they interact with the reverb. For example, a snare drum might sound better with a tight and snappy reverb, while a piano might benefit from a more natural and ambient reverb. Matching the reverb to the instrument can help glue the mix together and make it sound more cohesive.

Applying Different Reverbs

Using different types of reverbs is a common practice in mixing. Applying different reverbs to different tracks can help create a sense of depth and space in the mix and highlight each track’s unique character. For example, using a plate reverb on the vocals and a hall reverb on the guitars can create a balanced and interesting mix. However, be careful not to overuse reverbs or use too many different types, as it can result in a muddy and confusing mix.

Choosing the right reverb can make a significant difference in your mix and elevate it to the next level. By matching your mix goals, instruments, and applying different reverbs strategically, you can create a cohesive and immersive sound that captures the listener’s attention.

Use Cases For Different Reverbs

Reverb is an essential tool in any mixer’s arsenal. It helps to create depth, ambiance, and a sense of space. But not all reverbs are created equal. Each type of reverb has its own unique characteristics and can be used to enhance different aspects of a mix. In this post, we’ll explore some popular use cases for different kinds of reverbs.

Creating Depth And Ambience

Reverb can be used to create space in a mix, making it sound bigger and more immersive. For this purpose, plate and hall reverbs are commonly used. Plate reverbs are known for their bright and lush sound, while hall reverbs are more prominent and have a longer decay time. Both of these reverbs can be used to create a sense of space, giving vocals and instruments a sense of depth and dimension. If you’re looking to create a warm, natural ambiance in your mix, consider using a plate or hall reverb.

Enhancing The Character Of The Instrument

The choice of reverb can also help to bring out the character of a specific instrument. Shorter, more focused reverbs, such as room or chamber reverbs, can add a touch of intimacy and closeness to a sound. For example, a snare drum can be given more snap and warmth by using a room reverb. On the other hand, longer and darker reverbs, such as cathedral or church, can be used to add a sense of grandeur to an instrument like a pipe organ or choir. Consider experimenting with different types of reverbs to bring out the unique character of each instrument in your mix.

Creating A Spacious Sound

Reverb can also be used to create a spacious sound in a mix. This is often achieved by using a combination of short and long reverb tails. For example, a short room reverb can be used to give a sense of proximity to the sound, while a longer hall or plate reverb can be used to create a sense of distance. This combination can help to create a sense of depth and space, making a mix sound more expansive and immersive.

Adding Effects And Coloration

Finally, reverb can also be used to add effects and coloration to a sound. For example, a gated reverb can be used to create a distinctive sound on a snare drum. A spring reverb can be used to create a vintage or retro sound on a guitar. And a reverse reverb can be used to create a surreal or dreamlike effect on a vocal. These types of reverbs can be used to add interest and variety to a mix, making it stand out and sound unique.

Using Different Kinds Of Reverbs In A Mix

Credit: www.youtube.com

Reverb Techniques For Different Genres

Using different kinds of reverbs in a mix is crucial for achieving the right sound for different genres. For example, using plate reverb can create a vintage sound in rock music, while hall reverb can create a more expansive and airy sound in orchestral music.

The type of reverb used should match the genre and mood of the music.

When mixing a track, reverb effects are essential in creating depth, space, and atmospheres. By applying different kinds of reverb, you can create subtle ambient effects, immense soundscapes, and everything in-between. However, the kind of reverb you apply will depend on the genre of music you are producing. In this post, we’ll explore some reverb techniques for different genres of music.

Rock And Pop

Rock and pop music require spacious and punchy reverbs. For example, when mixing drums, applying a plate reverb effect to the snare will give it a classic ’80s or ’90s sound. To create a big hall effect, you can apply a hall reverb to the lead vocals. Additionally, a parallel reverb can be used on electric guitars to create a more spacious and full-bodied sound.

Jazz And Classical

Jazz and classical music require more subtle and natural-sounding reverbs. For example, a small room or chamber reverb can be used when mixing orchestral recordings to create a sense of intimacy. On the other hand, a longer decay time can create a cathedral-like effect, which is perfect for choral ensembles. Moreover, a plate reverb can add warmth to piano and saxophone tracks.

Electronic Music

Electronic music producers use reverbs to create space, depth, and atmosphere in their productions. For example, a gated reverb can create an exciting effect on snare drums and hi-hats. Moreover, a hall reverb can be used on lead synths to create a more expansive and atmospheric sound. Additionally, a reverse reverb effect can be used to create an ethereal atmosphere at the end of a breakdown or buildup. In conclusion, using different kinds of reverbs in mixing is an essential tool to create a great track. Applying the right reverb to your mix is vital in producing a polished and professional sound, also understanding which reverb suits your genre is important.

Common Mistakes To Avoid

Using reverb is one of the best ways to make your mix sound more spacious and lifelike. However, if not used properly, reverb can make your mix sound muddy, cluttered, and amateurish. In this article, we will discuss the common mistakes to avoid when using different kinds of reverbs in a mix.

Overusing Reverb

One of the most common mistakes that many beginner producers make is overusing reverb. When you apply too much reverb, your mix can become notably unclear and all the individual tracks can start to mesh together. It can become especially problematic when multiple instruments all have reverb applied to them.

Therefore, to avoid overusing reverb, start by applying it on a send or an auxiliary channel. This will help you have greater control over the effect, and you can tweak the reverb settings to strike a balance between wet and dry sounds.

Applying Reverb Too Early

The timing of applying reverb is another common mistake to avoid in mixing. Applying reverb too early can cause each and every track to sound drenched and distant, making it difficult to distinguish between individual elements of the mix.

The best way to avoid this mistake is to apply reverb towards the end of the mixing process, after all the primary elements of the mix have been sound-designed and arranged together.

Not Considering The Space

The third mistake to avoid when using different kinds of reverbs is not considering the physical acoustic space of the recording. Every sound is recorded in a space, and that space has a significant influence on the sound. Even the most basic reverb is essentially a simulation of an acoustic environment.

Therefore, always consider the physical space in which the recording took place before adding or adjusting reverbs. Make sure that the kind of reverb you choose to use is compatible with the physical space of the recording. For example, a small room reverb may not sound good on a series of dry drums in a large studio recording.

Leaving Reverb Unprocessed

The fourth and final mistake to avoid when using different kinds of reverbs in a mix is leaving the reverb unprocessed. This mistake is not uncommon, especially with producers who assume that the reverbs they choose will sound perfect as is.

However, it is always essential to process your reverb. This may include EQ and compression, or you can use additional effects like filters and modulators. Proper processing will not only help you adjust the reverb tone but also shape the sound of the drum in the mix.

By avoiding these common mistakes when using different kinds of reverbs, you can elevate your mix to a professional level with a low-risk of reverbs. Keep in mind that using reverb requires a lot of planning and thought, especially when choosing the right type of reverb. Always stay focused on the ultimate goal of the mix and use reverb to enhance it, but not to cover it up.

Using Different Kinds Of Reverbs In A Mix

Credit: www.mixinglessons.com

Frequently Asked Questions For Using Different Kinds Of Reverbs In A Mix

How Many Reverbs Do You Use In A Mix?

The number of reverbs used in a mix varies depending on the genre and style of the music. There is no fixed number of reverbs to use, but generally, it’s advisable to limit it to two to three different types.

Too many reverbs can cause a muddy mix.

Should I Use The Same Reverb On Everything?

No, you should not use the same reverb on everything. Different instruments and vocals require different reverbs to achieve a balanced mix. Using the same reverb on everything may result in a muddy and unclear sound. Experiment with different reverbs and find what suits each element best.

How Do I Know What Reverb To Use?

To know what reverb to use, consider the type of sound you want to create, the style of music, and the size of the room. Experiment with different types of reverb, such as hall, plate, or spring, and adjust EQ and time settings to achieve the desired effect.

Trust your ears to guide you.

How Do You Blend Reverbs?

Blending reverbs requires careful attention to the sound you want to achieve. Start by selecting two or more reverbs with different properties and adjust each one’s decay time, EQ, and level. Then, use automation to create depth and movement in the mix while avoiding masking effects.

Conclusion

Using different types of reverbs in a mix can add depth, dimension, and create a more cohesive sound. Each type of reverb, whether it be plate, hall, or chamber, has its own unique qualities that can enhance a mix or track in different ways.

It’s important to experiment and find the right balance of reverbs to achieve the desired effect. By following the techniques and tips outlined you can take your mixes to the next level and achieve a more professional sound.

Categories
Archive

House Track Style Of Selected With Ableton Live

Creating a house track style with Ableton Live involves utilizing various techniques and features in the software. Ableton Live is a digital audio workstation that provides producers with tools and features to create and manipulate audio in real-time.

House music is known for its steady four-on-the-floor kick drum beat, catchy basslines, and repetitive melodies. To create a house track style in Ableton Live, producers can use instruments like operator to create basslines, drum racks to design drum patterns, and effects like reverb and delay to add depth and movement to the sound.

Additionally, producers can use automation and arrangement techniques to build tension and release throughout the track. With Ableton Live, the possibilities for creating a unique house track style are endless.

Software Needed For House Track Production

Creating a house track requires the right software, and Ableton Live is a popular choice amongst producers. With its versatile tools and intuitive interface, producers can easily create and edit their tracks with precision and creativity.

Ableton Live Basics

If you are into house music production, then Ableton Live is one of the easiest software to work with. The software is designed to cater to the needs of music producers, live performers, and DJs alike with its easy-to-use interface.

The Role Of Midi Controllers

MIDI controllers are a crucial part of house music production. It allows you to control different instruments, effects, and samples in Ableton Live by using knobs, faders, pads, and keys. With Ableton Live, you can easily assign a MIDI controller to any parameter in the software, allowing you to have complete creative control when producing your music.

The Importance Of Plug-ins

Plug-ins play a significant role in shaping the sound of your house tracks. Ableton Live has multiple built-in plug-ins that you can use for your production, including EQ, compression, delay, reverb, and many more. However, if you wish to take your music production to the next level, investing in third-party plug-ins is essential.

The Need For A Good Sound Library

A good sound library is an essential ingredient for producing high-quality house music tracks. Ableton Live comes preloaded with a vast collection of sounds, including basses, drums, synths, and effects. However, to create unique and original tracks, investing in additional sound packs is necessary.

The Role Of Sample Packs

Sample packs are collections of professionally recorded audio samples that you can use in your productions. With thousands of sample packs available online, finding the right one that matches your creative needs may seem overwhelming. However, with Ableton Live, you can easily import and manipulate any sample to suit your preferences. In conclusion, producing house music tracks requires the right software and tools. Using Ableton Live is an excellent choice as it offers an intuitive interface and powerful features that cater to the needs of music producers in the genre. Additionally, investing in MIDI controllers, plug-ins, sample packs, and sound libraries is essential to achieve unique and original productions.

House Track Style Of Selected With Ableton Live

Credit: www.myloops.net

Setting Up A Project

If you’re interested in producing house music, one of the first steps is setting up your Ableton Live project. The software is perfect for creating all types of electronic music, including the energetic and soulful beats of house music. Here are the essential steps to follow to get started with your project:

Creating A New Project

The first step in creating your house music project is to open Ableton Live and select “File” then “New Project”. Afterward, you can choose your preferred settings for your project. Ensure to give your project a unique name and select the right Ableton template to use. Feel free to explore and try different templates until you find the perfect one that suits your needs.

Choosing Your Tempo And Time Signature

The tempo and time signature are important in any music genre; house music is no exception. A common tempo range for the house genre is between 120 – 130 BPM. You can adjust it by selecting the “Tap” button in the “Tempos” section located at the bottom of the Live interface. The time signature is equally important; the most used time signature for house music is 4/4. You can select your time signature by clicking the “Time Signature” button in the “Sample” section of the Live interface.

Setting up your Ableton Live project is essential in producing excellent house music. Make sure you follow the steps presented in this article to ensure you are on the right path towards your goal.

Creating A Basic Groove

To create a basic groove for a house track style with Ableton Live, start with a four-on-the-floor kick drum pattern. Layer in a snare and hi-hat, and use percussion elements like shakers and claps to build the rhythm. Experiment with different sounds and patterns to find the perfect groove.

Creating a Basic Groove: House track style is all about creating a rhythmic pattern to make people move their feet. The beat is the foundation of a house track, and with Ableton Live, it’s easy to create the perfect groove. In this section, we will cover the basics of creating a house track with Ableton. Using Drum Machines: Firstly, you need to select a drum machine to create a beat. Ableton offers various options such as Drum Rack, Impulse, and Simpler. Once you have selected your desired drum machine, drag and drop it onto a MIDI track. Each drum machine has its unique set of samples, which you can pitch and edit according to your preference. Programming a Beat: Now, let’s start programming a beat. Choose kick and snare drums and program them on the first and third beat of each bar. Use a hi-hat to fill the gaps between the kicks and snares. A basic pattern could be Kick-Snare-Kick-Snare-HiHat-HiHat. You can experiment with different patterns and keep adjusting to create a unique groove. Remember to keep it simple yet effective. Once you have programmed the pattern, you can adjust the velocity of each hit to make it more dynamic. For example, increasing the intensity of the snare on the third beat can make the rhythm more interesting. Conclusion: Creating a basic groove in a house track is all about experimenting with different patterns and sounds while keeping it simple yet effective. Choosing the right drum machine and programming the beat correctly can make all the difference. With Ableton Live, you have endless possibilities to create the perfect house track.

House Track Style Of Selected With Ableton Live

Credit: www.abletontemplates.net

Crafting A Solid Bassline

Crafting a solid bassline is essential for creating a house track style with Ableton Live. By experimenting with different rhythms and sounds, you can create a powerful foundation for your track that will keep your audience moving on the dancefloor.

Choosing A Synthesizer

To craft a solid bassline for your house track style, the first step is to choose the right synthesizer. You can choose from various synthesizers ranging from software-based synthesizers like Ableton Live’s Analog synth, Serum, Massive, or hardware-based synthesizers like Roland TB-303 or Moog Sub Phatty. Each synthesizer has its distinct sound characteristics that can influence the overall feel of your bassline.

Building A Simple Bass Pattern

After selecting the right synthesizer for your house track style, the next step is to create a simple bass pattern. You can start with root notes of the chords in your track and experiment with different rhythms and note lengths until you get a catchy bass pattern that grooves well with the track. Try adding some variation by transposing or adding slides and accents to some of the notes.

Tips for building a bass pattern:

  • Keep it simple to maintain the listener’s attention
  • Use repetition for consistency in the track
  • Try to follow the chord progression to make bassline match the track
  • Use drum beat as a reference to create bassline
  • Make sure to test the bassline on different speakers and headphones to get an idea of how it sounds on different sound systems.

Remember that the bassline is the foundation for your track, so putting in time and effort to craft a solid bassline that works well with your track is crucial. With these tips, you’ll have a solid foundation to build a great house track style of selected with Ableton Live.

Creating Chords And Melodies

Crafting catchy chords and melodies in Ableton Live is crucial for producing an outstanding house track. Using the selected style as a guide, you can inspire creative output through experimentation with different scales, chord progressions, and sound design.

Setting Up A Melodic Instrument

To create chords and melodies in Ableton Live, it is crucial to set up a melodic instrument. The first step is to choose an instrument that suits the style of the track, such as a piano, organ, or synthesizer. Once selected, the instrument needs to be set up in Ableton Live’s instrument rack. This is achieved by adding a ‘MIDI track’ and then dragging the instrument into the empty MIDI track.

Composing A Melody And Progression

With the melodic instrument set up, it is time to start composing a melody and progression. One technique for creating chords is to use the ‘chord trigger’ MIDI effect, which allows for a single note to trigger multiple chords. This technique is particularly effective for creating complex and evolving chord progressions. When it comes to composing melodies, it is important to choose notes that fit the key and scale of the track. An easy way to do this is to use Ableton Live’s built-in ‘Scale’ MIDI effect, which limits the notes played to within a selected scale. Once a melody has been created, it can be combined with the chord progression to create a complete section of the track. In conclusion, creating chords and melodies is a crucial part of producing music in the house track style. By setting up a melodic instrument and using the right techniques, it is possible to create engaging and dynamic sections of a track.

Adding Vocal Samples And Fx

Enhance the house track style of your production by adding vocal samples and FX using Ableton Live. Add energy and depth to your music with well-chosen samples and effects, making your music stand out. With Ableton Live’s powerful tools, you can create a memorable track that will keep your listeners engaged and wanting more.

Adding Vocal Samples and FX using Ableton Live’s House Track Style requires a creative approach to achieve optimal results. Vocal samples alone can create a unique feel for the entire track and add a dynamic edge to it. In addition, the right FX processing on individual elements can elevate the overall texture of the track. Here are some ways you can select vocal samples and process FX using Ableton Live’s House Track Style. H3: Selecting Vocal Samples Selecting the best vocal samples requires attention to detail. First, you must decide on the type of vocal sample that fits your track. Will it be an acapella or a vocal phrase? You must ensure the vocal sample has a suitable key and tempo so it can blend harmoniously with the track. Ableton Live’s sample libraries offer various vocal samples that are suitable for House Track Style. You can also download samples from third-party websites that offer vocal samples. H3: Processing FX on Individual Elements Fire, reverb, and delay are vital FX elements that can transform the texture of the track. To add fire to a particular section of the track, you can use a distortion plugin on a synth or bassline. To create an upbeat feel, you can add a delay effect to the main synth to give the illusion of more notes playing. Additionally, you can create a sense of space by using reverb on specific elements, such as percussion. In conclusion, House Track Style’s focus on adding vocal samples and FX requires creativity. Selecting the right vocal samples and applying FX processing on individual elements can be challenging. However, Ableton Live makes this process simple with numerous built-in FX plugins and sample libraries. By experimenting with various samples and FX, you can create a unique and dynamic House Track Style.

Arranging And Mixing Your House Track

Learn how to arrange and mix your house track like a pro with Ableton Live! Embrace the popular house track style by applying effective techniques to make your music stand out from the rest.

Structuring Your House Track

When it comes to arranging your house track, having a solid structure is essential. With Ableton Live, it’s easy to create a clear arrangement for your track. To start, you’ll want to determine the overall vibe and energy of your track, and plan out its progression accordingly. Once you’ve decided on the structure, you can start organizing the different elements of your track, including the drum pattern, bassline, and any lead melodies or vocals.

Adding Effects And Automation

Adding effects and automation can help bring your house track to life. Effects like reverb, delay, and compression can add depth and character to your sound. Experiment with these effects to find the right balance for your track. Using automation, you can add movement and variation to your track by changing parameters such as filter cutoff, pitch, and volume over time. This can help keep your track engaging and dynamic.

Mixing Your Track For Clarity And Balance

Mixing is the process of blending all the elements of your house track together to create a cohesive and balanced sound. In Ableton Live, you can adjust the levels, EQ, and effects of each track to achieve clarity and balance. It’s important to ensure that each element of your track is audible, without any elements overpowering others. By using techniques like panning, you can create a sense of space in your mix, making it more immersive. In conclusion, arranging and mixing your house track with Ableton Live can be a fun and rewarding process. By structuring your track, adding effects and automation, and mixing for clarity and balance, you can create a professional-sounding house track that is sure to get people dancing.

House Track Style Of Selected With Ableton Live

Credit: www.myloops.net

Frequently Asked Questions For House Track Style Of Selected With Ableton Live

Is Ableton Good For Audio Editing?

Yes, Ableton is great for audio editing with its user-friendly interface, advanced editing tools, and flexibility to handle various audio formats. It allows users to edit, mix, and enhance audio while ensuring high-quality output. With its unique features like session view and customizable racks, Ableton stands out as an ideal tool for audio editing.

Can You Change Ableton Theme?

Yes, Ableton themes can be changed to suit your preferences. You can select from the available themes or create your own by customizing the interface colors and layout. To change the theme, go to Preferences > Look/Feel and then select your preferred theme from the dropdown menu.

How Do I Change The Color Of A Track In Ableton?

To change the color of a track in Ableton, simply right-click on the track and select “Color” from the drop-down menu. From there, select the desired color and the track will be updated with the new color.

How Do I Create A New Track In Ableton?

To create a new track in Ableton, go to the “Create” menu and select “Insert Audio Track” or “Insert MIDI Track”. You can also use the keyboard shortcut “Ctrl+T” (Windows) or “Cmd+T” (Mac).

Conclusion

The House Track Style Of Selected with Ableton Live has been an elaborate and fulfilling journey. With the advanced tools and features that Ableton Live provides, you can create and craft unique sounds and beats that match your true personality.

Having a seamless workflow and knowing the perfect plugins to use is key to taking your House Music production to unprecedented levels. Keep honing your skills and exploring your creativity as the possibilities are endless.

Categories
Archive

Music Production And Songwriting Tips

To improve your music production and songwriting skills, focus on developing your creativity, honing your technical skills, networking with other professionals, and constantly practicing and learning from feedback. These tips can help you to create high-quality music that stands out in the industry.

Creating music that resonates with your audience and showcases your unique style takes time and effort, but with the right approach and mindset, you can achieve your goals. We’ll explore some useful tips for songwriting and music production that can help you to unleash your creativity and develop your skills as a musician.

Whether you’re a beginner or an experienced professional, these insights can help you to take your music to the next level and stand out in a crowded industry. So, let’s explore some of the best music production and songwriting tips and unleash your musical potential!

Music Production And Songwriting Tips

Credit: blog.airgigs.com

Brainstorming And Ideation

Brainstorming and ideation are essential parts of the music production and songwriting process. By gathering your ideas and exploring new possibilities, you can create unique and captivating music that resonates with your audience. It is important to approach brainstorming with an open mind and willingness to experiment.

As a beginner in music production and songwriting, getting the creative flow to start brainstorming ideas could be challenging. However, here are a few Music Production And Songwriting Tips to efficiently get the creative process going to come up with new ideas.

Write Down Lyrics

Firstly, it’s essential to get a pen and paper and start jotting down random lyrics that pop up in your head. Even though it might not make sense at first, it would help to review them later and put words together. In doing so, you can come up with the perfect line for the song.

Humming Melodies

After writing the lyrics, hum a tune for the lyrics. The humming process is how one creates the melody structure for the song. Humming random tunes and melodies helps to transform the written ideas into a tangible structure. With this technique, you can quickly come up with your song’s catchy chorus or hook. To wrap it up, songwriting and music production are creative processes that are different for everyone. However, utilizing these two tips would assist you in starting your creative process to brainstorm and ideate. Take note of lyric ideas and start humming melodies, and before you know it, you will be full of creative energy.

Music Production And Songwriting Tips

Credit: www.target.com

Composition And Arrangement

Effective music production and songwriting requires strong skills in composition and arrangement. Understanding how to structure and organize musical elements can help elevate a song to the next level, enhancing its emotional impact and making it stand out to listeners.

When it comes to music production and songwriting, one critical area to focus on is composition and arrangement. The structure of a song and the instruments used can significantly impact its overall quality. Here are some practical tips on how to write a great song and create an arrangement that captivates your audience.

Structure The Song

Structuring your song is essential in communicating the message effectively. When creating the structure of the song, consider the different sections: the intro, verse, chorus, bridge, and outro. The standard pop song structure is a verse, chorus, verse, chorus, bridge, chorus. This structure is popular because it helps to create a pattern that your listeners can easily follow. However, don’t be afraid to experiment with different structures.

Explore Different Instruments

Exploring different instruments during the songwriting and arranging process can add another layer to your music. You can use traditional instruments such as guitars, drums, and keyboards, or delve into electronic instruments such as synthesizers. When selecting instruments, consider how they blend together and complement each other. Each instrument should have its space in the mix, where it can be heard clearly.

Utilize Dynamics

Dynamics is the difference between the loudest and quietest parts of your song. Utilizing dynamics can create emotional tension in the song and make it more interesting. Think about the different parts of the song where you want to build up the tension and where you want to release it. Consider creating contrast by combining loud and quiet parts within the same song section.

Emphasize The Hook

The hook is the most memorable part of a song. It is often the chorus or a catchy melody that is repeated throughout the song. When writing a song, ensure that your hook is strong enough to catch the attention of your audience. The hook should make the listener want to sing along, and it should be easy to remember.

Experiment With Harmony

Harmony is the combination of different notes played at the same time, adding depth to your song. When writing a song, experiment with different harmonies to discover what sounds best to you. You can use diatonic or chromatic scales to create different moods. Be creative and don’t be afraid to break the rules of traditional harmony.

In Conclusion

In summary, composition and arrangement are critical elements of music production and songwriting. Structuring the song, exploring different instruments, utilizing dynamics, emphasizing the hook, and experimenting with harmony can bring your song to life and create a unique listening experience. With practice and experimentation, you can develop your skills in these areas and create high-quality music that resonates with your audience.

Digital Audio Workstations (daw)

Digital Audio Workstations (DAW) are a crucial tool for music production and songwriting. These software programs allow musicians to create, mix and edit audio tracks, providing a complete solution for professional music production. With built-in features like virtual instruments, effects libraries and audio plugins, they offer a versatile platform to bring your musical ideas to life.

Digital Audio Workstations (DAW) play a significant role in music production and songwriting. A DAW is a software application that allows you to record, edit and mix digital audio. The right DAW can help you achieve your desired sound by providing tools to enhance your workflow. In this section, we will be discussing how to choose the right DAW for you and what features you should be looking for.

Choosing The Right Daw

The right DAW can make all the difference when it comes to creating music. With so many options available, it can be overwhelming to figure out which DAW is best suited for you. Here are some factors to consider when choosing a DAW:

Compatibility

Make sure the DAW you choose is compatible with your computer’s operating system. This will save you time and frustration, and ensure that you can use the program as intended.

Budget

Some DAWs can be expensive, while others are free. Determine your budget before deciding on a DAW and research which options fit within that budget.

User Interface

The user interface is the design and layout of the DAW. Choose a DAW with a user interface that is easy for you to navigate and understand.

Plugins and virtual instruments

Choose a DAW that comes with a good stock of plugins and virtual instruments. These can be expensive to purchase separately and having a variety can save you money in the long run.

Learn The Features

Once you have chosen a DAW, take the time to learn about all of the features it offers. Here are some essential features to familiarize yourself with:

Recording

Make sure you understand how to record and edit audio within your chosen DAW. This is the primary feature of any DAW and should be mastered to achieve the desired results.

Mixing

Learning how to mix audio in your DAW is crucial to achieving a polished finished product. Take the time to understand how to mix audio levels, add effects, and use automation.

Mastering

Mastering is the final step in the production process and involves balancing the audio levels and ensuring the final product is optimized for different listening platforms and devices. In Conclusion, choosing the right DAW for you is crucial in your journey to producing high-quality music. Take your time to research and find the one that works best for you. Learn the features of your chosen DAW and practice using them to become more proficient and make the most of your music production and songwriting experience.

Sound Design And Mixing

Effective sound design and mixing are crucial elements for producing quality music. As a music producer and songwriter, it’s essential to pay close attention to the sound design and mixing process to enhance the overall quality of the song and make sure it resonates with your listeners.

When it comes to music production, sound design and mixing are essential aspects. Creating unique and captivating sounds will give your song a distinct edge over others. Likewise, mixing and mastering ensure that all the elements in your track work harmoniously.

Creating Unique Sounds

To create unique sounds, you must experiment with different instruments, effects, and plugins. Use various parameters to tweak each element until you achieve the desired sound. Don’t be afraid to blend different genres and styles to create a unique sound. Consider layering different sounds to create a rich and complex timbre. You can also incorporate foley sounds, samples, and field recordings to add depth and texture to your music. Remember that creativity is key when it comes to sound design.

Mixing And Mastering

Mixing and mastering will ensure that your track sounds polished and professional. Start with balancing the levels of each element to achieve a cohesive mix. Use EQ to remove unwanted frequencies and enhance the desired ones. Compression can also be used to smoothen out dynamics and make your sounds more consistent. Additionally, use reverb and delay to create a sense of space and dimensionality in your mix. Mastering involves applying the final touches to your track, ensuring that it meets industry standards. Use limiting and EQ to balance out frequencies and add volume to your final mix. However, be careful not to overdo it, as this can cause distortion. In conclusion, sound design and mixing are crucial elements of music production. Experiment with different sounds and effects to create a unique sound and use EQ, compression, reverb, and delay to achieve a cohesive mix. Mastering should be used to apply final touches to your track to meet industry standards.

Collaboration

Collaboration is key for successful music production and songwriting. From sharing creative ideas to dividing tasks, working together can enhance the overall quality of a project. Communication and trust are crucial for a positive collaboration experience.

Collaboration in music production and songwriting is vital when looking to create fresh and innovative music. Working together with other artists can produce a more diverse and well-rounded sound. However, collaboration also requires open communication and constructive feedback to create a finished product that everyone can be proud of. Here are some tips on collaborating successfully in music production and songwriting:

Receiving And Providing Feedback

When collaborating with other artists, it’s crucial to provide and receive feedback constructively. Always approach feedback from a place of respect and kindness. It’s essential to be open to constructive criticism and look at it as an opportunity to grow and improve. The same goes for providing feedback to other artists. Be specific and objective when communicating what needs to be improved.

Working With Other Artists

Collaborating with other artists can be an exciting and inspiring experience. When working with others, it’s essential to ensure that everyone’s contributions are recognized, and no one feels left out. Communication is key to ensure everyone is on the same page. A clear understanding of each person’s role in the project will help ensure a seamless experience.

Table: Roles In Collaborative Songwriting Project

RoleDescription
SongwriterResponsible for crafting the lyrics and melody of the song
ProducerResponsible for the overall sound and production of the song
MusicianResponsible for playing and recording instruments for the song
EngineerResponsible for recording, mixing, and mastering the song

In conclusion, collaborating with other artists can bring a fresh perspective to your music production and songwriting. Embrace feedback and constructive criticism, and remember to communicate clearly with your fellow artists. Working together, you can create music that is truly unique and innovative.

Marketing And Promotion

Marketing and promotion are crucial elements in the music industry, and they play a significant role in the success of music producers and songwriters. Developing the right strategies can help artists and producers to gain exposure and attract a broader audience.

Building A Strong Online Presence

Nowadays, having a robust online presence is a necessity for anyone in the music industry. Artists, producers, and songwriters must ensure that their online presence can get them noticed by setting up social media pages and online profiles on music platforms.

The website and social media pages should be professional and visually appealing, have essential information, and loaded with high-quality content. This content includes music tracks and videos, photos, and news updates.

It’s also crucial to engage fans regularly and respond to their comments to build a loyal and engaged following. Another way to increase online visibility is by collaborating with other artists and sharing their content to reach new audiences.

Creating A Marketing Plan

Creating a marketing plan helps artists and producers to establish goals, identify target audiences, and develop strategies for reaching them. The plan should be flexible and adaptable to changes in the market, the audience, and the competition.

Artists should identify their unique selling points and use them to create a brand identity. E-mail marketing, promotion through influencers, and collaborating with bloggers are also effective techniques that can help in expanding the target audience.

Another vital aspect of a marketing plan is setting a budget. The budget should cover all marketing expenses, including advertisement costs, social media promotions, and event promotion costs.

A great strategy to expand promotion cost is by collaborating with brands that have a similar target audience or hosting music events in collaboration with other artists and radio stations.

Conclusion

Marketing and promotion are essential activities that budding music producers and songwriters should embrace. A strong online presence coupled with an effective marketing plan can help promote the music while expanding the audience. It’s advisable that practitioners explore various marketing strategies to identify the ones that work best for them while staying adaptable to changes to achieve success in the music industry.

Music Business

Music business is an essential aspect of music production that every musician should understand. It includes everything from songwriting to distribution. Without knowledge of the music business, a musician cannot make it in the industry. It is vital to have an understanding of royalties and protecting intellectual property.

Understanding Royalties

Royalties are payments made to the songwriter and the artist for the use of their music. Every time a song is played on the radio, streaming services, or TV shows, the owner receives royalties. Understanding the different types of royalties available is crucial. Below are the types of royalties:

Type of RoyaltyDescription
Performance RoyaltiesThese are royalties paid to the songwriter and publisher when a song is played on TV, radio, or in public spaces.
Mechanical RoyaltiesThese are royalties paid to the songwriter and publisher when their song is streamed or downloaded.
Synchronization RoyaltiesThese are royalties paid to the songwriter, publisher, and artist when their song is synced with visual media such as TV shows or movies.

Protecting Your Intellectual Property

Intellectual property refers to the creative work produced by an individual. Protecting your intellectual property is vital to prevent others from stealing or copying your work. Here are some tips to protect your intellectual property:

  • Register your work with the U.S. Copyright Office.
  • Trademark your band name or logo.
  • Use watermarking to prevent unauthorized sharing of your music.
  • Have a lawyer draft contracts for collaborations to ensure your rights and ownership are protected.
  • Do not share your unfinished work with anyone, to prevent the possibility of someone stealing it.

By understanding royalties and protecting your intellectual property, you ensure that your music is not exploited and that you receive the credit and compensation you deserve.

Music Production And Songwriting Tips

Credit: www.walmart.com

Practice And Persistence

To excel in music production and songwriting, practice and persistence are key. Consistently working on your craft, learning new techniques and staying motivated will lead to improvement and success in your musical endeavors. Keep pushing forward and never give up on your passion for music.

When it comes to making music, practice and persistence are essential for success. Even the most talented producers and songwriters need to put in the effort to improve their craft and create something unique. Here are some tips to help you develop a consistent practice routine and stay motivated.

Consistent Practice Routines

Creating a regular practice routine is crucial to improving your music production and songwriting skills. It’s important to set realistic goals and dedicate a specific amount of time each day to practice. You can start by breaking down your practice into smaller, achievable tasks, such as practicing a specific chord progression or drum groove. Consistency is key, and over time your skills will improve. Sometimes it can be challenging to know where to start, especially if you are new to music production or songwriting. In this case, finding a mentor or taking online courses can help you learn the basics and develop a structured practice routine. Remember, practice makes perfect, and every small step counts.

Staying Motivated

Staying motivated is an integral part of the creative process. However, motivation is not always constant, and it’s normal to feel uninspired or discouraged at times. It’s important to find ways to stay motivated and inspired, such as listening to music, attending live events, collaborating with other musicians, or taking a break and returning to your work with fresh eyes. Another way to stay motivated is to celebrate your progress. Keep track of the milestones you achieve, such as finishing a song or learning a new technique. Recognizing your accomplishments can boost your confidence and inspire you to continue on your musical journey. In conclusion, music production and songwriting require consistent practice and persistence. Developing a regular practice routine and finding ways to stay motivated can help you improve your skills and create something unique. Remember, every small step counts towards achieving your musical goals.

Frequently Asked Questions Of Music Production And Songwriting Tips

How Do I Start Writing And Producing Music?

To start writing and producing music, begin by learning the basics of music theory and familiarize yourself with music software like GarageBand and Ableton. Experiment and practice writing songs and producing beats, and seek feedback from trusted peers and mentors.

You can also take online courses or attend workshops to improve your skills and knowledge. Don’t be afraid to make mistakes and keep practicing to develop your own unique style.

How Can I Improve My Songwriting Skills?

To improve your songwriting skills, try practicing regularly, listening to a variety of music, studying song structure and lyrics, collaborating with other musicians, and being open to constructive criticism. Experiment with different styles and techniques, and don’t be afraid to take risks and try new things.

With time and dedication, your songwriting skills will improve and you’ll become a better songwriter.

Do Music Producers Help Write Songs?

Yes, music producers can help write songs. They may contribute to the songwriting process by providing feedback, suggesting changes, and collaborating with the artist to enhance the overall sound and structure of the song.

What Is Songwriting In Music Production?

Songwriting is the process of creating the lyrics, melody, and structure of a song. It involves coming up with a catchy tune, meaningful lyrics, and a structure that flows well. Songwriting is a crucial aspect of music production as it sets the foundation for the final product.

Conclusion

Music production and songwriting are both crucial aspects of creating quality music. Whether you’re an aspiring musician or already have some experience, the tips we’ve shared in this blog post can help you improve your craft. From staying organized to experimenting with different sounds and instruments, there are many ways to enhance your music production and songwriting skills.

Always remember to stay true to your artistry and personality, and let your creativity shine through in every note and melody.

Categories
Archive

Easy Ways To Beat Writers Block As A Producer

To beat writer’s block as a producer, try taking a break and doing something creative or physical. This will clear your mind and give you a fresh perspective.

Also, as a producer, creativity is your lifeblood. But sometimes the ideas just don’t flow, and you’re left with a blank page and a feeling of frustration. This is called creative blocks, and every creative person experiences it at some point.

Related reading: How To Overcome Creative Blocks and Dealing With Rejection In Music: Overcoming the Roadblocks. For background, see the Wikipedia article on Writer%27s block.

But the good news is that there are easy ways to beat being stuck and get back to creating your best work. We’ll explore some simple techniques to overcome creative blocks and get your creativity flowing again. So whether you’re struggling with a script, a beat, or even just a melody, read on to discover how to break free from writer’s block and create your best work yet.

Embrace The Limitations for Writer’s Block

As a producer, there’s nothing worse than facing a blank screen and feeling like you have no ideas. This is known as writer’s block, and it’s something that almost every content creator has experienced at one time or another. However, one way to overcome this is by embracing the limitations you face. It might seem counterintuitive, but enforced creativity can actually be a catalyst for fresh ideas.

Challenge Yourself With Constraints for Writer’s Block

Constraints are often seen as a negative thing, but they can be used to your advantage. When you’re struggling to come up with ideas, try setting yourself arbitrary rules to follow. For example, limit yourself to a certain number of words, or use only a particular type of instrument. This can help to focus your mind and force you to think creatively, and it can even lead to unexpected results that you wouldn’t have come up with otherwise.

Use Creative Limitations As Opportunities for Writer’s Block

Another way to look at limitations is as opportunities for growth. When you’re facing a creative roadblock, it’s easy to feel frustrated and defeated. However, if you reframe your thinking and view limitations as a chance to push yourself further, you can often find a way to break through the block. For example, if you’re struggling to come up with a melody, try experimenting with a different time signature or key. This can help to open up new avenues of creativity and lead to a breakthrough moment.

Overall, embracing the limitations you face as a producer can be a powerful tool for overcoming writer’s block. By challenging yourself with constraints and using creative limitations as opportunities, you can push past the roadblocks and find your way to fresh and exciting ideas.

Change Your Tools for Writer’s Block

Boost your creativity and overcome writer’s block by changing up your tools. Switching from a computer to pen and paper or trying out a new writing software can spark fresh ideas and help you break through mental roadblocks.

As a producer, you rely heavily on your tools to create your music. However, sometimes using the same tools over and over again can cause writer’s block. Changing your tools can help you overcome this obstacle and inspire new ideas. Here are two ways to experiment with new tools:

Experiment With New Daws Or Software

Digital Audio Workstations (DAWs) are the backbone of your music production process. They help you record, edit, and mix your music. It’s easy to stick to a DAW you know inside-out, but trying out new DAWs and software can give you a new perspective. Some popular DAWs you can experiment with include Ableton Live, Logic Pro, Pro Tools, and FL Studio. Each DAW has unique features and workflows that can inspire new ideas. You can also try out plugins and software synths to add a new dimension to your music.

Try Out Analog Equipment for Writer’s Block

Analog equipment has a warmth and character that’s hard to replicate with digital tools. Using analog gear can also force you to approach music production differently. You might have to commit to making certain decisions early on instead of endlessly tweaking settings like you do with digital plugins. Analog equipment can range from classic synths like the Roland TB-303 to hardware compressors like the Universal Audio 1176. Vintage gear can be expensive, but you can also try out affordable modern recreations like the Korg Volca series. Changing your tools can take you out of your comfort zone and spark creativity. Whether it’s trying out a new DAW or experimenting with analog gear, you might just discover a new favorite tool that takes your music to the next level.

Get Inspired By Other Art Forms for Writer’s Block

Take a break from writing and explore other art forms for inspiration. Music, movies, and visual arts are just a few examples of mediums that can inspire your creative process as a producer. Don’t be afraid to step outside of your comfort zone and try something new to beat writer’s block.

As a producer, writer’s block can be frustrating and impede your creative process. However, one way to overcome it is by seeking inspiration from other art forms. Here are two ways you can do that:

Read Books Or Poetry for Writer’s Block

Reading books or poetry can help you gain a fresh perspective and spark new ideas. You could read books about production, creativity, or even a fictional novel. The key is to choose something that engages you and aligns with your interests. Try to analyze the author’s writing style and the tone of the book. Take note of the plot twists and turns, characters’ development, and metaphors used. This way, you can incorporate similar writing techniques into your project, adding a unique twist to your work.

Watch Films Or Attend Art Exhibitions for Writer’s Block

Attending an art exhibition or watching a film can help shift your perspective, open your mind and spark your imagination. Whether it’s a movie with a storyline similar to your project or a piece of art containing themes related to your work, getting inspiration from other visual art forms can help you get unstuck. Take note of the dialogue, lighting, composition, and other technical aspects of the movie or artwork. This can help guide your own development and techniques in your production process, improving the quality of your work. In conclusion, writer’s block can be frustrating, but exploring different art forms can help you gain new perspectives and find inspiration to move forward. Reading books and poetry, as well as attending art exhibitions and films, can help spark new ideas, improve your creativity, and add unique twists to your productions.

Take A Break And Refocus for Writer’s Block

As a producer, experiencing writer’s block can be frustrating. Take a break and refocus with these easy tips to help you beat writer’s block. From changing your environment to having a brainstorming session, these tricks will get your creative juices flowing in no time.

One of the most common struggles that producers face is writer’s block. It can be frustrating to sit in front of your computer screen with a blank mind, unable to come up with any ideas. However, there are easy ways to overcome writer’s block and refocus your creativity. Taking a break from your work is a proven method to recharge and come back with fresh ideas. Here are three ways you can engage in mindful activities, disconnect from social media, and revisit old work to jumpstart your creativity.

Engage In Mindful Activities for Writer’s Block

When you’re feeling stuck, it’s essential to engage in mindful activities to help you clear your mind and reduce stress. Here are a few ideas that can help you:

  • Take a walk in nature or listen to calming music
  • Try a different creative hobby such as drawing, writing, or photography
  • Meditate or practice yoga to center your thoughts

These activities can help you relax, reduce your stress level, and provide you with a fresh perspective, opening your mind to new ideas.

Disconnect From Social Media

Social media can be a productivity killer and a significant cause of writer’s block. It’s easy to get distracted and lose focus while scrolling through your social media feeds. So, when you find yourself feeling blocked, it may be time to disconnect from social media for a while. Consider these tips:

  1. Turn off notifications on your phone or computer to avoid getting distracted when you’re working on your music
  2. Limit your social media use by scheduling specific times for checking your accounts
  3. Take a social media break altogether and focus on activities that promote creativity and relaxation

By cutting back on social media use, you’ll have more time and energy to focus on your music and break through your writer’s block quickly.

Revisit Old Work For Ideas

Revisiting your old work can be a goldmine for gathering new ideas. You may discover snippets of beats or unfinished projects that could inspire a fresh take on your current music. Here are some ways you can revisit old work for inspiration:

MethodDescription
Listen to old tracksListen to unfinished tracks or b-sides and gather inspiration from the sounds and effects
Read old lyricsReread lyrics, stories and poems from old projects for inspiration
Collaborate with old friendsCollaborate with previous bandmates and exchange ideas to create something new

In conclusion, it’s normal to experience writer’s block now and then. However, the good news is that there are many easy ways to break through it and refocus your creative mind. Engaging in mindful activities, disconnecting from social media, and revisiting old work can help you jumpstart your creativity and create inspired music.

Collaborate With Other Creatives for Writer’s Block

Collaboration is an essential aspect of the music making process, and it is especially helpful in beating writer’s block. Creatives working together can often spark new ideas and lead to unique sounds. Sometimes all it takes is a fresh set of ears to get the creative juices flowing again. By collaborating with other creatives, one can get a fresh perspective, bounce ideas off each other, and get inspired to create something new.

Work With Vocalists Or Musicians for Writer’s Block

Working with vocalists or musicians can help break the monotony of working alone and help you beat writer’s block. A new voice or instrument can inspire you to try new things and see things from a different perspective. Collaborating with a vocalist or a musician can also give you a new subject to write about, which might help break any creative barriers you might have been experiencing.

Get Feedback From Other Producers for Writer’s Block

Another way to beat writer’s block is to collaborate with other producers and get feedback. Feedback is crucial as it can give insights into how to improve a piece of music. Feedback can also help you identify blind spots and weaknesses, which you might have missed. Getting feedback from other producers can also help you spark new ideas and push you towards a new direction.

Collaborating with other creatives is an excellent way to break the monotony of working alone and help you beat writer’s block. By working together, you can get new ideas, see things from a different perspective, and get the creative juices flowing again. Whether it’s working with a vocalist or a musician or getting feedback from other producers, collaboration is a great way to get unstuck.

Explore New Genres And Styles

Discovering new genres and styles can help break down writer’s block in producing. Experiment with unique sounds and rhythms to stimulate creativity and keep the musical journey fresh.

As a producer, writer’s block can be frustrating and can affect your creativity. One way to overcome this obstacle is by exploring new genres and styles. This can encourage you to try something new and unique. Here are two ways to explore new genres and styles:

Listen To Different Music

Listening to music is a fantastic way to find new inspiration. It’s also a great way to explore new genres and styles. Try branching out from your go-to playlist and listen to different types of music. This exposes you to new techniques, sounds, and ideas you wouldn’t otherwise encounter. You can think of it as adding new colors to your paint palette. When you introduce new sounds and techniques into your music, you give yourself more options to create something original.

Study The Production Techniques Of Other Producers

Another way to explore new genres and styles is by studying the production techniques of other producers. Sharing techniques with other producers can introduce you to new and innovative methods. It also allows you to apply those techniques in your workflow. Websites like Soundcloud and YouTube are great tools to research and discover new music. You can also watch live performances and interviews held by producers on these websites, which can provide you with different production methods and new ideas to experiment with.

Conclusion

Exploring new genres and styles can bring a new dimension to your music and help you overcome writer’s block. Be courageous and don’t be afraid to experiment. Remember to listen to different music and to study the production techniques of other producers. Who knows, it may lead you down a path of gold!

Create A Routine And Stick To It

Developing a routine can be a key factor in beating writer’s block as a producer. Consistency in your writing schedule can help train your brain to focus and be creative during those designated times. Stick to your routine, and you may find that ideas flow more easily and your productivity increases.

Creating a routine and sticking to it is one of the most effective ways to beat writer’s block as a producer. By establishing a consistent schedule and adhering to it, you can develop a rhythm that allows your creative juices to flow freely. In this post, we’ll discuss how you can set goals and deadlines, as well as block out time for regular production, so you can create a routine that works for you.

Set Goals And Deadlines

Setting goals and deadlines is crucial for creating a routine that keeps you on track. Without them, it’s easy to get distracted and lose focus. Start by setting realistic goals for what you want to achieve with your music production. These goals can be as simple or complex as you like, but they need to be specific and attainable. For example, you might want to set a goal to finish producing three tracks per month. This gives you something to work towards and provides a clear indicator of progress. To help you achieve your goals, set deadlines for each track you produce. This will keep you accountable and encourage you to stay on schedule.

Block Out Time For Regular Production

Blocking out time for regular production is essential for establishing a routine that sticks. Look at your schedule and determine when you have the most free time. This might be early in the morning, late at night, or on weekends. Once you’ve identified your most productive times, make sure to block them out for music production. During these dedicated production times, eliminate distractions and focus solely on creating music. This might mean turning off your phone, closing your email, and disconnecting from social media.

When you give yourself uninterrupted time to create, you’ll likely find that writer’s block dissipates and your creativity begins to flow. In conclusion, by creating a routine and sticking to it, you can beat writer’s block and become a more productive music producer. Setting goals and deadlines, as well as blocking out time for regular production, are two effective ways to establish a routine that works for you and keep you on track towards your goals. So start creating your own routine today and see how it transforms your music production process!

Writer’s block – Easy Ways To Beat Writer's Block As A Producer

Credit: medium.com

Push Through The Discomfort

Overcoming writer’s block can be a challenge for producers, but pushing through the discomfort can lead to great results. Take breaks when needed, try new methods, and don’t be afraid to write badly at first. With persistence and creativity, the words will eventually flow.

As a producer, nothing can be more frustrating than writer’s block. The feeling of having creative ideas flowing through your mind but not being able to put them into words can be discouraging. However, overcoming writer’s block is possible if you push through the discomfort. Here are some simple yet effective ways to help you push through the discomfort and beat writer’s block.

Don’t Wait For Inspiration

One common mistake that many producers make is waiting for inspiration to strike before they start writing. This approach can be counterproductive because it puts too much pressure on you to come up with the perfect idea. Instead of waiting for inspiration, start writing even if you don’t feel like it. Write down any idea that comes to mind, no matter how imperfect it may seem at first.

Start With Imperfect Ideas And Iterate

Starting with imperfect ideas may seem counterintuitive, but it’s an excellent way to overcome writer’s block. It takes the pressure off, allowing you to focus on the writing process rather than the end result. Once you have an imperfect idea, iterate on it. Refine it, make it better until you are satisfied with the final result.

Other Tips

In addition to the above tips, here are some other ways you can push through the discomfort and beat writer’s block:

  • Step away and take a break
  • Set deadlines and stick to them
  • Change your environment or routine
  • Brainstorm with others and get feedback
  • Use writing prompts to get your creative juices flowing

In Conclusion

Pushing through the discomfort is the key to beating writer’s block as a producer. Remember not to wait for inspiration, start with imperfect ideas and iterate, take breaks, set deadlines, change your environment or routine, brainstorm with others and use writing prompts. With these tips, you’ll not only overcome writer’s block, but you’ll also become a more efficient, productive, and creative producer.

Frequently Asked Questions Of Easy Ways To Beat Writers Block As A Producer

How Do You Overcome Producer Block?

To overcome producer’s block, try changing your environment, taking breaks, and collaborating with others. Focus on the task at hand and break it down into smaller, manageable steps. Don’t be afraid to experiment and try new things. And if all else fails, take a break and come back to it with a fresh perspective.

What Is The Fastest Way To Cure Writer’s Block?

The fastest way to cure writer’s block is to take a break and do something completely different, such as going for a walk, listening to music or reading a book. Changing your environment and activities can help your brain relax and generate new ideas.

You can also try writing exercises, such as freewriting or brainstorming, to get the creative juices flowing again.

How Do I Bypass Writer Block?

To bypass writer’s block, follow these guidelines: 1) Write in short sentences, no more than 20 words each. 2) Use SEO-friendly, unique, and easy-to-understand language. 3) Avoid certain words and phrases and don’t use passive voice. 4) Write in a style that passes AI writing detection and sounds human.

5) Keep your answer under 50 words.

How To Destroy Writers Block?

To overcome writer’s block, try these tips: take a break, free write, change your environment, read and research, or set a timer. Freewriting can help start ideas flowing, while a new location can bring fresh inspiration. Reading and research can also help spark an idea or even improve your writing.

Lastly, setting a timer can help focus your mind and eliminate distractions.

Conclusion

As a producer, writer’s block can often hinder your creative process. But with these easy tips, you can overcome it and keep creating amazing content. Remember to switch up your routine, take breaks, collaborate with others, and practice mindfulness. All of these techniques can help you push through the toughest moments.

So don’t let writer’s block hold you back any longer. It’s time to get writing!

Categories
Archive

How To Write A Dorian Chord Progression

To write a Dorian chord progression, start with a minor seventh chord rooted on the second scale degree, then transition to the dominant chord rooted on the fifth scale degree. The Dorian mode is a musical mode that is similar to the natural minor scale but with a raised sixth scale degree.

Writing a chord progression in Dorian mode can add a unique flavor to your music. It’s important to understand the characteristics of the Dorian mode and how to construct chords within it. We will cover the basics of Dorian mode and provide examples of chord progressions in this mode.

Whether you’re a beginner or a seasoned musician, this guide will help you create interesting and memorable chord progressions in Dorian mode. So let’s get started!

How To Write A Dorian Chord Progression

Credit: m.youtube.com

Building A Basic Dorian Chord Progression

If you want to create a distinctive and captivating chord progression, Dorian mode is an excellent option. Dorian mode is a minor scale that is one step higher than the natural minor scale, and it has a unique sound that is both happy and funky. Creating a Dorian chord progression is not complicated when you know the chord options, choose a suitable chord progression, and learn to play it in Dorian mode.

Knowing Your Chord Options

Before building a Dorian chord progression, you need to know the chords available in the Dorian mode. The chords in Dorian mode include i, IV, v, and VII. The first chord (i) is the root chord, the fourth (IV) and fifth (v) are major chords, while the seventh (VII) is a minor chord. You can also use other chords variations, including m7, 9, and 6/9. Understanding the chords available helps you to create a unique chord progression that sounds fantastic.

Choosing A Chord Progression

The most common chord progression in Dorian mode is the i-IV-v. These chords create a happy and uplifting sound that you might have heard in several pop or rock songs. However, there are numerous other chord progressions to choose from, including the i-v-IV, i-IV-V, and i-v-vii. When choosing a chord progression, ensure that the chords complement each other and create a flowing and consistent sound.

Playing The Progression In Dorian Mode

To play a Dorian chord progression, you need to be familiar with the Dorian mode. The Dorian mode is similar to the natural minor scale, but with a raised sixth note. So, to play a Dorian progression, you need to play the chords available in the Dorian mode, starting from the root chord. Ensure you emphasize the raised sixth note when playing the chord progression to create the unique Dorian sound.

With these three steps (Knowing your chord options, Choosing a chord progression, and Playing the progression in Dorian mode), you can create a fantastic Dorian chord progression. There are several Dorian chord progressions to choose from, so feel free to experiment with different chord progressions and create your unique sound that suits your music style.

How To Write A Dorian Chord Progression

Credit: jadebultitude.com

Using Modal Interchange To Add Color

Modal interchange is a useful tool for adding color to your Dorian chord progressions. By borrowing chords from other modes with similar tonal centers, you can create interesting and unique progressions that still maintain the Dorian flavor. Experimentation is key in finding the perfect combination of borrowed chords to fit your musical vision.

Modal interchange is a powerful tool that can be used to add color to your chord progressions. It allows you to borrow chords from outside the key and use them to enhance the harmonic palette of your music. In this section, we will discuss how to use modal interchange to write a Dorian chord progression.

What Is Modal Interchange

Modal interchange, also known as modal mixture or modal borrowing, is the technique of borrowing chords from a parallel mode. In the context of Dorian mode, parallel modes would be D major and D minor. The chords borrowed from these modes can be used to add tension, create harmonic interest, or simply provide a change of color.

Identifying Chords To Borrow

To use modal interchange in a Dorian chord progression, you will need to identify which chords can be borrowed. Typically, we borrow chords from the parallel major and minor modes. In the case of Dorian mode, you can borrow chords from D major and D minor. Here are the chords in D major and D minor:

D majorD minor
DDm
EE
F#mF
GGm
AA
BmBb
C#dimC

Applying Borrowed Chords In Dorian Mode

Now that you know which chords can be borrowed, you need to learn how to apply them in a Dorian chord progression. Let’s take a look at an example: Dm – G – A – Dm To add some color to this progression, we can borrow the chord Bb from the parallel D minor scale. This would give us the following progression: Dm – G – Bb – A Notice how the borrowed Bb chord provides a new harmonic flavor to the progression. It adds a touch of melancholy and creates a more interesting harmonic progression. In conclusion, modal interchange is a powerful tool that can be used to add color to your chord progressions. By borrowing chords from parallel modes, you can create more interesting and complex harmonic progressions. In Dorian mode, you can borrow chords from D major and D minor to add flavor and color to your music.

Adding Variety With Secondary Dominant Chords

Adding variety and interest to a Dorian chord progression can be achieved by incorporating secondary dominant chords. These chords, borrowed from other keys, can add tension and resolution to create a more dynamic musical feel.

Are you tired of using the same old chord progressions in your music? Are you looking for new ways to add depth and complexity to your sound? One technique that can help you achieve this is adding secondary dominant chords to your Dorian chord progressions.

What Are Secondary Dominant Chords

Before we dive into how to use secondary dominant chords, let’s first define what they are. A secondary dominant chord is a chord that functions as a dominant (V) chord to a chord other than the tonic (I) chord. In other words, it creates tension and resolves to a chord that is not the root chord.

Identifying Secondary Dominants In Dorian Mode

To identify secondary dominant chords in Dorian mode, you’ll need to first identify the dominant chord. In the key of D Dorian, the dominant chord is A7. To create a secondary dominant chord, use the V chord of the chord you want to resolve to. For example, if you want to resolve to the ii chord (Em7), you would use B7 as the secondary dominant chord.

Using Secondary Dominants In Chord Progressions

One way to use secondary dominant chords in Dorian chord progressions is to use them to replace the traditional ii or IV chord. For example, instead of using Em7 in your chord progression, you could use B7 as the secondary dominant chord to create tension and resolution. Another way to use secondary dominant chords is to create a chain of dominant chords that leads to a resolution. For example, you could use A7 as the dominant chord to lead to D7, which then leads to G7, and finally to Cmaj7. This creates a sense of tension and resolution that can add depth and interest to your music. In conclusion, adding secondary dominant chords to your Dorian chord progressions is a great way to add variety and complexity to your music. By understanding what secondary dominant chords are, how to identify them in Dorian mode, and how to use them in chord progressions, you can take your music to the next level.

Experimenting With Chord Inversions And Voicings

Experimenting with chord inversions and voicings can greatly enhance a Dorian chord progression. By changing the order and voicing of the chords, a new and unique sound can be created. It’s a fun and creative way to explore the possibilities of music.

Benefits Of Chord Inversions And Voicings

Experimenting with chord inversions and voicings adds depth and complexity to your Dorian chord progression. These techniques can help to create more tension and interest in your music, capturing your audience’s attention and making your music stand out. It can also help to create smoother transitions between chords, resulting in a more seamless and polished sound.

Experimenting With Different Inversions And Voicings

Trying different inversions and voicings with your chords can help to create a unique and distinct sound. Inversions involve moving the lowest note of the chord to the top, which can change the overall feel of the chord. Voicings refer to the way in which the notes of a chord are played, such as arpeggiated, blocked, or spread out. Experimenting with these techniques can lead to a richer sound and provide more options for melodic variation.

Listening For The Impact Of Different Inversions And Voicings

As you experiment with different chord inversions and voicings, it’s important to listen for the impact they have on your music. Some inversions or voicings may work better than others depending on the context of your song. Pay attention to how the changes in these techniques affect the mood, texture, and overall feel of your music. With practice, you can develop a stronger sense of the impact of different chord inversions and voicings, allowing you to make more informed decisions about which ones to use in your music.

Tips For Writing Memorable Melodies

Learn how to write a memorable melody with a Dorian chord progression. Start by understanding the characteristics of the Dorian mode and experiment with different chord intervals. Use repetition, variation, and unexpected notes to create an unforgettable melody.

Tips For Writing Memorable Melodies Writing a Dorian chord progression can be a great starting point for crafting catchy and memorable melodies. But what are some key tips for creating melodies that stick in your listeners’ heads? Here are some suggestions to get you started. Playing Over The Chord Progression One effective way to come up with a memorable melody is to experiment with different notes over the Dorian chord progression. Start by playing the chords and trying out different scales and modes, using your ear to guide you to the most interesting and engaging notes. Take note of any intervals or patterns that stand out to you and consider how they could become the basis for your melody. Experimenting With Different Scales And Modes Another way to create a unique and memorable melody is to experiment with scales and modes beyond the standard Dorian mode. For example, you could try using the harmonic minor scale or the Phrygian mode to add some unexpected flavors to your melody. Don’t be afraid to play around with different combinations of notes until you find something that feels truly original and exciting. Using Repetition And Variation To Create Catchy Melodies Even the most complex and sophisticated melodies are often built on simple, repetitive motifs. Once you’ve crafted a basic melody, try repeating certain parts of it with slight variations to create a sense of familiarity and catchiness. You can also vary the rhythm or add small embellishments to keep things interesting. The key is to strike a balance between repetition and variation that keeps your listeners engaged without becoming predictable or boring. Incorporating these tips into your Dorian chord progressions can help you come up with unique, memorable, and engaging melodies that will capture your listeners’ attention and leave them humming your tunes long after the song has ended.

How To Write A Dorian Chord Progression

Credit: hackmusictheory.com

Frequently Asked Questions For How To Write A Dorian Chord Progression

How Do You Write Chord Progressions In Dorian?

To write chord progressions in Dorian mode, start with the Dorian mode scale and use its chords. Typically, the I, ii, and IV chords are minor, the V is major, and the vi is a diminished chord. Experiment with different combinations of these chords while keeping the Dorian mode scale in mind.

How Do You Notate Dorian Mode?

To notate Dorian mode, write the starting note on the second line of the staff and use a natural minor key signature. The mode’s signature characteristic, a raised sixth note, is indicated through an accidental sharp.

How Do You Write A Good Chord Progression?

To write a good chord progression, start with a key and choose chords that fit within that key. Experiment with different chord progressions, and aim for both variety and coherence. Consider the emotions that you want to convey and how the chords can contribute to that.

Keep practicing and listening to other music for inspiration.

What Is The Format For Chord Progression?

The format for chord progression is the sequence of chords used in a musical composition or song. It is represented by Roman numerals that indicate the degree of the scale and the type of chord used. The format can vary depending on the genre and style of music, but it determines the harmonic structure and emotional impact of the piece.

Conclusion

Crafting a Dorian chord progression may seem like a daunting task, but it’s not rocket science either. Just keep in mind the basic rules and explore different combinations of chords to find one that fits your melody beautifully. Remember, practice is the key to perfection, so keep experimenting and playing until you have found the perfect chord progression for your tune.

By following the steps discussed you’re well on your way to crafting your own unique Dorian chord progression. So go ahead, take your music to the next level, and have fun while doing it!

Categories
Archive

How To Sell Merchandise Online As a Musician

To sell merchandise online as a musician, create an e-commerce website or use an existing platform like Bandcamp or Shopify. Use social media to promote your products and engage your fans.

Selling merchandise online can be an effective way for musicians to increase their revenue and expand their brand. To get started, you can create an e-commerce website or use a platform like Bandcamp or Shopify, which offer easy-to-use tools for setting up an online store.

Once you have your store up and running, use social media to promote your products and engage with your fans. Some effective strategies include offering exclusive merchandise to your fans, partnering with other artists to cross-promote products, and encouraging user-generated content through hashtag campaigns. By leveraging the power of online sales and social media, musicians can turn their merch into a profitable and engaging aspect of their brand.

How To Sell Merchandise Online As a Musician

Credit: www.shopify.com

The Importance Of Selling Merchandise Online

The Importance Of Selling Merchandise Online:

Increased Revenue Opportunities

Selling merchandise online provides musicians with a lucrative opportunity to generate additional revenue streams. By offering merchandise such as t-shirts, posters, and other memorabilia online, musicians can reach a wider audience and increase their sales potential beyond just live shows. The online space offers musicians a global market where they can sell their products to fans from all corners of the world.

Building Brand Awareness

Music is an extension of the musician’s brand, and selling merchandise that reflects that brand is a great way to build brand awareness. Fans love connecting with their favorite artists and expressing their support, and merchandise helps them do just that. Wearing a t-shirt or carrying a bag with a musician’s logo is a great way for fans to show their love, and it also serves as free advertising for the artist. Selling merchandise online gives musicians the opportunity to expose their brand to a wider audience and build brand loyalty.

Connecting With Fans

As a musician, connecting with your fans is essential. Selling merchandise online provides an excellent opportunity to do just that. By offering fans exclusive merchandise and personalized experiences, musicians can create strong bonds with their fans, fostering a loyal and dedicated fan base. This type of fan engagement can significantly improve a musician’s presence and reputation in the music industry

In conclusion, selling merchandise online for musicians is a great way to increase revenue opportunities, build brand awareness, and connect with fans. By utilizing the online space and offering unique merchandise, musicians can cultivate their brand and foster a loyal and supportive fan base.

Creating Your Own Online Store

Creating High-quality Merchandise

As a musician, creating high-quality merchandise is crucial for selling online. You need to focus on your brand’s image, work with reputable manufacturers, and offer unique and eye-catching designs to stand out in the market. By finding the right balance between quality and affordability, you can create a successful merchandise line and build a loyal fan base.

Creating High-Quality Merchandise is an essential aspect of selling merchandise online as a musician. It helps establish brand identity, connects with fans, generates revenue, and spreads the word about your music. With the right approach, you can create merchandise that resonates with your audience, stands out, and sells well. In this blog post, we’ll discuss some practical tips for Creating High-Quality Merchandise as a musician.

Choosing The Right Products To Sell

Choosing the right products to sell can make a huge difference in creating high-quality merchandise. You want to offer products that align with your music, mission, and audience’s interests. Start by brainstorming products that make sense for your branding and music genre. For example, if you’re a metal band, you may want to focus on selling t-shirts, hoodies, beanies, and patches. On the other hand, if you’re a pop artist, you may want to sell phone cases, tote bags, stickers, and posters. Once you have some product ideas, research the demand, competition, and profit margins for each product. You may want to start with a few products and scale up as you gain more experience and success.

Designing Merchandise That Resonates With Your Fans

Designing merchandise that resonates with your fans often comes down to understanding your audience, their preferences, and your brand’s visual identity. Start by creating a mood board or brainstorming ideas for your designs. Think about the colors, typography, imagery, and messaging that best represent your music and brand. Also, consider incorporating your lyrics, album art, or tour dates into your designs for added value. When designing merchandise, aim to strike a balance between creativity, practicality, and marketability. Make sure your designs are unique, eye-catching, and memorable, but also functional and wearable. You may also want to test your designs with your fans or gain feedback from design experts before finalizing them.

Finding Reliable Manufacturers And Suppliers

Finding reliable manufacturers and suppliers to produce your merchandise is crucial to ensure high-quality products, timely delivery, and customer satisfaction. Start by researching potential vendors online and checking reviews, ratings, and samples of their work. Reach out to them with your product and design requirements and ask for quotes, production timelines, and minimum order quantities. Once you’ve shortlisted a few vendors, you may want to request product samples to test the quality and fit. You may also negotiate the pricing, payment terms, and shipping arrangements with them. Remember to document all the communication and agreements in writing to avoid any misunderstandings or disputes later on. In conclusion, Creating High-Quality Merchandise is a crucial step in selling merchandise online as a musician. By choosing the right products, designing appealing merchandise, and finding reliable suppliers, you can create merchandise that resonates with your audience and generates revenue for your music career.

How To Sell Merchandise Online As a Musician

Credit: bandzoogle.com

Promoting Your Merchandise Online

Promoting your merchandise online is critical to the success of your music career. In today’s digital age, musicians have a wide range of platforms to choose from to promote and sell their merchandise. Here are some effective strategies that you can use to promote your merchandise online.

Social Media Marketing Strategies

Social media is an excellent platform to promote your merchandise, connect with your fans and grow your audience. Here are some strategies you can use to market your merchandise:

  • Create a buzz about your merchandise by posting sneak peeks of your new products on your social media accounts. Use engaging and creative captions and hashtags to make your posts more appealing.
  • Host giveaways and contests on your social media platforms to increase engagement and promote your merchandise.
  • Partner with other accounts on social media that have a similar audience and collaborate on promotions and giveaways to reach new potential customers.

Email Marketing Campaigns

Email marketing can be a powerful tool to promote your merchandise directly to your fans. Here are some strategies you can use:

  • Build an email list of your fans and send them personalized and engaging emails about your merchandise. Use creative subject lines and email content that accurately represents your brand.
  • Offer exclusive discounts and promotions to your email subscribers to incentivize them to purchase your merchandise.
  • Include high-quality photos and videos of your merchandise in your emails to showcase their quality and appeal to your fans.

Collaborating With Influencers And Other Musicians

Collaborating with influencers and other musicians is an excellent way to reach an even larger audience and promote your merchandise. Here are some strategies you can use:

  • Partner with influencers that have a significant following on social media and collaborate on promotions and giveaways to reach new potential customers.
  • Collaborate with other musicians and sell each other’s merchandise to cross-promote your products and reach new audiences.

By utilizing these effective strategies, you can promote your merchandise online, engage with your fans, and grow your audience and revenue as a musician.

Engaging With Fans Through Online Merchandise

Engaging with fans through online merchandise is a great way for musicians to connect and generate revenue. With the rise of e-commerce platforms, it’s never been easier to sell merchandise online, from t-shirts and posters to exclusive limited editions. By creating a unique brand and engaging with fans through social media, musicians can build a loyal following and increase their online sales.

As a musician, your fans are the lifeblood of your career. Engaging with your fans is essential for building a loyal following that will support you throughout your musical journey. One great way to connect with your fans is through online merchandise. Not only does it allow your fans to show their support for your music, but it can also help you generate additional revenue. In this blog post, we’ll explore some ways to engage with your fans through online merchandise, including creating exclusive merch, encouraging user-generated content, and tracking sales and customer data.

Creating Exclusive Merchandise For Your Fanbase

Offering exclusive merchandise that isn’t available anywhere else is a fantastic way to show your fans how much you value them. This can include limited edition t-shirts, autographed albums, or even merchandise with personalized messages from you. By creating limited-edition merchandise, you can also create a sense of urgency among your fans, encouraging them to purchase before the items are no longer available. Additionally, you can use this merchandise as a way to reward your most loyal fans, with early access or discounts.

Encouraging User-generated Content

Another way to engage with your fans through online merchandise is by encouraging them to create their own content. This could be something as simple as a photo of them wearing your merchandise or a video of them singing along to your latest album. By incentivizing your fans to create and share content, you can create a community of engaged fans who feel like they are part of something larger.

Tracking Sales And Analyzing Customer Data

In order to effectively engage with your fans through online merchandise, you need to have a clear understanding of who your customers are and what they are looking for. By tracking your sales and analyzing customer data, you can gain insights into what products are selling well, what prices your customers are willing to pay, and what types of merchandise your fans are most interested in. This data can be used to inform future merchandising decisions, ensuring that you are always offering products that your fans are excited to purchase. In conclusion, online merchandise is a powerful tool for engaging with your fans as a musician. By offering exclusive merchandise, encouraging user-generated content, and tracking your sales data, you can build a strong and loyal fanbase that will support you throughout your musical career.

How To Sell Merchandise Online As a Musician

Credit: www.printful.com

Expanding Your Music Business Through Online Merchandise

Selling merchandise online is a great way for musicians to expand their business and reach a wider audience. Utilizing various e-commerce platforms and social media channels, musicians can effectively promote and sell their merchandise online, generating additional income and building their brand simultaneously.

Selling merchandise online has become a popular way for musicians to generate revenue and grow their brand. By offering a range of products such as t-shirts, caps, albums, and posters, musicians are able to connect with their fans on a deeper level and expand their music business. In this article, we will explore how you can expand your music business through online merchandise sales, as well as how it can help you fund other projects and monetize your online presence beyond music sales.

Partnering With Brands And Sponsors

Partnering with brands and sponsors is a great way to expand your music business and increase your revenue stream. Brands and sponsors are always looking for opportunities to reach new audiences and partnering with a musician can be a great way to achieve this. This can take the form of sponsored merchandise, endorsements, or even product collaborations. By partnering with brands and sponsors, you not only generate extra income but also increase your brand visibility and fan engagement.

Using Merchandise Sales To Fund Other Projects

Selling merchandise online can also help you fund other music projects. Whether you want to record a new album, go on tour, or create a music video, the revenue generated from merchandise sales can be a valuable source of funding. In addition, offering exclusive merchandise to your fans, such as limited-edition items or signed copies of your latest album, can create a sense of urgency and encourage your fans to support your projects.

Monetizing Your Online Presence Beyond Music Sales

Finally, selling merchandise online can also help you monetize your online presence beyond music sales. By leveraging your social media following, you can create a brand and sell a range of products such as fashion accessories, beauty products, or lifestyle items. This can turn your music business into a diversified online store and generate multiple revenue streams. By monetizing your online presence, you not only increase your income but also establish a broader presence in the digital marketplace. In conclusion, selling merchandise online as a musician offers a multitude of benefits, including increased revenue, brand visibility, and fan engagement. By partnering with brands and sponsors, using merchandise sales to fund other projects, and monetizing your online presence beyond music sales, you can grow your music business and take your career to the next level.

Frequently Asked Questions For How To Sell Merchandise Online As A Musician

How Do Musicians Start Selling Merch?

Musicians can start selling merch by designing or ordering their merchandise, setting up an online store or using a platform like Bandcamp or Shopify, promoting their merch on social media, at live shows, or through their website, understanding their audience and tailoring their merch to their preferences, and considering the logistics of shipping and fulfilling orders.

Do Musicians Make Money From Merch?

Yes, musicians can make money from merch sales, including t-shirts, hats, posters and other merchandise items that feature their name or image. Merchandise sales can be a significant source of income for musicians, especially for those touring or with a large following.

How To Sell Merch At Gigs?

To sell merch at gigs, create eye-catching displays that showcase your products. Set up a designated area with adequate lighting and signage. Have a variety of items available for purchase, including t-shirts, CDs, and stickers. Make it easy for fans to purchase by accepting cash and card payments.

Lastly, promote your merch throughout the show and on social media to encourage sales.

How Do I Become An Online Creator And Sell Merch?

To become an online creator and sell merch, you need to: 1. Establish a niche or brand that aligns with your interests and skills 2. Create various content like videos, blogs, podcasts to build a loyal following 3. Choose a reliable platform like Shopify, Etsy, or Amazon to sell your merch 4.

Promote your products through social media and collaborations 5. Continuously engage with your audience and improve your content to grow your business.

Conclusion

Selling merchandise online as a musician can feel overwhelming at first, but with the right strategy, it can be a lucrative way to further your career. Remember to identify your target audience and create a brand around your music. Utilize social media platforms and host giveaways to engage with your fans.

Don’t forget to research and compare ecommerce platforms to find the right fit for you. With persistence and dedication, you can successfully sell your merchandise online and reach a wider audience than ever before.

Categories
Archive

Tips For Using Mid Side Eq While Mastering

Tips for using mid side EQ while mastering: Be cautious with your adjustments and use the technique subtly to avoid affecting the overall stereo image. Mid side EQ is a powerful technique used to adjust the levels of the center and side parts of the stereo field separately, commonly applied while mastering.

Although it can be an effective way to enhance the mix, it can also introduce problems if not correctly used. Mid side EQ can impact the mono compatibility of your track, which may result in loss of clarity and fullness when played on systems that collapse the stereo image.

We will guide you on the best practices for using the mid side EQ technique while mastering, avoid common mistakes, and ensure your mix maintains its sonic integrity.

Tips For Using Mid Side Eq While Mastering

Credit: www.masteringthemix.com

Tips For Using Mid Side Eq

Gain control over your mastering sessions by learning how to effectively use Mid Side EQ. Focus on shaping the stereo image of your mix by processing the mid and side channels separately. By making the right adjustments, you can achieve better clarity, balance, and width in your final mix.

Mid side EQ is a powerful tool that can help engineers craft an engaging and dynamic mix. With its ability to independently manipulate the mid and side channels of a mix, mid side EQ can be used to increase the stereo width, sculpt the stereo image, and balance the mix. However, using mid side EQ requires a nuanced approach. Here are some tips for getting the most out of mid side EQ while mastering.

Understand The Difference Between Mid And Side Channels

To use mid side EQ effectively, it’s essential to understand the difference between the mid and side channels. The mid channel contains all of the audio information that is panned to the center of the mix, while the side channel contains all of the information that is panned to the left or right of center. By manipulating these channels independently, you can adjust the width and balance of the mix to create a more immersive listening experience.

Use Mid Side Eq To Widen Your Mix

One of the most common uses of mid side EQ is to widen the mix. By increasing the volume of the side channel and decreasing the volume of the mid channel, you can create a more spacious and dynamic mix. However, it’s important to be careful when using this technique, as overcompensating can lead to an unnatural and disjointed sound.

Sculpt The Stereo Image With Mid Side Eq

Mid side EQ can also be used to sculpt the stereo image of the mix. By boosting or cutting certain frequencies in either the mid or side channels, you can create a more balanced and cohesive sound that is tailored to the specific needs of the track. For example, you might boost the mid channel around 2 kHz to bring out the vocals, while cutting the side channel around 400 Hz to reduce muddiness in the bass.

Avoid Over-correcting With Mid Side Eq

While mid side EQ can be a powerful tool, it’s important to avoid over-correcting. Overcompensating in either the mid or side channels can lead to a sound that is unnatural or disconnected. Instead, approach mid side EQ with a light touch, making small adjustments to ensure that the mix remains coherent and balanced.

Listen Carefully And Take Your Time

When using mid side EQ, it’s essential to listen carefully and take your time. Small adjustments can have a significant impact on the overall sound of the mix, and it can be easy to overdo it if you’re not paying attention. Take the time to listen to the individual elements of the mix and experiment with different settings until you find the right balance.

Use Mid Side Eq In Moderation

Finally, it’s important to use mid side EQ in moderation. While it can be tempting to rely solely on mid side EQ to solve all of your mixing problems, it’s important to remember that it’s just one tool in a larger toolbox. Use mid side EQ to complement other processing techniques, such as compression and reverb, to create a cohesive and engaging mix that is true to the unique sonic identity of the track.

Tips For Using Mid Side Eq While Mastering

Credit: www.masteringthemix.com

Tips For Using Mid Side Eq While Mastering

Credit: www.masteringthemix.com

Frequently Asked Questions Of Tips For Using Mid Side Eq While Mastering

How Do I Improve My Mid Side Eq Mix?

To improve your mid-side EQ mix, begin by isolating the mid and side channels and adjusting EQ settings to ensure they complement each other. Use a high-pass filter to clean up the low end and create space for other frequencies.

Consider using subtraction EQ to remove any clashing frequencies between the mid and side channels. Finally, make small adjustments and listen critically to achieve a balanced and polished mix.

When Should You Use Mid Side Eq?

Use mid side EQ when you want to adjust the stereo field of a mix or a track. It can be used to balance elements in the center and sides, as well as to create space and depth in a mix.

What Is An Ideal Eq Type To Use During Mastering?

The ideal EQ type to use during mastering depends on the particular mix. It is always best to approach the mastering process with an open mind and be ready to experiment with different EQs until you achieve the desired sound.

It is good practice to use a variety of EQs together to cover a broad range of frequencies.

How Should We Approach Equalization During Mastering?

Approach equalization during mastering by making sure each element of the mix has its own space in the frequency spectrum. Use EQ to enhance or cut certain frequencies as needed, and pay attention to the overall balance of the mix.

Utilize reference tracks to ensure a similar sound and monitor the effects in mono.

Conclusion

In mastering, one of the essential tools that can be used is the mid-side EQ. By emphasizing on the center and sides separately, this tool can bring out greater detail and clarity in a mix. However, it’s important to use it tastefully and enhance the mix, not change it entirely.

Remember, the goal is always to make the mix sound great. Take the time to experiment with mid-side EQ, and you might just find it to be a game-changer in your mastering process.