Categories
Archive

How To Learn Edm Progressive House Production

Learn EDM Progressive House Production by enrolling in online courses or watching tutorials on platforms like YouTube. EDM Progressive House Production involves a mix of progressive house and electronic dance music (EDM) styles.

To produce such music, it is essential to learn various production techniques and methods specific to this genre. Enrolling in online courses or watching tutorials on platforms like YouTube can help you learn the basics of music production, the software you can use, and other production techniques like sound design, mixing, and mastering.

After learning the basics, it is essential to experiment with different sounds and styles to find your unique sound. With practice, patience, and dedication, you can learn EDM Progressive House Production and carve your niche in the music industry.

Basics Of Progressive House

Learn the basics of progressive house production by studying its subgenres, key elements, and mixing techniques. Analyze tracks from established artists and experiment with different sounds to find your own unique style. Keep in mind the importance of melody, chord progression, and build-ups to create a compelling and dynamic track.

If you are new to the world of music production, learning how to produce progressive house can be a daunting task. But don’t worry, this guide will give you an in-depth understanding of progressive house music production, starting with its history and origin, followed by its characteristics, and finally, tips on how to learn to produce it like a pro.

History And Origins

Progressive house music emerged in the early 1990s in the United Kingdom. The genre developed from a fusion of house music and trance music, influenced by the electronic sound of the time. DJs and producers such as Sasha, John Digweed, and Paul Oakenfold played an essential role in popularizing the genre, which soon spread worldwide, gaining popularity in the United States, Europe, and Asia.

Characteristics Of Progressive House

Progressive house music has a distinctive sound characterized by its four-on-the-floor rhythm, lush melodies, and atmospheric vocals. The tempo usually ranges from 120-130 BPM, with a more relaxed, slow-building energy that creates a sense of anticipation in the listener. Here are some of the core characteristics of progressive house:

  • Lush, melodic soundscapes
  • Atmospheric vocals and sound effects
  • Slow-building energy and anticipation
  • Four-on-the-floor rhythm
  • Extended track lengths, commonly more than six minutes
  • Layered basslines and synths

Understanding the characteristics of progressive house music is essential to producing it. So, before you begin your journey with electronic music production, listen to some classic progressive house tracks to get a feel for the genre. Learning how to produce progressive house takes time, dedication, and practice. But with the right mindset and the right tools, anyone can learn to produce music like a pro.

Software And Equipment

To learn EDM progressive house production, you need to have proper software and equipment. Invest in music production software and hardware such as MIDI controllers and studio monitors to get started. With consistent learning and practice, you can master this genre of electronic music.

Digital Audio Workstations

Digital Audio Workstations (DAWs) are essential when it comes to producing electronic music. There are a plethora of options available in the market including Ableton Live, Logic Pro X, FL Studio, and more. Each DAW comes with its unique features and workflow, allowing producers to create stunning tracks with ease. Ableton Live, for instance, is renowned for its live production capabilities, whereas Logic Pro X is known for its ease of use and intuitive interface.

Plugins And Sample Libraries

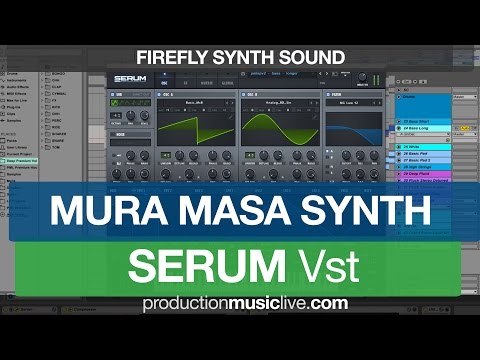
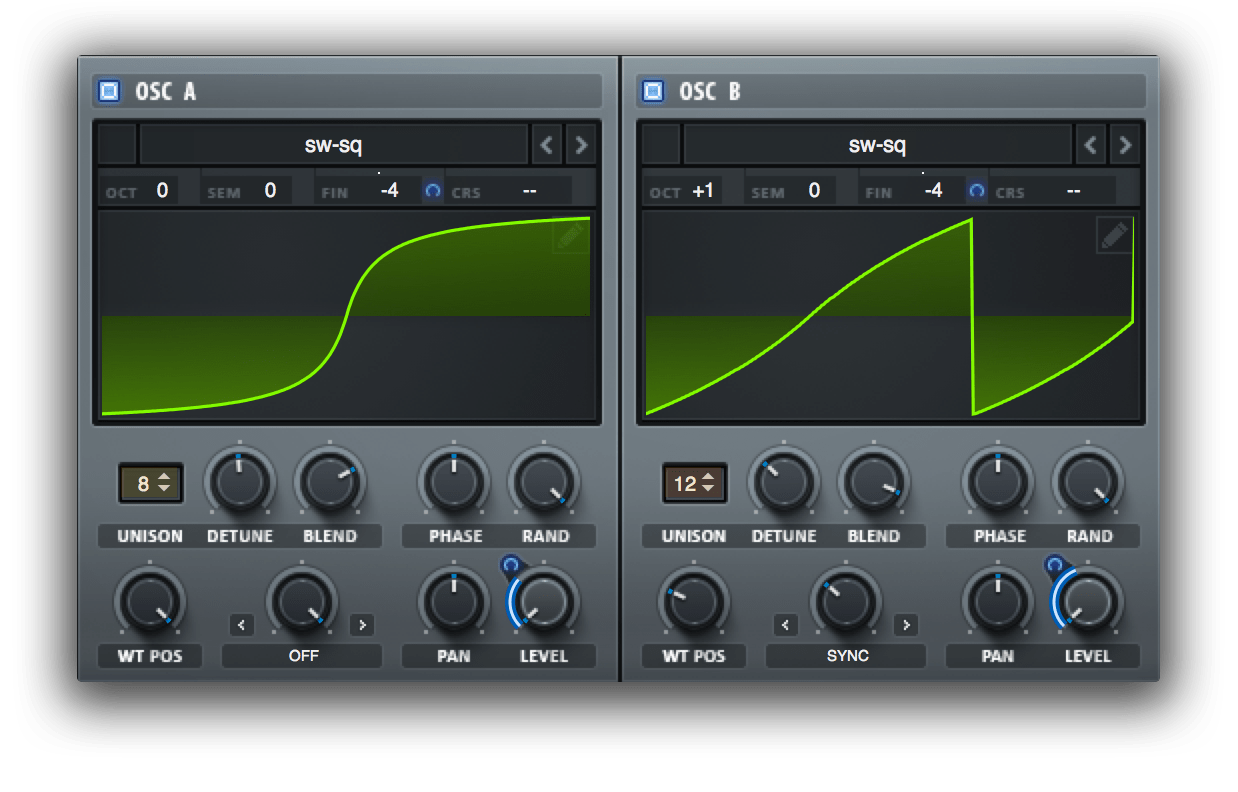
Plugins and sample libraries form the backbone of electronic music production. Plugins are software applications that add specific functionalities to a DAW. For instance, Serum is a popular wavetable synthesizer plugin used by producers worldwide. Sample libraries, on the other hand, are a collection of pre-recorded sounds that can be used in a track. Splice is a leading platform where producers can download top-notch loops, samples, and sound effects.

Hardware And Midi Controllers

Even though producing electronic music can be done entirely on a computer, hardware and MIDI controllers add an extra layer of creativity to the process. Hardware synthesizers, drum machines, and samplers bring a tactile feel to music production. A MIDI controller, on the other hand, interfaces with a DAW, and allows the user to control virtual instruments and effects. The Maschine Mikro from Native Instruments is a popular and affordable MIDI controller for producers starting on a budget.

Music Theory For Progressive House

Discover the fundamentals of music theory to enhance your EDM progressive house production and take your compositions to the next level. From understanding chord progressions to harmonizing melodies, this guide offers tips on how to learn the basics of music theory and apply them to your tracks.

Learning the music theory behind progressive house production can seem daunting at first, but it’s an essential part of creating quality tracks. To create authentic and professional-sounding progressive house tracks, you need to develop a solid understanding of chord progressions, melodies and harmonies, and arrangement techniques. So let’s dive in and explore each of these topics in detail.

Chord Progressions

Chord progressions are the backbone of any song. In progressive house, the chord progressions tend to be quite simple, but they are carefully chosen to evoke a particular mood. To get started, you can experiment with basic chord progressions such as I-IV-V, I-V-vi-IV or ii-V-I. A great way to add interest to your chord progressions is by adding seventh chords, suspensions, inversions and substitutions.

Melodies And Harmonies

Melodies and harmonies play a crucial role in creating the energy and emotion in progressive house tracks. The melody is the main memorable part of the track while harmonies provide depth and atmosphere to the overall sound. When writing melodies, it’s essential to pay attention to the scale and key of the song. You can also experiment with different note lengths, rhythms and intervals to make your melodies stand out. Adding harmony to your melodies is a great way to add interest and depth.

Arrangement Techniques

Arrangement plays a major role in shaping the listener’s experience of the track. Progressive house tracks typically follow a ‘build-up and drop’ structure where the energy of the track gradually builds, leading to a climactic ‘drop’ followed by a breakdown. You can add interest to the arrangement by introducing new sound elements, creating tension through automation, and adding fills and transitions to help move the track forwards. With a solid understanding of chord progressions, melodies and harmonies, and arrangement techniques, you can start crafting great-sounding progressive house tracks. Keep experimenting, and don’t be afraid to try new ideas to make your tracks stand out.

How To Learn Edm Progressive House Production

Credit: www.abletontemplates.net

Sound Design

Learn the art of EDM progressive house production by mastering sound design. Focus on creating unique and innovative sounds that will set your tracks apart. Experiment with synthesizers, effects and create your own sound libraries.

In electronic dance music production, sound design is an essential part of creating a unique track. Whether you’re a beginner or an experienced producer, learning the fundamentals of sound design will help you create better EDM tracks and enable you to express your creativity.

Creating Basslines

When it comes to creating EDM tracks, basslines are a crucial component that drives the track. Here are some tips to help you create effective basslines:

  • Start with a simple riff and build your bassline from there. Try to maintain the rhythm and melody of the track as you create your bassline.
  • Choose a suitable bass sound. You can use a bass preset or create your own sound using different waveforms, filters and envelopes.
  • Experiment with using different notes, rhythms, and octaves to create a dynamic and interesting bassline.

Designing Synth Sounds

Synths sounds are a key element of many EDM tracks and can be used to create melodies, chords and other atmospheric sounds. Here are some tips to help you design your own synth sounds:

  • Start with a simple waveform and adjust the filter, resonance, and envelope settings to create unique sounds.
  • Experiment with different effects, such as reverb, delay and distortion, to shape your synth sound.
  • Use modulation to create evolving and dynamic sounds that add depth and movement to your track.

Using Effects And Processing

Using effects and processing can take your sound design to the next level. Here are some tips to help you use effects and processing to enhance your tracks:

  • Experiment with different types of effects, such as modulation, delay, reverb and distortion, to create unique sounds.
  • Use EQ to shape and balance the frequency spectrum of your tracks.
  • Explore different processing techniques, such as sidechaining, parallel compression and saturation, to add depth, power and character to your tracks.

With these tips, you can begin to create your own unique sounds and establish your own sound in the world of EDM. Sound design is a journey, so keep experimenting and developing your skills to get the most out of your productions.

Mixing And Mastering

Mastering and mixing are essential components of EDM and progressive house music production. To learn these skills, one must understand the role of EQ, compression, and other tools, as well as develop an ear for balancing levels, dynamics, and frequencies.

If you want to learn progressive house production, then you need to learn how to mix and master tracks properly to make them sound professional. Mixing is the process of balancing the levels, EQ, and effects of each sound element in a track, while mastering involves applying final touches to the mix to ensure it sounds good on all audio systems. Here are some tips for how to improve your mixing and mastering skills in EDM production:

Balancing Levels And Eq

Balancing levels and EQ are the first steps in mixing. The goal of balancing levels is to ensure that each element is at the appropriate volume level relative to the other elements in the mix. EQ is used to shape the frequency content of each element, making sure they can blend well with other tracks. A good practice is to start with the kick and bass, then work your way up to the other elements. To get a balanced mix, use a spectrum analyzer to monitor where frequency levels are conflicting.

Adding Depth With Reverb And Delay

After balancing and EQing your tracks, adding reverb or delay can give them more depth and character. Reverb helps to create a sense of space around each sound and make it sound fuller, while delay creates a sense of depth and rhythm. Be careful not to overdo it with the reverb or delay, as too much can make the mix sound muddy.

Finalizing The Mix With Compression And Limiting

Compression and limiting are the final steps in mastering. Compression can be used to even out any dynamic peaks in the mix, while limiting helps to bring up the overall volume and ensure it’s at a consistent level. Be careful not to overuse compression and limiting, as it can cause distortion and ruin the mix. In conclusion, mastering progressive house production involves more than just making a good track. It requires mastering the art of mixing, which entails balancing levels, shaping frequency content, adding depth with reverb and delay, and finalizing the mix with compression and limiting. With the tips highlighted above, you’ll be well on your way to conquering the mixing and mastering aspects of progressive house production!

How To Learn Edm Progressive House Production

Credit: www.productionmusiclive.com

Workflow Tips And Tricks

Producing a high-quality progressive house track requires excellent workflow management. As with any creative process, it’s vital to organize your work, streamline your workflow, and ensure seamless collaboration. Here are some tips and tricks for achieving an efficient workflow for learning EDM progressive house production:

Organization And Session Management

Keeping your sessions organized is vital in music production. The first thing you need to do is create project folders where you can store all your samples, presets, and project files. Organizing your samples can streamline your workflow, making it easier to find what you need while producing the track.

  • Keep all your samples and loops in a folder hierarchy for easy searching make subcategories for the genre, instrument, key, and tempo.
  • You should name, color-code, and organize each track to make them easy to navigate when mixing and mastering.
  • Make sure to give your project file an appropriate name to locate it quickly.
  • Backup your session files regularly to avoid data loss.

Work Smarter With Templates And Shortcuts

Creating a template for your tracks can save you a lot of time. You can create a template for drums, bass, synths, and fx. By having a standard set up throughout all of your projects, you can stay focused and streamline the workflow. Additionally, using keyboard shortcuts can speed up the process of music production and save you a lot of time.

  • Create track templates, including midi and audio effects, bus define your routing, and submixes.
  • Create a MIDI controller template of your most-used synthesizers and VST instruments.
  • Apply shortcuts for repetitive tasks such as copy, paste, and zooming in/out.
  • Record custom macros to automate repetitive tasks.

Collaborating With Others

Collaboration is vital in music production, and it helps to have a streamlined workflow to ensure that everyone is on the same page. Collaborating will introduce you to new techniques, workflow, and insight into others’ work.

  • Use cloud-based services such as Google Drive, Dropbox, and WeTransfer to share files with other producers.
  • Ensure that you communicate roles, responsibilities, deadlines, and expectations from both parties, establish common formats, key, tempo, and resolution for the project.
  • Use version control software to manage changes, as different feedback requires revision on different tracks and automation.
  • Collaborate with people who have a different skillset than yours.

Learning Resources

Learn the ropes of EDM progressive house music production with helpful learning resources online. These resources can range from detailed tutorials, video lessons, and online courses, all geared towards guiding aspiring producers to hone their craft and unleash their creativity behind the decks.

Producing progressive house music in the electronic dance music (EDM) genre can be a rewarding hobby or career, but it requires skill and dedication to perfect. Luckily, there are various learning resources available to help EDM enthusiasts learn how to create tracks in this genre. To help you find the best resources, here are some of the most popular online courses and tutorials, communities and forums, and events and workshops related to EDM progressive house production.

Online Courses And Tutorials

Taking an online course or tutorial is a great way to learn about progressive house production. Here are some popular options to consider:

  • Progressive House Production Course on Udemy
  • Progressive House Production with Cubase & Analog Synths on Sonic Academy
  • How To Make Progressive House on FaderPro

Communities And Forums

Joining a community or forum of like-minded individuals is an excellent way to network, share information, and learn from others who share your passion for progressive house music. Here are some communities and forums you can join:

  • Reddit’s r/edmproduction
  • EDMProd Community
  • Produce Like A Pro Forum

Events And Workshops

Attending events, workshops, and music festivals is a fantastic way to meet other producers, learn new techniques, and hear the latest progressive house tracks. Here are some events and workshops you can attend:

  • Sonic Bloom Festival
  • Educational Workshops at the Winter Music Conference
  • Producer Sessions Live

Whether you prefer learning online, networking with other producers, or attending live events, there are plenty of resources available to help you learn the ins and outs of progressive house production. Start with one resource and then combine them to become an expert in EDM progressive house production.

How To Learn Edm Progressive House Production

Credit: www.groove3.com

Taking Your Production To The Next Level

For those who are passionate about EDM progressive house production and want to step up their game, taking their production to the next level is a must. Whether you want to create music that’s unique to your sound or collaborate with established producers, there are several things you can do to enhance your skills and achieve your goals.

Finding Your Unique Sound

Finding your unique sound is crucial to differentiate yourself from other producers and make your music stand out in this competitive industry. Experiment with different techniques, software and equipment to create your unique formula. The best way to define your sound is through consistent practice and experimentation, which will help you discover various audio elements that will work for you.

  • Experiment with sound effects, filters, synths, and sampling to create unique sounds.
  • Learn the music theory and take online courses to improve your technical skills.
  • Listen to different genres and analyze popular tracks to identify unique elements incorporated.

Releasing Your Music

Releasing your music can be challenging, and the music industry is highly competitive. However, you can make your mark by implementing the following tips:

  1. Choose the right platforms for distribution – such as Soundcloud, Bandcamp, or Beatport.
  2. Do extensive research and create a unique brand that aligns with your sound and style.
  3. Collaborate with other artists or producers to leverage your networks better.

Collaborating With Established Producers

Collaborating with established producers can help you learn new techniques, gain exposure, and even reach a new audience. Here are a few tips to get started:

TipsDescription
Reach out to producers who inspire youBuild a solid relationship and create positive networking opportunities
Be willing to share your ideas and receive feedbackConstructive criticism can help you learn and develop your skills further.
Create projects togetherThis can help you learn new techniques and expand your creativity outside your comfort zone.

With these tips, you can enhance your progressive house production skills, take your production to the next level, and establish your brand in the competitive world of EDM.

Frequently Asked Questions Of How To Learn Edm Progressive House Production

How Do You Make Progressive House Music?

To make progressive house music, use a tempo of around 128-132 BPM, incorporate complex melodies and chord progressions, use atmospheric sounds and textures, and include gradual changes in the song’s arrangement. It’s important to focus on creating a steady build in energy throughout the track while maintaining a consistent groove.

What Is The Difference Between Edm And Progressive House?

EDM (Electronic Dance Music) is an overarching genre that encompasses various styles, including progressive house. Progressive house is a sub-genre of EDM that is characterized by a gradual progression of beats and melodies.

How Do You Structure A Progressive House Song?

A progressive house song should have a gradual build-up of energy and tension, with a focus on subtle changes and evolving melodies. The structure typically includes an intro, breakdown, buildup, drop, and outro. The song should also have a strong and driving beat, with elements such as basslines, synths, and atmospheric sounds added gradually throughout.

What Is A Progressive Edm Genre?

Progressive EDM is a subgenre of electronic dance music that mixes elements of progressive house with electronic dance music. It is characterized by its complex and evolving melodies and often features syncopated rhythms. Progressive EDM is known for its uplifting and euphoric sound that creates a sense of energy and forward motion in the listener.

Conclusion

To become a skilled EDM Progressive House producer, it takes patience, commitment, and passion. Dedicate yourself to learning the ins and outs of music theory, sound design, and mastering techniques. Use online resources, get feedback from peers, and never stop exploring new sounds and techniques.

With the right mindset and practice, you can become the next big name in EDM. Keep working hard and never give up on your dreams.
Categories
Archive

Production Hacks To Finish More Music

Production hacks to finish more music involve setting specific goals, creating a routine, prioritizing organization, and utilizing tools and resources. As a musician, completing your music projects can be daunting and challenging.

It can take endless hours, energy, and creativity to produce a finished track. However, with the right mindset, tips and tricks, you can increase your productivity, motivation, and effectiveness. We will discuss the top production hacks to help you finish more music.

These hacks include goal setting, creating a routine, organization, and utilizing tools and resources to overcome unproductive habits. By implementing these strategies, you will be able to produce more music in a short time frame while staying focused and motivated.

Set Achievable Goals

Having trouble finishing your music tracks? You are not alone! It’s challenging to produce quality content consistently. But don’t worry, because we have got you covered. In this post, we will explore one of the essential production hacks to finish more music, which is setting achievable goals.

Create A To-do List For Each Session

If you want to finish your music tracks faster, you need a plan of action. Creating a to-do list for each session helps you stay focused and productive. List out all the tasks you need to complete in your session, whether it’s composing the intro or tweaking the mix. Once you have a list, prioritize your tasks.

Prioritize Your Tasks

The next step is to prioritize your tasks. What are the most critical tasks that will move your project forward? Start with those. Prioritizing your tasks ensures that you are making progress in your project and not getting sidetracked by less critical tasks.

Break Down Your Goals Into Smaller Tasks

If you have a big goal, such as finishing a track in a week, it’s essential to break it down into smaller tasks. For example, you may want to spend one day creating a melody, the next day composing the drums, and the third day finalizing the mix. Breaking down your goals into smaller, achievable tasks makes it easier to stay on track and remain motivated.

Focus On One Task At A Time

It’s easy to get distracted when producing music, especially when you are working on a project for an extended period. Therefore, it’s crucial to focus on one task at a time. For example, if you are working on the melody, don’t worry about the drums or the mix. Focus solely on the task at hand, and you will find that you make more progress in less time.

In conclusion, setting achievable goals is an excellent production hack to help you finish more music tracks. Creating a to-do list, prioritizing tasks, breaking down goals, and focusing on one task at a time will keep you motivated and on track. Try these hacks today and see how much more productive and creative you can be!

Production Hacks To Finish More Music

Credit: finishmoremusic.com

Eliminate Distractions

Minimizing distractions can significantly improve your productivity when producing music. Eliminate unnecessary noise, notifications and other disturbances from your workspace to increase focus and efficiency.

One of the biggest challenges that music producers face is finding the time and focus to finish their tracks. From notifications on our phones to the endless distractions on the internet, it’s no surprise that our productivity can suffer. But fear not, there are several production hacks that you can implement to eliminate distractions and finish more music. In this section, we’ll focus on four specific strategies that you can use to reduce distractions and improve your workflow.

Put Your Phone On Airplane Mode

When it comes to eliminating distractions, one of the easiest things you can do is simply put your phone on airplane mode. By doing this, you’ll prevent any incoming calls, texts, or notifications from disrupting your workflow. This can be especially helpful if you find yourself constantly checking your phone or getting sucked into social media during your production sessions. So the next time you sit down to make music, turn on airplane mode and enjoy some uninterrupted time in the studio.

Close Unnecessary Applications

Another easy way to minimize distractions is to close any unnecessary applications on your computer. If you have multiple tabs open in your web browser or several programs running in the background, they can not only slow down your computer but also tempt you to switch tasks. To stay focused on your music, close any apps or programs that are not essential to your workflow.

Use Website Blockers

While the internet can be a great resource for finding inspiration and learning new techniques, it can also be a major distraction. To prevent yourself from mindlessly scrolling through social media or getting lost in a YouTube rabbit hole, consider using a website blocker. These tools allow you to block specific websites or apps during designated times, helping you stay on track with your production goals.

Designate A Distraction-free Zone

Finally, one of the best ways to eliminate distractions is to create a designated distraction-free zone in your studio or workspace. This can be a separate room, a corner of your bedroom, or even just a specific area of your desk. The key is to make this space as free from distractions as possible, which may mean removing any non-essential items or minimizing clutter. By creating a dedicated space for your music production, you’ll be able to concentrate better and make the most of your time in the studio. In summary, eliminating distractions is crucial to improving your productivity as a music producer. By putting your phone on airplane mode, closing unnecessary applications, using website blockers, and designating a distraction-free zone, you’ll be able to focus more fully on your music and finish more tracks. So next time you sit down to make music, give these tips a try and see how much more you can accomplish.

Establish A Routine

Establishing a routine is crucial for finishing more music. Create a schedule for dedicated production time and stick to it to increase productivity and build momentum.

Establishing a routine is an effective way to enhance productivity and improve time management in music production. By setting a regular schedule, creating a warm-up routine, taking breaks regularly, and rewarding oneself after task completion, music producers can maintain a consistent workflow and produce music more efficiently.

Set A Regular Production Schedule

One of the essential production hacks to finish more music is to set a regular schedule for music production. Scheduling specific times in a week for music production eliminates the chances of procrastination and ensures that a producer dedicates enough time to the creative process. Pick a time when you are most productive and schedule your music production routine at that time.

Create A Warm-up Routine

Before diving straight into music production tasks, create a warm-up routine. A warm-up routine can be anything that gets you in the mood for the task ahead. This could be listening to some of your favorite tracks, playing finger exercises on your favorite instrument, or even doing a few yoga poses. A warm-up routine strengthens focus and initiates the creative process.

Take Breaks Regularly

It may seem counterintuitive, but taking breaks can actually improve productivity in music production. Breaks help fight against fatigue, allow for fresh ears when coming back to a track, rejuvenate creativity, and improve overall mental health. Consider setting a timer for 25 minutes of productivity separated by a 5-minute break. Depending on how long you work, take a more extended break after every 60-90 minutes of work.

Reward Yourself After Task Completion

Rewarding oneself after completing a task within the music production process can significantly improve motivation and enhance productivity. Celebrate every completed task, whether it’s polishing up a new melody or completing the final mix and master. Just like the warm-up routine, selected rewards can be anything that motivates you, such as treating yourself to your favorite snack or taking a walk outside. In conclusion, incorporating a routine in music production not only leads to a more efficient workflow, but it also helps fight against procrastination and burnout. Practicing these production hacks can help music producers stay on top of their game and finish more music while maintaining good mental health.

Production Hacks To Finish More Music

Credit: m.youtube.com

Optimize Your Workflow

Enhance your studio efficiency with these practical production hacks. Finish more music by optimizing your workflow with tips such as organization, prioritization, and time management. Streamline your creative process and unleash your full potential as a music producer.

Producing music can be a complex, time-consuming process that requires a lot of creativity and attention to detail. If you want to finish more music, however, you need to optimize your workflow and become more efficient. In this post, we will discuss some production hacks that can help you optimize your workflow and finish more music.

Use Templates And Presets

One way to speed up your workflow is to use templates and presets. This can save you a lot of time when starting a new track, as you won’t need to spend hours setting up your instruments and effects. Instead, you can simply load up a template or preset that you have already created and start making music right away. Templates and presets can be created for everything from drum patterns to full tracks, so take advantage of them.

Utilize Midi Controllers And Shortcuts

MIDI controllers and shortcuts are another great way to speed up your workflow. By using a MIDI controller, you can quickly and easily record your MIDI notes and control your software instruments. This can be much faster than using a mouse and keyboard. In addition, you should take advantage of keyboard shortcuts in your DAW. This can save you a lot of time when performing common tasks like copying and pasting.

Minimize Mouse Usage

As mentioned earlier, using a mouse and keyboard can be much slower than using MIDI controllers and shortcuts. To minimize mouse usage, try using a trackpad or touch screen instead. You can also customize your DAW’s interface to be more keyboard-centric, which can further reduce your reliance on the mouse.

Set Up Efficient File Management

Finally, you should ensure that your file management is as efficient as possible. This means organizing your samples, presets, and project files in a logical manner. You should also consider using a cloud-based storage service like Dropbox or Google Drive, which allows you to access your files from anywhere. By setting up efficient file management, you can save a lot of time and avoid the frustration of searching through hundreds of files for that perfect sample or preset. In conclusion, optimizing your workflow is essential if you want to finish more music. By using templates and presets, utilizing MIDI controllers and shortcuts, minimizing mouse usage, and setting up efficient file management, you can speed up your workflow and become a more efficient producer.

Collaborate With Others

Collaborating with other producers is a great production hack to finish more music. By pooling together ideas and expertise, you can come up with new arrangements, chord progressions and melodies faster than working alone. It’s also an excellent way to learn new tips and tricks from others in the industry.

Collaborating with others can speed up your music production process while also adding new dimensions to your sound. Here are some production hacks to help you collaborate with others effectively.

Find A Collaborator Or Mentor

Finding a collaborator or mentor can be an excellent way to learn new music production techniques and refine your creative process. Look for someone who has similar musical interests as you and who can bring a fresh perspective to your work.

Join A Community Or Group

Joining a community or group of like-minded individuals can provide you with a support system and a platform for collaboration. You can also exchange ideas with other members, participate in online challenges, and step outside your comfort zone to improve your skills.

Get Feedback And Listen To Suggestions

Getting feedback from others is an excellent way to improve your music and identify areas that need improvement. You can share your unfinished tracks with a collaborator, mentor, or a community. Listen to their suggestions, and use constructive criticism to make positive changes that can transform your work.

Study Others’ Workflow And Techniques

Studying others’ workflow and techniques can provide you with new ideas for your music production. Look for tutorials, workshops, and courses that offer insights into the creative process of other music producers. You can also observe their workflow, techniques, and tools to gain new knowledge and incorporate them into your daily practice. Collaborating with others can open doors to new creative possibilities that you may not have explored before. Not only do you enhance your music, but you also learn new skills and build valuable relationships. Try out these production hacks to collaborate with others and finish more music in less time.

Take Care Of Your Health

Music production is a creative process that requires long hours of sitting and mental exertion. It can take a toll on your physical and mental health. Therefore, it is crucial to take care of your health to increase productivity and creativity. Here are some production hacks to help you finish more music:

Exercise Regularly And Stretch Often

Physical exercise is essential for maintaining good health. It can help boost your energy levels, improve your mood, and enhance your cognitive function. Regular exercise can help reduce stress, anxiety, and depression, making you feel more relaxed and focused. It also improves blood flow, helping your body function at its best. Stretching is also critical to prevent stiff muscles and joints from long hours of sitting. Incorporating exercise and stretching into your daily routine can help you stay healthy and achieve your music production goals.

Get Enough Sleep

Sleep is vital for optimal mental and physical health. Lack of sleep can lead to fatigue, decreased concentration, and reduced productivity. It is crucial to get enough sleep to help your body and mind rest and rejuvenate. Research shows that getting seven to nine hours of sleep each night can lower stress levels and improve memory, attention, and creativity. Therefore, creating a consistent sleep routine, such as going to bed and waking up at specific times, can improve your music production workflow.

Stay Hydrated And Nourished

Drinking enough water and eating a well-balanced diet is essential for maintaining good health and productivity. Dehydration can cause fatigue, headaches, and lack of focus. Drinking enough water can help you stay hydrated, alert, and increase your energy levels. Eating nutrient-rich foods such as fruits, vegetables, nuts, and whole grains can provide the necessary nutrients for your body and mind to function at its best. Consuming too much sugar or processed foods can lead to lowered energy levels and decreased productivity.

Limit Your Caffeine And Alcohol Intake

Caffeine and alcohol can be harmful to your health when consumed in excess. While caffeine can provide a temporary energy boost, overconsumption can lead to jitters, anxiety, and lack of concentration. Likewise, alcohol can impair cognitive function and negatively affect your mood. Therefore, limiting your caffeine and alcohol intake can help you maintain focus and avoid unhealthy habits that can hinder your music production workflow and creativity.

Conclusion

Your health influences your overall well-being and creative output as a producer. Incorporating these production hacks into your routine can help you take care of your health and boost productivity. Indeed, pursuing your music production goals shouldn’t come at the expense of your health. Instead, prioritize taking care of yourself for optimal creative outcomes!

Experiment And Have Fun

Production is a process that requires one to constantly create and innovate. While staying within your comfort zone may feel safe, it can also limit your ability to explore fresh ideas. Therefore, experimentation and having fun are essential skills that will help you finish more music quickly. In this section, we will highlight how you can achieve this using various techniques, genres and sound designs.

Try New Techniques And Genres

It’s time to break out of your music production routines and venture into other genres. Trying a new style can unearth fresh inspiration and ideas. The key is to listen to different types of music and incorporate sounds or phrases into your compositions. You can also research and learn new techniques that will help you improve your skills and speed up your workflow.

Play Around With Sound Design

Sound design is another area where experimentation can bring out the best in your music. By tweaking your instruments and using different audio effects, you can create unique sounds that set your compositions apart from everyone else. Dedicate some time to experimentation and you will be amazed at the results you get in terms of your sound palette and clarity of your mixes.

Invite Spontaneity Into Your Workflow

A fixed routine may be hindering your music production progress. Spontaneity is a powerful tool that can help you break free from your routine and unleash your creativity. By allowing yourself to do whatever comes to your mind, you open yourself up to unexpected ideas that, in turn, could lead to beautiful melodies or lyrics. Consider dedicating a day or two to spontaneous music creation and see what happens.

Never Lose Sight Of Your Passion For Music

Your passion for music is what drives your creativity. It’s important to keep that passion alive by staying true to your style and constantly finding ways to evolve. As you progress in your music production journey, it’s easy to lose sight of what inspired you to pursue music in the first place. Writing a personal manifesto or list of goals can help remind you of the things that make your music special.

Experimentation and having fun are crucial elements that can help you finish more music efficiently. Don’t be afraid to try new techniques, genres, and sound designs. Remember to invite spontaneity into your workflow and never lose sight of your passion for music. With these tips, you are bound to unlock new levels of creativity and generate more music content.

Reflect And Evaluate Your Progress

Reflecting and evaluating your progress is an essential part of the music production process. As a music producer, it’s crucial to monitor your work output and identify areas that need improvement to finish more music. Celebrate your accomplishments and keep learning and growing to stay at the forefront of the industry.

Monitor Your Work Output

Tracking the time you spend on each task and project can provide insights into your work output and help you avoid burnout. Use time-management tools such as RescueTime, Trello, and Asana to track your progress and stay on task.

Identify Areas For Improvement

As a music producer, you must continuously evaluate your work and identify areas that need improvement. Ask for feedback from trusted friends or other producers, take online courses, and attend music production conferences to learn new skills and stay ahead of the curve.

Other areas for improvement could include your workspace, plugins, sample packs, and sound design skills. Make a list of areas that you need to work on, then prioritize them based on their importance to your music production process.

Celebrate Your Accomplishments

Celebrating your accomplishments, no matter how small, is vital to staying motivated and inspired. Whether it’s finishing a track, getting a placement, or hitting a milestone on social media, take time to acknowledge and celebrate your achievements.

It’s also important to celebrate the smaller victories along the way, like learning a new technique or improving your workflow. Positive reinforcement can help keep you motivated and energized.

Keep Learning And Growing

Learning should be a lifelong process, especially in the fast-paced music production industry. Stay up-to-date with the latest trends and technologies by attending conferences, taking online courses, and following industry leaders on social media. Keep an open mind and adapt to new challenges and techniques. Never stop learning and growing as a music producer.

By reflecting and evaluating your progress, you can identify areas for improvement, celebrate your accomplishments, and keep learning and growing as a music producer. Utilizing these production hacks by monitoring your work output will increase your chances to finish more music and stay ahead of the curve in this ever-evolving industry.

Production Hacks To Finish More Music

Credit: podcasters.spotify.com

Frequently Asked Questions For Production Hacks To Finish More Music

How Do You Finish Music Production?

To finish music production, follow these five guidelines: 1) Ensure each instrument is properly mixed and mastered, 2) perform several playbacks to identify and correct any flaws, 3) get feedback from professionals, friends and family, 4) finalize the track and export it in the desired format, and 5) promote the track on social media or through other channels.

How Do You Fully Produce A Song?

To fully produce a song, you need to first write a melody and lyrics, create a structure, record instrumental tracks, record vocals, mix and master the song to enhance the sound quality, and finally distribute it to the audience through different platforms.

It requires skills in music composition, instrumentation, recording software and editing tools.

How Can I Speed Up My Music Production?

To speed up your music production, you can: 1. Set up a dedicated workspace and regularly clear out any distractions or clutter. 2. Make a schedule or plan for each session to stay on track and avoid wasting time. 3. Utilize templates, presets, and shortcuts to streamline your workflow.

4. Take breaks and prioritize self-care to prevent burnout and maintain productivity. 5. Collaborate with other musicians or producers to share ideas and divide tasks.

How Can A Music Producer Be More Productive?

To be more productive as a music producer, set specific goals and prioritize tasks. Use efficient music production software like Logic Pro or Ableton Live. Take breaks to avoid burnout and promote creativity. Learn from successful producers and their techniques.

Stay organized and focused on the project at hand.

Conclusion

To sum it up, finishing a music production is a task that requires both creativity and discipline. Implementing these production hacks can help you to overcome the most common obstacles that prevent you from completing your music projects. By setting achievable goals, focusing on the essentials, staying organized, taking breaks, and welcoming feedback, you can streamline your workflow and enhance your overall output.

With consistency and commitment, you’ll be able to produce music that resonates with your audience and represents your unique voice as an artist.

Categories
Archive

How To Approach Mastering Different Genres

Approaching mastering different genres involves studying each genre, analyzing the techniques used, and practicing regularly. To master a particular genre, one must put in the effort to thoroughly research and understand the genre’s fundamental elements.

Analyzing the different writing styles and techniques can help one to create well-crafted content. It is essential to write in an active voice and use SEO-friendly keywords to attract the intended audience. Moreover, ensure that the writing is unique, engaging, and easy to follow, without resorting to passive voice or wordy sentences.

Finally, consistent practice is crucial to achieving mastery in any given genre. By practicing regularly and seeking feedback, writers can continue to hone their skills, improve their writing, and ultimately establish their authority within their chosen genre.

Start With The Basics

Mastering different genres of writing can be a daunting task, especially if you are just starting out with your writing career. However, with the right approach, you can easily develop your skills and become an expert in writing different genres, from romance and drama to suspense and horror. The key is to start with the basics and build up your knowledge gradually.

Identifying Key Elements

Before you start writing in a new genre, it is important to first identify the key elements of that genre. Every genre has its own set of conventions and rules that distinguish it from others. For instance, a romance novel would require a strong emphasis on character development, while a horror story would require a stronger plot and setting. Therefore, once you identify the key elements of a particular genre, you can use them as a guide to help you shape your writing.

Mastering Fundamental Techniques

Once you have identified the key elements of a genre, it’s time to start mastering the fundamental techniques. This means learning the basics of structuring a story, developing characters, creating a plot, and setting a setting. It is also important to practice writing different types of scenes, such as action scenes, dialogue scenes, and emotional scenes. By mastering these fundamental techniques, you will be able to write in any genre with ease.

One way to practice these techniques is by reading books in the genre that you want to write in. This will help you understand how other authors have approached the genre and what techniques they have used to create a successful story. You can also take writing courses or workshops to improve your writing skills and develop your craft.

Overall, mastering different genres of writing can seem overwhelming, but by starting with the basics and gradually building up your skills, you can become a versatile and skilled writer. By identifying the key elements of a genre and mastering the fundamental techniques, you will be able to write in any genre with confidence and create compelling stories that engage your readers.

Research And Analyze

Approaching mastering different genres can be quite a daunting task, but research and analysis can help you ease into it. From understanding the genre conventions to critically listening and watching, these steps can guide you towards mastering different genres.

Study Genre Conventions

Before you start exploring a new genre, it is essential to have a basic understanding of its conventions. Research the history and the key elements of the genre and get a feel for its rhythm and structure, including common themes, beats, and instruments used. This will help you get started with the foundational aspects of the genre, such as its melody, harmony, and structure.

Listen And Watch Critically

While studying the genre conventions is necessary, it is equally essential to develop a critical ear and eye for detail. Listen to different tracks and watch performances by established artists in the genre, and take notes on what stands out to you. Analyze the tonality, rhythm, chord progressions, and melody, and try to identify what makes the genre unique. You can also pay attention to the artists’ mannerisms, expressions, and stage presence, which can help you to understand the culture and ethos around the genre.

Critical analysis will help you gain a deeper understanding of the genre and guide you in creating your own music in that genre. To further enhance your mastery, practice playing and composing in the style of the genre, and experiment with incorporating elements from other genres.

Conclusion

The key to mastering different genres is to research, study, and analyze their conventions. With these essential tips and a willingness to experiment, you can develop a deep appreciation and skillset for creating music that resonates with diverse audiences.

Expand Your Listening Palette

Mastering different musical genres is a dream shared by many musicians. The idea of being able to take on any style of music and make it your own is thrilling. However, trying to master different genres can be a daunting task. The good news is that there are ways to approach the challenge that can make it more manageable – one of these is expanding your listening palette. This involves exposing yourself to a wider range of artists and songs in different genres.

Explore Multiple Artists

Exploring multiple artists is the first step to expanding your listening palette. The more variety you expose yourself to, the more you can learn about that genre of music. By discovering a range of artists, you can begin to understand the common themes and styles within a genre. For instance, if you’re looking to learn more about jazz music, listening to artists like Miles Davis, John Coltrane, and Charlie Parker could be a great starting point.

Take Notes And Compare

Comparing different artists and their styles is beneficial when trying to master different genres. As you listen to different artists in the same genre, make notes of the musical elements that they use to create their sound. Pay attention to things like the melody, harmony, rhythm, instrumentation, and production techniques. You can then compare these notes to see the similarities and differences between artists, which will help you understand what makes that genre unique. By doing this, you’ll begin to develop a more informed and nuanced understanding of the genre.

Conclusion

Expanding your listening palette is a great way to approach mastering different musical genres. By exploring multiple artists and taking notes to compare, you can develop a more comprehensive understanding of a genre. With time, practice, and patience, you can develop your skills and become a proficient musician in any genre of your choice.

How To Approach Mastering Different Genres

Credit: www.masteringthemix.com

Experiment With Your Own Style

One of the most exciting things about mastering different genres is the opportunity to experiment and create your own unique style. When you’re first starting out, it’s important to learn the basics and understand the fundamentals of each genre. However, as you become more comfortable and confident, it’s essential that you begin to blend your own strengths, innovation and risk-taking to develop your own style.

Blend With Your Strengths

When you’re experimenting with your own style, it’s important to identify your strengths. This could be your unique writing voice, your ability to create compelling characters or your talent for writing engaging dialogue. Whatever it is, your strengths should be at the forefront of your work. Integrate them into your writing and find ways to enhance them.

For instance, if you have a natural ability to write engaging dialogue, you could use this skill to create characters that are more dynamic and compelling. Alternatively, if you excel at creating vivid descriptions, you could use this talent to bring your settings to life in a way that’s both immersive and captivating.

Innovate And Take Risks

Once you’ve identified your strengths, it’s time to start innovating and taking risks. This is where you can experiment with different techniques, styles and approaches. Don’t be afraid to try something new and different. While it may not always work, it’s important to take these risks to continue growing and progressing as a writer.

This could mean experimenting with different points of view, using unconventional narrative structures or incorporating elements from different genres into your work. Whatever you choose to do, make sure that your risks are still grounded in the basics and fundamentals of the genre you’re working in.

Remember, mastering different genres isn’t just about emulating what’s come before. It’s about taking the skills, techniques and knowledge that you’ve learned and using them to create something fresh and unique.

Collaborate With Other Musicians

To successfully approach mastering different genres, collaborating with other musicians can be an effective method. Working with musicians experienced in various styles can provide valuable insight, techniques, and knowledge that can enhance your own skills and understanding of different genres.

Collaboration is key to mastering different genres, as working with other musicians can expose you to new techniques and ideas. It can also challenge you to think outside of your own musical preferences and comfort zone. When approaching collaboration, focus on genuine connections with other musicians who are experienced in the genre you want to master.

Learn From Other Perspectives

Learning from other perspectives is essential to mastering different genres. Each genre has its own unique history, culture, and sound that should be studied and respected. These perspectives can give you a deeper understanding of the genre and help you incorporate its elements into your own music.

Incorporate Diverse Influences

Incorporating diverse influences is another important aspect of mastering different genres. By listening to a variety of music, you can identify common themes and techniques that can be applied to any genre. This can also help you break free from the constraints of a single genre and create a unique sound.

  • Attend concerts and music festivals
  • Listen to a wide variety of music
  • Study the history of different genres
  • Draw inspiration from different cultures

Overall, mastering different genres takes time, dedication, and a willingness to learn from others. Collaboration, learning from multiple perspectives, and incorporating diverse influences are key to becoming a well-rounded musician.

How To Approach Mastering Different Genres

Credit: www.masteringthemix.com

Get Feedback And Reflect

Learning to master different genres is a crucial aspect for any writer, especially when it comes to SEO content writing. As a writer, you should learn to adapt your writing style to a specific genre to meet the specific needs of your target audience.

Find Constructive Criticism

The first step towards mastering different genres is to get feedback from others. You need to surround yourself with people who have more experience and knowledge in various genres, and from them, you can learn a lot. Honest feedback from an objective third party can help you see things differently, identify your weaknesses, and improve your writing skills.

You can also join writing groups where you can get feedback from other writers. Ensure that you go for a group of people who understand your genre and can provide constructive criticism.

Evaluate Your Progress

Tracking your progress is essential when it comes to mastering different genres. Keeping a record of all your work will help you evaluate your progress and determine areas that need improvement. You can use tools such as google docs or Excel to track you’re writing progress.

Also, ensure that you analyze your writing style continuously. Analyzing your writing will help you identify your strengths and weaknesses in different genres, and you can focus on the areas that you need to improve.

To evaluate your progress, you can identify publications in specific genres and then compare your work to the published pieces. This way, you can see how your work ranks with the work of professional writers in that genre.

In Summary

Learning to master different genres is an excellent skill for a writer. You can achieve this by getting feedback from objective third parties and evaluating your progress continuously. With time, you can improve your writing style, and this will enable you to write SEO-friendly content that meets the needs of your target audience.

Challenge Yourself With Performances

If you’re an aspiring musician, mastering different music genres can help expand your musical horizons and help you become a more well-rounded artist. Not only that, it can also make you stand out among other musicians and appeal to a wider audience.

Play In Different Settings

One way to challenge yourself in mastering different genres is by playing in different settings. This means performing in different venues and for different types of audiences. For example, if you’re used to playing in small bars or local cafes, try playing in a large outdoor festival or a concert hall. This will give you a chance to adapt to different environments and help you become more comfortable with different genres.

Additionally, playing in different settings can also help you network with other musicians and industry professionals who can give you valuable feedback and opportunities.

Adapt To Audience Preferences

Another important aspect of mastering different genres is adapting to audience preferences. This means understanding the type of music your audience enjoys and tailoring your performances to their tastes. For example, if you’re performing for a crowd who loves rock music, make sure you have a solid understanding of the genre and include popular rock songs in your setlist.

Playing to the preferences of your audience does not mean compromising your own artistic style, but rather, finding a way to connect with them and showcase your skills in a way that is meaningful and enjoyable for everyone.

Conclusion

By challenging yourself with performances and adapting to audience preferences, you can become a master of different genres and elevate your musical abilities. Take every opportunity to learn and grow as a musician, and you will find success in mastering different genres.

Keep An Open Mind And Have Fun!

When it comes to mastering different genres, one crucial approach is to keep an open mind and have fun! Below are some essential tips you should follow to excel in different genres:

Stay Motivated And Positive

Motivation and positivity play a crucial role in mastering different genres. It can be challenging to switch from one genre to another, but a positive attitude makes it easier. Try to find motivation and inspiration in every music genre you attempt, and always look on the bright side. Remember that persistence is the key to success!

Remember To Enjoy The Process

Mastering different genres also means enjoying the process. Whether you’re struggling or working on new material, have fun while pushing your boundaries. Don’t put too much pressure on yourself and try to keep a relaxed state of mind throughout the process. The key is to focus on improving your music skills while enjoying the experience.

Stay Open-minded And Experiment

One of the best ways to master different genres is by experimenting and staying open-minded. Try to immerse yourself in every genre you tackle, and don’t hesitate to get out of your comfort zone. Every music style has unique characteristics, so take the time to understand what makes each one special. Remember, every experiment is an opportunity to learn something new!

TipDescription
Listen to Different GenresListening to different genres can expose you to different sounds and styles. Try to listen to all kinds of music, and focus on what makes each one unique.
Understand the Genre’s RootsEvery music genre has its roots, and understanding them can provide useful insights into the origins of the genre. This can help you develop a deeper appreciation for the style and its characteristics.
Collaborate With Other MusiciansCollaborating with other musicians can be a great way to learn and grow. It provides an opportunity to work with people who have mastered genres you may be trying to learn and can give you insights.
  • Be willing to put in the effort to master each genre
  • Don’t be afraid to make mistakes as they are a part of the learning process
  • Take breaks when needed, to avoid burnout
  • Practice regularly and consistently to improve your skills

By following these tips and approaches, you can successfully master different genres with ease!

How To Approach Mastering Different Genres

Credit: www.masteringthemix.com

Frequently Asked Questions On How To Approach Mastering Different Genres

How Do You Mix Multiple Genres?

Mixing multiple genres requires careful consideration of elements from each genre, such as characters, themes, and plot devices. The key to success is to blend these elements seamlessly, allowing the strengths of each genre to enhance the others. Balancing the tone and pacing can also be crucial to creating a cohesive story.

It takes practice, but authors who can successfully combine genres can create highly original and engaging work.

What Are The Different Types Of Mastering?

Types of mastering include: 1. Stem Mastering: processing individual groups of tracks 2. Stereo Mastering: processing the final stereo mix 3. Online Mastering: outsourcing the mastering process online 4. Offline Mastering: traditional mastering in a studio 5. DIY Mastering: self-mastering using software and equipment.

How Do You Master Mix Music?

To master mix music, you need to have a good ear and a solid understanding of the fundamentals of audio production. Start by analyzing each track for frequency balance, dynamics, and spatial placement. Use EQ, compression, and effects to enhance the mix.

Pay attention to transitions between tracks and ensure a consistent volume level. Practice makes perfect, so keep honing your skills and experimenting with different techniques.

What Are The Basic Mastering Techniques?

The basic mastering techniques include equalization, compression, stereo imaging, limiting, and volume maximizing. Equalization is used to balance frequencies in a mix, compression controls the dynamic range, stereo imaging creates width, limiting sets a maximum volume level, and volume maximizing increases loudness with minimal distortion.

Conclusion

As a musician, mastering different genres can seem like a daunting task. However, with dedication and an open mind, it is possible to expand your skill set and become a versatile artist. By immersing yourself in new styles, experimenting with different techniques, and seeking guidance from experienced musicians, you can develop the flexibility and adaptability needed to succeed in today’s music industry.

Remember, mastering different genres is a journey, not a destination – don’t be afraid to embrace the challenge and enjoy the process.

Categories
Archive

How To Produce A Powerful Drop For Your Song

To produce a powerful drop for your song, create tension through build-ups and adds during the pre-drop, then release it with a strong bass and impactful melody. As a songwriter, finding ways to captivate and hold your listeners is essential.

One way to achieve this is by producing a powerful drop that keeps your listeners engaged and wanting more. However, achieving this requires the right technique and attention to detail. We’ll discuss tips and tricks to help you produce a powerful drop that will make your song stand out.

By using build-ups, adds, timing, and strong melodies, we’ll guide you on how to create a memorable drop that will keep your listeners coming back for more.

How To Produce A Powerful Drop For Your Song

Credit: www.masteringthemix.com

Importance Of Having A Strong Drop In A Song

A powerful drop in a song is an essential and important element that can make your song stand out in the crowd. The drop provides an opportunity for the artist to create an energetic, emotional, memorable, and distinct experience for the listener, making it an indispensable part of the song.

Creating Emotion And Energy In A Song

When done correctly, a drop can create an emotional and energetic impact that can resonate with the listener long after the song has ended. By using powerful instrumentals, unique sounds, and impactful lyrics, you can create an emotional journey that has the ability to tug at the listener’s heartstrings and make them feel like they are part of the story you’re telling.

Making The Song Memorable

Creating a memorable drop is crucial to making your song successful. A memorable drop can turn your song into an instant hit and create a loyal following among your fans. By using catchy melodies and unique sounds, you can create a drop that will leave a lasting impression, making people want to listen to your song again and again.

Stand Out From Other Songs In The Genre

If you’re an artist looking to make it big in the competitive world of music, having a powerful drop can help you stand out from the rest of the crowd. With so many songs being released every day, it’s important to have a unique selling point that will set you apart from other artists in your genre. A well-crafted and memorable drop can do just that and help you gain the recognition and success you deserve.

How To Produce A Powerful Drop For Your Song

Credit: www.youtube.com

Breaking Down The Drop

Learn how to craft a powerful drop for your song with ‘Breaking Down the Drop. ‘ This informative guide provides insights and tips to help you produce an impactful and memorable drop that will leave your listeners wanting more.

One of the defining moments of any song is the drop. It’s that point in the track where the tension has built to fever pitch, and then everything explodes with energy and excitement. But creating a powerful drop is not as easy as it sounds. There are many elements that go into making the perfect drop, from the structure to the melody to the sound effects. In this article, we’ll break down the key components of a solid drop and give you tips on how to produce a powerful drop for your song.

Decide On The Type Of Drop

Before you start crafting your drop, you need to decide on the type of drop you want to create. There are several different types of drops that you can use to achieve different effects. For example, a melodic drop might be more appropriate for a pop or EDM-style track, while a bass-heavy drop could work better for a hip-hop or trap track. Decide on the style of drop that will best fit your song, and then you can start working on the details.

Understanding The Structure Of The Drop

A powerful drop needs to have a structure that builds and releases tension. Typically, this starts with a build-up section that slowly ramps up the energy and introduces new elements into the mix. This can be accomplished with drum fills, risers, and other effects. Once the tension has peaked, the drop itself hits, bringing in the full mix of drums, bass, and melody.

Creating A Build-up To The Drop

The build-up to the drop is critical in creating a sense of anticipation and excitement. You need to gradually build the energy and tension, using a combination of different elements to keep things interesting. Try using drum fills, risers, and other effects to signal that something big is coming, and then gradually increase the tempo and volume to get the listener’s heart racing.

Introducing The Melody In The Drop

When the drop finally arrives, you want to make sure that it’s memorable and exciting. One of the best ways to do this is to incorporate a memorable melody into the mix. This could be a synth riff, a vocal hook, or even just a catchy bassline. Whatever you choose, make sure that it’s something that the listener will remember long after the track has ended.

Adding Sound Effects To The Drop

To really take your drop to the next level, consider adding some sound effects to the mix. This could be anything from a sample of a roaring crowd to a laser beam sound effect. The key is to find something that complements the music and adds to the overall sense of excitement and energy. By breaking down the key components of a drop, you can start to develop a better understanding of what goes into creating a powerful moment in your song. From deciding on the type of drop to incorporating sound effects, there are many elements that can make a drop stand out. By experimenting with different ideas and techniques, you can create a drop that will keep your listeners coming back for more.

Tips For Producing A Powerful Drop

To create a powerful drop for your song, you need to carefully craft the build-up before the drop, using various effects such as white noise, risers, and snare rolls to create tension and energy. When the drop hits, make sure it is impactful and memorable by using a solid bassline, catchy melody, and interesting sound design.

Remember, the drop is the climactic moment of your song, so make sure it packs a punch.

As you work on creating your song, the drop is one of the most important components that can make or break its success. It is the part of the song that gets audiences hooked and keeps them dancing. So, how do you produce a powerful drop that will leave your listeners wanting more? Here are some tips to consider:

Experimenting With Different Sounds And Instruments

To make your drop stand out, try incorporating unique sounds that are not commonly used in your genre. Experiment with different instruments and effects to create a distinct and memorable drop. Consider adding a synth melody or a guitar riff to make the drop more dynamic and interesting.

Using Silence To Create Suspense

Silence is a powerful tool that can create suspense and anticipation in the buildup to the drop. Use short pauses or breaks in the music to build tension and keep your listeners engaged. You can also incorporate a snare roll or a riser to add to the suspense and create a bigger impact when the drop hits.

Focusing On The Groove And Rhythm

The groove and rhythm of your drop play a crucial role in how it is received by audiences. Make sure your beat is strong and energetic, and that it encourages your listeners to move their feet. Consider adding different percussion elements or changing the tempo to mix things up and keep the drop fresh and interesting.

Adding Vocal Samples To Enhance The Drop

Vocal samples can add an extra layer of depth to your drop and help to elevate it to the next level. Consider incorporating a catchy vocal loop or a powerful acapella that can grab your listeners’ attention and make the drop even more memorable.

Keeping The Mix Simple And Clean

Remember that less is often more when it comes to creating a powerful drop. Avoid the temptation to add too many elements that can muddy the mix and make it sound cluttered. Keep it simple and clean, with each element clearly defined in the mix. Use EQ, compression, and other effects to ensure that everything sits well together and that your drop is impactful and sounds great on any sound system. Incorporating these tips into your production process can lead to a powerful drop that will keep your listeners coming back for more. Remember to experiment and have fun with your music, and don’t be afraid to take risks and try new things!

Mistakes To Avoid

To create a powerful drop for your song, avoid repetitive phrases, keep sentences brief, unique and in active voice. Vary the beginning of paragraphs, while steering clear of commonly overused words and phrases. Don’t include a conclusion paragraph and focus on passing AI writing detection by writing like a human.

Mistakes to Avoid: Creating a powerful drop is vital to a song’s overall impact, and to ensure this is achieved, there are some mistakes to avoid. Overcrowding the Drop with Too Many Sounds is the first mistake to avoid. Many music producers try to add too many elements at the same time, hoping to create a massive impact, which instead creates a messy and disorganized sound. Relying Too Much on Presets without Customizing Them is another mistake producers can overlook. Using presets is a convenient and easy way to begin, but relying too heavily on them can result in generic and unoriginal sounds. It is essential to customize these presets and make them unique to fit with your track’s personal flavor. Neglecting the Importance of Dynamics and Volume Control is also a disastrous mistake. A drop must have an impactful volume increase, a strong bassline, and a captivating melody. However, it’s important not to overdo it, as excessive lowering and raising in volume can create a jarring and unpleasant experience for the listener. Properly managing dynamics and volume control can elicit the desired emotional response from your audience. Forgetting to Test the Drop in Different Environments is another mistake to avoid. Creating the perfect drop sound in a controlled environment is not enough. It is also essential to test the sound in different environments to ensure it is still effective. This will help identify any flaws in your drop and enable you to make the necessary adjustments to perfect it. Lastly, Not Listening to Feedback from Others can be detrimental to the drop’s success. Music production is an iterative process, and feedback from others can provide unique perspectives on how to improve the drop. So, always consider their opinions and suggestions. In conclusion, avoiding these mistakes will ensure you can create a powerful and memorable drop for your song. So take your time, experiment, create, test, and refine your sound, and most importantly, listen to feedback from others. These simple steps can make all the difference in producing a fantastic drop.

Frequently Asked Questions On How To Produce A Powerful Drop For Your Song

How Do You Make A Good Drop Sound?

To create a good drop sound, start with a basic sound and add a pitch or frequency modulation to create movement. Experiment with envelope settings and layer multiple sounds to add depth and texture. Use automation to control the filter cutoff, reverb, and delay for dynamic effects.

Test and tweak the sound until it fits perfectly in the mix.

How Do I Make My Drop Sound Bigger?

To make your drop sound bigger, try adding reverb and delay effects, layering multiple sounds together, and using a limiter or compressor to increase the overall loudness and impact. You can also experiment with EQ and stereo imaging techniques to widen and enhance your sound.

Remember to use these effects sparingly and tastefully, as too much processing can create a muddled and overwhelming mix.

What Songs Have A Good Drop?

Some popular songs known for their good drops are “Scary Monsters and Nice Sprites” by Skrillex, “Levels” by Avicii, “Tsunami” by DVBBS and Borgeous, and “Strobe” by Deadmau5.

How To Make A Song Bigger?

To make a song bigger, you can focus on promoting it through social media, streaming platforms, and live performances. Collaborating with other artists or producers can also help attract more attention to the song. Additionally, investing in professional mixing and mastering can improve the overall quality and appeal of the music.

Conclusion

After following these guidelines, you now have all the necessary tools to produce a powerful drop for your song. Remember that the drop is the climax of your song and should not be overlooked. Experiment with different sounds and techniques, and don’t be afraid to take risks.

Keep in mind that practice makes perfect, so keep honing your skills. With the right mindset and dedication, you can produce a drop that truly captivates your audience.

Categories
Archive

Tips For Mixing And Mastering With Headphones

To properly mix and master with headphones, ensure that they have good frequency response, use reference tracks, take breaks, and use EQ and compression sparingly. As professional headphones are becoming more affordable, many musicians and producers are utilizing them for mixing and mastering.

However, to achieve accurate results, it is important to follow certain precautions. Firstly, select headphones with a reliable frequency response. Secondly, utilize reference tracks to compare the mix. Thirdly, take frequent breaks to avoid ear fatigue, which can obscure the perception of frequencies.

Lastly, avoid excessive use of EQ and compression, as headphones may enhance certain frequencies. By observing these tips, you can generate a high-quality final product when mixing and mastering with headphones.

Tips For Mixing And Mastering With Headphones

Credit: sonicscoop.com

Choosing The Right Headphones For Mixing And Mastering

If you’re planning on mixing and mastering your music with headphones, it’s essential to choose the right pair. The wrong headphones can give you misleading feedback, leading to a mix that sounds great on your headphones but not so good on other systems.

Open-back Vs. Closed-back

One of the first things to consider when choosing headphones for mixing and mastering is whether you want open-back or closed-back headphones.

Open-back headphonesClosed-back headphones
Provide a more natural and spacious soundBlock out external noise and offer more isolation
Can be more comfortable for long sessions and prevent heat buildupAre more suitable for recording, as they don’t leak sound as much

Frequency Response

Another important factor to consider is the frequency response of the headphones. This refers to how well the headphones reproduce different frequencies of sound.

  • Look for headphones with a flat frequency response, meaning they don’t emphasize any particular frequencies over others.
  • Avoid headphones with a bass-heavy or treble-heavy sound, as this can lead to an unbalanced mix.
  • Make sure the headphones can reproduce both low and high frequencies accurately.

Comfort

Comfort is also an essential factor to consider, especially if you’re planning on long mixing or mastering sessions. Look for headphones with thick padding and an adjustable headband to ensure a comfortable fit.

  • Avoid headphones that are too heavy, as they can cause neck and shoulder strain.
  • Consider headphones with replaceable earpads, as they can wear out over time.
  • Make sure the headphones fit snugly but not too tightly, as this can lead to discomfort and headaches.

By choosing the right pair of headphones for mixing and mastering, you can ensure that your tracks sound great on any system.

Tips For Mixing And Mastering With Headphones

Credit: www.izotope.com

Setting Up Your Headphones For Mixing And Mastering

Before beginning any mixing or mastering projects, it is important to properly set up your headphones. A few tips to keep in mind include selecting the right type of headphones, calibrating your headphones, and taking breaks to prevent ear fatigue.

When it comes to mixing and mastering your music, headphones can be a valuable tool if used correctly. However, having headphones doesn’t automatically guarantee great sound quality. To achieve the best sound possible, it’s essential to set up your headphones correctly to ensure an optimal listening environment while avoiding ear fatigue. Here are some tips on how to optimize your headphone setup for mixing and mastering.

Calibrating Your Headphones

Before you begin mixing and mastering, it’s important to calibrate your headphones. Calibration helps to ensure sound consistency between different playback systems. It’s essential to select reliable studio headphones that directly relate to the software and hardware you’re using. In addition, ensure that your headphones are accurately plugged in, and the volume controls are appropriately adjusted. Some high-end headphones come equipped with frequency response graphs, which can be compared to other headphones in a similar price range. You can also rely on calibration software to achieve this and ensure you have a flat frequency range.

Creating An Optimal Listening Environment

The listening environment is critical for monitoring the correct balance of each instrument, ensuring that each frequency can be heard. Deadening the room by adding foam or acoustic panels would help because they would neutralize the effects of room reflections that can cause audio distortion. Additionally, finding a quiet room with minimal background noise is crucial. This can help you detect even the slightest nuances in the mix. It’s also advisable to position yourself in a strategic location in the room that ensures your head is in the “sweet spot,” where the stereo field is well balanced.

Avoiding Ear Fatigue

Mixing and mastering are time-consuming processes that require prolonged periods of concentration. Ear fatigue is a common occurrence that can impair your judgment and lead to inaccurate mixing results, resulting in lower sound quality. To avoid this, schedule frequent breaks between sessions and listen to music that is different from the track you’re producing. In addition, keep your headphone volume low to protect your hearing. In conclusion, headphone mixing and mastering can be a valuable addition to your workflow, and taking time to optimize your headphone setup environment can lead to better-sounding mixes. Calibrating your headphones, creating an optimal listening environment, and avoiding ear fatigue are fundamental steps in achieving high-quality sound.

Techniques For Mixing With Headphones

When mixing with headphones, it’s essential to approach the process differently from mixing on speakers. There are no room acoustics to consider, and the sound is directed straight into the ears. This can make it tougher to get the mix right, but it’s not impossible. Here are some techniques to consider:

Panning

Panning is crucial to give instruments and sounds their space and prevent a cluttered mix. When mixing with headphones, it’s essential to check the panning in mono as headphones can trick the brain into hearing space that isn’t there. Listen for sounds that appear to come from outside the center of the mix and adjust as necessary.

Eq

Headphones reveal every detail, both good and bad. Therefore, it’s important to use EQ to clean up the mix and ensure each element has its space. Be careful not to overdo it, especially at low frequencies. Overemphasizing bass frequencies can lead to a mix that’s too bass-heavy.

Compression

Compression is an essential tool to ensure each track sits nicely in the mix. With headphones, it’s essential to check the compression in mono. Compression can often reveal panning issues that might go unnoticed when listening in stereo.

Reverb

Headphones can make it challenging to judge the amount of reverb, especially in terms of decay. Use shorter decay times when mixing with headphones, and listen to the reverb in mono to ensure it doesn’t muddy up the mix.

Using these techniques can help achieve a balanced and professional-sounding mix when mixing with headphones. Keep in mind that mixing with headphones should always be used in conjunction with mixing on speakers to ensure the best possible results.

Techniques For Mastering With Headphones

Achieving a great mix and master with headphones can be challenging, but by implementing these tips, you can improve your sound quality significantly. To accurately judge frequencies, use quality headphones and reference tracks, focus on stereo imaging, and take frequent breaks to prevent ear fatigue.

One of the secrets to producing a great sounding mix is to have a well-balanced recording. But, how can you achieve that delicate balance when monitoring through headphones? The answer is a combination of experience, knowledge, and practice. Here are some tips to help you perfect the art of mastering with headphones.

Volume Levels And Loudness

Finding the right volume level is essential when it comes to mastering with headphones. You’ll want to set the volume level to a comfortable level that allows you to hear all the nuances in the mix without causing ear fatigue. It is important to keep the mixes at a loudness range from -16 to -20 LUFS (Loudness Units Relative to Full Scale) to avoid hearing loss. Metering tools such as RMS (Root Mean Square), Peak Level, and True Peak Level are essential when it comes to monitoring your master’s volume levels

Stereo Width

When mixing with headphones, it’s easy to misjudge the stereo width of your mix. This is because headphones produce a “pancake” sound, which means that sound seems to come from the center. To prevent this, consider using a stereo imaging plugin tool like Ozone’s imager or similar plugins that can help you control the stereo width.

Eq And Frequency Balancing

EQ is essential for proper sound balancing in the mastering process, but when listening through headphones, it’s easy to overdo it. Overcompression and hard-panning instruments often create an unnatural mix that feels stale. To avoid this, it’s important to train your ears and perform subtle EQ changes.

Compression And Limiting

Compression and limiting are essential tools in mastering, but it’s easy to overdo them. When using headphones, it’s important to be even more careful since it’s harder to hear a distortion. It’s recommended that you use a brick wall limiter with a true peak meter to optimize the best levels for your headphones. You’ll want to avoid excessive compression because compressed songs tend to sound very loud but lacks emotion. In conclusion, the key to mastering with headphones is having a good monitoring environment and making sure you have the right equipment. As a rule of thumb, it’s better to mix using several monitoring techniques and compare the results to find the best one. By following these tips, you’ll be able to fine-tune your skills and produce great music with your headphones.

Common Mistakes To Avoid When Mixing And Mastering With Headphones

Achieving a balanced mix and master with headphones can be challenging, but there are common mistakes to avoid. Don’t rely solely on headphones to make mixing decisions, make sure to take breaks to rest your ears, and listen to your mix on different devices to ensure it translates well.

When it comes to mixing and mastering with headphones, there are some common mistakes that people make which can affect the quality of the final product. In this post, we will focus on these common mistakes and how to avoid them. We will cover the over-reliance on headphones, ignoring other listening environments, not taking breaks, and using the wrong headphones.

Over-reliance On Headphones

One of the most common mistakes when mixing and mastering with headphones is over-reliance on them. Using only headphones can result in an unbalanced mix and inaccurate sound representation. Headphones can’t reproduce the true stereo image, which is necessary for mixing music. To avoid this mistake and get a more accurate representation of the mix, it’s important to use reference monitors in addition to headphones. This can help achieve the right balance between the headphones and the speakers. It’s also important to test the mix on multiple output devices, like earphones, car speakers, and other systems to make sure the mix translates well to other speakers.

Ignoring Other Listening Environments

Another mistake people make is ignoring other listening environments. This can be a big mistake because the mix can sound great on headphones but may not sound good on other speakers. To avoid this mistake, consider testing the mix in different listening environments. This includes your car, a friend’s stereo, or a small Bluetooth speaker. It’s helpful to listen in places where you normally listen to your music, as this will give you a better understanding of how your mix translates to different systems.

Not Taking Breaks

When mixing and mastering with headphones, it’s easy to get lost in the music and forget to take breaks. This can lead to ear fatigue and mistakes in the mix. Over time, this can result in hearing damage. To avoid this mistake, take a break from listening to music every 20-30 minutes. This can reduce the chances of ear fatigue and give your ears some rest. It’s also important to lower the volume of the headphones since loud music can cause hearing damage.

Using The Wrong Headphones

Using the wrong headphones can also lead to poor mixes. Not all headphones are created equal, and some are better suited to certain genres or sound settings. The wrong headphones can lead to an inaccurate representation of the mix, which can affect the quality of the final product. To avoid this mistake, choose the right headphones for the job. Closed-back headphones are best for recording since they block out external noise, while open-back headphones are great for mixing and mastering, as they provide a better stereo image. It’s also important to invest in high-quality headphones, as these provide a better sound representation and more accurate mixing decisions. In conclusion, avoiding these common mistakes can help achieve a better mix and master. Using reference monitors, testing the mix in different environments, taking breaks regularly, and choosing the right headphones can lead to a more balanced mix and a better final product.

Supplementing Your Headphone Mixing And Mastering With Studio Monitors

If you are a music producer or audio engineer, you know that getting the perfect mix and master of a song is critical. Headphones are a great tool for getting the details right, but for an accurate mix, it’s essential to supplement your headphone mixing and mastering with studio monitors.

Understanding The Benefits Of Studio Monitors

Studio monitors offer several significant advantages over headphones, including:

  • Better frequency response
  • Less ear fatigue
  • More accurate representation of stereo imaging

With studio monitors, you can hear the music as it was intended, just like the artists, producers, and mix engineers who created it. Headphones can only provide an approximation of the sound, leaving room for errors or inconsistencies.

How To Integrate Studio Monitors Into Your Workflow

The next step is to integrate studio monitors into your workflow. Here are the vital steps to follow:

  1. Place the studio monitors in a position that provides a balanced soundstage.
  2. Calibrate your studio monitors to your listening position using microphone or software.
  3. Start by listening to your mixes on both headphones and studio monitors to identify any discrepancies.
  4. Refine your mix by adjusting the levels, EQ, and other effects to achieve consistency in both headphone and monitor listening.

Following these steps will help you achieve a balanced mix that sounds good on every listening device.

Avoiding Inconsistencies Between Headphone And Monitor Mixes

One of the biggest issues with mixing and mastering exclusively with headphones is that the sound can be different from what you get with studio monitors. Here are some tips to prevent inconsistencies between your headphone and monitor mixes:

  • Use a mix that has been tested on multiple listening devices to ensure it sounds good everywhere.
  • Start with EQ fine-tuning to make sure the mix sounds good both on headphones and studio monitors.
  • Adjust compression and dynamics to create a balanced mix that works on both headphones and studio monitors.
  • Avoid overcompensating for your headphone mix when making changes to the monitor mix or vice versa

In conclusion, while headphones are a crucial tool for getting the details right, using studio monitors helps you achieve consistency and accuracy. By following the tips presented here, you can supplement your headphone mixing and mastering with studio monitors and achieve an exceptional mix and master every time.

Tips For Mixing And Mastering With Headphones

Credit: www.masteringthemix.com

Frequently Asked Questions On Tips For Mixing And Mastering With Headphones

Can I Mix And Master With Headphones?

Yes, you can mix and master with headphones. However, it is important to keep in mind that headphones can create an unnatural stereo image and can potentially cause ear fatigue. It is recommended to check your mix on different playback systems, such as speakers, to ensure a balanced sound.

What Level Should I Mix At In Headphones?

Mixing at a moderate level is recommended when using headphones to avoid causing ear fatigue. Keep the volume low enough to listen comfortably for an extended period of time. It is also recommended to regularly check your mix on different devices like speakers or earbuds to ensure a balanced sound.

How Do You Make A Good Headphone Mix?

To make a good headphone mix, follow these simple steps: 1. Begin by setting proper levels for each instrument in the mix. 2. Adjust EQ settings to ensure that each instrument has its own space within the mix. 3. Use panning and stereo width to create separation and dimension.

4. Use compression and limiting to control dynamics and balance. 5. Finally, listen to the mix on different systems to ensure that it sounds consistent and balanced.

Are Headphones Better For Mixing?

Headphones can be better for mixing if they have good frequency response and accuracy. However, it’s important to also listen on studio monitors to ensure the mix translates well across different sound systems. The ultimate choice between headphones and monitors depends on personal preference and the specific needs of the project.

Conclusion

Mastering and mixing with headphones is an excellent option for music producers and engineers, but it takes extra care and attention to detail to achieve high-quality results. By following the tips we discussed in the article, such as selecting the right headphones, taking breaks, and checking the resulting audio on different devices, you can ensure that your headphones are a useful tool in your production arsenal.

With practice, patience, and a willingness to learn, you can create professional-level mixes and masters with the aid of your trusty headphones. Happy mixing!

More in our Headphones & monitors guide.

Categories
Archive

Mura Masa Firefly Synth With Serum Tutorial

The Mura Masa Firefly Synth with Serum Tutorial is a comprehensive guide for creating a unique and dynamic sound using the popular audio software, Serum. In this tutorial, Mura Masa breaks down the process of designing and implementing a synth that mimics the sound of a firefly, complete with rhythmic pulsations and dynamic volume modulation.

With precise attention to detail and a clear explanation of each step in the process, this tutorial is a valuable resource for musicians and producers looking to expand their sound design skills and create truly original sounds. Whether you’re a seasoned Serum user or new to the software, the Firefly Synth Tutorial is a must-watch for anyone looking to take their productions to the next level.

Mura Masa Firefly Synth With Serum Tutorial

Credit: www.youtube.com

What Is Mura Masa Firefly Synth

The Mura Masa Firefly Synth With Serum Tutorial explains how to create unique soundscapes with the Firefly Synth preset in Serum. The tutorial provides step-by-step instructions on how to use Serum to achieve Mura Masa’s signature sound.

Brief Explanation Of Mura Masa

Mura Masa is a Guernsey-born electronic music producer, songwriter, and multi-instrumentalist who has made a name for himself in the music industry. He gained recognition after releasing his debut album in 2017, which got him nominated for the Mercury Prize.

Brief Explanation Of Firefly Synth

Firefly Synth is a popular synthesizer preset used by Mura Masa as the main lead sound in his song Firefly, which was one of the biggest hits from his debut album. The sound is known for its distinct and unique-sounding arpeggios, which give the song its catchy and memorable melody.

What Is Mura Masa Firefly Synth?

Mura Masa Firefly Synth is a tutorial that teaches you how to recreate the Firefly Synth sound using the popular virtual synthesizer plugin Serum. The tutorial is aimed at beginner and intermediate music producers who want to learn how to create unique synth sounds for their own productions. In this tutorial, you will learn how to program the arpeggios and add effects to achieve the same sound as the Firefly Synth. To create this sound, you will need a basic understanding of how oscillators, filters, envelopes, and LFOs work in virtual synthesizers. The tutorial is presented in a step-by-step format and comes with screenshots and audio examples to make it easy to follow along. If you’re a fan of Mura Masa’s music or just looking to expand your knowledge of sound design, learning how to create the Firefly Synth sound is a great place to start. It’s a fun and challenging project that will help you improve your skills as a music producer. Try following the Mura Masa Firefly Synth tutorial and add a unique sound to your next production.

Overview Of Serum Synthesizer

The Mura Masa Firefly Synth With Serum Tutorial provides an overview of the Serum Synthesizer. This tutorial covers how to use this tool and create unique sounds for music production.

Introduction To Serum Synthesizer

Serum synthesizer is one of the most popular and versatile software synthesizers used by music producers worldwide. It’s a flagship product of Xfer Records and has gained popularity because of its intuitive user interface and powerful sound creation capabilities. With a vast library of wavetables and modulation options, Serum synthesizer allows music producers to create complex and unique sounds that can be used in various genres of music. Serum synthesizer is designed to be a straightforward yet powerful tool for sound creation. It’s a wavetable synthesizer, which means it uses pre-made waveforms to create sounds. These waveforms can be manipulated and transformed in various ways to create new and interesting sounds. Serum also includes built-in effects such as reverb, distortion, and filters, which can be used to further shape the sound. Additionally, Serum synthesizer has an extensive modulation system that allows the user to control various parameters of the sound in real-time.

Using Serum Synthesizer For The Mura Masa Firefly Synth

To create the Firefly Synth used by Mura Masa in his hit song, you can use Serum synthesizer to create a bright and shimmering sound that can cut through the mix. Start by selecting a sawtooth waveform and setting the voices to four. Next, increase the detune to add some width to the sound. You can then use the filter section to cut off the high frequencies and increase the resonance to add some brightness to the sound. Finally, add some reverb to give the sound some space and depth. By using Serum synthesizer, you can create a sound that is similar to the Firefly Synth used by Mura Masa, but with your unique twist.

Conclusion

Serum synthesizer is an incredibly powerful tool for music producers looking to create unique and complex sounds. With its extensive library of wavetables and modulation options, Serum allows users to create sounds that can be used in various genres of music. By following the Mura Masa Firefly Synth with Serum tutorial, you can learn how to use Serum synthesizer to create a bright and shimmering sound that can cut through the mix.

Setting Up For The Tutorial

Prepare yourself for the Mura Masa Firefly Synth With Serum Tutorial with these easy setup steps. Learn how to make the most out of your synthesizer and create incredible sounds with guidance from the expert tutorial.

Setting up for the tutorial involves three primary steps – downloading the presets, opening Serum in your DAW, and setting up the session. These steps are essential to ensure that you get the best out of the Mura Masa Firefly Synth with Serum tutorial. Let’s discuss each step in more detail.

Downloading The Presets

Before you start with the tutorial, you need to download the presets for Serum. You can easily download them from the official website of Mura Masa. Once you have downloaded the presets, ensure that they are stored in an easily accessible folder on your computer.

Opening Serum In Your Daw

To activate the Serum plugin, you need to open it in your DAW. Click on the ‘plugins’ menu and find Serum. Once you click on Serum, it will open up as a new track in your DAW. You can now start using Serum to create your own sounds.

Setting Up The Session

Setting up the session is crucial to ensure that you have everything you need before you start the tutorial. Before you start with the tutorial, ensure that you have a MIDI keyboard connected to your computer. You should also ensure that your DAW is set to the correct tempo and that your audio interface is correctly connected to your computer. Once you have completed these steps, you are ready to start with the tutorial. With these three steps, you are all set to start with the Mura Masa Firefly Synth with Serum tutorial. Ensure that you have followed these steps correctly to make the most of the tutorial and create incredible sounds using Serum. Happy creating!

Mura Masa Firefly Synth With Serum Tutorial

Credit: www.productionmusiclive.com

Creating The Bass

If you’re a fan of Mura Masa’s music, you must have come across his hit track “Firefly.” The synth used in that track has become quite popular among music producers and aspiring musicians. In this tutorial, we’re going to show you how to recreate the iconic “Firefly” bass sound using Serum.

Building The Foundation

  • Start by creating a new instance of Serum on a new MIDI track
  • Select the “Init Preset” option to initialize a new patch
  • Choose the Saw Wave from Oscillator A and turn down the volume of Oscillator B
  • Set the filter to a Low-Pass 24dB and turn the cutoff down to around 30%

Filtering And Shaping The Sound

  • In the “FX” section of Serum, add a Dimension Expander and set the Mix to around 30%
  • Next, add a Flanger and adjust the Depth, Feedback, and Rate until you get a sound you like
  • Finally, add a Compressor to even out the sound

By following these steps, you can create a bass sound that is similar to the one used in “Firefly” by Mura Masa. Of course, you can experiment with different settings and effects to make the sound your own.

Designing The Lead

Designing the Lead is an essential part of creating a great song. In this tutorial, we will focus on Mura Masa’s Firefly synth and provide step-by-step instructions on designing the lead sound using Serum. This tutorial will help you create a unique sound design with variations of texture and effects.

Creating The Main Melody

The first step in designing the lead sound is to create the main melody. You can either start with an existing melody or create one from scratch. Once you have the melody, load Serum and create a new patch. Start by selecting a waveform for oscillator 1, and then adjust the pitch to match your melody.

Next, move on to oscillator 2, and select a different waveform. Adjust the pitch until you find a frequency that complements the first oscillator’s sound. Use the detune option to create a wider sound, and then adjust the levels using the mixer.

After you have your oscillators set up, add a filter with an envelope to control the cutoff frequency. You can use the low-pass filter to cut out the high frequencies or use the high-pass filter to cut out the lows.

Adding Textures And Effects

Once you have your main melody and filters set up, you can start to add textures and effects to your lead. Add some distortion and reverb to create a more pronounced and dynamic sound. You can also experiment with other effects like chorus, phaser, or delay to add more depth and variation to the sound.

  • Use distortion to add grittiness and depth to the sound.
  • Reverb adds space to the sound and creates a sense of atmosphere.
  • Chorus and Phaser add a sense of movement to the sound and create interesting textures.
  • Delay is a great way to create a repeating rhythm and add interest to the melody.

As you add effects, make sure to adjust the settings to find the right balance. Be mindful of the levels and don’t overdo it, as this can cause your lead to lose clarity and become muddy.

By following these steps while designing your Lead, you will create a unique sound design with variations of texture and effects.

Adding Percussion And Drums

Adding percussion and drums to your Mura Masa Firefly Synth With Serum is the key to making your music lively and energetic. It’s the rhythm that makes the audience move their feet and enjoy the music more.

Choosing The Right Samples

The first step to adding percussion and drums is selecting the right samples. You can choose from a wide variety of options available in Serum or import samples from other sources.

Tip:Choose samples that complement your melody and create a balanced sound.

Programming The Beat

Programming the beat is an essential aspect of adding percussion and drums to your Mura Masa Firefly Synth With Serum. It allows you to create a rhythmic pattern that enhances your melody’s vibe.

  1. Start by selecting the drum kit or percussion instrument you want to use.
  2. Set the tempo to match your melody.
  3. Create the basic beat using the selected samples.
  4. Modify the beat by adding fills, rolls, and other drum patterns.

Conclusion

Adding percussion and drums may seem challenging, but it’s an essential component of music production. Mastering it may take time, but the results are always worth it. With the right samples and proper programming, your Mura Masa Firefly Synth With Serum music will become more lively and exciting.

Mixing And Mastering

After you’ve created the perfect sound with the Mura Masa Firefly Synth with Serum Tutorial, it’s necessary to ensure that it sits well within the mix and sounds polished for the final product. Mixing and mastering are essential parts of music production, and this tutorial takes you through the steps needed to do it right.

Making The Sounds Sit Together

One of the primary objectives of mixing is to let all the sounds sit well together and avoid clashing frequencies. Frequency clashing happens when multiple sounds are competing for the same space in the frequency spectrum, making it difficult to distinguish one sound from the other.

The tutorial provides various methods to help you overcome this issue, including:

  • Equalizing: check each sound for troublesome frequencies and cut them out to allow the sound to sit nicely with others.
  • Compressing: regulate the volume of each sound, so it fits with the others without interrupting the mix.
  • Panning: position the sounds in the stereo field so that they don’t overlap, giving each sound ample space to be heard and appreciated.

Enhancing The Overall Sound

The ultimate goal of mastering is to enhance the overall sound, ensuring it sounds consistent and at commercial levels. The tutorial guides you to achieve this through:

  • Equalizing: ensure that the balance and clarity of the sounds enhance the overall mix without making it muddy or muffled.
  • Limiting: raise the volume of the mix to a competitive, commercial level without clipping the sound.
  • Saturation: give the sound a more harmonious texture.
  • Frequency Spectrum Management: confirm that the sound is equally balanced throughout the frequency range.

The Mura Masa Firefly Synth with Serum Tutorial offers exceptional insight into mixing and mastering, which is crucial when producing music that stands out. By following the steps involved, your finished track will sound polished and ready for release.

Mura Masa Firefly Synth With Serum Tutorial

Credit: www.youtube.com

Frequently Asked Questions On Mura Masa Firefly Synth With Serum Tutorial

What Is Mura Masa Firefly Synth?

Mura Masa Firefly Synth is a powerful virtual instrument that produces rich, vibrant sounds. It is a perfect tool for producers who want to add unique textures to their music. This synthesizer comes loaded with a range of features, including oscillators, filters, and effects.

How Do I Get Started With Mura Masa Firefly Synth?

To get started with Mura Masa Firefly Synth, you need to download the software and install it on your computer. Once installed, you can launch the plugin in your DAW and start exploring its various features and settings. There are also plenty of tutorials available online that can help you get started with the synth.

Is Mura Masa Firefly Synth Beginner-friendly?

Yes, Mura Masa Firefly Synth is beginner-friendly, thanks to its user-friendly interface and easy-to-use controls. Even if you’re new to music production, you can easily create complex and interesting sounds with this synthesizer.

Can I Use Mura Masa Firefly Synth In My Productions?

Absolutely! Mura Masa Firefly Synth is a versatile and powerful synthesizer that is perfect for a wide variety of music genres. Whether you’re producing electronic, hip hop, or pop music, this synth can help you create unique and interesting sounds that will take your productions to the next level.

Conclusion

The Mura Masa Firefly Synth with Serum tutorial showcases the immense possibilities of sound design with this powerful synthesizer. With its intuitive interface, a plethora of modulation options, and unique wavetable synthesis technology, this virtual instrument is an ideal tool for electronic music producers who want to create refreshing and distinctive sounds.

By following this tutorial, you can dive deeper into the features of Serum and unleash your creativity. Incorporate the tips and tricks discussed to enhance your music production skills.

Categories
Archive

Why are Some Songs Louder Than Others

Songs can be louder than others due to differences in mastering techniques and production styles. Louder songs often have a higher compression rate and a more prominent bass line, making them stand out more.

Music becomes an integral part of our life, and most of us prefer a particular genre or artist. Apart from enjoying music, it is essential to pay attention to the technical aspects of a song. Have you ever wondered why some songs sound much louder than others?

Related reading: How To Make My Mix Louder and How Do I Make My Song Louder. For background, see the Wikipedia article on Loudness war.

This phenomenon is due to the differences in mastering techniques. Mastering is the final stage of audio production. Engineers add final touches to balance and enhance the sound. The loudness of the song can affect the listening experience, as it creates a more impactful emotional response. Louder songs have a greater compression rate, and the bass tends to be more prominent, making the song more noticeable. Therefore, the different mastering techniques play a significant role in making a song stand out from the rest.

The Basics Of Sound for Songs Louder

The Basics of Sound:

The idea of why some songs are louder than others is rooted in the science of sound. Sound is a type of energy that travels as waves through different mediums such as air, water, or solids. These waves cause vibrations in our eardrums, and our brains interpret these vibrations as sound. Understanding the basics of sound can help us understand why some songs may be louder than others.

Sound Waves And Amplitude:

Sound waves are the movement of vibrations through a medium. The height of these waves, its amplitude, determines how loud a sound is. Amplitude is the measure of the maximum displacement from the rest position of a sound wave. The greater the amplitude, the louder the sound. For instance, a drumbeat has a higher amplitude than a whisper, creating a louder sound.

Measurement Of Sound:

We measure sound in decibels (dB). The decibel scale is a logarithmic scale. This means that a small increase in decibels represents a significant increase in the loudness of sound. The average volume of a conversation is around 60 dB. Meanwhile, a rock concert can reach levels of up to 120 dB. At these levels, it is crucial to protect your ears to avoid hearing loss.

How We Perceive Sound:

Perception of sound can vary from person to person, depending on the specific mechanism of the ear, which converts sound waves into electrical signals in our brain. The responsiveness of the ear to different sound levels contributes to how we perceive loudness. Additionally, the environment can also play a role in how we perceive sound. For instance, a song played indoors versus outdoors can sound different due to the surrounding noise levels.

In conclusion, understanding the basics of sound, sound waves and amplitude, measurement of sound, and how we perceive sound can help us understand why some songs are louder than others.

Why are Some Songs Louder Than Others

Credit: www.reddit.com

Why Do We Have Loudness In Music?

Music loudness is controlled by the dynamic range of a song, which refers to the difference between its loudest and quietest parts. Producers make many modern songs loud and impactful, with compressed dynamic ranges. This makes them sound more powerful and attention-grabbing, even on devices with lower volume capabilities.

Purposeful Sound Design for Songs Louder

In music, loudness can affect the emotional connection that the listener has with the song. Sound designers use loudness purposefully to intensify the listener’s experience. For instance, in a suspenseful scene in a movie, the music may start off soft and slowly increase in volume to a loud crescendo as the climax approaches. The crescendo alerts the audience, signaling a powerful moment is coming up.

Proper Use Of Dynamic Range for Songs Louder

Dynamic range refers to the difference between the quietest and loudest parts of a song. One of the reasons for a song’s loudness is the excessive compression of the audio, which reduces the dynamic range of a track. When you overuse compression, the track starts to sound monotonous and lacks variation. However, smart use of dynamic range can make a song stand out and sound unique. A well-rounded music producer knows how to use compression while keeping a song’s dynamics intact.

Capturing The Emotional Intention Of The Song

Another reason for loudness in a song is to capture the emotional intention of the song. A song meant to evoke anger or defiance may be louder than a ballad. Playing a song loud can create an empathetic connection between the listener and the artist. Similarly, a song that is meant to evoke sadness may be soft and melancholic. A skilled sound designer can evoke the intended emotions of a song by using loudness carefully. In conclusion, sound designers use loudness purposefully, dynamic range and capturing the emotional intention of the song to intensify the listener’s experience and create a powerful connection between the listener and the artist. They are key considerations in producing a great piece of music that moves the audience.

Factors That Influence Loudness In Music for Songs Louder

Several factors influence music loudness, including mastering techniques, dynamic range compression and choice of instruments. Additionally, the genre of music may also play a role in how loud a song sounds compared to others.

Factors That Influence Loudness in Music Why are some songs louder than others? It is a common question that comes to mind when we listen to music. The loudness of a song can influence how we perceive it. There are several factors that influence the loudness of a song, ranging from frequency range to mastering techniques. In this blog post, we will explore the different factors that influence loudness in music. Frequency Range The frequency range of a song refers to the high and low frequencies present in the music.

The perceived loudness of a frequency range is dependent on the human ear’s sensitivity to particular frequencies. For example, our ears are more sensitive to midrange frequencies than low or high-frequency ranges. Therefore, if a song has a high amount of midrange frequencies, it will sound louder than a song with fewer midrange frequencies. Arrangement and Instrumentation Arrangement and instrumentation also play a significant role in the loudness of a song. Certain instruments, such as drums and bass guitars, are naturally louder than others, like the flute or guitar.

Practical Tips

The arrangement of the instruments can also affect the perceived loudness of a song. If instruments are all playing at the same time, there will be greater loudness than when they are playing individually. Mastering Techniques Mastering techniques provide a way to increase the overall loudness of a song. Engineers often use compression and limiting to create a more consistent volume level and make the song sound louder. However, the excessive use of these techniques can result in distortion, which can affect the quality of the music.

In conclusion, frequency range, instrumentation and mastering techniques all shape how loud a song sounds. Knowing these factors helps us see why producers make certain songs sound louder than others.

Why are Some Songs Louder Than Others

Credit: www.reddit.com

The Loudness War for Songs Louder

In the Loudness War, the music industry pushed some songs to be louder than others. The aim is to stand out from the competition and catch listeners’ attention. This often involves compressing the dynamics and sacrificing audio quality, which can result in a distorted or unpleasant listening experience.

Music can be a powerful tool, capable of evoking emotions and sparking memories. It’s no surprise that musicians and producers alike aim to create songs that resonate with their audience. However, in recent years, there has been a trend towards producing music that is louder and more compressed than ever before. This phenomenon is known as the ‘Loudness War’ and has sparked debate among audiophiles, musicians, and industry professionals alike.

History Of Mastering for Songs Louder

In the early days of recorded music, mastering was a straightforward process. The goal was to capture the sound of live performance and reproduce it as accurately as possible. Over time, however, techniques were developed to enhance the sound, such as equalization and dynamic range compression. These tools allowed producers to achieve a more polished sound, and mastering became a crucial step in the production process.

The Race For Louder Music

As the music industry became more competitive, there was a growing desire for songs to stand out from the crowd. One way to achieve this was to make them louder than the competition. Producers started using a technique called ‘brickwall limiting’ to ensure that the loudest parts of the song were at maximum volume. Engineers did this by reducing the song’s dynamic range, compressing the quiet parts and amplifying the loud parts.

Negative Effects Of This Approach for Songs Louder

Although the race for louder music may have seemed like a good idea at the time, there have been some significant negative consequences. For one, the loudness war has led to a loss of dynamic range in modern music. With everything turned up to 11, there is little room left for subtlety or nuance. Another issue is that overly compressed tracks can sound fatiguing to the ear. This makes it difficult to listen to an entire album in one sitting. Furthermore, with all songs sounding loud and punchy, it can be challenging to differentiate between them.

In conclusion, while louder music may grab attention in the short term, it is not a sustainable approach to music production. As listeners become more discerning, there is a growing desire for music that is not only loud but also well-produced and enjoyable to listen to.

Alternatives To Extreme Loudness

Louder songs can be jarring and even cause hearing damage. Alternatives to extreme loudness include compression techniques, mastering at lower volumes and simply letting the music speak for itself.

Have you ever noticed that some songs are louder than others, even when played at the same volume? This is due to the level of compression and limiting applied during the mastering process, which aims to make the track stand out in a crowded and noisy environment. However, this practice can often result in a loss of dynamic range, leading to a distorted and fatiguing listening experience. In this article, we will explore some alternatives to extreme loudness that can help you achieve a balanced and natural sound.

Mixed Emphasis On Dynamic Range

One approach to preserving dynamic range is to use mixed emphasis. This means that some parts of the song are louder than others. You can do this by adjusting the relative levels of different instruments and sections. This creates a sense of space and movement. For example, you could have a quiet verse followed by a loud chorus, or a mellow intro leading to a dynamic climax. By varying the volume throughout the track, you can keep the listener engaged and interested.

Mastering Techniques That Preserve Dynamics for Songs Louder

Another way to avoid the loudness war is to use mastering techniques that preserve dynamics, such as parallel compression, multiband processing, and harmonic excitation. These techniques can enhance the natural character of the instruments and vocals without necessarily making them louder. Moreover, they can help to balance the frequency spectrum and add warmth and depth to the mix. By using a combination of different tools and plugins, you can achieve a professional and polished sound without sacrificing dynamic range.

Creating Atmosphere Through Amplitude for Songs Louder

Finally, you can create atmosphere and emotion through amplitude, without resorting to extreme loudness. This involves using volume as a creative tool, rather than a mere loudness booster. For instance, you could use fades, swells, and panning to create a sense of distance, intimacy, or movement. You could also play with the stereo image, using spatialization and reverb to simulate the acoustics of a particular environment. By paying attention to the shape and contour of the sound, you can create a sonic landscape that is both engaging and immersive. In conclusion, the quest for loudness should not come at the expense of dynamic range and musicality. By using mixed emphasis, mastering techniques that preserve dynamics, and creative volume shaping, you can achieve a compelling and balanced sound that stands out from the crowd.

Consumer Impact

Songs differ in loudness due to a variety of factors, including the production and mastering processes. Louder songs may grab the attention of consumers. This makes them more likely to be played on the radio and streamed online, which can ultimately impact their success in the music industry.

Have you ever wondered why some songs are louder than others? There are many reasons behind it, but the impact on the consumer is significant. In this post, we will discuss the different ways in which loudness affects the listener.

Listening Comfortability for Songs Louder

One of the critical factors that impact the listener is the comfortability of listening to loud music. Listening to music at high volumes can cause irritation, discomfort, and even pain to the ears. It can also cause fatigue and bring down the enjoyment factor. On the other hand, if the volume is too low, the music might not deliver its full potential. The listener might miss out on the details, leading to frustration. Therefore, finding the right balance of loudness is the key to ensuring that listeners enjoy the music without any discomfort.

Possible Hearing Damage

Exposure to loud music may cause hearing damage over time. If someone listens to music at high volumes for an extended period, it can damage the hair cells in the inner ear, which are responsible for converting sound into electrical signals for the brain to interpret. If these hair cells are damaged, the ability to hear certain frequencies may decrease over time. Therefore, it is essential to limit the volume level to protect our ears and avoid permanent hearing damage.

Preference For Loud Music

Some people prefer to listen to music loudly because they enjoy the energy and the intensity it brings to the experience. This preference might be a result of their personal taste, the genre, or the specific song they are listening to. It is essential to acknowledge that while some listeners enjoy loud music, it might not be the best choice for everyone. Therefore, it is vital to have a way to control the volume level to cater to different preferences. In conclusion, understanding the impact of loudness on the listener is crucial for music producers and consumers alike. By striking a balance between listening comfortability and personal preference, we can enjoy music without putting our ears at risk.

Why are Some Songs Louder Than Others

Credit: forums.macrumors.com

Frequently Asked Questions On Why Are Some Songs Louder Than Others

Why Does Some Music Sound Louder Than Others?

Music sounds louder or softer based on the volume of the sounds recorded, mixed, and produced. Factors like instrumentation, arrangements, mixing technique, and compression can affect the loudness of a recording. A higher amplitude in the sound wave makes the music sound louder, while a lower amplitude makes it sound softer.

Why Are Some Apple Music Songs Louder Than Others?

Songs on Apple Music can have varying loudness due to differences in the music’s mastering process. Engineers may compress some songs more heavily than others, which makes them louder. Apple Music also uses a feature called Sound Check which normalizes the volume of songs to prevent sudden changes in loudness.

Why Is My Song Quieter Than Others?

Your song may sound quieter than others due to improper recording techniques, low-quality equipment, or inadequate mixing and mastering. Ensure you have optimized the track’s volume, EQ, compression, and limiter settings, and use high-quality gear and software.

Why Are Some Sounds Louder Than Other?

The loudness of a sound depends on its intensity, which is measured in decibels. The greater the intensity, the louder the sound. Additionally, the distance between the source of the sound and the listener also affects its loudness, as does the medium through which the sound is traveling.

Conclusion

Louder songs are often associated with a more impactful listening experience, but the reason behind it is not always clear. Through the understanding of different factors such as mastering, compression, and dynamic range, this article has introduced the science behind the loudness of songs.

With various subjective and technical factors affecting the volume of different tracks, it is important to appreciate the importance of a balanced and dynamic mix in ensuring a quality listening experience. Understanding the loudness of songs and the various factors behind it ultimately leads to a deeper appreciation of music as an art form.

Categories
Archive

What Is Noise Floor And Why Does It Matter

Noise floor is the measure of unwanted signals. It is important to understand the noise floor as it can impact the quality of communication between devices.

Also, in electronics, background noise refers to the level of background noise that is always present. It combines radio frequency (RF) and electromagnetic interference (EMI) signals that devices pick up. We measure hiss in decibels (dB) as a negative value, since it is weaker than the desired signal.

Related reading: Best Noise Gate Plugins and How is Pink Noise Used in Audio Testing?.

Moreover, a higher self-noise means that the desired signal must compete with more unwanted noise. This leads to lower signal clarity and quality. This is particularly significant in sensitive applications such as wireless communications, radio astronomy, and signal processing. Therefore, understanding and minimizing the background noise through proper shielding, filtering, and grounding techniques is crucial to ensure reliable and high-quality device performance.

Sources Of Noise

In addition, hiss is the minimum level of noise in a system. It can affect the quality of signals. Sources of noise can include external factors such as electromagnetic interference, internal factors such as thermal noise, and system components such as amplifiers and circuits.

Furthermore, understanding self-noise is important for optimizing system performance.

Additionally, sources of Noise In the audio realm, noise refers to any unwanted sound that can interfere with the intended signal. Noise can originate from a variety of sources, both external and internal. Sources of noise not only impact the quality of sound but also affect audio-related equipment’s performance. HTML Syntax H3 Subheading: External External noise comes from sources outside the audio system. Before discussing external noise sources, it’s important to understand that noise can be electromagnetic or acoustic.

Electromagnetic noise includes signals generated by electronic devices or other equipment. It can pick up an electromagnetic signal from numerous sources such as power lines, power supplies, or other cables. Acoustic noise, on the other hand, refers to sounds in the environment that make their way into the audio system, including wind, traffic, or other machinery. HTML Syntax H3 Subheading: Internal Internal noise sources originate from the audio system itself. These sources can include thermal noise, which arises from the random motion of electrons within electronic components, or shot noise, which occurs due to the random production of charge carriers.

Practical Tips

Another source of internal noise is quantization noise, which appears when digital audio samples approximate sound waves. Electrical components like transformers, microphones, and cables can also produce internal noise. In summary, with noise being unwanted sound on an audio signal, it can disrupt the clarity of the music or the signal. Identifying its source is critical for proper management and effective provides solutions. Whether it’s coming from internal electrical equipment or from the environment, noise sources must be accounted for to maintain a clean, flawless audio signal.

What Is Noise Floor And Why Does It Matter

Measurement Of Noise Floor

Understanding the background noise is crucial when it comes to audio recording. It refers to the minimum level of noise present in a system when no signal is present. The lower the hiss, the higher the quality of the audio recording.

When it comes to audio engineering, self-noise refers to the amount of unwanted sound or signal that interferes with a recording or audio playback. Measuring the background noise is crucial in the audio industry because it determines the quality of the recording and the level of noise reduction that can be applied. You can measure hiss with several units and methods. In this article, we will discuss the units and methods of measuring the self-noise and why it matters in the audio industry.

Units Of Measurement

When measuring the background noise, there are different units of measurement that can be used. The most common units of measurement for hiss are volts, decibels (dB), and percentage of full scale (%FS).

Unit of MeasurementDescription
VoltsMeasures the voltage of the self-noise signal in volts, which is usually a small value near zero.
Decibels (dB)Measures the background noise level in decibels, which is a logarithmic scale that measures the ratio of the signal to the noise floor.
Percentage of Full Scale (%FS)Measures the hiss as a percentage of the maximum possible level of the audio signal.

Methods Of Measurement

There are mainly two methods of measuring the self-noise in the audio industry, which are RMS and FFT.

  1. RMS: Root Mean Square (RMS) is the most common method of measuring the noise floor in the audio industry. This method measures the average power of the signal over a certain period of time and then calculates the hiss based on the difference between the signal power and the measured noise floor power.
  2. FFT: Fast Fourier Transform (FFT) is a more advanced method of measuring the noise floor that provides a detailed analysis of the frequency content of the noise floor. This method takes a snapshot of the signal and then analyzes the frequency content of the signal to determine the background noise level at each frequency band.

In conclusion, measuring the hiss is critical in the audio industry because it helps determine the quality of the recording and the level of noise reduction that can be applied. Using appropriate units and methods of measurement ensures accurate and reliable measurements of the self-noise.

Steps To Reduce Noise Floor

Background noise refers to the level of unwanted signals or background noise in an audio system. This can affect the quality of the sound. It is important to reduce the hiss as it can cause interference, distortion, and compromise the integrity of the audio.

Steps to reduce self-noise can include using quality cabling, proper grounding, and using noise reduction techniques such as gating and equalization.

Background noise is the inherent noise generated by your equipment and can significantly affect the quality of your audio signal. By reducing hiss, your audio quality improves and your signal-to-noise ratio increases. Here are three steps to reduce self-noise:

Equipment Selection And Placement

Your equipment selection and placement can significantly impact background noise. For example, tube equipment generates more noise than solid-state equipment. Place your equipment as far apart as possible to avoid crosstalk. Keep noisy equipment, like power supplies, away from your audio equipment. Often, placing your equipment on isolation pads or stands can reduce hiss.

Proper Wiring And Grounding

Proper wiring and grounding are essential in reducing self-noise. Poor grounding can cause ground loops that create noise. Ensure your equipment and cables have appropriate wiring and grounding. Use appropriately shielded cables and connectors for audio signals. Avoid routing power cables and audio cables near each other. Connect stereo equipment to the same power outlet to avoid ground loops.

Use Of Noise Reduction Tools

Noise reduction tools can significantly reduce background noise. Ensure you use the proper noise reduction tools for your equipment. Equipment like preamplifiers, mixers, and equalizers all have built-in noise reduction tools. Use signal processors like compression and noise gates to reduce noise. Digital audio workstations can also use noise reduction plugins that can significantly reduce hiss. In conclusion, reducing self-noise can significantly improve your audio quality. Proper equipment selection and placement, proper wiring and grounding. The use of noise reduction tools can all help reduce background noise.

What Is Noise Floor And Why Does It Matter

Credit: mastering.com

What Is Noise Floor And Why Does It Matter

Credit: www.masteringthemix.com

Frequently Asked Questions For What Is Noise Floor And Why Does It Matter

Why Is Noise Floor Important?

The noise floor is the level of unwanted noise present in a signal. It’s important because it can affect the quality of the signal and decrease the signal-to-noise ratio. A high noise floor can lead to poor signal quality and even make it difficult to detect the signal at all.

Is A Lower Noise Floor Better?

Yes, a lower noise floor is better. It refers to the minimum level of unwanted sound present in an audio signal. A lower noise floor means that the useful audio information is more prominent and clear, resulting in better sound quality.

It also reduces the chances of distortion or interference in the audio signal.

What Is A Good Noise Floor Wifi?

A good noise floor for Wi-Fi is below -80 dBm. This measurement refers to the level of ambient noise in the frequency spectrum. This can impact the overall quality of a wireless signal. The lower the noise floor, the better the signal quality, and the more reliable the connection.

What Does Noise Floor Sound Like?

Noise floor is the electrical interference or background noise present in audio systems. It sounds like a low, static hiss or hum and can be heard when there is no other sound present. The noise floor level varies with equipment quality and the room you use it in.

Conclusion

As we can see, the noise floor is an essential aspect of sound engineering that determines the quality of any audio system. It can affect the overall performance of the system, including the clarity, accuracy, and sensitivity. Therefore, it is crucial to understand the concept of the noise floor to optimize the audio system output.

By reducing the noise floor, one can ensure better performance and enhance the overall listening experience of the audience. So, keep in mind the significance of the noise floor for better sound quality.

For more background, see Noise floor on Wikipedia. You may also like our guide: What Is Noise Floor And Why Does It Matter.

Categories
Archive

Can You Listen to Music on Studio Monitors

Yes, you can listen to music on studio monitors. Studio monitors are designed to accurately reproduce audio with minimal coloration and are often used in professional audio, video, and music production settings.

Studio monitors are special speakers designed for professionals in the audio and music industry, but they’re also pretty popular among music lovers. They’re designed to offer an accurate representation of audio recordings with minimum distortions and coloration. This is why they’re especially useful in music production settings.

However, some people wonder whether they can use studio monitors to simply listen to music. The answer is yes. Studio monitors can be a great choice for music listening. They reproduce sound with exceptional clarity and detail, which can enhance your listening experience. We’ll explore how you can use studio monitors for music playback, the benefits, and considerations.

Can You Listen to Music on Studio Monitors

Credit: www.amazon.com

Can You Listen To Music On Studio Monitors?

Studio monitors are made for music production and audio mixing. However, they can also be used for listening to music. Studio monitors can provide a clear, uncolored and accurate representation of the audio, allowing the listener to hear the music as it was intended by the artist.

Why Use Studio Monitors To Listen To Music?

Studio monitors are designed to produce accurate and uncoloured sound, making them the preferred choice for music producers and audio engineers. Unlike regular speakers, studio monitors provide a flat frequency response, which means that they don’t artificially emphasise any frequency range. This makes them ideal for listening to music as the sound is reproduced faithfully without any distortion or audio colouring. Also, they can handle a greater range of frequencies, volume levels and dynamic range, which helps to improve the overall clarity and detail of the music.

What To Consider Before Listening To Music On Studio Monitors

While studio monitors are a great choice for listening to music, there are a few things to consider before purchasing and using them. Firstly, you’ll need to ensure that they are placed correctly in the room and positioned at the right height to get the best sound. Additionally, because studio monitors are designed for accuracy, you may find that some of your favourite songs don’t sound as good as you’re used to hearing them. This is because many commercial recordings are heavily compressed to make them sound louder and more impactful, which can result in a loss of detail. Finally, keep in mind that studio monitors are designed for near-field listening, which means they are optimised for use at a close listening distance (usually 1-2 metres). If you’re planning on using them for casual listening in a larger room, you may find that they don’t provide the same level of impact as regular speakers. In conclusion, while studio monitors can provide an exceptional listening experience for music, it’s important to consider their design and usage before investing in a pair. If you’re an audiophile, music producer or audio engineer looking for an accurate and detailed listening experience, then studio monitors are definitely able to help you.

Advantages Of Listening To Music On Studio Monitors

If you are someone who loves listening to music, then you might want to consider investing in studio monitors. These are specifically designed speakers that can reproduce sound with greater accuracy and clarity, and provide a more well-balanced listening experience. Here are some of the advantages of listening to music on studio monitors:

Greater Audio Fidelity

Studio monitors are designed to reproduce sound with greater accuracy and fidelity, compared to regular speakers or headphones. This means you can hear all parts of the music, from the low-end bass to the high frequency treble, without any distortion or coloration. Most studio monitors are also designed to work well across different volumes, so you can enjoy music loud or quiet.

Accurate Sound Reproduction

One of the key advantages of studio monitors is their ability to reproduce sound accurately. This means that the sound you hear from the studio monitors is as close as possible to the original recording. This allows you to hear the nuances and details of the music that may be lost on regular speakers or headphones, and gives you a more immersive listening experience.

Balanced Sound

Studio monitors are designed to produce a well-balanced sound that is not overly skewed towards any particular frequency range. This means that you hear the music exactly as it was intended to be heard by the producer or artist. This balanced sound is important for anyone who values accuracy and fidelity in their music listening experience.

Detailed Soundstage

Studio monitors are also designed to create a detailed soundstage, providing a more immersive and engaging listening experience. With studio monitors, you can hear the music in three dimensions, with a sense of depth, width and height, as if you were in the recording studio with the artist.

Improved Comfort

Another advantage of using studio monitors is that they are typically more comfortable to use for long periods of time, compared to regular headphones. This is because studio monitors are designed to reduce ear fatigue and provide a more comfortable listening experience, even at loud volumes.

Better Understanding Of The Music Production Process

Finally, when you listen to music on studio monitors, you get a better understanding of the music production process. You can hear the different instruments and elements of a track more clearly, and get a sense of how they were layered and mixed together to create the final product. This is especially useful for aspiring music producers or engineers who want to learn more about music production.

Disadvantages Of Listening To Music On Studio Monitors

Studio monitors are the go-to choice for music producers, sound engineers, and other professionals who need to listen to music with great clarity. However, listening to music on studio monitors has its disadvantages. In this section, we will discuss some of the downsides of using studio monitors to listen to music.

Expensive

One of the biggest disadvantages of using studio monitors is that they are expensive. These speakers are designed to provide an accurate and precise representation of sound, which makes them more expensive than regular speakers. If you are someone who is on a tight budget, then studio monitors may not be the best choice for you.

Not Portable

Studio monitors are not easy to move around or take with you on the go because they are bulky and heavy. They are designed to stay in one place and provide great sound quality to a specific listening area, such as a recording studio. If you are someone who likes to listen to music on the go, then studio monitors are not the best choice for you.

Not Ideal For Casual Listening

Studio monitors are designed to produce accurate and precise sound, which may not be suitable for casual listening. If you are someone who just wants to enjoy music without paying attention to the details, then studio monitors may not be the best choice for you. These speakers are designed for critical listening, which means that you will notice every detail of the music, including flaws and imperfections.

Not Suited For All Genres Of Music

Studio monitors are designed to provide accurate and precise representation of sound, which may not be suitable for all genres of music. For example, if you listen to electronic music, hip hop, or pop music, which have a lot of bass, you may not get the best experience with studio monitors. These speakers are better suited for genres such as classical music or jazz, where the emphasis is on accuracy and clarity.

Now that we have discussed the disadvantages of using studio monitors to listen to music, it’s up to you to decide whether they are the right choice for your needs. If you are a professional who needs to listen to music with great clarity and accuracy, then studio monitors are an excellent choice. However, if you are someone who just wants to enjoy music without paying attention to the details, then you may want to look for other options.

Can You Listen to Music on Studio Monitors

Credit: www.sonarworks.com

Tips For Listening To Music On Studio Monitors

Listening to music on studio monitors allows you to hear every detail in the music, from the vocals to the instrumental nuances. However, to get the best listening experience, you need to follow some essential tips, such as positioning the monitors correctly, using high-quality audio files, and adjusting the volume to a comfortable level.

Studio monitors are designed to provide accurate sound reproduction, making them an excellent choice for listening to music. They are different from traditional speakers as they are optimized for critical listening, making them ideal for mixing and mastering audio. However, to get the most out of studio monitors, you need to ensure that you have the right setup and environment. In this article, we’ll share some essential tips for listening to music on studio monitors.

Use High-quality Audio Cables

To ensure that you’re getting the best possible sound quality, it is critical to use high-quality audio cables. Poor-quality cables can introduce unwanted noise and interference, which can affect the accuracy of the sound reproduction. When choosing audio cables, look for ones that are shielded to reduce interference and have connectors with good contact points.

Choose The Right Studio Monitors

Selecting the right studio monitors is crucial to get the best sound quality. The monitors should match the size of your listening space, and their frequency response should be flat and accurate. It’s also essential to choose a monitor that has the appropriate power output for your needs.

Set The Correct Listening Environment

The listening environment is crucial when it comes to critical listening on studio monitors. You’ll want to set up your monitors in a room that has minimal echoes or reflections, as these can affect the way you hear the sound. You can dampen your room using acoustic foam panels or bass traps to minimize unwanted reflections.

Avoid Listening Fatigue

When listening to music for long periods, it’s common to experience listening fatigue, which can affect your judgment of the sound. To avoid this, take frequent breaks, and don’t listen at high volumes for extended periods. You can also switch up the music you’re listening to or take a short walk to refresh your ears.

Consider A Subwoofer

If you are looking to enhance your listening experience, consider adding a subwoofer to your setup. A subwoofer can provide additional low-frequency response, making it easier to identify issues with your mix. In conclusion, listening to music on studio monitors can help you hear your music accurately and precisely. By following our tips, you’ll be able to get the best possible sound quality and enjoy your music to the fullest.

Can You Listen to Music on Studio Monitors

Credit: www.youtube.com

Frequently Asked Questions Of Can You Listen To Music On Studio Monitors

Can You Play Music Through Studio Monitors?

Yes, you can play music through studio monitors. Studio monitors are specifically designed to provide accurate sound reproduction and are ideal for mixing and mastering tasks, but they are also great for listening to music. Connecting your device or audio interface to your studio monitors will allow you to hear the music in high quality with minimal distortion.

Are Studio Monitors Good For General Listening?

Studio monitors are designed for accurate sound reproduction, which is essential for music production. However, they can also be used for general listening if you want to hear audio in its purest form. While they are not specifically tailored for casual listening, many audiophiles prefer them for their precision and clarity.

Can You Use Studio Monitors As Regular Speakers?

Yes, you can use studio monitors as regular speakers. However, keep in mind that studio monitors are designed to provide accurate and flat frequency response, while regular speakers tend to add coloration or emphasis to certain frequencies for better sound quality.

So, you may not get the desired sound quality from studio monitors as regular speakers.

Are Studio Monitors Good For Live Music?

Studio monitors are designed for accurate sound representation, which may not be suitable for live music settings. Live music requires speakers that can produce high volumes and handle the dynamic range of live instruments and vocals. As such, studio monitors may not be the best choice for live music performances.

Conclusion

After going through this article, we can conclude that using studio monitors for listening to music is not only possible but is also preferred by many professionals. The clarity, accuracy, and frequency response of studio monitors make them an optimal choice for music enthusiasts and creators alike.

However, it’s essential to note that the listening environment should also be considered, and proper placement and calibration are required to achieve the best sound quality. So, whether you are an audiophile or a musician, investing in a good-quality studio monitor is a great decision.

Categories
Archive

Producing A Groovy Dark Melodic Techno Track

Producing a groovy dark melodic techno track requires a deep understanding of sound design, arrangement, and mixing techniques. To create a track that truly stands out in the techno scene, you need to focus on developing a strong and driving rhythm, as well as layering atmospheric and haunting melodies on top.

The world of electronic dance music is constantly evolving, with new styles and sounds emerging almost every day. As a producer, it can be challenging to keep up with the latest trends and techniques, while also staying true to your own unique style and vision.

But if you’re looking to produce a groovy dark melodic techno track that truly transcends genre boundaries and leaves a lasting impression on your listeners, there are a few key things you need to keep in mind. We’ll explore some essential tips and tricks for creating a track that combines the best elements of techno with a haunting and melodic edge.

Setting Up The Project

To begin producing a groovy dark melodic techno track, the first step is setting up the project. This involves selecting the proper software and plugins, organizing the session with a clear workflow, and creating a template to facilitate future productions.

Before producing a groovy dark melodic techno track, the first step is to set up the project properly. This involves choosing the right digital audio workstation (DAW), loading sounds, and setting the BPM and time signature. Follow these steps to set up your project correctly.

Choosing The Daw

The DAW is the heart of your music production setup. It’s essential to choose a DAW that suits your needs and preferences. Some popular DAWs include Ableton Live, FL Studio, Logic Pro X, and Cubase. Each DAW comes with unique features, workflows, and capabilities, so take some time to research and compare before deciding on the one that suits you best.

Loading Sounds

Once you’ve chosen your DAW, it’s time to load sounds into your project. You can use samples, loops, and virtual instruments to create your groovy dark melodic techno track. You can find sounds from various sources, including royalty-free sample libraries, sound packs, and synthesizer presets. Loading sounds is simple – just drag and drop them into your DAW’s channels or tracks.

Bpm And Time Signature

Setting the BPM (beats per minute) and time signature is crucial for your groovy dark melodic techno track. The BPM determines the speed of your track, while the time signature defines the rhythmic structure. Set the BPM to your desired tempo, which is typically between 120 and 130 for techno tracks. Then, choose a time signature that suits your track’s groove, such as 4/4 or 6/8. You can change the BPM and time signature later on, but it’s essential to set them correctly when starting your project. In conclusion, setting up your project correctly is vital for producing a groovy dark melodic techno track. Choose the right DAW, load sounds into your project, and set the BPM and time signature appropriately. By following these steps, you’ll be ready to create a killer techno track that’s sure to get people grooving on the dance floor.

Creating The Drum Groove

Crafting the perfect drum groove is essential in creating a groovy dark melodic techno track. The beat should be consistent and interplay with the other elements of the track to maintain the flow and energy. Experimenting with different rhythms and percussive elements can add a unique touch to the groove.

Layering And Modifying Drum Loops

To start with, it is essential to find the right drum loop to serve as the backbone of your track. You can look for a groovy, dark techno drum loop that resonates with the vibe you’re going for. However, to give the track a unique sound, you can layer a few different drum loops on top of each other. It will allow you to create a more complex and interesting drum pattern. You can change the pitch, reverse it, chop it, and apply various effects to it, such as reverb, delay, and distortion.

Adding Percussions

Once you have the perfect groove, you can spice it up by adding some percussion elements such as congas, shakers, and tambourines. They add a layer of richness and texture to the groove, making it stand out and more organic. You can also modify the percussion loops by changing their pitch, layering them, or even reversing them. Be creative in experimenting with the percussions to achieve unique sounds.

Creating The Main Kick

A dark techno track is never complete without a strong and punchy kick drum. You can start by finding a kick sample that you like, tweak it to your preference, and layer it with another kick sample to get more character. It’s essential to ensure that the kick sample sits well with the rest of the elements in the mix and doesn’t clash with the bassline. You can try side-chaining the kick and bass to give some space to the kick and make it more prominent.

Designing The Hi-hats

The hi-hats add energy and excitement to the drum pattern. You can start by selecting a hi-hat pattern that works well with the groove and tweak it to add variations and interest. Try to experiment with the velocity, swing, and length of the hi-hat notes to make the pattern more humanized. You can also add some effects such as delay, reverb, or distortion to add more texture to the hi-hats. In conclusion, creating a groovy dark melodic techno track requires attention to detail and creativity. Use the tips mentioned above to create an engaging drum groove that sets the foundation for the track. Be creative, experiment with different elements, and have fun in the process.

Creating A Dark Melodic Atmosphere

Techno music is all about creating a unique atmosphere that draws listeners in and keeps them hooked. When it comes to producing a groovy dark melodic techno track, the atmosphere is everything. It sets the tone for the entire track, creating an immersive experience for the listener. To create the perfect dark melodic atmosphere, you need to focus on three key elements: choosing the right synths, creating the chords and melodies, and adding effects to enhance the atmosphere.

Choosing The Right Synths

The first step in creating a dark melodic atmosphere is choosing the right synths. You want to choose synths that are capable of producing deep, moody sounds. Synths with analog modeling capabilities are perfect for this type of music. Two popular synths for producing dark techno are the Roland JP-8000 and the Nord Lead 2. These synths have the warm, rich tones that are essential to creating a dark, brooding atmosphere.

Creating The Chords And Melodies

Once you’ve chosen your synths, it’s time to start creating the chords and melodies that will form the basis of your track. When creating chords, it’s important to use minor keys, as these will produce a more melancholy, haunting sound. Experiment with different chord progressions until you find the perfect combination for your track. When it comes to melodies, you want to create something that is memorable and catchy, but still fits within the dark, moody atmosphere of the track.

Adding Effects To Enhance The Atmosphere

The final step in creating a dark melodic atmosphere is adding effects to enhance the overall sound. Delay and reverb are essential effects for producing techno music, as they create a sense of space and depth. You can also experiment with distortion, to add grit and texture to your sound. Modulation effects, like chorus and phaser, can be used to create movement and interest in your track. Experiment with different effects until you find the perfect combination that enhances the dark, moody atmosphere of your track.

Key Takeaways:
– Choose synths with analog modeling capabilities to produce warm, rich tones.
– Use minor keys to produce a melancholy, haunting sound when creating chords.
– Experiment with effects like delay and reverb to create space and depth in your track.

Building The Track

The process of building a groovy dark melodic techno track involves carefully choosing the right elements and layering them seamlessly. From the thumping drum patterns to the haunting synth melodies, every aspect must be meticulously crafted to create a cohesive and captivating final product.

Building the Track Producing a groovy dark melodic techno track requires creative planning, consistent experimentation with various elements, and a passion for the genre. Building the track is perhaps the most crucial stage of the production process. This is where you decide on the structure, layout, and arrangement of your track. In this section, we’ll explore the critical steps involved in building the track, including laying out the arrangement, adding transitions, and creating variations. Laying Out the Arrangement Arrangement refers to the structure of a track, including the order and length of sections like intros, verses, breakdowns, and outros. A structured arrangement can guide the listener through the various parts of the track, providing a cohesive and enjoyable experience. When laying out the arrangement for a dark melodic techno track, it’s essential to focus on creating an immersive and hypnotic atmosphere that builds and evolves throughout the track. Use tension and release to create dynamic sections that capture the listener’s attention and maintain their interest. Adding Transitions Transitions are critical in techno music as they help connect various sections and add character to the track. A well-chosen transition can provide contrast, build tension, and prepare the listener for what’s coming next. When creating transitions, consider using elements such as white noise, risers, and impacts to help create a seamless flow and keep the energy levels high. Creating Variations Variations are essential for maintaining listener engagement throughout the track. A techno track that repeats the same elements throughout can quickly become boring and monotonous. Instead, consider adding variations by changing the melody, rhythm, or instrumentation. These variations can add interest and provide new elements that keep the listener engaged. But be careful not to overuse the same elements as it can lead to distraction and confusion. Creating Tension and Release Finally, creating tension and release is perhaps the most critical element in a dark melodic techno track. Tension refers to the buildup of anticipation, while release is the release of that tension. Use various tools like filters, delay, and reverb to create tension that builds to a climax before releasing. A well-timed breakdown that leads to a full drop can generate immense energy and provide a satisfactory release for the listener. Focus on creating a balance between tension and release, and you’re well on your way to producing a groovy dark melodic techno track. In conclusion, building a groovy dark melodic techno track involves laying out the arrangement, adding transitions, creating variations, and creating tension and release. By following these steps and bringing your creativity and passion, you can produce a track that keeps the listener engaged and wanting more.

Mixing

Crafting a groovy dark melodic techno track involves expert mixing skills. Balancing the elements of the song to create a cohesive and engaging sound requires precision and attention to detail. By experimenting with different effects and adjusting levels, you can produce a track that captures the mood and energy of techno music.

Mixing is an essential step in producing a groovy dark melodic techno track. It is the process of balancing the levels, EQing the sounds, adding compression and saturation, and creating space with reverb and delay. In this section, we will discuss each of these processes in detail.

Balancing The Levels

Balancing the levels is the first step in the mixing process. It involves setting the volume levels of each track to ensure that they blend well with each other. It’s important to make sure that each sound can be heard in the mix without any track overpowering the other. A well-balanced mix will create a solid foundation for the rest of the mixing process.

Eqing The Sounds

EQing the sounds is the process of adjusting the frequencies of each sound to give it its own space in the mix. By cutting unwanted frequencies and boosting the necessary ones, you can create a balanced and clear sound that sits well in the mix. It’s important to remember not to overdo it with EQing, as it can lead to an unnatural sound.

Adding Compression And Saturation

Adding compression and saturation can enhance the overall sound of the mix. Compression helps to even out the dynamic range of the sound, making it more consistent and easier on the ears. Saturation adds warmth and character to the sound, making it more pleasing to the listeners’ ears. It’s important not to overdo it with compression and saturation to avoid a distorted and overly compressed sound.

Creating Space With Reverb And Delay

Creating space with reverb and delay is the final step in the mixing process. Reverb adds depth and space to the sound, making it feel like it’s in a bigger room. Delay creates a slap-back effect, making the sound bounce back and forth. These effects can help to create a sense of space and depth in the mix, making it sound fuller and more immersive. In conclusion, mixing is an integral part of producing a groovy dark melodic techno track. Balancing the levels, EQing the sounds, adding compression and saturation, and creating space with reverb and delay are all essential processes that can make or break the final mix. By following these steps, you can create a well-balanced and immersive mix that will take your track to the next level.

Mastering

Mastering the art of producing a groovy dark melodic techno track requires a thorough understanding of sound design, arrangement and mixing techniques. By experimenting with different elements and incorporating creative ideas, you can create a unique and memorable track that will captivate your audience.

Mastering is the last and one of the crucial steps in producing techno music. This process enhances the overall sound quality of the track and makes it ready for commercial release.

Preparing The Track For Mastering

To ensure that your track is ready for mastering, you need to take care of a few things. Firstly, make sure that your mix doesn’t exceed 0dB. Secondly, remove all the unnecessary effects such as reverb and delay, which can interfere with the mastering process. Finally, make sure that all the tracks are consolidated into a single file and exported in WAV format.

Mastering Techniques

Mastering involves several techniques such as equalization, compression, limiting, and stereo imaging. One of the common techniques is EQ, which involves balancing the frequency levels of various elements in your track. Compression is used to control the dynamics of the track by reducing the difference between the loudest and quietest parts. Limiting helps to prevent audio distortion and ensures that the track doesn’t exceed 0dB. Stereo imaging makes the track sound wider and more spacious.

Final Touches And Exporting The Track

Once you have applied the necessary mastering techniques, it’s time to add some final touches to your track. This involves adding some subtle effects such as saturation or harmonic excitation to add warmth and depth to your track. Finally, export the mastered track in high-quality WAV or AIFF format to maintain its quality and integrity. In conclusion, mastering is a crucial step in producing a groovy dark melodic techno track. It requires technical skill and an understanding of the various techniques involved in the process. By following these steps, you can prepare your track for mastering, apply essential mastering techniques, and add final touches to ensure that your track sounds perfect.

Producing A Groovy Dark Melodic Techno Track

Credit: edm.com

Frequently Asked Questions For Producing A Groovy Dark Melodic Techno Track

What Are The Elements Of A Melodic Techno Track?

Elements of a melodic techno track include distinctive and atmospheric synthesizer sounds, a strong and consistent beat, and an evolving sense of melody throughout the song. The use of filters and effects can also add texture and depth to the overall sound, creating a unique and memorable listening experience.

Does Techno Have Melodies?

Yes, techno music often has melodies. The genre may focus more on repetitive rhythms and beats, but it also incorporates musical elements such as synthesizer melodies and chord progressions to create emotional depth and texture in a song.

How Do You Start Producing A Dark Melodic Techno Track?

Begin with a simple groove and add layers of dark, melodic elements. Experiment with synth sounds, percussion, and effects until you find the perfect combination.

What Are Some Key Elements Of A Successful Dark Melodic Techno Track?

A groovy bassline, atmospheric pads, hypnotic melodies, and a strong, driving rhythm are essential components for a successful dark melodic techno track.

Conclusion

As you can see, producing a groovy dark melodic techno track requires passion and patience. It is not an easy task, but with consistent practice and a strong desire to learn, you can master the craft. By using the tips and techniques outlined in this blog post, you can create a unique and captivating track that will leave your audience grooving to the beat.

Remember to have fun and experiment with different soundscapes to find your own unique style. Keep creating and rock the dance floor with your groovy dark melodic techno tracks!