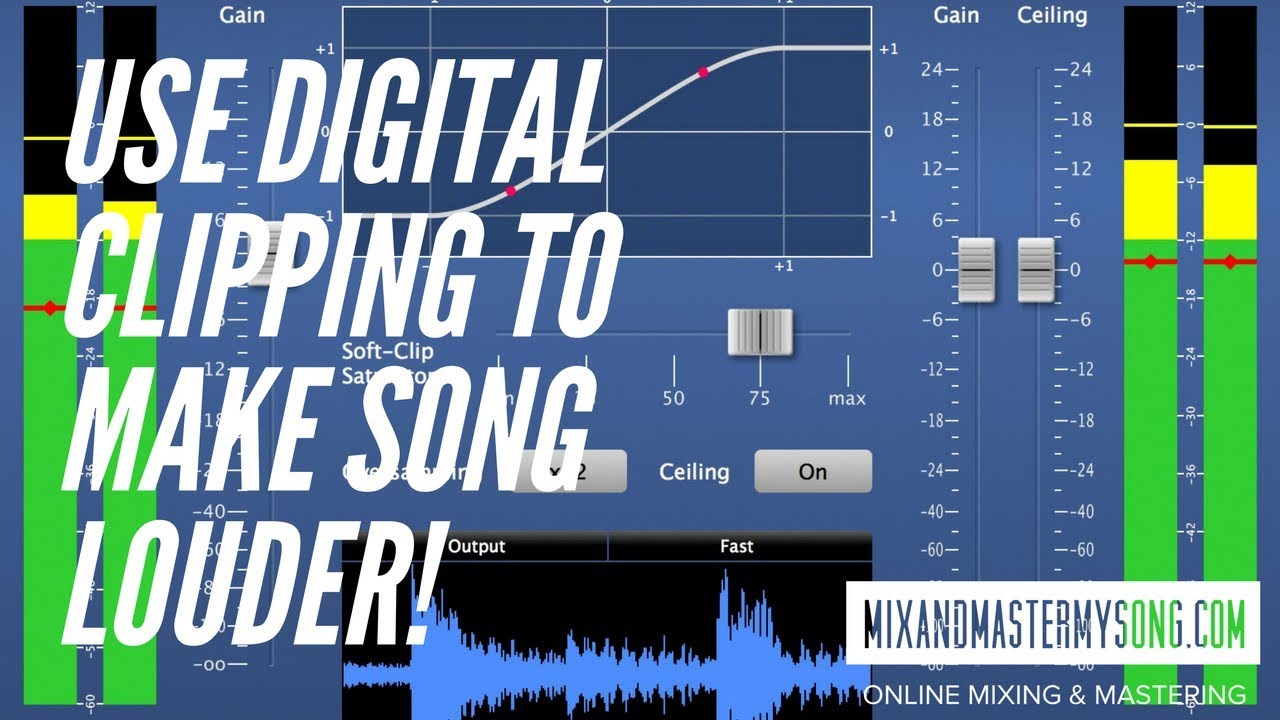
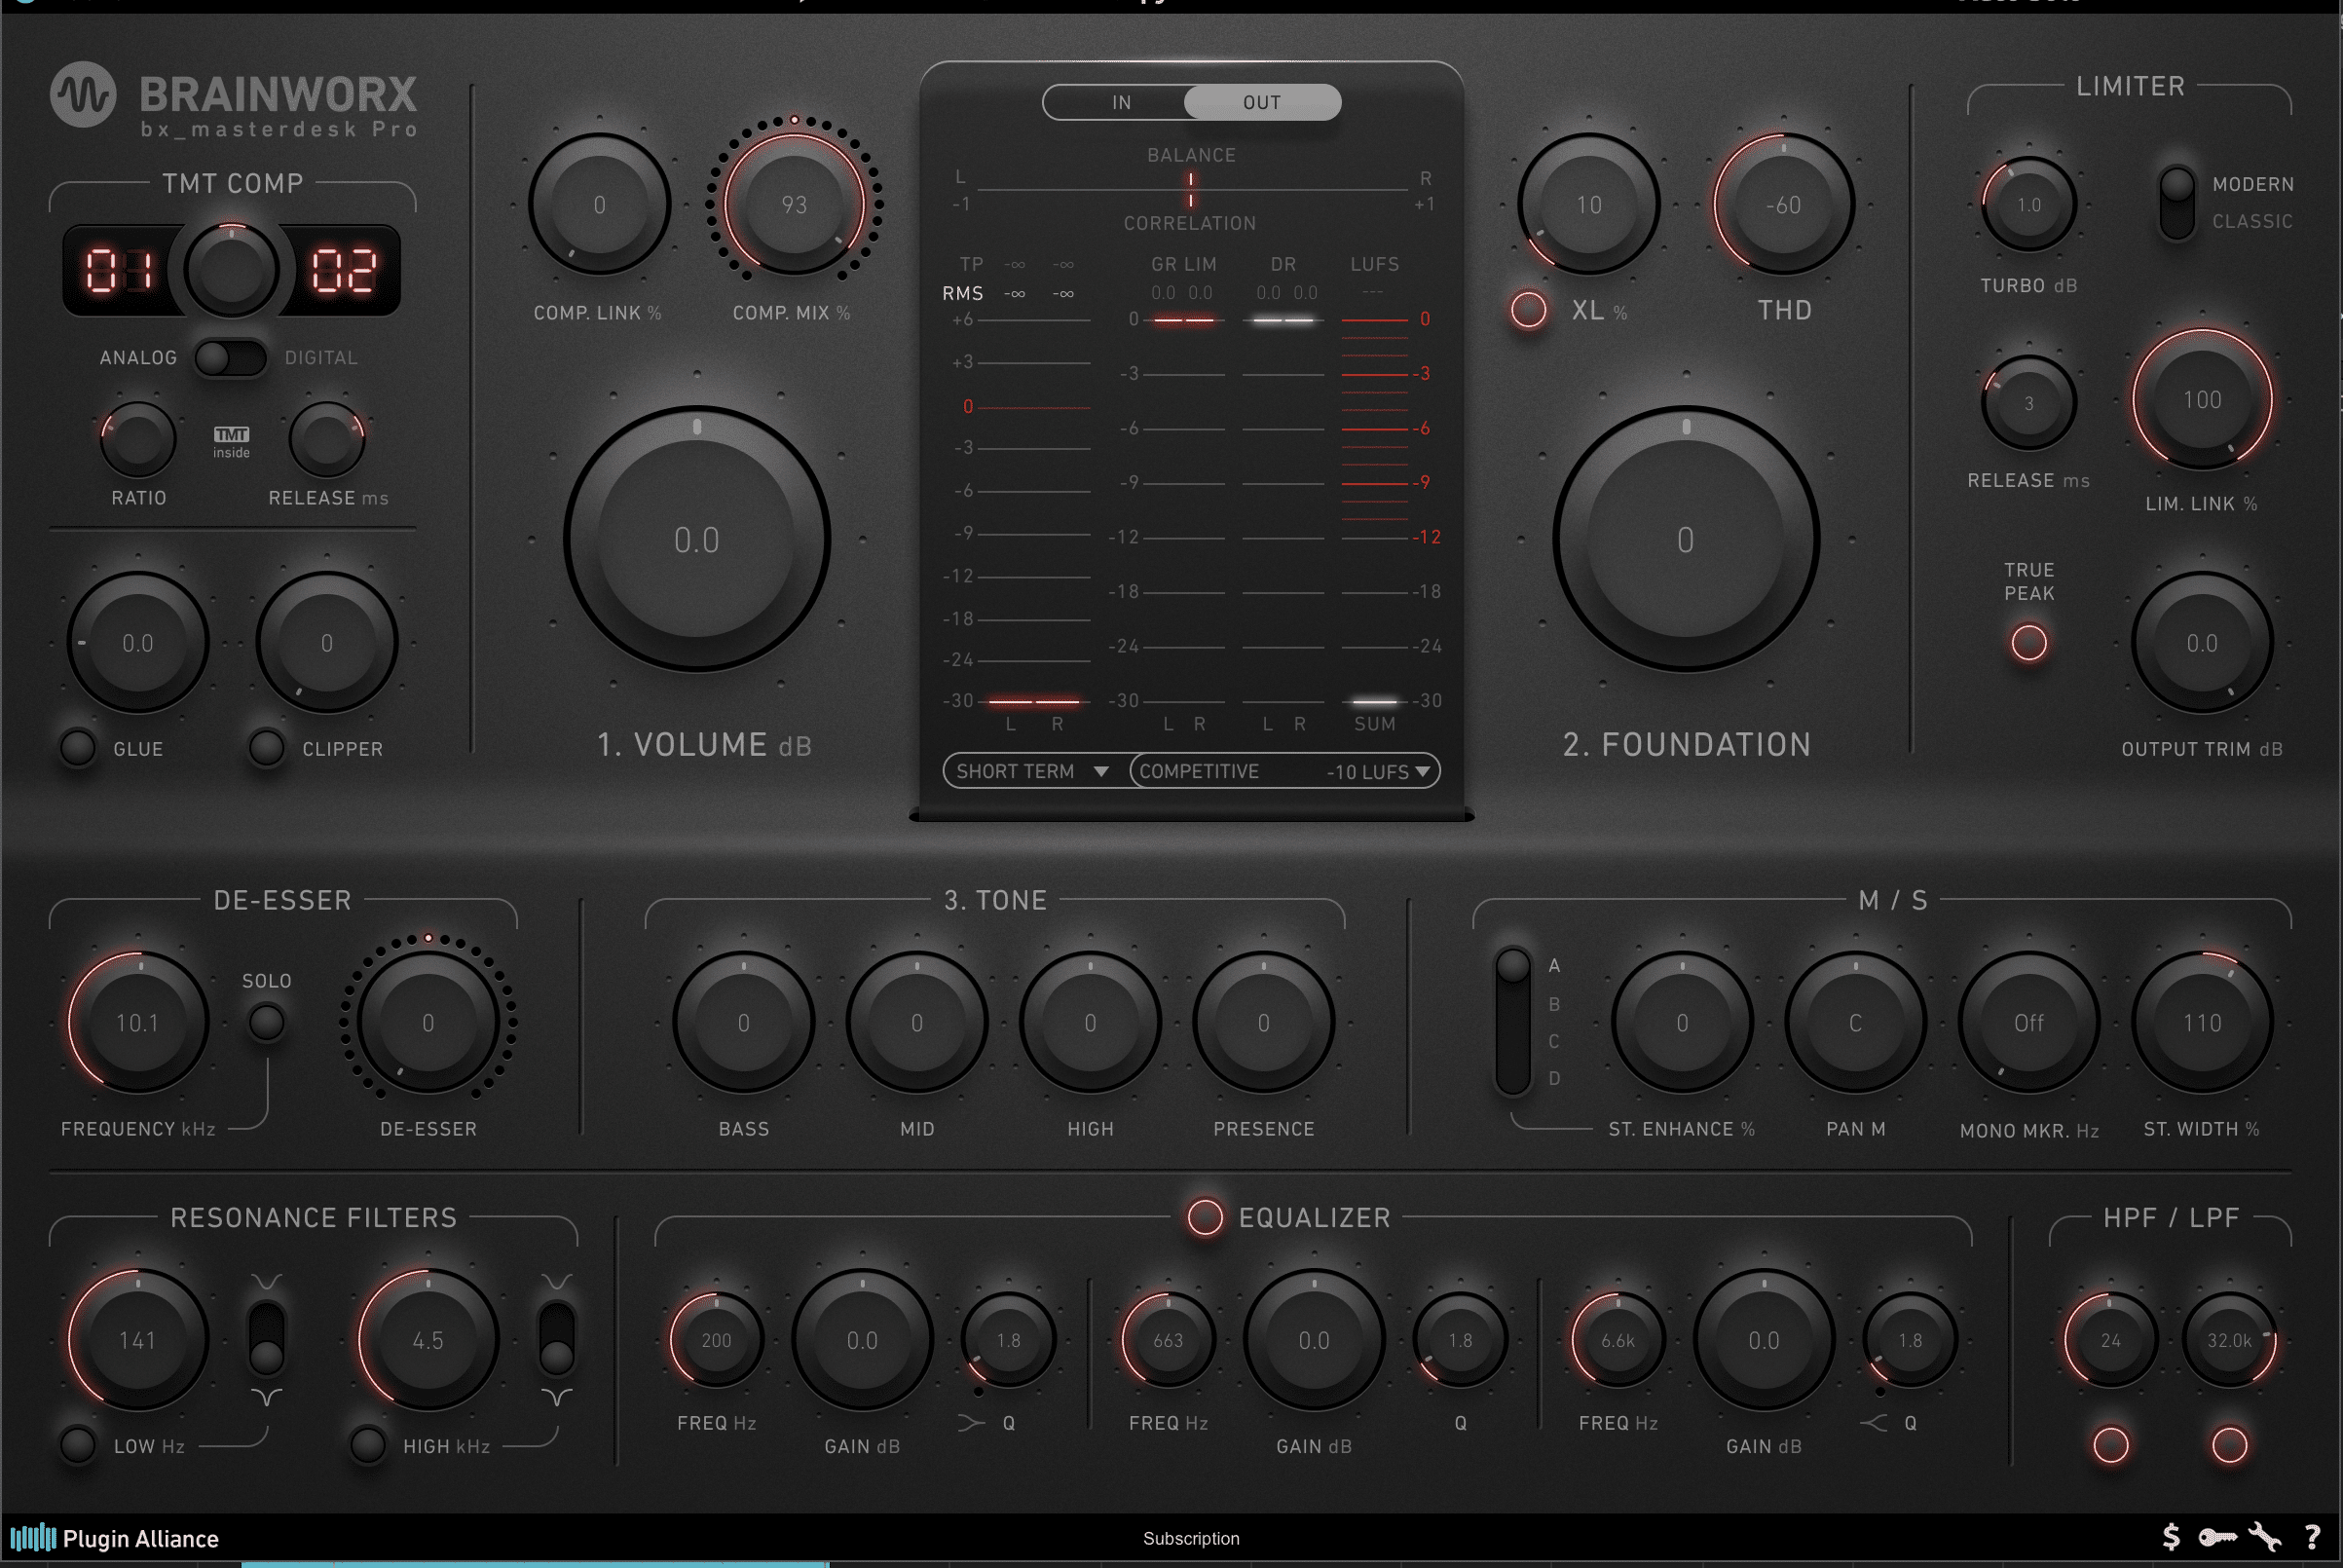
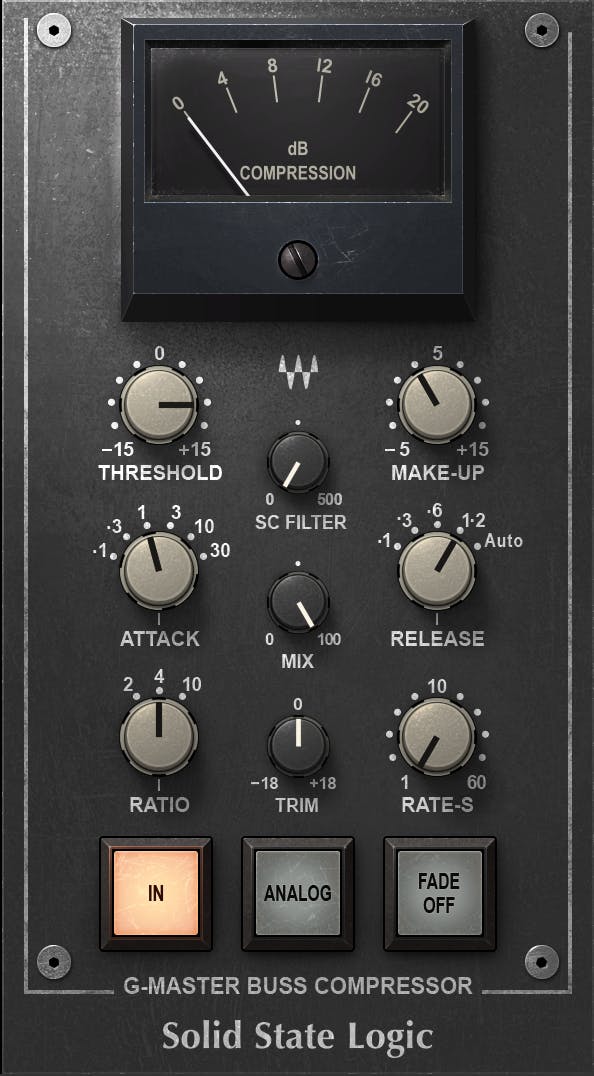
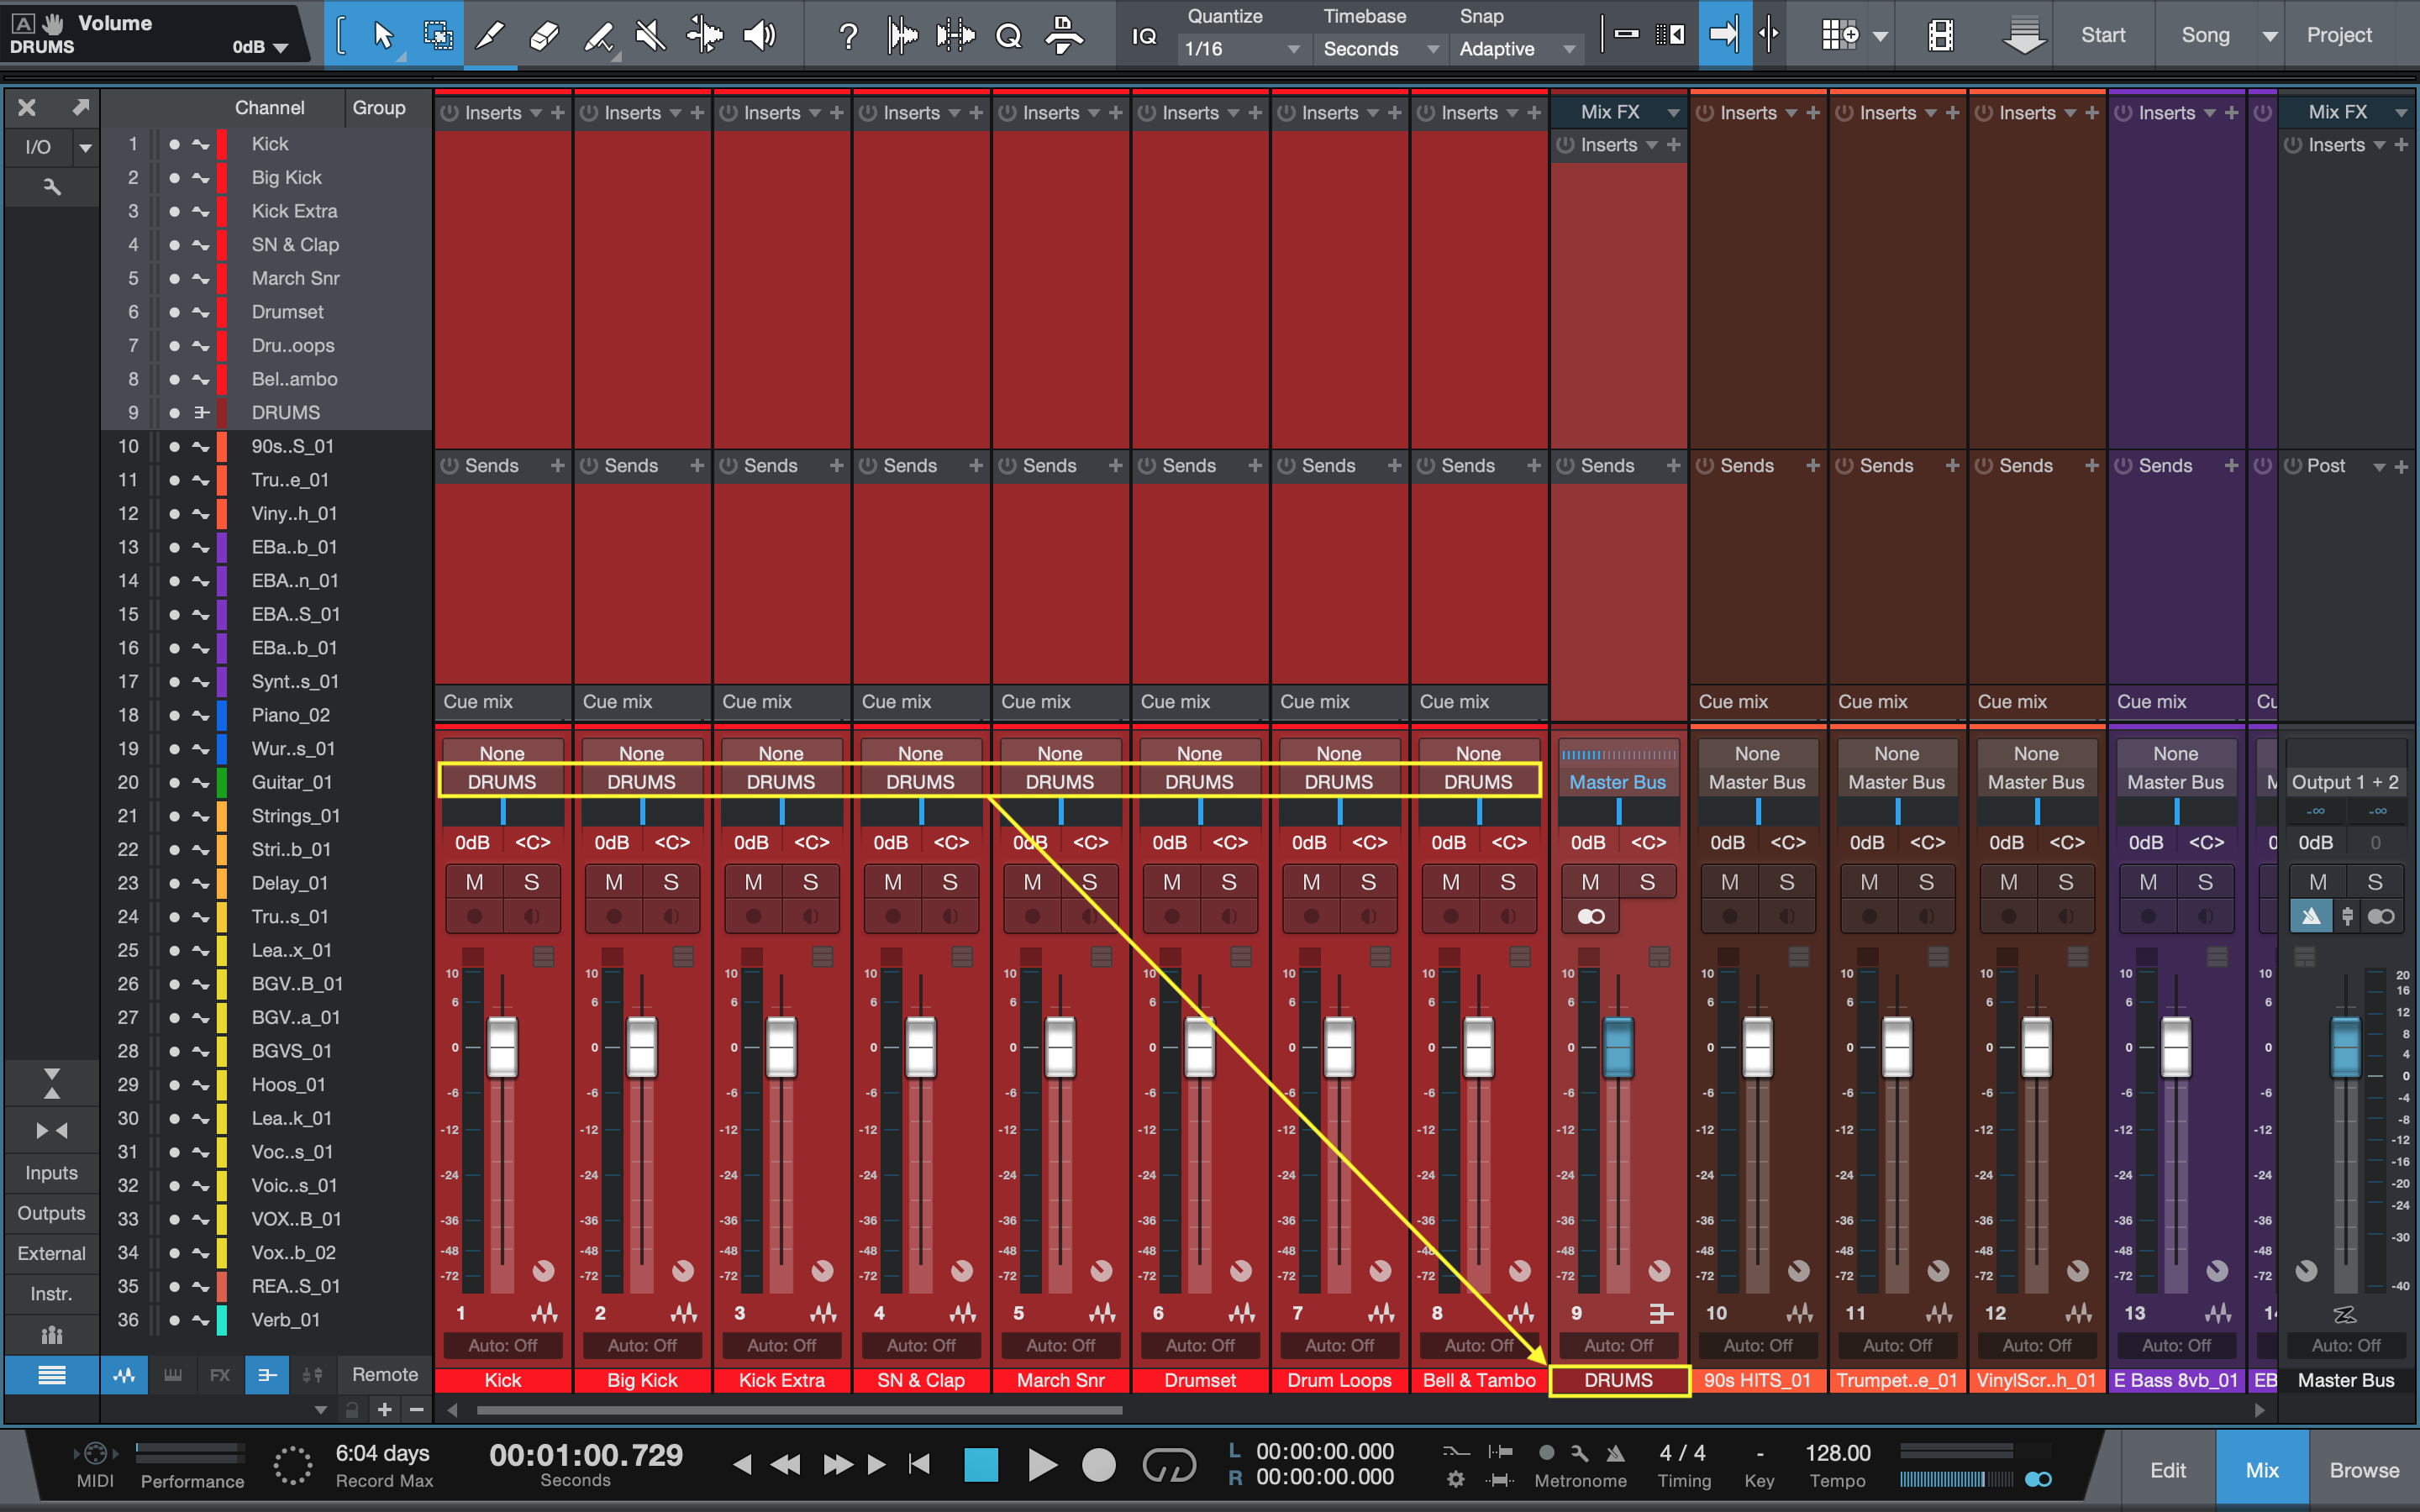
Digital clipping can make your song louder, boosting its overall volume. It involves increasing the gain or input level of your recording, allowing the sound to hit the maximum level without distortion.
This technique can be harmful if overused, but with proper application, it can result in a better mix with more cohesion and power. If you’re looking to level up your music production game, then understanding how to properly use digital clipping can be a valuable tool in your arsenal.
While it may seem like a simple solution, digital clipping can make a significant difference in the overall impact and quality of your songs, allowing them to stand out in a crowded field. That being said, digital clipping should be approached with caution as it can quickly lead to distortion and other unwanted consequences if not handled carefully. We’ll walk you through the basics of digital clipping and how you can implement it into your own music production process.
Credit: m.youtube.com
Step By Step Guide For Clipping Your Song
Learn how to make your song louder with digital clipping by following our step by step guide. Boost your track’s volume without sacrificing its quality and make it stand out in the competitive music industry.
If you want to make your song louder and punchier, digital clipping can do wonders. However, you need to be careful not to overdo it, as it can distort the audio quality and ruin the mix. In this step-by-step guide, we will show you how to clip your song in a safe and effective way.
Step 1: Importing The Audio File
The first step in clipping your song is to import the audio file into your digital audio workstation (DAW). Make sure you have the latest version of your DAW software and the necessary plugins installed for clipping.
Step 2: Creating A Backup Of Original File
Before you start clipping your song, create a backup copy of the original file. This is important because if you make a mistake during the clipping process, you can always go back to the original file and start again.
Step 3: Setting Up Digital Clipping
Next, set up digital clipping by selecting the audio track you want to clip and opening the clipping plugin. The clipping plugin will allow you to adjust the maximum peak level of the track, which is measured in decibels (dB).
Step 4: Applying Digital Clipping
Now it’s time to apply digital clipping to your track. Start by setting the maximum peak level to around -0.1 dB or -0.2 dB. This will give your track some extra headroom without clipping. However, if you want a more aggressive clipping effect, you can go higher, up to -0.5 dB or even -1 dB.
Step 5: Exporting Your Louder Song
Once you’re satisfied with the clipping effect, it’s time to export your louder song. Make sure to choose a high-quality export format like WAV or AIFF, and name the file accordingly. You can now listen to your louder song and compare it to the original file to hear the difference. In conclusion, digital clipping can be a powerful tool for making your song louder and punchier. However, it should be used with caution and in moderation to avoid audio distortion. By following this step-by-step guide, you can safely clip your song and give it the extra loudness it needs to stand out.
Credit: m.youtube.com
Credit: mixandmastermysong.com
Frequently Asked Questions For Use Digital Clipping To Make Your Song Louder
How Can I Increase The Loudness Of A Song?
To increase the loudness of a song, you can use a variety of tools such as a compressor or limiter. These tools help to boost the overall volume while maintaining the song’s dynamic range. Additionally, adjusting the levels of individual tracks and EQ settings can also help to increase the perceived loudness of the song.
Is Clipping Good For Audio?
Clipping is not good for audio as it results in distorted and unpleasant sound. It occurs when the audio signal exceeds the maximum limit of the equipment, causing the waveform to flatten and cut off at the peaks. To avoid clipping, it’s best to set the audio levels correctly and adjust the gain accordingly.
Why Does Digital Clipping Sound Bad?
Digital clipping sounds bad because it causes distortion and harshness in audio. It occurs when the input signal exceeds the maximum allowed level, and the resulting waveform is cut off, creating square-shaped waves that affect sound quality.
What Are The Effects Of Sampling By Clipping For Audio?
Sampling by clipping can lead to distortion in audio, producing a distorted sound that resembles a buzz or a crackle. This effect can make it challenging to accurately capture and reproduce the nuances of the original audio source. It may also affect the overall quality of the sound output.
Conclusion
In short, digital clipping is a simple yet effective solution to make your song louder. By using clipping plugins, you can avoid distortion and add volume without compromising the quality of your music. With the right approach, you can enhance the dynamics and punch of your tracks and make them stand out in the crowded digital landscape.
Remember to experiment, listen to your tracks carefully, and use clipping as a creative tool to achieve the desired sound. So, start clipping today and boost your music to new heights!
To mix effectively on headphones, start by choosing the right pair that suits your ears and align with a chosen reference mix. Properly balance levels with EQ in mono mode, and take breaks to rest your ears.
Mixing on headphones is a convenient alternative for music producers, especially those who have limited studio space or working with tight deadlines. However, it can be challenging to precisely balance levels with EQ and stereo field placement, leading to inaccurate mixes.
Fortunately, there are steps to follow to produce well-balanced, high-quality mixes on headphones. We’ll discuss some practical rules for mixing effectively on headphones that will help you achieve excellent results.
Credit: www.masteringthemix.com
Importance Of Mixing On Headphones
Mixing on headphones is a crucial step in producing quality audio. Following the rules for mixing effectively on headphones can greatly impact the final product. Paying attention to levels, frequency balance, and stereo image are essential for achieving a balanced mix on headphones.
Mixing is an essential part of music production that could make or break any song. A good mix can enhance the song’s mood or emotion, while a poor mix can make it unpleasant to the ears. In the past, mixing has been done on studio monitors. However, with the rise of home studios, many music producers now mix using headphones. Mixing on headphones has its benefits and drawbacks, and it is essential to understand the basic rules for mixing effectively on headphones.
Benefits Of Mixing On Headphones
Mixing on headphones offers several advantages. Here are some of the benefits of mixing on headphones:
Accuracy: Mixing on headphones can help you get a more accurate representation of the sound of your mix. Unlike speakers, headphones don’t have to battle room acoustics, which could interfere with the accuracy of your mix.
Isolation: Mixing on headphones allows you to concentrate on the mix without any external distractions. With headphones on, you can eliminate background noises and focus on the details of the mix.
Portability: Headphones are portable and could easily fit into your backpack. You can mix from anywhere, anytime, without having to worry about carrying studio monitors around.
Downsides Of Mixing On Headphones
As much as mixing on headphones is a popular option among music producers, it comes with some drawbacks. Here are some of the downsides of mixing on headphones:
Fatigue: Listening to music on headphones for an extended period could lead to ear fatigue and affect your ability to mix accurately. It’s essential to take breaks in between mixing sessions to rest your ears.
Spatial Perception: Unlike speakers, headphones don’t give you the same perception of space and stereo imaging. It could be challenging to get an accurate representation of how your mix would sound on different playback systems.
Tonal Balance: Headphones have a different tonal balance compared to speakers. You have to accommodate for the headphone’s frequency response when mixing to avoid overcompensating.
In conclusion, mixing on headphones is a viable option for music producers, but it’s essential to understand the benefits and drawbacks. Whether you choose headphones or studio monitors, ensure that you follow the basic rules of mixing to get the best results.
Credit: www.masteringthemix.com
Understanding Headphone Mixing
Effective headphone mixing involves following specific rules to ensure accuracy. Some tips include using multiple headphones for references, avoiding excessive volume, and considering the soundstage. Following these guidelines will enhance the quality of a mix produced on headphones.
Difference Between Mixing On Speakers And Headphones
When it comes to mixing audio, using headphones can be a convenient and reliable option. However, it is essential to understand the critical differences between mixing on speakers and headphones. Unlike speakers, headphones deliver sound directly to the ears, offering a more isolated listening experience. This isolation eliminates any external noise and reduces room acoustics’ impact on the mix. It changes the frequency response, stereo image, reverberation times, and other sound characteristics and makes it necessary to establish new boundaries for the mix.
Factors To Consider While Mixing On Headphones
Mixing on headphones offers an accurate monitoring system but can be challenging without considering the following factors:
1. Consistency and Volume:
Headphone mixes can sound vastly different at different listening levels. Consistency in volume is critical in headphone mixing. Mixing at a consistent volume is crucial to make informed mixing decisions.
2. Headphone Quality and Calibration:
Headphone quality and calibration differ, affecting the accuracy and reliability of the mix. Before making any mix decisions, ensure your headphones are calibrated for the specific frequency response.
3. Breaks and Listening Fatigue:
Mixing on headphones can cause ear fatigue and affect the overall mix quality. It’s essential to take regular breaks to prevent listening fatigue and maintain quality over time.
4. Reference and Comparison:
Always periodically compare your mix with the reference tracks on a different monitoring system to achieve accurate mixes. This will eliminate the stereotype representation of sound characteristics that headphones create.
5. Panning and Stereo Image:
The panning and stereo image can be challenging to assess accurately while mixing on headphones. It can be erroneous to rely on headphones to mix for the stereo field as they can present a broader separation across the stereo field than on speakers. It’s essential to occasionally verify panning accuracy through other monitoring systems. In conclusion, mixing on headphones requires unique insights and tools to get the best possible mix. Paying attention to the above considerations while mixing on headphones will help produce accurate, reliable, and harmonic mixes. Hence it’s an art to blend personal preference, method, and experience to achieve the perfect mix when using headphones.
Rules For Mixing On Headphones
Mixing music on headphones has become increasingly popular, as more producers and engineers opt for the convenience and affordability that comes with it. However, it is important to note that mixing on headphones requires a different approach and set of rules to mixing on speakers. In this blog post, we will discuss the Rules for Mixing on Headphones.
Set Realistic Volume Levels On Headphones
When mixing on headphones, it is important to set realistic volume levels to avoid ear fatigue. Prolonged exposure to high volumes can lead to hearing damage or even loss. It is recommended to keep the volume at a comfortable level and take regular breaks to rest your ears and prevent ear fatigue.
Choose The Right Pair Of Headphones For Mixing
One of the most important tools for mixing on headphones is selecting the right pair of headphones. It is recommended that you choose a pair of headphones that provide a flat and neutral frequency response. This ensures that you are hearing a true representation of the mix, without any overemphasis or underemphasis of certain frequencies.
Additionally, it is important to choose a pair of headphones that are comfortable to wear for long periods of time. It is recommended to choose headphones with ear cups that fit comfortably around your ears, as opposed to on-ear headphones, which can cause discomfort after prolonged use.
Use High-quality Audio Files For Mixing On Headphones
The quality of the audio files that you use for mixing on headphones is crucial. Low-quality audio files can contain artifacts or inconsistencies that may not be audible on speakers, but can be exaggerated on headphones. It is recommended that you use high-quality audio files with a high bit depth and sample rate for the most accurate representation of the mix.
Take Breaks Regularly During Headphone Mixing Sessions
One of the most important rules for mixing on headphones is to take regular breaks to rest your ears. Prolonged exposure to headphones can lead to ear fatigue, which can affect your perception of the mix. It is recommended to take a break every 20-30 minutes to rest your ears and prevent ear fatigue.
Techniques For Effective Headphone Mixing
Mixing on headphones can be challenging, but with the right techniques, you can achieve exceptional results. In this post, we’ll discuss some of the rules for mixing effectively on headphones, with a focus on techniques that will help you get the best possible sound.
Avoid Over-processing While Mixing On Headphones
When mixing on headphones, it’s important to avoid over-processing. Headphones can exaggerate certain frequencies, making it difficult to get a balanced mix. If you’re not careful, you can end up overcompensating and making certain elements too prominent in the mix. To avoid this, start with subtle adjustments and avoid using too much EQ or compression.
Assess Mixes On Different Devices
It’s essential to listen to your mix on different devices to ensure it translates well. While headphones are great for monitoring, they can sometimes hide certain elements in the mix. Compare your mix on multiple devices such as speakers, car audio, and earbuds. This will help you identify any frequency imbalances or other issues that you may have missed while mixing on headphones.
Trust Your Ears While Mixing On Headphones
While it’s essential to check your mix on multiple devices, never underestimate the power of your ears. Trusting your ears means being confident in your ability to identify and fix any issues, whether you’re mixing on headphones or speakers. Train your ears to recognize different frequencies and sounds so you can make critical decisions that result in a great mix.
Balance Levels And Panning For Clarity
When mixing on headphones, it’s essential to balance levels and panning for clarity. Make sure that each element in the mix is clear and distinct, and that it’s not competing with other elements for space. Use panning to separate elements and create a wider stereo image. This will ensure that each instrument or vocal has its own space in the mix and can be heard clearly.
By following these rules, you can create a high-quality mix when mixing on headphones. Remember, the key is to use your ears and trust your instincts. With practice, you’ll gain confidence in your ability to achieve exceptional results every time!
Credit: www.amazon.com
Frequently Asked Questions Of Rules For Mixing Effectively On Headphone
What Is The Most Important Rule For Building A Headphone Mix?
The most important rule for building a headphone mix is to ensure that all elements are balanced and adequately separated, allowing each instrument and vocal to be heard clearly without overpowering the others. This requires careful use of panning, volume levels, EQ, and other effects to create a cohesive and dynamic sound.
How Do You Make A Good Headphone Mix?
To make a good headphone mix, first consider the end listener and the type of music. Start with a balanced mix, utilizing panning to create separation, and using EQ and compression to shape the sound. Use reverb and delay sparingly, and make sure to listen to the mix at different volume levels.
What Makes Headphones Good For Mixing?
Good mixing headphones have a neutral and accurate sound, which allows producers and engineers to hear a faithful representation of the audio they are working on. They should also have a comfortable fit, good isolation, and be durable enough to withstand regular use in a studio environment.
Additionally, closed-back headphones are preferred to prevent sound leakage and interference with nearby microphones.
What Level Should Headphones Be When Mixing?
The recommended level for mixing headphones is around 85 decibels SPL. However, the ideal volume can vary depending on the type and quality of headphones, as well as personal preferences. It is important to avoid listening to headphones at high volumes as it can lead to ear damage and affect the accuracy of the mix.
Conclusion
Incorporating these rules into your process of mixing on headphones can successfully elevate your mix to a professional level. From keeping your sentences short and easily digestible, to writing in an SEO-friendly and plagiarism-free manner, there is much to consider in order to create a unique and effective piece of content.
So, it is essential to pass AI writing detection to ensure that your writing remains human-like while still adhering to SEO guidelines. Practice these techniques and watch your mixing skills improve over time!
The best way to record vocals at home is by using a condenser microphone and a pop shield. Now, with the advancement of technology, it’s incredibly easy and affordable to set up a home studio to record professional-quality vocals.
Recording great vocals at home can be a challenging and daunting task, but it doesn’t have to be. With the right equipment and techniques, anyone can achieve a professional-quality recording from the comfort of their own home. We’ll look at some of the best ways to record vocals at home, including the equipment you’ll need, the importance of room acoustics, and the best recording techniques to use.
Whether you’re a seasoned pro or just getting started, you’ll find plenty of great tips and advice to help you get the most out of your home recording studio.
Credit: www.youtube.com
Creating A Home Recording Setup
Creating a home recording setup can be a fun and rewarding experience, especially when it comes to recording vocals at home. With the right equipment and techniques, you can achieve professional-sounding vocals from the comfort of your own space. Ensure you have a high-quality microphone, acoustic treatments, and recording software to get started.
Creating a Home Recording Setup is easier than you think. With the right equipment and software, anyone can achieve professional-grade recordings from the comfort of their own home. In this article, we’ll be discussing two crucial elements of any home recording setup: Choosing the Right Microphone and Selecting a Recording Software.
Choosing The Right Microphone
When selecting a microphone for home recording, it’s important to consider factors such as the microphone’s sensitivity, frequency response, and polar pattern. Some popular types of microphones for recording vocals include dynamic, condenser, and ribbon microphones. Dynamic microphones are known for their durability and versatility, making them a popular choice for recording vocals. They can handle high sound pressure levels and can often provide a warmer sound. Condenser microphones are more sensitive and can capture a wider frequency range, making them ideal for capturing the nuances of a singer’s voice. Ribbon microphones have a unique sound, often described as warm and natural. When choosing a microphone, it’s important to consider your specific needs and the type of sound you’re looking to achieve.
Selecting A Recording Software
Once you’ve chosen the right microphone for your home recording setup, it’s time to select a recording software. There are many different options when it comes to recording software, ranging from free to expensive, and each has its strengths and weaknesses. Some popular software options for recording vocals at home include GarageBand, Audacity, and Pro Tools. GarageBand is a popular choice for Mac users, as it comes pre-installed on many Mac computers. Audacity is a free and open-source option that is great for beginners, while Pro Tools is a more professional-grade option used by many recording studios. When selecting a recording software, it’s important to consider the features you need, the compatibility with your computer and microphone, and your budget. Overall, creating a home recording setup for recording vocals is achievable with the right equipment and software. By selecting the right microphone and recording software, you can achieve professional-grade recordings from the comfort of your own home.
Credit: www.supremetracks.com
Preparing Your Recording Space
Achieving the best-quality vocal recordings at home requires preparing your recording space properly. You’ll need to choose a suitable room, invest in soundproofing materials, and set up good quality recording equipment. By doing these steps, you can ensure that your recordings are free of background noise and distortion, and have a professional sound.
Preparing Your Recording Space: When it comes to recording vocals at home, one of the most important factors to consider is the recording space. Setting up a high-quality recording environment can make a significant difference in the final result of your recording. In this section, we will discuss the best ways to prepare your recording space, including finding a quiet space and minimizing echo and background noise. H3: Finding a Quiet Space The first step in preparing your recording space is to find a quiet area to record in. This will ensure that your vocals are the primary sound captured and not competing with outside noises. Here are some tips on finding a quiet space: 1. Use a room with thick walls and few windows, such as a basement or walk-in closet. 2. Turn off any appliances, electronics or fans, as they can add unwanted background noise. 3. Schedule recording sessions during quiet times of the day, and inform others in your home of your recording schedule to avoid interruptions. H3: Minimizing Echo and Background Noise In addition to finding a quiet space to record your vocals, it’s essential to minimize echo and background noise. Here are a few practical tips on minimizing echo and background noise: 1. Use thick blankets or acoustic foam to cover walls and floors, absorbing sound and reducing echo. 2. Record in a closet filled with clothes, as the soft textures will absorb sound and reduce background noise. 3. Place a rug underneath your microphone to reduce vibration and absorb sound. By following these simple steps, you can set up a suitable recording environment to achieve high-quality vocal recordings at home. Remember, the most crucial aspect of recording vocals is to have a space that is quiet, minimizing unwanted background noise and echo.
Setting Up Your Microphone
To record vocals at home, it’s important to set up your microphone properly. Start by finding a quiet space and positioning the mic at the right distance from your mouth. Avoid background noise and adjust the gain levels for clear sound.
Are you ready to take your vocal recording game to the expert level? While recording vocals at home may seem like a daunting task, it’s actually quite easy with the right equipment and setup. The most important element of a vocal recording setup is a high-quality microphone. However, even the best microphone won’t deliver optimal sound if it’s not set up correctly. Here are the essential steps you need to follow to set up your microphone properly.
Placing The Microphone For Optimal Sound
To record the best vocal track possible, you must place the microphone in the correct position. Consider the characteristics of your recording space, such as room size, acoustic treatment, and ambient noise levels. Always position the microphone away from reflective surfaces such as walls, floors, and ceilings to eliminate the risk of echo or reverb. You can experiment with mic placement at different angles and distances until you find the sweet spot that captures the best sound.
Adjusting Microphone Volume Levels
Now that you have placed your microphone in the right position, you need to adjust its volume levels. This step is crucial to prevent distortion or clipping, which will negatively impact your recording quality. To determine the correct microphone volume levels, record a sample track and play it back to check for any distortion or clipping. Adjust the volume levels accordingly and repeat the process until you get an optimal sound.
Summary
Effective microphone setup is the key to recording high-quality vocal tracks at home. By placing your microphone in the right position and adjusting its volume levels, you’ll capture the best sound possible. Remember, investing in a high-quality microphone is the foundation of any successful home recording setup. Use these tips to optimize your microphone setup and take your vocal recordings to the next level!
Recording Your Vocals
Achieving professional vocals at home requires a few key elements, such as a high-quality microphone and a quiet, acoustically treated space away from background noise. Use a pop filter to reduce plosive sounds and experiment with mic placement to achieve the desired tone.
Recording your vocals at home can be a daunting task, but with the right equipment and recording techniques, it can be an enjoyable experience. In this blog post, we will look at the best way to record vocals at home, focusing on the subheading: Recording Your Vocals.
Creating A Comfortable Environment
The first step in recording your vocals at home is to create a comfortable environment. Find a quiet and isolated space, free from external noise that could interfere with the recording. Ensure the room is well ventilated and at a comfortable temperature. To improve the acoustic quality of your recording space, consider adding some soundproofing materials to the walls and floor. This could be as simple as hanging blankets or using acoustic foam panels. The goal is to create a space that is acoustically neutral and free from unwanted reflections.
Using Headphones For Monitoring
Using headphones for monitoring while recording vocals is essential in ensuring the quality of the recording. By using headphones, you can hear exactly what is being recorded without any interference from external noise. When choosing headphones for recording vocals, prioritize those that are comfortable and have good sound quality. Closed-back headphones are preferable since they offer noise isolation and prevent sound leakage. When recording, it’s essential to keep the volume of the headphones at a comfortable level to prevent damage to your hearing and maintain accuracy. Recording vocals at home requires some effort and precaution to ensure good quality sound. By creating a comfortable environment and using headphones for monitoring, you’re setting yourself up for success. Happy recording!
Editing Your Vocal Recording
Learn how to record vocals at home like a pro by editing your vocal recordings. With the proper equipment and techniques, you can achieve high-quality recordings that rival those of professional studios without even leaving your house.
After successfully recording your vocals, it’s time to edit the recording to achieve a polished and professional sound. The editing process mainly involves adjusting levels, panning, using EQ, and compression. Let’s look at each of these in more detail.
Adjusting Levels And Panning
One crucial element of editing vocals is adjusting the levels and panning. Ensure that each vocal track is levelled correctly to avoid any parts being too loud or too quiet. Adjusting panning helps to create a sense of space and width in your mix, making it sound more dynamic and interesting. For example, you can pan your vocals slightly to the left or right to create a stereo effect.
Using Eq And Compression
The EQ and compression effects help bring your vocals to life. EQ helps to shape the tone of the vocals, making them brighter or warmer, depending on the desired sound. Use compression to control the dynamic range of your vocals, which helps to even out the levels and ensure that the soft parts are audible while still keeping the loud parts under control. Applying these effects to your vocal recording will give them a professional touch.
Example EQ Settings:
Frequency
dB Gain
Q Factor
100 Hz
-2 dB
1.5
500 Hz
-1 dB
1.0
1 kHz
+2 dB
0.8
2 kHz
+4 dB
1.2
5 kHz
+1 dB
2.0
Example Compression Settings:
Threshold: -18dB
Ratio: 4:1
Attack: 10ms
Release: 100ms
In conclusion, editing your vocal recording is a vital part of achieving a polished and professional sound. Make sure you adjust the levels, panning, and use EQ and compression to bring your vocals to life. With these tips in mind, you are well on your way to creating a great-sounding vocal recording at home.
Adding Effects And Processing
To get the best quality when recording vocals at home, adding effects and processing is essential. Experiment with EQ, compression, and reverb to get the perfect sound. Make sure to record in a quiet room and use a good quality microphone for optimal results.
Using Reverb And Delay
One of the most popular ways to add effects to vocals is through reverb and delay. Reverb simulates the sound of a room, giving vocals depth and space. Delay creates echoes, giving vocal phrases a unique and memorable sound. Both effects can be adjusted to create the desired mood for your song.
Adjust the reverb settings to make vocals sound like they were recorded in a specific type of room.
Use delay to create a more ethereal and dreamy sound.
Experiment with different combinations of delay and reverb to get the perfect mix.
Adding Vocal Harmonies
Vocal harmonies are additional vocal parts that complement the lead vocal and add depth. Harmonies can make a big difference in a song, taking it to the next level.
Record multiple vocal tracks to create harmonies.
Use pitch correction software, like Auto-Tune, to ensure harmonies stay in tune with the lead vocal.
Experiment with different types of harmonies, such as thirds, fifths, and octaves, to create a richer sound.
Adding effects and processing to vocals can take your recordings to the next level. Whether you are looking for a dreamy and ethereal sound or a more classic and polished tone, experimentation with effects can help you achieve your desired outcome.
Mixing And Mastering Your Track
Achieving a professional vocal recording at home can be challenging, but with proper preparation and techniques, it can be achieved. From selecting the right microphone to finding a suitable space, mixing and mastering your track can make all the difference in producing a top-quality sound.
Balancing Instruments And Vocals
Once you have recorded your vocals and other musical instruments, it is time to find the right balance between them. The key to good mixing is ensuring that each element in the track can be easily comprehended without overshadowing the other. Start by adjusting the faders on your mixer or DAW until you can hear every instrument, melody, and vocal clearly. Also, you can use EQ and compression techniques to fine-tune your track.
When mixing your vocals, isolate the audio track and begin by adjusting its volume levels to ensure it stands out in the mix. Use equalization to cut or boost certain frequencies to help it fit well into the song. A popular EQ trick when mixing vocals is to cut off the low frequencies to create space for low-frequency instruments like the drums or bass.
Finalizing Your Audio With Proper Loudness Levels
After balancing your instruments and vocals, you need to finalize your track by setting the correct loudness levels. This helps to ensure that your music sounds better when played on different devices. When you master the track, it should sound loud without causing discomfort to the listener’s ears.
You can use a loudness normalization tool, such as LoudnessPenalty.com, to ensure that your track’s volume is in line with industry standards. Additionally, use a limiter to control the peaks in your track and make sure it doesn’t get too loud.
Sharing Your Vocal Recording
Recording vocals at home can be challenging, but with the right equipment and techniques, you can achieve professional-quality results. Consider investing in a good microphone, recording software, and soundproofing materials to create a controlled recording environment. Lastly, share your recording with others to get feedback and improve your skills.
Once you’ve recorded a great vocal track at home, it’s time to share it with the world. Sharing your vocal recording can be a bit intimidating, but with the right tools and knowledge, it can be a breeze. In this article, we’ll go over the best ways to share your vocal recording, including choosing the right file format and uploading your track to online platforms.
Choosing The Right File Format
When it comes to sharing your vocal recording, choosing the right file format is crucial. Different platforms and devices may require different file formats, so it’s important to choose the right one to ensure your track sounds its best. Here are some of the most common file formats for sharing vocal recordings:
File Format
Best For
WAV
High-quality recordings
MP3
Smaller file sizes and easy sharing
AAC
Great for streaming and sharing on social media
Uploading Your Track To Online Platforms
Once you’ve chosen the right file format for your vocal recording, it’s time to share it with the world. Uploading your track to online platforms is a great way to get your music heard by a wider audience. Here are some of the most popular platforms for sharing vocal recordings:
SoundCloud: A popular music-sharing platform that allows you to upload and share your tracks with the world.
YouTube: The world’s largest video-sharing platform, YouTube is a great place to share your music video or audio with a massive audience.
Social Media: You can also share your vocal recording on social media platforms like Facebook, Instagram, and Twitter to reach a wider audience.
Conclusion
Sharing your vocal recording can be a great way to get your music heard by a wider audience. By choosing the right file format and uploading your track to online platforms, you can ensure that your vocal recording sounds its best and reaches the right audience. So, get recording and start sharing your music with the world!
Credit: dittomusic.com
Frequently Asked Questions For The Best Way To Record Vocals At Home
How Can I Record My Voice At Home Professionally?
To record your voice at home professionally, you should invest in a good quality microphone. Choose a quiet and soundproof space to record. Optimize your computer settings and use a recording software. Make sure to practice and warm up your voice before recording.
Finally, edit and master your recording before sharing.
What Is Best For Recording Vocals?
The best way to record vocals is by using a quality condenser microphone, a pop filter, and a recording software. A condenser microphone is ideal for capturing clear, detailed, and natural-sounding vocals. A pop filter will reduce plosive sounds and other unwanted noises, and recording software will help you enhance the audio quality and make necessary adjustments.
How Can I Record Myself Singing?
To record yourself singing, you can use your smartphone or a microphone with audio recording software on your computer. Place the device close to your mouth, choose a quiet environment, and sing into the microphone. You can edit the recording afterwards using audio editing software.
What Equipment Do I Need To Record Myself Singing?
To record yourself singing, you will need a microphone, audio interface or digital recorder, headphones, and recording software. A microphone stand and pop filter can also enhance sound quality. Make sure to test equipment and adjust settings for optimal sound before recording.
Conclusion
To wrap up, recording vocals at home can be a challenging task, but with the right tools and techniques, it can yield professional results. Remember to invest in high-quality equipment, create a suitable recording environment, experiment with microphone placement and settings, and of course, practice and patience.
By following these tips, you can achieve a polished and professional sound for your vocals without breaking the bank. Happy recording!
In the mix bus vs master bus debate, the main distinction is that a mix bus applies to groups of individual tracks. Master Bus affects the overall mix. The mix bus collects audio from individual tracks into one channel that you can process with plugins.
The master bus, on the other hand, is the final destination of the mix, where you apply EQ, compression and saturation. Understanding these two terms is crucial as it will affect the overall sound quality of the mix. Mix Bus and Master Bus represent two essential parts of digital mixing that work together to create a better end result.
The difference can be subtle, but it’s integral to understanding how to mix a track or master a song. This article explores the differences between Mix Bus and Master Bus and how to use them effectively.
Mix Bus Vs Master Bus
Mix bus and master bus are important components of audio mixing, but they serve different purposes. Engineers typically use the mix bus to combine channels and send them to the master bus. This is responsible for the final output. Understanding the differences can help you achieve a better overall sound for your mixes.
Introductory Paragraph: When it comes to mixing and mastering a track, it’s important to understand the difference between the mix bus and master bus. Both are essential tools in achieving a balanced and polished final mix. In this article, we’ll explain the primary functions and key differences between these two buses so you can use them effectively in your music production. H3: What is Mix Bus? The mix bus, also known as the stereo bus or 2-bus, is the main output channel of your mixer. It’s where all the individual tracks in your mix converge to create a stereo mix.
Practical Tips for Mix Bus vs Master Bus
Think of the mix bus as a final mixing stage where you process groups of tracks with plugins. This can help glue your mix together and add a sense of cohesion to your track. H3: What is Master Bus? The master bus is the final step in the mixing process. It’s where you process the entire mix before exporting it. All the processing you do on the mix bus. You also apply EQ, compression and other effects on the master bus.
This means that any adjustments you make to the master bus will affect the entire mix. The master bus is where you can add the final touches to your mix, bringing out certain elements while taming others. The main job of the mix bus is to process grouped tracks together and shape the overall sound. Typically, you’ll use a combination of EQ, compression, and other processors to give your mix a cohesive and balanced sound.
Putting It Into Practice
You might also use saturation or other distortion effects to add warmth and character to your mix. By processing the mix as a whole, you can ensure that each element is sitting well in the mix and not clashing with other elements. The main job of the master bus is to put finishing touches on your mix and prepare it for export. This can include making final adjustments to the mix elements, such as EQ and compression. The master bus is also where you’ll typically apply limiting, which can help increase the overall loudness of your mix and make sure it’s competitive against other tracks in the same genre. However, it’s important to be careful with limiting and not overdo it. Meanwhile, it can result in undesirable artifacts such as distortion and pumping. Conclusion: In summary, the mix bus and master bus are two key components of the mixing and mastering process.
The mix bus is where you can process your entire mix to achieve a balanced and cohesive sound. Meanwhile, the master bus is where you can add the final polish to your mix and prepare it for export. Knowing the differences helps you decide how to process your mix and reach the sound you want.
Credit: mixandmastermysong.com
Key Differences for Mix Bus vs Master Bus
Mix bus and master bus differ in several ways. Mix bus processes signals on individual tracks, while master bus controls the overall mix of signals on all tracks. Understanding these differences is integral to optimizing your audio production.
Mix Bus and Master Bus are essential components of any mix, but they work differently to achieve different results. Mix Bus is primarily responsible for grouping and signal processing, while Master Bus is for overall control and processing. Understanding these differences is crucial to achieve a well-balanced and polished mix. In this article, we’ll explain how Mix Bus and Master Bus work together and their key differences. We’ll also provide actionable tips to help you improve your mixes.
How Mix Bus And Master Bus Work Together
The mix bus and master bus work hand in hand to produce a cohesive, balanced mix. The Mix Bus processes the individual tracks and channels. Meanwhile, the Master Bus is responsible for processing the sum of all those tracks. The mix bus usually sits before the master bus. It acts as a preliminary stage of processing before the final mix processing on the Master Bus. Processing tracks on the mix bus first keeps each sound balanced, EQed and compressed before the master bus.
Mix Bus Is For Grouping And Signal Processing
Mix Bus is an essential tool for grouping and processing individual tracks to achieve a cohesive sound. It allows you to group similar tracks, such as drums or backing vocals, and process them together. This process results in a more cohesive sound and helps glue the individual tracks together. Mix Bus processing can include EQ, compression, reverb, and other effects.
Master Bus Is For Overall Control And Processing
The Master Bus is the final step of the mixing process and is responsible for processing the overall mix. This includes processing the final stereo mixdown, including EQ, compression, limiting, and other mastering effects. The Master Bus usually includes a limiter to prevent clipping and ensure that the mix remains at a consistent volume level. It’s crucial to use the Master Bus sparingly and not to over-process the mix, resulting in an overtly processed sound. In conclusion, understanding the differences between Mix Bus and Master Bus is crucial to achieve a well-balanced and polished mix. Separate processing on the mix bus balances every sound before the master bus does final processing. Remember to use the Master Bus sparingly and not over-process the mix, resulting in an overtly processed sound.
Advantages Of Mix Bus
Mix bus and master bus are crucial for fine-tuning audio in a mix. By using a mix bus, sound engineers can achieve better control over the mix while preserving individual track dynamics. In contrast, engineers master on the master bus to produce a polished final product.
Advantages of Mix Bus When it comes to mixing music, the mix bus and master bus are two crucial components that need to be understood. The mix bus is where most of the audio mixing takes place. Meanwhile, the master bus is where the final output is produced. In this article, we will be discussing the advantages of mix bus and how it can help you achieve a better sound quality for your music.
Better Control And Flexibility for Mix Bus vs Master Bus
Mix bus offers better control and flexibility as compared to the master bus. That’s because the mix bus lets you shape grouped tracks with reverb, delay, compression and EQ. This gives you complete control over your music mix. You can experiment with different settings to bring out the perfect mix for your audio.
More Focused Sound for Mix Bus vs Master Bus
Another advantage of using the mix bus is that it enables you to achieve a more focused sound. This is because, when you use the mix bus, you can apply effects to individual tracks that help bring out their unique characteristics. For instance, if you want to fix the low-frequency buildup in your music, you can use EQ on the bass to eliminate that problem. Likewise, you can make other adjustments to other tracks to achieve a more balanced and focused sound.
Easier To Manage Levels
Managing levels is an extremely important aspect of audio mixing. You want to ensure that each track is leveled, so they all sound good with each other. This is where the mix bus performs better than the master bus. With the mix bus, you have full control over the levels of each track. You can quickly adjust them if needed. This ensures that every track is audible and balanced with each other, and you get an overall better sound quality. In conclusion, the mix bus offers better control and flexibility in achieving the desired sound quality for your audio.
It ensures that you have complete control over the levels. You can easily fix any imbalance issues, resulting in a more focused sound. Therefore, it’s worth understanding how to use the mix bus effectively to get the most out of your music mixes.
Credit: www.waves.com
Advantages Of Master Bus
When it comes to mixing music productions, the master bus is a vital component in achieving a polished final product. Here are some advantages of using a master bus:
Application Of Overall Dynamics Processing
The master bus allows for overall dynamics processing to be applied to the mix as a whole. This means that any adjustments made on the dynamics, such as compression or limiting, will affect the entire mix. This adds essential cohesion and uniformity to the final product. With the application of overall dynamics processing, the listener will experience a consistent volume level, avoiding any drastic spikes or dips in volume.
Application Of Global Eq
Another advantage of a master bus is the application of global EQ. Adding EQ to the master bus allows for a cohesive sound. This ensures that no frequency range is unrepresented, and no instruments sound overly bright or muddy. Additionally, the overall tonal balance of the mix can be tweaked to achieve presence and clarity.
Coherence Of Mix As A Whole
Using a master bus can provide coherence to the mix as a whole. The master bus allows for better control of the stereo image, establishing a consistent location of instruments across the soundstage. This also means that the listener can perceive instruments and vocals without any overlapping elements that distract from the focus of the music. The coherence of the mix ensures that each track contributes to the overall production, contributing to the musicality and impact of every component.
Mix Bus vs Master Bus: When To Use The Mix Bus
To achieve a well-balanced and cohesive mix, it’s important to understand the differences between the mix bus and master bus. The mix bus combines all the individual instrument and vocal tracks. Meanwhile, the master bus processes the final mix before sending it to the mastering stage.
Knowing when to use each can greatly improve the overall quality of your music production.
Mix bus and master bus are essential for mixing and mastering audio. Understanding the key differences between the two can help you make informed decisions when working on your music production. In this post, we’ll focus on the use of mix bus and its significance in pre-mastering and processing single instruments or groups.
For Pre-mastering
Mix bus is essential to use in pre-mastering to create a cohesive sound. You can use mix bus to enhance the stereo image and control the dynamics of your overall mix. By doing so, you can ensure that your mix sounds consistent across different playback systems. You can add some glue to the individual tracks in your mix by processing them through a mix bus. Additionally, you can use plugins like compressors, EQs, and limiters on the mix bus to achieve that desired sound you’re after.
Processing Single Instruments/groups for Mix Bus vs Master Bus
Mix bus can also be useful when processing single instruments or groups. If you’re working on a multi-track project, it can be challenging to manage the levels of each instrument or group. One way to make it easier is to group them together and process them through a mix bus. This way, you can apply similar effects and processing to different tracks and control the overall sound of the group. In conclusion, using a mix bus can significantly enhance your mixing and mastering processes. It’s critical to manage levels and apply processing to create a cohesive sound. Whether you’re processing single instruments or groups or pre-mastering, using a mix bus should be a crucial part of your workflow.
Credit: www.izotope.com
When To Use Master Bus
Understanding the difference between Mix Bus and Master Bus is essential to achieve the desired sound quality in your music production. Often, in the mixing process, you might think of Mix Bus as the starting point and Master Bus as the endpoint. Mix Bus is where individual component tracks are combined to make a single mix. Master Bus is where the final mix output is conveyed. In this post, we’ll discuss the key differences between Mix and Master Bus and explore the situations when using Master Bus is appropriate.
For Final Mix Control
The Master Bus provides complete control over the final mix, which affects the overall balance and coherence of the song. At this stage, all the tracks have already been mixed, and the output sound is passed through the Master Bus. Here, you can make subtle adjustments to enhance and polish the mix. Using compression, EQ, and other mastering plugins, you can shape the final output to ensure that it’s consistent with the genre and style of music. Master Bus processing helps bring all elements of the mix together, resulting in a cohesive and engaging sound.
Adjusting Overall Tone for Mix Bus vs Master Bus
Master Bus is also an excellent tool to adjust the overall tone of the mix. As you know, different frequency ranges produce different emotions. The right tone can evoke the desired reaction in the listener. Here, you can add or remove frequencies to level out the mix. For instance, if the mix sounds too bass-heavy, you can reduce the low-end frequency to produce a more balanced sound. Similarly, if the cymbals are piercing, you can dampen the high-end frequency. Overall, Master Bus processing is crucial for creating a well-balanced and tonally-rich mix.
In conclusion, Master Bus processing is crucial for achieving the desired sound quality in music production. By providing complete control over the final mix, it helps create a cohesive and engaging sound. Whether you adjust overall tone or make subtle tweaks, the master bus helps your mix sound its best.
Best Practices For Mix And Master Buses
Understanding the differences between the mix and master bus is crucial for achieving the best sound quality in your music production. The mix bus refers to the processing chain applied to all tracks before summing to a stereo image. Meanwhile, the master bus is where the final processing is done before exporting the track.
Best Practices for Mix and Master Buses. Mix bus and master bus are two significant elements in the audio mixing process. The mix bus connects all tracks, while the master bus gives the final output for the mix. It is crucial to know the differences between these two buses to create high-quality audio. Here are the best practices for mix and master buses that you should keep in mind. Keeping Levels in Check: It is crucial to keep the track levels in check to prevent any distortion or clipping.
Key Points to Remember for Mix Bus vs Master Bus
While mixing audio, the levels must be appropriate on each track. The mix bus should be peaking at approximately -6db. This practice will ensure that you will have enough headroom while mastering the track and prevent clipping or distortion caused by overloaded levels. Avoiding Over-Processing: Over-processing on the mix or master bus can lead to poor-quality audio. Applying too much compression, EQ, or saturation can ruin your mix and create an unpleasant sound. It is essential to use light compression, EQ, and saturation, especially in the early stages of the mixing process.
You may need more drastic processing at a later stage, but it is essential to keep it balanced and subtle. A/B Testing for Comparison: Comparing your mix and master with similar tracks is a crucial practice to perfect your mix. A/B testing is an effective way to compare your mix with commercial tracks close to your mix’s genre. Doing this can give you more of an understanding of what sonic characteristics are found in your track and how it differs from professional tracks.
Mix Bus vs Master Bus Mistakes to Avoid
It is helpful to use a reference track to understand the frequency balance and the overall sound that you are trying to achieve. Implementing these best practices into your mix and master process will lead to high-quality audio tracks that meet professional standards. Remember to keep the levels in check, avoid over-processing, and perform A/B testing for comparison.
Frequently Asked Questions For Mix Bus Vs Master Bus Key Differences Explained
What Is The Purpose Of A Mix Bus?
A mix bus is a component in audio mixing consoles that combines and processes multiple audio signals into a unified output. Its main purpose is to control the overall sound and level of the mix, while maintaining the tonal balance and clarity of the individual tracks.
It is an essential tool in professional audio production. This allows engineers to sculpt the final sound of the recorded music or dialogue.
What Is The Difference Between Master Bus And 2 Bus?
The master bus is the main output bus that carries all mixed signals from different tracks and channels before it goes to the master fader. On the other hand, 2 bus refers to the stereo output of the mix that typically consists of left and right channels.
The main difference is that the master bus is an internal routing function while the 2 bus is an external output that feeds the final mix.
What Is A Master Bus Used For?
A master bus is used to combine and route multiple audio signals to an output source, such as speakers or recording equipment. It allows for mixing and control of various audio channels, and is commonly used in music production and live sound settings.
What Is A Mix Bus On Sound Board?
A mix bus on a sound board is a group of channels that are combined to form a single audio output. This lets the engineer control the level and tone of many channels at once. They then go out as a single mix.
Conclusion
Ultimately, understanding the differences between mix bus and master bus can greatly improve the sound quality of your music productions. Mix bus processing can enhance individual tracks, while master bus processing can add a final polish to the overall mix.
It’s important to experiment with both techniques and find what works best for your particular mix and style. By doing so, you can elevate your music to a professional level and stand out in a crowded industry.
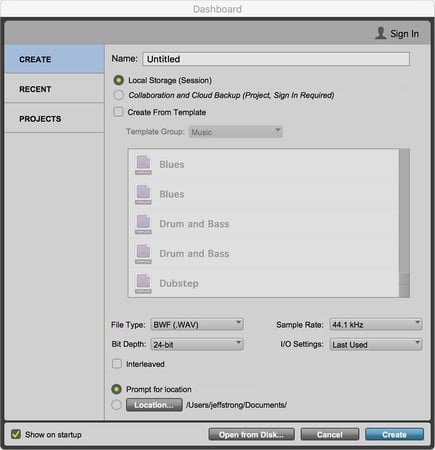
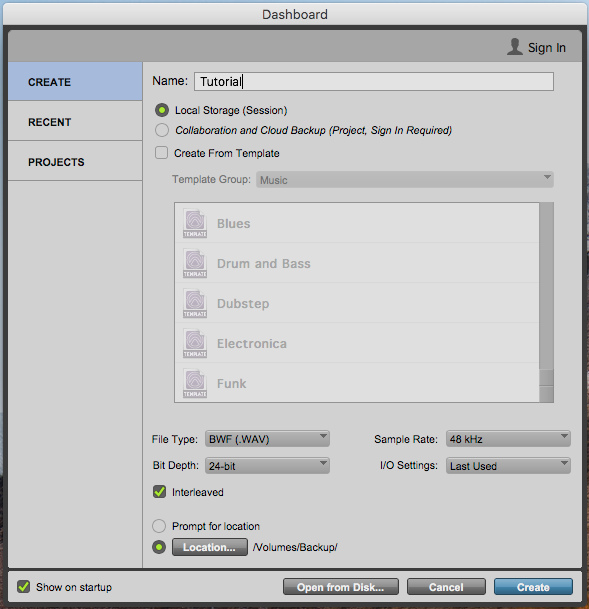
To create a new session in Pro Tools, go to File > New Session. Fill out the necessary fields, choose your session settings, and click Create.
Pro Tools is a popular digital audio workstation used by professionals in the music and film industries. Creating a new session is the first step in starting a new project, which can be overwhelming for beginners. However, with a few simple steps, it’s easy to get started.
We’ll go over how to create a new session in Pro Tools and provide helpful tips to ensure your project runs smoothly. Whether you’re a musician, sound engineer, or film editor, understanding how to create a new session in Pro Tools is a crucial skill to have. So, let’s dive in!
Accessing Pro Tools
To create a new session in Pro Tools, start by opening the application and selecting “New Session” from the File menu. Then, name your session and choose your desired sample rate and bit depth. Finally, select the location where you want to save the session and click “Create”.
To create a new session in Pro Tools, you must first access the program. Launching Pro Tools is easy if you have it installed on your computer. To start the program, simply click on the icon on your desktop.
Launching Pro Tools
If you don’t have the icon on your desktop, you can search for it in your computer’s file explorer or application folder. Once you have located the program, double-click on it to launch Pro Tools.
Creating A New Session
Once Pro Tools is launched, you can start a new session by selecting “File” from the top menu and then choosing “New Session.” Alternatively, you can use the keyboard shortcut “Command+N” on a Mac or “Ctrl+N” on a PC. A new window will then appear asking you to name your session and select a location to save it. Be sure to choose a descriptive name for your session and select a location where you can easily access it later. After you have filled out the required information, click “Create.” Pro Tools will then open the new session, and you can start recording or editing your audio right away.
Summary
In summary, accessing Pro Tools and creating a new session can be done with just a few clicks. Whether you are a seasoned professional or new to the program, following these simple steps will enable you to get started on your next audio project quickly and efficiently.
Session Setup
To create a new session in Pro Tools, go to the File menu and select “New Session”. Here you can name the session, choose the sample rate and bit depth, and select the track type and input settings. Once you’ve made your selections, click “Create” to start your new session.
When starting a new project in Pro Tools, the first step is to create a new session. The Session Setup window allows you to select the necessary settings and parameters for your project. This section focuses on the Session Setup and covers the important aspects of it in detail.
Choosing Sample Rate And Bit Depth
The Sample Rate and Bit Depth are two important settings that need to be configured before you begin recording. The Sample Rate determines the number of times per second that audio is captured, and the Bit Depth affects the quality of the audio. It is recommended to set the Sample Rate to 44.1kHz or 48kHz for most projects, while the Bit Depth should be set to 24 bits for better sound quality.
Selecting Session File Type
The Session File Type is another crucial setting that needs to be selected during the Session Setup process. Generally, Pro Tools sessions are saved as .ptx files, but you can also choose to save your session as a Template or a Session Interchange file. Templates allow you to set up a session with pre-configured settings, while Session Interchange files enable you to transfer sessions between different versions of Pro Tools.
Conclusion
Session Setup is an essential part of creating a new project in Pro Tools. Choosing the appropriate Sample Rate and Bit Depth settings and selecting the right Session File Type is crucial for ensuring the success of your project. Remember to double-check all settings before starting the recording process to avoid any unwanted surprises.
Session Templates
Creating a new session in Pro Tools is easy with Session Templates. Templates enable you to set up your session according to your needs, making it easier to dive right into the creative process. Simply select your preferred template and start working.
What Are Session Templates And Why Use Them?
Session templates refer to pre-configured settings, tracks, plugins, input/output devices, and other individual preferences that are saved and reused for different music and audio projects. They provide an efficient and time-saving way of setting up a new project with specified requirements, settings, and tracks. Instead of starting from scratch, you can utilize templates to create a new session that is pre-configured with all your favorite settings and default plugins. It is an organizing tool that allows for fast and easy initialization of new session projects.
Creating And Saving A Custom Session Template
Creating and saving a custom session template is easy and convenient. Start by opening a new session and configure your preferences and key settings. For instance, set the number of tracks you need, select your input/output devices, set the tempo and meter, and load your favorite plugins. Once you are done, select “Save As Template” under the File menu and give it a name.
Your custom session template will be saved into the “Session Templates” folder located in your Pro Tools document. It is essential to note that the template will save all settings and configurations except recorded audio files. The next time you need to use the same settings to create a new session, click on the “Create from template” button and select your custom template from the Session Templates folder.
Conclusion
Session templates are an excellent feature that allows you to create a new session with preset configurations and settings. It saves you time from configuring these settings each time you start a new project in Pro Tools. You can customize these templates, depending on your preferences and the requirements of your music projects. Creating and saving templates is an effective way to keep your workflow organized and more efficient. So, next time you start a new project on Pro Tools, remember to utilize session templates for better and faster results!
Credit: www.dummies.com
Session Parameters
Creating a new session in Pro Tools is crucial before starting a new recording. It allows you to save your work and customize various parameters that help optimize your recording setup. These parameters are what we call ‘session parameters.’ In this article, we will focus on one of these parameters – Session Parameters, and three subheadings that include ‘Naming your session,’ ‘Setting up tracks and busses,’ and ‘Assigning inputs and outputs.’
Naming Your Session
When creating a new session in Pro Tools, one of the first steps is to name the session. It is essential to name your session so that it reflects the type of recording or mix you will be working on. To name your session:
Open Pro Tools on your computer and select ‘Create a New Session.’
Enter a name for your session in the ‘Session Name’ field.
If you want to save it in a specific location, choose the location by clicking the ‘Browse’ button and select the folder.
Next, select the ‘Sample Rate’ and ‘Bit Depth’ for your session. The sample rate determines the number of samples per second, while the bit depth determines the dynamic range of your recording.
Finally, click ‘Create’ to create your new session.
Setting Up Tracks And Busses
Once you have named your session, the next step is to set up your tracks and busses. Setting up your tracks and busses allows you to manage the audio inputs and outputs for your recording. To set up tracks and busses:
Go to the ‘Track’ menu and choose ‘New Track.’ Alternatively, you can use the key command ‘Command+Shift+N’ (Mac) or ‘Control+Shift+N’ (Windows).
Select the ‘Track Type’ and ‘Track Format.’ You can choose from different types of tracks, such as Audio, MIDI, Video, or Master Fader tracks. You can also select the format based on the number of channels and the sample rate.
After creating your tracks, you can set up busses by selecting the ‘Bus’ tab in the ‘I/O’ window. A bus is an audio pathway that allows you to route multiple tracks for input or output.
Assigning Inputs And Outputs
After setting up your tracks and busses, the next step is to assign inputs and outputs. This step involves routing your audio inputs and outputs to your tracks and busses. To assign inputs and outputs:
Go to the ‘Setup’ menu and select ‘I/O.’ Alternatively, you can use the key command ‘Option+O’ (Mac) or ‘Alt+O’ (Windows).
Select the input or output that you want to assign to a track or bus.
Click and drag the input or output to the corresponding track or bus to assign it.
Creating a new session in Pro Tools involves setting up various session parameters. These parameters help optimize your recording setup and ensure that your recording is of high quality. By following these steps, you can easily create a new session, name it, set up tracks and busses, and assign inputs and outputs for your recording.
Session Preferences
To create a new session in Pro Tools, click on “File” and then select “New Session”. Choose your desired location and session name, then select your preferred audio file format and sample rate. Finally, set your session preferences such as tempo, bars/beats, and click track options.
Setting Preferences For Playback And Recording
When creating a new session in Pro Tools, setting preferences for playback and recording is a crucial step in optimizing the workflow. To access these preferences, go to “Setup” and select “Preferences” from the drop-down menu. From there, navigate to the “Operation” tab and adjust the preferences for playback and recording. Adjusting the buffer size, disk allocation, and other preferences can help ensure a smooth recording and playback experience.
Customizing The User Interface
Customizing the user interface is another important step in creating a new session in Pro Tools. To access these preferences, go to “Setup” and select “Preferences” from the drop-down menu. From there, navigate to the “Display” tab and adjust the preferences for the user interface. Customization options include adjusting the color scheme, track and clip heights, and other display options. Customizing the user interface can help improve workflow efficiency and organization.
Summary
In conclusion, when creating a new session in Pro Tools, setting preferences for playback and recording and customizing the user interface can greatly improve workflow efficiency and productivity. By adjusting these preferences, users can create a customized and optimized working environment in Pro Tools.
Credit: pcaudiolabs.com
Credit: music.tutsplus.com
Frequently Asked Questions For How To Create A New Session In Pro Tools
How Do You Create A Session In Pro Tools?
To create a session in Pro Tools, go to the File menu and select “New Session”. Then, name your session and set the desired sample rate, bit depth, and session file type. Hit “Create” and your new session will be ready to go.
How Do I Create A New Pro Tools?
To create a new Pro Tools project, launch the Pro Tools software and select “File” from the top menu. Choose “New Project” from the drop-down menu and enter a name for the project. Select the session parameters and hit create to start working on your new project.
Which Folders Will Pro Tools Create When You Create A New Session?
Pro Tools creates several folders when a new session is created, such as Audio Files, Clips, MIDI Files, Plug-In Settings, Rendered Files, Video Files, and more.
How Do I Send My First Session In Pro Tools?
To send your first session in Pro Tools, you need to go to “File” and select “Save Copy In. ” Choose a destination for your session and select the options you want. Then, click “Save” and your session will be sent to the chosen location.
Conclusion
Creating a new session in Pro Tools can seem daunting, but with these simple steps, you can start creating music in no time. Remember to name your session appropriately and set up your desired preferences. Utilize the workspace and organize your tracks to make editing and mixing easier down the line.
With these tips, you’ll be able to jump straight into creating your latest masterpiece. Get ready to let your creativity shine with the help of Pro Tools.
Gain staging is a crucial step in the mixing process. In Studio One, you do this by adjusting each track’s input level so the signal doesn’t clip or distort.
Also, proper level setting is essential in achieving a professional and polished mix. It involves setting the appropriate level for each track to ensure that the overall mix remains balanced and without distortion. Studio One offers various tools to help with this process, including clip gain, fader gain, and pre-fader metering.
Moreover, by paying close attention to each track’s input levels and using these tools, you can achieve optimal gain staging and ensure that your music sounds its best. We’ll go over the fundamentals of gain staging in Studio One and provide some tips to help you achieve a clean and clear mix.
Credit: www.youtube.com
Why Gain Staging Is Important
When it comes to producing music in a digital audio workstation (DAW) like Studio One, gain staging is an essential step in the recording process. In addition, Gain staging refers to the practice of optimizing the levels of audio signals to prevent digital clipping and achieve the best signal-to-noise ratio possible. Gain staging is important because it ensures that your final mix is free of distortion, noise and retains the dynamic range of your music.
Avoiding Digital Clipping for Gain Staging
Digital clipping occurs when an audio signal exceeds its maximum level. This results in distortion that can damage speakers and ruin the quality of your recording. To avoid digital clipping, it’s essential to carefully adjust the gain levels at each stage of the recording process. Studio One’s mixer includes a metering system that helps to visualize the audio levels and prevent clipping.
One approach to gain staging in Studio One is to set each track’s gain to zero first. Then raise it until the loudest parts sit just below the red clipping indicators in the mixer.
Optimizing Signal-to-noise Ratio for Gain Staging
Signal-to-noise ratio (SNR) is a measure of the level of a desired signal compared to the level of background noise. A higher SNR means that your audio signals are louder and clearer, making it easier to achieve a high-quality mix. Gain staging helps to optimize the SNR by reducing the amount of noise in the signal and improving the levels of the desired audio.
By maintaining proper gain levels throughout the recording process and minimizing background noise, you can achieve a higher SNR and a cleaner final mix.
In Conclusion
In conclusion, gain staging is an essential part of the recording process in Studio One that helps to prevent digital clipping, optimize the signal-to-noise ratio and maintain the dynamic range of your music. By carefully adjusting the gain levels at each stage of the recording process, you can achieve a high-quality mix that sounds great on any platform.
Setting Up Your Session for Gain Staging
In Studio One, gain staging is a fundamental aspect of mixing. Adjust levels at each stage of your signal chain. That way, you drive your plugins and hardware at optimal levels for clear, clean audio.
When it comes to mixing fundamentals, one of the first things you need to consider is setting up your session. This is crucial in making sure your mix is organized and easy to work with as you progress. In Studio One, these steps involve creating and organizing tracks, as well as using virtual instruments and plugins. Here are some tips on how you can optimize your session for smooth and efficient mixing. Creating and Organizing Tracks The first step in creating a well-organized session is to create tracks for all your instruments and sounds.
This helps you keep track of each track’s role in the mix and makes it easier to identify issues and work on them individually. In Studio One, simply click on “Track” and then “Add Tracks” to access this feature. Once you have created your tracks, organize them in a logical order. This means keeping similar tracks together and grouping tracks by section or instrument.
Practical Tips
To do this, drag and drop or right-click the track and choose “Move To Folder.” You can also color-code your tracks to make it more visually appealing and easy to identify each instrument. Using Virtual Instruments and Plugins Studio One offers many virtual instruments and plugins that can help enhance your mix. To use these efficiently, make sure you know what each one does and how it can benefit your mix.
For example, if you want to add reverb to a track, you can use the Open Air plugin. This offers a range of reverb options. Similarly, virtual instruments such as Impact or Presence can create drum grooves, basslines, and other instrument sounds. You can also edit and change these sounds to fit your mix perfectly. Overall, using virtual instruments and plugins is a great way to add depth and texture to your mix. Conclusion By setting up your session properly and using virtual instruments and plugins, you can make your mixing process more efficient and enjoyable.
Creating and organizing tracks helps you keep your mix organized, while virtual instruments and plugins offer a range of options to enhance your sounds. With these tips, you can make the most of Studio One and take your mixing skills to the next level.
Understanding Gain Vs. Volume
Gain staging is an essential mixing fundamental in Studio One. Understanding the difference between gain and volume is crucial to achieving a balanced mix. Gain refers to the input level of a track before any processing, while volume refers to the output level after processing.
When you’re getting started with audio mixing, understanding gain and volume can be confusing. In Studio One, gain staging is an essential process to achieve an optimal recording level before adjusting the volume. Understanding the difference between gain and volume is crucial to achieving a well-balanced and polished mix.
Gain As Input Level
Furthermore, Gain refers to the input level of a signal, typically controlled by the microphone or instrument’s preamp or gain knob. Gain determines the level of the signal that’s fed into your audio interface and affects the quality of the recording. Too little gain can make your recording sound weak and distant, while too much can cause distortion and clipping. It’s essential to set your gain level at the right level to capture your desired sound quality. In Studio One, you can control the gain using the PreSonus Audio device settings or plugin controls. Proper gain staging helps you get a clean recording level, which reduces the need for excessive post-processing.
Volume As Output Level
Volume refers to the output level of your mix. It controls the overall loudness of the final product. In Studio One, you usually adjust volume at the track fader or the master channel fader. Volume controls come in handy when trying to balance the mix and ensure that each element sits well in the mix. However, adjusting volume without proper gain staging can cause audio problems such as distortion, clipping, and noise. Therefore, it’s crucial to first set the gain levels, then adjust volume levels for each track. Proper handling of gain vs volume can bring a professional touch to your mixes. Studio One makes it easy to do this.
Conclusion
In summary, understanding gain and volume is crucial for effective audio mixing. Proper gain staging ensures that the input signal is optimized before adjusting volume levels. Studio One provides necessary tools for proper gain staging, making it easier to control your recording levels. With a basic understanding of gain and volume, you can create well-balanced and professional-sounding mixes.
Credit: yurtrock.com
Gain Staging In Studio One
Gain staging is a crucial step in mixing fundamentals in Studio One. It helps achieve optimal levels and clarity by balancing the volume levels of tracks. Implementing proper gain staging techniques can significantly enhance the overall quality of your mix.
Gain staging is an essential process that is often overlooked by many recording engineers. It involves setting the levels of individual tracks to ensure that there is an appropriate amount of gain throughout the signal path. When done correctly, gain staging can prevent unwanted noise and distortion from creeping into your mix. This results in a cleaner and more balanced sound. In this blog post, we will discuss gain staging in Studio One, focusing on three key areas. Setting Input Levels for Recording, Balancing Levels in the Mix, and Using Clipping and Metering Indicators.
Setting Input Levels For Recording for Gain Staging
When recording in Studio One, it’s important to set the input levels correctly to avoid clipping. Clipping occurs when a track’s input level runs too high. The signal then overloads and distorts. To set the input levels correctly, follow these steps:
Open the Input Mixer by pressing F3 on your keyboard.
Select the track you want to record.
Play the loudest part of the passage and adjust the gain knob until the level is just below the red clipping indicator.
Record your track.
Balancing Levels In The Mix for Gain Staging
Once you have recorded all of your tracks, it’s time to balance their levels in the mix. Balancing the levels of each track is crucial to ensure that no one track is dominating the mix and that all tracks can be heard clearly. Here are a few tips on how to balance levels in Studio One:
Use the faders to adjust the levels of individual tracks.
Additionally, use the Pan control to position each track in the stereo field.
Use automation to adjust levels and pan over time.
Use the Mixtool plug-in to adjust the gain, pan, and phase of each track.
Using Clipping And Metering Indicators for Gain Staging
Finally, it’s important to use clipping and metering indicators to ensure that your mix doesn’t clip or distort. Clipping and metering indicators are visual cues that tell you when the signal is reaching its maximum level. Here’s how to use them in Studio One:
Click on the Track Inspector and select the Overview tab.
Look for the Clipping and Metering indicators.
Adjust the levels of each track so that the signal stays below the red clipping indicator.
Use the metering indicators to ensure that the levels are balanced throughout the mix.
In conclusion, gain staging is an important process that should not be overlooked when recording and mixing in Studio One. By setting input levels correctly, balancing levels in the mix, and using clipping and metering indicators, you can ensure that your mix sounds clean, balanced, and professional.
Avoiding Common Mistakes
Mixing is an essential aspect of music production, and one of the key things to pay attention to during the mixing process is gain staging. Gain staging involves ensuring that the levels of audio signals are appropriate throughout the signal chain. When done correctly, it can lead to a better-sounding mix. However, there are some common mistakes that producers make when it comes to gain staging. In this article, we will explore some of these mistakes and how to avoid them.
Overdriving Processing Plugins
One of the common mistakes that producers make when it comes to gain staging is overdriving processing plugins. Overdriving occurs when the input level of the plugin is too high, causing the plugin to distort and create unwanted artifacts. This can happen when the levels of the audio signal going into the plugin are too high.
To avoid overdriving processing plugins, it’s essential to keep an eye on the input levels of the plugin. Make sure that the levels are not hitting the red on the meter. You may also consider reducing the volume of the incoming audio signal before it goes into the plugin. Doing so will help to prevent overdriving and ensure that the plugin works as intended, leading to a better-sounding mix.
Using Excessive Compression
Compression is an essential tool in mixing, and when used correctly, it can help to balance the levels of different parts of a mix. However, using too much compression can lead to a loss of dynamic range and an overly compressed mix. This can sound unnatural and fatiguing to the ears.
To avoid using excessive compression, it’s essential to keep an eye on the gain reduction meter of the compressor. If the gain reduction is consistently high, it’s an indication that too much compression is being applied. It may also be helpful to use multiple compressors in a serial chain, each applying a modest amount of compression, rather than using one compressor with high settings.
Conclusion
Gaining staging is a fundamental aspect of mixing that shouldn’t be overlooked. It’s essential to get it right to ensure that your mix sounds great. By avoiding common mistakes such as overdriving processing plugins and using excessive compression, you can achieve a better-balanced mix that sounds great on various playback systems.
Credit: yurtrock.com
Advanced Techniques
Proper gain staging is a crucial technique for achieving a clean and balanced mix in Studio One. With advanced techniques such as proper level matching and gain structuring, producers can ensure their tracks sound their best without introducing unwanted noise or distortion.
Creating a mix that sounds good is one thing, but making a mix that sounds great is something else entirely. It requires a thorough understanding of the tools you’re using and how they interact with each other. Gain staging is one of the most important concepts to understand when mixing. Proper gain staging ensures that all your audio tracks are at the right level. This results in a cleaner, clearer, and more professional-sounding mix. In this post, we’ll explore some advanced gain staging techniques you can use in Studio One to take your mixes to the next level.
Creating Headroom For Mastering
One of the primary reasons to be mindful of gain staging is to provide enough headroom for mastering. This means leaving enough space in your mix for a mastering engineer to make the final adjustments to your music. When you don’t leave enough headroom, the mastering engineer has to pull back the levels. This can result in a loss of clarity and detail in your audio. To create enough headroom, avoid slamming the levels on your tracks and buses. Instead, aim to keep your levels at around -18 dBFS to -12 dBFS.
Using Parallel Processing
Parallel processing is a powerful technique used to enhance certain elements of a mix. Instead of processing a track directly, you create a parallel track and process it separately. You then blend the two tracks together to create a fuller, more cohesive sound. You can apply this technique to everything from compressors to EQs to reverb. Parallel processing is particularly useful when you want to add more depth and dimension to a track without sacrificing clarity.
Conclusion
These advanced gain-staging techniques can help elevate the quality of your mixes and take them to the next level. Remember, the key to any great-sounding mix is balance, clarity, and depth. Learn gain staging and explore advanced techniques like parallel processing. You’ll be well on your way to a professional-sounding mix.
Frequently Asked Questions On Mixing Fundimentals Gain Staging In Studio One
Should You Gain Stage Before Mixing?
Yes, it is recommended to gain stage before mixing as it helps to balance the levels of individual tracks in a mix and prevent distortion. It ensures that each track has consistent volume levels in the mix. This helps to create a more cohesive and balanced sound.
Proper gain staging can also improve the overall sound quality and clarity of a mix.
How Do You Gain Stage After Mixing?
Gain staging after mixing involves adjusting the levels of different tracks to ensure clarity and balance without distorting the overall sound. This is typically achieved by using a limiter or compressor to control the signal level and bring everything within a suitable range.
Additionally, subtle EQ and panning adjustments can also help to improve the overall sound quality.
What Is The Best Level For Gain Staging?
The best level for gain staging depends on the recording setup and equipment being used. As a general rule, the first gain stage should be set low to avoid clipping, then progressively raised through subsequent stages to maintain a balanced level.
It’s important to monitor levels throughout the recording process to prevent distortion and ensure a clean mix.
How Do You Set A Proper Gain Structure?
To set a proper gain structure, follow these steps: 1. Set your input levels correctly and avoid clipping. 2. Balance the levels between different sources and channels. 3. Adjust the overall level to the desired listening level without distortion. 4.
Use a meter to visualize the signal level and adjust accordingly. 5. Monitor the sound quality throughout the process to ensure optimal results.
Conclusion
To sum it up, gain staging is not just adjusting the levels of your tracks, it’s a fundamental step in music production. With Studio One’s gain staging capability, you can achieve a clean and balanced mix that translates well on any playback device.
Use your ears and metering tools to avoid digital clipping and maximize headroom. Remember, a well-mastered track starts with a well-mixed track, so take your time to perfect your gain staging technique. Happy producing!
For beginners, the Korg Volca series or Novation Launchkey Mini are good options for synthesizers. These entry-level synths are affordable, portable, and easy to use, with enough features to explore and learn.
As an Amazon Associate I earn from qualifying purchases.
Learning how to use synthesizers can be a rewarding experience, especially for beginners. However, with so many options available, it can be overwhelming to choose which one to get started with. When it comes to selecting a synthesizer, the key is to find one that is easy to use, affordable, and has enough features to explore and learn without being too complex.
Also, we will discuss some of the best synthesizers for beginners, including the Korg Volca series and Novation Launchkey Mini. Also, whether you are a musician, producer, or just starting out, these entry-level synths offer a great starting point to kick off your synth journey.
Credit: m.youtube.com
Analog Synthesizers
Moreover, beginner analog synth enthusiasts should consider the Behringer Neutron or Korg Volca Keys. In addition, these are both affordable options with intuitive designs that make them easy to use and ideal for getting into the world of analog synthesis.
In addition, if you’re a beginner, choosing the right synthesizer can be a daunting task. While analog synthesizers are not as popular as they used to be, they are still a great option for beginners. For example, Analog synthesizers have a unique sound that is warm and can’t be replicated by digital synthesizers. In this post, we are going to look at some of the best options for beginners when it comes to analog synthesizers.
What Are Analog Synthesizers?
Furthermore, an analog synthesizer is a type of synthesizer that uses analog circuits to generate sound. As a result, these circuits are made up of components such as resistors, capacitors, and transistors. Analog synthesizers have a physical, hands-on nature that allows you to manipulate sound in real-time. This makes them an excellent choice for beginners who want to experiment with creating their own sounds.
Best Options For Beginners
There are a variety of analog synthesizers on the market, but not all of them are suitable for beginners. However, here are some of the best options for beginners:
Model
Price
Features
Korg Volca Keys
$159
16-step sequencer, three-voice polyphonic
Behringer Model D
$299
Monophonic, three-oscillator design
Arturia Microbrute
$349
25-note mini keyboard, analog oscillator
Additionally, these synthesizers are affordable and offer a variety of features that are perfect for beginners. Then, the Korg Volca Keys, for example, has a 16-step sequencer and is three-voice polyphonic, allowing you to create complex melodies and basslines. The Behringer Model D is a monophonic synthesizer and has a three-oscillator design that allows you to create a wide range of sounds. The Arturia Microbrute has a 25-note mini keyboard and an analog oscillator that produces a warm, fat sound. In conclusion, analog synthesizers are an excellent choice for beginners who want to experiment with creating their own sounds. They are affordable and offer a hands-on approach to creating music. The Korg Volca Keys, Behringer Model D, and Arturia Microbrute are three excellent options that offer a variety of features that are perfect for beginners.
Credit: www.sweetwater.com
Digital Synthesizers
When it comes to getting started with music production, choosing the right equipment can make all the difference. In short, Synthesizers are one of the most versatile instruments out there, enabling musicians to create a wide range of sounds and effects. However, with so many different types of synthesizers available, finding the right one for your needs can be overwhelming. Also, this blog post will focus on digital synthesizers and the best options for beginners.
What Are Digital Synthesizers?
Moreover, digital synthesizers are electronic instruments that use digital signal processing (DSP) to produce sound. Unlike analog synthesizers, which use voltage-controlled circuits to create sound, digital synthesizers use software algorithms to generate and manipulate waveforms. Similarly, this makes them more versatile and customizable, with a wider range of sound possibilities.
Best Options For Beginners
Synthesizer
Features
Price
Korg Volca FM
– 3-voice polyphonic FM synthesizer – Easy to use interface – Built-in arpeggiator and sequencer
$150
Novation Circuit
– 2-part synthesizer and drum machine – Built-in sequencer and sampler – Compact and portable
Korg Volca FM: With its simple interface and affordable price, the Korg Volca FM is a great entry point into the world of digital synthesis. Its built-in sequencer and arpeggiator make it easy to create complex patterns, and its 3-voice polyphony enables you to create rich, layered sounds.
Novation Circuit: The Novation Circuit combines two-part synthesis with a built-in drum machine and sampler, making it a versatile all-in-one solution for beginners. Its compact size and battery-powered option make it ideal for musicians on the go.
Arturia MicroBrute: The Arturia MicroBrute is an analog/digital hybrid synthesizer that offers a unique blend of vintage and modern sound. Its patchable architecture gives you the freedom to experiment and create your own unique sound, while its Steiner-Parker multimode filter adds warmth and character to your creations.
Also, starting with a digital synthesizer can provide beginners with the flexibility to experiment with different sounds and effects, all at an affordable price. Also, by choosing one of these top options, you can begin your journey into music production with a versatile, easy-to-use instrument.
Virtual Analog Synthesizers
Moreover, if you are a beginner looking to get started with synthesizers, virtual analog synthesizers are a great starting point. In addition, in this article, we will explore what virtual analog synthesizers are and some of the best options available for beginners.
What Are Virtual Analog Synthesizers?
In addition, virtual analog synthesizers are software synthesizers that simulate the sound of classic analog synthesizers. For example, they use digital signal processing algorithms to replicate the sound of analog circuitry, providing users with a similar sound quality and workflow to physical hardware. Unlike physical synthesizers, virtual analog synthesizers run on a computer or mobile device and don’t require any additional hardware to operate.
Best Options For Beginners
Furthermore, there are many virtual analog synthesizers on the market, and choosing the best one for beginners can be overwhelming. As a result, here are some of the best options:
Virtual Analog Synthesizer
Features
Xfer Records Serum
Intuitive interface, high-quality sound, versatile modulation system
Native Instruments Massive
Popular among EDM producers, flexible routing options, extensive preset library
Arturia Mini V
Emulates the sound of the classic Minimoog, easy-to-use interface
These virtual analog synthesizers are relatively easy to use and feature-rich, making them ideal for beginners looking to explore sound design and music production. However, keep in mind that they are just a few examples of many great virtual analog synthesizers out there. However, it’s worth doing your own research and experimenting with different ones to find the best fit for your needs.
Credit: www.sweetwater.com
Sample-based Synthesizers
As a beginner, choosing a synthesizer can be an overwhelming task. Then, with different types of synthesizers in the market, selecting the right one can be challenging. Sample-based synthesizers are one of the options available for beginners.
What Are Sample-based Synthesizers?
A sample-based synthesizer uses recorded sounds (samples) as its primary sound source. In short, the recorded sounds can be anything from instrumental samples to vocal samples. Sample-based synthesizers offer a wide range of sounds and are ideal for beginners who are just starting with music production.
Best Options For Beginners
If you are looking for a sample-based synthesizer as a beginner, there are some great options on the market. Similarly, here are some of the best options:
Sample-Based Synthesizers
Features
Native Instruments Kontakt
Over 43 GB of samplesUser-friendly interfaceFlexible modulation system
Easily drag and drop samplesUser-friendly interfaceFlexible modulation system
These sample-based synthesizers are great for beginners who want to experiment with different sounds and create unique music. Also, they offer different features and functionalities that suit a wide range of music styles.
In conclusion, sample-based synthesizers are a great option for beginners who want to explore different sound options in their music production. In addition, with great options available in the market, selecting the right one can be more accessible with this guide.
Hybrid Synthesizers
Hybrid synthesizers are a great option for beginners looking to explore different sounds and genres. These synthesizers combine digital and analog technologies to provide a unique and versatile experience. A popular choice for beginners is the Korg Minilogue, which offers easy-to-use controls and an affordable price point.
What Are Hybrid Synthesizers?
Hybrid synthesizers are a combination of both digital and analog components, offering musicians the best of both worlds. These synthesizers use analog circuitry for warm sound production and digital parts for more advanced features like effects, programming, and memory storage. As a beginner, the hybrid synthesizer is a great option as it has the capabilities of both classic and modern synths.
Best Options For Beginners
When it comes to hybrid synthesizers suitable for beginners, there are a few great options worth considering. Below are some of the best hybrid synthesizers for beginners:
Synthesizer
Price
Features
Korg prologue 8
$1,499.99
Analog oscillators and filters alongside digital capabilities, 8 voices
Novation Peak
$1,149.99
16 voices, three New Oxford Oscillators for each voice, wavetable, and FM synthesis
Behringer Neutron
$299.99
Semitone synthesizer featuring pure analog signal chain
While these synthesizers are on the pricier side, they offer superior sound quality and a range of features that make it easy for beginners to experiment with sound production and programming. When considering your budget, ensure that you choose a hybrid synthesizer that fits your needs without breaking the bank.
Frequently Asked Questions For Which Synthesizer Is Best For Beginners
What Is The Best Synth To Start With?
The best synth to start with depends on the user’s needs and budget. However, popular options for beginners include the Korg Volca series, Roland Boutique series, and Arturia MicroBrute. These synths offer a variety of features, user-friendly interfaces, and are affordable.
How Do I Choose My First Synthesizer?
To choose your first synthesizer, consider your budget, preferred music genre and playing style. Think about the synthesizer’s sound quality, functionality and ease of use. Do research and read reviews of models you’re interested in. Try out the synthesizer in person if possible before making a purchase.
What Is The Easiest Synth To Program?
The easiest synthesizer to program will depend on the user’s musical experience and knowledge. However, some synthesizers have a user-friendly interface that simplifies sound design, making them easy to use. Some of the easiest synths to program are the Korg Volca Keys, Roland Boutique JP-08, and Arturia MicroBrute.
Should I Get A Keyboard Or A Synthesizer?
It depends on your needs. A keyboard is best for mimicking the sound of a piano and playing traditional music. A synthesizer is better for creating and manipulating sounds, but may lack the feel of a traditional piano. Ultimately, it’s about what fits your style and preferences.
Conclusion
There isn’t a one-size-fits-all answer to which synthesizer is the best for beginners. The decision ultimately boils down to personal preferences, priorities, and budget. Nevertheless, it’s vital that you invest in a decent synthesizer that enables you to experiment with sound design and hone your skills.
Whether you opt for a classic synth or a modern one, don’t forget to have fun with music creation. Happy tinkering!
For beginners, the best piano keyboard is the Yamaha PSR-E363. This keyboard has basic features and is user-friendly, making it ideal for those learning to play.
Learning to play the piano can be a fulfilling experience for anyone. However, choosing the right keyboard is important, especially for beginners. With so many options available, it can be overwhelming to decide which one to purchase. The Yamaha PSR-E363 is a great choice for beginners as it has a variety of features specifically designed for those who are just starting to learn.
This 61-key keyboard has touch sensitivity, making it more responsive to touch, and it also has a wide range of voices and effects to choose from. Additionally, it comes with built-in lesson functions and a library of songs to help beginners learn.
Credit: www.nytimes.com
Types Of Piano Keyboards For Beginners
For beginners, there are several types of piano keyboards available in the market. These include digital pianos with weighted keys, portable keyboards with lighted keys, and MIDI controllers for computers. The best piano keyboard for beginners is one that suits their needs and fits within their budget while also offering a good learning experience.
For someone who is learning how to play piano keyboard, selecting the right keyboard can be a daunting task. There are different types of Piano Keyboards for beginners, and each has its own unique features. Therefore, it is essential to research and find out which one suits your needs the best. Here are the three different types of piano keyboards for beginners:
Digital Piano Keyboards
Digital Piano keyboards are designed to replicate the sound and feel of an acoustic piano. They come with weighted keys that provide a similar resistance to an acoustic piano and produce sounds that emulate the traditional piano’s sounds. They are less expensive than traditional pianos and do not require tuning. Digital pianos have become popular among beginners, as you can use headphones for practice, which is beneficial for apartment and dormitory dwellers.
Midi Controller Keyboards
MIDI controller keyboards are instruments that control digital sound modules or synthesizers. They are connected to external devices such as computers, smartphones, or music software through USB or MIDI cables. They are compact and lightweight, have touch-sensitive keys that enable beginners to regulate volume and tone, plus enable them to learn music production and composition. MIDI keyboards are a perfect fit for beginners who aim to learn to use music software, create music, or play synthesizers.
Portable Keyboards
Portable keyboards are a category of keyboards with different features designed for beginners, travelling musicians or stage performers. They are lightweight, easy to move around, and are battery-powered. They have different sound features and built-in accompaniment styles. A portable keyboard is suitable for those beginners who want a flexible and adaptable learning experience while keeping costs minimal. Now that you have a better understanding of the various types of Piano Keyboards for beginners, you can choose the one that best suits your needs and budget. Remember that the goal is to find a good balance between cost and quality to ensure long-term enjoyment and retain the instrument’s value.
Credit: m.youtube.com
Features To Consider When Choosing A Piano Keyboard For Beginners
Beginner piano players should consider the number of keys, weight of the keyboard, touch sensitivity, sound quality, additional features, and budget when choosing the best keyboard. These factors will provide a comfortable learning experience and help beginners improve their skills.
Choosing a piano keyboard as a beginner can be daunting, especially with the plethora of options available in the market. However, knowing the features to consider can make the process less overwhelming and ensure that you choose a piano keyboard that suits your needs. Here are the main features to consider when choosing a piano keyboard for beginners, presented in HTML syntax, that will help you make an informed decision.
Number Of Keys
The number of keys on a piano keyboard determines the range of notes you can play. Most beginner keyboards usually have between 61 to 76 keys, while others have the standard 88 keys. If you are unsure about committing to a full-sized keyboard, a smaller one will still allow you to learn the basics.
Weighted Keys
If you want to mimic the feel of playing an acoustic piano, it is advisable to choose a keyboard with weighted keys. Weighted keys add resistance to the keys, which makes it feel like you are playing a real piano. If you plan on transitioning to playing a real piano in the future, choosing a keyboard with weighted keys will make the transition smoother.
Touch Sensitivity
Touch sensitivity determines how the keyboard responds when you play. Choosing a keyboard with touch sensitivity ensures that you can play softer or louder depending on how much pressure you apply to the keys. A keyboard without touch sensitivity can make it difficult to express dynamics in your playing.
Polyphony
Polyphony refers to the number of notes that can be played simultaneously. When starting, you may not need a keyboard with a high level of polyphony. However, if you plan to advance and play more complex music, choosing a keyboard with a higher level of polyphony will be necessary.
Sound Quality
The sound quality of a keyboard is crucial, especially when purchasing one for practice and performance purposes. Sampling technology is used in most keyboards, which means that they recreate the sounds of a real piano. Try to choose a keyboard with good sound quality that emulates the sound and feel of a real piano.
Connectivity
Connectivity allows you to connect your keyboard to other devices such as computers, synthesizers, and other external audio equipment. If you plan on recording or performing with your keyboard, it is essential to choose a keyboard with connectivity options.
Built-in Learning Features
Some keyboards come with built-in learning features which can be helpful if you are just starting. These built-in features include lessons, tutorials, and guided practice sessions to help you learn at your own pace. However, if you already have a teacher or are taking lessons, these features may not be necessary. In conclusion, each of these features is essential when choosing a piano keyboard for beginners. Take your time to consider each feature to ensure that you choose a keyboard that will suit your needs.
Top Piano Keyboard Recommendations For Beginners
Beginner piano players looking for a reliable keyboard should consider the Yamaha YPT-260, Casio CTK-2550 or Alesis Melody 61. These keyboards offer a range of features and affordable pricing for those just starting out.
Yamaha P-45
The Yamaha P-45 is a great choice for beginners due to its simple yet effective design. With 88 weighted keys, the P-45 mimics the feel of a traditional piano, making it a great option for those looking to transition to a real piano. The P-45 also features a compact design, making it perfect for those who are short on space.
Casio Privia Px-160
The Casio Privia PX-160 is another excellent piano keyboard for beginners. The keyboard boasts a sleek design and responsive keys that provide a realistic playing experience. One of the key features of the PX-160 is the “tri-sensor scaled hammer action” which gives a similar feel to an acoustic piano. Additionally, the PX-160 features a variety of built-in voices and a duet mode which is perfect for practicing with a teacher or partner.
Alesis Recital
The Alesis Recital is an affordable option for beginners who want to learn piano without breaking the bank. The keyboard features 88 semi-weighted keys and five built-in voices including acoustic piano, electric piano, organ, synth, and bass. The Alesis Recital also includes a lesson mode, making it an excellent option for those just starting to learn.
Korg B2
The Korg B2 features 88 natural-weighted keys that provide an excellent playing experience for beginners. The keyboard also includes a variety of built-in voices and effects, making it perfect for those looking to experiment with different sounds. Additionally, the Korg B2 features a partner mode, which allows two players to use the keyboard simultaneously.
Roland Go:piano
The Roland Go:Piano is a portable option for beginners who want to take their playing on the go. The keyboard features 61 full-size keys and a variety of built-in voices and effects. One of the standout features of the Roland Go:Piano is the Bluetooth connectivity, which allows you to connect your phone or tablet and use music-making apps or play along with your favorite songs.
In Conclusion
Choosing the right piano keyboard as a beginner can be a daunting task. However, with options like the Yamaha P-45, Casio Privia PX-160, Alesis Recital, Korg B2, and Roland Go:Piano, you can’t go wrong. It is best to consider your budget and personal preferences before making a final decision.
Credit: www.nytimes.com
Frequently Asked Questions Of Which Piano Keyboard Is Best For Beginners
Should A Beginner Get A 61 Or 88 Key Keyboard?
For a beginner, a 61 key keyboard should suffice. An 88 key keyboard is typically for advanced players or those who want to play complex pieces. It’s better to get comfortable with 61 keys before upgrading to 88 keys. However, it ultimately depends on personal preference and goals.
What Is A Good Starter Keyboard For Learning Piano?
A good starter keyboard for learning piano would be one that has at least 61 keys, weighted keys to simulate the feel of an acoustic piano, and touch-sensitive keys to respond to the player’s dynamics. The Yamaha PSR-EW300 and Casio CT-S300 are great options for beginners.
Which Keyboard To Buy For Beginners?
For beginners, it’s better to opt for a keyboard that is easy to use and comes with basic features. An important aspect is the number of keys on the keyboard, with 61 or 76 keys being ideal. The Yamaha PSR-E263, Casio CTK-3500, and Alesis Melody 61 MKII are great options to consider.
Should A Beginner Get A Keyboard Or Digital Piano?
For a beginner, a keyboard might be a good option due to its compact size and affordability. However, if you are serious about pursuing piano and want a more authentic sound and feel, a digital piano is a better choice.
It offers weighted keys and a variety of sounds to experiment with and improve your skills.
Conclusion
To sum up, choosing the best piano keyboard for beginners is not an easy task. It requires careful consideration of features, budget, and personal needs. The Casio CTK-2550, Yamaha PSS-F30, and Alesis Recital are all excellent options that offer a variety of features at affordable prices.
Ultimately, finding the right keyboard will depend on individual preferences, learning styles, and goals. By taking the time to research and compare options, beginners can find a keyboard that will support their learning and inspire their creativity.
To use MIDI to improve your productions, firstly connect your MIDI device to your computer and ensure it is recognised by your software. MIDI can be a powerful tool to add dynamics, expression and creativity to your music productions.
MIDI (Musical Instrument Digital Interface) is a protocol that allows electronic musical instruments and computers to communicate and exchange musical information. With MIDI, you can easily record and transmit performance data such as notes, dynamics, expression, timing and more. This can help to add depth and character to your productions, which would be impossible to achieve with just audio samples.
By using MIDI controllers, you can manipulate and automate various aspects of your music production, such as volume, pitch, modulation, effects and more. In this guide, we will explore the various ways you can utilise MIDI to create more expressive and interesting music productions.
Credit: beatproduction.net
Different Types Of Midi Controller
If you’re looking to add some spice to your music production, a MIDI controller is a great place to start. These versatile devices allow you to control a variety of musical parameters with ease, using anything from simple buttons and knobs to full-blown keyboard controllers. Here are the different types of MIDI controller:
Keyboard Controllers
Keyboard controllers are one of the most common types of MIDI controller, and they come in a variety of sizes and configurations. From small, compact models that can fit in your backpack to full-sized keyboards with 88 weighted keys, there’s a keyboard controller out there to suit every need.
Benefits
Drawbacks
Allows for traditional piano-style playing
Can take up a lot of space
Offers a wide range of expression possibilities
Can be expensive
Pad Controllers
Pad controllers are another type of MIDI controller, and they are ideal for beat making and sample triggering. They consist of a grid of small, pressure-sensitive pads that you can use to trigger drum samples, trigger loops, or even control synthesizers.
Compact and portable
Great for beat making and sample triggering
Easy to use, even for beginners
Fader And Knob Controllers
Fader and knob controllers are specifically designed to control levels, panning, effects, and other parameters in your DAW. They offer precise control over your mix and can save you a lot of time in the long run.
Offers precise control over your mix
Can save you a lot of time when mixing
Often smaller and more affordable than keyboard controllers
Credit: www.blastbeat.org
Using Midi To Control Your Instruments
MIDI can be a powerful tool to enhance your music productions. With its ability to control virtual instruments and hardware, MIDI offers infinite possibilities for creative expression. Incorporating MIDI into your workflow can help you develop unique and exciting sounds that will set your productions apart.
Using MIDI to control your instruments is a game-changer when it comes to music production. With a MIDI controller, you can control multiple instruments effortlessly, add creative effects, and fine-tune your soundscapes. Midi technology has been around for decades, but it’s only in recent years that it has been made accessible and widespread. In this blog post, we will discuss how you can use MIDI to spice up your productions, specifically focusing on using MIDI to control your instruments.
Setting Up Your Midi Controller:
Setting up your MIDI controller is the first step in using MIDI to control your instruments. You’ll need to ensure your MIDI controller is plugged into your computer and that it’s being recognized by your Digital Audio Workstation (DAW) of choice. Most modern DAWs support MIDI without any additional configuration, but you may need to adjust some settings if you encounter any issues. Once you’ve set up your MIDI controller, you can map its controls to various parameters in your DAW and plugins. This process allows you to set up custom controls for your virtual instruments and effect plugins.
Using Midi With Virtual Instruments:
Using MIDI control with virtual instruments is where the technology truly shines. By mapping your MIDI controller’s knobs, faders, and buttons to specific parameters in your virtual instruments, you can create dynamic and expressive performances that would be impossible with a mouse and keyboard. For example, mapping the mod-wheel on your MIDI controller to the filter cutoff frequency on a virtual analog synthesizer gives you instant control over the sound’s tone. You can create dynamic sweeps and risers with ease, adding a human touch to your production.
Playing Real Instruments With Midi:
Playing real instruments with MIDI is another exciting use case. By attaching MIDI pickups to your acoustic or electric guitar, bass, or drums, you can trigger virtual instruments while playing your instrument as usual. This setup gives you the flexibility to switch between different instrument sounds on the fly, without having to change instruments physically. For example, you could play your guitar and have the MIDI pickups trigger a virtual bass sound, allowing you to create a bassline on the spot. Alternatively, you could use MIDI to play drums, triggering realistic drum sounds with your drum kit’s playing. In conclusion, MIDI technology is a powerful tool for music producers. By using MIDI to control your instruments, you can create dynamic and expressive performances, while unlocking new levels of creativity in your production process. With virtual instruments and MIDI pickups, the possibilities are endless, and only limited by your imagination.
Creating Drum Beats With Midi
Using MIDI to create drum beats is an excellent way to add flavor to your music. With this technology, you can easily manipulate drum sounds and rhythms to suit your production’s needs. MIDI also allows you to copy and paste beats, add swing, change tempos on the fly, and much more, making it an absolute must-know for the modern music producer.
The foundation of any music production is the drum beat. Creating a captivating drum pattern is a crucial aspect of music production. MIDI can help you in this aspect. By using MIDI, you can create unique and professional-sounding drum beats that will take your productions to the next level. In this blog post, we will discuss how to create drum beats with MIDI and some tips and tricks to make them more appealing and engaging.
Finding The Right Drum Samples
Before you program your drum beats, it’s essential to select the right drum samples. It would help if you had samples that suit the style of music you are creating. For example, if you are creating a hip hop beat, then you’ll need samples that have been recorded from hip hop kits, whereas rock beats require samples from the rock kit. You can find drum samples online, or you can create your samples, record them and import them into your DAW.
Programming Drum Beats In Your Daw
Once you have your drum samples ready, you can start programming your drum beats in your DAW. You can create drum beats by recording them in real-time or manually by drawing notes on the MIDI grid. If you’re not comfortable playing the drums or don’t have a drum kit, then programming your drum beats is the way to go. With MIDI, you have the freedom to create complex drum patterns that you may not be able to play with live drums.
Using Quantization To Tighten Up Your Beats
After you have programmed your drum beats, you can use quantization to tighten up your beats, ensuring they are in the correct timing with the click track. Quantization will snap your notes to the nearest grid line, making them more precise and accurate. You can use different quantization settings, such as 1/4, 1/8, or 1/16 notes, depending on the type of groove you want. However, it’s crucial to be careful not to over-quantize your beats, as it may result in robotic-sounding drum beats. In conclusion, using MIDI to create drum beats can add an exciting dimension to your music productions. It will allow you to create unique beats and tailor them to your style. By following the discussed tips, you can create captivating drum beats that will make your productions stand out.
Adding Expressive Elements With Midi
By incorporating expressive elements via MIDI, producers can bring more personality and depth to their music. From adding dynamic instrumentation to creative sound design, using MIDI allows for limitless possibilities in music production.
MIDI is a versatile and powerful tool for music production and can be used in many ways to add expressive elements to your tracks. You can modulate synth parameters, use pitch bend and mod wheel, and add aftertouch to your playing to create dynamic and emotive music. Let’s take a look at each of these techniques in more detail.
Modulating Synth Parameters
Modulating synth parameters is a popular technique for creating movement and variation in your tracks. With MIDI, you can automate any parameter of your synth, such as filter cutoff, resonance, or LFO rate. By using automation and assigning different values to the parameter, you can make your synth sound evolve over time and add interest to your track.
Using Pitch Bend And Mod Wheel
Pitch bend and mod wheel are MIDI controllers that allow you to add expression to your playing. Pitch bend lets you change the pitch of a note up or down, which can be used to create vibrato, slides, and other pitch variations. Mod wheel, on the other hand, can be assigned to any parameter of a synth, such as filter cutoff or LFO rate, to add modulation and movement to your sound.
Adding Aftertouch To Your Playing
Aftertouch is a MIDI message that detects how hard you are pressing down on a key after the initial attack. It can be used to add expression and dynamics to your playing, such as adding vibrato to a sustained note or increasing the volume as you press harder. Many MIDI controllers have aftertouch built-in, and most software synthesizers support it as well. In conclusion, MIDI is an essential tool for adding expressive elements to your productions. By modulating synth parameters, using pitch bend and mod wheel, and adding aftertouch to your playing, you can create dynamic and emotive music that stands out. So, try these techniques in your next production and see how they can spice up your tracks.
Using Midi To Control Your Effects
MIDI offers a precise way to control and enhance various effects in your music productions. By sending MIDI messages to your effects processors, you can easily modulate and modify the sounds in real-time, creating dynamic and exciting new sounds. Use this powerful tool to craft unique and engaging music that truly stands out.
Using MIDI To Control Your Effects is a game-changer when it comes to music production. MIDI controllers give you the flexibility to manipulate your sounds in real-time, which can add an entirely new dimension to your productions. One of the most exciting things you can do with MIDI is use it to control your effects plugins. In this section, we will explore how to route MIDI to your effects plugins, control wet/dry mix with MIDI and map effects parameters to your MIDI controller.
Routing Midi To Your Effects Plugins
When you route MIDI to your effects plugins, you can control them using a MIDI controller. This allows you to adjust the effect parameters in real-time, giving you much more control over your sound. To route MIDI to your effects plugins, you’ll need to select the MIDI channel that your controller is on. You can then assign the MIDI control to a parameter in your effect plugin. This will enable the control to be manipulated using your MIDI controller.
Controlling Wet/dry Mix With Midi
Being able to control your wet/dry mix with MIDI can add a whole new level of creativity to your productions. Typically, you would use a wet/dry mix to blend your dry signal with the processed signal from the effect plugin. By using MIDI to control the wet/dry mix, you can automate the mix, making it change over time. To control the wet/dry mix with MIDI, you can assign a MIDI control to the mix parameter within the effect plugin. This will allow you to manipulate the wet/dry mix using your MIDI controller.
Mapping Effects Parameters To Your Midi Controller
Mapping effects parameters to your MIDI controller is where the real magic happens. You can map your MIDI controller to any parameter within an effect plugin, giving you complete control over the effect. This can be incredibly powerful, as it allows you to automate and manipulate multiple parameters simultaneously. To map effects parameters to your MIDI controller, you’ll need to use the mapping function within your DAW. This will enable you to assign a MIDI control to a specific parameter within the effect plugin. Once mapped, you can then manipulate the parameter using your MIDI controller. In conclusion, using MIDI to control your effects plugins can add a new dimension to your music production. By routing MIDI to your effects plugins, controlling wet/dry mix with MIDI, and mapping effects parameters to your MIDI controller, you can make your productions more dynamic and creative. So why not experiment with these MIDI techniques and see how they can help take your music to the next level!
Credit: www.masteringthemix.com
Frequently Asked Questions On How To Use Midi To Spice Up Your Productions
How Is Midi Used In Music Production?
MIDI is used in music production to connect electronic instruments and computers. It allows the user to control and manipulate various aspects of sound such as pitch and rhythm. MIDI data is stored in a file and can be edited using software.
It is a vital tool for producers to create, record, and mix electronic music.
What Can Midi Be Used For?
MIDI can be used for creating and editing music electronically, controlling MIDI-enabled instruments, facilitating live performances, and syncing audio and video during live shows. MIDI technology allows musicians to create and manipulate sounds with precision and ease.
How Do I Make My Midi Sound More Realistic?
To make your MIDI sound more realistic, use expressive playing techniques like legato, varying velocity, and humanizing timing. Use a quality virtual instrument or sound library. Make use of controllers like modulation wheel, pitch and modulation bend. Use reverb and other effects to create a natural sounding space.
Finally, consider layering multiple instruments to create more complex sounds.
What Is Midi Out Used For?
MIDI out is used to send performance data from a musical instrument or device to other MIDI-enabled gear. It allows for synchronized playback and control of multiple devices, enabling a range of musical possibilities. This output is used to connect to other devices like synthesizers, digital audio workstations, and audio interfaces.
Conclusion
Overall, incorporating MIDI into your productions can add a whole new level of creativity and depth to your music. Whether you’re just beginning to experiment with MIDI or are a seasoned pro, there are endless possibilities to explore. From using MIDI controllers to manipulate software instruments, to programming your own custom patterns and loops, the capabilities of MIDI are truly limitless.
So, don’t be afraid to experiment and have fun with it – who knows what you might come up with!
Affordable mixing and mastering services are available for artists, producers and musicians looking to enhance the quality of their music. These services can improve audio balance, depth and clarity, resulting in a professional sound that listeners will appreciate.
As an artist or producer, you want your music to be the best it can be. That’s where mixing and mastering comes in. Professional mixing and mastering services can help take your music to the next level. These services involve adjusting the levels, EQ, and other effects to produce a balanced and polished sound.
However, finding affordable mixing and mastering services that provide quality work can be challenging. This is where research and due diligence come into play, including reading reviews and testimonials, exploring different options and comparing prices. By investing in affordable mixing and mastering services, you can push your music to its full potential without breaking the bank.
Credit: www.omarimc.com
The Importance Of High-quality Mixing And Mastering
High-quality mixing and mastering is crucial for producing professional-level music, but it doesn’t have to break the bank. Affordable mixing and mastering services can provide the necessary expertise without compromising on quality, ensuring that your music is ready to compete in today’s competitive industry.
As a musician or a producer, you put in a lot of effort into creating a track. You might spend hours writing lyrics, selecting the chord progression, recording the vocals, and adding the instruments. Once all the elements are in place, it’s time to finish the track by mixing and mastering it. Mixing and mastering are crucial aspects of the music production process, and they can make or break your track’s success.
Why You Need Professional Services
Mixing and mastering can be an overwhelming task, especially if you don’t have the proper skills and equipment. While some musicians prefer to do it all by themselves, others opt for professional mixing and mastering services. Working with a professional audio engineer can help you achieve a polished, radio-ready sound that’s consistent with your vision. Professional services can also help you save time and focus on other aspects of the music production process.
The Impact Of Poor Mixing And Mastering
When a track is poorly mixed or mastered, it can impact its overall quality and appeal. If the sound levels are off, the track might sound muddy or distorted. If the EQ is improperly balanced, some audio frequencies might be too overwhelming or not present enough. Poor mixing and mastering can also affect the stereo field, making the track sound too narrow or too wide. In the end, all these problems can lead to an unprofessional sound that fails to connect with the audience. In conclusion, if you want to create music that sounds professional and engaging, you need to pay attention to the mixing and mastering process. Whether you decide to do it yourself or hire a professional, make sure you invest time and effort into this crucial step. The importance of high-quality mixing and mastering should not be underestimated.
Affordable Options Available
If you’re a musician or content creator, you know how important it is to produce quality tracks. However, professional mixing and mastering services can be pricey, and not everyone can afford it. Affordable mixing and mastering services have come up with a few affordable options that won’t break the bank. In this post, we’ll discuss how you can save money and still get the quality mixing and mastering services that you need.
Comparing Prices And Services
Before making your decision, you should compare prices and services before you choose a mixing and mastering service provider. Most affordable mixing and mastering services provide a range of prices, depending on the level of service you require. So, start by comparing prices from different providers and weighing the pros and cons of each.
Services
Price (per track)
Basic
$50-$75
Standard
$100-$200
Premium
$250-$500
Why You Don’t Have To Break The Bank
While some mixing and mastering services can be expensive, you don’t have to break the bank to get the quality you need. Affordable mixing and mastering services offer several options that can help you save money. Here are some ways to stick to your budget:
Choose one package that suits your needs best.
Choose fewer tracks to get mixed and mastered.
Consider a mixing-only or mastering-only service.
Find a discount by hiring the same service provider to work on multiple tracks.
By following these tips, you can save money and still receive great quality mixing and mastering services. Remember, quality should always be the top priority, but with some research and negotiation with affordable mixing and mastering services, you can still get the results you need without going over budget.
Finding The Right Mixing And Mastering Professional
Looking for affordable mixing and mastering services? It can be challenging to find the right professional that fits your budget and meets your requirements. However, with careful research and reviewing their past work, you can hire a mixing and mastering expert that delivers high-quality results at a reasonable cost.
When it comes to music production, mixing and mastering are the most important steps in the process. They can make or break a track, and finding the right professional to handle these tasks can be the difference between success and failure. Affordable mixing and mastering services can help you get the most out of your music without breaking the bank. However, it is important to keep in mind that not all services are created equal.
Looking For Experience And Quality
The key to finding the right mixing and mastering professional is to look for someone with experience and quality work. When searching for a professional, ask about their experience and expertise in your genre of music. You want to find someone who has a deep understanding of the styles and techniques used in your genre. You should also ask to see their portfolio to make sure their work meets the quality standards you are looking for.
Reading Reviews And Listening To Samples
Reviews and samples are valuable tools when it comes to choosing the right mixing and mastering professional. Look for reviews from previous clients and read carefully to see what they say about the quality of work and the overall experience. You should also listen to samples of their work to get an idea of their style and capabilities. This will help you make an informed decision about which professional is the best fit for your project.
Making The Right Choice
Once you have done your research and found a professional with the right experience, quality, and reviews, it is time to make your choice. Be sure to communicate clearly with the professional about your vision and expectations for your music. A good mixing and mastering professional will be able to understand your needs and work with you to achieve the desired result. By finding the right professional, you can ensure that your music is ready to be heard by the world.
Credit: www.audiomixingmastering.com
Online Vs In-person Mixing And Mastering
Mixing and mastering in music production is a crucial process that can make or break the final product. Finding the right mixing and mastering provider for your music is essential. Choosing between online vs in-person mixing and mastering services can be daunting. If you’re trying to save money on music production, affordable online mixing and mastering services can be an excellent option. In this section, we will compare the pros and cons of each option.
Pros And Cons Of Each
Online Mixing and Mastering
In-Person Mixing and Mastering
Pros:More affordableConvenient – you can work with professionals from anywhere in the worldEfficient – turn-around times are often fasterVariety – access to a wider range of professionals and servicesLess pressure – working remotely can be less stressful than face-to-face interactionCons:Lack of physical interaction may lead to communication problemsQuality issues due to technical limitationsDifficulty in determining the authenticity of the provider
Pros:More personalized servicesHigher quality services due to more advanced equipmentMore collaborative environment – can get immediate feedback and adjust on the spotAbility to have better control of the final productCons:More expensiveLess flexible – need to be physically present during the mixing and mastering processLonger turn-around timesLess variety – limited to local professionals and services
Why Online Services Can Be More Affordable
Most online mixing and mastering services cut overhead costs by eliminating the need for a physical studio and reducing their staffing requirements. These cost savings are passed on to clients. The use of modern technology also makes it easier for online studios to streamline their processes, which will reduce their costs further.
It’s important to research the best option for your music production needs and budget. If you’re on a tight budget and have time constraints, online mixing and mastering services may be the best option. Whether you choose online or in-person mixing and mastering, be sure to work with reputable service providers.
Steps To Prepare Your Music For Mixing And Mastering
Preparing your music for mixing and mastering is a crucial step in ensuring high-quality audio output. Affordable mixing and mastering services are available, and it’s important to follow steps like checking levels, ensuring clarity and simplicity of arrangement, and using appropriate file formats to get the most out of them.
Preparing your music for mixing and mastering is an important step in achieving the best possible sound quality. There are several steps you can take to ensure that your music is ready for the mixing and mastering process. With these simple tips, you can make sure that your music is ready to shine.
Organizing Your Tracks
The first step in preparing for mixing and mastering is to organize your tracks. This means that you should name your tracks, label them by instrument, and arrange them in the proper order. It’s also important to take note of any problems in your tracks, including unwanted noise or distortion. By organizing your tracks, you make it easier for the mixing and mastering engineer to work with your music.
Making Sure Your Levels Are Consistent
Another important step in preparing for mixing and mastering is to ensure that your levels are consistent. This means that each track should be balanced so that it’s not too loud or too soft. If a track is too loud, it can cause distortion, while a track that’s too soft can get lost in the mix. To check your levels, you can use a metering tool or adjust your levels manually.
Cleaning Up Your Audio
One final step in preparing for mixing and mastering is to clean up your audio. This includes removing any unwanted noise, pops, or clicks that may have been recorded. You can use a noise reduction tool to remove background noise, and a de-clicker to eliminate clicking sounds. By cleaning up your audio, you can ensure that your music sounds as clean and clear as possible. To sum up, preparing your music for mixing and mastering can ensure the best possible outcome. By organizing and labeling your tracks, balancing your levels, and cleaning up your audio, you can make sure that your music is ready to shine. So, take your time, and follow these simple steps to prepare your music for the mixing and mastering process.
Credit: www.reddit.com
The Mixing Process Explained
Learn about the mixing process from experts who offer affordable mixing and mastering services. Improve the sound quality of your music with professional mixing techniques that enhance each element of your track.
Mixing and mastering are crucial steps in music production. They are responsible for turning a rough recording into a polished and professional-sounding track. The mixing process involves blending different elements of a song, like vocals and instruments, to create a cohesive and balanced sound. In this article, we will take a closer look at the different stages of mixing and explain how they contribute to the overall quality of the final product.
Balancing And Eqing Your Tracks
The first step in mixing is balancing the levels of individual tracks. This means adjusting the volume of each track to ensure that they complement each other and create a cohesive sound. EQ (Equalization) is also an important stage in balancing tracks. EQ enables you to adjust the tone of individual tracks, giving them more or less prominence in the mix. EQ is used to make sure each track occupies its own frequency range so that they don’t clash with one another. During the balancing stage, it’s important to listen to each element of the song and make sure they all sit well together. An experienced mixing engineer would make minor adjustments in the volume and the EQ ranges of each track, making sure that none of them are overpowering the others. This is an essential stage of the mixing process that lays the foundation of a polished final product.
Adding Effects And Processing
After the balancing stage, effects and processing are added to the tracks. This stage involves applying effects like reverb, delay, compression, and other techniques to give the track depth and dimension. Effects can be used to add ambience or to create a specific atmosphere for the song. Processing can also be used to shape the sound of each track. For example, compressors can be used to tighten up the low end of a track, or to create a more punchy sound. EQ can be used to shape the sound of each track, adding brightness and clarity or warmth and depth. The effects and processing stage is where the mixing engineer has a chance to use their creativity to enhance the song and give it a unique sound. This can be done by experimenting with different types of effects and processing techniques to add character to the track. In conclusion, the mixing process is crucial to the success of any music production. By balancing and EQing tracks and adding creative effects and processing, you can produce a polished and professional sounding track. Overall, it is really important to find affordable mixing and mastering services, so you can make the most of the mixing process without having to break the bank.
The Mastering Process Explained
When it comes to affordable mixing and mastering services, the mastering process is an integral part of making your music sound its best. In this section, we’ll take a closer look at the mastering process and what it involves.
Finalizing The Mix
The first step in the mastering process is to finalize the mix. This involves making sure that every part of the song is well balanced and that the levels are consistent. The mastering engineer will typically use a combination of EQ and other tools to make adjustments to the mix as needed. This ensures that the final result is a cohesive and polished version of the original recording.
Applying Compression And Limiting
Once the mix is finalized, the next step in the mastering process is to apply compression and limiting. Compression helps to even out the levels of the track and can help to bring out certain elements of the mix. Limiting is used to prevent any parts of the track from clipping or distorting, which can happen when the levels are too high. The mastering engineer will carefully adjust these settings to strike the right balance between loudness and clarity.
By carefully following these mastering steps, affordable mixing and mastering services can help you take your music to the next level. Whether you’re a professional musician or just starting out, it’s worth considering the benefits that professional mastering can bring to your tracks.
The Benefits Of Affordable Mixing And Mastering Services
As a musician, you want your music to be of top-notch quality and stand out from the rest. However, you may not have the budget to shell out huge amounts for expensive mixing and mastering services. That’s where affordable mixing and mastering services come in. Here are some benefits of opting for affordable mixing and mastering services:
Taking Your Music To The Next Level
Quality mixing and mastering services can make a world of difference in how your music is perceived. They can help bring out the best in your tracks and make them sound more professional and polished. By choosing affordable mixing and mastering services, you can get access to the same quality of services that high-end studios offer, but at a fraction of the cost.
Affording Quality Services
One of the main advantages of opting for affordable mixing and mastering services is that it allows you to access quality services that fit within your budget. This can help you save money in the long run, especially if you plan on creating more music in the future. With affordable services, you don’t have to compromise on quality just because of budget constraints.
Additionally, affordable mixing and mastering services can also help level the playing field for indie artists and new musicians who are just starting out. They can compete with bigger and more established musicians by having access to affordable and high-quality mixing and mastering services.
In conclusion, choosing affordable mixing and mastering services can help you take your music to the next level without breaking the bank. It can help you access quality services that fit within your budget and help you compete in the music industry with more established artists.
Frequently Asked Questions On Affordable Mixing And Mastering Services
How Much Do People Charge For Mixing And Mastering?
The cost of mixing and mastering varies greatly depending on the project size, complexity, and who you hire. On average, a professional may charge anywhere from $150 to $500 per song or more. However, some may charge hourly rates ranging from $50 to $200 or more.
Consequently, the cost may go even higher if you opt for a bigger studio or an experienced professional.
Should I Pay Someone To Mix And Master?
Yes, you should consider paying someone to mix and master your music. Professional mixing and mastering can greatly enhance the quality of your audio and make it sound more polished and competitive. It also requires specialized expertise and equipment that you may not have.
However, you should only do this if you have the budget and if you choose a reputable and experienced provider.
How Much Are Mastering Services?
Mastering services pricing typically ranges from $30-$150 per track, depending on the service provider and the level of complexity involved. Basic mastering services may cost less, while more intricate projects requiring specialized techniques or equipment may be priced at the higher end of the spectrum.
How Much Does It Take To Mix And Master A Song?
The cost to mix and master a song varies based on the complexity of the project, the experience of the audio engineer, and the length of the track. On average, a professional mix can cost around $300 to $1000, while mastering can cost around $50 to $200 per song.
Conclusion
Affordable mixing and mastering services are an excellent option for those on tighter budgets. It’s crucial to do thorough research to find a quality provider that matches your needs. With the right service, you can achieve professional-quality sound without breaking the bank.
Whether you’re a podcaster, musician, or YouTuber, these services can help take your content to the next level. Don’t let cost be a barrier to making great art when affordable solutions exist.