Categories
Archive

Can You Be a Musician Without Social Media

Yes, one can be a musician without social media. Social media is a valuable tool for promotion and networking, but it is not a requirement for success in the music industry.

Some musicians have achieved fame through live performances, radio play, and word of mouth. It may be more challenging to gain a following without social media, but it is not impossible. It is important for musicians to focus on honing their craft and creating quality music, regardless of their social media presence.

Additionally, there are alternative methods of promotion, such as collaborating with other artists, getting featured in media outlets, and using traditional marketing techniques. Ultimately, success as a musician is determined by talent, hard work, and dedication, rather than just social media presence.

The Importance Of Social Media For Musicians

As a musician, you might think social media isn’t essential for your career. However, in the current digital age, social media is an indispensable tool for any artist striving for success. Major record labels and industry professionals now use social media to discover and promote new talent. In this post, we’ll explore the importance of social media for musicians and discuss how you can leverage it to build your career.

How Social Media Helps To Build A Fanbase

Social media platforms like Twitter, Facebook, Instagram, and TikTok allow you to connect with fans on a personal level and build a loyal following. You can use these platforms to share your music videos, behind-the-scenes footage, and even your day-to-day life. By sharing your story, you give fans an insight into who you are as a person and an artist, which helps build a deeper connection.

Social media also provides an opportunity for real-time engagement with fans. You can respond to comments, run competitions, and answer fan questions. Whether it’s a tweet, a post, or a live stream, every interaction counts towards building a strong and dedicated fanbase.

The Role Of Social Media In Music Promotion

Social media is an excellent tool for promoting your music. You can use platforms like Soundcloud, YouTube, and Bandcamp to share your tracks and build your online presence. You can also collaborate with other artists, repost their content, and grow your following.

Utilizing social media ads is another effective way to promote your music. You can target your ads to reach your desired audience, such as people who have engaged with your content before or fans of similar artists. By using ads, you can increase your visibility and reach potential fans who might not have found you otherwise.

Connecting With Other Musicians And Industry Professionals

Social media provides an opportunity to connect with other musicians and industry professionals. You can use platforms like LinkedIn to connect with booking agents, managers, and A&Rs. By networking with industry professionals, you increase your chances of getting your music heard by the right people.

You can also collaborate with other artists and producers through social media. Through collaborations, you can reach new audiences and learn from other musicians’ experiences. By working with other artists, you can also strengthen your skills and create killer tracks that resonate with fans.

Can You Be a Musician Without Social Media

Credit: whisperroom.com

Examples Of Successful Musicians Without Social Media Presence

Although social media can be a powerful tool for musicians- success can still be achieved without it. A few successful musicians such as Adele, Daft Punk, and Enya have abstained from social media, focusing on their music instead.

Gone are the days when musicians had to rely only on traditional marketing and promotion methods to succeed in the industry. Social media platforms have revolutionized the way artists connect with their fans and grow their careers. However, there are still some successful musicians who have managed to carve out a name for themselves without any social media presence. Here are a few examples:

Famous Musicians Who Avoid Social Media

Some of the most successful musicians are not active on social media or do not have any accounts at all. Taylor Swift, who was once known for her social media presence, went on a hiatus in 2019 and deleted everything from her accounts. However, her career hasn’t suffered, and she remains one of the most successful artists globally. The honorable mention includes Prince, Sade, Daft Punk, and Enya.

The Pros And Cons Of Avoiding Social Media As A Musician

While social media is an essential tool in the modern music industry, it’s not always necessary to achieve success. There are pros and cons to avoiding social media as a musician. On the one hand, it allows musicians to focus solely on their craft and often results in them building a more organic following based solely on their music. On the other hand, social media provides an easy way to connect with fans and reach potential new listeners. Pros


Alternative Methods For Building A Fanbase

Social media isn’t the only way to build a fanbase as a musician. There are alternative methods for reaching new listeners and building a dedicated following. One of the most effective methods is by performing live shows. Live shows offer artists the opportunity to gain new fans organically, connect with their audience, and receive immediate feedback. Additionally, collaborations with other artists, getting press coverage from reputable media outlets, and appearing on podcasts and radio shows are all great ways to reach new listeners and establish yourself as an artist. With the right marketing and promotion strategy, musicians can achieve success without relying on social media.

Navigating Social Media As A Musician

Social media is a key tool for musicians in promoting their work and connecting with their audience. While it’s possible to be a successful musician without social media, it can be more challenging to gain exposure and reach new fans.

Navigating the many platforms can be overwhelming, but with a strong strategy, musicians can use social media to their advantage.

As a musician, social media can be a powerful tool for building a fanbase, promoting your music, and connecting with your audience. However, it can also be overwhelming to navigate the various platforms and keep up with the ever-changing algorithms. The key is to use social media strategically and effectively to maximize its benefits while avoiding its pitfalls. In this post, we’ll explore how to determine which social media platforms to use, creating a strong social media presence, tips for posting engaging content, and maximizing the benefits of social media.

How To Determine Which Social Media Platforms To Use

Not all social media platforms are created equal. Depending on your music genre, target audience, and goals, you may want to focus on one or a few platforms. Here are some factors to consider when deciding which platforms to use:

  • Your target audience: Which social media platforms are popular among your target audience?
  • Type of content: What type of content do you plan to post? Some platforms are better suited for visual content, while others are more text-based.
  • Your goals: What do you want to achieve with social media? Are you looking to build a fanbase, promote your music, or connect with your audience?

Creating A Strong Social Media Presence

Once you’ve determined which platforms to use, it’s important to create a strong social media presence. Here are some tips:

  • Consistency: Be consistent in your posting schedule and tone of voice.
  • Branding: Use cohesive branding across all platforms, including profile pictures, cover photos, and bios.
  • Engagement: Engage with your audience by responding to comments and messages.

Tips For Posting Engaging Content

Posting engaging content is key to building a fanbase and growing your social media presence. Here are some tips:

  • Variety: Post a variety of content, including behind-the-scenes glimpses, updates on your music, and personal posts.
  • Visuals: Use high-quality visuals, including photos and videos.
  • Calls to action: Encourage engagement with calls to action, such as asking questions or urging fans to share your posts.

Maximizing The Benefits Of Social Media While Avoiding Pitfalls

Social media can be a double-edged sword. Here are some ways to maximize the benefits of social media while avoiding its pitfalls:

  • Authenticity: Be authentic and true to yourself and your music.
  • Moderation: Don’t overwhelm your audience with too much content or too many promotions.
  • Privacy: Be mindful of your privacy and personal safety.

In conclusion, social media can be a powerful tool for musicians, but it’s important to use it strategically and effectively. By using the tips and strategies outlined in this post, you can create a strong social media presence, post engaging content, and maximize the benefits of social media while avoiding its pitfalls.

Can You Be a Musician Without Social Media

Credit: blog.groover.co

Finding A Balance That Works For You

As a musician, social media can be a powerful tool for growing your fan base. However, it is possible to be successful without relying heavily on online presence. Finding a balance that works for you and your music is key in navigating this aspect of the industry.

Trying to make it as a musician is hard work, and it’s easy to feel like you need to do everything possible to promote yourself and your music. One thing that many musicians wonder is whether they can be successful without using social media. While social media can be an incredibly effective tool for gaining exposure and connecting with fans, it’s also true that many musicians have achieved success without relying on it. In this post, we’ll explore the idea of being a musician without social media and offer some tips for finding the balance that works for you.

Assessing Your Goals As A Musician

When you’re deciding how much time and energy to devote to social media, it’s important to think about what you hope to achieve as a musician. Are you looking to make a name for yourself in your local scene, or are you aiming for national or international recognition? Are you focused on live performance, recording, or both? Once you have a clear sense of what you’re trying to accomplish as a musician, you can start to think about how social media fits into that picture.

Considering Your Personal Preferences And Style

Not every musician feels comfortable using social media, and that’s okay. Some artists prefer to let their music speak for itself and avoid the pressure to constantly promote themselves. Others thrive on the feedback and interaction that social media provides. When you’re trying to find a balance that works for you, it’s important to be honest with yourself about your preferences and style. If you love social media and find it easy to use, by all means, make the most of it. But if you feel like it’s just not your thing, that’s okay too.

Determining The Role Of Social Media In Your Career

Whether you’re an up-and-coming musician or an established artist, it’s worth thinking about the role that social media plays in your career. For some musicians, social media is a crucial way to build a fanbase and get their music out to a wider audience. For others, it’s an add-on that can enhance their existing promotional efforts. Whatever your situation, it’s important to be intentional about how you use social media and to make sure it aligns with your larger goals and strategy.

Making Smart Decisions About Social Media Use

If you do decide to use social media as part of your promotional efforts, it’s important to make smart decisions about how you use it. This might mean focusing on a few key platforms rather than trying to be active everywhere, or setting limits on how much time you spend on social media each day. It’s also a good idea to think about the kind of content you share and how it fits into your larger branding and messaging. By being intentional about your social media use, you can make sure that it’s making a positive impact on your career.

Can You Be a Musician Without Social Media

Credit: www.reddit.com

Frequently Asked Questions Of Can You Be A Musician Without Social Media

Can You Be An Artist Without Social Media?

Yes, you can be an artist without social media. While social media can be helpful for promoting and sharing your art, it is not a requirement for creating or maintaining a career as an artist. There are alternative ways to showcase your work and connect with potential buyers or collaborators, such as through art galleries, exhibitions, and networking events.

What Musician Does Not Use Social Media?

Some musicians do not use social media, while others use it extensively to interact with fans.

Is Social Media Important For Musicians?

Yes, social media is important for musicians. It’s an effective way to create and promote content, connect with fans, discover new opportunities and grow their fan base. Social media platforms offer an easy and affordable way to distribute new music, share news and updates, and engage with followers, increasing visibility in the industry.

Do Artists Have To Have Social Media?

Yes, it is highly recommended for artists to have social media accounts as it allows them to showcase their work, connect with potential collectors, and gain exposure and recognition within their field. It is important to select social media platforms that align with the artist’s goals and target audience.

Conclusion

Music and social media have a complex relationship. While social media is essential for artists’ success in today’s world, it isn’t the only essential tool. It’s possible to be a musician without social media, but it may limit your reach, exposure, and opportunities.

Many artists have succeeded before the advent of social media, and with the right approach, you can too. Focus on producing quality content, build a strong network, and actively engage with your audience. Success is possible with or without social media.
Categories
Archive

How To Make A Digital Synth Sound Analog

To make a digital synth sound analog, use low-pass filters and add noise to mimic analog circuitry. By using this method, the digital synth can produce a warmer and more natural sound.

Digital synthesizers have overtaken analog synthesizers in recent years due to their affordability and versatility, but the warm, expressive, and unpredictable sound that analog synths create is still a highly sought-after quality among musicians and producers. While digital synths can produce a similar sound to analog, there are still notable differences in the way the sound is generated.

That’s why many musicians and producers choose to emulate the analog sound through digital synthesis. We’ll discuss how to make a digital synth sound analog by utilizing techniques such as low-pass filters and noise generation.

Understanding Analog And Digital Synths

Analog and digital synthesizers are both used to create electronic music, but there are significant differences between the two in terms of sound and functionality. Understanding these differences is the first step in learning how to make a digital synth sound analog.

Differences Between The Two Synths

Analog synths use voltage-controlled oscillators and filters to create sound waves. These waves create a warm, rich, and textured sound that is difficult to replicate digitally. In contrast, digital synths use algorithms and samples to generate sound, which can be manipulated more precisely.

Another key difference is that analog synths are often built with physical knobs and controls that allow the user to modify the sound in real-time. Digital synths, on the other hand, often use a computer interface for control, which can take some getting used to.

Advantages And Disadvantages

Analog SynthsDigital Synths
Warm, organic soundReal-time controlUnique personalityPrecise controlSample-based sound librariesCost-effective
ExpensiveCan be bulky and difficult to transportMaintenance requiredLess personalityCan be difficult to programUninspired presets

Ultimately, the choice between analog and digital synths comes down to personal preference and the specific needs of the user. For example, if you’re looking for a warm, vintage sound, an analog synth may be the best option. On the other hand, if you need precise control over your sound and want access to a wide range of preset sounds, a digital synth may be the better choice.

How To Make A Digital Synth Sound Analog

Credit: producelikeapro.com

Analog Signal Processing Techniques

When it comes to synthesizer sounds, most musicians are divided into analog and digital camps. Although digital synths are more common and accessible, many musicians still prefer the warmth and harmonic distortion of analog synths. Fortunately, with some “analog signal processing techniques,” you can make your digital synth sound like an analogue one. In this article, we’ll explore some analog signal processing techniques to get a more authentic sound from your digital synth.

Gain Staging Techniques

Gain staging is essential to analog signal processing. Proper gain staging ensures that your signal is at the right level throughout the processing chain. In the analog world, this means ensuring that the signal is neither too low nor too high, which can result in unwanted distortion.

With digital synths, gain staging is equally critical. You should avoid setting the levels too high, as this can lead to digital clipping. Instead, aim for the sweet spot, where the signal is strong, but not overbearing. A general rule is to keep your digital synth signal between -12db and -6db. If you need to boost the signal after recording, you can use analog-style plugins to add warmth and saturation.

Analog Waveform Generation Methods

The waveform generated by a synthesizer is the foundation of any sound. While digital synthesizers produce waveform through mathematical algorithms, analog synthesizers generate the waveform through electrical circuits. The difference in waveform production explains the sonic differences between the two types of synthesizers.

To make your digital synth sound analog, incorporate analog waveform generation methods. One way to achieve authentic analog tones is by using sampled waveforms from vintage analog synths. You can also use additive synthesis to layer harmonic overtones onto your sound.

Conclusion

By applying analog signal processing techniques, you can make your digital synth sound warmer, fuller, and more organic. Use gain staging to set your signal levels correctly while incorporating analog waveform generation methods to achieve a more authentic sound. These tips will help you bridge the divide between analog and digital synthesis and enhance your music production skills.

Distortion And Saturation Effects

To create an analog effect on a digital synth, try applying distortion or saturation effects. This can enhance the warmth and richness of the sound, giving it a more organic and realistic feel. Adjust the amount of distortion or saturation to achieve the desired effect.

Using Distortion To Emulate Analog Sound

To make a digital synth sound analog, introducing distortion can go a long way. Distortion can add warmth and grit to your sound, which is characteristic of analog instruments. It can mimic the effect of overdriving an analog circuit, resulting in a more organic and authentic sound. One way to achieve this is by using a distortion pedal, something that guitarists use. You can also use distortion plugins, which are readily available in most DAWs.

Tape Saturation Effects On Digital Synths

Tape saturation promotes the addition of warmth, depth, and harmonics to the audio signal, much the same way analog equipment does. It can disguise harsh digital sounds with a naturally compressed, round, and fuzzy sound that vintage synths are so famous for. Saturation plugins can generate multiple layers of harmonic distortion, imitating the sound of analog tape. Take note that distortion is different from saturation, and it is possible to use both in conjunction to achieve the desired effect. In conclusion, using distortion and saturation effects can elevate the sound of your digital synth and give it a classic analog feel. By experimenting with various distortion and saturation plugins, you can achieve unique sounds and textures while still retaining the flexibility and convenience of digital synths.

How To Make A Digital Synth Sound Analog

Credit: www.fullcompass.com

Filtering Techniques For Analog Sound

When it comes to synthesizers, many musicians prefer the warm, organic sound of analog synths over their digital counterparts. While digital synths are capable of producing a vast array of sounds, it can be difficult to replicate the character and warmth that analog synths are known for. However, there are techniques that can be used to make a digital synth sound more like an analog synth, and one important technique is filtering.

Low Pass Filter Importance

One of the key features of analog synths is their use of filters, particularly low pass filters. Low pass filters allow frequencies below a certain cutoff point to pass through, while attenuating frequencies above that cutoff point. This creates a warm, rounded sound that is often associated with analog synths. One way to replicate this sound in a digital synth is to use a low pass filter.

Digital synths often come with a range of filter types, including low pass filters. By adjusting the cutoff frequency and resonance of the filter, you can shape the sound to create a warm, analog-like tone. Experimenting with different filter settings can yield a range of unique sounds, so don’t be afraid to play around and see what works best for your music.

Emulating Filter Resonance In Digital Synths

Another important feature of analog synths is the use of filter resonance. Resonance refers to the boost in amplitude of a narrow band of frequencies around the cutoff point. This creates a distinct sound that is often described as “squelchy” or “nasal”. While it can be difficult to fully replicate true analog resonance in a digital synth, there are techniques that can come close.

One technique is to use a filter envelope to modulate the cutoff frequency of the filter. By adjusting the envelope parameters, you can create a sound that emulates the resonance of an analog filter. Another technique is to use a filter drive or distortion effect to add harmonic content and saturation to the sound. This can help to make the sound more grittier and more analog-like.

By utilizing these filtering techniques, you can make your digital synth sound more like an analog synth. With some experimentation and creativity, you can create warm, organic sounds that are reminiscent of the classic analog synths of the past.

Analog Envelope Techniques For Digital Synths

Transforming the sound of digital synths to replicate that of analog is highly sought after by many music producers. By using analog envelope techniques, such as using filters and modulating parameters, you can add warmth and depth to your digital synth sounds and create a more natural and organic sound.

Understanding Envelope Generators In Analog Synths

Analog envelope generators are responsible for shaping the sound generated by an analog synth. The four stages of the envelope – attack, decay, sustain, and release – determine how the sound changes over time. These stages can be adjusted to create a wide range of sounds, from percussive stabs to sustained chords. In an analog synth, the envelope generator is typically a dedicated circuit that controls the voltage level of the synth’s amplifier and filter over time.

Applying Envelope Techniques In A Daw

While digital synths often lack dedicated envelope circuits, many DAWs come equipped with virtual analog synths that offer a range of envelope controls. Applying envelope techniques in a DAW involves using these controls to shape the sound of a digital synth in a way that emulates the characteristics of an analog synth. By adjusting the attack, decay, sustain, and release controls, it’s possible to create sounds that closely resemble those produced by an analog synth.

Envelope Techniques For Achieving Analog Sounds

To achieve a more authentic analog sound in a digital synth, there are a number of techniques that can be employed. First, experiment with longer attack and release times to create a smoother, more gradual sound. Second, try adjusting the pitch and level of the oscillator to mimic the natural instability of an analog oscillator. Finally, consider adding subtle noise, distortion, or saturation to the signal to add warmth and character. By using these techniques in combination with careful envelope shaping, it’s possible to create digital synth sounds that are virtually indistinguishable from their analog counterparts.

How To Make A Digital Synth Sound Analog

Credit: blog.native-instruments.com

Frequently Asked Questions For How To Make A Digital Synth Sound Analog

How Do You Make A Digital Instrument Sound Analog?

To make a digital instrument sound analog, you can use plugins or hardware equipment that emulate analog sounds. Certain processing techniques like saturation, distortion, and compression are also used to add analog warmth and character to digital sounds. Additionally, using analog gear like tape machines and analog synths can also help achieve an analog sound.

What Makes A Synth Analog?

An analog synthesizer uses analog circuits to generate and manipulate sound, whereas a digital synthesizer uses a microprocessor.

Do Analog Synths Sound Better Than Digital?

Analog synths have a warmer, richer, more organic sound compared to digital synths. However, digital synths have better sound editing capabilities, more features like presets, and are easier to use. It ultimately depends on personal preference and the specific sound you’re going for.

How Do You Make A Song Sound Analog?

To make a song sound analog, use analog gear like vintage microphones, tape machines, and analog synthesizers. Record live instruments to capture the warmth of acoustic sound. Avoid digital plug-ins that sound too clean and sterile, and add some tape hiss, distortion, or flutter to give the impression of analog tape.

Use mono recordings or panned stereo to achieve a vintage sound.

Conclusion

To summarize, making a digital synth sound like an analog one is not an impossible task. By using the right techniques, such as adding noise, distortion, and modulation effects, you can achieve warm and vintage sounds that many musicians desire.

While analog synths may have a certain charm, digital synths have their advantages as well, such as affordability and convenience. But with these tips in mind, you can get the best of both worlds and create stunning tracks that stand out.

Experiment and have fun!

Categories
Archive

Setting Up Virtual Instruments In Pro Tools

To set up virtual instruments in Pro Tools, simply create a new instrument track and select the desired plug-in from the menu options. Pro Tools supports a variety of virtual instruments, such as synthesizers, samplers, and drum machines.

With virtual instruments, you can expand your creative possibilities and add more depth to your music productions. As a music producer or sound engineer, you’re always on the lookout for ways to enhance your music tracks and make them stand out.

One way to do this is by incorporating virtual instruments into your Pro Tools projects. Virtual instruments are software-based instruments that can mimic the sound of real instruments or create entirely unique sounds. They are incredibly versatile, easy to use, and offer countless sonic possibilities. We’ll show you how to set up virtual instruments in Pro Tools, so you can start experimenting with different sounds and take your music to the next level.

Choosing The Right Virtual Instruments For Your Project

When setting up virtual instruments in Pro Tools, choosing the right tool for your project is vital for achieving the desired results. With countless options to choose from, selecting the proper virtual instrument can be overwhelming, but it is crucial to pick the right one to ensure your music sounds perfect.

Considering The Genre Of Your Music

Consider the genre of music you’re attempting to create, as some virtual instruments are more suitable for particular genres. Different genres require different sounds, and virtual instruments will have different sounds and styles. For instance, if you’re creating electronic dance music, choosing a virtual instrument that provides a vast library of synthesized sounds would be beneficial. Alternatively, if you’re creating a track that has more of a jazz or classical feel, you may want to choose a virtual instrument that provides more realistic instrument sounds.

Comparing The Features Of Different Virtual Instruments

Compare the features of different virtual instruments to make an informed decision. Several virtual instruments available provide different features that can help make your job more comfortable and, ultimately, your music more professional. Check what type of sounds each instrument offers, and also the number of presets they have.

Virtual InstrumentType of SoundsNumber of PresetsPrice
SampleTank 4Various instruments and sound effectsOver 100,000 individual samples and 250 separate sound libraries$299
Native Instruments Komplete 13 UltimateVarious instruments and sound effectsOver 115,000 individual samples and 65 separate libraries$1,199
Arturia Analog Lab VVarious analog synthesizers and keyboards soundsOver 6,000 presets and individual sounds$199

Remember, the virtual instrument you choose must fit your budget. Virtual instruments range in price from a few dollars to several thousand dollars, so research thoroughly to ensure you don’t overspend on unnecessary features or underspend on essential ones.

By keeping in mind the genre of your music, as well as comparing the features of different virtual instruments, you’ll be able to make the right decision when choosing virtual instruments for your Pro Tools project. Ensure your music is the best it can be and make the most out of the vast array of virtual instruments available.

Setting Up Virtual Instruments In Pro Tools

Credit: m.youtube.com

Installation And Setup Process

Virtual instruments have revolutionized the music industry, making recording and producing music easier and more affordable than ever before. Pro Tools is a popular digital audio workstation for musicians, audio engineers, and producers, and it allows users to access and use a wide range of virtual instruments to create and produce music. Installing and setting up virtual instruments in Pro Tools is easy, and in this guide, we’ll take you through the process, step-by-step.

Downloading The Virtual Instrument Files

The first step to setting up virtual instruments in Pro Tools is downloading the virtual instrument files that you want to use. The files should be compatible with Pro Tools and come in formats such as VST, RTAS, AAX, or AU. You can download virtual instrument files from various online sources or purchase them from music software stores.

Once you have downloaded the virtual instrument files, you need to save them in a folder where Pro Tools can easily access them. You can create a folder in a location that is easy to remember to save the files and make it easy to access them when installing the plugins in Pro Tools.

Installing The Plugin In Pro Tools

After saving the virtual instrument files in a folder that Pro Tools can easily access, you can then proceed to install the plugins in Pro Tools. The installation process varies depending on the operating system and version of Pro Tools that you are using, but the general steps are as follows:

  • Open Pro Tools and go to the ‘preferences’ menu
  • Under the ‘plug-ins’ tab, select the ‘add’ button to add a new plugin
  • Locate the folder where you saved the virtual instrument files and select the files
  • Follow the prompts to install the plugin

Once you have successfully installed the virtual instrument plugin, you can then use it to create and produce music in Pro Tools.

Authorizing The Plugin

After installing and using the virtual instrument plugin for Pro Tools, you may need to authorize it to access additional features, updates, and support. The authorization process varies depending on the vendor and type of virtual instrument plugin, but it may involve entering a serial number, activating a license, or connecting to an online server.

Make sure you follow the instructions from the vendor carefully to authorize your virtual instrument plugin successfully and avoid any issues or errors when using it in Pro Tools.

Creating A Midi Track

To create a MIDI track in Pro Tools, you need to set up the virtual instruments first. Go to the Inserts menu, select an instrument, and click on the Track button. Then, you can start recording MIDI notes and play them back with the virtual instrument.

If you want to add a virtual instrument to your Pro Tools session, the first step is to create a MIDI track. A MIDI track is essentially a blank canvas where you can draw in your virtual instrument. In this section, we’ll walk you through the steps of creating a MIDI track and assigning a virtual instrument to it.

Adding A New Midi Track

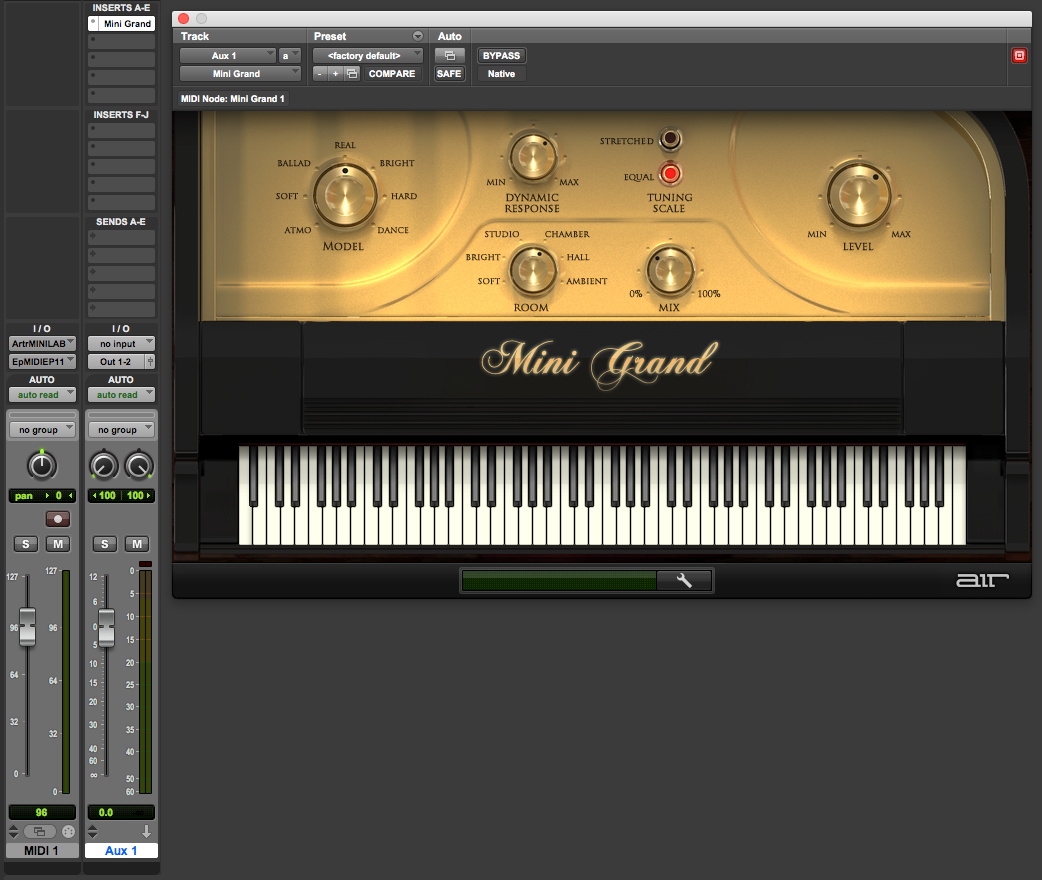
To add a new MIDI track, you can either go to Track > New or use the shortcut Shift + Command + N. Once you are in the New Tracks dialog box, select MIDI Track and click Create. You will now see a new MIDI track in your session with a default instrument assigned to it, typically the Air Mini Grand piano.

Selecting The Virtual Instrument As The Output

Now that you have created your MIDI track, it’s time to choose the virtual instrument you want to use. To do this, you need to set the output of the MIDI track to the virtual instrument. First, make sure your virtual instrument is installed and authorized. Next, click on the output drop-down menu on the MIDI track and select your virtual instrument in the list. If you don’t see your virtual instrument listed, you need to make sure it’s loaded into your Pro Tools session. You can do this by going to Window > Workspace and selecting your virtual instrument from the list. Once it’s loaded, you should be able to select it as the output for your MIDI track. In conclusion, creating a MIDI track and assigning a virtual instrument as its output is a straightforward process in Pro Tools. By following the above steps, you can easily add virtual instruments to your session and start creating music!

Setting Up Virtual Instruments In Pro Tools

Credit: www.sweetwater.com

Using The Virtual Instrument

One of the primary advantages of using virtual instruments in Pro Tools is the flexibility they offer in terms of sound selection and personalization. However, to leverage these benefits, you need to understand how to use the virtual instrument interface and adjust its settings to suit your needs. Additionally, you have to be able to trigger notes with a MIDI controller, record and edit MIDI data, and use multiple instances of the same virtual instrument. This article will cover all these aspects to help you set up and use virtual instruments effectively in Pro Tools.

Understanding The Interface

Before you start using a virtual instrument in Pro Tools, take the time to familiarize yourself with its interface. The interface may vary between different virtual instruments, but most have some basic elements:

  • Keyboard: used for triggering notes
  • Knobs and sliders: used for adjusting parameters like volume, pitch, and modulations
  • Browser: used for selecting sounds and presets
  • Grid: used for rhythm programming and step sequencing
  • Display: used for viewing waveform, MIDI settings, and other details

Once you understand the virtual instrument interface, you can start making adjustments and customizations to suit your needs.

Adjusting Settings

If you want to personalize your virtual instrument sound, you need to know how to adjust its settings. Some of the most common settings you can adjust include:

  • Volume: to make the sound louder or quieter
  • Pan: to move the sound left or right in the stereo field
  • Attack: to change the attack time of the sound
  • Release: to change the release time of the sound
  • Modulations: to add effects like vibrato, wah-wah, or tremolo to the sound

The settings you adjust may depend on the type of virtual instrument and the sound you want to achieve. Experiment and see what works best for you.

Triggering Notes With A Midi Controller

If you have a MIDI controller, you can use it to trigger notes in your virtual instrument. Simply connect the MIDI controller to your computer, select the virtual instrument as your MIDI input device in Pro Tools, and start playing. You can then record the MIDI data and edit it later to fine-tune your performance.

Recording And Editing Midi Data

After triggering notes with your MIDI controller, you can record the MIDI data onto a MIDI track in Pro Tools. Once recorded, you can edit the MIDI data to correct mistakes, add dynamics, or adjust the timing. Some of the editing tools you can use include:

  • Pencil tool: for drawing in new notes or adjusting their length
  • Velocity tool: for adjusting the volume of each note
  • Quantize tool: for aligning notes to a set rhythmic grid
  • Transposition tool: for shifting the pitch of the notes

Experiment with these tools to see how they affect your MIDI data and how you can use them to improve your performance.

Using Multiple Instances Of The Same Virtual Instrument

If you want to create a layered or complex sound, you can use multiple instances of the same virtual instrument. This allows you to play different sounds simultaneously or use different settings for each instance. However, it also increases the demands on your computer’s resources, so be mindful of that. To use multiple instances of the same virtual instrument, simply add a new track, select the same virtual instrument, and adjust its settings as desired.

Tips For Getting The Best Sound

Learn how to set up virtual instruments for better sound quality when working with Pro Tools. Follow these tips to ensure you get the best possible sound from your digital instruments.

When it comes to recording and producing music, Pro Tools is often the industry-standard software used by professionals. One of the benefits of using Pro Tools is the ability to incorporate virtual instruments into your music productions. Virtual instruments can mimic the sound of traditional instruments and bring new textures and tones to your music. But how do you get the best sound out of your virtual instruments in Pro Tools? Here are some tips to help you achieve the best results:

Experimenting With Different Presets

One way to get the best sound out of your virtual instruments is to experiment with different presets. Virtually all virtual instruments come with presets that offer different sound options. Take some time to play around with the presets and see which sound best suits your music. Don’t feel limited by the name of the preset. Often the preset name won’t give you a true indication of how the sound will actually sound in your music production. Play around, experiment, and find the perfect sound that works for your production.

Layering Virtual Instruments

Another tip for getting the best sound out of your virtual instruments is to layer them. Layering virtual instruments involves using multiple virtual instruments to create a new and unique sound that’s different from any individual virtual instrument. This technique works particularly well for creating complex and dynamic music productions. By layering multiple virtual instruments, you can add more depth, texture, and richness to your music.

Processing The Virtual Instrument With Effects

Processing virtual instruments with effects is another way to get the best sound out of them. Once you have found the perfect virtual instrument and preset for your music production, consider processing the virtual instrument with effects like reverb or delay. Processing can take your virtual instrument from sounding good to sounding great. Be sure to experiment with different effects and parameters to find the perfect processing effect for your virtual instrument. In conclusion, by experimenting with different presets, layering virtual instruments, and processing them with different effects, you can get the best sound out of your virtual instruments in Pro Tools. Remember, there’s no one right way to use virtual instruments. Be creative, experiment, and find the sound that works best for your music production.

Setting Up Virtual Instruments In Pro Tools

Credit: pcaudiolabs.com

Frequently Asked Questions On Setting Up Virtual Instruments In Pro Tools

How Do I Add A Virtual Instrument In Pro Tools?

To add a virtual instrument in Pro Tools, open the plugin browser and select the category of plugin you want. Then, choose the virtual instrument you want to add and drag it to the track where you want it to play.

You can also use the “Insert” menu and select “Instrument” to add a virtual instrument.

Does Pro Tools Have Virtual Instruments?

Yes, Pro Tools has a range of virtual instruments, including synthesizers, samplers, and drum machines, that can be used for creating and composing music. These instruments can be accessed within the Pro Tools software and used to enhance the sound of recordings.

How Do Virtual Instruments Work?

Virtual instruments work by using software to replicate the sounds of actual instruments, allowing musicians to create and produce music digitally. Samples are programmed into the software to create realistic sounds, which can then be played and manipulated using a MIDI controller or computer keyboard.

How Do I Create An Instrument Track In Pro Tools?

To create an instrument track in Pro Tools, go to the “Track” menu, select “New” and then “Instrument Track”. Choose your desired instrument, name your track and select the appropriate inputs and outputs. Click “Create” and you’re ready to start recording.

Conclusion

Setting up virtual instruments in Pro Tools is crucial for any music producer or sound engineer. The process may seem daunting at first, but with the right tools and patience, it can be a breeze. By following the steps outlined in this blog post, you can ensure that your virtual instruments are set up correctly and ready to use in your next project.

Remember, practice makes perfect, so don’t be afraid to experiment and try different techniques until you find what works best for you. Happy producing!

Categories
Archive

How To Prepare Your Track For Release

To prepare your track for release, ensure proper mixing and mastering, finalize artwork and metadata, and submit to digital music distribution platforms. Releasing your track to the public can be an exciting experience.

However, it is important to ensure that your music is ready to be released efficiently and effectively. We will discuss the steps you can take to prepare your track for release, ensuring that the quality of your music is optimized for its audience.

From perfecting the mix and mastering process to choosing the right artwork and metadata, we will guide you through the essential processes required to release your track successfully. Finally, we will provide tips for submitting your music to digital distribution platforms and promoting your track to maximize your reach.

Create A Final Mix

When it comes to preparing your track for release, the most crucial step is to create a final mix. The final mix is the last stage of the mixing process before mastering. It is where you make sure that all the individual components of the track blend together seamlessly to create a cohesive sound that is ready for the world to hear.

Eq And Balance Your Tracks

The first step in creating a final mix is to balance your tracks and apply EQ. Make sure that each element in the mix has its own space and does not clash with other tracks. Use EQ to cut out unwanted frequencies and boost the frequencies that contribute to the overall sound. Remember, less is usually more when it comes to EQ, so use it sparingly.

Add Compression

Compression is your friend when it comes to creating a final mix. It helps balance out the levels in the mix and ensures that no track stands out too much. Apply compression to the individual tracks and use a compressor on the master channel to bring everything together.

Create A Clean Master Track

The final step in creating a final mix is to create a clean master track. It is the track you will send to be mastered, and it needs to be free of any unwanted noise and artifacts. Make sure to apply gain staging to avoid clipping and use a limiter to prevent any unwanted peaks.

In conclusion, a final mix is a crucial step in preparing your track for release. Proper balancing, EQ, compression, and a clean master track are all essential components of creating a cohesive and professional mix that is ready to be shared with the world. Now, it’s up to you to put these techniques into practice and elevate your tracks to the next level.

Master Your Audio

Master Your Audio offers expert tips on how to prepare your track for release. Their comprehensive approach covers everything from mixing to mastering, ensuring your music is ready for distribution and optimized for maximum impact.

Mastering your audio is an essential step in preparing your track for release. This process brings together all the elements of your mix, making sure they are balanced and sound great across all listening devices. Here are three key steps to master your audio:

Create A Stereo Master

The first step in mastering your audio is to create a stereo master. This is the final mix of all your audio tracks that will be used for distribution. Start by exporting your mix from your DAW to a stereo audio file. Then, open the stereo file in a mastering software like Ozone or Waves. Using a mastering software, you can adjust the EQ, compression, and stereo imaging of your mix. The goal is to make sure your track sounds great across all devices and in all listening environments.

Limit Your Audio

The second step in mastering your audio is to limit your audio. This means controlling the dynamic range of your mix. Dynamic range refers to the difference between the loudest and quietest parts of your track. Using a limiter, you can increase the overall volume of your track without causing distortion. The goal is to make your track loud enough to compete with other tracks in the same genre, but not so loud that it becomes fatiguing to listen to.

Add Final Touches To Your Master Track

The final step in mastering your audio is to add final touches to your master track. This includes making sure the track has a consistent volume throughout, adding fades at the beginning and end of the track, and making sure the track is properly tagged with metadata. Metadata is important because it provides information about your track, such as the artist name, track title, and album name. This information is crucial for distribution and helps your track appear correctly on streaming services like Spotify and Apple Music.

Conclusion

Mastering your audio is an important step in preparing your track for release. By following these steps, you can ensure your track sounds great on all devices and in all listening environments. Remember to create a stereo master, limit your audio, and add final touches to your master track. With these tips, your track will be ready to release to the world.

Prepare Your Metadata

To prepare your track for release, it is essential to pay attention to the metadata. This includes information such as the title, artist name, genre, and release date. Properly filled metadata can improve the discoverability of your music on streaming platforms and increase its chances of being heard by more people.

As a musician, you put a lot of time and effort into creating your track. Now it’s time to release it to the world. But before you do that, you need to take care of some important metadata. Metadata is a set of data that describes and gives information about other data. In this case, metadata provides important information about your music that will help you get discovered by the right audience. Here are some key things you should do to prepare your metadata.

Create A Track Title

The first thing you need to do is create a track title. Your title should be catchy, unique and descriptive. It should give your listeners an idea of what your track is about and what they can expect to hear. Avoid generic titles like “Track 1” or “Untitled” as they are not search engine friendly and won’t help you get discovered. Instead, try adding a little creativity to your title, but ensure it still accurately describes the content.

Add Information To Your Id3 Tags

ID3 tags are a type of metadata that provide details about your track, such as the artist name, album name, track title, genre, year of release, and more. They are a great way to add important information about your music that will help you get discovered more easily. Most music players automatically display this information and suggest songs to listeners based on the ID3 tags. Make sure to fill out all the relevant fields of your ID3 tags. Be sure to correctly spell the Artist and Album names as this will make your music easy to search by various platforms. Entering the right information consistently can also help you build your brand and create a strong identity online.

Fill Out Copyright Information

One of the most crucial things to include in your metadata information is the copyright details. Protect your work by filling out the copyright information correctly. It ensures that you own your music and you have the right to distribute it. You can prevent unauthorized use and infringement if you register your copyright! You can also include any other ownership details, such as publishing, whether you collaborated with other artists, and who holds the rights to the lyrics or musical composition. Include the below details in your release: – Copyright owner’s name – Copyright year it was published – Any logo or trademark associated with the track

Conclusion

By ensuring your metadata is in top condition, not only will you make it easier for your fans to find your music, but you will also create credibility in the music industry! Keep in mind: being thorough ensures your music is supported by all major platforms, thereby improving your visibility to the world!

How To Prepare Your Track For Release

Credit: www.valisa.co

Choose A Distribution Platform

Choosing the right distribution platform is crucial when preparing your track for release. Consider your target audience and the reach of each platform before making your decision.

Once you’ve finessed your music and are all set to release your track, the next crucial step is choosing the best distribution platform. In today’s digital age of music consumption, digital music distributors have become the bridge between artists and streaming platforms. There are several choices to select from, each with its unique offerings in terms of user-experience, pricing and royalties. Therefore, it’s important to choose the best one that suits your needs and objectives.

Select A Reliable Distributor

Selecting a reliable distributor is essential as they help efficiently distribute your track across various music stores and streaming services. You don’t want to use just any service and find out they don’t have a good standing with major services, making your release unsuccessful. Therefore, opt for a well-respected music distributor with good relationships with streaming services and stores. This will ensure your music reaches the right audience, increases your revenue and widens your fan base. Some well-known distributors include DistroKid, CD Baby, and TuneCore – be sure to conduct thorough research before deciding on a suitable option.

Choose A Flexible Pricing Plan

While selecting a distributor, consider the pricing structure they offer. Some distributors charge per release, while others require an annual subscription. Ensure you choose a pricing plan that is flexible and fits your budget to avoid any hidden costs. With a flexible pricing plan, you can revise it later, enabling you to release more music without additional financial burden.

Ensure Proper Distribution

Your distributor will help you distribute your music to various music streaming platforms and stores, ensuring that it reaches your target audience. Ensure your distributor correctly adds the necessary metadata to your music, including the song title, artist name, album name, and artwork, to prevent any negative impact on the listener’s experience. Correct metadata improves the visibility and credibility of your music, making it more appealing to your audience. In conclusion, choosing the right music distributor is a critical factor in preparing your track for release. With the right distributor, you can ensure that your music reaches a wider audience, earns you revenue, and helps you grow your fan base. So, do your research, select the best platform, and watch your music go viral!

Promote Your Release

Preparing your track for release is a crucial step to ensure its success. Make sure to have high-quality audio, eye-catching artwork, and a strong social media presence to promote your release effectively. Engage with your audience and create hype through teasers and exclusive content.

Once you have prepared your track for release, it’s time to focus on promotion. Promotion plays a crucial role in the success of your music release. It helps you reach a wider audience, gain more recognition, and grow your fan base. In this section, we will discuss the ways to promote your release effectively.

Craft A Press Kit

A press kit is essential to promote your release. It provides media outlets, bloggers, and influencers with information about your track, making it easier for them to share it. Your press kit should include a high-quality press release, artist information, track artwork, and music samples. Here’s what should be included in your press kit:

ItemDescription
Press ReleaseA summary of your music release, including the track title, genre, release date, and any other relevant information.
Artist InformationA brief bio of the artist or band, contact information, and social media links.
Track ArtworkA high-quality image that represents your release and catches the eye of the media.
Music SamplesA demo or snippets of your track that showcase its best parts.

Submit To Music Blogs And Playlists

Submitting your track to music blogs and playlists is an excellent way to reach more people. It’s important to research and find blogs and playlists that are relevant to your genre. Make sure to follow their submission guidelines and provide them your press kit. Some sites might also require a fee to feature your music. If you have a music video, you can also submit it to video channels.

Share On Social Media

Sharing your release on social media is an effective way to reach your fans and attract new followers. Post teasers and snippets of your track, create a promotional campaign, and engage with your audience by hosting contests and giveaways. Use hashtags related to your genre and track to increase your visibility. Make sure to have your press kit ready for social media too. Your artwork should be well designed, and your caption must be catchy and attention-grabbing. Be consistent in your branding such as using the same fonts, colors, and tone of voice. With these simple steps, it’s easier to promote your music track effectively. A well-placed shout-out can lead to a wider fan base, more streams, and perhaps more opportunities to play gigs.

How To Prepare Your Track For Release

Credit: blog.groover.co

Protect Your Music

Ensure the successful launch of your music by preparing your track for release. Prioritize creating high-quality audio, optimizing your metadata and cover art, and ensuring copyrights and licensing are properly obtained. Protect your hard work and investment with these essential steps.

When it comes to preparing your track for release, protecting your music is essential. Whether you’re a seasoned artist or a beginner, registering your copyright, securing rights to your samples, and considering music distribution companies can make all the difference.

Register Your Copyright

Registering your copyright is crucial if you want to claim ownership of your music. It will also give you the legal right to sue anyone who infringes on your copyright. To register your copyright, you can go to the U.S. Copyright Office website or hire a copyright lawyer.

Secure Rights To Your Samples

If you’re using samples in your track, it’s important to secure the rights to them. Failure to do so could result in lawsuits or your track being taken down from streaming platforms. You can obtain sample clearance by contacting the owner of the master recording or the publisher. The cost of sample clearance may vary, so it’s best to include it in your budget.

Consider Music Distribution Companies

Music distribution companies can help you get your music on streaming platforms like Spotify, Apple Music, and more. They can also provide you with valuable resources and support to help you promote your track. Some popular music distribution companies include Distrokid, TuneCore, and CD Baby. Before choosing a company, make sure to read their terms and conditions carefully and compare their pricing. In conclusion, protecting your music is a critical part of preparing your track for release. By registering your copyright, securing rights to your samples, and considering music distribution companies, you can ensure the long-term success of your music career.

Prepare For Analytics

To prepare your track for release, focus on optimizing it for analytics. Ensure your metadata is accurate, your tags are relevant, and your track title is SEO-friendly. Consider the keywords and search terms your audience may use to find your track and incorporate them strategically.

Preparing for analytics is an integral part of getting your music track ready for release. Understanding your streaming service insights, staying current with royalties, and using analytics to plan the next release will make it easier for your track to gain traction. Below, we’ll explore these steps in more detail.

Get Insights From Streaming Services

One of the most efficient methods to assess the performance of your music track is to check the streaming services’ insight. The numbers from streaming services, such as Spotify, Apple Music, and Soundcloud, can aid you in determining the track’s popularity. You’ll see what songs are gaining traction and when, as well as which cities or regions enjoy your music. With this information, you can better target your audience and improve your marketing strategies to reach your audience more effectively.

Stay Up-to-date On Your Royalties

Ensure that you have an efficient system for tracking royalties or employ the services of a music distributor to handle the backend of music distribution. The royalties you earn from streaming services and other platforms can help you to understand the monetary gains from your music track or album’s usage. A music distributor has the knowledge and experience to ensure that you are well-informed of all your royalties.

Use Analytics To Plan Your Next Release

Analyzing the data gathered from various streaming platforms can give insight into the varying preferences of listeners from different regions. Use this information to explore potential collaborations and future releases. Analytical data can help you to enhance your future releases, so it is vital to keep track of all data and use it to improve your overall music success. In conclusion, preparing your track for analytics is crucial for achieving music success. By following these tips, you’re setting yourself up to make informed decisions that help you achieve your musical goals.

How To Prepare Your Track For Release

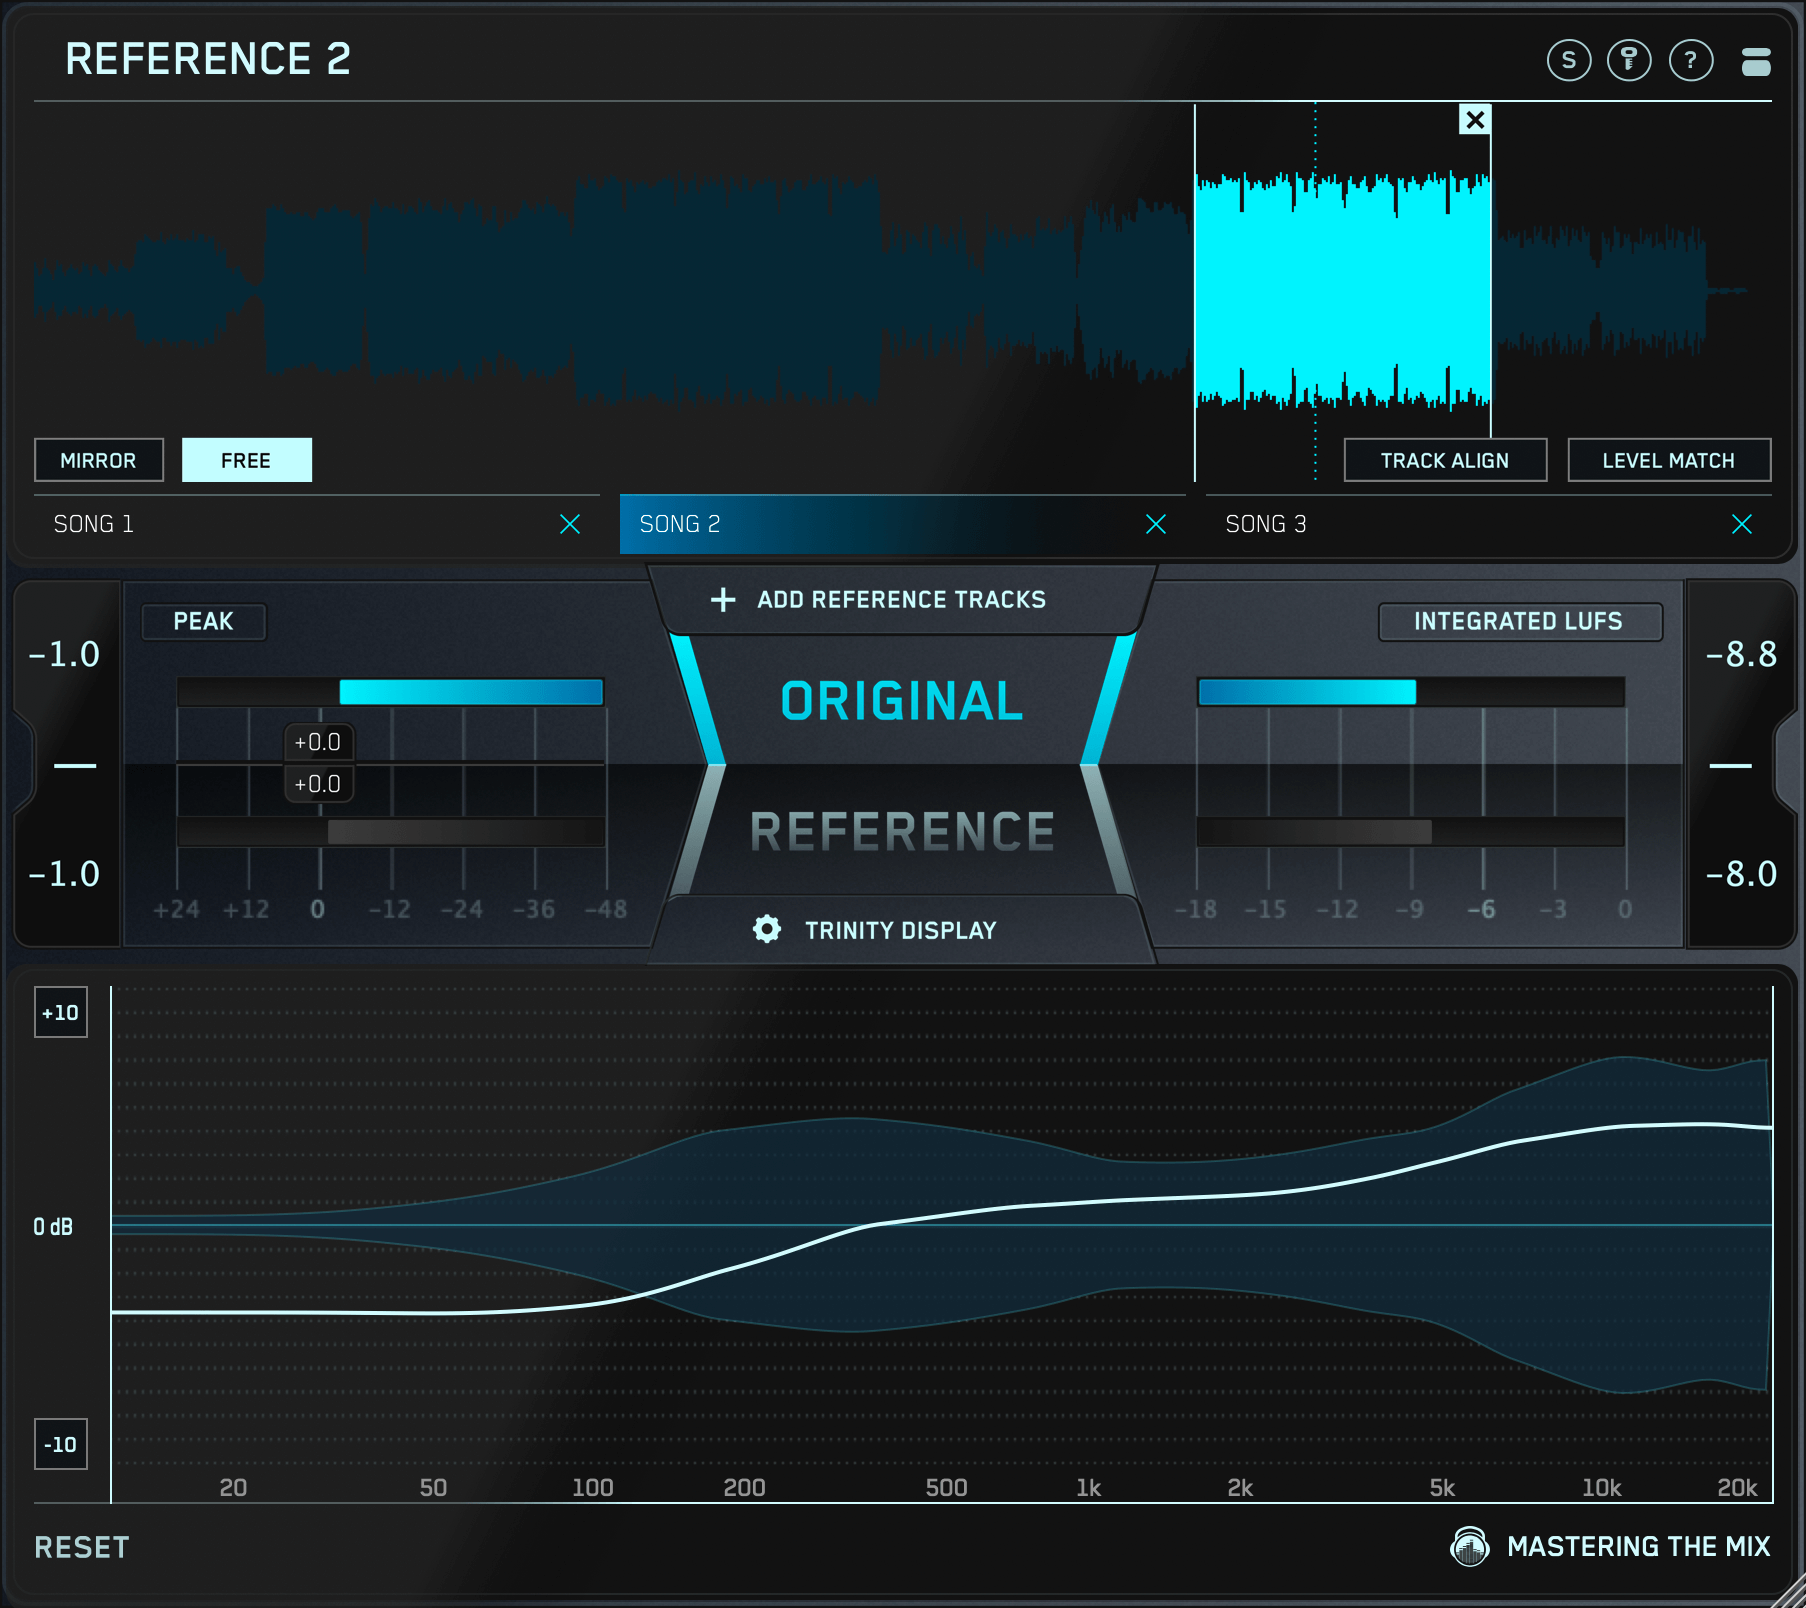
Credit: www.masteringthemix.com

Frequently Asked Questions Of How To Prepare Your Track For Release

How Do You Prepare For A Song Release?

To prepare for a song release, you should take the following steps: finalize the song, get it mastered, create cover art, write a press release, and plan a marketing strategy. Remember to promote the release on social media and other channels to build excitement.

How Do You Release Your First Track?

To release your first track, you need to first create high-quality music and get it professionally mixed and mastered. Then, choose a distribution platform to upload and distribute your track to different streaming websites. Use social media and email to promote your music and engage with your audience to build a fanbase.

Lastly, seek collaborations and perform live to gain exposure in the industry.

How Do You Release Music Properly?

To release music properly, follow these guidelines: plan a release date, create quality music, design an album cover, choose music distribution platform, promote and market your music through social media and playlists.

How Do You Master A Song For Release?

Mastering a song for release requires these steps: First, prepare your project by reviewing your mixes, checking levels, and cleaning up any audio inconsistencies. Next, choose a mastering engineer or use online mastering services. Then, communicate your preferences to the engineer and prepare your file for delivery.

Review the final master, and once satisfied, release the song.

Conclusion

Preparing your track for release involves several factors that need careful consideration to ensure your work receives the attention it deserves. Follow these tips to guarantee your music stands out from the crowded market. Remember to take your time and perfect every element of the release process before making it public.

Your attention to detail will pay off in the long run and set you apart as an artist. Keep the momentum going by continuously improving your craft and building your brand. Best of luck on your journey to success!

Categories
Archive

Studio Headphones For Music Listening

Studio headphones are essential for accurate music listening. They provide clear sound and detailed nuances that other headphones may not deliver.

As an Amazon Associate I earn from qualifying purchases.

Studio headphones are a must-have for music enthusiasts who crave an accurate, detailed, and precise listening experience. These headphones are designed to deliver high-quality sound reproduction, making them ideal for studio engineers, DJs, and producers. They are also popular among casual listeners who want to enjoy music as it was intended to be heard.

What sets studio headphones apart is their ability to reproduce sound faithfully and accurately, without coloring or distorting the audio. They have robust drivers, accurate frequency response, and noise isolation, which allows listeners to focus on the details and nuances of the music. We will cover some of the best studio headphones for music listening, based on factors such as sound quality, comfort, and price.

Benefits Of Using Studio Headphones

Music is an essential part of our lives, and listening to music using the right equipment can make a world of difference. Studio headphones can give you a unique experience and provide superior audio quality that regular headphones cannot match.

Accurate Sound Reproduction

Studio headphones are designed specifically for music production and audio engineering, making them perfect for music listening as well. They are engineered to provide accurate sound reproduction, which means you can enjoy your music the way the artist intended it to be heard. With studio headphones, you can hear every detail in the music, from the bass to the treble. This is particularly beneficial if you are an audiophile who values high-quality music.

Noise Isolation

Another benefit of using studio headphones is noise isolation. Regular headphones may block out some noise, but most often, they still let some unwanted sound creep in. On the other hand, studio headphones are designed to provide maximum noise isolation. This means that you can enjoy your music without any distractions and experience it in its purest form. Whether you’re in a noisy workspace or a crowded train, studio headphones can block out most of the unwanted noise, helping you focus on your music.

Comfortable For Long Sessions

Studio headphones are designed for prolonged use, so you can enjoy your music for as long as you want without any discomfort. They are made with premium, high-quality materials that provide comfort and durability. With well-padded ear cups and headbands, you can wear them for hours without any pressure or discomfort on your ears or head. This makes them ideal for music lovers who like to binge on their favorite albums or artists for long hours.

Studio headphones can significantly enhance your listening experience and provide superior sound quality. With accurate sound reproduction, noise isolation, and comfortable wear, they are perfect for music lovers who value high-quality audio. These headphones are the perfect investment for anyone looking for an immersive, authentic, and fulfilling music experience.

Studio Headphones For Music Listening

Credit: www.sonarworks.com

Different Types Of Studio Headphones

Studio headphones for music listening come in various types, including closed-back, open-back, and semi-open. Closed-back headphones provide isolation, while open-back headphones offer a more natural and spacious sound. Semi-open headphones are a balance between the two.

Studio headphones are essential tools for music producers, sound engineers, and any music enthusiast. They come in different shapes, sizes, and designs, each with its unique features and characteristics. Whether you are looking for a pair of headphones for casual music listening or professional mixing and mastering, it’s important to understand the different types of studio headphones available in the market. Here are the three main types of studio headphones you need to know:

Closed-back Headphones

Closed-back headphones are designed to provide maximum isolation from external noise. They feature ear cups that are fully enclosed with solid backs, which prevent sound from leaking in or out. These headphones are perfect for critical listening, tracking, and mixing since they allow you to hear a detailed and accurate representation of your audio. Closed-back headphones are ideal for use in noisy environments as they provide excellent noise isolation, but they may cause ear fatigue when used for long periods.

Open-back Headphones

Open-back headphones feature ear cups that are open at the back, allowing some sound to leak out. They are designed to provide a more natural and spacious soundstage that closely simulates the experience of listening to music on speakers. Open-back headphones are ideal for mixing and mastering as they provide a more accurate representation of how your audio will sound on different speakers. They are also great for long listening sessions since they don’t cause as much ear fatigue as closed-back headphones. However, they may not be suitable for use in noisy environments as they offer little to no noise isolation.

Semi-open Headphones

Semi-open headphones offer a combination of the benefits of closed-back and open-back headphones. They feature ear cups that are partially enclosed, allowing some sound to leak in and out. Semi-open headphones are designed to provide a more balanced and natural sound signature, with better bass response than open-back headphones and better isolation than closed-back headphones. They are ideal for mixing, mastering, and casual music listening, but they may not be suitable for use in very noisy environments. In conclusion, choosing the best studio headphones depends on your needs, preferences, and budget. Closed-back headphones are perfect for critical listening, tracking, and mixing, while open-back headphones are ideal for mixing and mastering. Semi-open headphones offer a balanced compromise between the two. Whichever type of studio headphones you choose, make sure they are comfortable, durable, and provide a good frequency response range.

Factors To Consider When Choosing Studio Headphones

Choosing the best studio headphones for music listening involves several factors. Factors such as sound quality, comfort, noise isolation, and durability should be considered to ensure a satisfactory music listening experience. Personal preferences such as design and brand may also play a role in the decision-making process.

If you are in the market for a new pair of studio headphones, there are several factors you need to consider before making a purchase. Studio headphones are critical for professional audio production and music listening. You don’t want to compromise on sound when listening to music or producing audio. In this post, we will discuss some essential factors like frequency response, impedance, sensitivity, comfort, and portability that you should consider when purchasing studio headphones to make an informed decision.

Frequency Response

Frequency response is the range of frequencies that headphones can produce. It is measured in Hertz (Hz) and shown as a range of numbers. For studio headphones, the ideal frequency response is between 20Hz-20kHz, which is the standard human hearing range. Look for headphones that provide a flat frequency response, which means a consistent sound across a range of frequencies. This capability ensures precise monitoring when recording or mixing audio.

Impedance

Headphone impedance is the electrical resistance offered by the headphones to the incoming signal. Lower impedance means the headphones are more sensitive to the incoming signal, making them louder. Higher impedance headphones require more power to drive them to the same level of loudness. For studio headphones, the ideal impedance range is between 32-80 ohms.

Sensitivity

Sensitivity is an important factor to consider when selecting studio headphones. It measures how efficiently headphones can convert an electrical signal into a sound. Higher sensitivity means the headphones can produce a louder sound, making them suitable for use with mobile devices and laptops that have low-power outputs. A sensitivity of about 100 dB/mW is sufficient for most audio needs.

Comfort

Comfort is equally important when selecting studio headphones, especially if you wear them for long hours. Look for headphones that come with comfortable earpads, adjustable headbands, and ergonomic design. The earpads should provide good noise isolation, so you can focus on your work without distractions.

Portability

Portability is another consideration to keep in mind when selecting studio headphones. If you plan to use your headphones while on the go, look for headphones that are lightweight and foldable. A case for protection is also essential to keep your headphones safe during transport. In conclusion, choosing the right studio headphones can positively impact the quality of audio production and music listening. Always consider the factors like frequency response, impedance, sensitivity, comfort, and portability. The information we provided in this post should help you make an informed decision when choosing the right studio headphones.

Studio Headphones For Music Listening

Credit: www.supremetracks.com

Top Studio Headphones For Music Listening

Discover the top studio headphones for music listening that offer an unparalleled audio experience. From noise-cancelling features to exceptional comfort, these headphones are designed for music lovers who want to truly immerse themselves in their favorite tracks with every beat and note.

Studio headphones are a necessary investment for music enthusiasts who value high-quality sound. With so many options on the market, it can be challenging to determine which headphones will be the right fit. In this blog post, we will take a closer look at the top studio headphones for music listening. These headphones have been selected based on their sound quality, comfort, and durability.

Sennheiser Hd 660 S

Sennheiser is a highly respected brand in the audio industry, and the HD 660 S lives up to its reputation. These headphones feature a balanced and detailed sound, making them ideal for audiophiles. Additionally, the headphones come with a detachable cable and replaceable ear pads, making them convenient for daily use.

Beyerdynamic Dt 990 Pro

Beyerdynamic is another well-known brand in the audio industry, and the DT 990 Pro is particularly popular among music producers and engineers. The headphones feature an open-back design that provides excellent soundstage and imaging. The ear cups are also spacious and comfortable, making these ideal for long listening sessions.

Audio-technica Ath-m50x

The Audio-Technica ATH-M50x is a popular choice among consumers looking for high-quality headphones that won’t break the bank. They offer a balanced and detailed sound, which makes them suitable for various types of music. Like the Sennheiser HD 660 S, these headphones come with detachable cables, which adds to their durability.

Sony Mdr-7506

The Sony MDR-7506 is a classic pair of headphones that has remained popular for decades. They provide excellent clarity and detail, which is essential for music production and sound engineering. Additionally, the headphones are lightweight and foldable, making them convenient for travel.

Akg K240

The final pair of headphones on our list is the AKG K240. These headphones are known for their natural and balanced sound, making them a popular choice for music producers. The headphones feature a semi-open design, which provides an excellent balance between isolation and soundstage. Additionally, the headphones come with a self-adjusting headband, which makes them comfortable to wear for long periods. In conclusion, when looking for a reliable pair of studio headphones, it’s essential to consider factors such as sound quality, comfort, and durability. Each of the headphones listed above provides a unique set of features that make them suitable for different types of listeners. Ultimately, the right choice will depend on your personal preferences and budget.

How To Take Care Of Your Studio Headphones

As a music lover, you know the importance of good quality studio headphones when it comes to listening to your favorite tracks. However, it’s not enough to invest in a pair of high-quality headphones; you also need to take care of them so they last longer. In this section, we’ll discuss how to take proper care of your studio headphones so you can enjoy your music for years to come.

Cleaning The Ear Pads

Your headphones’ earpads are one of the most important parts to clean as they come in direct contact with your ears. If left unclean, they can accumulate dirt and oil, which can cause skin irritation and an overall unpleasant listening experience. The following steps will help you clean your headphones’ earpads:

  1. Gently remove the earpads from the headphones
  2. Clean the surface of the earpads using a dry microfiber cloth or a soft-bristled brush
  3. For a deeper clean, dab a small amount of rubbing alcohol onto a cloth or cotton ball and gently clean the surface of the earpads
  4. Allow the earpads to dry completely before reattaching them to the headphones.

Replacing Parts

Despite proper care, certain parts of your headphones might require replacement over time. This is especially true for foam earpads and cables. Sometimes earpads can get worn, leading to poor sound quality and discomfort. In those situations, replacing your earpads can go a long way towards improving the longevity of your headphones.

Similarly, if you notice any damage to your cables, it is essential to replace them to avoid any further damage to the headphones. Keep an eye on the cables and consider replacing them every six months to ensure that you have the best possible listening experience.

Storing Properly

The way you store your studio headphones can have an impact on their lifespan. When not in use, it’s best to store your headphones in a protective case or pouch to avoid accidental damage.

Moreover, be sure to avoid storing them in humid areas or places exposed to direct sunlight. This can damage the earpads and affect the overall sound quality of your headphones.

By following the steps above, you can ensure that your studio headphones last longer and deliver the best possible listening experience. Properly cleaning them, replacing worn parts, and storing them in the right way will help you get the most out of your investment and ensure that you enjoy your music for years to come.

Studio Headphones For Music Listening

Credit: www.amazon.com

Frequently Asked Questions On Studio Headphones For Music Listening

Can You Use Studio Headphones For Music?

Yes, studio headphones are commonly used for music production, mixing and mastering purposes. They are designed to provide accurate, balanced sound reproduction and durable build quality. However, some studio headphones may lack bass response and can be uncomfortable for prolonged listening sessions.

It’s always best to test them out before making a final purchase decision.

Which Headphone Is Best For Listening To Music?

The best headphone for listening to music is subjective and depends on an individual’s preference. However, some models, like Sony WH-1000XM4, Bose QuietComfort 35 II, Sennheiser HD 660 S, and Beyerdynamic DT 1990 Pro, are highly rated by audiophiles and offer excellent sound quality, comfort, and features.

Are Studio Headphones Good For Casual Use?

Yes, studio headphones are good for casual use. They’re designed to produce accurate and balanced sound, ideal for listening to music during leisure time. However, some studio headphones may feel bulky and uncomfortable to wear for extended periods, so it’s essential to consider the level of comfort before purchasing one.

What’s The Difference Between Studio Headphones And Normal Headphones?

Studio headphones are designed for professional use and produce accurate, clear, and detailed sound. Normal headphones, on the other hand, are meant for listening to music on the go and may boost bass or treble to enhance the listening experience.

Studio headphones provide a more balanced sound and are suitable for mixing and mastering music.

Conclusion

As music lovers, we know that the right headphones can make a big difference in how we experience our favorite tunes. Studio headphones are a great choice for serious listening sessions and music production. They offer exceptional sound quality, accuracy and comfort.

While everyone has different preferences, there are some headphones that stand out from the rest. The headphones mentioned in this post are all great options and will give you a wonderful listening experience. Check them out and find your perfect pair today!

Categories
Archive

How To Mix 808 Kick And Bass in Ableton

To mix 808 kick and bass in Ableton, use EQ to separate the low frequencies, sidechain compression to avoid muddiness, and adjust levels to achieve a balanced sound. When mixing 808 kick and bass in Ableton, it can be tricky to achieve a clear and powerful low end without creating muddiness or clashing frequencies.

Using EQ to separate the frequencies, sidechain compression to create space, and adjusting levels for a balanced sound can help to achieve a polished mix. We will explore these techniques in depth to help you achieve a cohesive and professional-sounding bass and kick mix.

So let’s dive in and start mixing!

Setting Up

Achieving a perfect mix between the 808 kick and bass in Ableton requires a few key steps. Start by choosing the right samples, adding EQ and compression, experimenting with volume and sidechain, and tweaking the stereo image to achieve a balanced and clear low end.

Creating A New Project

To start mixing 808 kick and bass in Ableton, you need to create a new project. Open Ableton Live and click on File > New Live Set. Or, use the shortcut Command+N on Mac or Control+N on Windows. This will open a new session with default track settings. You can customize the session by adding or removing tracks, changing the tempo, and more according to your project requirements.

Choosing The Right Samples

The next key step in mixing 808 kick and bass in Ableton is choosing the right samples. You want to use samples that complement each other and don’t clash in the frequency spectrum. Look for samples that have a defined low-end and sub-bass frequency range. You can either use samples from Ableton’s Drum Rack or use your own samples. To do this, click on the browser icon in the bottom left corner, go to the Places section, and select the folder where your samples are stored.

Setting Up Your Midi Controller

Using a MIDI controller can help speed up your workflow while mixing 808 kick and bass in Ableton. Setting up your MIDI controller is easy. First, make sure your MIDI controller is connected and turned on. Go to Live > Preferences > MIDI Sync. Select your MIDI controller in the Input and Output sections. You can now use your MIDI controller to control various functions in Ableton including track volumes, panning, effects, and more.

How To Mix 808 Kick And Bass in Ableton

Credit: www.ableton.com

Arranging Your Track

Learn how to mix the 808 kick and bass in Ableton with ease by arranging your track properly. Utilize grouping, sidechain compression, and EQing techniques to ensure the bass and kick compliment each other and avoid muddiness in your mix.

Arranging Your Track Arranging your track is a crucial step in music production, as it helps in making a cohesive beat that sounds good. Once you have created a basic beat and added your bassline, the next step is to program your 808 kick pattern. In this section, we will discuss the steps to arrange your track to get the desired sound. Creating a Basic Beat Before moving on to arranging your track, you need to create a basic beat. You can use different drum samples to create a beat. However, to get the desired sound, try using a kick and snare that complement each other. Additionally, add some hi-hats and percussion to create a rhythmic feel. You can use Ableton’s built-in drum rack to create a beat. Adding Your Bassline Once you have your basic beat, it’s time to add your bassline. The bassline provides the foundation of your beat. You can use different bass sounds, such as sub-bass, electric bass, or synth bass. However, make sure that your bassline is in key with your melody or chord progression. You can also make your bassline follow your kick pattern to create a rhythmic feel. Programming Your 808 Kick Pattern Once you have your basic beat and bassline, it’s time to program your 808 kick pattern. The 808 kick is a staple of modern music production, and getting it right is crucial. You can use different techniques to program your 808, such as sidechain compression, EQ, and saturation. However, the key is to make sure that your kick does not clash with your bassline. You can achieve this by tuning your kick to fit with your bassline’s key. In conclusion, arranging your track is a crucial step in music production. By creating a basic beat, adding your bassline, and programming your 808 kick pattern, you can create a cohesive track that sounds good. Try experimenting with different sounds and techniques to get the desired sound. Remember, practice makes perfect, so keep creating tracks and honing your skills.

Mixing Your 808 Kick And Bass

Achieving a balanced mix between your 808 kick and bass is crucial in music production. In Ableton, use EQ and sidechain techniques to make sure the frequencies are not clashing and the kick stands out, while the bass still drives the track forward.

When it comes to creating a killer bassline, mixing your 808 kick and bass is key. It can be tricky to get the balance just right, but with a few tips and tricks, you will be a pro in no time. In this guide, we will cover the essential steps to mix your 808 kick and bass in Ableton for a powerful, tight sound.

Setting Levels And Panning

Before you start to mix your 808 kick and bass, ensure that both elements are playing together in harmony. Begin by setting the levels of each track so that the kick and bassline are audible and balanced. You can use the mixer’s gain slider or the individual track faders to adjust the levels and ensure that both elements sit together at the perfect volume. Remember not to overdo it with the levels as you do not want your mix to sound muddy. Additionally, panning your 808 kick and bass can add clarity and separation to each element of the mix. Panning the kick to the center of the mix and the bass to the left or right will provide space for vocals and other instruments while keeping the low-end punchy, direct, and powerful.

Sidechaining Your Bass To Your Kick

Sidechaining your bass to your kick is a crucial technique to create room for both elements in your mix. It involves reducing the volume of your bass when your kick hits, creating a pumping effect that pushes the kick to the front of the mix. To sidechain in Ableton, create an audio effect rack and insert a compressor on the bass track. Then, select the kick track as the input sidechain source for the compressor. Lastly, adjust the threshold and ratio settings to control how much the bass volume ducks when the kick hits.

Eq’ing Your Kick And Bass

EQ’ing your kick and bass is essential to make sure both elements have separate frequencies and do not clash with each other in the mix. Using the EQ in Ableton, you can cut out the unnecessary frequencies that clash between the two elements. First, frequency isolate your kick. Turn off all other tracks but the kick drums, pull up the EQ Eight on the mixer strip, and play the kick at full volume. Listen for and cut out any offending frequencies that sound muddy or cluttered. Next, frequency isolate your bass guitar similar to the above process, and identify any frequencies that sound muddy or clash with the kick. To make sure there are no conflicts, gently carve out space in the kick’s frequency range for the bass to fill in the low-end, and vice versa. In conclusion, balancing your 808 kick and bass is critical to any production with a deep, heavy groove. The specific techniques discussed above are a starting point in creating a powerful, punchy mix that makes the listener bob their head and tap their feet.

How To Mix 808 Kick And Bass in Ableton

Credit: m.youtube.com

Processing Your 808 Kick And Bass

Achieving a perfect balance between 808 kick and bass is crucial for producing quality music. In Ableton, you can achieve this by processing your 808 kick and bass separately using EQ and compression. Experimenting with different plug-ins and techniques can help you find the perfect balance for your track.

When it comes to mixing 808 kicks and bass in Ableton, one of the most important processes is processing the sound to create the desired effect. This means necessary adjustments to achieve a perfect balance between the two and make the mix as powerful as possible. Processing involves treating your 808 kick and bass to achieve a refined sound that stands out from others. In this post, we will cover three essential processing techniques: adding compression, using saturation and distortion, and tuning your kick and bass.

Adding Compression

Compression is one of the most important tools in a sound engineer’s arsenal, and it can help to glue elements of a mix together. When applied correctly, compression can help to make the 808 kick and bass sound more punchy and sit better in the mix. To add compression, follow these steps:

  1. Insert a compressor plugin onto the channel strip of your 808 and bass tracks.
  2. Tweak the settings to achieve the desired effect. Adjust the attack and release times to control the dynamics of the sound, and the threshold to manage the amount of compression applied.
  3. Ensure that both the 808 and bass tracks have roughly the same amount of compression applied to create a cohesive mix.

Using Saturation And Distortion

Saturation and distortion are excellent tools to use when mixing 808 kicks and bass in Ableton. Saturation can add warmth and harmonics to your sound, while distortion can help to add grit and punchiness. Here’s how to use them:

  • Insert a saturation or distortion plugin onto the channel strip of your 808 and bass tracks.
  • Adjust the settings to your liking, but be sure to add enough saturation or distortion to add character to the sound without overdoing it.
  • Saturation and distortion can be used on either the 808 or bass track, or both, depending on the effect you’re looking for.

Tuning Your Kick And Bass

The final essential process to creating a punchy 808 kick and bass mix in Ableton is tuning. When your kick and bass are in tune, they work together to create a strong foundation for your mix. Follow these steps to tune your kick and bass:

  1. Use a tuning plugin or function to detect the pitch of both your 808 kick and bass notes.
  2. If the pitch of the kick and bass notes is not matching, adjust the pitch of either the kick or bass notes to be in key with each other.
  3. When correctly tuned, your 808 kick and bass should sound harmonically clear and sit well together in the mix.

In conclusion, processing is an essential part of mixing your 808 kick and bass in Ableton. Adding compression, saturation and distortion, and tuning your kick and bass can help you achieve a refined sound that stands out from the rest. With these processing techniques in your toolkit, your 808 kick and bass mix will become more punchy, harmonically aligned, and stand out in the mix.

Enhancing Your Track

When producing music in Ableton, mixing the 808 kick and bass is vital to achieve a polished final product. Even a minor mistake in the mix can ruin the overall quality of the track. Enhancing your track requires the proper technique of mixing the 808 kick and bass in Ableton. In this tutorial, we’ll discuss the various techniques to make your track stand out using these subheadings:

Adding Effects To Your Kick And Bass

Adding effects to your kick and bass helps to create a cohesive sound, giving your track the boost it needs. Using Ableton’s built-in audio effects such as EQ and Compression can help you achieve depth and balance. Sidechain compression is a popular technique used by producers in which the bass is dynamically lowered in volume to make room for the kick to cut through the mix. Applying a subtle EQ to your kick and bass can help to avoid clashing frequencies, helping to maintain a clear sound and adding power to the low end.

Layering Your Kick And Bass With Other Sounds

Layering your kick and bass with other sounds can add extra texture to your track. Adding a second bassline can help to fill out the low end and create a more complex sound. For instance, you can use a synth bass to compliment the 808 kick or layer the bassline with a pad sound to create an atmospheric tone. This technique requires a subtle blend of sounds in order to avoid sonic clashes and ensure your mix is easy to listen to.

Using Automation To Create Movement

Using automation to create movement is an essential technique to keep the listener engaged throughout the track. You can use Ableton’s automation features to create volume and panning automation, adding dynamic movement to the track. Subtle changes in volume can help to add motion and avoid a static-sounding mix. Creating gradual filter automation can help to achieve a unique sound, adding character to the 808 kick and bass mix.

Mixing is a crucial aspect of music production, and mastering the art of mixing 808 kick and bass in Ableton can make or break your track. By using these techniques, you can enhance your track and make it stand out from the crowd.

Finalizing Your Mix

After spending hours tweaking and adjusting your mix, it’s essential to take some final steps to ensure it sounds professional and polished. Here are some tips for finalizing your mix:

Using Reference Tracks

When it comes to mixing, it’s vital to have a clear reference in mind. Using reference tracks can be incredibly helpful in this regard. A reference track is a professionally mixed and mastered song that is similar in style to your own. By comparing your mix to a reference track, you can identify any areas that may need adjustment.

When using a reference track, pay attention to the levels of instruments and how they interact with one another. Focus on the bass and 808 kick specifically, comparing the levels, tone, and how they blend in the mix.

Taking Breaks While Mixing

It’s easy to get lost in the mix and lose perspective over time, which is why it’s crucial to take breaks every so often. By stepping away from your mix for even just a few minutes, you can come back with fresh ears and a new perspective.

When you do take breaks, it’s a good idea to listen to something completely different to prevent ear fatigue. Go for a walk, grab a snack, or listen to some classical music. When you come back to your mix, you’ll be better equipped to make objective decisions about what needs fixing.

Exporting Your Track

Once you are satisfied with your mix, it’s time to export your track. Before doing so, ensure that you have checked the levels, panned appropriately and used adequate equalization to give each element its own space in the mix.

It’s a good idea to listen to your mix on different devices to ensure that it sounds the way you intend it to. Also, ensure that your mix adheres to industry standards, such as -12 dBFS peak level and a bit depth of 16 or 24 bits.

Finally, once your mix has been exported, it’s worth revisiting it again a few hours or even a day later, to ensure you are completely satisfied with it before sharing with the world.

How To Mix 808 Kick And Bass in Ableton

Credit: mixedinkey.com

Frequently Asked Questions Of How To Mix 808 Kick And Bass In Ableton

How Do You Mix Kick And 808 In Ableton?

To mix a kick and 808 in Ableton, first, place the kick on channel 1 and 808 on channel 2. Adjust the volume levels of each until they blend well. Next, EQ the kick to make room for the 808 and boost the low-end frequencies on the 808 to give it more punch.

Use compression to glue the sounds together. Finally, add any effects as desired and make any further adjustments as necessary.

How Do You Mix 808 Bass And Kick?

To perfectly mix 808 bass and kick, start by making sure they are in tune and not clashing. Next, level them out so they are equally balanced in the mix. Then, use EQ to cut the low-end of the kick to make room for the bass.

Finally, compress the bass to give it more punch and glue it together with the kick.

How Do You Make An 808 Bass In Ableton?

To make an 808 bass in Ableton, go to the “Instruments” tab and select “Analog”. Then, turn off oscillators 2 and 3, select the square wave for oscillator 1 and adjust it to -2 octave. Increase the resonance and play with the filter envelope until you get the desired sound.

Finally, add some distortion and compression to enhance the bass.

How Do I Stop 808 And Bass From Clashing?

To prevent 808 and bass from clashing, you can try these techniques: 1. Use EQ to adjust the bass and 808 frequencies. 2. Sidechain the bass, so it ducks when the 808 hits. 3. Tune your 808 to a specific key.

4. Use stereo separation to keep the bass and 808 apart in the mix. 5. Use different types of bass and 808 sounds to avoid frequency overlap.

Conclusion

After reading this blog post, you should now have a solid understanding of how to mix 808 kick and bass in Ableton. Remember to always keep an ear out for the balance between the two, and use EQ and sidechain compression in order to achieve a clean and powerful sound.

Don’t forget to experiment, and above all, have fun! With these techniques, you can create a professional-sounding track that is sure to impress your listeners. Happy mixing!

Categories
Archive

Do Expensive Xlr Cables Make Difference

Expensive XLR cables do not actually make a significant difference. A quality mid-range cable can perform just as well under normal circumstances.

XLR cables have been a popular choice for audio professionals, especially in the recording and music industry. However, there is a common misconception that expensive XLR cables will automatically improve sound quality. This belief is not entirely true. While high-end XLR cables may offer some advantages in specific situations, such as when working with long cable runs or high impedance microphones, they do not necessarily make a significant difference in most cases.

A well-made mid-range XLR cable can perform just as well under normal conditions. We will explore the topic of expensive XLR cables and whether they are worth the investment.

Do Expensive Xlr Cables Make Difference

Credit: www.youtube.com

The Science Of Audio Cables

As an audio enthusiast, you may have come across the debate about whether expensive XLR cables make a difference in audio quality. This debate has been raging on for years, with both sides presenting their arguments. In this article, we’ll look at the science behind audio cables, what XLR cables are, how they work, and what factors affect audio quality.

What Is An Xlr Cable?

XLR (which stands for “eXternal Line Return”) is a type of electrical connector commonly used in professional audio equipment, such as microphones, amplifiers, and speakers. An XLR cable has three pins, which are responsible for transmitting signals. One pin is used for ground, and the other two pins carry the audio signal, usually one for the positive signal and the other for the negative signal.

How Do Xlr Cables Work?

XLR cables use a balanced audio signal, which means that the positive and negative signals are transmitted with equal amplitude but opposite polarity. This technique cancels out any noise or interference picked up along the cable, resulting in a cleaner and clearer audio signal. XLR cables are also designed to prevent electromagnetic interference (EMI) and radio frequency interference (RFI) from affecting the audio signal.

What Factors Affect Audio Quality?

The quality of the audio signal transmitted through XLR cables can be affected by several factors, some of which include:

  • Cable length: Longer cables can result in signal degradation, especially if the cable is of poor quality. It’s generally recommended to use the shortest cable possible for the job.
  • Cable quality: Higher-quality XLR cables are less likely to affect audio quality than cheaper cables. This is because high-quality cables are better shielded against interference and are made with higher-quality materials.
  • Equipment quality: The quality of the equipment using XLR cables can also affect audio quality. High-end equipment is typically designed with better signal processing components, resulting in a cleaner and clearer audio signal.
  • Noise in the environment: External noise, such as background noise or interference from other electronic equipment, can also affect audio quality.

While the debate about whether expensive XLR cables make a difference in audio quality may continue, it’s clear that the science behind audio cables is much more complex than some may think. Understanding the basics of how XLR cables work and what factors affect audio quality is essential in ensuring you get the best possible sound from your equipment.

Do Expensive Xlr Cables Make Difference

Credit: www.mixinglessons.com

Understanding Audio Quality

The cost of XLR cables shouldn’t be the only factor to consider when it comes to audio quality. Expensive cables may have better insulation and higher build quality, but it doesn’t necessarily improve sound quality. Other factors such as the preamp, microphone, and recording environment play a vital role in determining audio quality.

What Is Audio Quality?

Understanding audio quality is crucial to determine whether expensive XLR cables make a difference or not. Audio quality refers to the accuracy and clarity of sound in an audio signal. It is the measure of how close the reproduction of the sound is to the original source. When you listen to music, watch a film, or attend a concert, you want the audio quality to be as clear and accurate as possible.

How Is Audio Quality Measured?

Audio quality is measured by several factors, including frequency response, dynamic range, distortion, and noise. Frequency response refers to the ability of a device or equipment to reproduce all frequencies in the audio spectrum without altering them. Dynamic range is the difference between the loudest and softest sounds that can be heard without altering the sound quality. Distortion refers to the difference between the original sound and the sound produced by the device or equipment. Noise refers to any unwanted sounds that are introduced during recording, transmission, or playback.

Do Expensive Xlr Cables Make A Difference In Audio Quality?

The answer is yes and no. Expensive XLR cables can make a difference in audio quality, but only under certain circumstances. If the audio equipment and cables in your setup are not capable of producing high-quality audio, then using expensive XLR cables will not make any difference. On the other hand, if you have high-end audio equipment and cables, upgrading to expensive XLR cables can make a difference in the audio quality. However, it is important to note that the difference will typically be subtle and not noticeable to the average listener. In conclusion, understanding audio quality is essential to determine whether the use of expensive XLR cables can make a difference in your setup. While these cables can improve the audio quality, it is important to ensure that your audio equipment is also capable of producing high-quality audio.

Entry-level Vs. High-end Xlr Cables

When it comes to audio equipment, XLR cables are a crucial element of sound recording. They offer balanced connections, shielding against noise interference, and high-quality sound.

What Are Entry-level Xlr Cables?

Entry-level XLR cables are the more affordable type of cables that novice sound recording enthusiasts tend to purchase. They are typically made with lower-grade materials, such as PVC and nickel connectors.

Although these cables may still offer decent sound quality, they are not built to last long-term and can easily become damaged. Additionally, the cheaper materials can lead to crackling or buzzing sounds.

What Are High-end Xlr Cables?

High-end XLR cables, on the other hand, are a class of XLR cables that are more expensive and offer premium features. These cables are usually made with higher-quality materials such as braided copper and gold connectors.

In terms of durability, high-end XLR cables can last several years and often come with a lifetime warranty. They are designed to reduce noise interference and provide high-fidelity sound for professional use.

Do High-end Xlr Cables Offer Superior Audio Quality?

While high-end XLR cables come at a premium price, they do offer a noticeable difference in audio quality compared to entry-level XLR cables. They are ideal for professionals who require high-fidelity sound recording or for those who want the best possible audio experience.

However, it’s worth noting that the difference between high-end and entry-level XLR cables may not be as significant as some people claim it to be in terms of audio quality. It’s also essential to ensure that all other audio equipment is of high quality for optimal performance.

Ultimately, it comes down to personal preference and the specific needs of the user. If you’re looking for a cable for occasional use, then an entry-level XLR cable may be more suitable. However, if you require the highest audio quality, then investing in high-end XLR cables is worth it.

Considerations For Choosing Xlr Cables

Choosing the right XLR cables is essential for audio quality, but expensive options may not necessarily be better. Consider the purpose and environment of the setup to determine the appropriate cable and prioritize shielding, length, and connectors.

What Factors Should Be Considered When Choosing Xlr Cables?

XLR cables are essential audio equipment that transmit signals from microphones, speakers, and mixers. When it comes to buying XLR cables, you might be confused about which one to choose because there are several factors to consider. First, consider the cable length you need for your setup. If you have a larger setup, you need longer cables, but be aware that longer cables can add unwanted noise and degradation to the signal. Secondly, pay attention to the cable gauge, which measures the cable’s thickness and durability. The thicker the cable, the less likely it will be to develop interference and signal degradation over time. A higher gauge cable is suited for professional setups where the cables will be frequently used. Lastly, consider the connector quality on the XLR cables, which includes the contacts, shells, and connectors. Good quality connectors can reduce noise in the signal and ensure your audio equipment lasts longer.

Do Expensive Xlr Cables Offer Better Value For Money?

When looking at the cost of XLR cables, it can be tempting to assume that more expensive cables will always offer better value for money. However, this is not necessarily the case. While expensive XLR cables may offer additional features, such as higher quality connectors and insulation, they don’t always deliver a noticeable difference in sound quality. That said, it’s important to remember that every setup is different, and some systems may be more sensitive to the quality of cables used. In such cases, investing in more expensive XLR cables may be worth it. However, for most setups, a mid-priced XLR cable will provide the durability and quality necessary for a professional studio or live performance. In conclusion, the key consideration when choosing XLR cables is to compare the quality to price ratio, and ensure the chosen cables meet your specific needs and budget.

Alternative Options

There is a debate over whether expensive XLR cables make a noticeable difference. Alternative options, such as using cheaper cables or ones made with different materials, can be explored to achieve similar results while saving money.

Are There Alternative Cables To Xlr?

If you’re wondering whether expensive XLR cables make a difference, it’s an indication you’re a music enthusiast. XLR cables are undoubtedly the preferred cables used in professional audio systems: they provide balanced signals, reject noise, and are durable. However, they can be pricey, and there are alternative cables that can perform just as well. One alternative to XLR cables is TRS (Tip, Ring, Sleeve) cables. They look similar to stereo headphone jacks, just thicker. TRS cables are unbalanced and less expensive than XLR cables. However, they typically have shorter cable lengths and a higher susceptibility to interference.

What Are The Pros And Cons Of Alternative Options?

Another alternative to XLR cables is RCA (Radio Corporation of America) cables, which are the same types of cables used in home entertainment systems. RCA cables are unbalanced and cheaper than XLR cables. RCA cables are readily available, which is a plus on a budget. However, they are more susceptible to noise and interference, which can affect the audio quality. If you’re looking for high-quality audio, it’s essential to go beyond the price of the cable and consider the audio system’s total setup. While XLR cables may be more expensive, they are the industry standard for good reason. They offer better noise rejection, better signal transfer, and their superior construction quality produces more durable cables and different length options than alternatives. Ultimately, XLR cables may make a substantial difference in the final audio output if you have an audio system with a high-quality audio card or mixer.

Do Expensive Xlr Cables Make Difference

Credit: www.youtube.com

Frequently Asked Questions For Do Expensive Xlr Cables Make Difference

Are All Xlr Cables The Same Quality?

No, not all XLR cables are the same quality. The quality of an XLR cable depends on the materials used to make it, the manufacturing process, and the level of shielding against interference. A high-quality XLR cable will provide better sound quality and reduce the risk of interruptions or interference in audio signals.

Does Long Xlr Cable Affect Sound Quality?

Yes, a long XLR cable can affect sound quality due to the cable’s capacitance and resistance factors. As the cable gets longer, it can cause a drop in high-frequency response and increase noise, which can alter the sound’s overall quality.

Using proper cable length, high-quality materials, and signal boosting can improve the sound quality.

What Is The Best Brand Of Xlr Cables?

There are several brands of XLR cables that are considered to be of high quality and reliable, including Mogami, Canare, and Neutrik. Ultimately, the best brand for you will depend on your specific needs and budget. It’s important to do your research and read reviews before making a purchase.

Do Xlr Adapters Reduce Quality?

XLR adapters do not reduce the quality of the audio. They actually provide better audio quality as they help in reducing noise and interference. XLR adapters can enhance the audio quality by allowing balanced connections between the audio devices, resulting in better sound quality.

Conclusion

Based on research and expert opinion, it seems that expensive XLR cables do make a difference in terms of their durability and shielding of interference. However, whether or not this difference is significant enough to justify the price difference is subjective and ultimately up to the individual.

It’s important to consider your specific needs and budget before making a decision. Ultimately, it’s always a good idea to invest in high-quality equipment to ensure the best possible sound quality.

Categories
Archive

Live 10 S New Wavetable Synth Explained

Live 10’s new Wavetable Synth is a powerful tool for music creation and production. This synth allows for flexible sound design with unique wavetables, filtering options, and modulation capabilities.

With Live 10’s intuitive interface, users can easily manipulate and customize sounds to fit their creative vision. As technology continues to advance, musicians and producers are constantly searching for the latest tools and software to enhance their craft. One such tool is Live 10’s new Wavetable Synth.

With its advanced wavetable technology, filtering options, and modulation capabilities, this synth allows for unparalleled sound design and customization. Whether you’re a seasoned pro or just starting out, Live 10’s Wavetable Synth is a must-have tool for anyone looking to take their music to the next level. We’ll dive deeper into the intricacies of this powerful synth and explore all the amazing features it has to offer.

Overview Of Live 10 S

Live 10 S introduces its new Wavetable Synth that offers versatile sounds for music producers. With an easy-to-use interface, the synth allows for extensive modulation possibilities and spectrum analysis.

New Features

Live 10 S boasts a plethora of new features that are sure to set it apart from earlier versions. One of the most talked-about features is the new Wavetable Synth. With this feature, Live 10 S truly sets itself apart from other DAWs, as it allows for endless sound design possibilities. Other notable features include the Capture function, which lets you easily recall those magical moments of improvisation that might have otherwise been lost, and the Echo effect, which brings new possibilities to the realm of delay.

Benefits Of The Upgrade

For users of previous versions of Ableton Live, upgrading to Live 10 S is a no-brainer. Not only does this version come with a host of exciting new features, but it’s also optimized for performance, ensuring that you can create music without worrying about issues like latency. Additionally, with Live 10 S, you get access to a vast library of sounds, effects, and presets. This means that you spend less time searching for the right sound, and more time creating. Live 10 S is a music production software that provides users with everything they need to create, record, and mix music. With its user-friendly interface, and a host of tools and features, Live 10 S is ideal for both beginners and professionals. Whether you’re a singer-songwriter, a producer, or a DJ, Live 10 S equips you with the tools you need to turn your musical ideas into reality. And with the new Wavetable Synth feature, the possibilities are endless. So, if you’re looking for a powerful and versatile music production software, Live 10 S might just be the perfect choice for you.

Live 10 S New Wavetable Synth Explained

Credit: www.groove3.com

What Is A Wavetable Synth?

The new Wavetable Synth in Live 10 S is a digital synthesizer that uses tables of waveforms to produce sounds. With its easy-to-use interface and advanced features, this synth is perfect for creating unique and complex sounds for your music productions.

Definitions And Basics

Wavetable synthesis is a popular method of creating sounds in the music industry today. It is a type of sound synthesis that uses sample waveforms seized from real-world instruments or generated using mathematical functions. When you manipulate these waveforms, you can create sounds that range from instruments, to ambient sounds, to sound effects. A wavetable synth is a type of synthesizer that uses wavetable synthesis. The Live 10 Suite has a new wavetable synth that takes advantage of modern computing power to deliver some superb sounds. This synthesizer has a host of functions that allow producers much more creativity than the previous Live 9 synth model.

How It Works

The Live 10 Suite Wavetable Synth uses a collection of single-cycle waveforms stored in tables. These waveforms then change their shape throughout a single cycle or waveform cycle. At the heart of every instrument is a carrier signal; this signal moves through the waveforms as the shape of the waveform changes. This produces the sound heard. Live 10’s Wavetable Synth is set to revolutionize music production with its user-friendly interface, LFOs, filters, and modulation matrix.

Historical Context

Wavetable synthesis was first introduced in the 1970s when pioneers of electronic music started experimenting with waveform tables. But, it wasn’t until the early 1990s that wavetable synthesis started to gain popularity. This was when synthesizers with wavetable synthesis started to become commercially available. Today, wavetable synths are ubiquitous in music production. They allow producers to create a wide variety of sounds from instruments to ambient sounds, and even create custom sound effects. With the new Live 10 Suite wavetable synth, music production is becoming more accessible than ever before.

Introducing Live 10 S New Wavetable Synth

Key Features

Live 10’s new Wavetable synth is designed to offer musicians a powerful and flexible synthesizer that can create a wide variety of sounds. Some of the key features of this new synth include:

  • Wavetable Oscillators: This synth comes equipped with a range of wavetable oscillators that provide a variety of harmonic shapes and spectral content for musicians to choose from.
  • Morphing: The morphing feature allows musicians to smoothly transition from one waveform to another, creating complex and evolving sounds in real-time.
  • Noise and Sub Oscillators: The synth includes a noise oscillator and two sub-oscillators that help add depth and complexity to sounds.
  • Modulation: This synth has a wide range of modulation capabilities, including frequency modulation, ring modulation, amplitude modulation, and more.
  • Filtering: Live 10’s Wavetable synth includes a range of filter types, including low-pass, high-pass, band-pass, and notch filters.
  • Effects: The synth also includes a range of built-in effects, including reverb, delay, chorus, flanger, and more.

Connectivity With Other Tools

One of the most exciting features of Live 10’s new Wavetable synth is its connectivity with other tools in the Live 10 ecosystem. Here are some of the ways the new synth integrates with other tools:

Connectivity FeatureDescription
Instrument RacksThe Wavetable synth can be used within Instrument Racks, allowing for complex layering and processing of sounds.
Macro ControlsThe synth’s parameters can be mapped to Macro Controls, providing a quick and easy way to fine-tune sounds.
Max for LiveThe Wavetable synth can be used within Max for Live devices, allowing for even greater flexibility and customization.

In conclusion, Live 10’s new Wavetable synth is a powerful and versatile tool that offers musicians a wide range of creative possibilities. Its flexible modulation capabilities, advanced filtering options, and innovative connectivity features make it a must-have synthesizer for any producer or musician looking to take their sound to the next level.

Demonstration Of Live 10 S New Wavetable Synth

This article demonstrates Live 10’s new Wavetable Synth with in-depth explanation. It offers insights on how to use and take advantage of its cutting-edge features for electronic music production.

If you’re a music producer or enthusiast, then you’re probably familiar with Ableton Live 10 software, which is a digital audio workstation that has been widely used in the music industry for decades. Ableton Live 10 software has recently introduced a new Wavetable Synth that has opened up new opportunities for music producers to create unique sounds that were not possible before.

Step-by-step Guide

To help you get started on using the Live 10 Wavetable Synth, we’ve put together a step-by-step guide that you can follow.

  1. Open Ableton Live 10 software.
  2. Click on the “Instruments” tab and select “Wavetable” from the drop-down menu.
  3. Click on the “Table” button to select a wavetable for your sound.
  4. Adjust the “Position” and “WT-Position” knobs to create different timbres.
  5. Use the “Filter”, “LFO”, and “Envelopes” tabs to further shape your sound.
  6. Experiment with different settings until you create the perfect sound.
  7. Save your sound and use it in your music production.

Use Cases And Applications

The Live 10 Wavetable Synth can be used in a variety of ways. Here are some of its use cases and applications:

  • Create unique sounds for your music production
  • Use as a lead or bass synth
  • Create atmospheric pads and soundscapes
  • Add texture to your tracks
  • Experiment with sound design and synthesis techniques

In conclusion, the Live 10 Wavetable Synth is a powerful tool in the hands of a skilled music producer. With its versatility and ease of use, it’s no wonder that it has become a go-to synth for many producers. Try it out for yourself and see how it can take your music production to new heights.

Integration With Ableton Live 10 S

Learn how to integrate Ableton Live 10 S’s new Wavetable Synth with ease through this concise explanation. Discover new sound possibilities to improve your music production using this advanced feature.

If you’re looking for an intuitive and powerful synthesizer that can elevate the quality of your music production, the new Wavetable Synth in Ableton Live 10 S is your solution. This fantastic synthesizer comes with a variety of features that make it easy to use. One of the most significant advantages of Wavetable Synth is its seamless integration with Ableton Live 10 S, which makes it easy to control every aspect with MIDI mapping and other convenient features. Let’s dive deeper into the compatibility and MIDI mapping and how they make the Wavetable Synth even more exceptional.

Compatibility

The Wavetable Synth is integrated with Ableton Live 10 S, and therefore compatible with all MIDI controllers that work with Ableton. This feature facilitates an intuitive workflow, as all sounds are automatically stored within Ableton’s library and can be accessed with any MIDI controller. Compatible controllers are now supported within the Wavetable settings, ensuring optimized collaboration with both live and studio productions.

Midi Mapping

The Wavetable Synth’s MIDI mapping enables you to assign individual parameters and controls to your MIDI controller, implementing a personalized workflow. You can customize MIDI mappings instantly by clicking on the “Map” button, choosing the parameter you want to control, and then adjusting it with your MIDI controller. The process is straightforward, allowing you to get all the controls mapped to your MIDI controller in no time, elevating your workflow and efficiency. If you want to keep creating music without worrying about technicalities, then the Wavetable Synth is perfect for you. With Ableton Live 10 S’s integration, you can be sure that your music-making is personal and efficient. MIDI integration makes it even better. Allowing you to tailor everything to your workflow’s convenience, means that you can produce outstanding music in no time. Try the Wavetable Synth out and discover its impressive capabilities.

Live 10 S New Wavetable Synth Explained

Credit: www.groove3.com

Tips And Tricks For Using Live 10 S New Wavetable Synth

Learn how to make the most out of Live 10’s new Wavetable Synth with these tips and tricks. Unleash your creativity with its extensive sound design features and unique capabilities.

If you are passionate about sound design and music production, Live 10 S’s new Wavetable Synth is a game-changer. The Wavetable Synth is a powerful tool that allows you to create unique sounds from scratch or edit pre-existing ones. Here are some tips and tricks to help you get the most out of Live 10 S’s new Wavetable Synth.

Sound Design Techniques

Creating unique sounds with Live 10 S’s new Wavetable Synth is all about experimentation. Start by selecting one of the preloaded Wavetable Synth presets and tweak the parameters to create a new sound. Here are some sound design techniques to try out:

  • Layer multiple waveforms to create complex sounds
  • Use the filter to shape the sound and create movement
  • Add modulation to create evolving sounds

Workflow Optimization

When it comes to music production, time is precious. Here are some ways to optimize your workflow when using Live 10 S’s new Wavetable Synth:

TipDescription
Save your own presetsSave your own presets to quickly recall your favorite sounds.
Use the Macro ControlsCreate custom Macro controls to adjust multiple parameters at once.
Use the 7″ touch screenThe touch screen on the Live 10 S makes editing Wavetable Synth much faster and easier.

Experimenting with Live 10 S’s new Wavetable Synth can be a lot of fun and the possibilities are endless. By using the tips and tricks outlined above, you’ll be able to create unique sounds and optimize your workflow. Give it a try and see what you can come up with!

Live 10 S New Wavetable Synth Explained

Credit: www.productionmusiclive.com

Frequently Asked Questions For Live 10 S New Wavetable Synth Explained

What Does A Wavetable Synth Do?

A wavetable synth is a type of synthesizer that uses a series of pre-recorded waveforms and combines them to create different sounds. These waveforms can be manipulated and combined in various ways to produce unique tones and textures. Wavetable synths are commonly used in electronic and dance music genres.

What Does A Wavetable Do In Ableton?

A wavetable in Ableton is a digital sound source that stores a series of audio waveforms. It allows users to create complex sounds by blending different shapes and patterns. Wavetables can be manipulated through various modulation techniques like filtering, LFO, and envelope shaping.

What Is The Most Famous Wavetable Synth?

The most famous wavetable synth is the Serum VST created by Xfer Records. It’s widely used by electronic music producers and sound designers due to its high-quality sound and flexibility in sound creation.

What Is Gs Wavetable Synth Windows 10?

GS Wavetable Synth is a software synthesizer that generates sound using digital waveforms. It comes pre-installed in Windows 10 and is a virtual instrument used for music production.

Conclusion

With Live 10’s new Wavetable synth, music producers can take their sound to the next level. This powerful instrument offers endless possibilities for creating unique, customized sounds for any project. With its user-friendly interface and intuitive controls, even beginners can start experimenting and creating in no time.

Whether you’re a seasoned pro or just starting out, the Wavetable synth is a must-have tool for any music production setup. Upgrade to Live 10 today and start exploring the possibilities!

Categories
Archive

Ableton Beginner Tutorial From Start To Finish

This Ableton beginner tutorial teaches you the basics from start to finish. In this tutorial, you will be guided through the essential tools, features, and functions of Ableton.

Also, are you a music enthusiast starting out with Ableton or a music producer looking for a new DAW? Look no further than this tutorial, which can guide you through the complete Ableton interface. Also, this comprehensive guide will introduce you to everything related to arranging and editing clips, working with instruments and effects, and much more.

Related reading: Ableton or FL Studio? and How to Mix on Ableton. For background, see the official Ableton website.

Moreover, with Ableton’s vast array of features and tools, including its unique Session View, this tutorial ensures that you’ll get started confidently and keep creating great music. In addition, from setting up your project to exporting tracks, this beginner tutorial for Ableton has you covered.

Ableton Beginner Tutorial From Start To Finish

Credit: www.youtube.com

Setting Up Ableton As A Beginner

Before you dive straight into using Ableton, you need to download and install it on your computer. For example, this step is crucial as it ensures that everything runs smoothly throughout your production process. In addition, in this section, we will take you through the process of downloading and installing Ableton Live on your computer. We will also give an overview of the Ableton workspace to provide you with a smooth start.

Downloading And Installing Ableton Live

Furthermore, to download Ableton Live, you first need to head over to the Ableton website and select the version that is compatible with your computer’s operating system. As a result, once you have downloaded the appropriate files, you can begin the installation process.

  1. Additionally, double-click the .exe file to launch the installation process and follow the prompts shown on the screen.
  2. Also, select the relevant options in the installer, including your preferred language and installation folder.
  3. Moreover, once the installation process is complete, you can launch Ableton Live from the shortcut on your desktop.

Overview Of Ableton Workspace

In addition, now that you have successfully installed Ableton Live, it’s time to explore the interface and workspace to gain a better understanding of how Ableton works.

Furthermore, the Ableton Live interface is divided into two main sections – the Session View and the Arrangement View. The Session View is where you can experiment with different sounds and loops, while the Arrangement View is where you can put together a finalized version of your track.

The workspace also includes various musical instruments and effects that you can use to create your desired sound. Additionally, you can customize the workspace to suit your specific preferences and needs.

Additionally, by familiarizing yourself with the Ableton workspace, you’ll be on a solid foundation for creating your music projects in Ableton Live.

Understanding Audio And Midi for Ableton Beginner

Also, this Ableton beginner tutorial covers the fundamentals of understanding audio and MIDI. However, from setup and configuration to recording and editing tracks, this comprehensive guide will take you from start to finish and empower you to create your own music.

Audio Vs Midi

Moreover, Audio and MIDI are two different types of data used in music production. Audio is simply the sound that you hear, while MIDI (Musical Instrument Digital Interface) is a digital language used to communicate musical information between devices. Audio files are recordings of actual sounds, whereas MIDI files contain information about what notes were played, how long they were held, and other musical data. Then, understanding the difference between the two is crucial for any aspiring producer.

Recording Audio

In addition, recording audio is the process of capturing a live sound and converting it into a digital format. In short, to record audio in Ableton Live, simply create an audio track and choose the input source you want to record. You can also adjust the recording settings, such as the input gain and file format. Once you hit record, Ableton will capture the sound and create a new audio clip in your session view.

Recording Midi for Ableton Beginner

Recording MIDI works differently from recording audio. Instead of capturing a live sound, you’re recording the digital information that represents the notes you’re playing. Similarly, to record MIDI in Ableton, create a MIDI track and select your instrument of choice. Then, click the record button and start playing. Ableton will capture the notes you play and create a new MIDI clip in your session view. Overall, understanding the differences between audio and MIDI, and knowing how to record both, is essential knowledge for any beginner in Ableton Live. With these skills, you’ll be able to start creating your own music and exploring the endless possibilities of music production.

Ableton Beginner Basics

Learn the basics of using Ableton and follow a step-by-step beginner tutorial from start to finish. Also, this tutorial will guide you through Ableton’s interface, tools, and techniques for producing music. Discover how to create loops, add effects, and navigate Ableton’s features.

As a beginner, it can be overwhelming to start learning a new software program like Ableton. However, with its user-friendly interface and intuitive features, Ableton is an excellent choice for beginners in music production. In addition, in this tutorial, we will guide you through the basics of using Ableton, starting from creating a new project to navigating the arrangement view. Let’s get started!

Creating A New Project

The first step in starting with Ableton is to create a new project. For example, to do this, click on “File” from the top menu bar and select “New Live Set.” Alternatively, you can use the keyboard shortcut “CTRL/CMD+N.” This will open a new project with two views: Session View and Arrangement View.

Arranging Clips In Session View for Ableton Beginner

The Session view is the default view in Ableton. As a result, it allows you to arrange and trigger audio and MIDI clips in real-time, making it great for live performances and improvisation. To arrange clips in Session View, simply drag and drop them onto the grid, and they will snap into place. Once you have arranged your clips, you can trigger them by launching them using the corresponding buttons. You can also group and manipulate multiple clips at once using the group function.

Navigating The Arrangement View

The Arrangement View is where you can arrange and edit your clips over time, giving you more control over your music’s structure. However, to access the Arrangement View, simply click on the “Arrangement” button at the top of the screen. In Arrangement View, you can see a timeline along the top, which represents the length of your track. You can edit and move individual clips to different locations in the timeline, resize them to change their length, or split them to create different sections of your track.

In conclusion, understanding the basics of using Ableton is critical for anyone looking to begin their music production journey. Then, by creating a new project, arranging clips in Session View, and navigating the Arrangement View, you can start making music with Ableton quickly and easily. Remember to experiment and have fun with your music production journey!

Ableton Beginner Tutorial From Start To Finish

Credit: www.productionmusiclive.com

Editing Audio And Midi Clips for Ableton Beginner

Learn how to flawlessly edit and manipulate both audio and MIDI clips in Ableton with this beginner tutorial. In short, from start to finish, this guide will teach you all the necessary steps to create professional-sounding tracks.

Editing Audio and MIDI Clips is a crucial step in music production using Ableton. Similarly, as a beginner, understanding the basics behind this step will help elevate your music-making experience. Here’s a comprehensive guide on Basic Audio Editing, Basic MIDI Editing, Using Effects on Clips, and Warping Audio Clips on Ableton.

Basic Audio Editing

When working with audio in Ableton, you’ll notice that each audio clip visually appears as a waveform. The basic audio editing involves the following:

  • Crop and truncating an audio clip
  • Adjusting the volume of an audio clip
  • Fading in and out to smoothly bring an audio clip into and out of a mix.
  • Reversing the audio clip for creative effects.

Basic Midi Editing

MIDI editing involves using virtual instruments and piano rolls to manipulate MIDI data. Also, some basic MIDI editing include:

  • Creating a MIDI clip and inputting notes into the clip.
  • Adjusting the timing of individual notes by moving them forward or backward in time.
  • Changing the velocity of each note to create dynamics.
  • Muting certain notes or sections of the clip to create variation.

Using Effects On Clips

Using effects on audio and MIDI clips is an essential part of music production. It adds flavor and character to the sounds. Ableton has numerous effects plugins to choose from, including EQ, delay, reverb, and distortion. Here are some tips:

  • Double-click on the clip to bring up the clip view, where you can access the effects rack.
  • Drag and drop the desired effect onto the clip.
  • Adjust the effect parameters to achieve the desired effect.
  • Save your effect chain as a preset for future use.

Warping Audio Clips for Ableton Beginner

Warping is the process of manipulating the timing and tempo of an audio clip. It comes in handy when trying to sync different audio clips to a specific tempo. The following steps are involved in Warping:

  1. Enable Warping by clicking on the Warp button in the sample box.
  2. Set the Warp mode to either Beats, Tones, or Texture.
  3. Use the warp markers to adjust specific sections of the clip.
  4. Adjust the tempo and timing of the clip using the BPM and transient markers.

In conclusion, Editing Audio and MIDI Clips is a crucial step in producing quality music on Ableton. Hopefully, with this guide, you can now confidently experiment with basic audio editing, basic MIDI editing, using effects on clips, and warping audio clips. Keep creating!

Using Instruments And Effects

Using Instruments and Effects in your Ableton beginner tutorial

As a beginner in Ableton, you might find it quite challenging to get started on using the software. Understanding how to use instruments and effects is essential, as it helps you produce high-quality music. In this section, we’ll take you step-by-step through using Ableton’s built-in instruments, third-party plugins, audio effects, and MIDI effects.

Using Ableton’s Built-in Instruments

Ableton has a range of built-in instruments that can help you create different sounds and music styles. Some of these instruments include:

  • Operator: This is a versatile synthesizer that can produce different types of sounds ranging from analog to digital.
  • Electric: This instrument simulates different types of electric pianos, allowing you to create different chord progressions and melodies.
  • Drum Rack: This instrument is suitable for creating drum beats and percussion sounds. You can create custom drum kits by dragging and dropping different samples into the drum rack slots.

Using Third-party Plugins for Ableton Beginner

You may want to explore different third-party plugins that you can use in Ableton. These plugins are useful because they offer more flexibility and new features that Ableton may not have. Some examples of third-party plugins include:

  • NI Massive: This plugin is suitable for creating basses, leads, and other complex sounds.
  • Xfer Serum: This plugin is a wavetable synthesizer that can produce different types of sounds. It allows you to drag and drop different waveforms and create complex modulation effects.
  • SoundToys Effect Rack: This plugin pack has different types of effects, including delays and filters that can be used to shape your sound.

Using Audio Effects

You can use different types of audio effects in Ableton to process your sounds. These effects can help you create unique and professional sounds, including:

  • Reverb: You can use this effect to create the illusion of a larger space, making it sound like the sound is in a larger room.
  • Delay: This effect allows you to repeat the sound after a certain interval, making it sound like it’s echoing.
  • EQ Eight: This allows you to adjust the frequency range of your sound by boosting or reducing specific frequencies.

Using Midi Effects for Ableton Beginner

MIDI effects are essential when it comes to editing and processing MIDI data. They help create more interesting patterns and melodies. Some MIDI effects include:

  • Note Length: This helps to adjust the duration of MIDI notes after they have been recorded.
  • Arpeggiator: This MIDI effect creates a sequence of notes from a single note, which is useful for creating complex melodies.
  • MIDI Chord: This effect lets you play chords by pressing one key on your keyboard, making it easier to play complex chords.

The different instruments and effects available in Ableton allow you to add diversity to your music and create a unique sound. Understanding how to use them will aid you in the music creation process and help produce high-quality music. With these steps, you can begin to use instruments and effects like a pro.

Ableton Beginner Tutorial From Start To Finish

Credit: www.borntoproduce.com

Arranging Your Song As An Ableton Beginner

Get hands-on experience on arranging your song with this comprehensive Ableton beginner tutorial from start to finish. Learn the basics of music arranging, structure, and add an element of creativity with the help of Ableton techniques.

Building Your Song Structure for Ableton Beginner

Once you’ve got all your ideas down, it’s time to start arranging your song. The structure of your song is crucial and can make or break its success. A typical song structure usually consists of an intro, verse, chorus, bridge, and outro. However, don’t let this limit you as you can design your structure as per your creativity. You can use different sections of the track according to your taste, such as breakdowns, drops, build-ups, and more. One way to go about building the structure of your song is to start with the chords and melody that you have created. From there, you can add additional elements such as percussion, synths, basslines, and vocals. Think about the big picture of your track and how each section will flow and connect to one another.

Adding Variation To Your Song

To make your track more interesting, you can add variation to the structure of your song. A common way to add variation is to change up the drums, bass, or melody to create a new feeling or mood. Adding breaks, drops, and transitions can also help to make your track more engaging. Make sure to keep the structure of your song cohesive, so that it flows naturally.

Finalizing Your Mix

When you’re happy with the structure and variation of your song, it’s time to finalize your mix. The mixing process involves balancing the levels of each sound and making sure there is no clashing or muddiness in the mix. Adjust EQ, Compression, and Reverb to add depth and clarity to the tracks. Make adjustments until you are satisfied with the sound, then export the final version of your track. In conclusion, the ability to arrange a song effectively is essential to making a hit track. Start by building your song structure, adding variation, and finalizing your mix to create a professional-sounding track. Remember, creativity is key, and don’t be afraid to experiment with the arrangement to make your track more unique and interesting.

Frequently Asked Questions For Ableton Beginner Tutorial From Start To Finish

Is Ableton Easy For Beginners?

Ableton can be easy for beginners with its user-friendly interface and simple workflow. It has helpful tutorials and a wide range of features that cater to different levels of experience. However, like any software, it requires practice and patience to master.

Can I Learn Ableton Myself?

Yes, you can learn Ableton yourself. There are numerous online resources available, such as video tutorials, forums, and blog posts, that offer guidance and help you build your skills. Additionally, Ableton offers a free 90-day trial of their software, so you have time to experiment and practice.

How Long Will It Take Me To Learn Ableton?

Learning Ableton varies from person to person depending on their previous experience and dedication. However, with consistent effort, one can become proficient within a few months. Daily practice and taking online courses can speed up the learning process.

Where To Start With Ableton Live?

To start with Ableton Live, you can begin with creating a new project and experimenting with the different features and tools. Familiarize yourself with the interface and workflow, and watch tutorials to learn more about specific techniques. It’s also important to understand the basic concepts of music production and sound design.

Practice and experimentation is key to improve your skills.

Conclusion

This beginner tutorial for Ableton has provided a comprehensive introduction to the basics of this powerful music production software. From setting up your project to using MIDI and audio clips, as well as effects and instruments, you should now be able to confidently begin exploring the creative possibilities of Ableton.

Remember to start with a clear idea in mind, take breaks when needed, and enjoy the process of making music. With practice and experimentation, your skills in Ableton will only get better. Happy producing!

Categories
Archive

Music Inspiration Tips To Get Inspired Fast

To find inspiration fast, collaborate with other musicians and try new sounds. Listen widely, and take breaks when you feel stuck. Music inspiration can be fickle. It appears when you least expect it and hides when you need it most.

However, there are many effective methods you can utilize to help get your creative juices flowing and find inspiration in your music making. Also, Pros and beginners alike can open new creative paths by trying new sounds, styles and techniques.

Related reading: Inspiration For Songwriting : Unleash Your Creative Potential and Unlocking Creative Genius: Recording Your Album Songwriting Tips & Inspiration. For background, see the Wikipedia article on Songwriting.

Additionally, working with other artists and taking breaks when feeling overwhelmed or stuck can often provide the much-needed spark of inspiration to propel your music making to new heights.

Music Inspiration Tips To Get Inspired Quickly

Also, looking for music inspiration tips that work fast? In addition, several methods can spark your creativity quickly. Try listening to your favorite artists, exploring new genres, collaborating with other musicians, and experimenting with different instruments or software to spark your creative juices.

Moreover, keep in mind that inspiration can strike at any moment. So be ready to jot down your ideas and melodies whenever they come to you.

In addition, as a musician, you may find it hard to stay inspired all the time. However, there are several techniques you can implement to help spark creativity and keep the music flowing. For example, here are some effective tips to spark ideas quickly. H3: Listen to Music from Different Genres One of the best ways to broaden your music perspective is by listening to various genres of music. Experiment with different types of music, and pay attention to how different artists compose their tracks. While listening, note down any unique melodies, harmonies, or lyrics that inspire you.

Practical Music Inspiration Tips

Furthermore, Watching live performances is an excellent way to find ideas and feel the energy of live music. As a result, attend concerts or gigs of different genres to witness how different artists execute their craft and engage with the audience. H3: Collaborate with Other Musicians Collaborating with other musicians is another effective way to spark inspiration and develop new ideas. Working with other musicians can introduce you to different musical styles and push you out of your comfort zone. It also presents an opportunity to learn new techniques and advance your skills.

H3: Take Walks and Observe Your Environment Taking walks is a great way to clear your mind, unplug from distractions, and observe your surroundings. Take in the sights, smells, and sounds around you, and let them inspire your music. Nature, cityscapes, and human interactions can offer an abundance of inspiration. H3: Read Poetry and Literature Poetry and literature are an excellent source of inspiration for musicians. Good writers can express their experiences and emotions in beautiful and captivating ways that can translate into music.

Putting It Into Practice

Take some time to read poetry and literature and let the words and ideas inspire your music. H3: Have a Dedicated Space for Music Inspiration Having a dedicated space for music inspiration can create a conducive atmosphere for creativity and inspiration. Ensure your space is well-organized, comfortable, and personalized to your taste. H3: Use Positive Affirmations Positive affirmations are a powerful tool to overcome self-doubt and boost confidence. Create affirmations that align with your goals and aspirations as a musician, and recite them daily to keep your mind focused on your music.

H3: Try New Instruments and Experiment Trying new instruments and experimenting with different musical techniques can be a refreshing way to stimulate inspiration. It can introduce you to new sounds and open up new creative pathways. Build these tips into your daily routine to spark ideas and keep your creative edge.

Frequently Asked Questions On Music Inspiration Tips To Get Inspired Fast

How Do You Get Inspired For Music?

To get inspired for music, you can listen to your favorite songs or explore new genres. You can also attend live performances, play an instrument, collaborate with other musicians or try something new. Inspiration can come from anything, so stay curious and open to new experiences.

Why Do I Have No Inspiration For Music?

Lack of inspiration in music can be due to multiple reasons such as stress, fatigue, overthinking, or lack of creativity. It’s important to take breaks, try new things, and surround yourself with music that inspires you. Try not to pressure yourself and let inspiration come naturally.

What Inspires People To Do Music?

Music can be inspired by various factors including personal experiences, emotions, cultural influences, societal issues. A desire for creative expression. It can serve as an outlet for creativity, a means of communication, and a source of pleasure and fulfillment.

What Music Inspires You The Most?

Different genres and artists inspire me at different times. It could be classical music or rock, pop or hip hop. As long as the lyrics and melody speak to me, it can inspire my writing.

Conclusion

Music inspiration can come from various sources and can be unique to each person. By incorporating these tips, like listening to different genres, exploring new artists, using technology for sound experimentation, or simply taking a break, you can get inspired fast.

Remember, inspiration can strike at any moment, so stay open and keep exploring to fuel your creativity. Use these tips to unlock your full potential and create music that truly speaks to you.