Categories
Archive

How Mixing And Mastering Can Help You

Mixing and mastering can help you achieve a polished and professional sound for your music. By balancing the levels of each track, adding effects, and optimizing the overall sound quality, your music can sound better on various listening platforms and potentially gain more recognition.

As a result, it is essential to understand the importance of mixing and mastering in the music production process. Mixing involves combining all the individual tracks of a recording to create a stereo or multichannel audio file. This process includes equalization, panning, compression, and effects to create a balanced and cohesive sound.

On the other hand, mastering the track involves optimizing the overall sound quality and preparing it for distribution, by adjusting the levels, dynamics, and frequency range of the already mixed track and ensuring that it sounds good across different audio systems. This process is particularly important in ensuring that your audience is engaged and interested in your music. A well-mixed and mastered track can make a huge difference in how listeners perceive your music, putting you ahead of competitors and making you stand out in the saturated music industry.

What Is Mixing?

Mixing and mastering play a significant role in the music production process. They are essential steps that ensure your music sounds its best. Mixing can be defined as the process of blending multiple audio tracks together to create a final stereo or surround sound mix. Many factors make mixing an important step in the music production process.

Definition

Mixing involves adjusting different tracks’ levels, panning them, and applying various audio effects to create a cohesive sound. It is done to ensure all the different instruments and sounds are balanced and sound great together. The final output should be pleasing to the ear, and this is achieved by adjusting the volume, tone, and dynamic range of each track.

Importance

Mixing can enhance the overall quality of your music. It can help you to:

  • Balance and adjust different sound levels
  • Make the different instruments and vocals stand out clearly
  • Add depth and dimension to the sound
  • Remove unwanted noise or distortion in the audio
  • Ensure a consistent sound throughout the track
  • Enhance the emotional impact of the music

Without proper mixing, a track can sound flat, muffled, or unbalanced. Listeners might overlook the song even if it has a great melody or lyrics. Mixing ensures your music translates well across different playback systems and platforms.

Overall, mixing and mastering music is essential in bringing out the best in your tracks, ensuring they sound professional and engaging to your listeners.
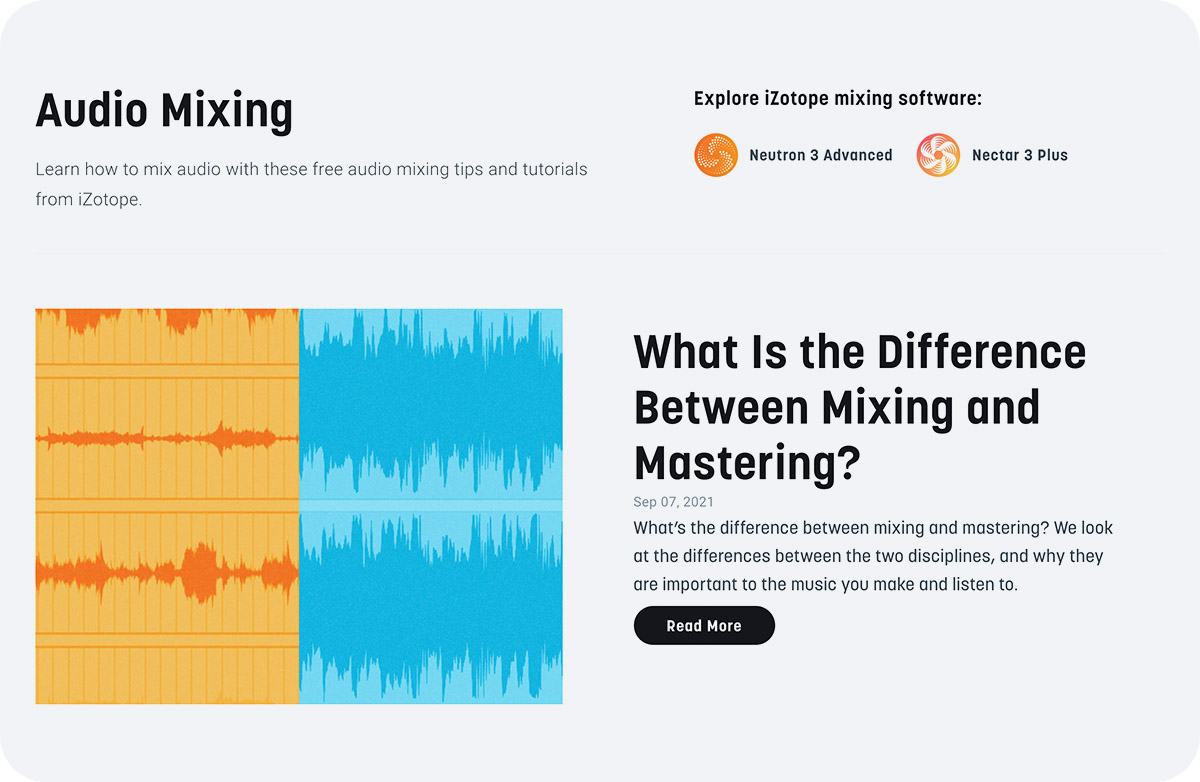
How Mixing And Mastering Can Help You

Credit: www.izotope.com

What Is Mastering?

If you are new to music production, the terms mixing and mastering may sound intimidating. However, they are essential processes that can make a huge difference in the quality of your final product. In this blog post, we will discuss mastering in detail, including its definition and the importance of mastering in music production.

Definition

Mastering is the final stage of music production, where an experienced mastering engineer applies various processes to ensure that the audio is balanced, cohesive, and polished. It involves optimizing the stereo image, enhancing clarity and depth, correcting frequency imbalances, adjusting levels, and adding fades where necessary. The goal of mastering is to make your music sound consistent, professional, and enjoyable, regardless of the listening environment or system.

Importance

Mastering is a crucial step in music production, as it can significantly improve the overall quality of your audio. Here are some of the reasons why mastering is important:

  • It enhances the sonic characteristics of your music, making it sound more polished and appealing to the listener.
  • It ensures that your music translates well across different playback devices, such as car stereos, headphones, and club sound systems.
  • It helps to unify the tracks on your album, giving them a consistent sound and feel.
  • It ensures that your music meets industry standards for loudness, dynamic range, and other technical aspects.
  • It prepares your music for distribution, whether you are releasing it on CD, vinyl, or digital platforms like Spotify and iTunes.

In summary, mastering is an essential aspect of music production that can make a significant difference in the overall quality of your audio. If you are serious about your music career, it’s crucial to work with an experienced mastering engineer who can help you achieve your goals and make your music sound the best it can be.

The Benefits Of Mixing And Mastering

Mixing and mastering are two important processes that can help musicians and producers to achieve a professional sound quality. While mixing is the process of balancing individual tracks and creating a stereo mix, mastering is the final step in the production process that focuses on enhancing the overall sound and making it sound cohesive across different playback systems.

Enhanced Sound Quality

Mixing and mastering can help in improving the sound quality of a track by cleaning up unwanted frequencies, enhancing the dynamics and adding depth and dimension to the mix. Mixing also helps in reducing any harshness or imbalance that might have been created by individual tracks, resulting in a more pleasant listening experience.

Balanced Audio

Mixing ensures that all tracks are balanced correctly. This means that the levels of each instrument are set to the right volume, making sure that one doesn’t overpower the other. Additionally, panning is used to separate sounds and give each instrument its space in the mix which makes it sound more natural. This results in a more cohesive sound where all elements are working together in a balanced way.

Volume Leveling

The volume levels of each instrument and the overall mix is one of the most crucial components of mixing and mastering. With the right volume levels, a track can sound balanced and consistent across different playback systems. Mastering ensures that the volume level is optimized and while normalizing, EQing, compression, and limiting being used to achieve the desired sound loudness and clarity.

The Process Of Mixing And Mastering

Mixing and mastering is the final process in producing a professional and polished audio track. Through the careful manipulation of levels, equalization, compression, and effects, mixing and mastering can enhance the sonic qualities of a track, making it sound more polished and up to industry standards.

This process can help you achieve a high-quality sound that can stand out from the competition.

When it comes to producing music, mixing and mastering are two crucial steps that can take your music to the next level. Mixing is the process of adjusting and combining individual tracks to create a cohesive and balanced sound, whereas mastering is the final step of polishing and enhancing the overall sound of your music.

Equipment Used

To achieve the best results in mixing and mastering, you need to have the right equipment. A Digital Audio Workstation (DAW) is a software that allows you to record, edit and mix audio. You will also need studio monitors and headphones, a microphone, and an audio interface to connect your equipment to your computer.

Expertise Needed

Mixing and mastering require technical knowledge of music production, as well as a good ear for sound. While there are many online tutorials and courses that can teach you the basics, it takes time and practice to become proficient in these skills. Hiring a professional mixing and mastering engineer can help you achieve a more polished and professional sound for your music. Whether you are an aspiring musician or a professional, mixing and mastering can help take your music to the next level. By investing in the right equipment and expertise, you can create a sound that stands out and captures the attention of your audience.

Hiring A Mixing And Mastering Engineer

Hiring a professional mixing and mastering engineer can enhance the sound quality of your music significantly. A trained engineer can help with EQ, compression, and other techniques to balance and refine your tracks, resulting in a polished and professional sound that will stand out.

Mixing and mastering are two essential processes in music production that transform raw recordings into polished, professional-sounding tracks. While many musicians may have the necessary skills and equipment to do their own mixing and mastering, hiring an experienced engineer can take your songs to the next level. In this article, we will discuss the benefits of hiring a mixing and mastering engineer, how to find the right one, and how to communicate effectively with them to get the best results.

How To Find The Right Engineer

Not all mixing and mastering engineers are created equal, and finding the right one can make all the difference in the quality of your final tracks. Here are some tips to help you find the right engineer for your needs:

  • Research online: Look for engineers who specialize in your genre, have experience with your type of project, and have a portfolio that includes examples of work that you admire.
  • Ask for recommendations: Reach out to other musicians and producers in your network to see if they have any recommendations for a mixing and mastering engineer.
  • Check credentials: Look for engineers who have formal training and/or certifications in audio engineering. This can be a good indicator of their knowledge and skill level.
  • Read reviews: Check online reviews and testimonials from previous clients to get an idea of their experience working with the engineer.

Communication With Engineer

Once you have found the right mixing and mastering engineer for your project, it is important to communicate effectively with them to ensure that you are on the same page and that your vision for the final tracks is realized. Here are some tips for effective communication:

  • Be clear about your goals: Have a clear idea of what you want your final tracks to sound like, and communicate this vision to the engineer.
  • Provide detailed feedback: Listen carefully to the engineer’s work and provide specific feedback on what you like and don’t like. This will help the engineer understand your preferences and make the necessary adjustments.
  • Stay open-minded: While it is important to communicate your vision, it is also important to be open to the engineer’s professional opinion and suggestions. Remember that they have years of experience and may have ideas that you have not considered.
  • Set clear deadlines: Agree on a timeline for the project, and make sure that both you and the engineer are clear on the deadlines and deliverables.

Overall, hiring a mixing and mastering engineer can greatly improve the quality of your music and bring your vision to life. By following the tips above, you can find the right engineer for your needs and communicate effectively to ensure that your final tracks are everything you imagined.

Diy: Mixing And Mastering

As a content creator, you want to present your work in the best possible way. Mixing and mastering are two essential steps that can make or break the quality of your final product. If you are someone who wants to take control of their creative output, you can save a lot of money and time by doing the mixing and mastering yourself. In this article, we will explore some helpful tips and software needed to mix and master your work at home.

Software Needed

Before you start mixing and mastering, you need the right tools. You can choose from a range of software options, but some of the most popular ones are:

SoftwareDescription
Pro ToolsA professional-grade digital audio workstation used by music producers and engineers to record, edit, and mix music.
Ableton LiveA popular music production software that supports both mixing and mastering, used by electronic music producers.
FL StudioA versatile music production software that is suited for mixing and mastering, as well as beat making, recording, and editing.

Tips For Success

While the right software is important, it is not enough to achieve a professional-quality mix and master. Here are some tips to consider to make sure you get the best results:

  • Take breaks frequently to avoid ear fatigue and maintain a fresh perspective on your work.
  • Mix at a low volume to prevent overcompensating for sound imbalances later in the process.
  • Use reference tracks to set a benchmark for the level of quality you want to achieve in your own work.
  • Take advantage of the many online resources such as tutorials and forums to learn from others in the mixing and mastering community.
  • Use EQ and compression to balance and enhance the levels of individual sounds in your mix.

With the right software and tips in mind, you can achieve a professional-quality mix and master from the comfort of your own home. Remember, practice makes perfect, so don’t hesitate to experiment and refine your skills as you go.

How Mixing And Mastering Can Help You

Credit: www.audiomixingmastering.com

Frequently Asked Questions For How Mixing And Mastering Can Help You

Why Mixing And Mastering Is Important?

Mixing and mastering are important to achieve a polished and professional sound for your music. Mixing blends all the individual tracks together into a cohesive whole, while mastering adds the final touches to ensure the music sounds great across all playback systems.

A well-mixed and mastered track will stand out and make a lasting impression on listeners.

Does Mixing And Mastering Make A Difference?

Yes, mixing and mastering can make a significant difference in the overall sound quality of a recording. Mixing involves combining individual tracks into a cohesive whole, while mastering involves enhancing the overall balance, loudness, and clarity of the mix. Good mixing and mastering can improve the sound quality of a recording and make it more polished and professional-sounding.

What Does Mixing And Mastering Does For A Track?

Mixing and mastering improves the overall sound quality of a track. Mixing involves blending and adjusting individual tracks while mastering involves preparing the final mix for distribution. Together, they balance the levels, enhance the clarity, and ensure the track is suitable for listening in different environments.

Why Is Audio Mixing Important?

Audio mixing is important because it allows multiple audio elements to blend together seamlessly, creating a more polished and professional sound. Proper mixing can enhance the listening experience by balancing levels, adjusting tone, and eliminating unwanted sounds. A well-mixed audio track can make a significant difference in the final product’s overall quality.

Conclusion

Mixing and mastering can take your music to new heights, improving its quality and overall impact on your audience. With modern tools and techniques, it’s easier than ever to achieve a polished, professional sound that grabs attention and keeps listeners engaged.

Whether you’re an aspiring artist or a seasoned pro, investing in high-quality mixing and mastering can make all the difference in your music’s success. So don’t settle for less – take advantage of the power of professional mixing and mastering to bring your music to life.

Categories
Archive

How To Pump Up Your Toms With Compression

To pump up your toms with compression, use a compressor plugin and adjust the attack, release, ratio, and threshold settings. Compression can add sustain, punch, and clarity to your drum sounds.

Compression is an essential tool in the sound engineer’s toolkit, and it can be used to enhance the sound of your drums. If you’re looking to add more punch, sustain, and clarity to your toms, using a compressor can help.

By adjusting the attack, release, ratio, and threshold settings, you can tailor the compression effect to suit your needs. However, it’s important to use compression sparingly and adjust the settings carefully to avoid over-compression or distortion. We’ll explore how to pump up your toms with compression, step-by-step.

Choosing The Right Compressor

Selecting the perfect compressor is crucial in achieving the desired sound of your toms. You’ll want to consider factors like the type of music you play, your drum set’s size, and the compressor’s settings before making your decision.

If you want to enhance the sound of your toms, using a compressor is an excellent option. Compression is a vital part of mixing music, as it can even out the volume of each drum and emphasize the attack of the toms. However, choosing the right compressor can be a daunting task, especially if you’re new to the world of audio engineering. In this section, we’ll discuss the types of compressors available for pumping up your toms and the key features to consider when choosing one.

Types Of Compressors

There are three main types of compressors: VCA, FET, and optical. VCA compressors use a voltage-controlled amplifier to compress the incoming signal. They’re known for their transparency and responsiveness to fast signals, making them ideal for toms. FET compressors use field-effect transistors to control the signal’s gain, providing a warm and gritty sound that works well with rock music. Optical compressors are known for their smooth and musical sound, making them great for jazz and other genres where a natural compression is desired.

Key Features To Consider

When choosing a compressor for your toms, there are several key features to consider. These include:

  • Dynamics: Look for a compressor with a high dynamic range, as it will be able to handle both soft and loud signals with ease.
  • Attack and Release: Consider the attack and release times, as they will affect how the compressor responds to the signal. For toms, a fast attack and a relatively slow release is ideal.
  • Ratio and Threshold: The ratio and threshold settings control the amount of compression applied to the signal. For toms, a moderate ratio and threshold should be sufficient.
  • Makeup Gain: A compressor can lower the overall volume of the signal, so a makeup gain control is necessary to restore the volume to its original level.

By considering these key features and selecting a compressor that meets your requirements, you’ll be able to pump up your toms and create a professional-quality drum sound for your recordings and live performances.

Setting Up Your Compressor

Learn how to effectively pump up your toms with compression by setting up your compressor properly. With the right settings, your toms can sound punchier and more pronounced in your mix.

If you’re looking to make your toms sound bigger and punchier, you might want to try using compression. It’s a technique that can help even out the dynamics of your drum sound, giving it more consistency and impact. To get started with compression on your toms, you’ll need to set up your compressor correctly. Here’s how to do it:

Connect The Compressor

Before you start adjusting any settings, you need to make sure your compressor is set up properly. Connect your compressor to your toms using a couple of XLR cables. You’ll need to plug one end of each cable into the output jacks on your toms and the other end into the input jacks on your compressor.

Adjust The Controls

Once your compressor is connected, it’s time to start adjusting the controls. The most important controls to focus on are the threshold, ratio, attack, and release. The threshold determines the point at which the compressor starts to work. The ratio determines how much the signal is compressed once it exceeds the threshold. The attack determines how quickly the compressor starts to work once the signal exceeds the threshold, while the release determines how quickly the compressor stops working once the signal drops back below the threshold.

Experimenting With Settings

To find the ideal compression settings for your toms, you’ll need to experiment with different combinations of controls. Start with a low ratio and a high threshold, and then gradually increase the ratio as you lower the threshold. You should aim to get a reduction of around 6dB to 10dB, depending on your desired effect. Also, pay attention to your attack and release times to ensure the attack is fast enough to capture the initial transient of the tom hit, and the release is slow enough to prevent any unwanted pumping effects. By taking the time to set up your compressor correctly, you’ll be able to achieve a bigger and more dynamic sound for your toms. Remember, it’s important to experiment with different settings until you find the right combination for your particular drum sound.

Applying Compression To Toms

Achieve a fuller and richer sound for your toms by applying compression. This technique works by leveling out the volume of each drum strike, making the sound more consistent and impactful. With the right settings, you can pump up your toms and take your drumming to the next level.

Tom drums are an essential component of any drum set, providing depth and character to your rhythm. However, sometimes the sound of the toms can be uneven, making it difficult to achieve the desired tone. This is where compression comes in. Applying compression can help bring out the best in your toms and achieve a more consistent sound. In this article, we’ll go over the steps for applying compression to your toms in a way that gets the best results.

Identify The Problem Areas

The first step in applying compression to your toms is to identify any problem areas. This could be anything from inconsistent volume levels to uneven ringing or resonance. Once you identify the issues, you can start to work on them using compression.

Setting The Attack And Release

When it comes to compressing your toms, it’s important to set the attack and release times correctly. The attack time determines how quickly the compressor reacts to a sound, while the release time dictates how quickly the compressor adjusts to changes in volume. For toms, you’ll generally want a slower attack time to allow the initial attack of the drum to come through, while a faster release time will help smooth out any ringing or resonance.

Adjusting The Ratio And Threshold

The final step in applying compression to your toms is to adjust the ratio and threshold. The threshold determines the amount of signal that needs to be present before the compressor kicks in, while the ratio determines how much the compressor affects the signal. For toms, a moderate ratio of around 4:1 is usually a good starting point, with the threshold set to just below the level of the drum hits. From there, you can adjust the settings to achieve the desired effect and ensure a consistent sound across all your toms. By following these simple steps, you can bring out the best in your toms using compression, providing a more consistent and powerful sound for your drum set. So go ahead and give it a try, and see how compression can elevate your drumming to the next level!

Adding Depth And Sustain

Adding Depth and Sustain to your toms is crucial for crafting a fuller and richer sound. Compression techniques are one of the best ways to achieve this effect. Here are two methods that are commonly used by audio engineers: Using Parallel Compression and Applying Sidechain Compression.

Using Parallel Compression

Parallel Compression is a technique that involves blending the compressed and non-compressed audio signals together. It allows you to apply a heavy amount of compression while retaining some of the original dynamics. Here’s how to set it up:

  1. Start by duplicating the toms track so that you have two identical versions.
  2. On the duplicate track, add a compressor plugin and set the attack, release, and ratio to your liking. You should aim for a high level of compression to really bring out the sustain.
  3. Blend the compressed and non-compressed tracks together. You can use the fader or pan controls to adjust the levels and panning to fit your mix.

Applying Sidechain Compression

Sidechain Compression is a more advanced technique that involves using another track to trigger the compressor on your toms. It can be used to create rhythmical pumping effects or to duck the toms sound whenever the kick drum hits. Here’s how to set it up:

  1. Start by adding a compressor plugin to your toms track.
  2. On the kick drum track, add a send to the toms track. Make sure it is set to Post-Fader and turn the send level all the way up.
  3. On the toms track compressor, engage the Sidechain button and set the Sidechain Input to the kick drum send. Adjust the attack and release settings to your liking.

By using these compression techniques, you can add depth and sustain to your toms and enhance the overall sound of your mix. Experiment with different settings and find the right balance for your track.

Fine-tuning The Compression

Get ready to take your tom sound to the next level with compression. This technique can help you add punch and sustain to your toms, giving them a fuller and more professional sound. With proper fine-tuning, your toms will stand out in the mix and leave an impact on your listeners.

Adjusting The Makeup Gain:

If you have compressed your tom, you may find that the volume has decreased significantly. To regain that lost volume, you need to use makeup gain. The makeup gain helps to boost the volume of your tom after applying compression, so you need to set it up appropriately. Too much makeup gain can cause distortion, so it’s essential to find the right balance.

You could use a VU meter to help you find the right balance. A VU meter is a tool that helps you monitor the signal’s level. Using a VU meter, adjust the makeup gain until your tom’s volume is at the same level or slightly higher than the unprocessed signal.

Using Eq To Enhance The Sound:

Using EQ can help enhance the tone and sound of your compressed tom. With EQ, you can refine the timbre of your tom to help it cut through the mix. EQ will help you improve the tonal balance of your tom, making it sound brighter, fuller, and cleaner.

When working with EQ, you need to be careful not to overdo it. Overdoing it may cause the tom to sound unnatural or too harsh. To avoid overdoing it, start by cutting frequencies that cause muddiness in the sound. This can be frequencies around 200Hz to 300Hz. You can also boost frequencies around 3kHz to 5kHz to help your tom cut through the mix.

If you are working with different tom sizes, fine-tune the EQ settings to fit each size. This adjustment helps tailor the tone of each tom size and reduce the time spent on EQing.

How To Pump Up Your Toms With Compression

Credit: www.masteringthemix.com

Final Tips And Tricks

Now that you’ve learned the basics of compressing your toms and have experimented with different techniques, it’s time to take your compression skills to the next level. Here are some final tips and tricks to help you pump up your toms and make them sound even better.

Experiment With Different Compressors

Don’t limit yourself to just one compressor plugin or hardware unit. Each compressor has its own unique sound and characteristics, so it’s worth experimenting with different types to find the ones that work best for your toms.

For example, a VCA (Voltage Controlled Amplifier) compressor has a fast attack and release time, making it ideal for capturing the initial attack of your tom hits. On the other hand, an optical compressor has a slower attack and release time, which can help even out the sustain and decay of your toms.

By trying out different compressors and settings, you can find the perfect combination to make your toms sound powerful, punchy and dynamic.

Don’t Overdo It

While compression can make your toms sound amazing, it’s important to use it in moderation. Over-compressing your toms can result in unnatural or robotic-sounding drum tracks.

To avoid overdoing it, start with a low compression ratio and gradually increase it until you achieve the desired effect. Similarly, be careful not to apply too much makeup gain as it can cause your toms to clip or distort.

Ultimately, your goal should be to achieve a balanced and natural sound that enhances the overall mix, rather than dominating it.

With these tips and tricks, you should be well on your way to pumping up your toms with compression. Remember to experiment, use compression in moderation, and most importantly, trust your ears to guide you towards the best sound for your mix.

Frequently Asked Questions On How To Pump Up Your Toms With Compression

How Do You Compress Toms?

To compress toms, use a compressor with a fast attack, moderate release, low threshold, and a high ratio. Adjust the attack time to allow the initial impact of the tom to come through. Adjust release time to allow the decay of the tom sound.

Use EQ to cut out unwanted frequencies and boost desirable ones. Experiment with different settings until you achieve the desired sound.

How Do You Make Toms More Punchy?

To make toms more punchy, consider using equalization and compression. Use a tight EQ to boost the desired frequencies and cut out any unwanted noise. Compression can add impact and sustain, resulting in a more dynamic sound. Adjusting microphone placement and drum tuning can also make a significant difference.

How Do I Make My Toms Sound Bigger?

Make your toms sound bigger by tuning them, using larger drumheads, adding more tension to the drumheads, placing them in an acoustically sound room, or using a microphone and amplifier to enhance their sound.

What Is The Best Compression Setting For Drums?

The best compression setting for drums depends on the genre of music, type of drum, and individual preferences. A good starting point is a compression ratio of 4:1 and a threshold of -20 dB. Keep experimenting until you find the desired sound.

Conclusion

Using compression to pump up your toms is an effective way to achieve a powerful and punchy sound. However, it’s important to use compression properly and with moderation, as too much can result in a flat and lifeless sound. Experiment with different settings and try out various compression techniques to find what works best for your sound.

By doing so, you can take your drumming to the next level and enhance the impact of your grooves.

Categories
Archive

Ableton Live 10 Sidechain Rack Boots And Cats

The Ableton Live 10 Sidechain Rack allows for easy creation of the classic “boots and cats” sidechain effect. This feature can be accessed within the audio effects rack.

Ableton Live 10 is a popular digital audio workstation (DAW) used by music producers and artists worldwide. Among its many features is the ability to create a “sidechain” effect, which is a popular technique used to add depth and rhythm to electronic dance music tracks.

The Sidechain Rack in Live 10 allows for easy creation of this effect by letting you choose which tracks will be sidechained, as well as the amount of sidechain compression. This feature is particularly useful for genres like techno, house, and EDM, where the “boots and cats” beat is a staple. We’ll take a closer look at the Sidechain Rack and how to use it to achieve that classic “boots and cats” sound.

Ableton Live 10 Basics

Learn how to create dynamic rhythms in Ableton Live 10 with sidechain rack boots and cats. This powerful technique allows you to control specific elements in your mix, adding depth to your music.

Ableton Live 10 is a popular digital audio workstation (DAW) that is widely used by musicians, producers, and DJs around the world. This software is designed for live performance, composition, and production of music. It is equipped with a wide range of tools, instruments, and effects that enable you to create and manipulate sounds in limitless ways. In this blog post, we’ll go over one of the most useful features of Ableton Live 10, which is the sidechain rack boots and cats. Before we dive into the details of this feature, let’s begin with an overview of the Ableton Live 10 interface.

Interface Overview

The Ableton Live 10 interface is divided into two main views: the Session View and the Arrangement View. The Session View is where you can trigger and manipulate clips, loops, and samples in real-time. The Arrangement View is where you can arrange your clips, create MIDI and audio tracks, and apply effects and automation to your composition.

Basic Sound Editing In The Arrangement View

To start creating music in Ableton Live 10, you can begin by adding audio or MIDI tracks in the Arrangement View. Once you have added a track, you can start recording or importing clips, loops, and samples. You can also use the built-in instruments and effects to create unique sounds and add them to your composition. To edit the sound of a clip in the Arrangement View, you can use the Clip View. Here, you can apply effects, adjust volume and panning, and add automation. You can also use the Warping feature to change the tempo and pitch of a clip without affecting its quality. In addition to these tools, Ableton Live 10 also offers a range of shortcuts and workflow enhancements that can make your production process faster and more efficient. For example, you can use the Tab key to switch between the Session and Arrangement Views, or use the Ctrl+G shortcut to group tracks and apply effects to them as a unit. Overall, Ableton Live 10 is a powerful and versatile music production software that offers a wide range of features and tools for creating, editing, and performing music. The sidechain rack boots and cats is just one example of the many innovative and unique features that this software has to offer.

Ableton Live 10 Sidechain Rack Boots And Cats

Credit: flypaper.soundfly.com

Sidechain Compression

If you’re looking for a way to create rhythmic patterns in your music, sidechain compression is a technique that you must know. Sidechain compression is a method used to create a pumping effect in music by reducing the volume of one track (the sidechain track) whenever another track (the primary track) plays. This technique is commonly used in electronic dance music and hip hop genres to create that “Boots and Cats” sound.

What Is Sidechain Compression?

Sidechain compression is a technique in which one audio signal (the sidechain) is used to control another audio signal’s level (the primary signal). In Ableton Live, sidechain compression is accomplished using the Compressor device on the primary track, where you route the sidechain audio signal as input.

How To Set Up Sidechain Compression In Ableton Live 10

The process of setting up sidechain compression in Ableton Live 10 is relatively straightforward:

StepDescription
Step 1Add a Compressor to the main track.
Step 2On the Compressor device, select “Sidechain” mode, then click the small arrow at the top right corner to access the sidechain menu.
Step 3Select the input source from the drop-down menu and adjust the threshold and ratio controls to achieve your desired results.

Advanced Sidechain Techniques

Once you have mastered the basics of sidechain compression, there are several advanced sidechain techniques you can use in Ableton Live 10 to enhance your music. One technique is to use a dedicated sidechain compressor device, such as the OSCiLLOT SidechainCompressor, to achieve more precise control over the sidechain compression. Another technique is to add sidechain effects to the main track using third-party plugins, such as Waves OneKnob Pumper or SideWidener.

Overall, understanding how to use sidechain compression in Ableton Live 10 is a valuable skill for any producer or musician. With this technique, you can add rhythmic patterns and a pumping effect to your music, giving it that unique sound that listeners love. Try experimenting with different settings and techniques until you find the perfect balance and achieve your desired results.

Understanding The Rack

Learn the ins and outs of Ableton Live 10’s sidechain rack, specifically the “Boots and Cats” effect. By understanding this rack, you can take your music production to the next level and create intricate and dynamic beats.

What Is A Rack?

In Ableton Live 10, a Rack is a tool that allows you to group multiple audio effects and instruments into a single, easily manageable device. Racks help simplify your workflow by letting you control all of the individual devices in your project from a single device. The audio signals from each device are fed consecutively, allowing for some unique sound design possibilities.

How To Create A Rack In Ableton Live 10

Creating a Rack in Ableton Live 10 is an easy process if you follow these simple steps:

  1. Open Ableton Live 10 and create a new audio track.
  2. Expand the browser by clicking “B” on your keyboard or by going View -> Browser.
  3. Navigate to the folder where your desired audio effects or instruments are stored.
  4. Click, drag and drop the devices, one by one, from the browser into the audio track.
  5. Select all the devices in the audio track by clicking the top device with Shift and clicking the bottom device.
  6. Right-click on any of the selected devices and click Group.
  7. You’ve now created a Rack! Double-Click the Rack to expand it and configure the individual effects and instruments further.

Using Macros To Control Device Parameters

One of the most remarkable features of Ableton Live 10 Rack is Macros. They allow you to connect multiple device parameters and configure a single knob to control them simultaneously. Macros are extremely flexible and can be used for many different purposes, including automating transitions, sound design, and live performances. You can customize the mapping range and direction, adjust the curve of the parameter mapping, and enable or disable automation. All of the device parameters can be assigned to a single macro, saving you time and effort during live performances. In conclusion, Ableton Live 10 Rack is a valuable tool that allows you to take advantage of a range of audio effects and instruments. By following the steps outlined above, creating a Rack in Ableton Live 10 is a breeze, and you’re well on your way to producing incredible music.

Building The Sidechain Rack

Learn how to create a Sidechain Rack in Ableton Live 10 for the iconic “boots and cats” effect. This tutorial takes you step-by-step through building the rack, allowing you to easily apply this popular sidechaining technique to your music production.

Building the Sidechain Rack: Sidechain compression is an essential tool for contemporary music production, and Ableton Live 10 makes it easier than ever with its sidechain rack. The sidechain rack is a versatile tool that can be used to achieve pumping drums, thumping basslines, and much more. If you are someone looking to explore Ableton Live 10’s sidechain rack, here’s how you can build It from scratch and customize It according to your needs. Preparing your tracks for sidechain compression: Before diving into the sidechain rack building process, It’s essential to prepare your tracks for sidechain compression. Here are a few tips on how to do It: – Make sure each track is clean and free from unwanted noise or hiss as this can affect the sidechain’s quality. – Have control over your individual tracks to define the elements that need to be side-chained. – Double-check the attack and release times for each track to achieve perfect timing when using the sidechain. Building the sidechain rack from scratch: Building sidechain rack in Ableton Live 10 is an easy process. Here Is how you can start from scratch: 1. Create a new MIDI track in your session view. This MIDI track will serve as your sidechain source. 2. On this new MIDI track, add the Audio Effect called “Compressor.” Go to the Compressor’s sidechain section and select the Input as “Sends Only.” 3. Add a new audio track for the track you want to sidechain. 4. On this new audio track, add the Audio Effect “Compressor.” Adjust its settings as per the sound you desire. 5. Click on the audio track’s “Sends Only” knob and select the MIDI track you created in step 1. 6. Adjust the “Compressor” settings as per your song’s timing and rhythm. You can adjust the attack, release, threshold, ratio, and makeup gain to achieve the desired effect. Customizing your sidechain rack: Once you have built your sidechain rack, you still have the flexibility to customize it to match your sound requirements. Here are a few tips: – Adjust the threshold, ratio, attack, and release times based on your song tempo and rhythm. – Try using compression plugins other than the default compressor to experiment with different sounds. – Add effects like EQ, reverb, and delay to your sidechain rack to achieve more complex textures and creative results. In conclusion, Ableton Live 10’s sidechain rack provides an easy and fun way to enhance your music tracks. Follow these steps to build your sidechain rack from scratch and customize it according to your preferences. With some practice and experimentation, you’ll undoubtedly create engaging boots and cats!

Using The Sidechain Rack

The Sidechain Rack in Ableton Live 10 is a powerful tool for creating that recognizable “boots and cats” pumping effect in electronic music. By routing one sound to trigger the compression of another, producers can achieve the signature pulsing rhythm heard in many genres.

Applying The Sidechain Rack To Your Tracks

When it comes to mixing, the sidechain technique is often used to create that pumping effect we hear in many dance and electronic music tracks. Ableton Live 10 offers a powerful feature called the Sidechain Rack, which allows you to apply this effect to your tracks with ease. To get started, add the Sidechain Rack to your track from the Audio Effects section in Ableton.

Fine-tuning The Settings For Optimal Sound

Once you have added the Sidechain Rack, it’s time to fine-tune the settings. The Sidechain Rack consists of two main sections: the Sidechain section and the Processing section. In the Sidechain section, you can select the audio source that you want to use for the sidechain effect. This can be any audio track in your project. In the Processing section, you can adjust the amount of compression and the attack and release times to achieve the desired effect. The attack time determines how quickly the compressor engages when the audio source triggers it, while the release time determines how quickly the compressor disengages when the audio source stops triggering it.

Using The Boots And Cats Technique

One popular technique for using the Sidechain Rack is called “Boots and Cats.” Essentially, this involves sidechaining a kick drum or bassline pattern to the main synth or instrument track. This creates a pumping effect that is commonly heard in modern dance music. To use the Boots and Cats technique, first, select the audio track that you want to sidechain. Next, add the Sidechain Rack to the track and select the audio source that you want to use for the sidechain effect. In most cases, this will be either a kick drum or bassline pattern. Finally, adjust the compression and attack and release times to achieve the desired effect. Experiment with different settings until you find what sounds best for your track. With the Sidechain Rack’s powerful features, you can achieve a professional sound that is sure to get people moving on the dancefloor.

Ableton Live 10 Sidechain Rack Boots And Cats

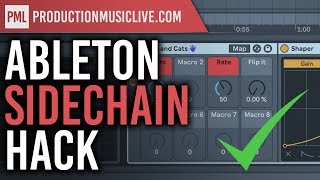
Credit: www.productionmusiclive.com

Ableton Live 10 Sidechain Rack Boots And Cats

Credit: www.reddit.com

Frequently Asked Questions On Ableton Live 10 Sidechain Rack Boots And Cats

How Do I Add Sidechain Compression In Ableton?

To add sidechain compression in Ableton, follow these steps: first, insert a compressor on the audio track you want to compress; second, choose the sidechain input in the compressor section; third, select the audio track to trigger the compressor sidechain; lastly, adjust the threshold, ratio, and attack/release settings to your preference.

How Do I Sidechain A Bus In Ableton?

To sidechain a bus in Ableton, follow these steps: 1. Group the tracks you want to sidechain to the bus. 2. Pick the bus as the Sidechain Input for the compressor on the group track. 3. Set the compressor’s Attack and Release times and adjust the Ratio and Threshold settings.

4. Adjust the Mix knob to blend in the compressed signal with the original sound. 5. Use the sidechain EQ plugin to fine-tune the compressor’s response to the selected frequency range.

What Is Ableton Live 10 Sidechain?

Ableton Live 10 Sidechain is a unique effect used to produce rhythmic pumping. Sidechain routing allows you to use one track to create compression on another track. This creates a “ducking” effect, meaning one track decreases in volume when the other track plays.

How Do You Use Sidechain In Ableton Live 10?

To use Sidechain in Ableton Live 10, you first select a source track and a target track. Then, you need to open the compressor on the target track and choose the source track from the “sidechain” menu. Next, adjust the sidechain parameters to your liking.

Finally, you can play both tracks to hear the effect.

Conclusion

Finally, we have listed the essential things to remember when using the Ableton Live 10 sidechain rack. With the “boots and cats” technique, creating that perfect beat has never been easier. You can now make your music sound professional and polished with just a few clicks.

By following the tips provided you can take your music production to the next level and impress your audience with the perfect sidechain compression. So, go ahead and experiment with your techniques and discover your unique style!

Categories
Archive

Know The History Of Modern Dance Music

Modern dance music originated in the United States and Europe in the late 19th century. Today, it has evolved into various subgenres and influenced contemporary popular music worldwide.

Originating as a form of resistance against classical ballet, modern dance music was first introduced by Isadora Duncan in the United States and Emile Jaques-Dalcroze in Switzerland. In the 1920s, the genre expanded with the emergence of jazz music and the popularity of social dancing.

The 1970s and 80s marked the birth of electronic dance music, which continues to evolve and dominate the scene today. Modern dance music has also been heavily influenced by diverse cultural and global musical traditions, leading to the creation of subgenres like Afrobeat, K-pop, and Latin pop. From underground clubs to mainstream cultural events and festivals, modern dance music remains an essential part of contemporary culture.

Know The History Of Modern Dance Music

Credit: study.com

Origins Of Dance Music

The history of modern dance music is closely related to the origins of dance music. The roots of dance music are found in the rhythms and beats of different cultures around the world. It has been used as a way of bringing people together, expressing joy, and celebrating life. Over time, dance music has evolved into many different styles and genres, each with its unique sound and cultural influences.

Early Forms Of Dance Music

Human beings have been dancing for thousands of years, and dance music has been a part of those traditions. Some of the earliest forms of dance music can be traced back to ancient civilizations, such as the Egyptians, Greeks, and Romans. They used music and dance to honor their gods and celebrate important events.

In Africa, the drum has played an essential role in traditional dance music for centuries, communicating with the spirits and telling stories. Similarly, Native American and South American cultures also have a long history of dance music, with drums, rattles, and other instruments used to create rhythm and sound.

How Dance Music Evolved Through Time

As civilization progressed, dance music began to evolve alongside it. In the early 1900s, jazz music emerged, bringing with it new dance styles such as the Charleston and the Lindy Hop. These dances were accompanied by the upbeat rhythms of jazz music, and they quickly became popular around the world.

In the 1950s, rock and roll music became the dominant force in dance music. With its high-energy beats and catchy melodies, rock and roll inspired a new generation of dancers. The introduction of the electric guitar and other electric instruments led to the birth of new styles such as heavy metal and punk rock.

In the 1970s, disco music took over dance floors around the world. The catchy beats and glamorous style of disco music seemed to offer an escape from the tensions of everyday life. Disco music also led to the birth of new dance styles such as the hustle and the electric slide.

Throughout the 1980s and 1990s, electronic dance music emerged as a dominant force in the world of dance music. With its synthesized sounds and futuristic beats, electronic dance music created a new landscape for dancers to explore. The fusion of electronic music with hip hop led to the birth of new styles such as techno and house music.

Today, dance music continues to evolve, with new styles and genres emerging all the time. From hip hop to EDM, dance music remains a vibrant and essential part of our culture.

The Birth Of Modern Dance Music

Modern dance music is a genre that has strongly influenced popular music ever since its inception. Initially starting as disco in the 1970s, Modern Dance Music has come a long way and has diversified into different sub-genres. However, before we delve more into the sub-genres, it is essential to explore the history and culture of the disco era, which gave birth to modern dance music.

The Cultural Context Of Disco

Disco music originated in New York’s underground club scene in the 1970s and emerged as a prominent genre of music during this era. It was popularized through the African-American, Italian-American, and Hispanic communities in the United States. Disco was more than just music; it was a cultural movement that celebrated diversity, inclusivity, and individualism. The clubs and bars that played disco music in the 1970s were the only places where LGBTQ+ individuals and people of color could express themselves freely without fear of harassment or persecution. Disco music was the soundtrack of self-expression, freedom, and acceptance.

The music borrowed elements from different genres such as funk, soul, and psychedelic rock. The rhythm, orchestration, and arrangement of disco music were specifically designed for dancing.

Disco’s Influence On Modern Dance Music

Disco music had a massive influence on the development of modern dance music. Its easy-to-dance beats and rhythms, and emphasis on the groove, laid a foundation for different subgenres such as house, electronic dance music (EDM), techno, and many more.

One of the notable influences of disco on modern dance music is that it paved the way for the use of electronic instruments in music production. Electronic instruments such as synthesizers, drum machines, and samplers, which were first used in disco music, became integral to modern dance music.

Similarly, disco’s repetitive beats and rhythms inspired the development of house music, which is characterized by a 4/4 beat, repetitive basslines, and synthesizer melodies. House music, in turn, gave birth to many other sub-genres such as techno, trance, and EDM.

In conclusion, modern dance music owes its existence to the cultural and musical influences of disco. Disco was more than just music; it was a cultural movement that celebrated diversity, individualism, and freedom of expression. It laid the foundation for many sub-genres of modern dance music and continues to influence the music industry today.

The Rise Of Electronic Dance Music

Electronic dance music (EDM), commonly known as dance music, has evolved significantly over the years and has become a mainstream genre across the globe. As we explore the history of modern dance music, it is essential to understand the massive impact that electronic dance music has on the music industry and music lovers globally. Let’s delve into the introduction of electronic music production and the impact of technology on dance music.

Introduction Of Electronic Music Production

The history of electronic music production dates back to the invention of synthesizers in the 1960s. However, it was in the 1980s when electronic dance music began to gain prominence with the invention of the drum machine, sequencer, and synthesizer. These technological advancements enabled DJs and music producers to create beats, loops, and soundscapes, resulting in the emergence of new electronic sounds to drive dance floors crazy.

Impact Of Technology On Dance Music

The advancements in technology have revolutionized the way dance music is produced and consumed. The proliferation of digital audio workstations (DAWs) enabling software recording, editing, mixing, and mastering of music has provided new opportunities for bedroom producers to develop their music. With the advent of social media and digital streaming platforms, aspiring musicians can now share their music with a broader audience and harness a following without the support of record labels.

Advantages of Technology on Dance music
AdvantagesExplanation
Easy accessibilityTechnological advancements have made music production more accessible to everyone.
Low entry barriersToday, aspiring music producers and DJs can create and distribute their music without the need for a record label.
Increased creative freedomDJs and music producers can manipulate sounds and beats and create unique dance music compositions.
Wider audience reachThe rise of digital streaming platforms has revolutionized the music industry, making it easier for aspiring musicians to reach larger audiences.

The proliferation of electronic dance music in modern music is a testament to the influence and impact of technology on the music industry. With continuous advancements in technology, we can only expect more creative sounds to emerge and take over dance floors globally.

The Emergence Of Club Culture

Club culture has swept the world and become a lifestyle for millions over the past few decades. Its roots lie in the late 1960s, when electronic dance music (EDM) began to evolve and brought about a new era of partying and socializing.

Understanding the history of modern dance music can lead to a greater appreciation of this phenomenon.

As musical genres evolved over time, so did the venue where they were played. The rise of disco in the mid-1970s led to the emergence of club culture where dance music was played and listened to. With this kind of venues, people found a new place to socialize, dance and enjoy music. The club culture introduced a new way of experiencing music that differs from the traditional way. The club environment and its music producing system lead to the creation of unique sounds and styles of dance music that we enjoy today.

The Role Of Clubs In Dance Music

Clubs played a significant role in the emergence and growth of dance music as a genre. These venues represented a new paradigm shift for music as they provided an opportunity for producers and DJs to perform in front of a live audience. The clubs allowed improvisation, with the DJ altering the records according to the crowd’s response. It became a two-way experience – it was not just about playing music, but also about engaging the audience. The club culture challenged DJs and producers to innovate and experiment with sounds and effects that would create unique dance tracks.

Impact Of Clubs On Music Production

Clubs had a significant impact on music production. As clubs grew in popularity, producers realized that they need to produce music that would cater to the club audience. This led to the creation of new music production techniques and tools that catered to dance music production. As a result, dance music became more integrated and diverse, with iconic sub-genres such as techno, house, and trance that owe their origins to the clubs. Club environments promoted the use of bass-heavy and fast-paced music that would get people on their feet, which led to more specialized and unique sounds competing in the market.

Conclusion

The emergence of club culture has played a vital role in the development and evolution of dance music. The clubs provided a unique platform for DJs and producers to showcase their creativity and innovate in their music production techniques. Dance music continues to be a global phenomenon, and its popularity continues to rise as more people embrace the club culture.

The Influence Of Dance Music On Popular Culture

Dance music has become one of the most popular genres in the music industry today. Its impact extends far beyond the clubs and festivals where it is played, influencing everything from art to fashion. In this article, we will explore how dance music has influenced popular culture.

Dance Music’s Impact On Fashion And Art

The influence of dance music on fashion and art cannot be underestimated. From the earliest days of disco, dance culture has had a significant impact on fashion trends. In the 1970s and 80s, disco fashion was all about colorful clothing, sequins, and platform shoes. As house music became more popular in the 1990s, the fashion became more minimal and sleek.

Today, dance music continues to influence fashion. Many of the biggest names in fashion, such as Alexander McQueen and Marc Jacobs, have incorporated elements of dance culture into their collections. The use of bright colors, bold patterns, and oversized accessories can all be traced back to the world of dance music.

Dance music has also had a significant impact on the art world. Artists such as Keith Haring and Jean-Michel Basquiat used the energy and vibrancy of dance culture in their work. Their bold, colorful paintings and graffiti reflect the energy and passion of dance music.

Crossover Success Of Dance Music In Mainstream Media

In recent years, dance music has broken through into mainstream media. It is no longer confined to clubs and festivals. Instead, dance music has become a global phenomenon, with tracks regularly making their way onto the pop charts.

One of the reasons for the crossover success of dance music is the use of technology. The rise of digital music production has made it easier than ever before for artists to create dance tracks. This has also made it easier for these tracks to be remixed and adapted for other genres.

Another reason for the crossover success of dance music is the way it has been embraced by the entertainment industry. Dance music is no longer just for the clubs. It is now a staple of movie soundtracks, TV shows, and commercials. This has helped to bring dance music to a wider audience.

Conclusion

In conclusion, dance music has had a significant impact on popular culture. It has influenced fashion, art, and mainstream media. As dance music continues to evolve, we can expect it to have an even greater impact on popular culture in the future.

Genres Of Dance Music

Dance music has come a long way from its early roots and has evolved into countless genres. Each genre has its own distinct sound, style, and history that sets it apart from the others. Let’s take a closer look at some of the most popular genres of dance music:

House Music

House music originated in the 1980s in Chicago and quickly spread throughout the world. It combines elements of disco, funk, and soul music to create a high-energy sound that’s perfect for dancing. The most common features of house music include four-on-the-floor beats, syncopated basslines, and vocal samples.

Techno

Techno is another genre of dance music that originated in the 1980s, this time in Detroit. It’s characterized by its use of synthesizers, drum machines, and other electronic instruments to create a futuristic sound. The tempo is usually fast, and the beats are repetitive, making it popular in clubs and parties.

Trance

Trance music is a genre that emerged in the early 1990s in Germany. It’s characterized by its use of repetitive melodies and beats, and it has a hypnotic quality that’s perfect for losing yourself on the dancefloor. Trance music is also known for its emotional and uplifting lyrics, which often focus on themes like love and spirituality.

Dubstep

Dubstep is a genre of dance music that originated in the UK in the early 2000s. It’s known for its use of heavily distorted basslines, complex rhythms, and frequent use of samples and sound effects. Dubstep is often associated with a dark and aggressive sound, but it can also be melodic and uplifting.

Future Bass

Future bass is a genre of dance music that emerged in the early 2010s. It’s known for its use of crisp and clean production techniques, as well as its complex rhythms and heavy use of samples. Future bass often features pitched-up vocals and other ethereal elements, giving it a dreamy and otherworldly feel.

Drum And Bass

Drum and Bass is a genre that emerged in the UK in the early 1990s. It’s characterized by its use of breakbeats, heavy basslines, and fast tempos. Drum and Bass is known for its energy and intensity, making it popular in clubs and raves around the world.

These are just a few of the many genres of dance music that have emerged over the years. Each genre has its own unique sound and history, and they all play an important role in the world of dance music today.

Globalization Of Dance Music

The globalization of dance music has taken the world by storm. What started as a subculture in the gay clubs of underground New York City venues has now spread across the globe and has become a mainstream culture all over the world. This article delves into the history of modern dance music and how it has evolved over the years.

Spread Of Dance Music Across Borders

The spread of dance music across borders has taken place due to an increase in technology and communication. The advent of the internet has made it possible for dance music artists to share their music with a global audience without the need for physical media. The ease of access through music streaming services has revolutionized the way people consume music worldwide. Social media platforms have also provided dance music artists with the ability to promote their music and events worldwide. As a result, dance music has become a global phenomenon.

Fusion Of Cultural Sounds And Genres

The globalization of dance music has also led to a fusion of cultural sounds and genres. Artists are no longer limited to a specific genre or region and are now encouraged to experiment with different sounds and styles. The fusion of cultural sounds and genres has resulted in unique and eclectic sub-genres of dance music such as techno, house, and trance. For example, the blending of African beats and electronic sounds has resulted in the creation of a new sub-genre of dance music known as afro-tech.

The globalization of dance music has also resulted in the emergence of new talent from all corners of the world. Dance music artists from different cultures and backgrounds have been able to collaborate and share their experiences through their music. It has also led to the discovery of new and unique sounds from different regions of the world.

In conclusion, the globalization of dance music has led to its immense popularity worldwide. The spread of dance music across borders and the fusion of cultural sounds and styles have resulted in the creation of numerous sub-genres that cater to a global audience. This has opened up new avenues for artists to showcase their talent and share their music with the world.

Future Of Dance Music

The world of music is in constant motion, and the dance music scene is at the forefront of this evolution. From the days of disco to the current rise of EDM, dance music has gone through various changes, and the future promises even greater innovations in sound, style and technological advancements.

Innovative Music-making Techniques

The future of dance music will be shaped by innovative music-making techniques that are already exploring new frontiers and redefining traditional styles. For instance, DJs are using live recording and sampling techniques to create diverse and unique sounds. Meanwhile, producers are experimenting with new MIDI controllers, digital audio workstations and other hardware and software tools that allow them to create complex compositions and soundscapes.

In addition, new techniques for collaboration and networked music-making are emerging, making it possible for producers and artists to work together remotely and share their creations online. This approach not only fosters creativity and diversity but also enables musicians to tap into the skills and expertise of other artists around the world.

The Potential Impact Of Technology In Dance Music

The influence of technology in dance music is not new, but the future promises even more advanced and sophisticated tools that can completely redefine the way we experience music. In fact, AI-powered music creation tools, VR-enabled music performances and blockchain-based systems for music distribution are already taking shape, promising to revolutionize the industry in the near future.

Even now, technological advancements like immersive audio systems, multi-dimensional soundscapes and interactive light shows are being integrated into live performances, creating an all-encompassing dance experience that can take a listener on a journey through time and space.

Conclusion

With innovative music-making techniques and the impact of cutting-edge technology, the future of dance music is bright and full of possibilities. As audiences continue to demand new and exciting sounds and experiences, producers, DJs and performers will continue to push the boundaries, creating new frontiers of creativity, energy and emotion.

Frequently Asked Questions Of Know The History Of Modern Dance Music

How Did Modern Dance Begin?

Modern dance originated in the early 20th century as a rebellion against traditional ballet. It was created by dancers who wanted to express themselves through more emotional and improvisational movements. Modern dance pioneers include Isadora Duncan, Ruth St. Denis, and Martha Graham.

What Music Is Used In Modern Dance?

Modern dance utilizes a wide range of music styles, from classical to contemporary. It can incorporate live music, electronic beats, and even silence. The music choice is often intended to evoke emotion and create a specific atmosphere that complements the dancer’s movements.

What Was Modern Dance In The 20th Century?

Modern dance in the 20th century was a form of dance that emerged as a rebellion against traditional ballet. It emphasized freedom of movement, improvisation, and personal expression. It was often accompanied by modern music and was a significant shift away from the rigid structure of classical ballet.

What Is The Cultural Importance Of Modern Dance?

Modern dance is culturally important as it represents a unique form of artistic expression, promoting individuality, creativity, and freedom of movement. It challenges traditional dance forms, encourages social and cultural awareness, and fosters a sense of community through shared experiences.

Modern dance is a significant part of the contemporary arts scene, creating a platform for diverse voices and perspectives.

Conclusion

Modern dance music has a rich history that dates back decades. From the development of electronic instruments to the emergence of house and techno, dance music has always been at the forefront of artistic and cultural expression. With its ability to bring people together and create a sense of community, dance music continues to evolve and adapt to new styles and technologies.

By understanding the roots and evolution of dance music, we can better appreciate the artists and genres that continue to shape this vibrant cultural phenomenon.

Categories
Archive

How To Prepare Your Songs For Mastering

To prepare your songs for mastering, ensure they are mixed well and have proper headroom. Then, export them in high-quality audio formats such as WAV or AIFF.

Preparing your songs for mastering is a crucial step in ensuring that they sound their best when released. The mastering process involves applying the finishing touches to your songs, making them sound polished and professional. However, before handing them over to a mastering engineer, you need to ensure that they are mixed well and have the proper headroom.

This involves eliminating any clipping or distortion and ensuring that there is enough headroom for the mastering engineer to work with. Additionally, when exporting your songs, be sure to use high-quality audio formats such as WAV or AIFF to ensure that no audio information is lost in the conversion process.

How To Prepare Your Songs For Mastering

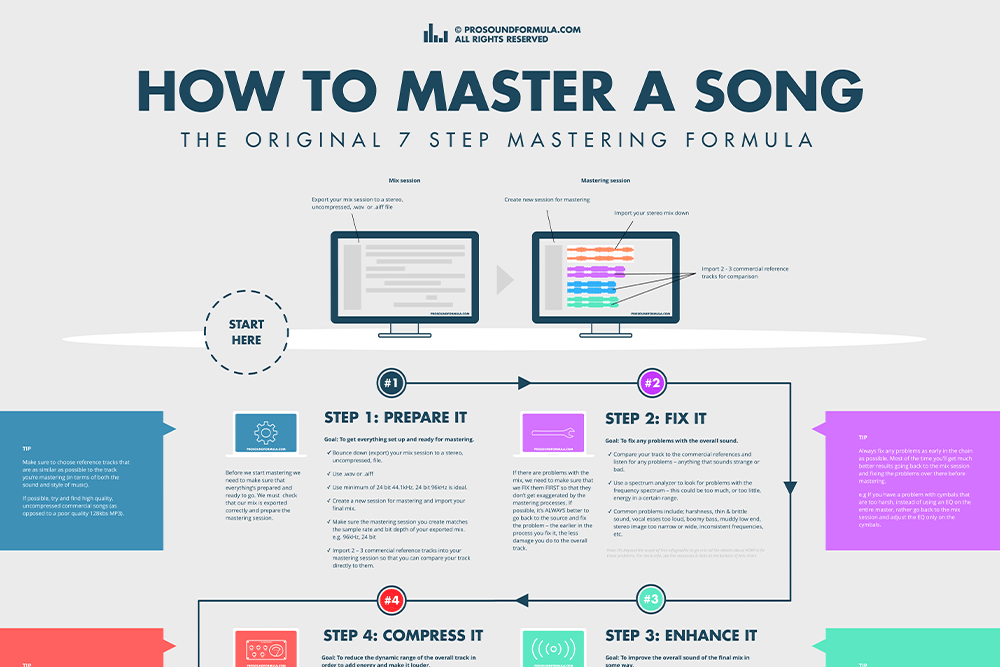
Credit: prosoundformula.com

Preparing Your Mix For Mastering

To ensure optimal sound quality, it’s crucial to prepare your mix for mastering. Begin by organizing your tracks, checking levels, and getting rid of any unwanted background noise. This will help your music sound its best during the mastering process.

Preparing Your Mix for Mastering is a critical step in ensuring that your songs sound as good as possible. There are several steps that you can take to make sure that your mix is ready to be mastered. Organize Your Tracks, Ensure All Tracks are Named Appropriately, Confirm the Bit Depth and Sample Rate, Consider Using Reference Tracks for Comparison, Clean Up Any Unwanted Audio Clips and Sounds, Get Your Mix as Close to the Final Product as Possible, and Export the Mix with Enough Headroom.

Organize Your Tracks

Before you start preparing your mix for mastering, it’s essential to organize your tracks. This process will help you quickly find the individual tracks that you need to adjust. Creating groups or folders that contain similar tracks can also be helpful. Start by listening to each track and determine which group it belongs to. Drag and drop each track to the appropriate group or folder. This step will make your life much easier when you start adjusting individual tracks.

Ensure All Tracks Are Named Appropriately

Naming your tracks appropriately is essential when preparing your mix for mastering. Use descriptive names that accurately reflect the sounds in the track. Doing so will make it easier to find and adjust specific tracks when the time comes. It will also help the mastering engineer understand your mix and make the appropriate adjustments.

Confirm The Bit Depth And Sample Rate

Before exporting your mix, confirm the bit depth and sample rate. These settings can significantly impact the quality of the final product. Generally, 24-bit depth and 44.1 kHz or higher sample rates are suitable for most commercial releases. Different platforms may require different settings. Ensure you understand their requirements before adjusting these settings.

Consider Using Reference Tracks For Comparison

Using reference tracks can be a great way to monitor your mix. Reference tracks are professionally mixed and mastered songs that are similar in style and genre to your music. To use them effectively, play both your mix and the reference track simultaneously. Make adjustments to your mix to try and match the reference track. This step will help you achieve a similar sound and volume level to the industry standard.

Clean Up Any Unwanted Audio Clips And Sounds

Clean up any unwanted audio clips and sounds from your mix. These unwanted sounds can significantly impact the quality of the final product. Be sure to remove any unwanted background noise, clicks, pops, or hiss. You may need to use noise reduction plugins or manually remove these sounds.

Get Your Mix As Close To The Final Product As Possible

Before exporting your mix, make sure it is as close to the final product as possible. Ensure all levels are balanced, and the EQ is as close as possible to the final sound you want. Remember that the mastering engineer will make final adjustments, but your mix should be as close as possible to your vision.

Export The Mix With Enough Headroom

Finally, when exporting your mix, make sure there is enough headroom. Headroom is the space between the loudest peaks in your mix and 0 dBfs, the maximum digital level. Leaving headroom helps prevent distortion during mastering. Aim for at least -3 dB to -6 dB of headroom. Export in a lossless format such as WAV to ensure the highest quality. In conclusion, preparing your mix for mastering is essential to ensure high-quality sound in your final product. By following these steps, you can ensure that your mastering engineer has the best possible mix to work with.

Preparing Your Individual Audio Tracks For Mastering

To prepare your songs for mastering, it’s crucial to properly export your individual audio tracks in high-quality WAV or AIFF format and ensure all tracks start at the same time. Use proper gain staging to avoid clipping and leave enough headroom for the mastering engineer to work with.

Lastly, label your tracks and provide detailed notes to help the engineer understand your vision.

Before sending your songs off for mastering, it’s essential to make sure that each individual audio track is ready for the process. Preparing your audio tracks before mastering ensures that you get the most out of the mastering process and achieve the best possible final product. Below are some essential steps to take when preparing your individual audio tracks for mastering:

Check For Distortion Or Clipping

Before starting any other processing, it’s crucial to check for distortion or clipping in each individual audio track. If your tracks have any distortion or clipping, it’s best to fix them by adjusting the levels to avoid any problems during mastering. It’s essential to keep all your levels under control to get the most out of the mastering process.

Check The Eq On Each Track

Next, check the EQ on each audio track and ensure that each track’s EQ sounds balanced and complements the rest of the song. If you find any areas that need work, it’s best to adjust the EQ before mastering to achieve the best final mix.

Apply Compression To Individual Tracks If Needed

Applying compression to individual tracks can help even out any volume inconsistencies and add more punch to each audio track. However, it’s essential to use compression sparingly, as too much compression can make your tracks sound flat and lifeless.

Edit And Clean Up The Audio Using A Gate Or Similar Tool

Editing and cleaning up your individual audio tracks using a gate or similar tool can help to reduce background noise and eliminate any undesirable sounds or artifacts. These edits can help to ensure that each track sounds as polished as possible before mastering.

Apply Reverb Or Delay As Needed

Reverb or delay can add a sense of space and depth to each individual audio track, especially in genres such as pop or rock. However, it’s best to use reverb or delay sparingly, as too much can make each track sound muddy or indistinct.

Confirm All Individual Tracks Are Summing To The Mix Correctly

Finally, it’s essential to confirm that all individual audio tracks sum to the mix correctly before sending off for mastering. This step ensures that each audio track complements the others and forms a coherent, well-mixed song. By following these essential steps, you can prepare your individual audio tracks for mastering and ensure that you achieve the best possible final mix for your songs.

Preparing Your Final Mix For Mastering

To prepare your songs for mastering, it’s important to ensure your final mix meets a few key requirements. This includes checking your levels, making sure your EQ and compression is balanced, leaving enough headroom, and making sure your files are properly labeled and formatted.

By following these steps, you can ensure your tracks are ready for the mastering process.

Preparing your final mix for mastering is a crucial step to ensure your music sounds the best it can. You want to make sure that your songs are ready for the final stage of the recording process and that they accurately reflect your creative vision. In this section, we’ll dive into some important steps you need to take to prepare your final mix for mastering.

Ensure You Have The Correct File Format

Before you send your final mix for mastering, make sure you have the correct file format. The most common formats for mastering are WAV and AIFF. Both formats are lossless and offer high-quality audio, which is crucial for a professional sound. Ensure that your file is exported at the same sample rate and bit depth that you used for mixing to maintain the quality of your music.

Name Your Final Mix Appropriately

It’s essential to name your final mix properly before sending it for mastering. Use a clear and concise naming convention that indicates the song name and version number, like “SongName_finalmix_v1.wav”. It will help the mastering engineer to keep track of your project and avoid confusion. If you have multiple songs, make sure to name them appropriately and clearly label their version number.

Confirm Headroom For The Final Mix

Headroom is the amount of space between the loudest parts of your audio and the maximum level your mix can reach before clipping or distortion occurs. Before sending your final mix for mastering, make sure the headroom is sufficient for the mastering process. Aim for at least -6dB of headroom to ensure that the mastering engineer has enough room to work with. Most mastering engineers prefer having enough headroom to apply compression and EQ without damaging your mix’s quality.

Perform A Final Listen-through

Take the time to listen to your final mix critically before sending it for mastering. Listen to it on different speakers and headphones to ensure that it sounds great across all mediums. Make sure that all the elements in your mix are balanced, and there are no inconsistencies like volume fluctuations. Check for any unwanted noises or issues with phase or stereo imaging. Fix any issues that you find before sending it to be mastered.

Take A Break Before Sending Your Mix For Mastering

Taking a break before sending your final mix for mastering is essential. Listen to it again after a few days or a week as it will help you freshen your perspective and hear any issues you may have missed earlier. Get feedback from trusted sources like friends, colleagues, or even online communities to gather some insights on how people perceive your music. In conclusion, preparing your final mix for mastering is an essential step in the recording process. Ensure your file format and naming conventions are correct, confirm the headroom, perform a final listen-through, and take a break before sending it for mastering. These steps will help you achieve the best possible results and accurately reflect your creative vision.

How To Prepare Your Songs For Mastering

Credit: www.youtube.com

Choosing The Right Mastering Engineer

Finding the right mastering engineer is crucial to ensure that your songs reach their full potential. To prepare your songs for mastering, make sure to properly mix them, use high-quality audio files, communicate your goals and preferences with the engineer, and trust their expertise.

Research Potential Mastering Engineers

Researching potential mastering engineers is the first step in finding the right one. Look for audio engineers who specialize in mastering and have experience working with your genre of music. You can begin your search on the internet, social media, or by asking other musicians for recommendations.

Request Samples Or A Portfolio Of Work

Once you have identified potential mastering engineers, the next step is to request samples or a portfolio of their work. This will give you an idea of their skills and what to expect from their work. You can listen to the before-and-after samples of their previous work to ensure you like their style and techniques.

Check Pricing And Turnaround Times

Before finalizing any mastering engineer, ensure you are clear on their pricing and turnaround times. Ask for a quote and make sure it fits your budget. Compare the cost with other professionals in the industry to ensure you are getting a fair price. Ensure their turnaround time suits your schedule and is reasonable enough.

Communicate Your Goals And Preferences

Smooth communication between you and your mastering engineer should start from the beginning. Let them know your goals, style, and preferences upfront. Clear communication ensures they understand your vision and can tailor their approach to achieve your desired result and goals.

Provide Clear Instructions For The Mastering Engineer

To ensure your songs are mastered to your liking, provide the engineer with clear instructions. Explain critical areas that need attention, such as vocal levels and instrument mixes. Label the tracks correctly so that the engineer understands the order and structure of the songs. By providing clear guidelines, you can avoid misinterpretation by the mastering engineer and receive precisely what you want. Finding the right mastering engineer can make a world of difference in the final sound of your music. By researching, requesting samples, checking pricing and turnaround times, and providing clear instructions, you can ensure your songs are mastered to your liking, and you’re fully satisfied.

Preparing Your Files For Transmission To The Mastering Engineer

To ensure seamless transmission of your songs to the mastering engineer, it is crucial to properly prepare the files. Start by checking the file format, resolution, and file names. It’s also important to communicate any specific instructions or preferences to the engineer beforehand.

With these steps, you can ensure a successful mastering process for your music.

Preparing Your Files for Transmission to the Mastering Engineer To get the best results from mastering, you need to ensure your audio is properly prepared. The process of preparing audio files for mastering can be overwhelming, but with the right approach, it can be easy. Here are some tips on how to prepare your songs for mastering. Ensure Your Files are Organized and Named Correctly An essential step in preparing your audio for mastering is to organize your audio files in a logical and straightforward way. Make sure you have a separate folder for each song, and label each file appropriately, including the song name, version, and format. This organization will help the mastering engineer work effectively, and you’ll avoid any confusion or mix-ups caused by improperly labeled files. Confirm the File Format with the Mastering Engineer Check with the mastering engineer about their preferred file format before sending your audio files. Most mastering engineers accept high-quality audio formats, including WAV, AIFF, and even DSD. Sending high-quality audio files will ensure that the mastering engineer has all the details and nuances they need to deliver the best results. Make Sure the Bit Depth and Sample Rate are Correct Bit Depth and Sample Rate are two critical components of an audio file that greatly affect the overall quality. Ensure that your audio files have the right Bit Depth and Sample Rate. For Bit Depth, the standard is 24bits. And for Sample Rate, the standard is 44.1kHz. Make sure you check with the mastering engineer to see if they have any specific recommendations based on their setup. Include a Reference Mix or Track for Comparison A reference mix is a pre-mastered version of your song that you provide for the mastering engineer to refer to. Using a reference mix can help the mastering engineer understand your vision for the final master. A reference track can be an original song that you emulate or one that has a similar vibe, tone, or feel to what you’re trying to achieve. Check that the Files are Secure and Virus-Free Before sending your audio files to the mastering engineer, it’s essential to check that they are virus-free and secure. Keep your audio files in a password-protected folder, and make sure they don’t contain any viruses that could harm the engineer’s computer system. This security ensures that your files will not be corrupted and that there will be no data loss during the transmission process. Following these tips for preparing your songs for mastering will ensure that your music gets the attention it deserves from the mastering engineer and delivers the results you desire.

How To Prepare Your Songs For Mastering

Credit: m.youtube.com

Frequently Asked Questions Of How To Prepare Your Songs For Mastering

How Do I Prepare A File For Mastering?

To prepare a file for mastering, follow these 5 guidelines: 1. Ensure the file meets technical requirements. 2. Clean up any pops, clicks, or distortion in the audio. 3. Leave headroom for the mastering engineer to work with. 4. Remove any limiters or EQ on the master buss.

5. Export the file as a high-quality, uncompressed audio file such as WAV or AIFF.

What To Do Before Mastering A Track?

Before mastering a track, there are a few things you should keep in mind. Make sure to review the mix for any issues, adjust levels and panning, clean up any unwanted noises, and ensure that it is properly exported. Additionally, it is important to take breaks during the mastering process and to use reference tracks to ensure that the final product is balanced and sounding great.

What Should My Mix Be Before Mastering?

Your mix should be balanced, with each element in its proper place and at the appropriate level. This means that each instrument and vocal should be equal in terms of perceived loudness and not mask or overpower any other element.

It should also be free of any distortion or significant frequency clashes. Before mastering, ensure that you have addressed any mix issues that could affect the final product.

How Do I Get My Mix Ready To Master?

To get your mix ready for mastering, make sure to: 1. Organize tracks and ensure they are consolidated and labeled correctly. 2. Clean up any unwanted noise and ensure levels are balanced. 3. Use proper EQ and compression. 4. Add reverb or delay (if necessary) and ensure all effects are tasteful.

5. Export the mix in the appropriate format and bit depth.

Conclusion

To summarize, preparing your songs for mastering is an essential step in ensuring a professional and high-quality end product. Follow these guidelines to ensure that your songs are ready for the mastering process. Remember to take your time, pay attention to detail, and utilize the skills of a professional mastering engineer.

With these tips in mind, you’ll be well on your way to music that truly shines.

Categories
Archive

How To Eq Critical Things To Avoid Doing

Avoid these critical mistakes to ensure success: don’t procrastinate, don’t multitask, don’t make assumptions and don’t be afraid of asking for help. When it comes to increasing productivity and ensuring success, it’s important to not only focus on what you should be doing, but also on what you should avoid doing.

There are certain critical mistakes that can hinder your progress and leave you feeling stuck. By avoiding procrastination, multitasking, assuming and being afraid of asking for help, you can increase productivity, stay focused and achieve your goals more efficiently. We will explore these critical things in detail and provide actionable steps to help you avoid them.

As a SEO friendly content writer, it’s important to not only provide valuable information but also do so in a concise and easy-to-understand way, which we will strive to achieve throughout the article.

How To Eq Critical Things To Avoid Doing

Credit: www.linkedin.com

Common Mistakes To Avoid While Using Eq

EQ is a powerful tool for shaping sounds in recordings, but there are some common mistakes to avoid. These include overusing EQ, making drastic cuts or boosts, adjusting too many frequencies, and failing to trust your ears. Remember to use EQ sparingly and trust your judgement.

When it comes to emotional intelligence, it is important to not only understand what it is but also how to use it effectively. EQ is crucial for building strong relationships and improving communication, but it can be difficult to master. One of the biggest challenges is avoiding common mistakes that can hinder EQ. Here are four critical things to avoid when using EQ.

Ignoring Your Own Emotions

One common mistake people make when trying to be emotionally intelligent is ignoring their own feelings. It is easy to get caught up in trying to understand others that you forget about how you are feeling. However, ignoring your emotions can lead to burnout and cause you to become disconnected from those around you. Instead, take time to reflect on your own feelings and how they may be impacting your interactions.

Making Assumptions Instead Of Listening

Another mistake to avoid while using EQ is making assumptions instead of listening. It can be tempting to assume you know how someone feels or what they want without actually listening to them. However, this can lead to misunderstandings and cause you to miss important details. Instead, practice active listening and ask questions to clarify what someone is trying to communicate.

Not Showing Empathy

Empathy is an essential component of emotional intelligence, but it can be difficult to display. One mistake to avoid is not showing empathy to others. It is important to put yourself in someone else’s shoes and try to understand their perspective. Without empathy, it is difficult to build strong relationships and have meaningful interactions.

Letting Emotions Control Actions

The final mistake to avoid is letting emotions control your actions. While it is important to acknowledge your emotions, it is equally important to control how you respond to them. Acting impulsively can lead to negative consequences and damage relationships. Instead, take time to process your emotions before reacting and think about the impact of your actions. In conclusion, avoiding these common mistakes can help you become more emotionally intelligent and build stronger relationships. By reflecting on your own emotions, practicing active listening, showing empathy, and controlling your actions, you can improve your EQ and positively impact those around you.

How To Improve Your Eq

To improve your EQ, it’s important to avoid common mistakes such as jumping to conclusions or making assumptions. Instead, actively listen to others and think before responding. It’s also helpful to practice empathy and self-awareness to better understand yourself and those around you.

To improve your emotional intelligence, you need to follow some essential steps that will help you identify and manage your emotions, as well as understand those of others. Here are some effective ways on how to improve your EQ:

Identifying Your Emotions

The first step to developing emotional intelligence is to understand your emotions. By recognizing your feelings, you can take control of them and avoid negative reactions. Pay attention to your body language, such as clenching your fists, tensing your shoulders, or sweating, when faced with stressful situations. These physical cues are often indicators of underlying emotions that you may be experiencing.

Active Listening

Emotional intelligence involves being an active listener, which means paying careful attention to what others are saying without interrupting or judging them. Focus on the speaker’s nonverbal cues, like facial expressions, tone of voice, and body language, to understand the emotional context of their message. When you actively listen, you can also ask questions, seek clarification, and show empathy to enhance the communication.

Practicing Empathy

Empathy refers to the ability to understand and share another person’s feelings. By putting yourself in the other person’s shoes, you can show respect, acceptance, and connect with them on an emotional level. Practice empathizing with others by actively listening, being present, and acknowledging their emotions. Ask yourself what you would feel if you were in their situation to better understand their point of view.

Managing Your Emotions

Managing your emotions is crucial to develop a high EQ, and it involves self-awareness, self-regulation, and self-control. Learn to notice emotional triggers that cause negative reactions, and practice deep breathing exercises, mindfulness techniques, or physical activities like exercise or yoga, to help regulate your emotions. When you’re in control of your emotions, you’re less likely to react impulsively or emotionally to stressful situations. In conclusion, improving your EQ requires a commitment to conscious self-awareness, active listening, empathy, and emotion management. By developing these skills, you can build stronger relationships, communicate more effectively, and achieve greater success in both your personal and professional life.

Frequently Asked Questions Of How To Eq Critical Things To Avoid Doing

Is There A Wrong Way To Eq?

Yes, there is a wrong way to EQ. EQ should enhance the natural sound, not completely change it. Overuse of EQ, boosting too many frequencies, or drastically cutting frequencies can harm the mix. It’s important to use EQ in moderation, make small adjustments, and listen to the changes in context with the rest of the mix.

What Is Too Much Eq?

Using too much EQ can result in an unnatural and distorted sound, as well as potential damage to equipment and hearing. It’s important to use EQ sparingly and purposefully, always being mindful of the overall balance and clarity of the mix.

How Do You Control An Equalizer?

To control an equalizer, you need to adjust the various frequency bands available on the equalizer. Each band represents a specific frequency range, and by increasing or decreasing the level of a particular band, you can boost or reduce the volume of that frequency.

You can adjust the equalizer settings through a dedicated equalizer interface, software or mobile apps.

How Do I Get Better At Eq Mixing?

To improve EQ mixing, practice using EQ plugins on different tracks and experiment with different settings. Start with soloing each track to hear the specific frequencies. Utilize EQ to remove any unwanted frequencies and boost desired ones. Avoid drastic changes and make small adjustments.

Trust your ears and keep practicing.

Conclusion

As you can see, avoiding certain critical things can make a huge difference in your success. By keeping in mind the tips mentioned above and by creating quality content, you can improve your website’s visibility and engagement. Remember to keep sentences short and simple, write unique and SEO-friendly content, and avoid common writing mistakes.

With a little bit of effort and dedication, you can create content that is both user-friendly and optimized for search engines. So, start implementing these tips and see the difference in your website traffic and engagement.

Categories
Archive

How Pros Make Hits Bohemian Rhapsody Queen

Queen’s hit “Bohemian Rhapsody” was made by combining different styles and genres with iconic vocal harmonies. The song’s success lies in the band’s unique musicality and artistic vision.

“Bohemian Rhapsody” by Queen is one of the most legendary and iconic songs in rock history. The song is known for its unconventional structure, fantastic vocal harmonies, and unforgettable melody. Freddie Mercury, the frontman of Queen, is the one who wrote this hit, and he managed to do it by mixing different genres such as opera, rock, and ballad.

Mercury’s vision was to create a song that could tell a story and take the listener on a musical journey. Queen’s innovative approach to music-making and their unique vocals helped make “Bohemian Rhapsody” a timeless hit that continues to captivate generations. We will examine how Queen’s creative process and musicianship contributed to making “Bohemian Rhapsody” the masterpiece that it is today.

How Pros Make Hits Bohemian Rhapsody Queen

Credit: www.masteringthemix.com

Analyzing The Structure Of Bohemian Rhapsody

Analyzing the unique structure of Queen’s legendary hit “Bohemian Rhapsody” reveals the creative genius of the band’s members. From its operatic influences to unconventional arrangement, the song’s complexity sets it apart as a true masterpiece in the music industry.

Analyzing the Structure of Bohemian Rhapsody Bohemian Rhapsody, released in 1975, remains one of the most iconic songs in the history of rock music. Its musical structure, which intertwines various genres, has fascinated music critics and enthusiasts for decades. In this section, we will analyze the structure of Bohemian Rhapsody to understand how the song was constructed and how various segments blend together seamlessly to create a masterpiece. Opening Verse and Chorus Bohemian Rhapsody opens with a slow-paced piano melody that gradually builds up to the first verse. The lyrics of the verse introduce the protagonist and set the stage for the story that follows. The chorus, which follows the verse, is more upbeat, with Freddie Mercury’s vocals reaching soaring heights. The lyrics of the chorus are simple and memorable, making it easy for listeners to sing along. Ballad Segment The ballad segment of Bohemian Rhapsody is the longest and occupies the central part of the song. The segment is characterized by its slower tempo and emotional intensity. The lyrics of the ballad express the protagonist’s regrets and desires, and Freddie Mercury’s vocals convey the emotions beautifully. The segment is also notable for its complex vocal harmonies, a trademark of Queen’s music. Guitar Solo After the ballad segment, the song transitions into the guitar solo. The solo, played by Brian May, is one of the most iconic elements of Bohemian Rhapsody. The solo is fast-paced, with intricate guitar riffs that demonstrate Brian May’s technical prowess. The solo serves as a bridge between the ballad segment and the next section of the song, the opera section. Opera Section The opera section of Bohemian Rhapsody is perhaps the most experimental and avant-garde part of the song. The section features Freddie Mercury’s vocals layered multiple times, creating a choral effect. The lyrics of the section do not follow a narrative but instead showcase the vocal range and technical abilities of the band members. The opera section seamlessly transitions into the next part of the song, the hard rock segment. Hard Rock Segment The hard rock segment of Bohemian Rhapsody is where the song reaches its climax. The section features a heavy guitar riff and intense vocals from Freddie Mercury. The lyrics of the section convey a sense of urgency, and the tempo of the music is faster than in any other part of the song. The section ends with a series of vocal chants that create a sense of catharsis, bringing the song to a satisfying conclusion. In conclusion, the structure of Bohemian Rhapsody is a masterful blend of different genres and styles. The song’s various segments seamlessly blend together, creating a coherent and powerful musical experience. By analyzing the structure of Bohemian Rhapsody, we can appreciate the genius of Queen’s music and the enduring legacy of this iconic song.

Songwriting Techniques Used In Bohemian Rhapsody

Bohemian Rhapsody is a timeless classic that has stood the test of time, captivating audiences since its release in 1975. The songwriting techniques used in Bohemian Rhapsody set it apart from others in its genre. Here are three songwriting techniques that the pros used to make this hit.

Layering Of Vocal Harmonies

One of the main features that stands out in Bohemian Rhapsody is the layering of vocal harmonies. In fact, over 180 overdubs were used to create the intricate harmony sections. This layering technique gave the song a full, grand sound that is still widely imitated today.

Incorporating Diverse Musical Genres

Queen seamlessly blended various genres, including rock, opera, and ballad, to create a unique sound in Bohemian Rhapsody. The song’s operatic section is an excellent example of this, in which the guitar-based rock section transitions to an operatic aria with a full choir and orchestra accompaniment. This diverse approach to songwriting created a one-of-a-kind sound that swept audiences away and has become a timeless classic.

Lyricism And Storytelling

The storytelling and lyricism in Bohemian Rhapsody added an incredible amount of depth to the song. The lyrics are based on a personal experience, with a story told in a captivating and emotive way. The inclusion of lyrics that deal with life and death, consequence and repentance, are all part of what makes Bohemian Rhapsody stand out.

TechniqueExample
Layering of vocal harmoniesOver 180 vocal overdubs used to create harmony sections in Bohemian Rhapsody
Incorporating diverse musical genresBlending of rock, opera, and ballad in Bohemian Rhapsody, most notably in the operatic section
Lyricism and storytellingPersonal storytelling that deals with life and death, consequence and repentance, in Bohemian Rhapsody
  • Bohemian Rhapsody is a unique blend of rock, opera, and ballad.
  • Over 180 vocal overdubs were used to create intricate harmony sections in the song.
  • The lyrics tell a personal story dealing with life, death, consequence, and repentance, adding gripping depth to the hit song.
  1. The layering of harmonies is one of the distinctive techniques used in Bohemian Rhapsody.
  2. The combination of diverse musical genres such as rock, opera and ballad in the song sets it apart from others in its genre.
  3. The inclusion of lyrics that deal with personal experiences, life and death, consequence and repentance creates a one-of-a-kind sound.

Layering of Vocal Harmonies

180-plus vocal overdubs created intricate harmonies in Bohemian Rhapsody.

Incorporating Diverse Musical Genres

Rock, opera and ballad blended together in the song.

Lyricism and Storytelling

Personal experiences, life/death, consequence/repentance, all part of the gripping story told through lyrics.

Recording Techniques That Produced The Classic Sound

Discover the recording techniques that led to the iconic sound of Queen’s legendary hit Bohemian Rhapsody. Learn how the pros used innovative methods like multitrack recording and vocal layering to create a track that is still celebrated today.

Queen’s Bohemian Rhapsody, one of the most iconic songs of all time, was famously recorded in a complex and unconventional way. This multi-sectional song that transcends genres, permeated with raw human emotion, pushed the boundaries of possibility with its extensive use of recording techniques. Let us delve deeper into the recording techniques that made the classic sound of Bohemian Rhapsody Queen.

Multitrack Recording

Multitrack recording is a technique that allows multiple sound sources to be recorded separately onto individual tracks of a recording medium, subsequent to which these tracks can be combined into a final mix. Freddie Mercury, the frontman of the band, recorded each vocal section separately onto a 24-track tape. The band followed a similar technique and layered each instrument in the same way, resulting in a symphonic structure that seamlessly transforms from a reflective ballad to a guitar-drenched rocker and back again.

Overdubbing

Overdubbing is the process of recording supplementary tracks onto previously recorded tracks in real-time. Queen was one of the first bands to use the technique extensively, and their use is evident in the guitar solo sections in Bohemian Rhapsody. Brian May, the band’s lead guitarist, recorded several guitar tracks that were then merged, adding depth and complexity to the solo.

Panning And Stereo Effects

Panning is the process of spreading sounds across the stereo spectrum, enabling them to be reproduced either solely on the left or right channel, or on both channels. Bohemian Rhapsody is a prime example of the effective use of panning, complemented by a stereo chorus effect, adding resonance to the harmonies. The final mix employed panning and stereo effects to great effect, enabling the song to be played on various sound systems, from small radio speakers to large concert venues. In conclusion, the legendary sound of Bohemian Rhapsody Queen was a result of their experimentation with multi-track recording, overdubbing, and panning techniques, to create a sound that had depth and complexity. Their unconventional recording choice paid off, and it resulted in a timeless classic that remains popular even today.

Tips For Aspiring Musicians And Songwriters

If you dream of writing a hit song like Bohemian Rhapsody by Queen, it takes more than just talent and a guitar. It takes knowledge, experimentation, and creativity to create a masterpiece. Here are some tips to help aspiring musicians and songwriters create catchy, unique, and unforgettable music.

Experiment With Song Structure And Genres

The key to creating a hit song is to experiment with different song structures and genres. While most songs follow a standard verse-chorus-verse structure, don’t be afraid to try something different. For example, Bohemian Rhapsody includes six different sections, including a cappella, ballad, opera, and hard rock. By experimenting with different structures and genres, you can create a unique sound that stands out from the crowd.

Use Vocal Harmonies And Overdubbing To Create A Rich Sound

Another way to enhance your music is by adding vocal harmonies and overdubbing. In Bohemian Rhapsody, Queen used multiple tracks of Freddie Mercury’s voice to create a full, rich, and textured sound. By layering your vocals and experimenting with different harmonies, you can create a sound that is both memorable and impactful.

Tell A Story Through Your Lyrics

Finally, one of the essential elements of a hit song is having meaningful and relatable lyrics. Bohemian Rhapsody tells a story of love, loss, and redemption, making it a timeless classic. When writing your lyrics, focus on telling a story and sharing an emotion that your listeners can connect with. Remember that the best songs are the ones that speak to people’s hearts.

In Conclusion

By experimenting with different song structures, adding vocal harmonies, and telling a story through your lyrics, you can create a hit song like Bohemian Rhapsody. While it takes time, effort, and hard work, the end result is worth it. So don’t be afraid to take risks, try something new, and let your creativity run wild.

Frequently Asked Questions For How Pros Make Hits Bohemian Rhapsody Queen

What Techniques Are Used In Bohemian Rhapsody?

Bohemian Rhapsody employs various techniques, including operatic vocals, a cappella sections, layered vocal harmonies, rock guitar solos, and shifting musical genres. The song’s complex structure and unconventional style makes it a unique and enduring piece of music history.

What Makes Bohemian Rhapsody So Good?

Bohemian Rhapsody’s greatness lies in its unique composition, combining opera and rock elements, and providing a powerful emotional connection through its lyrics. Its masterful use of vocal harmonies, guitar riffs, and Freddy Mercury’s charismatic performance creates a timeless classic that continues to resonate with audiences worldwide.

What Instrumental Techniques Are In Bohemian Rhapsody?

Bohemian Rhapsody features several instrumental techniques, including piano, guitar, drums, and bass. It also includes a choir, overdubbed vocal harmonies, and orchestral arrangements. The song overall is a blend of rock, opera, and progressive elements.

What Makes Bohemian Rhapsody Hard To Sing?

Bohemian Rhapsody is difficult to sing because of its complex structure, constantly changing tempo, and range of vocal styles required. The song includes multiple vocal parts, harmonies, and operatic sections. Additionally, its high pitch and challenging lyrics make it even more challenging for singers.

Conclusion

To sum up, making a hit like Bohemian Rhapsody by Queen is no easy feat, but with hard work and dedication, it’s possible to create a timeless masterpiece. Pros understand the power of strong songwriting, innovative arrangements, and incorporating unexpected elements for maximum impact.

They also know the importance of staying true to their own style and not being afraid to take risks. By following their lead, you too can create a hit that stands the test of time. Keep grinding and experimenting, and who knows – your song might just be the next Bohemian Rhapsody.

Categories
Archive

Should I Get a Keyboard Or Synthesizer

For beginners, getting a keyboard is more practical than buying a synthesizer. Keyboards are more affordable and easier to use when starting on music production.

If you’re venturing into the music-making industry, you might have come across the question of whether to get a keyboard or a synthesizer. It’s a valid question to ask, given the vast array of instruments available today. But before you make any purchase, it’s essential to understand their differences and which one is best suited for your needs.

To help you make an informed decision, this article will explore the factors to consider when deciding between a keyboard or a synthesizer. So, buckle up and let’s get started!

Should I Get a Keyboard Or Synthesizer

Credit: www.tropicalfishvintage.com

Budget Considerations

When deciding whether to invest in a keyboard or synthesizer, your budget will play a significant role. It’s important to consider the brand price differences, as well as the cost analysis of both keyboard and synthesizer options.

Brand Price Differences

The brand of keyboard or synthesizer you choose can greatly impact the overall cost. High-end brands such as Yamaha or Roland tend to be more expensive, while more budget-friendly options are available from brands such as Casio or Korg. However, it’s worth noting that investing in a higher-end brand can often result in better quality and longevity of the instrument.

Keyboard Cost Analysis

The cost of a keyboard can vary greatly depending on what features you are looking for. Basic models can range from $50 to $200, while more advanced options with weighted and touch-sensitive keys can cost upwards of $500 or more. Additionally, if you are interested in using the keyboard for performance or recording purposes, you may need to invest in additional equipment such as a stand, amplifier, or MIDI interface.

Synthesizer Cost Analysis

Synthesizers tend to be more expensive than keyboards, with basic models starting at around $300 and higher-end options costing $1000 or more. However, synthesizers offer a wider range of sounds and features, allowing for more creativity and customization in your music. It’s also worth considering that some synthesizers may require additional equipment such as speakers or a mixer.

Ultimately, your budget will play a significant role in determining whether a keyboard or synthesizer is the best choice for you. It’s important to do your research and consider your needs and preferences before making a final decision.

Should I Get a Keyboard Or Synthesizer

Credit: m.youtube.com

Sound Quality Comparison

When deciding between a keyboard or a synthesizer, sound quality is an important factor to consider. Both instruments have their own unique characteristics and produce different types of sounds, so it’s important to understand the differences in their sound quality.

Keyboard Sound Quality

Keyboards are designed to replicate the sounds of traditional acoustic pianos, as well as a variety of other instruments such as organs, strings, and brass. Keyboards use sampled or recorded sounds to create realistic tones, and the quality of those sounds can vary significantly depending on the make and model.

Higher-end keyboards often use more advanced technology and higher-quality samples, resulting in a more authentic and expressive sound. In general, however, the sound quality of a keyboard is limited to the quality of the pre-recorded samples they use.

Synthesizer Sound Quality

Synthesizers, on the other hand, are designed to create entirely new sounds. They generate sound electronically and allow you to manipulate the waveform, creating unique tones and timbres that you can’t achieve with a traditional keyboard.

While most synthesizers can replicate some traditional instrument sounds, they really shine when creating entirely new sounds. The sound quality of a synthesizer is highly dependent on the quality of the synthesizer’s electronics and its ability to manipulate sound waves.

In Summary

  • Choose a keyboard if you want a traditional piano sound and realistic replication of other instruments.
  • Choose a synthesizer if you want to explore new sounds and create unique tones and timbres.

Both a keyboard and a synthesizer have their own unique sound quality characteristics, and ultimately the right choice depends on what you want to use it for. Whether you’re a beginner or an advanced musician, choosing the right instrument can greatly impact your creative output.

Music Genre Analysis

Choosing between a keyboard and synthesizer primarily depends on the music genre you are interested in playing. While a keyboard is ideal for classical, jazz, and pop music, a synthesizer is popularly used in electronic dance music, hip hop, and techno.

Music Genre Analysis When it comes to music production, it’s essential to choose the right instrument based on the genre you want to excel in. A keyboard and synthesizer are popular choices among music producers, but which one is more suitable for you depends on the music genre you want to explore. In this section of the blog post, we’ll analyze the suitability of keyboard and synthesizer for common music genres.

Keyboard Suitability

If you’re more interested in classical music, a keyboard would be more suitable for you. It offers a range of sounds, from grand pianos to harpsichords, making it ideal for classical compositions. Additionally, keyboards are well suited for jazz music, as you can replicate the sound of various jazz instruments, including trumpets, saxophones, and trombones, using the instrument’s voices.

Synthesizer Suitability

Synthesizers are well-known for their ability to create artificial sounds. Thus, they suit best to modern electronic music genres such as EDM, trance, techno, and hip-hop. With a synthesizer, you can create a wide range of sounds, from drum beats to stringed instruments, and even special effects to add to your music. In conclusion, when choosing between a keyboard and synthesizer, consider the music genre you want to explore and what features you require to enhance your production. Both the instruments can be great for different genres, so make an informed decision based on your needs and preferences.

Skill Level Considerations

When it comes to choosing between a keyboard or synthesizer, your skill level is an important factor to consider. Both instruments have different skill requirements and offer unique features that cater to specific skill sets.

Keyboard Skill Requirements

Keyboards are a great option for beginners or those with basic piano playing skills. If you have experience playing the piano or other keyboard instruments, you should have no problem transitioning to a keyboard. However, if you have never played a keyboard before, you will need to learn basic piano skills such as hand positioning, finger placement, and how to read sheet music.

Some keyboard models have touch-sensitive keys, which means the sound produced depends on the force with which you strike the keys. This feature can take some time to get used to but is great for those looking to improve their dynamics and playing style.

Synthesizer Skill Requirements

Synthesizers, on the other hand, require a different set of skills compared to keyboards. While basic keyboard skills may help, they are not as essential as with keyboards. If you have a background in digital audio production, sound design, or music production, then a synthesizer might be a more suitable option for you.

Synthesizers are versatile instruments that allow you to create and manipulate sounds in a range of ways. However, this comes with a learning curve for those who are new to synthesis. If you are not familiar with chord progressions or the terminology used in synthesis, it may take some time to get used to using the instrument effectively.

Which Should You Choose?

Ultimately, the choice between a keyboard or synthesizer depends on your skill level, musical preferences, and intended use of the instrument. If you have basic piano skills or are looking for an instrument to learn how to play on, a keyboard may be the best option. On the other hand, if you have experience with digital audio production or music production, a synthesizer might be more suitable for your needs.

It is important to remember that both instruments offer different features and benefits that cater to different skill sets. Therefore, before making a decision, consider what you want to achieve with the instrument and choose the one that aligns with your goals.

Versatility Of Use

One of the most crucial considerations when deciding between a keyboard and synthesizer is the versatility of use. Both these instruments have unique features that can cater to different playing styles and genres. Understanding the versatility of use is crucial to making an informed decision on what instrument will meet your needs best.

Keyboard Versatility

A keyboard, also known as a digital piano, is a versatile musical instrument that can mimic the sound of an acoustic piano with striking accuracy. It comes equipped with different sounds, such as organs, strings, and bass, providing you with a wide range of options. This variety of sounds makes it perfect for playing classical music, pop, jazz, and more. Besides, it comes with weighted or semi-weighted keys that resemble those of an acoustic piano, making it easy to play for those used to playing an actual piano.

Synthesizer Versatility

A synthesizer, on the other hand, is an electronic musical instrument that can produce a nearly infinite variety of sounds using oscillators, filters, and amplifiers. With a synthesizer, you can tweak the sound to produce almost any type of music you have in mind. As a result, they are popular in genres like electronic music, EDM, and pop, where unique, experimental sounds are in demand. Synthesizers can produce different sounds, from traditional piano and strings to futuristic electronic sounds, making it a versatile instrument for creators who want to explore a wide range of sounds.

Ultimately, when choosing between a keyboard or a synthesizer, the versatility of use is essential. A keyboard is ideal for those looking for an instrument that mimics an acoustic piano and wants to play genres such as classical, jazz, or pop, while a synthesizer is more suitable for electronic genres, experimental music, or where unique sounds are required.

Portability

One of the factors to consider when deciding whether to buy a keyboard or a synthesizer is portability. Portability is essential for musicians who are frequently on the move and need to carry their equipment around. Both keyboards and synthesizers have their unique features that render them suitable for different purposes. This section explores the portability of both types of instruments.

Keyboard Portability

Keyboards come in different sizes and weights, ranging from 49 keys to 88 keys. The size and weight of keyboards influence their portability. For example, a 49-key keyboard is more portable than an 88-key keyboard. A small keyboard is suitable for beginners or musicians who need a portable keyboard for gigs, while a full-sized keyboard is suitable for stage performances, studios, and churches.

Keyboard Portability ProsKeyboard Portability Cons
Small keyboards are lightweight and portable, making them easy to carry aroundSome keyboards come with a built-in battery, allowing for use without a power sourceKeyboards can be folded, making them even more portable and easy to storeFull-sized keyboards can be heavy and difficult to transportFull-sized keyboards usually require external power sources, making them less portable in certain situations

Synthesizer Portability

Synthesizers also come in various sizes and weights but are generally more portable than keyboards. They are more compact and lightweight, making them ideal for traveling and performing in small spaces. Synthesizers come with a host of features, including samplers, sequencers, and effects, which make them suitable for music production and performance.

Synthesizer Portability ProsSynthesizer Portability Cons
Synthesizers are compact and lightweight, making them perfect for musicians on the goMost synthesizers come with built-in speakers, reducing the need for external amplifiersSynthesizers are versatile and can be used for music production and performanceSynthesizers can be more expensive than keyboardsSome smaller synths may have fewer keys, limiting performance options

When it comes down to portability, both keyboards and synthesizers have their strengths and weaknesses. A deciding factor for many musicians may depend on the individual’s specific needs. A beginner or a musician who plays gigs locally may find that a small keyboard is sufficient, while a professional musician who tours regularly may find a synthesizer more practical. The choice ultimately depends on the musician’s personal preference and needs.

Durability And Maintenance

Consider your needs and preferences in terms of durability and maintenance when deciding between a keyboard and synthesizer. Keyboards tend to be sturdier and require less maintenance, while synthesizers may require more upkeep but offer more advanced features.

Durability and Maintenance: When it comes to purchasing instruments, durability and maintenance are important factors to consider. In this section, we will discuss the durability and maintenance requirements of a keyboard and a synthesizer.

Keyboard Durability

Keyboards are known for their adaptation to different playing styles. Durability and sturdiness are important features that make keyboards reliable instruments. Most keyboards have a sturdy frame and are built to withstand the wear and tear of regular use. The keys are made of durable materials such as plastic or ivory to ensure that they can withstand the constant pressing. Moreover, keyboards also have a simple design that requires fewer maintenance requirements. You can easily clean it using a cloth or compressed air to remove any accumulated dust or debris. Additionally, keyboards do not require frequent tuning or repair, which is one less thing to worry about.

Synthesizer Durability

In contrast to keyboards, synthesizers are more sophisticated instruments that require a higher level of maintenance. They have a complex design with intricate parts that add to their sound production capabilities; however, this also means that they are more prone to problems. The durability of a synthesizer is dependent on the quality of the components. Some synthesizers are made of cheap plastic or low-quality materials that can easily become damaged during normal usage. However, if you purchase a high-quality synthesizer, you can expect it to last for many years.

Maintenance Requirements

As previously mentioned, keyboards require less maintenance than synthesizers. Keyboards only need to be cleaned occasionally and do not require frequent tuning, unlike a synthesizer. On the other hand, synthesizers require regular maintenance to keep them in optimal condition. Synthesizers have a complicated design that requires more attention to their various components such as oscillators, filters, and modulators. Moreover, they require regular tuning and calibration to ensure that they are producing the correct sound. The maintenance requirement of synthesizers is more frequent compared to keyboards. In conclusion, when it comes to durability and maintenance, keyboards are generally reliable with low maintenance. However, if you opt for a high-quality synthesizer, you can expect it to be durable and offer great durability as well. Ultimately, the decision between a keyboard and a synthesizer depends on your musical needs, budget, and preference.

Should I Get a Keyboard Or Synthesizer

Credit: m.youtube.com

Personal Preferences

Personal preferences play an important role while deciding whether to get a keyboard or a synthesizer. While some musicians prefer a piano-like feel, others might want to experiment with different sounds. Here we discuss key and synthesizer preferences to help you make an informed decision.

Key Preferences

If you are someone who enjoys playing the piano or wants to learn, getting a keyboard might be your best bet. With weighted keys, the keyboard can replicate the feeling of playing an acoustic piano. Moreover, keyboards come in a variety of sizes, some with fewer keys, making it easy to carry around and store. It’s important to note that keyboards are great for classical music, but they might not be the best for modern electronic music.

Synthesizer Preferences

If you are more interested in creating your own music and experimenting with different sounds, synthesizers might be the better choice. They come with an array of sound effects and sounds, making it easy to create different genres of music. Synthesizers are also great for electronic music as they can produce unique sounds that cannot be replicated with traditional keyboards.

Ultimately, the decision to buy a keyboard or synthesizer depends on your personal preferences and the kind of music you wish to play or create. So, choose one that suits your requirements.

Frequently Asked Questions Of Should I Get A Keyboard Or Synthesizer

Is A Synthesizer A Good First Instrument?

Yes, a synthesizer is a good first instrument because it is versatile, affordable, and easy to learn. It allows you to create a wide range of sounds and explore different genres of music. With practice, you can develop your skills and eventually expand to other instruments.

Do I Need To Learn Keyboard To Play Synth?

No, you don’t necessarily need to learn the keyboard to play a synth. Many modern synthesizers come with pads, buttons and other interface options, so you can use those instead. However, knowing how to play the keyboard can be helpful in manipulating the sound creatively and designing patches.

How Hard Is It To Learn How Do You Play A Synthesizer?

Learning how to play a synthesizer is not hard. You can start by learning some basics, such as how to navigate through different presets and tweak sounds. With regular practice, you can develop your techniques and create unique sounds easily.

What Is A Good Beginner Synthesizer?

A great beginner synthesizer is the Korg Volca Keys. It’s affordable, easy to use, and has a range of sound options. The compact design and portability make it a great option for those starting out in music production.

Conclusion

After carefully weighing the pros and cons of both keyboards and synthesizers, it ultimately comes down to personal preference and intended usage. If you are a beginner looking for a simpler, more affordable option, a keyboard may be the better choice.

However, if you are a seasoned musician looking for versatility and a wider range of sounds, a synthesizer may be the way to go. Regardless of your decision, ensuring that you choose a quality instrument is key to achieving success in your musical endeavors.

More in our Synth guides.

Categories
Archive

Essential Tips For Perfecting Your Vocal Mixes

To perfect your vocal mixes, focus on proper gain staging, EQ, compression, and reverb. These essential tips will help you achieve a balanced and clear sound for your vocals.

Also, as a music producer or sound engineer, setting up a great mix for vocals is essential. It can be challenging, but with the right techniques and tools, you can create a seamless sound that will wow listeners. The secret lies in understanding how to tweak basic processing elements such as gain staging, EQ, compression, and reverb.

Related reading: De Ess Vocals and Background Vocals. For background, see the Wikipedia article on Audio mixing.

Moreover, by paying close attention to these four critical factors, you can control the dynamics and tone of the vocals to achieve a polished and professional-sounding mix that highlights the emotion and energy of the performance. Keep reading to learn more about perfecting your vocal mixes.

Essential Tips For Perfecting Your Vocal Mixes

Credit: www.landr.com

Use Quality Equipment for Vocal Mixes

In addition, one of the essential elements for producing high-quality music is perfecting your vocal mixes. Your ultimate goal is getting your vocals to sit beautifully within your mix without overpowering or getting lost in it. Even with the perfect lyrics and melodies, poor mixing can ruin your music.

Invest In High-quality Microphones

When it comes to recording vocals, the quality of the microphone is everything. A high-quality microphone can capture the natural tonality, texture, and nuances of your vocals, enhancing the recording’s overall quality and clarity. Therefore, investing in a high-quality microphone is crucial.

When choosing a microphone, ensure that it complements your vocal performance, style, and budget. Furthermore, the two most common microphone types are dynamic and condenser microphones. Condenser microphones are more sensitive to sound and better for capturing detail, while dynamic microphones are more robust and suitable for loud sound sources.

Select The Right Audio Interface for Vocal Mixes

Additionally, having the right audio interface is crucial for recording high-quality vocals. The audio interface is the link between your microphone and recording software. It significantly impacts the quality and clarity of your vocal recordings.

Also, your audio interface should have preamps with enough gain to amplify your microphone’s signal without adding noise or distortion. Additionally, it should have a high-quality Analog to Digital Converter (ADC) that converts the analog audio signal from your microphone to a digital signal that your computer can use.

Before selecting an audio interface, consider the type of connectivity that works best for your recording setup. Moreover, the most common connectivity types are USB, Thunderbolt, and FireWire.

In addition, with quality equipment, producing high-quality vocal mixes becomes much easier. Investing in high-quality microphones and selecting the right audio interface helps you achieve the desired results. This way, you can ensure that every aspect of your music production is top-notch and of exceptional quality.

Proper Mic Techniques

Effective microphone techniques play an essential role in achieving the perfect vocal mix. Proper posture, distance, and placement of the microphone are necessary for optimal sound quality. Experimenting with different techniques can help ensure that your vocals are crisp, clear, and well-balanced in the mix.

Getting the perfect vocal mix is a crucial element in achieving an excellent sound quality in music production. However, this can only be achieved by paying close attention to the proper mic techniques. Below are some essential tips to help you perfect your mic techniques and produce an impeccable vocal mix.

Find The Right Distance for Vocal Mixes

The distance of the microphone from the singer is an essential factor to consider when perfecting mic techniques. Placing the microphone too close to the singer results in distorted vocals, while positioning it too far results in weak signals. It would be best to position the microphone at a distance between six and ten inches from the singer’s mouth. This distance ensures that the sound picked up by the microphone is optimal, resulting in a perfect vocal mix.

Use Pop Filters And Windscreens for Vocal Mixes

Pop filters and windscreens are essential tools for every sound engineer. Pop filters help eliminate unwanted plosives and sibilants produced by the singer, while windscreens help reduce the impact of gusts of wind that may affect sound quality. Before starting the recording process, ensure the pop filter or windscreen is positioned correctly to obtain the desired sound quality.

Adjust Microphone Position While Recording

As the singer performs, their position and movements may affect the sound quality picked up by the microphone. To ensure optimal sound quality, it is crucial to adjust the microphone position throughout the recording process. An easy way to achieve this is by using a boom arm or stand to hold the microphone in place. This way, it becomes easier to adjust the microphone position and maintain optimal sound quality. In summary, proper mic techniques are crucial in achieving an impeccable vocal mix. By finding the right distance, using pop filters and windscreens, and adjusting microphone position while recording, you can take your vocal production to the next level.

Clean Up Your Tracks

Enhance the quality of your vocal mixes with some essential tips. To achieve a perfect vocal mix, make sure to use appropriate panning techniques, select suitable reverbs and delays, and EQ each track meticulously. Don’t forget to experiment with various compression and distortion techniques to add character to your mix.

Clean Up Your Tracks Clean up your vocal mix tracks by removing unwanted noise and editing out breath sounds. These two steps can make a significant difference in the quality of your final mix. H3 Remove Unwanted Noise Unwanted noise can come from a variety of sources, such as electrical interference, microphone hiss, and background ambiance. When removing unwanted noise from your vocal tracks, you need to be careful not to eliminate any necessary sound.

Use the following methods to remove unwanted noise from your vocal tracks: – Noise gate: Use a noise gate plugin to remove background noise during silence or low-level passages. – EQ: Use an equalizer to isolate the frequencies of the unwanted noise and remove them. – De-esser: Use a de-esser plugin to remove sharp sounds that are hard on the ears. H3 Edit Out Breath Sounds Breathing sounds are a natural part of singing or speaking, but they can be distracting when they are too loud or frequent.

Practical Tips for Vocal Mixes

To edit out breath sounds in your vocal mix tracks, try one of the following methods: – Volume automation: Use volume automation to lower the volume of the breath sounds. – Cut: Use an audio editor to cut out the breath sounds completely. – Noise reduction: Use noise reduction software to reduce the volume level of the breath sound without having to remove it entirely. By cleaning up your vocal mix tracks, you can ensure that the final mix is of high quality and free of unnecessary noise. Put these tips into practice, and you’ll be on your way to perfecting your vocal mixes.

Equalization

Equalization:

Furthermore, equalization is the process of balancing different frequencies of a vocal track to achieve a cleaner and more professional sound. Equalizers are useful tools to help you effectively boost and cut different frequencies of a vocal track. However, improper use of equalization can lead to a mixed result. Proper equalization enhances vocals and eliminates undesirable low or high frequencies.

Remove Low-end Muddiness

The low-end frequencies in a vocal track can easily muddy up the mix. Therefore, it’s important to remove any low-frequency noise, rumble or hum. Using a high pass filter is an effective way to remove low-frequency noise that can ruin the quality of the vocal track. Set the filter between 80 to 200 Hertz to eliminate low noise while retaining that warmth in the vocal track.

Boost High-end Clarity

Vocals with a lot of high-end frequencies can sound bright and clear, but too much can cause ear fatigue for the listener. It’s essential to ensure the high-end frequencies complement the track without overpowering it. Using a high shelf filter can boost high frequencies gently, adding warmth and clarity to the vocals. Careful application is required to keep control of the high frequencies without adding too much.

  • Use a high pass filter to remove low-frequency noise, hum, or rumble.
  • Set the filter between 80 to 200 Hertz to eliminate low noise while retaining warmth.
  • To boost high-end clarity, use high shelf filter to add warmth and clarity gently.
  • Ensure control of high-end frequencies without adding too much.
ProsCons
Reduce hum, noise, and rumbleLoss of warmth and depth if filter not correctly set
Add warmth and clarity to the vocalsHigh frequencies can cause ear fatigue for the listener
More professional soundImproper use can lead to a mixed result

Compression

Compression is a crucial tool when it comes to perfecting your vocal mixes. It helps to even out the levels and add consistency to the vocals, creating a polished sound. However, it’s important to use compression sparingly and correctly to avoid muddying the mix.

Compression is a crucial part of mastering vocal mixing. It is used to even out the dynamics of a vocal recording, resulting in a consistent and polished sound. However, using too much compression can make a vocal mix sound unnatural and squashed. Here are some H3 headings in HTML syntax to help you perfect your compression techniques and maximize the impact of your mixes.

Apply Natural Compression for Vocal Mixes

The key to applying compression is to make it sound as natural as possible. Start by choosing the right compressor that suits your vocal recording. When adjusting the compressor settings, aim for a subtle compression that glues the vocals together. A good starting point for the ratio is 2:1, and the threshold should be set so that the compressor only kicks in during the loudest parts of the vocal recording. Beware of adding too much gain reduction and losing the dynamic range of the vocal performance.

Avoid Overusing Compression for Vocal Mixes

A common mistake in vocal mixing is to over-compress the vocals, resulting in a flat and lifeless sound. It’s important to find a balance between compression and dynamics for a natural-sounding vocal performance. To avoid overusing compression, use your ears to judge the amount of compression needed, not the meter. If the mix sounds unnatural, pull back on the compression until it sounds smooth and transparent. Additionally, consider using multiband compression or parallel compression techniques if you need more control over the vocals’ dynamics while retaining their natural sound. In conclusion, proper compression techniques are essential for creating a polished vocal mix that enhances the overall quality of a song. By applying natural compression and avoiding overusing compression, you can achieve a balance between dynamics and consistency that highlights the vocals’ strengths and brings your mix to life.

Essential Tips For Perfecting Your Vocal Mixes

Credit: www.izotope.com

Reverb And Delays

Reverb and delays are crucial elements for perfecting vocal mixes. Mastering the proper use of these effects can add depth, warmth, and space to vocals, creating a more professional and polished sound.

Reverb and delays are crucial elements in creating a professional-sounding vocal mix. However, it’s easy to overdo it, leading to a muddy and cluttered sound. Here are some essential tips to help perfect your usage of reverb and delays in your vocal mixes.

Use Reverb And Delay Sparingly for Vocal Mixes

One mistake some music producers make is using too much reverb and delay on vocals, resulting in a washed-out sound. Instead, use reverb and delay sparingly to give the vocals a sense of space and depth while maintaining clarity. Start with a small amount of reverb and delay, then gradually increase the effect until it sits well in the mix. Always check your mix on different audio systems, such as headphones and speakers, to ensure the balance is right.

Experiment With Different Settings

Experiment with different reverb and delay settings to see what works best for your track. Adjust the decay time, pre-delay, and wet/dry mix to find a sound that complements the vocals and enhances the overall mix. A shorter decay time brings the vocal forward, while a longer decay time creates a more distant sound. Also, consider using different types of reverb and delay effects to create a unique sound, such as a plate reverb or a ping-pong delay.

Final Thoughts

In conclusion, reverb and delay are powerful tools for creating depth and space in your vocal mixes. Remember to use them sparingly and experiment with different settings to find the right balance for your track. By following these essential tips, you can create a professional-sounding vocal mix that stands out above the rest.

Volume Automation

Achieving the perfect vocal mix requires a deep understanding of volume automation. To ensure your vocals sit nicely in the mix, focus on subtle movements that follow the natural dynamics of the performance. Practice and experimentation are key to mastering this technique.

When it comes to mixing vocals, using the right volume automation techniques can make a huge difference in the final sound. Volume automation helps to control the volume levels of different parts of the vocal track and blend them seamlessly, resulting in a polished and professional-sounding mix. In this post, we will walk through two crucial volume automation tips that will help you perfect your vocal mixes.

Adjust Volume To Highlight Key Phrases

One of the primary goals of mixing vocals is to ensure that the most important phrases and words are prominent in the mix. One way to achieve this is by adjusting the volume levels for individual words and phrases. For instance, during a chorus or bridge section, you may want to increase the volume of the lead vocal so that it stands out from the background vocals. You can also lower the volume of certain phrases to prevent them from overpowering the rest of the track. Here’s how you can apply volume automation to highlight key phrases:

  1. Identify the parts of the vocal track where the key phrases occur.
  2. Select the corresponding regions in the DAW.
  3. Adjust the volume levels for those regions, making sure that the key phrases are more prominent than the surrounding sections.

Smooth Out Inconsistent Volume Levels

Inconsistent volume levels can make a vocal track sound amateurish and unrefined. These inconsistencies can occur due to variations in the vocalist’s performance, improper microphone technique, or other factors. Fortunately, with volume automation, you can smooth out these inconsistencies and achieve a more even volume level throughout the track. Steps to smooth out inconsistent volume levels:

  • Listen carefully to the vocal track and identify the sections where the volume levels fluctuate.
  • Select those regions in the DAW.
  • Use the volume automation tool to adjust the levels gradually, ensuring that the transitions are smooth and natural.
  • Repeat the process until you achieve a consistent volume level throughout the track.

In conclusion, volume automation is a powerful tool for perfecting vocal mixes. By adjusting the volume levels of individual sections and smoothing out any inconsistencies, you can create a polished and professional-sounding mix. Practice these tips and experiment with different volume automation techniques to find the ones that work best for your tracks.

Reference Other Mixes

When it comes to perfecting your vocal mixes, one of the best things you can do is reference other professional mixes. This will give you a better idea of what your mix should strive to sound like while allowing you to learn from the pros. Here are some essential tips for referencing other mixes.

Compare To Other Professional Mixes

Start by comparing your vocal mix to other professional mixes in the same genre. This will give you a better idea of what your mix should sound like in terms of tone, balance, and clarity. Listen closely to how the vocals sit in the mix and how they interact with the other instruments. Pay attention to things like EQ, compression, reverb, and delays. Take notes and make adjustments to your mix as necessary.

Learn From The Pros for Vocal Mixes

Learning from the pros is essential for perfecting your vocal mix. Study the mixes of well-respected engineers and producers in the industry, paying close attention to their techniques and approaches. Look for interviews, tutorials, and online courses that focus specifically on vocal mixing. Don’t be afraid to experiment with different techniques and find what works best for your own mixes.

Use Reference Tracks

Reference tracks are a powerful tool for perfecting your vocal mixes. Whether you’re mixing in a professional studio or your bedroom, using reference tracks can help you achieve the same level of quality and clarity as your favorite mixes. Choose reference tracks that are in the same genre and have a similar vocal style to your own mix. Use them as a guide for EQ, compression, and overall mix balance.

Don’t Rely Too Heavily On Other Mixes

While referencing other mixes can be incredibly helpful, it’s important not to rely too heavily on them. Remember that every mix is unique, and what works for one mix may not work for another. Use other mixes as a guide and a source of inspiration, but don’t be afraid to experiment and find your own unique sound.

By referencing other mixes, you can improve the overall quality and clarity of your vocal mixes. Use these tips as a guide to get started and don’t forget to trust your own ears and instincts along the way.

Frequently Asked Questions On Essential Tips For Perfecting Your Vocal Mixes

How Do You Get The Perfect Vocal Mix?

To achieve a perfect vocal mix, you need to consider five essential factors. First, use EQ to remove any unwanted frequencies or enhance vocal presence. Second, apply compression to even out the dynamic range and add character. Third, use time-based effects such as reverb and delay to create a sense of space.

Fourth, use automation to adjust volume levels for consistency. Finally, balance the vocal with other elements in the mix.

What Are The 6 C’s Of Vocal Mixing?

The 6 C’s of vocal mixing are clarity, cohesion, consistency, compression, creativity, and character. These factors play a crucial role in achieving a well-balanced vocal mix that sounds professional and polished.

How Can I Improve My Vocal Clarity Mixing?

To improve vocal clarity in mixing, try these tips: 1. Use EQ to boost the higher frequencies of the vocal track. 2. Remove any unwanted background noise or competing elements. 3. Use compression to even out the volume of the vocal.

4. Pan the vocal in the center to enhance its presence. 5. Adjust the reverb and delay effects to add depth without muddying the sound.

How Do You Make Your Mixes Sound Good?

To make your mixes sound good, make sure you have a solid understanding of EQ, compression, and reverb. You should also use reference tracks, take breaks while mixing, and set your levels properly. By following these guidelines, you can improve the overall sound quality of your mixes.

Conclusion

Perfecting your vocal mixes requires a combination of techniques and skills. By following the essential tips outlined in this post, you can take your mixes to the next level. Always remember to tune your ears and listen carefully, use high-quality equipment, and experiment with different techniques.

Keep practicing and refining your skills to become an expert in vocal mixing. With hard work and dedication, you can create top-notch mixes that stand out from the rest.

Categories
Archive

Is Being a Classical Musician Worth It

Being a classical musician can be worth it, depending on personal goals, passions and expectations. Classical music has been a significant part of Western culture for centuries and continues to captivate audiences worldwide.

For some, becoming a classical musician is a dream come true, but for others, it may seem like an unattainable feat. The rigorous training and years of practice required to become a professional classical musician can be daunting, and even then, there is no guarantee of success.

Despite these challenges, many people pursue classical music with a passion and dedication that makes it all worthwhile. We will explore the benefits and drawbacks of being a classical musician and answer the question: Is being a classical musician worth it?

Is Being a Classical Musician Worth It

Credit: m.youtube.com

The Pros Of Being A Classical Musician

Classical music is a genre that has been around for centuries and continues to be a prominent cultural force throughout the world. For those who have a passion for this art form, being a classical musician can be an incredibly fulfilling career choice. While there are certainly some challenges that come with pursuing this career, there are also many pros to consider.

Stability Of Performance

One of the most significant advantages of being a classical musician is the stability of performance. While some genres of music may be subject to fluctuations in popularity, there will always be a demand for classical music. This means that there are many opportunities for employment as a performer, whether that be in orchestras, operas, or other institutions.

Furthermore, because classical music is often associated with high culture and formality, it is typically viewed as a prestigious and respected profession. This can lead to more consistent work and stronger job security over time.

Intellectual Stimulation

Another great benefit of being a classical musician is the intellectual stimulation that comes with the job. Classical music is complex and often requires significant technical skill and knowledge in order to perform well.

This means that classical musicians often have to engage with challenging pieces of music, constantly refining their technique and understanding of the art form. This can be incredibly rewarding for those who are intellectually curious and motivated to improve their craft.

Cultural Contribution

Finally, one of the most significant pros of being a classical musician is the cultural contribution that this profession makes to society as a whole. Classical music is a vital part of many cultures around the world, and those who perform it play a crucial role in preserving and advancing this important art form.

Classical musicians are often seen as ambassadors of culture, traveling around the world to perform in different venues and share their expertise with others. This can be an incredibly rewarding and fulfilling experience for those who are passionate about music and cultural exchange.

Overall, while being a classical musician is certainly not without its challenges, there are many reasons why pursuing this career can be an incredibly fulfilling and worthwhile choice. Whether it be the stability of performance, intellectual stimulation, or cultural contribution, there are many pros to consider when deciding whether or not to pursue a career as a classical musician.

The Cons Of Being A Classical Musician

While being a classical musician is an incredible profession, it’s not without its challenges. Here are three major cons to consider before pursuing this career:

Highly Competitive Industry

The world of classical music is an incredibly competitive industry. There are countless talented musicians vying for a limited number of job opportunities in orchestras, ensembles, and music schools. Even after years of hard work and dedication, there’s no guarantee that you’ll land a full-time job. This level of competition can be discouraging and make it difficult to stay motivated.

Substantial Time And Money Investment

Becoming a successful classical musician requires a substantial investment of both time and money. You’ll likely need to devote hours of practice each day and invest in private lessons, training programs, and expensive instruments. Additionally, pursuing a career in classical music may mean sacrificing other pursuits, such as hobbies or spending time with loved ones. This investment of time and money can be a significant hurdle for many aspiring musicians.

Limited Job Opportunities

Despite the amount of training and dedication required, there are only a limited number of job opportunities available for classical musicians. Many musicians end up piecing together a living with multiple part-time jobs, often with little job security or benefits. This lack of stability can make it difficult to plan for the future and create financial stability.

While there are certainly challenges to being a classical musician, for those who are passionate about their craft, the rewards can be well worth it. It’s important to consider both the pros and cons before embarking on this career path.

Alternative Career Paths

Classical music is a highly competitive industry, and being a musician may not always be financially rewarding. However, for those who are passionate about music, there are alternative career paths such as music education, music therapy, and music production that can still allow you to pursue your love for music while earning a stable income.

If you’re a trained classical musician, you may have at least once pondered upon the question, “Is being a classical musician worth it?” The classical music industry can be tough and unpredictable, with limited job prospects and uncertain income. However, it’s not all bleak and negative, and there are several alternative career paths for classical musicians that can lead to a fulfilling and successful life.

Teaching

Teaching music is a popular career choice for classical musicians. Music education is in demand, and teachers are needed at all levels – from elementary schools to universities. Teaching can be an excellent way to share your knowledge and passion for music with the younger generation. You can teach at schools, universities, or even start your music academy. Teaching also offers stable income and benefits such as summers off and a regular working schedule.

Composing

Composing is another alternative career path for classical musicians. Composers write original classical music pieces of all lengths for soloists, groups, and orchestras. Composing can be a lucrative career path, with opportunities for commissions, grants, and royalties. However, it can take years to establish oneself in the industry as a composer, and it requires strong connections and networking skills.

Performing Other Genres Of Music

Although classical music is your main focus, performing other genres of music can be an exciting and rewarding alternative career path. Many classical musicians explore jazz, folk, or pop music to expand their musical repertoire and income opportunities. You can join a band or orchestra, work as a studio musician, or even write and perform your music. In conclusion, there are several alternative career paths available for classical musicians, and it’s essential to explore these paths to find the most suitable one for you. Teaching, composing, and performing other genres of music are just a few examples of the possibilities out there. With hard work and persistence, you can find success and fulfillment as a classical musician or in the alternative career paths mentioned.

Balancing Financial Stability With Career Satisfaction

Achieving financial stability while pursuing a career in classical music can be challenging. However, for those passionate about this art form, the rewards of job satisfaction and personal fulfillment can make it all worthwhile. Balancing these factors requires careful planning and a willingness to adapt to changing circumstances.

Being a classical musician can be incredibly fulfilling, but it can also come with its fair share of challenges, especially when it comes to balancing financial stability with career satisfaction. Many musicians struggle with the idea of pursuing their passion while also ensuring that they can make ends meet. However, with the right strategy and approach, it is possible to achieve both.

Finding Multiple Income Streams

One way to balance financial stability with career satisfaction as a classical musician is to diversify your income streams. This means finding different ways to generate income beyond just performing. For example, you may choose to teach lessons, compose music, or work in a related field such as music therapy. By diversifying your income, you can reduce the financial stress that comes with relying solely on performances.

Networking Effectively

Networking effectively is also crucial for a classical musician. Building relationships within the industry can open up new performance opportunities and help you connect with other professionals who may be able to offer guidance or advice. Attend industry events, join professional organizations, and make an effort to meet new people whenever possible.

Planning And Budgeting

Finally, planning and budgeting are essential for balancing financial stability with career satisfaction. As a classical musician, you need to be aware of your expenses and plan accordingly. This may mean setting aside money for equipment and instrument maintenance, as well as living expenses. By creating a budget and planning ahead, you can reduce your financial stress and focus on your craft. Balancing financial stability with career satisfaction as a classical musician is possible. The key is to find multiple income streams, network effectively, and plan and budget carefully. By taking these steps, you can pursue your passion while also ensuring that you can make ends meet.

Is Being a Classical Musician Worth It

Credit: www.youtube.com

Frequently Asked Questions On Is Being A Classical Musician Worth It

Is Classical Musician A Good Career?

Yes, classical musician can be a good career for individuals who are passionate about music, willing to put in hard work and practice, and willing to build their network. The competition may be fierce, but the dedication and skill required for success can lead to fulfilling and financially stable careers.

Do Classical Musicians Make Money?

Yes, classical musicians can make money through various avenues such as concerts, recording deals, music teaching, and online streaming services. However, depending on factors such as their level of skill, experience, location, and demand, the amount of money they earn can vary significantly.

Is It Hard To Become A Classical Musician?

Becoming a classical musician is challenging and requires dedication, hard work, and many years of practice. It’s important to have a solid musical foundation, a strong work ethic, and an unwavering passion for music to succeed in this highly competitive field.

However, with the right mindset and training, anyone can become a successful classical musician.

Do High Iq People Like Classical Music?

Yes, high IQ people tend to prefer classical music. Studies have shown that individuals with higher IQ scores tend to have greater appreciation for complex music such as classical music. However, music preference ultimately depends on personal taste and experience.

Conclusion

As with any career path, being a classical musician has its challenges and rewards. It takes immense dedication and hard work to succeed, but the opportunity to create beautiful music and connect with audiences can be incredibly fulfilling. While the industry may be competitive, it’s important to remember the passion and love for the art that brought you there in the first place.

Ultimately, the decision to pursue a career in classical music is a personal one, but for those who are willing to put in the effort, the journey can be well worth it.