Categories
Archive

Mastering Psytrance From Start To Finish

Mastering Psytrance From Start To Finish is a comprehensive online course that teaches you how to produce, mix and master high-quality psytrance tracks. In this course, you will learn everything from basic sound design and arrangement to advanced mixing and mastering techniques.

Psytrance is a subgenre of electronic dance music that originated in Goa, India, in the late 1980s. It is known for its hypnotic melodies, energetic basslines and intricate percussion. The genre has since spread globally, with many producers striving to perfect their production skills and create their unique sound.

Mastering Psytrance From Start To Finish offers a step-by-step guide to producing high-quality psytrance tracks, covering everything from the fundamentals of sound design to the mastering process. Whether you are a beginner or an experienced producer looking to refine your skills, this course is an excellent resource for anyone looking to take their psytrance production to the next level.

Psytrance Production Basics

Psytrance production is a complex process that requires creativity, dedication, and technical skills. Mastering the basics of psytrance production is essential before moving on to advanced techniques. In this article, we will go through the essential elements of psytrance production basics:

Selecting The Right Daw

The first step in mastering psytrance production is selecting the right Digital Audio Workstation (DAW). A DAW is a software application used for recording, editing, and producing music. The choice of a DAW will depend on personal preference, functionality, and compatibility with plugins and synths. Some popular DAW options include Ableton Live, FL Studio, Logic Pro, and Cubase.

Essential Plugins And Synths

Using appropriate plugins and synths is crucial to producing high-quality psytrance music. Plugins are software components that add specific effects or functions to a DAW. Synths are virtual instruments that produce electronic sounds. Some essential plugins and synths for psytrance production include:

Plugin/SynthFunction
Sylenth1A virtual analog synthesizer plugin that produces high-quality sound
MassiveA wavetable synthesizer plugin with customizable sound shaping features
SpireA software synthesizer plugin that produces a wide range of sounds

Building A Template

Creating a template is a crucial step in psytrance production that ensures consistency and saves time. A template contains pre-configured tracks and effects that can be used to produce a new track quickly. Some essential elements of a psytrance template include:

  • Drum sequencing
  • Basslines and melodies
  • Sound effects
  • Mixing tools such as EQ, compression, and reverb

Once the above-listed elements are in place, one can make every track with ease.

Creating The Groove

Learn how to create the perfect groove in Psytrance with a step-by-step guide on mastering the genre from start to finish. This comprehensive resource will help you produce professional-quality tracks that will keep the dance floor moving all night long.

Creating the Groove is an essential part of mastering Psytrance. It sets the foundation for the entire track, drawing the listener in with its infectious rhythm. The groove is created through a combination of elements, including the kick drum, bassline, percussion, and drums. Let’s explore each of these elements in detail to learn how to create a powerful and irresistible groove that will keep the dancefloor moving all night long.

Designing The Kick Drum

The kick drum is the backbone of any Psytrance track. It anchors the rhythm and provides the driving force that propels the track forward. A well-designed kick drum should be punchy, with a sharp attack and a long decay. One way to achieve this is by layering different kick samples and processing them with effects such as distortion or saturation. Another approach is to synthesize the kick from scratch using a plug-in such as Kick 2 or BazzISM.

Programming The Bassline

The bassline complements the kick drum and provides the low-end energy that moves the crowd. A good Psytrance bassline should be melodic and rhythmic, with a distinctive sound that cuts through the mix. You can create a bassline by selecting a synth sound and programming a simple pattern that follows the root notes of the chords. Once you have a basic pattern, you can experiment with adding variations and embellishments such as slides or stutters.

Working With Percussion And Drums

In addition to the kick and bass, percussion and drums add depth and complexity to the groove. Psytrance tracks often feature a variety of percussive elements, including shakers, hats, claps, and snare rolls. These elements are placed in strategic positions within the track to create tension and release. Programming these elements requires careful attention to detail, as they must fit together seamlessly and complement the other elements in the mix. As you work on creating the groove for your Psytrance track, remember that experimentation is key. Don’t be afraid to try new techniques and push the boundaries of what’s possible. By combining the right elements and taking the time to fine-tune the details, you can create a groove that will keep the dancefloor moving all night long.

Crafting Mesmerizing Melodies

In Psytrance, the melodies play a crucial role in evoking the desired emotions among the listeners. Mastering the art of crafting mesmerizing melodies is a must-have skill for every producer who wants to create music that people will love. With a blend of creativity and technical know-how, you can easily translate your musical ideas into captivating melodies.

Creating And Layering Synth Pads

Synth pads are crucial in creating atmospheric and captivating melodies that hook the listener into the song. They provide the perfect groundwork for other melody elements. It is important to ensure that the synth pads are well-layered to produce rich and harmonious sounds. By tweaking the different parameters such as the attack, decay, sustain, and release, you can create unique and captivating synth pads that blend effortlessly with your other melody elements.

Designing Arpeggios And Sequences

Arpeggios are an excellent way to create interesting melodies that keep the listener engaged. They lend themselves well to different styles of Psytrance, from morning to twilight to dark Psytrance. By manipulating the arpeggio notes and applying creative effects such as reverb and delay, you can create mesmerizing melodies that drive the energy of the track. Sequences, on the other hand, are great for creating a sense of progression in your melodies. By varying the notes and lengths of the sequences, you can build tension and hook your listeners into the groove.

Working With Leads And Riffs

Leads and riffs are the most prominent melody elements in any Psytrance track. They are the top layer of the melody and offer a catchy and memorable hook that stays with the listener long after the track has ended. It’s important to pay attention to the sound design of your lead synths, choosing the right waveform, ADSR, and modulation to create a sound that complements the other melody elements. When working with riffs, focus on creating simple but memorable patterns that allow the listener to easily recall the melody even after they’ve left the dancefloor.

Mastering the art of crafting mesmerizing melodies in Psytrance takes time and practice. By experimenting with different techniques and staying true to your creative vision, you can create melodies that captivate your audiences and keep them engaged from start to finish.

Mastering Psytrance From Start To Finish

Credit: www.reddit.com

Arrangement Techniques

Discover the arrangement techniques of mastering Psytrance from start to finish with this comprehensive guide. Learn how to effectively structure your tracks for maximum impact and keep your listeners engaged from beginning to end.

Arrangement techniques are crucial for creating a well-structured Psytrance track that holds the listener’s attention from start to finish. The arrangement process helps in organizing the various elements of a track, building energy, and crafting well-timed drops to keep the audience engaged.

Structuring Your Psytrance Track

The first step in arranging a Psytrance track is mapping out the structure. This involves deciding on the number of bars in the intro, breakdowns, drops, and outro. A typical Psytrance track structure comprises an intro, a breakdown, various drops, and an outro. Once the structure is mapped out, it becomes easier to place different elements and sounds in their rightful places.

Creating Transitions And Builds

Transitions and builds play a significant role in creating a sense of progression in a Psytrance track. Smooth transitions can be achieved by using effects like risers, whooshes, and crashes, while builds can be achieved by progressively increasing the volume, pitch, and intensity of sounds leading up to a drop. Incorporating subtle changes such as filters and modulation can also add depth and interest to the track.

Crafting A Killer Drop

The drop is the climax of a Psytrance track, and it’s essential to get it right. A killer drop should be unexpected, memorable, and provide a release to the energy built up in previous sections of the track. To achieve this, a Psytrance producer needs to use various elements like lead synths, basslines, percussion, and effects to create a massive sound that resonates with the listener. In conclusion, mastering arrangement techniques is vital for creating a cohesive and engaging Psytrance track. By following these techniques, producers can create a track that successfully builds tension and energy, leading up to a memorable drop that leaves the listener wanting more.

Mixing And Mastering

When it comes to mastering psytrance tracks, proper mixing and mastering is crucial to ensure the track sounds polished and professional. In this section, we will delve into some essential tips and techniques to help you achieve a well-balanced mix and master your psytrance track to perfection, to stand out amongst the best in the industry.

Balancing Your Mix

The first step in mixing your psytrance track is to balance the levels of each element in the mix. This includes adjusting the volume of each instrument, sample, and effect in the mix to achieve a well-balanced and cohesive sound.

  • Start by soloing each element in the mix to ensure that they are all playing at their optimal levels.
  • Then, slowly start adding in each element one by one, making sure that each layer sits well in the mix and doesn’t clash with other elements.
  • Use panning to create a sense of space and depth in the mix, by placing different elements in different parts of the stereo field.

Sculpting Your Sound With Eq

EQ is an essential tool for shaping the frequency balance of each element in your psytrance track, allowing you to carve out specific frequencies that you want to emphasize or reduce.

  • Start by identifying which elements in the mix are competing for the same frequency range, and then use EQ to carve out a space for each element to breathe.
  • Use boosting to emphasize the frequencies that make each element special.
  • Use cutting to reduce any frequencies that are causing muddiness or interference in the mix.

Adding Space With Reverb And Delay

Reverb and delay are two essential effects for creating a sense of space and depth in your psytrance mix.

  • Use reverb to create a sense of space around each element in your mix, and to glue different elements together.
  • Use delay to create a sense of movement and rhythm in your mix, and to add interest to repetitive elements like percussion and basslines.
  • Use automation to create evolving and dynamic reverbs and delays that keep the listener engaged throughout the track.

Mastering Your Psytrance Track

The last step in the process is to master your psytrance track to ensure it sounds well-balanced on all playback systems, and to add some final polish to the mix.

  • Start by using EQ to correct any frequency imbalances that may have occurred during the mixing process.
  • Use compression to glue the mix together, and to bring out the subtleties of the track.
  • Use limiting to ensure that the track sounds loud and punchy on all playback systems, without causing distortion or clipping.
Mastering Psytrance From Start To Finish

Credit: www.youtube.com

Promotion And Distribution

Mastering Psytrance From Start To Finish is a comprehensive course covering all aspects of producing and promoting your own Psytrance music. It includes tips on promotion and distribution, allowing you to get your music to the right people and gain the exposure you need to succeed in the music industry.

As a Psytrance producer, promotion and distribution are crucial to getting your music heard. Building your brand, sharing your music on streaming platforms, and networking and collaborating with other producers can all help promote and distribute your music to a wider audience.

Building Your Brand As A Psytrance Producer

Building your brand as a Psytrance producer is essential to promoting your music. Start by creating a logo that represents your style, and use it consistently on your social media channels and website. Develop a consistent aesthetic for your album covers, website, and promotional materials to create a cohesive brand image.

Sharing Your Music On Streaming Platforms

In today’s digital world, sharing your music on streaming platforms can help you reach a wider audience. Platforms like Spotify, SoundCloud, and Bandcamp allow you to easily upload your music and reach millions of listeners. Create a profile on these platforms and share your music regularly to build a following.

Networking And Collaborating With Other Producers

Networking and collaborating with other producers is a great way to expand your reach and promote your music. Attend local shows and festivals to meet other producers and create connections. Collaborating on tracks can also help you reach new audiences who may not have discovered your music otherwise. In conclusion, mastering promotion and distribution is crucial to making it as a Psytrance producer. By building your brand, sharing your music on streaming platforms, and networking and collaborating with other producers, you can promote your music and reach a wider audience.

Mastering Psytrance From Start To Finish

Credit: www.audiomatic-mastering.com

Frequently Asked Questions For Mastering Psytrance From Start To Finish

How Many Bpm Is Full On Psytrance?

Full on psytrance usually ranges between 140-150 BPM (beats per minute).

What Is Psytrance Music?

Psytrance is a form of electronic music that originated in the 1990s. It is characterized by its fast and repetitive beat, psychedelic sound effects, and use of samples from science fiction movies and TV shows.

What Are The Essential Components Of A Psytrance Track?

A Psytrance track typically consists of a bassline, drums, percussion, samples, and synthesizers. The bassline is often the driving force of the track, while the other elements add texture and atmosphere.

How Can I Create A Psytrance Track From Scratch?

To create a Psytrance track from scratch, you will need to have a basic understanding of music theory and production tools such as synthesizers, drum machines, and digital audio workstations. It’s also important to experiment with different sounds and effects to create a unique and dynamic track.

Conclusion

Mastering Psytrance is a long journey, but with passion and dedication, it can be achieved. By mastering the key elements such as arrangement, sound design, and mixing, you will be able to create your own unique sound and stand out in the crowded music industry.

Remember to always keep learning, remain open-minded, and trust your instincts. The key to success lies in constant experimentation and practice. So go ahead and explore the vast universe of Psytrance, and who knows, maybe one day you will be the one inspiring others to join the journey.
Categories
Archive

Frequency Masking Insights And Pro Tips

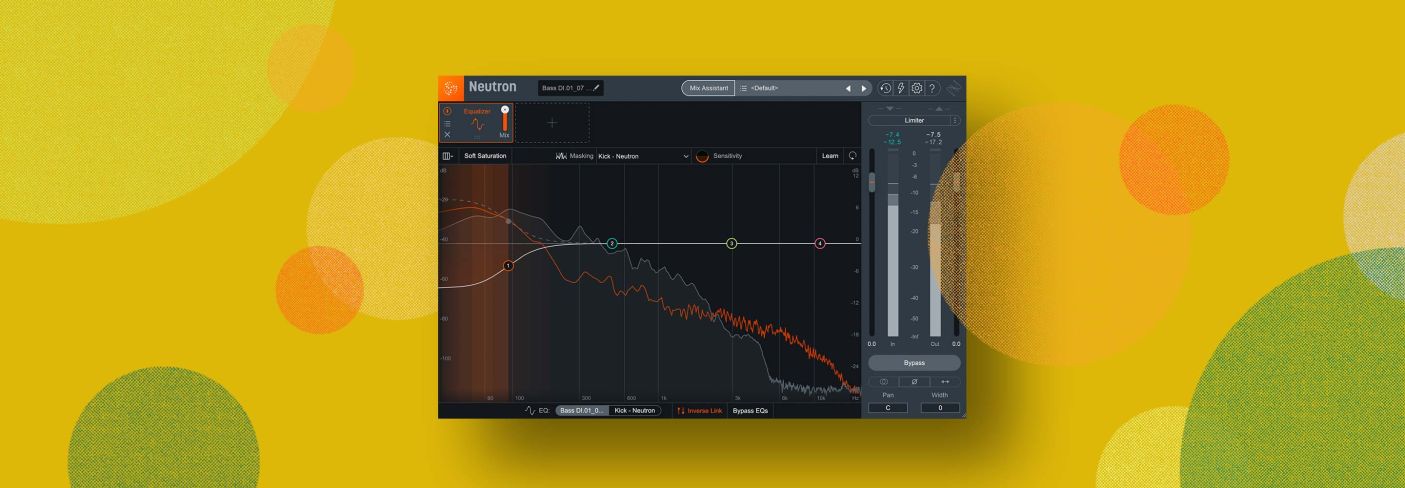
Frequency masking occurs when one sound frequency interferes with the perception of nearby frequencies. To avoid this problem, try adjusting the EQ of your audio tracks for better separation and clarity.

We’ll delve deeper into frequency masking and offer tips on how to identify and address it for better sounding audio recordings. Whether you’re a music producer, podcaster, or content creator, understanding frequency masking is essential for delivering quality content to your audience.

Keep reading to discover how to optimize your audio quality by identifying and addressing issues related to frequency masking.

Frequency Masking Explained

Have you ever had trouble hearing two different sounds simultaneously? This phenomenon is known as Frequency Masking. It occurs when a louder sound in a particular frequency range makes it difficult for a quieter sound in the same range to be heard. In this blog post, we’ll delve deeper into the concept of Frequency Masking, explore some examples, and explain why this matters.

What Is Frequency Masking?

Frequency Masking occurs when a loud sound in a particular frequency range makes it difficult to hear a quieter sound in the same range. This is because the brain processes some sounds as masking others. Simply put, when two sounds share the same frequency range, the louder one tends to dominate. The auditory system has limited bandwidth capacity, which means it can only process a certain number of sounds simultaneously. This makes Frequency Masking a significant challenge in many audio-related fields, including music production, sound engineering, and speech recognition.

Examples Of Frequency Masking

The most common example of Frequency Masking is the inability to hear a person speaking when there is loud music playing in the background. Another example is the difficulty in hearing a guitar riff when the kick drum is playing at the same time in a song. Additionally, imagine you are in a park and trying to listen to a bird chirping while the sound of traffic or construction is playing loudly nearby. These are all examples of Frequency Masking.

Why Does Frequency Masking Matter?

Understanding Frequency Masking is crucial for anyone working in audio-related fields. For example, in music production, a sound engineer must ensure that each instrument or vocal track is heard clearly over others. If not, certain sounds can become inaudible or buried beneath other sounds, which can lead to an overall muddy mix. In speech recognition, accurate voice recognition is critical for effective communication leading to hearing loss. Similarly, hearing aid companies use frequency masking to improve their technology to help the hearing of those who suffer from hearing disabilities.

How To Identify Frequency Masking

As a sound engineer, it’s essential to understand the concept of frequency masking. It refers to the phenomenon where a loud noise or sound can mask or hide a quieter one. In simpler terms, when two sounds with different frequencies occur at the same time, we might not be able to hear the softer one. Identifying frequency masking situations is crucial in sound engineering, and there are tools and scenarios to consider.

Tools To Identify Frequency Masking

Thankfully, there are tools available to identify when frequency masking might be happening. One such tool is a frequency spectrum analyzer, which displays different frequencies on a graphical interface. You can use this tool to identify whether one frequency is covering up another, indicating a frequency masking situation. Another common tool is a level meter, which measures the overall volume of the sound, helping you identify when one sound might be masking another.

Common Frequency Masking Scenarios

Frequency masking can happen in different scenarios, and as a sound engineer, it’s essential to be aware of them. Here are some common frequency masking scenarios:

SituationExample
Low Frequencies Masking High FrequenciesA bass guitar hiding the higher-pitched notes of a cymbal.
Similar Frequencies Masking Each OtherA guitar and a synth playing the same note, but the guitar is louder, masking the synth.
Adjacent Frequencies Masking Each OtherA sound at 2 kHz masking a sound at 1.8 kHz.

Being able to identify frequency masking scenarios will help you adjust the sounds you’re working with, making them sound cleaner and more audibly pleasing.

Tips For Preventing Frequency Masking

Frequency masking is a prevalent issue in audio production where some frequencies mask or hide the others. It results in less clarity and quality of sound, causing discomfort to the listeners. However, there are several effective techniques to overcome frequency masking.

Eq Techniques For Preventing Frequency Masking

EQ or equalization is a technique used to balance the audio spectrum frequency. It can help prevent frequency masking by cutting or boosting specific frequencies. A useful tip would be to identify problematic frequencies and attenuate them to allocate space to other frequencies. It’s essential to use EQ sparingly, or it could lead to unwanted side effects.

Dynamic Eq And Multiband Compression Techniques

A dynamic EQ is a combination of equalizer and compressor, which automatically adjusts the equalizer settings according to the sound’s dynamics. It’s helpful to prevent frequency masking, especially in situations where the masking frequencies are dynamic. Another technique is multiband compression, which allows you to control the dynamics of different frequency ranges. Multiband compression can help reduce the masking effect of lower frequencies on higher frequencies.

Using Sidechain Compression To Avoid Frequency Masking

Another effective technique to overcome frequency masking is to use sidechain compression. It involves using an audio signal’s amplitude to trigger the compressor on another sound, reducing its level when the first sound is playing. It’s useful in situations where two sounds share frequencies, and one should be given priority over the other.

Overall, preventing frequency masking requires a combination of techniques and a keen ear for identifying problematic frequencies. Using EQ, dynamic EQ, multiband compression, and sidechain compression can prevent frequency masking in audio production.

How To Solve Frequency Masking Issues

To solve frequency masking issues, it’s important to understand the concept of frequency masking and use pro tips to address them. This can include applying notch filtering, adjusting gain levels, and utilizing dynamic equalization. By addressing frequency masking, you can improve the overall clarity and balance of your audio mixes.

How To Solve Frequency Masking Issues: As a music producer or engineer, you might have come across the term ‘frequency masking.’ It occurs when two sounds share the same frequency range, and one sound overtakes the other, making it hard to be heard. Frequency masking can cause a mixing disaster as it often leads to an uneven balance between sounds. So, what can you do to solve frequency masking issues? In this post, we will be looking at some practical frequency masking solutions you can use to ensure that every sound in your mix is well balanced and blends flawlessly with another. Frequency Masking Solutions for Low-Frequency Instruments: Low-frequency instruments like kick drums, basses, and toms are prone to frequency masking issues. It is crucial to keep them under control to achieve a balanced mix. Here are some solutions to help you overcome the problem: – Use a high-pass filter to remove unnecessary low-end frequencies that can build up on other instruments and interact with the low-frequency instruments. – Find the fundamental frequency of the low-frequency instrument and cut a small dip in other instruments that clash with it. – Use a side-chain compression technique to create space for the low-frequency instrument. Frequency Masking Solutions for High-Frequency Instruments: High-frequency instruments such as cymbals, hi-hats, and acoustic guitars can also suffer from frequency masking issues. To prevent them from clashing with other instruments and dominating the mix, you can try some of the following frequency-masking solutions: – Use a low-pass filter to remove unnecessary high-end frequencies that can interact with other instruments. – Lower the volume of the high-frequency instrument in sections where it is not required. – Use an equalizer to carve out space for the high-frequency instrument and remove any overlapping frequencies. In conclusion, frequency masking is a common problem that every producer and engineer will encounter at some point. However, with these tips, you can significantly reduce the chances of frequency masking occurring in your mixes. Remember to use these frequency masking solutions carefully upon assessing the mix.

Advanced Techniques For Frequency Masking

You might already know about frequency masking, but did you know that there are advanced techniques that can help you combat it? In this section, we’ll explore two such techniques: M/S Processing and Transient Shaping. Read on to learn how these techniques can help you to reduce masking and create better-sounding mixes.

M/s Processing To Combat Frequency Masking

M/S processing is a technique that involves separating the mid and side information of a stereo signal, processing each separately, and then recombining them. This technique can be useful in combating frequency masking.

When frequencies in the mid and side channels are masked, it can create a muddy or unclear sound. By using M/S processing, you can isolate these frequencies and treat them differently, creating more clarity and separation in the mix. For example, you might boost the high end in the side channel to make it stand out more, or cut some mids in the mid channel to make room for other instruments.

Transient Shaping Techniques For Reducing Masking

Transient shaping is a technique that involves manipulating the attack and sustain portions of a sound. This can be useful in reducing frequency masking by making individual sounds stand out more clearly in the mix.

For example, if you have a kick drum and a bass guitar that are masking each other in the low frequencies, you might use a transient shaper to enhance the attack of the kick drum, making it cut through more in the mix. Alternatively, you could use a transient shaper on the bass guitar to reduce its sustain, making it less prominent in the mix and allowing the kick drum to shine through more clearly.

These are just a few examples of the many advanced techniques that are available for combating frequency masking. With a little experimentation and practice, you can become an expert in using these techniques to create better-sounding mixes.

Frequency Masking Insights And Pro Tips

Credit: www.izotope.com

Frequently Asked Questions For Frequency Masking Insights And Pro Tips

How Do You Deal With Frequency Masking?

Frequency masking can be dealt with by identifying any overlapping frequencies and adjusting the levels accordingly to ensure all important frequencies are audible. It’s essential to have a detailed understanding of the various frequencies involved to accurately deal with frequency masking.

What Is The Concept Of Frequency Masking?

Frequency masking is a psychoacoustic phenomenon where one sound can prevent the listener from hearing another sound that occurs simultaneously or follows. It occurs when two sounds share overlapping frequency components, making the weaker sound masked or inaudible to the listener.

This concept plays a crucial role in audio and music production, particularly in reducing unwanted sounds and enhancing the clarity and quality of audio recordings and live performances.

How Do You Mask High Frequency Sound?

High frequency sound can be masked by using noise-cancelling headphones or earplugs, white noise machines, or sound-absorbing materials such as acoustic panels. Another option is to use sound masking systems that emit low level noise to cover up high frequency sounds.

It is important to choose the appropriate method based on the specific situation and needs.

What Is Masking Radio Frequency?

Masking radio frequency is the process of concealing electromagnetic radiation from a device or system to prevent it from interfering with other devices or systems. This is done using shielding materials or other techniques to block or absorb the radio frequency waves.

Conclusion

Frequency masking is a critical phenomenon that affects the perception of sound. As music producers and engineers, it’s vital to take note of its effects and find ways to enhance our mixing and mastering techniques. With the tips and insights discussed in this blog post, we hope to have given you a better understanding of frequency masking and how to overcome it.

Keep experimenting and learning new ways to improve your music production skills. Happy crafting!

Categories
Archive

Mixing Mastering Tip Why Use Reference Tracks

Using reference tracks during mixing and mastering helps you achieve a better sound quality and consistency in your music productions. Reference tracks serve as a comparison tool to evaluate your sound and identify areas that need improvement.

They allow you to hear how your mix stacks up to professionally mixed and mastered tracks, and help you make informed decisions during the mixing process. By referencing your mix to tracks that you like or admire, you can establish a clear direction and ensure that your mix sounds competitive and polished.

We will explore the benefits of using reference tracks in mixing and mastering and provide tips on how to use them effectively.

Mixing Mastering Tip Why Use Reference Tracks

Credit: www.izotope.com

Why Use Reference Tracks?

Using reference tracks is a crucial mix and mastering tip for creating elite recordings. It allows you to compare your mix to a professionally mixed track and make necessary adjustments to achieve similar quality sound. By utilizing reference tracks, you can improve the overall quality of your work.

As a mixing and mastering engineer, using reference tracks is an essential step in achieving the perfect sound for any project. A reference track is a professionally mixed and mastered recording that you use as a guide throughout the mixing process. Here are a few reasons why using reference tracks is essential:

Helps Achieve A Professional Sound

Using reference tracks helps you achieve a professional sound by providing a benchmark for what a finished, polished track should sound like. This can be especially helpful when you’re working with a new genre or style of music you’re not experienced with. Listening to a well-mixed reference track can help you understand what makes a particular genre or style of music sound professional and polished.

Improves Track Consistency

When you use reference tracks, you ensure that each track you mix and master has a consistent sound and quality. Consistency is critical for creating a cohesive album, EP, or even a single. By using reference tracks, you can ensure that each track has a similar tonal balance, volume level, clarity, and overall sound quality.

Provides Objective Guidelines

Mixing and mastering are highly subjective processes, and it can be challenging to know when you’re done. Using a reference track provides an objective standard that you can measure your own mix against. This can help ensure that you don’t over-process your mix, or miss anything that you should have addressed.

Helps Adapt To Different Playback Systems

Finally, using reference tracks helps you adapt your mix to different playback systems. Every speaker system or set of headphones is different, and listening to your mix in multiple contexts can help ensure that it translates well across all playback systems. By comparing your mix to a reference track in each context, you can keep your mix sounding great no matter where it’s played. In conclusion, using reference tracks is essential for achieving a professional sound, ensuring track consistency, providing objective guidelines, and adapting to different playback systems. Start incorporating reference tracks into your mixing and mastering process today and hear the difference for yourself.

Mixing Mastering Tip Why Use Reference Tracks

Credit: www.productionmusiclive.com

Using Reference Tracks In Mixing

Reference tracks are a vital tool for the mixing and mastering process. Using reference tracks allows you to compare your mix to a professionally produced track and make necessary adjustments to achieve a similar sound. It helps to achieve a balanced and dynamic mix.

When it comes to mixing, referencing is an essential practice that ensures your work holds up against professional productions. Using reference tracks is an excellent way to gain perspective on your mix and identify problem areas before finalizing your work. In this post, we will be discussing the importance of using reference tracks in mixing and how it can improve your work.

Choosing Appropriate Reference Tracks

Choosing the right reference track is crucial in ensuring your work’s quality and relevancy. It’s essential to choose a track that is similar in genre, style, and overall energy to your final mix. Analyzing your preferred track’s instrumentation, dynamics, and timbre and selecting a reference with the same qualities is a smart move.

Analyzing Reference Tracks

Analyzing your reference tracks helps you identify the technicalities and attributes of a high-quality mix. Pay attention to the track’s frequency spectrum, stereo width, dynamics, and overall balance in your listening session. You need to understand how your reference track functions so that you can reproduce the same sound quality in your mix.

Using Eq And Compression To Match

Equalization and compression play a crucial role in achieving the same tonal balance, stereo width, and dynamic range of a reference track. You may have to boost or attenuate certain frequencies, adjust attack and release times, or employ stereo widening techniques to achieve your desired sound quality. Copying the settings of a reference track is not necessary, but it gives you an idea of how to achieve a similar high-quality mix.

Referencing During Mixing Process

After selecting and analyzing your reference track, it’s time to execute referencing during the mixing process. Continuously A/B-ing your mix with your preferred reference keeps you on track, ensuring that you’re achieving your desired sound quality. Referencing helps you identify areas that need improvement. It’s vital for achieving a professional mix. In conclusion, using a reference track is essential in achieving a high-quality mix. You need to analyze, match, and reference your work with appropriate reference tracks to take the quality of your mixes to the next level. Embrace referencing as a standard practice in your audio production process.

Using Reference Tracks In Mastering

In music production, reference tracks are a useful tool in mastering to achieve a desired sound. By comparing a track to a reference track, it allows for a better understanding of any discrepancies that need to be addressed in the mix.

Incorporating reference tracks can lead to a more polished and professional final product.

Using reference tracks in mastering is essential to achieve a superior and polished sound that can compete with professional music releases. A reference track is a commercial song that you use to compare the tonal balance, loudness, and overall quality of the track you are working on. Reference tracks are essential tools in mastering, and they can help you attain a balanced and polished sound, match the loudness of your track to commercial releases, and make informed mixing decisions. In this article, we will discuss how to choose appropriate reference tracks for mastering and how they help achieve a balanced sound, determine loudness, and improve the overall quality of your music.

Choosing Appropriate Reference Tracks For Mastering

When selecting reference tracks, it’s crucial to choose songs that are similar in style, tone, energy, and overall sound to your mix. It is ideal to select tracks that showcase the same mix elements as yours. For example, if your mix has a lot of transient elements such as drums and percussion, you might want to choose a reference track with similar tonal balance in these areas. Choosing appropriate reference tracks that are similar in style, tempo, and instrumental makeup will enable you to make informed decisions that will elevate your music towards the professional level.

Using Reference Tracks To Achieve A Balanced And Polished Sound

Reference tracks can help you achieve a balanced sound by allowing you to hear how your mix compares to commercially released tracks. The goal is not to copy another song, but rather to achieve balance and refinement in your own mix by listening to examples of well-mixed and mastered tracks. Listening to your reference track through headphones can be helpful in identifying imbalances between the left and right channels. You can also listen to the reference track at different volume levels to identify the points in your mix where the balance is off.

Using Reference Tracks To Determine Loudness

Reference tracks can also help determine the loudness of your mix. A track that is too quiet can lack impact, while one that is too loud may suffer from digital distortion or listener fatigue. By comparing your mix loudness to that of a commercial reference track at different points, you can identify whether your mix is too quiet or too loud. Using tools such as LUFS meters helps in this regard and are important tools for a Sound engineer

Referencing During Mastering Process

Referencing during the mastering process is crucial for ensuring that your track has the desired level of balance and loudness. By comparing different areas of your mix to a reference track, you can make informed decisions about which elements need more work and where to make improvements. You can also compare your mix against a variety of reference tracks to ensure that your music is on par with commercial releases. In conclusion, while referencing may not replace great sound engineering skills and the importance of good acoustics, using reference tracks for mastering can be an important aspect in achieving the desired outcome. By choosing appropriate tracks, comparing tonal balance and loudness levels, and using the insights gained to make informed decisions about your mix, you can achieve the desired level of polish and professionalism in your music.

Mixing Mastering Tip Why Use Reference Tracks

Credit: www.izotope.com

Frequently Asked Questions For Mixing Mastering Tip Why Use Reference Tracks

Do Professionals Use Reference Tracks?

Yes, many professionals use reference tracks when creating music or mixing audio. Reference tracks serve as a comparison point to ensure that the final product has a similar quality and standard as other successful tracks in the same genre.

What Is A Reference Track For Mastering?

A reference track for mastering is a previously mastered audio track used to set a benchmark for the desired sound quality in the master track. It’s essential for accurately evaluating the track’s tonal balance and dynamic range. The engineer can use the reference track as a guide and make adjustments to the master track to achieve the desired sound quality.

How Do You Level Match A Reference Track?

Level matching a reference track involves adjusting the volume of your mix to match that of the reference track. This can be done by using a metering plugin to measure the loudness of both tracks and adjusting the volume accordingly.

It’s important to ensure that both tracks are playing at the same loudness to achieve accurate comparisons.

How Important Is Mastering A Track?

Mastering a track is important as it enhances the overall sound quality, levels the audio, and adds cohesion to the entire album or mix. It ensures a consistent and loud volume throughout the music, enhances the clarity and dynamics, and makes the overall listening experience better.

It is an essential part of the music production process and requires expertise and careful attention by professionals.

Conclusion

When it comes to mixing and mastering, using reference tracks can make all the difference in achieving a professional sound. By comparing your own mix with a well-produced reference track, you can identify areas that may need improvement and make necessary adjustments.

Not only does this technique save time, but it also helps you create a more cohesive and polished final product. With these tips, you can incorporate reference tracks into your mixing and mastering process and elevate your production game.

Categories
Archive

How To Make a Moog Bass With Arturia Mini V3

To make a Moog bass with Arturia Mini V3, open the software and select the “MG Lowpass” filter. Then, choose a sawtooth waveform and adjust the filter cutoff and resonance to achieve the desired tone.

Arturia Mini V3 is a powerful software synthesizer that emulates various vintage analog synthesizers, including the legendary Moog synth. If you’re into electronic music production, you might know how important the Moog bass sound is for creating groovy, funky, and powerful basslines that cut through the mix.

With Arturia Mini V3, you can create your own Moog bass sounds easily and quickly. We’ll show you how to make a Moog bass with Arturia Mini V3 that sounds authentic and professional. So, let’s dive in and explore the world of Moog bass!

How To Make a Moog Bass With Arturia Mini V3

Credit: gearspace.com

Getting Started With Arturia Mini V3

If you’re looking to create a unique and catchy bass sound for your next track, look no further than the Arturia Mini V3 virtual synthesizer. With its versatile and intuitive interface, you can easily sculpt a wide range of bass sounds, including the classic Moog-style bass. In this guide, we’ll show you how to get started with Arturia Mini V3, so you can start making some sweet bass in no time!

Adjusting Audio Input

Before you dive into creating your bass sound, it’s important to make sure your audio input is adjusted properly. When you load up Arturia Mini V3, you should see a panel for audio input on the left. This panel allows you to adjust the input level for your instrument or microphone. Make sure you set the input level so that you’re not overloading the synth, which can lead to unwanted distortion or clipping.

Choosing A Preset Sound

If you’re new to synthesis or just looking for a quick way to get started, Arturia Mini V3 comes with a variety of preset sounds that you can use as a starting point. To access the preset library, simply click on the Presets button at the bottom of the interface. From here, you can browse through the different categories and select a sound that suits your needs. Once you’ve selected a preset, you can tweak the parameters to customize the sound to your liking.

Tweaking Parameters

If you want to create your own bass sound from scratch, the Arturia Mini V3 interface gives you a lot of control over the sound-shaping parameters. Some of the most important parameters for creating a Moog-style bass are the filter and the oscillator. The filter controls the cutoff frequency of the sound, while the oscillator generates the waveform. By adjusting these parameters, you can create a wide range of bass sounds, from thick and round to thin and piercing.

The Arturia Mini V3 interface also features a variety of modulation options, including LFOs and envelopes. These tools allow you to create dynamic and evolving bass sounds that can add a lot of interest and movement to your tracks. Experiment with different modulation sources and destinations to find the perfect balance of movement and stability for your bass sound.

Conclusion

With the Arturia Mini V3 synthesizer, you have all the tools you need to create a killer Moog-style bass sound. Whether you’re a seasoned pro or just starting out in the world of synthesis, the intuitive interface and powerful sound-shaping capabilities of Arturia Mini V3 make it easy to create a wide range of bass sounds that will give your tracks the punch and energy they need!

Tweaking The Sound

When it comes to creating a powerful and punchy bass sound, the Arturia Mini V3 synthesizer is a popular choice for musicians, sound designers, and producers. With its accurate emulation of the legendary Moog Model D synth, the Mini V3 offers a wide range of sound sculpting possibilities that can help you achieve a signature bass sound.

Modulating The Filter Cutoff

One of the key features of the Mini V3 is its filter section, which includes a low-pass filter with a cutoff frequency knob. To create a classic Moog-style bass tone, try modulating the filter cutoff with an LFO (low-frequency oscillator) or an envelope. This will add movement and warmth to the sound, making it more dynamic and expressive.

Adjusting Envelope Settings

Speaking of envelopes, the Mini V3 offers two ADSR (attack-decay-sustain-release) envelopes that can be used to shape the sound over time. In particular, the filter envelope is useful for creating a punchy and percussive bass sound. Try setting a short attack time and medium decay time to emphasize the initial attack of the sound and then adjust the sustain and release times to your liking.

Fine-tuning Oscillator Settings

In addition to the filter and envelope sections, the Mini V3 also has two oscillators that generate the sound. By fine-tuning the oscillator settings, you can achieve a wide variety of bass sounds, ranging from smooth and mellow to aggressive and distorted. Some useful parameters to tweak include:

  • Waveform selection: Sawtooth, square, and pulse waves can all add different harmonics to the sound.
  • Tuning: Slightly detuning the oscillators can add a natural chorus effect to the sound.
  • Sub-oscillator: Adding a sub-oscillator can give the sound more weight and depth.

Experiment with different combinations of these parameters until you find a bass sound that fits your track and inspires you to create more music.

Creating Basslines With Arturia Mini V3

Discover how to create the iconic Moog bass sound using the Arturia Mini V3 software synthesizer. This tutorial walks you through the steps to create a classic bassline with the Mini V3’s rich analog sound and intuitive interface.

Are you looking for a way to create a high-quality Moog bass with Arturia Mini V3? Look no further. Arturia Mini V3 is a great software synthesizer that allows you to create basslines quickly and easily. In this guide, we will show you how to create Moog Bass with Arturia Mini V3 and different ways to record it.

Using A Midi Controller

The Arturia Mini V3 allows you to use a MIDI controller to create basslines. All you need is a MIDI controller that is compatible with your DAW setup. Connect the MIDI controller to your computer, open the DAW software, and then open the Arturia Mini V3 plugin. With the MIDI controller connected, you can easily manipulate the Arturia Mini V3 using the MIDI knobs and buttons. This method is perfect for musicians who prefer to use a physical instrument to control the software synthesizer.

Recording Directly In The Daw

If you prefer to record basslines directly into your DAW, you can do that too. Simply open the DAW software, create a new track, and then add the Arturia Mini V3 plugin to the track. With the Arturia Mini V3 plugin added, you can use your computer keyboard or virtual piano to create basslines in real-time. Another option is to draw in the notes using the DAW’s piano roll. This method is perfect for musicians who prefer a more visual approach to creating basslines.

Optimizing Sound With Arturia Mini V3

To create an optimal Moog bass sound with Arturia Mini V3, you need to use the right settings. Start by selecting the “Bass” preset in the “Preset Browser” menu. This preset is designed to create a classic Moog bass sound. Next, tweak the settings to get the perfect sound. Adjust the filter cutoff frequency, resonance, and envelope amount to get the desired tone. You can also use the “Drive” feature to add distortion and make the bass sound grittier. In conclusion, the Arturia Mini V3 is an excellent software synthesizer for creating Moog basslines. Use a MIDI controller or record directly in your DAW, and optimize the sound using the right settings. With a little bit of practice, you can create high-quality Moog bass sound that will impress your audience.

How To Make a Moog Bass With Arturia Mini V3

Credit: www.youtube.com

Mixing And Mastering Tips

Learn how to create a Moog bass with Arturia Mini V3 through these mixing and mastering tips. Enhance your sound with these techniques to make your music production stand out.

Mixing and Mastering Tips: Processing the Moog Bass with EQ and Compression When it comes to mixing and mastering your music, the key is to strike a balance between all the different elements of the track. The Moog bass is no different, and you’ll want to ensure that it sits perfectly in the mix. In this section, we’ll take a look at how to process the Moog bass with EQ and compression. First of all, let’s talk about EQ. One of the main benefits of the Arturia Mini V3 is the built-in EQ, which allows you to shape the sound of your Moog bass in a number of ways. When mixing, try to focus on the low end of the frequency spectrum, cutting any unnecessary frequencies that might clash with other elements of the mix. When it comes to compression, it’s all about finding the perfect balance between dynamics and consistency. Too much compression can remove all the character from your Moog bass, while too little can result in a sound that’s difficult to hear in the mix. Try using a slow attack and medium release when compressing your Moog bass, and listen carefully to make sure it’s sitting nicely with the rest of the track. Tips for Incorporating the Moog Bass in a Mix Now that you’ve processed your Moog bass with EQ and compression, it’s time to incorporate it into your mix. Here are a few tips to ensure it sits perfectly in the track: – Consider panning: You might want to pan your Moog bass slightly to the left or right, to give it a sense of space in the mix. – Use automation: Try automating the volume or other parameters of your Moog bass throughout the course of the track, to add variation and interest. – Layer with other sounds: The Moog bass is a versatile instrument, and can be layered with other sounds to create a richer, more complex texture. In conclusion, by processing the Moog bass with EQ and compression and incorporating it thoughtfully into your mix, you can achieve a balanced and polished sound that will impress your listeners.

How To Make a Moog Bass With Arturia Mini V3

Credit: vintageking.com

Frequently Asked Questions For How To Make A Moog Bass With Arturia Mini V3

Which Moog Is Best For Bass?

Moog’s Model D and Subsequent 37 are the best for bass, offering warm, rich sounds. Both have easy-to-use interfaces, making them ideal for beginner and experienced musicians alike. Additionally, the Subsequent 37 comes with more features, including two high-pass filters, that give you more creative options.

What Is A Bassline Synthesizer?

A bassline synthesizer is a type of electronic musical instrument that produces low-pitched sounds or basslines for creating rhythm in music. It utilizes electronic oscillators to produce sounds and filters to control frequencies. It is commonly used in electronic dance music, hip hop, and various genres of music to create the foundation of the musical composition.

How Can I Create A Moog Bass Sound With Arturia Mini V3?

To create a Moog bass sound with Arturia Mini V3, start by selecting a sawtooth waveform and set the filter to 24dB/oct low pass. Then, adjust the resonance to your liking and add some envelope modulation to create a classic Moog bass sound.

What Are Some Tips For Creating A Unique Moog Bass Sound?

Experiment with different waveforms, filters, and modulation to create unique variations of the classic Moog bass sound. Try using a square or triangle waveform, adjust the filter cutoff and resonance, and add some distortion or saturation for extra character.

Conclusion

Creating a Moog bass with the Arturia Mini V3 can be a fun and rewarding experience for music producers of all levels. By utilizing the versatile features of the Mini V3 and following the steps outlined in this guide, you can easily craft unique and dynamic basslines that perfectly fit your productions.

With its intuitive interface and impressive sound quality, the Arturia Mini V3 is a must-have tool for any producer looking to push the boundaries of electronic music production. So, why not give it a try and see where your creativity can take you?

Categories
Archive

Top Acoustic Drums Vst Plugins Windows Mac

Some of the top acoustic drums VST plugins for Windows and Mac are EZdrummer 2, Superior Drummer 3, Addictive Drums 2, and Steven Slate Drums 5. These plugins offer realistic drum sounds and customizable options for different genres and styles of music.

With the advancement of technology, virtual drum plugins have become a go-to for music producers and songwriters. Not only do they provide ease of use and convenience, but they also save space and money compared to traditional recording methods. We will take a closer look at the top acoustic drums VST plugins available for Windows and Mac, their features, and how they can enhance your drum tracks and productions.

Top Acoustic Drums Vst Plugins Windows Mac

Credit: m.youtube.com

Top Acoustic Drums Vst Plugins

As a music producer, it’s essential to have quality acoustic drum sounds in your toolkit. While traditional drum kits can be expensive and take up space, Virtual Studio Technology (VST) plugins offer a convenient alternative that can be used inside your Digital Audio Workstation (DAW).

Superior Drummer 3

If you’re looking for the ultimate acoustic drum VST plugin, Superior Drummer 3 from Toontrack should be at the top of your list. With a massive library of drum kits, MIDI grooves, and drum sound shaping tools, this plugin offers unmatched realism and flexibility. You can even use custom drum samples to craft your unique drum sounds.

Addictive Drums 2

XLN Audio’s Addictive Drums 2 is another popular VST drum plugin that is used by many music producers worldwide. This plugin features high-quality drum samples from some of the world’s best drum kit manufacturers. It also includes a large selection of MIDI grooves and drum kit presets that can be quickly loaded up and incorporated into your tracks.

Steven Slate Drums 5

Steven Slate Drums 5 is a VST plugin that aims to replicate the sound of a professional recording studio’s drum kit. This plugin features a comprehensive mixer that allows you to fine-tune each drum sound’s characteristics and process them with effects like compression and distortion. Steven Slate Drums 5 also includes many MIDI grooves and custom drum kit samples.

Abbey Road Modern Drummer

For a unique and authentic drum sound, look no further than Abbey Road Modern Drummer from Native Instruments. This plugin features drum samples recorded in Abbey Road Studios’ Studio Two, which has been used to record legendary albums like The Beatles’ Abbey Road. Abbey Road Modern Drummer also includes a wide selection of MIDI grooves and drum kit presets.

Studio Drummer

Another VST plugin from Native Instruments, Studio Drummer, provides some of the most realistic acoustic drum sounds out there. With multiple drum kits to choose from, Studio Drummer allows you to mix and match different drum sounds and create your unique drum kit. This plugin also includes multiple MIDI grooves and drum kit presets that can add some creativity to your tracks.

In conclusion, these are just some of the best acoustic drum VST plugins available for both Windows and Mac. Each of these plugins has its unique features that can add value to your music production workflow, and you can’t go wrong with any of them. Try them out and see which one works best for you.

Top Acoustic Drums Vst Plugins Windows Mac

Credit: m.youtube.com

Top Acoustic Drums Vst Plugins Windows Mac

Credit: www.productionmusiclive.com

Frequently Asked Questions For Top Acoustic Drums Vst Plugins Windows Mac

What Is The Best Vst For Drums?

Superior Drummer 3 by Toontrack is considered the best VST for drums due to its extensive library of drum sounds, as well as its intuitive and customizable interface. It also allows for advanced drum mixing, processing, and manipulation.

What Is The Best Drum Plugin For 2024?

The best drum plugin for 2024 will depend on your needs and preferences. Some popular choices include Addictive Drums 2, Superior Drummer 3, and Steven Slate Drums 5. Each offers unique features such as realistic drum sounds and customizable drum kits.

What Is Drums Vst?

A drums VST is a virtual instrument software that is used to replicate the sound of acoustic drums. It is a plugin that is used within digital audio workstations to create drum tracks. It offers a vast range of drum sounds, styles, and effects that can be customized by the user.

What Is The Best Drum Library?

The best drum library is subjective as it depends on personal preferences and the genre of music. Some popular ones include Superior Drummer 3, Kontakt 5’s Studio Drummer, and Steven Slate Drums 5. They all have high-quality samples and diverse sounds to choose from.

Conclusion

As told earlier, the acoustic drum VST plugins can add an exceptional touch to your music production. With a list of top drum plugins available for both Windows and Mac, you can incorporate authentic drums sounds into your music. These high-quality plugins enhance the sound quality, realism, and flexibility of your music.

So, choose the best plugin that suits your budget and requirements and start crafting outstanding drum tracks today!

Categories
Archive

Whats The Difference Between Mixing Mastering

Mixing involves adjusting individual tracks to create a balanced stereo mix, while mastering is the final step in the music production process that involves optimizing the overall sound of the mix for distribution. Mixing serves to blend separate recorded tracks together into one cohesive stereo or multichannel audio output, using techniques such as EQ, panning and volume adjustments, compression, and effects processing.

Mastering comes after mixing. It prepares the final mix in a format you can copy and distribute to listeners. This process involves refining the overall sound, adjusting levels, eq, compression. This adds clarity and punch while ensuring the tracks are consistent and loudness compliant.

Related reading: AI Audio Mastering and Dolby Atmos Mastering. For background, see the Wikipedia article on Audio mastering.

A well-mixed and mastered track will sound polished, balanced, clear, and full-bodied. This provides the listener with an immersive and engaging audio experience.

Defining Mixing And Mastering

Mixing is the process of combining different tracks to form a final stereo mix, balancing levels, and adding effects. Mastering is the final stage of audio production and involves making adjustments to the overall sound of the mix, preparing it for distribution on different platforms.

The key difference between mixing and mastering is focus: mixing works on individual tracks, while mastering works on the entire mix.

Mixing and mastering are two crucial steps in the music production process. They are often used interchangeably, but they are two different stages with very distinct purposes. Mixing involves blending all the individual tracks of a song to create a cohesive and balanced final mix, while mastering involves putting the final touches on the mix to make it sound polished and ready for distribution. In this section, we will define each process and explain the differences between them.

Mixing Defined

Mixing is the process of combining multiple audio tracks together into a stereo or surround sound format. Here, the engineer brings vocals, guitars, drums and bass together into a final mix that sounds good on all devices. During this step, the mixer will adjust volume levels, panning, EQ, compression, and other sonic elements to make each track work together seamlessly. Mixing also involves editing or removing parts of tracks, such as cutting out silence or removing noise.

Mastering Defined

Mastering is the final step in the music production process and involves preparing the final mix for release. It involves making overall adjustments to the mix to ensure that it sounds consistent across all playback devices and platforms. During this step, the mastering engineer will make final tweaks to EQ, compression, stereo width, and volume levels to enhance the mix and make it sound polished. Additionally, mastering can involve adding fades, crossfades, and spacing between tracks to create a cohesive album.

Overall, the goal of mastering is to make the mix sound as good as it possibly can on all playback devices, from high-end speakers to earbuds. In summary, mixing and mastering are two different stages in the music production process that serve unique purposes. Mixing blends multiple tracks into a cohesive final mix, while mastering puts the final touches on the mix to make it sound polished and ready for distribution. Both steps are crucial and require attention to detail to achieve the best possible sound.

Whats The Difference Between Mixing Mastering

Credit: www.youtube.com

Comparison Of Mixing And Mastering

When it comes to music production, two terms commonly heard are mixing and mastering. Mixing and mastering are essential steps in producing great music, but there are some key differences between them. In this post, we will discuss the purpose of mixing and mastering and the key differences in the process.

Purpose Of Mixing Vs. Mastering

Mixing and mastering are both critical components of the music production process, but they serve different purposes.

MixingMastering
Mixing is the process of combining individual tracks into a final audio mix. The goal is to balance the levels, EQ, and effects of each track so that they blend together into a cohesive whole.Mastering is the process of preparing a final mix for distribution. The goal is to ensure the mix sounds as good as possible on as many playback systems as possible. This involves optimizing the overall volume, EQ, compression, and limiting of the mix.

Key Differences In Process

While both mixing and mastering involve manipulating audio, the specific techniques and tools used differ.

  • Tools: Mixing typically involves working with a variety of tools, including EQ, compression, effects, and automation. Mastering typically involves working with a smaller set of tools, with the main focus on EQ, compression, and limiters.
  • Workflow: Mixing is typically done on a per-track basis, with the engineer adjusting the levels and effects of each track before combining them into the final mix. Mastering is done on the final mixdown, with the engineer applying EQ, compression, and limiting to the entire mix.
  • Goals: Mixing is focused on creating a balanced and cohesive mix, whereas mastering is focused on optimizing the mix for distribution across a wide range of playback systems.

In conclusion, while mixing and mastering share some similarities, they serve different purposes and involve different techniques. Understanding the difference between mixing and mastering can help you better appreciate the different aspects of the music production process.

Mixing In Detail

When it comes to music production, mixing and mastering are crucial stages that can make or break a song. While both processes involve manipulating audio, there are fundamental differences between them that every musician should know. In this article, we’ll focus on mixing in detail. Exploring the role of the mixing engineer, components of the mixing process, and tips for getting the best mix possible.

Role Of Mixing Engineer

The mixing engineer is responsible for taking various audio tracks and combining them into a cohesive and balanced mix. They work with individual elements such as vocals, drums, bass, guitars, and other instruments to create a stereo or surround sound mix that sounds good across different playback systems.

A mixing engineer uses various tools such as equalization (EQ), compression, reverb, delay, and automation to shape the sound of each track and the overall mix. They also use panning to position each track in the stereo or surround sound field and create a sense of depth and space.

Components Of Mixing Process

The mixing process involves several components that the mixing engineer needs to balance and blend seamlessly. These components include:

ComponentDescription
VolumeThe loudness of each track in the mix.
PanningThe position of each track in the stereo or surround sound field.
Equalization (EQ)The balance of frequencies in each track and the overall mix.
CompressionThe control of dynamic range and sustain in each track and the overall mix.
ReverbThe simulation of acoustic space and ambience in each track and the overall mix.
DelayThe repetition of sound with different timing and feedback in each track and the overall mix.
AutomationThe control of volume, panning, and effect parameters over time in each track and the overall mix.

Tips For Getting The Best Mix Possible

To get the best mix possible, here are some tips to keep in mind:

  • Start with a clear and organized session with properly labeled and routed tracks.
  • Use reference tracks to get a sense of the balance, tone, and dynamics you’re aiming for.
  • Take breaks and listen to the mix with fresh ears to avoid ear fatigue and overprocessing.
  • Address any technical issues such as noise, phase cancellation, or clipping before applying artistic processing.
  • Collaborate with other professionals such as producers, musicians, and mastering engineers to get different perspectives and expertise.

By following these tips and understanding the role of the mixing engineer and the components of the mixing process, you can create a professional and impactful mix that brings your music to life.

Whats The Difference Between Mixing Mastering

Credit: www.sweetwater.com

Mastering In Detail

Mastering is the final step in music production. It involves enhancing the sound quality and overall balance of tracks. Though similar to mixing, mastering focuses more on the technical aspects of sound production.

Mastering is the final creative step in the production process of a song or album. It can be considered as the icing on the cake. This adds the final touches that make the music sound polished, balanced, and cohesive. The purpose of mastering is to prepare the final mix for distribution. This ensures that it sounds as good as possible on all playback systems. However, mastering involves much more than just making the music louder. Let’s take a closer look at the role of the mastering engineer and the components of the mastering process.

Role Of Mastering Engineer

The mastering engineer is responsible for ensuring that the final stereo mix sounds consistent, balanced, and as good as possible. They are trained to hear subtle nuances and can effectively treat imbalances in the frequency spectrum, adjust dynamics, and add punch and clarity to the sound. The mastering engineer is also responsible for ensuring that the final mix meets industry standards. You can play so it on any medium, from vinyl to streaming services. Moreover, they carefully monitor the level of the final mix, not just to avoid distorting the signal but also to ensure there is sufficient headroom for dynamic range and to prevent any unintended clipping. In essence, the mastering engineer puts the final “sheen” on the mix, making it ready for distribution.

Components Of Mastering Process

The mastering process involves several components, each of which contributes to a polished, professional-sounding final product. The following table summarizes some key components of the mastering process.

ComponentDescription
Equalization (EQ)Adjusts the balance of frequencies in the mix, compensating for any imbalances caused during recording or mixing.
CompressionReduces dynamic range, evening out inconsistencies in loudness
Stereo EnhancementExpands the stereo image, creating a “wider” soundstage that can enhance the listening experience.
Loudness MaximizationIncreases the perceived loudness of the mix without distorting or reducing its dynamic range.
Harmonic EnhancementAdds warmth, clarity, and character to the sound using harmonic distortion or saturation.
LimitingPrevents unintended clipping by setting a maximum output level for the mix.

Overall, the mastering engineer uses a combination of these and other tools to create a final product that sounds great on all devices and playback systems. The mastering process should never be overlooked. Meanwhile, it can make a world of difference in the quality and impact of the final product.

Importance Of Mixing And Mastering

Mixing and mastering are equally important stages in the music production process. The main difference between them is that mixing involves adjusting the levels and balance of individual tracks within a song, while mastering involves fine-tuning the overall sound and applying final touches to the entire mix.

It’s crucial to ensure that both stages are done properly for a professional-sounding outcome.

Impact On Sound Quality

The process of mixing and mastering plays a significant role in the overall sound quality of any audio recording. Mixing takes multiple individual tracks and blends them together to create a cohesive and balanced sound. It involves adjusting levels, panning, equalization, and various effects to ensure that each instrument and vocal sits well in the mix. This results in an enjoyable listening experience. A well-mixed track makes it easier to pick out individual elements while appreciating the full artistic vision of the song. Once the mixing process is complete, mastering adds the final polish to the audio.

It’s a crucial step in the music production process. This ensures that the final product is consistent in sound quality across various playback devices. The mastering engineer uses compression, equalization, and other techniques to balance the track’s frequency response and dynamic range. The goal is to achieve a punchier, louder, and more polished sound that enhances the overall listening experience.

Our Listening Experience

Mixing and mastering are essential aspects of creating music that can be enjoyed across multiple platforms, from streaming services to home theater systems and car stereos. Suppose the mix is unbalanced or the frequency response is poorly adjusted. In that case, the listener may experience ear fatigue or miss out on essential elements like background vocals, percussion, or other instruments. In contrast, a well-mixed and mastered track immerses the listener, creating an emotional connection with the music. It enhances the listening experience, allowing the listener to focus on the music and connect with it on a deeper level.

In conclusion, the importance of mixing and mastering can’t be overstated. It’s a critical step in music production that ensures the final product is enjoyable to the listener. A well-mixed and mastered track will have an excellent impact on sound quality and our overall listening experience.

Whats The Difference Between Mixing Mastering

Credit: www.sweetwater.com

Common Mixing And Mastering Mistakes

Mixing and mastering are two essential steps that music producers must take before releasing their tracks. Mixing is the process of combining all the individual tracks of a song into a final stereo mix, while mastering is the final step in the post-production process where the final mix is optimized for distribution and playback on different media platforms.

Over Compression

One of the most common mistakes made during mixing and mastering is over-compressing audio tracks. Compression is the process of reducing the dynamic range of a track. This makes the quiet parts louder and the loud parts quieter. While compression can be useful in creating a consistent sound across a track, over-compressing can cause the track to sound unnatural and with little dynamics.

Not Enough Headroom

Headroom is the amount of space between the highest sound level in the track and 0db. Not leaving enough headroom can cause distortion in the track, ruining its overall sound quality. It’s best to leave about 3-6db of headroom to allow for potential volume increases during mastering.

Inappropriate EQ

Equalization (EQ) is the process of adjusting the balance between different frequency ranges in a track. Sometimes, producers can be overzealous in their EQ adjustments, leading to an out-of-balance mix. The best practice is to make subtle EQ adjustments and use high-pass filters to remove any unnecessary frequencies.

Skipping the Reference Track

Listening to a reference track is crucial to ensure that the final mix matches the desired sound. Skipping this step can cause the track to sound off-balance, especially when played alongside tracks of the same genre.

Ignoring Limiting Techniques

Limiting is the process of setting a ceiling on the loudest part of a track, preventing distortion and providing room for headroom. Ignoring limiting techniques can lead to a distorted track and also ruin the overall sound quality. You should use compression before limiting to avoid distortion.

Final Thoughts

In summary, understanding the difference between mixing and mastering and avoiding common mistakes, such as over-compression and not enough headroom, is essential to achieving pristine and professional sound quality.

Frequently Asked Questions On Whats The Difference Between Mixing Mastering

Does Mixing And Mastering Make A Difference?

Yes, mixing and mastering can definitely make a significant difference in the quality of your audio recordings. Mixing is the process of blending and adjusting the individual tracks, while mastering is the final step of polishing and enhancing the overall sound.

A well-mixed and mastered audio track can sound more clear, balanced, and professional.

Do I Need Mixing Or Mastering?

Whether you need mixing or mastering depends on your goals. Mixing combines individual tracks to create a cohesive sound, while mastering polishes the overall sound and prepares it for distribution. If you want a professional, polished sound, you’ll likely need both.

Which Is Harder Mixing Or Mastering?

Both mixing and mastering are different yet equally important processes in audio production. However, generally mixing is considered harder due to the complexity involved in balancing different elements and achieving a coherent sound. Mastering, on the other hand, focuses on enhancing the overall sound quality and loudness of the mix.

Ultimately, both processes require expertise and attention to detail.

What Does Mastering Do For A Mix?

Mastering enhances the overall sound quality of a mix, making it louder, clearer, and more balanced. It also ensures that the music translates well across different playback devices and platforms.

Conclusion

Mixing and mastering are two distinct processes that play a crucial role in the production of high-quality audio. While mixing blends individual tracks to create a cohesive sound, mastering ensures that the final product meets industry standards for loudness, tonal balance, and overall clarity.

Understanding the differences between these two processes is paramount for producers, engineers, and artists seeking to create professional-quality recordings. Getting it right can make all the difference in achieving a polished, professional sound that stands out in a crowded market.

Categories
Archive

Audio Sample Rate And Bit Depth Complete Guide

The audio sample rate and bit depth define the quality of digital audio recordings. This guide provides an overview of the technical aspects and importance of choosing the right settings for audio production.

Audio production requires a fundamental understanding of digital audio processing and how parameters like sample rate and bit depth can impact the final result. Whether you are a beginner or a seasoned professional, having a comprehensive understanding of these settings can significantly improve your audio quality.

Related reading: Sample Rate For Recording and Mp3 Bitrate Differences : Demystifying the Power Behind High-Quality Sound. For background, see the Wikipedia article on Sampling.

Sample rate refers to the number of digital audio samples captured per second, while bit depth determines the resolution of each sample. Moreover, choosing the appropriate audio settings allows for the preservation of audio quality, minimizing distortion and noise in the final product. This guide aims to provide a complete overview of audio bit depth. This includes their technical aspects, and the impact on audio quality.

Audio Sample Rate And Bit Depth Complete Guide

Credit: majormixing.com

What Is Audio Sample Rate

What Is Audio Sample Rate:

In addition, Audio sample rate refers to the number of samples of audio carried per second. In simpler terms, it is the rate at which a system measures, records or plays back an audio signal. The sample rate determines the quality of an audio recording.

Definition Of Audio Sample Rate

Furthermore, Audio sample rate means the number of audio samples carried per second. Digital audio converts an analog signal into a digital one by taking “samples” of it at regular intervals. These samples are then played back at the same rate to reproduce the original audio signal.

How Audio Sample Rate Is Measured

Additionally, we measure the audio sample rate in Hertz (Hz). Consumer audio commonly uses 44.1 kHz, while professional work often uses higher rates such as 96 kHz.

Why Audio Sample Rate Is Important

Audio sample rate is important because it determines the audio quality of a recording or playback. The higher the sampling frequency, the better the quality of the audio recording. This is because higher sampling rates capture more detailed and accurate information about the audio signal.

However, a high sampling frequency also results in larger audio files. This can take up more storage space and may require more processing power to edit or playback.

Audio Sample Rate And Bit Depth Complete Guide

Credit: www.yololiv.com

Understanding Bit Depth

Understanding bit depth is a crucial aspect of audio sampling rate. It refers to the number of bits of information contained in each audio sample. This complete guide will help you comprehend how to balance bit depth with other aspects of audio quality.

Understanding Bit Depth If you are a budding music producer, engineer, or audio enthusiast, you may have heard the term “bit depth”. Bit depth is an essential aspect of digital audio and is crucial to achieving clarity and precision in your recordings. In this article, we’ll dive into bit depth, what it is, and why it matters. Definition of Bit Depth Bit depth refers to the number of bits of information used to represent each sample in a digital audio file. It basically determines how accurately the recorded waveform conforms to the original sound wave.

The more bits used for each sample, the more accurately the digital recording represents the original source. Types of Bit Depth There are two common types of bit depth in digital audio recording, namely 16-bit and 24-bit. 16-bit audio has a total of 65,536 possible values for each sample, while 24-bit audio has 16,777,216 possible values per sample. In other words, 24-bit audio has significantly more resolution and dynamic range. That’s because it can represent a broader range of amplitude levels.

Practical Tips

Why Bit Depth is Important Bit depth is crucial as it determines how much detail and clarity your recordings will have. As you increase the bit depth, your recording becomes more accurate and less susceptible to digital noise. In addition, bit depth affects the overall dynamic range of your recording. A higher bit depth allows for a more prominent dynamic range, resulting in more precise and nuanced recordings. In conclusion, understanding bit depth is vital when it comes to achieving high-quality digital audio recordings.

It determines how accurately a waveform conforms to an original sound wave. It affects the overall clarity, detail, and dynamic range of your recording. Always ensure you use the right bit depth when recording audio; this is crucial to achieving professional-quality recordings.

Choosing The Right Audio Sample Rate

Choosing the appropriate audio sample rate is critical to the quality of your audio recordings. A higher sample rate provides better quality sound, but requires more storage space. A lower sample rate might save storage space, but produces lower quality audio.

When it comes to audio recording, one of the most important decisions you’ll make is selecting the right sample rate. The sample rate determines the quality of your audio, and choosing the right one can make all the difference. In this guide, we’ll explore the factors to consider when choosing audio sample rate, common audio sample rates, and the intended use of audio and sample rate.

Factors To Consider When Choosing Audio Sample Rate

Before choosing an audio sample rate, it’s important to understand the factors that influence your decision. The following are some factors to consider:

  • Intended Use: The primary factor to consider is the intended use of your audio. For instance, if you’re recording for podcasts, a sample rate of 44.1 kHz would be suitable. For music production, a higher sample rate of 96 kHz or 192 kHz is preferred.
  • Storage Space: Another factor to consider is the size of the audio file. Higher sample rates require more storage space than lower sample rates. Therefore, you need to balance the audio quality you require and the storage space available.
  • Computing Power: Higher sample rates require greater computing power to process. If your computer is not powerful enough to handle higher sample rates, you may experience lagging and dropped frames.

Common Audio Sample Rates

The following are some of the most common audio sample rates and their respective uses:

Sample RateUse Case
44.1 kHzCD Audio, Podcasting, Online Streaming, and Television.
48 kHzDigital Video, DVD, and Digital Television.
96 kHzProfessional Music Production, Film, and Video Game Sound.
192 kHzMusic and High-Resolution Audio.

Intended Use Of Audio And Sample Rate

Choosing the right audio sample rate largely depends on your intended use. For instance, if you’re recording audio for YouTube videos or podcasts, a sample rate of 44.1 kHz should suffice. For professional production or high-resolution audio, many engineers prefer 96 kHz or 192 kHz. By understanding the intended use of your audio, you can select the right audio sample rate that guarantees the quality of your audio. In conclusion, choosing the right audio sample rate is crucial in determining the quality of your audio. By understanding the factors to consider when selecting the right audio sample rate, common audio sample rates. The intended use of the audio, you can make an informed decision.

Audio Sample Rate And Bit Depth Complete Guide

Credit: www.gumlet.com

Choosing The Right Bit Depth

Selecting the appropriate bit depth is an essential consideration for high-quality audio recordings. The bit depth indicates the precision of the audio’s digital representation and has a significant impact on the overall sound fidelity and dynamic range.

When it comes to choosing the right bit depth, there are a few factors to consider. Bit depth determines the dynamic range and resolution of the audio, which impacts the overall quality. In this section, we’ll go over the common bit depths, factors to consider, and how intended use plays a role.

Factors To Consider When Choosing Bit Depth

There are a few factors to consider when deciding on a bit depth. The intended use, available storage space, and processing power are all important considerations. Intended use: Different types of audio have different bit depth requirements. For example, a podcast may only require a bit depth of 16 bits. Meanwhile, a music project may require a bit depth of 24 bits or higher to capture the full range of the audio. Available storage space: Higher bit depths require more storage space. If you’re working on a project with limited storage, you may want to consider using a lower bit depth. Processing power: Recording and processing audio at higher bit depths requires more processing power. If you’re working on an older or less powerful computer, a lower bit depth may be more suitable.

Common Bit Depths

The most common bit depths used in audio are 16, 24, and 32 bits. Here’s a brief overview of each: 16-bit: CD quality audio is 16-bit. This means it has a dynamic range of 96 dB. This is suitable for most podcast, speech, and other projects where the audio isn’t heavily processed. 24-bit: 24-bit audio captures more dynamic range and resolution than 16-bit audio. It’s commonly used in music production where the audio will be heavily processed, mixed, and mastered. 32-bit: 32-bit audio is the newest professional standard. It captures a massive dynamic range and resolution and is suitable for high-end music production, mastering, and other specialized audio applications.

Intended Use Of Audio And Bit Depth

Ultimately, the intended use of your audio will play the biggest role in choosing the right bit depth. If you’re producing a podcast or speech project, a bit depth of 16 bits is likely sufficient. For music production, a bit depth of 24 bits or higher is recommended to capture the full range of the audio. It’s important to keep in mind that a higher bit depth does not necessarily mean better quality. It’s all about finding the right balance between dynamic range, resolution, and processing power based on your specific project’s needs.

Audio Sample Rate And Bit Depth For Recording

Understanding audio sample rate and bit depth is crucial for recording quality audio. Sample rate measures the number of samples per second which determines the frequency range, while bit depth determines dynamic range and resolution. Choosing higher values improves audio quality.

When it comes to recording audio, choosing the right sample rate and bit depth is crucial for achieving high-quality recordings. Sample rate refers to the number of times per second that audio is sampled and bit depth refers to the number of bits used to represent each sample. In this article, we’ll take a look at how sample rate and bit depth affect recording quality, as well as some common misconceptions about these parameters.

Recommended Audio Sample Rates And Bit Depths For Recording

For most recording applications, a sample rate of 44.1kHz or 48kHz and a bit depth of 24 bits is recommended. However, some professional recording studios may use higher sample rates and bit depths, such as 96kHz or 192kHz and 32 bits, to achieve even higher quality recordings. It’s important to note that higher sample rates and bit depths also require more storage space and processing power.

How Audio Sample Rate And Bit Depth Affect Recording Quality

Sample rate and bit depth have a direct impact on the quality of audio recordings. Higher sample rates capture more detail and nuance in the audio waveform. This results in a more accurate representation of the original sound. Likewise, higher bit depths allow for a greater dynamic range and more accurate representation of subtle changes in volume.

Common Misconceptions About Audio Sample Rates And Bit Depths In Recording

One common misconception about sample rate and bit depth is that higher is always better. While it’s true that higher sample rates and bit depths can result in higher-quality recordings, there are diminishing returns beyond a certain point. Additionally, it’s important to consider the limitations of the equipment being used, as not all recording devices are capable of capturing and processing higher sample rates and bit depths.

Finally, it’s worth noting that the mixdown process typically involves reducing the sample rate and bit depth, so extremely high sample rates and bit depths may not necessarily translate to a better final product. In conclusion, choosing the right sample rate and bit depth for recording is crucial for achieving high-quality audio recordings. By selecting a sample rate and bit depth appropriate for the specific recording application, considering the limitations of the equipment being used and understanding the mixdown process, it’s possible to capture accurate and nuanced audio recordings.

Audio Sample Rate And Bit Depth For Mixing And Mastering

Every music producer knows that mixing and mastering can make or break your final product. One of the most crucial aspects of the mixing and mastering process is setting the audio sample rate and bit depth. Audio sample rate determines how many times per second the audio signal is measured, while bit depth defines the number of bits of information in each sample. Choosing the right sample rate and bit depth can be a daunting task, but in this complete guide, we’ll help you understand how audio sample rate and bit depth affect mixing and mastering quality.

Recommended Audio Sample Rates And Bit Depths For Mixing And Mastering

When it comes to mixing and mastering, it’s essential to use high-quality sample rates and bit depths. Most industry-standard digital audio workstations (DAWs) offer sample rates between 44.1kHz and 192kHz and bit depths of 16, 24, or 32 bits. However, you should choose the right sample rate and bit depth based on your specific needs.

Sample RateBit DepthRecommended use
44.1kHz16-bitCD-quality audio production
48kHz24-bitHigh-quality audio production
96kHz or higher32-bit floating-pointProfessional audio production

How Audio Sample Rate And Bit Depth Affect Mixing And Mastering Quality

The choice of audio sample rate and bit depth affects the quality of your mix and master. Higher sample rates capture more audio information, resulting in better audio quality. Similarly, using higher bits captures a greater dynamic range, providing more headroom to work with during mixing and mastering. It’s crucial to remember that, although higher sample rates and bit depths provide better quality, they also require more processing power and can increase file sizes.

Common Misconceptions About Audio Sample Rates And Bit Depths In Mixing And Mastering

  • Misconception: Higher sample rates always equal better audio quality.
  • Reality: Sample rate must match the recording source to achieve optimal sound quality.
  • Misconception: Higher bit depths are always better for audio production.
  • Reality: It’s essential to strike a balance between bit depth and processing power to avoid excessive file sizes.
  • Misconception: There’s no need to use high sample rates and bit depths in modern music production.
  • Reality: High-quality audio production requires using high sample rates and bit depths to work with large dynamic ranges and capture more audio information.

Choosing the right audio sample rate and bit depth is crucial to achieve the best audio quality possible during mixing and mastering. Choose the recommended sample rates and bit depths based on your specific needs, and don’t be misled by common misconceptions. Now that you have a complete understanding of audio sample rate and bit depth, you can take your mixing and mastering skills to the next level.

Audio Sample Rate And Bit Depth In Digital Audio

When it comes to digital audio, understanding audio sample rate and bit depth is crucial. These two parameters determine digital audio quality and play a significant role in enhancing the overall audio experience. Audio sample rate and bit depth specify how accurately audio is captured and reproduced. The higher the value, the more precise the audio quality. In this guide, we will discuss how audio sample rate and bit depth affect digital audio quality, the advantages, and limitations of high-resolution audio, and common misconceptions about it.

Advantages And Limitations Of High-resolution Audio

High-resolution audio refers to audio that is recorded at a higher sample rate and bit depth than the standard CD quality, which is 44.1kHz/16-bit. There are several advantages to high-resolution audio, including:

  • The ability to reproduce sound more accurately, resulting in better audio quality.
  • Higher dynamic range and greater detail in sound reproduction.
  • A more realistic listening experience that matches the original recording.

However, high-resolution audio also has its limitations. One of the main downsides is that it requires more storage space than standard CD-quality audio due to the larger file sizes. Additionally, not all audio devices support high-resolution audio playback. The difference in audio quality may not be noticeable to some listeners.

How Audio Sample Rate And Bit Depth Affect Digital Audio Quality

Audio sample rate and bit depth determine the accuracy and precision of digital audio. Sample rate refers to the number of times per second audio is recorded, and bit depth determines the number of bits of data used to represent each sample. The higher the values of these parameters, the more accurate and detailed the audio will be.

For example, CD-quality audio has a sample rate of 44.1kHz and a bit depth of 16-bit. In contrast, high-resolution audio can have sample rates of up to 192kHz and bit depths of up to 24-bit. The higher values result in better audio quality and more accurate representation of the original sound.

Common Misconceptions About High-resolution Audio

Despite the advantages of high-resolution audio, there are several common misconceptions surrounding it. One misconception is that high-resolution audio always sounds better than standard CD-quality audio. While this may be true in some cases, it largely depends on the quality of recording and the listener’s equipment and ears. Another misconception is that high-resolution audio eliminates the need for proper acoustics and quality speakers, which is incorrect. Good audio quality is a combination of the quality of the recording, the audio equipment, and the room acoustics.

Frequently Asked Questions Of Audio Sample Rate And Bit Depth Complete Guide

What Should I Set My Sample Rate And Bit Depth To?

Set your sample rate to match your project’s requirements and choose the highest bit depth your recording equipment will support. It’s recommended to use at least a 44. 1 kHz sample rate and 16-bit depth for most applications, but higher quality recordings may require 48 kHz or even 96 kHz and 24-bit depth.

What Is The Best Sample Rate And Bit Depth For Audio?

The best sample rate and bit depth for audio depends on the purpose of the recording. For music production and professional purposes, 24-bit depth and 48 kHz or higher sample rate is recommended. For casual listening and streaming, 16-bit depth and 44.

1 kHz sample rate is sufficient.

Should I Record At 44.1 Or 48?

Record at 48 if you’re shooting video and 44. 1 if you’re recording audio. 48 is the standard for digital video, while 44. 1 is the standard for digital audio. You can still record audio at 48 but it will increase the file size.

What Is The Difference Between 44100 And 48000 Sample Rate?

44100 sample rate means capturing 44100 audio samples per second, while 48000 means capturing 48000 samples per second. 48000 provides higher quality audio but consumes more storage space, and 44100 is standard in most devices.

Conclusion

To ensure the best possible audio quality, understanding sample rate and bit depth is crucial for any audio project. By choosing the appropriate settings and keeping in mind the limitations of the equipment, you can produce high-quality recordings with minimal noise and distortion.

Remember to consistently monitor your settings and adjust as necessary to achieve the desired results. Mastering sample rate and bit depth is an essential skill for any serious audio enthusiast or professional.

Categories
Archive

How to Make My Music Louder on Spotify

To make your music louder on Spotify, use the equalizer setting and adjust the volume levels. Improve the clarity and quality by using compressor or limiter effects and don’t forget to double-check that the track is optimized for loudness before uploading it to the platform.

As a musician, you know that being on Spotify is a big deal. The platform has millions of users and is one of the largest music streaming services in the world. But with so many artists competing for listener attention, it’s no surprise that you might want to make your music louder on the platform.

Whether you’re trying to stand out in a crowded marketplace or just want to ensure your music is heard at the right volume, making your tracks louder on Spotify is a must. We’ll explore some tips and tricks you can use to make your music louder on Spotify and get your music the attention it deserves.

How to Make My Music Louder on Spotify

Credit: www.wikihow.com

Adjusting Spotify Volume Settings

Adjusting the volume settings on Spotify is an easy way to make your music louder. You can easily increase the volume on your device or through the app’s equalizer settings.

Adjusting Spotify Volume Settings is one of the most common queries people have while listening to music on Spotify. The sound quality of music plays a significant role in our overall listening experience. Often, people face issues with the volume of the music on Spotify. The good news is, it’s completely customizable according to your preferences. If you’re wondering how to make your music louder on Spotify, adjusting the volume settings is the best and easiest way to do it. In this blog post, we’ll cover how you can check the Spotify volume level and change the default playback volume. H3: Check Spotify Volume Level Checking the Spotify volume level is the easiest way to determine if your sound needs adjusting. Here’s how you can do it: 1. Start by playing a song on Spotify. 2. Look at the volume bar at the bottom of the screen, located next to the play/pause button. 3. Check if the volume is set to the maximum level. If not, drag the volume bar to the right to increase it. 4. If you’re still not satisfied with the volume, move on to the next step. H3: Change Default Playback Volume If you’re constantly adjusting the volume of your music, it might be worth changing the default playback volume so that you don’t have to adjust it manually each time. Here’s how you can change the default playback volume: 1. Start by clicking the ‘Edit’ tab on the top left of the Spotify application screen. 2. Click on ‘Preferences’ from the drop-down menu. 3. Scroll down and look for ‘Playback.’ 4. Under ‘Playback,’ look for ‘Default Volume Level.’ 5. Drag the slider to the right to increase the volume or to the left to decrease it. 6. Click ‘Save’ at the bottom of the screen to save your changes. By following these simple steps, you can adjust the volume settings on Spotify and make your music louder. There’s no need to listen to music at an uncomfortable volume level anymore. Whether you’re an avid music listener or just someone who enjoys music from time to time, adjusting the volume settings on Spotify can make your listening experience more enjoyable.

Adjusting Device Settings

Increase the volume of your favorite playlist on Spotify by adjusting your device settings. Simply go to the sound settings on your device and turn up the volume to your desired level. Enjoy your music at a louder level on Spotify.

Adjusting device settings is one of the simplest ways to make your music louder on Spotify. The device you’re using to stream music can have a significant impact on audio quality. Adjusting your device settings can allow you to enhance the volume and clarity of your music. Let’s dive into the steps involved in adjusting your device settings. ### Check Device Volume Level The first step in adjusting your device settings is checking the volume level of your device. Ensure that the volume level on your device is at its maximum. To do this, locate the volume button on your device and push it up to increase the volume. Also, check if there is any damage to your device’s speakers, which could be causing low volume issues. ### Ensure Volume Limit is Disabled Another thing to check when adjusting device settings on Spotify is volume limits. Some devices come with a feature that restricts the maximum volume. This feature is called the volume limit. If this feature is enabled, it limits the volume of music played on your device. Disabling this feature will remove any restrictions and allow your device to play music at maximum volume. To disable volume limits on your device, navigate to the device settings, and locate volume limits. Disable the feature by toggling it. This will remove any restrictions and allow your device to play music at its maximum volume. In conclusion, adjusting your device settings can improve the volume and clarity of the music played on Spotify. By checking the volume level and disabling volume limits, you can enhance the quality of music played on your device. This will ensure you enjoy your favorite tunes at maximum volume.

Using Equalizer Settings

Spotify is an amazing platform for music lovers, with tons of songs and playlists available at your fingertips. If you’re one of those people who like to listen to their music loud, using Spotify’s equalizer settings might just be the solution for you. Here’s how to make your music louder on Spotify using equalizer settings.

Open Spotify Equalizer

To start, open the Spotify app on your phone and click on the “Home” tab. From there, click on the “Settings” icon in the top right corner of the screen and scroll down to the “Playback” section. Click on “Equalizer” at the bottom of the list.

Adjust Eq Settings

Once you’re on the Equalizer screen, you’ll see a list of preset options such as “Acoustic,” “Bass Booster,” and “Classical.” Click on each one to see how it affects the overall sound of your music. If you want to create a custom EQ profile, click on the plus sign icon in the top right corner and adjust the bars accordingly.

It’s important to note that boosting the bass or treble too much can cause distortion in the sound, so make sure to take breaks and listen to your music at a reasonable volume to avoid damaging your hearing.

With these simple steps, you can now make your music louder on Spotify using equalizer settings. Enjoy your music at the volume that you prefer!

How to Make My Music Louder on Spotify

Credit: www.groovypost.com

Uploading Music At Higher Volume

Boost the volume of your music on Spotify by maximizing the loudness levels of your tracks before uploading. Use a third-party mastering service or audio editing software to increase the volume without sacrificing audio quality and make your tracks stand out on Spotify.

Are you frustrated that your music on Spotify isn’t as loud as your favorite artists’? Don’t worry; we’ve got you covered. One way to make your music louder on Spotify is by uploading it at a higher volume. Here’s how:

Increase Volume Before Uploading

The first step in uploading your music at a higher volume is to increase the volume before uploading. The volume level of your music can impact how your track sounds on different playback systems. In other words, if your track is too quiet, it may get lost in the mix, but if it’s too loud, it may distort. Thus, before uploading your track, ensure that you’re recording at a high enough volume level. This can be done using digital audio workstations (DAWs) that have volume normalization features.

Use Mastering Techniques

The second step to uploading your music at a higher volume is to use mastering techniques. Mastering is the process of refining and finalizing a track after it’s been mixed. By using mastering techniques, you’ll be able to boost the overall volume of your music while maintaining its overall quality. Some of the techniques that you can try include limiting, compression, EQ, and stereo widening.

Final Thoughts

By following the steps mentioned above, you’ll be able to upload your music at a higher volume and make it louder on Spotify. Keep in mind that it’s important to strike a balance between volume and quality. By doing so, you’ll ensure that your music stands out on Spotify without sacrificing its overall sound.

Maximizing Loudness With Spotify Tools

If you want to make your songs stand out on Spotify, you need to make sure they sound loud and clear. Fortunately, Spotify has several tools to help you maximize loudness and improve the overall quality of your music. In this post, we’ll show you how to use these tools to make your music as loud as possible.

Use Volume Normalization

One of the most important tools Spotify offers for maximizing loudness is volume normalization. Volume normalization is a feature that adjusts the loudness of all the songs in your playlist to a consistent level. This means that songs that are naturally quieter will be boosted in volume to match louder songs.

To turn on volume normalization in Spotify:

  1. Open the Spotify app on your device
  2. Click on the ‘Settings’ icon at the top-right corner of the screen
  3. Scroll down to the ‘Playback’ section
  4. Click on ‘Normalize Volume’ and turn on the feature

With volume normalization turned on, you can be sure that all your songs are playing at the same level, making your overall playlist sound louder and more consistent.

Turn On Loudness

Another tool you can use to maximize loudness on Spotify is the Loudness feature. This feature boosts the volume of songs that may be naturally quieter or have less energy, making them sound louder.

To turn on Loudness:

  1. Open the Spotify app on your device
  2. Click on the ‘Settings’ icon at the top-right corner of the screen
  3. Scroll down to the ‘Playback’ section
  4. Click on ‘Loudness’ and turn on the feature

By turning on Loudness, you can give your music an extra boost of energy and ensure it sounds as loud and impactful as possible on Spotify.

Conclusion

By using the volume normalization and Loudness features on Spotify, you can make your music sound louder and more consistent across your entire playlist. With these tools, you can ensure that your songs stand out and make a lasting impression on your listeners.

How to Make My Music Louder on Spotify

Credit: www.groovypost.com

Frequently Asked Questions Of How To Make My Music Louder On Spotify

Is There A Way To Make Music On Spotify Louder?

Yes, you can make music on Spotify louder by adjusting the volume slider. Additionally, some devices may have a “Loudness” or “Equalizer” setting that can enhance the sound. However, keep in mind that excessive volume can damage your hearing and speakers.

Why Is Spotify Not As Loud?

Spotify is not as loud as other music streaming services because it uses a recommended loudness level to prevent distortion. This means that music on Spotify may sound quieter than on other platforms, but it also ensures that the sound quality is maintained and consistent.

How Do I Turn Up Volume On Spotify?

To turn up the volume on Spotify, you can use your device’s volume controls or the volume slider within the Spotify app. On mobile devices, you can also use a two-finger swipe gesture to adjust the volume. Additionally, you can check if the volume is turned down within your device’s settings.

How Can I Listen To Music Louder?

Here’s the exact, accurate and short answer to the question “How can I listen to music louder? ” To listen to music louder, you can use headphones or earbuds that provide noise isolation. You can also adjust the equalizer settings on your device or use a portable speaker.

However, it’s important to protect your hearing by not turning the volume too high.

Conclusion

To conclude, making your music louder on Spotify can significantly increase your chances of getting noticed by more listeners. By following the tips and techniques discussed you can enhance your music’s volume without compromising its quality. It’s essential to keep experimenting with different settings until you find the perfect balance of loudness and sound quality.

Also, keep track of the latest updates in the music industry and implement them to stay ahead of the competition. With consistent efforts and patience, you can take your music to the next level on Spotify.

Categories
Archive

Pro Tools Audiosuite Editing In Studio One

Pro Tools Audiosuite editing can be done in Studio One using ARA2 integration. This allows seamless transfer of edits without the need for rendering or exporting.

Studio One users can now apply Pro Tools Audiosuite plug-ins directly to clips within their sessions using the ARA2 protocol. This integration eliminates the need to render files or export them to another program for editing. By using Audiosuite plugins with Studio One, users can easily manipulate and alter audio files with precision and ease.

The ARA2 protocol also allows for real-time editing, making the process much faster than before. The combination of these two powerful software programs provides an unparalleled level of flexibility and convenience for audio editing professionals. Whether you’re a seasoned audio engineer or just starting out, Pro Tools Audiosuite editing in Studio One is an excellent tool to add to your arsenal.

Preparing For Audiosuite Editing

Preparing for AudioSuite editing in Studio One involves organizing audio files, selecting the appropriate plugin, and setting the parameters to apply the necessary changes to the audio track. By understanding the basic concepts of AudioSuite editing, you can enhance your workflow and create high-quality audio projects efficiently.

Preparing for AudioSuite Editing Before diving into the AudioSuite editing process, it’s essential to prepare your Studio One session properly. Organizing your project files and setting up your session for AudioSuite editing will save time and ensure smooth workflow. In this section, we’ll cover these two important steps in detail. Organizing Your Project Files Start by creating a new folder for your audio files. It’s crucial to keep your audio files organized to avoid confusion and save time. Store all audio files related to your project in this folder. Also, include a subfolder for the edited versions of your audio files. Next, create a new folder for your AudioSuite plugins. Name it something familiar, like “AudioSuite Plugins.” This folder will make it easier to access and use your plugins throughout the editing process. Setting Up Your Session for AudioSuite Editing To set up your session for AudioSuite editing, you need to enable the AudioSuite window. Click on the “Window” tab in the top menu and select “AudioSuite” from the drop-down menu. Once you enable the AudioSuite window, it will appear on your screen. Once you have the AudioSuite window open, you can start using AudioSuite plugins. To use an AudioSuite plugin, select the audio file you want to edit, then select the plugin you want to apply from the AudioSuite window. Once you’ve selected the plugin, adjust the settings as needed, and click “Render.” The edited audio file will be saved in the folder you created earlier. In conclusion, organizing your project files and setting up your Studio One session for AudioSuite editing play a crucial role in ensuring a smooth workflow. Take the time to set up your session properly before diving into AudioSuite editing to save time and make the editing process more efficient.

Pro Tools Audiosuite Editing In Studio One

Credit: mixandmastermysong.com

Basic Audiosuite Editing Techniques

Learn the basic Audiosuite editing techniques in Pro Tools and Studio One. With these tools, you can accurately edit audio, adjust tempo, pitch and timing, and apply effects to enhance audio quality.

AudioSuite editing has been made easy with the integration of Pro Tools and Studio One. Basic AudioSuite editing techniques are essential to produce high-quality audio. Here are some of the fundamental techniques:

Creating Fades And Crossfades

Fades and crossfades are necessary to avoid audio distortion and to create a smooth transition between audio clips. Here’s how to create fades using Studio One:

  1. Select the audio clip in the arranger window and open ‘Process’ in the Mix Console.
  2. Click on ‘AudioSuite’ and select ‘Fade In/Out’.
  3. Choose the length of the fade and click on ‘Process’.

Creating crossfades in Studio One is as easy as creating fades. Here’s how:

  1. Select two audio clips in the Arranger window and overlap the edges.
  2. Right-click on the overlapped area and select ‘Crossfade’.
  3. Choose the desired crossfade type and click on ‘Process’.

Using Eq And Compression With Audiosuite Editing

EQ and compression are crucial tools when it comes to editing audio. Studio One provides the ability to use these tools through AudioSuite editing. Here’s how:

  1. Select the audio clip in the Arranger window and open ‘Process’ in the Mix Console.
  2. Click on ‘AudioSuite’ and select ‘EQ’ or ‘Compression’.
  3. Adjust the settings to your preference and click on ‘Process’.

Using The Reverse And Time Stretch Functions

The reverse and time stretch functions are frequently used in the audio editing industry. Studio One enables the use of these tools via AudioSuite editing. Here’s how:

  1. Select the audio clip in the Arranger window and open ‘Process’ in the Mix Console.
  2. Click on ‘AudioSuite’ and select ‘Reverse’ or ‘Time Stretch’.
  3. Adjust the settings to your preference and click on ‘Process’.

To sum up, knowing the basic AudioSuite editing techniques is essential for producing high-quality audio. Studio One offers these tools, making it simple to create fades, use EQ and compression, and use reverse and time stretch functions. With this knowledge, you can produce professional audio that stands out.

Advanced Audiosuite Editing Techniques

Learn advanced Pro Tools AudioSuite editing techniques with Studio One. Improve your audio production skills and create high-quality tracks with ease.

Using Audiosuite Plug-ins For Unique Effects

Using AudioSuite plug-ins for unique effects is one of the most powerful features in Pro Tools. A plug-in is an add-on to a software application that adds new functionality to it. With AudioSuite, you have access to a suite of plug-ins for audio processing and mixing. These plug-ins can help you create truly unique audio that stands out from the crowd. Some of the common plug-ins you can use with AudioSuite include EQ, compression, distortion, and reverb.

Editing To Picture With Audiosuite

Pro Tools AudioSuite is also an excellent tool for editing audio to picture. With the AudioSuite software, you can import video into your editing project, and use it as a reference while you edit your audio tracks. This is especially useful for video editors who need to create sound effects and mix audio for their projects. When you edit audio to picture, you can see the visual representation of the sound wave and make precise changes to the audio that correspond to the picture.

Automating Audiosuite Parameters

One of the most under-used features of Pro Tools AudioSuite is the ability to automate parameters within the plug-ins. This means that you can set up a plug-in to change parameters over time, which can create some truly unique effects and mixes. For example, you can set up a reverb plug-in to gradually increase in intensity over time, for a slow build-up effect. Or you can use a filter plug-in to create a sweeping effect that changes the frequency of the audio over time. By automating AudioSuite parameters, you can create dynamic and evolving soundscapes that keep listeners engaged.

Collaboration And Audiosuite Editing

Collaboration becomes effortless with the Pro Tools Audiosuite editing feature in Studio One. Edit and collaborate with ease on audio files with its comprehensive sound library and precise mixing tools.

Collaboration and AudioSuite Editing Audio editing software is an essential tool for audio professionals, and there are different options available. Pro Tools and Studio One are two excellent choices for anyone looking to edit audio, each with unique features that make them popular among audio professionals. If you use both Pro Tools and Studio One, you can share audio between these two programs, which minimizes the hassle associated with switching between different software. Another essential aspect is collaboration among audio professionals: with AudioSuite editing, Studio One permits audio producers to collaborate with others seamlessly. In this post, we will delve into the benefits of collaborating with AudioSuite editing in Studio One and tips that can streamline the process of collaborating with others.

Sharing Audio Between Pro Tools And Studio One

One of the most significant benefits of using Pro Tools and Studio One is the ability to share audio between these two programs. Studio One now supports the Pro Tools AudioSuite plug-ins, making it possible to import audio directly from Pro Tools into Studio One. This feature is especially essential when collaborating with other audio professionals who might be using different editing software. The process is relatively simple; all you need to do is export your audio from pro tools and import it into Studio One. Studio One supports different audio file formats, making it easy to import a variety of audio files.

Collaborating With Other Audio Professionals

Collaborating with other audio professionals is now easier than ever with AudioSuite editing in Studio One. AudioSuite enables audio editors to create, process, and edit audio files in real-time. With this feature, you can collaborate with other audio professionals and work on a project simultaneously. AudioSuite editing also allows audio professionals to share their work with others easily. You can select a particular audio waveform and apply different sound effects, depending on your preferences. For instance, you can apply an equalizer, reverb, or any other effect to the selected audio region, and all collaborators will receive the same effect instantly.

Tips For Efficient Collaboration

Collaboration is essential for the success of any audio project, but it can also be challenging, especially when different people are working on the same audio project. Here are a few tips for efficient collaboration using AudioSuite editing in Studio One:

  • Agree on a common audio file format that every collaborator can import easily.
  • Use descriptive file names to make it easy to track individual audio files.
  • Ensure everyone has access to the same plug-ins and effects to avoid compatibility issues.
  • Use chat or messaging platforms for communicating with other collaborators, sharing ideas and progress, and getting feedback in real-time.
  • Regularly backup all audio files to avoid any data loss.
  • Save a version of your work before making significant changes to your audio file.

In conclusion, AudioSuite editing in Studio One makes it easier for audio professionals to collaborate and work on projects fast and efficiently. With the tips outlined here, audio professionals can now collaborate with others seamlessly without worrying about compatibility issues.

Audiosuite Editing Best Practices

Pro Tools is the industry standard for recording and mixing music, but Studio One offers a robust set of tools that can rival its capabilities, including AudioSuite editing. AudioSuite editing allows performing non-realtime processing on audio clips and altering audio files with various plug-ins, such as noise reduction and reverb, and using them as a permanent part of the audio file. With AudioSuite Editing, you have complete control over the audio editing process and can make changes to even the tiniest detail.

Avoiding Common Audiosuite Editing Mistakes

When using AudioSuite editing, it’s crucial to ensure you don’t make common mistakes that may cause you to lose valuable data or make a mistake that’s difficult to fix. Here are a few tips to avoid making common AudioSuite editing mistakes:

  • Always make a copy of your original audio clip
  • Use the right plug-ins for a specific job.
  • Use the right settings for a specific job like the sample rate, bit depth, and file format
  • Label and organize audio clips appropriately for easy retrieval.
  • Avoid going overboard with editing, which will undoubtedly detract from the quality of the audio files.

Optimizing Audio For Different Formats

Once you’ve completed your audio editing work, it’s important to optimize the audio for different formats, such as CD, streaming, or use in a TV or film production. Optimizing the audio ensures that it sounds its best, regardless of the playback environment. Here are few tips for optimizing AudioSuite editing for different formats:

FormatTips
CDRender audio files at 16-bit, 44.1 kHz sample rate, and ensure that level peaks don’t exceed -0.5 dB.
StreamingRender audio files at 24-bit, 48 kHz sample rate, and ensure that the audio is normalized.
TV/Film ProductionRender audio files at 24-bit, 48 kHz sample rate, and ensure that the audio conforms to the standard broadcast level of -24 dB LUFS.

Backing Up Your Work

Your audio editing work is valuable, making it essential to back up your work. With AudioSuite editing, backup your original audio files and all associated plug-ins and settings. Here are few tips for backing up your AudioSuite editing work:

  1. Store original audio files separately from edited ones.
  2. Use external hard drives or cloud storage services to backup your files securely.
  3. Create a backup schedule to ensure it happens automatically at a set time or interval.
Pro Tools Audiosuite Editing In Studio One

Credit: mixandmastermysong.com

Frequently Asked Questions Of Pro Tools Audiosuite Editing In Studio One

How Do I Use Audiosuite In Pro Tools?

To use AudioSuite in Pro Tools, first select the region you wish to process. Then, open the AudioSuite plug-in window and choose the desired processing effect. Adjust the settings and render the effect onto the audio file. The processed result will be saved as a new audio clip.

Is Presonus Compatible With Pro Tools?

Yes, PreSonus audio interfaces are compatible with Pro Tools. In fact, PreSonus has developed a special software called Universal Control that enables users to easily integrate their PreSonus gear with Pro Tools. This ensures seamless communication between the two platforms for recording, mixing, and editing audio.

Is Studio One As Good As Pro Tools?

Yes, Studio One is considered as good as Pro Tools. It offers excellent features for recording, mixing, and mastering music. It has a user-friendly interface, powerful tools, and flexible workflows. Studio One also has a lower price point compared to Pro Tools.

Many musicians and producers prefer Studio One for its intuitive and streamlined approach to music production.

How Can You Select Audio To Be Processed With Audiosuite?

To select audio for processing with AudioSuite, follow these steps: Launch the plugin, find and import your desired audio file, select the region to be processed, and choose the desired AudioSuite processing option. Once done, simply render the processed audio.

Conclusion

Working with audio files can be frustrating without the right tools. Pro Tools Audiosuite editing in Studio One makes the process faster and easier. With intuitive features like non-destructive effects processing and real-time preview, audio editing becomes seamless and stress-free.

Efficiency and convenience are essential in modern music production, and Pro Tools with Studio One delivers on both fronts. Try it out for yourself and experience the difference it makes.

Categories
Archive

Should Vocals Be Louder Than the Beat

No, vocals should not necessarily be louder than the beat. Maintaining a proper balance between the beat and vocals is crucial in music production to ensure a clean and professional-sounding mix.

The right balance will depend on various factors, such as the genre of music, the mood of the song, and the artist’s intention. Focusing too much on either the vocals or the beat can result in an unappealing sound that does not do the song justice.

Therefore, it’s essential to carefully consider and balance the levels of all elements in a song, including vocals and the beat, to create a successful and enjoyable track. We’ll explore the importance of balanced levels between vocals and the beat in music production.

Should Vocals Be Louder Than the Beat

Credit: www.quora.com

The Importance Of Vocal Balance

Achieving vocal balance is crucial in music production. While some may argue that vocals should be louder than the beat, it’s important to find the right balance so that each element of the track can shine. A balanced mix will improve clarity and make the overall sound more enjoyable to listeners.

When it comes to creating music, one element that often gets overlooked is the balance of vocals and the beat. Many aspiring musicians focus solely on creating a catchy beat, believing that it will carry the song on its own. However, the truth is that the vocals play an equally important role and need to be balanced appropriately. Maintaining the correct vocal balance can be the difference between a hit song and a forgettable one. In this post, we’ll explore the importance of vocal balance and why vocals should not be louder than the beat.

The Role Of Vocals

Vocals are the backbone of any song. They convey the message of the song and connect the listener emotionally. They can either make or break the song. Quality vocals can keep the listener engaged and make them want to hear more. However, if the vocals are poorly balanced, they can drown out the melody, and the listener may lose interest.

Maintaining Listener Attention

The ultimate goal of any musician is to maintain their listener’s attention throughout the entire song. The correct balance between vocals and beat can help achieve this goal. If the beat is too loud, the listener may struggle to understand the lyrics, and the vocals may be lost in the mix. On the other hand, if the vocals are too loud, they can overpower the melody and make the song feel unbalanced. Striking the right balance between the two is essential to maintain the listener’s attention. Vocal balance is essential to ensure that each element of the song is heard clearly. It allows the listener to focus on the melody and understand the lyrics. The beat provides a foundation for the song, but the vocals add depth and emotion. The vocals should be mixed so that they blend seamlessly with the beat and enhance the overall sound. A balanced mix ensures that both elements work together in harmony and create a memorable piece of music. In conclusion, while the beat is undoubtedly essential, vocals play an equally vital role in creating a successful song. Balancing vocals with the beat can be challenging, but it’s essential to maintain the listener’s attention. Ensuring that the elements of the song work together harmoniously will create a memorable piece of music that listeners will enjoy for years to come.

Factors To Consider

When it comes to deciding if vocals should be louder than the beat, it ultimately depends on the genre and artistic vision. The vocals can be the centerpiece of a song, but balancing them with the beat is crucial to create a cohesive sound.

It’s up to the producer and mix engineer to make the right decision.

Factors to Consider: When it comes to mixing music, one of the most debated topics is whether vocals should be louder than the beat. The answer to this question is not a straightforward one, as there are several factors to consider when deciding the appropriate volume levels for vocals and the beat. In this blog post, we will discuss three main factors that determine whether vocals should be louder than the beat: genre and style, vocal style and delivery, and intended audience. Genre and Style: One of the primary factors to consider when deciding the appropriate volume levels for vocals and the beat is the genre and style of the music. For example, in genres such as hip-hop and rap, the vocals are typically the main focus, and the beat serves as a background. Therefore, in these genres, it is common for vocals to be louder than the beat. On the other hand, in genres such as EDM and trance, the beat is the focal point, and the vocals serve to enhance the overall sound. In these genres, it is typically appropriate for the beat to be louder than the vocals. Vocal Style and Delivery: Another essential factor to consider when determining the appropriate volume levels for vocals and the beat is the vocal style and delivery. For instance, some vocal styles, such as opera and classical singing, require high levels of clarity and definition. In such cases, it’s essential to ensure that vocals are appropriately balanced with the beat, avoiding any overshadowing of the lyrics and words. In contrast, other vocal styles, such as rock and heavy metal, can benefit from a more aggressive and upfront mix where vocals are louder than the beat. Intended Audience: The intended audience is another vital factor to consider when adjusting the volume levels for vocals and the beat. An experienced music listener who’s familiar with the genre may prefer a different mix than a novice listener. For example, if the audience is a club full of experienced EDM music fans, it may be appropriate to have the beat louder than the vocals to enhance the listening experience. In contrast, if the audience consists of casual music listeners, it might be better to have the vocals louder than the beat to ensure the song’s lyrics are understood. In conclusion, the volume levels of vocals and the beat can significantly impact the overall listening experience of a song. Genre and style, vocal style and delivery, and intended audience are all essential factors to consider when deciding whether vocals should be louder than the beat. Therefore, it’s crucial to analyze all of these factors and make the necessary adjustments to ensure that the final mix sounds perfect and pleases the intended audience.

Arguments For Louder Vocals

Louder vocals help the audience to connect with the lyrics and emotions of a song, allowing them to fully engage with the music. It also helps the lead vocals stand out and be distinguishable from the background beat. However, balancing the volume levels is important to prevent distortion and maintain overall sound quality.

The debate surrounding the appropriate levels of vocals and beat in a music mix has been ongoing for years. Many insist that vocals should be louder than the beat while others believe the opposite. In this post, we will explore the arguments for louder vocals and why it may be beneficial for the overall sound of a song.

Emphasizing Lyricism

When vocals are louder than the beat, it makes it easier to understand the lyrics and appreciate the song’s message. As an artist, the primary goal is to convey the intended message to your audience. This makes vocal clarity an essential aspect of any music production. By placing the vocals at the forefront of your mix, it ensures that every word is heard, making it easier for the listener to connect with the artist’s message.

Keeping Vocals Clear In The Mix

Mixing vocals with optimum clarity is a challenging task. The human voice ranges between different frequencies and can clash with other instruments in the mix. When the vocals are too low in the mix, they can become muddled, get buried by the beat, or fade into the background altogether. By elevating the vocal levels, especially during climactic moments of the song, it ensures that the vocals remain distinguishable from other recorded elements. When the vocals become too loud, it may cause a harshness in the mix, making it challenging to appreciate other recorded elements. However, balancing between the two is possible with the right tools, technique, and expertise. In conclusion, these are some of the arguments for louder vocals in a mix. As with most things in music production, there is no one-size-fits-all solution. It all depends on the intended sound and the message to be conveyed. Regardless of which approach is taken, it’s essential to make sure that both the vocals and beat complement each other to produce a cohesive sound that fosters the intended emotion or message.

Should Vocals Be Louder Than the Beat

Credit: www.reddit.com

Arguments Against Louder Vocals

Vocals overpowering the beat can diminish the overall sound quality of a song. Arguments against louder vocals suggest that a balanced mix of both is crucial for a good musical experience.

As producers and audio engineers debate the age-old question of whether vocals should be louder than the beat in a song, there are arguments against the practice of boosting the vocals. Some arguments focus on the need to maintain musical balance, while others prioritize the importance of giving the beat room to breathe. Let’s take a closer look at these arguments.

Maintaining Musical Balance

One of the primary arguments against having vocals louder than the beat is that it can upset the delicate balance that makes music sound good. Music is made up of many different parts that must work together to create a cohesive whole. If one part is too loud, it can overpower the rest of the track and make it difficult for the listener to follow along. To maintain musical balance, it is crucial to mix the vocals and the beat at levels that are appropriate for each individual track. This may mean keeping the vocals low in the mix for some songs or raising them slightly for others. Ultimately, the goal is to ensure that all aspects of the music work together to create a pleasing and cohesive listening experience.

Giving The Beat Room To Breathe

Another argument against having louder vocals is that it can make it difficult for the beat to be heard properly. The beat is the backbone of any song, and if it is drowned out by the vocals, the entire track can suffer. To avoid this problem, it is essential to give the beat room to breathe. This may mean lowering the vocal levels or using EQ to carve out space for the beat in the mix. By doing so, the beat can be heard more clearly, and the listener can better appreciate the nuances and intricacies of the production. In conclusion, while having louder vocals can sometimes enhance a song, it is essential to consider the arguments against the practice. By maintaining musical balance and giving the beat room to breathe, producers and audio engineers can create tracks that are both engaging and cohesive.

Best Practices For Achieving Vocal Balance

One of the most challenging tasks in music production is achieving the right balance between vocals and the beat. Inexperienced producers, and even some seasoned ones, struggle with determining whether to make the vocals louder or quieter than the instrumental. However, there are best practices that can help create the perfect vocal balance in a track.

Experiment With Vocal Levels

It’s essential to experiment with different vocal levels when mixing a track. Try enhancing the vocals and increasing its volume to see if it works better for the sound of the song. You can also try reducing the vocal volume slightly to determine if it blends well with the instrumental. Keep in mind that the right vocal level is subjective and determined by the kind of music and the listener’s preferences.

Focus On The Music First

Before considering the vocal levels, focus on getting the instrumental right first. Ensure that the beat, melody, and tone of the song are in tune. You can then add the vocals to the instrumental and fine-tune the volumes. Sometimes, producing the beat in the right way allows the voice to blend in seamlessly with the music.

Use Eq And Compression Strategically

EQ and Compression are essential tools to achieve the perfect vocal balance in a track. EQ helps to adjust specific frequency ranges that clash with the beat, while compression helps to balance out the vocal levels. Using these tools strategically can achieve the desired vocal balance and create a polished sound.

Table: Vocal Balance Checklist

Factors to ConsiderAction to Take
Musical styleDetermine how loud or quiet the vocals should be concerning the beat and genre of music.
Vocal styleThe volume of the vocals should reflect the style and tone of the singer. Consider the singer’s style and what they bring to the song.
Lyrical contentThe loudness of the vocals should reflect the emotional message of the lyrics. Determine if the lyrics are powerful and require more vocals or a softer tone.
GenreEach genre of music has a different balance between vocals and instrumental. Do some research on the genre to determine the vocal balance required.

Conclusion

Creating the perfect vocal balance is not an easy task, but with experimentation, careful consideration of the music style, and strategic use of EQ and Compression, it’s possible to achieve the desired sound. Experiment with different levels, focus on the beat first, and remember to take into account the various factors that affect vocal balance and adjust accordingly.

Should Vocals Be Louder Than the Beat

Credit: blacktidemusic.com

Frequently Asked Questions Of Should Vocals Be Louder Than The Beat

Should Voice Be Louder Than Music?

No, voice should not be louder than music. The voice and music should be balanced and complement each other. If the voice is too loud, it can overwhelm the music and make it hard to hear. On the other hand, if the music is too loud, it can drown out the voice and make it difficult to understand the lyrics.

Therefore, it’s important to find the right balance between the two.

How Loud Should The Beat Be When Recording Vocals?

The beat shouldn’t overpower the vocals and drown them out, but also shouldn’t be too low that it makes the vocals sound weak. It’s recommended to keep the beat at a low to medium volume and adjust it to suit the vocal style.

The vocals should be the focus, not the beat.

How Loud Should Your Singing Voice Be?

Your singing voice should be loud enough to be heard by an audience or a recording device but not so loud that it causes strain or damage to your vocal cords. The ideal volume will depend on the type of song you are singing and your natural vocal range.

Remember to always warm up your voice before singing and take breaks if you feel any discomfort.

What Volume Should Vocals Peak At?

Vocals should peak at around -6db to -3db, with -4db being the sweet spot. This ensures that the vocals cut through the mix without being too loud or too quiet. However, it’s important to use your ears and adjust accordingly based on the specific song and mix.

Conclusion

To wrap things up, there is no straightforward answer to whether vocals should be louder than the beat. As a content creator, it’s essential to keep in mind the genre, the audience, and the message you want to convey before making a final decision.

While some genres demand loud vocal tracks, others may require a balanced approach. Ultimately, it all comes down to what sounds great to our ears and fits our brand. So, experiment, listen to feedback, and let your ears be the judge!