Categories
Archive Audio Production

How to Mix Music Properly: Unlock the Secrets of Professional Sound

To mix music properly, focus on levels, panning, EQ, effects, and dynamics for a balanced sound. Use reference tracks for guidance.


When it comes to mixing music, achieving a polished and professional sound requires attention to detail and a good understanding of both the technical and creative aspects of the process. Mixing involves blending the individual elements of a track – such as vocals, instruments, and effects – to create a cohesive and balanced sound.


By using tools like volume levels, stereo panning, equalization (EQ), effects processing, and dynamic processing, you can enhance the clarity, depth, and overall quality of the mix. Utilizing reference tracks can also help you compare your mix to professionally mixed songs and make informed decisions to improve your own work. In this guide, we will explore some essential tips and techniques to help you mix music properly and elevate your sound to the next level.


Setting The Stage

Setting the stage is crucial for achieving a professional sound in music mixing. This phase lays the foundation for a seamless and cohesive final product that captures the essence of the music.

Professional Sound Defined

To achieve a professional sound in music mixing is to create a polished and balanced audio experience that captivates the listener. This entails attention to detail in every element of the mix.

The Importance Of Proper Mixing

  • Proper mixing enhances the clarity and impact of each instrument and vocal track.
  • It ensures that the various elements of the song are well-balanced and complement each other.
  • Effective mixing can bring out the emotions and dynamics of the music, engaging the audience on a deeper level.

A well-mixed track can make a significant difference in how the audience perceives and connects with the music, highlighting the importance of proper mixing techniques.
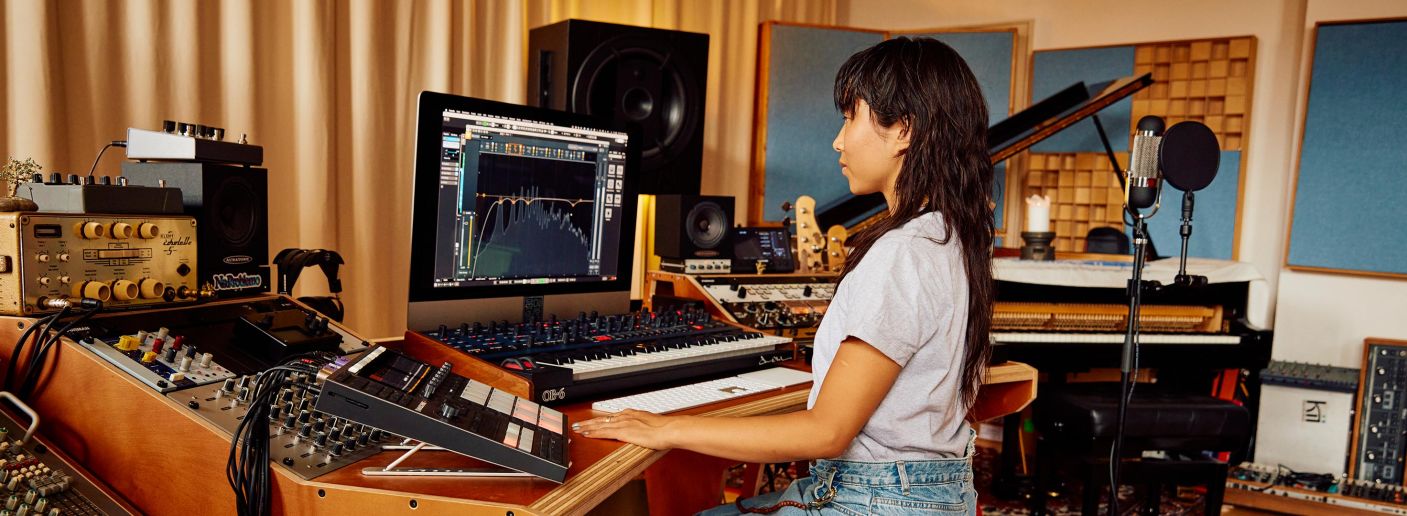
How to Mix Music Properly: Unlock the Secrets of Professional Sound


Credit: www.izotope.com


Essential Tools

Essential Tools: To properly mix music, you need the right tools. Understanding how to use EQ and dynamics, as well as knowing how to effectively utilize effects and processing, are crucial.

Understanding Eq And Dynamics:

EQ allows you to adjust the frequency balance of different tracks. Dynamics control the overall volume and manage the sound’s intensity.

Utilizing Effects And Processing:

Effects such as reverb and delay add depth to your mix. Processing involves compression, which smoothens out the dynamics of your tracks.

https://www.youtube.com/watch?v=bApTxO2a4ac


Crafting The Mix


Learn how to properly mix music with the “Crafting the Mix” guide, covering essential techniques for achieving a professional sound. From balancing levels to utilizing effects, this resource provides valuable insights and tips for creating a polished, cohesive mix. Whether you’re a beginner or seasoned producer, this guide offers actionable advice to elevate your music production skills.

Crafting the Mix Balancing Levels and Panning When crafting a mix, ensuring that balancing levels and panning are done accurately is crucial. Balancing levels refers to adjusting the volume of each track to make sure they blend well together, while panning controls the placement of the sound within the stereo field. Creating Depth and Space Another important aspect of crafting a mix is creating depth and space. Using techniques such as reverb, delay, and EQ, you can give your mix a sense of depth and space, helping each element find its place within the mix. Balancing Levels and Panning First, focus on balancing the levels of individual tracks. Use the faders on your mixing console or within your digital audio workstation to adjust the volumes. Pay attention to how each track fits into the overall mix, aiming for clarity and balance. When it comes to panning, experiment with placing different instruments and sounds in the stereo field. This can create a sense of space and separation, making the mix more dynamic and engaging for the listener. Creating Depth and Space To create depth and space, start by using reverb and delay effects. These can give the impression of distance, with reverb adding a sense of room size and delay creating echoes and reflections. By adjusting the parameters of these effects, you can tailor the spatial qualities of each track. Additionally, utilize EQ to carve out space for each instrument in the frequency spectrum. By removing unwanted frequencies and emphasizing the desirable ones, you can give each track its own sonic space, contributing to a more cohesive and spacious mix. Crafting a Mix requires attention to detail, as each element plays a crucial role in the overall sound. By mastering the art of balancing levels and panning and creating depth and space, you can elevate your mixes to a professional standard.
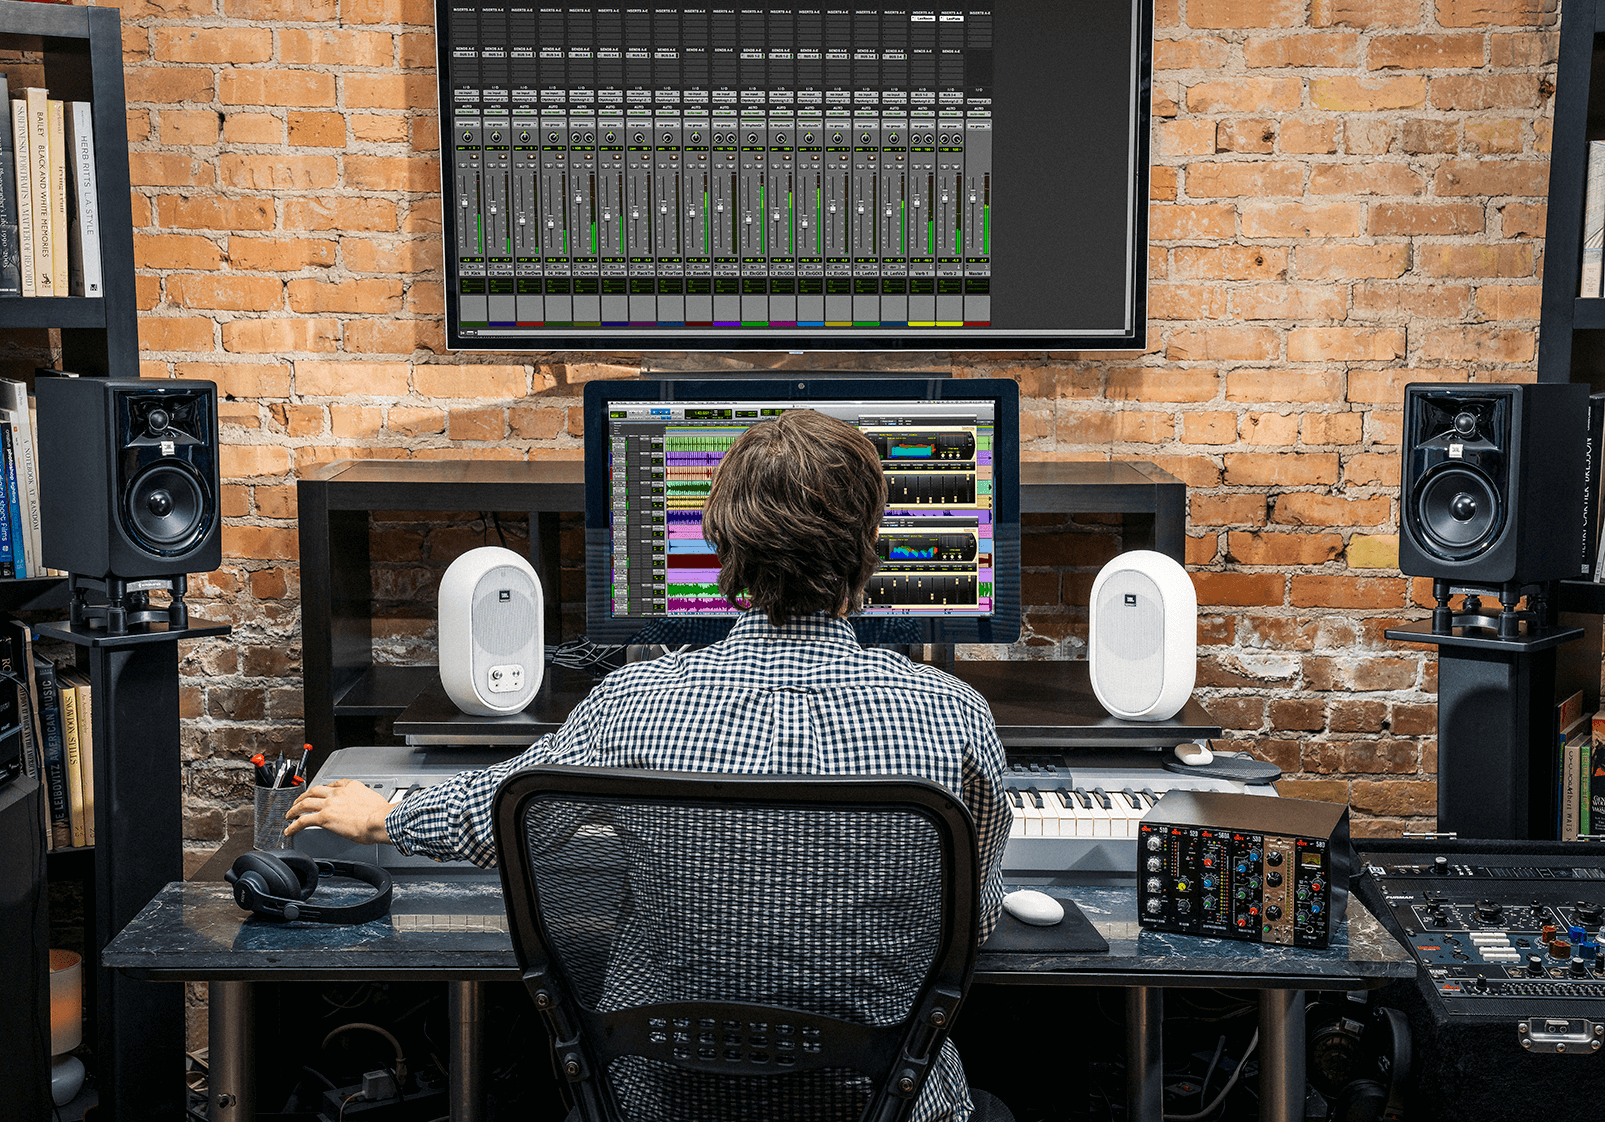
How to Mix Music Properly: Unlock the Secrets of Professional Sound


Credit: lexiconpro.com


Refining The Sound

Once you have your basic mix done, it’s time to refine the sound and make it shine. This phase is crucial in ensuring your music sounds professional and polished. In this section, we’ll focus on two essential aspects of refining the sound: the listening environment and reference tracks.

Listening Environment

Before diving into the specifics of refining your mix, it’s important to set up an optimal listening environment. The way you hear the music can greatly impact how you perceive and make adjustments to it. Here are some key factors to consider:

  • Choose a quiet and acoustically balanced room for your studio setup. Avoid rooms with excessive reverb, as this can distort your perception of the mix.
  • Position your speakers or headphones at the correct height and distance to create an accurate stereo image.
  • Use acoustic treatment to minimize reflections and echoes in your room. Absorbing panels and bass traps can greatly improve the clarity of your listening environment.

By optimizing your listening environment, you’ll be able to make more precise decisions when refining your mix.

Reference Tracks

One effective way to refine your mix is by using reference tracks. These are professionally mixed and mastered songs in a similar genre to yours that you can compare your mix to. Here’s how you can use reference tracks effectively:

  1. Select a few high-quality reference tracks that embody the sound and style you want to achieve.
  2. Import these tracks into your project and play them alongside your mix. Take note of the differences in levels, tonal balance, and overall clarity.
  3. Listen carefully to how the instruments and vocals are placed in the stereo field. Pay attention to the depth and width of the mix.
  4. Make adjustments to your mix based on what you hear in the reference tracks. Aim to match the overall tonal balance and level of detail.

Using reference tracks as a guide helps you to identify any areas that need improvement in your mix. It provides a benchmark for the quality and professional sound you’re aiming to achieve.

By focusing on creating an optimal listening environment and using reference tracks effectively, you can refine your mix to a whole new level of quality and ensure it stands out in the competitive world of music production.

Mastering The Mix

Mastering is the final step in the music production process. It is the stage where the individual tracks of a song are brought together and polished to sound cohesive, balanced, and ready for distribution. One crucial aspect of mastering is mixing, which involves adjusting the levels, dynamics, and frequencies of each track to ensure they work together harmoniously.

Before you start mastering your mix, it’s important to prepare it adequately for distribution. This involves several key steps:

  1. Organize your tracks: Make sure all the audio files are properly labeled and organized in your project. This will save you time and confusion when you start mastering.
  2. Check for silence: Remove any unwanted silence at the beginning or end of each track. This will make the transitions between songs or sections smoother.
  3. Normalize the volumes: Adjust the overall volume of each track to ensure they have a consistent loudness level. This will prevent any sudden jumps or drops in volume when the songs are played back-to-back.

While it’s possible to master your own mixes, getting professional feedback can significantly improve the final outcome. Consider the following:

  • Work with an audio engineer: Collaborating with an experienced audio engineer or mastering professional can provide valuable insights and help you achieve a polished and industry-standard sound.
  • Use reference tracks: Listen to well-mixed and mastered songs similar to your music. Analyze the dynamics, tonal balance, and stereo imaging to get an idea of what your mix should strive for.
  • Ask for feedback: Share your mix with trusted individuals, such as fellow musicians or producers, and ask for their feedback. They may identify areas that need improvement or offer suggestions for enhancing the overall sound quality.

How to Mix Music Properly: Unlock the Secrets of Professional Sound


Credit: www.amazon.com


Frequently Asked Questions On How To Mix Music Properly


How Do I Mix Music Properly?


To mix music properly, start by organizing your tracks, adjusting levels, and panning instruments. Use EQ to balance frequencies, apply compression to control dynamics, and add reverb or delay for depth. Finally, check your mix in different listening environments and make necessary adjustments.


What Tools Do I Need For Proper Music Mixing?


To mix music properly, you’ll need a Digital Audio Workstation (DAW) like Pro Tools, Ableton Live, or Logic Pro. DAWs provide essential tools like EQ, compression, and reverb. Additionally, having high-quality studio monitors, headphones, and an audio interface will help you achieve accurate and detailed mixes.


How Can I Achieve Clarity In My Mix?


To achieve clarity in your mix, make sure each instrument has its own space in the frequency spectrum. Use EQ to cut unnecessary frequencies, and consider using sidechain compression to create space for the most important elements. Additionally, pay attention to stereo width and ensure each instrument is well-balanced and distinct.


Why Is Gain Staging Important In Music Mixing?


Gain staging is important in music mixing to ensure optimal signal flow and prevent distortion. By carefully setting levels throughout your mix, from individual tracks to the master bus, you maintain a healthy signal-to-noise ratio and avoid clipping. Proper gain staging allows you to retain clarity and dynamics in your mix.


Conclusion


To wrap up, mastering the art of mixing music properly takes time and dedication. By following the tips and techniques mentioned in this blog post, you can elevate the quality of your music productions. Remember, practice makes perfect, so continue to hone your skills and trust your ears.


With patience and experience, you can achieve professional-sounding mixes that resonate with your audience. Happy mixing!


Categories
Archive Audio Production

How To Make A Hip Hop Beat: Unleash Your Creative Power

To make a hip hop beat, start with a catchy melody and lay down a solid drum pattern. Experiment with different sounds and effects to create a unique vibe for your beat.


Understanding the basic elements of hip hop production, such as drum patterns, sampling, and mixing techniques, will help you craft a professional-sounding beat. By keeping the energy high and adding your personal touch, you can create a beat that stands out in the hip hop genre.


Let your creativity flow and don’t be afraid to try new things to make your hip hop beat truly shine.

How To Make A Hip Hop Beat: Unleash Your Creative Power


Credit: www.amazon.com


Finding Inspiration

Making a hip-hop beat starts with finding inspiration. This crucial step sets the tone for your music creation process.

Exploring Different Music Genres

  • Listen to various music genres to expand your creative horizon.
  • Blend elements from different genres to create a unique sound.

Drawing From Personal Experiences

  1. Reflect on your life experiences for authenticity in your music.
  2. Channel emotions and memories into your beats for depth.
  3. Tell stories through your music to connect with listeners.

Setting The Mood

Setting the Mood:

Making a hip hop beat is a creative process that requires the right environment to foster inspiration and innovation.

Creating A Conducive Environment

  • Choose a quiet and clutter-free space with good lighting.
  • Set up your equipment in an organized and accessible manner.
  • Play some of your favorite tracks to get in the musical mindset.

Embracing Creativity

  1. Experiment with different sounds and rhythms.
  2. Don’t be afraid to think outside the box and try new techniques.
  3. Allow yourself to get lost in the music and let your creativity flow.

Laying Down The Foundation

When it comes to crafting a compelling hip hop beat, laying down the foundation is crucial. This initial step sets the tone for the entire composition, creating the rhythm and groove that will form the backbone of the track. In this guide, we’re going to explore the essential elements of laying down the foundation for a captivating hip hop beat. From selecting the right drum kit to crafting an irresistible rhythm, we’ll cover everything you need to know to create an attention-grabbing beat that will make heads nod and feet tap.

Selecting The Right Drum Kit

One of the first steps in laying down the foundation for a hip hop beat is selecting the right drum kit. Choosing a high-quality drum kit with a diverse range of sounds is essential for creating a unique and impactful beat. Look for kits that offer a variety of kicks, snares, hi-hats, and percussion sounds to provide versatility and flexibility in your composition. By selecting a carefully curated drum kit, you can ensure that your beat has the foundational elements it needs to stand out and make an impression.

Crafting An Irresistible Rhythm

Once you have the right drum kit selected, it’s time to focus on crafting an irresistible rhythm. Experimenting with different patterns and sequences can help you find the perfect groove for your beat. Pay attention to the placement of each drum sound to create a dynamic and engaging rhythm that will drive the energy of the track. By layering different drum sounds and experimenting with various rhythms, you can create a beat that captivates the listener and keeps them hooked from start to finish.

How To Make A Hip Hop Beat: Unleash Your Creative Power


Credit: soundoracle.net


Melody And Harmony


Discover the art of creating a captivating hip hop beat using melody and harmony. By blending varied musical elements and experimenting with rhythm patterns, you can craft a unique composition that stands out. Embrace your creativity and let the music flow to create an unforgettable hip hop beat.

Choosing The Perfect Sounds

When it comes to making a hip hop beat, choosing the right sounds is crucial. You want to create a melody that grabs the listener’s attention and keeps them hooked. Start by selecting a drum kit that has the right punch and texture for your beat. Look for kicks, snares, hi-hats, and percussion that complement each other and create a cohesive sound. Experiment with different samples and don’t be afraid to layer sounds to add depth.

Crafting Catchy Melodies

Crafting a catchy melody is the key to making a hip hop beat that stands out. Start by finding the right scale for your song. The most common scales used in hip hop are major and minor scales, but don’t be afraid to experiment with other scales as well. Once you have the scale, start playing around with different chords and progressions. Create a chord progression that has a nice flow and complements the rhythm of your drums. Remember, simplicity is key in hip hop melodies, so don’t overcomplicate things.

Ensuring Each Heading Adheres To Html Syntax

` tags. For example, to create a heading that says “Choosing the perfect sounds,” you would write `

Choosing The Perfect Sounds

`. This tells the browser that the text inside the tags is a level 3 heading and should be displayed as such. Make sure to close the tags properly with the `/` before the `h3`, like this “, to avoid any errors.

https://www.youtube.com/watch?v=VKI605D0apc


Mixing And Mastering


Achieving a professional sound in hip hop requires meticulous mixing and mastering. To craft a top-notch beat, focus on balancing elements like drums, vocals, and melodies for a crisp, polished finish that captivates listeners. Mastering techniques enhance overall clarity and depth in the final track.

Enhancing Sound Quality

Mixing and mastering play a crucial role in the overall sound quality of a hip hop beat. When it comes to enhancing sound quality, there are several steps you can take to make your beat stand out. One key aspect is EQing, which involves balancing the frequencies of different elements in the mix. By adjusting the EQ settings, you can ensure that each instrument and sound occupies its own space in the frequency spectrum.

Another way to enhance sound quality is through the use of compression. Compression helps to control the dynamics of the track, making sure that no element is too loud or too soft. This can help to create a more balanced and polished sound. Additionally, adding effects such as reverb and delay can add depth and dimension to your beat, making it more captivating to the listener.

Lastly, don’t forget the importance of good recording techniques. Ensure that your instruments and vocals are recorded at the right levels, free from any unwanted background noise. This will give you a solid foundation to work with during the mixing and mastering process.

Balancing The Elements

When it comes to mixing and mastering a hip hop beat, balancing the elements is crucial. Each instrument and sound should have its own space and contribute to the overall groove and feel of the beat. To achieve this, it’s important to carefully adjust the volume levels of each element.

One way to balance the elements is by using panning. This technique allows you to position instruments and sounds in the stereo field, creating a sense of width and separation. For example, you can pan the hi-hats slightly to the left and the snare slightly to the right, giving your beat a more immersive and dynamic sound.

Another aspect to consider is the use of levels. You want to ensure that no element is overpowering or getting lost in the mix. By adjusting the levels, you can create a cohesive and well-balanced beat that keeps the listener engaged from start to finish. Remember to trust your ears and make subtle adjustments until you achieve the desired balance.

In conclusion, mixing and mastering are essential steps in creating a professional hip hop beat. By enhancing sound quality and balancing the elements, you can take your beat to the next level and captivate your audience. Apply these techniques and unleash the full potential of your music!

How To Make A Hip Hop Beat: Unleash Your Creative Power


Credit: www.facebook.com


Frequently Asked Questions For How To Make A Hip Hop Beat


Can I Make A Hip Hop Beat Without Any Musical Experience?


Absolutely! You don’t need any prior musical experience to make a hip hop beat. There are plenty of user-friendly software and online tools available that simplify the beat-making process. With some creativity and experimentation, you can create impressive beats regardless of your musical background.


What Equipment Do I Need To Make A Hip Hop Beat?


To create a hip hop beat, you’ll need a computer or laptop with music production software (such as FL Studio or Ableton Live), good quality speakers or headphones, and a MIDI keyboard or controller. These essential tools will provide you with the necessary elements to start making your own unique beats.


How Can I Find Inspiration For Hip Hop Beats?


Inspiration for hip hop beats can be found everywhere. Listen to a wide variety of music genres, attend concerts and live performances, and explore new artists. Digging into music history, understanding different styles and rhythms, and paying attention to current trends can ignite your creativity and help you craft fresh and innovative hip hop beats.


Conclusion


Making a hip hop beat is an intricate art form that requires both technical and creative skills. By following the process outlined in this post, you can create your own unique beats that resonate with your audience. Remember to experiment and stay true to your individual style to make your mark in the hip hop music world.

Categories
Archive Audio Production

Recording Vocals: Sit or Stand for Better Performances?

It is generally better to record vocals standing to have better breath support and vocal projection. However, sitting can also work well for some singers, especially those with physical limitations.


Recording vocals can be a crucial part of music production, as the quality of the vocals can make or break a song. One common debate among recording artists is whether it is better to record vocals sitting or standing. This decision can impact the overall sound and performance of the vocals.


Understanding the pros and cons of each option can help singers and producers make an informed choice that suits their needs and preferences. We will explore the benefits and drawbacks of recording vocals sitting versus standing, and provide tips for getting the best vocal recordings in either position.


Benefits Of Sitting During Vocal Recording

Sitting during vocal recording offers several advantages that can enhance the quality of your performance and the overall recording process. Here, we dive into the key benefits of opting to record vocals while sitting down.

Improved Support And Stability

Sitting provides better support for your posture, which is crucial for maintaining consistent vocal quality.

Enhanced Breath Control

Sitting encourages proper breathing techniques, allowing for improved breath control while singing.


Benefits Of Standing During Vocal Recording

When it comes to recording vocals, choosing whether to sit or stand can impact the quality of your performance. Let’s explore the benefits of standing during vocal recording.

Increased Energy And Projection

  • Standing allows for better breath control.
  • Engaging core muscles boosts vocal power.
  • Heightened energy leads to more dynamic vocals.

Facilitates Natural Body Movement

  • Standing encourages natural vocal posture.
  • Freedom of movement enhances vocal expression.
  • Physical engagement improves vocal clarity.

Considerations For Choosing Sitting Or Standing


When recording vocals, it’s important to consider whether sitting or standing is better for the performance. Factors to take into account include comfort, breath control, and overall vocal performance. Experimenting with both options can help determine the best approach for optimum results.

Considerations for Choosing Sitting or Standing There are several factors to consider when deciding whether to record vocals sitting or standing. This decision can significantly impact the quality of the performance, so it’s important to weigh the pros and cons of each option. Two crucial considerations are physical comfort and health and emotional comfort and confidence, which can heavily influence the overall vocal delivery and recording experience. Physical Comfort and Health When it comes to physical comfort and health, singers and recording artists should prioritize their well-being during the recording process. Sitting for extended periods can lead to back pain and muscle tension, while standing for too long can cause fatigue and discomfort. It’s essential to find a balance that allows for proper posture and reduces the risk of physical strain. Emotional Comfort and Confidence Emotional comfort and confidence play a significant role in vocal performance. Some singers may feel more relaxed and in control while sitting, providing a stable foundation for expressing emotions through their vocals. On the other hand, standing can convey a sense of energy and dynamism, empowering singers to deliver a more powerful and engaging performance. In conclusion, the decision to record vocals sitting or standing should take into account both the physical well-being and the emotional state of the performer. By carefully considering these factors, artists can optimize their recording experience and deliver their best performances.

Tips For Optimal Vocal Performances


When deciding whether to record vocals sitting or standing, consider factors like energy levels and breath control. Standing can help with projecting vocals, while sitting may promote relaxation and stability. Experiment to find what works best for your vocal performance.

Positioning Of Microphone

When recording vocals, the positioning of the microphone plays a crucial role in capturing the best sound quality. Placing the microphone at the correct height and distance from the vocalist can significantly impact the overall performance. Here are some tips to help you optimize the positioning of your microphone:

  • Ensure that the microphone is positioned at the same level as your mouth to capture the vocals directly.
  • Place the microphone approximately six to eight inches away from your mouth to avoid distorting the sound.
  • Adjust the microphone angle slightly downward to prevent excessive plosives or popping sounds.
  • Use a pop filter between the microphone and the vocalist to reduce the impact of plosives.

Effective Warm-up Techniques

Before diving into recording vocals, it’s essential to warm up your vocal cords to achieve optimal performance. Here are some effective warm-up techniques to get your voice ready:

  1. Start with gentle humming exercises to warm up your vocal cords.
  2. Perform lip trills or rolls to help relax your vocal muscles and improve breath control.
  3. Engage in vocal sirens or slides, gradually transitioning between different vocal registers.
  4. Practice tongue twisters to improve diction and articulation.
  5. Do gentle stretches to release tension in your neck, shoulders, and jaw.
  6. Stay hydrated by drinking warm water to keep your vocal cords lubricated.

Remember, a well-warmed-up voice is more flexible, controlled, and less prone to strain during recording sessions.

Implementing these tips during your vocal recording sessions can help you achieve the best sound quality and performance. By optimizing the positioning of your microphone and warming up your voice effectively, you can set the stage for an exceptional vocal recording experience.

Adapting Recording Style To Different Genres


For recording vocals, deciding between sitting and standing can impact the performance based on the genre. Standing often allows for more energy and better breath control, ideal for genres like rock or pop. Conversely, sitting promotes relaxation and precision, suitable for intimate acoustic or jazz recordings.

Situation-dependent Vocal Delivery

When it comes to recording vocals, the choice between sitting or standing can greatly impact the final result. However, it’s essential to consider the genre of the music being recorded. Adapting your recording style to different genres can enhance the overall performance and ensure the vocals are captured in the best possible way.

Effect Of Performance Style On Body Posture

The performance style of a vocalist can have a significant impact on their body posture during recording sessions. When standing, the body is naturally more upright, allowing for better breath support and projection. This is well-suited for genres that require a powerful and dynamic vocal delivery, such as rock or pop.

On the other hand, sitting can be beneficial for genres that prioritize a more intimate and controlled vocal performance, like jazz or acoustic music. Sitting encourages a relaxed posture, helping the vocalist focus on subtleties and nuances in their delivery.

It’s important to note that the impact of body posture on vocal performance can vary from person to person. Some vocalists may find it easier to maintain consistent pitch and tone while standing, while others may feel more comfortable and in control while sitting.

Therefore, the choice between sitting and standing should ultimately be determined by the vocalist’s personal preference and what best suits their unique style and vocal abilities.

Recording Vocals: Sit or Stand for Better Performances?


Credit: www.soundonsound.com


Frequently Asked Questions On Recording Vocals Sitting Or Standing Which Is Better


Is It Better To Record Vocals Sitting Or Standing?


Recording vocals sitting or standing is a personal preference and depends on the individual’s comfort and performance style. Some singers find standing allows for better breath control and posture, while others prefer sitting for a more relaxed and focused approach.


Experiment with both positions to find what works best for you.


What Are The Benefits Of Recording Vocals While Sitting?


Recording vocals while sitting can provide more stability and control over your performance. Sitting allows you to focus on your breath control, posture, and microphone technique, resulting in a more consistent and controlled vocal performance. It can also be more comfortable for longer recording sessions.


What Are The Advantages Of Recording Vocals While Standing?


Recording vocals while standing can offer a sense of freedom and energy in your performance. Standing allows you to use your body and movement to enhance your delivery and expressiveness. It can also help you project your voice and engage with the music, resulting in a more dynamic and emotive vocal performance.


Conclusion


Choosing to record vocals while standing or sitting ultimately depends on individual preference and the specific requirements of the recording session. Both approaches offer unique advantages and it’s essential for each artist to experiment and find what works best for them.


Comfort and performance should be the primary considerations when making this decision.


https://www.youtube.com/watch?v=sfzy45BwgYg


Categories
Archive Audio Production

A Good Mix Vs A Poor Mix Difference: Unveiling the Power of the Perfect Blend

A good mix combines elements effectively, while a poor mix lacks harmony and balance. In the world of mixing, understanding the difference between a good mix and a poor mix is crucial for creating high-quality results.


A good mix involves blending all ingredients harmoniously, resulting in a balanced and cohesive flavor profile. On the other hand, a poor mix often results in clashing or overpowering flavors, ultimately leading to a disjointed and unappealing final product. By mastering the art of creating a good mix, whether in cooking, music production, or other areas, you can elevate your outcomes and provide an enjoyable experience for your audience or consumers.

A Good Mix Vs A Poor Mix Difference: Unveiling the Power of the Perfect Blend


Credit: www.nytimes.com


The Importance Of Mixing

Key Role In Music Production

Mixing plays a crucial role in music production by blending individual tracks into a cohesive and balanced sound.

Impact On Final Product

Effective mixing influences the final product by refining the audio quality and enhancing the overall listening experience.

Mixing helps to create depth, clarity, and emotion in the music.

It allows different elements to shine and ensures a well-rounded sound.

Whether it’s a good mix or a poor one, the difference lies in the skill and attention to detail during the mixing process.

Characteristics Of A Good Mix

A Good Mix is essential for creating high-quality audio content. Characteristics of a Good Mix include Balance, Clarity, and Depth.

Balance

  • Each element in the mix should have its place and contribute harmoniously.
  • Ensure that no single element overpowers the others.
  • Proper adjustment of volume levels is crucial for achieving balance.

Clarity

  • All individual sounds should be distinctly audible.
  • Eliminate any muddiness or overlapping frequencies that can obscure clarity.
  • Clear separation of instruments and vocals enhances overall clarity.

Depth

  • Create a sense of space by utilizing techniques like panning and reverb.
  • Depth adds dimension to the mix and enhances the listening experience.
  • Ensure that the mix has both a foreground and background to create depth.
https://www.youtube.com/watch?v=QiBmQuz9yr4


Signs Of A Poor Mix

When it comes to music production, achieving a good mix is crucial for the overall quality and impact of the final product. Conversely, a poor mix can significantly detract from the listening experience, potentially leading to a loss of audience engagement. Understanding the signs of a poor mix is essential for producers and engineers to rectify any issues and deliver a polished end result.

Muddiness

One common sign of a poor mix is muddiness. This occurs when the low-frequency elements in the mix, such as kick drums and basslines, clash and overlap, resulting in a muddled sound that lacks clarity and definition. It can make the overall mix sound muffled and indistinct, compromising the impact of the music.

Frequency Conflicts

Another indicator of a poor mix is frequency conflicts. When different instruments or elements are competing for space within the same frequency range, it can lead to muddiness and masking, making it difficult for each individual element to stand out and be heard clearly in the mix.

Lack Of Dynamics

Furthermore, a poor mix may exhibit a lack of dynamics. This means that the volume levels of the various elements in the mix do not vary sufficiently, resulting in a monotonous and flat sound. Without adequate dynamics, the music can sound lifeless and uninspiring, failing to captivate the listener.

A Good Mix Vs A Poor Mix Difference: Unveiling the Power of the Perfect Blend


Credit: www.zdnet.com


Techniques For Achieving A Good Mix

When it comes to creating a well-balanced and professional-sounding mix, mastering various audio mixing techniques is crucial. Achieving a good mix involves cleverly manipulating elements like equalization, panning, and compression. By understanding and implementing these techniques effectively, you can take your recordings from sounding unpolished to clear, dynamic, and captivating. In this post, we will delve deeper into each of these techniques to help you achieve a good mix that will leave your listeners enthralled.

Equalization

Equalization, or EQ, is one of the most fundamental tools in audio mixing. It allows you to adjust the frequency balance of individual tracks and shape the overall sound of your mix. By targeting specific frequencies, you can enhance or reduce certain elements, such as emphasizing the warmth of a bass guitar or reducing harshness in a vocal track.

To achieve a good mix using EQ, follow these steps:

  1. Listeactively to each track and identify any frequency imbalances.
  2. Use a graphic equalizer or parametric EQ to adjust the levels of different frequencies on each track.
  3. Take care not to overdo it or make drastic changes, as subtlety is key.
  4. Regularly refer to reference tracks to ensure your mix maintains a natural and balanced sound.

Panning

Panning is the process of placing different audio sources in the stereo field. By strategically positioning each element, you create a sense of space and width in your mix, enabling each instrument or sound to be heard distinctly. Proper panning can make your mix sound immersive and three-dimensional.

Here are some guidelines for achieving a good mix through panning:

  • Ensure that each instrument has its own defined space in the stereo field.
  • Avoid panning everything hard left or right, as this can result in an unbalanced mix.
  • Experiment with subtle panning adjustments to find the ideal placement for each element.
  • Consider using automation to create movement and interest within your mix.

Compression

Compression is a powerful tool that controls the dynamic range of your mix. Dynamic range refers to the difference between the softest and loudest parts of a song. By using compression, you can even out these differences, making the quieter parts more audible while preventing the louder parts from overpowering the mix.

To achieve a balanced mix through compression:

  1. Ensure that you have a clear understanding of how compression works and its impact on the sound.
  2. Use compression to control the levels of individual tracks or groups of tracks.
  3. Avoid excessive compression that results in a lifeless or unnatural sound.
  4. Regularly adjust the threshold, ratio, attack, and release settings to find the optimal balance.

By employing these techniques with skill and finesse, you can transform your mix from ordinary to extraordinary. Whether you’re working on your own music or mixing for others, a good mix will set your recordings apart, leaving a lasting impression on your audience.

Professional Mix Vs Amateur Mix

A well-executed mix can be the difference between a lackluster song and one that captivates listeners, taking them on a sonic journey. When it comes to mixing, there is a stark contrast between a professional mix and an amateur mix. In this article, we will explore two aspects that set them apart: attention to detail and the use of reference tracks. Let’s delve into what makes a professional mix stand out.

Attention To Detail

A professional mix is characterized by the meticulous attention to detail bestowed upon it. Mixing engineers with exceptional skill pay careful attention to every aspect of the mix, ensuring that each element occupies its rightful place in the sonic spectrum. From balancing levels to fine-tuning EQ, compression, and effects, no detail is overlooked. Professional mixers are like conductors, orchestrating a harmonious blend of instruments and vocals to create a polished and cohesive sound. With their acute ears and discipline, they eliminate any imperfections that may hinder the listener’s experience.

Use Of Reference Tracks

The use of reference tracks serves as a cornerstone in the professional mix process. An experienced mixing engineer understands the importance of benchmarking against well-mixed songs in similar genres. By carefully selecting reference tracks, they establish a sonic target to strive for, ensuring that their mix achieves the desired balance, tonality, and dynamics. Reference tracks provide invaluable insight into the characteristics that make a song shine in a specific style. Whether it’s the clarity of the vocals, the punchiness of the drums, or the warmth of the bass, referencing helps professionals craft a mix that meets industry standards and satisfies discerning listeners.

When comparing a professional mix to an amateur mix, it becomes evident that the former is a product of expertise, experience, and an unwavering commitment to sonic excellence. Attention to detail and the use of reference tracks are just two facets of the professional mix that contribute to its standout quality. Aspiring mixers can gain insight from this distinction, striving to elevate their own mixes to achieve the same level of professionalism.

A Good Mix Vs A Poor Mix Difference: Unveiling the Power of the Perfect Blend


Credit: www.instyle.com


Frequently Asked Questions For A Good Mix Vs A Poor Mix Difference


What Is The Difference Between A Good Mix And A Poor Mix?


A good mix refers to a well-balanced combination of ingredients in a recipe, while a poor mix lacks proper proportions or ingredients. A good mix results in a flavorful and harmonious outcome, while a poor mix can result in blandness or an unpalatable taste.


How Does A Good Mix Enhance A Dish?


A good mix enhances a dish by bringing out the flavors of each ingredient, creating a delicious and well-rounded taste. The right combination of flavors and textures in a good mix elevates the dish, making it more enjoyable and satisfying.


What Are The Consequences Of A Poor Mix?


A poor mix in a dish can lead to a range of consequences, including an imbalance of flavors, uneven cooking, or a lack of cohesion. This can result in a disappointing taste, texture, or appearance that fails to meet expectations.


How Can You Improve A Poor Mix?


To improve a poor mix, consider adjusting the proportions of ingredients, adding complementary flavors, or reevaluating the cooking techniques used. It also helps to taste and adjust the seasoning as needed, ensuring a more balanced and enjoyable final result.


Conclusion


The difference between a good mix and a poor mix is evident in its final outcome. By understanding the crucial elements of composition, level adjustments, and sound quality, you can enhance the overall production. With attention to detail and a strong foundation, achieving an exceptional mix is within reach.

Categories
Archive Audio Production

How Long To Learn Mixing Mastering: Unlock the Skill Expertise

Learning mixing and mastering can take several months to a few years, depending on dedication and practice. Timeframes vary for each individual.


Mastering the art of mixing and mastering requires time, effort, and a commitment to continuous learning. Many factors contribute to the learning process, such as previous experience, technical aptitude, and exposure to different music genres. Setting realistic goals and consistently honing your skills through practice and experimentation are key to mastering this craft.


By dedicating the necessary time and effort, you can improve your mixing and mastering skills and achieve professional-level results.

How Long To Learn Mixing Mastering: Unlock the Skill Expertise


Credit: m.facebook.com


The Fundamentals Of Mixing And Mastering

Mixing and mastering are essential components of producing high-quality audio. Understanding the fundamentals of mixing and mastering is crucial for any aspiring music producer or artist.

The Basics Of Mixing

  • Mixing combines individual tracks into a cohesive and balanced audio mix.
  • It involves adjusting levels, panning, equalization, and effects to create a polished sound.
  • Each element must occupy its space, ensuring clarity and depth in the overall mix.

Understanding Mastering

  1. Mastering is the final step in the audio production process.
  2. It involves optimizing the mix for various playback systems and formats.
  3. Mastering enhances the overall sound quality, ensuring consistency and cohesiveness.

Mastering the basics of mixing and mastering is a journey that requires practice and dedication. By mastering these skills, you can elevate the quality of your music productions and create a professional sound that stands out.

The Learning Curve


Discovering how to mix and master music is a unique journey for each individual. Learning times can vary, depending on the complexity of the project and the skills you want to acquire. Dedication and practice play significant roles in the learning process.

The Learning Curve: Learning mixing and mastering involves different levels of expertise and time investment for proficiency.

Different Levels of Expertise:

– Novice: Foundation of basic concepts. – Intermediate: Refinement of skills. – Advanced: Mastery of techniques.

Time Investment for Proficiency:

– Novice: 3-6 months for basics. – Intermediate: 6-12 months for refinement. – Advanced: Continuous learning for mastery.

Effective Learning Strategies

Learning mixing and mastering requires effective strategies that encompass hands-on practice and gaining technical knowledge. By focusing on these key areas, you can accelerate your learning process and enhance your abilities in the realm of audio production.

Hands-on Practice

Practical experience is crucial for mastering the art of mixing and mastering. Setting aside dedicated time for hands-on practice allows you to refine your skills and develop an intuitive understanding of audio editing techniques. By actively engaging with the tools and processes involved, you acquire a deeper grasp of how to manipulate sound elements for the desired effect.

Gaining Technical Knowledge

Acquiring technical knowledge is fundamental to mastering the intricacies of mixing and mastering. Understanding the functionality of various audio software, effects, and equipment empowers you to make informed decisions during the mixing and mastering process. By delving into the technical aspects, you can unleash your creativity and achieve professional-quality results.

How Long To Learn Mixing Mastering: Unlock the Skill Expertise


Credit: www.heightsplatform.com


Utilizing Resources And Tools


Learn how to master mixing audio effectively using a range of resources and tools. The time it takes to grasp these techniques varies based on your dedication and practice routine. Dive into tutorials, practice sessions, and seek feedback to accelerate your learning curve.

Learning the art of mixing and mastering can be a time-consuming process, but with the right resources and tools at your disposal, you can expedite your learning journey. In this section, we will explore two essential aspects of this process: software and hardware options, as well as learning from industry professionals.

Software And Hardware Options

When it comes to mixing and mastering, having the right software and hardware options is crucial. Here are some recommendations:

  • Digital Audio Workstations (DAWs): DAWs like Ableton Live, Logic Pro, and Pro Tools are widely used in the music production industry. These powerful tools allow you to manipulate and mix multiple audio tracks with ease.
  • Plugins: Plugins are software extensions that provide additional functionalities for your DAW. With plugins, you can enhance the quality of your mix and add creative effects. Popular plugin options include Waves, FabFilter, and iZotope.
  • Monitoring System: Investing in a good pair of studio monitors or headphones is essential for accurate mixing and mastering. Look for options like KRK Rokit, Yamaha HS series, or Sony MDR headphones.

Learning From Industry Professionals

One of the most effective ways to expedite your learning process is by learning from industry professionals. Here are some resources to consider:

  1. Online Courses: Many platforms offer online courses specifically tailored to mixing and mastering. Platforms such as Udemy, Coursera, and LinkedIn Learning provide comprehensive courses taught by industry professionals.
  2. YouTube Channels: YouTube is a treasure trove of free educational content. Look for channels like Pensado’s Place, Recording Revolution, and Mix With The Masters, where experienced professionals share tips, techniques, and tutorials.
  3. Mentorship: Finding a mentor who is already established in the industry can greatly accelerate your learning. They can offer guidance, provide feedback on your work, and share industry insights that you wouldn’t find elsewhere.

By utilizing these resources and tools, you can enhance your mixing and mastering skills and speed up your learning process. Remember, practice and experimentation are essential components of the journey, so dive in, get your hands dirty, and continuously strive for improvement.

https://www.youtube.com/watch?v=YEorsfZe4vU


Overcoming Challenges And Pitfalls


Embarking on the journey of mastering mixing can vary greatly in duration. Overcoming challenges and pitfalls involves dedication and consistent practice. The timeline to learn mixing and mastering ultimately depends on individual commitment and learning pace.

Common Mistakes To Avoid

When learning the art of mixing and mastering, it’s important to be aware of common mistakes that can hinder your progress. By avoiding these pitfalls, you can accelerate your learning process and achieve better results in less time.

One common mistake is relying too heavily on presets. While presets can be a useful starting point, they should not be your sole reliance. Experimenting and developing your own settings will allow you to create a unique sound that sets you apart from others.

Another mistake to avoid is not paying attention to the fundamentals. Understanding concepts such as EQ, compression, and reverb will help you make informed decisions during the mixing and mastering process. Taking the time to learn and apply these basics will greatly improve your ability to create professional-sounding tracks.

It’s also important to avoid over-processing. It can be tempting to add a multitude of effects to every element of a mix, but this can lead to muddiness and a loss of clarity. Keeping things simple and focusing on enhancing the natural qualities of the elements in your mix will yield better results.

Lastly, make sure to avoid rushing through the process. Mixing and mastering take time and patience. It’s important to give yourself the necessary time to listen critically, make adjustments, and refine your work. Remember, practice makes perfect, and the more you invest in your craft, the better your results will be.

Developing A Unique Style

While it’s important to learn the technical aspects of mixing and mastering, it’s equally crucial to develop a unique style that sets you apart. Having a distinctive sound will make your work stand out and attract clients and listeners who appreciate your individuality.

One way to develop your own style is by studying and analyzing the work of professionals in your preferred genre. Pay attention to their use of EQ, compression, and other techniques, and try to identify the elements that make their mixes unique. By understanding what works well in their projects, you can incorporate similar ideas into your own work while adding your personal touch.

Experimentation is another key component of developing a unique style. Don’t be afraid to try unconventional techniques, explore different effects, and push the boundaries of traditional mixing and mastering. This will allow you to discover new sounds and approaches that may become your signature.

It’s also crucial to trust your instincts and follow your creative intuition. Don’t be swayed solely by what is popular or what others say is “correct.” Stay true to yourself and your vision, and don’t be afraid to take risks. Embrace mistakes as learning opportunities and use them to refine and evolve your own style.

How Long To Learn Mixing Mastering: Unlock the Skill Expertise


Credit: www.timelessrecordingstudio.com


Frequently Asked Questions Of How Long To Learn Mixing Mastering


How Long Does It Take To Learn Mixing And Mastering?


Learning mixing and mastering can take anywhere from a few months to several years, depending on the level of skill you want to achieve. It requires practice, experimentation, and constant learning to master the technical and creative aspects of the process.


What Skills Are Needed To Learn Mixing And Mastering?


To learn mixing and mastering, you need a solid foundation in sound engineering, music theory, and technical proficiency with audio editing software. Along with these skills, having a good ear for detail, patience, and the ability to make critical listening judgments are essential for achieving professional-quality results.


Are There Any Prerequisites To Learning Mixing And Mastering?


While there are no strict prerequisites, it is helpful to have a basic understanding of music production concepts, such as recording techniques, signal flow, and audio processing. Familiarity with digital audio workstations (DAWs) and plugins is also beneficial in order to effectively apply the techniques in the mixing and mastering process.


Conclusion


Learning mixing and mastering takes time and practice. Don’t rush the process; focus on constant improvement. Embrace mistakes and keep experimenting with different techniques. Stay patient and persistent, as mastering these skills doesn’t happen overnight. With dedication and commitment, anyone can achieve proficiency in mixing and mastering.

Categories
Archive Audio Production

11 Essential Reasons to Prioritize Mixing and Mastering for Optimal Results

Mixing and mastering are crucial for achieving professional-sounding music. They enhance clarity, consistency, and overall quality.


Effective mixing balances all elements of a song, while mastering ensures it meets industry standards. This process polishes the sound, enhances dynamics, and elevates the overall listening experience. Here are 11 reasons why mixing and mastering are key for musicians and producers alike.


Credit: blog.uxtweak.com


Importance Of Mixing And Mastering

Mixing and mastering are crucial elements in the audio production process, serving as the foundation for creating high-quality sound. They play a vital role in polishing and enhancing audio tracks to ensure they are ready for distribution.

Enhancing Audio Quality

Mixing involves blending different audio elements such as vocals, instruments, and effects to achieve a balanced and cohesive sound. Mastering, on the other hand, refines the overall mix, optimizing it for various playback systems. Altogether, these processes enhance the clarity and richness of the audio.

Balancing Audio Elements

Balancing audio elements in mixing ensures that each component of the track is heard at the right level, creating a harmonious blend. Mastering takes this further by fine-tuning the overall volume, EQ, and dynamics to ensure a consistent and professional sound across different devices.


Credit: www.linkedin.com


Benefits Of Prioritizing Mixing And Mastering


When it comes to music production, prioritizing mixing and mastering can have numerous benefits. It helps to enhance the overall sound quality, balance the different elements of a track, and ensure that the final product meets professional standards. Moreover, it can also make the music more appealing to listeners and stand out in the competitive music industry.

In the music industry, mixing and mastering play a vital role in ensuring the overall quality of a song or album. Let’s explore why prioritizing these aspects is crucial for artists and producers:

Achieving Professional Sound

Professional sound quality elevates a song’s appeal to listeners and distinguishes it in a competitive market.

Maximizing Artistic Vision

Artistic vision can be fully realized through proper mixing and mastering, allowing the artist’s intent to shine through.

Key Elements Of Mixing And Mastering

The key elements of mixing and mastering play a crucial role in the creation of high-quality audio productions. These processes involve a series of technical adjustments that are essential for refining and enhancing the sonic characteristics of a recording. Each element contributes to the overall balance, clarity, and cohesion of the sound, ensuring a polished and professional end product.

Equalization

Equalization, or EQ, is a fundamental tool in the mixing and mastering process. It involves adjusting the frequency balance of individual tracks or the entire mix to achieve clarity, separation, and tonal balance. Through precise manipulation of the frequency spectrum, EQ helps to sculpt the overall sound and bring out the best in each element of the mix.

Compression

To ensure consistency and control dynamics, compression is employed during mixing and mastering. This technique reduces the dynamic range of audio signals, bringing quieter sounds up and preventing louder sounds from peaking. This results in a more balanced, cohesive, and polished audio texture, ultimately refining the overall sonic quality of the mix.

Common Mistakes To Avoid

Mixing and mastering are critical stages in the music production process. However, many musicians and producers make common mistakes that can hinder the overall quality and impact of their tracks. To ensure that your music shines at its best, it’s important to be aware of these mistakes and avoid them. Let’s take a closer look at some of the most common mistakes during mixing and mastering.

Overusing Effects

One of the most common mistakes that artists make during mixing and mastering is overusing effects. While effects can add depth and character to your tracks, excessive use can quickly lead to a messy and unnatural sound. Instead, it is important to use effects sparingly and purposefully, ensuring that they enhance the overall sound rather than overpower it. Remember, less is often more when it comes to effects.

Neglecting Reference Tracks

Another mistake to avoid is neglecting to use reference tracks during the mixing and mastering process. Reference tracks act as a benchmark for how your mix and master should sound in terms of tonal balance, dynamics, and overall production quality. Without a reference, it’s easy to lose perspective on your own work. By regularly comparing your tracks to well-mixed and mastered songs in a similar genre, you can ensure that your music meets industry standards and professional sound expectations.

Professional Mixing And Mastering Services


Discover why high-quality mixing and mastering services are essential for professional music production. Achieve optimal sound clarity, balance, and consistency in your tracks, enhancing their overall quality and impact. Trust experienced professionals to elevate your music to its full potential.

In order to achieve the best possible sound quality for your music, it is essential to invest in professional mixing and mastering services. Quality engineers have the knowledge, experience, and expertise to take your tracks to the next level and give them that professional polish.

When you work with a professional engineer, you can expect them to have a deep understanding of the technical aspects of audio production, such as equalization, compression, and spatial effects. They know how to make your music sound balanced and cohesive, enhancing the overall listening experience.

One of the major advantages of professional mixing and mastering services is the access to advanced tools and technology. These tools can greatly enhance the quality of your music, providing precise control over every element.

Professional engineers use industry-standard software and plugins to refine and shape the audio. From equalizers and compressors to reverbs and delays, these tools allow them to fine-tune every aspect of the mix and master.

They can also detect and fix any imperfections or issues that may arise during the production process. With their expertise and advanced tools, they can eliminate noise, correct phase problems, and enhance the overall clarity and definition of your music.


Credit: www.shopify.com


Frequently Asked Questions Of 11 Reasons Why Mixing And Mastering Are So Important


Why Is Mixing And Mastering Important In The Music Production Process?


Mixing and mastering are crucial steps in music production as they enhance the overall sound quality, balance the different elements, and ensure the track sounds cohesive and professional.


What Role Does Mixing Play In Music Production?


Mixing involves adjusting levels, panning, and applying effects to individual tracks to create a balanced and cohesive sound, enhancing the overall quality and impact of the music.


How Does Mastering Contribute To The Final Product?


Mastering adds the final polish to the music, ensuring consistency across tracks, optimizing the overall loudness and dynamics, and preparing the music for distribution or playback on different platforms and systems.


Can I Skip The Mixing And Mastering Process?


Skipping the mixing and mastering process can result in an unbalanced, amateur-sounding track that lacks clarity, impact, and professional quality. These steps are essential for achieving a polished and commercially viable final product.


Conclusion


To sum up, mixing and mastering play crucial roles in producing high-quality audio. They enhance the overall sound by balancing the elements and ensuring a polished, professional finish. From improving clarity to creating a consistent sound, these processes are essential for any music production.


Embracing their importance can elevate the impact and appeal of your music.


Categories
Archive Audio Production

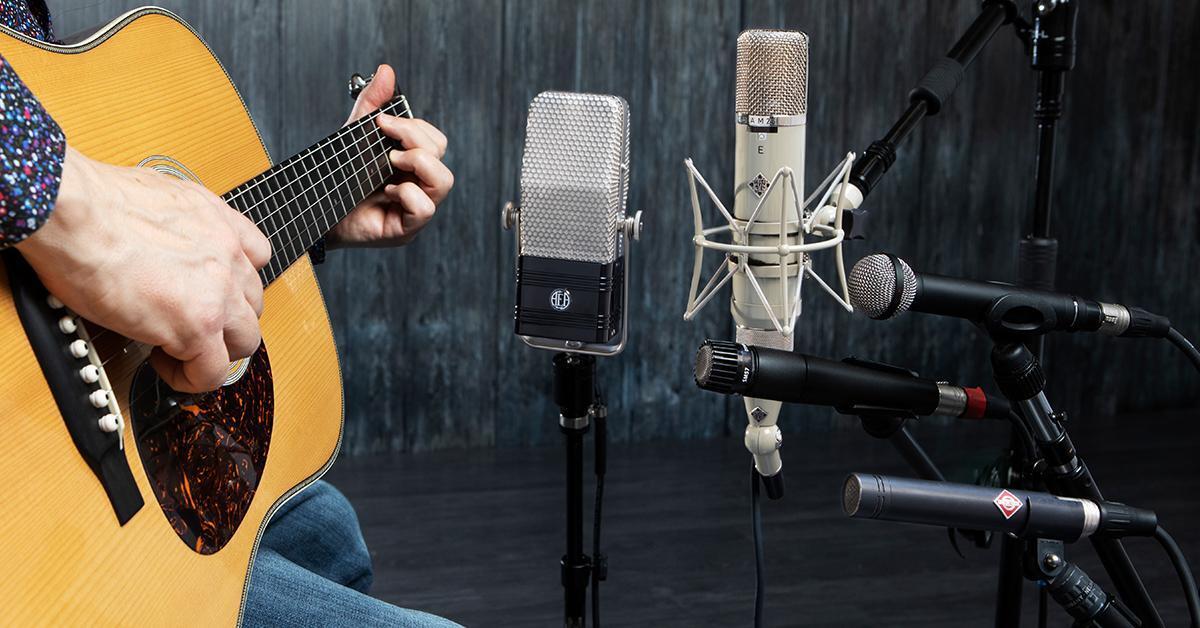
Is Shure Sm57 the Ultimate Mic for Recording Acoustic Guitar?

As an Amazon Associate I earn from qualifying purchases.

The Shure SM57 is an excellent choice for recording acoustic guitar due to its versatility and quality sound reproduction. With its exceptional clarity and ability to capture the nuances of acoustic instruments, the SM57 is a popular microphone among professional musicians and recording engineers.


Its durability and reliability make it a go-to option for capturing the natural warmth and dynamics of acoustic guitar performances. Whether you are recording in a studio setting or during live performances, the Shure SM57 is a trusted and highly recommended microphone for enhancing the sound of acoustic guitars.

Is Shure Sm57 the Ultimate Mic for Recording Acoustic Guitar?


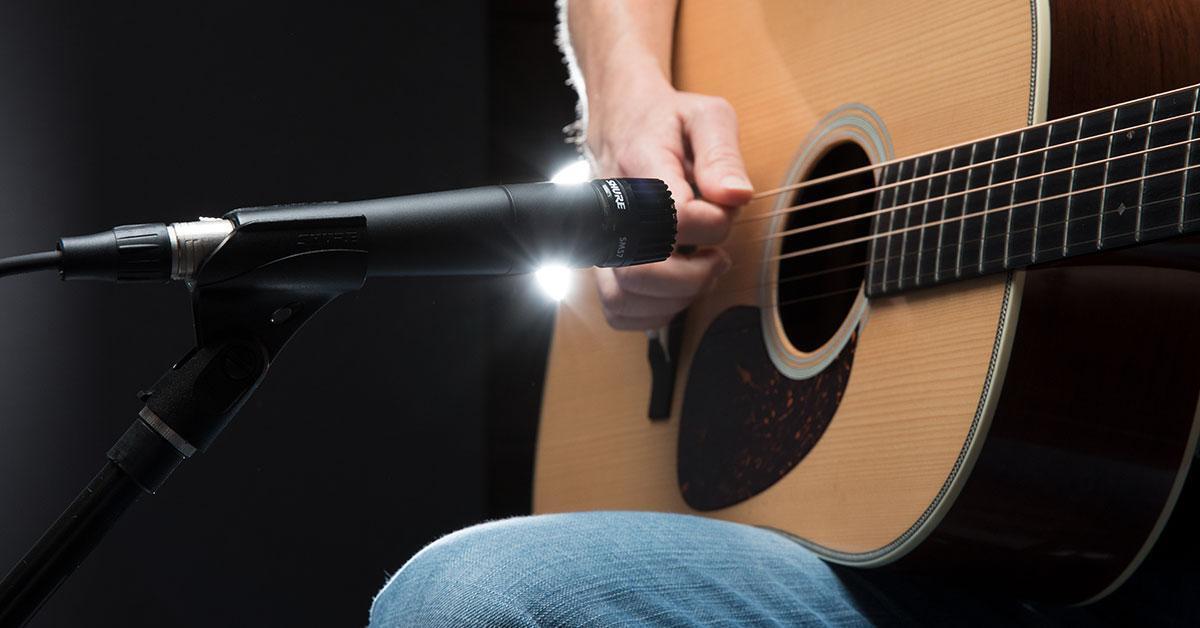
Credit: www.sweetwater.com


Characteristics Of Shure Sm57

The Shure SM57 is a dynamic microphone renowned for its versatility in recording various instruments like acoustic guitar.

Dynamic Microphone Design

SM57 is designed to capture sound with high precision, delivering clear and natural acoustic guitar recordings.

Versatility In Recording Scenarios

It excels in both studio and live settings, making it a popular choice for acoustic guitarists looking for reliable recording equipment.

Is Shure Sm57 the Ultimate Mic for Recording Acoustic Guitar?


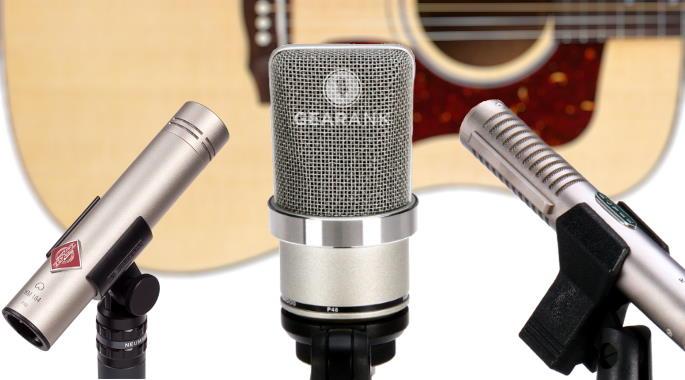
Credit: www.gearank.com


Comparison With Other Mics

The Shure SM57 offers a more focused and detailed sound compared to condenser mics.

While condenser mics capture a broader frequency range, the SM57 excels in capturing mid-range frequencies.

Compared to other dynamic mics, the SM57 stands out for its versatility and durability.

Dynamic mics like the SM57 are known for their ability to handle high sound pressure levels.

Experiences Of Musicians And Engineers

When it comes to recording acoustic guitar, the Shure SM57 is a popular choice among musicians and engineers. The experiences of musicians and engineers with using the Shure SM57 for recording acoustic guitar offer valuable insights into its performance and capabilities.

Feedback From Professional Guitarists

Professional guitarists overwhelmingly praise the Shure SM57 for its ability to capture the nuances and natural tone of acoustic guitars. Its precise and detailed sound reproduction earns high marks, with many citing its exceptional clarity and warmth. The microphone’s durability and reliability make it a go-to choice for live and studio settings, allowing guitarists to consistently achieve the desired sound without compromise.

Insights From Recording Engineers

Recording engineers laud the Shure SM57 for its versatility and consistent performance when recording acoustic guitars. The microphone’s tight cardioid pickup pattern effectively captures the intricacies of the instrument, while its rugged construction and ease of placement make it an ideal tool for achieving desired recordings in various acoustic environments. Engineers often rely on the Shure SM57 as a staple in their mic locker for its reliability, adaptability, and capability to deliver exceptional recordings with minimal hassle.

Is Shure Sm57 the Ultimate Mic for Recording Acoustic Guitar?


Credit: www.sweetwater.com


Tips For Using Shure Sm57

When it comes to recording acoustic guitar, the Shure SM57 is a popular choice among musicians and engineers. Its versatility and durability make it a reliable microphone for capturing the warm and natural tones of the instrument. However, knowing how to effectively use the microphone can make a significant difference in the final sound quality. In this section, we will explore some tips to help you get the best results when using the Shure SM57 for recording acoustic guitar.

Optimal Placement Techniques

To capture the true essence of the acoustic guitar, it is crucial to position the Shure SM57 correctly. Here are some optimal placement techniques to consider:

  1. Place the microphone around 6-12 inches away from the guitar’s sound hole. This distance allows for a balanced tone, capturing both the body resonance and the clarity of the strings.
  2. Experiment with different angles to find the sweet spot. Slightly angling the microphone towards the 12th fret can help achieve a balanced sound.
  3. Avoid pointing the microphone directly at the sound hole, as it can result in unwanted boomy or muddy tones. Instead, position it slightly off-axis to capture a more detailed and natural sound.

Precautions For Achieving The Best Results

While the Shure SM57 is a robust microphone, taking a few precautions can help you achieve the best results when recording acoustic guitar:

  • Use a pop filter to minimize plosive sounds such as ‘p’ and ‘b’ in your recordings. This accessory will help maintain a clean and clear sound quality.
  • Consider using a shock mount to reduce handling noise. This practical accessory can eliminate unwanted vibrations and ensure a more pristine recording.
  • Experiment with different placements and room acoustics. Utilize the microphone’s directional characteristics to your advantage by adjusting its position and experimenting with different spaces within your recording environment.

By following these tips for using the Shure SM57, you can confidently capture the beautiful nuances and delicate tones of your acoustic guitar. Remember to experiment, find your unique sound, and let the Shure SM57 enhance your recording experience.

Frequently Asked Questions For Is Shure Sm57 Good For Recording Acoustic Guitar


Is The Shure Sm57 Good For Recording Acoustic Guitar?


Yes, the Shure SM57 is a popular choice for recording acoustic guitar. It has a natural and transparent sound reproduction, allowing the true tone of the guitar to shine through. Its directional cardioid pickup pattern also helps to reduce unwanted background noise, making it ideal for capturing acoustic guitar performances in a studio or live setting.


Can The Shure Sm57 Handle High Sound Pressure Levels?


Absolutely! The Shure SM57 is known for its ability to handle high sound pressure levels with ease. Whether you’re recording a powerful strumming session or a hard-hitting percussive style, the SM57 can handle the loudness without distortion or any negative impact on the audio quality.


It’s a reliable microphone that can capture even the most dynamic guitar performances.


Does The Shure Sm57 Require Any Additional Equipment For Recording Acoustic Guitar?


To record acoustic guitar with the Shure SM57, you will need a few additional equipment. Firstly, you will need an audio interface or a mixer to connect the microphone to your computer or recording device. Additionally, using a mic stand or a guitar stand with a built-in mic holder can help you position the microphone properly for optimal sound capture.


Conclusion


The Shure SM57 is a versatile and reliable option for recording acoustic guitar. Its durable build and smooth frequency response make it well-suited for capturing the natural tones of the instrument. With its affordability and widespread popularity among professional musicians, the SM57 is a solid choice for acoustic guitar recording.


Categories
Archive Audio Production

How to Nail Simultaneous Electric Guitar and Vocal Recording!

To record electric guitar and vocals simultaneously, use a multitrack recording interface with separate inputs. Set levels carefully.


When recording both electric guitar and vocals together, it’s important to have the right setup to capture both elements accurately and with high quality. By using a multitrack recording interface that offers separate inputs for each instrument, you can ensure that the levels are balanced and each track is recorded cleanly.


This allows for easier mixing and editing in post-production, resulting in a professional sound for your recordings. We will explore the step-by-step process of recording electric guitar and vocals at the same time, offering tips and techniques to help you achieve the best results in your music production endeavors.


Selecting The Right Equipment

Selecting the right equipment is crucial when recording electric guitar and vocals simultaneously. To achieve high-quality recordings, it’s essential to focus on choosing the right microphone and setting up an appropriate guitar rig.

Choosing The Right Microphone

  • Dynamic microphone: ideal for capturing the power and dynamics of an electric guitar amp.
  • Condenser microphone: great for capturing vocals with clarity and detail.

Selecting An Appropriate Guitar Setup

When recording electric guitar and vocals together, the guitar setup plays a key role in achieving a balanced sound.

  • Use a direct input: connect your electric guitar directly to the audio interface for a clean signal.
  • Add effects pedals: experiment with different effects pedals to enhance the guitar tone.

By carefully selecting the right microphone and guitar setup, you can ensure that your recordings capture the full essence of both the electric guitar and vocals simultaneously.

How to Nail Simultaneous Electric Guitar and Vocal Recording!


Credit: www.ebay.com


Setting Up Your Recording Space

Setting up your recording space is crucial for capturing high-quality electric guitar and vocal recordings simultaneously.

Optimizing Acoustics

Ensure your recording space has adequate sound absorption materials like foam panels or diffusers.

Place the electric guitar amp in an area with good acoustics to minimize reflections.

Position microphones strategically to capture the best sound from both the guitar and vocals.

Eliminating Noise

Use a pop filter for vocals to reduce plosive sounds and improve recording clarity.

Close windows and doors to block out external noise interference.

Consider using a noise gate effect to eliminate background noise during the recording process.

Preparing For The Session

Preparing for a recording session that involves both electric guitar and vocals requires some careful planning and preparation. Each instrument requires specific attention and care to ensure they sound their best when recorded together. In this section, we’ll cover the essential steps to take in order to properly prepare for a session that involves recording both electric guitar and vocals simultaneously.

Vocal Warm-up

Before diving into the recording, it’s important for the vocalist to start with a vocal warm-up. This helps to ensure that the vocals are at their best for the recording, preventing strain and improving the overall quality of the performance.

Guitar Tuning And Maintenance

Ensuring that the electric guitar is properly tuned and well-maintained is crucial for a successful recording session. Use a tuner to ensure that each string is in tune, and check the guitar’s overall condition and cleanliness to avoid any potential issues during the session.

Recording Techniques

Recording electric guitar and vocals simultaneously can be challenging, but with the right techniques, you can achieve a balanced and professional sound. In this blog post, we will explore two important recording techniques that will help you manage levels and gain, as well as utilize isolation techniques to capture clean and clear recordings of both instruments. Let’s dive in!

Managing Levels And Gain

When recording electric guitar and vocals together, it’s crucial to manage the levels and gain to ensure a well-balanced mix. Here are some tips to help you:

  1. Start by setting the input levels on your audio interface. This will prevent clipping and distortion. It’s always better to start with lower gain settings and gradually increase if needed.
  2. Use a preamp or a channel strip with individual gain controls for each instrument. This will allow you to adjust the levels independently for the guitar and vocals, ensuring a proper balance between the two.
  3. Monitor the levels closely and make adjustments whenever necessary. Keep an eye on the meters in your recording software or on the audio interface to make sure the levels are not too high or too low.
  4. If the guitar or vocals are overpowering each other, use automation to adjust the levels during the mixing process. This will give you more control and help create a cohesive and polished sound.

Utilizing Isolation Techniques

To ensure clean recordings of both the electric guitar and vocals, it’s essential to utilize isolation techniques that minimize bleed and unwanted noise. Here’s how you can achieve this:

  • Set up a dedicated space for recording vocals. This can be a vocal booth, a treated room, or even a makeshift isolation area using blankets and cushions. The goal is to minimize reflections and external noises that can affect the vocal recordings.
  • Position the electric guitar amplifier away from the vocal microphone to minimize bleed. Experiment with different placements to find the optimal distance that reduces the guitar’s sound from bleeding into the vocal microphone.
  • Consider using a dynamic microphone for the electric guitar instead of a condenser microphone. Dynamic microphones are less sensitive and can help isolate the guitar sound better, reducing the chance of bleed.
  • Use headphones for monitoring instead of relying solely on studio monitors. This will further reduce the risk of bleed and allow you to focus on each instrument separately.

By following these recording techniques, you can successfully record electric guitar and vocals at the same time, achieving a professional sound with minimal interference between the two instruments. Experiment with different settings and positions to find what works best for your setup, and don’t be afraid to make adjustments during the mixing process to achieve the desired balance. Happy recording!

Post-production And Mixing

Once you have recorded your electric guitar and vocals simultaneously, the next step is post-production and mixing. This is where you can refine and enhance your recordings to create a polished and professional sound.

Editing And Comping

In the editing and comping stage, you will go through your recorded tracks and make any necessary adjustments to ensure a seamless performance. Here’s what you need to do:

  1. Start by listening to each individual track to identify any mistakes, unwanted noises, or off-pitch sections. Using editing software, you can easily cut out these sections and replace them with cleaner ones from other takes if needed.
  2. Next, focus on comping. This process involves selecting the best parts from multiple takes and creating a composite track. By carefully listening to each take, you can choose the strongest performances of both the electric guitar and vocals to compile into one unified track.
  3. Pay attention to the timing and rhythm of your comped track. Make sure the guitar and vocals are perfectly aligned, and use tools like quantization to correct any timing issues if necessary.
  4. Remember to keep the editing and comping process natural. You want to maintain the authenticity and emotion of your original performance while removing any distractions or inconsistencies.

Balancing Guitar And Vocal Tracks

Creating a balanced mix between your electric guitar and vocal tracks is crucial to ensure both elements shine through in the final product. Here are some tips:

  • Start by adjusting the volume levels of each track. Ideally, both the guitar and vocals should be audible and clear without overpowering one another.
  • Use panning to position the guitar and vocals in the stereo field. By placing them slightly left and right of center, you can create a more immersive and spacious sound.
  • Consider using equalization (EQ) to carve out space for each element. For example, you might reduce the low frequencies on the vocals to allow the guitar’s bass frequencies to come through, or vice versa.
  • Experiment with different effects like reverb, delay, and compression to add depth, ambiance, and dynamics to your mix. However, use these effects sparingly and tastefully to retain the natural sound of your recordings.

By following these post-production and mixing techniques, you can take your combined electric guitar and vocal recordings to the next level, ensuring clarity, balance, and a professional finish.

How to Nail Simultaneous Electric Guitar and Vocal Recording!


Credit: www.ebay.com


How to Nail Simultaneous Electric Guitar and Vocal Recording!


Credit: www.quora.com


Frequently Asked Questions On How To Record Electric Guitar And Vocals At The Same Time


Can You Record Electric Guitar And Vocals At The Same Time?


Yes, you can record electric guitar and vocals at the same time by using a multi-track recording setup. Connect your electric guitar and microphone to an audio interface with multiple inputs, and use recording software to capture both signals simultaneously.


What Equipment Do I Need To Record Electric Guitar And Vocals Together?


To record electric guitar and vocals simultaneously, you will need an audio interface with multiple inputs, a microphone, cables to connect your guitar and microphone to the interface, and recording software on your computer. Additionally, you may want headphones for monitoring and a microphone stand for convenience.


How Do I Set Up My Recording Space For Electric Guitar And Vocals?


To set up your recording space for electric guitar and vocals, make sure you have a quiet environment to minimize unwanted background noise. Position your microphone to capture your vocals effectively, and place your guitar amp at a reasonable distance to avoid microphone bleed.


Experiment with microphone placement and room acoustics for optimal results.


Can I Use Effects While Recording Electric Guitar And Vocals Together?


Yes, you can use effects while recording electric guitar and vocals together. Many recording interfaces and software offer effects plugins that can be applied in real-time during recording. Experiment with different effects to enhance your sound, but be mindful not to overdo it and maintain a balanced mix.


Conclusion


Achieving a professional sound while recording both electric guitar and vocals simultaneously requires planning and practice. With the right equipment, technique, and mindset, you can create a seamless and dynamic recording. By following the tips and tricks outlined in this post, you can make the most out of your recording sessions and elevate your music production skills.


Categories
Archive Audio Production

Get Youtube Content ID For Your Music: Unlock Earnings!

To get a YouTube Content ID for your music, you must work with a YouTube partner or use a certified Content ID provider. Obtaining a Content ID protects your music and monetizes its use across YouTube.


In the dynamic digital world, musicians and content creators need to safeguard and monetize their creative outputs. YouTube Content ID serves this purpose impeccably, serving as a digital fingerprint for your music. By availing of this service, artists ensure that their music is not only protected but also earns revenue when other YouTube users incorporate it into their videos.


It’s a vital step for any musician looking to maintain control over their work and benefit from the global reach of the YouTube platform. Engaging with a trusted partner to access this service simplifies the process, securing your creations while allowing you to focus on producing more captivating content.


Introduction To Youtube Content Id

YouTube Content ID is a powerful system for creators and music rights holders. It helps to manage and monetize copyrighted content on YouTube. Creators can upload their music and allow YouTube’s advanced scanning algorithms to identify when their content gets used. This ensures creators get their fair share of revenue generated from their music. Entering the realm of YouTube Content ID is the first step toward protecting and monetizing your creative work.

The Role Of Content Id In Monetizing Music

Monetizing music on YouTube involves more than just uploading and sharing content. Content ID steps in as a key player. Here’s how it works:

  • Automatic Identification: When you submit your music to Content ID, YouTube scans videos across the platform to find matches of your content.
  • Claiming Content: If your music is found in someone else’s video, Content ID automatically claims the content on your behalf.
  • Revenue Options: You can choose whether to monetize the matched videos by placing ads, to track them, or to block them outright.

This system ensures that you benefit financially every time your music is used on the platform.

How Content Id Protects Artists And Composers

Content ID is not only about monetization. It’s also about protecting the rights of artists and composers. Protection is critical, and this is how Content ID helps:

  1. Digital Fingerprinting: Your music receives a unique digital fingerprint which ensures precise identification.
  2. Control Over Use: You maintain control over your music, deciding how and where it can be used across YouTube.
  3. Illegal Usage Alert: If unauthorized usage is detected, Content ID alerts you, allowing you to take action.

Artists and composers find peace of mind with Content ID as it guards against unauthorized use and ensures credit for their creative endeavors.

Get Youtube Content ID For Your Music: Unlock Earnings!


Credit: m.facebook.com


Eligibility For Youtube Content Id

Do you want to protect and monetize your music on YouTube? Understanding the eligibility for YouTube Content ID is key. This powerful tool helps artists track and manage their content. Let’s run through what you need to qualify.

Criteria For Accessing Content Id

Content ID is not for everyone. YouTube has specific requirements:

  • You must own exclusive rights to the content.
  • Your content should be original and distinctive.
  • A good amount of your content must be uploaded and viewed on YouTube.
  • Content cannot be public domain or royalty-free.

These rules ensure only rightful owners get access.

Common Misconceptions About Eligibility

Many think any content can acquire Content ID. This is not true. Clear up these myths:

Misconception Reality
Small channels qualify easily. Channel size does not guarantee access.
Content ID is automatic. You must apply and meet criteria.
All music genres are eligible. Only music with clear rights does.

Understanding these points helps clarify eligibility.

Registering Your Music With Content Id

Are you ready to protect your music on YouTube? It’s time for Registering Your Music With Content ID. This guide will make the process smooth for you.

Step-by-step Guide To Submission

Follow these simple steps to submit your music:

  1. Create an account with a Content ID provider.
  2. Compile your music tracks into a single digital folder.
  3. Fill out the application with all required details.
  4. Upload your music using the provider’s instructions.
  5. Wait for approval from the Content ID system.

Be thorough. Mistakes can delay the process. Allow time for your music to be registered.

Potential Challenges And How To Overcome Them

Registering can have its hurdles. Here’s how to handle them:

  • Eligibility Issues: Ensure you own all the rights to your music. Content ID requires this.
  • Incorrect Metadata: Double-check all music info. Accuracy is key to avoid rejection.
  • Delays in Approval: Be patient. Follow up if needed, but know the process takes time.

Remember, you can always seek help from the provider if stuck.

Maximizing Your Earnings

Maximizing Your Earnings through YouTube Content ID lets you make money from your music. This feature ensures you get paid when someone else uses your work. Let’s dive into strategies to boost your revenue with Content ID.

Strategies For Increasing Content Id Revenue

  • Register All Your Music: Make sure every song you own is enrolled in Content ID.
  • Choose a Good Digital Distributor: Pick one that maximizes your presence on YouTube.
  • Use Metadata: Fill in all details about your track to help the system find matches.
  • Promote Covers and Use: Encourage covers that can earn you more through Content ID.
  • Collaborate: Team up with other creators to boost your song’s popularity and claims.

Monitoring And Managing Claims

Task Importance
Check Your Claims Regularly Maintain control over your content’s usage.
Dispute Invalid Claims Guard against false claimants who take your earnings.
Update Ownership Info Ensure your claims stay accurate after changes.

Keep an eye on your videos and claim earnings. This vigilance keeps your revenue flowing. Take charge, and watch your earnings from YouTube Content ID climb!

Understanding Your Analytics

As a music creator on YouTube, mastering the Content ID system can amplify your success. Recognizing trends, understanding viewer behavior, and improving your content strategy are pivotal. Detailed analytics provides insights into the performance of your music. Let’s unlock the power of Content ID analytics. Get ready to turn data into action.

Interpreting Content Id Reports

Content ID reports are treasure troves of information. These reports give you visibility into how often your music is used across YouTube. Understanding these metrics is the first step to maximizing your earnings.

  • Claims: Tracks where your music was detected.
  • Views: Shows how many times your music got played.
  • Revenue: Details your earnings from these views.

Link these metrics with viewer trends to make informed decisions. Dive into which songs perform best and why. Use this to direct your creative efforts.

Using Analytics To Improve Content Strategy

Grow your channel by leveraging data from Content ID. Look for patterns in viewer engagement and adapt accordingly. Content strategy optimization is a continuous journey.

Metrics Insights Action
Peak View Times Identify when your audience is most active. Schedule releases around these times for maximum impact.
Geographic Data Find out where in the world your music hits home. Consider language and cultural influences in your new music.
Engagement Metrics See how viewers interact with your content. Refine content length and style to boost engagement.

Implement changes, track progress, and refine. Success in content creation comes from learning and adapting.

Get Youtube Content ID For Your Music: Unlock Earnings!


Credit: twitter.com


Alternative Monetization Options

For musicians, the digital landscape is rich with opportunities. While YouTube’s Content ID system is a popular way to monetize music, it’s not the only option. Below, we explore alternative strategies for generating revenue on the platform.

When Content Id Isn’t Available

Sometimes Content ID may not be an option. This could be due to eligibility issues or copyright disputes. In such cases, you still have choices to bring in earnings from your music.

  • Direct donations from viewers can support your work.
  • Creating exclusive paid content can drive fan support.
  • Merchandise sales can be promoted directly through videos.

Other Revenue Streams For Musicians On Youtube

Diversification is key to consistent earnings. Let’s look at some lucrative revenue streams beyond Content ID.

You can turn your vision into income through different methods.

Revenue Stream Details How to Start
Channel Memberships Subscribers pay monthly for perks. Enable memberships on your channel.
Super Chat & Super Stickers Fans pay to highlight messages. Activate on your YouTube account.
Affiliate Marketing Earn by promoting products. Join affiliate programs, include links.
  1. Keep a regular upload schedule to engage viewers.
  2. Interact with your fanbase through comments.
  3. Collaborate with other artists for exposure.


Get Youtube Content ID For Your Music: Unlock Earnings!


Credit: www.sourceaudio.com


Frequently Asked Questions Of Get Youtube Content Id For Your Music


What Is A Youtube Content Id?


The YouTube Content ID is a unique identifier that YouTube assigns to audio and video content. It’s used to manage copyright claims on the platform, tracking instances where your content is used by others.


How Do I Get Content Id For My Music?


To obtain a Content ID for your music, you must first become a YouTube Partner or work with a digital rights management company. They submit your tracks to YouTube’s Content ID system on your behalf.


Can Independent Artists Use Youtube Content Id?


Yes, independent artists can use YouTube Content ID. However, they usually need to go through a third-party company, as YouTube generally does not provide Content ID directly to individuals.


What Benefits Does Youtube Content Id Provide?


YouTube Content ID allows content creators to monetize their work on the platform. When someone uploads a video including your music, Content ID helps you earn revenue from that use.


Conclusion


Securing a Content ID for your music enhances your rights management on YouTube. This process ensures you earn revenue and retain creative control. As an artist or producer, taking this step is crucial for protecting your work online. Embrace the power of Content ID; your music deserves this security.

Categories
Archive Audio Production

Why Should I Get My Song Mixed: Unleash Your Musical Potential

Getting your song mixed enhances sound quality and ensures all elements blend harmoniously. Engaging mixing services elevates your music’s professionalism and appeal, captivating listeners and potentially boosting your career.


As technology advances, quality mixing becomes essential for standing out in the competitive music industry. A well-mixed song can bring out the best in your vocals and instrumentation, creating a polished and cohesive sound that resonates with your audience. Additionally, professional mixing can help correct any imperfections and enhance the overall balance, clarity, and impact of your music.


Partnering with an experienced mixing engineer can take your music to the next level, making it stand out in a saturated market and increasing its potential for success.

Why Should I Get My Song Mixed: Unleash Your Musical Potential


Credit: www.facebook.com


The Importance Of Professional Mixing

Welcome to the world of professional mixing! Whether you are a budding artist, an aspiring musician, or a seasoned producer, the importance of professional mixing cannot be overstated.

Enhancing Sound Quality

Professional mixing takes your raw tracks and enhances sound quality to make them shine. It balances different elements to create a cohesive and polished sound.

Balancing And Polishing

By balancing levels, frequencies, and stereo imaging, professional mixing brings clarity and precision to your music. It polishes every aspect to ensure a seamless and engaging listening experience.

Impact On Listener Experience

In the music industry, the mixing process plays a crucial role in enhancing the overall quality of a song. One significant aspect where mixing has a profound impact is on the listener experience. Effective mixing can significantly affect how the audience connects with a song, influencing their emotions and engagement levels.

Creating Emotional Connection

Mixing can evoke powerful emotions in listeners by balancing and enhancing various elements of a song such as vocals, instruments, and effects.

  • It can heighten the impact of lyrical content, making it more meaningful and relatable.

Increasing Engagement

Well-crafted mixing can capture listeners’ attention and maintain their interest throughout the song.

  • It can create a dynamic listening experience by highlighting different musical nuances.

Industry Standards And Competition

When it comes to the music industry, it’s essential to understand the significance of meeting industry standards and standing out amidst competition. The quality of your song can determine whether it will gain the attention it deserves. Let’s delve into the importance of meeting professional expectations and how it allows you to stand out in the market.

Meeting Professional Expectations

Getting your song mixed to industry standards is vital for a competitive edge. Quality sound is the cornerstone of any professional music production. By adhering to these standards, your song is more likely to captivate audiences and industry professionals alike. A polished and professional mix can make the difference between a song that blends in and one that stands out.

Standing Out In The Market

With the vast number of songs released daily, setting yourself apart from the competition is imperative. A professionally mixed song sets a high bar, elevating your brand image in the market. It demonstrates to your audience that you are committed to delivering top-notch quality. In such a competitive industry, this can be a decisive factor in earning recognition and success.

Potential For Commercial Success

When it comes to creating music, it’s not just about the talent and passion behind the lyrics and melodies. To achieve commercial success in today’s competitive music industry, there are several factors that come into play. One crucial element is the quality of your song’s mix. Having a professionally mixed song can make all the difference in attracting label interest and expanding your audience reach.

Attracting Label Interest

Labels are constantly on the lookout for new talent with potential for commercial success. They receive countless submissions from artists every day, making it crucial for your music to stand out from the crowd. A well-mixed song demonstrates that you take your craft seriously and have invested time and effort into creating a high-quality product. It showcases your professionalism and makes a strong first impression on labels.

A professionally mixed song also allows label executives to better envision the song’s potential in terms of radio play, streaming platforms, and overall marketability. They are more likely to take notice of your talent and consider signing you to their roster when they hear a polished, radio-ready sound.

Expanding Audience Reach

Having your song professionally mixed can significantly enhance its chances of reaching a wider audience. In today’s digital age, where music is readily accessible through numerous platforms, it’s essential to deliver a product that stands out from the vast sea of music available.

A well-mixed song ensures that your music sounds its best on various playback devices and systems, allowing listeners to fully enjoy your music without any distractions. It enhances the clarity of vocals, instruments, and the overall balance of the mix, providing a more immersive and captivating experience for the audience.

Moreover, a professionally mixed song is more likely to receive positive reviews from music critics and bloggers. This can lead to increased exposure for your music, as well as opportunities for features and collaborations with established artists, further expanding your reach to new audiences.

In conclusion, getting your song professionally mixed is a wise investment for any artist aspiring for commercial success. It not only attracts label interest but also expands your audience reach, putting you on the path to achieving your musical goals.

https://www.youtube.com/watch?v=8EXFwcjvAQs


Personal And Artistic Growth


Considering personal and artistic growth, having your song mixed can significantly enhance its overall quality, helping it stand out and reach a wider audience. Professional mixing can elevate the production value, ensuring that your artistic vision is fully realized and your music is ready for release.

Developing Signature Sound

In the music industry, having a unique and recognizable sound is essential for artists who want to stand out. When you get your song mixed by a professional, you have the opportunity to develop your signature sound. Mixing engineers are skilled in the art of enhancing the elements of a song, ensuring that each instrument and vocal is balanced and blended seamlessly. They use their expertise to bring out the best in your music, capturing the essence of your style and helping you to create a sound that is uniquely yours.

Gaining Confidence

Getting your song mixed can be a transformative experience for any artist. Working with a professional mixing engineer not only improves the overall quality of your music but also boosts your confidence in your abilities. When you hear your song transformed into a polished, professional sounding track, it gives you a sense of accomplishment and validation. This newfound confidence can be invaluable as you continue to create and share your music with the world.

Why Should I Get My Song Mixed: Unleash Your Musical Potential


Credit: www.instagram.com


Why Should I Get My Song Mixed: Unleash Your Musical Potential


Credit: www.instagram.com


Frequently Asked Questions On Why Should I Get My Song Mixed


Why Is Getting My Song Mixed Important?


Getting your song mixed is important because it helps balance the different elements of your track, enhances the overall sound quality, and ensures that every instrument and vocal can be heard clearly. It also helps to create a professional and polished final product that will sound great on any sound system.


How Does Song Mixing Improve The Sound Quality?


Song mixing improves the sound quality by adjusting the levels, panning, and equalization of each track in your song. It helps to eliminate any unwanted background noise, enhances the clarity of the vocals, and makes sure that each instrument is sitting in the right place in the mix.


This results in a cleaner and more enjoyable listening experience for your audience.


Can I Mix My Own Song Without Professional Help?


While it is possible to mix your own song without professional help, it can be challenging if you are not experienced or have the necessary tools and software. Professional mix engineers have the knowledge, expertise, and specialized equipment to bring out the best in your music.


They can help you achieve a more polished and professional sound that may be difficult to achieve on your own.


How Long Does It Take To Mix A Song?


The time it takes to mix a song can vary depending on various factors such as the complexity and length of the track, the number of instruments and vocals involved, and the skill level of the mix engineer. On average, it can take anywhere from a few hours to several days to complete the mixing process for a single song.


Conclusion


Getting your song mixed is crucial for professional sound quality. It enhances the overall listening experience and ensures that your music stands out. By working with a skilled mixing engineer, you can elevate your music to new heights and grab the attention of your audience.


Don’t overlook the power of quality mixing for your music career.