Categories
Archive

How To Release A Mixtape

Releasing a mixtape requires promoting it online and offline, utilizing social media, marketing tactics, and networking. The process includes building a fanbase, creating a buzz, and targeting the right audience to improve the mixtape’s visibility and popularity.

How To Release A Mixtape

Credit: www.youtube.com

Set Your Goals

To release a mixtape successfully, you should start by clarifying your goals and deciding on a theme for your project. Next, create a track list, choose beats, and produce your songs. Finally, promote your mixtape on social media platforms and strive for a high level of engagement with your audience.

As an artist, releasing a mixtape is an exciting way to reach your target audience and showcase your unique sound. However, before you jump right into the recording studio, it’s important to set your goals for the mixtape in order to ensure its success. In this article, we’ll discuss the two essential steps for setting your goals: identifying your target audience and defining the purpose of your mixtape.

Identifying Your Target Audience

Knowing your target audience is crucial when creating and releasing a mixtape. Understanding who you’re making music for will help you tailor your sound and marketing efforts to appeal to that specific audience. To identify your target audience, consider the following:

  • Age group: Are your listeners teenagers or young adults? Or, are they middle-aged music lovers?
  • Gender: Is your music more geared towards males or females?
  • Genre: What genre(s) does your music fall under?
  • Location: Where are your listeners located?
  • Interests: What other artists or hobbies are your listeners interested in?

Once you have a clear picture of your target audience, you can use this information to develop a marketing strategy that appeals to them.

Defining The Purpose Of Your Mixtape

Your mixtape should have a clear purpose. This could be to showcase your skills as an artist, promote an upcoming album, or even introduce a new sound to your fans. Whatever your purpose may be, make sure it aligns with your target audience and the message that you’re trying to convey through your music. In addition to defining the purpose of your mixtape, you should also consider the following:

  • Length of the mixtape: How long will your mixtape be?
  • Guest features: Will you be featuring other artists on your mixtape?
  • Production quality: Will the mixtape be professionally produced or recorded at home?
  • Release date: When do you plan on releasing the mixtape?

By defining the purpose of your mixtape and considering these additional factors, you can create a cohesive and effective mixtape that resonates with your audience. In conclusion, setting your goals is a crucial first step in successfully releasing a mixtape. By identifying your target audience and defining the purpose of your mixtape, you can create a sound and marketing strategy that appeals to your listeners and helps you achieve your ultimate goal as an artist.

Plan Your Mixtape

Learn how to release your very own mixtape with ‘Plan Your Mixtape’. From song selection to promotion, this guide covers everything you need to know to make your mixtape a success.

As an aspiring artist, releasing a mixtape can be a crucial step towards establishing yourself in the music industry. While creating a mixtape requires immense talent and hard work, planning it can be equally important. Here is how you can plan your mixtape to make it a success:

Selecting Beats And Instrumentals

Beats and instrumentals play a vital role in making a mixtape successful. You need to ensure that the beats you select complement your style, personality, and message. Consider reaching out to your network or using online resources to find high-quality beats. While doing this, ensure that you have the legal permission to use the beats that you select.

Creating A Tracklist

A well-thought-out tracklist can significantly enhance the listening experience. A well-structured tracklist ensures that your mixtape flows smoothly, guiding the listener from one track to another seamlessly. Consider placing tracks that represent different emotions, beats, and melodies to keep the listener engaged throughout the mixtape.

Writing And Recording Music

One key aspect of releasing a successful mixtape is creating original music that resonates with your audience. Consider spending quality time writing and recording your music. Ensure that your lyrics have a clear message and that your approach is unique, captivating, and original. Remember that creating a successful mixtape requires hard work, dedication, and a lot of planning. By selecting beats, creating a tracklist, and writing original music, you can create a compelling mixtape that will help you advance your music career.

Produce And Edit Your Mixtape

Producing and editing a mixtape is an excellent way to showcase your music talents. To release a mixtape, you need to plan your songs, create a tracklist, and upload your mixtape online through music distribution platforms. With the right preparation and marketing strategy, anyone can release a successful mixtape and reach a wider audience.

Producing and editing your mixtape is crucial to ensuring that your listeners are satisfied with the final product. It is important to note that the quality of your mixtape should be your top priority. This means that you should take the necessary time and effort to produce and edit your music in a professional way. Here are some essential steps you should follow to produce a clean and polished mixtape.

Choosing A Studio Or Recording Equipment

Investing in the right recording equipment can make a huge difference when it comes to producing quality music. It is important to choose the right equipment based on your budget and needs. If you have a tight budget, you can opt for a home recording setup using a computer, microphone, and audio interface. However, if you have more money to spend, you could consider renting a professional recording studio with high-end equipment for a better quality recording experience.

Mixing Your Tracks

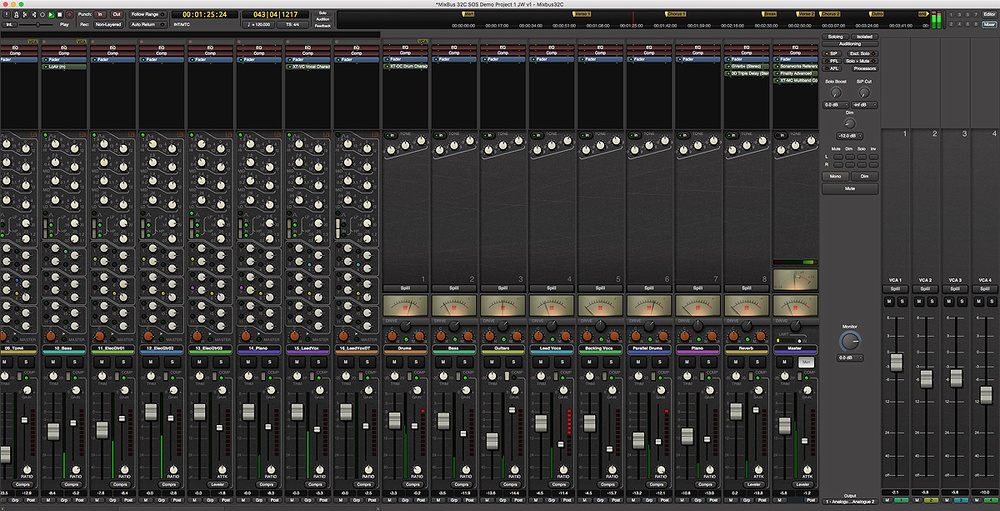
Mixing is the process of combining all the recorded tracks of your mixtape into a balanced and harmonious sound. During this process, you need to adjust the volume levels, equalization, panning, and effects to create a perfect mix. Keep in mind that the track levels should be consistent, and each instrument’s frequency spectrum should be clear and audible.

Editing Your Music For Clarity

Editing is the final step in the production process aimed at perfecting your tracks and eliminating errors. This step involves trimming or adding parts of the instrumental tracks, removing background noise, and adjusting the tempo and pitch to ensure consistency. During editing, make sure to listen carefully to each track to ensure that it is clear and distinct. In addition, it is important to ensure that there is enough silence at the start and end of each track to allow for a smooth transition between songs. In conclusion, producing and editing a mixtape is a long but satisfying process that requires a keen ear, patience, and skill. Understanding the basics of these processes and following the essential steps is vital for delivering a high-quality mixtape that your listeners will enjoy.

Promote Your Mixtape

The goal of releasing a mixtape is for it to be heard by as many people as possible. After all the hard work you’ve put in to create your mixtape, it’s now time to promote it. In this section, we’ll go over the different ways to promote your mixtape to gain optimal exposure. Follow these steps to get the word out efficiently and effectively.

Creating A Website Or Blog

Creating a website or blog related to your mixtape can help you gain exposure. It gives you a platform to tell your story, showcase your work, and build a following. Make sure to include the following:

ContentWrite a bio about yourself, an introduction about your mixtape, and the meaning behind it if there is one. Mention what inspired you to create it. Also, include a tracklist of your mixtape with links to the songs.
DesignMake it visually appealing, use high-quality images of yourself or artwork related to your mixtape and make sure it is mobile-responsive.
FunctionalityMake sure your website or blog is easy to navigate, quick to load, and has social media sharing buttons.

Engaging On Social Media Platforms

Social media is essential for promoting your mixtape. Make sure to establish a social media presence and engage with people interested in your work. Take advantage of these platforms:

  • Twitter: Share your mixtape and engage with followers by retweeting and responding to tweets.
  • Instagram: Use hashtags related to your mixtape and post high-quality visuals of the artwork and yourself.
  • Facebook: Create a Facebook page solely for your mixtape and invite people to like it. Share updates on the release and ask for feedback.

Collaborating With Other Artists

Collaborating with other artists can help expand your audience and introduce your mixtape to new listeners. Here are some ways to collaborate:

  1. Featured Artists: Ask other artists to feature on your mixtape or ask to feature on theirs.
  2. Shows: Perform at shows with other artists and network with them afterwards. You could even create a show around the release of your mixtape.
  3. Remix: Contact other artists to remix one of your songs or remix one of their songs.

By using these methods, you can promote your mixtape efficiently and reach a wider audience. Remember to be persistent and consistent with your promotion efforts. Good luck!

Prepare For Release

To successfully release a mixtape, start by creating a buzz by promoting and sharing your music with fans and followers. Plan ahead and set a release date, select the right platform to distribute your mixtape, and make sure your artwork and tracklist are engaging and eye-catching.

After all the hard work and dedication poured into your mixtape, it’s finally ready for release. But before you hit the publish button, it’s crucial to prepare for the launch. This step is just as critical as creating the music and will determine its success. Here are some essential things you need to do to prepare for release.

Creating Album Art And Graphics

The album art and graphics are the first impression your audience will have of your mixtape. It’s crucial to make it visually appealing and captivating. You can hire a professional graphic designer or use online tools like Canva or Adobe Spark to create your artwork. Make sure it’s high-quality, relevant to the music, and represents your brand. Including information like the tracklist and credits will also make it more informative.

Choosing An Appropriate Release Date

Choosing the right release date can significantly impact the success of your mixtape. Consider some factors like holidays, notable events, or other significant releases that can compete with yours. An ideal timeline is usually between two to four weeks, allowing ample time to promote and hype the release. Consider releasing it on a weekday when people are more active on social media and avoid releasing it on Fridays or weekends.

Digital Distribution Strategies

Nowadays, digital distribution is more convenient, cost-effective, and accessible in releasing your mixtape. Platforms like DistroKid, TuneCore, and CD Baby provide easy-to-use distribution services that get your mixtape on all major streaming platforms like Spotify, Apple Music, and Tidal. It’s also essential to create a Spotify artist page and social media accounts to promote and engage with your audience. In conclusion, preparing for a mixtape release is a crucial step that determines its success. Creating visually appealing artwork, choosing the right release date, and utilizing digital distribution platforms are essential elements to consider. Make sure to plan it well and promote it effectively to reach your target audience.
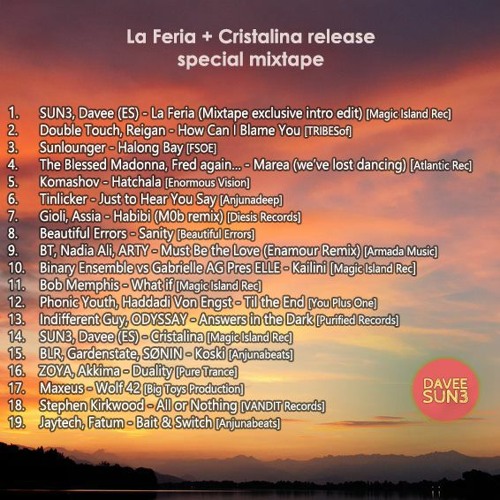
How To Release A Mixtape

Credit: soundcloud.com

Release Your Mixtape

Learn the step-by-step process of how to release a mixtape successfully. From planning, production, marketing, and distribution, this comprehensive guide covers all the necessary aspects for a successful release.

Releasing a mixtape is a big step for any aspiring musician and involves a lot of work, but it’s worth it in the end. You want to ensure that your mixtape release is a success and this requires planning and effort. Here are three steps to help you release your mixtape successfully.

Making Your Mixtape Available Online

Making your mixtape available online is essential in today’s digital age. You want to ensure that your mixtape is accessible to as many people as possible. You can upload your mixtape on various platforms, including SoundCloud, Audiomack, and DatPiff, among others. Take advantage of social media and promote your mixtape on all your social media accounts such as Facebook, Twitter, Instagram, and TikTok. Use relevant hashtags to reach a broader audience.

Hosting A Launch Party Or Listening Party

Hosting a launch party or listening party is a great way to celebrate your mixtape release with your fans and supporters. This event can be hosted online or in person, depending on your preference and resources. You can invite friends, family, and fans to listen to your mixtape and give feedback. You can also use this opportunity to sell merchandise such as t-shirts, hats, and posters.

Press Releases And Outreach

You need to get your mixtape in front of as many people as possible to increase its chances of success. One way to achieve this is through press releases and outreach. You can approach bloggers, music writers, and online influencers to promote your mixtape. Craft an email or press release that is compelling, informative, and concise. Include a link to your mixtape and a brief explainer of what it is about. Follow up with those who show interest and thank them for their support. Remember, your mixtape release is just the beginning. It’s a great way to get your music and name out there, but you need to keep promoting and hustling to gain new fans and achieve your dreams. Keep at it and never give up.

Analyze And Learn

Learn how to release a mixtape by analyzing successful releases, understanding your target audience, promoting on social media, networking with influencers, and creating buzz through live events and giveaways.

Releasing a mixtape can be thrilling, but it requires a lot of effort. Analyzing and learning from experience is crucial, as it ensures that you can improve the next time you launch a mixtape. Several factors determine the success of your mixtape, such as how you promote it, the quality of content, and engagement with your audience.

Tracking Your Downloads And Engagement

Keep track of your downloads and engagement to determine your mixtape’s reach. Checking the download numbers helps you evaluate the success of your mixtape and gives you insights into your audience’s preferences. Google Analytics is an excellent tool to track downloads. Additionally, keeping track of views on your website and interaction on social media allows you to gauge engagement levels. Use this data to identify the sources of traffic and how visitors interact with your content.

Engaging With Your Audience For Feedback

Communicate with your audience to learn their interests, what they love about your mixtape, and potential areas for improvement. You can use social media platforms to engage with your audience, respond to comments and messages. Additionally, you can create an email list to gather feedback from your listeners, which can be valuable for future releases. Using the feedback you’ve collected, you can create a better experience for your listeners in your next mixtape.

Adjusting Your Strategy Based On Feedback

Once you’ve gathered feedback from your audience, analyze it, and adjust your strategy accordingly. This involves refining what worked, removing what didn’t, and experimenting with new music styles. It may be helpful to seek the help of a professional music marketer to get feedback on your mixtape and how you can improve. It’s essential to make adjustments before your next release, and adapting your strategy can attract a more significant audience and ultimately lead to a successful mixtape. As a final point, make sure to have clear criteria for measuring the success of your mixtape. A mixtape is about reaching an audience and providing them with a unique experience. By analyzing the data and communicating with your audience, you can optimize future releases and take your career to new heights.

Keep Grinding

Releasing a mixtape involves hard work and dedication. To make it stand out, perfect your craft, create an impactful tracklist, and market heavily. Keep grinding through the process, and soon your mixtape will be ready for the world to hear.

Releasing a mixtape is no easy feat. It takes hard work, dedication, and a willingness to keep grinding even when things get tough. In this post, we’ll explore some tips and strategies for releasing a mixtape, including how to build a fan base, plan future projects, and continuously improve your craft. So, let’s get started!

Building A Fan Base

Building a fan base is essential to the success of any mixtape. Social media platforms like Twitter, Instagram, and TikTok can be incredibly useful for reaching new fans and engaging with your existing audience. Here are some tips for building your fan base:

  • Create engaging content that resonates with your fans
  • Collaborate with other artists and DJs in your genre
  • Promote your music on relevant blogs and websites
  • Participate in local shows and events to get your name out there

Planning Future Projects

Once you’ve built a solid fan base, it’s time to start planning your next move. This can include future mixtapes, collaborations with other artists, or even live shows. Here are some tips for planning future projects:

  1. Set specific goals for your music career
  2. Collaborate with artists and producers who complement your style
  3. Stay on top of industry trends and integrate them into your music
  4. Use feedback from your audience to inform future projects

Continuously Improving Your Craft

As an artist, it’s important to continuously improve your craft. This means honing your skills and seeking feedback from your audience and peers. Here are some tips for improving your craft:

  • Dedicate time each day to practicing your craft
  • Participate in music-related forums and discussions
  • Seek feedback from other artists and industry professionals
  • Stay up to date on new technology and software related to your craft

In conclusion, releasing a mixtape takes hard work and dedication. By building a fan base, planning future projects, and continuously improving your craft, you can increase your chances of success. So, keep grinding and never give up on your dreams!

How To Release A Mixtape

Credit: www.youtube.com

Frequently Asked Questions On How To Release A Mixtape

How Are Mixtapes Released?

Mixtapes can be released through various channels such as on online streaming platforms, physical copies in stores, or through a free download on artist websites. The release method depends on the artist’s preference and chosen distribution platform.

Where Do I Release My Mixtape?

To release your mixtape, you can upload it to music distribution platforms such as SoundCloud, Bandcamp, and DatPiff. You can also make it available on streaming services like Spotify and Apple Music through a digital distributor like DistroKid or TuneCore.

Choose the platform(s) that best align with your goals and target audience.

How Do You Make And Release A Mixtape?

To create and release a mixtape, you need to choose your music, organize the tracks and create a tracklist, select a cover design, and get your mixtape duplicated or uploaded to online platforms such as SoundCloud or YouTube. Additionally, promoting your mixtape on social media and through networking can help increase its reach and visibility.

Is It Legal To Make A Mixtape?

Yes, it is legal to make a mixtape as long as it includes music that you have legally obtained or created yourself. Making a mixtape of copyrighted music without permission is illegal and can result in legal action.

Conclusion

Overall, releasing a mixtape can be a thrilling experience for any aspiring musician. By following the steps outlined in this post and staying organized throughout the process, you can increase the chances of success and growth in your music career.

Remember to prioritize your audience, build a strong network, and leverage social media platforms to gain visibility. With the right mindset and approach, you can create a mixtape that resonates with your listeners and sets you apart in a crowded industry.

Good luck with your next release!

Categories
Archive

Get Music Heard

To get music heard, promote it on social media and music streaming platforms. A strong online presence can increase exposure to potential fans.

The music industry is highly competitive, and getting your music heard can be a difficult task. With so many different options available like social media, music streaming platforms, and blogs, it’s crucial to have a strong online presence to attract potential fans.

Utilize social media to create a strong brand image, share new releases, updates, and engage with your audience. Collaborating with other artists can also help to gain new fans and listeners. Additionally, consider reaching out to music blogs, radio stations, and playlists to get your music in front of a wider audience. By following these tactics, you can increase your chances of getting your music heard and growing your fanbase.

Importance Of Getting Music Heard

Getting your music heard is essential for aspiring musicians. By promoting and sharing your music through various channels, you increase your chances of gaining exposure, reaching a wider audience, and ultimately getting recognized in the industry.

Music has been around for centuries, and it still touches people in a unique way. There is something about listening to good music that soothes the soul, and this is why musicians strive to get their music to the masses. In today’s digital age, it is easier than ever to share our music with the world. However, just having your music on a streaming platform is not enough. It is crucial to get your music heard, and in this post, we will discuss the importance of doing so.

Impact On Career Growth

Getting your music to the masses is essential for career growth. If a musician wants to grow their career, they must work on expanding their fan base. The more people that listen to a musician’s music, the more they gain recognition and popularity. Gaining popularity is what leads to more opportunities, such as gigs, tours, endorsements, and collaborations. A musician’s network and following are essential elements that help to grow their career, and it all starts with getting their music heard.

Building A Fanbase

Getting your music heard is the foundation for building a fan base. As a musician, you want people to listen to your music and connect with it. By building a fan base, a musician can create a community of people that appreciate their music and support them. This support comes in many forms, from attending concerts and shows to sharing their music with others. A robust fan base can propel a musician to the top of their industry and can be a valuable asset for future career growth. In conclusion, it is of utmost importance for a musician to get their music heard. It is the foundation for career growth and building a fan base. As a musician, it is important to work on expanding your listeners, using the available digital and traditional marketing channels. The more people that hear your music, the more you grow your career and your community.

Get Music Heard

Credit: www.youtube.com

Strategies For Getting Music Heard

Getting your music heard is crucial for success in the industry. Utilizing social media, submitting to influential playlists and blogs, and networking with industry professionals are just a few strategies to get your music heard. With persistence and a strong online presence, you can increase your chances of reaching a wider audience and gaining recognition in the competitive music world.

Musicians, whether beginners or established, need their music to reach a vast audience. While many artists pour their hearts and souls into their music, their efforts are pointless if their creations are not heard. But with so many ways to promote music, where should one start? You’re in luck; this blog post will suggest some strategies for getting your music heard by thousands, if not millions, of people.

Promotion On Social Media

Social media platforms have changed the way music is promoted worldwide, and all musicians must grab opportunities presented by these platforms. In today’s digital age, social media channels offer free marketing access to a limitless pool of listeners of all demographics worldwide. Social media platforms such as Facebook, Twitter, Instagram, TikTok, and SoundCloud, among others, are great music marketing channels. To promote your music, create accounts and publish updates regularly, sharing your music inspirations and constantly engaging with your followers. You can also collaborate with other artists and music influencers with strong social media followings to widen your promotional reach. With eye-catching visuals and engaging content, you can attract a new, more diverse, and engaged audience base for your music.

Creating A Website

Creating a personalized website is another excellent strategy for getting music heard. An artist’s website is an extension of their brand and an excellent way to communicate with fans. Also, since it’s your website, you can share as much content as you want and as often as you’d like. When building your website, ensure that it’s user-friendly, easy to navigate, and optimized for search engine optimization (SEO). You should include your latest music releases, upcoming shows, and tours, merchandise store, photos, and videos. You can also add a blog section to share your music inspirations and upcoming projects, and enable your fans to reach you through contact forms and social media links.

Collaborating With Influencers

Collaborating with influencers in your niche can help to increase exposure for your music. Influencers already have a loyal following base, and they will introduce your music to their audience, thereby boosting your followers. Identify influencers or bloggers in your genre or related fields and collaborate with them by offering them exclusive content to use on their platforms, such as snippets of your latest song or a behind-the-scenes vlog. You can also offer free tickets to shows or other exclusive content in exchange for collaborations. Such opportunities will help to expand your reach and raise awareness of your music. In conclusion, these strategies are just but a few of several ways that musicians can use to promote and market their music. By creating a social media presence, building a website, and collaborating with influencers, artists can grab opportunities presented and market to millions of potential listeners.

Utilizing Streaming Services

Utilizing streaming services can be a great way to get your music out to the masses. With platforms like Spotify and Apple Music, you can easily upload and share your music with your audience, making it more accessible to listeners around the globe.

With the right strategy in place, you can get your music heard by more people than ever before.

Utilizing Streaming Services As a music artist, it’s important to have your music heard by your fans and potential new listeners. Thanks to the internet, streaming services like Spotify and Apple Music have made it easier for musicians like you to get your music out there. In this post, we’ll explore how you can utilize these platforms to get your music heard. Spotify for Artists As one of the most popular music streaming services in the world, Spotify is a great place to get your music heard. Spotify for Artists is a platform that allows you to manage your artist profile, view your stats and insights, and promote your music to new listeners. Some of the features of Spotify for Artists include: – Claiming your artist profile and customizing it with images and a bio. – Accessing your stats and insights to see how many streams your tracks are getting, where your listeners are coming from, and which playlists your music has been added to. – Promoting your music with tools like Artist Pick, which allows you to choose a track or playlist to feature at the top of your profile, and Marquee, which lets you promote new releases to your fans. Apple Music for Artists Apple Music is another popular streaming service that can help you get your music heard. Apple Music for Artists is a similar platform to Spotify for Artists, allowing you to manage your artist profile, view your stats and insights, and promote your music to new listeners. Some of the features of Apple Music for Artists include: – Claiming your artist profile and customizing it with images and a bio. – Accessing your stats and insights to see how many streams your tracks are getting, where your listeners are coming from, and which playlists your music has been added to. – Promoting your music with tools like Apple Music for Artists badges, which you can display on your website or social media to let your fans know they can stream your music on Apple Music. In conclusion, utilizing streaming services like Spotify and Apple Music for Artists can help you get your music heard by your fans and potential new listeners. By claiming your artist profile, accessing your stats and insights, and promoting your music with tools like Artist Pick and Marquee (on Spotify) or badges (on Apple Music), you can get your music in front of more people and grow your fanbase.

Get Music Heard

Credit: blog.groover.co

Building A Network

Building a network is an essential step towards getting your music heard. It helps you establish yourself in the industry, find opportunities, and collaborate with like-minded individuals. Here are some ways to build your network:

Connecting With Local Musicians

Building relationships with local musicians can be a great way to find new collaborators, learn about the music scene in your area, and get exposure to new audiences. Attend local shows, join music groups on social media, and participate in local music events to meet new people. Exchange contact information and follow each other on social media to stay connected and collaborate on future projects.

Networking With Music Industry Professionals

Networking with music industry professionals can be a daunting task, but it’s an essential part of building your career as a musician. Attend music conferences, festivals, and workshops to meet labels, managers, promoters, and other industry insiders. Introduce yourself, exchange business cards, and follow up with a thank-you email. Stay in touch with your connections and keep them updated on your latest projects and achievements.

Networking is a gradual process, and it takes time to build relationships that can lead to opportunities in the industry. Be patient, persistent, and keep working on your craft. Continuously improve your skills and create high-quality content that can help you stand out in a crowded market.

The Role Of Live Performances

Live performances play an integral role in getting music heard. They allow artists to connect with their audience and showcase their talent in a unique way. By performing live, musicians can leave a lasting impression and build a fanbase that can support their career in the long run.

Live performances play a crucial role in an artist’s career. As a musician, you can have a presence on social media and streaming platforms, but there is no substitute for a live performance. It is a chance to showcase your talent, build a fanbase, and ultimately get your music heard by a larger audience. In this article, we will discuss how to find gigs and maximize your live performance to help you get your music heard.

Finding Gigs

Finding gigs can be challenging, especially for new or emerging artists. Here are a few tips to help you get started:

  • Network – attend local open mic nights, connect with other musicians, and music industry professionals.
  • Join a music collective – join a community of musicians who share resources, gigs, and contacts.
  • Use online platforms – browse gig listings on websites such as Sonicbids or GigSalad.

Maximizing Your Live Performance

Once you have secured a gig, it is important to make the most of this opportunity. Here are some tips to help you maximize your live performance:

  1. Practice, practice, practice – rehearse your performance until you are confident.
  2. Engage with your audience – connect with your audience, share stories behind your songs, make them feel a part of the experience.
  3. Showcase your personality – be yourself, let your personality shine through, and connect with your audience on a personal level.
  4. Promote your music – take advantage of the opportunity to promote your music. Have merchandise available, collect email addresses from potential fans, and share your social media handles with them.
  5. Stay professional – be on time, respect the venue and staff, and always aim to leave a good impression.

In conclusion, live performances are an essential aspect of getting your music heard. Follow the tips provided to find gigs and maximize your performance to build your fanbase and ultimately achieve success as a musician.

Get Music Heard

Credit: www.careersinmusic.com

Understanding Music Marketing

Understanding music marketing is crucial for artists who want to get their music heard. With the rise of social media, it’s possible to reach a wider audience and grow your fan base, but it requires a strategic approach to be successful.

Focus on creating quality content, building relationships with influencers, and engaging with your fans to maximize your reach.

Music marketing involves promoting and selling music to the target audience. Get Music Heard understands the importance of music marketing, and how it can help musicians build a loyal fan base, increase sales, and achieve their goals. One key aspect of music marketing is understanding the target audience. Identifying your audience is critical if you want to reach the right people with your music.

Target Audience Identification

Identifying your target audience is crucial for the success of your music marketing strategies. Your target audience is the group of people who are most likely to enjoy and appreciate your music. To identify your target audience, you need to consider factors such as age, gender, location, musical interests, and other relevant demographics. You can use tools such as social media analytics and online surveys to gather information about your audience. By understanding your target audience, you can create music that resonates with them and tailor your marketing strategies to reach them effectively.

Brand Building

Brand Building is another important aspect of music marketing. It involves creating a unique brand identity that distinguishes your music from others. Your brand should communicate your style, genre, and personality in a memorable way. Building a strong brand can help you stand out in a crowded market, increase brand recognition, and attract more fans. To build your brand, you need to create a compelling image through album artworks, logos, social media profiles, and other promotional materials. Consistency is key when building a brand, so make sure all your marketing materials are cohesive and aligned with your brand message.

Measuring Success

As a musician, it’s not just about creating great music – it’s about getting that music heard. In today’s digital age, there are more ways than ever to get music out there, but with so many options, it can be difficult to know which strategies are working. That’s where measuring success comes in – by tracking metrics like streaming data and social media engagement, you can get a clearer picture of where your music is making waves and where there may be room for improvement.

Analyzing Streaming Data

One of the most important ways to measure the success of your music is by looking at streaming data. By analyzing metrics like the number of streams, listener demographics, and geographic location of your listeners, you can get a better understanding of which platforms and markets are most receptive to your music. With this information, you can adjust your promotional efforts accordingly, focusing on the platforms and regions where you’re seeing the highest engagement.

Tracking Social Media Engagements

Another key way to measure success in the music industry is by tracking social media engagement. Platforms like Instagram, Twitter, and Facebook offer a wealth of data on how your fans are interacting with your content, from likes and comments to shares and retweets. By measuring these engagements, you can get insights into which types of content are resonating with your audience and adjust your social media strategy accordingly.

Overall, measuring success as a musician involves keeping a close eye on metrics like streaming data and social media engagement. By tracking these metrics and adjusting your promotional efforts accordingly, you can ensure that your music is getting heard by the right people, at the right times, and on the right platforms.

Frequently Asked Questions On Get Music Heard

How Do You Make Music Heard?

To make your music heard, you can utilize social media platforms such as SoundCloud, YouTube, and Instagram. Networking and collaborating with fellow artists in the music industry can also help boost your exposure. Finally, consider performing live shows and submitting your music to blogs and playlists to expand your reach.

How Do You Get People To Hear Your Music?

To get people to hear your music, you should promote it on social media. Use hashtags, interact with listeners and collaborate with other artists. Submit your tracks to music blogs and streaming platforms. Play live shows and participate in contests.

Build a loyal fan base through consistency and quality music.

How Do I Get Listens To My Music?

To get more listens for your music, try to promote it on social media, streaming platforms, and to your existing fan base. Collaborate with other artists, perform live shows, and offer exclusive content to your followers. Consistency is key, so keep creating and sharing quality music regularly.

Don’t forget to engage with your audience and seek feedback to improve your work.

How Can I Get My Song Heard On The Radio?

To get your song heard on the radio, you need to follow these steps: 1. Create a high-quality recording of your song. 2. Research and target the appropriate radio stations and DJs. 3. Submit your song to the stations via their submission process or directly to the DJs.

4. Follow up with the stations or DJs to ensure they have received your submission. 5. Promote your song through social media and other platforms to gain buzz and increase the chances of it being played on the radio.

Conclusion

Having your music heard is now easier than ever before thanks to the power of the internet. By creating a strong online presence, utilizing social media, and optimizing your content for search engines, you can reach a wider audience and gain more exposure.

Remember to focus on quality over quantity and engage with your fans to build a loyal following. By following these tips and consistently putting in the effort, you can get your music heard and build a successful music career.

Categories
Archive

How To Achieve Loud Mixes

Achieving loud mixes involves proper gain staging, compression, and EQ, in addition to careful panning. A well-rounded introduction to achieving loud mixes involves understanding the vital components of producing high-quality sound.

A mix that is too quiet can be uninspiring and easily overlooked. However, a mix that is too loud can be difficult to listen to and cause ear fatigue. Therefore, it is essential to understand how to achieve a loud mix that is pleasing to the ear.

This requires focus on several important factors such as proper gain staging, compression, and EQ, as well as attentive panning. We will explore these aspects in-depth, providing practical tips for achieving a powerful and masterful mix.

How To Achieve Loud Mixes

Credit: www.soundonsound.com

Understanding Audio Levels

Achieving loud mixes requires understanding audio levels. Paying careful attention to gain staging, compression, and limiting can help you achieve the desired loudness without sacrificing quality or clarity. By gaining a solid understanding of audio levels, you can create professional-sounding mixes that stand out from the crowd.

Audio mixing involves combining different tracks into one, and achieving a loud mix is often one of the top priorities for mix engineers. Understanding audio levels is one of the most important aspects of achieving a loud mix. In this post, we’ll explore the different types of audio levels and their impact on the final sound output.

Db Levels And Human Perception

The decibel (dB) is the unit of measurement used to quantify the volume or loudness of audio. The human ear can perceive sound in a wide range of dB levels, from the faintest whisper at 0 dB to the loudest sound at around 120 dB. When mixing audio, it’s important to keep in mind that our perception of loudness is not linear. For example, a 10 dB increase in volume may sound twice as loud to the human ear.

Peak Vs. Rms Levels

Peak level refers to the highest instantaneous level of a waveform, whereas RMS (root mean square) level describes the average power of an audio signal over time. Peak level is important in controlling distortion and preventing clipping, while RMS level gives an overall sense of the loudness of the audio. When mixing, it’s essential to balance peak and RMS levels to achieve a coherent and cohesive sound.

Clipping And Distortion

Clipping occurs when the audio signal exceeds the maximum peak level allowed by the recording medium, which leads to distortion. Distortion, in turn, can cause unpleasant harmonics and affect the overall quality of the mix. It’s important to monitor the peak levels and avoid clipping by adjusting the input levels, using dynamic range compression, or adjusting faders and EQ. To achieve a loud mix, understanding audio levels is crucial. By balancing peak and RMS levels, monitoring peak levels to avoid clipping, and avoiding unnecessary distortion, you can achieve a cohesive and powerful mix that leaves a lasting impression on your listeners.

How To Achieve Loud Mixes

Credit: www.youtube.com

Balancing Your Mix

If you want to achieve a loud mix without compromising on quality, you need to focus on balancing your mix in the right way. Balancing your mix includes proper gain staging, setting levels for individual tracks, and using panning and stereo imaging techniques. In this article, we’ll explore these techniques and explain how you can use them to achieve a loud mix that sounds great on any speaker.

Gain Staging

Gain staging is the process of optimizing the levels of your audio signal at each stage of your signal chain. You need to ensure that you’re not pushing any part of your signal chain too hard. If you do, you’ll end up with a distorted and overdriven mix that won’t sound good on any speaker.

The first step in gain staging is to set the levels of your input sources. You should adjust your input levels so that the signal hitting your first processor is at an optimal level. This will prevent you from clipping your signal later on in the chain.

Next, you need to set the levels of your processors, such as EQs, compressors, and limiters. You should aim to get your levels as hot as possible without causing any distortion. The goal here is to optimize the signal-to-noise ratio of your mix.

Setting Levels For Individual Tracks

Setting levels for individual tracks is all about creating a balanced mix where each part of the mix can be heard clearly. You should aim to set the levels of each track in relation to the other tracks in your mix. This will ensure that each part of your mix has enough space to breathe and be heard.

One way to set levels for individual tracks is to use a reference track. This is a track that you know sounds good on different speakers. You should use this reference track as a guide to set the levels of each track in your mix.

Using Panning And Stereo Imaging

Panning and stereo imaging are important techniques that can help you achieve a loud mix. Panning is the process of placing sounds in the stereo field. Stereo imaging is the process of manipulating the width of the stereo image.

You should aim to use panning and stereo imaging to create a sense of space in your mix. You should place sounds that occupy similar frequency ranges at different positions in the stereo field. This will create separation between the sounds, making them easier to identify and hear.

Another way to use panning and stereo imaging is to create a stereo image that is wider than the stereo field. This can be done by using techniques such as stereo widening, stereo enhancement, and stereo delay.

In Conclusion

By following these techniques, you can achieve a loud mix that sounds great on any speaker. Balancing your mix is all about finding the right balance between gain staging, level setting, panning, and stereo imaging. With a little practice, you can achieve the perfect balance and create mixes that sound professional and engaging.

Creatively Enhancing Your Mix

Getting a loud mix is not just about turning up the volume. Creativity and mastering several technical aspects are also necessary. One of the keys to getting a louder mix is to enhance it creatively. Here are some creative ways to enhance your mix:

Adding Harmonic Content With Saturation

Saturation is a technique that adds harmonic content to your mix, making it sound richer and fuller. It works by introducing harmonics to the original sound, creating the illusion of volume without clipping or distorting the mix. You can use analog hardware or plugins to achieve saturation. Saturation plugins allow you to easily dial in the amount of saturation you want, making it a powerful tool for enhancing your mix.

The Role Of Compression And Limiting

Compression and limiting are essential tools for achieving a loud mix. Compression is used to even out the levels in your mix, while limiting is used to prevent any peaks from going above a certain threshold. Together, they make the overall mix louder and more consistent. It’s important to use compression and limiting in moderation, as too much can cause unwanted distortion and affect the overall sound of your mix.

Using Eq To Carve Out Space

EQ is used to adjust the balance and tone of individual tracks in your mix. When used correctly, EQ can help carve out space for each instrument to sit within the mix without clashing with each other. It’s important to remember that EQ affects the overall tone of the mix, so small adjustments can go a long way. Using a spectral analyzer can help you identify frequency clashing, enabling you to fine-tune each track individually.

In conclusion, enhancing your mix creatively can help you achieve better results when it comes to getting a louder mix. Adding saturation, using compression and limiting in moderation, and using EQ to carve out space are all powerful techniques that can help your mix stand out and sound great. Give these techniques a try and see the difference they can make in your mixes!

Processing Drums

To achieve loud mixes, the processing of drums is crucial. Start by properly recording and tuning the drums, then make use of compression, equalization, and limiting to balance the sound and enhance its impact. Experiment with different processing techniques to achieve the desired result.

When it comes to achieving a loud mix, processing drums is crucial. Drums make up the foundation of any song, and getting them to sound punchy and powerful can make all the difference. In this post, we’ll look at some essential techniques for processing drums to help you achieve a mix that’s both powerful and dynamic.

Eqing The Kick And Snare

EQing your kick and snare is essential when aiming for a loud mix. The kick and snare are the backbone of your drum track and need to be the focus of your EQing. Here are some tips to help you get started:

  • Use a high-pass filter to remove any unwanted low-end frequencies from the kick and snare.
  • Boost the frequency range of the kick and snare to enhance their attack and presence.
  • Cut any frequencies that clash with other elements of the mix, such as the bass or guitars.

Using Parallel Compression On Drums

Parallel compression is a powerful technique for making your drums sound more punchy and powerful. Here’s how to do it:

  1. Create a copy of your drum bus and apply heavy compression to it.
  2. Mix the compressed signal back in with your original drum track, adjusting the levels to taste.

Adding Excitement With Reverb And Delay

Reverb and delay can add depth and excitement to your drum track, making it sound more dynamic and interesting. Here are some tips for using reverb and delay on your drums:

  • Use short, snappy reverb on your snare to give it more snap and presence.
  • Use longer reverb on your toms and cymbals to give them more space and depth.
  • Use delay on your snare and toms to create a sense of movement and excitement.

By using these techniques, you’ll be well on your way to achieving a loud, powerful drum mix that will make your tracks stand out. Remember, there’s no one-size-fits-all approach to processing drums, so experiment and find what works best for your mix.

Treating Vocals

Achieving loud mixes for vocals requires proper treatment. Utilize equalization to remove unwanted frequencies and compression to balance the levels. Adding reverb and delay can help create depth, while limiting and maximizing can help the overall loudness.

De-essing And Plosive Control

De-essing and controlling plosives are crucial in treating vocals. De-essing is the process of removing the harsh “s” or “sh” sounds that can distract the listener. Plosives, on the other hand, are the “p” and “b” sounds that can create burst-like sounds in the recording. To de-ess, one can use a dynamic EQ to lower the frequencies when the sibilance becomes harsh. To control plosives, one can use a pop shield to minimize the impact of plosives, or use a low-cut filter.

Adding Warmth With Saturation And Eq

To add warmth to vocals, saturation and EQ can be used. Saturation adds harmonics to the recording, giving it a vintage feel. EQ can also be used to enhance the brightness and lower frequencies to provide a balanced sound. To use saturation, one can use analog saturation plugins, tape, or tube emulators. When using EQ, it’s important to boost the vocal’s unique characteristics and cut off unwanted frequencies.

Using Compression And Limiting On Vocals

Compression and limiting are essential to achieving louder mixes. Compression evens out the dynamics in the recording, while limiting reduces the level of any peaks that may go beyond a certain threshold. Use a compressor to control the vocals and ensure that any soft sounds are brought up and loud sounds are brought down. A limiter can help protect the recording from any clipping or distortion. Always set the attack and release times correctly to avoid any unwanted side effects. To achieve loud mixes, proper treatment of vocals is important. By de-essing and controlling plosives, adding warmth with saturation and EQ, and using compression and limiting, one can get great sounding vocals that blend well with the overall mix.

How To Achieve Loud Mixes

Credit: flypaper.soundfly.com

Handling Bass

Achieving loud mixes can be challenging, especially when it comes to handling bass. To achieve the perfect balance, start by carving out space for the bass in the mix and adding compression and saturation to bring it forward without overpowering the other elements.

Handling bass is a critical aspect of achieving a loud mix. If you don’t handle it correctly, your mix will sound muddy and unbalanced. Bass, by nature, has more energy than other frequencies, which can cause problems in the mix. In this post, we will cover three essential techniques for handling bass and achieving a loud mix that sounds punchy and balanced.

Eqing The Bass And Kick To Sit Together

EQing the bass and kick to sit together is an essential step in mixing any track. Proper EQing can help you achieve a balance between the kick and bass, giving you a solid foundation for the rest of the mix. Here are the steps to EQ the bass and kick:

  • Use a high-pass filter on the kick to remove unnecessary low frequencies
  • Use a low-pass filter on the bass to remove unnecessary high frequencies
  • Find the fundamental frequencies of the kick and bass
  • Scoop out frequencies in the bass that clash with the kick’s fundamental frequency
  • Boost the kick’s fundamental frequency if you want to add more punch

Once you’ve EQed the bass and kick, you should be able to hear both of them clearly in the mix without them clashing with each other.

Using Sidechain Compression

Sidechain compression is a technique that’s used to create space in the mix by ducking the bass when the kick hits. This technique allows both the kick and bass to be heard clearly without clashing with each other. Here’s how you can set up sidechain compression:

  1. Insert a compressor on the bass track
  2. Set the compressor’s sidechain input to the kick track
  3. Set the compressor’s threshold so that it only compresses the bass when the kick hits
  4. Adjust the attack and release settings to create a smooth ducking effect

Using sidechain compression can help you achieve a more pronounced and punchy kick, ensuring your track is ready for the dancefloor.

Taking Advantage Of Harmonic Distortion

Harmonic distortion is often used to add warmth, character, and depth to a mix. By distorting the bass, you can add harmonics that sit well with the kick and other elements of the mix. Here are some common ways to add harmonic distortion to your bass:

MethodDescription
Tape SaturationSimulates the sound of tape, adding warmth and subtle distortion
TubesEmulates the sound of tube amps, adding warmth and saturation
Soft ClippingApplies gentle distortion to the bass, adding warmth and character

Adding harmonic distortion can make your bass sound fuller, more present, and more punchy, which will help it sit better in the mix. By using these three techniques, you can handle bass more effectively and achieve loud and punchy mixes. EQing the bass and kick, using sidechain compression, and taking advantage of harmonic distortion are all essential steps for achieving a balanced and professional-sounding mix.

Using Effects To Create Depth

Achieving loud mixes in music production requires creating depth through the proper use of audio effects. By using effects like reverb, delay, and compression, you can give your mix the necessary space and clarity needed to make it stand out.

With careful consideration and experimentation, you can achieve a sound that is both dynamic and powerful.

If you want your mix to be bold and loud, you need to use effects to create depth. Adding effects, such as reverb, delay, and modulation, can help create a sense of space and movement in your mix. Here are some tips on how to use these effects effectively.

Enhancing Your Mix With Reverb

Reverb is an essential effect for creating depth in your mix. It adds a sense of space and naturalness to your tracks. To enhance your mix with reverb, try the following:

  • Use different reverb settings for different instruments and tracks
  • Adjust the decay time, predelay, and mix settings to find the right balance
  • Try using a short reverb on percussion and a longer reverb on vocals and guitars
  • Experiment with different types of reverb, such as plate, hall, and spring

Creating Atmosphere With Delay And Echo

Delay and echo are great effects for creating atmosphere and depth. They can add a sense of space and movement to your tracks. Here are some tips on how to use delay and echo effectively:

  • Use a short delay on percussion to create a sense of rhythm and groove
  • Try using a longer delay on vocals and guitars to create a sense of space
  • Adjust the delay time, feedback, and mix settings to find the right balance
  • Experiment with different types of delay, such as tape, analog, and digital

Using Modulation To Add Movement

Modulation effects, such as chorus and flanger, can add movement and depth to your mix. They can create a sense of space and make your tracks sound more interesting. Here are some tips on how to use modulation effectively:

  • Use chorus on guitars and keyboards to create a sense of width and depth
  • Try using flanger on percussion and vocals to create a sense of movement
  • Adjust the rate, depth, and mix settings to find the right balance
  • Experiment with different types of modulation, such as phaser and tremolo

Achieving Loudness

Achieving loudness in a mix is crucial for making your music stand out. To achieve this, use compression, EQ, and limiting techniques to balance and maximize the volume of each track. Additionally, pay attention to your overall levels and avoid clipping to ensure a clean and powerful final product.

When it comes to mixing music, achieving loudness is one of the ultimate goals for many producers and engineers. A loud mix can help a track stand out and cut through the noise, but achieving that loudness without sacrificing the quality of the mix can be a delicate balance. In this post, we’ll explore some techniques for achieving loud mixes that still sound great, including using limiting to push levels and the role of multi-band compression in the mix.

Using Limiting To Push Levels

One of the most common techniques for achieving loudness in a mix is using limiting to push the levels of the track. Limiting is a type of dynamic range compression that limits the maximum level of a signal, preventing it from going over a certain threshold. By applying limiting to a mix, you can increase the overall volume of the track without allowing any peaks to exceed the threshold, resulting in a louder sound. However, it’s important to be careful when using limiting, as pushing levels too hard can result in a distorted and unnatural sound. It’s important to use your ears to determine how much limiting is necessary to achieve the desired loudness without sacrificing the quality of the mix.

The Role Of Multi-band Compression

Another technique for achieving a loud mix is using multi-band compression. Unlike traditional compression, which affects the entire frequency range of a track, multi-band compression allows you to compress specific frequency bands independently. By using multi-band compression, you can control the levels of different frequency ranges and bring up the quieter parts of the mix. This can result in a more balanced mix with a greater perceived loudness, without resorting to excessive limiting. However, as with any type of compression, it’s important to use multi-band compression judiciously and with a good understanding of how it affects the mix.

Is Loudness Always Better?

While achieving loudness can be a desirable goal for many producers and engineers, it’s important to remember that louder doesn’t always mean better. In fact, pushing levels too hard can result in a harsh and fatiguing sound, and can even damage listeners’ ears over time. Ultimately, the goal of mixing should be to create a balanced and dynamic mix that serves the song. If achieving loudness is an important part of that goal, then techniques like limiting and multi-band compression can be useful tools. But it’s also important to remember to use these tools judiciously, and to prioritize the quality of the mix over sheer loudness.

Frequently Asked Questions On How To Achieve Loud Mixes

How Do People Get Their Mixes So Loud?

People get their mixes loud by using compression, limiting, EQ, and saturation. They also ensure that each track has enough headroom, avoid clipping, and use reference tracks for comparison. Additionally, they use mastering techniques to enhance loudness without sacrificing the dynamic range.

Why Can’t I Get My Mixes Loud?

To achieve a loud mix, you need to focus on a balance between volume, dynamic range, and frequency balance. Improper use of compression, limiting, and other effects can also negatively impact loudness. Additionally, be aware of the technical limitations of your equipment and software.

Proper gain staging and monitoring levels can also help achieve a loud mix.

How Do You Mix Loud Music?

When mixing loud music, follow these guidelines: adjust the levels of each track, use EQ to balance the sound, compress tracks to create consistent volume, add effects to enhance the sound, and finalize the mix by listening to it on different speakers.

How Do You Make Music Really Loud?

To make music really loud, you can use a powerful amplifier or turn up the volume on your device. It’s important to be cautious of the potential damage to your hearing and equipment. Consider using earplugs or investing in high-quality speakers that can handle high volumes without distortion.

Proper EQ settings can also optimize volume levels.

Conclusion

It’s achievable to create powerful and energetic mixes you crave for, if you focus your attention on a few crucial areas. You need to start with selecting the right sounds and pay close attention to balancing levels. Then, tweak the equalizer and hone in on elements, followed by compression and limiting.

Finally, try experimenting with automation and get creative. Remember, the key to achieving a loud mix is to maintain a balance between preserving the dynamics and keeping it loud enough to stand out in the competitive market. With these techniques, you’ll achieve the perfect balance of energy and clarity in your mixes.

Categories
Archive

Dont Fix It In The Mix

Don’t fix it in the mix means to fix issues in the recording stage instead of relying on the mixing stage. This approach is vital as it allows engineers to capture a clear and natural sound, which is the foundation of a great mix.

By fixing issues during recording, the mixing process becomes less stressful, and the final output is of higher quality. Recording music takes a lot of effort, and the mixing process can be just as demanding. A lot can go wrong during the mixing process, which is why it’s crucial to fix all possible issues during recording.

This approach is where “Don’t fix it in the mix” comes in, encouraging engineers and producers to capture the most natural and clear sound possible during recording. We’ll explore why this approach is vital, the various techniques, and how they shape the final output.

What Is ‘don’t Fix It In The Mix’?

‘Don’t Fix It In The Mix’ is an audio production principle that involves taking the time to properly record and process sounds before mixing them together. By ensuring that each element is well-captured and processed, the mix process can be smoother, resulting in a better final product.

‘Don’t Fix It In The Mix’ is a term commonly used in the music production industry. It refers to the practice of not relying on mixing or mastering processes to solve problems with a recording. Instead, it stresses the importance of capturing the best recording possible from the start, using good microphone placement, sound levels, and other production techniques.

Origins Of The Term

The term ‘Don’t Fix It In The Mix’ was popularized in the 1970s and 1980s, a time when analog recording was the norm. Back then, recordings were made on magnetic tape, which made editing difficult and time-consuming. As a result, producers and engineers had to be meticulous in their recording process to ensure that they captured the best possible sound.

Explanation Of The Concept

The concept of ‘Don’t Fix It In The Mix’ is simple but powerful. It means that you should try to get the best possible sound at the source, and not try to fix problems during the mixing and mastering stages. For example, if a recording has too much background noise or unwanted echoes, it is better to address these issues during the recording stage, rather than trying to remove them in post-production. There are several reasons why the ‘Don’t Fix It In The Mix’ philosophy is important. First, it can save a lot of time and effort during the production process. Mixing and mastering can be very time-consuming, and the more problems a recording has, the longer it will take to fix them. Second, it can lead to better-sounding recordings. When problems are fixed during the recording stage, the resulting sound is often cleaner and more natural. In conclusion, the ‘Don’t Fix It In The Mix’ philosophy is an essential part of the music production process. By focusing on getting the best possible sound at the source, producers and engineers can save time, effort, and create better-sounding recordings.

Dont Fix It In The Mix

Credit: www.instagram.com

The Importance Of Proper Recording

Proper recording is one of the most important aspects of creating high-quality music. As a music producer, it is essential to understand the significance of capturing the right sound and addressing technical issues during the recording process.

Capturing The Right Sound

One of the most crucial aspects of proper recording is capturing the sound the right way. Every instrument has its unique sound, and it is essential to choose the right microphone and placement to ensure that you capture its full sound. When recording the drums, for example, the microphone placement and the drum kit’s tuning is essential to get the desired sound. Similarly, when recording vocals, it is vital to ensure that the right microphone and preamp are used for the voice’s specific tonality.

Addressing Technical Issues

Technical issues such as phase cancellation, distortion, and noise are common issues that arise during the recording process. It is essential to address these issues early on to ensure the final mix is of high quality. Phase cancellation, for example, can occur when the same sound is recorded with multiple microphones at different distances. This can cause a phase shift, which results in lower sound quality. Noise, on the other hand, can occur when there is electromagnetic interference from other equipment.

Tips to Address Technical Issues
IssueSolution
Phase CancellationAdjust microphone placement distances
DistortionAdjust signal levels and gain staging
NoiseUse a noise gate or remove the source of interference

In conclusion, proper recording is vital to ensure high-quality music production. Capturing the right sound and addressing technical issues early on can make a big difference in the final mix. By taking these steps, you can create a more exceptional quality recording that listeners will enjoy.

The Role Of Mixing

When it comes to music production, mixing is an indispensable process that involves combining individual recorded tracks to create a cohesive, balanced, and polished sound. In essence, mixing can make or break the quality and effectiveness of a music composition, and hence it is critical to take the right steps to ensure that it enhances the overall sound.

Enhancing The Recorded Sound

The primary goal of mixing is to enhance the recorded sound. This involves analyzing the various individual tracks and manipulating them to balance the volumes, frequencies, and dynamics to create a harmonious sound that appeals to the listener. Mixing can also help to add depth, space, and texture to the music, making it sound more natural and live.

Using various tools such as equalizers, compressors, and effects, a mixer can adjust and fine-tune the recorded sound to achieve the desired effect. For example, equalizers can be used to boost or cut specific frequencies to create a more balanced sound, while compressors can help control the dynamics of individual tracks to prevent them from clipping or becoming too dominant.

Focusing On Creative Choices

Mixing is not just a technical process, but it is also a creative one. Mixers have the freedom to make critical decisions that affect the overall outcome of the composition. They must make wise choices regarding the use of pan, volume, and delay to create a dynamic mix that complements the song’s mood.

The mixer must also consider the listener’s experience; hence they must ensure that the music sounds good on various listening devices. For example, a mix that sounds great on high-end headphones may not translate well to small earbuds or computer speakers. To avoid this, the mixer may test the mix on multiple devices to ensure that it sounds good across a range of listening environments.

Conclusion

In conclusion, mixing plays a crucial role in music production. It has the power to transform a raw recording into a polished masterpiece. By enhancing the sound quality and making creative choices that suit the intended audience, mixers can create music that resonates with listeners across different platforms and environments.

Challenges Faced When Fixing In The Mix

Fixing in the mix is a term that refers to the process of applying effects and editing after recording the track. It is a common practice among audio engineers, but it brings several challenges that can impact the quality of the recording. Here are some of the challenges faced when fixing in the mix:

Limited Options

When a producer or audio engineer fixes a problem by editing in the mix, it limits their options for a creative solution. It is because changes made in the mix are not as flexible as the ones made during the recording process. The engineer may not be able to change the level of individual instruments without affecting the mix’s overall balance. Therefore, fixing in the mix is like painting yourself into a corner, which restricts creativity and limits the outcome’s quality.

Compromising The Integrity Of The Recording

One of the significant disadvantages of fixing in the mix is that it often compromises the integrity of the recording. Once you apply too many effects or editing, the original recording’s natural sound may get lost or even damaged. For instance, if you use a lot of equalization to fix a problem on a particular part of the track, you may end up with a track that no longer sounds crisp and clear like the original recording.

Waste Of Time And Resources

Another challenge of fixing in the mix is that it can be a waste of time and resources. It is because the more time and resources you invest in the editing process, the more money you spend on the production. Additionally, as an audio engineer, you may spend a lot of resources fixing a problem in the mix only to realize that it is unfixable. This means that all the time and resources invested in the editing process were wasted, and you may have to re-record the whole track again.

Thus, fixing in the mix should be a last resort for the audio engineer. It’s better to capture the best quality recording possible than to depend on fixing problems in the editing process. However, it’s essential to acknowledge that sometimes we make mistakes during recording, and fixing in the mix is the only option. But when we aim to create quality audio recordings, we should always strive to avoid fixing in the mix as much as possible.

Tips For Avoiding ‘fixing In The Mix’

If you’re a music producer or sound engineer, you’ve probably heard the phrase ‘Don’t fix it in the mix.’ It’s a common saying in the industry that emphasizes the importance of getting things right beforehand instead of relying on post-production fixes. But how exactly can you avoid fixing things in the mix? Here are a few tips:

Pre-production Techniques

Pre-production is the planning stage of any recording project. It’s where you can get things right before hitting the record button. Here are a few techniques to consider before recording:

  • Choose the right instruments and sound sources
  • Tune your instruments
  • Set the tempo and key of your song
  • Prepare a solid arrangement
  • Record scratch tracks to perfect the arrangement

Performance Considerations

Performance is everything in music production. Here are a few things to consider when recording:

  • Rehearse your parts before recording
  • Use a metronome for better timing
  • Record multiple takes for flexibility in post-production
  • Take frequent breaks to avoid fatigue
  • Encourage musicians to play dynamically and expressively

Addressing Technical Issues Early

Technical issues can cause headaches in the studio. To avoid fixing things in the mix, address technical issues early on. Here are a few examples:

Technical IssueAddressing Technique
Hum or buzz in the audio signalCheck cables and grounds, isolate sources of interference
Background noise in the recordingChoose a quiet location, use sound baffles to isolate the mic
Low volume or weak signalAdjust mic placement, use preamp gain to boost gain level

By following these tips, you can avoid fixing things in the mix and achieve a polished, professional sound that requires less post-production correction. Remember, fixing in the mix is not an ideal solution, so always try to get things right beforehand. By doing so, you’ll save time, money, and effort in the long run.

Dont Fix It In The Mix

Credit: www.reddit.com

Examples Of Successful Recording And Mixing

Successful recording and mixing techniques involve capturing the right sound and tone at the source, rather than trying to fix it later in the mixing process. Using proper microphone placement, soundproofing, and a clear vision for the final product can lead to exceptional recordings with minimal editing required.

Successful recording and mixing is a combination of quality equipment, proper techniques, and creative skills. It is a process that requires patience and attention to detail. When done correctly, it elevates a song to a higher level, making it unique and memorable. In this section, we will look at some examples of successful recording and mixing and the techniques used to achieve them.

Case Studies Of Hit Songs

One example of a hit song that was successful in recording and mixing is “Blinding Lights” by The Weeknd. The song was recorded at Sonic Ranch in Texas, where the team used a Neve 1073 mic pre, an API 550 EQ, and an EMT 140 plate reverb. The mixer, Serban Ghenea, applied creative EQ techniques to enhance the tonality of the track. The song went on to become an international hit and a chart-topper. Another example is “Stayin’ Alive” by the Bee Gees. The song was recorded at Château d’Hérouville in France using a Studer A80 24-track tape machine and an SSL 4000 G-series console. The producers used a process called “perceived loudness” to create a sound that was bright and lively. The mixer, Albhy Galuten, used a technique called “reverse-panning” to create an effect that made the song sound like it was moving from one side to the other.

Innovative Techniques Used

Innovative techniques are vital in achieving successful recording and mixing. One such technique is “Analog Summing,” where the mix is sent to a summing mixer rather than a digital audio workstation. Analog summing adds warmth and character to the sound and is used by mixing engineers like Dave Pensado. Another innovative technique is “Sampling.” Sampling involves recording snippets of sounds and using them as instruments. Sampling is widely used in hip-hop and electronic music, where producers like J Dilla and Flying Lotus have created unique sounds using samples. In conclusion, successful recording and mixing require a combination of knowledge, skills, and creativity. Using appropriate recording and mixing techniques, engineers can create a signature sound that can separate a hit song from others. So, “Don’t Fix it in the Mix” but get it right during the recording process.

The Future Of Recording And Mixing

The future of recording and mixing in the music industry is rapidly evolving, and one concept that is gaining momentum is “Don’t Fix It In The Mix.” This means that the recording process is becoming more critical than ever before, as the focus shifts towards capturing the best natural sound possible during the recording phase, ultimately making the mixing process more efficient and streamlined. Let’s dive into some of the advancements in technology that are contributing to this shift and the potential impact on the industry.

Advancements In Technology

The advent of digital audio workstations (DAWs) has revolutionized the recording and mixing landscape. It allows recording engineers to manipulate audio in almost every imaginable way, but also has the potential to lead to “fixing it in the mix.” The good news is that recent advancements in microphone technology and preamps have made it possible to capture high-quality audio with minimal processing during recording, thereby reducing or eliminating the need for excessive mixing later on. Moreover, the emergence of high-speed internet and remote collaboration tools have made it possible to work on a mix from virtually anywhere in the world.

Potential Impact On The Industry

The “Don’t Fix It In The Mix” approach has the potential to change the way the music industry operates. For instance, artists can save time and money by recording high-quality audio at the outset, rather than spending hours in the studio trying to get everything perfect. Also, with the trend towards live performances and intimate concert settings, the demand for a more organic, raw sound in music is on the rise. If this trend continues, it could mean less pressure on mixing engineers to “fix” every flaw in a track, and more attention paid to capturing the authentic sound of the performers in the moment.

Overall, the future of recording and mixing in the music industry is looking bright thanks to this concept. The focus on capturing a natural, organic sound during the recording phase, combined with advancements in microphone and preamp technology, has the potential to revolutionize the way we approach music production. As we move forward, it will be exciting to see how this trend evolves and shapes the industry moving forward.

Dont Fix It In The Mix

Credit: www.linkedin.com

Frequently Asked Questions For Dont Fix It In The Mix

What Does Fix It In The Mix Mean?

Fix it in the mix refers to the practice of fixing or adjusting audio recordings during the mixing process, rather than during the recording process. This allows for greater flexibility and control over the final audio mix.

What Does In The Mix Mean On Radio?

“In the mix” on radio means that a DJ or radio personality is playing a selection of songs or tracks without stopping in between. This creates a continuous flow of music for listeners to enjoy without commercial breaks or interruptions.

What Does ‘don’t Fix It In The Mix’ Mean?

‘Don’t Fix It in the Mix’ means that it’s better to take care of any technical issues before mixing a song. Fixing issues in the mix can negatively affect the overall sound quality.

Why Is It Important To Not Fix It In The Mix?

Fixing technical issues in the mix can cause the loss of clarity and other undesirable effects. It can also make the mixing process more time-consuming and expensive. It’s better to address problems before mixing to avoid these issues.

Conclusion

Don’t “fix it in the mix” should be every content creator’s mantra. It’s important to plan and organize your content before starting, to ensure that it connects well with your target audience. From a basic outline to thoughtful research, it all adds up to a well-written piece that can make or break your content marketing goals.

With SEO-friendly writing, you can attract and engage readers while paving the way to higher rankings. Remember to also proofread your work, finalize your edits, and publish with confidence. By following these guidelines, you’re bound to produce content that stands out from the crowd.

Categories
Archive

Auto Tune Versions Compared

Auto-Tune versions can be compared based on feature sets and pricing. Different versions are available, such as Auto-Tune Pro, Auto-Tune EFX+, and more.

Auto-Tune is a digital audio processor developed by Antares Audio Technologies that uses a proprietary device to measure and alter pitch in vocal and instrumental music recording and performances. The software has become a ubiquitous tool for modern music production, and there are several versions available, each with its own set of features and pricing.

We will compare the most popular Auto-Tune versions, including Auto-Tune Pro, Auto-Tune EFX+, and Auto-Tune Artist, to help producers and musicians determine which version is best for their needs. Additionally, we will cover the new features added to each version, compatible music production software, and the pricing options available.

Auto Tune Versions Compared

Credit: www.antarestech.com

The Evolution Of Auto-tune

The Evolution of Auto-Tune: Ever since its invention in 1997, Auto-Tune has become an integral part of the music industry. From its early days as a tool to correct slight pitching errors to its widespread use in popular music, Auto-Tune has come a long way in terms of versatility and functionality.

Early Uses Of Auto-tune:

The first version of Auto-Tune was released in 1997, and initially, the software was used primarily as a pitch correction tool for live performances. With its ability to quickly detect and fix even slight pitch discrepancies, Auto-Tune proved particularly useful for correcting mistakes made by inexperienced singers.

Auto-tune In Mainstream Music:

In the early 2000s, Auto-Tune began to gain wider acceptance in the music industry. Artists such as Cher and T-Pain made use of the software’s distinct vocal effect to create the now-iconic robot-like vocals. Soon, Auto-Tune became a staple in many genres of popular music, including pop, hip-hop, and electronic dance music.

Today, Auto-Tune has evolved beyond a simple pitch correction tool. The software’s advanced features allow producers to manipulate vocals in a myriad of ways, from creating harmonies to adding vibrato and more. Additionally, Auto-Tune has even found its way into genres outside of mainstream pop music, including country and rock.

Auto Tune Versions Compared

Credit: www.antarestech.com

Different Versions Of Auto-tune

Auto-Tune is one of the most popular pitch correction software used by music producers and engineers all over the world. It has evolved over the years, with different versions catering to specific needs. Here are the different versions of Auto-Tune:

Auto-tune Efx

Auto-Tune EFX is a streamlined version of the software that offers pitch correction and the famous Auto-Tune “effect”. It comes with a user-friendly interface and can be used as a plugin in popular digital audio workstations like Ableton Live and Logic Pro X. It also has a built-in Auto-Motion feature that adds intricate rhythmic patterns to your vocal tracks.

Auto-tune Pro

Auto-Tune Pro is the most advanced version of the software and is designed for professional use. It provides detailed control over every aspect of pitch correction, including scale selection, vibrato, and formant shifting. It also comes with a host of other features like real-time MIDI control, automatic key detection, and flex tune technology for more natural-sounding corrections.

Auto-tune Artist

Auto-Tune Artist is a version of the software designed specifically for use by artists and performers. It provides real-time pitch correction and a live performance mode that adjusts the corrections based on the input signal. This version also comes with a variety of presets for different genres of music and the ability to save custom presets.

Auto-tune Access

Auto-Tune Access is a simplified version of the software that provides basic pitch correction features. It is designed for users who need quick, easy-to-use pitch correction without all the advanced features of the other Auto-Tune versions. It comes with a streamlined interface and can be used as a plugin in various DAWs.

Auto-tune Live

Auto-Tune Live is a version of the software designed for live performances. It provides real-time pitch correction and a low latency mode for live monitoring. It comes with a user-friendly interface and can be used with a variety of hardware controllers for easy control during performances.

Comparison Of Different Versions

Auto tune has various versions that provide different functionalities to enhance and modify vocals. From Antares Auto-Tune Pro to Auto-Tune Access and EFX+, they all offer unique features that cater to specific needs.

Comparison of Different Versions Auto-Tune is a popular vocal processing tool used by many producers and musicians. It is available in different versions, each with unique features and functionalities. In this post, we will compare the different versions of Auto-Tune based on price and accessibility, features, ease of use, and compatibility with various DAWs. Price and Accessibility Auto-Tune is available in different versions, ranging from the basic to advanced editions. The price for each version varies, with the more advanced versions costing more. The Auto-Tune Access edition is the most affordable, with a retail price of $99. However, this version has limited features compared to the more advanced editions. The Auto-Tune Pro edition is the most expensive, with a retail price of $399. This version includes all the advanced features and functionalities. Features The different versions of Auto-Tune come with unique features that cater to the varying needs of producers and musicians. The basic edition, Auto-Tune Access, has limited features, including pitch correction, vibrato control, and formant shifting. The advanced editions, such as Auto-Tune Pro, come with advanced features, such as automatic key detection, adjustable humanization, and MIDI parameter control. The Auto-Tune Artist edition, designed for artists, has a live mode for real-time processing and optimized workflow. Ease of Use The ease of use of Auto-Tune varies depending on the edition. The basic edition, Auto-Tune Access, has a simple interface that is easy to navigate and use. However, the more advanced editions, such as Auto-Tune Pro, have a more complex user interface, which requires some getting used to and understanding. The Auto-Tune Pro edition has a unique graphical mode that allows producers and musicians to visualize pitch and time edits easily. Compatibility with Various DAWs Auto-Tune is compatible with different Digital Audio Workstations (DAWs). However, the level of compatibility varies depending on the edition. The basic edition, Auto-Tune Access, is compatible with most popular DAWs, including Ableton, Logic Pro, and FL Studio. The advanced editions, such as Auto-Tune Pro, have better compatibility and support for various DAWs, including Pro Tools, Studio One, and Cubase. In conclusion, selecting the right version of Auto-Tune depends on your budget, desired features, level of expertise, and workload. The more advanced versions come with advanced features, which cater to the needs of professionals, while the basic versions are designed for novice users. We hope this comparison guide helps you make an informed decision when choosing the right Auto-Tune version for your needs.

Who Uses Auto-tune?

Auto-Tune is utilized by music producers and artists across various genres, including pop, hip-hop, and electronic. However, opinions on different versions of Auto-Tune vary, with some preferring specific editions for their unique sound qualities.

Auto-Tune, the pitch-correction software used in music production, has become increasingly popular in recent years. It has been used by various artists in different genres, such as pop, hip-hop, and electronic dance music. Initially, Auto-Tune was used to fix minor pitch problems during recording or post-production. However, the software has now become a staple in the music industry due to its creative uses in pitch-shifting and sound manipulation.

Famous Songs That Use Auto-tune

Auto-Tune has been used in many chart-topping songs. The software’s first big hit was Cher’s “Believe” in 1998, which heavily used the effect for creative purposes. Since then, there have been numerous songs that have utilized Auto-Tune, such as T-Pain’s “Buy U a Drank” and Kanye West’s “Heartless.” Here are some other examples of famous songs that use Auto-Tune:

  • Lil Nas X – “Old Town Road”
  • Travis Scott – “Goosebumps”
  • Daft Punk – “One More Time”
  • Bon Iver – “Woods”
  • Beyoncé – “Drunk in Love”

Criticism Of Auto-tune In Music

Auto-Tune has received backlash from some critics who believe that the software takes away from the authenticity of an artist’s vocals. It is often associated with a lack of skill and talent in singing, as the software is used to correct pitch errors and provide a polished sound. Some critics argue that the use of Auto-Tune has led to a decline in live singing performances and the need for autotune has affected the performance of the singers. Despite this criticism, there are also plenty of music producers and enthusiasts who champion Auto-Tune for its unique sound and creative potential. Many believe that Auto-Tune has a significant place in modern music and is responsible for shaping the sound of music in recent years.

Auto Tune Versions Compared

Credit: www.soundonsound.com

Frequently Asked Questions Of Auto Tune Versions Compared

Which Auto-tune Version Is The Best?

The best Auto-Tune version depends on your requirements and preferences. If you require more advanced features, then go for the latest version. However, if budget is a concern, then consider Auto-Tune EFX+. Ultimately, the choice is subjective and depends on your needs.

What Are The Different Types Of Auto-tune?

There are three main types of Auto-Tune: Graphical Mode, Auto Mode, and Classic Mode. Graphical Mode offers complete control over pitch correction, Auto Mode automatically corrects pitch in real-time, and Classic Mode mimics the sound of classic Auto-Tune processors.

What Is The Difference Between Auto-tune Efx And Pro?

Auto-Tune EFX is a plug-in tool for real-time pitch correction in vocal performances and has limited features. In contrast, Auto-Tune Pro is a more advanced version of the software used for detailed pitch correction, MIDI parameter control, and many other professional features.

What Auto-tune Do Professionals Use?

Professional audio engineers tend to use Antares Auto-Tune, both the Pro and Artist versions, as their go-to choice. Other popular options include Waves Tune and Melodyne.

Conclusion

To sum up, the comparison of different auto-tune versions shows that each one has its unique advantages and drawbacks. While Antares Auto-Tune is widely popular among professionals, newer versions like Melodyne and Waves Tune are quickly gaining ground with their advanced features.

However, the choice of auto-tune completely depends on your personal preference and requirements. The key is to choose the version that suits your style and workflow to create a polished and professional sound.

Categories
Archive

Mix Bus How To

To set up a mix bus, route multiple audio channels into one mix bus track. Then apply effects and processing to the mix bus to enhance the overall sound.

Mix buses are an essential tool for creating polished and professional-sounding mixes. By grouping several audio channels together and processing them as a cohesive unit, you can add depth, width, richness, and clarity to your mixes. The process involves routing the source channels into a single mix bus, where you can then apply various tools and effects such as EQ, compression, and saturation.

Properly setting up a mix bus takes time and experience, but the end result is well worth the effort. In this guide, we will provide you with a step-by-step procedure on how to create an effective mix bus that will elevate your mixes to the next level.

Mix Bus How To

Credit: www.izotope.com

How Does A Mix Bus Work?

A Mix Bus is a channel in a mixing console that brings together multiple audio signals to create a stereo mix. It is where the final signal is summed, processed and enhanced before being sent out to the master output.

A good Mix Bus setup can greatly improve the overall sound quality of a recording.

Mix Bus is an essential part of any mixing console which plays a crucial role in producing high-quality audio output. It is responsible for combining multiple audio signals together and balancing their levels to create a cohesive mix. In this section, we will discuss the basic principles and signal flow of a Mix Bus.

Basic Principles

The Mix Bus is essentially a virtual channel that combines several channels into one output. It applies processing such as equalization, compression, and adds effects in this new combined channel. It’s similar to how an electrical circuit works, where signals from multiple sources are redirected and combined into one destination.

Signal Flow

The signal flow of a Mix Bus can vary depending on the mixing console and the preference of the mixer. Generally, the signal passes through the channel strip first, where individual adjustments can be made for each channel. The signals from all channels are then routed to the Mix Bus, where the mixer can apply overall volume and effects processing. Finally, the signal is adjusted for the master output and sent to the loudspeakers or recording device. To ensure proper signal flow in the Mix Bus, it is essential to maintain proper gain staging. This means adjusting the input gain and output level of each channel to maximize headroom and prevent distortion. In conclusion, understanding how a Mix Bus works and its signal flow is crucial to producing high-quality audio output. Basic principles and proper gain staging are essential components for effective use of a Mix Bus in any mixing setup.

Why Is A Mix Bus Important?

A mix bus is an important element in the mixing process as it helps bring together all the individual tracks in a mix, combining and processing them so they sound cohesive and balanced. A mix bus can make or break the sound of a mix, and it’s a tool that every audio engineer should have in their arsenal.

Balancing Levels

One of the key functions of a mix bus is level balancing. Balancing levels involves adjusting the volume of each track in a mix so they sit well together and don’t overpower each other. When each track is balanced, the mix can sound clean, clear and cohesive. Using a mix bus to balance levels can be an effective way to control and adjust the dynamic range of a mix.

Gluing Mix

Another function of a mix bus is to glue the mix together. Gluing the mix involves processing the mix bus in a way that helps blend the individual tracks together. By adding EQ, compression, saturation, and other processing to the mix bus, the individual tracks can sound more cohesive and unified, creating a professional-sounding mix.

Creating Sonic Space

A mix bus can also be used to create sonic space in a mix. By using reverb, delay and other effects on the mix bus, you can create a sense of depth and width in the mix. This can help create a more immersive and engaging listening experience for the listener.

Balancing LevelsGluing MixCreating Sonic Space
Adjusting volume of each track to sit well together.Processing mix bus to blend individual tracks.Using effects to create depth and width in mix.
Effective way to control dynamic range.Creating a professional-sounding mix.Creating an immersive listening experience.

Code Example:

function mixBus() {
  balanceLevels();
  glueMix();
  createSonicSpace();
}

mixBus();

Summary

A mix bus is a powerful tool that audio engineers can use to balance levels, glue the mix, and create sonic space in a mix. By understanding how a mix bus works and implementing it effectively, you can take your mixes to the next level and create professional-sounding recordings.

Mix Bus Techniques

Discover effective mix bus techniques for getting that polished sound you desire in your mixes. Learn how to use EQ, compression, and saturation on your mix bus to achieve clarity, punch, and warmth in your tracks.

Mix Bus Techniques are essential to the production of high-quality audio mixes. It’s a process that involves several technical aspects of music mixing. Compression, EQ, Saturation/Analog Emulation, and Stereo Techniques are fundamental mix bus techniques that every audio engineer must master. In this post, we will discuss each of these techniques in-depth to provide valuable insights on how to use them effectively.

Compression

Compression is a game-changer in mixing and mastering. It is used to smooth out an audio track’s dynamic range, making the quieter parts louder and the louder parts quieter. A compressor helps to keep the track’s volume level consistent, making it easier to hear every detail of the mix. When applying compression, it’s important to set the threshold and ratio correctly. Using a faster attack and slower release can also help to create a smoother sound. Experimenting with compression settings can help an audio engineer create a unique sound profile for a track.

Eq

Equalization is the process of adjusting the balance of frequencies in an audio track. EQ can be used to boost or cut specific frequencies, allowing an audio engineer to tailor the sound to their liking. When using EQ, it’s crucial to take note of each instrument’s frequency range so that they do not overlap and cause muddiness in the mix. Cutting frequencies can be just as important as boosting them, so it’s essential to have a good understanding of EQ when mixing music.

Saturation/analog Emulation

Saturation and Analog Emulation are two powerful mixing tools that aim to provide warmth, depth, and character to a mix. Saturation can be used to add subtle harmonics to a track, producing a more pleasing sound. Analog Emulation can imitate the sound of vintage equipment, creating a unique and authentic sound profile. Both techniques are great for adding color and depth to a mix without changing its dynamics or balance, which can be beneficial when producing music in a digital environment.

Stereo Techniques

Finally, Stereo Techniques are the use of panning and stereo imaging to give depth and dimension to a mix. Panning is the act of adjusting the stereo field of individual tracks in a mix. Stereo imaging, on the other hand, refers to the process of adjusting the stereo image of a mix as a whole. These techniques help to create a more immersive sound that can help to capture the listener’s attention. Proper use of Stereo Techniques can lead to a more engaging and enjoyable listening experience. In conclusion, Mix Bus Techniques in music production are essential to create high-quality and unique audio mixes. Compression, EQ, Saturation/Analog Emulation, and Stereo Techniques help to bring color, depth, and character to your mixes. A good understanding of these techniques can help elevate your production and establish you as an expert audio engineer.

Mix Bus How To

Credit: store.harrisonaudio.com

Mix Bus Setup

HTML Response:

Setting up a Mix Bus is a crucial part of achieving a polished final mix. It determines how the different audio tracks mix together as a whole. There are two primary types of Mix Buses: Analog Mix Bus and Digital Mix Bus. Let’s discuss the setup of each Mix Bus:

Analog Mix Bus

An Analog Mix Bus involves mixing audio signals using analog hardware. This setup creates warmth and character in the sound, which is missing in digital mixing. Here’s how to set up an Analog Mix Bus:

  • Connect the output of your mixer to the input of the Analog Mix Bus processor (a compressor, EQ, or a combination of both).
  • Use the bus send feature of your mixer to send each channel to the Analog Mix Bus.
  • Adjust the levels of each channel going into the Analog Mix Bus to achieve the perfect balance of sound.
  • Apply compression and EQ as desired to enhance the mix.
  • Connect the Analog Mix Bus output to a stereo recorder or back to the mixer’s stereo inputs.

Digital Mix Bus

Digital Mix Buses use software and digital processors to mix audio signals, making it much more flexible and repeatable. However, the resulting sound is less warm and more precise. Here’s how to set up a Digital Mix Bus:

  1. Create a stereo Aux Bus in your DAW (Digital Audio Workstation).
  2. Use the Bus Send feature to route each channel to the Aux Bus.
  3. Apply any desired digital processors such as EQ, Compressor, and Limiters to the Aux Bus.
  4. Adjust the levels of each channel going into the Aux Bus to achieve the perfect balance of sound.
  5. Connect the Aux Bus output to the main stereo output of your DAW.

By following the above steps, you can set up an Analog or Digital Mix Bus to create a cohesive and polished final mix. Keep experimenting with different processors and settings to find that perfect balance that makes your mix sound amazing.

Mix Bus Plugins

Mix bus plugins are essential for achieving a polished and cohesive sound in your mix. These plugins route all your tracks to a single channel where you can apply additional processing and effects to enhance the overall balance and impact of your mix.

Overview

Mix Bus Plugins are essential for every music producer who wants to create high-quality audio productions. In the simplest terms, a mix bus consists of all the audio channels in a mix routed to a single stereo output. This allows you to apply processing to the entire mix as a whole. Mixing is an art, and mix bus plugins play a crucial role in enhancing the sonic characteristics of your mix.

Recommendations

There are a plethora of mix bus plugins available in the market. It can be overwhelming to choose the right one for your project. Here are some highly recommended mix bus plugins that can significantly improve your mix:

Plugin NameDescriptionPrice
FabFilter Pro-L 2A top-of-the-line limiter plugin that provides transparent limiting, loudness metering, and various limiting algorithms.$199
Waves API 2500Emulates the sound of the classic API 2500 compressor and offers features like adjustable threshold, attack, and release settings.$299
Izotope Ozone 9A comprehensive mastering suite with a range of tools, including equalization, dynamic processing and much more.$499

These plugins offer different features and functionalities that cater to different types of music. It’s important to experiment with different plugins and find the one that enhances the overall sound of your mix. In conclusion, mix bus plugins are a crucial part of the mixing process, as they allow you to enhance the sonic characteristics of your overall mix. By experimenting with different plugins and understanding how they affect the sound, you can choose the one that best suits your music production needs.

Mix Bus How To

Credit: www.soundonsound.com

Frequently Asked Questions Of Mix Bus How To

How Do You Set Up A Mix Bus?

To set up a mix bus, you need to route your tracks to a designated bus. Then, add any desired plugins and adjust the levels and pan of the tracks to achieve the desired balance. It’s important to reference the mix through different speakers and headphones to ensure it translates well.

What Goes On Mix Bus?

The mix bus is where all recorded tracks come together before being sent to the master output. This is the final stage where various processing is applied to achieve the desired sound of the mix. Equalizers, compressors, and limiters are commonly used on the mix bus to balance and enhance the mix.

It is important to use caution when adding processing to the mix bus as it affects the entire mix.

How To Do Mix Bus Compression?

Mix bus compression is the process of applying compression to the stereo mix bus to glue together the individual tracks of a mix. Start by selecting an appropriate compressor and setting a moderate amount of compression. Adjust the attack and release times to achieve a smooth sound and use a low ratio to avoid over-compression.

Finally, adjust the makeup gain to compensate for the loss of volume caused by compression.

What Is The Compression Ratio For A Mix Bus?

The compression ratio for a mix bus depends on the genre of music and desired outcome. Typically, a ratio of 2:1 to 4:1 is suitable for Pop and Rock genres, while Jazz and Classical may require a lower ratio of 1.

2:1 to 2. 5:1. It’s important to experiment with different ratios to achieve the desired sound.

Conclusion

To sum up, the mix bus is a vital component of the audio mixing process that can make or break the success of a recording. Understanding how to properly configure and process your mix bus is crucial for achieving a professional and cohesive sound.

By taking into account the tips and techniques we’ve discussed, you’ll be well on your way to mastering the mix bus and creating outstanding mixes that stand out from the competition. Remember, practice makes perfect, so keep experimenting and refining your techniques to take your music to the next level.

For more background, see Audio mixing (recorded music) on Wikipedia. You may also like our guide: Exploring Mix Bus Secrets.

Categories
Archive

Tips For Mastering Hip Hop

To master hip hop, focus on developing your rhythm, flow, vocabulary, and performance skills. Hip hop artists must work hard and aim to be original, creative, and authentic in their lyrics, beats, and style.

Hip hop is a vibrant and diverse genre of music that originated in the United States in the 1970s. Since then, it has evolved into a global cultural movement, with millions of fans, artists, and producers around the world. Hip hop encompasses a wide range of sub-genres, from gangsta rap to conscious hip hop.

However, what unites these different styles is the importance of rhythm, flow, and lyrics, which are the building blocks of every successful hip hop track. Whether you are a rapper, singer, or producer, mastering hip hop requires time, effort, and dedication. We will provide a few tips and tricks to help you improve your hip hop skills and take your music to the next level.

Find Your Groove

Hip hop is a dance style that can be mastered through practice, patience and determination. To become proficient, finding your groove is fundamental. While some people may struggle to find their rhythm at first, others may seem to have a natural talent. However, everyone can improve their hip hop dancing skills by following a few simple tips. Here are some tips that will help you discover your groove and become a more confident hip hop dancer!

Learn And Practice Different Dance Styles

Many different dance styles fall under the broad category of hip hop, including breaking, popping, locking, and krumping, among others. Each style has its own unique moves and techniques. By learning and practicing these styles, you can gain a better understanding of the hip hop culture and improve your dance skills. One great way to do this is by taking hip hop dance classes from different instructors. Each teacher is likely to teach a different style, which will help you find your own unique groove.

Listen To Various Hip Hop Genres

Hip hop music is diverse and has many different sub-genres, including rap, trap, old school, and boom bap, to name a few. Listening to these different genres will expose you to a wide range of beats and rhythms. Find music that resonates with you and make a playlist of your favorite songs. When you practice your dance moves, try to match the rhythm of the song to your movements. This will help you develop your own style and groove.

Experiment And Freestyle

One of the best ways to find your groove is to experiment with different moves and freestyle. Don’t be afraid to try new things and make mistakes. The more you experiment, the more you will discover your own style. Freestyling is also a great way to develop your musicality, which is the ability to dance in sync with the music. Start by practicing simple movements and gradually build up to more complex moves.

In conclusion, finding your groove is crucial to mastering hip hop dancing. Learning and practicing different styles, listening to a variety of hip hop genres, and experimenting with freestyle are all great ways to find your rhythm and develop your own style.

Develop Your Technique

Developing technique is an essential step in mastering hip hop. Without honing your movements, your performance may lack the precision and flair required for the genre. In this blog post, we’ll delve into some tips on how to develop your technique as a hip hop dancer.

Improve Your Isolation And Control

Isolation and control are two critical skills for a hip hop dancer that can make all the difference in your performance. Good isolation involves the ability to move each part of your body independently, making your moves look sharper and more impressive. Excellent control enables you to execute your movements with precision and a slow, smooth flow.

  • Practice isolating each part of your body, starting with small movements like your fingers, then working up to your shoulders, neck, hips, and legs.
  • Slow down your movements and ensure that each one is precise with no unnecessary jerks or extra movements.
  • Focus on your breathing control, which can help with your overall body control.
  • Record your practice sessions and watch to see where you need improvement and adjust accordingly.

Master Footwork And Toprocking

Footwork and toprocking are highly essential in hip hop dance, and mastering them can set you apart and elevate your performance. Footwork is the movement of your feet and involves intricate stepping patterns, while toprocking is the dance done from a standing position and requires a lot of balance and foot coordination.

FootworkToprocking
Start slowly and start with simple steps, so you don’t feel overwhelmed.Practice regularly to develop muscle memory.Focus on the beat and stay on rhythm.Watch and learn from other dancers or online tutorials.Master foot coordination and balance.Vary your toprocking patterns and find your unique style.Take inspiration from other dancers and incorporate into your toprocking patterns.Practice daily for improvement.

Learn To Flow And Connect Moves

In hip hop, the ability to flow from one move to the other seamlessly is an equally crucial skill to have. Your performance should look like one continuous movement without any awkward transitions. To achieve this, you need to learn to connect your moves.

  1. Break down each move and understand how it connects to the next.
  2. Practice specific transition moves that help you move seamlessly between moves.
  3. Focus on fluid movement and make sure your moves are not isolated from each other.
  4. Experiment with different moves and try to integrate them into your current routine.

Developing your technique is a continuous process, and it can take some time to get everything just right. Practice hard, seek feedback, and continue to learn and improve. With these tips, you should be well on your way to mastering hip hop and delivering stunning performances.

Study The Originators

For aspiring hip hop artists, studying the originators is essential to mastering the genre. Listening to and analyzing the pioneers of the craft can provide insight into the techniques and concepts that have shaped the culture and art form.

To become a great hip hop artist, understanding the roots of hip hop is essential. The culture and the music style of hip hop originated in Black and Latino communities during the 1970s in the Bronx, New York. It started as a form of expression and a way to tell stories of life struggles faced by marginalized communities.

Understand The Roots Of Hip Hop

Hip hop has four main elements: MCing (rapping), DJing (scratching and mixing music), breaking (breakdancing), and graffiti writing. Studying these elements will help you grasp the roots of hip hop and its cultural significance.

Research Historical Figures

One of the best ways to study hip hop is to research and learn about the historical figures who shaped it. Artists like Grandmaster Flash, DJ Kool Herc, Afrika Bambaataa, and many more played a significant role in the development of hip hop culture. Researching their contributions and achievements can provide a deeper understanding of what it takes to master hip hop.

Watch Classic Hip Hop Videos And Battles

Watching classic hip hop videos and battles is another way to study the originators of hip hop. You can learn from the classic collaborations of Tupac, Biggie, Wu-Tang Clan, and other legendary hip hop artists. These videos can also help you learn about the different styles of hip hop, such as old-school, boom-bap, and trap. In conclusion, studying the originators of hip hop is crucial to mastering the artform. By understanding the roots of hip hop, researching historical figures, and watching classic hip hop videos and battles, you can gain valuable insights and knowledge about the culture and style of hip hop. Keep these tips in mind and start exploring the world of hip hop to become a successful hip hop artist.

Tips For Mastering Hip Hop

Credit: blog.daisie.com

Collaborate And Exchange

To master hip hop, collaborating and exchanging tips with other artists is crucial. Seek out mentors, join online communities and attend workshops to learn new techniques, build connections, and hone your skills. Practice regularly and embrace constructive criticism to improve your craft.

Creating and mastering hip hop moves can be a challenging task, but performing them with others can be even more satisfying. Collaboration and exchange with other dancers can help enhance your skills as a hip hop dancer. By sharing ideas, techniques, and tips with other dancers, you can expand your knowledge and learn new moves. In this article, we will discuss the different ways to collaborate and exchange with other dancers and how it can help you dominate the dance floor.

Join Dance Groups And Communities

One of the best ways to collaborate and exchange with other dancers is by joining dance groups or communities. You can participate in events, performances, and competitions organized by these groups, which will help you improve your skills and learn from other talented dancers. These groups can provide you with a supportive learning environment where you can receive feedback on your moves and get suggestions for improvement. Also, joining these groups provides an opportunity to meet new people and build long-lasting relationships.

Attend Workshops And Classes

Attending workshops and classes is another effective way to collaborate and exchange with other dancers. When attending a workshop, you get to learn from an experienced instructor who can provide you with valuable feedback. Here, you can interact with other students and exchange ideas, discuss techniques, and even choreograph together.

Exchange Ideas And Techniques With Other Dancers

The beauty of hip hop dance is that everyone has their own unique style. Exchanging ideas and techniques with other dancers can help you expand your range of moves and improve your performance. Even if you are an experienced dancer, you can always learn something new from others. To exchange ideas, you can join an online community, attend dance sessions, or even watch dance videos.

Conclusion

Collaborating and exchanging with other dancers is a great way to enhance your skills as a hip hop dancer. It enables you to learn new techniques, exchange ideas, and share your passion for hip hop with other enthusiasts. By joining dance groups, attending workshops, and exchanging techniques with other dancers, you will be on your way to mastering hip hop dance moves.

Express Yourself

To master hip hop, it’s important to express yourself through your movements and music. Practice regularly, study the history of hip hop, and find your own unique style. Don’t be afraid to push your boundaries and show your personality in every performance.

Develop Your Own Style And Flavor

Hip Hop is all about self-expression through dance. Therefore, one of the most important things is to develop your own unique style and flavor that sets you apart from others. Take inspiration from different styles and techniques but don’t forget to incorporate your own signature moves and style to create something new.

Use Your Body To Communicate And Tell A Story

One of the essential elements of hip hop dance is storytelling. Your objective should be to convey a message or tell a story through your dance movements. Use your body to communicate, using body language and facial expressions to convey the message more effectively.

Incorporate Your Personality Into Your Moves

Hip hop dance is all about expressing who you are through dance. Therefore, it’s important to let your personality shine through your moves. Whether it’s your confidence or your quirkiness, let your uniqueness show in your dance. This is what makes each dancer stand out from the crowd.

Final Words

Mastering hip hop dance requires passion, practice, and persistence. But most importantly, it requires you to express yourself in a way that feels true to who you are. With these tips, you can take your hip hop dance skills to the next level and become an exceptional dancer.

Tips For Mastering Hip Hop

Credit: m.youtube.com

Tips For Mastering Hip Hop

Credit: www.masteringthemix.com

Frequently Asked Questions Of Tips For Mastering Hip Hop

How Do You Master A Hip-hop Song?

To master a hip-hop song, you need to follow the below steps: 1. Get a great mix that’s properly balanced. 2. Use a professional mastering engineer. 3. Master at an appropriate volume level. 4. Pay attention to dynamics and EQ. 5.

Ensure that the track is ready for mastering.

How Loud Should A Hip-hop Master Be?

The loudness of a hip-hop master should be between -8 dB to -5 dB of integrated LUFS and should not exceed -1 dBTP. The mastering engineer should also take care not to distort the sound.

What Should Compression Settings Be For Mastering Hip-hop?

Compression settings for mastering hip-hop should be based on the specific mix and desired outcome. It’s recommended to use a light to medium compression ratio with a low attack time and longer release time. This should help create an even and balanced sound without sacrificing dynamics.

It’s important to trust your ears and adjust settings accordingly.

How Can I Get Better At Hip-hop Production?

To become better at hip-hop production, you can focus on learning about music theory, audio engineering, and production software. Watch tutorials and listen to other artists for inspiration, practice consistently, and seek feedback from experienced professionals to improve your skills.

Attend industry events and connect with other producers to build your network and stay up to date on industry trends.

Conclusion

To become a master of hip hop, a deep understanding of the genre, rhythm, and flow is crucial. Remember to focus on your voice, your style, and your unique form of expression. Never forget to practice and hone your skills, collaborate with other artists, but stay true to your own style.

By following these tips, you can take your hip hop game to the next level and create music that truly resonates with your audience. Keep writing, keep creating, and never stop perfecting your craft.

Categories
Archive

Roland Tr 909 Review

The Roland TR-909 is a highly-rated drum machine that has stood the test of time, offering a classic sound that has been heard in countless iconic tracks. In this review, we dive into the features, performance, and overall quality of the TR-909 to help you decide if it’s the right drum machine for you.

Since its release in 1984, the Roland TR-909 has been one of the most influential drum machines in the music industry. It was initially created as a tool for creating drum beats for live performances, but it quickly found its way into the studio, where its unique sound helped shape the sound of dance and electronic music.

The TR-909 features a distinctive analog sound, offering a warm, punchy tone that brings a classic vibe to any track. In addition to its iconic sound, the TR-909 includes a range of features and controls that make it incredibly versatile and easy to use. Whether you’re a producer, musician, or DJ, the Roland TR-909 is a powerful tool that can take your music to the next level.

Roland Tr 909 Review

Credit: www.sweetwater.com

Features Of The Roland Tr 909

The Roland TR 909 is often described as one of the most iconic drum machines ever created. Even after decades since its first release, it still remains one of the most sought-after instruments in the music industry for its unique sounds and versatility. In this review, we’ll take a closer look at the key features of the Roland TR 909.

Design And Build Quality

The TR 909 has a classic design which has remained virtually unchanged since it was first introduced in the 1980s. The device boasts a sturdy metal construction and weighs in at just over six pounds, making it both durable and portable. Its compact size makes it an ideal tool for musicians working in smaller studio spaces or on the go.

Sound Engine

The TR 909 is known for its distinctive sound which is full of character and warmth. It features 16 drum sounds including bass drum, snare, rimshot, claps, hi-hats, cymbals, and more. Each sound has unique tuning and filtering controls that allow users to tweak the sounds to their liking. The drum machine also features individual volume controls which allow for precise mixing.

Sequencer

The TR 909 has a built-in step sequencer that allows users to create complex drum patterns with ease. The sequencer can store up to 96 patterns, and chaining patterns together creates even longer compositions. Users can also create accent variations, shuffle patterns, and even add swing to their sequences for added groove.

Connectivity Options

The TR 909 has a range of connectivity options that make it easy to integrate into any music production setup. It features MIDI in/out/thru connections, DIN sync, and trigger inputs and outputs. The device can also be synced with other instruments and computers through USB or its own sync bus.

Controls And User Interface

The TR 909 features a simple and intuitive user interface that makes it easy for users to navigate through its controls. The device has a range of knobs and buttons that provide instant access to its various functions. The interface is also backlit, making it easy to use in any lighting condition.

Pros And Cons Of The Roland Tr 909

ProsCons
– Iconic sounds
– Intuitive interface
– Durable construction
– Expensive
– Limited range of sounds
– Lacks modern features

Overall, the Roland TR 909 is a reliable and classic instrument that has stood the test of time. Its unique sound and intuitive interface make it an essential tool for music production. While it may lack some of the modern features found in newer drum machines, its enduring popularity is a testament to its enduring appeal.

Roland Tr 909 Review

Credit: www.michaelgallagher.co.uk

Sound And Performance

The Roland TR-909 is a classic drum machine that remains a popular choice for music production and performance due to its distinctive sound and reliable performance. With its analogue circuitry and versatile sequencing capabilities, the TR-909 offers endless creative possibilities for musicians and producers looking to add rhythmic depth to their compositions.

The Roland TR 909 is a drum machine that has been widely used in the music industry. It may have been created in the 1980s, but it still remains a favorite of many producers and musicians. The TR 909 is renowned for its unique sound and intuitive sequencing capabilities. In this review, we will delve into the details of the TR 909 and see why it has stood the test of time.

Drum And Percussion Sounds

The TR 909 has a distinctive sound that sets it apart from other drum machines. It boasts a diverse range of drum and percussion sounds, including kick drums, snare drums, toms, cymbals, and hi-hats. These sounds can be tweaked to create a unique mix that suits the project you’re working on. The TR 909’s sounds have a warm analog feel and are known for their punchiness and brightness, making them perfect for dance and techno music.

Sequencing Capabilities

The TR 909’s sequencing capabilities are one of the main reasons why it has remained popular over the years. Its 16-step sequencer allows for intricate programming of beats that can be easily edited on the fly. The sequencer also has a range of features such as shuffle, flam, and accent that can add complexity and dynamics to your beats. Additionally, the TR 909 has the ability to control external MIDI gear, making it an even more versatile tool in the studio.

Live Performance With The Roland Tr 909

The TR 909’s sound and sequencing capabilities make it an excellent choice for live performance. Its intuitive interface, combined with its distinctive sound, make it easy to create engaging beats on the fly. The TR 909’s rugged build quality also ensures it can withstand the rigors of live performance. Additionally, the TR 909 has a range of connectivity options such as MIDI and USB, making it easy to integrate with other gear in your setup. In conclusion, the Roland TR 909 is an outstanding drum machine that has proven its worth time and time again. Its unique sound and sequencing capabilities have made it a staple in the music industry, and its durability ensures it will remain relevant for years to come.

Impact On Music Production

The Roland TR-909 is arguably one of the most iconic drum machines ever produced. Since its introduction in 1983, this powerful beat-making machine has not only influenced generations of electronic music producers and dance music enthusiasts, but it has also shaped the sound of a vast range of popular music genres throughout the decades. In this blog post, we’ll take a closer look at the impact of the Roland TR-909 on music production and explore how it has been used in some of the most popular tracks of all time.

Influence On Electronic Dance Music

The Roland TR-909 has had a massive impact on the development of electronic dance music. Since its release, it has been used in countless classic tracks across many different genres of electronic music, from techno and house to hip hop and R&B. One of the key reasons for its popularity is its unique sound, which has become an essential component of the electronic music landscape.

The powerful kick drum and crisp snare are instantly recognizable and have become synonymous with the sound of electronic dance music. The TR-909 has also been instrumental in the development of acid house, a subgenre of house music characterized by its use of the Roland TB-303 and TR-909. The acid sound created by this combination of machines has become a standard in the world of electronic music, and it all started with the TR-909.

Usage In Popular Tracks

The Roland TR-909 has been used in countless popular tracks over the years, both within the electronic music world and beyond. One of the most famous examples of its use outside of electronic music is in Prince’s classic hit “Erotic City.” The driving rhythm of the TR-909 gives the track an infectious energy that helped make it a hit around the world.

Within the electronic music world, the TR-909 has been used in countless classic tracks. Some of the most iconic examples of its use include “Acid Trax” by Phuture, “Voodoo Ray” by A Guy Called Gerald, and “Strings Of Life” by Derrick May. Each of these tracks features the distinctive sound of the TR-909 and has helped to cement its place in electronic music history.

Track NameArtistYear
Acid TraxPhuture1987
Voodoo RayA Guy Called Gerald1988
Strings Of LifeDerrick May1987

The TR-909 has continued to be used in modern electronic music to this day. Its unique sound has become a staple of the genre, and its influence can be heard in countless tracks across a wide range of subgenres. Its legacy lives on, and it remains one of the most iconic and influential drum machines in the history of music.

Roland Tr 909 Review

Credit: www.youtube.com

Comparison With Other Drum Machines

The Roland TR-909 is frequently compared to other drum machines in terms of functionality, sound quality, and versatility. While some newer models may have more features, the TR-909 offers a unique sound that has become iconic in electronic music. Its classic analogue sound and simple workflow continue to make it a popular choice among producers today.

If you’re in the market for a high-quality drum machine, you’ve undoubtedly come across the Roland TR-909. But how does it stack up against other popular drum machines on the market, such as the Roland TR-808, Linn LM-1, and Akai MPC Series? Let’s take a closer look.

Roland Tr-808

The Roland TR-808 was introduced in the early 1980s, a few years before the TR-909. It was widely popular in the hip-hop and electronic dance music scenes and is still celebrated today. The TR-808 is known for its warm, analog sound and its distinctive kick and snare sounds. However, the TR-909 introduced new sounds and features that set it apart.

Linn Lm-1

The Linn LM-1 was released in 1980 and is often credited as the first digital drum machine. It was a game-changer for its time and provided a more realistic drum sound than its analog predecessors. However, the LM-1 had limited programming features and could only store 12 sounds. In contrast, the TR-909 introduced more programming options and the ability to store more sounds.

Akai Mpc Series

The Akai MPC series, first introduced in the late 1980s, is a sampler and sequencer that can be used as a standalone instrument or with a computer. It offers a wide variety of sounds and programming options, making it a popular choice among producers. However, the TR-909 is specifically designed for drum sounds and has a more specialized focus. Overall, the Roland TR-909 sets itself apart with its unique sound and programming features, making it a favorite among musicians and producers alike. While it may not have been the first drum machine on the market, it’s certainly one of the most beloved.

Frequently Asked Questions Of Roland Tr 909 Review

What Artists Use The Tr-909?

The TR-909 drum machine has been used by numerous artists from different genres such as Aphex Twin, Daft Punk, and Frankie Knuckles.

Is The Tr-909 Analog Or Digital?

The TR-909 is an analog drum machine produced by Roland Corporation in the 1980s. It uses analog technology to generate its sounds, including its iconic kick, snare, and hi-hats. The TR-909 has become a staple in electronic dance music and has been emulated in digital formats.

What Does Tr Mean In Roland?

TR in Roland stands for “Transistor Rhythm” and refers to the line of drum machines produced by Roland that use analog synthesis and were popular in the 1980s and 1990s.

What Does The Roland Tr-909 Do?

The Roland TR-909 is a drum machine that was first released in 1984. It is used for creating electronic music and features 16 built-in drum sounds, as well as the ability to program patterns and adjust settings to create unique beats.

Its distinctive sound has been used in many genres of music, including techno, house, and hip hop.

Conclusion

Overall, the Roland TR-909 is a classic and iconic drum machine that has stood the test of time in the music industry. Its unique sound and versatility have made it a popular choice for musicians and producers across multiple genres.

Whether you’re looking to add some 80s flair to your tracks or create fresh and modern beats, the TR-909 is a reliable tool worth considering. With its intuitive interface and undeniable charm, the Roland TR-909 is a must-have for any serious music producer or enthusiast.

More in our Gear reviews.

Categories
Archive

How To Build A Home Studio

Building a home studio requires setting up equipment and soundproofing your space. With proper planning and quality gear, you can create a professional recording environment in your own home.

As technology continues to advance, more musicians and content creators are opting to create their own home studios. Setting up a studio may seem daunting but with the right information and guidance, it can be easier than you think. To get started, it is important to have a clear understanding of your goals, the space you have available, and the amount of money you are willing to invest.

We will guide you through building your own home studio by explaining the essential equipment you’ll need, how to treat your room as well as sharing some tips to ensure you create a high-quality recording space.

Choosing A Space

Selecting the perfect area to build a home studio is crucial for creating high-quality content. Consider factors such as natural light, proximity to main living areas, and sound insulation when choosing a space.

Building a home studio is an affordable and convenient way to have access to a private recording space. Choosing the best space is crucial, as it can affect the quality of your recordings. It is important to consider several factors when selecting the ideal location for your home studio.

Determining Your Needs

The first step in choosing a space for your home studio is determining your specific needs. This includes factors such as the volume of recording equipment, the type of music you will be composing, and the size of your band. If you are a solo artist, a small corner of a room might suffice, but if you’re in a band with drums, amplifiers, and other instruments, a larger area might be necessary.

Assessing The Acoustics

Assessing the acoustics of the space is also crucial when choosing the location of your home studio. You want a room that is not too small or too large, as both can affect the quality of the recordings. A square room with sound diffusing elements such as curtains, bookshelves, and carpets can help lessen the echo in the room.

Conclusion

Choosing the right space for your home studio is an important step in creating a productive environment where you can make amazing recordings. By determining your specific needs and assessing the acoustics of the space, you’ll be able to select a location that meets your requirements and helps bring your creative vision to life.

How To Build A Home Studio

Credit: www.soundonsound.com

Essential Equipment

Building a home studio requires some essential equipment such as a computer, audio interface, microphone, headphones, and studio monitors. By investing in quality equipment, you can create a professional sounding recording environment in the comfort of your own home.

To build an efficient home studio, you need to have the essential equipment in place. These include a computer with suitable software, audio interface, studio monitors, microphone, and cables. Investing in quality equipment can enhance the quality of your recordings and make your work easier.

Computer And Software

The first essential piece of equipment you need is a computer with the appropriate software to enable you to record, mix, and edit music. Your computer must have a powerful processor, enough storage capacity, and high RAM to support the software. You may opt for a desktop or a laptop, depending on your preferences and available space. Besides, you need software like Pro Tools, Logic Pro, or Ableton Live, among others to record and mix music.

Audio Interface

To convert analog-to-digital signals for recording, you require an audio interface. This piece of equipment is crucial in getting a clear and quality recording. It connects the musical instruments and microphones to the computer. Different audio interfaces come with varying features, such as input/output channels, headphone outputs, and different voltage preamps. Investing in a quality audio interface can enhance the quality of your recordings.

Studio Monitors

Studio monitors are specialized loudspeakers designed to deliver an impartial and clear sound representation. They are ideal for mixing, mastering, and production. Choosing high-quality studio monitors with excellent frequency response, sensitivity, and amplification is crucial. Additionally, make sure they match your room’s size and acoustic treatment.

Microphone And Cables

A suitable microphone is essential in capturing clear and accurate sound. You can choose between condenser and dynamic microphones, depending on your recording needs. Besides, investing in high-quality cables is critical in transmitting audio signals between the musical equipment and the audio interface or mixer. Ensure that you purchase the right length and type to avoid noise interference. In conclusion, having the right equipment is crucial to building an efficient and functional home studio. Investing in high-quality equipment can enhance the quality of your recordings, ease your work, and save you time and money in the long run.

Designing Your Space

Designing your space is one of the most important steps when it comes to building a home studio. A well-designed space will not only improve the quality of your recordings but it will also create a comfortable and efficient workspace. In this section, we will cover two crucial elements of designing your space: soundproofing and acoustic treatment and furniture and layout.

Soundproofing And Acoustic Treatment

Soundproofing and acoustic treatment are essential if you want to achieve professional-quality recordings. Soundproofing is the process of preventing sound from entering or leaving your studio, while acoustic treatment is used to improve the acoustic properties of your space.

When it comes to soundproofing, there are several methods you can use:

  • Seal all gaps and cracks: Gaps and cracks allow sound to leak in and out of your space. Use acoustic sealant to seal all the gaps around windows, doors, and electrical outlets.
  • Add mass: Adding mass to walls and ceilings will help prevent sound transmission. Use high-density materials such as drywall or mass-loaded vinyl to cover existing walls and ceilings.
  • Build a room within a room: Building a room within a room is one of the most effective ways to achieve complete sound isolation. This involves constructing a new frame within your existing walls and ceiling, then adding insulation and drywall.

Acoustic treatment involves manipulating the way sound behaves in your space. This can be achieved by using acoustic panels, diffusers, and bass traps. Here are some tips for acoustic treatment:

  • Add acoustic panels to your walls: Acoustic panels are designed to absorb sound waves, preventing them from bouncing around in your space.
  • Use bass traps in corners: Bass traps help absorb low-frequency sounds that tend to accumulate in corners.
  • Add diffusers to your ceiling: Diffusers help break up sound waves, creating a more natural-sounding space.

Furniture And Layout

The furniture and layout of your home studio can make a huge difference in the quality of your recordings. Here are some tips for designing your furniture and layout:

  • Invest in a comfortable chair: You will be spending a lot of time in your chair, so it’s important to invest in a comfortable, ergonomic one that won’t leave you with back pain.
  • Place your desk against a wall: This will help prevent sound from reflecting off the wall and back into your microphone.
  • Avoid placing your microphone near reflective surfaces: Reflective surfaces such as windows, mirrors, and metal objects can cause unwanted reflections and distortions in your recordings.
  • Create a designated area for your equipment: Keep your equipment organized and within reach so that you can easily adjust your settings as needed.
How To Build A Home Studio

Credit: www.shure.com

Setting Up Your Equipment

Setting up your home studio equipment is an essential step to achieving professional-quality audio recordings. To get started, it’s important to make sure that each piece of equipment is connected correctly. Additionally, you’ll need to calibrate your monitors and set up your microphone correctly to ensure that you’re capturing the best audio possible. In this guide, we’ll walk you through each step of the process to help you set up your home studio like a pro.

Connecting Your Audio Interface

Before you begin recording, you’ll need to connect your audio interface to your computer. To do this, follow these steps:

  1. Connect one end of your audio interface’s USB or Thunderbolt cable to your computer.
  2. Connect the other end of the cable to your audio interface.
  3. If your audio interface requires external power, plug it into a power outlet.
  4. Turn on your audio interface.

Calibrating Your Monitors

Once your audio interface is connected, it’s time to calibrate your monitors. Calibration is essential to ensure that you’re hearing your recordings accurately. Follow the steps below to calibrate your monitors:

  1. Use a sound pressure level meter to measure the sound pressure level at your listening position.
  2. Open your digital audio workstation and play a test tone through your monitors.
  3. Use your sound pressure level meter to measure the sound pressure level of the test tone.
  4. Adjust the volume of your monitors until the measured sound pressure level matches the target level for your listening environment.

Setting Up Your Microphone

Once your monitors are calibrated, it’s time to set up your microphone. Follow the steps below to get started:

  1. Place your microphone on a stand or shock mount to minimize noise and vibrations.
  2. Connect your microphone to your audio interface using an XLR cable.
  3. Adjust the height and position of your microphone to get the best sound possible.
  4. Test your microphone by recording and adjusting its placement as needed to get the best sound quality.

Creating Your First Recording

Learn how to build a home studio and create your first recording with these easy steps. Start by selecting the right equipment, setting up the space, and experimenting with sound until you get the perfect mix.

Creating Your First Recording: Establishing Levels: The first step in creating your first recording is to establish the levels of your recording equipment. Make sure that you have a decent microphone placed appropriately in front of your sound source. Adjust the input level of your audio interface to avoid clipping. Try to keep your recording signal level as high as possible without going into the red zone in your DAW. This will ensure that your recording doesn’t sound too quiet or too loud. Recording Technique: After setting up the levels, it’s time to focus on recording technique. If you are recording vocals, make sure that you have a pop filter in front of the microphone to avoid pops and breaths. If you’re recording an instrument, try out different mic positions to find the sweet spot. If you are recording a band, make sure everyone is positioned correctly around the microphone. If you’re recording a spoken word, make sure you pace yourself, take breaks as needed, and enunciate well. Editing Your Audio: Once you’re done recording, it’s time to edit your audio. This will involve trimming unused audio regions, splitting into individual tracks, and applying basic effects such as EQ, Compression, and Reverb. Use an EQ to remove unwanted frequency ranges and improve the perceived clarity of your sound. Apply compression to tame the dynamic range of your recording and enhance the overall loudness. Finally, add Reverb to create a sense of space and depth to your recording. Keep these techniques in mind while editing your audio. In conclusion, building a home studio and creating your first recording may seem daunting, but if you focus on these key steps and techniques, you can create a great sounding track. Establish your levels, practice proper recording techniques, and use basic editing techniques to create a more polished sound. Start with these basics, then continue learning and experimenting with your home studio setup.

How To Build A Home Studio

Credit: audient.com

Optimizing Your Workflow

When building a home studio, optimizing your workflow is crucial. It allows you to work more efficiently, save time, and produce higher-quality work. Here are three ways to optimize your workflow:

File Management

Good file management is one of the most important aspects of optimizing your workflow. It allows you to quickly find the files you need and reduces the risk of losing important data. Here are some tips for organizing your files:

  • Use clear and consistent naming conventions for your files.
  • Create a folder structure that makes sense for your workflow.
  • Keep all your files in one place, such as an external hard drive.
  • Back up your files regularly to prevent data loss.

Keyboard Shortcuts

Keyboard shortcuts are another great way to optimize your workflow. They allow you to perform tasks quickly without having to stop and use the mouse. Here are some keyboard shortcuts every content writer should know:

ActionWindows ShortcutMac Shortcut
CutCtrl + XCmd + X
CopyCtrl + CCmd + C
PasteCtrl + VCmd + V
UndoCtrl + ZCmd + Z
RedoCtrl + YCmd + Shift + Z

Custom Templates

Creating custom templates is a great way to optimize your workflow. If you find yourself writing the same type of content repeatedly, you can create a template that includes all the necessary formatting, headings, and placeholders. Here are some tips for creating custom templates:

  • Identify the types of content you write most frequently.
  • Create a template for each type of content.
  • Include all the necessary formatting, headings, and placeholders in the template.
  • Save the template in a folder where you can easily access it.

Additional Tools And Techniques

If you want to take your home studio to the next level, there are a few additional tools and techniques you can use to make your recordings sound even better. In this section, we’ll cover three important areas: virtual instruments, effects and plugins, and automation.

Virtual Instruments

Virtual instruments are software-based musical instruments that can be played using a MIDI controller or your computer keyboard. They can be used to mimic the sound of real instruments, or to create unique sounds that are impossible to achieve with traditional instruments. There are many virtual instruments available, ranging from simple synthesizers to complex orchestral libraries.

If you’re just starting out, you may want to invest in a few basic virtual instruments, such as a piano or drum kit. As you become more comfortable with them, you can experiment with more advanced instruments and learn how to program them to create the sounds you want.

Effects And Plugins

Effects and plugins are software tools that can be used to process your audio recordings and add special effects to them. Some effects are used to correct problems with the audio, such as noise reduction or EQ, while others are used to add creative effects, such as reverb or distortion.

There are many different effects and plugins available, both free and paid. When choosing which ones to use, it’s important to consider the needs of your recording and the style of music you’re creating.

Automation

Automation is the process of recording changes to your mix over time. For example, you might use automation to slowly increase the volume of a track over the course of a song, or to fade out the reverb on a vocal track at a certain point.

Most DAWs (Digital Audio Workstations) have built-in automation tools that allow you to record changes to your mix in real-time. By using automation, you can add movement and dynamics to your mix, making it more interesting and engaging.

These are just a few of the additional tools and techniques you can use to build a home studio. By experimenting with different tools and techniques, you can find the ones that work best for you and create professional-quality recordings from the comfort of your own home.

Going Pro

So, you’ve decided to take your home studio to the next level and turn it into a professional one. Congratulations! Going pro means that you’ve now taken your passion and turned it into a career. However, there are a few things you’ll need to do to ensure your success. In this section, we’ll cover some key things to keep in mind as you expand your setup, market your studio, and collaborate with other artists.

Expanding Your Setup

If you’re serious about taking your home studio to the next level, it’s essential to expand your setup. This means investing in high-quality equipment and software that will allow you to create professional-grade music, videos, or other content. Here are some things to consider:

  • Invest in a high-quality audio interface that can handle multiple inputs and outputs
  • Upgrade your recording software to a professional-grade DAW
  • Invest in high-quality microphones and headphones for recording and mixing
  • Consider adding hardware effects processors like compressors, EQs, and reverbs
  • Invest in studio monitors and acoustic treatment to ensure accurate monitoring

Marketing Your Studio

Marketing your studio is essential to its success. After all, you can’t have a successful business if no one knows you exist. Here are some ways to market your studio:

  • Create a website that showcases your services, rates, and portfolio
  • Use social media to promote your studio and engage with potential clients
  • Offer free consultations or trial recording sessions to attract new clients
  • Create business cards and flyers to distribute locally
  • Attend local music events and conferences to network with potential clients

Collaborating With Other Artists

Collaborating with other artists can be a great way to expand your network and build your reputation. Here are some tips for successful collaborations:

  • Be clear about your expectations and goals for the collaboration
  • Communicate regularly and openly with your collaborators
  • Be respectful of each other’s creative ideas and input
  • Credit each other appropriately in the final product
  • Promote each other’s work and collaborations on social media

Frequently Asked Questions For How To Build A Home Studio

How Much Will It Cost To Build A Home Studio?

The cost of building a home studio varies based on the equipment and features you require. A basic setup with a computer, audio interface, microphone, and headphones could cost around $500-$1000. However, for a more professional setup with additional equipment and soundproofing, the cost could go up to $5000 or more.

How To Build A Home Studio For Beginners?

To build a home studio for beginners, start by selecting a suitable space, investing in quality studio monitors, recording software and a microphone. You can also add acoustic treatment panels to enhance sound quality and reduce noise reflections. Finally, ensure your studio is properly set up and calibrated for optimal sound production.

Can You Build A Studio In Your House?

Yes, you can build a studio in your house. It’s a great way to have a dedicated space for your creative pursuits. However, it’s important to check local zoning laws and building codes before starting any construction. You may also need a building permit and must follow safety regulations.

What Is The Ideal Size For A Home Studio?

The ideal size for a home studio can vary depending on the type of equipment and space needed. However, it’s recommended to have a minimum space of 8 feet by 10 feet to accommodate basic equipment and allow for proper sound insulation.

The height of the room should also be at least 8 feet to reduce sound distortion.

Conclusion

Creating a home studio allows you to take control of your music production and achieve professional-sounding recordings without spending a lot of money. From selecting the right equipment to optimizing your space, building a home studio may seem like a daunting task at first.

However, with proper planning and execution, you can set up a studio that meets your unique needs and allows you to unleash your creativity. Remember to prioritize sound quality, invest in essential gear, and most importantly, have fun with the process.

Happy recording!

For more background, see Recording studio on Wikipedia. You may also like our guide: Things You Need To Build A Home Studio.

Categories
Archive

Tips For Mixing 808

When mixing 808, be mindful of its frequencies, levels, and stereo image. Use EQ to remove unwanted frequencies and enhance the desired ones.

Adjust the levels to blend the kick with the 808 seamlessly. Lastly, pan the 808 to enhance the stereo image and create a sense of space. Mixing 808 can be a daunting task, but the right tips and tricks can help make the process easier.

808s are the foundation of modern hip hop and trap music, and it’s crucial to get them right. We’ll explore some essential tips for mixing 808s, including how to manage their frequencies, levels, and stereo image. By following these guidelines, you’ll be able to create a powerful, tight, and well-defined bass sound that will anchor your track and get the crowd moving. So, let’s dive in!

Tips For Mixing 808

Credit: www.pinterest.com

Understanding The 808

Understanding the 808 is crucial for creating powerful and impactful music. When it comes to mixing 808, you need to make sure it’s well-balanced in terms of volume, frequency range and harmonic content. Use EQ wisely to avoid clashing with other elements in your track and always reference your mix on multiple systems.

Understanding The 808 Mixing an 808 can be a daunting task, especially if you’re new to music production. The 808 has revolutionized the music industry with its distinct bass-heavy sound and has become a staple in genres such as hip-hop, trap, and electronic music. In this section, we’ll discuss the history, characteristics, and popular genres that use the 808. History Of The 808 The Roland TR-808 Rhythm Composer, commonly known as the 808, was first introduced in 1980. It was initially a commercial failure, but it later became a game-changer in music production. The 808 was affordable and easy to use, making it accessible to aspiring musicians. It also had a unique sound that stood out from other drum machines of the time. Characteristics Of The 808 The 808 is distinct for its deep and booming bass sound. It’s also characterized by its long decay and wide frequency range, making it ideal for long sustained bass notes. The 808 can also create punchy and snappy sounds, perfect for creating percussion elements. Popular Genres That Use The 808 The 808 has become synonymous with several genres, but it’s undoubtedly most prevalent in hip-hop and trap music. In hip-hop, it’s often used to create the iconic boom-bap sound. In trap, it’s used to create the characteristic 808 kick and snare patterns. The 808 also plays a significant role in electronic dance music, where it’s used to create bass-heavy drops and build-ups. In summary, the 808 is an essential sound in modern music production. Understanding its history, characteristics, and popular genres that use it can help you create more impactful mixes. Keep these tips in mind when mixing your next 808 and experiment to find your unique sound.

Preparing The Mix

When mixing 808, it’s important to layer multiple samples to achieve a full and balanced sound. Make sure to EQ each layer to avoid frequency clashes and use compression to glue the sounds together. Experiment with different processing techniques like distortion or saturation to add character and depth to your 808.

Setting Up Your Session

Before you can start mixing your 808 track, it’s important to ensure that your session is set up correctly. Make sure that all the necessary plug-ins, instruments, and effects are loaded, and that your channels are properly routed. This will save you time and frustration later on in the mixing process.

Preparing The 808 Track

Once your session is set up, it’s time to prepare your 808 track. This means adjusting the levels to ensure that the 808 sits at the right level in the mix. You can use a spectrum analyzer to help you visualize the frequency spectrum of your track, and make sure that the lows of the 808 aren’t clashing with other elements in the mix.

Choosing Complementary Sounds

In addition to preparing the 808 track itself, it’s important to choose complementary sounds that work well with the 808. This can include other bass elements, such as a synth or a sub-bass, as well as percussion, such as a kick drum or snare. Make sure that each element in the mix has its own space in the frequency spectrum, and isn’t clashing with other elements.

Optimizing Eq And Compression

Finally, once you have your 808 track prepared and your complementary sounds in place, it’s time to optimize the EQ and compression settings. This will help to give your mix depth and definition, and ensure that each element sits in the right place in the mix. You can use a multiband compressor to adjust the levels of different frequency bands, and a sidechain compressor to help the kick drum and 808 work together. Preparing the mix for your 808 track can be a time-consuming process, but it’s essential for getting the best possible sound in your mix. By following these tips, you’ll be well on your way to creating a polished and professional 808 mix!

Achieving Clarity

To achieve clarity when mixing 808, consider following these tips: use clean samples, EQ to remove conflicting frequencies, experiment with compression and saturation, use sidechain compression to avoid muddiness, use stereo imaging to widen the sound, and listen on multiple sources to check for balance.

Remember to trust your ears, start with a solid foundation, and constantly reference other tracks to fine-tune your mix.

Mixing the 808 is a crucial part of producing any modern-day track. However, achieving clarity in the mix can be a challenging task. The 808 sound is heavy, deep, and often requires a lot of processing to cut through the mix. This section will provide tips on how to achieve clarity in 808 mixing, focusing on applying EQ, using compression, adjusting levels, and simplifying the arrangement.

Applying Eq

EQ is one of the essential tools for achieving clarity in 808 mixing. The crucial thing to remember while applying EQ is to avoid overlapping frequencies, which can cause masking and phase cancellation. Here’s how to apply EQ for clarity:

  • Remove unnecessary low-end frequencies, such as rumble, with a high-pass filter
  • Clean up the mid-range frequencies with a parametric EQ
  • Boost the harmonics to give the 808 more presence and character
  • Cut the harsh top-end frequencies to avoid ear fatigue

Using Compression

Using compression can add punch and impact to the 808 while maintaining its clarity. Here’s how to use compression for clarity:

  • Use a fast attack and release time to tame the initial transient and sustain the tail of the 808 sound
  • Avoid over-compressing, which can cause distortion and loss of dynamics
  • Use parallel compression to blend the compressed sound with the dry sound for a balanced mix

Adjusting Levels

Adjusting levels is a crucial part of achieving clarity in 808 mixing. The 808 should be loud enough to be heard but not overpowering. Here’s how to adjust levels for clarity:

  • Keep the 808 level consistent throughout the track
  • Avoid clipping by keeping the level below 0 dB
  • Use automation to adjust the level in different parts of the track, depending on the arrangement

Simplifying The Arrangement

The arrangement of the track can also affect the clarity of the 808 mix. A cluttered arrangement can cause the 808 to get lost in the mix. Here’s how to simplify the arrangement for clarity:

  • Remove unnecessary elements that clash with the 808 sound
  • Give space for the 808 to breathe in the mix by reducing the number of sounds playing together
  • Use muting or side-chain compression to make the 808 stand out in the mix

In conclusion, achieving clarity in the mix is essential for any 808-based track. Applying EQ, using compression, adjusting levels, and simplifying the arrangement can help achieve clarity and make the 808 sound punchy, impactful, and clear in the mix.

Creating Groove

Mixing 808 can be a daunting task for any music producer or audio engineer. It is essential to get the perfect balance between the 808 kick and the rest of the instruments in the mix. One crucial aspect of mixing 808 is creating groove. Groove is the rhythmic feel or swing of the music, which makes people want to dance. In this article, we will discuss tips for mixing 808 that can help create groove in your music.

Timing The 808

The timing of the 808 kick is crucial for creating groove. A well-timed 808 can make your music sound more energetic and create a sense of movement. The timing of the 808 should be precise and in sync with the other instruments in the music. A good way to check the timing is to use a metronome and adjust the 808’s timing accordingly. Also, try experimenting with different timing patterns to see which works best for your music.

Layering Percussion

Layering percussion with the 808 kick can add more depth and groove to the music. Adding percussions such as shakers, hi-hats, claps, and snares can complement the 808 kick and create a more complex rhythmic pattern. Experiment with different percussion instruments and layer them with the 808 to create unique and exciting rhythms. However, make sure not to over-layer the music as it may sound too cluttered and muddy.

Using Sidechain Compression

Sidechain compression is a technique that can help create space and groove in the mix. It involves reducing the volume of one instrument when the other is playing. Using sidechain compression on the 808 can help create more room for other instruments and give them more prominence in the mix. Also, sidechain compression can be used to create rhythmic patterns by making the 808 kick pulse to the beat.

In conclusion, creating groove is a key aspect of mixing 808. By implementing these three tips, you can enhance the rhythmic feel of your music and make it more danceable. The key is to experiment with different techniques and find the ones that work best for your music. Utilizing these tips in your mixing can take your music to the next level and make it stand out from the rest.

Adding Harmonic Depth

Adding harmonic depth to your 808 mix can greatly enhance the overall sound. By using techniques such as layering, EQing, and adding saturation, you can achieve a richer and fuller bass. Remember to experiment and trust your ears to find the perfect mix.

Using Saturation

Adding Harmonic Depth to your 808 mixes can be challenging, but with the right techniques, it can be achieved seamlessly. One technique you can use to add harmonic depth to your mix is the use of saturation. Saturation can deliver a warm and organic tone to your 808, making it sound fuller, richer and more dynamic. Saturation plugins like Decapitator, Softube Saturation and Slate Digital’s Virtual Tape Machines can help you achieve the right balance of saturation in your 808 mix. It is important, however, to be moderate in the use of saturation so as not to lose the original character of your 808 sound.

Applying Distortion

Another way to add harmonic depth to your 808 mix is by applying distortion. Distortion adds overtones to your 808 and can be used to create unique tones. When using distortion, try experimenting with multiple distortion plugins to blend the overtones seamlessly with your mix. Some distortion plugins that can be used in mixing 808s include the Decapitator, SoundToys Radiator and Waves Abbey Road J37. It is also important to note that too much distortion can make your mix sound muddy, so be sure to use it sparingly.

Mixing In Melodic Elements

Aside from using saturation and distortion, you can also add harmonic depth to your 808 by mixing in melodic elements. This can be achieved by adding melodic sounds like pads or bells that match with the key of your 808. One way to achieve this is by using a plugin like Melodyne which enables you to pitch and adjust the timing of individual notes in your melody with great ease. In adding melodic elements, ensure not to overwhelm the mix and find the right balance between the 808 and melodic sounds for a perfect blend. In summary, adding harmonic depth to your 808 mix can make a big difference in the final output, and can be achieved using a combination of techniques including saturation, distortion and mixing in melodic elements.

Tips For Mixing 808

Credit: www.waves.com

Finalizing The Mix

When it comes to mixing 808, getting the perfect balance can be challenging. Finalizing the mix requires careful attention to levels, EQ, and compression to ensure the low-end is present without overpowering the mix. Following these tips will help achieve a well-balanced, punchy 808 in your mix.

Once you have done a good job of mixing your 808 drum sounds, it is time to finalize the mix. This involves putting everything together, mastering the track, and comparing to reference tracks. Let’s explore each of these steps.

Putting Everything Together

To put everything together, start by organizing the tracks in your project. You should group similar instruments together and label each track accordingly. You can also use color-coding to make it easier to identify tracks. Once everything is organized, adjust the levels of each track to ensure that they are all audible without any distortion. The key here is to create a balance between all the elements in your mix.

Mastering The Track

The final step in the process of finalizing the mix is mastering the track. This involves enhancing the overall sound quality and making adjustments to the levels, EQ, compression, and stereo imaging. You can also add effects like reverb and delay to enhance the sound. Avoid over-processing your track as it may create unwanted artifacts that will affect the overall quality of your mix.

Comparing To Reference Tracks

Finally, it is important to compare your mix to reference tracks. Choose tracks that are similar to yours and that have achieved the sound that you want to achieve. Listen to these tracks and compare them to your own. You can use this as a guide to make adjustments to your mix until you get your desired sound. Also, ensure that the volume of your mix is equivalent to that of the reference tracks. In conclusion, finalizing your mix is an important step in music production that should not be overlooked. Putting everything together, mastering the track, and comparing to reference tracks will take your mix to the next level and help you achieve a professional sound.

Mixing Mistakes To Avoid

To achieve a well-balanced mix of 808’s, it’s important to avoid common mistakes such as overcompression, improper EQ, and not leaving enough headroom. Be sure to properly level and pan your sounds, as well as using a reference track to compare your mix.

When mixing your 808, it’s important to avoid some common mixing mistakes that can hurt the quality of your mix. In this section, we’ll discuss the mistakes you should avoid while mixing 808s.

Overusing Effects

One common mistake is overusing effects on your 808. While it may be tempting to use effects like distortion or saturation to make your 808 stand out, too much can be overwhelming and muddy. It’s best to use effects in moderation and trust that the 808 itself will provide the necessary punch and warmth.

Clashing With Other Low-end Elements

Another mistake is clashing with other low-end elements in your mix. To avoid this, it’s important to make sure your 808 fits well with the bass, kick, and any other low-end elements. If there are conflicting frequencies, adjust the EQ of one or both tracks to make sure they are not fighting for the same space.

Ignoring The Rest Of The Mix

Lastly, ignoring the rest of your mix can be a big mistake. While the 808 is an important element, it’s just one piece of the puzzle. Make sure to pay attention to the other sounds in your mix and ensure that they are balanced with the 808. This will help bring clarity and balance to your mix. To sum up, when mixing 808, avoid overusing effects, clashing with other low-end elements, and ignoring the rest of the mix. By avoiding these common mistakes, you can ensure that your 808 will sit well in the mix and help elevate your overall production.

Tips For Mixing 808

Credit: majormixing.com

Frequently Asked Questions On Tips For Mixing 808

How Can I Make My 808 Sound Better?

Improve the sound of your 808 by following these tips: 1. Try layering multiple 808 samples for a fuller sound 2. Experiment with EQ to boost or cut certain frequencies 3. Use a compressor to even out the volume 4.

Add distortion or saturation for more grit and character 5. Consider adding reverb or delay for more depth and space.

How Do You Mix 808 Drums?

To mix 808 drums, start by layering different samples and adjusting the levels until they sound cohesive. Use EQ to shape the frequency spectrum and create space for other elements in your mix. Apply compression to give the drums more punch and control their dynamics.

Experiment with additional effects, like distortion or reverb, to add character and depth to the sound. Finally, make sure to balance the volume of the drums with the rest of your track.

How Loud Should My 808 Be In The Mix?

Your 808 should sit at a suitable level in the mix, typically around -18db to -12db. Aim for a balance where it’s audible but doesn’t overpower other elements. Use EQ and compression to ensure it’s fitting comfortably within the frequency range of your track.

Experiment until your ears are content.

How To Make 808 Punchy?

To make an 808 punchy, you should consider using techniques such as adjusting the attack and decay, adding distortion or saturation, layering drums, and using compression and EQ. Experiment with the settings until you find the right balance of frequency and impact, ensuring that the 808 sits well in the mix and has enough space to cut through.

Conclusion

To sum up, mixing 808s can be a challenging task that requires a creative approach. But with these tips, you can now confidently tackle any 808 mixing project and achieve a powerful and impactful low-end sound on your music productions.

Remember to experiment with EQ, compression, and saturation, choose the right samples, adjust the levels, and always trust your ears. By following these guidelines, you will be able to make your tracks stand out and impress your listeners. So, go ahead and start mixing those 808s like a pro!