Categories
Archive

Harmony Theory Circle Of Fifths

Harmony Theory Circle of Fifths is a diagram that displays the twelve possible pitches and their corresponding key signatures arranged in a circular pattern. It is a useful tool to understand the relationship between keys and the chords they contain.

By moving clockwise, the key of the next note will add one sharp, while counterclockwise will add one flat. The chords of the corresponding keys can be easily identified by the notes within the circle. Understanding the Circle of Fifths provides a comprehensive understanding of music theory, from chord progressions to key signatures and scales.

As a musician, understanding harmony theory is essential to mastering the craft. The Circle of Fifths is a fundamental concept in music theory that provides insight into the relationships between notes, keys, and chords. We will delve into the Circle of Fifths and explore how it can be used to unlock the mysteries of music theory. We will explore the key signatures, scales, and chord progressions that can be derived from the circle. By the end, you will have a solid grounding in this essential tool for any musician.

Harmony Theory Circle Of Fifths

Credit: www.pinterest.com

Fundamentals Of The Circle Of Fifths

The Circle of Fifths is an essential tool for any music enthusiast, whether you’re a beginner or a pro. It is a diagram that represents the relationships between the 12 tones of the chromatic scale. Understanding the Circle of Fifths will help you to understand the basic principles of music theory and improve your skills in composition, improvisation, and performance. In this post, we will dig into the nitty-gritty of the Circle of Fifths and its fundamentals.

How It Works

The Circle of Fifths consists of a series of key signatures arranged in a circular fashion. Each key signature is separated by a fifth interval going clockwise. For example, the key of G is one fifth higher than the key of C. The key of D is one fifth higher than the key of G, and so on. Going counterclockwise from any given key signature will take you down a fifth interval to the next key signature. For example, the key of F is one fifth lower than the key of C. The key of Bb is one fifth lower than the key of F, and so on. When you start with the key of C major, it will get you all the way around the circle until you come back to C major, thus completing the cycle.

Why It’s Important

The Circle of Fifths is used to show the relationships between key signatures, chords, and scales, and it helps musicians to understand how different notes and chords relate to each other. By understanding the Circle of Fifths, you can analyze and transpose music, modulate between keys, create chord progressions, and improvise with ease. Additionally, the Circle of Fifths is vital for understanding harmony theory, as it illustrates the flow of chord progressions, showing how dominant chords resolve to their tonic counterparts.

Overall, the Circle of Fifths is a critical tool for anyone interested in understanding and creating music. Whether you’re a beginner or an experienced musician, mastering the Circle of Fifths will enhance your understanding of music theory and help you to create more complex, harmonious compositions. So, start exploring and experimenting with the Circle of Fifths today and take your music to the next level.

Mastering Major Keys

If you want to excel in music, it’s vital to understand the Circle of Fifths and its role in the harmony theory. Among the several key concepts associated with music theory, mastering major keys can have a significant impact on the overall sound of your compositions. Below, we’ll explore how identifying key signatures and building chords and progressions can help you become proficient in major keys.

Identifying Key Signatures

Knowing how to identify key signatures is crucial before diving deeper into chord progressions. You can find key signatures on sheet music where they indicate the key signature of the piece. The number of sharps and flats in key signatures differs depending on the major key. For instance, the key of C has no sharps or flats, and the key of G has one sharp. By memorizing the number of sharps or flats in each key, you can identify the key of the piece of sheet music you’re working on and start building complementary chords.

Building Chords And Progressions

One of the easiest ways to build chords and progressions is by following the harmonic minor scale or the natural minor scale since they have a simple and predictable sequence of chords. For example, the natural minor scale of C consists of C, D, Eb, F, G, Ab, and Bb. Following this sequence will give you the chords of C, Dm, Eb, F, G, Ab, and Bb. Furthermore, you can also build chords by following the Circle of Fifths, which is an essential tool in music theory. The Circle of Fifths displays the relationships between the 12 tones on the chromatic scale, helping musicians to understand the relationships between different chords.

Major KeysComplementary Chords
CC, Dm, Em, F, G, Am, Bdim
GG, Am, Bm, C, D, Em, F#dim
DD, Em, F#m, G, A, Bm, C#dim
AA, Bm, C#m, D, E, F#m, G#dim
EE, F#m, G#m, A, B, C#m, D#dim
BB, C#m, D#m, E, F#, G#m, A#dim
F#F#, G#m, A#m, B, C#, D#m, E#dim

Using the chart above, you can master the complementary chords to various major keys so that you can build chords and progressions easily. Once you’ve mastered these chords, you can start exploring with chord inversions and variations to add more flavor and movement to your compositions.

Diving Into Minor Keys

Understanding minor keys is crucial to becoming a well-rounded musician. While many people tend to focus on major keys, diving into minor keys can open up a world of possibilities for creating unique and compelling music. In this section, we’ll explore the concept of relative key relationships, building chords and progressions, and how they relate to the harmony theory circle of fifths.

Relative Key Relationships

One of the most important concepts to understand when exploring minor keys is relative key relationships. In music theory, every major key has a corresponding minor key that shares the same key signature. For example, the relative minor of C major is A minor, because both keys have no sharps or flats. This relationship can be seen by moving clockwise around the circle of fifths, three positions from the major key.

Building Chords And Progressions

Once you understand the relative key relationships, you can start building chords and progressions in minor keys. Just like in major keys, chords in minor keys are labeled with Roman numerals based on their position in the scale. However, the natural minor scale has a different harmonic structure than major scales, so chords and progressions in minor keys can have a distinctly different sound.

Minor keys also allow for the use of borrowed chords from the major key that shares the same key signature. For example, a song in A minor might use the C major chord, which is borrowed from the relative major key of C major. This creates a unique sound that can add interest and variety to your music.

Putting It All Together

By combining the circle of fifths, relative key relationships, and chord progressions, you can create complex and beautiful music that truly stands out. Whether you’re a seasoned musician or just starting to explore music theory, diving into minor keys is a fascinating and rewarding journey that can take your music to the next level.

Harmony Theory Circle Of Fifths

Credit: www.amazon.com

Exploring The Circle

If you’re a music enthusiast or composer, you’ve undoubtedly heard of the circle of fifths. This fundamental concept provides insight to understand chord progressions and structure in music theory. Understanding the circle of fifths is essential in creating music that impresses audiences and stands the test of time. In this blog post, we’ll explore the circle, beginning with the basics and gradually moving to more advanced topics like extended circle progressions and circle of fourths.

Circle Of Fourths

The circle of fourths provides a complementary approach to the circle of fifths. It moves clockwise, from left to right, and provides insight into the relationships between chords separated by a fourth. To explore this concept, first, locate C, and then move four notes to the right, which leads to F, the fourth note of C. This method continues around the circle, resulting in the chords separated by a fourth around the entire circle. For example, moving four notes from F leads to B-flat, and so forth.

Extended Circle Progressions

Extended circle progressions encompass a series of chords that complement each other and form the foundation of most songs. The circle begins with the primary chords of C major (C, F, and G) and builds around the circle. Extended circle progressions move in either a clockwise or counter-clockwise direction around the circle. One of the most common extended circle progressions is the ii-V-I progression, where the second note of a scale (ii) is followed by the fifth note (V) and then resolves to the first (I). This progression relies heavily on the circle, and understanding its structure is essential to creating compelling music.

Overall, the circle of fifths and its complementary circle of fourths are essential concepts when it comes to creating music that resonates with listeners. Exploring the circle of fifths in depth will not only provide insights into chord structure and progressions but will also give you the tools to create sophisticated and memorable music.

Application In Music Production

Understanding the Harmony Theory Circle of Fifths is crucial in music production. It allows producers to easily identify the key signature of a track, making it simpler to construct harmonies and melodies that are musically pleasing.

Harmony theory is a core principle in creating music. It is the art of combining different musical elements to produce a beautiful and harmonious sound. One of the essential tools in harmony theory is the Circle of Fifths, which serves as a guide to understanding the relationship between musical keys. In music production, producers can use the Circle of Fifths to produce chord progressions and composition techniques that enhance the overall musical experience. In this article, we will discuss how to apply Harmony Theory Circle of Fifths in music production with a particular focus on chord progressions and composition techniques.

Chord Progressions

Chord progressions are a series of chords played in a particular order to create a musical piece’s harmony. Producers can use the Circle of Fifths to create chord progressions with ease. The Circle represents every musical key and its corresponding chords, helping producers to explore chord progressions that work together harmoniously. For instance, producers can use the Circle of Fifths to create chord progressions that start in one key and smoothly transition to another key. This technique is useful in creating musical pieces that have a unique sound that is both appealing and harmonious.

Composition Techniques

Another way to apply the Harmony Theory Circle of Fifths in music production is by using composition techniques. Producers can use the Circle as a guide to composing melodies that work together harmoniously. For example, using the Circle, producers can compose melodies that begin in one key and finally end up in another key. This technique is called modulation, and it helps in creating musical pieces with a beautiful and sophisticated sound.
In conclusion, the Harmony Theory Circle of Fifths is an excellent tool for producers who want to create unique and harmonious musical pieces. By using the Circle, producers can create beautiful chord progressions and composition techniques that enhance the overall musical experience.

Harmony Theory Circle Of Fifths

Credit: www.productionmusiclive.com

Frequently Asked Questions On Harmony Theory Circle Of Fifths

What Is The Harmony Circle Of Fifths?

The harmony circle of fifths is a diagram used in music theory that shows the relationships between the 12 tones of the chromatic scale. It is a circular arrangement that shows the order of keys based on the interval of a perfect fifth.

The circle is used to help musicians understand chord progressions, key signature relationships, and modulations.

What Is The Circle Of Fifths In Harmonics?

The circle of fifths is a tool used in music theory to show how keys and chords are related. It’s a circular graph that shows the twelve notes of the Western musical scale, arranged in ascending fifths. Each key can be connected to its adjacent keys, and the circle can be used to figure out chord progressions and key changes in a musical composition.

What Is The Harmony Theory?

Harmony theory is a concept in music that involves the use of different notes, chords, and melodies to create a pleasing sound. It is based on the principle of combining different sounds that complement each other to form a cohesive whole.

The theory is used in various music genres including classical, jazz, and pop music.

What Is The Circle Of Fifths In Basic Music Theory?

The circle of fifths is a musical tool used in basic music theory to help musicians understand the relationships between key signatures. It shows the position of each key on a circle, with adjacent keys differing by a fifth. The circle helps musicians understand key relationships, chord progressions, and modulation.

Conclusion

The circle of fifths is a powerful tool for understanding harmony in music. As we have explored, it provides a visual representation of the relationships between different chords and keys. By using the circle of fifths in your music writing, you can enhance your compositions and create more complex harmonies.

With practice and patience, mastery of this tool can bring new depth to your musical creations. It is truly an essential knowledge for any serious musician or composer looking to take their craft to the next level.

Categories
Archive

The Magic Behind Writing Melodies

Melodies are created by combining pitch and rhythm in a way that captivates the listener. The process of writing melodies involves careful consideration of intervals, phrasing, and repetition, resulting in a memorable and emotional musical line.

Also, Melody is often the most recognizable aspect of a song or instrumental piece, and it can set a mood or convey a message on its own. Also, understanding the basic principles of melody writing can unlock a world of creative possibilities for songwriters and composers.

Related reading: Chords And Melody Writing and Ableton Live 12 Piano Roll Top Melody Chord Writing Features. For background, see the Wikipedia article on Melody.

Moreover, let’s delve deeper into the magic behind writing effective and memorable melodies.

The Art Of Writing Melodies

When it comes to music production, melody is the heart of any song. In addition, a well-crafted melody can instantly captivate the listener and stay in their head long after the song ends. But what defines a melody, and what role does it play in music? In addition, let’s explore the magic behind writing melodies and discover the art of crafting them.

Defining Melody for Writing Melodies

Furthermore, a melody can be defined as a sequence of notes played in a structured and rhythmic manner to create a specific tune. For example, it is the most prominent and recognizable part of a song that grabs the listener’s attention. Melodies can be composed of simple or complex patterns, consisting of different time signatures, pitches, and scales.

The Role Of Melody In Music

Additionally, one of the crucial roles of melody in music is to convey emotions. As a result, a well-written melody can evoke a wide range of emotions, from happiness to sadness, excitement to melancholy. Melodies can also set the tone and atmosphere of a song, and help develop the story or message behind the lyrics.

In addition to emotional connection, creating a memorable melody is essential for a song’s success. However, a captivating melody can make a song stand out from others and make it more likely to be remembered and recognized by listeners.

The Emotional Connection

Also, the emotional connection that melodies create with listeners is of utmost importance. Then, a well-crafted melody can make the listener feel, and draw them into the song’s story or message. Regardless of the genre or language, a great melody has the power to speak to people on a universal level, transcending cultural and linguistic barriers.

In conclusion, the art of crafting melodies is an intricate process that requires creativity, skill, and ingenuity. In short, melodies play a vital role in music, conveying emotions, setting the tone and atmosphere of a song, and creating a memorable experience for listeners. Moreover, as a songwriter or producer, master the art of writing melodies can make all the difference in creating a successful and impactful song.

The Building Blocks Of A Melody

In addition, Writing a memorable melody involves choosing the right combination of musical notes that emotionally resonate with the listeners. Similarly, utilizing key signatures, chord progressions, and rhythm, along with a personal touch, are some of the building blocks that contribute to crafting a truly captivating melody.

Furthermore, a melody is the heart and soul of any song. It is what we hum along, what gets stuck in our head, and what we sing in the shower. Writing a melody that grips the listener is no easy task, but with a few building blocks, anyone can create a memorable tune. In this post, we will explore the essential components that make up a melody- notes, intervals, rhythmic patterns, phrasing, and dynamics.

Notes And Intervals

Additionally, notes are the fundamental building blocks of any melody. They are the sound waves that produce a pitch. A melody can consist of a single note or a series of notes played sequentially. The melody’s pitch is determined by the distance between each note, known as intervals. Each interval has a unique name and a specific distance measured in semitones. For example, the distance between C and D is called a whole tone, while the distance between C and C# is called a semitone.

Rhythmic Patterns

Also, rhythm is a crucial aspect of melody writing. It is the foundation on which the melody is built. Rhythmic patterns refer to the duration and arrangement of notes in a melody. The rhythm sets the tone and mood of the song and can determine how it is perceived by the listener. Melodies can have different rhythmic patterns, such as syncopation, swing, or straight rhythms.

Phrasing And Dynamics

The phrasing and dynamics of a melody refer to how it is played and the different levels of intensity. Phrasing is the art of dividing the melody into phrases, each with its beginning and end, like sentences in language. Phrasing can make melodies interesting and dynamic by creating tension and resolution. Dynamics refer to the volume or intensity of a melody, from soft to loud. Dynamics can create contrast and drama in a melody, making it more captivating. In conclusion, understanding the building blocks of a melody is crucial for any songwriter or composer. It lays the groundwork for creating a memorable tune that resonates with the listener. By paying attention to notes, intervals, rhythmic patterns, phrasing, and dynamics, anyone can write a compelling melody that stands the test of time.

The Creative Process

The creative process of writing melodies is a beautiful and magical experience that requires patience, insight, and a deep understanding of music theory. Whether you’re an experienced songwriter or aspiring musician, composing a memorable melody takes time, effort, and a willingness to explore new ideas. In this post, we will explore the creative process behind writing melodies, delving into each aspect of the art to provide you with a comprehensive guide to crafting your own unique melodies.

Exploring Melodic Ideas for Writing Melodies

The first step in the creative process of writing melodies is to generate melodic ideas. To explore melody ideas, you need to find inspiration. Inspiration can come from anything, a personal experience, current events, and even other songs with their melodies. To unlock your creativity, you can start with humming a tune or otherwise making sound. Playing around with notes and chords and finding melodies that you feel good about.

Choosing The Right Key When Writing Melodies

Once you have a melody you’re excited about, the next step is to choose the right key. The right key is an important factor in the success of a melody and affects the emotion it conveys. Choosing a key that fits your melody and the intended emotion behind it is essential. Some keys are happier or brighter, while others are sadder or darker. Once you’ve selected your key, you can start experimenting with different chord progressions to find one that complements the melody you’ve created.

Developing A Theme for Writing Melodies

Developing a theme for your melody ensures that it sticks to your listener’s mind and makes it unique. The melody’s theme should be memorable and easy to hum or sing along. Ensure that it’s not too complicated or too dull, select a theme that can be customized and can make you stand out. To develop a theme, you can analyze your melody’s structure and identify its recurring patterns and motifs. Then, you can develop it by varying it, repeating it in different ways, or breaking it apart to create variations. All these add layers to your melody development.

Writing a memorable melody is the heart of songwriting. To produce a melody that catches the listener’s attention, you’ll need to be aware of all these steps that are involved. From exploring melodic ideas to chosing the right key and developing a theme, the creative process of writing melodies require a combination of musicianship and creativity. When you follow these tips, you’ll be sure to come up with a unique and memorable melody that will set you apart.

Writing Melodies People Remember

Crafting memorable melodies requires a bit of magic, creativity, and musical know-how. The process involves exploring different tones, rhythms, and chords to create a unique and unforgettable tune that listeners won’t soon forget. With a little inspiration and practice, anyone can learn the art of writing melodies that touch people’s hearts and minds.

Crafting memorable melodies is an art form that has been revered for centuries. Be it a symphony, a pop song, or a jingle, the melody is undoubtedly the most recognizable and memorable part of a composition. Melodies have the power to stir emotions, evoke memories, and set the mood for a piece of music. In this section, we will explore the magic behind writing melodies that stick with the listener.

Creating Contrast And Interest

Creating contrast and interest in a melody is crucial in captivating the listener’s attention. Using different melodic intervals, tempos, rhythms, and dynamics can add depth and complexity to a melody. A melody that follows a predictable pattern can be forgettable and lackluster. Combining contrasting elements in a melody can create intrigue and keep the listener engaged. For instance, using unexpected chord progressions or introducing a new instrument in the middle of a melody can create a memorable hook that sticks with the listener.

Adding Variation And Development for Writing Melodies

Adding variation and development in a melody can make it more interesting and memorable. Melodies that repeat themselves over and over can become tedious. Adding dynamics and variation in the melody by changing the emphasis on certain notes or adding a different rhythm can add interest to the melody. Furthermore, developing a melody by changing an octave or adding a variation in the melody can create more interest and depth in the melody.

Experimenting With Structure

Experimenting with structure is another way to write memorable melodies. A melody’s structure refers to the order in which the different parts of a melody are placed. A well-structured melody can create anticipation and add excitement to the listener. For example, using a chorus-verse-chorus structure in a pop song can make the melody catchy and memorable. Experimenting with different structures can also create unique and exciting melodies that stand out from the norm. In conclusion, crafting memorable melodies is a multi-faceted process that requires a keen ear, creativity, and patience. By adding contrast and interest, variation and development, and experimenting with structure, musicians can create melodies that stick with the listener and stand the test of time.

Finding Inspiration for Writing Melodies

When it comes to writing melodies, one of the crucial parts of the creative process is finding inspiration. Inspiration can come from a variety of sources, including personal experiences, collaboration with other musicians, and incorporating different styles.

Incorporating Different Styles

Incorporating different styles into your melody can often lead to unique and exciting sounds. Experimenting with various genres such as jazz, blues, or rock can take your melody in unexpected directions. Try listening to different music styles and find inspiration in the way other artists approach melodies.

Drawing From Personal Experience for Writing Melodies

Another way to find inspiration for your melody is to draw on personal experiences. This can be anything from a beautiful nature scene to a recent breakup. Emotions have a way of fueling creativity, and personal experiences can provide a deep well of inspiration.

Collaborating With Others

Collaboration with other musicians is an excellent way to find inspiration for your melody. Collaborators bring different perspectives and skill sets to the table, which can lead to fresh ideas and creative approaches. Working with others also provides a support system that can help to keep the creative process moving forward.

The Magic Behind Writing Melodies

Credit: www.youtube.com

Breaking The Rules for Writing Melodies

Have you ever wondered what makes a melody stick in your head? Breaking the rules when it comes to writing melodies can be the key to creating a memorable tune. Experimenting with unconventional chord progressions or unexpected rhythms can lead to unique and captivating melodies.

When it comes to music, there are several rules that are meant to guide songwriters on how to write melodies. However, as much as these rules play an essential role in music creation, there are times when songwriters need to break them to create something unique and unforgettable. Let us examine some instances when breaking the rules might be the best decision for any songwriter.

When To Depart From Tradition

Traditionally, the melody of a song follows a specific pattern and structure. However, songwriters who stick to these rules might end up creating something that has already been done before, and this makes it less appealing to the audience. Departing from tradition can result in something remarkable that can leave a lasting impression on listeners. The key is to listen to the inner voice, follow instincts, and let creativity take over.

Pushing Boundaries And Taking Risks

Songwriters who keep things too safe might end up creating something that is forgettable. Pushing boundaries and taking risks can lead to exciting results. Experiment with different approaches, change the key, play with the tempo, incorporate unusual instruments, and do anything that feels right. Keep in mind that taking risks comes with the possibility of failure, but it is this same risk that can result in something amazing.

Writing Melodies That Stick

Creating unforgettable melodies requires more than just following the rules. It requires understanding what makes a great melody and the ability to create something that captures the listener’s attention. A great melody should resonate with the listener, creating an emotional connection. Pay attention to the rhythms, harmonies, and the overall song structure. The key is to create something that is not only unique but also memorable. Breaking the rules is not just about breaking them for the sake of it. It is about understanding what rules to break that can lead to creative expression and something unique. By departing from tradition, pushing boundaries, and taking risks, songwriters can create melodies that are unforgettable, resonating with listeners for years to come.

The Impact Of Melody

Melody has an undeniable impact on music listeners worldwide. A well-written melody has the power to capture emotions, inspire, and even transport us to another place and time. The magic behind writing melodies lies in understanding the basic structure of music theory and using it to create something unique and unforgettable.

Influencing Emotion And Memory for Writing Melodies

Melodies have a powerful impact on our emotions and memory. It is the melody that creates a connection between the listener and the music. When we listen to music, we tend to associate the melody with certain emotions. Sad melodies make us sad, while happy melodies bring out happiness and joy. Melodies can also trigger memories and bring back specific moments in time. It has been seen that music can help in the recovery of stroke patients by evoking memories and emotions through the melody.

Creating Lasting Impressions

Melodies have the power to create lasting impressions. Think about your favorite song. One of the reasons it stands out is because of its melody. It is the melody that makes the song memorable and stays with us even after the song has ended. The melody is what makes the song unique and different from other songs. It is this uniqueness that creates a lasting impression on our minds.

Shaping Music History for Writing Melodies

Melodies have played a crucial role in shaping the course of music history. From Beethoven’s Moonlight Sonata to The Beatles’ Yesterday, iconic melodies have emerged as some of the most memorable pieces of music in history. Melodies have inspired countless musicians over the years, and have contributed to the evolution of music. The impact of melody can be seen in all forms of music, across cultures and genres. In conclusion, the impact of melody is undeniable. Melodies have the ability to influence our emotions and trigger memories, create lasting impressions and shape the course of music history. By understanding the magic behind writing melodies, we can create music that not only sounds great but also connects with the listener in a profound way.

Perfecting Your Craft

With melody being a crucial element of music, perfecting its creation is of utmost importance. The magic behind writing melodies lies in finding the perfect combination of notes that evoke emotion and captivate audiences. By honing your craft and experimenting with different techniques, you can master the art of creating unforgettable melodies.

Writing melodies is a skill that takes time and practice to perfect. The art of melody writing involves balancing the right notes, tempo, and rhythm to create a unique sound. However, achieving perfection doesn’t happen overnight. It takes dedication, discipline, and persistence to hone your craft and become a maestro in the world of music.

Continued Practice And Exploration

One of the most important aspects of perfecting your craft as a melody writer is to never stop practicing. Keep exploring different sounds and experimenting with various melodies. By doing so, you can identify the strengths and weaknesses of each melody as well as learn new techniques. Schedule a practice session every day, and set achievable goals. It could be as simple as learning a new melody every day or improvising a well-known tune.

Getting Feedback And Critique

Another crucial factor in crafting your skill is getting feedback and constructive criticism from others. Share your melodies with fellow musicians or mentors and ask for their honest opinions. It is essential to listen to feedback and use it to improve your craft. Some musicians use online communities and social media platforms to share their work and get feedback from their audience.

Sharing Your Melodies With The World

As you continue to refine your melody writing skills and receive positive feedback, the time may come when you want to share your work with the world. It could be through live performances or recording and sharing your work on social media platforms like YouTube or Soundcloud. When sharing your melodies, be open to constructive criticism and stay true to your unique sound. In conclusion, perfecting your melody writing craft requires consistency, exploration, and a willingness to accept constructive criticism. By practicing daily, getting feedback, and sharing your work with the world, you can develop your unique sound and become a successful music artist.

Frequently Asked Questions Of The Magic Behind Writing Melodies

What Is The Theory Behind Melody?

Melody theory involves the arrangement of musical notes in a way that creates a pleasing and memorable sequence. It is based on the concept of pitch, duration, and rhythm in music composition. A melody typically contains a series of notes with varied intervals, rhythms, and pitch that create a distinctive sound.

What Is The Concept Behind Writing Melodies?

Melody writing is the process of creating a memorable and catchy sequence of notes played one after the other. It involves choosing the right notes that blend well together to evoke a particular emotion or mood. It is an essential aspect of music composition that requires creativity, skill, and practice.

What Is The Most Important Thing To Remember When Writing A Melody?

To write a great melody, the most important thing to remember is that it should be memorable and catchy. It should also be simple, interesting, and unique to stand out from other songs. Additionally, it must fit the mood or emotion of the song and be easy to sing or play.

Why Is Melody So Important?

Melody is important because it is the main driving force in music. Melody is what makes music memorable, emotional, and expressive. A well-crafted melody can evoke powerful feelings and emotions in the listener, and it can also help to reinforce the meaning and message of a song’s lyrics.

Conclusion

In essence, writing melodies is a beautiful amalgamation of creativity, technical knowledge, and practice. It requires the ability to channel emotions and express them through music. As a songwriter, you must find inspiration from your surroundings, create a solid foundation, and experiment with different techniques.

By keeping these points in mind and nurturing your skills, you’ll be able to craft a memorable melody that resonates with your audience’s soul. So keep practicing, stay inspired, and unleash the magic of melody writing!

Categories
Archive

How To Improve Chord Progressions

To improve chord progressions, try experimenting with different chord combinations and adding textures or variations in rhythm. These techniques can help make your progressions more interesting and dynamic.

Music compositions are like a journey of chord progressions towards an ultimate destination. A chord progression is a series of chords played in a specific order, and it is the backbone of any song. Creating engaging chord progressions can be challenging, but they can make a significant difference in the emotional response of your audience.

Great chord progressions not only create a sense of depth and emotion in music but also captivate the listener’s attention. We’ll share a few tips on how to improve chord progressions for your next music composition.

Why Good Chord Progressions Are Important

Good chord progressions are the backbone of any song. They help create the mood, generate interest, and keep the listener engaged. To improve your chord progressions, experiment with different chord voicings, use inversions, and try exploring different keys and modes.

Good chord progressions are the backbone of any great song. They create emotional depth, keep the listener engaged, and can even make or break a composition. The right chord changes can add excitement, drama, or even a sense of calm to your music. On the other hand, a predictable or repetitive progression can leave your audience feeling bored or disengaged. Therefore, understanding how to improve chord progressions is essential for any musician who wants to create memorable and compelling compositions.

Creating Tension And Release

One of the key aspects of good chord progressions is the ability to create tension and release. This is done by using chords that naturally lead to other chords. For example, using a dominant chord (such as G7) before resolving to the tonic chord (such as C) creates a sense of tension that is then resolved by the tonic chord. This process not only makes the music more interesting but also creates an emotional response in the listener.

Adding Emotional Depth

Good chord progressions can also add emotional depth to your music. By using chords that are major, minor, or modal, you can create moods ranging from happy and upbeat to sad and melancholy. For example, a progression that starts with a minor chord (such as Am) can create a sense of sadness or longing, while a progression that uses major chords (such as C, G, and F) can create a feeling of joy or triumph.

Keeping The Listener Engaged

Finally, good chord progressions are essential for keeping the listener engaged. By using unexpected or unusual chord changes, you can keep the audience guessing and make them more invested in the music. Similarly, by varying the rhythm and tempo of the chords, you can create an ebb and flow that adds interest and excitement to your composition. In conclusion, good chord progressions are essential for creating memorable, emotional, and engaging music. By using techniques such as creating tension and release, adding emotional depth, and varying the rhythms and tempos, you can improve your chord progressions and take your music to the next level.

The Fundamentals Of Chord Progressions

Learn the fundamentals of chord progressions and take your music to the next level. Discover how to improve your chord progressions by experimenting with different chord structures, inversions, and melodies to create a unique and unforgettable sound.

Chord progressions form the foundation of every music composition, making them an essential aspect of music production. The chord progressions are the sequence of chords that accompany the melody of a song. A well-crafted chord progression can bring depth and excitement to any song, while a poorly structured one can sound bland and uninspiring. Therefore, it becomes pertinent to learn and understand the basics of chord progressions to create excellent music. Here are the three fundamental aspects you need to consider when improving your chord progressions:

Building Chords And Scales

Before you can understand chord progressions, it is essential to learn how to build chords and scales. Chords are, quite simply, a combination of two or more notes that are played together to create a harmony. Scales, on the other hand, are a sequence of notes played in a specific order to produce a particular sound or mood. Understanding the relationship between chords and scales will allow you to create more complex and interesting chord progressions.

Identifying Chord Progressions

Once you have mastered the basics of building chords and scales, you need to be able to identify the chord progressions used in existing music compositions. This is a critical skill that will enable you to understand how specific melodies fit with certain chord progressions, enabling you to create your unique progressions. By taking the time to analyze music, you can train your ears to recognize the different chord progressions that are used in various genres, such as rock, pop, jazz, and blues.

Working With Chord Inversions

Finally, you need to understand how to work with chord inversions to create more interesting chord progressions. A chord inversion is essentially when you change the order of the notes within a chord, which can create a different harmony and sound. By playing around with chord inversions, you can create new chord progressions that sound distinct and unique. Keep in mind that chord inversions can be used either in isolation or in conjunction with another chord progression. In conclusion, understanding the fundamentals of chord progressions is essential for every music producer and songwriter. By learning how to build chords and scales, identify chord progressions, and work with chord inversions, you can create exciting and engaging music. Remember that creating great chord progressions takes time, so don’t be afraid to experiment, play around, and try out new ideas until you find the perfect progression for your song. So go ahead and get started with creating amazing chord progressions that will keep your audience hooked!

Making Interesting Chord Choices

Learn how to improve chord progressions by making interesting chord choices. Experimenting with unique chord combinations can add depth and complexity to your music, enhancing the listener’s experience.

As a musician, you want your composition to stand out, and playing predictable chord progressions just won’t cut it. That’s where experimenting with unusual chord types comes in. In this section, we will discuss how to make interesting chord choices that will enhance the mood and feel of your music. We will cover experimenting with uncommon chord types, combining different chord progressions, and breaking musical rules.

Experimenting With Uncommon Chord Types

Uncommon chord types add color and texture to your composition. While they might sound unusual, they can create a unique sound that will capture your listener’s attention. Here are some of the uncommon chord types that you can experiment with:

  • Diminished chords
  • Augmented chords
  • Suspended chords
  • Extended chords

By including these unusual chords in your music, you can create a unique sound that will set your composition apart from others.

Combining Different Chord Progressions

Instead of sticking to one chord progression, try to combine different ones. This method can add depth and complexity to your composition. You can also try changing the order of the chords to make them sound fresh and unexpected. Here are some of the chord progressions that you can combine:

Chord ProgressionExample Key
I-IV-VKey of C: C-F-G
ii-V-IKey of C: Dm-G7-C
I-vi-IV-VKey of C: C-Am-F-G

By combining different chord progressions, you can create a unique and interesting sound that will keep your listeners engaged.

Breaking Musical Rules

Finally, don’t be afraid to break musical rules. Experiment with unusual chord progressions, use uncommon chord types, and try changing the tempo or time signature. Breaking the rules can create a unique sound that sets you apart from other musicians. But remember, breaking the rules should be done with a purpose and not just for the sake of it. So, make sure to stay true to the context and emotion of your music.

Making interesting chord choices is a crucial component of composing music. By experimenting with uncommon chord types, combining different chord progressions, and breaking musical rules, you can create a unique and engaging sound that will captivate your listeners.

Using Melody To Enhance Chord Progressions

Using melody to enhance chord progressions is a powerful but often overlooked method. By incorporating melodies into your chord progressions, you can add complexity and depth to your music. Experiment with different melodies and see how they can improve your compositions.

Chord progressions are an essential element of songwriting and music composition. Creating a catchy and engaging chord progression alone is not enough to make a great song. Melody plays a crucial role in making a chord progression memorable and captivating. In this section, we will discuss how to use melody to enhance your chord progressions.

Writing Melodies That Complement Chords

Writing a melody that complements the chords is a critical step in improving your chord progressions. A good melody should follow the chord changes and include notes from the chord. It should also include interesting turns and phrases that capture the listener’s attention. Here are a few tips to help you write melodies that complement chords.

  • Start with the chords: Understand the chords and their progression before writing the melody.
  • Use chord tones: Include notes from the chord in your melody to establish a strong connection between chord and melody.
  • Create a contour: Build an interesting melody by adding variations in pitch, volume, and duration to create a smooth flow.

By following these tips, you can create a melody that complements your chord progression and keeps the listener engaged.

Creating Contrast With Rhythm And Harmony

Contrast is essential in creating a captivating chord progression. Adding contrast can take your melody to another level. Using harmony, rhythm, and tempo variations can help you create a beautiful contrast. Here are a few ways to add contrast to your melody:

  1. Change the rhythm: Adjust the rhythm of your melody to create a distinction, e.g., by using syncopation or dotted rhythms.
  2. Variation in harmony: Change the harmony in the melody to create contrasts by using different chords or keys.
  3. Volume variation: Create distinction through variations in volume, e.g., by using crescendo or decrescendo.

Adding contrast to your melody with these techniques not only makes your melody interesting and dynamic but also separates it from the chord progression, making it more memorable.

Exploring Chord-melody Pairings

The combination of chords and melody can create a magical effect when paired well. The art of pairing chords and melodies together is called chord-melody pairing. This technique helps to merge the melody with the harmony, creating a more cohesive sound. Here are a few techniques to help you explore chord-melody pairing:

TechniqueDescription
ArpeggioPlaying a melody note from each note in the chord.
Chord ScaleCreating a melody that follows the chord scale.
Counter MelodyCreate a melody that runs parallel to the main melody, creating additional harmonies.

The art of pairing the chords and melody together is a skill that requires practice. By exploring chord melodies using these techniques, you can master chord-melody pairings and take your chord progressions to the next level.

Adding Layers To Chord Progressions

Adding layers to chord progressions is a great way to improve the overall sound and depth of your music. By incorporating different instruments or harmonies, you can create a more complex and interesting arrangement that will captivate your listeners. Experiment with different combinations and see what works best for your song.

Chord progressions form the backbone of most musical compositions, but a simple three or four chord progression can sound plain and stagnant. Adding layers to your chord progressions can take your music to the next level and make them more interesting and enjoyable. In this post, we’ll explore some techniques you can use to add depth and dimension to your chord progressions.

Incorporating Bass Lines

One of the most effective ways to add layers to your chord progressions is by incorporating bass lines. A well-crafted bass line can add groove, rhythm, and movement to your music. You can start by selecting a chord progression and then creating a bass line that complements the chords. The bassline should not only follow the root notes of the chord but also add variations and extensions. By doing this, you can create a more compelling and dynamic foundation for your music.

Including Octaves And Harmonies

Another way to add layers to your chord progression is by including octaves and harmonies. Using octave intervals can create a fuller sound, while harmonies can add complexity and richness. You can apply these techniques by either adding octaves or harmonies to your melody notes to give them more depth. As a result, your music becomes more complex and engaging.

Using Arpeggios And Broken Chords

Arpeggios and broken chords can also add layers to your chord progressions. Using arpeggios is simply playing the notes of a chord one by one. This technique can create a sense of flow and momentum in your music. Broken chords, on the other hand, involve playing the notes of a chord in a pattern. This technique adds a new dimension to your chord progressions, creating a more intricate and interesting sound.

Final Thoughts

Adding layers to your chord progressions is an effective way to elevate your music. Incorporating bass lines, including octaves and harmonies, and using arpeggios and broken chords can add depth and dimension to your music. Experiment with these techniques and see which ones work best for you. Remember, the key is to keep your chord progressions interesting and engaging.

How To Improve Chord Progressions

Credit: m.youtube.com

Arranging Chord Progressions For Different Instruments

To improve chord progressions for different instruments, consider the unique qualities of each instrument, such as its range and timbre, when arranging the chords. Experiment with various voicings and inversions to create a balanced and harmonious sound.

When it comes to writing music, arranging chord progressions to fit different instruments can be a challenge. By adjusting chord voicings for piano and keyboard, creating interesting guitar parts, and writing bass lines that support the chords, you can take your songs to the next level.

Adjusting Chord Voicings For Piano And Keyboard

To make chord progressions work for piano and keyboard, it’s important to adjust the voicings. One way to do this is by placing the root note of the chord in the left hand and playing the rest of the notes in the right hand. You can also try using inversions, where you play the notes of the chord in a different order.

Creating Interesting Guitar Parts

Guitar parts can add flavor and depth to your chord progressions. By varying the strumming pattern, you can create a more interesting and dynamic sound. Try using arpeggios, where you play each note of the chord separately, to add complexity. And don’t be afraid to experiment with different effects and techniques, such as palm muting or slide guitar.

Writing Bass Lines That Support The Chords

A good bass line can tie your chord progressions together and give your song a solid foundation. To write a bass line that supports the chords, start by playing the root note of each chord in time with the beat. Then, try adding in some passing notes, such as the 3rd or 5th of the chord, to create movement. And don’t forget to keep the rhythm tight and aligned with the drums. Overall, arranging chord progressions for different instruments takes some practice and experimentation. By adjusting chord voicings for piano and keyboard, creating interesting guitar parts, and writing bass lines that support the chords, you can create a cohesive and dynamic sound for your songs.

Applying Chord Progressions In Different Genres

Chord progressions form the backbone of many music genres, and understanding how to use them correctly can make your music sound more engaging. Different genres use different progressions, and here’s an overview of some of the most popular:

Using Chords In Pop And Rock Music

In pop and rock, chords tend to follow a fixed pattern known as the “four chord progression.” This progression typically uses four chords in a repeating pattern, making it an easy one for beginners to get to grips with. Generally, the pattern follows a structure of I-V-vi-IV, and it can be heard in many pop and rock hits, including Journey’s “Don’t Stop Believin'”.

Exploring Jazz Chord Progressions

Jazz music usually employs more complex chord progressions compared to other genres. Jazz musicians tend to use chords that feature extended harmonies, which means that they include additional notes beyond the basic triad. For example, the dominant seventh or chord extensions like 9th, 11th, and 13th. Understanding advanced chords used in Jazz like ii-V-I, Minor 2-5-1, I-IV-vi-iii-VII, III-VI-II-V, will take you higher and adds more flavor to your music.

Applying Chords In Folk And Indie Music

Folk and indie music often employ simple chord progressions that are perfect for beginners. These progressions are usually repetitive and follow a structure of I-IV-V. Songs like “With or Without You” by U2 or “Lonely Boy” by The Black Keys use this progression. The goal for using chords in Folk and Indie is to create a pleasant, relaxing, and comfortable atmosphere in your music.

Recap Of The Article

  • The four-chord progression is commonly used in pop and rock music.
  • In jazz music, extended chords like 9ths, 11ths, and 13ths are frequently used.
  • Folk and indie music use repetitive and simple chord progressions.

By exploring chord progressions in different genres, you’ll have a solid foundation to create engaging music. Each genre has its unique sound, but practicing different chord progressions can help you create fresh and exciting harmonies for your music.

How To Improve Chord Progressions

Credit: m.youtube.com

Developing Your Own Style And Sound

To improve your chord progressions and develop your own style and sound, it’s important to experiment with different chord combinations and rhythms. Practice playing with different tempos, strumming and fingerpicking patterns, and incorporating inversions and extensions into your chord progressions.

Listen to a variety of music genres and styles to gain inspiration and develop your unique sound.

Developing Your Own Style And Sound is crucial in the music industry to stand out amongst a sea of artists. To achieve this, improving your chord progressions is a must. You can start with Experimenting With Different Techniques, which is the first step towards achieving a unique sound. Creating Your Own Chord Progressions next involves choosing chords that resonate with you and fits with the melody you have in mind. Lastly, Listening To And Learning From Other Musicians can also help you get a new perspective on your music and inspire you to develop your style.

Experimenting With Different TechniquesAs a musician, you can experiment with different techniques to find the ones that work best for you. Try different chord voicings, chord inversions, and harmonies to create a unique sound. Play around with different chord progressions and see what fits with the melody you have in mind. You can try playing different genres of music as well, as this can give you a fresh perspective and allow you to incorporate those styles into your own music.
Creating Your Own Chord ProgressionsCreating Your Own Chord Progressions is a crucial aspect of developing your own sound. Start by listening to other musicians, analyze their chord progressions, and see how they fit with the melody. You can then create your own chord progressions that resonate with you. Don’t be afraid to break away from traditional chord progressions and create something entirely new. Remember, creating your own sound means taking risks and daring to be different.
Listening To And Learning From Other MusiciansListening To And Learning From Other Musicians is a vital step in developing your own style and sound. You can learn a lot by studying the chord progressions of your favorite artists, understanding how they create their signature sound. Take the time to listen to different genres and artists, attend concerts, and watch live performances. This can inspire you and help you find your own sound.

In conclusion, Developing Your Own Style And Sound is important for any musician who wants to stand out in the music industry. You can achieve this by Experimenting With Different Techniques, Creating Your Own Chord Progressions and Listening To And Learning From Other Musicians. Keep in mind, taking risks by daring to be different is crucial in the music industry and can lead to a memorable and unique sound.

Frequently Asked Questions On How To Improve Chord Progressions

How Do You Make A Powerful Chord Progression?

To make a powerful chord progression, focus on finding a compelling melody. Experiment with different chords, trying new combinations until you find the ones that work for you. Use simple, repetitive structures to ensure your progression has a strong foundation.

Don’t be afraid to experiment with dissonance or shifting chords to keep the listener engaged. Finally, remember that the more practice you have, the more confident and natural your progressions will become.

How Do You Train Chord Progressions?

Training chord progressions involves practicing and playing different chord patterns, experimenting with different variations and genres, analyzing and learning from other musicians, and utilizing resources such as chord charts and online tutorials. Consistent practice and a willingness to learn and explore can greatly improve one’s ability to play and create chord progressions.

How Can I Learn More Chord Progressions?

To learn more chord progressions, you can start by studying music theory and learning different chord types. Practice playing chords and experiment with creating your own progressions. Listen to music and analyze the chord progressions used in different songs. There are also online resources, books, and courses available for further study.

What Makes An Effective Chord Progression?

An effective chord progression should have a logical and flowing sequence of chords that create a sense of tension and release for the listener. It should also have variation and interest, but not be too complex or disorienting. The chords should complement the melody and lyrics, and fit the style and genre of the song.

Conclusion

Improving chord progressions is an essential skill for any musician looking to take their music to the next level. By following the techniques mentioned such as experimenting with alternative chords, using different rhythms, and playing with tempo, you can create more interesting and dynamic progressions.

Additionally, you should continually strive to challenge your current abilities and push the boundaries of what you know. With practice, patience, and dedication, you can craft truly unique and impressive chord progressions that will keep your listeners engaged and excited.

Categories
Archive

Inter Sample And True Peak Metering

Inter-sample and true peak metering are techniques used in audio mastering to measure peak levels and avoid digital distortion. These techniques help to ensure the quality of audio files.

Audio mastering involves the final stage of audio production, which fine-tunes recorded tracks for distribution. Inter-sample metering detects distortion that can occur when creating audio files from digital samples. It works by analyzing the spaces between samples to ensure that they do not create unwanted distortion.

On the other hand, true peak metering measures how close audio levels get to the maximum digital level before distortion occurs. This technique considers the inter-sample peaks as part of the overall peak level. Both inter-sample and true peak metering are important in mastering to ensure that audio files are of the best possible quality.

Inter Sample And True Peak Metering

Credit: ask.audio

Pros And Cons Of Inter-sample Peak Metering

Inter-sample and true peak metering can be advantageous for ensuring that audio levels do not exceed maximum limits, while also allowing for dynamic range. However, it may also result in inaccurate readings and affect the overall sound quality, so careful consideration should be taken when implementing this method.

Inter-sample peak metering is an essential tool for audio mastering. It measures peak levels that transcend the sample rate, ensuring that the final mix does not contain any digital distortion. While this technique is useful, it also has its downside. Here are some pros and cons of inter-sample peak metering:

Pros Of Inter-sample Peak Metering

  • Allows audio engineers to detect and prevent digital distortion that may not be visible through traditional peak meters
  • Helps retain the clarity and quality of the final mix
  • Makes accurate peak level measurements, essential for high-quality audio mixing and mastering
  • Assists audio engineers in complying with broadcasting and mastering standards
  • Gives audio professionals peace of mind that their final mix will not contain digital artifacts or distortions

Cons Of Inter-sample Peak Metering

  • May cause overcorrection of peak levels, leading to an overly compressed or limited mix
  • Difficult to differentiate between inter-sample peaks and true peaks
  • May not be helpful for inexperienced audio engineers unfamiliar with inter-sample metering
  • May not work with outdated audio software that does not support inter-sample peak metering

In conclusion, inter-sample peak metering is an accurate and important technique in audio mastering. While it helps retain the clarity and quality of the final mix, it can also lead to overcorrection of peak levels and may not work with outdated audio software that does not support inter-sample peak metering. Knowing the pros and cons can help audio engineers make informed decisions about when and how to use inter-sample peak metering.

Inter Sample And True Peak Metering

Credit: www.masteringthemix.com

Pros And Cons Of True Peak Metering

True peak metering is an essential tool in music production, allowing us to predict how our tracks will sound after compression and limiting. However, this technique also has its downsides, as it can sometimes cause unnecessary limiting, leading to distortion and poor sound quality.

True peak metering is a relatively recent development in audio measurement technology that ensures that there are no digital clipping issues and helps achieve the highest quality sound possible. In this section, we will discuss the advantages and disadvantages of using this technology.

Pros Of True Peak Metering

True peak metering offers several benefits that contribute to producing high-quality audio. Here are some advantages:

  • Prevents digital clipping
  • Provides accurate readings for inter-sample peaks
  • Helps detect issues that might not be noticeable beforehand
  • Assists with file format conversion
  • Ensures compatibility with modern audio distribution platforms such as Spotify, iTunes, and Tidal

The above benefits make true peak metering an essential tool for sound engineers and artists who want to produce professional, high-quality results.

Cons Of True Peak Metering

While true peak metering presents many advantages, there are also some drawbacks to the technology. Here are some cons:

  • Some plugins do not separate true peak metering from sample peak metering
  • Creates additional processing time and resources
  • May reduce the overall loudness slightly
  • May require an upgrade to the digital audio workstation( DAW)

However, the cons of true peak metering are minimal compared to the advantages, and it is vital to use this technology to achieve high fidelity results in audio production. In conclusion, true peak metering offers significantly more benefits than drawbacks, making it an essential tool for anyone involved in the audio production process.

Inter Sample And True Peak Metering

Credit: m.youtube.com

Frequently Asked Questions For Inter Sample And True Peak Metering

What Is The Difference Between True Peak And Inter Sample Peak?

True peak refers to the highest level of an audio signal, whereas inter-sample peak refers to a signal’s peak that may occur between samples during digital processing. True peak is measured by analyzing the waveform, while inter-sample peak is detected by examining the digital signal.

What Is Sample Peak And True Peak?

Sample peak refers to the highest value of the audio signal in a given sample. True peak, on the other hand, takes into account the potential distortion caused by digital-to-analog conversion and measures the highest point in the analog waveform.

In simpler terms, true peak is more precise than sample peak and ensures that the audio signal doesn’t clip or distort when played back.

What Is True Peak Metering?

True peak metering is a technique used to measure the peak levels of audio signals more accurately. It calculates the true peaks of a signal by oversampling it and taking the highest value within each sample. True peak metering helps avoid clipping and distortion in digital audio by providing a more precise measurement of peak levels.

What Is Intersample Peaks?

Intersample peaks are brief voltage spikes that exceed the maximum digital level in audio signals. They can cause distortion when converting analog to digital or when playing back digital audio. It’s essential to monitor intersample peaks to ensure optimal sound quality and prevent damage to equipment.

Conclusion

Understanding inter sample and true peak metering is critical for any audio engineer or producer. These tools effectively measure and prevent distortion, ensure compliance with broadcast standards, and overall improve the quality of audio output. Utilizing a combination of both meters can help achieve the desired loudness and clarity without sacrificing the integrity of the audio.

Keeping these concepts in mind can greatly enhance the overall audio production process.

Categories
Archive

Mixing And Mastering Using Lufs

Mixing and mastering using LUFS involves measuring and adjusting audio levels for optimal playback quality. LUFS, or Loudness Units Full Scale, is a standardized measurement for loudness in digital audio.

By correctly mastering and mixing audio with LUFS, the final product will sound consistent across all playback devices. This technique is critical in music production and podcasting to ensure listeners have an optimal listening experience. Developing your skills in LUFS mixing and mastering could set you apart from other producers, especially in an oversaturated industry.

If you’re planning to release your music or podcast, you need your content to sound great and stand out in the sea of others. Keep reading, and we’ll explore everything you need to know to use LUFS effectively to improve the sound quality of your audio.

Mixing And Mastering Using Lufs

Credit: www.masteringthemix.com

What Are Lufs?

LUFS stands for Loudness Units Full Scale, which is a measurement used in mixing and mastering to ensure the audio is balanced and consistent in volume. Using LUFS can help prevent tracks from sounding too quiet or too loud in comparison to other tracks, resulting in a polished and professional sound.

Introduction To Lufs

LUFS stands for Loudness Units Relative to Full Scale. LUFS is a new digital loudness normalization and measurement system developed to solve the problems of loudness disparity between songs, commercials, and movies. Audio content created with different loudness levels causes significant problems in broadcasting and streaming, so loudness normalization in mastering has become a popular way to tackle these issues.

Why Are Lufs Important In Mixing And Mastering?

LUFS is essential in mixing and mastering because it standardizes loudness levels across different audio formats and platforms. An audio mastering engineer can use LUFS to set the optimal loudness level for the audio without compromising the overall sound quality. LUFS help to provide a consistent and enjoyable listening experience for the audience. Besides, broadcasting and streaming platforms heavily rely on LUFS to ensure audio loudness levels are within acceptable standards. In conclusion, LUFS is a crucial factor in mixing and mastering, providing consistency in loudness levels and ensuring the best listening experience for the audience.

Mixing And Mastering Using Lufs

Credit: www.youtube.com

Mixing With Lufs

Mixing and mastering using LUFS is essential for achieving optimal audio levels and ensuring that your tracks sound great across all platforms. By adjusting your levels to match the industry-standard LUFS values, you can create a polished and professional mix that stands out from the crowd.

If you are a music producer or sound engineer, you know that mixing and mastering are crucial parts of the music production process. Mixing involves combining individual tracks to create a balanced stereo audio file, while mastering involves the final preparation of the mixed track for distribution. One important aspect to consider when it comes to mixing is the Loudness Units Relative to Full Scale (LUFS) measurement.

Balancing Levels Using Lufs

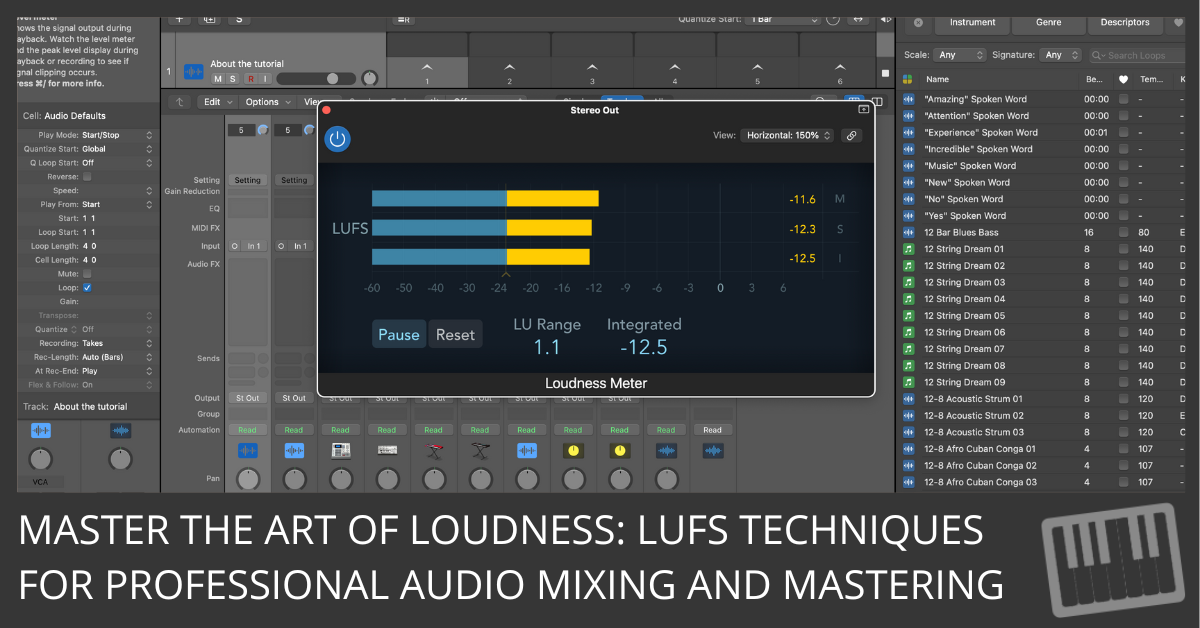
When mixing tracks, it is essential to ensure that the overall loudness level is balanced across all elements. Using LUFS, you can achieve this balance easily. LUFS measures the perceived loudness of an audio signal and is expressed in a negative decibel (dB) value. The reference level for LUFS is -23dB, which is the loudness level that most digital distributors (such as Spotify and Apple Music) require. To balance levels using LUFS, start by setting the reference level for your mix to -23dB. Next, compare the loudness of the individual tracks and adjust their levels until they are all balanced relative to one another. For example, if the vocal track is too loud compared to the instrumental tracks, reduce its level until it sounds balanced. Repeat this process for all tracks until you achieve a balanced mix.

How To Use Lufs To Achieve A Consistent Mix

LUFS can help you achieve a consistent mix across different playback systems and environments. A mix that sounds good in the studio may sound different when played on a home stereo, car system or mobile phone. By using LUFS, you can normalize the loudness of your mix and ensure that it sounds consistent across all playback systems and environments. To use LUFS for consistency, start by setting the reference level to -23dB. Next, use a LUFS meter plugin (such as the Waves WLM Plus Loudness meter), to measure the integrated LUFS level of your mix. If the level is higher or lower than -23dB, adjust the overall level of the mix accordingly. Once you have achieved -23dB integrated LUFS, check the short-term LUFS levels (measured over a shorter period, such as 3 seconds). If the short-term levels are consistently higher or lower than the integrated level, adjust the levels of the individual tracks until they are balanced. Using LUFS is an essential tool for any music producer or sound engineer. By balancing levels and achieving a consistent mix, you can ensure that your music sounds great across all platforms and environments.

Mastering With Lufs

Mastering with LUFS is a crucial aspect of the mixing and mastering process. LUFS (Loudness Units Full Scale) measures perceived loudness, and this method ensures that the final mix maintains a consistent volume level while avoiding distortion.

Mastering is the process of polishing a track to sonically enhance the final mix. It involves improving the frequency balance, maximizing the volume, and imparting a sense of depth and clarity. Using LUFS (Loudness Units Full Scale) in the mastering process can help achieve a balanced and loud mix without sacrificing dynamic range.

Using Lufs To Set The Overall Level Of Your Track

LUFS is a standardized measurement of loudness that provides an objective analysis of the perceived volume of a track. It measures the average loudness of a track over time, with the units ranging from -60 to 0. The optimal LUFS level for your track depends on its genre and intended playback medium. To prepare your mix for mastering, you need to ensure its overall loudness falls within an acceptable LUFS range. For instance, if you’re making music for streaming services, you’ll want your tracks to meet their loudness normalization guidelines. Most streaming platforms require tracks to be mastered to a target loudness of -14 LUFS.

How To Use Lufs To Ensure Your Track Stands Out

Using LUFS in mastering helps ensure that your track stands out in a crowded digital landscape. By setting the optimal LUFS level, you can make your track sound louder and clearer while avoiding distortion. When mastering with LUFS, it’s essential to pay attention to the dynamic range. A track that has too much compression and limiting can sound flat and lifeless, while one with too little can be difficult to hear in noisy environments. With LUFS, you can strike a balance between loudness and dynamic range that ensures your track sounds great on any playback system. In conclusion, mastering with LUFS can take your tracks to the next level by emphasizing its unique characteristics and making it stand out from the crowd. By using LUFS to set the overall level of your track and ensuring it stands out, your master will sound dynamic and balanced.

Using Lufs With Eq

Mixing and mastering music is a complex art that requires quite a bit of knowledge about various tools and techniques available. One important tool that has emerged in recent years is LUFS which stands for Loudness Units Full Scale. It is a measurement that helps engineers achieve a consistent and balanced level of loudness across different platforms and devices.

Using Eq To Achieve A Balanced Mix With Lufs

One of the most effective ways to achieve a balanced mix with consistent loudness across different playback systems is by using EQ. EQ is a tool that allows engineers to adjust the tonal balance of a mix by boosting or attenuating certain frequencies. By using EQ, engineers can achieve a more balanced mix while ensuring that the mix stays within the desired LUFS range.

Eqing Your Master With Lufs

Once you have achieved a balanced mix using EQ, the next step is to EQ your master with LUFS in mind. This involves adjusting the overall tonal balance of the mix and ensuring that the levels are consistent across the entire frequency spectrum. One effective way to achieve this is to use a reference track that has a similar tonal balance and level to your mix. By comparing your mix to the reference track and making adjustments, you can achieve a master that is balanced and consistent in terms of loudness.

Using Lufs With Compression

Having a dynamic mix with balanced loudness and tonality is a crucial aspect of audio mixing and mastering. LUFS, or Loudness Units Full Scale, is a solid reference point for calibrating audio at a specific target loudness level. Compression, on the other hand, is a popular mixing tool that can help manage the dynamic range of an audio track. When combined appropriately with LUFS, compression can become an effective tool for achieving a sonically balanced mix.

How Compression Affects Lufs Levels

Compression can affect the LUFS levels by reducing the dynamic range of an audio track. As a result, the quieter parts will sound louder, and the louder parts will sound quieter. If overused, compression can cause unwanted artifacts and pumpings, which could negatively affect the perceived sound quality of the mix. It is, therefore, important to use compression conservatively and with a subtle hand.

Using Compression With Lufs To Achieve A Dynamic Mix

When used correctly, compression is an effective tool that can help achieve a balanced mix. By reducing the dynamic range, compression can make the quieter parts of an audio track more audible and the louder parts less overpowering. Using LUFS as a reference point can ensure that the audio is calibrated to a specific target loudness level. With this in mind, it is important to use compression in moderation, as overcompression can result in an unnatural sound that lacks depth and dimension.

Note that compression is not always necessary, and its application will depend on the individual characteristics of the audio track being mixed. It is therefore important to understand the unique qualities of each track and use compression judiciously as needed.

Mixing And Mastering Using Lufs

Credit: logicstudiotraining.com

Understanding True Peak

Understanding True Peak is crucial when it comes to mixing and mastering using LUFS. It helps to avoid distortion and ensure that the audio does not exceed the maximum level for digital audio, making it sound better on different devices and platforms.

What Is True Peak?

Understanding True Peak is crucial when mixing and mastering audio using LUFS. True Peak refers to the highest level of an audio signal, measured in decibels, as it passes through a digital-to-analog converter (DAC). LUFS (Loudness Units Full Scale) uses an algorithm to measure the perceived loudness of a track. This is especially important for streaming services, where tracks are usually normalized to match the same perceived loudness. But, to ensure the LUFS measurements are accurate, you need to understand the concept of True Peak.

The Importance Of True Peak When Using Lufs

When a digital signal passes through a DAC, the waveform is reconstructed using a process called oversampling. Oversampling creates additional data points between each sample point, which essentially smooths the waveform. This smoothing can cause the signal to exceed 0dBFS, which is the maximum level a digital signal can reach. This results in distortion, known as clipping. True Peak meters can measure the highest level a signal will reach after it passes through a DAC. It provides a more accurate reading of the potential for clipping, and helps you pinpoint where you need to adjust the levels to ensure that your audio sounds great when played back through any system, including on streaming services like Spotify or Apple Music. Ensuring your audio is mixed and mastered to the right levels is essential for any professional production. By understanding the True Peak and using LUFS measurements, you can be confident that your audio will sound great on all playback systems.

Using Lufs In Different Genres

LUFS (Loudness Units Full Scale) is an essential tool in the music production industry as it helps producers and engineers to maintain loudness consistency across all platforms. Whether you are producing EDM, recorded music or any other genre, using LUFS is crucial in achieving a balanced mix and loudness levels that meet industry standards.

Applying Lufs In Edm Music

EDM (Electronic Dance Music) is a genre that demands high energy and loudness levels. Applying LUFS in EDM music helps maintain a consistent and optimum level of loudness, preventing distortion. LUFS can also help bring balance between the kick, bass, and leads to avoid one element from overpowering the other, making all the elements of the mix audible.

  • Using a meter plugin to measure the loudness levels of an entire mix.
  • Use LUFS to measure the loudness level of individual tracks, for example, drums, synths, and vocals.
  • Once you have established the correct loudness levels for each track, you can apply gain staging and compression to maintain uniformity across all tracks.

Using Lufs For Recorded Music

Recorded music is diverse and can include a variety of different instruments and vocal performances. Using LUFS can help ensure that each instrument or vocal track is at the same loudness, producing a well-balanced mix. Here are some tips for using LUFS for recorded music:

  1. Start by measuring the loudness levels of each track to ensure they are all at the same level.
  2. Apply gain staging to bring up or down tracks that require adjustment.
  3. Use EQ and compression to make sure each track is clearly audible in the mix.

Whether you are producing EDM or recorded music, using LUFS can help you achieve a consistent and balanced mix. Make sure to use LUFS and meter plugins to ensure your mix meets industry standards and sounds great across all platforms.

Frequently Asked Questions On Mixing And Mastering Using Lufs

What Is The Best Lufs Level For Mastering?

The best LUFS level for mastering depends on the intended platform and genre of music. Streaming platforms typically require a range between -14 and -16 LUFS, while radio and CD may require -9 to -12 LUFS. Genres with more dynamic range may benefit from lower LUFS levels, while louder genres may benefit from higher levels.

Ultimately, it’s best to consult with a professional mastering engineer for optimal results.

Is It Ok To Master At Lufs?

Mastering at LUFS is a widely accepted standard in the music industry. However, it’s important to use your ears and not rely solely on technical measurements. The best mastering approach is a combination of technical expertise, creative intuition, and aesthetic sensibility.

Is 9 Lufs Too Loud?

Yes. 9 LUFS (Loudness Units Full Scale) is considered too loud for an audio recording as it can cause distortion and lead to listener fatigue. It is recommended to target a loudness level of around -16 to -18 LUFS for music and -24 to -20 LUFS for spoken word content in order to achieve a balanced and comfortable listening experience.

What Is Lufs In Mixing?

LUFS stands for Loudness Units Full Scale. It’s a method to measure the perceived loudness of an audio signal. It’s commonly used in mixing and mastering to ensure consistent loudness levels across different songs or albums. LUFS takes into account human perception of sound, unlike other methods based purely on peak or RMS levels.

Conclusion

To sum up, using LUFS while mixing and mastering can greatly improve the overall quality of your audio. It ensures that the volume levels are consistent and balanced, making it pleasant for the listener to hear. By paying attention to LUFS, you can avoid issues like distorted sound and unnecessary loudness.

All in all, if you want to produce high-quality audio, using LUFS should definitely be a part of your mixing and mastering process.

Categories
Archive

How to Get Discovered As a Musician

To get discovered as a musician, utilize social media and online platforms. Introduce yourself to industry professionals and collaborate with other artists to expand your reach.

As a musician, getting discovered and growing your fan base is crucial for building a successful career. However, with so many other talented musicians out there, it can be challenging to stand out and get noticed. In today’s technologically advanced world, utilizing the power of social media and various online platforms is key to gaining exposure and increasing your chances of success.

Networking with industry professionals, creating visually appealing content, and collaborating with other artists also play essential roles in building a broader audience. We will explore tips and strategies to help you get discovered as a musician and take your career to the next level.

How to Get Discovered As a Musician

Credit: plus.pointblankmusicschool.com

Identifying Your Niche

Discovering your niche is crucial to successfully get noticed as a musician. Finding an area of expertise within your genre and creating unique content tailored towards a specific audience can skyrocket your chances of being discovered.

As a musician, it’s important to find and identify your niche. By doing so, you’re not only able to stand out from the competition but also to attract the right audience. Here are three ways to identify and define your niche:

Define Your Style

Your unique style is what sets you apart from other musicians. You may be influenced by different genres, but it’s important to develop your own sound. Take the time to experiment with different styles and sounds until you find the one that reflects who you are as an artist. When you define your style, make sure it aligns with your personality and brand. Don’t be afraid to take risks and try something new, but make sure it’s authentic to who you are.

Analyze Competition

Identifying your niche also involves analyzing your competition. Research other musicians in your genre and see what they’re doing well. Take note of their branding, marketing, style of music, and the audience they’ve attracted. But don’t just imitate your competitors, use this information to create something unique. Identify what sets you apart and capitalize on that, even if it feels unconventional.

Find Your Audience

Once you have identified your style and analyzed your competition, it’s time to find your audience. This involves understanding who your music appeals to and where they hang out online and offline. Research where your audience is consuming music, what blogs they read, social media platforms they use, and events they attend. By understanding your audience and where they are most active, you can focus on promoting your music where it matters most. In conclusion, identifying your niche is an important first step in getting discovered as a musician. Define your style, analyze your competition, and find your audience to attract loyal fans who appreciate your music.

Create A Brand Identity

Establishing a brand identity is crucial for getting discovered as a musician. Create a memorable logo, define your unique sound, and utilize social media to connect with fans and showcase your music.

As a musician, creating a brand identity is crucial. Your brand will be the first impression your fans and industry peers have of you. How you present yourself will determine if they are interested in knowing more about your music or simply move on to the next artist. With that in mind, here are some tips to help you define your brand, create a logo and visual identity, and develop a website and social media presence.

Define Your Brand

Defining your brand is about creating a unique identity that represents who you are as an artist. Start by asking yourself what makes you different from other musicians. What is the vibe of your music, and what message do you want to convey to your audience? Use this information to craft a unique brand statement that captures the essence and spirit of your music.

Create A Logo And Visual Identity

Once you have a solid brand statement, designing a logo and creating a visual identity that aligns with your brand becomes more manageable. A logo is your visual stamp; it should be easy to recognize and memorable. Make sure your logo reflects your brand statement’s vibe and message. Use complementary color schemes to give your brand a consistent and professional look.

Develop A Website And Social Media Presence

Develop a website and social media presence to showcase your brand and music. Your website should be easy to navigate, visually appealing, and informative. Make sure your website and social media have the same visual and brand identity, consistent with your logo and color scheme. Create engaging content consistently to build a following and interact with your followers actively. Use social media to reach fans and connect with the music industry. Creating a brand identity takes time, effort, and consistency. Make sure your brand reflects your music’s vibe and message, and that your visual identity aligns with your brand statement. Promote your music by building a strong social presence and creating engaging content for your fans. By doing this, you will increase your chances of getting discovered and paving the way for a successful music career.

Creating Quality Content

To get discovered as a musician, creating quality content is crucial. It’s important to release original, engaging and authentic music, alongside captivating visuals, in order to stand out in an oversaturated industry. Social media platforms are a great platform for self-promotion and collaboration, allowing you to grow your fanbase and connect with industry professionals.

Creating Quality Content is a crucial factor in getting discovered as a musician. In today’s digital age, having a strong online presence is a must for any musician looking to make a name for themselves in the industry. High-quality content is essential to achieving this. In this section of the blog post, we’ll discuss how to create quality content that can help you get noticed and build a fanbase. ### Record quality music Recording and producing high-quality music is an essential part of creating quality content as a musician. First, invest in good quality equipment, including microphones, headphones, and a digital audio workstation. It’s also essential to find a quiet and acoustically treated space to record in. You must have a good understanding of music theory and have a well-tuned singing voice. Once you have recorded the music, make sure it is mixed and mastered to a professional standard. This will make sure your music stands out from the crowd. ### Produce music videos Producing music videos is another way to create engaging content and get discovered as a musician. A good video can help you connect with your listeners on an emotional level and showcase your creative vision. You may not have a big budget to make the video, but you can still produce a high-quality video. Consider your clothing and background and make sure both sets an appropriate tone for the song or the album. Good lighting, angles, and interesting shots are a good way to create engaging visuals for your music. Make sure your music video is visually appealing, and you are proud of it before releasing it. ### Collaborate with other musicians Collaborations with other musicians can help you create incredible content, expand your audience and build new relationships in the industry. Collaboration helps to share knowledge and blend your creativity that creates a new masterpiece. The power of collaborating with other musicians can never be overstated. This technique helps you to get exposed to a new audience who are already familiar with your collaborator. When working with other musicians, ensure you find a compatible artist who shares your vision and works well with you. In conclusion, creating quality content can bring about great results and help you get discovered as a musician. Record high-quality music, produce engaging music videos, and collaborate with other artists. These techniques will help you get noticed in the music industry and grow your audience, all while establishing your presence in the industry.

Networking And Building Connections

Networking and Building Connections are crucial to getting discovered and making a name for yourself as a musician. With so much competition in the industry, it’s essential to put yourself in front of the right people and build relationships that can lead to opportunities. Here are a few tips on how to network as a musician.

Join Local Music Communities

Joining local music communities is an excellent way to connect with other musicians, producers, and industry professionals in your area. Attend local events, shows, and jam sessions to meet new people and showcase your talent. You can also join online communities and forums to connect with other musicians and industry professionals outside of your city.

Perform Live Shows

Performing live shows is an effective way to get noticed and build your fan base. Play at local venues, festivals, and events to get your music in front of new audiences. Engage with your audience, connect with other artists on the lineup, and be sure to network with industry professionals in attendance.

Network With Industry Professionals

Networking with industry professionals is essential to get discovered and advance your music career. Attend music conferences, workshops, and seminars to meet people in the industry and learn about the latest trends and opportunities. Connect with producers, record labels, and music supervisors on social media platforms and send them your demos and music videos. Remember, building a relationship takes time, so be patient and persistent.

To sum it up, networking and building connections are critical to get discovered and make a name for yourself in the music industry. Join local music communities, perform live shows and network with industry professionals to build lasting relationships and advance your music career.

Utilizing Online Platforms

As a musician, utilizing online platforms is crucial in getting discovered. By creating profiles on social media and streaming services, sharing your music, and engaging with fans, you can increase your visibility and attract new listeners. Additionally, collaborating with other artists and participating in online communities can expand your network and opportunities for exposure.

As a musician, getting discovered can be a real challenge. However, in the digital age, there are numerous online platforms where you can showcase your music to the world. Utilizing these platforms can help get your music in front of more people and increase your chances of being discovered. Here are some ways you can use online platforms to get your music heard.

Upload Your Music On Streaming Platforms

Streaming platforms like Spotify, Apple Music, and Amazon Music offer a massive audience for musicians. By uploading your music to these platforms, you can reach millions of potential fans around the globe. These platforms also offer features like analytics and playlists, which can help you track your progress and gain more listeners.

Create A Youtube Channel

YouTube is the second largest search engine globally, making it an excellent platform to showcase your music. Create a YouTube channel for your music and upload music videos or lyric videos. YouTube also offers features such as annotations, end screens, and cards, which can help you direct viewers to your website, social media accounts, or other streaming platforms where your music is available.

Pitch Your Music To Blogs And Playlists

Pitching your music to blogs and playlists can help you gain new fans and build a bigger audience. Look for blogs and playlists that feature music similar to yours, and research their submission guidelines. Make sure your pitch is personalized, professional, and includes a link to your music. You can also use email marketing platforms like Mailchimp to create an email list of industry contacts and keep them updated on your latest releases and news. In conclusion, utilizing online platforms is an excellent way to get discovered as a musician. By uploading your music on streaming platforms, creating a YouTube channel, and pitching your music to blogs and playlists, you can reach a broader audience and increase your chances of success. Remember, consistency is key, so stay active on these platforms, engage with your audience, and keep creating great music.

Collaborating With Brands

As a musician, collaborating with brands can be an effective way to get discovered. Seek partnerships with companies that align with your style and values, and use social media to promote your collaborations to a wider audience.

As a musician, collaborating with brands could be a great way to get discovered. By partnering with a brand, you can leverage their resources and audience to expand your fan base. However, it’s important to find the right partnerships that align with your music genre and personal values. Here are some tips on how to collaborate with brands to create exposure and drive engagement:

Find Music Partnerships

One of the best ways to find music partnerships is by networking with industry professionals, attending music festivals and conferences. You can also leverage social media platforms such as LinkedIn and Instagram to network with music producers, record labels, and music supervisors looking for artists to collaborate with.

Work With Brands To Create Music Content

When collaborating with brands, focus on creating music content that aligns with their brand vision and target audience. For instance, if a brand is targeting a new age demographic, creating specific content for that audience will generate more engagement and exposure.

Collaborate With Influencers

Influencer marketing has become a powerful tool to reach new audiences and amplify content. By partnering with influencers in your music genre or havin similar engagement and reach audience, can result in great outcomes that would help you to get discovered as a musician. This is an excellent way to cross-promote your music and grow your social media following on different platforms such as Instagram, YouTube, and TikTok. In summary, partnering with brands and influencers provides a great opportunity for musicians to gain exposure, build their brand and get discovered. However, it’s important to find the right opportunities and create music content that resonates with their target audience. Start by networking with industry professionals, attending music festivals and conferences, and leveraging social media to find the right partnerships.

Building A Fanbase

Building a fanbase as a musician can be a challenging task, but with the right strategy, it is possible to get discovered. Utilizing social media, uploading content to streaming platforms, networking with other musicians, performing live shows, and creating a unique brand can all contribute to building a dedicated fanbase.

Attracting a fanbase is an essential aspect of any musician’s journey to success. Without followers, it would be tough to generate buzz and eventually achieve mainstream popularity. However, building a fanbase requires more than just releasing great music. You also need to interact with your listeners and create a sense of community around your brand. In this blog post, we will cover a few effective techniques for building your fanbase and expanding your reach.

Engage With Fans On Social Media

One of the best ways to build a fanbase as a musician is to interact with your audience on social media platforms. Social media offers an opportunity for direct communication with your listeners, which you can leverage to build brand recognition, loyalty, and trust. Be sure to use social media regularly by posting engaging content, sharing behind-the-scenes moments, and announcing tour dates or upcoming releases. Respond to comments, questions, and DMs, and show your fans how much you care about them. With consistent effort, you can build an engaged online community that will support your musical career.

Run Giveaways And Contests

Running giveaways and contests is another excellent way to attract and retain fans. Offering compelling prizes like concert tickets, merch, or exclusive content would make your fans excited and eager to participate. To get the most engagement, you should promote your giveaway/contest on social media platforms, email list, and website. Make sure the requirements to participate are clear, easy to understand, and follow all guidelines and laws. You’ll be surprised at just how much this can boost your fanbase and engagement levels.

Create Exclusive Content For Fans

Creating exclusive content is another effective way to nurture a fanbase. By offering your supporters something they can’t get anywhere else, you can make them feel special, increase loyalty and make them lifetime supporters. You could create exclusive content like bonus tracks, behind-the-scenes footage of your recording process, sneak peeks of your next album EP, personalized messages, and invites to virtual meet-and-greets. By putting extra effort into creating unique content for your fans, you show them how much you value their support and encourage them to keep listening. Make sure each fan knows the value they bring to your career by offering unique content. In essence, building a loyal fanbase takes dedication and effort, but it is worth the investment. By engaging with fans on social media, running giveaways and contests and creating exclusive content, you are likely to convert casual listeners into enthusiastic supporters. It is essential to remember to stay honest, authentic, and true to your music; that’s the best way to maintain an engaged following over the long haul.

How to Get Discovered As a Musician

Credit: www.loudup.com

Staying Focused And Consistent

To get discovered as a musician, it’s important to stay focused and consistent. This means consistently creating and releasing music, promoting yourself across social media, and networking within the industry. With hard work and dedication, you can increase your chances of being noticed by the right people.

As a musician looking to get discovered, you need to keep in mind that consistency is key. Staying focused on your goals and putting in the work on a regular basis can make all the difference in your journey to success. In this post, we’ll explore some tips that can help you stay focused and consistent on your journey to becoming a successful musician.

Set Goals And Timelines

It’s important to set specific goals for your music career and establish timelines for achieving them. This helps you stay focused and motivated. Your goals should be SMART- specific, measurable, attainable, relevant, and timely. For instance, you could set a goal to release one song a month for the next twelve months. This not only sets you up for success but also helps you track your progress over time.

Stay Consistent With Posting Content

Consistency is crucial in establishing a loyal following for your music. Create a content schedule and stick to it, whether it’s releasing a new single every month, playing weekly gigs or posting content on your social media channels. Consider leveraging social media platforms to showcase your music and connect with your audience. Post regularly, engage with your followers and keep them updated on your progress. Over time, your fans will come to expect your content and will eagerly anticipate your releases.

Continuously Refine Your Brand And Sound

Your music brand and sound should be unique and memorable. This is where continuous refinement comes in. Take the time to listen to feedback from fans, and industry professionals. Use their input to refine your sound and brand, testing new tracks and experimenting with new sounds. This helps you stay relevant and connected to your audience. In conclusion, staying focused and consistent is essential to getting discovered as a musician. Set SMART goals, establish timelines, stay consistent with posting content, and continuously refine your brand and sound. These tips will keep you on track towards becoming a successful musician.

How to Get Discovered As a Musician

Credit: flypaper.soundfly.com

Frequently Asked Questions For How To Get Discovered As A Musician

How Do New Musicians Get Discovered?

New musicians can get discovered through various ways such as promoting their music on social media, collaborating with other artists, playing live shows, submitting their music to blogs and streaming platforms, and joining music competitions. Having a strong online presence and networking with industry professionals can also contribute to their discovery and success.

How Do You Get Noticed As A Musician?

To get noticed as a musician, you can try the following: promote yourself on social media, create a website, collaborate with other artists, play live shows, and submit your music to blogs and playlists. Consistent branding and quality content are also important in capturing and retaining a fanbase.

How Do Musicians Get Known?

Musicians can get known by creating an online presence through social media, performing live shows, collaborating with other artists, submitting their music to blogs and playlists, and networking with industry professionals. It’s also essential to consistently release quality music and engage with their audience.

How Do You Get Heard As A Musician?

To get heard as a musician, you need to create a strong online presence by promoting your music on social media, uploading it to streaming platforms, and collaborating with other artists. Performing at local gigs and festivals can help you build a fanbase and network with industry professionals.

It’s also important to create high-quality recordings and have a unique sound to stand out from the competition.

Conclusion

As a musician, it takes more than just skill and talent to get discovered. It requires a strategic approach, consistent effort, and an understanding of what your fans want. By creating a strong online presence, networking with industry professionals, utilizing social media, and investing in your craft, you can increase your chances of establishing a successful music career.

Remember to stay true to yourself and your brand, and always keep pushing forward towards your goals. With dedication and persistence, you can make your mark in the music industry. Keep playing, keep creating, and keep striving for greatness.

Categories
Archive

How To Mix Drums Bass And Vocals

To mix drums, bass, and vocals, use EQ to carve out spaces for each element and adjust levels to create a balanced mix. Then, apply compression to even out peaks and add depth and clarity with reverb and delay.

Mixing drums, bass, and vocals can be a daunting task for any producer or recording engineer. Achieving a balanced mix where each element sits well in the mix and doesn’t overpower the others can be difficult. However, by using EQ to carve out space for each element and adjusting levels, a well-balanced mix can be achieved.

Compression can then be applied to even out peaks, and reverb and delay can be used to add depth and clarity. We will delve deeper into the techniques used to mix drums, bass, and vocals and how to apply them effectively.

How To Mix Drums Bass And Vocals

Credit: www.youtube.com

Understanding The Basics Of Audio Mixing

Audio mixing is a crucial part of music production that involves blending different sounds to create a cohesive and balanced final result. When mixing drums, bass, and vocals, it’s important to understand the frequency range of each instrument and how they interact with one another to achieve a polished sound.

As a beginner in the world of music production or a musician who wants to take their craft to the next level, it is crucial to have a grasp of the basics of audio mixing. The process of mixing involves combining different audio elements such as drums, bass, and vocals to create a finished product that is enjoyable to listen to. In this section, we will explore the concept of audio mixing, why it is essential and the elements that make up a mix.

What Is Audio Mixing?

Audio mixing refers to the process of combining and adjusting audio tracks to create a final balanced stereo mix. This process involves manipulating individual elements such as volume, panning, equalization, and effects to achieve a cohesive sound. Mixing plays a significant role in the production process, as it can make or break the quality of a final recording.

Why Is It Important?

Audio mixing is a crucial element of music production, as it helps to create a polished and professional sound. A well-mixed track will sound balanced, with each element sitting appropriately in the stereo field, allowing the listener to discern individual elements. Poorly mixed audio, on the other hand, can sound cluttered and amateurish, and may not be enjoyable to listen to.

Elements Of A Mix

A mix comprises different elements that work together to create a cohesive and balanced sound. These elements include:

  • Drums
  • Bass
  • Vocals
  • Melodic Instruments (e.g., guitar, piano, etc.)
  • Effects (e.g., reverb, delay, etc.)

Each of these elements plays a crucial role in the overall mix, and each must be treated and adjusted carefully to achieve a balanced and cohesive sound. For instance, the drums and bass create the foundation of the track, and the vocals and melodies sit on top of this foundation. In conclusion, audio mixing is a crucial element of the music production process that requires careful attention and expertise. A well-mixed track can make all the difference in creating a polished and professional-sounding finished product. By understanding the basics of audio mixing, you can create a cohesive and well-balanced mix that will be enjoyable to listen to.

Preparing For The Mixdown

Preparing for the mixdown requires careful attention to drum, bass, and vocal levels to ensure a balanced and polished sound. By adjusting EQ levels, applying compression, and panning instruments appropriately, you can achieve a professional mix that highlights each element while allowing them to work together harmoniously.

Preparing for the Mixdown To ensure a successful mix, it’s essential to do some preparation work before diving in. One of the most crucial steps is to organize your session, as a well-organized session will make mixing much more manageable. In this post, we’ll discuss the necessary steps you should take before mixing drums, bass, and vocals. Recording the tracks Before mixing, it’s essential to record all of the tracks you need. Ensure that all tracks are recorded at the same sample rate and bit depth, which is typically 44.1kHz and 16-bit or higher. Once all of the tracks have been recorded, import them into your DAW and start organizing. Cleaning up the tracks When you’ve recorded your tracks, the next step is to clean them up. Remove all the unwanted noise, clicks and pops, and anything else that is causing distortion, such as hum or interference. Use your DAW’s built-in tools for this, such as noise gates, EQ, and compressors. This will make it much easier to mix the tracks later on. Organizing the session One of the most important steps when mixing is to keep everything organized. Before you start mixing, create a folder for each track and name them accordingly. Make sure you color code each track to keep everything easy to find and visually appealing. This step will save you hours of time and help make your mix more efficient and professional. Next, create a group for each section of the mix, such as drums, bass, vocals, and so on. This allows you to adjust the levels of each group independently, making the mixing process much smoother. Using sends and auxiliary tracks can also be helpful for adding effects such as reverb or delay to multiple tracks at once. In conclusion, the preparation work is crucial before you start mixing drums, bass, and vocals. Recording all of the tracks, cleaning them up, and organizing your session can make your mix sound more polished and professional. Follow these steps carefully, and you’ll be well on your way to creating a fantastic mix that will sound great on any platform.

Mixing Drums

To achieve a balanced mix of drums, bass, and vocals, it’s important to start by balancing the levels of each element. Then, apply EQ to cut unwanted frequencies and boost desired ones. Use compression to control the dynamics and add depth with reverb and delay effects.

Experiment with panning and volume automation to create space and movement in the mix.

When it comes to mixing music, the drums play a crucial role in creating the perfect sound. But, mixing drums is not as easy as it seems, especially when you need to balance them with bass and vocals. Fortunately, there are techniques that you can apply to make the process easier and achieve the perfect balance of sound. Here are a few tips to get you started:

Applying Eq To Drums

The first step in mixing drums is to apply EQ. This means you’ll be adjusting the frequency levels of the drum kit to make each piece sound unique. You can use EQ to enhance the kick drum’s punch, snare’s crack, and cymbals’ shimmer. Typically, most drum kits will feature around 10 dB boost/cut at specific frequencies. Therefore, by understanding which frequencies are essential, such as the bass drum’s lower frequencies, you can make sure that each component of the drum kit stands out.

Compressing The Drums

Once you’ve applied EQ to your kit, it’s time to compress it. Drum compression is all about controlling volume levels, which will help ensure a smooth, consistent sound across your audio track. It is particularly useful for drums that have a lot of dynamic range or sudden spikes in volume. By compressing your drums, you can make sure that every beat is audible without causing issues with other kit layers.

Using Parallel Compression

Parallel compression is another technique used for mixing drums when you want them to stand out more. This method involves sending the unprocessed drum signal to a second track, which you can then compress heavily. The compressed version is then blended back in with the original sound, providing a fuller and brighter sound. The parallel track ensures that the drums are present, crisp, and cutting through the mix without being too loud or overwhelming.

Adding Reverb And Delay

Finally, consider adding reverb and delay to your drum mix. Adding reverb can add depth and realism to your kit, while delay can provide a sense of movement, particularly if you’re mixing electronic music. Applying these effects to individual drum tracks will help create a bigger sound while ensuring each piece of the kit fits together smoothly. In conclusion, mixing drums is an instrumental part of producing a great track. By using these techniques and understanding what each does to the sound, you’ll be able to create drum tracks that stand out and complement the rest of the mix. Apply these tips and see how they help take your mixes to the next level!

How To Mix Drums Bass And Vocals

Credit: www.masteringthemix.com

Mixing Bass

Achieving a well-balanced mix of drums, bass, and vocals requires careful attention to each element. When mixing bass, it’s important to carve out space for it in the low end and ensure it’s not overpowering the other instruments. Slight EQ adjustments and careful compression can help achieve a cohesive sound.

Mixing bass is a crucial part of producing high-quality music. The bass guitar is the foundation of the rhythm section, and properly mixing it with the drums and vocals can determine the overall sound and impact of the track. Here are some important tips to help you mix your bass with the rest of your music elements.

Setting The Right Levels

Setting the right levels for the bass is critical. You don’t want the bass to be too loud and overpowering, or too soft and buried in the mix. The ideal levels should be balanced, with the bass fitting comfortably within the mix. It’s good practice to start with the kick drum and bass levels, setting the kick slightly louder than the bass, and then adjust the other instruments around them.

Applying Eq To The Bass

EQ is a vital tool to help shape and define the sound of the bass. You can use EQ to enhance the bass’s presence and clarity, and to remove any unwanted frequencies that may cause muddiness or clashes with other instruments. Using a low pass filter can also be useful, allowing you to remove any unnecessary high-end frequencies, leaving more room for other instruments in the mix.

Using Compression On The Bass

Compression can help control the dynamics of the bass and give it a more consistent volume throughout the track. It can also help bring out the subtle details of the bass playing. However, be careful not to overuse compression, as this can cause the bass to lose its natural dynamics and become too flat.

Adding Distortion Or Saturation

Distortion or saturation can add a subtle warmth and edge to the bass sound. It can also work to help it cut through the mix, making it more audible, and giving it a more prominent role in the track. However, be judicious with these effects as excessive distortion or saturation can cause the bass to become too harsh and overwhelming. To sum up, mixing the bass, drums, and vocals is a crucial aspect of producing high-quality music. By adhering to the tips highlighted above such as setting the right levels, applying EQ, using compression, and adding distortion or saturation, you can create a balanced, professional-sounding mix that highlights the best of each instrument.

Mixing Vocals

Mixing vocals requires careful attention when also mixing drums and bass. Start by setting levels and panning for each element, then add appropriate EQ and compression to create a cohesive mix. Finally, use reverb and delay to add depth and dimension.

Mixing vocals is a critical aspect of music production. It involves finding the perfect balance between the vocals and the instrumental tracks, so they all work together cohesively. In this article, we will explore four essential techniques for mixing vocals that can elevate your music production to the next level.

Setting The Vocal Levels

One of the most critical aspects of mixing vocals is setting the levels. The goal is to ensure that the vocals are audible, but not too loud that they overpower the instrumental tracks. To do this, start by soloing the vocal track and adjusting the fader until it reaches a comfortable volume. Then, bring in the instrumental tracks and adjust the vocal levels so they sit well with the other sounds. Remember that a balanced mix is crucial, so take the time to adjust the levels until everything is well-balanced.

Applying Eq To Vocals

Equalization (EQ) is another critical technique for mixing vocals. EQ helps to balance the frequency response of the vocal tracks by removing or boosting specific frequencies. Start by cutting unwanted low-end frequencies and boosting high-end frequencies to add clarity and presence to the vocals. Additionally, a slight boost to the mid-range frequencies can help vocals cut through the mix better.

Using Compression On Vocals

Compression is the process of reducing the dynamic range of an audio signal. By compressing vocals, you can bring out the quieter parts while taming the louder parts. Start by setting the threshold and ratio controls to achieve a 3-6dB gain reduction. Then, adjust the attack and release controls until the vocal tracks sit well in the mix. Remember not to overcompress the vocals, as this can make them sound unnatural.

Adding Effects To Enhance The Vocals

Finally, adding effects such as reverb and delay can enhance vocals and add depth to the mix. Reverb, for example, can help vocals sound more natural and add space to the mix. Delay, on the other hand, can create a sense of movement and interest within the mix. When adding effects, be careful not to overdo it. Too much reverb or delay can make the vocals sound washed out or muddy. In conclusion, mixing vocals is a critical aspect of music production that requires skill and patience. By setting the vocal levels, applying EQ, using compression and adding effects, you can create a well-balanced mix that enhances the overall sound of your music. Start by utilizing these tips in your music production, and with practice, you will master the art of mixing vocals.

Bringing Everything Together

Bringing Everything Together is the final step in mixing drums, bass, and vocals. This is where you blend and balance all the separate elements and create a cohesive and polished sound. In this section, we will cover the crucial steps required to bring everything together for a perfect mix.

Balancing The Mix

The first and most important step in balancing the mix is to ensure each track is at the right level. You don’t want any one track overpowering the others as that will ruin the whole mix. To make things easier, start by turning down all the tracks, except the drums or the vocal. Slowly increase the volume of each remaining track, so they all sit together nicely. Listen, adjust and repeat until everything sounds balance and blended.

Panning The Tracks

Panning gives your mix a sense of space and depth. You can move each individual track left or right in the stereo sound field. The key is to keep the critical elements like the bass and drums right in the center, while the rest of the instruments and vocals can be panned left or right. Always use contrast while panning. For example, if you pan a guitar to the left, you might want to pan a keyboard or another instrument to the right.

Using Automation

Automation allows you to make changes to your mix over time, such as fading in and out or changing the volume of a particular track. This can be done manually or using software easily. Automation is a powerful tool in bringing everything together by making subtle adjustments that make all the difference. If you have a recurring section in the song, you can use automation to increase the volume of the drums or bass, making them more prominent.

Finalizing The Mix

The last step is to finalize the mix. This requires careful listening and making fine adjustments to ensure that all tracks work seamlessly together. At this stage, you can also add some subtle effects like EQ, compression, and reverb, to enhance the overall sound. Remember, the goal is not to overdo any of the effects or processing but to make the mix sound polished and professional.

How To Mix Drums Bass And Vocals

Credit: www.masteringthemix.com

Frequently Asked Questions Of How To Mix Drums Bass And Vocals

How Do You Mix Bass And Drums Together?

To mix bass and drums together, use EQ to ensure each instrument sits in its own frequency range. Use compression to even out volume levels and add punch. Experiment with panning to create a wide and balanced stereo image. Use reverb and delay to add depth and space.

Adjust levels until they work together as a cohesive rhythm section.

Which Instrument Should I Mix First?

There is no set rule on which instrument should be mixed first, as it depends on the type of music and personal preference. However, starting with the most important instrument or the one with the most complex parts is a common practice.

It’s also important to adjust levels, pan, and EQ each instrument to achieve a balanced mix.

Should Drum And Bass Be Mono?

Drum and bass music does not necessarily have to be in mono. It depends on the preference of the producer and the final mixing/mastering. Some producers prefer to have a wider stereo image for their music, while others prefer it to be more centered.

Ultimately, it is up to the producer’s artistic vision.

How Should I Mix My Drums?

To mix your drums effectively, ensure each drum track is clean and has its own space in the mix. Use EQ to balance the frequencies and give each drum its own sound. Adjust levels to bring out the intended impact of each drum.

Use compression to add sustain and clarity. Finally, utilize reverb to create depth and space in your mix.

Conclusion

To create a fantastic mix, understanding the roles of drums, bass, and vocals in a song is essential. Mixing the three elements requires patience, attention to detail, and creativity. Remember to have a clear vision of the intended sound, pay attention to levels, and use effects strategically.

Achieving an excellent mix of drums, bass, and vocals takes time and practice, but with the knowledge and skills learned in this post, you are well on the way to creating amazing mixes. Happy mixing!

Categories
Archive

How To Use Automation In Pro Tools

To use automation in Pro Tools, you can simply select the automation mode, choose the parameter you want to automate, and then add automation breakpoints as needed. Automation in Pro Tools allows for precise control over levels, panning, and other parameters throughout a session.

Additionally, automation can be used to create complex effects, sync delay and reverb, and control plugin parameters in real-time. By automating various parameters, you can achieve a dynamic and polished sound in your recording, mixing, and mastering work. With the option to use automation in various modes and various types of tracks, Pro Tools provides a versatile platform for controlling everything from a single vocal track to a full mix.

Moreover, automating in Pro Tools can save time and effort of manual editing and can help bring out the best from your final product.

What Is Pro Tools?

Pro Tools is a digital audio workstation used for recording, editing, and mixing music and sound. Automation in Pro Tools allows users to automate mixing and editing tasks, saving time and creating a more dynamic and polished sound.

Introduction To Pro Tools

Pro Tools is a digital audio workstation used for recording, editing, and producing music and sound for a variety of media. It’s one of the most popular audio software options available for professionals and beginners alike. Pro Tools comes with a vast array of features and tools that help music producers create high-quality music with ease.

Benefits Of Using Pro Tools

Using Pro Tools provides various benefits, making it a top choice for music producers worldwide. Some of the significant advantages of using Pro Tools are:

  • Industry-Standard Platform: Pro Tools is widely used in the music industry, making it the industry-standard audio workstation software.
  • Professional Quality: With Pro Tools, users can produce high-quality music, ensuring everything from sound design to mixing sound is top-notch.
  • User-Friendly Interface: Pro Tools comes with an intuitive interface that helps creators concentrate on creating audio content rather than learning the software.
  • Automation Capabilities: Pro Tools allows users to automate various functions, such as volume and panning, enabling users to create dynamic soundscapes that are otherwise challenging to achieve manually.

With Pro Tools’ automation capabilities, users can quickly and easily add motion to their mixes using the track’s automation lanes. Automation makes it possible to modify volume, pan, and other parameters throughout a song to create optimal sound quality and a great listening experience.

Using Automation In Pro Tools

Using automation in Pro Tools can seem challenging at first, but with time and practice, it becomes second nature. To use automation, follow these steps:

  1. Open the automation lane for the track you want to automate by clicking the automation mode button. The automation lane lets you draw in volume, pan, and other parameters.
  2. Add breakpoints by clicking on the line in the automation lane. These points create an anchor where you can adjust the desired volume or parameter value.
  3. Move your mouse over the point you wish to adjust and change the value by dragging it up or down.
  4. Repeat steps two and three until you achieve your desired sound and motion.

In conclusion, Pro Tools is an industry-standard audio software that provides a wide range of tools and features that make it easy to create high-quality music. Using automation in Pro Tools is a great way to create movement and dynamic soundscapes in your audio productions. With practice and time, you can quickly learn how to use automation effectively on different parameters and create audio content that stands out.

How To Use Automation In Pro Tools

Credit: musictech.com

Why You Should Automate In Pro Tools

Automating in Pro Tools can save you time and give you greater control over your mix. By using automation, you can easily adjust the levels of individual tracks, add effects, and create dynamic changes that bring your music to life.

The Importance Of Automation

In today’s world, where technology plays an essential role in every aspect of life, it is no surprise that the music industry has transformed too. The use of technology has made music production easier than ever before. One of the most beneficial tools for music production is automation. Automation is a process of taking care of the repetitive tasks in a music production workflow. Automating your tasks helps saves time and allows you to focus on the creative process. In Pro Tools, automating your tracks and plugins is considered the backbone of the software. Let’s dive deeper into the importance of automation in Pro Tools.

Overview Of Automation In Pro Tools

Pro Tools is an audio software that is widely used in the music industry. It is known for its powerful features, and automation is one of them. Automation in Pro Tools provides you with the tools you need to make your track sound more polished and professional. You can automate a wide range of parameters like volume, panning, effects, and more. By automating these parameters, you can create dynamic effects, smooth transitions, and add a personal touch to your audio recordings.

How To Use Automation In Pro Tools

To automate a parameter in Pro Tools, you need to enable automation mode by clicking on the “Auto” button. Once you have enabled automation mode, you can draw in automation data using the “Draw” tool or record automation by moving knobs and faders on your MIDI controller. To change the automation mode, you can simply hit the “Trim” or “Latch” buttons. With Pro Tools, automating your tasks has never been easier.

Conclusion

In conclusion, automation in Pro Tools is a game-changer. It is almost impossible to create a polished track without the use of automation. Pro Tools provides you with the tools you need to automate your tracks and plugins easily. In this blog post, we discussed the importance of automation, an overview of automation in Pro Tools, and how to use automation in Pro Tools. If you haven’t used automation in Pro Tools, we highly recommend that you give it a try. Your music productions will thank you.

What Can You Automate?

Pro Tools is a digital audio workstation (DAW) that provides a range of tools and features to enhance efficiency and productivity. One of the most useful features of Pro Tools is automation, which can streamline workflows and make the mixing and editing process much easier. But, the question is, What Can You Automate? Below are some of the important aspects of automation:

Track Volume And Pan

Track volume and pan are basic operations for mixing in Pro Tools. However, adjusting these parameters manually can be quite time-consuming. With Pro Tools automation, you can easily automate the volume and pan for each track to achieve a more accurate and consistent mix. You can use the volume and pan automation to create gradual fades or changes over time.

Plug-in Parameters

With the help of automation, you can customize the parameters of plug-ins and create dynamic changes in your mix. For instance, you might want to automate the parameters of a compressor to create a smooth transition between vocal parts. Use automation for plug-ins to create nuanced changes and specific effects that can elevate your mix.

Mute And Solo

Whether muting or soloing an instrument or a vocal track, the mute and solo automation is an effective way to adjust these parameters easily. This feature saves the time required to manually mute and unmute tracks. You can apply these changes over a longer period of tracks for a well-controlled effect.

Send Levels

Another important feature of Pro Tools automation is controlling send levels. With this automation, you can vary the levels of signal being sent to effects, auxiliary tracks, and buses. This feature allows you to add a range of effects, and you can choose how much of the signal goes to each of those effects.

Clip Gain

Clip Gain allows you to adjust the gain of individual clips in your session without affecting the overall track level, making it easy to level out audio clips. Automating clip gain can help normalize and balance audio that fluctuates in volume, as well as dynamically adjust the volume of individual clips.

These are some of the essential aspects of Pro Tools automation. With these features, you can customize your workflows and make your mixing process more efficient and accurate.

How To Automate In Pro Tools

Discover how to add automation to your Pro Tools project and streamline your workflow. With a few simple steps, you can automate tasks such as the panning of audio tracks, volume adjustments and plugin settings to achieve a more professional sound.

Automation is a powerful tool that can save you hours of time and energy. In Pro Tools, automation can be used to change the volume, pan, and other parameters of your tracks over time. Whether you are working on a music production or a post-production project, automating your tracks is an essential skill. In this post, we will discuss how to set up automation lanes, draw in automation, and edit automation in Pro Tools.

Setting Up Automation Lanes

To set up automation lanes in Pro Tools, you need to do the following steps:

  1. Go to the Edit Window of Pro Tools and select the track that you want to automate.
  2. Click on the “A” button in the track header to open the automation menu.
  3. Select the parameter that you want to automate from the automation menu.
  4. Pro Tools will create a new automation lane for the parameter that you selected.

Drawing In Automation

Drawing in automation is one of the easiest ways to automate a track in Pro Tools. To draw in automation, you need to follow these steps:

  1. Select the automation parameter that you want to edit from the automation lane.
  2. Use the pencil tool to draw in the automation points on the automation lane.
  3. Drag the automation points up or down to adjust the parameter value.

You can also use the smart tool or the trim tool to edit the automation points by clicking and dragging them.

Editing Automation

Editing automation in Pro Tools is a straightforward process but can save you a lot of time. To edit automation, you need to do the following steps:

  1. Select the automation parameter that you want to edit from the automation lane.
  2. Use the selector tool to choose the automation points that you want to edit.
  3. Use the cut, copy, and paste functions to move or duplicate the automation points.
  4. Drag the automation points left or right to adjust the timing of the automation.

Automation in Pro Tools is a powerful feature that can save you a lot of time and effort in your music or post-production projects. By setting up automation lanes, drawing in automation, and editing automation, you can create dynamic and professional-sounding tracks quickly and efficiently. So why not give it a try and unleash the full potential of your creative projects?

Advanced Automation Techniques

Learn advanced automation techniques to speed up your workflow in Pro Tools. From routing audio to setting up macros, automation can help you streamline your editing process and save time.

Pro Tools has always been a favorite DAW for engineers in the music, film, and post-production industries. One of the reasons for its popularity is the advanced automation techniques allowing users to add dynamic movements to a mix.

Grouping Tracks For Automation

Grouping tracks is a helpful technique while working on automation tasks in Pro Tools. Grouping tracks will allow you to automate multiple tracks at once. This can save you a lot of time when working on large projects. Here are the steps to group tracks in Pro Tools:

  1. Select the tracks that you want to group.
  2. Right-click on the selected tracks.
  3. Select “Group” from the contextual menu.
  4. The group menu will appear and will allow you to name the group, choose group attributes and link the group to a keyboard shortcut.

Using Automation Presets

Using automation presets can save a lot of time and streamline the mixing process. It can be useful when you’re trying to replicate automation movements in different sections of a track. To use automation presets in Pro Tools, follow the steps listed below:

  1. In the Pro Tools menu bar, click on the “Mix” button.
  2. Choose “Save Settings As” from the contextual menu.
  3. Give your preset a name that clearly defines its purpose.
  4. Choose the automation parameters you want to save, then click “OK”.
  5. The preset can be accessed later by going to the “Mix” menu, selecting “Plug-In Settings” and choosing the preset from the drop-down menu.

Creating Smooth Transitions

Creating smooth transitions between automated points is crucial to ensuring a mix sounds cohesive. There are a few techniques to achieve seamless transitions, such as:

  • Crossfading: Adjust the volumes of two adjacent regions to create a smooth and gradual transition.
  • Trimming: Create smooth transitions by trimming automation data in Pro Tools.
  • Using Automation Preview mode: Automation Preview mode allows you to preview changes to automation data and see a visual representation of changes before committing to them.

In conclusion, utilizing advanced automation techniques in Pro Tools can enhance your mixing workflow and help you produce high-quality mixes faster. Try grouping tracks for automation, using automation presets, and creating smooth transitions to add movement and depth to your mix.

How To Use Automation In Pro Tools

Credit: ask.audio

Tips For Using Automation Efficiently

Maximizing the use of automation in Pro Tools is key to workflow efficiency. It allows for quick repetitive tasks such as applying effects or edits to be done with ease. Create custom key commands and macros to speed up your workflow and save time.

Automation in Pro Tools is a powerful tool that lets you control various parameters of your music track over time. However, managing automation data can be time-consuming and tedious, especially if you’re working on a complex project. Here are a few tips to help you use automation efficiently.

Using Keyboard Shortcuts

When you’re working with automation in Pro Tools, keyboard shortcuts can be your best friend. They can help you speed up your workflow and make the process more efficient. Here are a few keyboard shortcuts that you can use:

ShortcutAction
Ctrl + Shift + AShow/hide automation lane
Ctrl + Shift + FCreate a fade in or out
Ctrl + clickCreate a breakpoint

Organizing Automation Lanes

Organizing your automation lanes can help you keep things tidy and make it easier to navigate through your project. Here are a few tips to help you organize your automation lanes:

  • Create a separate automation lane for each parameter you want to control
  • Group related lanes together
  • Color-code your lanes for easy identification

Duplicating Automation Data

If you need to repeat the same automation data in different parts of your project, duplicating the data can save you a lot of time. Here’s how you can duplicate automation data:

  1. Select the automation data you want to duplicate
  2. Press Ctrl + D to duplicate the data
  3. Drag the duplicated data to the desired location

Utilizing Templates

Templates can be a lifesaver when you’re working on a project that requires a lot of automation. Here are a few ways you can utilize templates:

  • Create a template with all your commonly used automation lanes and parameters
  • Save a template with common automation patterns, such as volume or panning, that you can use in different projects
  • Modify existing templates to fit the needs of a specific project

In conclusion, using automation efficiently in Pro Tools can help you save time and energy. By using keyboard shortcuts, organizing your automation lanes, duplicating automation data, and utilizing templates, you can streamline your workflow and focus on creating great music.

Common Mistakes To Avoid

When using automation in Pro Tools, it’s important to avoid common mistakes. Don’t overuse automation, make sure you understand the parameters and use a clear naming system. Keeping these things in mind will help you maximize the benefits of automation in Pro Tools.

When it comes to using automation in Pro Tools, there are certain common mistakes to avoid. Over-automating, not checking automation data, forgetting to bypass automation, and not using snapshots are the most common mistakes that can lead to a less-than-optimal workflow. Here’s a closer look at each one.

Over-automating

One of the most common mistakes people make when using automation in Pro Tools is over-automating. While automation can be a great way to add depth and dimension to your projects, it’s important to use it sparingly. Over-automating can make your projects sound cluttered and unprofessional, so it’s important to strike a balance between using automation effectively and knowing when to back off.

Not Checking Automation Data

Another mistake that many people make when using automation in Pro Tools is not checking their automation data. This can result in unintentional changes to your mix, or even worse, complete audio chaos. It’s important to always double-check your automation data before finalizing your project to ensure that everything is where it should be.

Forgetting To Bypass Automation

Forgetting to bypass automation is another common mistake that can cause problems. If you’re tweaking your mix and you’ve got one or more tracks automated, it’s easy to accidentally make changes to a track that you wanted to leave unchanged. To avoid this, always be sure to bypass automation on any tracks that you’re not actively working on.

Not Using Snapshots

Finally, not using snapshots is another mistake to avoid. Snapshots are a powerful tool that lets you save multiple settings for a given mix, which you can then easily switch between. This can save you time and effort when making changes or trying out new ideas. So if you’re not already using snapshots, give them a try! In conclusion, using automation in Pro Tools can significantly enhance your projects, but it’s important to avoid these common mistakes. By being mindful of over-automating, checking your automation data, bypassing automation when necessary, and using snapshots, you can use automation to its fullest potential and create professional-quality mixes that sound great.

How To Use Automation In Pro Tools

Credit: ask.audio

Frequently Asked Questions Of How To Use Automation In Pro Tools

How Do You Do Automation In Pro Tools?

Automation in Pro Tools can be done by using the automation playlists or modes available in the software. First, activate the automation mode for the track you want to automate, then use the pencil tool to write in the automation data on the track timeline.

You can also use the fader or knob controls in real-time to record automation changes.

Why Would You Use Automation In Pro Tools While Mixing?

Using automation in Pro Tools while mixing allows for precise adjustments in volume, panning, and effects at specific points in the track. This technique can save time and ensure consistency throughout the mix, as well as add creative flair to the production.

How Do I Enable Plugin Automation In Pro Tools?

To enable plugin automation in Pro Tools, follow these simple steps: first, select the track containing the plugin you want to automate. Next, click on the track name and select “Auto” from the dropdown menu. Finally, choose the parameter you want to automate and click “Enable”.

How Do You Use Automation?

Automation can be utilized by businesses to simplify tasks, increase efficiency, and save time and money. It involves the use of technology and software to perform repetitive and routine tasks without human intervention. Various systems can be automated such as email marketing, customer service, social media management, data entry, and more.

The main goal is to streamline processes and improve productivity.

Conclusion

Effective automation is an essential tool for music producers and audio engineers. With Pro Tools, there are endless possibilities, from saving time on tedious tasks to enhancing creativity. Implementing automation can be a daunting task, but with patience and practice, you’ll soon realize the power of automation in your music productions.

As you use automation, it’s important to remember to balance human touch with automated precision. Finding that sweet spot will help you create music that not only sounds great but also touches the listener’s soul. Keep exploring, experimenting, and creating with Pro Tools automation!

Categories
Archive

Should You Compress Every Track

Compression should be used strategically and not on every track. Over-compressing can lead to a loss of dynamics and affect the overall quality of the audio.

Compression is an essential tool for audio production, but it should be used logically. Compression helps even out levels and bring out certain sounds in a mix, but over-compressing can cause distortion and a loss of clarity. Every track may not require compression, and some tracks may need more compression than others.

It’s important to use compression as a strategic tool to help enhance the quality of the audio. We will explore the benefits of compression, when to use it and when to avoid it, and how to use it effectively to optimize the production’s sound quality.

Should You Compress Every Track

Credit: m.youtube.com

What Is Audio Compression?

What is Audio Compression?

Compression is an audio signal processing technique that reduces the dynamic range of audio. Simply put, it reduces the gap between the loudest and the quietest parts of the audio signal. Compression makes audio sound louder, clearer, and more consistent. Compression is used to make audio more impactful and to smooth out uneven audio levels. Audio compression is used in most music production, radio and TV broadcasting, podcasts, and streaming platforms.

How Compression Works

Compression software applies a certain amount of gain reduction (amplitude decrease) on audio signals that exceed a specific threshold level. Once the audio crosses the threshold level, gain reduction is applied. This results in a more consistent audio level, effectively “compressing” the dynamic range of audio. The settings on the compression software determine how much gain reduction is applied and how quickly the gain reduction is applied once the threshold is crossed.

Types Of Compression

There are two main types of audio compression: Analog and Digital. Analog compression is achieved through hardware like compressors and limiters. Digital compression applies compression through software like VST plugins and DAWs. There are several different compression types such as VCA, FET, and Optical compression, each with their unique tonal characteristics. Different compression types are suited for different applications; for instance, VCA compression is great for transparent compression, while Optical compression gives a more natural sound.

Should You Compress Every Track

Credit: www.tunecore.com

Why Do People Use Compression?

Compression is a technique used by music producers, sound engineers, podcasters, and home recording enthusiasts to balance and refine audio by reducing the dynamic range. Compression helps in leveling out differences in volume between the soft and the loud sections of an audio track. It is a go-to technique for audio professionals to add energy, presence, and punch to the audio tracks.

Benefits Of Compression

Compression offers the following benefits:

  • Balances Sound – Compression helps in balancing the volume levels of different parts of an audio track.
  • Adds Punch – Compression helps in giving the audio track an energetic and punchy feel.
  • Reduces Noise – Compression reduces the background noise in the audio track.
  • Brings Consistency – Compression eliminates the inconsistencies in sound levels.
  • Allows Better Mixing – Compression allows the sound engineer to mix different elements of the audio track more accurately.

Drawbacks Of Compression

Compression, though useful, has some drawbacks as well. It can cause the following:

  • Loss of Dynamics – Compression can cause the audio track to lose its natural dynamics.
  • Artificial Sound – Compression, when overdone, can make the audio track sound unnatural.
  • Introduces Artifacts – Compression can introduce distortion and other unwanted effects into the audio track.
  • Requires Expertise – As compression can be a complex technique, it requires an expert to use it effectively.

Therefore, before compressing every track, it is important to consider both its benefits and drawbacks to determine the best course of action for the particular audio track in question.

When Should You Compress A Track?

If you are new to music production, compression may seem like a daunting task. However, it is an essential technique for ensuring that your tracks sound professional and polished. But when should you compress a track? Let’s take a closer look.

Factors To Consider

Before you start compressing every track, there are some factors you should consider. Relying on compression too heavily can actually make your music sound worse, so it is essential to use it judiciously.

FactorConsiderations
Dynamic rangeIf a track has a wide dynamic range, compression can help even it out.
InstrumentSome instruments benefit from compression more than others. For example, a bass guitar typically needs more compression than a piano.
MixIf your mix is already well-balanced, you may not need much compression at all.

Common Scenarios

There are several common scenarios where you may want to use compression in your tracks:

  1. Control peaks: If a track has very loud peaks, compression can help bring them down to a more manageable level.
  2. Add sustain: Compression can help add sustain to instruments like guitars and drums, making them sound fuller and richer.
  3. Glue tracks: Compression can help “glue” multiple tracks together, creating a cohesive sound.

Keep in mind that these scenarios are just a starting point. There are countless ways to use compression effectively in your music.

Should You Compress Every Track

Credit: www.audio-issues.com

How To Use Compression?

Compression is a powerful tool that helps to even out the dynamics in an audio track, making it sound more polished and professional. Understanding how compression works can be tricky, but it’s essential if you want to get the most out of your mixes. In this section, we’ll look at how to use compression effectively to enhance your tracks and achieve the perfect sound. Let’s get started!

Setting Threshold And Ratio

The threshold and ratio are two essential parameters on a compressor that you’ll need to set when compressing a track. The threshold determines how loud a signal needs to be before the compressor starts working, and the ratio sets the amount of compression applied once the threshold is reached. To achieve the desired effect, experiment with different threshold and ratio settings until you find the perfect balance.

Choosing Attack And Release

Attack and release refer to how quickly the compressor will start and stop working once the threshold is crossed. Attack sets how fast the compressor kicks in to reduce the signal level, and release determines how long it takes for the compressor to stop working once the signal drops below the threshold. Choosing the right attack and release times is crucial to ensure a clear and punchy sound.

Using Makeup Gain

When you compress a signal, it reduces the overall level of the track. To bring the volume back up to where it was before compression, you’ll need to apply makeup gain. This process ensures that the compressed track has the same level as the uncompressed version and prevents excessive volume differences between tracks in your mix.

By following these tips, you can use compression effectively to polish your tracks and make them sound more professional. Experiment with different settings, keep an ear out for any changes, and adjust your parameters until you get the sound you’re looking for.

What Happens When Every Track Is Compressed?

When it comes to mixing your music, compression can be a valuable tool. By reducing the dynamic range of a track, compression can make the quieter parts louder and the louder parts quieter, helping to even out the sound and make everything sound more cohesive. However, should you compress every track in your mix? What happens when every track is compressed? Let’s take a closer look.

How Compression Affects Mixes

When every track in your mix is compressed, it can lead to a few different issues. Firstly, it can cause the overall mix to sound flat, with little variation in volume between different parts of the song. This can make it harder to create a sense of dynamics and impact in your music. Additionally, when every track is compressed, it can lead to a build-up of unwanted frequencies in the mix, which can muddy the overall sound and make it harder to distinguish individual instruments or parts.

That said, compression can still be a valuable tool in mixing, but it’s important to use it judiciously. Rather than compressing every track, try to identify the parts of the mix that could benefit most from compression. For example, you might compress the vocals to help them sit better in the mix, or compress the bass guitar to add more punch and definition.

Avoiding Compression Pitfalls

If you do choose to compress multiple tracks in your mix, there are some things to keep in mind in order to avoid some common pitfalls. Firstly, make sure you pay attention to the attack and release times when setting your compressor settings. If the attack time is too slow, you risk losing the initial transient of the sound, while a release time that’s too long can lead to a build-up of unwanted noise.

Additionally, make sure you’re paying attention to the relative levels of each track in the mix. If certain tracks are louder than others, you may need to adjust your compressor settings accordingly to prevent the quieter tracks from getting lost in the mix.

Quick tips for using compression in mixing
Use compression judiciously, focusing on the tracks that will benefit most from it
Pay attention to attack and release times when setting your compressor
Adjust the settings of your compressor based on the relative level of each track in the mix

As with any tool in mixing, compression can be a valuable asset when used correctly. By understanding its strengths and limitations and using it judiciously, you can help to create a mix that sounds polished and professional.

Alternatives To Compression

Compressing every track may not always be necessary as there are alternatives such as EQ and limiting that can help achieve a clear and bright sound. It’s important to assess each track individually and consider the overall mix before deciding whether to compress or not.

Compression is widely used in music production, but it’s not the only tool at your disposal. In fact, there are plenty of creative ways to achieve a desired sound without the use of compression. Here are some great alternatives to consider:

Volume Automation

One method is through the use of volume automation. Rather than relying on compression to balance the levels of different elements in a mix, you can automate the volume of individual tracks instead. This gives you more granular control over the dynamic range of your mix, and can be particularly effective for shaping the feel of a track.

Saturation And Distortion

Saturation and distortion are also great alternatives to compression. These effects can add warmth, character, and a sense of grit to an otherwise sterile mix. By pushing the input gain of your tracks, you can introduce pleasing harmonic distortion that can help glue everything together. Saturation is also great for adding some extra flavor to individual elements in a mix, such as drums or bass.

Parallel Processing

Another alternative is parallel processing. Rather than applying compression directly to a track, you can duplicate it and apply different processing to each copy. For example, you could apply heavy compression to one copy and leave the other uncompressed. By blending the two tracks together, you can achieve the desired level of compression without sacrificing the natural dynamics of the original track. In conclusion, compression is a powerful tool, but it’s not the only one. By exploring some of these alternative techniques, you can achieve a more creative and unique sound for your tracks. Whether you’re using volume automation, saturation, or parallel processing, these methods can help take your music to the next level.

Frequently Asked Questions Of Should You Compress Every Track

Do You Put Compressor On Every Track?

No, it is not necessary to put a compressor on every track. The use of compressors should be based on the particular needs of each track. Overusing compressors can impact the dynamics and overall sound quality of the final mix.

Should I Use Compression On Everything?

No, compression should not be used on everything. It is only necessary for large files, like images or videos, to improve website loading speed. However, compressing small files may not be necessary and can even reduce their quality. Consider file size and purpose before deciding to compress.

Should You Compress Individual Tracks?

Yes, you should compress individual tracks to even out the audio levels and make the sound clearer, crisper, and more professional. Compression can help control the dynamic range of audio and eliminate any sudden loud or quiet parts. But be careful not to over-compress and lose the natural dynamics of the sound.

Should You Compress All Your Instruments?

It is not necessary to compress all your instruments. Compression should only be used when it is needed to even out the levels of a track or to add a specific effect. Over-compressing can result in a loss of dynamic range and can make your music sound flat.

Use compression sparingly and only when necessary.

Conclusion

After considering the pros and cons, it ultimately comes down to personal preference and the needs of the project. While compressing every track can create a more polished and professional sound, it can also remove some of the natural dynamics and nuances of the music.

It’s important to consider the style of music and the desired end result before deciding whether or not to compress every track. Ultimately, use compression wisely and in moderation to enhance the overall sound without sacrificing the integrity and character of the music.

Categories
Archive

Cubase Doesn’t Detect My Headphones

To resolve Cubase not detecting headphones, try changing the audio device settings. Check if the headphones are set as default playback device.

In some cases, updating audio drivers may also resolve the issue. Cubase is a popular digital audio workstation used by professional and amateur musicians alike. However, it can be frustrating when the software doesn’t detect headphones. This issue can occur due to multiple reasons such as incorrect audio device settings or outdated drivers.

Fortunately, resolving this problem is usually straightforward. By switching the audio device settings or updating the drivers, you can get Cubase to recognize your headphones. We’ll explore common solutions to help you get back to making music in no time.

Cubase Doesn'T Detect My Headphones

Credit: forums.steinberg.net

Check Headphones And Connection

To troubleshoot Cubase not detecting headphones, ensure that the headphones are properly plugged in and that the audio settings are set to output sound to the correct device. Additionally, check that the headphones are functioning properly by testing them on another device.

If you are facing an issue with Cubase not detecting your headphones, it can be frustrating. But before jumping to conclusions, you must remember that the problem can often be a simple one. Checking your headphones and the connection can be the first few steps you need to take to fix the problem.

Verify Headphone Compatibility

The first step in finding out if there’s a problem with your headphones is to confirm their compatibility with your system. Some headphones don’t work with certain operating systems or devices. For example, if you have a pair of Apple earbuds with a 3.5mm jack that you’re trying to connect to a device that only supports USB-C, you won’t get any sound. So, before you check anything else, make sure the headphones are compatible with your system. You can check with your device’s or headphones’ manufacturer if you’re not sure about the compatibility.

Ensure Proper Connection

The next step is to ensure that your headphones are properly connected to your device. Check if the headphones are plugged into the correct jack or port. Sometimes, it’s just a matter of a loose connection or dirt in the port that may be preventing your headphones from connecting properly. If you’re using a wired connection, try unplugging and plugging your headphones several times to ensure they’re securely and properly connected. In case you have a wireless headset, make sure the Bluetooth connection between the headset and the device is turned on, and both the devices are paired.

Check The Headphones Themselves

If none of the above works, it is time to inspect the headphones themselves. Check if the headphones are turned on, and the volume is up. If the headphones have a mute button, ensure that it is disabled. If your headphones have a “mon” or “mix” switch, ensure that it is on the right setting. Mixing and monitoring modes may have different outputs, and if you’ve chosen the incorrect mode, that could be the reason why you have no sound in your Cubase software.

Wrap-up

In conclusion, Cubase not detecting your headphones can be a simple problem to fix. Verifying headphone compatibility, ensuring proper connection, and checking the headphones themselves are the first few steps to take. Once you have completed these steps, you can start looking into other possible reasons. But it’s always good to start with the basics.

Troubleshoot Audio Settings

To troubleshoot audio settings for Cubase not detecting your headphones, check if the headphones are properly plugged in and have the correct drivers installed. Go to the audio settings in Cubase and ensure that the correct audio device and driver are selected for playback.

If you can’t hear any sound from Cubase despite connecting your headphones, it may be due to some audio settings issue. Follow these troubleshooting steps to ensure your audio settings in Cubase are properly configured.

Check Audio Settings In Cubase

Check your audio interface settings and make sure that it is configured properly. Go to Cubase > Studio > Studio Setup and select your audio interface from the list. Confirm that it is set up correctly. If it’s not, reconfigure it and restart Cubase.

Restart Audio Drivers

Try restarting the audio drivers as they sometimes become unresponsive due to software updates or upgrades. Press the Windows + X keys and select Device Manager. Go to Sound, Video and Game Controllers and locate your audio device. Right-click on it and select Properties. Click on the Drivers tab and select Uninstall Device. Restart your computer and Windows will automatically reinstall the drivers.

Reset Cubase Preferences

If none of the above two methods work, try resetting Cubase preferences. This will restore the default settings and might solve the issue related to your headphones. Close Cubase, and press Windows key + R to open the run command. Type %appdata% and press Enter. Open the Steinberg folder and locate the Cubase version you’re currently using. Right-click on it and select Rename. Rename it to CubaseOld or something similar. Now launch Cubase and it will automatically create a new set of preferences. In conclusion, if your headphones are not detected by Cubase, these troubleshooting steps will help you to identify and resolve audio settings issues. Follow these steps and get back to creating with Cubase.

Update Or Reinstall Audio Drivers

To fix the issue of Cubase not detecting headphones, you can try updating or reinstalling your audio drivers. This can solve any compatibility problems that may be preventing Cubase from recognizing your headphones and allow you to get back to creating and editing your audio projects with ease.

Are you facing the issue of Cubase not detecting your headphones? Is it hindering your music composition process? If your answer is yes, then you are not alone. The problem may arise due to outdated or corrupted audio drivers in your system. Audio drivers are software components that enable your operating system to communicate with your audio hardware. Updating or reinstalling them can fix the issue. In this post, we will discuss how to update or reinstall audio drivers to resolve the issue of Cubase not detecting headphones.

Download And Install Updated Drivers

Downloading and installing updated drivers is the first solution you should try. Follow the steps below:

  1. Identify the brand and model of your audio hardware.
  2. Go to the manufacturer’s website and navigate to their support or drivers section.
  3. Download the latest drivers suitable for your operating system and hardware model.
  4. Double-click the downloaded file and follow the prompts to install the drivers.

If the problem persists, try the next solution below.

Uninstall And Reinstall Audio Drivers

Uninstalling and reinstalling audio drivers can fix the issue if downloading and installing updated drivers did not work. Here’s how:

  1. Press the Windows key + X and select Device Manager from the context menu.
  2. Locate the audio hardware in the list of devices and expand the option.
  3. Right-click on the audio hardware and select Uninstall device.
  4. Check the box to delete the driver software and click Uninstall.
  5. Restart your computer and let Windows reinstall the audio drivers automatically.

If the above methods do not resolve the issue, try contacting the manufacturer’s support team or seeking professional help.

Conclusion

We hope this post has helped you find a solution to the problem of Cubase not detecting headphones. Remember, outdated or corrupted audio drivers can cause this issue, and updating or reinstalling them can fix it. Follow the steps mentioned above and see if it works for you!

Cubase Doesn'T Detect My Headphones

Credit: forums.steinberg.net

Check Operating System Compatibility

When it comes to music production, issues like Cubase not detecting headphones can be quite frustrating and may significantly affect the workflow of the user. This problem is something producers encounter occasionally, so it’s important to know how to troubleshoot the issue.

Verify Cubase Compatibility With Os

Before purchasing a new operating system, it’s crucial to ensure that it’s compatible with the Cubase version in use. This is because different Cubase versions have specific minimum requirements for operating systems, so some may not work with the latest OS. To check the compatibility, visit the Steinberg website to find out more about the software and hardware compatibility.

Ensure Os Is Up-to-date

Having an updated version of your operating system is essential for troubleshooting many errors, and it can also help fix issues arising from Cubase not detecting headphones. Therefore, ensure that your OS is entirely up-to-date and that all critical patches and updates are installed. It will help avoid compatibility conflicts and reduce the likelihood of incompatibilities between the two.

If neither of the two aforementioned solutions resolve the issue, try checking other headphones, guessing there has to be an issue with the headphones or checking the audio setting to ensure that the headphones are selected as the primary audio output device.

By following these essential steps, you can fix the common issue of Cubase not detecting headphones, avoid potential compatibility complications and achieve a better music production experience.

Examine Audio Hardware

If your headphones are not being detected by Cubase, examining the audio hardware might help you troubleshoot the issue. This step is crucial if you want to ensure that everything is functioning correctly on your end.

Test Audio Interface

The first thing to do is test your audio interface. Check the USB or firewire connection and the driver software installed on your computer. If required, update it. Then, open Cubase and go to the Studio Setup window. Select Audio System from the list and choose your audio interface from the drop-down menu. Make sure all the necessary drivers are selected and enabled.

Check Headphone Jack

The headphone jack could also be the culprit. Check for any damage or debris that could be preventing it from functioning correctly. Make sure you’re plugging in your headphones in the right jack and not in the microphone jack if your computer has separate jacks. Additionally, check if your headphones work with other devices. If your headphones still aren’t being detected, try plugging them into a different jack or using a different pair of headphones, if available.

By examining your audio hardware in Cubase, you can isolate the problem and determine whether it’s a problem with the headphones or the software. Make sure all drivers are installed and functioning correctly, and check that your headphones are not damaged or potentially inserted into the wrong jack.

Seek Support From Steinberg

If your Cubase doesn’t detect your headphones, it can be quite frustrating. Before you throw in the towel and give up, you should seek support from Steinberg. Here are some steps you can take:

Search Knowledge Base For Solutions

If you are experiencing problems with Cubase detecting your headphones, you can first try using Steinberg’s knowledge base. This is an excellent source of information that can help you find solutions to your specific problems. It has articles, FAQs, videos, and other resources that can help you diagnose and fix the problem.

Contact Steinberg Support

If you have tried the knowledge base and haven’t found a solution, you can contact Steinberg support. They have a dedicated team of customer service representatives who will help you with any problems you are having. To contact them, you need to fill out a form on their website with your name, email, and a brief description of your problem. They usually respond within 24-48 hours, but if it’s an urgent matter, you can also call them.

Remember, getting support is nothing to be ashamed of. Even the best software can have problems, and Steinberg is dedicated to helping their users get the best out of Cubase.

Explore Alternative Headphone Options

In Cubase, if your headphones aren’t being detected, you may want to try exploring alternative headphone options. There are plenty of other headphones available on the market that could potentially be compatible with Cubase.

If you are having trouble with Cubase not detecting your headphones, don’t worry! There are several alternative headphone options you can explore. Here are some tips to help you get started:

Consider Using Different Headphones

Sometimes, the headphones you are using may not be compatible with Cubase. Consider using a different pair of headphones and see if that resolves the issue. It’s recommended that you use headphones specifically designed for music production as they provide a neutral frequency response and a comfortable sound.

Try A Headphone Amplifier

If you already own a pair of headphones that you like and they are not working with Cubase, you could try using a headphone amplifier. This device boosts the audio signal strength coming from your computer, resulting in a stronger and cleaner audio signal to your headphones. This may help you detect your headphones in Cubase.

Ensure Correct Audio Settings In Cubase

Before you try any alternative headphone option, make sure to check your audio settings in Cubase. Go to Devices > Device Setup > VST Audio System, and make sure your headphones are selected as the Input and Output device.

Check Your Computer’s Audio Settings

Another reason why Cubase may not detect your headphones could be due to your computer’s audio settings being misconfigured. Check your sound settings and ensure your headphones are selected as the default audio output device.

Isolate The Issue

If you’ve tried all of the above and still have issues, it could be an issue with either your headphones or Cubase. You could isolate the issue by trying your headphones on a different computer or trying a different pair of headphones on your computer. If the issue persists, consider reaching out to Cubase support.

Conclusion

By exploring alternative headphone options, you can easily troubleshoot the issue of Cubase not detecting your headphones. By trying different headphones, using a headphone amplifier, and ensuring all audio settings are correct, you can get back to producing music in no time!

Cubase Doesn'T Detect My Headphones

Credit: www.reddit.com

Frequently Asked Questions For Cubase Doesn’t Detect My Headphones

How Do I Get Cubase To Recognize My Headphones?

To get Cubase to recognize your headphones, go to the Studio Setup menu and select Audio System. Choose your headphones in the ASIO Driver dropdown menu, set the buffer size to an appropriate level, and press Apply. Your headphones should now be recognized.

Why Is My Audio Not Coming Through My Headphones?

Your audio may not be coming through your headphones due to several reasons. Check if your headphones are properly plugged in, if the volume is turned up, and if the audio source is correctly selected. If these steps don’t work, try testing your headphones on a different device or checking for any physical damage to the headphones.

Why Is Music Not Playing Through My Headphones?

There could be several reasons why music may not be playing through your headphones. Check if they are plugged in correctly, the volume is turned up, or if the headphones are broken. Additionally, make sure the audio source is correctly selected and not on mute.

How Do I Use Bluetooth Headphones In Cubase?

To use Bluetooth headphones in Cubase, make sure your device supports Bluetooth audio. Ensure Bluetooth is enabled on your computer and headphones. Pair your headphones with the computer and select them as the audio output in Cubase’s audio device settings.

Enjoy wireless audio monitoring.

Conclusion

Overall, Cubase not detecting headphones can be frustrating but it’s important to troubleshoot the issue step-by-step. Check the headphones and their connections, make sure your drivers are up to date, and adjust the settings in Cubase accordingly. With some patience, you can get your headphones working properly and continue to create great music.

Remember to always stay up to date with the latest software updates and check forums for any additional tips and tricks. Happy music making!

More in our DAW guides.