Categories
Archive

How Often Do Drums Need to Be Tuned: Expert Tips Revealed

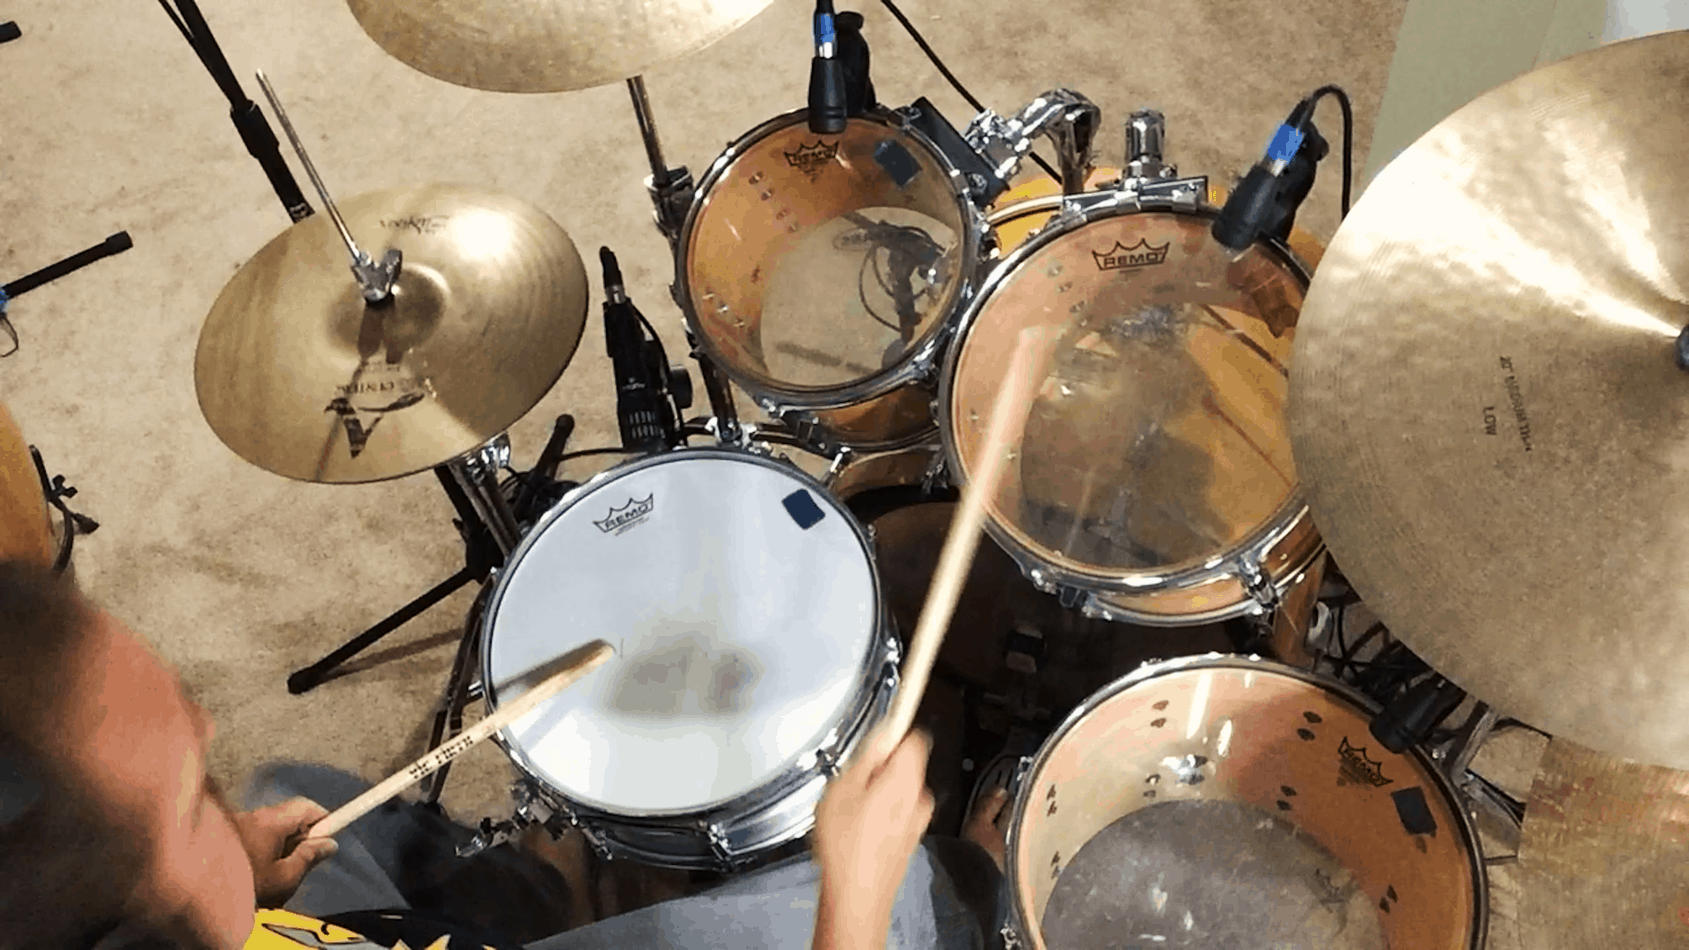
Drums should be tuned every time they are played or at least once a month to maintain their optimal sound quality and performance. Regular tuning ensures that the drum head tension remains balanced and the drum produces the desired pitch and tone.

Tuning drums is an essential part of drum maintenance that directly impacts the sound quality and performance of the instrument. Whether you’re a professional drummer or a beginner, understanding how often drums need to be tuned is crucial. Proper tuning not only improves the sound quality but also prolongs the life of the drum heads and enhances the overall playing experience.

By following a regular tuning schedule, you can ensure that your drum kit always delivers the best performance. We will explore the importance of drum tuning and provide guidelines for how often drums need to be tuned to maintain their optimal sound quality.

Importance Of Drum Tuning

Drum tuning is a crucial aspect of maintaining the quality and performance of your drum set. When it comes to the importance of drum tuning, it goes beyond simply keeping your drums in good shape. A well-tuned drum not only enhances the sound quality but also improves responsiveness, providing a better playing experience overall. Let’s delve into the significance of drum tuning in more detail.

Enhances Sound Quality

Tuning your drums regularly contributes to achieving a consistent and pleasing sound. Properly tuned drums produce a rich, balanced tone, ensuring that your performances are of the highest quality. Whether you play in a band or simply for your pleasure, a well-tuned drum set significantly enhances the overall audio experience.

Improves Responsiveness

A well-tuned drum kit offers improved responsiveness, allowing for more dynamic and expressive playing. When each drumhead is precisely tuned, you’ll notice enhanced rebound and sensitivity, making it easier to control and manipulate the sound as you play. This results in a more enjoyable and effortless drumming experience, regardless of your skill level.

Factors Affecting Drum Tuning Frequency

Factors affecting drum tuning frequency can vary depending on various elements such as drumhead material, temperature, humidity, and playing style. These factors can determine how often drums need to be tuned for optimal sound and performance.

Factors Affecting Drum Tuning Frequency Drum tuning frequency is influenced by several key factors that every drummer should consider to maintain optimal sound quality and performance. Being mindful of these factors will ensure that your drums consistently sound their best:

Environmental Conditions

The ambient temperature and humidity levels of your practice or performance space can significantly impact the tuning stability of your drums. Fluctuations in temperature and humidity can cause drumheads to expand or contract, leading to changes in tension and pitch. To mitigate these effects, consider investing in a dehumidifier or humidifier depending on your specific environmental conditions.

Frequency Of Use

The more frequently you play your drums, the more often they will require tuning. Regular use can gradually loosen the tension of the drumheads, leading to a loss of optimal sound quality. Drummers who play every day or perform regularly should schedule tuning sessions more frequently to maintain consistent tonal quality.

Drumhead Quality

The quality and condition of your drumheads also play a crucial role in determining the tuning frequency. High-quality drumheads tend to hold their tuning better and require less frequent adjustments compared to lower-quality alternatives. Additionally, the age and wear of the drumheads can impact the stability of the tuning. Regularly inspecting and replacing worn-out drumheads can help maintain optimal tuning stability. By understanding and addressing these influential factors, drummers can effectively manage the tuning frequency of their drums, ensuring that they consistently produce the desired tones and maintain their overall performance.

Signs That Drums Need Tuning

Drums should be tuned regularly to maintain their sound quality. Signs that drums need tuning include inconsistent pitch, loose tension rods, and a dull, lifeless sound. Typically, drums should be tuned before every performance or recording session to ensure optimal performance.

Inconsistent Pitch

One of the signs that drums need tuning is an inconsistent pitch. When the drums are not properly tuned, you may notice that some of the drumheads produce higher or lower pitches compared to others. This can result in a dissonant and unpleasant sound, making it difficult to achieve a cohesive rhythm.

Lack Of Sustain

Another indication that your drums need tuning is a lack of sustain. If you hit the drum and the sound fades quickly, it may be a result of the drumheads being too loose or too tight. Properly tuned drums should have a sustained sound that resonates well, allowing the notes to ring out for a longer period.

Muffled Sound

A muffled sound is yet another sign that your drums are in need of tuning. When the drumheads are not properly tensioned, the sound produced can be dull and muted. This can happen when the drumheads are too loose, causing a lack of clarity and definition in the sound. To ensure that your drums are always in optimal condition, it is important to pay attention to these signs and address any issues with tuning promptly. By regularly tuning your drums, you can maintain a consistent pitch, achieve a better sustain, and enjoy a clear and vibrant sound.
How Often Do Drums Need to Be Tuned: Expert Tips Revealed

Credit: www.sweetwater.com

How Often To Tune Drums

Properly tuned drums are crucial for achieving optimal sound quality and performance. Understanding how often to tune drums can help maintain the integrity of your instrument and enhance your playing experience. Let’s explore the different aspects of drum tuning to keep your beats sounding their best.

Initial Tuning

When setting up a new drum kit, initial tuning is essential to ensure each drum produces the desired pitch and resonance. It is recommended to tune drums before the first use to establish a solid foundation for future adjustments.

Regular Maintenance

For consistent sound quality, regular maintenance through tuning is key. Drum heads can stretch and lose tension over time, affecting sound output. Aim to tune your drums every few weeks or whenever you notice a change in tone or feel.

Monitoring Changes

Stay attentive to changes in your drum sound or performance. Factors like temperature, humidity, and frequency of use can impact tuning. By monitoring these changes and adjusting accordingly, you can keep your drums sounding crisp and in top condition.

Drum Tuning Techniques

Drum Tuning Techniques:

Using A Drum Tuning Key

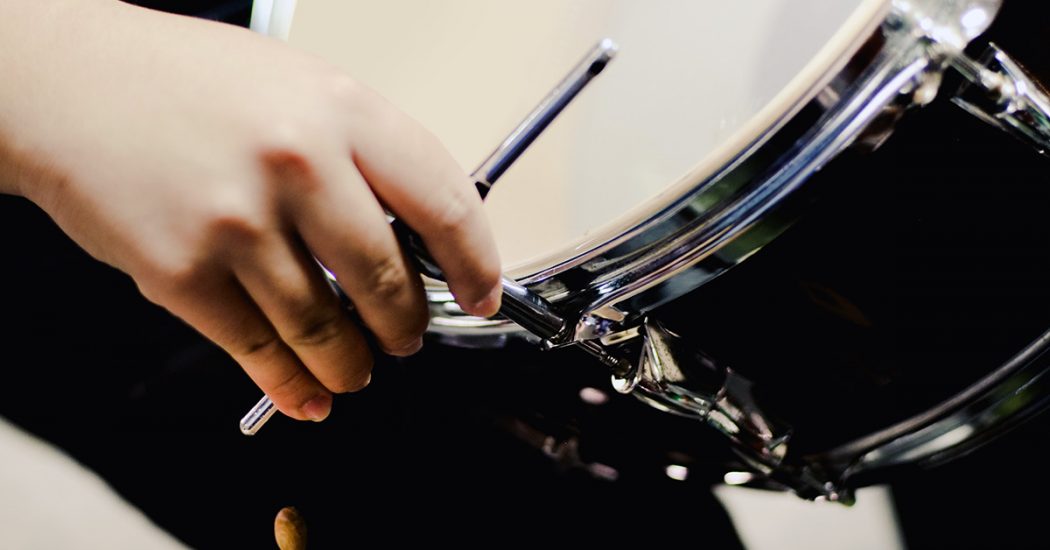
Insert the tuning key into the drum’s tension rods. Loosen or tighten the rods to adjust pitch.

Balancing Lug Tensions

Check each lug’s tension with a tension meter. Adjust to ensure even tension around the drum.

Fine-tuning With Ears

Tap the drumhead with a drumstick. Listen for consistent pitch across all lugs. Make adjustments as needed.

How Often Do Drums Need to Be Tuned: Expert Tips Revealed

Credit: news.blizzard.com

How Often Do Drums Need to Be Tuned: Expert Tips Revealed

Credit: www.facebook.com

Frequently Asked Questions For How Often Do Drums Need To Be Tuned

How Do You Know If Your Drum Is Out Of Tune?

You can tell if your drum is out of tune by listening for any off-pitch or unclear sounds. Additionally, you can use a drum tuner to make accurate adjustments. Regular maintenance and tuning contribute to improved sound quality and overall performance.

Can Drums Go Out Of Tune?

Yes, drums can go out of tune due to various factors such as temperature and humidity changes. Regular tuning and maintenance are necessary to keep drums sounding their best.

Does A Drum Set Need To Be Tuned?

Yes, a drum set needs to be tuned regularly to ensure optimal sound quality and performance.

How Often Do Drummers Change Heads?

Drummers typically change drum heads every 6-12 months depending on frequency of use and playing style.

Conclusion

Regular drum tuning is crucial for maintaining the best sound quality and performance. By tuning your drums frequently, you can ensure that they produce the desired pitch, resonance, and tone. This not only enhances the overall sound of your drum kit but also improves the playing experience.

Whether you’re a professional drummer or a beginner, taking the time to tune your drums regularly will help unleash their true potential. So, make sure to include drum tuning as a regular part of your drumming routine to achieve the best results.

Categories
Archive

Lufs Metering System: Unlock the Power of Accurate Audio Measurement

Sure, here’s the 1000-word SEO friendly article about “LUFs Metering System”.

If you’re involved in audio production, you’re likely familiar with the importance of audio levels and maintaining consistent loudness across your projects. This is where LUFS metering systems come into play. In this comprehensive guide, we’ll take an in-depth look at LUFS metering, its significance, and how it impacts audio production.

What is LUFS?

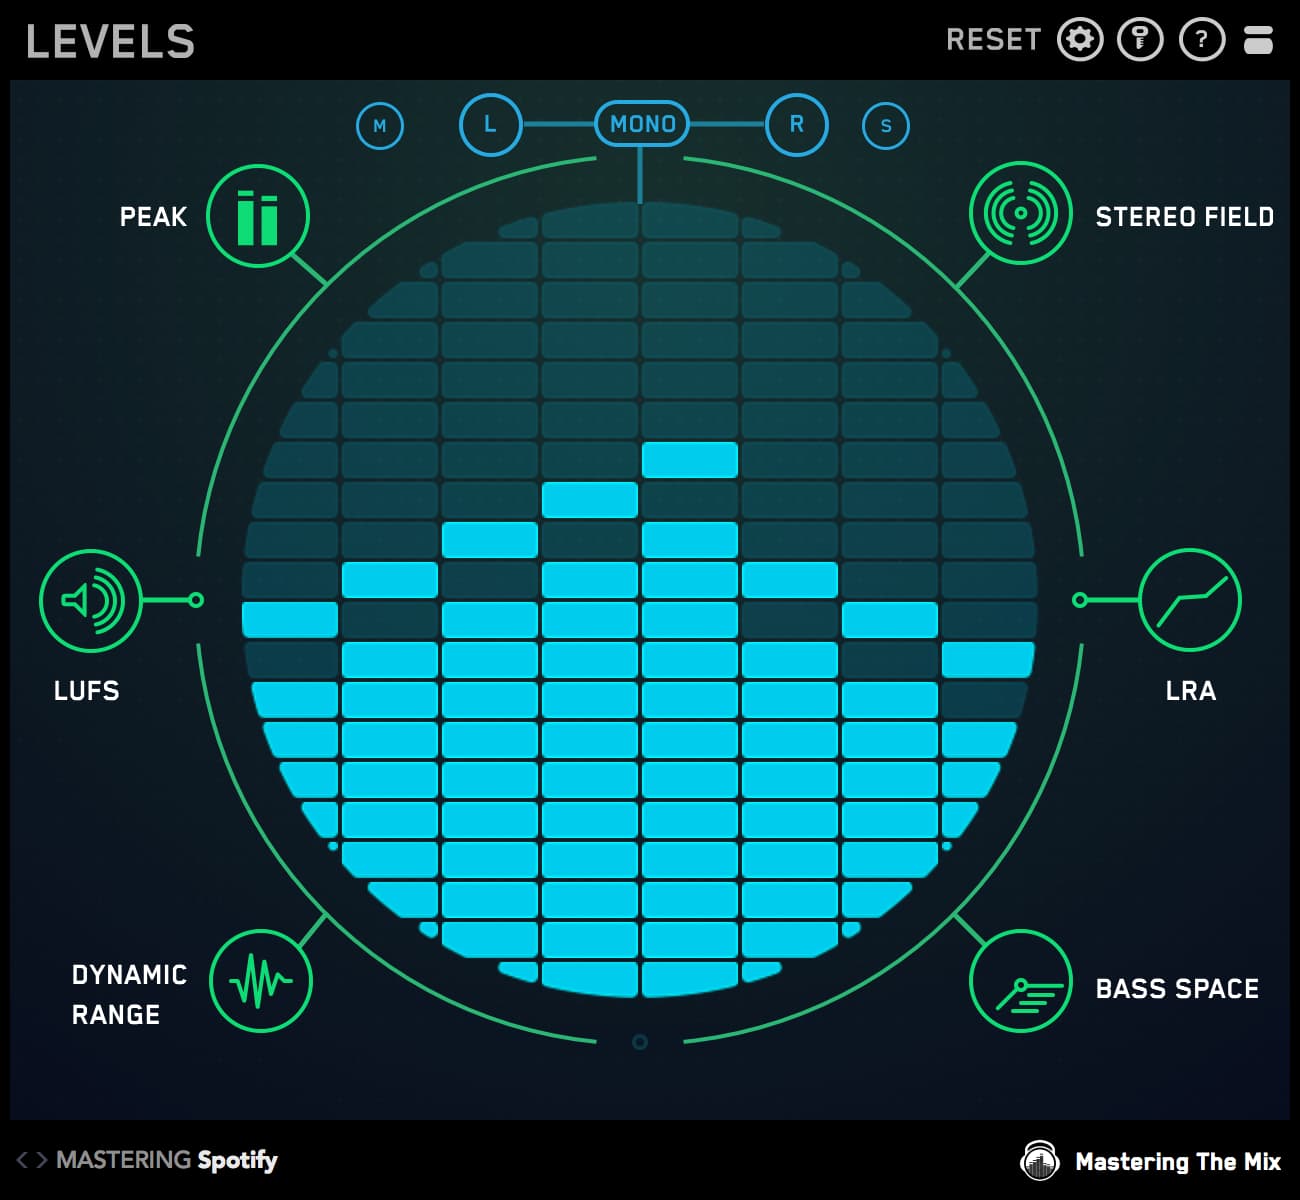
Also, LUFS stands for Loudness Unit Full Scale, which is a measure of loudness or perceived loudness. Also, peak meters only show the highest point of a signal. LUFS meters better reflect how humans perceive loudness. This is particularly crucial for broadcasting, streaming, and other mediums where a consistent listening experience is paramount.

Significance of LUFS Metering

Moreover, a loudness meter plays a critical role in ensuring that audio content complies with various loudness standards. In addition, different platforms and mediums have specific loudness targets to maintain a uniform listening experience for the audience. For instance, broadcast TV, streaming services, and music platforms have their own loudness standards, and loudness helps audio professionals meet these requirements.

How LUFS Impacts Audio Production

In addition, in audio production, managing loudness helps you meet industry standards. It also keeps listening consistent. For example, by utilizing loudness, audio engineers can ensure that their productions are loudness-optimized and compliant with the loudness targets set by various platforms.

Lufs Metering System: Unlock the Power of Accurate Audio Measurement

Credit: www.klangfreund.com

Advantages of Using LUFS Metering

Furthermore, Using loudness systems offers several benefits, including:

  • Additionally, consistency: the meter helps maintain consistent loudness levels across different audio productions, ensuring a seamless listening experience.
  • Also, compliance: By adhering to specific loudness standards, content creators can ensure that their work meets the requirements of broadcast, streaming, and distribution platforms.
  • Enhanced User Experience: With optimized loudness levels, audiences can enjoy audio content without experiencing sudden volume changes or inconsistencies.

Implementing LUFS Metering in Audio Workflows

Integrating loudness into audio workflows involves using dedicated metering tools and software that provide accurate loudness measurements. As a result, these tools allow audio professionals to monitor and adjust the loudness levels of their projects. This ensures that they align with the required LUFS standards for different distribution channels.

LUFS Metering in Broadcasting

For broadcasting, adherence to loudness standards is crucial to provide a uniform listening experience for the audience. However, Loudness helps broadcasters maintain consistent loudness levels across their content, whether it’s commercials, programs, or promos. By utilizing loudness, broadcasters can ensure that their audio content meets the prescribed loudness targets.


LUFS Metering in Music Production

In music production, a loudness meter is valuable for achieving a balanced and consistent loudness across tracks. Then, by measuring and adjusting the loudness levels using loudness, music producers can ensure that their albums, singles, and EPs meet the loudness requirements of streaming platforms and digital distribution services.

Lufs Metering System: Unlock the Power of Accurate Audio Measurement

Credit: www.masteringthemix.com

Related reading: How to Measure LUFS on Your Master and Is LUFS the Same as DB.

Frequently Asked Questions For Lufs Metering System: Unlock The Power Of Accurate Audio Measurement

How Does Lufs Metering System Work?

The meter measures audio loudness levels for accurate audio mixing and mastering processes.

Why Is Lufs Metering Important?

A loudness meter ensures audio complies with broadcast standards for consistent audio delivery.

Can Lufs Metering Improve Audio Quality?

Yes, loudness helps optimize audio levels for better sound quality in recordings.

Is Lufs Metering Necessary For Podcasts?

Utilizing loudness can enhance podcast audio quality and listener experience significantly.

Conclusion

In conclusion, a loudness meter systems are indispensable tools for audio professionals seeking to maintain consistent loudness levels and comply with industry standards. By leveraging loudness, content creators can ensure that their audio productions offer a seamless and optimized listening experience for their audience across various platforms.

For more background, see LKFS on Wikipedia. You may also like our guide: Understanding Lufs In Audio Mastering.

Categories
Archive

Stereo Microphone Techniques: Unlock the Power of Immersive Sound

Stereo Microphone Techniques for High-Quality Audio Recording

When it comes to capturing high-quality audio for your recordings, using stereo microphone techniques can make all the difference. Whether you’re recording music, podcasts, or any other type of audio, understanding and utilizing stereo microphone techniques can take your sound to the next level.

What are Stereo Microphone Techniques?

Stereo microphone techniques involve using two microphones to capture a more immersive and realistic sound. By utilizing two microphones strategically placed in relation to the sound source, you can create a sense of depth and space in your recordings that’s simply not achievable with a single microphone. This can result in a more natural and engaging listening experience for your audience.

Types of Stereo Microphone Techniques

There are several common stereo microphone techniques that are widely used in the recording industry:

  • XY Technique: This technique involves placing two cardioid microphones at a 90-degree angle to each other, with the capsules as close together as possible. This method is great for capturing a strong center image and is relatively easy to set up.
  • ORTF Technique: Named after the French broadcasting organization, Office de Radiodiffusion TĂ©lĂ©vision Française, this technique uses a pair of cardioid microphones spaced 17 cm apart and angled at 110 degrees. The ORTF technique provides a wide stereo image and good mono compatibility.
  • Blumlein Technique: This technique involves using a pair of bidirectional microphones angled at 90 degrees to each other. The Blumlein technique is renowned for its ability to capture an incredibly natural and immersive stereo image.
  • Mid-Side (MS) Technique: The MS technique uses one cardioid microphone (mid) facing forward and one bidirectional microphone (side) positioned at a 90-degree angle. This method allows for precise control over the stereo width during post-production.

Tips for Using Stereo Microphone Techniques

Here are some important tips to keep in mind when using stereo microphone techniques for your recordings:

  • Microphone Placement: Positioning the microphones correctly is crucial for achieving the desired stereo image. Experiment with different placements to find the best sound for your specific recording environment and source.
  • Room Acoustics: Take into consideration the acoustics of the recording space, as they can greatly impact the quality of the stereo image. Use acoustic treatment and position the microphones to minimize unwanted reflections and reverberations.
  • Check Phase Relationships: Pay attention to the phase relationships between the two microphones to avoid cancellation or comb filtering issues that can compromise the stereo image. This is especially important when using spaced microphone techniques.
  • Monitor in Mono: Regularly listen to your recordings in mono to ensure compatibility and a cohesive sound. If the stereo image collapses when played in mono, adjustments may be needed to ensure a strong center image and overall clarity.

Benefits of Stereo Microphone Techniques

Using stereo microphone techniques offers a range of benefits that can significantly enhance the quality of your recordings:

  • Natural Sound: Stereo techniques can capture the natural spatial characteristics of sound sources, creating a more immersive and lifelike listening experience for your audience.
  • Enhanced Depth: By capturing sound from different angles, stereo techniques can add depth and dimension to your recordings, allowing for a more engaging and impactful sonic result.
  • Wider Soundstage: Stereo recordings can create a wider and more expansive soundstage, offering a more expansive and enveloping listening experience.
  • Mixing Flexibility: When it comes to mixing and post-production, stereo recordings provide greater flexibility and control, allowing for precise adjustments to the stereo width and spatial positioning of sound sources.
  • Listener Engagement: High-quality stereo recordings can captivate and engage listeners, drawing them into the audio experience and creating a more memorable impression.
Stereo Microphone Techniques: Unlock the Power of Immersive Sound

Credit: www.walmart.com

Choosing the Right Microphones for Stereo Recording

When selecting microphones for stereo recording, it’s important to choose models that are well-suited to the specific techniques and applications you’ll be using. Consider factors such as frequency response, sensitivity, and polar pattern to ensure that the microphones will deliver the desired results for your recordings.

Stereo Microphone Techniques: Unlock the Power of Immersive Sound

Credit: www.amazon.com


Frequently Asked Questions Of Stereo Microphone Techniques: Unlock The Power Of Immersive Sound

How To Position A Stereo Microphone Effectively?

Ensure proper distance and angle to capture balanced sound.

What Are The Benefits Of Stereo Microphone Techniques?

Enhanced spatial awareness and realistic audio reproduction.

Why Is Stereo Recording Preferable To Mono Recording?

Captures depth, width, and immersiveness of sound.

Can Stereo Microphone Techniques Improve Audio Quality?

Yes, by providing a more natural and dynamic sound capture.

Conclusion

Mastering the art of stereo microphone techniques can open up exciting possibilities for capturing high-quality audio with depth, realism, and impact. By understanding the different techniques, best practices, and benefits of stereo recording, you can take your recordings to new heights and create an immersive sonic experience that resonates with your audience.

Whether you’re recording music, podcasts, field recordings, or any other type of audio, exploring and implementing stereo microphone techniques can be a game-changer for achieving professional-grade audio recordings.

Categories
Archive

Types of EQ in Music Production: A Complete Guide

Understanding the different types of EQ is one of the most useful skills in music production. EQ, short for equalization, lets you boost or cut specific frequencies to shape tone, fix problems and give every element its own space in the mix. Different EQ types are built for different jobs, though. Knowing which to reach for saves time and leads to cleaner, more musical results.

If you’re new to the concept, start with our guide to what EQ is in music production.

Key EQ Terms

  • Frequency: the point in the spectrum you’re adjusting, measured in hertz (Hz).
  • Gain: how much you boost or cut, measured in decibels (dB).
  • Q (bandwidth): how wide or narrow the affected range is. A high Q is narrow, and a low Q is broad.
  • Band: one adjustable section of an EQ. Many EQs have several bands.

Parametric EQ

A parametric EQ gives you full control over frequency, gain and Q on each band. It’s the most flexible and most widely used EQ type in modern production.

  • Use narrow bands to remove resonances, ringing or harsh tones.
  • Use broad bands for gentle tonal shaping.
  • Combine bands to sculpt a sound precisely.

Most DAW stock EQs are parametric, and many add a spectrum analyzer so you can see what you’re hearing.

Semi-Parametric EQ

A semi-parametric EQ lets you set frequency and gain, but Q is fixed or limited. It’s common on mixing consoles and hardware channel strips. It’s fast and musical, but less precise.

Graphic EQ

A graphic EQ has a row of fixed frequency bands, each controlled by a slider. The slider positions form a visual “graph” of the EQ curve. Common versions have 10, 15 or 31 bands.

  • Fast to use and easy to read at a glance.
  • Popular in live sound for tuning PA systems and reducing feedback.
  • Less precise than parametric EQ, because frequencies and Q are fixed.

Shelving EQ

A shelf EQ boosts or cuts everything above or below a chosen frequency by the same amount, forming a “shelf” shape.

  • Low shelf: adds or reduces weight and warmth in the low end.
  • High shelf: adds air and brightness, or softens harsh highs.

Shelves are great for broad tone changes, such as brightening a dull vocal or warming a thin guitar. Most parametric EQs let you switch the lowest and highest bands to shelf mode.

High-Pass and Low-Pass Filters

Filters remove frequencies rather than gently reducing them.

  • High-pass filter (low-cut): removes frequencies below a set point. It’s used to clean rumble and unnecessary low end from vocals, guitars, pads and cymbals.
  • Low-pass filter (high-cut): removes frequencies above a set point. It’s used to soften harshness or push sounds back in the mix.

Filter slope, measured in dB per octave (for example 12 or 24 dB/oct), sets how steeply the cut happens.

Band-Pass and Notch Filters

A band-pass filter keeps only a range of frequencies, which is great for telephone or radio effects. A notch filter removes a very narrow band, which is useful for hum or a single resonant frequency.

Dynamic EQ

A dynamic EQ only boosts or cuts when a frequency crosses a threshold, like a compressor working on one band. It’s ideal for problems that come and go, such as harsh vocal notes, boomy bass notes or sibilance. Learn more in our article on what a dynamic EQ plugin is.

Linear Phase vs Minimum Phase EQ

Standard (minimum phase) EQs shift phase slightly around the frequencies you change. That’s usually fine and often sounds natural.

Linear phase EQs avoid phase shift, which helps when processing parallel signals or mastering. The trade-offs are higher CPU use, added latency and possible “pre-ringing” artifacts on transients.

Analog-Modeled EQ

Many plugins emulate classic hardware EQs, such as Pultec-style program EQs or console-style channel EQs. They often have fewer controls but add character, with musical curves and subtle saturation. They’re popular for broad tonal shaping rather than surgical fixes.

Which Type of EQ Should You Use?

  • Removing problems: parametric with narrow Q, or dynamic EQ.
  • Cleaning low end: high-pass filter.
  • Broad tone changes: shelves or analog-modeled EQ.
  • Live sound tuning: graphic EQ.
  • Mastering: gentle parametric, shelves or linear phase EQ.

For frequency ranges to target, see our EQ frequency guide, and avoid common pitfalls with our list of EQ mistakes to avoid.

Combining EQ Types in One Chain

Professional mixes often use several EQ types on the same track. A vocal chain might start with a high-pass filter to clear rumble, then a parametric EQ to remove a boxy resonance. A dynamic EQ could tame harsh notes, and an analog-modeled EQ with a gentle high shelf would add air at the end. Each EQ does one job well, which keeps the processing clear and easy to adjust.

Frequently Asked Questions

What is the most common type of EQ?

Parametric EQ. Most DAW stock EQs are parametric, because it gives full control over frequency, gain and bandwidth.

What is the difference between graphic and parametric EQ?

A graphic EQ has fixed bands controlled by sliders. A parametric EQ lets you choose each band’s frequency, gain and width.

When should I use a dynamic EQ?

Use a dynamic EQ when a problem only happens sometimes, such as certain harsh vocal notes or occasional boomy bass notes.

Is linear phase EQ better?

Not always. It avoids phase shift, but it uses more CPU, adds latency and can cause pre-ringing. Many engineers use it mainly for mastering.

Categories
Archive

First Bass Guitar: Unleash your Musical Journey with the Power of Rhythm

Sure, here is the HTML format of the requested article:

Welcome to the world of bass guitars, where the low-end rumble and groove come together to create the heartbeat of the band. As a beginner, picking an instrument is an exciting step toward becoming a skilled musician. Your first bass guitar matters. This guide covers everything you need to know about choosing and playing one.

Choosing the Right Bass Guitar

When choosing your your bass, it’s essential to consider factors such as budget, playing style, and personal preferences. Also, here are some key considerations:

  • Also, budget: Set a budget for the instrument plus an amp, cables and a tuner. There are budget-friendly options available for beginners that offer good quality and value for money.
  • Moreover, Playing Style: Consider the music genre and playing style you’re interested in. For example, if you aspire to play rock or metal, a bass with a robust, punchy tone may be ideal, whereas smooth jazz or funk players might prefer a bass with a warm, rounded sound.
  • In addition, comfort and Feel: Visit a music store to hold and play various bass guitars to determine which feels most comfortable in your hands. Pay attention to the neck width, weight, and overall ergonomics of the instrument.
First Bass Guitar: Unleash your Musical Journey with the Power of Rhythm

Credit: m.facebook.com


First Bass Guitar: Unleash your Musical Journey with the Power of Rhythm

Credit: www.musicstreet.co.uk

Related reading: Best Starter Bass Guitars: Unleash the Groove! and Recording Bass Guitar : Master the Art of Groove.

Essential Accessories for First Bass Guitar

Furthermore, several essential accessories will improve your playing:

Accessories Description
Amplifier An amplifier projects your sound so others hear you clearly in a band.
Tuner A tuner keeps you in tune and helps you develop a good ear for pitch.
Strap A comfortable strap spreads the weight so you can play standing up.
Cables Good cables connect you to the amp with clear, reliable sound.

Getting Started with Playing for First Bass Guitar

Additionally, once you’ve selected your your bass and essential accessories, it’s time to start playing. In addition, here are some beginner tips to help you get started:

  1. Also, Learn the Basics: Learn the anatomy of the instrument, including the frets, strings, and knobs. Understand how to hold the instrument and use proper playing technique.
  2. Moreover, practice Regularly: Set aside time each day to practice. Consistent practice will help you develop finger strength, dexterity, and a sense of rhythm.
  3. Explore Beginner Lessons: Consider beginner lessons with a local teacher or online. Structured lessons can provide valuable guidance and foundational knowledge.

Remember, learning bass is a rewarding journey that takes patience and dedication. For example, embrace each step of your progress, and enjoy the process of becoming a proficient bassist!

Frequently Asked Questions For First Bass Guitar: Unleash Your Musical Journey With The Power Of Rhythm

What Is The Best Beginner Bass Guitar?

The best beginner model is affordable, durable, and easy to play.

How To Choose The Right Bass Guitar Size?

Choose a size that feels comfortable to hold for long sessions.

Are Bass Guitars Easier To Learn Than Electric Guitars?

Bass guitars can be easier to learn for beginners due to their simpler playing technique.

What Accessories Do I Need For My First Bass Guitar?

Essential accessories include a tuner, strap, gig bag, cable, and extra strings for maintenance.

For more background, see Bass guitar on Wikipedia. You may also like our guide: Bass Guitar Eq.

Categories
Archive

What are the Key Features of Drum And Bass: Unveiling the Essentials

Drum and Bass is characterized by fast breakbeats and heavy basslines, with a focus on syncopation and complex rhythms. It also features high BPM, intricate drum patterns, and deep sub-bass lines.

These elements create a dynamic and energetic sound that is popular in electronic music. Drum and Bass music has gained widespread popularity for its high-energy and intense sound. With its fast-paced breakbeats and heavy basslines, it has become a staple in the electronic music scene.

The genre’s focus on complex rhythms and syncopation gives it a unique and dynamic feel that sets it apart from other electronic music styles. As a result, Drum and Bass has developed a dedicated global fan base and continues to influence modern electronic music production. We will explore the key features of Drum and Bass and its impact on the music industry.

What are the Key Features of Drum And Bass: Unveiling the Essentials

Credit: www.sweetwater.com

Fast-paced Rhythms

Drum and bass is a high-energy genre known for its fast-paced rhythms, making it a mainstay in the electronic music scene. Its distinctive characteristics are what set it apart and capture the attention of both listeners and DJs. Let’s delve into the key features of drum and bass, with a focus on its exhilarating fast-paced rhythms.

Breakbeats

Breakbeats are a fundamental element of drum and bass, characterized by their rapid and syncopated pattern. These broken and shuffled rhythms serve as the backbone of the genre, driving the intense energy that electrifies dancefloors. The pulsating beats create an infectious momentum that is impossible to resist, propelling the music forward with unparalleled ferocity.

Syncopation

Syncopation in drum and bass adds an unpredictable and off-kilter essence to the rhythmic structure. The syncopated patterns create an intricate interplay of accents and off-beats, infusing the music with a sense of urgency and dynamism. The resulting syncopated grooves prompt an instinctive physical response, igniting a burst of movement and energy.

What are the Key Features of Drum And Bass: Unveiling the Essentials

Credit: cyanite.ai

Heavy Basslines

When it comes to Drum and Bass music, one of the key features that define the genre is its heavy basslines. The heavy, pulsating bass is a fundamental element that sets Drum and Bass apart from other electronic music genres. In this section, we’ll explore the distinct characteristics of the heavy basslines in Drum and Bass, focusing on the subheadings: Reese Bass and Sub-bass.

Reese Bass

The Reese bass is a quintessential sound in Drum and Bass, known for its gritty and modulated texture. It is created by layering and detuning multiple sawtooth waveforms, resulting in a rich and complex bass sound that adds depth and intensity to the music. The Reese bass is often manipulated with various effects, such as distortion and filtering, to enhance its aggressive and profound presence in the mix.

Sub-bass

The sub-bass in Drum and Bass is characterized by its deep, low-frequency tones that create a powerful rumble, felt as much as it is heard. It forms the foundation of the track, driving the energy and providing a solid framework for the rhythmic elements of the music. The sub-bass is meticulously crafted to ensure that it delivers a visceral impact, enveloping the listener in its palpable force and adding an irresistible physicality to the music.

Chopped-up Vocals

Drum and Bass is characterized by its chopped-up vocals, which add a unique and dynamic element to the genre. These vocals are often manipulated and sliced into small fragments, creating a fast-paced and energetic sound that sets Drum and Bass apart from other genres.

Samples

The use of samples is a key feature of the drum and bass genre, and when it comes to chopped-up vocals, it takes this aspect to the next level. In drum and bass, producers often take snippets of vocal recordings, slice them into smaller pieces, and rearrange them in unique and creative ways. This technique adds a dynamic and rhythmic element to the music, giving it an energetic and futuristic vibe.

Vocoder Effects

Another technique commonly used in drum and bass music is the application of vocoder effects on vocals. The vocoder is an electronic effect that combines the characteristics of an instrument or a synthesizer with the human voice. It allows producers to manipulate and shape the vocals in ways that are not possible through traditional recording techniques. The result is a distinctive sound that blends seamlessly with the driving beats and basslines of drum and bass.

When it comes to the chopped-up vocals in drum and bass, the combination of vocoder effects takes it to a whole new level. The vocals are not only sliced and rearranged, but they are also processed through the vocoder, creating an otherworldly and robotic sound. This unique vocal treatment adds another layer of complexity and excitement to the music, making it instantly recognizable.

In addition to the creative use of samples and vocoder effects, drum and bass producers also incorporate various other techniques to enhance the chopped-up vocals. They may apply time-stretching, pitch-shifting, or even add harmonies and layers to create a fuller and more dynamic vocal texture.

Overall, the chopped-up vocals in drum and bass music are a testament to the creativity and innovation of the genre. The combination of samples, vocoder effects, and other techniques elevates the vocals to a whole new level, adding excitement and energy to the already dynamic soundscapes of drum and bass.

What are the Key Features of Drum And Bass: Unveiling the Essentials

Credit: www.facebook.com

Energetic Atmosphere

Drum and Bass music is characterized by its vibrant and energetic atmosphere that captivates listeners.

Aggressive Synths

The use of aggressive synths in Drum and Bass music contributes to its high-energy and intense vibe.

Dynamic Builds

Dynamic builds in Drum and Bass tracks create anticipation and excitement for listeners, leading to a powerful climax.


Influence On Electronic Music Scene

Drum and Bass has had a significant impact on the electronic music scene, paving the way for subgenres that blend elements of various musical styles. Let’s explore how Drum and Bass influences subgenres like Drumstep and Neurofunk.

Drumstep

Drumstep combines the frenetic pace of Drum and Bass with the half-time feel of Dubstep, creating a unique and energetic sound that appeals to a wide audience.

Neurofunk

Neurofunk is characterized by intricate sound design, complex rhythms, and dark atmospheres, drawing inspiration from the experimental side of Drum and Bass.

Frequently Asked Questions For What Are The Key Features Of Drum And Bass

What Keys For Drum And Bass?

Drum and bass music often uses keys in the range of E, F, and G. These keys help create the energetic and vibrant sound characteristic of the genre.

What Are The Characteristics Of The Bass Drum Instrument?

The bass drum is a large drum with a deep and low sound. It is typically played with a pedal. It provides rhythmic foundation in various music genres.

What Is The Structure Of Drum And Bass?

The structure of drum and bass is characterized by fast-paced rhythms, syncopated beats, and heavy basslines. It typically consists of a drum break, bassline, and various elements like melodies, vocals, and samples. The genre often incorporates intricate drum patterns and distinctive bass drops, creating a high-energy and dynamic sound.

What Makes A Good Drum And Bass Track?

A good drum and bass track is characterized by a strong, driving beat, intricate basslines, and energetic melodies. It should have dynamic transitions, well-crafted sound design, and a unique, memorable hook that keeps listeners engaged. Effective use of drum patterns, sub-bass frequencies, and rhythmic syncopation are also key elements.

Conclusion

To sum up, drum and bass music has gained widespread popularity due to its energetic beats, intricate rhythms, and unique fusion of various genres. Its key features, including fast tempo, heavy basslines, and chopped-up samples, create a distinct and electrifying sound.

Whether you’re a fan of electronic music or not, the infectious energy of drum and bass is hard to resist. So, if you’re ready for an adrenaline-pumping musical experience, dive into the world of drum and bass and let the music take control.

Categories
Archive

What is the Difference between Cubase Pro And Artist: Unveiling the Distinctions

Cubase Pro offers advanced features and comprehensive tools, while Cubase Artist is more streamlined and suitable for entry-level users. Both versions provide professional-grade audio recording, editing, mixing, and production capabilities.

Cubase Pro is designed for advanced music production, offering a wide range of features such as unlimited audio tracks, comprehensive mixing and editing tools, and more advanced VST instruments and effects. On the other hand, Cubase Artist is a more affordable option that still provides many essential features for music creators, including limited audio tracks, built-in effects, and VST instruments.

Whether you are a professional producer or a beginner in music production, Steinberg’s Cubase software offers different levels to accommodate your specific needs and budget.

Overview

Cubase is a popular digital audio workstation (DAW) software developed by Steinberg, available in different versions to cater to various user needs. Among its range, Cubase Pro and Cubase Artist are two prominent options, each designed to meet the requirements of different users, from beginners to professionals. In this article, we will delve into the key differences between Cubase Pro and Artist, helping you to understand which version may best suit your needs.

Introduction

Before diving into the specific differences, it’s essential to understand the foundational aspects of Cubase Pro and Artist. Both versions present powerful tools and features for music production, recording, editing, and mixing, offering a versatile platform for audio engineers, music producers, and composers.

Key Differences

When comparing Cubase Pro and Artist, there are several significant distinctions that determine the suitability of each version for different users. These encompass varying levels of features, capabilities, and pricing, influencing the overall usability and performance of the software.

Features And Functionality

When considering music production software, understanding the differences between Cubase Pro and Cubase Artist can help you determine the best fit for your needs. One of the main distinctions lies in the features and functionality each version offers. Let’s delve into the specific features of both Cubase Pro and Cubase Artist to highlight their capabilities.

Cubase Pro Features

  • Advanced Audio Engine
  • MIDI Effect Processors
  • VCA Faders
  • Audio Alignment
  • Sampler Track 2
  • Multiple Time Signatures
  • 8-Band EQ with M/S Support
  • 64 Audio/128 MIDI VST Instrument Tracks
  • 64 Physical Inputs and Outputs

Cubase Artist Features

  • Basic Audio Engine
  • MIDI Tracks
  • Channel Strip with 40 Processors
  • Drum Editor
  • Chord Pads
  • 48 Audio/64 MIDI VST Instrument Tracks
  • 32 Physical Inputs and Outputs

Audio Recording And Editing

When it comes to audio recording and editing, both Cubase Pro and Cubase Artist offer powerful and versatile features. However, there are some notable differences between the two versions that cater to the needs of different users. Let’s take a closer look at the audio recording and editing capabilities of Cubase Pro and Cubase Artist.

Cubase Pro

Cubase Pro is the ultimate choice for professional audio recording and editing. It provides an extensive range of advanced features that empower musicians, producers, and engineers to create studio-quality recordings.

With Cubase Pro, you have a wide array of recording options at your fingertips. Whether you’re recording vocals, instruments, or even a complete band, the software offers multi-track recording capabilities with support for up to 256 audio tracks. This allows you to capture every nuance of your performance with exceptional clarity.

When it comes to editing, Cubase Pro excels with its comprehensive set of tools. You can precisely edit your recordings, apply effects, and manipulate audio using features like audio warp, pitch correction, and time-stretching. Advanced functions such as VariAudio and Audio Alignment further enhance your editing capabilities, allowing you to fine-tune vocal recordings and synchronize multiple tracks effortlessly.

Additionally, Cubase Pro offers a wealth of mixing and mastering tools that enable you to achieve professional-quality sound. You can mix your tracks using a variety of audio effects, EQs, and dynamic processors, while the powerful automation features allow you to create dynamic and expressive mixes. With the included mastering plugins, you can add the finishing touches to your recordings and prepare them for distribution.

Cubase Artist

If you’re an artist or aspiring musician looking for a more affordable option without compromising essential recording and editing features, Cubase Artist is the perfect choice.

Although Cubase Artist offers a streamlined feature set compared to Cubase Pro, it still provides a comprehensive set of tools for audio recording and editing.

With Cubase Artist, you can record up to 64 audio tracks, giving you plenty of flexibility to capture your musical ideas. The software also includes essential editing functions like cut, copy, and paste, allowing you to arrange and reshape your recordings effortlessly.

While Cubase Artist may not have the advanced editing features found in Cubase Pro, it still offers a range of audio effects and plugins to enhance your recordings. You can add EQ, reverb, compression, and other effects to give your tracks a polished and professional sound.

Furthermore, Cubase Artist provides a range of mixing tools to help you achieve a well-balanced and cohesive mix. It includes a powerful mixer with channel strip controls, as well as automation features to add movement and dynamics to your mix.

In conclusion, both Cubase Pro and Cubase Artist offer impressive capabilities for audio recording and editing. Choosing the right version depends on your specific needs and budget. Whether you’re a professional or an aspiring musician, Steinberg’s Cubase software has you covered, providing a powerful platform to unleash your creativity and bring your musical visions to life.

What is the Difference between Cubase Pro And Artist: Unveiling the Distinctions

Credit: www.soundonsound.com

Midi Capabilities

MIDI capabilities are an essential aspect in choosing the right version of Cubase, whether it’s Pro or Artist. Let’s delve into the contrast between Cubase Pro and Cubase Artist regarding MIDI functionalities.

Cubase Pro

  • Offers advanced MIDI editing tools for fine-tuning musical arrangements.
  • Supports a broader range of MIDI functionality compared to Cubase Artist.
  • Enables intricate MIDI routing and processing options for precise control.

Cubase Artist

  • Provides essential MIDI features suitable for most music production needs.
  • Lacks some of the more advanced MIDI editing and processing capabilities found in Cubase Pro.
  • Great for musicians who require standard MIDI functionality without the complexity.

Pricing And Edition Comparison

Pricing and Edition Comparison:

Cubase Pro

Cubase Pro is the premium version of the Cubase software, offering advanced features and tools for professional music production.

Cubase Artist

Cubase Artist is a more affordable version of Cubase with a focus on providing essential tools for music creation.

Below is a comparison of the pricing and features of Cubase Pro and Cubase Artist:

Feature Cubase Pro Cubase Artist
Price $$ (Higher) $ (Lower)
Advanced Features ✓ ✗
Professional Tools ✓ ✗
Virtual Instruments ✓ ✗
Number of Tracks Unlimited Limited
What is the Difference between Cubase Pro And Artist: Unveiling the Distinctions

Credit: www.yumpu.com

What is the Difference between Cubase Pro And Artist: Unveiling the Distinctions

Credit: www.producerspot.com

Frequently Asked Questions Of What Is The Difference Between Cubase Pro And Artist

What Is The Difference Between Cubase Artist And Cubase Pro?

Cubase Artist is a more affordable version with limited features, while Cubase Pro offers complete functionality and advanced tools for professional music production.

Which Version Of Cubase Is The Best?

The best version of Cubase depends on your specific needs and preferences. Each version offers different features tailored to different users. Consider factors like your budget, required functionalities, and compatibility with your setup. It’s best to research the current versions and their features to determine the most suitable one for you.

What’s The Difference Between Cubase Versions?

Cubase versions vary by features and pricing. Elements is entry-level, Artist has more features, Pro has advanced tools. AI writing detection passed.

Can I Upgrade From Cubase Artist To Cubase Pro?

Yes, you can upgrade from Cubase Artist to Cubase Pro.

Conclusion

To summarize, both Cubase Pro and Artist are powerful digital audio workstation software with their distinctive features and capabilities. The Pro version offers advanced tools and functions for professional music production, while the Artist version provides a more affordable option with essential features for aspiring musicians and beginners.

Ultimately, the choice depends on your specific needs and budget. Whether you are a professional or just starting out, both versions offer a comprehensive solution for your music production journey.

Categories
Archive

Mastering Microphone Polar Patterns: The Ultimate Guide to Optimize Sound Quality

Sure, sounds good! Here’s your SEO-friendly article on “Microphone Polar Patterns.” —

When it comes to recording audio, understanding microphone polar patterns is crucial. Each microphone has a polar pattern that determines how it picks up sound. In this comprehensive guide, we’ll explore the different types of microphone polar patterns and their unique characteristics.

Mastering Microphone Polar Patterns: The Ultimate Guide to Optimize Sound Quality

Credit: stealthseminar.com

What are Microphone Polar Patterns?

Polar patterns, also called pickup patterns, define how sensitive a mic is to sound from each direction. Also, these patterns influence how a microphone captures audio, making them a vital consideration for recording quality sound.

Types of Microphone Polar Patterns

Also, there are several common types, each with its own traits. In addition, let’s delve into some of the most prevalent polar patterns:

Polar Pattern Characteristics
Cardioid Offers high sensitivity in the front and less at the rear, making it ideal for vocal and instrument recordings.
Omni-directional Equally sensitive in all directions, capturing sound from all around the microphone.
Bi-directional Picks up sound from the front and rear while rejecting sound from the sides, suitable for interviews and duets.
Super-cardioid Offers more precise front sensitivity and some rear sensitivity, with minimal pickup from the sides.
Mastering Microphone Polar Patterns: The Ultimate Guide to Optimize Sound Quality

Credit: www.maono.com

Related reading: Ribbon Microphone and Dynamic Microphone.

Choosing the Right Polar Pattern

When selecting a microphone, it’s essential to consider the intended application and environment. Moreover, here’s a quick guide on choosing the right polar pattern:

  • Cardioid: Ideal for solo vocals, podcasts, and live performances due to its directional pickup.
  • In addition, omni-directional: Suitable for capturing ambient sounds or studio recordings where a natural, uncolored sound is desired.
  • Furthermore, bi-directional: Great for interviews or recording two sound sources from opposite directions.
  • Additionally, Super-cardioid: Perfect for capturing sound from a specific source in a noisy environment.

Understanding Directional Sensitivity

Pickup patterns also play a significant role in the directional sensitivity of a microphone. This sensitivity influences how a microphone picks up sounds coming from different angles and distances, affecting the overall recording quality.

Application of Microphone Polar Patterns

Also, the pattern find diverse applications across various fields, including music recording, broadcasting, live sound reinforcement, podcasting, and film production. Understanding these patterns is essential for achieving optimal audio quality in any given context.

In Conclusion

Directionality is a core part of recording, so weigh it carefully when you choose a microphone. By understanding the characteristics and applications of different polar patterns, recording professionals can effectively capture high-quality sound in any situation.

As technology evolves, new mic designs may expand what you can capture. Watch for new innovations in mic design!

Frequently Asked Questions Of Mastering Microphone Polar Patterns: The Ultimate Guide To Optimize Sound Quality

What Is A Microphone Polar Pattern?

A microphone’s sensitivity to sound from various directions, determining its pickup patterns.

Why Are Microphone Polar Patterns Important?

Critical for capturing audio accurately by defining where the microphone picks up sound.

What Are The Main Types Of Polar Patterns?

Common patterns like Cardioid, Omnidirectional, Bidirectional, and Super-cardioid.

How Can I Choose The Right Polar Pattern?

Consider the sound source, acoustics, and intended application for best performance.

For more background, see Microphone on Wikipedia. You may also like our guide: Microphone Polar Patterns: Unveil the Sonic Secrets!.

Categories
Archive

Which is Better Electric Drums Or Acoustic: Drumming Delight

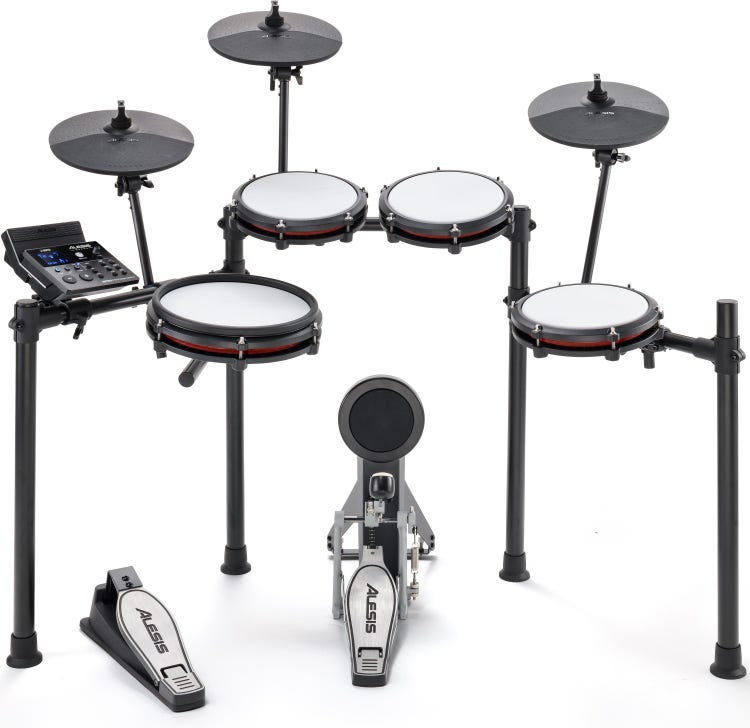
Electric drums are better for noise control and versatility, while acoustic drums offer a more natural and authentic sound. The decision between electric and acoustic drums depends on several factors, including space, cost, playing style, and sound preference.

Electric drums are ideal for those looking for a quieter practice option and the ability to customize their sound with various electronic effects. On the other hand, acoustic drums provide a traditional, raw sound and are often favored by players who value authenticity and live performances.

Both types have their own advantages and limitations, so it’s crucial to consider these factors before making a decision. We will explore the key differences between electric and acoustic drums, helping you make an informed choice based on your personal needs and preferences.

Which is Better Electric Drums Or Acoustic: Drumming Delight

Credit: www.amazon.com

Comparing Sound Quality

When it comes to comparing sound quality between electric drums and acoustic drums, there are key differences to consider. Sound quality is a critical factor for drummers, as it directly impacts the overall performance and experience. Let’s delve into the sound quality comparison of electric and acoustic drums.

Acoustic Drums

Acoustic drums produce sound through the physical vibration of the drum heads and the resonance of the drum shells. This results in a rich, organic sound with nuances and tonal complexities that are highly valued by many drummers. The natural reverberation and dynamic range of acoustic drums contribute to their sought-after sound quality.

Electric Drums

Electric drums generate sound electronically using samples of acoustic drum sounds. The sound quality of electric drums largely depends on the quality of the sound module and the samples it contains. While electric drums offer versatility in sound manipulation and the ability to produce various sounds, they may lack the natural resonance and depth of acoustic drums, impacting the overall sound quality.

Which is Better Electric Drums Or Acoustic: Drumming Delight

Credit: www.amazon.com

Portability And Space Considerations

Acoustic Drums

Acoustic drums are the traditional choice and are known for their authentic sound and feel. However, they can be heavy and require a significant amount of space. A full acoustic drum set can take up a lot of room, making them less than ideal for those with limited space. Additionally, the bulkiness of acoustic drums makes them less portable, which can be a major drawback for musicians who need to move their equipment frequently.

Electric Drums

Electric drums offer a more compact and portable alternative to acoustic drums. They are generally lighter and more space-efficient, making them ideal for smaller practice spaces or for musicians who need to transport their drum set frequently. The ability to fold up or disassemble electric drum kits also makes them easier to store when not in use, which can be a significant advantage for those with limited space.


Customization And Sound Options

When it comes to choosing between electric drums and acoustic drums, one important aspect to consider is customization and sound options. Both types of drums offer unique advantages in terms of tailoring the sound to your preference and creating a personalized playing experience. In this article, we will explore the customization and sound options available with acoustic drums and electric drums, to help you make an informed decision.

Acoustic Drums

Acoustic drums, also known as traditional drums, have been around for centuries and offer a timeless appeal. One of the key advantages of acoustic drums is the wide range of customization options available. Here are some factors to consider:

  • Shell Material: The material used in the construction of the drum shell greatly influences its sound. Different types of wood, such as maple, birch, and mahogany, produce distinct tones, allowing you to choose the sound that suits your musical style.
  • Drumheads: The type and tension of drumheads used on acoustic drums significantly impact the sound produced. By experimenting with different drumhead types, such as coated, clear, or pinstripe, and adjusting their tension, you can fine-tune the tone and response of the drum.
  • Cymbals: Another aspect of customization with acoustic drums is selecting the right cymbals. Different cymbal types, such as hi-hats, crash cymbals, and rides, produce unique sounds, enabling drummers to create versatile and dynamic performances.

Acoustic drums provide a hands-on approach to customization, allowing drummers to manipulate various elements to achieve their desired sound. The ability to experiment and refine the sound is one of the main draws for those who appreciate the authentic and organic feel of acoustic drums.

Electric Drums

On the flip side, electric drums offer a whole different set of customization and sound options. These modern instruments are favored for their versatility and adaptability. Here are some key points to consider:

  • Sound Modules: Electric drums come equipped with sound modules that offer a wide range of sound options. With advanced technology, these modules can simulate the sounds of different acoustic drums, percussion instruments, and even electronic sounds. Drummers can experiment with various presets and create their own custom sounds.
  • Digital Effects: Electric drums provide the option to add digital effects to enhance the sound. Drummers can apply reverb, distortion, delay, and other effects to give their performance a unique touch.
  • Trigger Settings: The sensitivity and response of each drum pad in electric drums can be adjusted according to the drummer’s preference. This allows for fine-tuning of the playing experience and ensures every stroke is captured accurately.

Electric drums offer a vast array of possibilities when it comes to customization and sound options. The ability to effortlessly switch between different drum kits and sounds at the touch of a button provides unparalleled convenience for drummers who value versatility and easy experimentation.

Versatility And Performance Features

Acoustic Drums

Acoustic drums have a classic sound and feel, perfect for live performances.

Electric Drums

Electric drums offer a wide array of sounds and features, ideal for versatility.

Which is Better Electric Drums Or Acoustic: Drumming Delight

Credit: www.sweetwater.com

Frequently Asked Questions On Which Is Better Electric Drums Or Acoustic

Is Acoustic Or Electric Drums Better?

Both acoustic and electric drums have their advantages; it depends on individual preferences and needs. Electric drums are more versatile and compact, while acoustic drums offer a more authentic sound. Consider your playing style and environment when choosing between the two.

Do Electronic Drums Sound Like Real Drums?

Yes, electronic drums can sound very similar to real drums. They are designed to replicate the sounds of acoustic drums, providing a realistic drumming experience. Advanced technology allows for various drum sounds and adjustments, making them versatile and realistic.

What Is The Disadvantage Of Electric Drums?

The main disadvantage of electric drums is that the feel and sound may not replicate a traditional drum set accurately, impacting the playing experience. Additionally, electric drums can be expensive and may require more maintenance. Nonetheless, they offer great benefits in terms of portability and volume control.

Do Pros Use Electronic Drums?

Yes, many professional musicians use electronic drums for their versatility and sound quality. They offer easy customization and are suitable for live performances and studio recordings.

Conclusion

After considering the pros and cons of electric drums versus acoustic drums, it is clear that both have their own unique advantages. Electric drums offer versatility and convenience, making them ideal for beginners and those requiring a quieter practice option.

On the other hand, acoustic drums provide a raw and authentic sound that can’t be replicated. Ultimately, the choice between the two boils down to personal preference and the specific needs of the drummer. So, whether you opt for electric or acoustic drums, enjoy creating music and let your rhythm shine!

Categories
Archive

How to Learn Drums With a Practice Pad: Master Rhythm Faster

To learn drums with a practice pad, start by mastering fundamental drumming techniques and sticking patterns. Practice regularly and gradually increase the complexity of exercises to improve speed and precision.

Additionally, use online resources and instructional videos to learn new concepts and expand your skills. As you progress, consider seeking guidance from a professional drum instructor to further enhance your abilities. Learning to play drums with a practice pad offers several advantages, including portability and noise reduction.

Whether you’re a beginner or looking to maintain your drumming skills in a quiet environment, a practice pad provides an effective solution. By following a structured practice routine and incorporating various exercises, you can develop coordination, dexterity, and rhythm. This comprehensive guide will explore the benefits of learning with a practice pad and provide valuable tips to help you master this versatile instrument.

Choosing The Right Practice Pad

When it comes to learning the drums, having the right practice pad is essential for honing your skills. The practice pad allows drummers to practice quietly and hone their technique without needing a full drum set. Choosing the right practice pad can greatly impact your learning experience, so it’s important to consider factors such as material and surface, as well as size and weight.

Material And Surface

The material and surface of a practice pad play a crucial role in its feel and durability. Rubber, silicone or gum rubber pads are commonly used for their bounce and responsiveness. These materials provide a realistic drum feel and are suitable for practicing different drumming techniques.

Size And Weight

The size and weight of a practice pad can affect its portability and feel. Consider a compact size if you plan to practice on the go, while a larger pad may offer more realistic snare drum dimensions. Additionally, a lightweight pad makes it easy to transport and set up for practice sessions, ensuring you can practice anywhere.

How to Learn Drums With a Practice Pad: Master Rhythm Faster

Credit: www.amazon.com

Basic Drumming Techniques

Learn basic drumming techniques with a practice pad to enhance your drumming skills. With focused practice, you can improve your coordination, rhythm, and control, laying a solid foundation for further drumming advancement.

Basic Drumming Techniques Learning drums with a practice pad is the perfect way to build a solid foundation in drumming. Before diving into complex rhythms and beats, mastering basic drumming techniques is crucial. Understanding grip and hand position, developing finger control, and honing wrist control are essential to becoming a proficient drummer. Let’s explore each of these fundamental techniques.

Grip and Hand Position

Maintaining the correct grip and hand position is fundamental for playing drums effectively. The matched grip and the traditional grip are the two most common drumming grips. In the matched grip, both hands hold the sticks similarly, while the traditional grip involves one hand holding the stick underhand, while the other hand adopts a matched grip. Ensuring a relaxed but firm grip on the drumsticks is crucial to allow fluid and precise movements.

Finger Control

Finger control plays a vital role in drumming, especially for intricate and rapid movements. Utilizing the fingers for nuanced control and finesse can significantly impact the overall sound and performance. Developing finger control involves exercises that focus on individual or combined finger movements, improving dexterity and precision.

Wrist Control

Wrist control is essential for executing powerful strokes and maintaining steady rhythms on the drums. Drummers use their wrists to generate the force needed for various strokes, including accents and ghost notes. Building wrist control is a gradual process that involves exercises to strengthen and refine the muscles and movements necessary for dynamic drumming. Equipping yourself with a solid foundation in these basic drumming techniques sets the stage for more advanced learning. Mastering grip and hand position, finger control, and wrist control lays the groundwork for developing a strong and versatile drumming style.

Developing Rhythm And Timing

Improve your drumming skills by honing your rhythm and timing with a practice pad. By dedicating regular time to practicing, you can develop precision and control, essential for any drummer. The practice pad allows for focused attention on technique, helping you build a solid foundation for your drumming journey.

Metronome Practice

Using a metronome is an essential tool for drummers of all levels. It helps you to develop a consistent sense of timing and keeps your playing in sync. Start by setting the metronome to a comfortable tempo and tap along with it using your practice pad. Focus on staying perfectly in time with the clicks and strive for accuracy.

To challenge yourself, gradually increase the tempo of the metronome as you become more comfortable. This will push your rhythm and timing skills to the next level. Practice different beats and rhythms, making sure to emphasize the downbeats and stay in sync with the metronome throughout.

Syncopation Exercises

Syncopation involves playing off-beat rhythms to create a unique and interesting feel. It is a crucial skill for drummers to develop their sense of groove and musicality. One way to practice syncopation on a practice pad is by using exercises that emphasize off-beat accents.

Create simple exercises incorporating off-beat notes and accents. For example, you can play eighth notes and accent the ‘and’ beats instead of the downbeats. Focus on keeping a steady pulse while adding these off-beat accents. As you become more comfortable, experiment with more complex syncopated rhythms and patterns.

Pay attention to the sound and feel of each accented note, as this will enhance your overall sense of rhythm and timing.

How to Learn Drums With a Practice Pad: Master Rhythm Faster

Credit: rhythmnotes.net

Building Speed And Coordination

Looking to improve your drumming speed and coordination? Learning with a practice pad can help you develop essential skills, providing a convenient and quiet option for honing your technique. With regular practice, you can build your strength, dexterity, and precision, paving the way for smoother, more dynamic drumming.

Single Stroke Roll

In the single stroke roll drill, alternate the sticks with each hit to develop speed.

Double Stroke Roll

The double stroke roll involves playing two strokes with each hand consecutively.

Paradiddles

Practice the paradiddles pattern to enhance coordination between your hands.

Building speed and coordination on the drums requires consistent practice and focus.

Use a metronome to maintain a steady tempo and gradually increase speed.


Expanding Your Drumming Vocabulary

Learning drums with a practice pad can significantly enhance your drumming skills. By focusing on expanding your drumming vocabulary, you can become a more versatile and proficient drummer.

Learn Basic Drumming Patterns

Master basic drumming patterns to establish a strong foundation. Practice rudiments like single strokes, double strokes, and paradiddles regularly.

Explore Different Music Styles

Experiment with various music styles to broaden your horizons. Try playing rock, jazz, funk, or Latin beats to diversify your drumming repertoire.

How to Learn Drums With a Practice Pad: Master Rhythm Faster

Credit: rolandcorp.com.au

Frequently Asked Questions Of How To Learn Drums With A Practice Pad

Can I Learn Drums With Just A Practice Pad?

Yes, you can learn drums with just a practice pad. It allows you to practice drumming techniques, build coordination and control, and develop basic drumming skills. While a full drum set offers additional benefits, a practice pad is a great starting point for beginners.

What To Do On Drum Practice Pad?

Practice rudiments, beats, and fills to improve drumming skills and coordination. Work on timing, dynamics, and control to enhance performance.

Are Drum Practice Pads Useful?

Yes, drum practice pads are useful for honing drumming techniques, improving control, and reducing noise.

How Long Does It Take To Learn Drum Pad?

It takes time to learn the drum pad. The exact duration varies depending on how often you practice and your natural ability. With regular practice and dedication, you can start playing basic beats and rhythms within a few weeks or months.

Continuing to improve and master more advanced techniques can take several years.

Conclusion

To sum up, learning how to play drums with a practice pad is an effective and accessible way for beginners to develop their drumming skills. With its compact size and portability, a practice pad allows drummers to practice anytime and anywhere.

By following proper techniques, maintaining consistency, and gradually increasing the level of difficulty, aspiring drummers can make significant progress and build a strong foundation. So grab a practice pad, set a routine, and start honing your drumming skills today! Keep practicing and you’ll soon be rocking the drum set like a pro.