Categories
Archive

How Much to Charge for Music Production: Price Smart!

Music production costs range from $200 to $50,000, depending on expertise and project complexity. Music producers may also charge per hour, typically between $25 and $150.


Music production pricing is a crucial factor for artists and record labels looking to navigate the creative and financial aspects of bringing a song to life. The production fee can vary widely based on the producer’s reputation, the project’s scope, and the level of production required.


Experienced producers with hit tracks may demand higher fees, reflecting their proven track record in the industry. Independent artists often seek more affordable options without compromising quality, leading to a diverse market with a wide range of pricing structures. It is essential for musicians to consider their budget and desired outcome when selecting a music producer to ensure the best balance between cost and the professional execution of their vision.


Setting The Stage: The Value Of Music Production

Music production shapes the sound of an artist’s work. It transforms raw melodies and lyrics into a polished, market-ready product. Quality production can mean the difference between a hit and a miss. It entails skilled work. It demands both creativity and technical knowledge. Think of it as the bridge connecting an artist’s vision to the listeners’ ears.

Music Production As An Art And Business

Producing music is an art form. Creative decisions give each song a unique identity. But it’s not just about art. It’s also a business. Producers must balance artistic vision with commercial appeal. They need to understand the industry to ensure their work sells.

Factors Influencing Production Costs

  • Experience level: Veterans charge more than beginners.
  • Project complexity: More tracks, effects, and editing can add to the cost.
  • Equipment and software: High-end tools often result in higher fees.
  • Timeframe: Rush jobs can incur extra charges.
  • Reputation: Well-known producers with hit records are pricier.

Setting your rates for music production services can be tricky. You must recognize the artistry and business of music. Build on your expertise. Increase your demand. Invest in quality equipment. Most importantly, know your value in the music industry. This understanding will guide you to a pricing strategy that respects both your skill and your clients’ budgets.

Knowing Your Worth: Assessing Your Skills And Experience

Understand your value as a music producer starts with recognizing your unique skill set and experience level. This self-awareness forms the foundation for pricing your services correctly in the music production market.

Evaluating Your Expertise In Music Production

Start by assessing your proven skills:

  • Technical proficiency: Are you a whiz with production software?
  • Musical knowledge: Can you craft complex arrangements?
  • Industry experience: Have you worked with notable artists or studios?

Consider your portfolio’s diversity and the feedback from past clients. Recognize your strengths to position your service offering effectively.

Comparing The Market: What Are Others Charging?

After evaluating your skills, look at your competitors:

Experience Level Price Range
Beginner $200 – $500 per track
Intermediate $500 – $1,500 per track
Expert $1,500 – $3,000+ per track

Research market trends and standard rates, but remember to weigh them against your expertise and the quality of your work.

Cost Structures: Fixed Vs. Variable Pricing Models

Deciding on the perfect pricing model is crucial for music production services. The choice often falls between adopting fixed or variable pricing models. Understanding these can lead to more strategic decisions and beneficial client agreements.

Pros And Cons Of Fixed Pricing

Fixed pricing means setting a standard charge for all projects. This strategy simplifies the billing process and provides clear expectations for clients.

  • Budget-friendly: Clients appreciate knowing the cost upfront.
  • Time-saving: Simplified proposals and billing save time.
Pros of Fixed Pricing Cons of Fixed Pricing
Straightforward budgeting for clients Limited flexibility for unique projects
Ease of marketing set packages Potential undervaluing of complex work

On the downside, fixed pricing can undervalue complex projects requiring more work.

Adopting A Variable Pricing Strategy

Variable pricing adapts to the project’s scope. This flexibility caters to diverse client needs and project sizes. Setting a base rate is common, while adding charges based on project complexity.

  • Customized quotes: Addresses specific project demands.
  • Higher earning potential: Reflects actual effort and resources used.
  1. Assess the project’s requirements.
  2. Calculate the work hours projected.
  3. Include costs for additional resources needed.

However, variable pricing can lead to inconsistent income and confuse clients with complex quotes.

In summary, both pricing models have their unique advantages. The choice largely depends on the nature of the music production service’s clientele and project types.

Project Complexity And Its Impact On Price

Project complexity greatly influences music production pricing. As with any service, intricate projects require advanced skills, additional time, and often, specialized equipment. Recognizing the particular needs of a music production task allows you to set a fair and accurate price.

Analyzing The Scope Of Work

Before quoting a price, assess the project thoroughly. Consider these factors:

  • The length of the track or album.
  • Variety and number of instruments.
  • Vocalists’ inclusion and their number of tracks.
  • Genre-specific production needs.
  • Mixing and mastering requirements.

All elements determine the workload. A detailed examination reveals the intensity of labor and expertise needed.

Adjusting Prices For Project Scale And Difficulty

When the project complexity is clear, adapt prices accordingly. Use this approach:

Project Scale Difficulty Base Price Added Cost
Single Track Low $200 +10%
EP (4-6 Tracks) Moderate $750 +15%
Album (10+ Tracks) High $1,500 +25%

Increase prices for added complexity such as orchestration or advanced audio engineering. Smaller projects may require a lower price uplift. Larger, more challenging projects need a significantly higher add-on to the base price.

Additional Services: Mixing, Mastering, And Extras

Expanding your music production services to include mixing, mastering, and other extras can transform a standard track into a polished product. These services are vital and often require separate fees from the basic production cost. By understanding how to price these services, you position yourself to better meet client expectations while ensuring fair compensation.

Charging for Additional Production Services

Charging For Additional Production Services

Effective pricing for mixing, mastering, and other additional services relies on the complexity, duration, and technical requirements of the project. Professionals often charge separately for these, considering the expertise and time they demand.

Service Price Range
Mixing $100 – $300 per song
Mastering $50 – $200 per song
Extras (Editing, Vocal Tuning) $20 – $100 per hour
  • Factor in revision rounds for clarity.
  • Offer bundle pricing for multiple services.

Tailoring Packages to Client Needs

Tailoring Packages To Client Needs

Creating custom packages caters to diverse client needs. A flexible approach appeals to various project scopes and budgets, enhancing your marketability.

  1. Assess the project’s scale and requirements.
  2. Discuss client’s end goals and budget.
  3. Present tiered options for select services.

Transparent communication ensures clients understand the value they receive. Build lasting relationships with clear, customized offerings that highlight your comprehensive production services.

Client Budgets: Balancing Expectations With Rates

Setting the right price for music production involves a dance between client budgets and your own rates. You want to secure the project, yet ensure it’s worth your time and skill.

Handling Client Pricing Expectations

Educate your clients about what goes into music production. Let them understand the value they’re getting.

  • Explain the process: Give an outline of the workflow, from pre-production to mastering.
  • Showcase your portfolio: Use past work to illustrate quality and expertise.
  • Be transparent: Discuss costs upfront to avoid any surprises later.

With clear communication, clients will see the rationale behind your rates. Use examples to demonstrate the complexity of projects you’ve handled. This clarity sets realistic expectations from the start.

Negotiating Fair Rates That Work For Both Parties

Negotiation is a critical skill in music production pricing. Your goal is to reach an agreement that’s fair and satisfactory for both.

Step Action
1 List your services and associate costs.
2 Understand the client’s budget and needs.
3 Propose a package that aligns with both.
4 Discuss and adjust as necessary.

Focus on crafting solutions that deliver value to your client while respecting your professional worth. Offer options like tiered pricing for different levels of service. This approach allows flexibility and adjusts to client budgets without undercutting your standard rates.

Profit Margins: Keeping Your Business Financially Healthy

Running a successful music production business means keeping an eye on your profit margins. To thrive, understanding the balance between costs and income is crucial. Let’s explore how to calculate your costs and ensure profitability, as well as how to handle discounts and special offers.

Calculating Costs And Ensuring Profitability

The first step to financial health in music production is knowing your expenses. List all costs, from equipment to software. Remember to include hidden costs like electricity and internet. Use this information to set a baseline price for your services that covers these expenses.

  • Equipment costs (microphones, headphones)
  • Software subscriptions (DAWs, plugins)
  • Miscellaneous expenses (cables, stands)
  • Operating costs (rent, utilities)

Next, factor in your time and expertise. Decide on an hourly rate or a project fee that reflects your skills. Finally, add a profit margin that allows your business to grow. This ensures every project contributes to your business’s financial health.

Cost Type Details Price
Equipment Microphones, Headphones $XXX
Software DAWs, Plugins $XXX/year
Operating Costs Rent, Utilities $XXX/month

Dealing With Discounts And Special Offers

Discounts attract clients but can harm profit margins. Only offer discounts when they benefit your business strategy. Consider offers for bulk or repeat business. Always set discount limits to protect your profits.

  1. Define clear criteria for discounts.
  2. Set a maximum discount percentage.
  3. Analyze the impact of any discount on your profits.
  4. Use special offers strategically, perhaps to fill your studio during slow periods.

Keep track of all discounts provided. This helps to assess their success in attracting new business. Always ensure the deal is mutually beneficial to maintain a healthy bottom line.

Remember, balance is key. Align deals with business growth goals and never undercut your value.


Communicating Your Rates: Transparency Builds Trust

Setting the right price for music production services is crucial. But even more important is how you communicate those rates to potential clients. Transparency not only builds trust but also shows professionalism. It’s not just about the numbers; it’s about setting clear expectations and avoiding future misunderstandings. When rates are clear, clients know what they’re getting into from the start. This ensures a smooth working relationship.

Crafting Clear And Comprehensive Price Lists

As a producer, your price list acts as the first point of communication. A well-structured price list guides clients through your services. It helps them understand what they’re paying for. Here’s a useful format:

Service Price Description
Basic Production $500 Includes beat making, arrangement
Full Song Production $1000 From composition to final mix

Remember to update your price list regularly. Include any discounted packages or additional costs like studio time.

The Importance Of Contracts And Written Agreements

Contracts secure both parties in a professional agreement. They are essential for a reliable business relationship. Your contracts should include:

  • Services: What you provide.
  • Payment Terms: Costs, deposits, refunds.
  • Deadlines: Project timelines.
  • Rights: Who owns the music?

Contracts prevent disputes and clarify expectations. Always consult with a legal expert when drafting contracts. This ensures all terms protect your interests and comply with the law.

Adjusting Your Pricing: When And How To Reevaluate

Determining the right time to adjust your rates for music production can be tricky. Stay competitive and ensure your pricing reflects the value and quality of your services. Below, find insights on recognizing when it’s time for a change and how to implement new pricing strategically.

Recognizing The Signs That It’s Time To Change Your Rates

Watch for key indicators that suggest a need to reevaluate your fees:

  • Skills Improve: When you gain new skills or certifications, it’s time to reconsider your rates.
  • Gear Upgrade: Investing in better equipment can justify a price increase.
  • Market Shifts: Stay tuned to industry rate changes. Align your pricing accordingly.
  • Demand Surge: When demand for your services rises, consider increasing your rates.
  • Yearly Review: Make it a habit to assess your pricing structure annually.

Implementing Price Changes Without Losing Clients

Tread carefully when changing prices. Keep your clients informed and involved:

  1. Transparent Communication: Clearly explain why you’re changing your rates.
  2. Advance Notice: Give clients plenty of time to adapt to the new pricing.
  3. Grandfathering: Offer existing clients a period at their current rate before the hike.
  4. Add Value: Pair increases with new or improved services.
  5. Flexible Options: Create packages to cater to different budgets.

By following these steps, you ensure a smooth transition to higher rates with minimal risk of client loss. Your goal should be to demonstrate that the price increase is a reflection of your improved offerings and the value you provide.


The Future Of Music Production Pricing

Navigating through the complexity of music production pricing can baffle even seasoned artists. As we sail into the future, the landscape of how much to charge for music production seems set for dramatic changes. What’s ahead could redefine the value of music as a digital commodity and an art form. Understanding upcoming trends is essential for producers aiming to find their financial harmony.

Industry Trends And Future Predictions

The music production industry is evolving at a rapid pace. With new technology, the cost of production can vary widely. Some key factors influencing future pricing include:

  • Advancements in AI: Sophisticated software could lower production times and costs.
  • Subscription models: A shift is expected towards recurring revenue models for software and samples.
  • Growth of independent artists: More artists self-producing could lead to competitive pricing strategies.

Music producers must remain vigilant to these shifts to price their services fairly.

Staying Competitive In A Changing Market

Adaptability is key to staying relevant. To maintain competitiveness in music production pricing, consider:

  1. Flexibility in service offerings: Tailor packages to emerging artist needs.
  2. Cultural relevance: Stay updated with music trends to offer in-demand production styles.
  3. Continued learning: Mastering new tools and techniques ensures quality and efficiency.

As the market changes, so should your approach to pricing. Transparent and value-based pricing will likely dominate, ensuring clients feel they’re getting their money’s worth.

Frequently Asked Questions Of How Much To Charge For Music Production

What Factors Determine Music Production Rates?

Music production rates can vary greatly depending on factors such as producer experience, project complexity, and studio costs. Additional considerations include the track’s duration, number of instruments, and whether it’s for commercial use.

How Do I Set Pricing For Music Production Services?

Setting prices involves evaluating your experience, assessing the market rates, and accounting for production details such as time spent and equipment used. Always ensure your rates reflect the quality and expertise you offer.

Can Music Producers Charge Per Hour Or Per Project?

Music producers can charge either per hour or per project. Hourly rates suit smaller or open-ended projects, while flat rates work well for clearly defined projects. Your choice should align with your working style and client preferences.

What’s The Average Cost Of Hiring A Music Producer?

The average cost of hiring a music producer ranges widely from $200 to $15,000 or more. These rates hinge on the producer’s reputation, project complexity, and the level of production required.

Conclusion

Setting the right price for music production can be a balancing act. Reflect on your expertise, costs, and the market value. Aim for competitive rates that also honor your craft. Remember, clear communication with clients about pricing upfront fosters trust.


Let your passion and business sense harmonize to strike the perfect financial chord.

Categories
Archive

Where Can Reverb Be Found in Ableton Live: Uncover Secrets!

Reverb can be found in Ableton Live as a built-in audio effect. Users can access it by browsing the Audio Effects section in Live’s browser.


Ableton Live, a widely-celebrated digital audio workstation, offers an array of tools to enhance music production. Among these, the reverb effect stands out, enabling producers to simulate various acoustic environments. Seamless integration of reverb enhances tracks with depth and space, essential for creating a polished mix.


Aspiring musicians and seasoned professionals alike delve into Ableton’s reverb to sculpt sounds, from giving vocals a lush ambiance to adding dimension to percussive elements. Having a grasp of where to locate and how to manipulate reverb in Ableton Live is crucial for high-quality sound design and production.


Exploring Reverb In Ableton Live

Exploring Reverb in Ableton Live is like discovering the secret ingredient to your favorite recipe. Reverb adds depth and space to your music, making everything come alive. Whether you are a bedroom producer or a professional sound engineer, Ableton Live offers a range of reverb effects that transform flat sounds into lush, sonic landscapes.

The Essence Of Reverb In Music Production

Reverb is the sound of space. It is the echo that fills a room when you clap your hands. In music, reverb gives a sense of space to sounds, bringing them to life. It can make your music feel larger than life.

  • Reverb makes sound waves bounce off walls.
  • It helps musicians create an atmosphere.
  • It can place your sound in a virtual room, from a bathroom to a cathedral.

Reverb’s Role In Ableton’s Ecosystem

In Ableton Live, reverb is not just an effect; it’s an essential tool for creativity. Ableton’s reverb comes with a variety of presets and parameters. This allows you to shape your sound in endless ways.

Parameter Function
Decay Time Controls how long the reverb lasts.
Pre-Delay Sets the time before the reverb begins.
Size Changes the size of the virtual space.
Dry/Wet Balances the original and the reverberated sound.

You can find reverb in Ableton Live by going to the Browser under Audio Effects. Drag and drop the Reverb effect onto a track to start shaping your sound.

Native Reverb Effects

Ableton Live’s sonic landscape includes distinctive echoes and spacious sounds made possible by native reverb effects. These reverbs allow producers to add depth to their music. Reverb gives a sense of place. Let’s explore the built-in options Ableton offers for creating reverberating magic.

Dive Into ‘reverb’ Device

The ‘Reverb’ device in Ableton Live works wonders for soundscapes. It simulates environments from tight rooms to vast halls. Music creators find this tool straightforward to use. They shape the tail, density, and diffusion of their reverb with ease. The ‘Reverb’ device offers several controls:

  • Input Processing: Tweak frequencies before they hit the reverb.
  • Reflections and Diffusion: Control the reverb’s character and space.
  • Decay Time: Adjust the duration of the reverb tail.
  • Quality: Choose between eco and high modes for efficiency or fidelity.

Demystifying ‘convolution Reverb’ Pro

The ‘Convolution Reverb’ Pro elevates the realm of reverb. This advanced device is part of Ableton’s Max for Live essentials. It uses real-life space samples, called impulse responses (IRs), to create authentic reverb experiences. Think of it as a photographic snapshot of real-world acoustic spaces for your tracks. The ‘Convolution Reverb’ Pro features include:

  1. High-quality impulse responses from famous locations.
  2. Ability to import custom IRs for unique reverbs.
  3. Extended shaping options like damping and EQ.
  4. Modulation for dynamic reverb effects.

Unlocking Hidden Reverb Features

Exploring Ableton Live, many find its Reverb effect a gem for achieving depth in their tracks. Beneath the basic knobs lies a world of sonic sculpting, awaiting discovery. Let’s dig into some hidden features, elevating your sound with unique Reverb traits.

Manipulating Pre-delay And Diffusion

Understanding the intricacies of pre-delay and diffusion can take your Reverb from good to great. Pre-delay shapes the gap between the dry signal and the reverb’s onset, crucial for clarity. Diffusion determines the echo density, affecting smoothness. Here’s how to access and adjust these settings:

  • Go to ‘Reverb’ effect on your track’s effect rack.
  • Find the ‘Input Processing’ section on the left.
  • Adjust the ‘Pre-delay’ knob to taste.
  • Twist the ‘Diffuse’ control in the ‘Reflections’ network for denser echoes.

Advanced Modulation Techniques

Reverbs enchant listeners’ ears when modulated with skill. In Ableton Live, advanced modulation breathes life into your Reverb. Explore LFOs and envelope followers within the effect for dynamic movement. Follow these steps to start:

  1. Click on the ‘Modulate’ tab within the Reverb effect.
  2. Select an LFO or envelope under ‘Modulation Source’.
  3. Map the source to parameters like decay, size, or shape.
  4. Tweak your modulation depth and rate for evolving spaces.

Integrating Third-party Reverb Plugins

Producers often seek unique soundscapes beyond Ableton Live’s built-in effects. Third-party reverb plugins open up a world of sonic possibilities. These external tools can simulate spaces from cozy rooms to vast halls. This blog post guides you on using VST and AU reverbs with Ableton Live and setting up external reverb hardware.

Harnessing Vst And Au Reverbs In Ableton

Virtual Studio Technology (VST) and Audio Units (AU) are plugin formats. VSTs work on both Windows and Mac, while AUs are Mac-only. Ableton Live supports these formats, letting you integrate new reverbs.

Follow these steps:

  1. Install your VST or AU reverb plugin.
  2. Open Ableton Live and go to Preferences.
  3. Click on the File Folder tab.
  4. Toggle Use VST2 or Use Audio Units to ‘On’.
  5. Scan for your new plugin or rescan if needed.
  6. Drag the plugin from the browser to a track.

Setting Up External Reverb Devices

Ableton Live also lets you use outboard reverb equipment. This method lets you apply hardware effects in real-time.

Set up like this:

  • Connect your reverb device to an audio interface.
  • In Ableton Live, create an Audio Track.
  • Go to I/O settings.
  • Select the correct input from your interface.
  • Adjust the output routing to send audio to the device.
  • Apply the reverb by arming the track.
  • Tweak settings on your hardware as needed.

By using third-party reverbs, you give your tracks unique character. VST and AU plugins expand your digital toolkit. Outboard gear adds an analog warmth. Take these steps and explore new reverberation realms in Ableton Live.


Creative Sound Design With Reverb

Reverb breathes life into sounds. In Ableton Live, reverb transforms dry audio into landscapes of echo. Dive into creative sound design with reverb to explore depths and dimensions of audio. This versatile tool not only places sounds in virtual spaces but also molds them uniquely. Let’s uncover how to harness the power of reverb for extraordinary soundscapes.

Crafting Unique Ambiences

Reverb in Ableton Live creates worlds of sound. Start by selecting the Reverb effect from the browser. Deploy it onto a track. Now play with the decay time and pre-delay. Short decay times give intimate vibes, long ones, vast halls. Introduce frozen reverb tails for ambient pads. Remember, reverb paints a sonic picture. The settings you choose are your colors.

  • Size control: Larger for grand spaces, smaller for tight spots
  • Diffusion network: Blends echoes for smoother textures
  • Modulation: Adds movement and life to static sounds

Spatial Effects For Sound Sculpting

Reverb shapes sound in Ableton Live. Use its spatial effects to sculpt sounds. Twist the stereo width for broader soundscapes or narrow focus. Experiment with the reflect and diffuse controls. Hear minute changes in echoes and reverberations. Place a sound close or far with the dry/wet balance. Direct sound left, right, close, or distant. It’s like molding clay—every adjustment makes something new.

Control Effect
Reflect Echoes that define space
Diffuse Blurs echoes for softer reverb
Stereo Width Adjusts the spatial spread
Where Can Reverb Be Found in Ableton Live: Uncover Secrets!


Credit: www.productionmusiclive.com


Mixing With Reverb In Ableton

Reverb is a staple effect in music production, prominently featured in Ableton Live. It adds depth and space to your tracks, simulating the natural echoes of sound in various environments. Proper reverb application can bring your mixes to life, creating an immersive audio experience. Let’s dive into how to balance these effects optimally within Ableton.

Balancing Dry And Wet Signals

Understanding the balance between dry and wet signals is crucial in using reverb. Dry signal refers to the original, unaffected sound, while the wet signal represents the reverb effect.

  • Start with a low wetness; gradually increase until you achieve the desired ambience.
  • Use the reverb’s mix knob to adjust the blend; a 100% wet signal means all reverb, zero percent is all original sound.

Avoiding Common Reverb Mixing Pitfalls

Muddiness and clutter can occur with improper reverb use. Prevent these issues by following these tips:

  • Apply EQ to the reverb: Cut low frequencies to reduce muddiness.
  • Less is more: Excessive reverb can drown your mix. Aim for subtlety.
  • Pre-delay adjustment: Create space between the dry signal and the onset of reverb.

Automation And Envelopes

The ‘Automation and Envelopes’ feature in Ableton Live turns the static nature of effects into a dynamic journey. It lets producers alter the reverb effect over time. This creates unique and evolving soundscapes in their tracks. Let’s explore how you can animate and shape reverb for impactful sound.

Animating Reverb Parameters For Dynamic Effects

Animating reverb parameters in Ableton Live brings life to your sounds. You can make your tracks breathe by tweaking settings at different parts of your song. Creating automation clips is straightforward:

  • Choose the reverb-equipped track
  • Click ‘A’ to reveal the automation lanes
  • Select the reverb parameter you want to automate
  • Draw automation curves in the lane

Experiment with decay time, room size, or dry/wet balance. These changes create motion in your mix. Vary intensity to match musical dynamics or build tension before a drop.

Envelope Shaping For Immersive Soundscapes

Envelope shaping is crucial for tailoring reverb to your track. Ableton Live’s envelopes allow for intricate control. To shape your reverb envelopes, follow these steps:

  1. Access the clip view
  2. Select the Envelope Box
  3. Choose Reverb from the device chooser
  4. Adjust the reverb parameters’ envelopes over time

This approach gives your sound a three-dimensional space. Tweak envelopes for the reverb’s build-up and tailoff. This adds depth and can simulate natural echo decay. It makes your audio feel like it’s part of a larger, living space.


Tips From The Pros

Exploring the secrets and techniques of reverb can revolutionize a music producer’s approach to sound design. Every pro has their own set of tricks. This section dives into the seasoned advice of top producers, unraveling how reverb finds its place in Ableton Live and the innovative methods to wield it in modern music production.

Secrets From Top Producers On Reverb Use

Top producers often share wisdom that can transform the way reverb is used in a mix. Here’s a look at their secrets.

  • Customary Settings: Start with default settings and tweak them to fit the mix.
  • Less Is More: Use reverb sparingly to prevent a muddy sound.
  • Creating Space: Differentiate instruments by assigning different reverb types.
  • Automation is Key: Automate reverb parameters for dynamic changes.
  • Pre-Delay for Clarity: Adjust the pre-delay to help lead vocals stand out.

Innovative Reverb Techniques In Modern Productions

Innovative techniques with reverb can help craft a unique sound. Discover tips to incorporate in your music.

  • Reverse Reverb: Apply reverb to a reversed audio clip, then reverse it back for an ethereal effect.
  • Reverb Throws: Use ample reverb on a specific word or phrase for emphasis.
  • Filtered Reverb: EQ your reverb returns to fit the mix neatly.
  • Sidechain Reverb: Sidechain reverb to the kick for rhythmically pulsing ambiances.
  • Reverb Freeze: Freeze a reverb tail to create a sustained atmospheric pad.
Where Can Reverb Be Found in Ableton Live: Uncover Secrets!


Credit: www.udemy.com


Frequently Asked Questions Of Where Can Reverb Be Found In Ableton Live


Where Is The Reverb Effect Located In Ableton Live?


Reverb in Ableton Live is found within the software’s built-in effects. To access it, click on the ‘Audio Effects’ section in the browser on the left side, then drag the ‘Reverb’ effect onto a track.


How Can I Apply Reverb To A Track In Ableton?


To apply Reverb to a track in Ableton, simply drag the ‘Reverb’ effect from the ‘Audio Effects’ library to your desired track. You can adjust settings within the effect controls to tailor the sound.


What Presets Does Ableton’s Reverb Offer?


Ableton’s Reverb effect offers various presets such as ‘Ambient Spaces,’ ‘Rooms,’ ‘Halls,’ and ‘Special Effects’ that you can use as starting points. These presets are designed to fit different types of sounds and environments.


Can Reverb Be Automated In Ableton Live?


Yes, Reverb parameters can be automated in Ableton Live. Just click on a parameter and adjust its automation envelope in the arrangement view, or right-click and select ‘Show Automation’ in the session view.


Conclusion


Navigating Ableton Live’s reverb options enhances your audio projects with depth and ambiance. Audio Effect Rack and individual track settings offer versatility. Experiment for optimal soundscapes. Mastering reverb application sets your productions apart, elevating creativity. Remember, practice unlocks perfection. Ready to weave sonic magic?


Dive in!

Categories
Archive

What Music Keyboard Should I Buy?: Unleash Your Melody

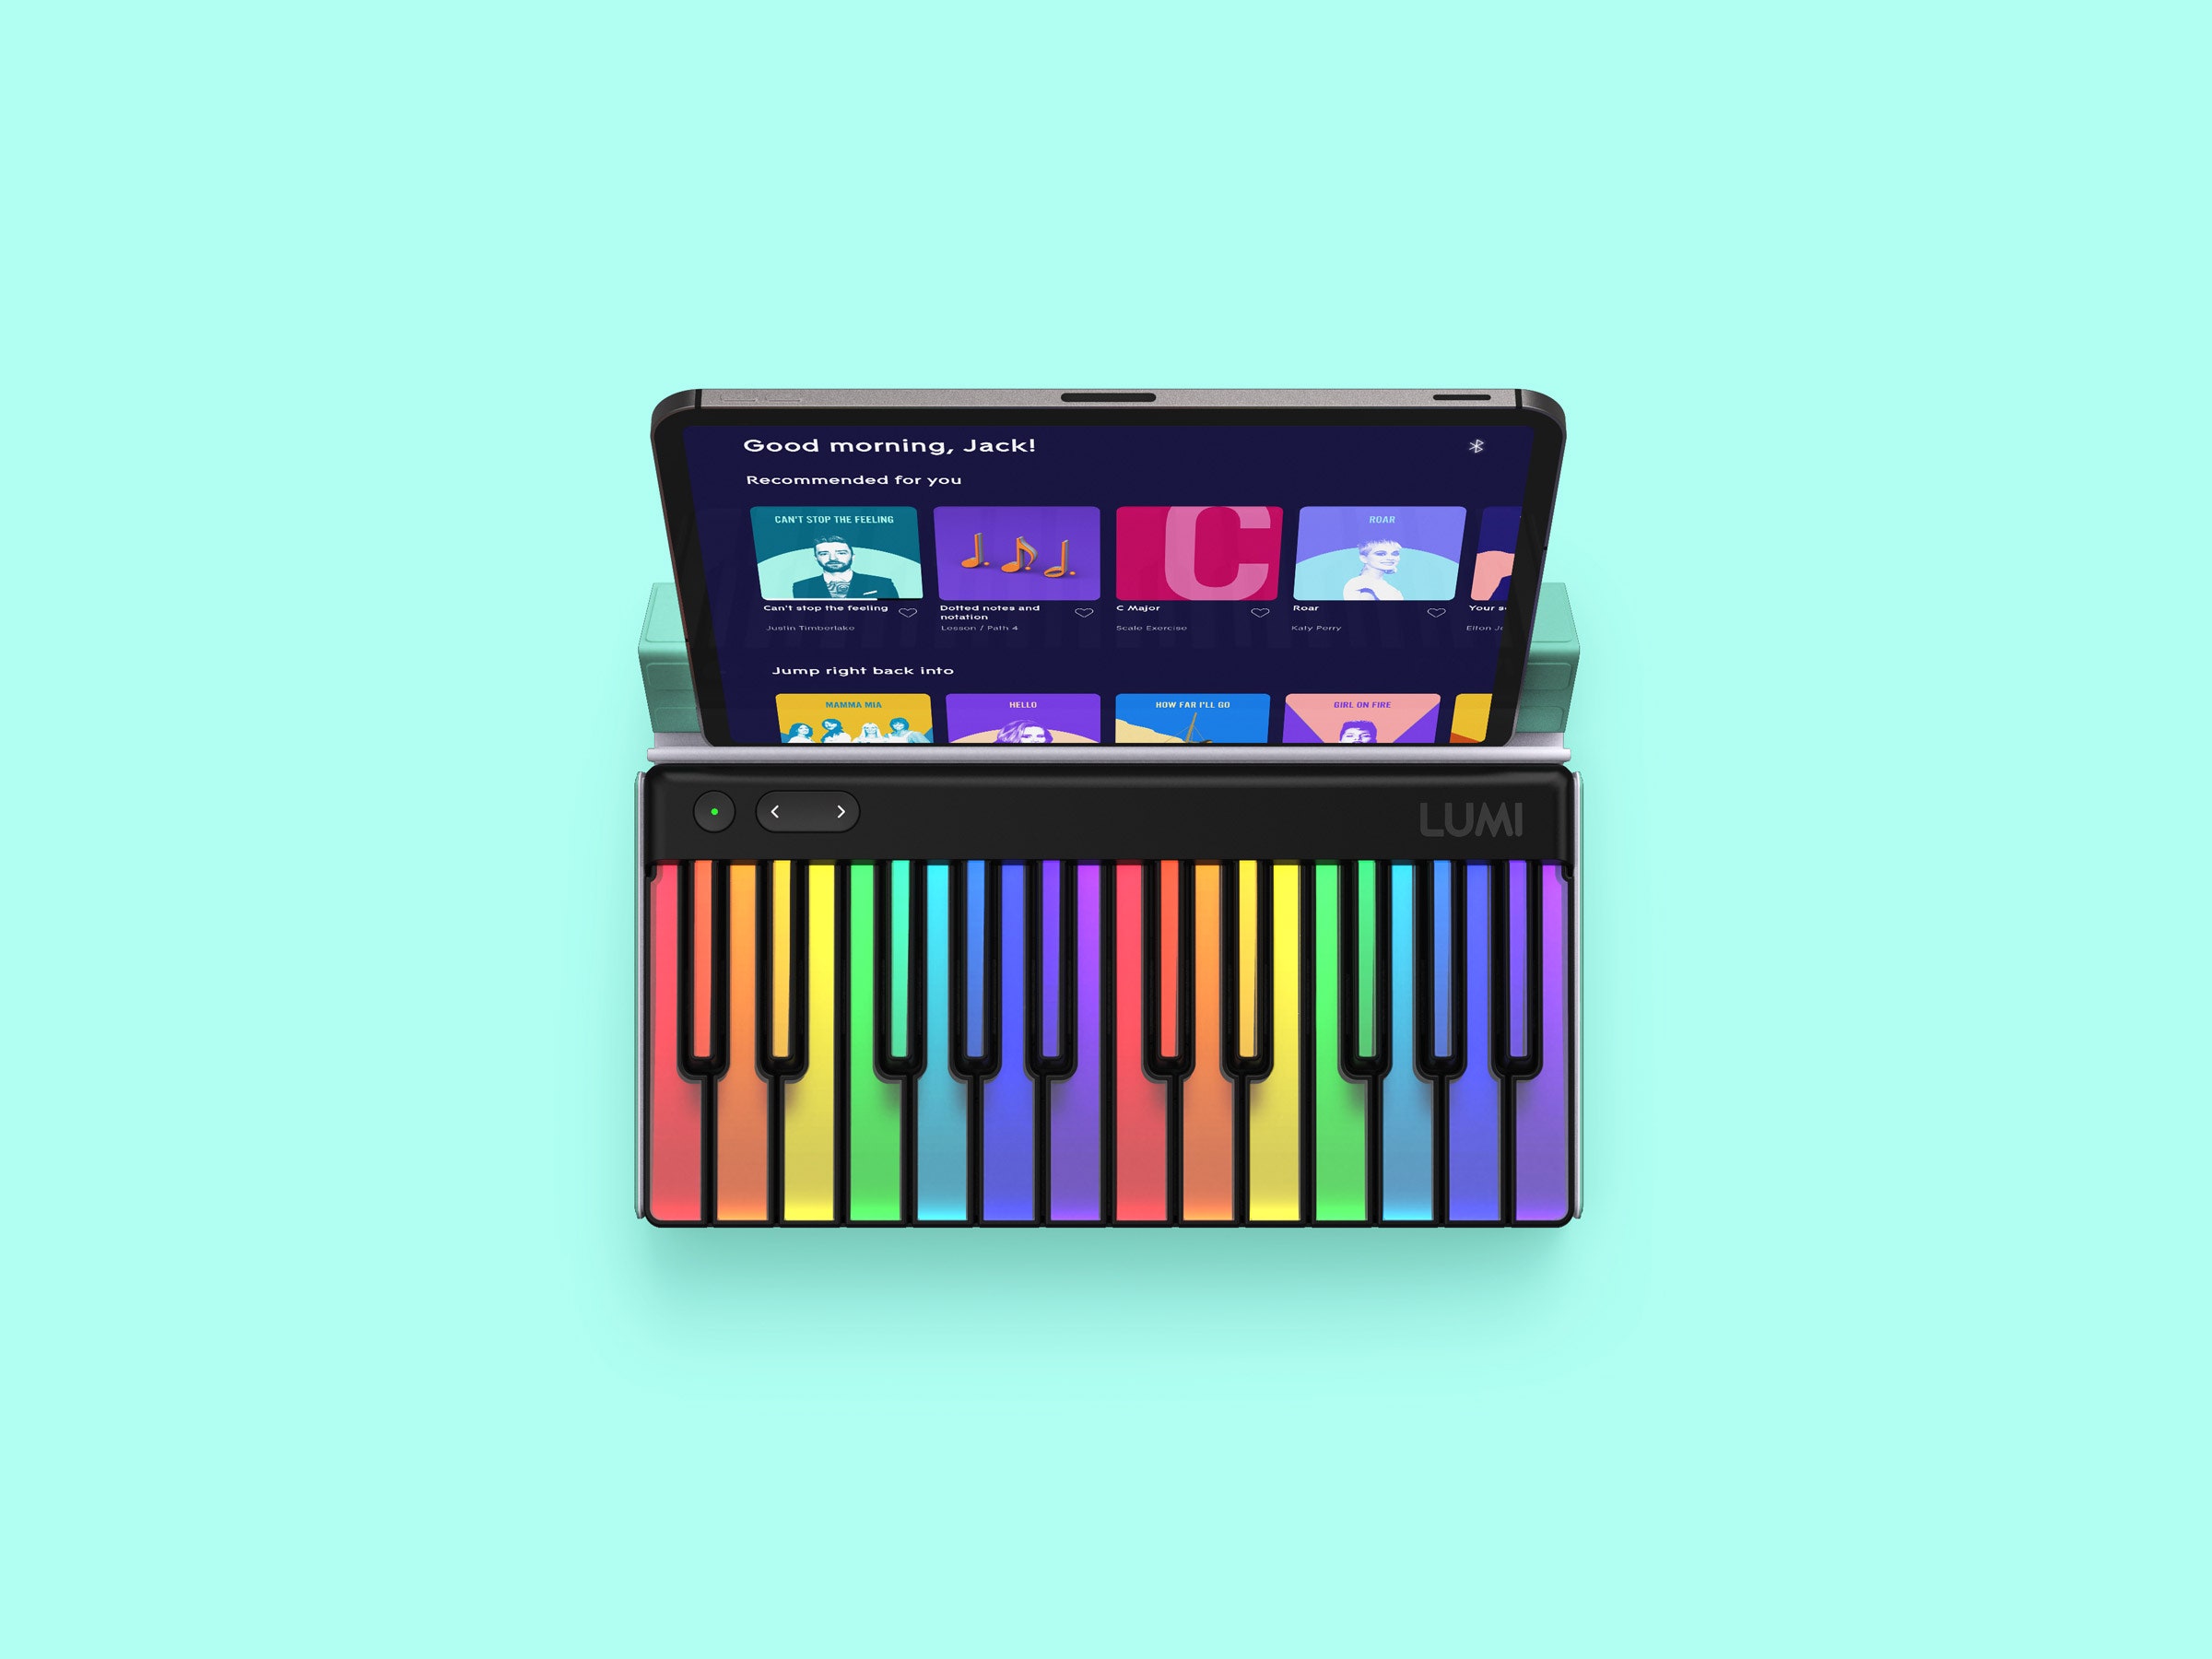
Light-up keyboard to consider when choosing which music keyboard to buy

Choose a music keyboard that aligns with your skill level and the features you require. Consider factors like key sensitivity, size, and available sound options.


Also, selecting the right music keyboard can be a daunting task, with a vast array of options catering to different skills and budgets. Beginners might opt for an entry-level model that focuses on basic functionality and learning tools, while more experienced players may prioritize keyboards with advanced features such as weighted keys and a wide range of sounds.

Related reading: Icon Ikeyboard Review and Best Midi Keyboards Under 500. For background, see the Wikipedia article on Electronic keyboard.


Moreover, Keyboards come in various sizes, from compact, portable models to full-sized, 88-key versions, making it essential to consider the space you have available and your portability needs. Also, digital pianos offer a more realistic touch and sound for those serious about classical training. Each keyboard has varying levels of touch sensitivity, affecting how the performance feels and responds to your playing style. Ensure the keyboard you choose enhances your playing experience and helps you progress in your musical journey.


Introduction To Selecting A Music Keyboard

In addition, embarking on the journey to buy a music keyboard is exciting. In addition, it opens a world of melody and harmony. Yet, this choice requires thought. You need the right fit for your needs. Think of a keyboard as an extension of your musical voice. Picking the perfect one enhances learning and enjoyment.

The Importance Of Choosing The Right Instrument

A great keyboard inspires you. It makes practice enjoyable. For example, Quality instruments grow with your skills. Furthermore, they ensure years of musical exploration. A mismatch can lead to frustration. It might even stall your progress. Thus, let’s explore this crucial step.

Factors That Influence The Decision for Music Keyboard

  • Additionally, skill Level: Are you a beginner or a pro? Different keyboards cater to various stages of learning.
  • Keyboard Action: Weighted keys? Synth action? Also, each type offers a unique touch.
  • Sound Quality: High-quality sounds inspire. Moreover, they make music vibrant and authentic.
  • In addition, portability: Will you travel with it? Lightweight keyboards make movement easy.
  • Furthermore, Features: Consider built-in lessons, recording capabilities, and connectivity options.
  • Budget: Instruments vary in price. Additionally, match your choice with what you can spend.

Types Of Keyboards And Their Features

Also, Choosing the right music keyboard is crucial for any musician. As a result, various types offer unique features to suit different needs.

Digital Pianos Vs Synthesizers for Music Keyboard

Moreover, digital pianos bring the feel of an acoustic piano to your fingertips.

  • In addition, Weighted keys: Mimic the hammer action of traditional pianos.
  • Furthermore, built-in speakers: No need for external amplification.
  • Additionally, multiple voices: Often include different instrument sounds.
  • Also, minimalistic design: Focus on piano experience.

Moreover, Synthesizers are all about creating and manipulating sounds.

  • In addition, Sound synthesis: Craft original sounds with oscillators and filters.
  • Furthermore, velocity-sensitive keys: Control over the character of the sound.
  • Additionally, extensive controls: Knobs and sliders for real-time tweaking.
  • Also, MIDI compatibility: Integrate with other electronic instruments.

Workstations And Arrangers for Music Keyboard

Moreover, workstations are the powerhouses of keyboard world.

  • In addition, integrated sequencing: Record and edit your music.
  • Furthermore, wide range of sounds: Packed with sound libraries for production.
  • Additionally, audio/MIDI integration: Combine with computers and other gear.

Also, arranger keyboards serve as a one-man band.

  • Moreover, auto-accompaniment: Provide backing tracks to play along.
  • In addition, performance assistance: Quick access to rhythms and sounds.
  • Furthermore, portable: Designed for gigging and ease of use.

Understanding Keyboard Action Types

Understanding Keyboard Action Types is crucial when selecting a music keyboard. However, different actions suit various playing styles and preferences. Additionally, here, we’ll delve into the nuances of keyboard mechanics.

Weighted Keys Versus Semi-weighted Keys for Music Keyboard

Also, Weighted keys mimic the resistance of an acoustic piano. Then, they provide a heavier touch, which classical pianists prefer. Semi-weighted keys, on the other hand, blend weight and spring mechanisms. This mix offers a lighter touch. It’s helpful for beginners or those wanting a middle ground.

Weighted Keys Semi-Weighted Keys
Mimic acoustic piano Lighter than weighted
Ideal for classical music Good for various genres
Heavier touch Middle ground touch

Synth Action And Graded Hammer Action Explained

Moreover, synth action keyboards are light and quick. In short, they are perfect for fast, energetic music styles. On this type, the keys spring back instantly. Graded hammer action mimics the feel of real pianos even more closely. Lower notes have a heavier touch, and higher notes are lighter. This set-up is ideal for those aiming for a realistic piano experience.

  • In addition, synth Action: Light, fast, springs back quickly
  • Furthermore, Graded Hammer Action: Varies in weight from low to high notes

“` This HTML content provides clear information about the different types of keyboard actions available. Similarly, the content is organized with suitable headings and tables for an engaging and informative read.


Sound Quality And Technology for Music Keyboard

Choosing the right music keyboard involves more than just keys and designs. Also, Sound quality and technology are the soul of a musical performance. Additionally, to bring your music to life, consider how a keyboard creates and manipulates sound. A keyboard with advanced technology offers a wealth of creative potential. Let’s explore two key features: polyphony and multitimbrality, and sampling and sound engines.

Polyphony And Multitimbrality for Music Keyboard

Also, polyphony refers to the number of notes a keyboard can produce at once. In addition, multitimbrality means playing multiple sounds together. These features impact how rich and layered your music can be.

  • 32-note polyphony: Good for beginners.
  • 64-note polyphony: Better for complex pieces.
  • 128-note polyphony: Ideal for professional use.

Keyboards with higher polyphony won’t cut off notes prematurely when using the sustain pedal or playing with a full band. For example, multitimbral capabilities allow for orchestration on your keyboard, enabling different instrumental sounds to play in harmony.

Sampling And Sound Engines for Music Keyboard

Moreover, the quality of a keyboard’s sound engine determines its tone and responsiveness. As a result, sampling technology records real instruments to create authentic sounds. Together, these shape the musical experience.

Type of Sound Engine Benefits
PCM (Pulse Code Modulation) Standard digital sound reproduction
Virtual Analog Simulates vintage synth sounds
Physical Modeling Imitates the properties of acoustic instruments

For examples of realism and expressiveness in your music, choose a keyboard with a robust sound engine and detailed sampling. However, this will allow you to capture the nuances and dynamics of true-to-life performances.

Connectivity For The Modern Musician

In addition, connectivity for the Modern Musician is not just a catchphrase; it’s a necessity.

Furthermore, Choosing the right music keyboard ties directly to how well it will mesh with other tech.

Additionally, let’s focus on two essential aspects: MIDI Compatibility and USB Connections .

Midi Compatibility And Usb Connections for Music Keyboard

Modern music creation demands seamless digital integration.

A keyboard with MIDI support opens doors to a universe of musical possibilities.

  • Connect to computers or mobile devices
  • Control virtual instruments
  • Sync with other MIDI gear

USB connections further simplify the setup.

Connection Type Function
USB to Host Data transfer between keyboard and computer
USB to Device Connect external storage devices for data

Integrating With Other Equipment for Music Keyboard

Integration shines when equipment works in concert.

A keyboard with ample connectivity options serves as a hub in your musical setup.

  1. Check compatibility with audio interfaces
  2. Ensure control surfaces talk to your keyboard
  3. Look for traditional ports like MIDI Out/In

The right keyboard acts as a bridge between gear, making the music-making process smooth and intuitive.

Portability And Size Considerations

Deciding on the right music keyboard means looking at portability and size. Then, think about where you’ll play. Will you travel with your instrument? Or do you have a special spot at home for it? Size affects how easy it is to carry and the experience when you play. Now, let’s dive into the key aspects for on-the-move musicians and those with ample space.

Compact Models For The Traveling Musician

For musicians on the go, small keyboards save the day. In short, they’re light, fit in tight spaces, and are easy to take from gig to gig. Check out these perks:

  • Weight: Less than 15 pounds, a breeze to carry.
  • Keys: Often 61, enough for most music.
  • Power: Battery options for playing anywhere.

Go for a model with a durable case. It will protect your keyboard during your travels. The best part? Compact models still offer great sound and features. Similarly, producers and performers often prefer these for their convenience.

Full-sized Keyboards For The Dedicated Space

A dedicated space calls for a full-sized keyboard. Also, these are ideal if you have a music room or studio. The advantages include:

Feature Benefit
88 keys Mimics a real piano
Weighted keys Feels like an acoustic piano
Extra features More sounds and tools

These models often include advanced functions. In addition, they suit composers and serious learners. They take more space but offer a complete playing experience.

Budget And Price Range

Deciding on a music keyboard requires careful budget consideration. For example, your choice spans from affordable entry-level models to high-end professional keyboards. Understanding your budget and price point will guide you to the perfect instrument without breaking the bank.

Entry-level Versus Professional Models

Entry-level keyboards are fantastic for beginners. As a result, they often cost less and provide the essentials for learning. Professional models include advanced features but come with a higher price tag. Consider your skill level and commitment before deciding.

Type Price Range Best For
Entry-Level $50 – $300 Beginners, Casual Players
Professional $1000+ Seasoned Musicians, Performers

Finding The Best Value For Your Money

Balance quality with cost to find the best value. However, look for sales, second-hand options, or bundles with accessories. Evaluate features versus needs. A good deal blends utility, quality, and a fair price.

  • Check Reviews: Research and compare user experiences.
  • Compare Features: Align features with your requirements.
  • Test Play: Try keyboards to assess feel and sound.
  • Warranty: Ensure your investment is protected.


Brands And Warranties

Choosing the right music keyboard involves navigating through a sea of brands and options. Then, with countless manufacturers on the market offering a myriad of features, the process can seem daunting. Key to your decision should be the reputation of the brand and the type of warranty offered. These factors ensure the longevity and service support of your instrument, which are crucial for any musician.

Trusted Manufacturers In Keyboard Production

When it comes to high-quality music keyboards, certain names stand out:

  • Yamaha – Known for exceptional sound and durability.
  • Casio – Offers a range of options for beginners to advanced players.
  • Roland – Specializes in synthesizers with advanced technology.
  • Kawai – Recognized for their responsive keys and realistic piano sounds.
  • Nord – Frequented by professionals for their stage-ready keyboards.

These brands have earned trust globally for their build quality, customer support, and innovation.

Understanding Warranties And Customer Services for Music Keyboard

A warranty ensures protection against defects and malfunctions. In short, here’s what to look for:

Warranty Length What’s Covered Customer Support
1 to 5 years Manufacturing defects, parts, labor Phone, email, in-person

Longer warranty periods reflect the manufacturer’s confidence in the product. Similarly, always read the fine print to understand the scope of coverage. Contact customer service to gauge their response time and helpfulness. Doing so will offer insight into the brand’s commitment to their customers.


Additional Features And Accessories

Choosing the right music keyboard often goes beyond just the keys and sounds. Also, additional features and accessories can elevate your playing experience. They can even speed up your learning process. Let’s dive into some of these enhancements that could sway your decision on the best keyboard to bring home.

Built-in Lessons And Recording Functions

For beginners and intermediate players, keyboards with built-in lessons are invaluable. In addition, these interactive tutorials guide you through songs and techniques. As for aspiring composers or those looking to track their progress, recording functions are essential. They come in handy for listening back to your sessions or capturing moments of inspiration.

  • Step-by-step instructions for learning
  • Playback options to hear your improvements
  • Capacity to record multiple tracks

Pedals, Stands, And Other Accessories

Pedals add dynamics to your play, sustaining notes or dampening them. A stable stand is also crucial, whether you prefer an X-style or a full wooden cabinet for a more traditional look. For example, other accessories such as cases, benches, and headphones might influence your choice.

Accessory Function Why It’s Important
Pedals Sound control They help create rich, varied tones.
Stands Keyboard support A stable stand prevents unnecessary movement.
Cases Protection They protect your keyboard during transport.
Benches Seating A comfortable seat allows for longer practice sessions.
Headphones Private practice They allow for concentration without disturbing others.

Concluding Thoughts for Music Keyboard

Choosing the right music keyboard marks the beginning of a musical journey. Before wrapping up this guide, let’s crystallize the core insights and plan the steps post-purchase. As a result, strong choices lead to strong musicianship. Let’s ensure your investment counts for every note played.

Synthesizing The Key Takeaways for Music Keyboard

  • Assess your level: Beginners, intermediates, and pros all need different features.
  • Key count matters: Decide between 61, 76, or 88 keys based on space and requirements.
  • Touch sensitivity: This affects the feel and dynamics of your playing.
  • Sound quality: Listen to demos; the better the sound, the more inspiring the playing.
  • Polyphony is key for complex pieces; 32-note polyphony is a good start.
  • Connectivity: USB/MIDI ports for interfacing with computers and other gear.
  • Portability: Consider weight if you plan to gig or move around often.
  • Budget wisely: Balance cost with features; invest in long-term satisfaction.

Next Steps After Purchase

  1. Unpack carefully: Keep all packaging for future transport or warranty claims.
  2. Initial setup: Follow the manual to connect and start your keyboard correctly.
  3. Explore sounds: Discover built-in tones and rhythms to understand your keyboard’s capabilities.
  4. Register your product: This secures your warranty and offers support.
  5. Plan lessons: Either self-taught through online resources or with a teacher.
  6. Practice schedule: Regular practice builds skills and familiarity with your instrument.
  7. Accessory check: Invest in a stand, bench, and headphones for better playing sessions.
  8. Join communities: Find online forums or local groups to connect with fellow musicians.

Frequently Asked Questions For What Music Keyboard Should I Buy


What Factors Determine The Best Music Keyboard?


When choosing a music keyboard, consider your skill level, the features you need, the size and portability, the touch response of keys, available sounds and functions, and of course, your budget. However, match these with your goals for playing to find an ideal fit.


Is Brand Important When Purchasing A Keyboard?


Yes, brand matters as it often reflects quality and durability. Then, renowned brands like Yamaha and Casio offer reliability and excellent after-sales service. However, don’t overlook lesser-known brands that may provide great value for money and innovative features at a lower cost.


What Keyboard Size Is Best For Beginners?


Beginners should look for a keyboard with full-sized keys, and for ease of learning, a 61-key layout is often recommended. This provides a balance between range and playability while maintaining portability and a lower cost than larger keyboards.


Does Weighted Keys Feature Matter For Keyboard Players?


Weighted keys emulate the feel of an acoustic piano and are beneficial for those looking to transition to piano playing or improve their finger strength and technique. In short, it’s a crucial feature for serious students and professionals seeking an authentic playing experience.


Conclusion


Deciding on the perfect music keyboard is a deeply personal choice. Similarly, consider your skill level, desired features, and budget. Consult reviews, try out different models, and select one that resonates with your musical journey. Let your creativity soar with the right instrument by your side.


Your melody awaits!

Categories
Archive

How Much Do Studio Headphones Cost: Unveiling the Truth

Studio headphones can vary widely in cost, ranging from $50 to over $1000. Popular professional models average around $100 to $300.


Choosing the right pair of studio headphones is essential for both amateur and professional audio work. These specialized headphones provide accurate sound reproduction, critical for mixing and mastering tracks. The price reflects differences in sound quality, build materials, comfort, and additional features like noise cancellation or wireless technology.


Budget-conscious buyers can find decent options at the lower end of the price spectrum, while audio professionals might invest in high-end models that deliver superior sound fidelity and durability. Whether you’re a budding musician, a seasoned engineer, or an audiophile, there’s a set of studio headphones to meet your needs and budget, with multiple brands and models to choose from.


The Sound Investment: Studio Headphones

The Sound Investment: Studio Headphones

Making music requires clear sound. Studio headphones are special. They play sound very well. Buying studio headphones is a smart move.

Why Professionals Choose Studio Headphones

Studio headphones are loved by experts. They help hear every note. Music makers need this.

  • Clear sound: Hear tiny details in music.
  • Comfort: Wear them for many hours, no pain.
  • Durable: They last a long time without breaking.

The Role Of Sound Quality In Production

Good sound is key for music. Bad headphones make bad music. High-quality sound makes great tracks.

Feature Benefit
Flat Frequency Response Hear sounds as they are.
Noise Isolation Block out unwanted noise.
Accurate Bass Feel the rhythm right.


Decoding The Price Range

Let’s dive into the ‘Decoding the Price Range’ of studio headphones. Understanding the costs helps you make informed decisions for your audio needs.

Entry-level Vs. Professional Studio Headphones

Price tags on studio headphones often reflect the audience they target. Entry-level sets cater to beginners or those on a tight budget. Professional headphones meet demands for high-quality sound production.

Studio Headphones Type Price Range
Entry-Level $50 – $200
Professional $200 – $1000+

Factors Influencing Cost

  • Sound Quality: Crisp, clear audio commands higher prices.
  • Build Material: Durable materials add to the cost but extend longevity.
  • Brand Reputation: Well-known brands often have premium pricing.
  • Features: Noise-cancellation and wireless tech can increase expenses.
  • Design Innovations: Comfort and aesthetics play a role in pricing.

These factors create a wide price range. It’s vital to balance budget and needs for the best pick.

Budget-friendly Options

Good studio headphones can cost a lot. Yet, amazing sounds can come from headphones that are kind to your wallet. Let’s explore some super choices that keep the beats pumping without breaking the bank.

Top Picks Under $100

Finding quality studio headphones under $100 is possible.
With these picks, expect great sound without spending much:

  • Audio-Technica ATH-M20x – Delivers crisp sound.
  • Samson SR850 – Open-back design for a natural listening experience.
  • Sennheiser HD 202 II – Offers good bass and comfort.

These headphones are winners for anyone making music or enjoying tunes at home.

Balancing Price And Performance

It’s sweet when you find gear that’s affordable and sounds good.
When mixing price and quality, here’s what to look for:

Feature Why It Matters
Driver Size Bigger drivers mean better sound.
Frequency Range Wide range catches all the highs and lows.
Comfort Good padding keeps sessions pain-free.

Remember, premium sound doesn’t need a hefty price tag when you pick the right headphones!


Mid-range Mastery

Stepping into the realm of mid-range studio headphones unfolds a plethora of options for the discerning audiophile and upcoming artist alike. This tier is the sweet spot where affordability meets professional audio quality. With prices ranging from $100 to $300, these headphones offer a balance between cost-effectiveness and high-end features.

Features To Expect From $100-$300

While searching within this price bracket, you can anticipate a significant upgrade in sound quality and comfort. Here’s what you should look for:

  • Enhanced Sound: Detailed highs, mids, and lows
  • Durable Build: Better materials for longevity
  • Comfort: Ear padding and adjustable headbands for long sessions
  • Isolation: Better noise isolation for studio work
  • Connectivity: Options like detachable cables and adaptors
  • Warranty: Longer coverage for peace of mind

Best Value For Upcoming Artists

For those who are serious about their craft, investing in a reliable pair of studio headphones is essential. Here are the benefits:

Benefit Explanation
Sound Quality Clear audio helps perfect your mix
Build Quality Withstand repeated use in the studio
Comfort Work for hours without discomfort

Purchasing mid-range headphones gives you professional features without breaking the bank. This investment can transform your audio experience and elevate your music production to new heights.

High-end Heaven


How Much Do Studio Headphones Cost: High-End Heaven

Introducing High-End Heaven

Welcome to High-End Heaven, where the quest for perfect sound leads to a trove of studio headphones that promise an unmatched auditory experience. With price tags soaring above $300, these headphones are not merely tools but investments into professional-grade audio fidelity. Let’s explore what these luxurious headphones offer to justify their cost.

What Justifies a $300+ Price Tag

What Justifies A $300+ Price Tag

Why spend more than $300 on studio headphones? It all boils down to a few key factors:

  • Top-tier Sound Quality: Expect crystal-clear highs, deep lows, and precise midranges.
  • Durability: These headphones are built to last with premium materials.
  • Advanced Technology: Features like noise-cancellation and high-resolution audio are standard.

Luxury Features for the Audiophile

Luxury Features For The Audiophile

Delving deeper, the luxury features of high-end studio headphones include:

Feature Description
Comfort Design Ergonomic and long-session wear with memory foam padding.
Unparalleled SoundStage Immersive and expansive sound that replicates studio acoustics.
Wireless Technology Cutting-edge Bluetooth for mobility without sacrificing audio quality.

Brand Breakdown

Choosing the right studio headphones can be tricky, especially with so many brands available. The cost often varies widely. A closer look at the brand’s influence can shed light on pricing. Let’s dive into some of the top names in the industry and see how they stack up.

Industry Giants And Their Offerings

Industry leaders like Audio-Technica, Sennheiser, and Beyerdynamic set the standard for studio headphones. They cater to all levels of audio professionals.

Brand Entry Level Mid-Range Premium
Audio-Technica $50 – $100 $100 – $300 $300+
Sennheiser $70 – $150 $150 – $500 $500+
Beyerdynamic $80 – $200 $200 – $600 $600+

These brands offer an impressive range of options. They provide choice for budget and professional studios.

The Impact Of Brand On Price

The reputation of a brand can greatly influence the cost. Prestigious brands often have higher price tags due to their quality assurance and industry status.

  • Build quality often justifies higher prices.
  • Advanced technology can lead to increased costs.
  • Sound fidelity is a priority for premium brands.

For those serious about audio, investing in a respected brand may prove beneficial. It can ensure durability and unmatched sound quality.

Additional Costs To Consider

While you hunt for the perfect studio headphones, budgeting doesn’t stop at the price tag. Costs like accessories and maintenance can add up. Investing in good accessories can enhance your experience. Long-term value matters too; cheaper options might cost more over time.

Must-have Accessories

Diving into the world of studio headphones, the right accessories keep the music flowing. Here’s what you might need:

  • Carrying Cases: Protect your headphones and keep them safe.
  • Replacement Cables: Always handy for when originals fail.
  • Amplifiers: Boost sound quality to professional levels.
  • Ear Pads: Extra comfort for those long mixing sessions.

Maintenance And Long-term Value

Maintaining your studio headphones ensures they last. Simple habits can save you money:

  1. Regular Cleaning: Keeps your headphones sanitary and functional.
  2. Proper Storage: Extends their life and prevents damage.
  3. Repair Services: Sometimes fixing is cheaper than replacing.

Remember, quality headphones might cost more upfront but can save money in the long run.

The Verdict On Value

The quest for the perfect studio headphones often boils down to the value they provide. Understanding what you’re getting for your money is crucial. With options ranging from budget-friendly to premium, it’s essential to delve into what value means in the world of studio headphones.

Is the Investment Worth it?

Is The Investment Worth It?

You might ponder whether high-end studio headphones are a sound investment. Price tags for these devices can soar. Yet, they bring precision audio quality to the table. Studio headphones surpass their consumer counterparts in build quality and sound fidelity. Professionals and audiophiles take notice: costly headphones could transform music production and listening experiences.

Deciding What’s Right For Your Needs

The decision-making process involves assessing your studio needs. Start by asking simple questions:

  • What is my budget?
  • What sound quality level do I require?
  • How often will I use them?

Once you pinpoint these factors, compare across categories. Here’s a quick breakdown:

Budget Range Sound Quality Durability
$50 – $100 Basic Average
$100 – $300 Intermediate Good
$300+ Professional High

This comparison should guide you. Select a model that aligns with your needs and budget for the best value. Remember, the right headphones can last for years. Making a smart investment now could mean savings in the long run.


Frequently Asked Questions Of How Much Do Studio Headphones Cost

What’s The Average Price Of Studio Headphones?

The average price for quality studio headphones typically ranges from $50 to $300. More professional-grade models may exceed this range, reflecting advanced features and higher sound fidelity.

Are Expensive Studio Headphones Worth The Cost?

Expensive studio headphones often offer superior sound quality, comfort, and durability. For audio professionals and avid music listeners, the investment can be worthwhile for the enhanced listening experience and longevity.

Can I Find Good Studio Headphones Under $100?

Yes, there are good studio headphones available for under $100. They offer decent sound quality and comfort, suitable for casual listening and basic recording tasks.

How Do Studio Headphones Differ From Consumer Ones?

Studio headphones are designed with flat frequency response for accurate sound monitoring, crucial for mixing and mastering. Consumer headphones often have enhanced bass and treble for a more pleasing listening experience.

Conclusion

Exploring the cost of studio headphones highlights a range of options. Quality and features drive prices, from budget-friendly to premium models. Savvy shoppers strike a balance, seeking value for their specific needs. Remember, investing in the right pair enhances your audio experience exponentially.


Happy listening, and choose wisely!

Categories
Archive

How to Use Studio Headphones on PC: Expert Tips!

To use studio headphones on a PC, connect them via the headphone jack or USB port. Adjust system sound settings to recognize the headphones for optimal audio output.


Studio headphones offer superior sound quality and comfort, making them an excellent choice for audio professionals and enthusiasts alike. Connecting them to your PC is straightforward and enhances your listening experience significantly. Whether you’re mixing music, enjoying high-definition games, or immersing yourself in a movie, the right setup ensures you hear every detail.


It’s important to choose studio headphones compatible with your computer and to understand the necessary configuration steps. Read on to learn the simple procedures for getting studio-standard audio from your PC.


Choosing The Right Studio Headphones

Studio headphones are vital for precise audio editing and casual listening. Pick the ideal pair for your PC to enhance sound experiences. In this guide, discover essential features and decide between wired and wireless options.

Key Features To Look For

The perfect studio headphones merge comfort, sound quality, and durability. Examine these aspects:

  • Frequency Response: Seek a wide range for detailed audio.
  • Driver Size: Larger drivers often deliver better bass.
  • Impedance: High impedance ensures optimal sound with professional gear.
  • Comfort and Fit: Check for padded earcups and adjustable headbands.
  • Isolation: Good isolation prevents sound leak and keeps you focused.

Wired Vs Wireless Considerations

Decide between wired and wireless headphones based on your needs.

Wired Headphones Wireless Headphones
No batteries needed. Convenient with no cords.
Zero latency for precise editing. Portable for on-the-go use.
Often provide superior sound quality. Require charging, but offer freedom of movement.

Consider your activities on the PC. Audio professionals often choose wired headphones for zero latency. Wireless headphones grant flexibility and comfort for casual users.

How to Use Studio Headphones on PC: Expert Tips!


Credit: www.nytimes.com


Understanding Pc Audio Outputs

When using studio headphones with a PC, knowing your audio outputs is crucial. PCs offer multiple ways to connect headphones. Each option provides different audio quality levels. Let’s delve into the world of PC audio outputs and simplify the connection process.

Types Of Audio Jacks

Audio jacks are common in PCs. They are small, round connectors. These jacks come in different sizes and serve various functions. Look at your PC’s side or back. You will likely see these:

  • 3.5mm Headphone Jack: The standard for headphones. It supports stereo sound.
  • 3.5mm Microphone Jack: Specifically for microphones, not for headphones.
  • 3.5mm Headset Jack: A combo that supports both audio and a microphone. It is versatile.

A color code helps identify the purpose of each jack:

Color Function
Green Headphone output
Pink Microphone input
Blue Line in

Usb Audio Interfaces

USB interfaces offer improved sound. They bypass the PC’s internal sound card, enhancing audio clarity. This device plugs into a USB port. It then connects to your headphones.

Benefits include:

  • Easier volume control and input selection.
  • Ability to drive higher-powered headphones.
  • Less noise from the PC’s components.

Select a USB audio interface with a headphone amp for professional studio headphones. This ensures the best sound experience.

Setting Up The Software

Getting your studio headphones to work with your PC is easy. You need some software setup first.

Audio Drivers Installation

To start, make sure your PC has the right audio drivers. Here’s how:

  1. Check your headphone’s brand. Go to their website.
  2. Find the ‘Support’ or ‘Downloads’ section.
  3. Choose the correct driver for your model and PC operating system.

Download and run the installer. Follow on-screen steps.

Sound Settings Configuration

Now, adjust your PC’s sound settings:

  • Right-click the sound icon on your taskbar.
  • Select ‘Open Sound Settings’.
  • Under ‘Output’, pick your headphones.
  • Test the sound to ensure everything is working.


Avoiding Common Setup Mistakes

Setting up studio headphones on a PC seems straightforward, but small errors can affect sound quality. Learning to avoid common setup mistakes ensures optimal audio performance. Let’s delve into some crucial steps.

Correct Audio Format Selection

Choosing the right audio format is vital for sound clarity. Follow these steps to select the correct format:

  1. Go to ‘Sound Settings’ on your PC.
  2. Find ‘Playback Devices’ and choose your headphones.
  3. Click on ‘Properties’ and navigate to the ‘Advanced’ tab.
  4. Under ‘Default Format’, pick the highest quality option that’s compatible with your headphones.

Using the right format reduces distortion and improves listening experience.

Solving Audio Latency Issues

Audio latency can disrupt timing and lead to poor sound synchronization. Handle it by:

  • Updating your audio drivers to the latest version.
  • Choosing headphones as the default playback device.
  • Minimizing active audio processing effects or enhancements.

Adjust buffer size settings in your audio software to fine-tune performance.

Optimizing Sound Quality

Optimizing Sound Quality involves more than just connecting studio headphones to a PC. It requires attention to detail and adjustments within the audio settings to truly enhance your listening experience. Here’s how to make the most of your studio headphones and enjoy sound that rivals professional setups.

Balancing Equalization

Equalization (EQ) controls the balance of different frequencies in your audio. It allows you to enhance or reduce certain sound elements. To achieve a balanced sound:

  • Locate the sound settings on your PC.
  • Access the EQ settings.
  • Adjust bass, mids, and trebles to suit the content you’re listening to.

A well-balanced EQ setup ensures a natural and clear audio output, essential for high-quality sound.

Selecting High-resolution Audio

High-resolution audio files provide superior sound quality. To get the best out of your headphones:

  • Choose audio files with high bit rates and sampling frequencies.
  • Opt for lossless formats like FLAC or WAV over MP3 for richer sound.
  • Configure your PC’s sound output to match the capabilities of your headphones.

By selecting high-resolution audio, you’ll experience the full range of sound your studio headphones can deliver.

Accessorizing For Improved Experience

Transforming your listening sessions on a PC with studio headphones can be an elevating experience. Accessorizing effectively bridges the gap between standard sound output and professional-quality audio. Let’s explore how to enhance your studio headphone use on a PC with the right accessories for an improved experience.

Choosing The Right Cable

Selecting an appropriate cable is vital for high-quality sound. Your headphones may require a specific type of connector, such as a 3.5mm jack or a 6.35mm plug. Ensure compatibility with your PC’s audio output port. A high-quality cable minimizes signal loss, preserves sound purity, and prevents interference. Consider cable length too; it should allow free movement without tangles.

Using Sound Cards And Amps

Most PCs have built-in sound processors, but they may not fully bring out the best in studio headphones. A dedicated sound card or external digital-to-analog converter (DAC) can dramatically improve sound quality. It allows your studio headphones to reveal finer details and deliver clearer audio. An amplifier (amp) might also be necessary, particularly for headphones with high impedance. Amps boost signals, ensuring your headphones perform at their optimum level. Together, a sound card and an amp can transform your audio experience.

Accessory Purpose Benefit
High-quality cable Connect headphones to PC Minimize signal loss and interference
Sound card/DAC Enhance audio processing Deliver detailed and clear sound
Amplifier Boost headphone signals Optimize headphone performance

Finding the perfect blend of accessories not only improves sound quality but also enhances your overall PC audio experience.


Maintaining Your Studio Headphones

Studio headphones require regular upkeep to deliver the best sound quality. Proper maintenance ensures longevity. Discover easy headphone care tips next.

Regular Cleaning Tips

Keep your studio headphones in top condition with these cleaning methods:

  • Wipe ear pads gently with a soft cloth.
  • Use alcohol-free cleaners to avoid damage.
  • Remove detachable parts and clean separately.
  • Keep the headphones dry and free from dust.

Software Updates And Equipment Care

Protect your investment with these simple steps:

  1. Check for driver updates regularly.
  2. Store your headphones in a safe place.
  3. Avoid exposing them to extreme temperatures.
  4. Handle cables carefully to prevent tangling.

Follow manufacturer guidelines for software updates.

Expert Tricks For Enhanced Audio

Welcome to the world of immersive audio experiences! Using studio headphones on a PC can be a game-changer. However, to truly elevate the sound, a few expert tricks can enhance the audio significantly. Peek into these professional tips for a sonic transformation.

Advanced Equalizer Settings

Tailor your audio with advanced equalizer settings. Here’s how to do it:

  1. Access your sound card’s control panel.
  2. Find the equalizer and turn it on.
  3. Adjust frequencies to suit your listening preferences.

For a balanced sound:

  • Boost the bass frequencies slightly.
  • Reduce the mids for clarity.
  • Enhance the highs for detail.

Remember: Each genre may require different settings. Experiment to find your sweet spot.

Incorporating Virtual Surround Sound

Experience the power of virtual surround sound on your PC:

  1. Download a virtual surround software.
  2. Install and open the software.
  3. Configure the settings to match your headphones.

Key benefits include:

  • Enhanced depth and spatial awareness.
  • Detailed sound positioning, perfect for gaming.
  • Immersive movie and music sessions.

Pro Tip: Test various virtual surround profiles. Some may cater better to your headphones and ears.

Troubleshooting Common Issues

Running into snags while using studio headphones with your PC? No need to worry. Here’s a quick guide on fixing common problems.

Dealing With Static Noise

Static noise can be a real annoyance. Let’s tackle it:

  • Check your headphone connections. Loose cables can cause static.
  • Test on another device. It helps to find if the issue is headphone or PC-related.
  • Update your sound card drivers. Old drivers sometimes cause noise.
  • Reduce wireless interference by keeping devices like routers at a distance from your PC and headphones.

Resolving Driver Compatibility Problems

Driver issues can prevent your headphones from working smoothly. Here’s how to fix:

  1. Go to your Device Manager.
  2. Under “Sound, video and game controllers,” find your headphone’s driver.
  3. Right-click and select “Update driver.”
  4. Choose “Search automatically for updated driver software.”
  5. If no update is found, visit your headphone manufacturer’s website for the latest driver.
How to Use Studio Headphones on PC: Expert Tips!


Credit: www.amazon.com


Future-proof Your Setup

Setting up studio headphones on a PC means thinking ahead. Durable choices and tech-ready features save hassle later. We’ll delve into how to adapt to new technologies and expand your audio gear for a setup that lasts.

Adapting To New Technologies

Tech upgrades fast. Ensure headphones and PCs mesh well with upcoming advances. For example:

  • USB-C connections: They’re the future. Get headphones with this option.
  • Software compatibility: Choose gear that works with new audio software.
  • High-resolution audio support: It’s a must for future sound fidelity.

Expandability With Audio Gear

A good setup grows with you. Look for:

  • Modular components: Swap parts out easily.
  • Additional ports: They let you add more devices.
  • Audio interfaces: Consider ones that offer extra inputs.

Invest in quality and your PC’s audio will stay top-notch.

Frequently Asked Questions On How To Use Studio Headphones On Pc


Do Studio Headphones Require A Pc Amp?


Studio headphones can benefit from a PC amp for higher audio quality and proper driving power, but it isn’t mandatory. Most PCs can adequately power them, but for optimal sound, especially with high-impedance headphones, an amp may be suggested.


Can I Connect Studio Headphones Via Usb?


Yes, if studio headphones come with a USB option, you can connect them directly to your PC’s USB port. This can provide better sound quality as the headphones may have a built-in sound card.


Is A Dac Necessary For Pc Headphones?


A DAC (Digital-to-Analog Converter) is not strictly necessary but can improve sound quality significantly if your studio headphones are high-end and your PC’s built-in audio is lacking.


How To Reduce Latency With Studio Headphones On Pc?


To reduce latency, use a wired connection if possible and adjust the buffering settings in your audio software. Ensure your PC’s drivers are up-to-date for the best performance.


Conclusion


Wrapping up, mastering studio headphone usage on a PC elevates your audio experience. Remember to select the right adapter, configure your sound settings, and test for optimal quality. Embrace these steps to unlock professional-grade sound from your studio headphones. Keep your sessions sounding crisp and clear, every time.

Categories
Archive

Best Music Keyboard for Music Production: Top Picks!

The Akai Professional MPK249 is a top choice for music production. It combines performance pads and comprehensive controls for extensive functionality.

For musicians and producers venturing into music production, selecting the right keyboard is critical. A suitable music keyboard not only enhances workflow but also seamlessly integrates with various software to bring musical ideas to life. The Akai MPK249 strikes the perfect balance between portability and an extensive range of features.

It houses velocity-sensitive keys for expressive performance, MPC-style pads for triggering samples, and assignable knobs for tactile control over your music software. Its ability to interface with virtually any DAW makes it a versatile tool, whether in a studio setting or on the move. The MPK249 is a professional-grade instrument designed to elevate production quality and efficiency, making it a reliable companion for both studio work and live performances.

Intro To Musical Keyboards

A musical keyboard acts as the canvas for producers. It’s where melodies come to life. In music production, the right keyboard can make a world of difference. Visualize an artist with paints but no brush, or a chef with ingredients but no pan. That’s music without the keyboard – full of potential but lacking the tool to bring it all together. The magic is in your fingertips, and a stellar hardware-piece is your wand. Let’s take a dive into the core essentials and understand its pivotal role in music production.

Essentials Of A Production-ready Keyboard

Knowing the essentials helps in choosing the perfect keyboard. Here’s what to check off your list:

  • Keys: Look for full-size, velocity-sensitive keys. Weighted keys are a bonus for a real piano feel.
  • Controls: Pitch bend and modulation wheels are must-haves. Extra knobs and sliders for adjusting sounds are useful.
  • Integration: It should connect easily with your DAW. USB/MIDI compatibility is key.
  • Polyphony: More voices mean more simultaneous notes. Aim for at least 64-note polyphony.
  • Sounds: Built-in sounds spark quick inspiration. An expansive sound library is ideal.

The Role Of Keyboards In Music Production

Keyboards are the heartbeat in the studio. They serve many roles:

Role Description
Melody Maker Keyboards lay down catchy tunes that become the song’s identity.
Harmony Hub They blend notes together, creating rich backdrops for tracks.
Rhythm Provider From pacing beats to grooves, keyboards set the tempo.
Sound Sculptor Twist and shape sounds. Go from a soft string pad to a roaring synth lead.
Production Central Keyboards tie other musical elements together, making them a control center.

Key Features To Look For

Choosing the right music keyboard is crucial for music production. Focus on key features to find a perfect fit. These features shape your music creation experience. Let’s dive into what to seek.

Weighted Vs. Unweighted Keys

Weighted keys mimic the feel of a traditional piano. They offer resistance and have a hammer action. This is best for those who want an authentic piano touch.

Unweighted keys, also known as synth-action keys, are lighter and require less force to play. This can be ideal for rapid playing or for those who prefer a lighter touch.

Key Count And Size

The number of keys on your keyboard affects playability and portability. A full-sized keyboard has 88 keys, but smaller versions with 61 or 49 keys are also popular.

Key Count Size Suggested Use
88 keys Full-size Classical music, full range compositions
61 keys Medium Pop, rock, general production
49 keys Compact Travel, small studios, quick ideas

Connectivity Options For Studio Setups

Connectivity is vital. Look for USB/MIDI ports for digital connections. Traditional MIDI in/out ports allow for communication with older gear.

  • USB to host: Connects directly to computers and smart devices
  • MIDI I/O: Links with MIDI hardware
  • Audio Outputs: For amplifiers and PA systems
  • Pedal Inputs: For sustain and other effects

Many keyboards now offer Bluetooth functionality for wireless connection.


Budget-friendly Options

Many believe a tight budget means compromising on quality in music production. Not true! Affordable keyboards can unleash creativity without breaking the bank. Let’s explore valuable options that promise to deliver both performance and affordability.

Top Picks For Aspiring Producers

Great news for up-and-coming beat makers! Quality and affordability can go hand in hand. The market offers impressive keyboards tailored for tight budgets.

  • Casio CTK-2550: A versatile starter keyboard with a wealth of sounds.
  • Yamaha PSR-E263: Known for durability and rich features well-suited for learning.
  • Alesis Melody 61 MKII: Packed with built-in lessons, perfect for honing skills.

These picks strike a perfect balance between cost and function, ideal for those taking their first steps in music production.

Making The Most Of Limited Features

Don’t overlook keyboards with fewer features. Limitations can boost creativity and help you focus on core skills. Use the following approaches to maximize your keyboard’s potential:

  1. Explore every sound and rhythm pattern available. Mastering these can add depth to your music.
  2. Use layering techniques. Combining sounds can create rich textures even with a basic keyboard.
  3. Integrate with software. Digital Audio Workstations can expand your keyboard’s abilities exponentially.

Remember, limitations are often just steps towards innovation. Embrace them!

Best Music Keyboard for Music Production: Top Picks!

Credit: www.nytimes.com

Mid-range Keyboards

Are you seeking the perfect keyboard for making music? Mid-range keyboards offer a blend of quality and affordability. This sweet spot is where most musicians find their best gear. If you’re chasing professional sounds without breaking the bank, you’re in the right place. Let’s explore these options.

Balancing Cost And Quality

Mid-range keyboards strike a balance between cost and quality. They often sport features from high-end models, without the steep price tag. It’s where durability meets performance. You want a keyboard that feels right under your fingers and can withstand countless hours of use. We’ve picked out ones that hit that perfect balance, giving you a delightful experience every time you play.

Models With The Best Value

Finding the best value in mid-range keyboards means looking for the features that matter to you. Below are models that stand out for their performance and price:

  • Yamaha P-125: Offers great feel with its 88 fully weighted keys.
  • Novation Launchkey 61 MK3: Ideal for electronic music producers.
  • Arturia KeyLab Essential 61: Packs a suite of software for production.
  • Nektar Impact LX88+: A powerhouse with integration for DAW control.
  • Akai Professional MPK261: Known for its pads and extensive controls.

Each keyboard above brings something unique to your studio. They are reliable, packed with features, and won’t empty your wallet.

Model Key Features Why It’s a Great Value
Yamaha P-125 Fully weighted keys, classic sounds Bridges the gap between practice and performance
Novation Launchkey 61 MK3 Intuitive Ableton Live control, pads Best for electronic music production
Arturia KeyLab Essential 61 Includes Analog Lab software Ready-to-use sounds for music creation
Nektar Impact LX88+ 88 keys, deep DAW integration Full piano range with a home studio footprint
Akai Professional MPK261 16 RGB pads, assignable controllers For dynamic beat-making and live performance

High-end Keyboards For Professionals

Stepping into the world of professional music production means demanding only the best tools. High-End Keyboards for Professionals satisfy this need. A superior music keyboard can transform sounds into compelling music that captures the listener’s heart.

Premium Features And Build Quality

When quality is a must, high-end keyboards offer features that are a class apart:

  • Fully Weighted Keys that mimic an acoustic piano touch.
  • Aftertouch Sensitivity for expressive control.
  • High-end DAW Integration to streamline workflow.
  • Expandable Libraries with thousands of sounds.
  • Metal chassis and Long-lasting Materials.

Durable construction ensures they withstand the rigor of studio work and touring.

Industry-standard Keyboards For Top Producers

The top producers rely on industry-standard keyboards known for

reliability and versatility.
Model Key Count Integrations
Nord Stage 3 88 Multiple Synth Engines
Yamaha Montage 8 88 DAW Control
Korg Kronos 61/73/88 Karma Sequencing

These keyboards represent the pinnacle of performance and set the standard for professional music creators.

Best Music Keyboard for Music Production: Top Picks!

Credit: www.pinterest.com

Software Integration

Let’s dive deep into the heart of music production: software integration. A music keyboard that integrates smoothly with production software is a game-changer. It fuels creativity and boosts efficiency. Imagine hitting all the right notes without any technical hitches. That’s what we aim for with the perfect setup. Now, to make things rock, here are the keyboards that top the charts in software compatibility and workflow mastery.

Keyboards With The Best Daw Compatibility

When it comes to Digital Audio Workstations (DAW), some keyboards just sing in harmony. Choose a keyboard that plays nice with your favorite DAW. Look for one with pre-mapped controls and automatic detection. This will save time and keep the music flowing. Below, find keyboards that hit high notes with popular DAWs:

  • Novation Launchkey – Ideal for Ableton Live, tactile pads and knobs.
  • AKAI Professional MPK261 – Versatile with any DAW, packed with controls.
  • Native Instruments Komplete Kontrol – Seamless with Komplete and Maschine.
  • Arturia KeyLab – Known for its integration with Analog Lab.

Mapping Controls For Efficient Workflow

Time is music, and faster you work, more you create. Customizable control maps make your keyboard an extension of your creative mind. With the right setup, you cut the clutter and streamline your process. Here’s a simple breakdown of how mapped controls pave the way:

Function Benefit
Knobs Tweak sounds on the fly.
Faders Dynamic volume control.
Pads Beat creation made easy.
Keys Expressive playability.

Additional Gear And Accessories

Your music keyboard is the centerpiece of your music production setup. Yet, to truly maximize its potential, you need more than just the keyboard itself. Let’s explore the realm of additional gear and accessories that can elevate your music-making journey.

Essential Add-ons For Your Keyboard

Think of your keyboard as a computer. Without the right software and accessories, it’s just hardware. Here’s a list of must-have keyboard add-ons:

  • MIDI Controllers: For expansive sound manipulation.
  • USB Interface: Connect and communicate with other devices.
  • Audio Cables: Essential for clean, noise-free connections.

Don’t forget software, such as Digital Audio Workstations (DAWs) and plugins for an infinite sound palette.

Investing In Stands, Pedals, And Cases

Now, let’s gear up. Protect and enhance your keyboard with the following:

  1. Stands: They provide a stable and ergonomic platform for your instrument. Adjustable stands are the best.
  2. Pedals: Sustain, expression, or volume pedals add expressiveness to your performance.
  3. Cases: A good case ensures your instrument’s safety during storage or travel.

Invest in quality stands, pedals, and cases to safeguard your keyboard and ease your workflow.

Best Music Keyboard for Music Production: Top Picks!

Credit: www.gearank.com

User Reviews And Testimonials

When choosing the best music keyboard for production, hearing from fellow musicians matters. User reviews and testimonials shed light on real-world use. They highlight how a keyboard holds up in various music-making scenarios. Let’s dive into what users are saying.

What The Pros Are Saying

Industry professionals often share their experiences with music keyboards. Their insights can lead to informed decisions. Pro musicians value certain features that enhance their production workflow. Below, find a summary of their top-rated keyboards.

  • Yamaha Genos: Praised for its versatile sound library.
  • Roland Fantom: Acclaimed for its integration capabilities.
  • Korg Kronos: Celebrated for its real-time controls.

Community Favorites And Recommendations

The music production community is a treasure trove of insights. Community members often post about their preferred gear. We’ve compiled favorites based on recent forums and social media polls.

Keyboard Model Rating
Nord Stage 3 4.9/5
Akai Professional MPK249 4.7/5
Arturia KeyLab 88 4.6/5

Let’s not forget about forums where new and veteran producers interact. Here’s what keyboards they consistently recommend:

  1. M-Audio Keystation 88 for its simplicity and affordability.
  2. Native Instruments Komplete Kontrol for the deep software integration.
  3. Novation Launchkey for its intuitive Ableton Live controls.

Where To Buy

The journey to find the best music keyboard for music production might begin in your mind but it swiftly moves to the marketplace. Knowing where to purchase can be just as critical as the instrument itself. Let’s explore the best places to buy and the perks of each option.

Trusted Retailers And Online Stores

Trusted retailers offer a range of keyboards for beginners to pros. Explore shops like Guitar Center, Sam Ash, or local music stores. They provide warranties and return policies which are reassuring perks.

  • Returns and exchanges are easy
  • Staff can offer expert advice
  • Hands-on experience with keyboards before purchase

For convenience, online stores shine.

  1. Amazon: A vast selection with user reviews.
  2. Sweetwater: Offers detailed product information.
  3. Musician’s Friend: Features deals and discounts.

Both options have easy search functions, customer reviews, and often, free shipping.

Buying Second-hand Keyboards: Yay Or Nay?

Buying second-hand keyboards can be a great way to save money. Consider platforms like eBay, Craigslist, or Reverb. Test the instrument before purchase, if possible. Verify the condition and ensure the seller is reputable.

Pros Cons
More affordable Less warranty
Vintage finds May have wear and tear
Negotiable prices Higher risk
  • Always ask for clear pictures
  • Check for any signs of damage
  • Read the description carefully

Know the market value and don’t shy away from negotiation. A second-hand keyboard could be the start of an amazing music production journey.

Maintaining Your Music Keyboard

A quality music keyboard is an asset to any music producer. Proper maintenance ensures its longevity and optimal performance. Ignoring routine care might lead to costly repairs or replacements. Let’s dive into how to keep your keyboard in top shape.

Routine Cleaning And Care

Keep your music keyboard pristine and functional with regular cleaning. Dust and dirt can affect the keys’ action and electronics. Follow these simple steps:

  • Turn off and unplug the keyboard before cleaning.
  • Use a soft, dry cloth to wipe the surface gently.
  • Clean between the keys with a soft-bristled brush.
  • Avoid liquid cleaners; if needed, use a damp cloth and dry immediately.
  • Keep liquids away to prevent spills and potential damage.
  • Protect your keyboard with a cover when not in use.

When To Upgrade Your Equipment

Your keyboard is crucial for producing great music. It’s time for an upgrade if:

You Notice Action to Take
Outdated technology Explore new keyboards with current features.
Persistent malfunctions Consider repair or replacement options.
Limited functionality Look for a keyboard that matches your growing needs.
Desire for better quality Research and invest in a higher-end model.

An upgrade can bring fresh inspiration and improve the quality of your music. Balance the cost with the benefits to make a sound decision. Keep creating and let your music flourish with a well-kept, up-to-date keyboard!

Frequently Asked Questions For Best Music Keyboard For Music Production

What Features Define The Best Music Keyboards?

The best music keyboards typically offer velocity-sensitive keys, a range of octaves, built-in audio interfaces, and quality sampling or synthesizing capabilities. They also include a variety of ports for connectivity and integration with other production gear.

How To Choose A Music Keyboard For Production?

Select a music keyboard based on key count for your space, weighted action for your playing style, MIDI compatibility, and included software bundles. Consider the type of music production you are involved with and your skill level as key deciding factors.

Are Expensive Keyboards Better For Music Production?

Not necessarily. While high-priced keyboards may offer advanced features and build quality, mid-range models can provide excellent value and performance. Your budget, expertise, and the specific functionalities you need should drive your decision.

What’s The Best Size Keyboard For A Home Studio?

The best size for a home studio often ranges from 49 to 61 keys. This size provides a good balance between functionality and space-saving. However, compact 25-key models could be ideal for very small spaces or for those who primarily compose digitally.

Conclusion

Selecting the perfect music keyboard truly elevates your production journey. It’s about matching features with your creative vision. With top picks discussed, your next masterpiece awaits. Let your talent shine through every keypress, blending skill with the best tools in the industry.

Start composing, and let the music speak for itself.

Categories
Archive

How to Get Started Mixing Music: Essential Tips for Beginners

To begin mixing music, start by acquiring basic equipment and selecting your digital audio workstation (DAW). Learn the fundamental techniques of equalization, compression, and gain staging to lay a foundation.


Also, delving into the realm of music mixing can be both exhilarating and daunting for aspiring audio enthusiasts. Also, with the vast array of software and hardware options available, it’s essential to focus on the core essentials early on. You’ll need a reliable computer, a set of good-quality headphones or speakers, and a DAW—such as Ableton Live, FL Studio, or Pro Tools—that suits your workflow and budget.

Related reading: Mixing: The Complete Guide Hub and Mixing Piano. For background, see the Wikipedia article on Audio mixing.


Moreover, grasping the basics will help you to manipulate tracks creatively and achieve a polished sound. In addition, embarking on this journey requires patience, practice, and a willingness to learn as you explore the art and science of blending individual music tracks into a harmonious final product. Remember, every expert mixer started as a beginner, so stay focused on your goals and enjoy the process.


Introduction To Mixing Music

In addition, welcome to the exciting world of music mixing, where creativity meets technical skill. For example, Music mixing is an essential step in bringing a song to life. It transforms raw recordings into polished tracks. Let’s explore the art and importance of this process.

The Art Of Blending Sounds

Imagine painting with sound. As a result, that’s what mixing music is like. Each instrument is a color. Furthermore, Mixing is the art of combining them on an audio canvas. This balance creates a harmonious piece that captures the listener. Here’s a snapshot:

  • Additionally, volume levels control the loudness of each instrument.
  • Also, panning places sounds from left to right.
  • Moreover, equalization (EQ) adjusts frequencies to avoid clashes.
  • In addition, Effects like reverb add space and depth.
  • Compression evens out dynamic ranges.

Importance Of Mixing In Music Production

Mixing shapes the listener’s experience. However, it’s not just about making all parts heard. It’s about creating a feeling. Furthermore, a well-mixed track can make a song shine. It can also bring out the emotion the artist wants to convey.

Aspect of Mixing Why It’s Important
Balance Keeps any sound from overpowering the mix.
Space Gives each sound a clear position.
Dynamics Controls the energy and flow of the music.
Cohesion Makes all elements work together as one.

Setting Up Your Mixing Environment

Additionally, welcome to the journey of mixing music! Then, setting up the right environment is a key first step. This makes mixing not just easier, but more effective. Let’s dive into how to choose the perfect space and treat it for acoustics.

Choosing The Right Space for Mixing Music

Also, room selection greatly influences your mixing results. In short, opt for a quiet area where external noise is minimal. A medium-sized room works best; too small can cause sound to feel trapped, too large can weaken sound energy. Look for a space with regular dimensions, avoiding square rooms as they can muddle the sound.

Moreover, your mixing area should inspire creativity. Similarly, ensure the space is comfortable and well-lit . This can help you focus for long mixing sessions. Finally, the room layout matters. Position your desk and speakers so they form an equilateral triangle with your listening position. This helps with accurate sound representation.

Acoustic Treatment Basics

In addition, acoustic treatment transforms an ordinary room into a proper mixing environment. Also, it manages reflections and absorbs excessive sound for clarity. Start with bass traps in the corners, where low frequencies tend to build up. Next, add acoustic panels on the walls. This controls mid to high-frequency reflections.

Diffusers are also essential as they scatter sound throughout the room, preventing echo. In addition, focus on the wall directly behind the speakers and the one behind the listening position. Furthermore, a simple carpet can reduce floor reflections . For the ceiling, acoustic tiles help reduce sound bouncing above you.

Here’s a basic checklist of acoustic treatment materials:

  • Bass traps
  • Acoustic panels
  • Diffusers
  • Acoustic tiles
  • Rugs or carpets

Also, remember, your goal with a mixing environment is to hear the music, not the room. For example, an effective space helps you make precise adjustments and produce professional-sounding tracks. Follow these steps, and you’re on your way to creating a harmonious mixing space!


Essential Tools For A Beginner’s Mix

Moreover, embarking on your music mixing journey calls for the right tools. As a result, to craft your sound, you need various instruments like a good chef needs their knives. Gearing up with the basics paves the way to creating professional-level tracks. Start with these essentials and mix with confidence, even as a beginner.

Digital Audio Workstation Essentials

In addition, think of your Digital Audio Workstation (DAW) as mission control for music production. However, this software helps you record, edit, and mix music. Start with user-friendly options, as they offer plenty of features and a gentle learning curve.

DAW Option Feature
Audacity Free and open-source; great for beginners
FL Studio Popular among electronic music producers
Pro Tools Industry standard with advanced capabilities

Fundamental Mixing Plugins

Furthermore, a set of basic plugins is essential for your mixing toolbox. Then, look for bundles that offer a range of effects. These core plugins shape your sound and bring life to your mix.

  • Additionally, equalizers: Balance frequencies to make tracks blend well.
  • Also, compressors: Control the dynamic range of your audio.
  • Moreover, reverbs and Delays: Add space and depth to sounds.

Monitoring: Headphones vs. Speakers

Monitoring: Headphones Vs. Speakers

In addition, accurate monitoring is key to a good mix. In short, it gives you the truest sense of how your music sounds. Headphones provide a personal sound environment, while speakers give a room’s perspective.

Monitoring Tool Usage
Headphones Ideal for detailed listening and late-night sessions
Speakers Best for understanding how your mix fills a space
How to Get Started Mixing Music: Essential Tips for Beginners


Credit: mixingmonster.com


Understanding Basic Mixing Concepts

Understanding Basic Mixing Concepts can feel like entering a labyrinth of dials and waveforms. But fear not! Similarly, grasping a few key ideas sets a solid base for your mixing journey. Let’s decode the essentials and turn complexity into clarity.

Volume And Gain Staging

Additionally, volume and Gain Staging are your mix’s backbone. Also, a balanced mix starts with setting the right levels. Gain staging is like setting the volumes on different tracks to talk, not shout or whisper, each clear and confident. When every sound sits right, your mix breathes and each detail sparkles.

  • Also, set your track levels to avoid peaking.
  • Moreover, keep the main volume under 0dB to prevent distortion.
  • In addition, adjust to taste and create a balanced starting point.

Equalization And Frequency Balancing

Furthermore, equalization , or EQ, shapes your sound by cutting or boosting frequencies. In addition, think of it as a sculptor’s tool, carving space for each instrument in a mix. Frequency balancing lets each instrument breathe, eliminating muddy sounds and highlighting the best features.

Key tips for EQ:

  1. Identify and remove clashing frequencies.
  2. Use high-pass filters to clean up low-end rumble.
  3. Seek clarity by subtle adjustments rather than drastic changes.

Panning For A Wide Soundstage for Mixing Music

Panning arranges sounds in a stereo field, from left to right. For example, imagine placing instruments on a stage. Wide Soundstage creates a 3D listening experience, offering an immersive feel. It lets you pinpoint sounds in the space around you, making your track come alive.

Element Left (%) Center (%) Right (%)
Lead Vocals 0 100 0
Snare Drum 0 100 0
Rhythm Guitar 50 0 50

Use panning to separate instruments, avoid clutter and allow each sound to shine through. Experiment with different placements until you find the perfect balance for your ears and for the track.

Applying Effects And Dynamics Processing for Mixing Music

Mixing music is an art and a science. As a result, entering the process, one critical stage stands out: Applying Effects and Dynamics Processing . It’s where character and polish come to the forefront, granting your tracks that professional sound.

Compression For Consistency

Picture your music like a wild stallion, raw and full of vigor. However, compression is the lasso that helps rein it in. Applying compression ensures that your tracks have a consistent volume level, avoiding peaks that can jar the listener out of the experience.

  • Set the threshold based on where loud parts start.
  • Adjust attack and release to control how quickly compression acts.
  • Use makeup gain to bring back the overall level after compression.

Add Reverb And Delay For Depth for Mixing Music

Adding reverb and delay breathes life into a mix. Then, these effects mimic the way sound behaves in physical spaces, offering a sense of depth and dimension .

Effect Purpose
Reverb Creates a sense of space and resonance.
Delay Adds echoes for texture and rhythmic interest.

Creative Use Of Modulation Effects

Modulation effects like chorus, flanger, and phaser add rich textures. In short, they can make your mix more interesting and lively.

  1. Chorus doubles and detunes your signal for thickness.
  2. Flanger creates a swooshing effect for dynamic movement.
  3. Phaser filters the signal to create a swirling effect.

Improving Your Mix With Automation for Mixing Music

Improving your mix with automation is a powerful technique in the music production process. Automation allows for precise control over your music elements, changing them over time to enhance the overall sound. Similarly, from adjusting volume to modulating effects, automation can transform a flat mix into a dynamic masterpiece.

When And How To Automate Parameters

Understanding when and how to automate can make a significant difference:

  • Volume: Automate to keep levels consistent.
  • Panning: Move sounds left or right for interest.
  • Effects: Adjust reverb or delay over time.
  • EQ: Change frequencies to avoid clashes.

Use automation in your digital audio workstation (DAW) by creating automation lanes and drawing in the needed adjustment. Also, start with areas where the mix feels static or elements get lost.

Using Automation For Dynamic Interest for Mixing Music

Automation adds dynamic interest to your tracks. In addition, it breathes life into song sections and builds emotional impact:

  1. Introduce Variations: Make choruses shine with subtle boosts.
  2. Build Tension: Ramp up filters for climactic moments.
  3. Add Depth: Automate reverb sends on vocals for space.
  4. Emphasize Rhythms: Use LFOs on synths for groove.

Create specific points for automation to start and end. For example, this captivates listeners, giving them a sonic journey through the waves of your mix.

Mixing Vocals To Stand Out

Great music always features standout vocals. Achieving this can be tricky, but the right mix makes all the difference. As a result, it elevates your music to a professional level. Let’s dive into some essential techniques to get your vocals shining in the mix.

Basic Techniques For Vocal Clarity

Clear vocals ensure your listeners catch every word. Start with these steps:

  • EQ: Cut low frequencies to remove rumble.
  • High-Pass Filter: Apply it lightly to clean up the sound.
  • De-Essing: Tame harsh ‘s’ sounds for smoothness.
  • Compression: Use it for consistent volume levels.

Sculpt your vocals to fit the mix without clashing with other elements. Remember, boosting the highs can add presence, but too much can cause harshness.

Layering And Processing Background Vocals for Mixing Music

Background vocals add depth. However, here’s how to layer them effectively:

  1. Pan: Spread layers across the stereo field for width.
  2. Volume: Keep them lower than the lead vocal.
  3. Reverb: Add space but don’t drown the clarity.
  4. Equalization: Cut frequencies to reduce competition with the lead.

Processed correctly, background vocals support the lead without stealing the spotlight.


Finalizing And Testing Your Mix for Mixing Music

Embarking on the journey of finalizing and testing your mix is exciting. Then, this critical stage polishes your music to perfection. Master the art of listening, refine your mix, and test it across different sound systems. Ensure your creation sounds amazing everywhere.

The Art Of Listening And Refining

Truly hearing the nuances in your mix is an art. Take a break, then return with fresh ears. In short, listen carefully for balance, clarity, and depth. As you listen:

  • Note each instrument’s level and adjust for a harmonious blend.
  • Check the panning to create a wide, engaging stereo image.
  • Isolate problem frequencies and apply EQ fixes gently.
  • Add compression wisely to enhance dynamics without squashing them.
  • Use effects to add color but avoid over-processing.

Revise your mix with these points in mind. Similarly, your goal is to achieve a balanced, clear sound.

Testing On Different Sound Systems for Mixing Music

Testing your mix on various sound systems exposes flaws and strengths. Always:

  1. Play your mix on studio monitors, headphones, and consumer speakers.
  2. Listen in different environments, such as a car or a living room.
  3. Take notes on how the mix translates across devices and spaces.

Make adjustments based on this testing. Also, aim for your mix to sound great on all systems.

Remember, patience and attention to detail will elevate your mix to professional standards. In addition, embrace these final steps, and your music will shine in any listener’s ears!

Continual Learning And Advancement

Welcome to the journey in music mixing, a forever-evolving craft that demands dedication. ‘Continual Learning and Advancement’ takes you beyond the basics of mixing tracks.

Learning Through Practice for Mixing Music

Talent grows with hands-on experience. Start mixing music today. For example, utilize your software daily to discover its features. Progressive practice leads to perfection. A consistent routine can develop expertise quickly. Here are strategies to practice effectively:

  • Set up daily goals for mixing activities.
  • Tackle one tool at a time to avoid overwhelm.
  • Engage in replicating mixes from professionals to learn.

Seeking Feedback And Critique for Mixing Music

No one becomes a pro alone. As a result, honest reviews enhance skills sharply. Try sharing your mixes with peers.

  1. Join online forums or local music groups.
  2. Seek constructive criticism, not just praise.
  3. Implement the feedback to refine your mix.

Resources For Further Education

Continuous learning fuels your passion for mixing. However, here’s a list of resources:

Resource Type Description Example
Books Essential theories and techniques in print. ‘Mixing Secrets’ by Mike Senior
Online Courses Interactive lessons with expert producers. Coursera, Udemy
Videos Step-by-step tutorials on specific skills. YouTube channels like Produce Like A Pro

Embrace these continual learning habits. Then, witness your mixing music techniques soar!

How to Get Started Mixing Music: Essential Tips for Beginners


Credit: samplified.us


Frequently Asked Questions On How To Get Started Mixing Music


What Equipment Do I Need To Mix Music?


To start mixing music, you’ll need a computer, Digital Audio Workstation (DAW) software, an audio interface, studio monitors, and headphones. Optional but beneficial are MIDI controllers or mixing consoles for tactile control over your mix.


How Can Beginners Learn Music Mixing?


Beginners can learn music mixing by starting with basic DAW tutorials, practicing with included virtual instruments and plugins, and analyzing professional mixes. In short, engage in online courses, watch video tutorials, and practice consistently to improve your skills.


What Are The Basic Steps In Mixing?


Basic steps in mixing include organizing tracks, setting levels, EQing frequencies for clarity, applying compression for consistency, adding effects like reverb and delay, and adjusting panning for stereo width. Similarly, always conclude with a critical listening session to refine the mix.


How Long Does It Take To Mix A Song?


The time to mix a song varies, depending on track complexity and skill level. For a beginner, a basic mix might take several hours, while experienced engineers could complete a mix in 1-2 hours. Also, practice and familiarity with the tools enhance speed and efficiency.


Conclusion


Embarking on your mixing journey has never been simpler. In addition, start with the basics, practice consistently, and embrace the learning curve. Remember, your unique sound is waiting to be discovered. So grab those tunes, mix them up, and let the world hear your creativity.


Your music mixing adventure begins now!

Categories
Archive

5 Music Copyright Mistakes Every Musician Should Avoid

Music copyright mistakes can lead to legal issues and financial losses for artists. Understanding proper licensing is crucial.


When creators fail to obtain permission for using copyrighted music, they risk facing lawsuits. By educating oneself on music copyright laws, artists can protect their work and avoid costly mistakes. It is essential to always seek permission or use royalty-free music to avoid copyright infringement.


Be proactive in understanding and adhering to music copyright regulations to safeguard your artistic endeavors.


Mistake #1: Using Copyrighted Samples Without Permission

Not Understanding The Legal Implications

Using copyrighted samples without permission violates legal rights, leading to potential consequences.

Risks Involved In Using Unauthorized Samples

  • Copyright infringement repercussions
  • Lawsuits and legal action
  • Financial penalties and fines
  • Potential damage to reputation

Mistake #2: Failing To Properly License Cover Songs

Covering a song can be a great way to showcase your talent. However, failing to obtain the necessary licenses can lead to serious consequences.

Legal Requirements For Covering A Song

To legally cover a song, you need to secure the appropriate licenses from the copyright holders. This includes obtaining a mechanical license to reproduce the song and a synchronization license if you plan to use it in videos or other visual mediums.

Consequences Of Not Obtaining The Necessary Licenses

  • Legal action: Copyright holders can take legal action against you for copyright infringement.
  • Financial penalties: You may have to pay hefty fines or damages for using a cover song without proper licenses.
  • Restrictions: Unauthorized cover songs can be taken down from online platforms, limiting your reach.

Mistake #3: Neglecting To Register Original Works

One common music copyright mistake is neglecting to register original works. Many musicians underestimate the importance of copyright registration, which can result in various legal and financial complications. It is crucial for artists to recognize the significance of this step in protecting their creative endeavors. Neglecting to register original works can leave music vulnerable to unauthorized use and exploitation.

Importance Of Copyright Registration

Copyright registration provides artists with legal evidence of their ownership and protects their music from potential infringement. Registering originals works is a proactive measure to establish legal rights and ensure that artists have a strong foundation for claiming ownership in the event of any disputes or unauthorized use of their music.

Benefits Of Registering Original Music

  • Legal Protection: Registration strengthens the legal standing of the artist, providing a basis for taking legal action against infringement.
  • Potential Damages: When a work is registered, the copyright owner may be entitled to statutory damages and attorney’s fees in successful infringement lawsuits.
  • Licensing Opportunities: Registered works are more attractive to potential licensees and can lead to additional revenue through licensing agreements.
  • Global Recognition: Copyright registration facilitates international protection and recognition of the artist’s music, enhancing its marketability worldwide.


Mistake #4: Overlooking Split Sheets And Agreements

One common mistake in music copyright is overlooking split sheets and agreements. Failure to establish clear ownership of a song can lead to legal disputes and loss of royalties. It is crucial for artists and collaborators to negotiate and document their rights to avoid potential conflicts in the future.

In the world of music, collaboration is key. But when it comes to protecting your intellectual property and ensuring fair rights and royalties, it’s crucial to have a clear understanding of the role of split sheets and agreements. Mistakenly overlooking these important documents can lead to disputes, misunderstandings, and potentially even legal battles. In this section, we’ll delve into the significance of split sheets and the importance of clear agreements among collaborators.

Understanding The Role Of Split Sheets

Split sheets are not just another piece of paperwork in the music industry; they are a vital tool for properly dividing ownership and ensuring accurate distribution of royalties. A split sheet is essentially a written agreement that outlines the percentage of ownership each contributor holds in a song.

Let’s say you collaborated with another artist on a song, and you both contributed lyrics, melody, and production. Without a split sheet, it can be challenging to determine how the royalties should be divided between the two of you. By having a split sheet, you can clearly document each person’s level of contribution, ensuring transparency and fairness in the distribution of royalties.

To further understand the significance of split sheets, let’s take a look at an example:

Contributor Contribution Percentage of Ownership
Artist A Lyrics, melody 50%
Artist B Production 50%

In this example, both Artist A and Artist B have equal ownership rights as they contributed equally to the song. This split sheet not only helps avoid any potential conflicts but also serves as proof in case of disputes or legal issues.

Importance Of Clear Agreements Among Collaborators

Collaboration in the music industry often involves multiple people contributing their skills, creativity, and resources. To avoid misunderstandings and protect everyone’s interests, it is crucial to have clear agreements in place.

When collaborating on a song, it’s essential to clearly define the roles and responsibilities of each participant, the terms of ownership, and the distribution of royalties. This can be achieved through a formal agreement or contract, which may include terms such as:

  1. The ownership percentage for each contributor.
  2. The division of mechanical royalties, performance royalties, and synchronization royalties.
  3. The role of each participant in the promotion and exploitation of the song.
  4. The rights and limitations on the use of the song by each collaborator.

By having these agreements in place, you can ensure that everyone involved in the creation of the song is on the same page, reducing the risk of disputes and providing a solid foundation for future endeavors.

To summarize, overlooking split sheets and agreements in the music industry can have severe consequences. Understanding the role of split sheets helps to accurately divide ownership and royalties, while clear agreements among collaborators establish expectations and protect everyone’s interests. Don’t make the mistake of neglecting these essential documents – they are the backbone of a successful and harmonious collaboration.

Mistake #5: Ignoring Digital Distribution Rights

Ignoring digital distribution rights is a common music copyright mistake. Artists must understand and protect their rights to control how their music is distributed online. Failure to do so can result in lost revenue and legal issues.

In today’s digital age, music distribution has evolved significantly. With the rise of platforms like Spotify, Apple Music, and YouTube, artists now have access to worldwide audience like never before. However, amidst the convenience and opportunities that digital distribution brings, there’s one crucial aspect that often gets overlooked – digital distribution rights.

Understanding Digital Distribution Rights

Digital distribution rights refer to the legal permissions required to distribute music in digital formats. When artists sign with record labels or music distributors, they often grant them the rights to distribute their music through various digital channels. These agreements outline the terms and conditions under which the music can be distributed, including platforms, territories, and revenue sharing arrangements.

Consequences Of Unauthorized Digital Distribution

Ignorance or disregard of digital distribution rights can result in severe consequences for artists. Here are some potential repercussions:

  • Loss of revenue: Unauthorized distribution of music can lead to unpaid royalties and lost revenues. When music is distributed without proper authorization, artists may not receive the compensation they are entitled to.
  • Legal implications: Distributing music without the necessary rights can infringe copyright laws, exposing artists and distributors to legal action. This can result in hefty fines, damage to reputation, and even the removal of the infringing content from digital platforms.
  • Missed opportunities: By ignoring digital distribution rights, artists may miss out on valuable opportunities for exposure and growth. Properly utilizing authorized digital distribution channels can help artists increase their fan base, gain new listeners, and build a successful music career.

Ensuring Compliance With Digital Distribution Rights

To avoid these pitfalls, artists must ensure they have a clear understanding of their digital distribution rights. This involves:

  1. Reading and understanding distribution agreements: Artists should carefully review the terms and conditions of any agreements they enter into with record labels or music distributors. They should pay close attention to the digital distribution rights outlined in these contracts.
  2. Choosing reputable distribution partners: Working with trustworthy and reputable music distribution services can help ensure that artists’ music is distributed legally and in compliance with digital distribution rights. Researching the reputation and track record of potential partners is critical.
  3. Regularly monitoring and auditing distribution channels: Artists should actively monitor the distribution of their music and regularly audit the platforms and services used to ensure their rights are respected. This includes keeping track of revenues and royalties generated through digital distribution.

By taking these steps to prioritize and protect their digital distribution rights, artists can safeguard their music, income, and reputation in the digital landscape. So, be proactive, educate yourself about your rights, and make informed decisions when it comes to digital music distribution.

5 Music Copyright Mistakes Every Musician Should Avoid


Credit: www.bmi.com

Frequently Asked Questions Of Music Copyright Mistakes

What Are The Key Issues In Music Copyright?

Key issues in music copyright include protecting original works, licensing for use, enforcing rights, and addressing infringement.

What Are 3 Examples Of Violating Copyright Laws?

Three examples of violating copyright laws include using copyrighted images without permission, pirating movies or music, and plagiarizing someone else’s written work.

How Much Of A Song Can Be Used Without Violating Copyright?

You can only use a small portion of a song without violating copyright. The amount depends on factors like the purpose, nature, and effect of the use. It’s best to obtain permission or use royalty-free music to avoid copyright infringement.

What Are The 3 Problems Of Copyright?

The three problems of copyright include infringement, piracy, and fair use challenges. Infringement refers to the unauthorized use of copyrighted material. Piracy involves the illegal reproduction and distribution of copyrighted content. Fair use challenges arise when determining the boundaries of permissible use of copyrighted material.

Conclusion

Understanding music copyright is essential for avoiding legal issues. By acknowledging the common mistakes, such as assuming fair use or disregarding permission, musicians and content creators can protect their work. Consulting with legal professionals can provide valuable guidance and support, ultimately safeguarding the creative rights of all involved parties.

Categories
Archive

How to Make Piano Music on Computer: Easy Melodic Guide

To make piano music on a computer, use digital audio workstations (DAWs) with MIDI keyboards. Choose software like FL Studio, Ableton Live, or GarageBand for composition.


Creating piano music on your computer has become incredibly accessible with a range of user-friendly programs. Gone are the days when composing music required bulky instruments and recording equipment. Today, budding musicians and seasoned composers alike turn to the digital space for their musical creations.


Engaging in the virtual piano world starts by selecting a suitable Digital Audio Workstation (DAW) that complements your skill level and creativity. Armed with a MIDI keyboard and your DAW of choice, you’re set to translate your musical ideas into polished piano compositions. Whether you’re crafting a classical sonata or a trendy pop melody, the integration of technology with traditional piano sounds is seamless, thus giving you the freedom to produce and share your artistry with the world.


Introduction To Digital Piano Composition

Welcome to the enchanting world of digital piano composition! If you love the sound of piano music and want to create your own masterpieces, modern technology offers an array of fantastic tools to turn your dreams into reality. Whether you’re a beginner or an experienced musician, composing piano music on a computer is accessible, versatile, and immensely rewarding.

The Rise Of Virtual Instruments

Virtual piano software has transformed music production. These powerful programs simulate a vast range of piano sounds—from classic grand pianos to electric keyboards, enabling you to compose with sounds that once required a room full of instruments. Artists globally embrace these innovative tools to craft stunning piano pieces without needing a physical piano.

Advantages Of Using Computers For Music Creation

  • Unlimited Editing: Compose and tweak notes to perfection.
  • Versatility: Access various instrument sounds with a click.
  • Portability: Take your studio with you anywhere you go.
  • Cost-Effective: Save on instrument and recording space costs.
  • Collaboration: Share and work on projects with musicians worldwide.
How to Make Piano Music on Computer: Easy Melodic Guide


Credit: medium.com


Essential Equipment And Software

Embarking on the journey of making piano music on a computer requires the right toolkit. From a powerful Digital Audio Workstation (DAW) to expressive Virtual Studio Technology (VST) instruments, each component plays a pivotal role. Let’s dive into the essential gear and software you need to create beautiful piano melodies from the comfort of your screen.

Choosing the Right DAW

Choosing The Right Daw

The Digital Audio Workstation (DAW) is the backbone of your music production setup. It allows you to record, edit, and mix music seamlessly. Here are our top picks for beginners and pros:

  • Ableton Live: Ideal for live performances and electronic music.
  • GarageBand: Great for Mac users just starting out.
  • FL Studio: Popular among hip-hop and EDM producers.
  • Logic Pro: Advanced features for professional production.

MIDI Keyboards and Controllers

Midi Keyboards And Controllers

To capture the essence of piano playing, a MIDI keyboard is indispensable. It translates your performance into digital data that DAWs can understand. Consider these factors:

Feature What to Look For
Size 25, 49, 61, or 88 keys based on space and playability.
Action Weighted keys for a real-piano feel.
Controls Faders, knobs, and pads for added versatility.

VST Instruments and Piano Libraries

Vst Instruments And Piano Libraries

VST instruments replicate the sound of real pianos. High-quality piano libraries can make a massive difference in your music. Look out for:

  1. Sound Quality: Crisp and authentic piano sounds.
  2. Diversity: A wide range of piano types.
  3. Dynamic Range: Soft whispers to powerful crescendos.
  4. Customizability: Tweak to match your musical style.

Setting Up Your Workspace

Creating piano music on a computer starts with a well-organized workspace. This space will be your cockpit for musical creativity, where every tool is within easy reach, and your computer is ready to capture every keystroke with clarity and precision. Here’s how to set it up properly.

Optimizing Your Computer For Music Production

Your computer is the heart of your music production setup. Get it running at its best with these steps:

  • Update your software: Ensure your operating system and music software are up to date.
  • Maximize RAM: More RAM means more space for your software to run smoothly.
  • Optimize storage: Use an SSD for faster access to your samples and files.
  • Manage startup programs: Disable unnecessary programs at startup to free up resources.
  • Check for updates: Keep your audio drivers up-to-date for the best sound quality.

Creating The Ideal Environment For Creativity

The right environment can inspire your best work. Follow these tips to create that space:

  • Natural light: Helps keep you focused and energized.
  • Comfortable seating: Invest in a comfortable chair to support long sessions.
  • Organized desk: Keep your workspace clutter-free.
  • Inspiring decor: Add items that motivate you, like art or instruments.
  • Good acoustics: Soft materials can reduce unwanted echoes.

Basic Music Theory For Piano

The journey of creating piano music on your computer starts with understanding basic music theory. Grasping these concepts will guide your compositions and help bring your melodies to life. Whether you aim to compose a classical piece or modern beats, these music theory fundamentals are your building blocks.

Scales And Chords

Two critical elements in piano music are scales and chords.

  • Scales are sequences of notes in a specific order.
  • Chords are groups of notes played together harmoniously.

Mastering these can lead to effective composition and improvisation. Start with the C Major scale since it uses white keys only.

Common Chord Progressions

Memorable music often features catchy chord progressions. Chord sequences can evoke different emotions.

Progression Type Example Feel
Simple C-G-Am-F Happy/Pop
Blues C7-F7-G7 Soulful

The 4-chord song structure is a popular framework to start with.

Melody And Harmony Fundamentals

Melody and harmony are the essence of music. Melodies are the main themes, while harmonies support them.

To create a melody, focus on:

  1. Choosing a scale.
  2. Creating a tune within that scale.
  3. Using rhythm to add character.

Harmony comes from chords and chord progressions. These support your melody and add depth.

Tip: Try playing the melody with the right hand and chords with the left.

Crafting Your First Melody

Embarking on the journey of creating piano music on a computer is exciting. Crafting your first melody may seem daunting, but with the right tools and a splash of creativity, a tuneful composition is within reach. Let’s dive into the melody-making process.

Finding Inspiration

Begin by seeking out inspiration. Listen to favorite songs, soundtracks, or classical pieces. Identify what captivates you in those melodies.

  • Pay attention to emotions and stories in the music.
  • Try imitating patterns or moods to kickstart ideas.
  • Explore the vast library of online music for diverse influences.

Experimenting With Rhythms And Patterns

With inspiration as your guide, start experimenting. Your computer’s music software offers numerous tools for pattern creation.

  1. Use the piano roll editor to draw notes and form rhythms.
  2. Adjust tempo and try different beats to see what fits.
  3. Mix high and low tones for variety in your melody.

Layering Simple Melodies

With a basic melody, you can build complexity through layering. Simple melodies combined create rich, textured music.

Step Action
1 Start with a simple, catchy tune.
2 Add a bass line underneath.
3 Include a counter melody for depth.

Experiment with harmony and texture. Remember that sometimes, less is more. A few well-chosen notes can make your melody shine without overwhelming the listener.

Arranging And Structuring Your Piece

Arranging and structuring your piece is like building a house. You need a strong foundation, walls in the right places, and a roof to tie it all together. In music, these elements are your intro, verse, chorus, bridge, transitions, dynamics, and variations. They help your composition flow and keep listeners engaged. This section will show you how to craft each part for a masterpiece on your computer.

The Role Of Intro, Verse, Chorus, And Bridge

A well-composed piece of piano music entices listeners from the start and takes them on a journey. Every section has its role.

  • Intro: This is your first impression. Make it inviting.
  • Verse: Tell your story. Verses lay down the theme.
  • Chorus: It’s the catchy part that sticks. Make it memorable.
  • Bridge: It brings a twist. Use it to add surprise.

Transitions And Dynamics

Dynamics and transitions are the spice of your music. They make your piece alive. Keep listeners guessing what comes next.

  1. Build Tension: Use volume and pace changes.
  2. Create Flow: Smooth transitions connect ideas seamlessly.
  3. Contrast Sections: Loud and soft parts create drama.

Using Variations To Maintain Interest

Repetition is good but too much can be boring. Variations keep ears perked.

  1. Melody Tweaks: Change it up slightly for freshness.
  2. Rhythm Mix-ups: Alter the beat for excitement.
  3. Harmonic Colors: Add different chords for richness.


Editing And Refining Your Music

Once your piano masterpiece is laid out on the computer, the journey isn’t over. Now, it’s time to edit and refine. Creating great music involves fine-tuning each segment until it resonates with perfection. This stage turns a good track into a great one. Here’s how to meticulously polish your composition.

The Editing Process

Edit your music carefully. Start by listening to the entire piece. Identify sections that need improvement. Are there wrong notes or off-beat rhythms? Fix these first. Use your software’s editing tools to cut, copy, paste, or delete notes. Correct mistakes and experiment with different arrangements to enhance the flow of your music. Make sure each change keeps the integrity of your original composition.

Quantization And Timing Adjustments

Even pros don’t always hit the right timing. That’s where quantization helps. It aligns notes to the nearest beat or subdivision, ensuring a tighter performance. But don’t over-quantize; music needs a human feel. Adjust timing manually if needed to avoid a robotic sound. Use your digital audio workstation’s (DAW) quantization feature sensibly to make your piece rhythmically coherent.

Adding Articulations And Expressiveness

Music speaks through its articulations and expressiveness. Start with dynamics; alter volume levels for softness or power. Next, add articulations like staccato or legato to convey emotion. Use pitch bends, modulation, and expression tools available in your software to breathe life into the notes. These subtle touches make your digital piano music feel as emotive as a live performance.


Mixing And Mastering Basics

Once you have laid out your piano compositions, the vital steps of mixing and mastering come into play. These processes polish your music, providing the final shine before listeners hit play. Let’s delve into the basics to ensure your piano tracks sound professional and are ready for the world to hear.

Balancing Levels And Panning

A well-balanced track invites listeners into a full audio experience. Start by adjusting the volume levels of different elements. Your goal is to ensure no part overwhelms the rest. Think about how each note and chord deserves attention and clarity.

  • Panning helps by assigning a spatial location in the stereo field.
  • It creates a realistic sound, mimicking how we hear in a live setting.
  • Play with left and right channels to give your music dimension and breadth.

Eq And Effects For A Polished Sound

Equalization (EQ) is essential for molding the tone of your piano sounds. Use EQ to cut unnecessary frequencies and to ensure each note resonates.

  • Boost the high ends for clarity or the lows for warmth.
  • Apply effects like reverb and delay to add depth.
  • Remember, subtlety is key; overdoing effects can clutter your track.

Preparing Your Track For Distribution

Mastering gives your track the final touches before it goes live.

  1. Ensure consistency across all aspects of the track.
  2. Attain the right loudness levels for streaming platforms.
  3. Use a limiter to increase volume without distortion.

Metadata like the title, artist name, and other info must be correct. This data helps listeners find and identify your music. With these steps covered, you’re ready to share your piano masterpiece with confidence!

Sharing Your Music With The World

Once you’ve captured the essence of melody and harmony in your computer-generated piano music, it’s time to unveil your creations to listeners across the globe. The excitement begins when your music leaves the private realm of your studio and enters the public domain. Let’s explore how to effectively share your music with the world.

Publishing On Music Platforms

Your musical journey transcends creation. Reach listeners by publishing your tracks on renowned music platforms:

  • SoundCloud: Ideal for new artists, easy to use.
  • Spotify for Artists: Access listeners worldwide, detailed analytics.
  • Bandcamp: Sell music directly to fans, set your own prices.
  • Apple Music: Offer your melodies to a vast audience, seamless integration.

Explore each platform’s features, selecting the one that aligns with your goals. A distribution service can also help place your music across multiple outlets.

Creating An Online Presence

Your online identity is as important as your music. Highlight your unique style through:

  1. Personal Website: Share your story, updates, and sell music.
  2. Social Media: Engage fans, build community, regular updates.
  3. YouTube Channel: Visualize your music, grow a subscriber base.

Use visual elements to craft an engaging narrative around your music. Offer insight into your creative process through blogs or vlogs.

Joining Composer And Producer Communities

Relationships with fellow artists can propel your career. Connect, collaborate, and grow through:

  • Online Forums: Discuss techniques, seek feedback.
  • Music Production Groups: Find like-minded producers, broaden networks.
  • Social Media Groups: Engage in composer communities on platforms like Facebook and Reddit.

Attendance at virtual workshops and seminars can also enhance your skills and visibility.

How to Make Piano Music on Computer: Easy Melodic Guide


Credit: www.avid.com


Continuing Your Musical Journey

So you’ve started making piano music on your computer and you’ve got the basics down. What’s next? Continuing your musical journey involves more than just practicing. It’s about growing, connecting, and staying fired up about your craft. Let’s delve into ways to keep the music playing and the creativity flowing.

Expanding Your Skill Set

Learning never stops in the world of music. Enhancing your abilities on the digital keyboard involves:

  • Exploring new software that offers advanced features and tools.
  • Diving into music theory courses to deepen your understanding.
  • Practicing different genres and styles to widen your horizons.

These steps can radically change your music-making game.

Collaboration Opportunities

Working with others can spark fresh ideas and bring unique elements to your music. Consider these options:

  1. Join online music communities where collaborations are born.
  2. Connect with singers or songwriters who need your piano expertise.
  3. Use social media to share your music and find peers to work with.

Together, you will create sounds that are next-level awesome.

Staying Inspired And Motivated

Keeping the fire alive in your musical soul means:

Activity Benefit
Setting achievable, short-term goals Offers a clear path forward
Regularly updating your playlist Introduces new rhythms and melodies
Participating in challenges or contests Stimulates creativity and fun

Don’t let the melody in your heart fade. Feed your passion daily!

Frequently Asked Questions For How To Make Piano Music On Computer


What Software Is Needed For Piano Composition?


Most piano compositions can be created using DAW software, like FL Studio, GarageBand, or Logic Pro X. These programs offer piano roll features and virtual instruments to emulate piano sounds and compose music digitally.


Can You Simulate Piano Pedals In Software?


Yes, piano software often includes features to simulate sustain, soft, and sostenuto pedals. Look for MIDI control options or pedal effect settings within your chosen digital audio workstation (DAW) to accomplish this.


How To Connect A Midi Keyboard For Piano Music?


To connect a MIDI keyboard, use a USB cable to plug it into your computer. If required, install drivers and select it as a MIDI device in your DAW. You can then play and record piano music directly.


What Are The Best Virtual Piano Vst Plugins?


Popular virtual piano VST plugins include Spectrasonics Keyscape, Native Instruments The Giant, and Synthogy Ivory II. These plugins are renowned for their realistic piano sounds and detailed customization options.


Conclusion


Creating digital piano music is within your reach, regardless of your experience level. With the right software and a bit of practice, you can compose and share your creations with the world. Start exploring your musical potential now—your next masterpiece is just a few clicks away.


Make your computer your piano, and play on!

Categories
Archive

How Much Do Music Producers Charge Per Hour: Insider Rates!

Music producers typically charge between $20 to $500 per hour. Rates vary based on experience, reputation, and project complexity.


Also, navigating the costs of music production can be challenging for artists and record labels alike. Also, skilled music producers play a crucial role in the creation of a song, bringing technical expertise and creative flair to the recording process. From burgeoning talents to seasoned veterans, producers charge rates that reflect their skill level and the demand for their services.

Related reading: How Many Hours a Day Do Music Producers Work? Unveiling the Untold Secrets! and Unveiling the Ultimate Studio Desk Guide: Discover the Perfect Setup for Music Producers. For background, see the Wikipedia article on Record producer.


Those at the beginning of their careers might offer competitive pricing, while industry heavyweights with hit tracks command premium fees. In addition, understanding the pricing landscape is essential for anyone looking to craft a professional sound, as the right producer can transform a simple melody into a chart-topping hit. Moreover, establishing a budget and researching producers that align with both your financial constraints and artistic vision are vital first steps in the music production journey.


Setting The Stage: Music Production Costs

In addition, embarking on a musical venture requires understanding the financial investment behind it. For example, Music producers are pivotal in shaping the sound and quality of a project. Their rates can significantly impact the overall cost of production. Whether an urban beat-smith or a seasoned sound engineer, a producer’s fee is a key budgeting factor for artists and record labels alike.

The Value Of A Music Producer

Furthermore, a skilled music producer brings a wealth of experience to the studio. They do more than press record. As a result, Producers engineer hit tracks , offer creative direction , and ensure the artist’s vision translates to the final product. They are like movie directors for music. It’s not just about what they do; it’s about the value they add.

Cost Variables In Music Production

Additionally, diverse elements affect a music producer’s rates. Below are key factors:

  • Experience Level: Industry veterans command higher fees than newcomers.
  • Also, Project Complexity: More intricate work involves additional costs.
  • Moreover, location: Producers in music hubs like LA or Nashville may charge more.
  • In addition, reputation: Producers with notable credits often have premium rates.
  • Furthermore, Studio Usage: Renting a professional studio space can influence the hourly cost.

Additionally, let’s explore a typical rate range for various producer tiers:

Experience Level Average Hourly Rate
Beginner $20 – $50
Intermediate $50 – $150
Experienced $150 – $400+

Artists should consider these factors when budgeting for a producer. However, it’s a pivotal decision that can shape the musical outcome, and the cost is a testament to the producer’s impact on a project’s success.


Hourly Rates Explained

Also, diving into the music production scene can be exciting! Then, one big question is: What do music producers charge per hour? As we uncover this, it’s not just a simple figure. Many factors swing these rates up or down. Let’s break it down so you know what to expect.

Factors Influencing Rates for Music Producers Charge Per Hour

Moreover, several factors play a key role in shaping what a music producer might charge:

  • In addition, experience : Seasoned producers typically charge more.
  • Furthermore, Project Complexity : More tracks equal higher costs.
  • Additionally, reputation : Known producers have premium rates.
  • Also, location : Rates vary in different cities and countries.
  • Moreover, Equipment Used : Top gear sometimes means top dollar.
  • In addition, genre : Some music styles demand specialized skills.

Average Hourly Rates Across The Industry

The average hourly rate fluctuates. Newcomers often start lower, while veterans price higher. In short, we’ve assembled a table to outline these averages:

Experience Level Rate per Hour
Beginner $15 – $30
Intermediate $35 – $75
Expert $80 – $200+

Remember, these are ballpark figures. Similarly, an individual producer may set rates outside these ranges. Also, some producers opt for flat fees over hourly rates. Always discuss pricing upfront.

Breaking Down The Pricing Models for Music Producers Charge Per Hour

Furthermore, different music producers have various ways of charging for their services. Also, understanding the pricing models helps artists budget effectively for their music production. Let’s dive into the two common models: flat fees and hourly rates.

Flat Fee Vs. Hourly Rate

Additionally, Music producers often offer both options based on the project scope.

  • Also, flat Fee: A single charge for the entire project. Benefits include budget certainty and no worries about time spent.
  • Moreover, Hourly Rate: Charges based on actual time invested in a project. Offers flexibility and is ideal for smaller tasks.

In addition, choices vary based on project complexity and timelines.

Retainer Agreements And Their Impact for Music Producers Charge Per Hour

Furthermore, some producers work on retainer agreements . In addition, this model offers multiple advantages:

  1. Additionally, consistent monthly income for the producer.
  2. Predictable expenses for the artist.
  3. Long-term collaboration opportunities.

Producers may provide discounted rates for ongoing commitments under retainers.

Model Advantage Consideration
Flat Fee Budget certainty Scope must be clear
Hourly Rate Flexibility Can be more expensive with delays
Retainer Consistency Requires trust and commitment

Experience Matters: Tiers Of Producer

The world of music production is as varied as the melodies and genres it births. A seasoned hand at the soundboard can command a hefty fee, while a fresh face may offer more affordable rates. For example, the cost of hiring a music producer can perplex artists. Understanding the hierarchy based on experience demystifies this puzzle.

Emerging Producers And Their Rates

New players in the music production field often set their sights on building a portfolio. As a result, they tend to charge lower rates. These fees reflect their eagerness to establish a name.

  • Hourly rates start at $20 – $50.
  • Some may offer flat rates for complete projects.
  • Focus on indie and upcoming artists.

However, their uncapped zeal can be an asset. However, clients typically include artists on a budget or those seeking experimental sounds.

Veteran Producers: Expected Costs

At the top of the ladder, veteran producers bring years of industry experience. Then, Their rates often mirror this vast expertise.

Experience Level Hourly Rate
10-20 years $75 – $150+
20 years+ $200 – $400+

These producers have a track record of hits and deep industry connections. In short, top-tier talents can even command thousands per hour.

  • Collaborate with high-profile artists.
  • Offer unparalleled quality and services.
  • Possess a signature sound recognized industry-wide.

Remember, the best producer for your project aligns with both your budget and musical vision.

Genre Specifics And Production Fees for Music Producers Charge Per Hour

Music production costs can change with different genres. Similarly, understanding the genre is key to knowing the fees. Each genre has unique needs and requires different skills.

Hip-hop And Electronic Rates for Music Producers Charge Per Hour

Hip-hop and electronic music are hot genres today. Producers in these fields often charge more because they bring a specialized skillset. Also, below, find typical hourly rates for these producers:

  • Beginner: $20-$50/hour
  • Intermediate: $50-$150/hour
  • Top Professionals: $200+/hour

These rates change with demand and experience. Remember, producers might also ask for a percentage of royalties. In addition, this can affect the upfront cost.

Rock And Acoustic: A Different Pricing?

Rock and acoustic genres often require less electronic work. Costs can differ here. For example, live instrument tracking and band dynamics play a big role. Here’s what to expect for these genres’ production costs:

Experience Level Hourly Rate
Newcomers: $15-$40
Seasoned Pros: $50-$150
Industry Veterans: $150+

The studio setup and equipment quality also impact rates. As a result, remember, experienced producers might bring more value and expertise to a project.

The Studio Factor for Music Producers Charge Per Hour

The Studio Factor plays a paramount role in determining music production costs. However, not all studios charge the same. Rates can vary hugely. This variance hinges on several factors. Key among them? The type of studio and equipment quality. Let’s explore how these elements influence the hourly rates charged by music producers.

Home Studio Vs. Professional Studio Rates for Music Producers Charge Per Hour

Home studios and professional studios differ greatly in cost. Here’s why:

  • Home studios often have lower rates. This is due to less overhead costs.
  • Professional studios, on the other hand, tend to charge more. They’ve got higher-end gear and amenities.

Expect to pay from $20 to $100 per hour in a home studio. Then, in contrast, professional studios might charge from $50 to over $200 per hour.

Studio Equipment And Hourly Rates

The quality and diversity of studio equipment can affect producer fees.

Equipment Quality Expected Hourly Rate Increase
Basic + 0%
Intermediate + 25%-50%
High-End + 50%-100%

Producers with high-end gear often charge more. In short, clients pay for quality sound.

Producers justify these rates by the superior sound quality they deliver. Similarly, this promises better final tracks.


Additional Costs To Consider for Music Producers Charge Per Hour

While exploring the hourly rates of music producers, it’s crucial to peek beyond the standard fees. Also, a variety of additional costs can add up quickly. This section shines a light on two key areas where expenses might grow: hiring session musicians and vocalists, as well as investing in professional mixing and mastering services. Let’s delve into each to ensure you budget effectively for your project.

Session Musicians And Vocalists

The creation of music often demands more than a producer’s touch. In addition, talented session musicians and vocalists can elevate your track. They bring versatility and proficiency to the recording session. But, their contributions come at a cost.

Prices for these artists vary, influenced by their experience, demand, and the project’s complexity. For example, expect to budget for each person’s time in the studio.

  • Standard musician rates range from $50 to $300 per hour.
  • Vocalists may charge between $100 to $500 per session.

Always ask for a clear pricing structure to avoid surprises.

Mixing And Mastering Services for Music Producers Charge Per Hour

Once your track is recorded, mixing and mastering are crucial steps. As a result, they ensure your music sounds polished and professional.

Specialists in these areas often charge separately from producers. However, Their fees account for the time and skill it takes to perfect a track.

  • Mixing services might run from $100 to $300 per song.
  • Mastering may cost about $50 to $150 for each track.

Combine these costs with producer rates to see your total budget. Then, choose professionals wisely to ensure quality results within your means.


Negotiating With Producers

Ever wondered about the cost of hiring a music producer? In short, let’s dive into how you can effectively negotiate with them to get the best deal for your musical project.

Understanding The Bargaining Space for Music Producers Charge Per Hour

When you begin to negotiate, know your budget and the producer’s worth. Similarly, each producer sets their rates based on experience , reputation , and project complexity .

Start with research. Also, look at comparable rates for similar projects. Determine what you can offer aside from money. This could include creative freedom or project exposure. Remember, flexibility and clear communication create win-win scenarios.

Points And Royalties: Alternative Compensation

Also, points and royalties can be a savvy way to compensate a producer, especially if your budget is tight.

  • Points: One ‘point’ typically equals 1% of the record’s profits.
  • Royalties: These are ongoing payments based on usage and sales.

Negotiate a fair deal where the producer receives a percentage of the revenue. In addition, this drives them to create a hit track. Both parties win if the song performs well.

Tales From The Inside for Music Producers Charge Per Hour

Delving into the ‘Tales from the Inside’, we uncover the unspoken truths about music producer rates. For example, an intriguing look at the industry reveals how much producers really charge per hour. Stories and experiences shed light on the elusive question: What does it cost to have a pro shape your sound?

Producer Interviews for Music Producers Charge Per Hour

To get the scoop on hourly charges, we turned to the pros themselves. As a result, hands-on experiences and candid conversations with established producers reveal the financials behind the soundboard.

  • Anecdotes from veterans and newbies alike
  • Insights into the variables that influence rates
  • Perspectives on value versus time in the studio

Real-world Rate Examples

We’ve compiled real-world examples from interview insights. These serve as a guide to what you might expect when budgeting for production work.

Experience Level Rate Per Hour
Novice $20 – $50
Intermediate $50 – $100
Expert $100 – $300+

These figures reflect a combination of skill, reputation, and project complexity. However, keep in mind, every producer’s journey differs, influencing their pricing models.

Budgeting For Your Project for Music Producers Charge Per Hour

When you dream of amazing music, money talk can seem dull. Then, yet, smart budgeting is key to making those dreams true. Let’s dive into planning the finances and picking the best producer for your budget.

Planning Financially for Music Producers Charge Per Hour

Understand your project’s needs first. In short, you might want full album production or just a single song polished. These choices affect your budget greatly.

  • Research is vital. A producer’s fee can range widely based on experience and demand.
  • Factor in additional costs like studio time, mixing, mastering, and possibly travel.
  • Set aside a contingency fund for unexpected expenses.

Creating a detailed budget helps avoid surprises. Similarly, use a spreadsheet to keep track of every expense.

Finding The Right Producer Within Your Budget

Chasing affordability doesn’t mean compromising quality. Also, an adept producer can elevate your music without breaking the bank.

  1. Outline your musical vision clearly. This ensures you and your producer are on the same page.
  2. Seek out recommendations. Friends in the industry might know producers who offer quality services within your range.
  3. Use online platforms to compare rates. Websites like SoundBetter or Upwork list numerous producers, alongside their rates and portfolios.
Experience Level Estimated Hourly Rate
Beginner $20 – $50
Intermediate $50 – $150
Expert $150 – $300+

Remember to read reviews and chat with potential producers. In addition, ask about their past projects and ensure their style aligns with what you envision.

By budgeting carefully and picking a fitting producer, your music can thrive without causing financial strain.

Frequently Asked Questions On How Much Do Music Producers Charge Per Hour


What’s The Average Hourly Rate For Music Producers?


The average hourly rate for music producers typically ranges from $20 to $150. For example, this can vary based on experience, genre, and project complexity.


Do Music Producer Fees Include Studio Costs?


Usually, music producer fees do not include studio costs. Studio time is often billed separately unless a package deal is arranged.


Can Music Producers Charge Royalty Fees?


Yes, some music producers charge royalty fees in addition to hourly rates. As a result, these royalties are a percentage of the earnings from the music they produce.


How Do Producer Rates Differ By Industry?


Music producer rates vary by industry, with film and game producers often commanding higher fees than those working solely in music production due to project scale.


Conclusion


Understanding music producers’ hourly rates is crucial for budgeting your project. However, each producer sets unique fees based on experience, genre, and project complexity. Conduct thorough research and negotiate to fit your budget without compromising on quality. Remember, it’s an investment in your musical aspirations.


Choose wisely, and happy recording!