Categories
Archive

Tunecore Publishing Administration Review

Tunecore Publishing Administration provides a comprehensive music publishing service for independent artists. With its simple interface and affordable fees, the service makes it easy for artists to manage their copyrights and royalties.


Also, Music publishing is a critical component of every musician’s career, yet it can be tough to manage without professional help. Among the many companies providing music publishing services is Tunecore Publishing Administration. The service offers a full suite of publishing tools, including registration and management of the artist’s copyrights and royalties.

Related reading: What is Music Publishing And How Does It Work? and Intro To Music Publishing Licensing Copyright : Mastering Music Rights. For background, see the Wikipedia article on Music publisher.


Moreover, this gives independent artists control over their music and ensures they receive their rightful earnings. In this review, we’ll dive deeper into TuneCore’s admin service to help artists decide if it’s the right fit for their music career.


How Does Tunecore Publishing Administration Work?


In addition, the service administration helps artists manage their music rights by collecting royalties, registering copyrights, and monitoring their music usage. It offers transparency, flexibility, and control to maximize an artist’s earning potential.

TuneCore’s admin service is an easy-to-use platform that helps independent musicians and labels get their music onto major streaming and download services, while ensuring that they are collecting all the royalties they are owed. Furthermore, here’s a quick breakdown of how it works:

Signing Up For Tunecore Publishing Administration

Additionally, getting started with TuneCore’s admin service is simple. You just need to create an account, agree to the terms of service, and pay a one-time setup fee to start the process. Once you’re signed up, you’ll be able to upload your songs to the platform and start collecting royalties right away.

Uploading Your Music And Metadata for TuneCore Publishing

Also, uploading your music to TuneCore’s admin service is a breeze. You can upload your tracks in a variety of formats, including WAV, MP3, and FLAC. You’ll also need to provide information about each track, including the title, artist name, and album name. Finally, you’ll need to provide details about the songwriters and publishers, as well as any copyright information.

Tracking And Collecting Your Royalties

Moreover, once your music is uploaded to TuneCore’s admin service, the platform takes care of the rest. It monitors your music’s performance across the major streaming and download services, such as Spotify, Apple Music, and Amazon. It then collects all the royalties you’re owed and deposits them directly into your account. TuneCore’s admin service also provides comprehensive reporting tools, so you can see exactly how your songs are performing and how much money you’re making. In conclusion, TuneCore’s admin service is an excellent platform for independent musicians and labels who want to get their music onto major streaming and download services and ensure they’re collecting all the royalties they’re owed. It’s easy to use, affordable, and provides all the tools you need to succeed in the competitive world of online music.

Benefits Of Tunecore Publishing Administration

In addition, if you are an independent music artist looking to get your music out there and earn more money from your music, TuneCore administration is worth your attention. Here are three benefits that make it a smart choice for musicians:

Increased Earnings Potential

Furthermore, one of the biggest benefits of publishing admin administration is that it helps you earn more money from your music. It does this by collecting royalties from places you might not even know your music is being played, such as TV shows, movies, and video games. Tunecore then passes that money on to you, helping you get paid for your hard work and creativity.

Access To Global Collection Societies

Additionally, the service administration gives you access to some of the world’s most important collection societies. These are organizations that collect royalties for musicians and other artists. With Tunecore, you get access to these collection societies without having to go through the complicated registration process yourself. This saves you time and helps you get paid wherever in the world people play your music.

Transparent Royalty Reporting

TuneCore administration provides you with transparent royalty reporting, so you always know how much money your music is earning. Also, with detailed reports that break down where your music is being played and how much it’s earning, you can make informed decisions about how to promote your music and where to focus your efforts.

Overall, publishing admin administration is a smart choice for independent music artists looking to earn more from their music. Moreover, with its focus on increasing your earnings potential. This provides access to global collection societies, and transparent royalty reporting, it’s a tool that every musician should consider.


Tunecore Publishing Administration Vs. Traditional Publishing Deals

In addition, if you’re a music artist, there are several ways to publish your music online. Traditional publishing deals are one option, but they come with a hefty price tag and long-term commitments. TuneCore’s admin service, on the other hand, offers control over your music, no long-term contract, lower fees, and better payouts. Let’s compare the two options and see which one offers the best deal for you.

Control Over Your Music

Furthermore, with traditional publishing deals, you usually have to give up some control over your music. The publisher may demand creative control over your work or certain rights to your work. On the other hand, TuneCore’s admin service allows you to maintain complete control over your music. You can manage your compositions and recordings as you see fit, and you retain all your rights.

No Long-term Commitment

Traditional publishing deals usually require long-term commitments, which can tie you down for years. TuneCore’s admin service offers a non-exclusive agreement that has no long-term commitment. You can stop using Tunecore services at any time. This gives you the freedom to pursue other opportunities or to stop publishing your music altogether.

Lower Fees And Better Payouts

Traditional publishing deals come with high fees, and the publisher may claim a significant portion of your royalties. Tunecore has a much lower flat fee, which can help you save a considerable amount in the long run. Additionally, Tunecore ensures better payouts because they return 100% of your royalties to you. This means that you get to keep all your earnings without having to share them with the publisher.

Overall, Tunecore Publishing Administration is an excellent choice for music artists who wish to retain control over their music and do not want to be tied down by long-term commitments or high fees. With Tunecore, you can publish your music with ease and reap the financial rewards of your hard work.

Tunecore Publishing Administration Review


Credit: www.tunecore.com


Common Issues With Tunecore Publishing Administration

Tunecore Publishing Administration is a platform that allows independent artists to manage their music publishing and collect royalties. Although the platform has its advantages, it’s not without its shortcomings. Here are the common issues that users may encounter:

Metadata Errors

One of the most significant issues that users face with Tunecore Publishing Administration is metadata errors. Metadata refers to the information that identifies a digital music track. This includes the artist’s name, the song’s title, and the album’s name. Metadata errors lead to incorrect information on stores and services. This makes it difficult for fans to find the music they want to purchase. Some users criticize Tunecore for a lack of transparency in fixing metadata errors. This can be frustrating for users.

Royalty Collection Delays

Another major issue that users face is royalty collection delays. Tunecore’s royalty collection process can take up to two months. This can be frustrating, especially when users have bills to pay. According to some users, the platform lacks transparency in how it handles royalty collections. This can be frustrating for artists who rely on these payments for their livelihoods.

Difficulty Reaching Customer Support

When you encounter any issues with the Tunecore Publishing Administration, you need swift and easy access to customer support. However, many users have found it increasingly difficult to contact Tunecore’s customer support in recent years. Tunecore has faced criticism for its lack of responsiveness to support requests, making users feel left in the dark.

Overall, Tunecore Publishing Administration has some significant issues that users may face, with metadata errors, royalty collection delays, and poor customer support ranking the top of the list.

Success Stories With Tunecore Publishing Administration


Tunecore Publishing Administration has enabled artists to achieve success by managing their music publishing and generating revenue streams. Many artists have reported positive experiences with Tunecore, highlighting its ease of use and comprehensive services. This makes it a go-to platform for music publishing management.

Tunecore is a music distribution and publishing administration company that has helped many independent artists build a successful music career. Its publishing administration services ensure that artists receive the royalties they deserve from their music by collecting all the publishing royalties on behalf of the artist and ensuring they are paid accurately and timely.

Artist Testimonies

Independent artists who have worked with Tunecore for their publishing needs have seen significant benefits and improvements in their music career. Here are some of their testimonies:

  • Emily Cole: “Tunecore publishing administration has been a game-changer for my music career. They have helped me collect all my publishing royalties, which I couldn’t have done on my own. With their help, I have seen a significant increase in my revenue and can focus more on making music.”
  • James Smith: “I used to struggle to keep track of all my music royalties, but Tunecore made the process much easier. Their platform is straightforward to use and provides real-time data on my earnings, which is fantastic. I highly recommend their publishing administration service to independent musicians.”

Revenue Growth Statistics

Tunecore’s publishing administration service has helped many independent artists increase their revenue significantly. Here are some statistics that highlight the company’s role in boosting artists’ earnings:

Year Revenue Growth
2018 $30 million
2019 $35 million
2020 $40 million

Tunecore’s publishing administration service has helped independent musicians take control of their music career while earning the royalties they deserve. With its reliable and timely payment system and user-friendly platform, Tunecore is an excellent choice for independent artists looking to take their music career to the next level.

Is Tunecore Publishing Administration Right For You?


Tunecore Publishing Administration is an ideal option for independent artists who want to secure their song rights and royalties. The platform offers easy access to songwriter credits, royalty collection, and worldwide music distribution.

If you’re an independent musician, you probably know the importance of music publishing and how it can help you earn royalties from your work. Tunecore Publishing Administration is one of the options available to help you with music rights management. However, it may not be for everyone. In this post, we’ll take a closer look at Tunecore Publishing Administration, its features, benefits, and downsides, and examine whether it’s the right choice for your music career.

Considerations Before Joining

Before signing up for Tunecore Publishing Administration, there are a few things you need to consider. Firstly, you need to determine whether you have a significant amount of original music that is eligible for publishing. Tunecore Publish Administration can manage copyrights and license your music, but it can’t create content for you. Another crucial consideration is your budget. Tunecore Publishing Administration charges an annual fee for its services, which mainly depends on the number of songs in your catalog. So before taking the plunge, make sure you have a clear idea of what you can afford.

Alternatives And Competitors

While Tunecore Publishing Administration is a popular choice, it’s not the only option available. There are several alternatives and competitors, such as CD Baby Pro Publishing, Songtrust, and Distrokid. Each of these services offers different pricing plans and features. So you need to research and compare them carefully before making a decision. Ultimately, the choice of which platform to use for music publishing depends on your unique music career goals and current budget constraints. So take your time, weigh your options carefully, and select the one that best aligns with your needs.

In conclusion, Tunecore Publishing Administration can be an excellent choice for independent musicians, especially those looking for an affordable and easy-to-use service for music rights management. However, before joining, ensure you have enough original music eligible for publishing and understand the costs involved. Additionally, research other alternatives and competitors to ensure you make an informed choice.

Tunecore Publishing Administration Review


Credit: aristake.com


Frequently Asked Questions Of Tunecore Publishing Administration Review


Do I Need Music Publishing Administration On Tunecore?


Yes, you need music publishing administration on TuneCore to protect your musical works, collect royalties, and ensure that your music is properly registered and licensed. It helps you handle all administrative tasks related to music publishing, making it a crucial aspect of your music career.


How Much Does Tunecore Charge For Publishing Administration?


TuneCore charges $75 per composition for its publishing administration service. This covers worldwide registration, royalty collection, and distribution.


What Is The Downside To Tunecore?


The main downside to TuneCore is that it is a self-service platform. This means that artists must do all the work themselves. This includes distribution, promotion, and marketing. TuneCore also charges a fee for every release, which can add up for artists who release multiple songs or albums.


Can You Opt Out Of Tunecore Publishing?


Yes, you can opt out of TuneCore at any time by contacting their support team and requesting to cancel your publishing agreement. However, it is important to note that if you have already distributed music through TuneCore’s publishing service, it may take up to a year for the songs to be removed from all digital stores.


Conclusion


As we conclude our Tunecore Publishing Administration review, we can say that it is a great choice for independent artists who wish to take control of their music publishing. Tunecore’s self-service platform allows you to register, license, and collect royalties for your songs without the involvement of a third party.


With its unparalleled transparency, easy to navigate interface and competitive rates, Tunecore is definitely one of the best publishing administration services for artists looking for control and autonomy.
Categories
Archive

Music Production Desk A Personal Journey

A music production desk is an essential tool in the process of creating music. This personal journey explores the benefits and challenges of choosing a suitable desk for one’s unique needs.


Also, Music production demands a great deal of time and effort. So it’s important to have a workspace that caters to your needs. A my desk offers ample space for equipment, promotes organization, and enables you to optimize your workflow.

Related reading: Studiodesk Music Commander and How to Build a Music Studio Desk. For background, see the Wikipedia article on Recording studio.


However, selecting the right desk may pose a challenge as it hinges on personal preferences, equipment, and features. This article will delve into the factors one needs to consider before making a final decision.


Discovering The Perfect Workspace for Music Production Desk

Moreover, Music production is not just about creating music. It is about the process of turning your ideas into a masterpiece that people will enjoy. And to achieve this level of excellence, you need a workspace that will facilitate your creativity and productivity. For years, I struggled with creating music on my bed or on the couch, but I soon realized that it was not the right approach. So, I set out on a personal journey to find the perfect my desk.

Initial Struggles for Music Production Desk

I remember the time when I started producing music. In addition, I would often work on my bed or on the couch, and it was not a productive environment. Distractions pulled me away, and I could not focus on my work for long. Additionally, I faced technical difficulties, such as the lack of space for equipment and the poor lighting conditions. As a result, my work suffered, and I was not producing the quality of music I wanted to create.

Importance Of A Dedicated Space for Music Production Desk

Furthermore, I realized that to produce music efficiently, I needed a dedicated workspace. This should be a place that would allow me to focus on my work and eliminate all distractions. I started looking for the best music production desk that would provide me with the comfort and convenience I needed to create my music. I researched extensively and finally found a desk that was perfect for my needs. The desk had enough space to accommodate my equipment, it was comfortable to work on. It provided an excellent workflow.

Since then, I have noticed a significant improvement in my work. Additionally, I am more productive, and I can concentrate on my music for longer periods. Moreover, my music has improved in quality, and I have received positive feedback from my fans and collaborators.

In conclusion, finding the perfect workspace is crucial to music production. It can make a huge difference in your productivity, creativity, and overall quality of work. Also, if you are struggling to create music, it is worth considering the benefits of investing in a dedicated space for your work.

Essential Features Of A Music Production Desk


Moreover, a proper my desk should have features like spacious work surface, ergonomic design, ample storage, cable management, and adjustable height. These are the key factors to consider while choosing a functional my desk that can cater to your personal journey of music production.

Essential Features of the studio desk: A music production desk is an essential part of any music producer’s setup. It is where they spend most of their time mixing and mastering the tracks, recording instruments, and vocals. To achieve the best workflow efficiency in the studio, one needs a smartly designed and comfortable my desk. In this blog post, we will explore the essential features of a my desk that will help you pick the right one for your needs.

Ergonomic Design for Music Production Desk

Comfort is essential when working on music projects for extended periods. So ergonomics is an important consideration when selecting the studio desk. You should design the desk in a way that allows you to work for hours without causing strain or fatigue. It should have a comfortable height relative to your chair and an adjustable monitor stand to prevent neck strain. The desk surface should be tilted to eliminate awkward wrist positions during extended periods of typing or using a mouse.

Sufficient Surface Area for Music Production Desk

The desk surface area is another critical aspect to consider when selecting the workstation. You’ll need enough workspace to accommodate your equipment, such as computers, controllers, monitors, and speakers. The desk surface should also have space for your musical instruments, synthesizers, keyboards, and any other devices you might need.

Cable Management for Music Production Desk

Effective cable management is crucial for any music producer’s desk. It helps keep cables organized, preventing tangling and accidental disconnection of devices. A clutter-free workspace enhances productivity and reduces stress levels while working in the studio. The desk should have cable routing holes for wires to pass through and hide channeling away from view.

Storage Options

A my desk should provide storage options for storing your essential music-production materials. You’ll need to keep pens, notepads, and other stationeries, backup hard drives, and external devices within reach. Some desks have built-in drawers, shelves, and compartments for storage purposes. In conclusion, the studio desk is an essential tool to have for anyone who wants to produce music. You should design the desk in such a way that it meets your workflow and ergonomic needs. Ensure that it has enough surface area, effective cable management and storage options for storing your belongings. With the above-discussed features as a guide, you can confidently pick the right music production desk that fits your needs.


Customization And Personalization


Creating a customized music production desk is a personal journey. It allows you to personalize the desk based on individual needs, preferences, and music production style. A customized desk can help improve the workflow and boost creativity.

As music producers, the workstation or desk where we spend hours crafting our music is crucial. It is not just a place to sit and work, but somewhere that should inspire creativity and allow us to work with ease. This is where customization and personalization come into play. The ability to customize and personalize our music production desk can enhance our workflow, improve our productivity, and lead to a more enjoyable and successful music making process.

Importance Of Personalization

Having a workspace that is tailored to your needs and preferences can significantly impact the quality and output of your work. Personalizing your music production desk allows you to create a space that is uniquely yours. You can design it to fit your work style, physical needs and equipment. With a customized desk, you can optimize your workflow and achieve a more efficient and productive workspace.

Diy Desk Options

For those who are handy and looking to save money. This creates your own music production desk may be the perfect option. There are numerous DIY desk plans available online that range in complexity and cost. Some will require basic carpentry skills, while others can be completed with minimal tools and materials. Customization options for DIY desks are endless and can be tailored to your specific needs and wants.

Adjustable Height Desks

An adjustable height desk is a great option for those who prefer to stand while working or want the flexibility to change their working position throughout the day. These desks can be manually or electronically adjusted to various heights. This allows you to find a comfortable position for both standing and sitting. Adjustable desks can also improve posture, reduce back pain, and increase energy and focus.

Monitor Arm Options

Proper monitor placement is important for reducing eye strain and improving posture while working. Monitor arms can be a great solution for achieving optimal placement and can also free up desk space. There are a variety of monitor arm options available, ranging from single to multiple arms, and can be mounted to the desk or wall. In conclusion, customization and personalization of your music production desk can lead to a more enjoyable, productive, and efficient workspace. Customization options such as DIY options, adjustable height desks, and monitor arm options ensure that you can create a workspace that is tailored to your specific needs and preferences.

Music Production Desk A Personal Journey


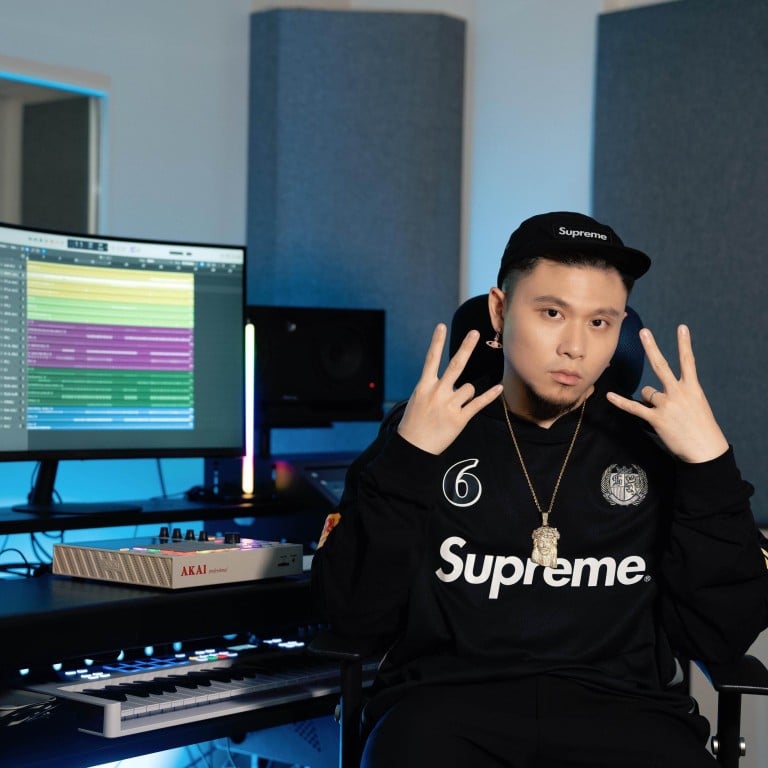
Credit: www.scmp.com


The Right Gear For Your Desk


Embarking on the journey of creating the perfect music production desk can seem daunting, but with the right gear, it can go smoothly. From a comfortable chair to monitor stands, take the time to find the proper equipment that fits your personal needs and enhances your creative process.

As a music producer, the gear you use is just as important as the sound you create. It’s not just about having the latest and greatest equipment, but rather choosing the right tools that will complement your work style and optimize your workflow. The right music production desk can make or break your studio. So it’s essential to choose something that meets your specific needs and preferences. In this post, we will explore some of the essential gear you need for your desk and how to choose the right studio monitors, keyboard and mouse options, and audio interface placement.

Choosing The Right Studio Monitors for Music Production Desk

Studio monitors are one of the most critical pieces of equipment for any music producer. They allow you to hear your work as accurately as possible, which is necessary for mixing and mastering. When choosing studio monitors, you want to prioritize accuracy and frequency response over overall volume and bass. You can use online resources for comparisons and in-person auditions of monitors at your preferred music store. Consider the surface area you have in your studio and choose a pair of monitors that will fit nicely into that space. Once you have chosen your monitors, it’s important to set them up correctly, at ear level with an equilateral triangle arrangement relative to the position of your head.

Keyboard And Mouse Options

A keyboard and mouse are essential components of your desk setup and can impact your overall productivity. There are various options available in both categories, from traditional, wired keyboards to wireless and ergonomic models. The ideal mouse should be comfortable and precise, with adjustable settings to suit your needs. Ensure they are accessible and well-positioned to prevent any strain or discomfort on your hands or wrists.

Audio Interface Placement

The audio interface is your connection to the outside world and can improve the quality of your sound. Some audio interfaces come with onboard processing power for microphone modeling or plugin effects, so reviewing the options and choosing one according to your needs is essential. When it comes to the placement of your audio interface, you want it to be within reach. This allows easy adjustments and connections to your other equipment. Also, make sure to keep it away from computer noise and other electronics that may cause interference.

To sum up, choosing the right gear for your music production desk is essential to optimize your workflow and get the most out of your studio. From choosing the right studio monitors to comfortable keyboard and mouse options and proper audio interface placement, taking the time to consider your preferences and needs will pay off in the long run.

The Future Of Music Production Desks


Create your perfect music production environment with a personalized music production desk. With advancements in technology and the need for ergonomics, the future of music production desks is becoming more customizable and efficient. Build your ideal workspace to increase productivity and creativity.

As technology advances, musicians and music producers are looking for more advanced and efficient ways to create music. One area that has seen a lot of innovation in recent years is music production desks. These specialized desks are designed specifically to enhance the music production workflow, making it easier for producers to create music. In this article, we’ll take a look at the latest innovations and trends in music production desks.

Innovations In Ergonomic Design

One of the most important trends in music production desks is ergonomic design. This refers to the way the desk is designed to fit the user’s body and movement, in order to reduce strain and improve comfort. Many music production desks now come with adjustable height options, allowing users to customize the desk to their height. Some desks also have curved or angled edges, which can relieve the pressure on the wrists and arms.

Wireless Charging And Integration

Another important trend is the integration of wireless charging capabilities into music production desks. This allows users to charge their mobile devices and other wireless accessories directly from the desk, eliminating the need for messy and cumbersome cables. Some music production desks also include built-in wireless speakers, allowing users to play music directly from the desk.

Smart Desks And Artificial Intelligence

Finally, some of the most advanced music production desks on the market are incorporating artificial intelligence and smart technology. These desks are able to analyze the user’s workflow and make suggestions on how to improve it. For example, they may suggest different plugins to use or recommend different mixing techniques. Some smart desks even include touchscreens and voice recognition technology. This enables users to control their software and hardware with voice commands. In conclusion, music production desks are evolving rapidly, with new features and innovations being added all the time. Whether you’re a professional music producer or just starting out, investing in a high-quality music production desk can help to improve your workflow and make it easier to create great music. With ergonomic design, wireless charging, and smart technology, the future of music production desks looks very promising indeed!

Music Production Desk A Personal Journey


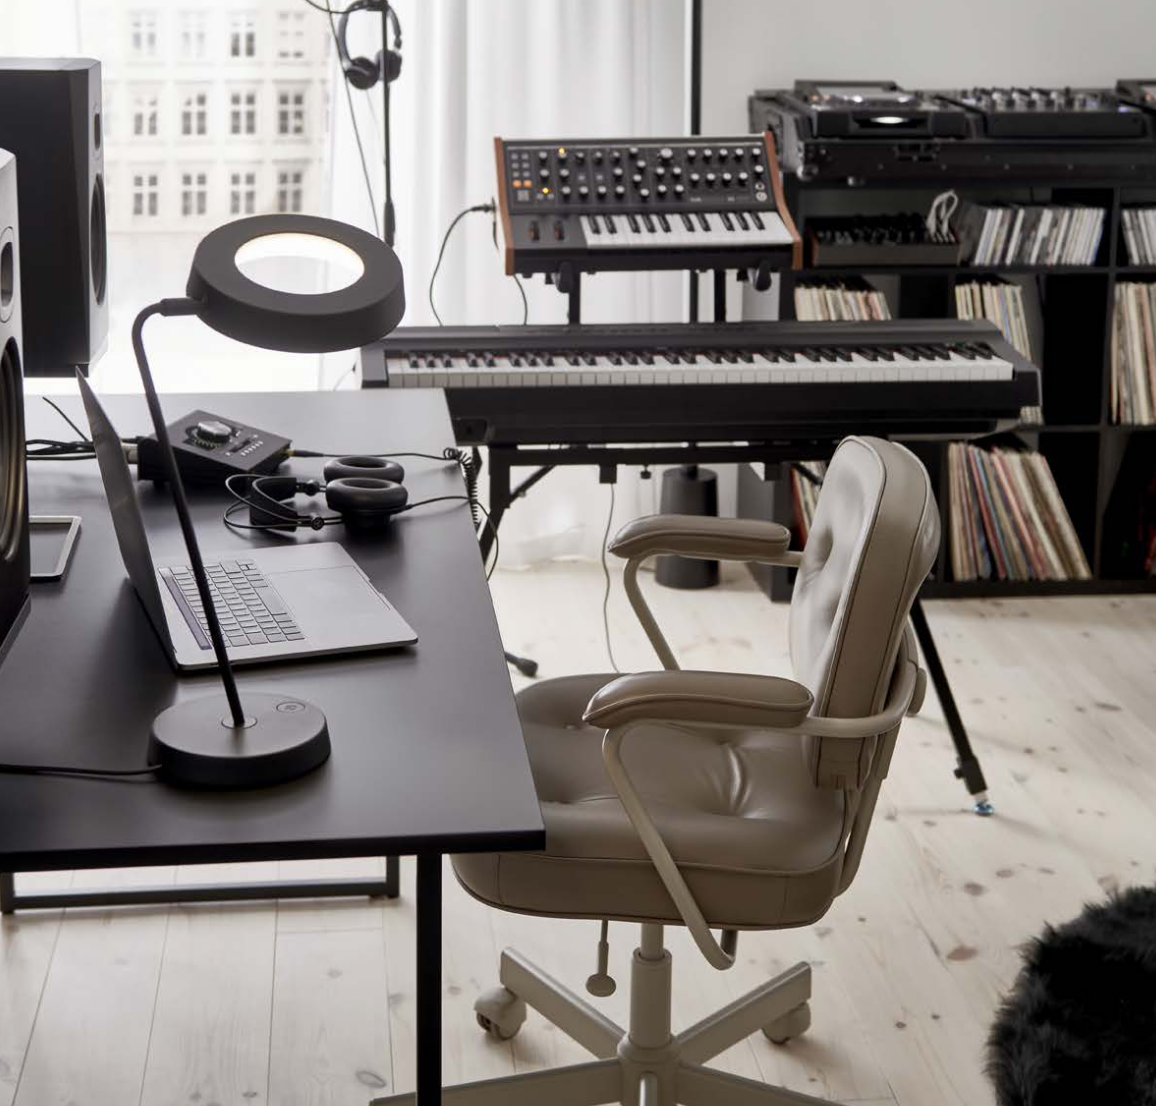
Credit: www.synthtopia.com


Frequently Asked Questions Of Music Production Desk A Personal Journey


How Deep Should A Studio Desk Be?


The depth of a studio desk varies based on personal preference and equipment. However, the standard depth for a studio desk is between 24 to 30 inches. This provides ample space for computer monitors, keyboards, and other necessary equipment.


How High Should A Studio Desk Be?


The ideal height for a studio desk is between 27-30 inches, depending on your own height and preference. It’s important to consider your seating height and the equipment you’ll be using to determine the perfect desk height for your needs.


What Is A Music Production Desk?


A music production desk is a specially designed piece of furniture that provides space for essential equipment used in music production and recording. It typically includes built-in storage, cable management, and various other features.


How Important Is A Music Production Desk?


A music production desk is essential for a comfortable and efficient working environment for music producers. It allows for better organization, improved workflow, and can reduce strain on the body during long hours of use.


Conclusion


Creating the perfect music production desk is a personal journey that takes time, effort, and dedication. Your desk isn’t just a workspace; it’s an extension of who you are and a source of inspiration. A well-crafted production desk can improve your workflow, enhance productivity, and elevate your creative output, ultimately helping you achieve your music production goals.


Remember to prioritize comfort, ergonomics, acoustics, and functionality when building or upgrading your workstation, and never stop experimenting until you find your ideal setup. Happy producing!

Categories
Archive

How To Mix Music Like A Pro Mixing Engineer

To mix music like a pro, use a reference track and balance volume levels. Then, adjust EQ, compression, and reverb.


If you want to make your music sound like it was mixed by a professional, it’s important to understand the basics of mixing. You don’t need to be a mastering engineer to achieve a great sound in your tracks. Mixing is all about balancing the different elements of a song to create a cohesive and harmonious sound that resonates with the listener.


In order to mix like a pro, you need to use the right tools and techniques. This means understanding how to use EQ, compression, and reverb to your advantage, as well as paying attention to volume levels and using a reference track to keep your mix on track. We’ll explore some tips and tricks to help you mix music like a pro.


The Fundamentals Of Mixing Music


Learn the fundamentals of mixing music and turn your basic tracks into professional-sounding recordings. From volume and panning to EQ and compression, this guide will provide you with essential tips and tricks used by experienced mixing engineers.

Mixing music like a professional mixing engineer can be a challenging task. It is easy to get overwhelmed by the number of knobs, buttons, and sliders on a mixer. However, the key to successful mixing lies in mastering the fundamentals.

Understanding Eq

EQ (Equalization) is an essential tool used in mixing music. It involves adjusting the balance between various frequencies in an audio file. To understand EQ, it is essential to know the different frequency ranges and how they affect the overall sound. The frequency ranges are as follows:

  • 20 Hz – 200 Hz (Bass)
  • 200 Hz – 2 kHz (Low Mids)
  • 2 kHz – 4 kHz (High Mids)
  • 4 kHz – 20 kHz (Treble)

Using an EQ, you can reduce or boost any one of these frequency ranges in an audio file. With practice, one can enhance any mix by accurately applying EQ, making the music sound more polished.

Mastering Compression

Compression is the process of reducing the dynamic range of an audio signal. This means that the loud parts of the audio file are reduced, and the quieter sections are boosted. The goal is to achieve a more consistent volume level. Compression is used in mixing to tighten or glue together the different elements that make up the mix. This is especially helpful in genres such as rock, where the drums can sometimes overpower the other instruments. Compression can help to control the dynamic range of the drum track, making it more balanced with the rest of the mix.

Balancing Levels

The final step in mixing music is to balance the levels of each track in the mix. This involves setting the correct volume levels for each instrument to create a cohesive sound. Begin by focusing on the lead instrument, such as the vocals or lead guitar. Set the volume of the other instruments around the lead, aiming for a harmonious sound. The key is to listen to the mix as a whole and adjust each track accordingly to produce a balanced audio file. In conclusion, mastering the fundamentals of mixing music is critical for anyone who wants to produce professional-sounding mixes. By understanding EQ, compression, and balancing levels, you can create a cohesive sound that is both balanced and polished. With practice and patience, you can become a master mixing engineer.

Preparing Your Tracks For Mixing

Before you even think about starting to mix your music, there are some important steps you need to take to prepare your tracks. Preparing your tracks for mixing can make all the difference in achieving a professional sound. In this article, we’ll be discussing three important steps to take before diving into mixing your tracks.

Cleaning Up Your Tracks

The first step to take in preparing your tracks for mixing is to clean them up. This means getting rid of any unwanted noise, clicks, pops, or any other inconsistencies that may affect the quality of your mix. Some things to look out for include:

  • Background noise from the room the track was recorded in
  • Mouth clicks or breaths from vocal recordings
  • Fret noise on guitars or string instruments
  • Any other unwanted sounds that may have been picked up during recording

There are several plugins available that can help you with this process, such as noise reduction plugins or de-clicking plugins. You can also use EQ to cut out any unwanted frequencies.

Organizing Your Session

The next step to take in preparing your tracks for mixing is to organize your session. This means making sure all of your tracks are labeled correctly and are in the correct order. You should also consider color coding your tracks to make them easier to identify. Organizing your tracks can save you a lot of time and frustration during the mixing process.

You should also consider grouping your tracks together. This can be done by grouping tracks that are similar, such as all of the drum tracks or all of the guitar tracks. This can make it much easier to apply EQ or compression to multiple tracks at once.

Preparing For Automation

The final step to take in preparing your tracks for mixing is to prepare for automation. Automation can add a lot of depth and movement to your mix, but it’s important to plan it out beforehand. Some things to consider when preparing for automation include:

  • Deciding which tracks you want to automate
  • Planning out when you want to automate certain tracks
  • Choosing the type of automation you want to use, such as volume automation or panning automation

It’s also important to make sure that all of your plugins and effects are set up correctly before you start automating. You don’t want to have to go back and fix things later on.

By following these three steps, you can ensure that your tracks are ready for mixing and that you’ll be able to achieve a professional sound. Remember to take your time and be patient during the preparation process, as it can make all the difference in the final outcome of your mix.

Mixing Techniques That Will Improve Your Sound


Enhance your sound quality by learning mixing techniques that professional mixing engineers use. From EQ adjustments to adding reverb, this article will provide you with practical tips on how to mix music like a pro.

Mixing Techniques That Will Improve Your Sound When it comes to mixing music, the techniques you use can make or break the quality of the final sound. One common mistake that inexperienced mixers make is to apply too much processing or effects to a track, which can result in a muddy or cluttered mix. But with the right mixing techniques, you can make your tracks sound more professional and polished. In this article, we will explore three popular mixing techniques that can improve your sound: using reverb and delays correctly, parallel compression, and sidechain compression. Using Reverb and Delays Correctly Reverb and delay effects can add depth, dimension and spaciousness to your tracks, but it’s important to use them correctly. For example, if you apply too much reverb to a vocal track, it can sound like the singer is singing in a large hall, which may not be appropriate for every song. Similarly, if you use too much delay on a guitar track, it can sound cluttered and distracting. To use reverb and delay correctly, experiment with different settings and EQ to find the sweet spot. It’s often better to use smaller amounts of reverb and delay than to go overboard. Parallel Compression Parallel compression is a technique in which the uncompressed and compressed versions of a track are blended together to create a more dynamic and punchy sound. Essentially, you’re creating a duplicate track of the original and applying compression to the duplicate, then blending both tracks. This technique can be used on drums, vocals, and other instruments that need to cut through a mix. By utilizing parallel compression, you can make certain elements of your mix stand out without sacrificing overall loudness. Sidechain Compression Sidechain compression is often used in electronic dance music (EDM) and other genres where a pumping bass sound is desired. In this technique, the bass track is ducked (made quieter) every time the kick drum hits. This creates a pumping effect that can add energy and excitement to a track. Sidechain compression can also be used on other tracks, such as vocals or guitars, to create a rhythmic pulse that adds interest and movement to the mix. In conclusion, these are just a few of the many mixing techniques that can help you achieve a more professional-sounding mix. By using reverb and delay correctly, parallel compression and sidechain compression, you can add dimension, punch, and excitement to your tracks. Remember to experiment with different settings and techniques until you find the ones that work best for your specific song.

Creative Mixing Strategies

Creative Mixing Strategies:

Mixing music is an art. It involves combining different elements together to create a final product that sounds amazing. An experienced mixing engineer knows how to add different effects and techniques to enhance the sound quality of an audio mix. This blog post will teach you about some creative mixing strategies that you can use to mix your music like a pro.

Automation For Dynamics:

Automation is a powerful tool that can be used to control the dynamics of a mix. It involves using a digital audio workstation (DAW) to adjust the volume, pan, and other effects over time. This can be used to add excitement and energy to a mix by increasing the volume during certain parts of the song.

For example, you can automate the volume of a lead vocal to be louder during the chorus compared to the verse. This will create a sense of dynamic range in the mix. You can also automate the panning of different elements to create movement in the stereo field. Automated filter sweeps and delays can create interesting and unique textures that make your mix stand out.

Mixing For Emotional Impact:

The emotional impact of a mix is critical to the success of the final product. The mix should reflect the intended emotional message of the song and should evoke an emotional response in the listener. A good mixing engineer knows how to use different effects and techniques to create emotional impact in a mix.

For example, using reverb can create a sense of space and depth that can make the listener feel like they are in a different environment. Pitch correction can also create an emotional response, especially when used creatively to create unique vocal effects. The mix engineer can also use different levels and panning to create a sense of tension and release that is important for creating an emotional response in the listener.

Creating Space And Depth:

Creating space and depth is an essential component of a great music mix. This involves using different effects and techniques to make the mix sound bigger and grander than it actually is. By creating space, the mix engineer can make the audio seem like it is reverberating in a concert hall or other large space. Depth can be used to create the illusion of different sound sources in a three-dimensional space.

To create space, a mix engineer may use different natural-sounding reverb effects to replicate the sound of an actual concert hall. They may also use different delay times and feedback levels to create a sense of space between different sound sources. Creating depth might involve using EQ to make certain elements sound closer or further away and panning to separate different instruments in the mix. Using different layers of sounds can also create greater depth and make the mix sound more interesting.


Tools Used By Professional Mixing Engineers


Professional mixing engineers use various tools, including equalizers, compressors, reverbs, and delays, to mix music to perfection. The combination of technical and creative skills allows them to make music sound balanced, clear, and dynamic, with the help of their ears and experience.

Mixing music like a pro involves more than just having great ears. You need the right tools too. The tools used by professional mixing engineers have evolved over the years, but they all serve the same purpose: to make music sound better. In this post, we’ll explore the most common tools used by mixing engineers, and how you can use them to enhance your mixes.

Exploring Different Plug-ins

Plug-ins are software tools used for processing audio inside a digital audio workstation (DAW). They come in different categories, including EQ, compression, reverb, and delay. Every mixing engineer has their favorite plug-ins, but the most popular ones include:

  • Equalizers (EQ): Used to adjust the frequency balance of a track
  • Compressors: Used to control the dynamic range of a track
  • Reverbs: Used to add space and depth to a track
  • Delays: Used to create echoes and repeats

The key to using plug-ins like a pro is to understand their parameters and how they affect the sound. Take your time to experiment with different plug-ins and try to develop your taste in sound.

Hardware Vs Software Processing

Hardware processing involves using external devices, such as analog compressors and equalizers, to process audio signals. Software processing, on the other hand, is done entirely inside the computer using plug-ins. Both approaches have their advantages and drawbacks. Hardware processing is prized for its warm, analog sound and tactile feel. However, it’s expensive and requires specialized knowledge to use effectively. Software processing, on the other hand, is more affordable and offers a wider range of options. But it can sound digital and lack the character of analog equipment. It’s up to you to decide what works best for your workflow and budget. Many mixing engineers use a hybrid approach, combining hardware and software processing for the best of both worlds.

Monitoring Your Mix

Monitoring is the most crucial aspect of mixing. It involves listening to the mix in different contexts to ensure it sounds good on different systems, from headphones to club speakers. Some of the best tools for monitoring your mix include:

Tool Usage
Studio monitors For critical listening in a controlled environment
Headphones For checking stereo imaging and low-frequency response
Reference tracks For comparing your mix to a well-mixed commercial song
Metering tools For analyzing loudness, frequency balance, and stereo spread

By using these tools, you can ensure your mix sounds great on any system. Remember, mixing is both an art and a science. You need to use your ears and tools to create the best possible mix.


Achieving A Professional Mix

Learning how to mix music like a pro mixing engineer takes a lot of time, patience, and dedication. It’s not just about making things sound good, but also about creating a cohesive and polished sound that captures the essence of the musical composition. Achieving a professional mix requires knowledge of the right techniques, strategies, and tools, but also a strong sense of creativity and experimentation. If you’re looking to take your mixing skills to the next level, here are some tips to help you achieve a professional mix that sounds great and stands out.

Setting Realistic Goals

The first step in achieving a professional mix is setting realistic goals for what you want to achieve. This means taking into account the genre of music you’re working with, the desired emotional impact, and the intended audience. A professional mix is not just about making everything sound perfect, but about creating a sound that compliments the music and engages the listener. Setting realistic goals will help you maintain focus and make the most of your time and resources.

Mastering Your Mix

Mastering your mix involves understanding the principles of equalization, compression, panning, and other tools that can help you refine your sound. It’s important to focus on individual elements of your mix, such as the bass or the vocals, and make sure they are properly mixed before moving on to the overall sound. Paying attention to the overall dynamics and levels of your mix can also help you achieve a professional sound that is balanced and cohesive.

Collaborating With Professionals

Collaborating with professionals such as other mixing engineers, producers, and artists can help you expand your knowledge and skills and take your mixes to the next level. Seeking feedback and critiques from others can help you identify areas of improvement and refine your mixing techniques. It’s important to surround yourself with individuals who share your passion for music and are dedicated to achieving a professional sound.

Mistakes To Avoid When Mixing


Mixing music like a pro can be tricky, but avoiding common mistakes can make all the difference. One mistake is using too many effects, which can muddy the sound. Another is not taking breaks, which can lead to ear fatigue and a lack of objectivity.


Remember to keep it simple and take breaks to achieve the best possible mix.

Mixing music is an art that requires a trained and experienced ear. The way you mix your tracks can make or break the entire song. It can be easy to get carried away in the process of mixing, leading to common mistakes that can hinder the quality of your final product. In this section, we will discuss three common mistakes to avoid when mixing your tracks: overprocessing your tracks, ignoring the importance of panning, and going too hard on effects.

Overprocessing Your Tracks

Overprocessing your tracks means adding too many effects, EQ, or compression. It may seem like a good idea to add a lot of effects to make your mix sound fuller, but this can actually have the opposite effect. When you add too many effects, you risk losing the natural sound of your tracks. It’s important to find a balance between adding enough effects to enhance the sound and keeping the track’s originality. In other words, use effects sparingly and only when needed.

Ignoring The Importance Of Panning

Panning is the process of placing tracks in the stereo field. Ignoring the importance of panning can leave your mix sounding flat and one-dimensional. When you have multiple tracks, it’s important to place them in different positions in the stereo field to create a more immersive listening experience. For example, you can pan a guitar to the left and a piano to the right to create a wider sound. Experiment with different panning techniques to find what works best for your mix.

Going Too Hard On The Effects

Adding effects is necessary to enhance the sound of your tracks, but going too hard on them can cause distortion and ruin the quality of your mix. It’s important to use effects in moderation and to always consider the context of the song. For example, too much reverb can make the vocals sound distant and disconnected from the rest of the track. Remember, the goal is to enhance the sound, not overpower it with effects. In conclusion, mixing music like a pro requires a lot of practice, patience, and attention to detail. By avoiding these common mistakes, you can ensure that your mix sounds polished and professional. Remember to always trust your ears and to experiment with different techniques until you find what works best for your mix.

How To Mix Music Like A Pro Mixing Engineer


Credit: www.levelsmusicproduction.com


Continually Improving Your Mixing Skills

Mixing music is an art that requires skills, practice, and patience. As a mixing engineer, you need to continually improve your skills to create top-notch mixes that stand out. Continuously enhancing your skills will help you stay competitive, offer better audio quality, and create mixes that meet client demands. In this blog post, we will discuss three tips to help you improve your mixing skills so that you can create amazing mixes.

Working With Feedback

Feedback is essential when it comes to improving your mixing skills. It helps you identify your strengths and areas that need improvement. Make sure you work with people who are honest and have a good ear for music. Feedback helps you improve your workflow and make decisions more quickly. So, don’t be afraid to ask for feedback on your work.

Analyzing Other Mixes

One of the best ways to improve your mixing skills is by analyzing other mixes. You can learn a lot from listening to how other audio engineers mix their music. Take note of the different techniques they use, and try to understand why they used them. Analyzing other mixes can help you identify how different elements can be combined to achieve a certain sound. It can also help you develop and refine your mixing style.

Investing In Your Skillset

Investing in your skill set is an essential step in improving your mixing skills. You can attend workshops, master classes or take courses to learn more about mixing. There are also numerous online resources that you can take advantage of such as audio forums or video tutorials. By investing in your skillset, you keep up with advancements in technology, software, and hardware tools that enhance your workflow. You can also network with other audio engineers and learn from them.

What are some other ways you can improve your mixing skills? Share your thoughts in the comment section below.

Frequently Asked Questions For How To Mix Music Like A Pro Mixing Engineer


How Can I Be A Good Mixing Engineer?


To be a good mixing engineer, you need to have a good understanding of audio equipment, acoustics, and music theory. You should also have good communication skills to work with clients and artists and be open to learning new techniques.


Practice regularly to hone your skills and listen to a variety of music to develop your ear for what sounds good.


How Do You Professionally Mix Audio?


To professionally mix audio, you need to use the right tools, have a clear understanding of the sound you want to achieve, balance the levels of each track, apply EQ and compression as needed, and make sure the overall sound is cohesive and polished.


It also helps to have experience and a good ear for music.


What Do Mixing Engineers Use?


Mixing engineers use a variety of tools for their work, including digital audio workstations (DAWs), hardware mixing consoles, equalizers, compressors, and effects processors. They also rely on their trained ears to make adjustments to levels, panning, and the overall sound of a recording.


How Long Does It Take For A Mixing Engineer To Mix A Song?


Mixing a song can take anywhere from a few hours to several days, depending on the complexity of the project, the experience of the mixing engineer, and the number of revisions needed to achieve the desired sound. The typical turnaround time is around 2-5 days.


Conclusion


As you can see, mixing music like a pro mixing engineer requires a combination of technical skills, creativity, and experience. By following these tips and tricks, you can simplify the process and improve the overall quality of your mixes. With practice, patience, and persistence, you can become a proficient mixing engineer and take your music production skills to the next level.


Keep experimenting, stay curious, and always strive for improvement. Happy mixing!

Categories
Archive

How Much Does Music Production School Cost

Music production school can cost anywhere from $5,000 to $100,000 or more. Whether you’re interested in producing your own music or helping others create theirs, attending a music production school can be a wise decision.


However, the cost of attending such a school is a significant factor to consider. The cost of music production schools varies depending on factors such as the location and the type of program you’re interested in pursuing. In general, certificate and diploma programs are less expensive than associate’s, bachelor’s, or master’s degree programs.


Additionally, attending a music production school that’s in-state may save you money on tuition fees. It’s essential to weigh the cost of attendance against the potential return on investment in terms of career opportunities and earning potential before making a decision.


Factors Influencing The Cost Of Music Production School


Music production school costs vary depending on factors such as the type of program, location, and equipment. Some programs offer scholarships or financial aid, while others may require additional fees for materials or software. It is important to research and compare different options to find a program that fits your budget and needs.

If you’re interested in pursuing a career in music production, you might be wondering about the cost of attending a music production school. The cost of music production school varies widely based on several factors, including the location of the school, type of program, duration of the program, and level of the program. Here, we’ll explore each of these factors in more detail.

Location

The location of the school can have a significant impact on the cost of attending a music production program. Schools in major cities or metropolitan areas tend to be more expensive than those in smaller towns or rural areas. This is primarily because the cost of living is higher in urban areas, so schools in these areas must charge more to cover their expenses.

Type Of Program

There are different types of music production programs, and the cost of each program varies. For example, you can choose to attend a full-time or part-time program, an online or in-person program, or a certificate or degree program. Certificate programs are generally less expensive than degree programs, and online programs are often less expensive than in-person programs.

Duration Of The Program

The duration of the program also affects the cost of attending music production school. Shorter programs, such as certificate programs, typically cost less than longer programs, like bachelor’s or master’s degree programs. This is because shorter programs require fewer courses and less time, so they are less expensive for the school to run.

Level Of The Program

The level of the music production program also plays a role in determining the cost. For example, a bachelor’s degree program in music production will generally cost more than a certificate program, and a master’s degree program in music production will usually cost more than a bachelor’s program. This is because higher-level programs require more advanced coursework, faculty, and resources, which can drive up the cost. In conclusion, the cost of attending a music production school can vary widely depending on several factors. The location, type, duration, and level of the program all play a role in determining the cost. It’s essential to research different programs and compare the costs before making a decision. Ultimately, remember that the cost of attending a music production school is an investment in your future career and can pay off in the long run.

How Much Does Music Production School Cost


Credit: plus.pointblankmusicschool.com


Choosing A Music Production School


Selecting the right music production school involves considering various factors, including the cost of tuition. Before enrolling in a program, it’s important to research and compare the expenses of different schools to find one that fits your budget and offers quality education.

If you’re passionate about a career in music production, enrolling in a music production school can hone your skills and increase your chances of achieving your goals. However, before you start your journey to become a music producer, it’s essential to choose the right school that best fits your needs. Here are some things to consider as you research potential schools, compare costs, and explore scholarship and financial aid opportunities.

Researching Potential Schools

Before deciding on a music production school, you must research potential schools carefully. Factors such as location, faculty, course offerings, and alumni success rates are critical in determining which school is right for you. Here are some tips to get you started:

  • Read student reviews and ratings on credible websites and social media forums.
  • Attend open houses and music production school fairs to gain first-hand experience and gather more information.
  • Reach out to alumni and current students to ask about their experiences and obtain advice.
  • Review the school’s curriculum and course offerings to ensure that they align with your career goals.

Comparing Costs

The cost of attending music production school varies significantly, with some schools charging as much as $100,000 for a degree program. To ensure that you’re getting the best value for your money, research schools’ costs and compare them. Here are some tips to help you:

School Cost
School 1 $50,000
School 2 $70,000
School 3 $85,000
  • Consider the cost of living expenses in the area where the school is located.
  • Explore options such as online courses or part-time programs that may be more affordable than traditional programs.
  • Compare financial aid packages offered by different schools, including scholarships, grants, work-study programs, and loan options.

Scholarship And Financial Aid Opportunities

Many music production schools offer scholarships and financial aid opportunities to help students pay for their education. Ensure that you explore all the available options and take advantage of them. Here are some tips:

  • Research scholarships offered by music industry organizations and foundations.
  • Look for financial aid packages offered by the schools you are considering.
  • Explore work-study programs offered through the school to earn money while studying.
  • Consider taking out a student loan, but ensure that you understand the terms and repayment options.

In summary, when choosing a music production school, it’s essential to research potential schools, compare costs, and explore scholarship and financial aid opportunities. By doing so, you’ll be on your way to achieving your dream of becoming a music producer.

Types Of Programs Available

Music production schools offer various programs that cater to the different needs of aspiring music producers. These programs range from certificate courses to master’s degree programs. Let’s explore each of these types of courses in detail.

Certificate Programs

Certificate programs are the shortest and the most basic courses offered by music production schools. These programs can take as little as a few weeks to complete and provide students with an overview of music production. The estimated cost of certificate programs ranges from $1,000 to $7,000 depending on the school and program length.

Associate Degree Programs

Associate degree programs usually take two years to complete and provide students with a more in-depth education in music production. These programs cost between $8,000 and $35,000, depending on the school and program length.

Bachelor’s Degree Programs

Bachelor’s degree programs in music production typically take four years to complete and offer a comprehensive education that covers all aspects of music production, including music theory, audio engineering, and songwriting. The estimated cost of these programs ranges between $30,000 and $120,000 depending on the school and program length.

Master’s Degree Programs

Master’s degree programs are the most advanced music production courses offered by schools. These programs usually take two years to complete and offer a highly specialized education in music production. The estimated cost of master’s degree programs in music production ranges from $20,000 to $80,000 depending on the school and program length.

Which Program Should You Choose?

The type of program you should choose depends on your career goals, budget, and time constraints. Certificate programs are ideal for beginners who want to learn the basics of music production, while associate and bachelor’s degree programs are suitable for those who want to pursue a career in music production. Master’s degree programs are reserved for those who want to specialize in a specific area of music production, such as composing for film or producing electronic dance music.

It’s important to note that the cost of music production schools varies widely depending on the type of program and the school you choose. Before selecting a program, make sure to research various schools and compare costs to find the best option for you.

How Much Does Music Production School Cost


Credit: hk.garnishmusicproduction.com


Costs Of Attending Music Production School


Curious about the cost of attending music production school? Tuition fees can range from $5,000 to $50,000 depending on the school and program chosen. It’s important to research thoroughly and consider any additional expenses before making a decision.

Tuition Fees

The cost of studying music production varies depending on the school and location. The tuition fees range from $10,000 to $60,000 per year. Private schools and universities might charge more than community colleges. Some schools offer scholarships and financial aid, which can significantly reduce the overall cost of attending music production school.

Accommodation And Living Expenses

When considering the cost of attending music production school, students also need to account for living expenses, such as housing, food, transportation, and entertainment. On-campus housing can cost up to $15,000 per year, while off-campus housing can cost less, depending on the location. Transportation costs vary according to the school’s accessibility and students’ needs. Food and entertainment expenses depend on each student’s preferences and habits.

Additional Costs

In addition to tuition and living expenses, music production students may also need to purchase gear, software, and other equipment necessary for their studies. The cost of these additional items varies but can be as much as $5,000 per year. It’s essential to check with the school to see if they provide access to equipment or require students to purchase their equipment. In conclusion, the cost of attending music production school differs based on various factors. It’s vital to do research on the schools and application requirements and assess individual financial needs before applying. With scholarships, student loans, and other aid options, funding music production school is possible.


Paying For Music Production School


Music production school costs vary depending on the program, school, and location. Some schools offer certificate courses for a few thousand dollars, while others have degree programs that can cost upwards of $50,000. It’s essential to research and compare different schools to find the perfect fit for your budget and career goals.

If you’re considering music production school, one of the first questions you may have is, “How much will it cost?” The answer is that it depends on several factors, including the school you choose, the length of the program, and any financial aid opportunities you may be eligible for. In this post, we’ll explore some options for paying for music production school.

Scholarships And Grants

Scholarships and grants are a great way to help offset the cost of music production school. Scholarships are typically awarded based on merit, such as academic achievement or musical ability, while grants are often based on financial need. Research the type of scholarships and grants a school offers before choosing where to attend.

Financial Aid

Financial aid is an umbrella term that encompasses various types of aid, including grants, scholarships, loans, and work-study programs. It is important to fill out the Free Application for Federal Student Aid (FAFSA) to determine what kind of financial aid you qualify for.

Work-study Programs

Work-study programs allow students to work on campus or in the community to help pay for the cost of tuition. These programs often offer opportunities related to studying music production, such as assisting in a recording studio or working as a production assistant.

Student Loans

While student loans should be a last resort, they can be a helpful option for paying for music production school. Be sure to research the different types of loans available, including federal and private loans, and understand the terms and interest rates before accepting any loan offers. Overall, paying for music production school can be a daunting task, but there are options available to help make it more affordable. Research scholarship and grant opportunities, consider filling out the FAFSA to explore financial aid options, look into work-study programs, and only consider student loans as a last resort.


Alternative Paths To Music Production Education


Explore alternative paths to music production education and skip the expensive costs of traditional schooling. Consider online courses, tutorials, internships and apprenticeships to gain industry experience without breaking the bank. With discipline and dedication, you can still develop your skills and launch your music career.

When it comes to pursuing a career in music production, attending a music production school might be the most common route. However, the cost of attending a music production school can be a significant barrier to entry for many aspiring musicians. Fortunately, alternative paths to music production education are available at a lower cost. Here are some of the options available for individuals who want to learn music production on a budget.

Self-learning

One way to learn about music production without spending a dime is through self-learning. The beauty of self-learning is that it allows you to learn at your own pace from the comfort of your home. There are many free resources available online that can help you get started. Websites such as YouTube have millions of videos that can teach you everything from music production basics to advanced techniques. Additionally, online forums and community groups are great places to learn from and network with other music producers.

Online Courses

Online courses are another option to consider if you want to learn about music production with a more structured approach. There are many online course providers, such as Coursera, Udemy, and LinkedIn Learning, that offer music production courses at a fraction of the cost of traditional music production schools. What’s great about these courses is that they are often taught by industry veterans with years of experience. They provide students with practical lessons on building and refining their music production skills.

Mentorship Programs

Mentorship programs are another option for aspiring music producers aiming to get hands-on experience. These programs allow students to work closely with an experienced music producer who can provide guidance, feedback, and mentorship. Mentorship programs are often offered by local recording studios or other music industry professionals. They provide students with the opportunity to learn about the music industry and build their skill set while working on real-world projects. By opting for alternative paths to music production education such as self-learning, online courses, or mentorship programs, you can avoid the high cost of traditional music production schools. Whether you choose to pursue music production school, self-learning, online courses or mentorship programs, the key is to stay passionate and committed to your craft. With hard work and dedication, you can reach your goal of becoming a successful music producer.

Frequently Asked Questions Of How Much Does Music Production School Cost


How Much Does It Cost To Learn Music Production?


The cost to learn music production depends on various factors, such as the learning platform, the type of courses taken, and the duration of the program. Free online courses are available, while some music production schools may charge thousands of dollars.


On average, a comprehensive course can cost anywhere from $500 to $5,000.


How Many Years Does It Take To Learn Music Production?


The time required to learn music production can vary depending on the individual’s dedication. It typically takes a few months to several years to acquire the necessary skills and experience. Practice and learning from experienced producers can expedite the learning process.


How Long Is A Music Production Degree?


A music production degree typically takes around 4 years to complete.


How Much Does It Cost To Get A Music Production Degree Online?


The cost of a music production degree online varies depending on the school and program. Some may cost around $15,000 while others may cost over $50,000. It is best to research and compare options to find a program that fits your budget.


Conclusion


To conclude, music production school costs can vary widely based on several factors such as location, course length, and reputation of the school. Students should carefully evaluate their career goals and financial resources before enrolling in a program. While the cost of tuition may seem daunting, a degree or certification from a reputable music production school can significantly increase one’s chances of success in the industry.


Therefore, it is crucial to choose a program that offers the best value for money and meets individual needs and goals.

Categories
Archive

Steps To Overcome Red Light Fever in Audio Production

To overcome red light fever in audio production, create a detailed plan and practice. Consistent practice will build your confidence and help you to produce better recordings.


Audio production can be a daunting task for many music producers, engineers, and artists, especially during the recording process. The fear of making mistakes or delivering below par results can cause anxiety and nervousness, despite having a wealth of experience and knowledge.


This phenomenon is commonly known as “red light fever. ” It can be frustrating and detrimental to a music project. However, by following specific steps, it is possible to overcome this fear and deliver exceptional results. We will explore the essential steps to take to overcome red light fever and produce top-quality audio recordings.


Frequently Asked Questions Of Steps To Overcome Red Light Fever In Audio Production


What Is Red Light Fever?


Red light fever is a term used to describe the nervousness and anxiety that performers experience when recording or performing live. It can cause mistakes and affect the quality of the performance.


What Is Red Light Fever In Audio Production?


Red Light Fever is the anxious feeling experienced by musicians or audio professionals when recording in front of a microphone while under pressure or scrutiny.


What Causes Red Light Fever?


Red Light Fever is caused by a combination of factors such as performance anxiety, fear of mistakes, and pressure to deliver.


How Can Red Light Fever Affect Audio Recordings?


Red Light Fever can negatively impact audio recordings by causing performers to make mistakes, sound unnatural, or deliver a subpar performance.


Conclusion


To sum up, red light fever is a common phenomenon that many audio producers face. However, with the right mindset and approach, it can be overcome. Remember to stay calm, stick to the plan, and practice regularly to build confidence.


Don’t be afraid to make mistakes and take breaks when necessary. Ultimately, by following these steps, you’ll be able to produce high-quality audio that showcases your skills and talent. So start tackling red light fever today and take your audio production to the next level!


Categories
Archive

Tips For Getting Your Vocals To Cut Through The Mix

To get your vocals to cut through the mix, use EQ to increase presence and clarity while reducing competing frequencies. Getting your vocals to stand out in a mix can be challenging, especially when other instruments and frequencies are competing for attention.


However, using EQ to increase presence and clarity in the vocal range can help achieve a clearer and more defined sound. Additionally, addressing any problematic frequencies with cuts or filters can help reduce muddiness or harshness. Compression can also be used to even out dynamics and increase overall volume, making the vocals more audible.


By carefully balancing EQ, compression, and other processing techniques, you can achieve a professional-sounding vocal mix where the vocals are the star of the show.


Work On Vocal Technique


One of the most crucial things for a singer is to ensure their vocals cut through the mix. While EQ and compression can be used during mixing, the technique used in singing must also be focused on to make sure that the vocals stand out. Here are some ways to work on your vocal technique to ensure your voice cuts through the mix.

Breathing Exercises:


Proper breathing is the foundation for excellent vocals. It helps singers maintain correct pitch, tone, and vocal strength. Here are some breathing exercises that every singer should work on:

  • Deep breathing- Sit down, relax and take a long, deep breath. Slowly, exhale through your mouth.
  • Diaphragmatic breathing- Place one hand on your stomach and the other on your chest while standing or lying down. Inhale slowly, filling your lower lungs first, then your upper lungs. Exhale slowly.

Vocal Warm-ups:


Before a performance, warm up your vocals with exercises to avoid vocal strain and soreness. Here are some vocal warm-ups:

  • Tongue twisters- Repeat phrases like “unique New York” or “red lorry, yellow lorry.”
  • Lip rolls- Blow air through your lips as if it’s raspberry-making sounds

Articulation Practice:


Articulation practice is essential for developing a clearer and attractive tone. Here are some exercises:

  • Lip trills- Vibrate your lips together, producing a hum.
  • Pitch glides- Sing A-E-I-O-U while sliding from one pitch to the next.

By working on these techniques, you’ll develop strong and impressive vocals that cut through the mix with ease. Incorporate these exercises into your routine and consistently practice them to achieve your desired results.

Tips For Getting Your Vocals To Cut Through The Mix


Credit: makeyourmixesnotsuck.com


Consider Microphone Placement


Proper microphone placement is critical to achieve clear vocals in a mix. Experiment with different distances and angles to find the sweet spot that works best for your voice. Make sure to test your levels and EQ settings to achieve the desired effect.

When you’re recording vocals, one of the most crucial factors that determine the quality of your final output is microphone placement. Even if you have the best microphone that money can buy, it will not yield high-quality recordings if it’s not positioned correctly. Here are some tips on how to position your microphone to get the best possible sound:

Distance

The distance between your mouth and the microphone is a critical aspect of microphone placement. To achieve a clear and distinct vocal recording, place the microphone about 6 inches away from your mouth. This distance ensures that your vocals are not too loud or too soft, and it helps to minimize background noise.

Angle

The angle of the microphone placement is another aspect to consider. Ideally, you want to position the microphone directly in front of your mouth, pointed towards your chin. This way, the microphone captures the sound coming from your vocals and avoids picking up any unwanted sounds or ambient noise.

Off-axis Positioning

Off-axis positioning refers to angling the microphone slightly off-center from your mouth. This method can help to reduce sibilance (harsh and hissing sounds) and reduce plosive sounds (popping sounds). Angle the microphone slightly off-center so that it’s pointing towards the corner of your mouth. This positioning helps to reduce unwanted sounds and highlight the essential aspects of your vocals. In conclusion, microphone placement plays a significant role in ensuring high-quality vocal recordings. By considering the distance, angle, and off-axis positioning, you can achieve a clear and distinct vocal recording that cuts through the mix.

Use Eq To Boost Vocals


Using EQ is an effective way to make your vocals stand out in a mix. Boosting the right frequencies can give your voice more presence and clarity, making it easier to be heard over other instruments and sounds.

Getting your vocals to cut through the mix is crucial for a clear and powerful sound. One effective way to achieve this is by using EQ to boost vocals. Equalization, or EQ for short, adjusts the balance between frequencies in an audio signal. When applied correctly, EQ can bring out the best qualities in a vocal performance and help it stand out in the mix.

Identify Vocal Frequency Range

Before you can start boosting frequencies, it’s important to know which range your vocals lie in. Vocals typically span a frequency range of 80Hz to 16kHz, with the sweet spot being between 1kHz and 5kHz. However, every vocalist is unique, and their frequency range may differ. To identify the vocal frequency range, use an EQ plugin or hardware device and sweep through the frequencies until you hear the vocals clearly.

Apply Narrow Eq Boost

Once you’ve identified the vocal frequency range, it’s time to start enhancing it. Use a narrow EQ boost to emphasize the frequencies that make the vocals sound most prominent and clear. Typically, a boost of around 2dB to 6dB is enough to give vocals a subtle lift. Be careful not to overdo it, as too much boost can result in unnatural or harsh-sounding vocals. Keep the Q-factor narrow to target only the desired frequencies.

Experiment With Different Eq Techniques

Along with a narrow EQ boost, there are other EQ techniques you can try to make your vocals stand out, such as:

  • High-pass filtering: Removes frequencies below a certain point, allowing the vocals to sit more clearly in the mix.
  • Notch filtering: Removes a small, specific frequency to eliminate unwanted resonance or harshness.
  • Shelf EQ: Boosts or cuts a range of frequencies above or below a specified point, useful for giving vocals a brighter or darker tone.

Combining these EQ techniques can give you more control over your vocal sound and help you achieve a polished mix. Remember to always listen critically and make adjustments based on what sounds best for the song. With the right use of EQ, your vocals can take center stage and elevate your music to the next level.

Compression To Control Dynamics


Compression is an essential tool for controlling dynamics and getting vocals to cut through the mix. Using a compressor, you can even out the levels of your vocal track, making it easier to hear and understand amidst other instruments in the track.

Set Appropriate Threshold

When it comes to using compression to control dynamics, the first step is to set an appropriate threshold. This is the point at which the compressor begins to work. Set it too low, and the compressor will be triggered too often, making the vocals sound unnatural. Set it too high, and the compressor won’t be triggered enough, allowing the vocals to get lost in the mix. Finding the perfect balance takes some experimentation, but a good rule of thumb is to set the threshold so the compressor is triggered only during the loudest parts of the vocal performance.

Adjust Attack And Release Times

Once you’ve set your threshold, the next step is to adjust the attack and release times. The attack time is how quickly the compressor kicks in after the threshold has been crossed, and the release time is how quickly the compressor stops working after the volume drops below the threshold. Adjusting these settings can dramatically change the sound of the vocals. A fast attack time will allow the compressor to react quickly to sudden spikes in volume, while a slower release time will help smooth out any abrupt changes in volume. Experiment with different settings until you find the perfect balance for your vocals and mix. Using these compression tips will help you achieve a balanced and cohesive vocal sound that cuts through the mix. Remember to set an appropriate threshold and adjust the attack and release times to give your vocals the right amount of compression. With some experimentation and practice, you’ll be able to create a professional-sounding mix that highlights your vocals and enhances the overall sound of your music.

Double Tracking For Thicker Sound


Double tracking can thicken up your vocal sound and allow them to cut through the mix. By recording multiple takes of your vocals and layering them together, you can create a fuller and more powerful sound.

One effective technique for getting your vocals to stand out in a mix is double tracking. This method involves duplicating your vocal track and adjusting the timing and pitch slightly on the second track to create a thicker and more prominent sound. Here’s how to do it:

Duplicate Vocal Track

The first step to double tracking is to duplicate your vocal track. In your DAW, right-click on the track and select “duplicate”. Alternatively, you can copy and paste the vocal on a new track. This will create two identical tracks of your vocal.

Adjust Timing And Pitch Slightly

Next, you’ll want to adjust the timing and pitch slightly on the duplicated track. You can do this manually by dragging the waveform slightly off-beat or using a pitch correction plugin to vary the pitch slightly. The idea is to create a natural-sounding variation between the two tracks.

Experiment With Pan And Volume

Once you have your double-tracked vocals, experiment with panning and volume levels to create a balanced mix. You can pan each track slightly left and right to create a wider stereo image, or keep them centered for a more upfront sound. Adjust the volume levels so that the double-tracked vocals sit comfortably in the mix without overpowering the other elements.

Use On Selective Phrases

When using the double tracking technique, it’s often the selective phrases that are ideal for the process, rather than entire sections. This is because these parts can have a more prominent presence in the mix. Try double-tracking certain lines or phrases to give your vocals an extra boost without overdoing it.

Pay Attention To Reverb And Delay


Getting your vocals to stand out in a mix can be a challenging task, but paying attention to reverb and delay can make a big difference. Use just enough to enhance the vocals without overwhelming them, allowing them to shine through the mix with clarity.

One of the biggest challenges for vocalists recording in a studio is getting their vocals to cut through the mix. One crucial element to focus on in this regard is the use of reverb and delay effects. However, it’s essential to exercise caution when using these effects to avoid overloading the mix. Here are some tips to help your vocals stand out in the mix:

Use Effects Sparingly

Less is often more when it comes to using reverb and delay effects on your vocals. Applying too much of these effects can cause your vocals to sound washed out or overly processed and, as a result, get lost in the mix. Instead, try using just enough to give your vocals some space and depth without overwhelming the mix.

Adjust Wet/dry Ratio

One effective way to avoid overusing reverb and delay is to adjust the Wet/Dry ratio of your effects. The Wet/Dry ratio is the balance between the processed and unprocessed sounds, where the Wet signal is the amount of effect and Dry signal is the original, unprocessed sound. It’s important to find the right balance to give your vocals a sense of space without becoming overwhelmed by the effects. Try setting the Wet/Dry ratio at around 30% to achieve the right balance.

Experiment With Different Settings

It’s always a good idea to experiment with different settings on your reverb and delay effects to find the perfect fit for your vocals. Start by applying a small amount of effect and adjust accordingly. Try different types of reverb, such as hall or plate, and adjust the decay time to achieve the desired result. Similarly, experiment with different delay times and feedback settings to give your vocals the right amount of space in the mix.

Conclusion

By paying attention to your reverb and delay effects, you can easily make your vocals stand out in the mix without overwhelming the overall sound. Remember to use effects sparingly, adjust the wet/dry ratio, and experiment with different settings for the best results. With these tips, you’ll be producing professional-sounding vocals in no time.


Final Mixing Tips


Achieving clarity and balance in your final mix can be challenging, especially when it comes to getting your vocals to cut through. However, with the right techniques, it’s possible to bring your vocals to the forefront of the mix without drowning out other instruments.


Here are some tips to help you achieve a clear and dynamic vocal sound in your final mix.

Level Matching

Level matching is important to ensure your vocals are at the same volume as the rest of the instruments in the mix. You can do this by lowering the volume of the other elements by a few decibels or increasing the volume of the vocals until they blend well with the other sounds. A good way to check if the volumes are in sync is to use a metering plugin, which will help you visualize the levels of the various components in your mix.

Check Mix In Different Playback Systems

It’s important to check your mix in different playback systems to make sure the vocals are cutting through the mix in all types of environments. Play your mix on different systems like headphones, car stereos, or home speakers. This will help you catch any mixing mistakes or areas of the mix that need improvement.

Use Eq To Carve Out Space

EQ plays a critical role in mixing vocals to cut through the mix. Use EQ to carve out space in the frequency spectrum for the vocals. Start by identifying any frequency clashes between the vocals and other instruments in the mix. For example, if the guitar and vocals are fighting for space in the mid-range frequency, use EQ to carve out room for the vocals to shine through. You can also try cutting any frequencies below 100 Hz and above 16 kHz to make the vocals sound brighter and clearer.

Use Compression To Control Dynamics

Compression is another tool that can be used to help the vocals cut through the mix. Apply light compression to the vocal track to even out the dynamics and make sure the vocals are consistently present in the mix. Try different compression settings to find the perfect balance between clarity and natural sound.

Add Reverb And Delay

Adding reverb and delay can give your vocals depth and help them sit better in the mix. Be careful not to overuse them, though, as too much can make the vocals sound distant and obscure. Start with a small amount of reverb and delay and gradually increase them until you find the right balance.

By following these final mixing tips, you can ensure that your vocals cut through the mix and sound great in any playback system.

Tips For Getting Your Vocals To Cut Through The Mix


Credit: www.youtube.com


Tips For Getting Your Vocals To Cut Through The Mix


Credit: www.masteringthemix.com


Frequently Asked Questions For Tips For Getting Your Vocals To Cut Through The Mix


How Do You Cut Vocals Through Mix?


To cut vocals through the mix, first, use EQ to remove any unnecessary frequencies. Then, use compression to even out the dynamic range and make the vocals sit well in the mix. Finally, add reverb or delay to create a sense of space and depth.


Be careful not to overdo any effect and always listen to the mix as a whole to maintain balance.


How Do I Get My Vocals To Sit Better In The Mix?


To get your vocals to sit better in the mix, try adjusting the EQ to carve out some room in the frequency spectrum for the vocals. Reduce any competing frequencies in other instruments and use compression to even out the volume levels.


Panning and reverb can also give the vocals a sense of depth and help them blend better with the mix.


How Do You Make Vocals Pop In A Mix?


To make vocals pop in a mix, start by making sure they are recorded well and have little background noise. Then, use EQ to boost the desired frequencies and cut any unwanted ones. Use compression to even out the vocal volume and add some character.


Finally, add some reverb to create depth and add interest.


How Do You Make Vocals Clear In Mix?


To make vocals clear in mix, first, ensure that they are recorded properly. Use EQ to remove any unwanted frequencies, such as rumble or hiss, and boost the desired ones. Compress the vocals to balance the levels. Use a de-esser to control any sibilance or harshness.


Finally, consider adding a touch of reverb or delay for depth.


Conclusion


To sum up, getting your vocals to cut through the mix is an essential goal for any singer or recording artist. By following the tips mentioned above and using the right tools, you can ensure that your vocals sound clear, powerful, and expressive.


Remember to experiment with different techniques and never stop improving your craft. With time and practice, you’ll be able to produce professional-quality recordings and performances that leave a lasting impact on your audience. So go ahead and give these tips a try, and don’t forget to have fun and enjoy the process!

Categories
Archive

Common Mistakes To Avoid When Mastering In The Box

To avoid common mistakes when mastering in the box, be mindful of the importance of gain staging and leaving headroom before applying processing. It is also crucial to refrain from overdoing processing and using too many plugins to avoid a cluttered mix.


Mastering in the box, or the digital domain, has become the method of choice for many music producers and engineers due to its convenience and cost-effectiveness. However, it also comes with its own set of challenges. One of the most common mistakes people make when mastering in the box is overlooking the need for proper gain staging and headroom before applying processing.


Over-processing and using too many plugins can also lead to a cluttered mix lacking clarity and depth. We will explore some other common mistakes to avoid when mastering in the box and how to achieve a clean and balanced final mix.

Common Mistakes To Avoid When Mastering In The Box


Credit: www.masteringthemix.com


Mixing In The Box Mistakes


Mistakes can happen when mastering music in the box. Common errors include overuse of compression and EQ, not referencing the mix on multiple speakers, and failing to give each element in the mix sufficient space and clarity. Avoiding these mistakes can lead to a better final product.

Mixing in the box can be tricky, and without the right guidance, even experienced mixing engineers can make mistakes. In this article, we will explore common mixing in the box mistakes and how to avoid them. Mixing in the box means that the mixing process takes place entirely inside the computer, often using digital audio workstations (DAWs), with no external mixing hardware involved.

Overdoing The Plugins

One of the most common mixing in the box mistakes is overdoing the plugins. It can be tempting to add numerous plugins to your mix, but this can quickly lead to a cluttered and distorted sound. It is best to stick with the essential plugins and learn how to use them to get the sound you desire. When using plugins, be mindful of their impact on the overall mix and use them sparingly.

Ignoring The Gain Staging

Another common mixing in the box mistake is ignoring the gain staging. It’s important to properly set the gain levels between each stage of your mix to avoid clipping, distortion, and noise. Proper gain staging will also ensure that the final mix has the desired loudness and a focused sound.

Relying Too Much On Templates

Another mistake that mixing engineers make is relying too much on templates. Although templates can be useful, they are not a one-size-fits-all solution for every mix. Each mix is unique and requires a tailored approach. It’s essential to listen to each element of your mix and determine the best way to enhance it. This will ensure that your mix stands out and has its unique sound. In conclusion, mixing in the box can yield excellent results when done correctly. By avoiding these common mixing in the box mistakes, you’ll ensure that your mix sounds great and meets the desired specifications. Remember to keep it simple, focus on clean gain staging, and let your mix have its unique sound.

Mastering In The Box Mistakes


Mastering in the box can be a challenging process to get right, especially when it comes to avoiding common mistakes. Some common mistakes to avoid include over-compressing, over-limiting, and failing to check your mix in mono. However, with a careful approach and attention to detail, it’s possible to achieve great results mastering in the box.

Mastering in the box is a great way to achieve professional-sounding final tracks. However, there are some common mistakes that many beginners make with mastering in the box. These mistakes can hold you back from achieving the sound you want. In this post, we’ll dive into some common mastering in the box mistakes.

Using Too Much Compression

Compression is essential in mastering, but using too much can be a mistake. Too much compression can make the track sound unnatural and squeezed. When you use a lot of compression, parts of the track that should have dynamics end up sounding flat. You should use compression in moderation. Make sure to strike a balance between dynamics and volume.

Not Paying Attention To Eq Balance

Balancing the EQ in mastering is crucial. EQ affects the overall tonality of the track. If the EQ is imbalanced, then the entire mix can sound off. Make sure to use a proper reference track when mixing to get an idea of how your track can sound. Afterward, it’s vital to use spectrum analyzers to make sure your track falls in the same frequency range as professional tracks.

Ignoring The Loudness War

The “loudness war” is a term used to describe the competition for maximum loudness between different tracks on the market. This issue arose because of a technical flaw in digital audio signals that made loudness potential endless. Many mastering engineers mistakenly aim for maximum loudness, competing with other tracks. However, this can result in lack of dynamic range, and losing transients which make tracks sound lively. In conclusion, mastering in the box is a learning process that requires diligence and patience. It’s important to avoid the common mastering in the box mistakes outlined in this post – using too much compression, not paying attention to EQ balance, and ignoring the loudness war. By following a systematic approach and avoiding these issues, you’ll be able to achieve professional-level mastering at home.

Monitoring Mistakes

If you’re new to audio mastering and plan to tackle it in the box, you need to know the common monitoring mistakes that you should avoid.

Using Bad Quality Headphones

Using bad quality headphones is one of the most common monitoring mistakes. Headphones may be more convenient, but not all headphones are designed for audio mastering. Low-quality headphones tend to boost or cut certain frequency ranges, giving you an inaccurate representation of your mix.

When using headphones, always ensure that they are of high quality and specifically designed for audio engineering. Also, avoid using noise-canceling headphones as they can affect the perceived sound quality.

Not Calibrating Your Studio Monitors

Another common monitoring mistake is not calibrating your studio monitors. Failing to calibrate your monitors can lead to mixing and mastering in an unbalanced listening environment. Monitor calibration is the process of adjusting your speakers’ output to achieve a neutral, flat frequency response, providing an accurate representation of the audio.

Here are some steps to follow when calibrating your studio monitors:

  • Ensure that your room is equipped with acoustic treatment to minimize room reflections and standing waves.
  • Position your studio monitors at the correct height and distance from your ears.
  • Use a measurement microphone and software to measure your room’s frequency response and adjust the monitor’s output accordingly.
  • Periodically check the calibration to ensure the accuracy of your monitoring setup.

Mastering in the box needs a cautious ear and accurate monitoring, and avoiding monitoring mistakes is an essential part of achieving a professional-sounding mix. With the tips mentioned above, you can achieve an accurate representation of your mix and ensure that your mastering process yields the best possible results.

Common Mistakes To Avoid When Mastering In The Box


Credit: www.masteringthemix.com


Workflow Mistakes

When it comes to music production, mastering plays a crucial role in ensuring that your music sounds professional and polished. With the advent of digital audio workstations (DAWs), mastering in the box has become a popular choice for many producers. However, just like any other technique, mastering in the box has its fair share of mistakes that you should avoid. In this article, we’ll focus on workflow mistakes that can hinder your progress and affect the quality of your final mix.

Not Organizing Your Sessions

One of the biggest mistakes you can make when mastering in the box is not organizing your sessions. It’s easy to get carried away with plugins and effects, but if you’re not keeping track of what you’re doing, you can quickly lose sight of your original mix. That’s why it’s essential to create a system for organizing your sessions. This can include labeling tracks, grouping similar elements, and color-coding to make your workflow more efficient.

To keep your sessions organized, consider creating a template that you can use for all your mastering projects. This template should include all the plugins and effects you typically use and be set up with a consistent routing and naming convention. By doing this, you’ll save time and ensure that your workflow remains consistent, regardless of the project you’re working on.

Not Taking Breaks To Refresh Your Ears

When you’re working on a mix, it’s easy to get lost in the details and lose perspective on the big picture. This is especially true when mastering in the box, where you’re dealing with small changes that can have a significant impact on the final mix. That’s why it’s essential to take regular breaks to refresh your ears and give your brain a rest.

How often you take breaks depends on your personal preference, but a good rule of thumb is to take a five or ten-minute break every hour. During this time, step away from your computer and do something that doesn’t involve sound or music. This can be as simple as taking a walk, stretching, or closing your eyes and meditating. By taking regular breaks, you’ll be able to return to your mix with fresh ears and a clear mind.

Conclusion

Mastering in the box is a powerful technique that can help you achieve professional results. However, it’s essential to be aware of the mistakes that can affect your workflow and the quality of your final mix. By organizing your sessions and taking breaks to refresh your ears, you’ll be able to avoid these common mistakes and produce better results.


Common Mistakes To Avoid When Mastering In The Box


Credit: www.masteringthemix.com


Frequently Asked Questions Of Common Mistakes To Avoid When Mastering In The Box


At What Db Should Beat Be Before Mastering?


There is no specific dB level for beats before mastering as it depends on the track and desired sound. However, it is recommended to keep the levels below 0 dB to avoid distortion. It is important to have a balanced mix and use the right EQ and compression settings to achieve the desired sound.


What Is Too Loud For Mastering?


The loudness level that is too much for mastering can vary depending on the genre, but in general, it’s recommended to aim for a maximum peak level of -1 or -2dB and a loudness level of -16 to -14 LUFS.


Exceeding these levels can result in distortion, loss of dynamics, and poor sound quality.


How Do You Tell If Your Song Is Mastered Properly?


To tell if your song is mastered properly, listen to it on different devices and in different environments. Check if all the instruments and vocals are balanced and well-defined. Look for any distortion or clipping in the audio. Make sure the song’s volume and overall sound are consistent with other professional music.


How Do I Stop Distortion When Mastering?


To prevent distortion during mastering, you should ensure that your levels are not too loud, use equalization to balance frequencies, and consider using a limiter. Additionally, avoid excessive compression and saturation and test your master on various audio systems.


Conclusion


Mastering in the box can be a daunting task, especially for beginners. However, avoiding common mistakes can make the process much easier. Remember to take breaks, experiment with different techniques, and don’t be afraid to ask for help. With time and practice, you can become a pro at mastering in the box.


Avoiding these mistakes will allow you to elevate your skills and produce top-quality music. Keep these tips in mind and happy mastering!

Categories
Archive

The Essential Guide To The Best Daw For Beginners

The best DAW for beginners is Ableton Live or FL Studio. In this guide, we will explore the features and benefits of each DAW and provide recommendations based on your needs and preferences.


As an aspiring music producer, choosing the right DAW is a crucial decision. A DAW or Digital Audio Workstation is a software application used for recording, editing, and producing audio files. With the plethora of options available, it can be overwhelming to select a DAW that suits your style and needs, especially as a beginner.


In this essential guide, we will explore two of the most popular DAWs: Ableton Live and FL Studio. We will analyze their features, compare their pros and cons, and provide recommendations based on your genre, budget, and workflow preferences. Don’t let the abundance of options discourage or confuse you; read on, and discover the best DAW for your music production journey.


Why Choosing The Right Daw Matters


Choosing the right DAW is crucial for beginners to create quality music. A good DAW will facilitate easy navigation through recording and editing features, a user-friendly interface, and a sound library with virtual instruments, effects, and plugins.

The Impact Of A Good Daw On Your Music Production Journey

Choosing the right Digital Audio Workstation (DAW) is crucial for beginners starting their music production journey. A DAW is a software used by musicians, producers, and engineers for recording, editing, and mixing audio. The right DAW can greatly impact the quality of your music and enhance your creativity. With so many options available, it’s important to consider important features and factors that can improve your production. Here are some ways a good DAW can contribute to your music production journey:

  • Efficient workflow: A good DAW comes equipped with tools and features that can speed your workflow and save time. This allows you to focus on creativity and producing high-quality music.
  • High-quality sound: A good DAW has a variety of recording and editing effects, which can significantly improve the sound of your recordings. You can achieve professional-sounding tracks, even as a beginner.
  • Versatility: A good DAW allows you to work with a variety of instruments and genres, including MIDI, VST, and plug-ins. This versatility allows you to explore and discover new ways of creating music.

How A Great Daw Can Enhance Your Creativity

“Creativity is the key to success in the future, and primary education is where teachers can bring creativity in children at that level” – A.P.J. Abdul Kalam A great DAW opens up a world of possibilities, making it easy to explore your creativity without limitations. It allows you to compose and arrange audio recordings in different ways, even if you don’t have any previous experience. Here are some ways a great DAW can enhance your creativity:

  • Easy-to-use interface: A great DAW has an intuitive and user-friendly interface with clear, easy-to-understand menus and features. This allows you to focus on your production, rather than technicalities.
  • Integration: A great DAW allows you to integrate various software and plugins seamlessly, providing access to a wide range of sounds and effects.
  • Visualization: A great DAW has powerful visualizations. Vidualization helps musicians to see what they are hearing which enhances their creativity when they are creating music else it feels like creating music in the dark.

Overall, choosing the right DAW is paramount in your music production journey. Take your time and conduct research before settling on a choice. Remember that everyone’s music production journey is different, and one’s preferences may not be the same as the other.

Factors To Consider When Choosing A Daw


When starting out as a music producer, choosing the appropriate Digital Audio Workstation (DAW) is crucial. Key factors to consider include the type of music you want to produce, your budget, and your computer’s technical specifications. With so many options available, it’s important to do your research to find the best DAW for your needs as a beginner.

Choosing the right Digital Audio Workstation (DAW) can make or break your music production journey. With so many different options available, it can be overwhelming to decide which one is best for you. Before making a decision, it’s important to consider the following factors:

Compatibility With Your Hardware And Software

One of the most important factors to consider when choosing a DAW is compatibility. You want to ensure that your DAW of choice will work seamlessly with your computer’s hardware and software. It’s important to make sure that your computer meets the DAW’s system requirements and that any external hardware you plan to use is compatible with the software.

Ease Of Use For Beginners

As a beginner, you want to choose a DAW that is easy to use and doesn’t have a steep learning curve. Look for software that has a clean and user-friendly interface and offers tutorials or walkthroughs to help get you started. Choosing a DAW that is intuitive can make a big difference in your productivity and creativity.

Availability Of Tutorials And Support

Even if you’ve chosen an easy-to-use DAW, there may still be certain aspects or features that you need help with. Look for a DAW that offers a comprehensive manual, video tutorials, or a community forum where you can ask for help. When something goes wrong, having access to support can save you hours of frustration.

Pricing Options

DAWs come in a range of prices, from free software to several thousand dollars. As a beginner, you probably won’t need all the bells and whistles of the most expensive software. Choose a DAW that fits within your budget while still offering the features you need.

Features And Functionality

Lastly, you want to choose a DAW that meets your specific needs in terms of features and functionality. Look for a software that offers the tools you need to express your creativity, whether it’s the ability to record multiple tracks, add effects, or mix and master your tracks. In conclusion, choosing the right DAW is a decision that shouldn’t be taken lightly. Consider the above factors before making a decision, and remember that you can always switch to another software if needed.

Top Daws For Beginners


Newcomers to digital audio production would benefit from software such as Cakewalk and LMMS. Both enable multi-track recording, MIDI and VST support, and loops, making them a great starting point. Additionally, they are available for free, which is ideal for anyone on a budget.

Introduction To The Most Popular Daws In The Market

If you’re a beginner in music production, choosing the right Digital Audio Workstation (DAW) can be challenging. With so many options available, it’s easy to get overwhelmed. However, with this informative guide, you’ll be able to learn about different DAWs and their features to help you decide which one to choose.

Comparison Of Features And Pricing For Different Daws

Different DAWs come with different features, and their prices vary as well. While some DAWs offer a wide range of features and come with a professional price tag, others are more affordable and easier to use. Here’s a comparison chart to help you narrow down your options.

DAW Features Pricing
Ableton Live MIDI sequencing, Audio Warping, Session view, and more $449 (Standard), $749 (Suite)
Pro Tools Powerful mixer, Professional-grade plugins, Advanced automation, and more $599 (Standard), $2,499 (Ultimate)
FL Studio MIDI support, Mixer track grouping, Plugin delay compensation, and more $99 (Fruity Edition), $199 (Producer Edition), $299 (Signature Bundle)
Logic Pro X Smart Tempo, Flex Time, Music notation, and more $199.99

Recommended Daws Based On Your Music Production Goals

Before choosing a DAW, think about your music production goals. Are you a songwriter, beatmaker, or sound designer? Here are some recommended DAWs based on your music production needs.

  • For Songwriters – Logic Pro X or GarageBand (Mac OS only)
  • For Beatmakers – FL Studio or Ableton Live
  • For Sound Designers – Pro Tools or Ableton Live

Pros And Cons Of Each Daw

Here are some pros and cons of each DAW to help you make an informed decision.

Ableton Live

  • Pros: User-friendly interface, Session view, Excellent audio warping capabilities
  • Cons: Limited mixing capabilities, Fewer built-in plugins than other DAWs

Pro Tools

  • Pros: Professional-grade plugins, Advanced automation, Powerful mixing capabilities
  • Cons: Expensive, Steep learning curve, Requires hardware compatibility for some features

FL Studio

  • Pros: Affordable, Easy to use, Growing community of users
  • Cons: Limited compatibility with other DAWs, Windows only

Logic Pro X

  • Pros: Excellent MIDI capabilities, Powerful mixing and mastering tools, Good value for the price
  • Cons: Mac OS only, Some features are not beginner-friendly

Regardless of your music production goals or budget, there’s a DAW out there that can suit your needs. Hopefully, this guide has provided you with valuable information to help you make an informed decision when it comes to choosing the best DAW for beginners.


Getting Started With Your Chosen Daw

If you are new to the world of digital audio workstations (DAWs), it can be overwhelming to choose the best one for your needs. Once you have made your decision and downloaded or purchased your chosen DAW software, it’s time to get started with the setup process.

Setting Up Your Workspace

The first step in setting up your workspace is to choose a location where you will be working. It’s important to have a dedicated space for your music production where you can focus and eliminate distractions.

Tips: Choose a quiet space with good acoustics.
  Invest in a comfortable chair and a proper desk.

Once you have chosen your workspace, it’s time to configure your DAW preferences. This includes choosing your sample rate, buffer size, and other settings specific to your software. Be sure to consult your DAW’s documentation for the best settings to use for your computer and hardware.

Understanding Key Features And Tools

It’s important to take some time to familiarize yourself with the key features and tools of your chosen DAW. This will give you a solid foundation to build your music production skills upon.

  • Learn how to create and manipulate tracks.
  • Understand how to use effects such as reverb and delay.
  • Learn how to use MIDI and audio editing tools.

Learning the basics of your DAW will give you the confidence to experiment and develop your unique sound.

Tips And Tricks For Beginners

Here are some tips and tricks to help beginner music producers get started:

  1. Start small: Don’t overwhelm yourself by trying to create a masterpiece right away. Start with a simple beat or melody and build from there.
  2. Experiment: Don’t be afraid to try new things. Experimentation is the key to discovering your unique sound.
  3. Take breaks: It’s important to take regular breaks to prevent burnout and give your ears a rest.

Resources For Learning And Getting Support

There are plenty of resources available to help beginner music producers learn and get support as they develop their skills. Here are some popular options:

These resources can help beginners build their knowledge and connect with a supportive community as they embark on their music production journey.


Advanced Techniques For Using Your Daw

Learning how to use your DAW is just the beginning. To truly take advantage of all that it has to offer, you need to know some advanced techniques. Below, we’ll cover some of the most essential techniques to start using, including mastering plugins and effects, understanding MIDI and audio routing, automation, advanced editing techniques, and workflow optimization.

Mastering Plugins And Effects

Plugins and effects are essential tools that can make or break your music production. To get the most out of these tools, it’s important to understand how each one works and its potential for creative expression. Here are some tips for mastering plugins and effects:

  • Experiment with different types of plugins and effects to see what works best for your tracks
  • Know your signal chain and when to use certain effects before or after others
  • Learn how to tweak the settings of each effect to get the desired sound

Understanding Midi And Audio Routing

MIDI and audio routing can be complex, but they’re essential to creating a well-organized and efficient workflow. Here are some tips to understand these techniques:

  • Understand the difference between MIDI and audio signals and how to move them through your DAW
  • Know how to set up MIDI controllers to work with your DAW
  • Learn how to use aux channels to route audio to various places in your mix

Automation And Advanced Editing Techniques

Automation is a powerful tool that can add life and movement to your music. Additionally, advanced editing techniques can give you greater control over your tracks. Here are some tips to help you master automation and advanced editing techniques:

  • Learn how to use automation for volume, panning, and effects
  • Know how to use MIDI controllers to record automation in real-time
  • Understand how to use advanced editing techniques such as comping, slicing, and warping

Optimizing Your Workflow For Faster Production

Finally, optimizing your workflow is crucial for creating music quickly and efficiently. Here are some tips to help you optimize your workflow:

  • Set up keyboard shortcuts for the functions you use most frequently
  • Group your tracks for easier organization
  • Know when to use templates to save time and energy

By mastering these advanced techniques and incorporating them into your workflow, you’ll be well on your way to creating music like a pro using your DAW.

The Essential Guide To The Best Daw For Beginners


Credit: mixandmastermysong.com


Common Mistakes To Avoid When Using A Daw


When starting out with a DAW, beginners often make common mistakes. Some of these mistakes include not properly organizing files, using too many plugins, not practicing proper gain staging, and not taking breaks to rest their ears. To avoid these mistakes, it’s important for beginners to do their research and practice good habits from the beginning.

As a beginner using a DAW, it’s easy to make mistakes that can greatly affect the quality of your production. In this guide, we’ll take a look at some common mistakes to avoid when using a DAW.

Overloading Your Computer’s Processing Power

It is important to be mindful of your computer’s processing power when producing music via a DAW. Running too many effects and plugins can overload your computer, causing it to freeze or crash. To avoid this, make sure you have enough RAM and sufficient processing power. Also, keep an eye on your CPU usage meter in your DAW to ensure you’re not pushing your computer too hard.

Poor Organization And File Management

When producing music via a DAW, it is important to implement proper file management and organization. Poor organization can lead to lost or misplaced files, wasted time, and missed deadlines. Make sure to create folders for your different audio files, keep track of your project versions, and label your tracks clearly. This will help you stay organized and streamline your workflow.

Not Backing Up Your Project Files

Nothing is more frustrating than losing all of your hard work due to a computer malfunction or crash. It is important to always backup your project files, so you don’t lose all your progress. You can use cloud-based storage services like Dropbox, Google Drive, or OneDrive, or simply keep a copy of your project files on an external hard drive.

Skipping Important Steps In The Production Process

Skipping important steps in the production process can lead to a less polished and professional final product. Ensure to take your time and don’t rush the process. Also, make sure to adequately mix and master your tracks. Skipping these steps can lead to a lackluster final product. So, be patient, follow the production process, and always thoroughly review your work before finalizing. In conclusion, by avoiding these common mistakes, you can produce better-quality music using a DAW as a beginner. Always keep in mind the importance of your computer’s processing power, file management and organization, backing up your project files, and following the production process.


Frequently Asked Questions Of The Essential Guide To The Best Daw For Beginners


What Daw Should A Beginner Use?


For beginners, I recommend using GarageBand or FL Studio as they are both user-friendly and affordable options with a variety of features. Other popular choices include Ableton Live and Pro Tools, but they may have a steeper learning curve and higher cost.


Ultimately, it’s important to choose a DAW that fits your needs and preferences.


What Is The Best Daw To Start Producing With?


The best DAW to start producing with will depend on your goals, budget and operating system. Popular options include Ableton Live, Logic Pro X, FL Studio, Cubase, and Reaper. Consider the features, ease of use, and included instruments and effects before making a decision.


Can You Learn A Daw By Yourself?


Yes, you can learn a DAW (Digital Audio Workstation) by yourself through online tutorials, courses, and practice. But, taking professional guidance can help you navigate more quickly through complex software components and optimize your skills. Learning with a mentor helps you to clarify your doubts, gain immediate feedback, and personalizes your learning experience.


What Is The #1 Daw?


The #1 DAW, or Digital Audio Workstation, can vary depending on personal preference and usage. However, some of the most popular choices among professionals include Ableton Live, Logic Pro X, and Pro Tools. It ultimately comes down to the features and tools that work best for your specific needs and workflow.


Conclusion


As a beginner in the music production industry, choosing the right Digital Audio Workstation (DAW) can be daunting. This comprehensive guide has explored the top DAWs available for beginners and provided insight on their features and functionality. Ultimately, the perfect DAW is subjective and depends on individual preferences.


Therefore, take advantage of available trial versions and experiment with various options before deciding. Arm yourself with the right knowledge and tools and watch your music production skills soar.

Categories
Archive

Unlocking The Power Of Compression In Audio Mastering

Compression in audio mastering unlocks the power to improve the sound quality of your recordings. By applying compression techniques, you can bring out the best in your mixes, providing the necessary space and clarity for every instrument and vocal to shine.


Compression also evens out the dynamic range of your audio, allowing you to increase the level of your recordings without causing any distortion. Whether you are a recording artist, producer, or just starting out in the audio industry, understanding how compression works and how to use it can help you achieve professional-quality sound that stands out.


If you’re new to audio mastering, don’t worry. In this guide, we’ll take a closer look at how compression works and explore techniques for applying compression in your audio mastering projects. We’ll also share some tips to help you avoid common mistakes and get the most out of your compression tools. So, let’s dive in and unlock the power of compression in audio mastering!

Unlocking The Power Of Compression In Audio Mastering


Credit: musixon.org


What Is Audio Compression?


Audio compression is a technique used to balance the loudness of different parts of a song while enhancing its overall sound. In audio mastering, compression helps unlock the power of a song by increasing its clarity, depth, and punch.

Audio compression is a technique used in audio mastering to control the dynamic range of a musical track. In simple words, it’s a tool used to attenuate the loudest cues of the music so that the overall level of the track can be increased without clipping the peaks. Compression is one of the most important tools in a mastering engineer’s toolkit. It’s a vital component in producing a defined sound that helps to glue together all the different elements of a track and make it sound more polished and professional.

Dynamic Range

Dynamic range refers to the difference between the quietest and loudest parts of a musical track. It’s the difference between the sound of the hi-hat in the background and the singer’s voice in the foreground. Compression is the process used to reduce the dynamic range of a track. By compressing the louder parts of a track, we’re bringing up the quieter parts, which helps to make the overall sound of the track more consistent and balanced.

The Purpose Of Compression

The main purpose of compression is to make sure that the track doesn’t peak at a high level while still sounding loud enough. Compression is a powerful tool, and if used correctly, it can give the track that extra punch and presence that it needs. By compressing the audio track, we’re achieving two things: Firstly, we’re reducing the dynamics of the track, and secondly, we’re increasing the overall level of the track. Compression is a technique that can make the difference between a song that sounds ‘good’ and one that sounds ‘great.’ It’s an essential tool for any audio engineer who wants to produce professional-sounding music.

How Audio Compression Works


Audio compression is a crucial technique used in audio mastering that helps to control and balance the dynamics of a track. By reducing the dynamic range of an audio signal, compression makes it possible to increase the overall loudness of a track without causing distortion or clipping.

Audio compression is an essential tool for mastering engineers to adjust and polish the final mix of a recording. The process involves reducing the dynamic range of an audio signal, making the quieter parts louder and the louder parts quieter, to achieve a more balanced and consistent sound.

Threshold

The threshold is the level at which the compressor begins to attenuate the input signal. If the input level exceeds this threshold, the compressor will reduce the level of the audio signal. The threshold can be adjusted to suit the specific needs of the track, allowing the mastering engineer to control the amount of compression applied.

Ratio

The ratio is the amount of gain reduction applied to the input signal once it surpasses the threshold. For example, a 2:1 ratio means that for every 2 decibels the signal goes above the threshold, the compressor will allow only 1 decibel to pass through. The higher the ratio, the more aggressive the compression.

Attack & Release

The attack and release settings determine how quickly the compressor begins and stops attenuating the signal. The attack time is how long it takes for the compressor to start working and the release time is how long it takes for the compressor to stop working. Adjusting these settings can have a significant impact on the character of the compressed signal.

Makeup Gain

The final stage of the compression process is to apply makeup gain, which is an increase in the level of the audio signal after compression has been applied. This compensates for any loss of volume caused by reducing the dynamic range and ensures that the overall level of the track remains consistent with the original recording. In conclusion, understanding how audio compression works is an essential part of the mastering process. By adjusting the threshold, ratio, attack and release settings, and applying makeup gain, mastering engineers can unlock the full power of compression and achieve a polished and professional sound for their recordings.

Different Types Of Audio Compressors


Audio compression is a key tool in audio mastering, but understanding the different types of compressors can be overwhelming. From optical to VCA to FET, each type of compressor has its own unique characteristics and offers different results. Unlocking the power of compression starts with understanding the nuances of each type.

Different Types Of Audio Compressors: Audio compression is a crucial aspect of mastering, and it is essential to understand the different types of audio compressors that are available. Each compressor type has its unique characteristics, and using the wrong type of compressor can detrimentally affect your audio quality. In this section, we will be discussing four different types of audio compressors: VCA, Optical, Tube, and FET.

Vca

Voltage-controlled amplifier compression, or VCA, is the most commonly used compressor in audio mastering. They are perfect for precise and quick compression, as they have a quick attack and release time. VCA compressors work by regulating the gain of an audio signal through voltage control. They are known for their transparent sound and are widely used in pop and rock music mastering.

Optical

Optical compressors utilize a photovoltaic cell and a light source to control gain reduction. They are known for their warm and dynamic sound and are ideal for smooth and musical compression. Optical compressors have a slow attack and release time, making them perfect for vocal and bass tracks. They are also widely used in jazz and classical music.

Tube

Tube compressors work through vacuum tubes, which give them their unique analog sound. They add a natural saturation to the audio signal and are perfect for adding warmth and character in mastering. Tube compressors have a slow attack and release time and are ideal for mastering vocals, acoustic guitars, and drums.

Fet

Field-effect transistor, or FET, compressors are known for their speedy attack and release time. They are perfect for fast and aggressive compression and are widely used in heavy rock and metal music. FET compressors have a transistor-based circuitry that adds a particular edge and punch to the audio signal. In summary, understanding the different types of compressors and their unique characteristics is essential for quality audio mastering. Whether you choose a VCA, optical, tube, or FET compressor, it is important to use the right one for your specific audio needs.

Compression In Audio Mastering

Compression in audio mastering is the process of altering the dynamic range of an audio signal. It’s an essential tool for balancing the levels of individual tracks in a mix while achieving a cohesive final product. When used correctly, compression can add punch, energy, and intensity to your music.

The Role Of Compression In Mastering

Compression plays a critical role in the mastering process. It allows you to control the overall volume and balance of your mix, making it sound more polished and professional. Mastering engineers use compression to even out the levels of individual tracks and to bring out the detail and character of the music.

However, it’s important to use compression with care. Overcompression can strip the life and energy out of a mix, so it’s crucial to find the right balance.

Pre-mastering Compression Tips

It’s important to note that compression should be used as a tool during mixing, as well as mastering. It’s essential to use compression during the mixing process to avoid overcompression in the mastering process.

When using compression during mixing, try these tips:

  • Set the threshold so that the compressor only engages during the loudest parts of the track.
  • Use a slow or medium attack time to allow the initial transients to pass through uncompressed.
  • Adjust the release time to allow the compressor to reset before the next transient.
  • Use a low ratio, typically around 2:1 to 4:1.
  • A/B test with and without compression to ensure you’re not overdoing it.

By following these tips during the mixing process, you can avoid overcompressing and achieve a more natural sound.

Lastly, during the mastering process, it’s important to keep the compressor’s settings conservative. The goal of mastering is to enhance the overall sound of your mix, not to drastically alter it.

https://www.youtube.com/watch?v=BJ1S0qqg2-M


Common Audio Compression Mistakes To Avoid


Avoiding common audio compression mistakes can improve the overall quality of audio mastering. Examples of common mistakes to avoid include over-compression, not leaving enough headroom, and applying too much compression to individual tracks. By unlocking the power of compression, you can enhance the dynamic range and clarity of your audio recordings.

Audio compression is an essential part of audio mastering used to control the dynamics of audio signals. However, it is easy to make mistakes when compressing audio, which may negatively affect the audio quality and musicality. To avoid these issues and achieve the best possible results, it’s crucial to know the common audio compression mistakes and how to avoid them. In this article, we’ll take a closer look at some of the most common audio compression mistakes to avoid.

Overuse Of Compression

One of the most common mistakes people make when applying compression to audio is overusing it. Using too much compression can cause the audio to sound unnaturally flat and lifeless. Compression should be used only where needed, to even out the audio’s dynamic range or add some character, without squashing the life out of your mix. To avoid overuse of compression, it’s crucial to consider the mix before applying the compression, determine the balance of the instruments, and then use compression to control the dynamics gradually, rather than attempting to fix everything at once.

Poor Threshold & Ratio Settings

Another common mistake is poor threshold and ratio settings. The threshold and ratio settings have a significant impact on how much compression is applied to the audio. Setting a low threshold or high ratio values will lead to over-compression or unnatural sound. The best approach is to start with conservative settings, adjust the threshold to match the audio’s level, and set a ratio that complements the musicality of the song. Also, it’s essential to ensure that the attack time is not too fast; otherwise, you will lose the audio’s transients.

Ignoring Makeup Gain

Makeup gain is another crucial parameter ignored when applying compression to audio. Makeup gain is a feature of the compressor that allows you to boost the overall gain of the compressed audio to match the level of the original audio source. After compression, the level of the audio may decrease slightly, so it’s necessary to adjust the makeup gain to compensate for the decrease. Failing to set the makeup gain correctly will lead to uneven levels in the mix, destroying the balance and integrity of the music.

Neglecting The Attack & Release

The attack and release settings are also essential when it comes to compression. The attack time determines how fast the compressor starts to react to the incoming signal, while the release time determines how long it takes for the compressor to stop compressing after the signal drops below the threshold. Neglecting the attack and release settings can lead to unnatural and unpleasant results. For example, setting the attack time too slow will result in lost transients, while setting the release time too fast will cause distortion and other unwanted audio artifacts. It’s best to experiment with different settings to find what works best for the audio and musicality of the song. In conclusion, audio compression is essential for controlling dynamics and adding character to the mix. However, it’s crucial to avoid the common mistakes discussed in this article to achieve the best results. Each mistake can affect the audio quality and musicality, so be sure to take your time when applying compression and experiment with different settings to find what works best for you!

Unlocking The Power Of Compression In Audio Mastering


Credit: mixingmonster.com


Advanced Technique: Multiband Compression


By utilizing advanced technique of multiband compression in audio mastering, you can unlock the true power of compression. This process allows for precise frequency control and ensures that the sound is consistent, balanced and full, giving a polished and professional result.

Advanced Technique: Multiband Compression In music production, compression is an essential tool for creating a polished and professional sound. It helps control the dynamic range of an audio signal, allowing the listener to hear every detail in the mix. And while regular compression techniques can do wonders for individual tracks, sometimes, they are just not enough. That’s where multiband compression comes in. This advanced technique allows you to apply different amounts of compression to different frequency bands of a track, making it a powerful tool for mastering. In this article, we’ll discuss what multiband compression is, when to use it, and how to set it up. We’ll also go over common multiband compression mistakes to avoid.

What Is Multiband Compression?

Multiband compression is a technique that divides the audio frequency spectrum into separate bands and applies compression to each band independently. Essentially, it’s like having multiple compressors working on different parts of the audio signal. By controlling the amount of gain reduction in each band, you can achieve a more balanced and polished sound.

When To Use Multiband Compression

Multiband compression is especially useful when working with complex, multi-layered tracks. For example, if you’re mastering a song that has a lot of instrumentation, vocals, and percussion, it can be challenging to get a balanced sound with regular compression. By using multiband compression, you can focus on problem areas in the mix and apply more targeted compression to those areas.

Setting Up Multiband Compression

To set up multiband compression, you’ll need a plugin that supports the technique. Most digital audio workstations come with a built-in multiband compressor, but there are also third-party options available. Once you have the plugin loaded onto your track, you’ll need to set the frequency bands. This can be done manually or using presets provided by the plugin. It’s crucial to listen to the track carefully and adjust the frequency bands until you find the right balance. Then you can set the compression ratio and threshold settings for each band, working to achieve a more balanced and polished sound.

Common Multiband Compression Mistakes To Avoid

Multiband compression can be a powerful tool, but it’s essential to use it correctly. Here are some common multiband compression mistakes to avoid: – Overuse: Don’t apply multiband compression to every track just because it’s there. Only use it when necessary to avoid over-compression. – Too much gain reduction: Using too much compression can suck the life out of your track. Be careful not to apply too much gain reduction or risk losing the dynamics and punch of the mix. – Ignoring the rest of the mix: Remember that multiband compression should be used in conjunction with regular compression techniques. Don’t rely solely on multiband compression to fix your mix. In conclusion, multiband compression is an advanced technique that can help you achieve a more balanced and polished sound in your audio mastering. By using this technique correctly, you can control the frequency spectrum of your audio tracks with precision and achieve a professional sound.

Choosing The Right Audio Compressor For Your Needs


Choosing the right audio compressor is crucial for unlocking the power of compression in audio mastering. It is important to consider the type of audio being compressed, the dynamic range, and the desired outcome in order to make the best choice for your needs.

Audio compression is an essential tool in the world of sound engineering. It helps to balance the dynamic range of a mix and achieve a final master that’s cohesive and sounds professional. However, choosing the right compressor can be tricky, especially if you’re new to the world of audio mastering. In this section, we’ll discuss the key considerations when shopping for a compressor and the top compressors on the market that you should consider.

Key Considerations When Shopping For A Compressor

When shopping for an audio compressor, there are a few factors you need to consider.

  1. The Type of Compressor: There are several types of compression, including VCA, FET, Optical, and Vari-Mu. Each of these compressors has its own unique sound and characteristics.
  2. The Controls: You need to consider the controls on the compressor, including the attack, release, ratio, and threshold. These controls affect how the compressor reacts to the audio signal.
  3. Single-Channel or Stereo: Depending on your needs, you may require a single-channel or stereo compressor. Consider your application and how you plan to use the compressor.
  4. The Price: Compressors can range in price from a couple of hundred dollars to several thousand dollars. Determine your budget and look for compressors that fall within that range.

Top Audio Compressors On The Market

Here are some of the top audio compressors on the market that you should consider:

Compressor Type Price
Universal Audio LA-2A Optical $4,000
Empirical Labs Distressor VCA $1,400
SSL G Series Bus Compressor VCA $5,000
API 2500 Stereo Bus Compressor VCA $3,600
dbx 160A VCA $400

These compressors are popular choices used by the best audio engineers globally and offer outstanding capabilities to enhance the sound of your mix. When shopping for a compressor, it’s crucial to understand the key considerations and choose the right one that aligns with your needs. Whether you’re looking for a single-channel or stereo compressor, one with a specific type of compression or something that fits within your budget, there are plenty of options available on the market. Take your time, do thorough research, and test out different compressors to ensure you’re getting the one that’s right for your needs.

Unlocking The Power Of Compression In Audio Mastering


Credit: www.masteringthemix.com


Frequently Asked Questions For Unlocking The Power Of Compression In Audio Mastering


How Do I Master Audio Compression?


To master audio compression, you need to understand the fundamentals of compression and how to adjust the various settings to achieve the desired result. Practice using different audio sources and experiment with different compression techniques. Use references and seek feedback from other experienced audio professionals to improve your skills.


Consistent practice and experimentation are key to mastering audio compression.


How Much Compression Should I Use When Mastering?


When mastering, the amount of compression to use varies depending on the track and what the desired outcome is. It’s important to avoid over-compression, as this can result in a loss of dynamics and overall sound quality. A good rule of thumb is to aim for a reduction of no more than 2-4dB in most cases.


However, ultimately, it depends on the individual track and what sounds best to the ears of the mastering engineer.


What Is The Release Time For Mastering Compression?


The release time for mastering compression varies depending on the specific type of compressor and the desired effect. It can range from fast release times for a more aggressive sound to slower release times to retain the natural dynamics of the audio.


It’s important to experiment and adjust the release time to achieve the desired result.


What Makes A Mastering Compressor?


A mastering compressor is a tool used by audio engineers to balance the levels of different audio sources in a mix. It smooths out peaks in the sound while preserving the dynamic range and ensuring that the overall volume of the mix is consistent.


The compressor is an essential part of the mastering process and helps to give the mix a polished and professional sound.


Conclusion


Compression is an immensely versatile and powerful tool used in audio mastering. From adding punch and warmth to your sound, to controlling dynamics and smoothing out inconsistencies; a compressor can take your mix to a whole new level. There’s no one-size-fits-all approach, but with the right techniques and practice, you can unlock the true potential of compression to deliver a polished, professional audio.


So, experiment, trust your ears, and make compression your new best friend. Happy mastering!

Categories
Archive

Why Use Ableton Live For Electronic Music Production

Ableton Live is a software widely used for electronic music production due to its user-friendly interface and live performance capabilities. Ableton Live has revolutionized the electronic music production industry by providing an innovative approach to music-making.


The software is designed to be user-friendly, intuitive and adaptable, making it easy for both beginners and professionals to create electronic music. One of the most significant features of Ableton Live is its live performance capabilities, making it a go-to choice for DJs, producers and musicians around the world.


The software’s unique session view allows for real-time manipulation of the tracks, which can be arranged and edited later in the arrangement view. In addition to these features, the software comes with a vast library of sounds, effects, and instruments, making it a one-stop-shop for all music production needs. The combination of its versatility, user-friendly interface, and live performance capabilities has made Ableton Live a must-have tool in every electronic music producer’s toolbox.

Why Use Ableton Live For Electronic Music Production


Credit: ny.garnishmusicproduction.com


Overview Of Ableton Live

Ableton Live is a popular Digital Audio Workstation (DAW) for electronic music producers, widely used for creating, recording, arranging, mixing, and mastering music. This software provides creative tools and features suitable for both beginners and professionals to create unique electronic music.

Interface

The interface of Ableton Live is intuitive, user-friendly and modern. The software is designed to keep the flow of music-making uninterrupted. The layout of the interface is split into two main views, the Session View and the Arrangement View. The session view allows producers to arrange their tracks into clips and play these clips in any order they wish using the intuitive drag and drop feature. The Arrangement view is used for organizing and recording song arrangements in a traditional linear timeline. This flexibility in Ableton empowers users to create music in a non-traditional way.

Workflow Advantages

The workflow of Ableton Live is unmatched, providing users with fast access to vital features and tools. It uses a non-linear approach that allows users to create music ideas quickly, providing the ability to create loops, hands-on control, and live improvisation. Live’s MIDI editing capabilities are unique in their speed, precision, and ease. It also has a powerful browser with a well-organized sample library that includes various packs and loops suitable for electronic music production. This results in quick and easy music production workflow.

Ableton Live is one of the best digital audio workstations for electronic music production with an intuitive interface and a unique workflow. It’s a must-have for anyone who wants to create unique electronic music.

Audio Editing And Manipulation


Ableton Live is a powerful tool for electronic music production due to its advanced audio editing and manipulation capabilities. It allows producers to easily create, manipulate and sequence their audio in real-time, making it an essential software for any electronic music production studio.

Ableton Live is a powerhouse for electronic music production with its user-friendly interface and unique features. Its audio editing and manipulation capabilities are particularly exceptional, making Ableton Live an essential tool for music producers. Here are some reasons why:

Clip Launching

Ableton Live’s clip launching feature allows producers to trigger and launch different clips, loops, and samples on the fly and in real-time, enabling them to create spontaneous and intuitive musical arrangements. Clip launching is an efficient way to experiment with different ideas and sounds, allowing producers to quickly record and manipulate their musical inspirations.

Warping

The warping feature in Ableton Live is a powerful tool that enables electronic music producers to sync audio files regardless of their original tempo and pitch. Producers can quickly warp and manipulate any audio clip, adjust its timing, or stretch it to fit any tempo, without altering its pitch or sound quality. With warping, producers have more creative control, making Ableton Live an excellent tool for crafting eclectic and dynamic electronic music.

Sampling

Sampling is an essential part of electronic music production, and Ableton Live offers a wide range of sampling capabilities. Producers can use Ableton Live to record and manipulate any sound or instrument, regardless of its source, and turn it into a unique sample or loop. Additionally, Ableton Live’s extensive library of sound samples and instruments makes it easy for producers to experiment and create new sounds quickly.

Automation

Ableton Live’s automation feature allows producers to create dynamic and changing musical arrangements effortlessly. By automating parameters such as volume, panning, filters, and effects, producers can create evolving musical landscapes. Automation is a great way to add textures, variations, and movement to a track, making it sound more interesting and engaging. In conclusion, Ableton Live’s audio editing and manipulation features make it an essential tool for electronic music producers of all levels. Its clip launching, warping, sampling, and automation capabilities offer producers more creative control and flexibility, enabling them to craft unique and dynamic electronic music with ease.


Built-in Synthesizers And Effects


Ableton Live is the go-to software for producers of electronic music due to its built-in synthesizers and effects. With features like Ableton’s Simpler and Sampler, creating unique and intricate sounds has never been easier.

If you are an electronic music producer or aspiring to be one, you probably know how important it is to have a powerful and versatile digital audio workstation (DAW) at your disposal. When it comes to electronic music production, Ableton Live is widely regarded as one of the best DAWs in the market. One of the key features that makes Ableton Live stand out from its competitors is the built-in synthesizers and effects that come with the software.

Operator

Operator is an FM (frequency modulation) synthesizer that allows you to create complex, yet dynamic sounds. It is particularly useful for creating metallic, percussive, and bell-like sounds. The synthesizer has four oscillators and various modulation options that give you a lot of control over the sound you want to create. You can create anything from subtle pad sounds to aggressive leads and basslines with Operator.

Wavetable

Wavetable is a synthesizer that uses the technique of wavetable synthesis. It allows you to create evolving and intricate sounds by interpolating between different waveforms. With Wavetable, you can create everything from lush pads to intricate leads and basslines. The synth comes with a large variety of built-in waveforms that you can experiment with.

Analog

Analog is a virtual analog synthesizer that emulates the classic sound of analog synthesizers. It is perfect for creating warm and fat basslines, leads, and pads. The synth comes with two oscillators that can be detuned to give you a fuller sound. It also has a sub-oscillator that helps you create even more massive sounds.

Guitar Amp

If you want to add some grit and distortion to your sound, then the Guitar Amp effect is perfect for you. It emulates the sound of various guitar amplifiers, from classic clean amps to modern high-gain ones. You can use it to add some warmth and character to your synth sounds or to create distorted guitar-like leads and basslines.

Audio Effects

Ableton Live comes with a wide variety of audio effects that you can use to shape your sound. From reverbs and delays to compressors and distortion, you have everything you need to create a polished and professional sound. One of the best things about the effects is that they are all optimized for real-time performance, which means you can use them live on stage. In conclusion, the built-in synthesizers and effects in Ableton Live are one of the most compelling reasons why you should consider using this DAW. With these tools at your disposal, you can create complex and dynamic sounds that are unique to your style and vision. Whether you are a beginner or a seasoned producer, Ableton Live is a powerful tool that can take your electronic music production to the next level.

Why Use Ableton Live For Electronic Music Production


Credit: davidjlowe.medium.com


Max For Live Integration


Ableton Live’s Max for Live integration is a game-changer for electronic music production. With endless possibilities for customization and creativity, Max for Live allows producers to push the boundaries of what’s possible in their tracks.

Ableton Live is the go-to software for electronic music producers everywhere. It is a digital audio workstation that revolutionized the way music is made. One of the features that make Ableton outstanding is its deep integration with Max for Live. Max for Live is a platform that enables developers to create custom instruments, effects, and devices that integrate seamlessly into Ableton Live. This section will discuss how Max for Live integration empowers producers to create music that is unique and personal.

Custom Instruments And Effects

Max for Live provides producers with a platform to create their own instruments and effects. The platform is easy to use, and producers can create anything their imagination allows. It allows users to create unique sounds that are not possible with traditional synthesizers and effects. With Max for Live, producers can create instruments and effects that suit their specific needs and expressions. The tools are customizable and provide endless possibilities for producers to explore.

Seamless Third-party Plugin Integration

Another benefit of Max for Live is its ability to integrate third-party plugins seamlessly into Ableton Live. This integration enables producers to use any of their favorite plugins within Ableton Live. They can mix and match plugins to create unique sounds that are not possible with stock plugins. The integration makes the workflow fast and efficient, and it eliminates the need to load separate applications.

Visuals And Audio Reactive Environments

Max for Live provides producers with a platform to create audio-reactive visuals, animations, and environments. The producers can create immersive audio-visual experiences that enhance the listener’s experience. The environment can react in real-time to the music, making the performance feel dynamic and interactive. The visuals and animations can add layers of depth and meaning to the music, making the whole experience memorable. In conclusion, Max for Live integration is a game-changer for electronic music producers. The customizable tools provide endless possibilities for producers to explore and create music that is unique and personal. The seamless third-party plugin integration and the ability to create audio-reactive visuals and environments make Ableton Live the go-to software for electronic music production.

Collaboration And Performance Capabilities


Ableton Live offers exceptional collaboration and performance capabilities for electronic music production. With its unique workflow, intuitive interface, and advanced features, producing music and performing live has never been easier.

Session View

One of the key reasons why Ableton Live is a popular choice amongst electronic music producers is its Session View. It provides a flexible and fluid way to create, organize, and perform with musical ideas, making it an ideal tool for live performances and collaborations. The Session View is structured around clips which can be triggered individually or grouped together in scenes. This feature gives producers the ability to manipulate and arrange different musical elements on the fly, creating new musical combinations and evolving soundscapes in real-time.

Link

Another significant advantage of using Ableton Live for collaborative work is the Link feature. It enables multiple devices to communicate with each other and stay in sync, making it easier for producers to collaborate on projects without the need for complicated setups or equipment. The Link feature allows users to collaborate with other musicians and producers in different locations, in real-time, without latency issues. All users need is an internet connection, and they can link their devices and collaborate on projects with ease.

Ableton Push

Ableton Push is a performance controller specifically designed for Ableton Live. It integrates seamlessly with the software, providing producers with an intuitive and tactile way to create and perform music. Push allows producers to trigger clips, play melodies and chords, program drums and percussion, and mix tracks all from one interface. This feature makes it easier for producers to experiment with different musical ideas and come up with new and exciting soundscapes. In conclusion, Ableton Live is an ideal choice for electronic music producers looking for collaboration and performance capabilities. With its Session View, Link feature, and Ableton Push, producers can create, arrange, and perform music with ease, making it an excellent choice for live performances and collaborations.

Why Use Ableton Live For Electronic Music Production


Credit: www.productionmusiclive.com


Frequently Asked Questions On Why Use Ableton Live For Electronic Music Production


Why Is Ableton Good For Electronic Music?


Ableton is great for electronic music due to its intuitive design, versatile features, and seamless integration with hardware. Its session view allows for easy experimentation and arrangement, while its audio and MIDI effects provide endless sound design possibilities. Additionally, its time-stretching and warping capabilities make it easy to manipulate audio to fit within a track.


Is Ableton Live Good For Music Production?


Yes, Ableton Live is good for music production. It is widely used by professional producers and offers features such as audio and MIDI sequencing, a vast library of sounds, real-time looping, and flexible editing tools. It also integrates well with other software and hardware, making it a popular choice for music production.


What Are The Benefits Of Ableton Live?


Ableton Live is a digital audio workstation that offers numerous benefits to musicians, producers, and DJs. These include real-time audio manipulation, intuitive session and arrangement views, MIDI sequencing, automation tools, and a vast library of effects and virtual instruments. Additionally, Ableton Live provides advanced features such as warp, clip-launching, and crossfading, making it an ideal choice for live performance and studio production.


Is Ableton Better Than Logic For Electronic Music Production?


Both Ableton and Logic are popular DAWs for electronic music production. The choice of which is better depends on personal preferences and workflow. Ableton excels at live performance and looping, while Logic is more traditional in its layout and mixing capabilities.


It’s best to try both and see which one suits your needs.


Conclusion


To summarize, Ableton Live is a top choice for electronic music production due to its unique features and user-friendly design. Its intuitive workflow allows for seamless experimentation with sound and composition. Its ability to integrate with various hardware and software options enhances the overall music-making experience.


Whether you are a beginner or seasoned electronic music producer, Ableton Live is a powerful tool to unleash your creativity and produce high-quality music. So, start exploring and have some fun with it!