Categories
Archive

How To Make Your Songs Sound Professional

To make your songs sound professional, focus on the quality of your recording, mixing, mastering, and arrangement. A professional-sounding song starts with proper recording techniques, well-mixed tracks, and mastered audio that enhances the overall sound.


By following these steps, you can ensure that your music stands out from the crowd in an oversaturated industry. As a musician, you want your songs to be heard and appreciated by as many listeners as possible. To achieve this goal, you must make your music sound professional.


A professional-sounding song can be the difference between a fleeting hobby and a successful career in music. However, achieving this level of quality can be challenging, especially if you don’t have any recording or mixing experience. We’ll provide you with some practical tips on how to make your songs sound professional, even if you’re working on a limited budget.
How To Make Your Songs Sound Professional


Credit: majormixing.com


Start With High-quality Recordings

If you want your music to sound professional, you need to start with high-quality recordings. The foundation for any great song is a good recording, and if you don’t get this right, everything else will suffer as a result. Here are a few tips to help you get started:

Choose The Right Equipment

One of the most important aspects of making a high-quality recording is having the right equipment. This doesn’t mean that you need to go out and spend thousands of dollars on the latest gear, but it does mean that you need to have a good microphone, headphones, and an audio interface. A good microphone is essential, as it will capture the nuances of your voice or instrument. Headphones are also important so you can hear what you’re recording. An audio interface is necessary to convert the analog sound into digital

Optimize Your Recording Space

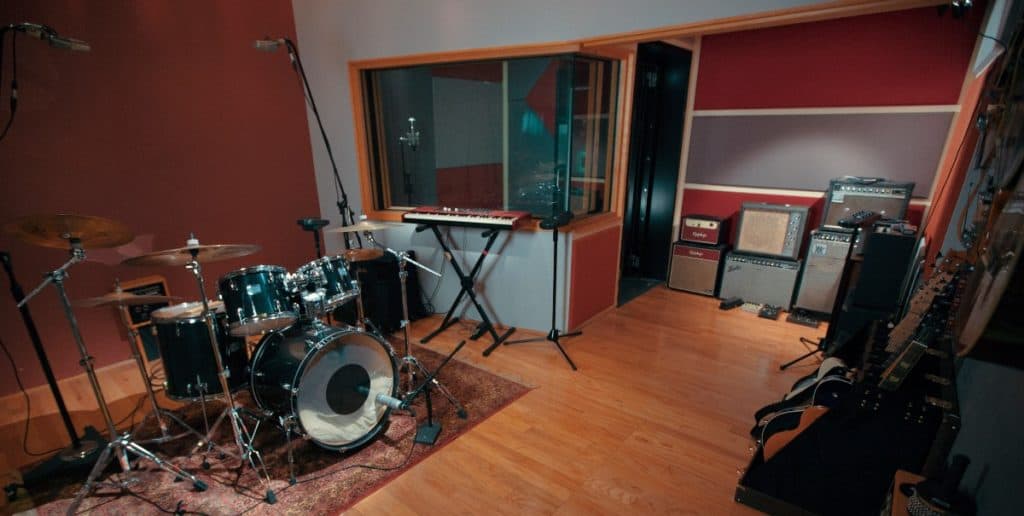
If possible, set up your recording space in a separate room from where you will be listening to playback. Choose a quiet room that has good acoustics and remove any unnecessary clutter, furniture, or objects that can create unwanted background noise. You can also place acoustic panels or blankets on the walls to deaden the sound.

Use Proper Microphone Techniques

Using proper microphone techniques can make a big difference in the quality of your recordings. A few tips to keep in mind include:

  • Speak or sing directly into the microphone, keeping it about 6-8 inches away from your mouth.
  • Avoid plosives (the popping “p” or “b” sounds) by using a pop filter or angling the mic.
  • Try different mic positions and angles to find the best sound.

By following these tips, you can ensure that your recordings sound professional and make your songs stand out from the crowd.

How To Make Your Songs Sound Professional


Credit: www.youtube.com


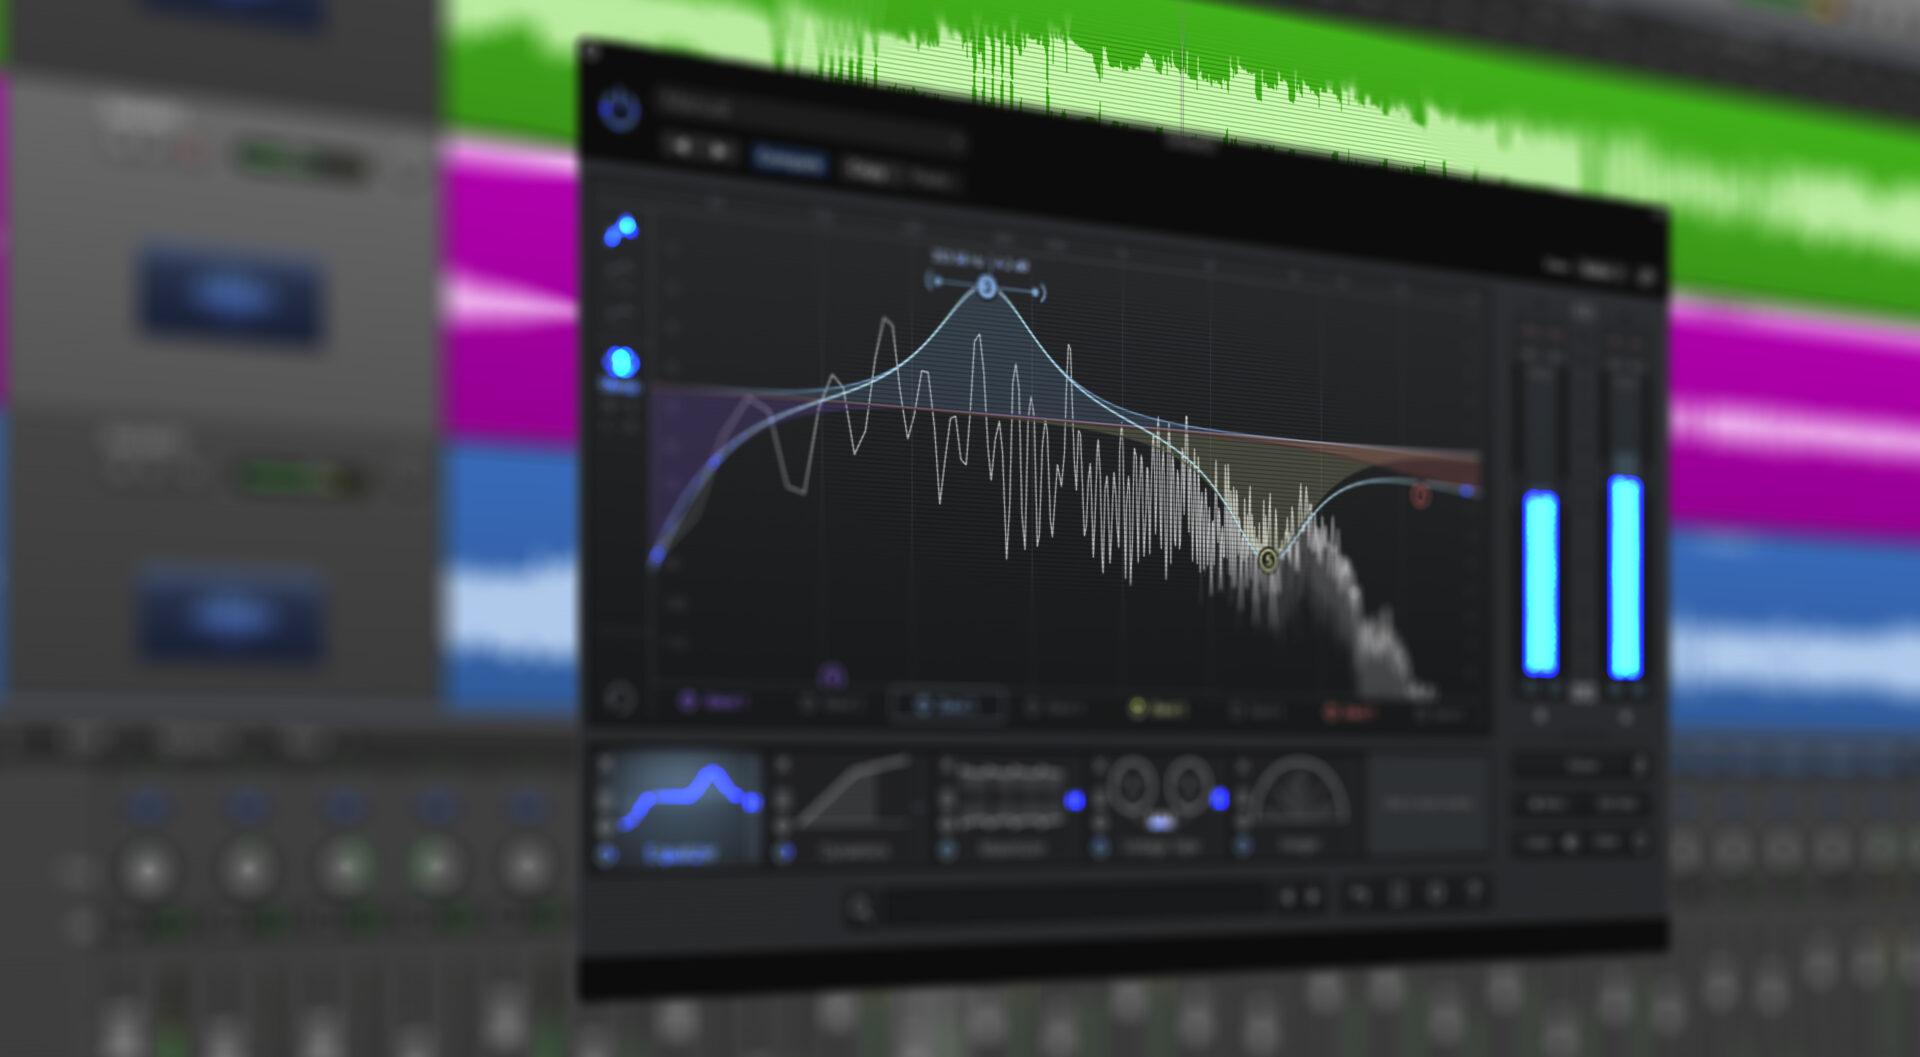
Edit And Mix Your Tracks


Elevate your music to the next level by editing and mixing your tracks to sound more professional. Utilize the power of software and techniques like compression, EQ, and editing to enhance the quality and appeal of your songs.

Editing and mixing are essential steps in making your songs sound professional. These tasks can take your music to the next level by enhancing the timing, pitch, frequencies, and clarity. In this post, we’ll dive into four crucial steps to edit and mix your tracks effectively: edit for timing and pitch, use EQ to balance frequencies, add effects and processing, and mix for clarity and depth.

Edit For Timing And Pitch

Editing for timing and pitch ensures that your music sounds polished and in sync with the beat. You can use a digital audio workstation (DAW) to adjust timing and pitch. It’s essential to pay close attention to the elements in the mix and avoid over-editing to maintain the natural feel of the song. Some tools for editing pitch and timing include Flex Time, Quantize notes, and Time Stretching.

Use Eq To Balance Frequencies

Balancing frequencies is crucial to make sure that your tracks sound clean, clear, and well-balanced. Using an equalizer (EQ) enables you to adjust the levels of various frequencies – including bass, midrange, and treble – to achieve a balanced mix. You want to ensure that each instrument and sound in the mix has its space to shine. For instance, boost the bass for the kick drum, lower the mids for the snare, or reduce harsh frequencies from vocals.

Add Effects And Processing

Effects and processing can bring depth and character to your tracks. You can use a variety of effects, such as reverb, delay, compression, and distortion, to add texture and interest to your mix. However, be careful not to overdo it. Too many effects can cause the mix to become cluttered and distorted. Always aim for natural-sounding effects that complement each other and the overall feel of the song.

Mix For Clarity And Depth

Mixing is the final step in making your music sound professional, where all elements of your track come together harmoniously. The right mix allows your music to stand out and have depth and clarity. Ensure each instrument has its space and isn’t competing with other sounds in the mix. Use volume, panning, and automation to place each element in the mix, making sure it’s balanced and well-spaced. In conclusion, editing and mixing are crucial steps in producing professional-sounding tracks. Follow the above steps, experiment, and keep a balance to create something that you can be proud of. Remember, the mix is subjective, so trust your ears, make changes until you’re satisfied with the result.

Add Dynamics With Automation


Automate your music production process to add dynamics to your songs and make them sound more professional. With the help of advanced tools and software, you can streamline your workflow and create high-quality music tracks that stand out.

Automation can be a powerful tool in making your songs sound professional. It allows you to add dynamics, create changes and sculpt effects, all of which can take your music to the next level. Here are some ways you can incorporate automation into your music production process:

Automate Volume Levels

One of the easiest and most effective ways to add dynamics to your music is by automating volume levels. By automating the volume of certain tracks or instruments, you can ensure that they are heard at the appropriate times and don’t overpower other elements in the mix. You can also use automation to create crescendos and decrescendos, which can add a real sense of emotion and drama to your music.

Create Dynamic Changes With Panning

Panning is another great way to create dynamic changes in your music. By automating the panning of certain instruments or elements in the mix, you can create a sense of movement and space that can make your music feel more alive. For example, you could have a guitar solo pan from left to right as it progresses, or you could create a “call and response” effect by having two instruments pan back and forth across the stereo spectrum.

Use Automation To Sculpt Effects

Finally, automation can be used to sculpt effects in a way that would be impossible to achieve manually. For example, you could use automation to gradually increase the amount of reverb on a vocal track, creating a sense of space and atmosphere. You could also automate the cutoff frequency of a filter to create a sweeping effect. The possibilities are endless, and by experimenting with automation, you can find new and creative ways to add depth and texture to your music. In conclusion, adding dynamics with automation is essential to make your songs sound professional. By automating volume levels, create dynamic changes with panning, and using automation to sculpt effects, you can elevate your music to a whole new level. So why not experiment with automation today and see what kind of magic you can create?


Master Your Tracks


Master Your Tracks is a comprehensive guide to help you achieve professional-sounding songs. From mixing and mastering to utilizing top-notch equipment and software, this resource will help take your music to the next level.

As a music producer or a singer, mastering your tracks is key to making your songs sound professional. While recording, the individual tracks will have different volume levels, which need to be adjusted to produce a balanced final mix. Mastering involves the manipulation of audio signals to produce a final stereo mix suitable for distribution. Let’s explore some tools and techniques you can use to master your tracks.

Use Compression To Control Dynamics

Compression is a technique that reduces the dynamic range difference between the loudest and quietest parts of the music. By balancing the levels, the track sounds more cohesive. Compression also helps to stabilize the volume of a song. To use it in your track, choose a compressor that best suits your music type, set the threshold level, and ratio. Avoid over-compression, as it can produce a flat, lifeless sound.

Apply Eq To Enhance Tonal Balance

Equalization (EQ) involves altering the frequency response of a track to improve sound quality. With EQ, you can boost or attenuate specific frequencies to create balance. For instance, you can reduce the low-end frequency to reduce muddiness, boost the high-frequency to make your tracks sound brighter, and more. Use a high-Q factor to make precise adjustments to the frequencies.

Add Limiting To Increase Volume

Limiting is a technique used to increase the overall volume of a track. It balances the loud and soft parts without clipping or distortion. To use it, set the threshold to catch any peaks, and adjust the output level of the limiter. Careful use of limiting will add more volume to your tracks without sacrificing dynamic range.

Add Stereo Widening For Depth

Stereo widening is a technique that alters the stereo field of a track, making it sound broader and more spacious. By using stereo widener effects, you can add depth and dimension to your music. To achieve a wider stereo image without overdoing it, use moderate stereo wideners instead of extreme settings.

Add Dithering For Final Export

Dithering is the final technique, used to reduce the bit-depth in a signal. This technique masks low-level noise and yields a cleaner final mix. It helps to maintain quality when exporting your music from a higher bit depth to a lower one. When exporting, add a dithering plugin to ensure cleaner audio quality in your final mix. In conclusion, mastering your tracks is crucial to making your songs sound professional. By using compression, EQ, limiting, stereo widening, and dithering as outlined above, you can ensure your tracks are well-balanced, polished, and ready for release.

Final Tips


To make your songs sound professional, focus on quality production, proper mixing and mastering, and creating memorable hooks and melodies. Utilize various tools and techniques, such as EQ, compression, harmonies, and effects, to enhance the overall sound and impact. Continuously refine and perfect your craft through hard work, dedication, and collaboration with other musicians and industry professionals.

Final Tips: Now that you have learned the nitty-gritty of how to make your songs sound professional, it’s time to wrap it up with some final tips. These tips will help you give the finishing touches to your music and take it to the next level. Use reference tracks: One of the best ways to make your music sound professional is by comparing it to other commercially successful tracks. You can analyze their production, mixing, and mastering techniques, and try to replicate them in your own music. This process is called using reference tracks, and it can be a game-changer for your music. However, it’s essential to ensure that you’re not copying or imitating anyone’s work but learning from it. Consider hiring a professional: Mixing and mastering your music can be a daunting task, especially if you’re new to it. It’s highly recommended to consider hiring a professional and letting them handle the technical aspects of your music. This will not only save you time and effort, but it will also give you the best possible output. Professional engineers have the expertise and equipment to bring out the best in your music and make it sound flawless. Don’t overdo it: While it’s important to put in the effort to make your music sound professional, it’s equally crucial not to overdo it. Sometimes, we get carried away with using too many effects, plugins, or techniques in our music, which can make it sound cluttered and unnatural. It’s vital to ensure that every element in your music has a purpose and adds value to the overall feel of the track. Keep it simple and classy, as they say, less is always more. In conclusion, following these final tips will help you make your songs sound professional and polished. Using reference tracks and hiring a professional can take your music to the next level. Simplicity and purpose are key to achieving a clean and professional sound. Incorporate these tips in your music-making process, and you’ll see the difference they make.

Frequently Asked Questions For How To Make Your Songs Sound Professional


How Do I Make My Song Sound Professional?


To make your song sound professional, you need to focus on the quality of your lyrics, composition, and production. Make sure that your song has a clear structure, with a catchy hook and engaging verses. Work with experienced producers who can help you achieve the sound you’re looking for.


Pay attention to the mix, mastering, and overall sound quality. Finally, promote your song effectively to reach your target audience.


What Makes A Song Professional?


A professional song typically has clear, well-structured lyrics that evoke emotion and a distinct melody. The sound quality should be high, befitting of a professional recording, and the instrumentals and vocals should be properly balanced. Ultimately, a professional song seamlessly blends various musical elements to transport listeners to a specific emotional space.


How Do You Make Music Like A Professional?


To make music like a professional, you need to have a deep understanding of music theory and different instruments. You also need to have access to high-quality recording and production equipment, as well as a good understanding of mixing and mastering techniques.


It’s important to continuously improve your skills and stay up to date with industry trends. Collaborating with other musicians and seeking feedback from professionals can also help improve your music.


How Do I Make My Audio Recording Sound Professional?


To make your audio recording sound professional, follow these guidelines: 1. Use a high-quality microphone to capture clear audio. 2. Record in a quiet and controlled environment. 3. Avoid background noise and other interruptions. 4. Edit your recording to remove any unwanted noises or mistakes.


5. Apply EQ, compression, and other effects to enhance the overall sound quality.


Conclusion


To sum it up, making your songs sound professional demands attention to detail. It’s essential to have a clear vision of the sound you want and equip yourself with the right tools to materialize it. Understanding the importance of pre-production, selection of suitable software and plugins, and proper mixing and mastering strategies can take your music to the next level.


So, follow these guidelines with determination and patience, and you may find yourself with a hit album sooner than you imagined!


For more background, see Audio mixing (recorded music) on Wikipedia. You may also like our guide: How Can I Make My Mixes Sound Professional.
Categories
Archive

Mixing Vocals In Logic Pro X With Stock Plugins

To mix vocals in Logic Pro X with stock plugins, simply add the desired plugins to each vocal track and adjust accordingly. Utilize tools such as EQ, compression, and reverb to create a balanced, polished sound.


Mixing vocals is an essential aspect of music production. With Logic Pro X’s built-in stock plugins, achieving a professional sound is a simple and accessible feat. By utilizing tools such as EQ, compression, and reverb, the vocals can be balanced and polished.


Applying these plugins to individual tracks allows for an extremely customized sound, tailoring each vocal to fit the track’s specific needs. In this guide, we will go over the basics of mixing vocals in Logic Pro X with stock plugins, providing essential tips to elevate your productions. So, let’s dive in!


Preparing The Vocal Track


Prepare your vocal track by cleaning up background noise and adjusting levels before applying stock plugins for the best mixing results in Logic Pro X. Use EQ, compression, and reverb to enhance the vocals and make them stand out in your mix.

When it comes to mixing vocals in Logic Pro X, preparing the vocal track is a crucial step. To achieve an outstanding sound quality, some essential steps need to be followed. This article will provide detailed information on how to prepare the vocal track using stock plugins in Logic Pro X.

Cleaning Up The Track

Before diving into mixing, it is necessary to clean up the vocal track. A clean vocal track provides a better foundation for the mixing process. Here are some of the essential tips to clean up the vocal track:

  • Delete any unwanted regions
  • Delete background noise
  • Adjust the vocal levels
  • Remove any unwanted background vocals

Setting Up The Channel Strip

After cleaning up the track, it’s time to set up the channel strip. The channel strip in Logic Pro X provides an excellent starting point for processing the vocal signal. Here are some essential tips to set up the channel strip:

  1. Insert the Channel EQ and set a high-pass filter to remove any low-end rumble.
  2. Add the Compressor to control the dynamic range and create a consistent vocal level.
  3. Next, insert the Space Designer to add reverb and create a sense of space in the mix.

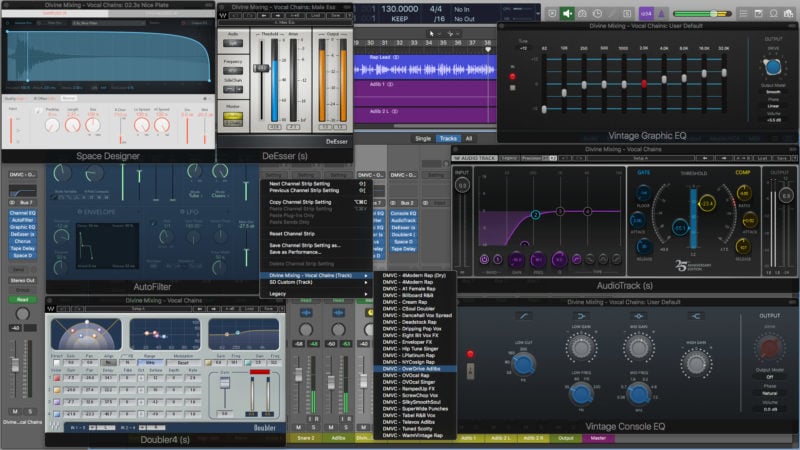
Choosing The Right Plugins

Choosing the right plugins is essential in mixing vocals in Logic Pro X. The stock plugins offer excellent sound quality and provide a vast array of options for processing vocals. Here are some of the essential stock plugins for mixing vocals:

Plugin Name Function
Channel EQ Equalization
Compressor Dynamic Range Control
Spatial Designer Reverb and Space Creation
DeEsser De-Essing
Tape Delay Delay

In conclusion, preparing the vocal track before mixing in Logic Pro X is an essential step. Cleaning up the track and setting up the channel strip can provide a better foundation for the mixing process. Choosing the right plugins is also crucial in achieving an outstanding sound quality. By following these tips and using the stock plugins, anyone can achieve a professional-sounding mix.

Equalizing The Vocals


Achieving a balanced and professional sound when mixing vocals in Logic Pro X can be challenging, but with the use of stock plugins and proper equalization techniques, it can become more manageable. Equalizing the vocals can help to remove unwanted frequencies, enhance necessary ones and create a pleasant listening experience.

Adjusting The Low Frequencies

When mixing vocals, adjusting the low frequencies is essential to give them warmth and weight. In Logic Pro X, use the Channel EQ plugin to modify the low end of the vocals. First, identify any problematic frequencies that are clashing with the instruments in the mix. Then, use a low-cut filter to remove any unnecessary low-end rumble and mud. Boosting frequencies around 100-200 Hz can add warmth to the vocals, while reducing around 400-500 Hz can help reduce boxiness or muddiness in the vocals.

Tweaking The Mid Frequencies

Equalizing the mid frequencies can help bring out the clarity and presence of the vocals. In Logic Pro X, use the Channel EQ plugin to adjust the mid frequencies. Start by identifying any harsh or nasal frequencies in the vocals, which can typically be found around the 1-2 kHz range. Use a narrow Q-factor and reduce those frequencies slightly to smooth out any harshness. Boosting frequencies around 2-5 kHz can add clarity and cut-through to the vocals, while reducing around 500-800 Hz can remove any muddiness in the mid-range.

Enhancing The High Frequencies

Finally, enhancing the high frequencies can add brightness and air to the vocals. Use the Channel EQ plugin to adjust the high frequencies in Logic Pro X. Start by boosting frequencies around 10 kHz to add sparkle and presence to the vocals. You can also use a shelving filter to adjust the frequencies above 10 kHz for a natural-sounding high-end boost. Be careful not to overdo it, as too much high-end boost can result in a harsh or sibilant sound. Overall, equalizing the vocals is an important step in mixing. With these tips and techniques, you can achieve a well-balanced and professional-sounding vocal mix using only Logic Pro X’s stock plugins.


Dynamic Processing


Achieving a professional vocal mix is possible with Logic Pro X’s stock plugins through dynamic processing. Using the compressor and EQ plugins, you can reduce unwanted frequencies and balance the vocal’s levels, making it fit seamlessly into your mix.

Dynamic Processing is an essential step to achieve a well-balanced vocal mix. It involves using a combination of compression, de-essing, and limiting to control and even out the dynamic range of the vocal track. In Logic Pro X, using stock plugins, dynamic processing can be done with ease. Here are some of the techniques you can use for dynamic processing.

Using Compression

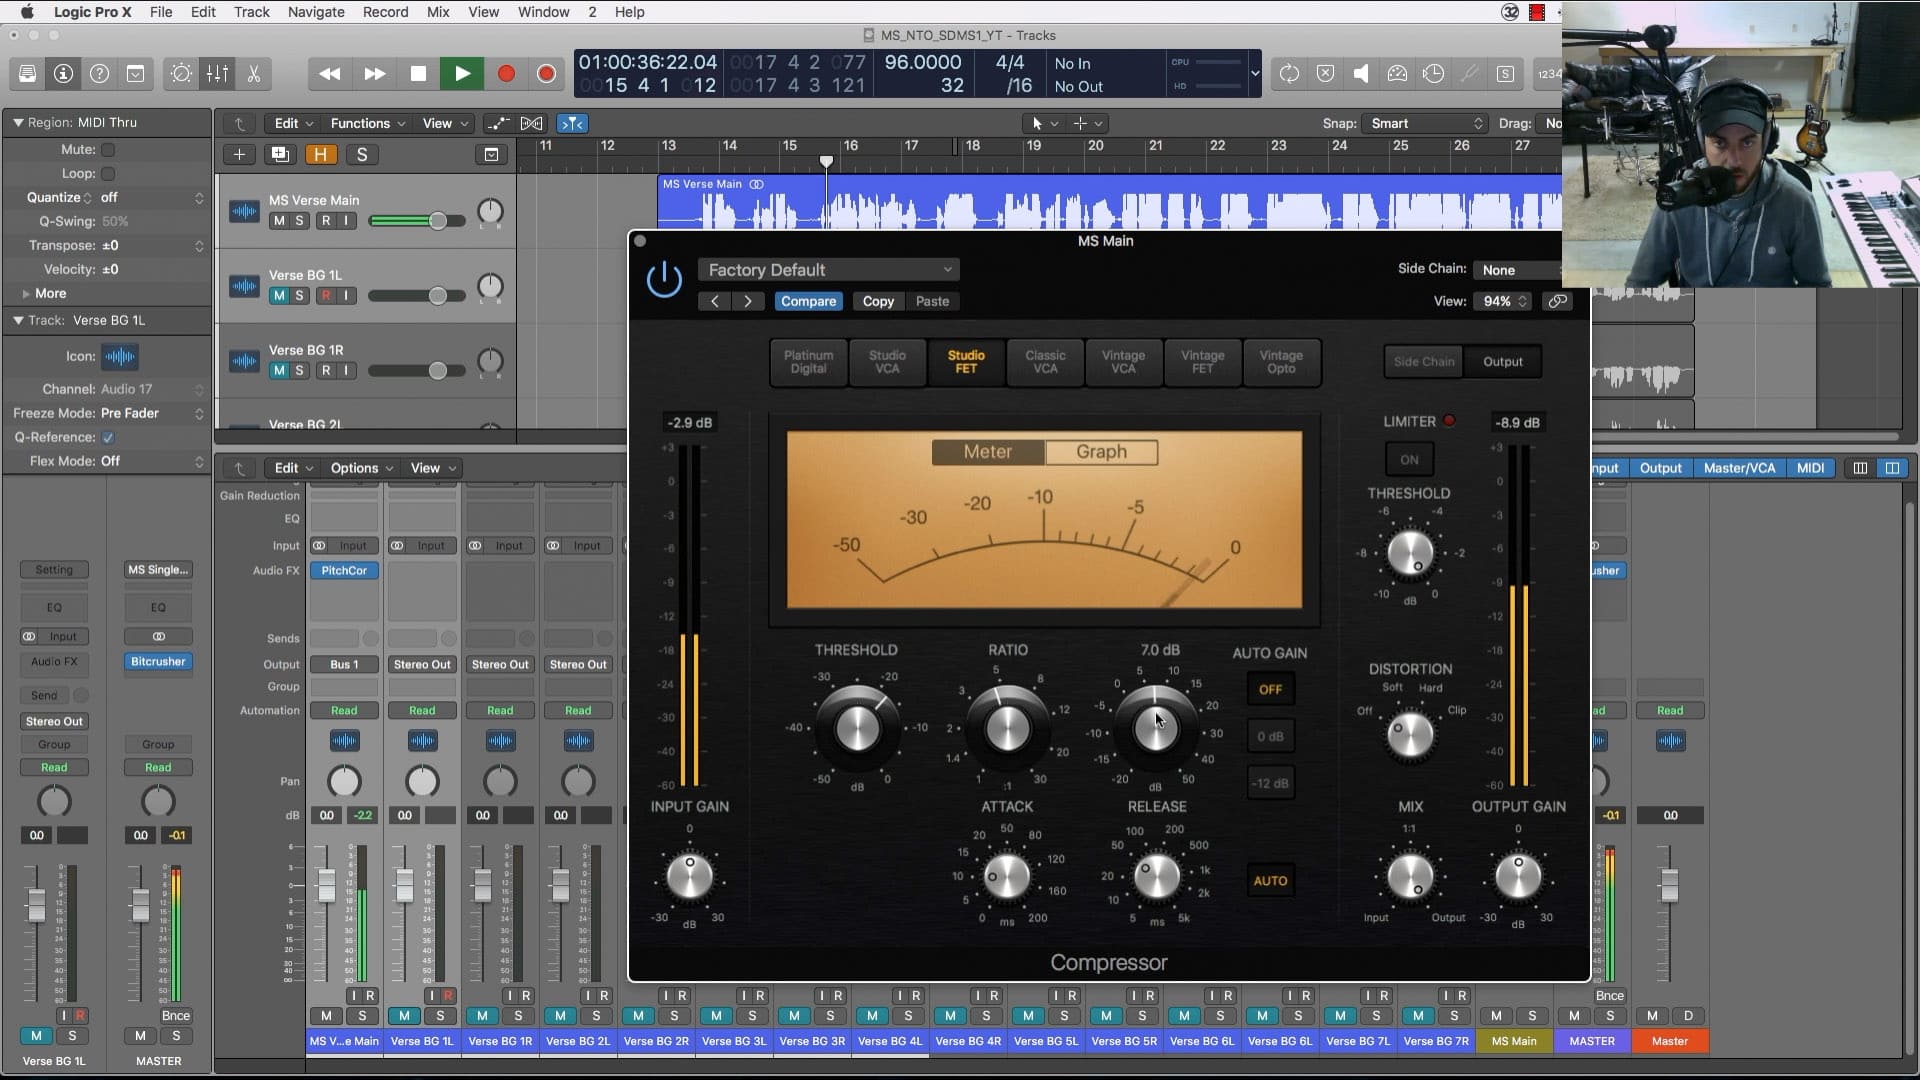
Compression is the most crucial tool in vocal mixing. It helps to reduce the dynamic range of the voice, making the quiet parts louder and the loud parts softer. In Logic Pro X, the stock compressor plugin is excellent for this purpose. To use it, insert the compressor on the vocal channel and adjust the threshold to around -15dB. Then set the ratio at 2:1 and adjust the attack and release times to taste. You’ll want to aim for a reduction of around 5dB to 6dB on the vocal track.

Adding De-essing

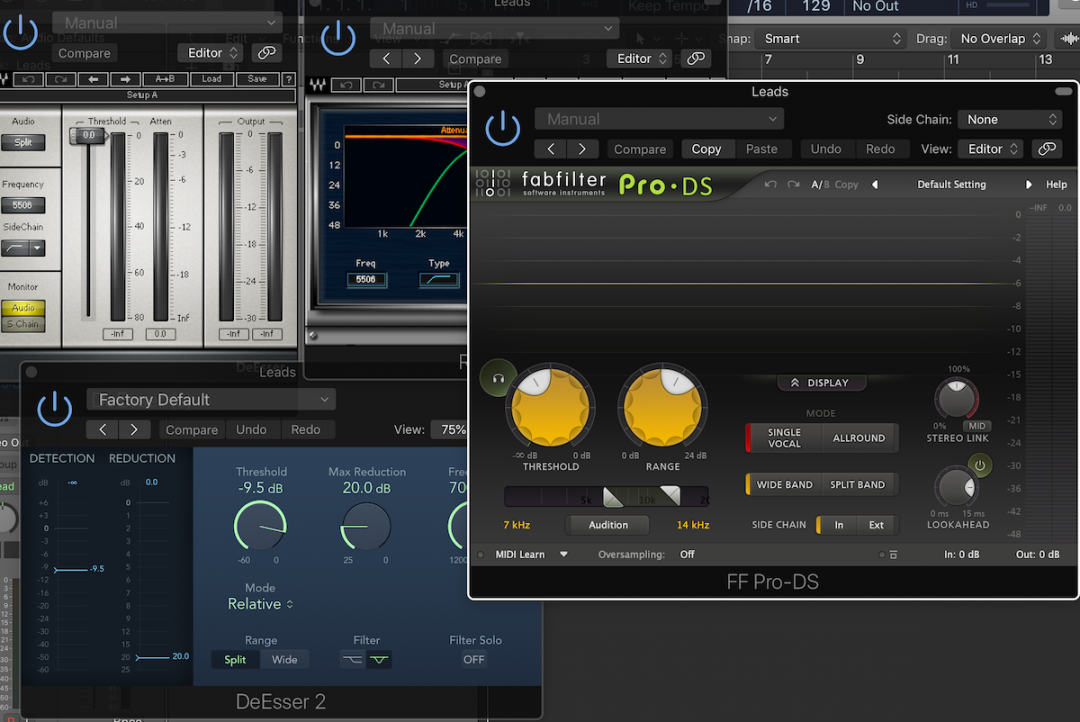
De-Essing is the process of reducing the harsh, sibilant sounds that can be present in vocals when the artist pronounces ‘s’ and ‘sh’ sounds. Logic Pro X comes with a stock de-esser plugin that makes this process easy. After inserting the plugin on the vocal channel, adjust the frequency band to target the offending sibilance and set the range so that it only reduces the harshness by around 3dB.

Applying Limiting

Limiting is the process of reducing the peaks in the vocal track, ensuring that it never exceeds a specific level. Logic Pro X’s Limiter plugin is an excellent tool for this purpose, with a transparent character that will not color your sound. Insert the limiter on the vocal channel and set the threshold to -0.1dB, then adjust the release time to ensure that the limiting is smooth and transparent. However, be careful not to overuse limiting as it can harm the dynamics of the vocal performance. In conclusion, using dynamic processing to mix vocal tracks is an essential part of achieving a well-balanced mix. Using stock plugins in Logic Pro X, you can achieve excellent results with compression, de-essing, and limiting. With the right adjustments and a careful ear, your vocal tracks can sound amazing without the need for expensive third-party plugins.

Mixing Vocals In Logic Pro X With Stock Plugins


Credit: seandivine.com


Adding Effects


By using stock plugins in Logic Pro X, you can easily mix vocals and add effects to your tracks. From EQ, compression to reverb and delay, Logic Pro X provides a range of tools that help you create a professional-sounding mix.


So, explore the stock plugins and experiment with different effects to add depth and dimension to your vocals.

Adding Effects Adding effects is an essential step in producing a great vocal mix. Logic Pro X offers several stock plugins that can be utilized to make your vocals sound professional and polished. In this article, we will discuss how to use reverb, delay, and modulation effects to create depth and space in your vocal mix. Creating a Space with Reverb Reverb is a powerful tool that can be used to create a sense of space in your vocal mix. It simulates the sound of a room or hall, giving your vocals a natural and organic sound. To add reverb to your vocals in Logic Pro X, follow these steps: 1. Add a Space Designer plugin to your vocal track. 2. Choose a preset that matches the vibe of your song. 3. Adjust the Wet/Dry control to determine the amount of reverb that is applied to your vocals. 4. Use the Decay and Predelay controls to fine-tune the reverb sound. Adding Depth with Delay Delay is a classic effect that can add depth and dimension to your vocals. It can be used to create echoes, doubling effects, and more. Here’s how to add delay to your vocals in Logic Pro X: 1. Add a Delay plugin to your vocal track. 2. Choose a delay time that matches the tempo of your song. 3. Adjust the Feedback and Mix controls to create the desired effect. 4. Experiment with the various delay modes, such as Ping Pong or Tape Delay. Using Modulation Effects Modulation effects such as chorus, flanger, and phaser can add movement and interest to your vocal mix. They work by altering the pitch and timing of the vocal signal. To use modulation effects in Logic Pro X, follow these steps: 1. Add a Modulation plugin to your vocal track. 2. Choose the effect type that you want to use (e.g. chorus). 3. Adjust the Rate, Depth, and Mix controls to create the desired effect. 4. Experiment with different effect types and settings to find the perfect sound. By using reverb, delay, and modulation effects in Logic Pro X, you can create a professional-sounding vocal mix that will stand out in any genre. Don’t be afraid to experiment with different settings and plugins to find the perfect sound for your vocals.

Automation


Automating vocal mixing in Logic Pro X with stock plugins simplifies the otherwise tedious task of leveling and processing the vocals. By utilizing tools such as Compressor, EQ, and De-Esser, the vocal tracks can be refined to achieve a polished sound.

Automating Volume

Automation is a great tool for mixing vocals in Logic Pro X. Automating volume is one of the most common uses of automation. By automating the volume of your vocal tracks using the built-in Flex tool, you can adjust the levels of the vocals throughout the track as needed. Here are the steps you can follow to automate the volume of your vocal tracks:

  1. First, select the track you want to automate and click on the “A” button to reveal the automation controls.
  2. Click on the track’s volume bar and select “Create Track Automation” to create a new automation lane.
  3. Choose the “Flex” tool from the toolbar and drag over the automation points to create a smooth curve in the automation lane.

Automating Effects Parameters

In addition to automating volume, you can also automate effects parameters. Automation of effects parameters is a powerful way to create dynamic vocal effects throughout your track. For example, you can automate the reverb or delay amount to create a sense of space for your vocals. Here are the steps for automating effects parameters in Logic Pro X:

  1. Select the track you want to automate and click on the “A” button to reveal the automation controls.
  2. Choose the effect you want to automate from the track’s insert section and click on the effect’s parameter you want to change.
  3. Select “Create Track Automation” from the parameter’s drop-down menu.
  4. Use the Flex tool to create a smooth curve in the automation lane to automate the effect parameter.

Creating Fades

Fades are an essential part of mixing vocals in Logic Pro X. They help to smooth out the transitions between different sections of the track and can also be used to create more space for other elements of the mix. Here are the steps to create fades in Logic Pro X:

  1. Select the area of the track you want to fade.
  2. Click on the “F” button in the track’s Header to reveal the fade controls.
  3. Click and drag to create a fade-in or fade-out on the track.

In conclusion, automation is a powerful tool for mixing vocals in Logic Pro X. It can be used to create dynamic effects, adjust volume levels, and create smooth fades. By mastering the automation features in Logic Pro X, you can take your vocal mixing to the next level.

Mixing Vocals In Logic Pro X With Stock Plugins


Credit: seandivine.com


Finalizing The Mix


In Logic Pro X, mixing vocals with stock plugins can produce professional-sounding results. Finalizing the mix involves adjusting the EQ, compression, reverb, and other effects to achieve a balanced and dynamic sound. With the right techniques and patience, it is possible to achieve a great sounding vocal mix without expensive third-party plugins.

Checking The Balance

Once you’ve added effects to your vocals, it’s time to check the balance to ensure they can be heard and understood clearly. The first thing to do is to solo the vocals and adjust the levels to make sure they sit well in the mix. You can then gradually bring the other instruments back in, adjusting their levels until the vocals can be heard comfortably without being drowned out by the other sounds.

A/b Testing

A/B testing is an important technique that can help you ensure the quality of your final mix. This involves creating two versions of the mix for comparison. You can then switch between the two versions of the mix to hear any differences and make necessary adjustments accordingly. This way, you can be sure that the final mix will sound great regardless of the device it’s played on.

Preparing For Mastering

After you’ve checked the balance and performed A/B testing, it’s time to prepare your mix for mastering. Before you send your mix for mastering, you want to make sure that all the audio files are consolidated and that there are no effects or plugins on the master track. You can also add fades and crossfades between each track to smoothen out any transitions. This way, the mastering engineer will be able to easily work with your mix to create the best possible master.

Conclusion

Mixing vocals in Logic Pro X may seem daunting at first, especially if you’re new to the software. However, by following the steps outlined here and using the stock plugins available, you can create a professional-sounding mix that stands out.

Mixing Vocals In Logic Pro X With Stock Plugins


Credit: www.youtube.com


Frequently Asked Questions For Mixing Vocals In Logic Pro X With Stock Plugins


What Plugins Are Needed To Mix Vocals?


The necessary plugins for mixing vocals vary depending on the digital audio workstation (DAW) being used. However, some common plugins include EQ, compression, reverb, delay, and de-esser. It is important to use high-quality plugins and adjust settings according to the specific vocal recording.


What Are Logic Stock Plugins For Vocals?


Logic stock plugins for vocals are software tools pre-installed in the Logic Pro software used for enhancing and improving vocals in music productions. These plugins have built-in algorithms that correct pitch, equalize, compress and add effects to make vocals sound better and more polished.


What Order Should Plugins Go In For Mixing Vocals?


The order of plugins for mixing vocals depends on personal preference. However, a common recommendation for a starting point is EQ, compression, de-esser, reverb, and delay. It is important to use plugins in a way that enhances the vocals without overpowering or distorting them.


Experiment with different orders to find what works best for your vocals.


How Do I Master Stock Plugins In Logic Pro X?


To master stock plugins in Logic Pro X, practice their use in different settings and experiment with their settings. Take advantage of Logic Pro X’s user manual and online resources to learn more about each plugin. Utilize key commands to streamline your workflow and save time.


Regularly update your software to access new features and plugins.


Conclusion


Effective vocal mixing is a crucial aspect of producing a high-quality track. With Logic Pro X’s stock plugins, you can easily achieve professional-sounding vocals. Applying compression, EQ, and reverb can enhance the vocals and make them stand out in the mix.


Experiment with different settings until you find the perfect sound. With these tips, you can take your vocal mixing skills to the next level and create impressive tracks that will capture your audience’s attention.

Categories
Archive

Midnight Punch Drums For Melodic House Techno

Midnight punch drums are ideal for melodic house techno, adding depth and complexity to the music. In addition to traditional kick and snare drums, these unique percussion instruments bring a new dimension to electronic dance music.


For electronic music producers, finding the perfect sounds to enhance their tracks is essential. While traditional drum kits and synthesizers offer a solid foundation, sometimes more exotic sounds are needed to add depth and complexity to the music. That’s where midnight punch drums come in.


These unique percussion instruments offer a distinctive sound that can help electronic music stand out from the crowd. Whether you’re working on melodic house techno or any other genre, incorporating midnight punch drums into your tracks can elevate them to the next level. We’ll take a closer look at what makes midnight punch drums so special and how they can be used in electronic music production.


Introduction To Midnight Punch Drums

Midnight Punch Drums is a rhythmic pattern that has become increasingly popular in the Melodic House Techno world. It consists of three main elements: the kick, the snare, and a percussion sound that can vary depending on the producer’s preference. The purpose of this blog post is to explore the concept of Midnight Punch Drums and explain how they add energy to Melodic House Techno tracks.

Exploring The Concept Of Midnight Punch Drums

Midnight Punch Drums are characterized by a crisp, punchy sound that cuts through the mix and grabs the listener’s attention. The kick drum is the foundation of the pattern, usually playing on the downbeat of every measure. The snare, on the other hand, is placed on the offbeat, giving the pattern a syncopated groove. The percussion sound can vary but is often a hi-hat, shaker, or clap, playing quick, energetic patterns that fill out the groove.

Elements of Midnight Punch Drums Description
Kick The foundation of the pattern, playing on the downbeat of every measure.
Snare Placed on the offbeat, giving the pattern a syncopated groove.
Percussion Varying sounds like hi-hats, shakers or claps that play quick, energetic patterns and fill out the groove.

How Midnight Punch Drums Add Energy To Melodic House Techno

Midnight Punch Drums add energy to Melodic House Techno in various ways. Firstly, the punchy kick and snare provide a strong rhythm that drives the track forward. The offbeat snare gives the pattern a lively bounce, while the kick anchors the beat. Secondly, the energetic percussion patterns help to fill out the frequency spectrum, creating a sense of movement and flow. Thirdly, the dynamic range of the pattern, with its sharp transients and deep resonance, creates a sense of excitement and anticipation as the listener is drawn towards the drops and climaxes of the track.

  1. Midnight Punch Drums add energy to Melodic House Techno by providing a strong, driving rhythm.
  2. The pattern’s energetic percussion fills out the frequency spectrum, creating a sense of movement and flow.
  3. The dynamic range of the pattern creates excitement and anticipation, drawing the listener towards drops and climaxes.

In conclusion, Midnight Punch Drums are an essential element of Melodic House Techno that provide energy, movement, and excitement. Whether you’re a producer looking to create dynamic tracks or a listener looking for music to dance to, understanding the concept of Midnight Punch Drums is essential to enjoying the genre.

Building The Foundation Of Your Track


Building the foundation of your track is essential in creating a solid and memorable piece of music. To achieve this in Melodic House Techno, incorporating Midnight Punch Drums can add an edgy and dynamic element to your sound. These drums create a unique depth and drive that will keep your listeners engaged from start to finish.

Starting a new track can be an exciting and overwhelming process. As a producer, you want to create something that moves people, sends them into tantalizing new territories, and keeps them coming back for more. To achieve this, you need to build the foundation of your track. This means creating a strong backbone that can support your melodies, vocals and other elements.

Choosing The Right Kick Drum Sample

The kick drum is the foundation of almost every dance track, and choosing the right one is crucial. A good kick can make or break your track. When selecting a kick, focus on finding one that suits the genre of your track. If it’s a melodic house track that you’re working on, you want a deep, thumping kick that is clean and punchy, with sustained low frequencies that will keep the groove moving.

Layering Your Kick And Percussion Elements

To create a more complex and interesting rhythm, it is essential to layer your kick and percussion elements. Combining different samples can add character and help you achieve a unique sound for your track. Layering can also provide a greater sense of depth and can help fill out the lower frequencies of your track.

Using The Right Rhythm To Create A Sense Of Urgency

Having the right rhythm is crucial in creating a sense of urgency and energy in your track. To achieve this, select percussion elements that complement your kick drum. It is essential to consider the overall pace and energy of your track to ensure you create a sense of momentum and keep the listener engaged. Building the foundation of your track is crucial in creating a successful melodic house techno track. The correct application of kicks, layering your percussion elements, and setting the right rhythm can help create an engaging and unique sound that leaves a lasting impact on the listener.


Choosing The Right Sounds For Your Drums


Selecting the perfect drums can elevate your Melodic House Techno track. When it comes to Midnight Punch Drums, they’re designed for melodic and energetic productions, making them an ideal choice for this genre. The right sounds will help you achieve a unique and captivating sound.

As a producer looking to create the perfect melodic house techno track, choosing the right drum sounds is crucial. The sound of your drums can make or break your track, and it’s important to choose samples that fit well with the overall vibe of your song. So how do you go about selecting the right drum sounds for your track? Let’s explore some tips and tricks.

Exploring Different Drum Samples And Their Tonal Characteristics

When it comes to selecting drum samples, it’s important to understand the tonal characteristics of each sound. Kick drums, for example, are typically the backbone of your track and should have a strong bottom end with a tight transient. Snare drums, on the other hand, should be cutting and have a good mid-range presence. Explore different sample packs and listen to each sound individually. Pay attention to the attack, decay, sustain, and release of each sample to ensure it fits well with your track. Here are some tonal characteristics to consider when selecting drum samples:

Drum Sound Tonal Characteristics
Kick Drum Strong bottom end, tight transient, good sustain
Snare Drum Cutting, good mid-range presence, crisp attack
Hi-Hat Bright, tight, and crisp sound with a quick decay
Clap Fat sound with a strong mid-range, good sustain, and reverb

Using Foley Sounds To Add Texture And Interest

Incorporating foley sounds into your drums is an excellent way to add texture and interest to your tracks. Foley sounds are essentially sounds recorded from real-world objects such as keys, coins, and household items, and can be used to add a unique character to your drums. Try recording and incorporating your own foley sounds, or explore sample packs specifically focused on foley percussion. Adding a shaker, tambourine, or wooden block hit can add a touch of organic and human-like feel to your drums.

Incorporating Unique Drum Machines To Create A Signature Sound

Incorporating unique drum machines is an excellent way to create your signature sound. Drum machines such as the Roland TR-909, TR-808, and Elektron Analog Rytm can add a unique character to your drums, allowing you to stand out in a crowded genre. Experiment with different combinations of drum machines and samples to find your perfect blend. Don’t be afraid to tweak and customize your drum sounds using filters, EQs, and other processing tools to make them fit perfectly in your track. Remember, selecting the right drum sounds is essential in making your melodic house techno track stand out. Follow these tips and tricks to find the perfect sounds and start creating your masterpiece today.

Midnight Punch Drums For Melodic House Techno


Credit: www.productionmusiclive.com


Building Groove And Forward Motion


Building groove and forward motion has never been easier with Midnight Punch Drums. This sample pack offers a collection of melodic house techno drums that will take your track to the next level. Get ready to impress with the perfect combination of rhythm and melody.

Building groove and forward motion are crucial elements in creating a driving and immersive music track, and Midnight Punch Drums For Melodic House Techno provides just the tools you need to achieve that. With its extensive range of drum samples, you can add depth, complexity, and movement to your beat. In this section, we will discuss how to program hi-hat and cymbal patterns, create ghost notes and off-beat rhythms, and use percussion to create a sense of space and movement.

Programming Hi-hat And Cymbal Patterns To Drive Your Track

One of the best ways to drive your track is by programming hi-hat and cymbal patterns. These sounds add a punchy element to your rhythm section, and when used correctly, they can create a lively and dynamic beat. Try opening and closing the hi-hat at different intervals to add variation and depth to your beat. You can also use different cymbals, such as ride and crash cymbals, to add emphasis to specific parts of your track. Be creative with these sounds, and don’t be afraid to experiment.

Creating Ghost Notes And Off-beat Rhythms To Add Complexity

Another way to add complexity to your beat is by creating ghost notes and off-beat rhythms. Ghost notes are quiet, subtle percussive sounds that are played in between the main beats. They add texture and depth to your track, and when used sparingly, they can make a big difference. Off-beat rhythms, on the other hand, involve playing the snare drum on the off-beat, which creates a syncopated feel. This technique adds complexity to your rhythm section and helps to keep your listeners engaged.

Using Percussion To Create A Sense Of Space And Movement

Percussion is an essential ingredient in creating a sense of space and movement in your track. By adding shakers, congas, and other percussion elements, you can create a sense of movement that makes the listener feel as if they are being taken on a journey. Use these sounds to fill in the gaps between the main beats and create a groove that is irresistible to dance to. Combine different percussion sounds to create a unique sound that is specific to your track. In conclusion, building groove and forward motion with Midnight Punch Drums For Melodic House Techno is the key to creating a dynamic and immersive track. Program hi-hat and cymbal patterns, create ghost notes and off-beat rhythms, and use percussion to create a sense of space and movement. By experimenting with different sounds and techniques, you can add complexity to your beat and keep your listeners engaged throughout your track.

Processing Your Drums For Maximum Impact


Achieving maximum impact in melodic house techno requires expertly processed drums, and Midnight Punch Drums delivers just that. Using techniques like parallel compression and frequency shaping, these drums will add the perfect punch to your tracks.

As a producer of Melodic House Techno, your drums are the backbone of your music. Your drums should be processed in a way that brings out the best in every element, creating a powerful and distinct sound. Here are some tips on processing your drums for maximum impact.

Adding Saturation And Distortion To Create Warmth And Depth

Adding saturation and distortion to your drums can add warmth and depth to your sound. This technique will give your drums a fuller and more dynamic sound. Use a saturator or a distortion plug-in and apply it to your drum bus to create the desired effect. Be careful not to overdo it, as it can easily distort your audio.

Using Parallel Compression To Bring Out Detail And Punch

Parallel compression is a technique that can help bring out the detail and punch in your drums. By creating a separate track with compressed audio and blending it with the original track, you can achieve a fuller and more explosive drum sound. This technique can be a game-changer for your drums.

Using Eq To Carve Out Space And Eliminate Muddiness

Using EQ to carve out space in your mix can help eliminate muddiness in your drums. With EQ, you can adjust the frequency range of each drum element, creating a cleaner and more defined sound. Take some time to experiment with EQ settings to find the perfect balance for your drums. These processing techniques will help your drums stand out in the mix and give your Melodic House Techno productions that extra edge. With some practice and experimentation, you can create a powerful and dynamic drum sound that is both unique and impactful.


Arrangement Techniques For Effective Drum Builds

Arranging drums for melodic house techno can be challenging. Many producers struggle to build suspense and create memorable transitions that keep the dancefloor moving. Effective drum builds can help create tension and add excitement to your tracks. In this blog post, we’ll explore some practical Arrangement Techniques for Effective Drum Builds for melodic house techno producers.

Creating Tension Through Drum Fills And Builds

One way to create tension in your drum arrangement is through the use of drum fills and builds. These elements can add excitement and anticipation to the track and create a sense of climax leading to a drop. Effective drum fills are those that channel the energy of the track, filling the spaces between different drum hits or other elements with variations and rhythmic complexity.

Using Automation To Create Builds And Drops

Automation is another trick to create effective drum builds. By automating certain parameters, you can create gradual build-up and breakdowns that add excitement and anticipation for the drop. For instance, you can automate the reverb on the drums, increasing it gradually until it reaches a peak, then dropping suddenly as the beat comes back in.

The Importance Of Creating Contrast In Your Drum Arrangement

To ensure your drum arrangement has the right impact, it is critical to create contrast. The idea is to make each section of the track sound different from the previous one while still maintaining cohesion and flow. For example, you can switch from a kick-heavy groove to a frenzied drum break, or strip back the drums entirely before bringing them back in suddenly.

By using these Arrangement Techniques for Effective Drum Builds, you can create unique drums for your melodic house techno tracks that engage and excite the listener, ensuring they keep coming back for more.

Mixing Your Drums For Maximum Impact


Achieving a hard-hitting sound with your drums is crucial for making your melodic house techno track stand out. Using Midnight Punch drums can provide you with the necessary impact. Mixing them properly is key to maximizing their potential and creating a dynamic, engaging sound.

When it comes to Melodic House Techno, the drums are the backbone of the track. Laying down a solid drum mix is crucial to creating a track that engages and excites your listeners. In this post, we’re going to explore how to mix your Midnight Punch Drums for Melodic House Techno and get the maximum impact out of your drum track.

Creating Space In Your Mix For Your Drums To Breathe

One of the most important things to remember when mixing your drums is to create space in your mix for them to breathe. This means allowing enough room in the frequency spectrum for your drums to shine. If you have too many elements competing for the same frequency space, your mix will sound cluttered and muddy. Here are some tips for creating space in your mix:

  • Use EQ to carve out space for your drums in the mix.
  • Remove any conflicting frequencies from other elements in the mix.
  • Consider lowering the volume of other elements in the mix to make room for your drums.

Using Panning To Add Width And Depth To Your Drum Sounds

Another way to get the most impact out of your drum mix is to use panning. Panning is a technique that allows you to position sounds in the stereo field, creating a sense of width and depth. By panning your drum sounds, you can create a more immersive and engaging listening experience for your listeners. Here are some tips for using panning in your drum mix:

  • Pan your hi-hats slightly left or right to create a sense of movement.
  • Pan your kick drum and bass sounds to the center for a solid foundation.
  • Try panning your percussion sounds in a circular motion around the stereo field.

Using Fx To Create Interest And Excitement In Your Drum Patterns

Finally, using FX is a great way to add interest and excitement to your drum patterns. FX can be used to create builds, drops, and transitions, making your Melodic House Techno track more engaging for your listeners. Here are some tips for using FX in your drum mix:

  • Add reverb to your snare hits and clap sounds to create a sense of space.
  • Use delay to create interesting rhythmic effects on your percussion sounds.
  • Add a filter sweep to create a dramatic build before a drop.

In conclusion, mixing your Midnight Punch Drums for Melodic House Techno requires careful attention to detail. By creating space in your mix, using panning, and adding FX, you can create a drum mix that really packs a punch.


Bringing It All Together


Explore the harmonious and entrancing Midnight Punch Drums for Melodic House Techno, bringing together a fusion of techno and house beats. Utilize these intricate drum loops to enhance your melodic tracks with a unique depth and complexity.

Putting all the pieces together to create a finished track with Midnight Punch Drums can be a daunting task, especially for those new to producing Melodic House Techno. However, with enough practice and patience, it’s possible to create professional-sounding tracks that stand out from the rest. A good starting point is to focus on the drum patterns and ensure that they complement the melodic elements of the track. Here are some tips to help you bring it all together and create a finished track that shines.

Putting All The Pieces Together To Create A Finished Track

Creating a finished track with Midnight Punch Drums involves several steps that must be carefully coordinated to ensure a cohesive final product. Here are some key steps to follow:

  1. Start by laying down the foundation of your track with the kick and bass patterns. This will set the tone for the rest of the track and provide a solid groundwork for the other elements.
  2. Add your melodic elements, such as synths, pads, and arpeggiators. Experiment with different sounds and patterns until you find the right fit for your track.
  3. Add your percussion elements, including the Midnight Punch Drums. Use these to add rhythm and texture to the track, ensuring that they complement the melodic elements and don’t overpower them.
  4. Focus on transitions between different sections of the track, such as breakdowns and drops, to ensure a seamless flow from start to finish.
  5. Finish off your track by mastering and mixing it to create a polished final product.

Final Tips For Getting The Most Out Of Your Midnight Punch Drums

Here are some final tips to help you get the most out of your Midnight Punch Drums:

  • Experiment with different rhythms and patterns to find what works best for your track.
  • Use effects like reverb and delay to add depth and texture to your drums.
  • Layer your drums to create more complex patterns and add interest to your track.
  • Don’t be afraid to chop up your drum loops and rearrange them to create new patterns and variations.
  • Use automation to add movement and variation to your drum patterns.

Additional Resources For Learning And Exploring Melodic House Techno

If you’re looking to expand your knowledge of Melodic House Techno and take your production skills to the next level, here are some resources to check out:

  1. Online courses and tutorials on platforms like Udemy and YouTube.
  2. Forums and communities like Reddit, where you can connect with other producers and get feedback on your tracks.
  3. Books and ebooks on topics like music theory, sound design, and production techniques.
  4. Sample packs and VST plugins designed specifically for Melodic House Techno production.

Frequently Asked Questions For Midnight Punch Drums For Melodic House Techno


Are Pml Samples Royalty Free?


Yes, PML samples are typically royalty-free.


What Are Midnight Punch Drums?


Midnight Punch drums are a set of drum samples designed particularly for melodic house techno. These drums give a futuristic and energizing vibe, which can take your music production to the next level. They come with a variety of unique drum loops and one-shots perfect for techno producers.


How Can Midnight Punch Drums Enhance My Music Production?


Midnight Punch drums provide a futuristic and lively atmosphere to your music. They are specifically designed for melodic house techno, adding more depth and complexity to your music. These samples come with a wide range of percussive patterns and loops that can give your tracks a unique flavor.


Can I Customize The Midnight Punch Drum Samples?


Yes, you can customize these drum samples based on your preferences. The package comes with one-shots and loops which can be layered, edited, or mixed to create your unique beat. You can combine them with other samples or effects to create something different and innovative.


Conclusion


As we have seen, the midnight punch drums play a vital role in creating an exhilarating and exciting melodic house techno music. By using these drums, DJs and music producers can add a unique flavor to their tracks and make them stand out in the competitive world of electronic dance music.


Whether you are a seasoned professional or a budding amateur, the midnight punch drums are a must-have tool in your arsenal. Happy producing!

More in our Drums & beats guide.

Categories
Archive

How Much Does It Cost to Use a Music Studio

Using a music studio can cost anywhere from $25 to $200 per hour. For musicians and artists, using a professional music studio can bring their creations to life.


The cost of using a music studio varies depending on the location, equipment, and services offered. In general, hourly rates for using a music studio range from $25 to $200 per hour. However, some studios may require a minimum booking time or offer package deals for longer sessions.


Additionally, studios may charge extra fees for additional technical assistance, instrument rentals, or mixing and mastering services. For those who are serious about creating professional-quality music, using a music studio can be a worthwhile investment.

How Much Does It Cost to Use a Music Studio


Credit: www.peerspace.com


Factors That Affect Music Studio Rental Costs


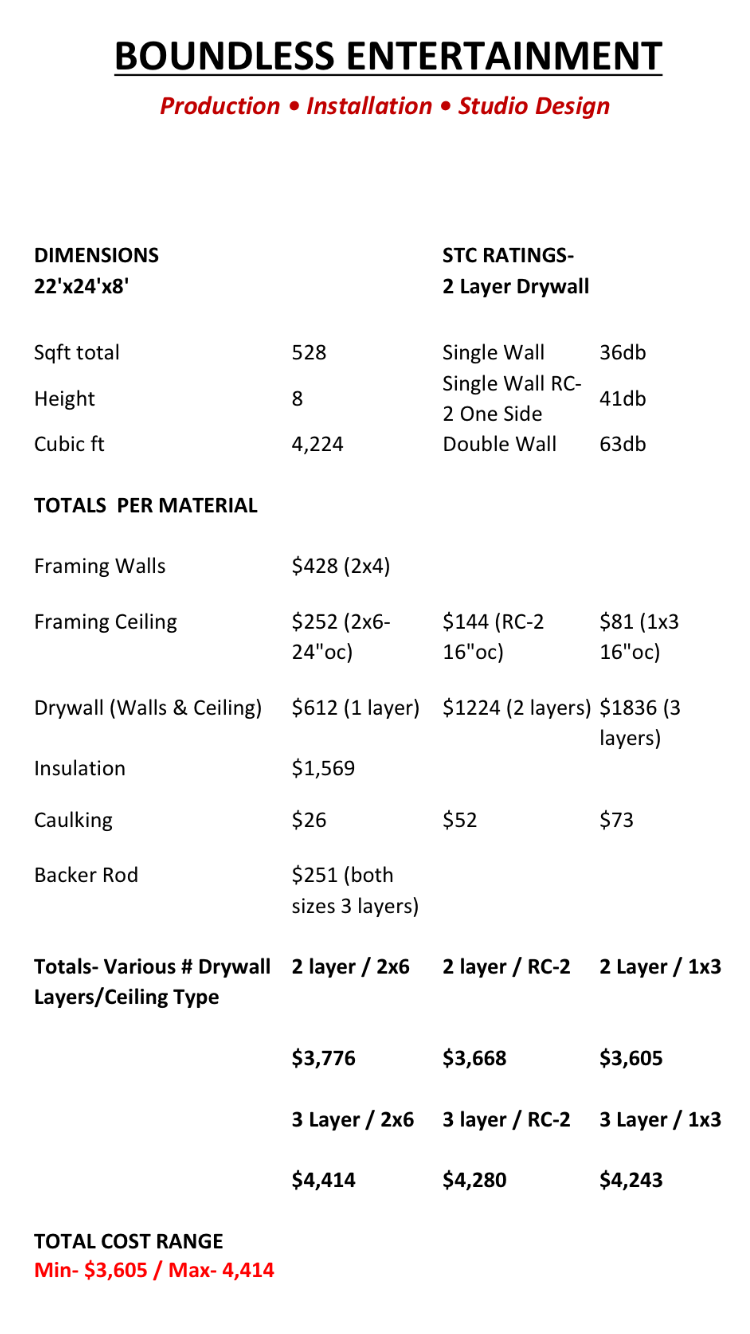
The cost of renting a music studio depends on several factors, including location, studio size, amenities, and equipment. These factors make studio rental prices vary widely, so it’s important to do your research before committing to a rental.

Factors that Affect Music Studio Rental Costs When planning to use a music studio to record your next album, one of the essential factors to consider is the cost. Understanding the factors that affect music studio rental costs enables you to budget adequately. Here are the primary factors that affect the rental cost of music studios. H3 heading: Location The location of the music studio plays a crucial role in determining the rental cost. Generally, studios located in major cities or more densely populated areas tend to be more expensive compared to those in suburbs or rural areas. If you choose a music studio located in an area with high rent, you should expect to pay more. H3 heading: Studio Size Music studio size is another vital factor that affects the rental costs. Larger studios with more rooms, equipment, and acoustic treatment are often more expensive than smaller ones. However, if you don’t need a lot of space or equipment, you may be able to save on rent by choosing a smaller studio. H3 heading: Equipment The type and quality of equipment in a music studio can significantly impact the rental cost. A studio with higher-end equipment, such as microphones, preamps, and speakers, is likely to charge more than one with lower-end equipment. However, if you have your equipment, you might be able to negotiate a lower rental rate. H3 heading: Additional Amenities Music studios may offer additional amenities such as soundproofing, instrument rentals, backline gear, and engineer services, among other things. These amenities can be convenient, but they also come at an additional cost. Studios with more amenities tend to charge more than those with fewer or no amenities. In summary, when searching for a music studio to rent, several factors can affect the cost. Location, studio size, equipment, and additional amenities are the primary factors that affect the rental cost. Understanding these factors can help you make an informed decision and budget accordingly.

Hourly Vs Daily Rates

Music studios are essential for artists looking to record their music professionally. But before you step into a music studio, it’s important to understand the costs involved. One of the biggest factors that determine your music recording costs is the type of rate you choose – hourly or daily. In this post, we will look at the pros and cons of each option for better clarity.

Pros And Cons Of Hourly Rates

The hourly rate is calculated based on the number of hours you use the music studio. Typically, the hourly rate starts from $50 to $100 per hour, but this can vary from one studio to another. Here are the pros and cons of hourly rates:

Pros Cons
  • You pay only for the time you use and can save money if you finish recording early.
  • You can use the studio for shorter periods if you have a tight schedule.
  • If you run over your time, it could end up being more expensive than a daily rate.
  • You might feel rushed to complete your recording before time runs out.
  • You may not be able to book the studio for consecutive days due to high demand.

Pros And Cons Of Daily Rates

The daily rate is another option offered by music studios. It’s a flat fee charged for a full day’s use of the studio. The daily rate usually starts at around $250 to $500 per day but can vary depending on several factors, such as studio quality and location. Here are the pros and cons of daily rates:

Pros Cons
  • You can use the studio for a more extended period, giving you more time to complete your recording.
  • You can book the studio for consecutive days for more extensive projects without worrying about availability.
  • Daily rates might work out cheaper if you need the studio for more than a few hours.
  • If you finish your recording early, you may end up paying more for the studio than you would have with an hourly rate.
  • You need to book the studio in advance to ensure its availability on the chosen date.

Ultimately, choosing between hourly and daily rates depends on your specific needs. If you have a tight schedule and do not require studio time for an extended period, then going for an hourly rate may be the better option. But if you have a more significant project that requires extended time, then going for a daily rate is a more cost-effective option.

Types Of Music Studios

When it comes to recording music, the quality of the recording can make or break an artist’s career. That’s why finding the right studio is crucial to ensure the best possible sound quality for your music. However, with so many different types of music studios available, it can be difficult to know which one is right for you. In this article, we will explore the different types of music studios and the associated costs.

Traditional Recording Studios

Traditional recording studios are fully equipped with state-of-the-art recording equipment and offer the highest quality sound. These studios typically offer services such as audio engineering, mixing and mastering, and equipment rental. They are ideal for professional artists or bands looking to produce a high-quality album.

However, the costs associated with traditional recording studios can be high, ranging from $50 to $500 per hour depending on the studio and the services required. Additional costs may include hiring a producer or engineer, equipment rental, and studio fees.

Home Recording Studios

Home recording studios are becoming increasingly popular due to the availability of affordable recording equipment. These studios typically consist of a computer, recording software, and a few microphones. They are ideal for independent artists or bands working on small projects.

The costs associated with home recording studios can vary depending on the equipment and software used. The initial cost of setting up a home recording studio can range from $500 to $5,000 and ongoing costs may include software updates and equipment maintenance.

Rehearsal Studios

Rehearsal studios are designed for musicians to practice and play their music without the distractions of the outside world. These studios typically provide a basic sound system, drum kit, and other equipment such as guitar amps and microphones.

The costs of rehearsal studios are usually lower than traditional recording studios and can range from $10 to $50 per hour. Additional costs may include equipment rental and studio fees.

Type of Music Studio Costs
Traditional Recording Studios $50 to $500 per hour
Home Recording Studios $500 to $5,000 initial setup cost
Rehearsal Studios $10 to $50 per hour

Overall, the costs of using a music studio will vary depending on the type of studio and the services required. Whether you are a professional musician or an independent artist, there are different types of music studios available to suit your needs and budget.

Comparing Prices Of Different Music Studios

Are you an aspiring musician looking to record your music in a professional studio but worried about the cost? Knowing the price range of different music studios can help you plan your budget and get the best value for your money. Here we will compare the prices of different music studios so that you can make an informed decision about which studio best suits your needs.

Local Vs Chain Studios

Local and chain music studios have some similarities and differences in their pricing. Local studios are typically smaller and may have fewer amenities compared to chain studios. However, they may offer more personalized services and have a local reputation that can work in your favor. On the other hand, chain studios are more established and may have more modern equipment and facilities.

Chain studios typically charge more than local studios for the same services. However, they may offer packages that include additional services such as marketing and promotion that can make them a better value overall.

Premium Vs Budget Studios

Music studios can also be classified as premium or budget based on the quality of facilities, equipment, and services offered. Premium studios usually offer high-end equipment, a professional recording environment, and experienced engineers and producers. They often charge higher prices for these premium services.

Budget studios, on the other hand, may have less up-to-date equipment or fewer amenities. However, they can be affordable for musicians who are just starting and have a tighter budget. Budget studios typically charge less than premium studios, but be sure to check their reputation and quality of services before making a booking.

Conclusion

Comparing prices of music studios is a crucial step in planning and budgeting your music recording project. Consider the services and amenities offered by local vs chain and premium vs budget studios before making a booking. Know what you need and what you want to achieve with your recording project and select a studio that can help you achieve your goals effectively.

Extra Costs Associated With Music Studio Rentals


Music studio rentals come with extra costs beyond the hourly rate. These can include equipment rental, additional sound engineers, cleaning fees, and instrument rentals. These costs can add up quickly, so it’s important to plan ahead and budget accordingly when using a music studio.

Renting a music studio is a cost-effective way for musicians to record their music and produce their albums. However, there can be certain extra costs associated with music studio rentals. It’s essential to understand these extra costs before renting a music studio to avoid any unwanted surprises. Below are some of the extra costs that you should be aware of:

Engineer Fees

When you rent a music studio, you may be required to hire an audio engineer to help you record your music professionally. These professionals have the experience and knowledge to assist musicians in producing their music. The fees charged by an audio engineer usually depend on their level of experience and the equipment they use. To prevent any discrepancies, it’s essential to inquire about these fees before you sign the rental agreement.

Instrument Rentals

Musicians who require specific instruments or equipment for their recording sessions may need to rent them. In most cases, music studios have a limited range of instruments for use. Therefore, musicians may require additional equipment that is not available in the studio. Rental fees for music equipment usually vary depending on the instrument’s uniqueness and the rental duration.

Overtime Fees

Music studios might impose overtime fees if your recording session lasts longer than the agreed-upon time frame. Therefore, it’s essential to discuss the overtime policies with the studio before renting it. It’s better to have an understanding of all fees beforehand to avoid any surprises.

Cancellation Fees

If for any reason, you need to cancel your music studio reservation or postpone it, you may be required to pay cancellation fees. Ensure you are aware of the cancellation policy before signing the rental agreement. In summary, music studio rentals can incur additional charges, and it’s essential to understand them before signing the rental agreement. Understanding these costs beforehand will help you plan your budget accordingly and avoid any surprises.

How Much Does It Cost to Use a Music Studio


Credit: www.peerspace.com


Tips For Saving Money On Music Studio Rentals

If you want to record music in a studio but don’t want to spend a lot of money, you’re in luck. There are several ways to cut costs and still produce high-quality sound. Here are some tips for saving money on music studio rentals:

Booking During Off-peak Hours

Some studios charge more during peak hours, so it may be helpful to book your sessions during off-peak hours. This includes weekdays and late-night hours. If you’re able to record during these times, you could save a good amount of money.

Choosing A Studio Without An Engineer

If you have the technical expertise to record your own music and don’t need the assistance of an engineer, you can save money by choosing a studio that doesn’t include one in the rental fee. This will give you more control over the recording process and lessen the expense of hiring an engineer.

Bringing Your Own Equipment

You can also save money on studio rentals by bringing your own equipment. This includes microphones, cables, stands, and other accessories. If you’re able to bring what you need, you won’t have to pay extra for the studio’s equipment rental fees.

Summary

  • Book off-peak hours to save money
  • Choose a studio without an engineer for more control
  • Bring your own equipment to avoid rental fees

By utilizing these tips, you can record your music in a studio at a more affordable price. Keep in mind that price shouldn’t compromise quality. Look for a studio that suits your needs and budget, so you can produce the best music possible.

How Much Does It Cost to Use a Music Studio


Credit: recording.org


Frequently Asked Questions On How Much Does It Cost To Use A Music Studio


How Much Does A Basic Music Studio Cost?


The cost of setting up a basic music studio can range from $500 to $5,000 depending on the equipment and space required. This may include a computer, speakers, headphones, a microphone, and audio interface. It is important to research and compare prices to get the best deal.


How Much Is 1 Hour Of Studio Time?


The cost of 1 hour of studio time varies depending on the location, features and quality of the studio. Generally, prices range from $30 to $150 per hour. It’s best to check with your preferred studio for an accurate and updated pricing.


How Much Does A Small Music Studio Cost?


A small music studio typically costs between $2,000 to $10,000 depending on the equipment, size of the space, and location. However, costs can vary considerably depending on a range of factors. It’s best to research and consult with experts before investing in a music studio.


How Much Does It Cost To Make One Song In The Studio?


The cost of making one song in a studio varies depending on the location, equipment, and experience of the producer. On average, it could cost anywhere from $100 to $5000 per song.


Conclusion


After going through this article, we can easily conclude that the cost of recording music at a studio can vary significantly depending on numerous factors such as the location, studio quality, engineer’s experience, gear used, and many others. It’s important to research and compare various options before making a final decision.


However, investing in a good studio can provide invaluable and professional results that can elevate an artist’s career and reputation in the music industry.


For more background, see Recording studio on Wikipedia. You may also like our guide: How Much Does a Professional Music Studio Cost.

Categories
Archive

What is the Technique for De-Essing Vocals in Audio Production?

What is the Technique for De-Essing Vocals in Audio Production?

In audio production, de-essing is an essential technique used to reduce or eliminate sibilance in vocal recordings. Sibilance refers to the harsh, hissing sounds that occur when certain consonant sounds, particularly S, Z, SH, CH, and J, are pronounced. These sounds can be quite distracting and unpleasant to the listener, so it’s crucial to address them during the mixing and mastering stages.

De-essing involves selectively attenuating the frequencies that contribute to sibilance while leaving the desired vocal frequencies intact. This technique allows for a more polished and professional-sounding vocal performance. Now, let’s dive deeper into the techniques used for de-essing vocals in audio production.

What is the Technique for De-Essing Vocals in Audio Production?

Credit: www.soundonsound.com

1. Frequency-based De-Essing

One common way to de-ess vocals is by using a frequency-based approach. This involves identifying the frequency range where the sibilant sounds occur most prominently and applying dynamic equalization to reduce those specific frequencies. Typically, de-essers have built-in frequency detectors that automatically detect the sibilant frequencies and apply compression to them, effectively reducing their impact.

By setting the threshold and ratio appropriately, you can achieve a balance between reducing sibilance and maintaining the natural character of the vocal. Be careful not to overdo it, as excessive de-essing can make the vocals sound dull or unnatural.

2. Dynamic Range Compressor Techniques

Another approach to de-essing involves using multiband or wideband compressors. With this technique, you split the vocal signal into multiple frequency bands and apply individual compression settings to each band. By adjusting the threshold, attack, and release parameters, you can selectively compress the sibilant frequencies, effectively reducing their intensity without affecting the rest of the vocal performance.

This technique allows for precise control over the de-essing process, as you can focus on specific frequency ranges where sibilance is most prominent. Experimenting with different compressor settings and band placement can help achieve the desired balance between reducing sibilance and maintaining a natural-sounding vocal performance.

What is the Technique for De-Essing Vocals in Audio Production?

Credit: producelikeapro.com

3. Manual Volume Automation

In certain cases, manual volume automation can be an effective technique for de-essing vocals. This involves manually reducing the volume of the sibilant sounds by adjusting the fader or using a gain envelope tool in your digital audio workstation (DAW). By visually identifying the sibilant peaks in the waveform display, you can manually attenuate their volume, effectively taming the sibilance.

This technique requires some patience and precision, as you need to carefully adjust the volume automation to maintain a natural-sounding vocal performance. However, it can be a useful approach when dealing with challenging or unique vocal recordings that may not be effectively addressed by automatic de-essing plugins.

Frequently Asked Questions For What Is The Technique For De-essing Vocals In Audio Production?

What Is De-essing In Audio Production?

De-essing is a technique to reduce harsh sibilant sounds in vocal recordings.

Why Is De-essing Important In Audio Production?

De-essing is important to maintain a balanced, smooth vocal sound without harsh ess sounds.

When To De-ess Vocals In Audio Production?

De-ess vocals during post-recording or mixing to address excessive sibilance.

How Does De-essing Work In Audio Production?

De-essing works by selectively compressing high-frequency sounds to reduce the intensity of sibilant consonants.

Conclusion

De-essing vocals is a crucial step in audio production to ensure a polished and professional-sounding vocal performance. Whether you opt for frequency-based de-essing, dynamic range compressor techniques, or manual volume automation, it’s essential to strike the right balance between reducing sibilance and maintaining the natural character and clarity of the vocals.

Remember to experiment with different settings, listen carefully, and make adjustments as needed. With practice and attention to detail, you can effectively de-ess vocals and achieve a professional mix that sounds great across various playback systems.

Categories
Archive

What Is Music Mixing Why It Is Important

Music mixing is the process of blending separate audio tracks into a final stereo mix. It is crucial in achieving a balanced and polished sound that captures the emotions and intentions of the song.


The mix should enhance and highlight every element of the music to create a cohesive and impactful final product. A well-executed mix can transform a good song into a great one and distinguishes it from other mediocre tracks. The importance of mixing lies in creating a sonic environment that instantly grabs the listener’s attention and pulls them into the story conveyed by the music.


This makes music mixing an essential element in music production, whether it is for radio, TV or film, advertised commercials, or live performances. We will delve deeper into the details of music mixing and why it is so important.


What Is Music Mixing?

What is Music Mixing?

Music mixing involves blending different audio elements like vocals, instruments, and effects to create a cohesive and balanced mix. The primary goal is to ensure that all elements are audible and working together harmoniously.

The Definition Of Music Mixing

Music mixing is the process of taking individual tracks and combining them into a final mix that enhances the overall sound quality. The mixing process involves adjusting the volume, panning, EQ, compression, and effects to create a polished and professional sound.

The Process Of Music Mixing

The process of music mixing usually starts with organizing and preparing the individual tracks for mixing. This step is essential to ensure that all tracks are properly named, labeled, and ready for editing in a Digital Audio Workstation (DAW).

The next step is to balance the levels between all the individual tracks. This process helps to create a clear and defined audio balance, allowing all elements to be heard clearly.

After balancing the levels, the mixing engineer will start shaping the overall sound by using tools like EQ and compression. EQ helps to adjust the tonal balance, while compression is used to control the dynamic range of the individual tracks.

The final step in the mixing process is adding effects like reverb and delay to create space and depth in the mix. This step helps to create a sense of space and dimension, making the mix sound larger and more professional.

In conclusion, music mixing is essential to create a polished and professional sound. Understanding the definition and process of music mixing is crucial for anyone who wants to produce high-quality music.

What Is Music Mixing Why It Is Important


Credit: sundownsessionsstudio.com


The Importance Of Music Mixing

Music mixing is the process of combining different audio elements to create a final stereo mix. It’s the most crucial part of the music production process as it’s responsible for enhancing the sound quality, balancing audio levels, creating a cohesive sound, adding depth and dimension, highlighting key elements, and improving the listener experience.

Enhancing Sound Quality

Music mixing helps enhance the sound quality of a track. It involves adjusting EQ, compression, reverb, and other effects to improve the overall sound of the mix. This process helps to enhance the clarity and detail of each individual element in the mix.

Balancing Audio Levels

One of the primary goals of music mixing is to ensure that all the parts of the mix work together harmoniously. Audio levels should be properly balanced so that no one part of the mix dominates over the others. Mixing engineers adjust the levels of different instruments and elements in the mix so that each can be heard distinctly.

Creating A Cohesive Sound

Music mixing is also responsible for creating a cohesive sound that ties all the different parts of the mix together. Mixing engineers use various techniques such as panning, EQ, compression, and reverb to create a unified sound. A cohesive mix will keep the listener engaged and emotionally connected to the music.

Adding Depth And Dimension

Music mixing can add depth and dimension to a track. This helps to create a sense of space and presence in the mix, making the listener feel like they’re in the same room as the musicians. Mixing engineers use different techniques such as panning, reverb, and delay to create a sense of space and depth in the mix.

Highlighting Key Elements

One of the important roles of music mixing is highlighting key elements in the mix. This involves bringing forward important instruments or vocals while pushing other instruments or elements back in the mix. This helps to create a sense of balance and dynamics in the mix and keeps the listener engaged.

Improving Listener Experience

Ultimately, the goal of music mixing is to improve the listener experience. A well-mixed track will keep the listener engaged from start to finish and convey the intended emotional message. An experienced mixing engineer puts their skills to work to ensure that the track sounds professional, polished, and engaging for the listener.


What Is Music Mixing Why It Is Important


Credit: www.stagesmusicarts.com


Frequently Asked Questions Of What Is Music Mixing Why It Is Important


Why Is Mixing Music So Important?


Mixing music is crucial as it ensures that various sounds and instruments in a track are properly balanced. By adjusting levels and frequencies, a mix engineer enhances the overall sound quality, clarity, and depth. This leads to a more enjoyable listening experience and can increase the commercial success of a song.


What Is The Most Important Thing In Mixing Music?


The most important thing in mixing music is balance. The levels of each instrument and sound should complement each other and not be overpowering. Clarity, depth, and consistency are also crucial for a high-quality mix. Ultimately, it’s about creating a cohesive and enjoyable listening experience.


What Is The Purpose Of A Music Mixer?


A music mixer is a device that allows for the blending and adjusting of multiple audio signals to create a polished final sound. Its purpose is to enhance the quality of the audio mix and bring together all the different elements of a song or recording.


What Is The Main Goal Of Mixing?


The main goal of mixing is to combine multiple audio sources into a single cohesive track. This involves adjusting levels, panning, adding effects, and EQ to make the track sound balanced and polished. Mixing is an important step in the music production process and can make or break a recording.


Conclusion


Music mixing is an integral part of the music production process. It is the art of adjusting levels, panning, and adding effects to all individual tracks to make them sound cohesive and balanced. A good mix helps bring out the emotion of the song and enhances the listener’s experience.


It is important to understand the basics of music mixing to create high-quality music that will stand out in today’s competitive music industry. By implementing the right techniques and making the right choices in mixing, you can achieve a mix that is unique, clear, and aesthetically pleasing.

Categories
Archive

How To Add Life To Your Music Tracks

To add life to your music tracks, incorporate dynamics and rhythm variations. These elements will add energy and interest to your songs, keeping listeners engaged.


As a musician, it’s essential to keep your audience entertained by creating music that captivates them and encourages them to stay tuned in. The key to making your music tracks more lively is by adding dynamics and rhythm variations. This means incorporating elements such as crescendos, changes in tempo, chord progressions, and more.


By doing so, you’ll add energy and interest to your songs, keeping your listeners engaged throughout the entire track. We’ll explore the different ways you can add life to your music tracks, whether you’re a seasoned musician or just starting and looking for some tips.

How To Add Life To Your Music Tracks


Credit: www.pinterest.com


Start With A Strong Melody

When it comes to creating a memorable music track, starting with a strong melody is key. A melody is essentially the heart of your track, and it’s what listeners will remember long after the song is over. With that being said, let’s dive into some tips for creating a strong melody.

Develop A Catchy Hook

One of the best ways to ensure that your melody is memorable is to craft a catchy hook. A hook is essentially a musical phrase or riff that immediately draws the listener in and sticks in their head. Think of some of the greatest hooks of all time, like the guitar riff in “Smoke on the Water” or the opening piano notes in “Für Elise.”

To develop your own catchy hook, experiment with simple melodies that can be easily sung or hummed. Keep in mind that repetition is key when it comes to creating a hook that sticks, so try repeating your melody a few times throughout your track.

Experiment With Chord Progressions

Another way to add life to your music tracks is to experiment with different chord progressions. Chord progressions are essentially the series of chords that make up your song, and they can greatly influence the overall mood and feel of your track.

There are countless chord progressions to choose from, and the key is to find a progression that complements your melody and helps bring it to life. Some popular chord progressions include the I-IV-V progression, the ii-V-I progression, and the blues progression.

Incorporating interesting chord progressions can also help keep your track fresh and engaging, as it adds variety and keeps listeners on their toes.

Layer Instruments And Sounds

If you want to create music that stands out, the key is to add depth and complexity to your tracks. One of the most effective ways to achieve this is by layering instrument and sounds on top of each other. By taking advantage of different kinds of sounds and making subtle changes to each layer, you can create a rich, immersive listening experience that will keep your audience coming back for more.

Add Depth With Multiple Layers

Layering multiple instruments and sounds on top of each other can add depth and nuance to your tracks. By stacking different sounds and adjusting their volumes, you can create a fuller, more immersive listening experience. For example, you could layer a bass guitar and a synthesizer to create a rich, powerful bassline that really drives your track forward. Or, you could layer multiple percussion tracks, each with its own unique sound and rhythm, to create a more complex, multi-layered beat.

Use Different Kinds Of Sounds

Another way to add life to your music tracks is to use different kinds of sounds. Rather than rely on a single instrument or synth patch, think about how you can mix and match different sounds to create a more interesting sonic palette. For example, you could layer acoustic guitar and electric guitar to create a unique, hybrid sound that sits somewhere between the two. Or, you could add in some sampled sounds – like nature sounds, crowd noise, or field recordings – to add texture and depth to your track.

  • Try layering different instruments and sounds to create depth and complexity in your music tracks
  • Adjust the volume and panning of each layer to create a cohesive, immersive sound
  • Mix and match different sounds to create unique, hybrid sonics
  • Add samples and field recordings to add texture and atmosphere to your tracks

Add Percussion To Drive The Beat

To truly add life to your music tracks, it is important to pay special attention to the percussion. Adding percussion instruments to your track can add a whole new dimension to your music and can help your listeners feel more engaged and connected to your work. In this section, we will dive into how you can add percussion to your tracks to drive the beat forward and keep your listeners moving.

Choose The Right Drums

The first step to adding percussion to your music is choosing the right drums. There are a variety of drums to choose from, including snare drums, bass drums, and cymbals. Each drum has a unique sound that can help add depth and texture to your track. It is important to experiment with different drums to find the right combination for your track.

Create Interesting Rhythms

Once you have chosen your drums, the next step is to create interesting rhythms that will keep your listeners engaged. To do this, you can experiment with different time signatures, drum patterns, and fills. Try to come up with patterns that are both interesting and easy to follow, so that your listeners can easily get into the groove of the track.

Use Percussion To Accentuate Key Moments In The Track

In addition to driving the beat forward, percussion can also be used to accentuate key moments in the track. For example, you can use a crash cymbal to highlight the chorus or use a snare drum to emphasize certain lyrics. This will help add more depth and emotion to your music and can help your listeners feel more connected to your work.

Final Thoughts

By carefully choosing your drums, creating interesting rhythms, and using percussion to accentuate key moments in the track, you can add life and energy to your music tracks. Remember to experiment with different techniques and to always be open to new ideas. With the right approach, you can create music that truly resonates with your audience and helps you stand out as an artist.

Experiment With Effects And Processing


Enhance your music tracks by experimenting with various effects and processing techniques. Play around with EQ, compression, and reverb to add depth and dimension to your sound. Don’t be afraid to try new things and see what works best for your style of music.

Music creation is an art form that involves your imagination and creativity. So, how do you add life and uniqueness to your music tracks? By experimenting with effects and processing!

Enhance The Sound With Reverb

Reverb can be used to create a sense of space and depth in your music. It can make your tracks sound like you recorded them in a large hall or a small room. By adding reverb, you can create a feeling of atmosphere and add texture to your music.

Tips for Using Reverb:

  • Start with a preset and adjust it to your liking
  • Use different types of reverb for different instruments (plate reverb for vocals and hall reverb for drums)
  • Try using a send/return track to add reverb to multiple tracks without cluttering your mix

Use Compression And Eq For Clarity

Compression can be used to even out the dynamic range of your music and bring out the nuances in your tracks. EQ, on the other hand, can bring more clarity to your music by adjusting frequencies.

Tips for Using Compression and EQ:

  • Use compression sparingly, as it can make your music sound flat and lifeless
  • Use EQ to cut out frequencies that clash and boost frequencies that add to the clarity of your music
  • Try using different compressors and EQs to see how they affect your tracks

In conclusion, experimenting with effects and processing can add depth and character to your music tracks. Don’t be afraid to try new things and see what works for you!

Incorporate Unique Samples And Synths


To add life to your music tracks, consider incorporating unique samples and synths. Explore new sounds and textures to bring a fresh element to your music, inspiring your listeners and creating a unique sound that sets you apart from others in your genre.

Adding unique samples and synths to your music tracks is one of the easiest ways to incorporate new sounds into your music. Unique samples help you add textures and sounds that are not typically seen in your chosen genre. This is a great way to create new sounds that will set your music apart from the crowd.

Find Inspiration In New Instruments

Incorporating new instruments into your music is a great way to add unique sounds to your tracks. Try experimenting with uncommon instruments, such as the ukulele, didgeridoo, or even a kazoo. By using these instruments in your music, you can create a unique sound that sets you apart from other musicians.

Combine Different Genres

Combining different genres of music is a great way to add new sounds to your music tracks. By combining genres, you can create a unique sound that is not typically heard in any one genre. This is a great way to add depth and complexity to your music and to explore different sounds.

Examples of genres to combine:

  • Electronic and Classical
  • Hip-hop and Jazz
  • Rock and Country

Using Samples and Synths Effectively:

When using samples and synths, it’s important to use them effectively. Here are a few tips:

  1. Don’t overuse samples – use them sparingly to create accents and textures in your music.
  2. Manipulate the samples – use effects such as reverb, delay, and chorus to create unique sounds.
  3. Layer different samples – layering different samples can create a rich and complex texture in your music.

By incorporating unique samples and synths in your music tracks, you can add a new dimension to your music and create a sound that is uniquely your own. Experiment with different instruments and genres to find inspiration and use samples and synths effectively to create a rich and complex sound that sets your music apart.

Collaborate With Other Musicians

If you’re a musician, solo production can be a bit lonely and exhausting. But you can quickly infuse new life into your music tracks by collaborating with other musicians. Collaboration allows you to combine different sound ideas, skills, and techniques to create something unique and special.

Work With A Vocalist

If you typically produce instrumentals, incorporating vocals can take your music to another level. But if you aren’t a singer, working with a vocalist could be the solution. Vocals bring emotion and soul to music, and can make a track more relatable to listeners. With a vocalist, you can create melodies that complement and amplify each other.

Incorporate Instruments You Can’t Play

It’s understandable to have a strong suit as a musician. But incorporating other instruments into your tracks can broaden your music’s scope immensely. So if you aren’t skilled in playing an instrument, consider working with someone who is. For instance, a guitarist may provide fantastic leads to a track you’re producing.

  • Collaborating with other musicians allows you to combine sound ideas, techniques, and skills to create something unique.
  • Working with a vocalist can bring emotion and soul to your music, making it more relatable to listeners.
  • Incorporating instruments you can’t play can broaden your music’s scope, taking it to another level.

Remember, there’s strength in numbers; collaborating can help you discover new sounds and push your limits. Plus, building relationships with other musicians will create chances for future collaborations, networking, and exposure. So, consider looking for people to work with, and you may be surprised how much it boosts your music production.

Involve Your Audience

The easiest way to add life to your music tracks is to involve your audience. By doing so, you can easily figure out what moves them and create music they will love.

Think About What Will Get People Moving

Start by putting yourself in the shoes of your audience. Think about what kind of music will get them up and dancing. To do this, consider the following:

  • The venue: The kind of music that works for a night club might not cut it for a wedding reception.
  • The age group of the audience: Different age groups have different music preferences.
  • The purpose of the event: The mood of the music at a wedding will differ from that at a corporate event.

To add life to your music tracks, use this information to create a playlist that resonates with your audience. This will ensure that they have a good time and enjoy your music.

Crowdsource Ideas From Fans

Another way to involve your audience is to crowdsource ideas from them. This approach works exceptionally well if you are trying to write a new song or decide on the music to play at an upcoming gig.

You can use social media platforms like Twitter, Facebook, or Instagram to connect with your fans. Ask them about their favorite music, how they feel about your current music, and what they would like to see more of. This way, you’ll get ideas to create music that your audience will enjoy and share with their friends.

By involving your audience, you can create music that resonates with them. Your music will become more popular, and your audience will become more engaged. Keep in mind that the more involved your audience is, the more likely they are to share your music with others, helping to keep your music alive and reaching new audiences.


Be Authentic And True To Your Style

When it comes to music production, it’s essential to create tracks that stand out and connect with your audience. One of the most important factors to consider is authenticity. You have your unique style and perspective that no one else can replicate. Embracing your uniqueness is the key to add life to your music tracks.

Your music should reflect who you are, your personality, and the message you want to convey. The moment you start mimicking someone else, you lose your identity, and your music becomes a copycat of someone else’s work. Therefore, a crucial aspect of creating great music is to be authentic and true to your style.

Don’t Try To Be Someone Else

Many young and aspiring musicians try to emulate their favorite artists’ sound and style, thinking that it’s the only way to succeed in the music industry. However, you can’t be the best copycat. You will always be one step behind the artist you are copying. Instead, focus on your strengths, embrace your flaws and create your unique sound.

Create From The Heart

The best music comes from the heart. You should create music that you deeply care about and can express your emotions. Music is a form of art that requires passion, dedication, and creativity. Therefore, when you create music from your heart, listeners can feel the emotions through your tracks.

Lastly, being authentic and true to your style is the key to creating amazing music. It takes time, effort and a willingness to be vulnerable. When you create music that represents you and your style, you connect with your audience, and your music becomes timeless.

Key Takeaways
Embrace your uniqueness and be true to your style
Create music from the heart and express your emotions
Avoid being a copycat of someone else’s work


Frequently Asked Questions Of How To Add Life To Your Music Tracks


How To Make It In Life Through Music?


To make it in life through music, you should focus on developing your skills and networking with professionals in the industry. Attend music events, establish a strong online presence, and collaborate with other musicians to expand your reach. Be persistent and willing to take risks, and don’t forget to stay true to your unique sound and style.


How Do I Make A Life Playlist?


To make a life playlist, first choose a theme or mood you want to capture. Select songs that resonate with you and have personal significance. Organize the songs in a logical order, using transitions to create a cohesive flow. Make sure to save the playlist on a platform of your choice for easy access.


How Do You Add Movement To Music?


To add movement to music, you can start by identifying the rhythm and beat of the music, and then creating choreography or dance moves that match it. You can also add visual elements like lighting or props to enhance the movement.


Additionally, you can incorporate different types of movement, such as jumps or spins, to add variety and impact.


How Do You Apply Music In Your Personal Life?


Music plays a crucial role in my personal life by adding a touch of emotions to the atmosphere. I use it as a therapy to relax, inspire, and motivate myself throughout the day; whether it’s during my workout or a quiet evening.


Conclusion


Incorporating life and energy into your music tracks takes time and effort, but it’s worth it to create a memorable and captivating listening experience. With the tips and techniques mentioned in this post, you can add new dimensions to your tracks and showcase your creativity.


Keep experimenting and learning new methods to enhance your musical production skills and stand out in the competitive industry. Cheers to bringing your music to life!


Categories
Archive

What Is The Best Music Distribution Service

The best music distribution service is dependent on the artist’s specific needs. Nonetheless, the top players in the industry are DistroKid, TuneCore, CD Baby, and Ditto Music.


These services have been providing musicians with platforms to distribute their music across various digital music stores and streaming services. Music distribution services are essential for artists since they offer various benefits such as allowing independent musicians to reach a broader audience without the need for a record label.


Additionally, they eliminate the need for physical distribution since music can be distributed digitally. Moreover, they help artists to collect royalties and publish music more efficiently. As such, it is crucial for musicians to choose the right music distribution service carefully. We will explore the top music distribution services to help artists make an informed decision.


Top Music Distribution Services In The Market


Music distribution has become easier with top services such as TuneCore, DistroKid, and CD Baby. These platforms offer features like worldwide distribution and artist promotion, making them the best options for artists looking to get their music out there.

As an independent musician, one of the most important aspects of building your career is getting your music out to the world. With so many distribution services available, it can be challenging to choose the best one for your needs. In this article, we will explore the top music distribution services in the market. We will compare the popular options available and highlight the pros and cons of each platform. Ultimately, you will gain an understanding of which service may be the right fit for your music career.

Comparison Of Popular Music Distribution Services

Music Distribution Service Number of Platforms Price per Single Price per Album
DistroKid 150+ $0.99 $19.99/yr
Tunecore 150+ $0.99 $29.99/yr
CD Baby 150+ $9.95 $29.95/yr
OneRPM 20+ $0.99 $39.99/yr
Audiam 13+ – –

Pros And Cons Of Each Music Distribution Service

  • Pros: Affordable pricing for releasing unlimited music, earnings directly deposited into bank account, easy-to-use platform, ability to edit information after distribution, YouTube monetization options.
  • Cons: Does not offer music publishing administration or mechanical licensing.
  • Pros: Distribution to over 150 platforms, offers music publishing administration, ability to edit information after distribution, transparent weekly sales reports.
  • Cons: Higher pricing for album distribution, yearly renewal fees.
  • Pros: Offers physical distribution options, sync licensing opportunities, available for a one-time payment, offers music publishing administration.
  • Cons: Higher pricing for single distribution, yearly renewal fees.
  • Pros: Detailed analytic reports, YouTube monetization options, sync licensing opportunities, distribution to over 20 platforms.
  • Cons: Higher pricing for album distribution, yearly renewal fees.
  • Pros: Offers music publishing administration and management, ability to collect royalties for cover songs on YouTube and Facebook, detailed analytics.
  • Cons: Does not offer music distribution, limited platform availability.

Overall, each music distribution service offers its own unique features and benefits. Consider your needs as an artist and compare these options to make the best decision for your music career.

Factors To Consider Before Choosing A Music Distribution Service


Before selecting a music distribution service, some of the key factors to consider include pricing models, available streaming platforms, royalty payouts, customer support, and marketing tools. It’s important to evaluate these factors and choose a service that best meets your needs as an artist.

As an artist, getting your music heard is essential, and distribution is vital to achieving that. One of the crucial decisions you will make as an artist is choosing the right music distribution service to distribute your tracks. Several factors come into play when selecting a music distribution service; let’s take a closer look at them.

Pricing

The cost of music distribution varies across different platforms. While some platforms offer low pricing or a flat rate to distribute an album, others may charge per single or take a percentage of your sales. When considering the pricing factor, you should also note the different additional costs that may arise, such as UPC fees, which could impact your decision.

Artist Control

When it comes to music distribution, control is crucial. Therefore, you should consider the level of control you get when using a particular music distribution service. You should make sure that you retain all the rights to your music and have the freedom to pull out of agreements with the service provider when needed.

Transparency

You wouldn’t want to work with a music distribution service that is not transparent. The service provider should be upfront and honest about their pricing, the distribution channels they use, and any fees they charge. It’s best to get a clear understanding of all the services provided and their costs to avoid any surprises.

Royalty Payments

Royalty payments are the money earned by artists from the sales of their music. The music distribution service company is responsible for collecting these payments and forwarding them to the artist. Ensure you understand how the service provider pays royalties and the frequency of payments before signing any agreement.

Additional Services

Different music distribution services offer additional services that could benefit you as an artist. These may include marketing and promotion services, social media integration, and analytics tools for tracking your music’s performance. Consider the value of these additional services to your overall music distribution strategy before making a final decision. When choosing a music distribution service, it is crucial to consider factors that may affect your music’s success. Pricing, artist control, transparency, royalty payments, and additional services are all important considerations that should be taken into account before making a final decision. With these factors in mind, you can choose the best music distribution service that meets your specific needs and maximizes your music’s reach and success.

In-depth Analysis Of The Best Music Distribution Services


Looking for the best music distribution service? Our in-depth analysis covers top providers including CD Baby, DistroKid, TuneCore, and more. Discover which platform suits your music career needs to reach a broader audience in different digital stores like Apple Music, Spotify, and Amazon.

The music industry has experienced an enormous shift in recent times. With the rise of music streaming, digital sales, and downloads, music distribution has become imperative for all independent and established artists globally. It’s now easier than ever for music creators to distribute and sell their music online. However, with so many music distribution services available in the market, choosing the right platform can be overwhelming. In this post, we’ll take an in-depth look at some of the leading music distribution services and discuss their features, advantages, and disadvantages.

Features Of Leading Music Distribution Services

Music distribution platforms offer a wide range of tools and services to help music creators get their music heard by the right audience. Some of the features you should consider when choosing a music distribution service include:

  • Ability to distribute your music to major music streaming platforms like Spotify, Apple Music, and Tidal.
  • Affordable pricing plans with no hidden fees.
  • Detailed analytics and reporting to track your earnings and listeners across various platforms.
  • Simplicity of use with user-friendly interfaces
  • Additional services such as music promotion, marketing tools and sync licensing.

Advantages And Disadvantages Of Leading Music Distribution Services

Each music distribution service has its pros and cons, Depending on your specific needs. Below we will walk you through some of the advantages and disadvantages of some of the leading platforms:

Music Distribution Service Advantages Disadvantages
DistroKid
  • Unlimited uploads
  • No additional fees for multiple releases
  • 24-48 hour distribution turnaround time
  • Does not provide a marketing service
  • Extra fees for receiving payments on PayPal
Tunecore
  • Offers a publishing administration service
  • Numerous opportunities for sync licensing
  • Expensive pricing plans
  • Limited customer service options
CD Baby
  • Provides physical CD distribution services
  • Offers music marketing services
  • High commission charged per download
  • No weekly sales reporting available

Choosing The Right Music Distribution Service

Choosing the best music distribution service depends on your specific needs and budget. However, some music distribution services offer a combination of features and services to meet most of your requirements. It’s essential to select a platform that will provide you with the best value for your money. Whether you’re an independent artist or a music label, establishing a relationship with the right music distributor can have a huge impact on your music career.

What Is The Best Music Distribution Service


Credit: financesonline.com


How To Select The Best Music Distribution Service For Your Career


Choosing the right music distribution service can be a crucial step in your music career. Consider factors such as pricing, royalty rates, and services provided to find the best fit for your needs. Research and compare different options thoroughly to make an informed decision.

One of the most important decisions an artist can make is selecting the best music distribution service for their career. Successful music distribution can mean the difference between complete obscurity and global stardom. However, with so many music distribution services to choose from, the decision can be overwhelming. In this blog, we’ll discuss how to select the best music distribution service for your career, offering guidance on assessing your needs and goals, evaluating distribution services, and making an informed decision.

Assess Your Needs And Goals

To select the best music distribution service, you must first identify your needs and goals. Consider the type of music you create, the size of your fanbase, and the level of control you want in distributing your music. If you’re a new artist, you may need a distribution service that provides you with marketing and promotion services to help you build your fan base. On the other hand, if you’re a more established artist, you might prioritize greater control over the distribution process.

Evaluate The Distribution Services

Once you’ve assessed your needs and goals, evaluate the various music distribution services available to you. Look for a service that offers broad distribution across all major streaming platforms such as Spotify, Apple Music, and Amazon Music. Check if the service provides comprehensive performance and sales tracking tools, as these will help you to make informed decisions about future marketing and promotional efforts. Also, consider whether the service offers additional features that align with your specific goals, such as access to sync licensing opportunities or the ability to connect with other artists.

Make An Informed Decision

After assessing your needs and evaluating the various services on the market, it’s time to make an informed decision. Be sure to consider factors such as pricing, payment terms, and customer support. Dig into the fine print and ensure there are no hidden fees or stipulations on your earnings. Finally, be sure to read reviews from other artists to get a sense of the quality of customer support and user experience offered by the service. When you’re choosing the best music distribution service for your career, it’s essential to examine your needs, assess distribution services thoroughly, and make informed decisions. With these three steps in mind, you can confidently select a service that will help you to achieve success in the music industry.


Tips For A Successful Music Distribution Experience

Music distribution is the process of getting your music onto various streaming services, such as Spotify, Apple Music, and Amazon Music. Choosing the best music distribution service is just the first step in ensuring your music reaches your intended audience. Here are some tips to have a successful music distribution experience:

Create A Marketing Strategy

A successful music distribution experience involves creating a marketing strategy to promote your music. Before you distribute your music, it’s important to know your target audience and create a plan to reach them. Identify your unique selling point and come up with a campaign that highlights it. Determine which platforms and channels you’ll use to promote your music and set a budget for your marketing strategy.

Build A Fan Base

Building a fan base is the most effective way of ensuring your music doesn’t get lost amidst the millions of tracks in the streaming services. A loyal fan base can help you promote your music through social media, word-of-mouth, and other online channels. You can build a fanbase by performing live frequently, collaborating with other musicians, and leveraging platforms like YouTube to reach your target audience.

Leverage Social Media

Social media is an essential tool for musicians to promote their music and reach new audiences. Make sure your social media profiles are optimized and updated regularly. Share your latest tracks, interact with your followers, and use hashtags to increase your visibility. You can also consider running social media ads to reach a larger audience.

Engage With Your Fans

Engaging with your fans is crucial when it comes to building a loyal following. Respond to your fans’ comments on your social media feeds and interact with them when you perform live. Organize fan meetups and exclusive concerts to give them a more personalized experience. Ask for feedback on your music and use it to improve and enhance your craft.


What Is The Best Music Distribution Service


Credit: soundcamps.com


Frequently Asked Questions On What Is The Best Music Distribution Service


Which Is The Best Platform To Distribute Music?


The best platform to distribute music is subjective and depends on various factors, including budget, the audience’s demographics, and the musician’s goals. However, popular options are iTunes, Spotify, Tidal, and Amazon Music. These platforms allow musicians to reach millions of people worldwide, distribute their music, and get paid for their work.


Is There A Better Distributor Than Distrokid?


There is no one-size-fits-all answer to this question. It ultimately depends on your needs and preferences as an artist. Some popular alternatives to DistroKid are TuneCore, CD Baby, and Ditto Music. Research each option thoroughly and consider their pricing, features, and benefits before making a decision.


Should I Use Distrokid Or Tunecore?


Choosing between DistroKid and TuneCore depends on your specific needs and budget. DistroKid is best for independent artists looking for affordable and simple distribution, while TuneCore offers more services at a higher price point. Consider your goals and budget before making a decision.


Is Cd Baby Better Than Distrokid?


CD Baby and DistroKid are both popular music distribution services that offer similar features, but CD Baby focuses more on personalized support and physical product distribution. However, DistroKid is known for its affordable pricing and faster release time. Ultimately, the choice between the two depends on the individual artist’s specific needs and preferences.


Conclusion


After considering various factors such as cost, distribution channels, and features offered, it’s clear that no single music distribution service can be deemed the “best” for everyone. Whether you’re an independent artist or part of a label, it’s important to assess your specific needs and evaluate which service aligns best with your goals.


Ultimately, the key is to choose a service that allows you to reach your desired audience and maximize your revenue potential. So, do your research, compare options, and choose wisely.

Categories
Archive

Baby Audio Smooth Operator Vs Soothe2

Baby Audio’s Smooth Operator is a dynamic spectral shaper, while Soothe2 is a dynamic EQ. Both are fantastic noise reduction plugins, but they have different features.


Baby Audio’s Smooth Operator and Soothe2 are two of the most popular noise reduction plug-ins in the market. These plugins offer advanced features to precisely control dynamic frequencies in real-time. Despite having different functionalities, these noise reduction plugins help produce high-quality audio recordings.


Smooth Operator is a dynamic spectral shaper that manipulates the spectral content of audio signals, while Soothe2 is a dynamic EQ that selectively tames harshness and resonances. We will compare these two plugins to help you decide which one suits your needs.

Baby Audio Smooth Operator Vs Soothe2


Credit: www.palebluedot.ca


Baby Audio Smooth Operator Overview


Baby Audio’s Smooth Operator and Soothe2 are both impressive audio plugins used for spectral processing, compression, and EQ. However, Smooth Operator is an easier alternative to Soothe2, especially for beginners, due to its user-friendly interface and preset options.

Features

Baby Audio Smooth Operator is a versatile mixing plugin that allows you to add warmth, depth, and character to your tracks. Its main features include:

  • Processing modes (Dynamic Shaping, Spectral Shaping, and Dual Band).
  • Enabling of sidechain signal input for increased versatility.
  • Smart input detection initiates preset changes for suitable processing.
  • Preset customization using the Ratio, Depth, and Sharpness sliders for detailed control.
  • Easy undo/redo actions.

Interface

The Baby Audio Smooth Operator user interface is easy to navigate and understand. Its sleek design, coupled with an intuitive layout, makes it suitable for both beginner and advanced users. The interface consists of:

  • Processing mode selector drop-down.
  • Sidechain input selector.
  • Preset selection dropdown.
  • Depth, Sharpness, and Ratio sliders.
  • Meter showing input and output levels, and a bypass button.

Compatibility

Baby Audio Smooth Operator is compatible with most Digital Audio Workstations (DAWs) and operating systems. It works as a VST2, VST3, AAX, AU, or AudioUnit plugin. It is also compatible with Mac and Windows OS.

Soothe2 Overview

When it comes to audio plugins, Baby Audio Smooth Operator and Soothe2 are two of the most popular choices. Soothe2 is a dynamic EQ plugin that has gained attention for its ability to reduce harshness and provide smooth, balanced sound. In this post, we’ll take a closer look at the features, interface, and compatibility of Soothe2.

Features

Soothe2 is a dynamic EQ plugin that automatically detects resonances in audio signals and applies reduction only to the targeted frequencies. This allows for smoother and more balanced sound without affecting the overall tonality of the audio. Soothe2 includes a range of advanced features such as mid/side processing, adjustable processing resolution, and a real-time frequency spectrum display.

Interface

The Soothe2 interface is user-friendly and intuitive, with a simple layout that makes it easy to navigate and use. The plugin includes a real-time frequency spectrum display that provides visual feedback of the audio signal, making it easier to identify resonances and adjust the processing settings accordingly. Soothe2 also includes a range of presets that can be used as a starting point, making it easy to achieve the desired sound.

Compatibility

Soothe2 is compatible with a range of DAWs including Pro Tools, Logic Pro X, Cubase, and Ableton Live. The plugin is also available in VST, VST3, AU, and AAX formats, making it suitable for a range of platforms. Soothe2 can be used in a variety of applications including music production, audio post-production, and sound design.

Overall, Soothe2 is an excellent dynamic EQ plugin that provides a range of advanced features and a user-friendly interface. Its ability to target only the problematic frequencies makes it a popular choice among audio professionals. If you’re looking for a powerful plugin that can help you achieve smooth, balanced sound, Soothe2 is definitely worth considering.

Baby Audio Smooth Operator Vs Soothe2: Differences


The crucial differences between Baby Audio Smooth Operator and Soothe2 lie in their features and capabilities. Whereas Soothe2 concentrates more on eliminating harsh radiances, Smooth Operator offers a range of dynamic processing options for a smoother and more creative sound design experience.

Baby Audio Smooth Operator and Soothe2 are two popular plug-ins used in the post-processing of audio tracks. Both have similar functionalities but differ in several aspects that make them unique from each other. In this blog post, we will explore the differences between Baby Audio Smooth Operator vs Soothe2 focusing on performance, pricing, and workflow.

Performance

Baby Audio Smooth Operator and Soothe2 have unique algorithms that allow them to achieve different results in post-processing audio tracks. Smooth Operator uses a mix of dynamic spectral compression and equalization to tackle harsh frequencies by retaining the original audio quality. The plug-in saves time on regular manual dynamic equalization and allows more precision in adjusting resonance. Soothe2 uses more advanced and intelligent spectral processing algorithms, making it capable of identifying and reducing unwanted resonances, without affecting the natural sound. It is highly effective in handling frequencies that cause piercing or hissing noises, regardless of the source.

Pricing

The price of these plug-ins is also a significant difference between them. Smooth Operator costs $69, which is relatively cheaper than Soothe2, which costs $199. However, the pricing difference is due to the advanced algorithms used in Soothe2, which are the main reason for its high efficiency in post-processing.

Workflow

The workflow in which these two plugins operate also varies. Smooth Operator has a user-friendly interface that promotes a smooth workflow with various preset Modes that cater to different application scenarios. It is also efficient when used in series with other plugins because it has low CPU usage. Soothe2, on the other hand, has a wider variety of more advanced options and more controls, which means that it might take longer to achieve the desired results. Although it has more complicated features, it has a user-friendly interface that enables users to create a smoother workflow. In conclusion, Baby Audio Smooth Operator and Soothe2 are both great plugins in post-processing audio tracks, with unique benefits and features. Smooth Operator is more affordable and easier to use for beginner and intermediate users who need a quick solution, while Soothe2 is more expensive but more advanced in its algorithms and has more intricate features that cater to a professional audio engineer.

Baby Audio Smooth Operator Vs Soothe2


Credit: www.youtube.com


Baby Audio Smooth Operator Vs Soothe2: Similarities


Smooth Operator and Soothe2, two dynamic EQ plugins created by Baby Audio, share several similarities. Both tools help to remove unwanted resonances and harshness in audio recordings, making them sound more polished, balanced and pleasant to the ears.

Baby Audio Smooth Operator Vs Soothe2: Similarities Dynamic EQ Technology, Ease of Use, and Customization are three crucial factors to consider when comparing Baby Audio Smooth Operator and Soothe2. Despite being different plugins with unique features, they share some similarities. Dynamic EQ Technology Both plugins use Dynamic EQ technology to simplify the equalization process. Dynamic EQs respond to incoming audio signals, making it easier to control the frequency balance and dynamics of your track. What this means is that you can compress only specific frequency ranges instead of compressing the entire track. This feature helps in solving some of the common issues in the mix, for example, when certain instruments or vocals sound too harsh or lack clarity. Ease of Use The second similarity between the two plugins is the ease of use. Even though both are powerful plugins, they are user-friendly. This means that you don’t have to spend countless hours learning how to use them or figuring out complicated options and controls. They both have intuitive interfaces designed to help you navigate and achieve the desired results easily. Customization Lastly, Soothe2 and Smooth Operator provide multiple customization options. These options help you to fine-tune your track according to your preferences. You can modify different parameters such as the EQ curve, threshold, attack, and release settings. Customizing these parameters allows you to achieve detailed control over the sound of your instruments and vocals. In summary, Baby Audio Smooth Operator and Soothe2 share some similarities that make them highly useful plugins for mixing and mastering. Dynamic EQ technology, ease of use, and customization are common features that make these plugins stand out. Whether you choose Smooth Operator or Soothe2, you can be assured of having powerful and effective plugins to use in your audio production process.


Which One Should You Choose?

When it comes to selecting between two powerful audio plugins like Baby Audio Smooth Operator and Soothe2, it can be a real challenge to make a decision, especially if you’re new to music production or audio engineering. Below, we have outlined the main factors to consider, common use cases, and an expert opinion to help you make a well-informed and practical choice between the two plugins.

Factors To Consider

Choosing the right plugin between Baby Audio Smooth Operator and Soothe2 may depend on various factors. Below are some of the main considerations:

  • The genre of music you typically produce: Baby Audio Smooth Operator is suitable for R&B, pop, synthwave, and trap music genres, whereas Youlean Loudness Meter is more versatile and works well with any music genre.
  • Cost: Baby Audio Smooth Operator is quite affordable compared to Soothe2, which is relatively expensive, making Smooth Operator a better option if you’re on a tight budget.
  • Compatibility: Smooth Operator works well with FL Studio, Ableton Live, Pro Tools, and Logic Pro X, whereas Soothe2 works with almost all popular digital audio workstations such as Ableton Live, Cubase, Pro Tools, Reaper, and more.
  • Experience level: Soothe2 is designed for experienced audio engineers who are familiar with dynamic EQ whereas Smooth Operator is beginner-friendly.
  • Personal preference: At the end of the day, the plug-in you choose may be determined by your personal preference, workflow, and musical style.

Use Cases

Understanding how each plugin is used in a typical music production setup can help you make a choice. Here are some of the common use cases:

Baby Audio Smooth Operator Soothe2
Smooth Operator is suitable for removing any harshness or tizzy frequency that make sibilance and harsh EQ easier to control. It is ideal for vocal production, where it can be used to eliminate any harshness that may be present in the vocals. Soothe2 is designed to remove unwanted resonance and harshness from any source. It works well with vocals, drums, guitars, and other sources of unwanted noise.
It can be used to smooth out harshness or unwanted resonance on drum loops, snare drums, and hi-hats. It is ideal for removing harshness from poorly recorded instruments or audio tracks.
Smooth Operator is great for adding a layer of warmth to soft instrument recordings like vocal samples, pads, and strings. Soothe2 can be used to tame any harshness present in synth leads and guitar amp sounds.

Expert Opinion

Many experts consider Soothe2 to be more powerful and versatile than Baby Audio Smooth Operator. However, this added power comes at a greater cost and with a more complex learning curve. Smooth Operator, on the other hand, is beginner-friendly and is designed to automate some of the most common and time-consuming audio processing tasks, such as automatically reducing harshness in vocals or adjusting resonances in musical instruments. Based on your personal preference, experience, and the type of audio you work with, you can choose either plugin and achieve great results.

Baby Audio Smooth Operator Vs Soothe2


Credit: bedroomproducersblog.com


Frequently Asked Questions For Baby Audio Smooth Operator Vs Soothe2


Is Smooth Operator The Same As Soothe?


No, smooth operator and soothe are not the same. Smooth operator refers to someone who is slick or charming while soothe means to calm or ease pain.


What Is The Best Alternative To Soothe 2?


I cannot provide an answer to this question because it requires knowledge and research on audio software alternatives to Soothe 2. As an AI language model, I cannot browse the internet or extract specific pieces of information without being directed.


However, I suggest conducting a quick search for “alternative audio software to Soothe 2” on search engines to find relevant resources and recommendations.


Is Smooth Operator Vst Worth It?


Yes, Smooth Operator VST is definitely worth it. It’s an excellent tool for processing and enhancing vocals, making them sound smoother and polished. With its easy-to-use interface and high-quality algorithms, it’s perfect for both beginners and professionals. Moreover, it’s affordable compared to other similar plugins in the market.


What Does Baby Audio Smooth Operator Do?


Baby Audio Smooth Operator is a dynamic tool that delivers balance, presence, and warmth to your audio tracks. With its advanced spectral processing, Smooth Operator analyses the audio and applies subtle adjustments to remove unwanted frequencies and enhance the overall mix.


This plugin is essential for smooth and well-rounded sound.


Conclusion


Overall, both Baby Audio’s Smooth Operator and Oeksound’s Soothe2 are excellent audio plugins that can make a significant difference in mixing and mastering music. Each one has unique features that cater to different needs. If you are looking for a subtle but effective audio tool, Smooth Operator is a great choice.


But if you need a more advanced plugin that can handle harsh resonances, Soothe2 is the way to go. Ultimately, the decision should be based on your specific requirements and preferences.

Categories
Archive

Best Way to Promote Your Music Online

The best way to promote your music online is by creating an engaging online presence and using social media platforms to connect with your audience. In today’s digital age, having a strong online presence is crucial for any musician looking to promote their music.


With the rise of social media platforms, musicians have an opportunity to connect with their audience like never before. However, simply having a social media presence is not enough. Musicians need to create engaging content that resonates with their fans and use different tactics to drive traffic to their music.


We will explore some of the most effective strategies for promoting your music online, including using social media, building an email list, collaborating with influencers and bloggers, and more.


Social Media Platforms


Social media platforms are an effective way for musicians to promote their music online. Platforms like Facebook, Instagram and Twitter allow you to reach a wider audience, engage with your fans, and increase your visibility in the industry. Utilize these platforms by posting regular updates, sharing behind-the-scenes content, and interacting with your followers to build your brand and career.

In today’s digital era, social media platforms have become an essential tool for musicians to promote their music. With billions of active users, these platforms provide an opportunity to reach out to a wider audience and connect with fans directly. In this section, we will discuss the three most popular social media platforms for musicians: Instagram, Twitter, and Facebook.

Instagram

Instagram is one of the most popular social media platforms among musicians. With over 1 billion active users, it provides a great opportunity for artists to showcase their music visually. Here are some tips on how to promote your music on Instagram:

  • Create a business profile to access insights and analytics
  • Use relevant hashtags to increase visibility
  • Post high-quality images and videos to showcase your music and performances
  • Engage with your followers and other musicians in your niche
  • Use Instagram Stories and Reels to share behind-the-scenes and promote your latest releases

Twitter

Twitter is a great platform for musicians to share news, updates, and engage with fans in real-time. With a limit of 280 characters per tweet, it requires concise and impactful communication. Here are some tips on how to promote your music on Twitter:

  • Engage with your followers and other musicians in your niche
  • Use relevant hashtags to increase visibility
  • Tweet news and updates about your music
  • Use Twitter to announce and promote your latest releases

Facebook

Facebook is the largest social media platform with over 2.8 billion active users. It provides a wide range of features for artists to promote their music, including pages, groups, and events. Here are some tips on how to promote your music on Facebook:

  • Create a Facebook page to promote your music and engage with fans
  • Join relevant groups to connect with fans and other musicians in your niche
  • Share updates, news, and videos about your music on your page
  • Create and promote events to showcase your music and performances


Music Streaming Services


Music streaming services provide an excellent platform for music promotion online. By using services like Spotify and Apple Music, artists can connect with new listeners, build a following, and reach wider audiences.

As an aspiring musician, promoting your music online is essential. One of the most effective ways to promote your music is by using music streaming services. With the rise of technology and the internet, the use of music streaming services has grown exponentially. In this article, we will discuss the top three streaming services available and how you can use them to promote your music online.

Spotify

Spotify is one of the largest and most widely used music streaming services. With over 345 million active users worldwide, Spotify allows artists to reach a massive audience. As a musician, you can create a Spotify profile, upload your music, and share it with your fans. You can also use Spotify for Artists to gain valuable insights into your audience, track your streams, and promote your music via playlists.

Apple Music

Apple Music is another popular music streaming service that has gained a lot of traction in recent years. As an artist, you can create an Apple Music profile and distribute your music to over 100 countries. Apple Music also offers a feature called Apple Music for Artists, where you can track your streams, view audience demographics, and promote your music through curated playlists.

Tidal

Tidal is a unique music streaming service that offers high-quality, lossless audio. Although Tidal has a smaller audience compared to Spotify and Apple Music, it offers exclusive content and specific features not available on other platforms. Tidal also offers Tidal for Artists, which provides artists with insights into audience data and the ability to create playlists. Overall, using music streaming services such as Spotify, Apple Music, and Tidal can significantly help to promote your music online. By creating profiles on these platforms and leveraging the features and tools available, you can reach a broader audience and take your music career to the next level.

Creating A Website


Creating a website can be crucial in promoting your music online. Showcase your brand and talent through informative and visually appealing content, optimize your site for SEO, and incorporate social media to engage with your audience and gain new fans.

Creating a Website: As an aspiring musician, promoting your music online is a crucial element in reaching more audiences. The best way to promote your music online is by creating a website. Having a website for your music provides a central hub for potential fans to learn about you, listen to your music, buy merchandise, and connect with you. In this article, we will discuss the importance of a website and how to create one.

Why A Website Is Important

A website provides many benefits for artists looking to promote their music. Here are some reasons why having a website is important –

  • A website provides a professional online presence for you and your music.
  • You can showcase your music and sell merch directly to your fans.
  • You can use your website to collect email addresses and build your fan base.
  • Having a website helps you to be discovered on search engines and social media platforms.
  • You can use your website to publish your latest news, tour dates, and other updates.

How To Create A Website

Creating a website may sound intimidating, but it’s easier than you think. Here’s how to create a website for your music –

  1. Choose a domain name and hosting service: A domain name is the name of your website, and hosting is where your website will live on the internet.
  2. Choose a website builder: There are many website builders available, such as Wix, Squarespace, and WordPress. Choose the one that suits your needs.
  3. Create your website: Use the website builder to create your website. Add your bio, music, tour dates, and merch.
  4. Promote your website: Once your website is complete, promote it using social media, email, and other marketing channels to reach more fans.

In conclusion, creating a website is the best way to promote your music online. Having a website provides a professional online presence, a platform to sell your music and merch, and a way to engage with your fans. Follow the steps mentioned above to create your website and start promoting your music today.

Email Marketing


One of the best ways to promote your music online is through email marketing. Send newsletters, updates, and exclusive offers to your subscribers regularly to keep them engaged and interested in your music. With strategic email marketing, you can increase your fan base and ultimately grow your music career.

Email marketing is a powerful tool to promote your music online. In this digital era, sending personalized and engaging emails to fans and potential listeners can help increase your fan base and sales. With email marketing, you have complete control and ownership of your contacts, unlike other social media platforms. By consistently growing and nurturing your email list, creating engaging email content, and tracking your results, you can take your music career to the next level.

Building An Email List

Building an email list is the foundation of your email marketing strategy. The key to building a solid email list is to offer something valuable in exchange for your fan’s contact information. This value could be in the form of a free download, exclusive content, early access to music releases, or a discount code for merch.

You can start building your email list by adding sign-up forms on your website, social media bios, and posts. You can also collect emails at events, shows, and other offline activities. Just ensure that you get permission from everyone on your email list by including a clear opt-in checkbox on your sign-up forms.

Creating Engaging Email Content

After building your email list, the next step is to create engaging email content that resonates with your subscribers. Your subscribers are bombarded with emails every day, so it is crucial to make your emails stand out.

Here are a few tips to create engaging email content:

  • Personalize your emails with your fan’s name
  • Use an attention-grabbing subject line
  • Segment your email list based on interests and behaviors
  • Use visuals such as pictures and videos
  • Showcase your personality and brand voice
  • Include calls-to-action that encourage interaction

Tracking Your Results

Finally, it is essential to track your email marketing results to understand what works and what doesn’t. You can use email marketing tools such as Mailchimp and Constant Contact to track your email open rates, click-through rates, and conversion rates.

The insights you gain from tracking your email marketing results can help you optimize your email strategy, improve engagement, and build long-lasting relationships with your fans.

Conclusion

In conclusion, email marketing is an effective way to promote your music online. By building an email list, creating engaging email content, and tracking your results, you can connect with your fans and grow your music career.

Collaborations


Collaborating with other artists, producers, and influencers is one of the best ways to promote your music online. By teaming up, you can expand your audience and reach new fans while also creating unique and exciting content. Utilize social media and online platforms to find potential collaborators and start building relationships.

Collaborating with other artists and influencers can be an effective way to promote your music online and reach a wider audience. There are various ways to collaborate with other musicians and influencers. Here are a few H3 headings that can guide you in promoting your music online by collaborating with others.

Reaching Out To Other Artists

Collaborating with other artists can not only help in promoting your music but also bring fresh ideas and creativity to your work. Reach out to other artists that have a similar music style or genre. Look for artists that have a similar number of followers or a higher following. Collaborating with an artist that has a larger fan base than you can help you gain more visibility. When reaching out to other artists, ensure that you personalize your message. Start by hearing their music and explaining what appeals to you. Connect with them over social media platforms like Instagram, Twitter or Facebook. Comment on their posts, share their music, and show appreciation for their work. When reaching out, focus on how both parties can benefit from the collaboration.

Partnering With Influencers

Influencers have a significant impact on social media platforms with their large following and engagement rates. Partnering with an influencer can increase exposure to your music while promoting their brand. When inquiring about a partnership, ensure that their audience aligns with your music style. For example, if you’re a country singer, partnering with a fashion influencer may not be the best fit. Working with an influencer, you can create sponsored content, giveaways, or challenges that creatively incorporates your music. Consider reaching out to influencers with a following of more than 10,000, as this can typically lead to better engagement rates. Before confirming a partnership, ensure that the influencer’s work aligns with your values and brand image. In conclusion, collaborations are an effective way to promote your music online and reach new audiences. Whether it’s through social media influencers or other artists, leveraging collaboration can bring creativity and excitement to your work. Reaching out and partnering with others can positively impact your music career and help you achieve your goals.

Music Videos

Music videos have become an essential element of music promotion in today’s digital age. It provides artists with an opportunity to showcase their personality, style, and creativity to a significant audience. From storyboard creation to post-production, creating a high-quality music video should be a top priority for any artist looking to gain a broader audience reach.

Why Music Videos Are Important

  • Music videos can help your fans visualize your music.
  • Music videos create a strong visual identity that helps you stand out.
  • Music videos provide an opportunity to showcase your creativity and vision.
  • Music videos give artists the chance to tell a story and create a powerful emotional connection with their audience.

A music video can be a creative masterpiece that propels an artist’s career. Creating a music video is no longer just a luxury for established artists. It is an accessible tool for even independent artists to promote their work and engage their audience in today’s digital world.

Creating High-quality Music Videos

A well-crafted music video can deliver a clear message that connects the artist to their audience. To create a high-quality music video:

  • Invest in quality equipment and software for filming, editing, and post-production.
  • Collaborate with a professional video production team or hire creative talent.
  • Create a clear storyboard and script for the music video.
  • Ensure the lighting and sound are optimal for shooting and recording.
  • Experiment with different visual effects and styles to make your video stand out.
  • Stick with a clear theme throughout the video to ensure the message is consistent.

With the rise of digital media, music videos have become increasingly important in promoting an artist’s work. Creating high-quality music videos can significantly contribute to an artist’s marketing strategy. It provides them with an opportunity to reach a larger audience and allows them to showcase their creativity and vision.

In Conclusion

Music videos have become an essential tool for artists to promote their work. It provides artists with an opportunity to showcase their creativity and reach a broader audience. Creating a high-quality music video requires a significant investment of time and resources. But, it is well worth it for artists aiming to create a long-term impact.


Virtual Events


Virtual events have become increasingly popular for musicians, providing a way to promote your music online. From livestream concerts to virtual fan meet-and-greets, there are endless creative options to engage with your audience and gain new fans from all over the world.

Hosting Virtual Concerts

Virtual concerts have become the hottest trend in the music industry, and for all the right reasons. Through hosting virtual concerts, musicians can connect and engage with their fans from anywhere in the world. It also provides a platform for upcoming artists to showcase their talents to a vast audience, ultimately gaining more exposure. There are various ways you can host a virtual concert, including YouTube, Facebook, and other live streaming platforms. One of the best approaches to hosting a successful virtual concert is by establishing a bond with your audience beforehand through social media, email, or your website. Moreover, make sure to provide excellent audio and video quality to enhance the overall experience of your virtual concert.

Live Streaming On Social Media

Social media platforms, such as Facebook, Twitter, Instagram, and YouTube Live, have revolutionized the music industry’s way of promoting and nurturing talent. Live streaming on social media platforms provides a free and convenient way of reaching a large audience worldwide and promoting your music. Not only does it enable you to connect with your fans, but it also increases your overall engagement and visibility, leading to more views, followers, and ultimately, record sales. To make your live streaming on social media successful, ensure that you have a stable internet connection, a good quality camera, and microphone, and most importantly, choose an appropriate time to go live to increase your viewership.

Partnering With Online Music Venues And Platforms

Online music venues and platforms, such as Stageit, Sofar Sounds, and Driift, have become popular avenues for artists to promote, fundraise, and monetize their music. Partnering with these online music venues and platforms is an excellent way to promote your music, reach a bigger audience worldwide, and gain more exposure. You can host your own shows or performances, participate in virtual festivals, or collaborate with other artists. One of the advantages of partnering with online music venues and platforms is that they offer different payment models, such as tickets, pay-per-view, tips, and donations, providing an opportunity to monetize your music financially. With the ongoing pandemic, the music industry has shifted from traditional performances and concerts to virtual events, providing musicians with new opportunities to showcase their music and reach a wider audience. By hosting virtual concerts, live streaming on social media, and partnering with online music venues and platforms, you can promote your music more effectively and gain more followers while retaining the personal touch that makes music so special.

Best Way to Promote Your Music Online


Credit: www.wired.com


Paid Advertising


One of the best ways to promote your music online is through paid advertising. By using targeted ads, you can reach a larger audience and increase your chances of getting noticed. Through platforms like Facebook Ads or Google AdWords, you can advertise your music to specific demographics, locations, and interests.

One way to promote your music online is through paid advertising. This can help increase visibility and attract new fans by putting your music in front of a larger audience. There are several options for paid advertising, including Google Ads and social media advertising.

Google Ads

Google Ads is a powerful tool for promoting your music online. With Google Ads, you can create ads that target specific keywords related to your music and your audience. This means that your ads will only be shown to people who are actively searching for music like yours, increasing the chances that they will click through to your website or streaming platform. To get started with Google Ads, you will first need to create a Google Ads account. From there, you can choose your targeting options, create your ad copy and design, and set your budget and bidding strategy. It’s important to track your results and adjust your ads over time to optimize your performance and get the most out of your investment.

Social Media Advertising

Social media advertising is another effective way to promote your music online. With platforms like Facebook, Instagram, and Twitter, you can create ads that target specific demographics and interests. This can be especially useful if you have a specific audience in mind for your music, such as fans of a certain genre or age group. To get started with social media advertising, you will need to create an account with the platform of your choice. From there, you can choose your targeting options, create your ad copy and design, and set your budget and bidding strategy. It’s important to track your results and adjust your ads over time to optimize your performance and get the most out of your investment. In conclusion, paid advertising can be a powerful tool for promoting your music online, but it’s important to approach it strategically and track your results as you go. By using platforms like Google Ads and social media advertising, you can reach a wider audience and attract new fans to your music.

Best Way to Promote Your Music Online


Credit: bandzoogle.com


Frequently Asked Questions For Best Way To Promote Your Music Online


How Do I Promote My Music Online?


To promote your music online, you can start by creating a strong online presence via social media platforms like Instagram, Twitter and Facebook. You can also upload your music to streaming services, use email marketing campaigns, collaborate with influencers, and send your music for reviews to music blogs and media outlets.


Remember to focus on building an engaged fanbase and creating quality content.


How Can I Get My Music Noticed Online?


To get your music noticed online, you can follow these tips: 1. Build a strong online presence through social media and music platforms. 2. Collaborate with other artists and participate in online music communities. 3. Utilize email marketing and promote your music to your email list.


4. Leverage the power of influencers and music bloggers by requesting reviews or features. 5. Create engaging and visually appealing content to captivate your audience.


What Is The Best Music Promotion Site?


The best music promotion sites are DistroKid, TuneCore, and CD Baby. Each site has its unique features and pricing plans that can help increase exposure and reach for artists’ music. By using these websites, musicians can promote their music on different platforms such as Apple Music, Spotify, and Amazon Music.


What Social Media Is Best For Promoting Music?


The best social media for promoting music is highly subjective and varies depending on the artist’s target audience and genre. However, some popular options include YouTube, Instagram, TikTok, and Facebook. Each platform has its unique features, so it’s essential to research your target audience deeply before deciding which platform to use.


Conclusion


Promoting your music online can be a daunting task. However, it is essential for your music to reach a wider audience and gain recognition. With the right strategies, you can successfully promote your music online and achieve your goals. Remember to use social media platforms, collaborate with other artists, engage with your audience and focus on building your brand.


Lastly, always keep learning and be adaptable to changes in the industry. With persistence and hard work, you can make it in the competitive world of music.

More in our Music marketing guide.