Categories
Archive

Creating Drakes Marvins Room Reverb Effect

Creating Drakes Marvins Room reverb effect can be achieved by using a combination of plugins and mixing techniques. To recreate the sound, you will need a reverb plugin, a compressor, and an EQ plugin.

Drake’s 2011 hit “Marvins Room” is an emotional ballad that is characterized by its distinct reverb effect. The song’s producer, Noah “40” Shebib, is known for his unique production style that often features a heavy use of reverb and other effects.

Recreating this effect can be challenging, but with the right tools and mixing techniques, it is possible. The key is to use a combination of plugins such as a reverb, compressor and EQ, while also making adjustments to the wet/dry mix and the pre-delay time. We will walk you through how to create Drakes Marvins Room reverb effect so that you can apply it to your own music productions.
Creating Drakes Marvins Room Reverb Effect

Credit: www.youtube.com

Understanding Reverb

Achieving the signature reverb sound on Drake’s Marvin’s Room can elevate your music production to the next level. Understanding reverb and its different parameters like decay time and pre-delay can help you achieve this effect. By experimenting with the right settings and plugins, you can create a rich and immersive sound that brings your music to life.

When it comes to creating a unique and original sound for your music, adding effects becomes a critical aspect. One of the most popular and widely used effects is reverb. Understanding reverb is essential for music production.

What Is Reverb?

Reverb is a type of audio effect that aims to replicate the natural reverberation of sound in a physical space. It refers to the persistence of sound after it has been produced. Reverb effect adds depth and spaciousness to your music.

Types Of Reverb

There are different types of reverb, some of which include plate, chamber, hall, and spring. Each type of reverb provides a slightly different sound, which means that choosing the appropriate type is necessary to achieve the desired effect.

Parameters Of Reverb

Understanding the parameters of reverb is crucial in manipulating the sound. The parameters include decay time, room size, pre-delay, diffusion, and many more. Each parameter plays a significant role in the sound produced, so getting them right is imperative. Whether you’re a beginner or a seasoned music producer, understanding reverb is essential in creating unique sounds. So, take the time to learn the different types of reverb and the parameters involved to create the best possible sound.
Creating Drakes Marvins Room Reverb Effect

Credit: www.youtube.com

Setting Up The Daw

To create Drake’s “Marvin’s Room” reverb effect, it is important to properly set up the DAW. This involves adjusting the input and output levels, choosing the right audio interface, and selecting the appropriate plugins for your project. With careful attention to detail, you can achieve the desired professional sound.

Selecting The Right Daw

Choosing the right DAW (Digital Audio Workstation) is the first and most crucial step towards creating the perfect Drake Marvin’s Room reverb effect. Some of the popular DAWs among music producers worldwide include Ableton Live, Cubase, Logic Pro X, and FL Studio. You should choose a DAW that you are comfortable with and has all the tools you need to achieve the desired sound effect.

Setting Up The Session

After selecting your preferred DAW, it’s time to set up your session. The session refers to the individual project files that contain all your recorded audio, MIDI, and effects. Follow these steps to set up your session:

  1. Create a new project and name it accordingly. Ensure that the project’s tempo matches the tempo of Drake’s Marvin’s Room song (80 bpm).
  2. Choose the project’s sample rate and bit depth, which will determine the audio quality.
  3. Choose your preferred audio input and output device. Ensure that they are set up correctly and can receive and send audio signals.
  4. Create a new audio track and set it to receive input from your microphone or external sound card. Ensure that the track is armed and ready to record.
  5. Set up your preferred audio effects, including EQ, reverb, delay, and compression, to create the Marvin’s Room reverb effect.

Following these steps will set up your DAW session for creating the perfect Drake Marvin’s Room reverb effect. Remember, the key is to experiment with your audio effects and create your unique sound.

Finding The Right Source Sound

To create a sound close to Drake’s Marvin’s Room reverb effect, start by finding the right source sound. In this article, we’ll discuss different techniques for recording audio to get the perfect sound for your reverb effect. Selecting the right sound is crucial as it serves as the foundation for the entire reverb. Here are a few things to keep in mind when selecting a sound for your reverb.

Selecting The Right Sound

To achieve the perfect reverb, you need to select a sound that is clean and has a good dynamic range. It should have enough clarity to allow the reverb to stand out. A good source sound will be a single source of sound, such as vocals with minimal background noise. The quieter the sound, the better it is for reverb as it gives more space to work with reverb effects.

Different Techniques For Recording Audio

When recording audio, capturing a good sound is the first step to producing a great reverb effect. Different recording techniques can help you achieve the desired result. Below are a few techniques for recording audio:

TechniqueDescription
X-Y Stereo Mic TechniqueThis technique involves placing two cardioid microphones next to each other with their heads positioned at a 90-degree angle. It’s ideal for recording a solo instrument such as a guitar or vocal.
Spaced Pair TechniqueThis technique involves spacing two identical microphones a few feet apart from each other. It’s ideal for recording ambience or multiple instruments.
Close-Mic TechniqueThis technique involves placing the microphone as close to the sound source as possible. It’s ideal for recording an instrument with less ambient sound.

Once you’ve selected the right sound and recorded it using the appropriate technique, the next step is to process it. Use plugins to add reverb and other effects that will enhance the quality of the sound. Remember to experiment with different techniques until you find the perfect reverb that suits your sound.

Creating The Reverb Effect

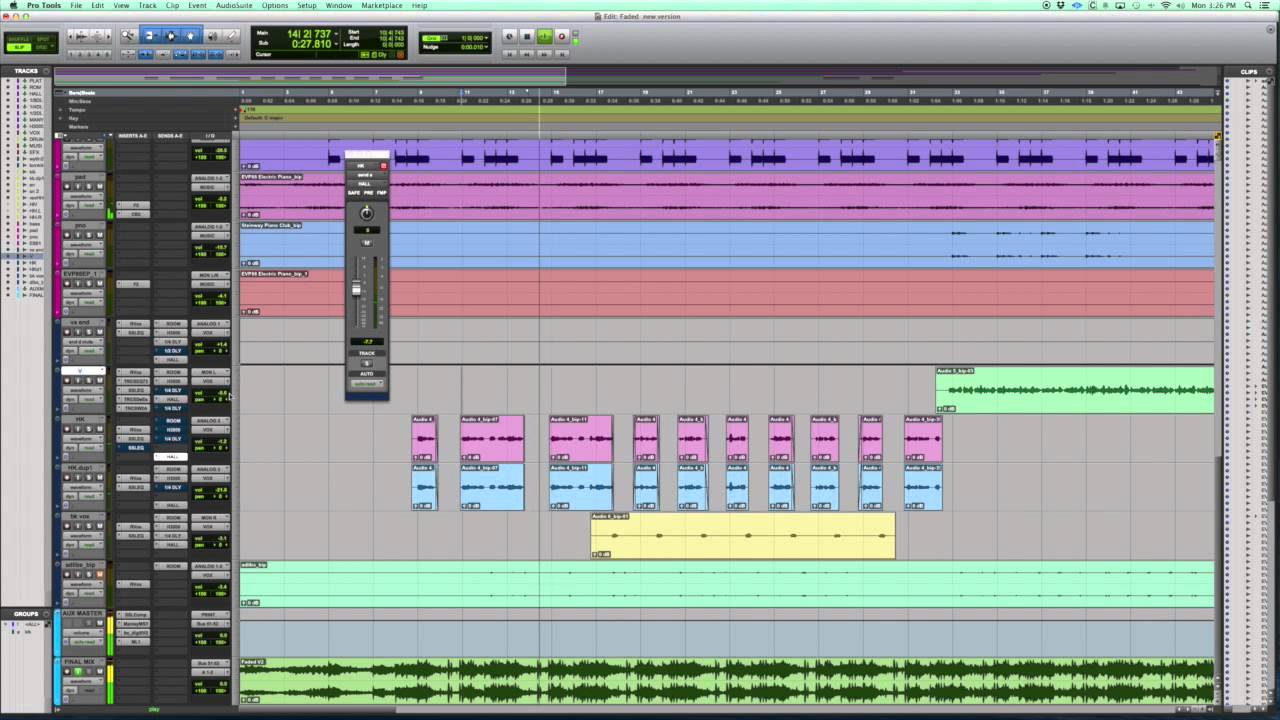
To achieve Drake’s Marvins Room reverb effect, start by layering a vocal track and duplicating it. Use a long reverb plugin with a short decay time and adjust the mix and EQ to create the desired effect. Experiment with adding delays and doubling the vocals for a richer sound.

Creating the reverb effect for Drake’s Marvin’s Room is a key element to achieving the atmospheric and moody vibe of the song. In this section, we will explore the steps to create the reverb effect using a plugin, adjusting the parameters, and adding automation to create movement. Using a reverb plugin: Firstly, select a reverb plugin that suits the tone of the vocals and the overall mood of the track. A plugin with a smooth tail, such as the Valhalla VintageVerb, is a popular choice for Drake’s Marvin’s Room reverb effect. Adjusting the parameters: Once the plugin is selected, adjust the parameters such as decay time, pre-delay, and high/low cut to achieve the desired reverb effect. Set the decay time to a longer duration if you want to create a larger space feel. Pre-delay will give a sense of space between the vocals and their reverb. High and low cut can be used to adjust the frequency range of the reverb effect. Using automation to create movement: Adding automation to the reverb effect can enhance it by creating movement between the vocal phrases to add interest. Use the automation to increase the reverb’s depth and wetness during specific lyric phrases, which will emphasize the emotions conveyed in the lyrics. Experiment with different automation patterns to bring your track to life. In conclusion, creating the reverb effect for Drake’s Marvin’s Room is critical to the overall tone of the song. With the right plugin, adjusted parameters, and automation techniques, you can create a moody, atmospheric reverb effect that captures the essence of the track.

Enhancing The Effect

If you’re a fan of Drake’s music, then you’ve probably heard the reverb effect used in his hit song, “Marvin’s Room.” This effect is commonly used by sound engineers to give vocals a sense of space, depth, and warmth. However, that doesn’t mean that you can’t create this effect too! In this post, we’ll take a look at how to create Drake’s Marvin’s Room reverb effect and then enhance it using EQ and compression to take it to the next level.

Adding Eq To The Effect

One way to enhance the reverb effect is to use EQ. This involves adjusting the levels of different frequencies in the signal to create a more balanced sound. For instance, boosting the lower frequencies will add warmth to the vocals, while cutting the higher frequencies will remove any harshness or sibilance.

Here’s how to add EQ to the reverb effect:

  1. Insert an EQ plugin on the vocal track that you want to add reverb to.
  2. Adjust the EQ settings to your preference. For example, you might want to boost the low frequencies by around 3dB and cut the higher frequencies by around 2dB.
  3. Insert a reverb plugin on the same track and adjust the reverb settings to your preference.
  4. Use the wet/dry mix to balance the amount of reverb applied to the signal, and adjust the EQ settings as needed to further enhance the effect.

Using Compression To Balance The Sound

Another way to enhance the reverb effect is to use compression. This involves reducing the dynamic range of the signal by attenuating the loudest parts and boosting the quietest parts. This helps to create a more consistent and balanced sound, making it easier to hear the reverb effect.

Here’s how to use compression to balance the sound:

  1. Insert a compressor plugin on the vocal track that you want to add reverb to.
  2. Adjust the compressor settings to your preference. For example, you might want to set a ratio of 2:1, a threshold of around -20dB, and a medium attack and release time.
  3. Insert a reverb plugin on the same track and adjust the reverb settings to your preference.
  4. Use the wet/dry mix to balance the amount of reverb applied to the signal, and adjust the compressor settings as needed to further enhance the effect.

In conclusion, adding EQ and compression to the reverb effect can help to create a more polished, professional sound. With a little bit of experimentation, you can use these techniques to take your music production to the next level and create a sound that’s uniquely your own.

https://www.tiktok.com/api/img/?itemId=7331445348453420331&location=0&aid=1988

Credit: www.tiktok.com

Applying The Effect To The Mix

To create the Drake’s Marvin Room reverb effect, applying the effect to the mix is an essential step. This involves using the right settings for the reverb effect and ensuring it blends seamlessly with the rest of the mix.

Determining Which Tracks Need The Effect

Before applying the Drake’s Marvin Room Reverb effect, you need to identify which tracks need it. This is an important step because applying the effect to the wrong track may result in a muddy and unpleasant mix. Usually, you will want to apply the effect to the vocals, but you can also experiment with applying it to other tracks such as the drums or guitar. To determine which tracks need the effect, listen to each track individually and then listen to the whole mix. If you find that a track sounds a bit dry compared to the other tracks, then it may benefit from the effect.

Effects On The Overall Mix

When applying the effect to the mix, it’s important to consider its effects on the overall sound. It can add depth and space to the mix, but it can also make it sound muddy if applied too heavily. One way to avoid this is to use the effect subtly and only apply it to the tracks that really need it. Another approach is to use a parallel processing technique, where you create a duplicate of the track and apply the effect to the duplicate only. By doing this, you can blend the original and duplicate tracks to achieve the desired effect without affecting the overall sound too much. In conclusion, applying the Drake’s Marvin Room Reverb effect can add depth and space to your mix, but it’s important to use it judiciously and only on the tracks that really need it.

Frequently Asked Questions On Creating Drakes Marvins Room Reverb Effect

Does Drake Use Reverb?

Yes, Drake does use reverb in his music to add depth and a sense of space to his vocals and instrumentals.

What Instruments Are Used In The Song Marvins Room?

The main instruments used in the song “Marvins Room” are a piano and drums with additional background vocals and synth effects.

How Do I Add Reverb To My Vocals?

To add reverb to your vocals, you can use a digital audio workstation (DAW) or a reverb pedal. In a DAW, simply add a reverb effect to the vocal track and adjust its parameters. With a reverb pedal, connect your microphone to the input and adjust the settings to your preference.

Who Is The Girl’s Voice In Marvins Room?

The girl’s voice in Marvins Room belongs to Ericka Lee, a singer and songwriter who co-wrote the song with Drake.

Conclusion

Creating the Marvins Room Reverb Effect used in Drake’s popular song can be achieved with the right tools and techniques. By understanding the principles of reverb and having access to quality plugins, you can effectively recreate this effect. With a little patience and experimentation, you can produce a similar sound that adds depth and emotion to your music.

By following these steps, you’ll be able to achieve a professional-sounding Marvins Room Reverb Effect in no time.

Categories
Archive

How To Add The Finishing Touches To A Final Mix

Adding the finishing touches to a final mix involves performing a thorough evaluation of the mix and making tweaks to achieve a polished sound. We’ll explore some essential tips for adding those final touches to your mix.

The final mix is the product of all the hard work put into recording, editing, and mixing a track. However, a great final mix can still be improved with the right finishing touches. It involves paying attention to the finer details and making small tweaks to enhance the overall sound and balance of the mix.

The process can be challenging, but it’s worth it to achieve a polished and professional sound. We’ll be sharing some essential tips for adding those final finishing touches to your mix.

Assessing Your Final Mix

When adding the finishing touches to a final mix, it is important to assess the overall sound quality and make adjustments where necessary. This includes listening for balance, clarity, and consistency throughout the track. With careful attention to detail, the final mix can truly shine and impress listeners.

After spending hours mixing audio tracks, it can be challenging to resist the temptation to call it a day and declare that your job is done. However, adding the finishing touches to a final mix is a crucial step in achieving the best possible outcome. Before submitting your final work, it is essential to assess your mix in its entirety to ensure that every aspect is perfect. Here are some simple steps to help you assess your final mix effectively.

Listen With Fresh Ears

The first step in assessing a final mix is to listen to it with as fresh ears as possible. Take a break for a few hours or days before you begin your assessment. This break time will allow you to hear the mix from a fresh perspective and identify any problem areas more easily. Make sure to get rid of all possible distractions when listening to your final mix. Turn off your phone, move to a quiet room, and put on some high-quality headphones or speakers to avoid any interference. Listen to your mix multiple times at different volume levels to ensure adequate balance.

Take Notes

It’s essential to take notes as you listen to your final mix. Pay close attention to every detail of the audio tracks, including the dynamics, clarity, balance, and overall feel. Write down everything that you think needs adjusting or improving. If you notice areas with unwanted noise, note what kind of noise it is and where it appears. Be specific when taking notes, allowing yourself to determine the necessary adjustments accurately.

Evaluate Dynamics

The dynamics of your final mix play a significant role in producing a professional-sounding end product. Evaluate the dynamics by focusing on the volume levels and the transitions between different parts of the mix. Ensure that every instrument is audible, and the overall mix doesn’t have any spots that are overpowering or inaudible. Also, pay attention to the stereo image and panning to ensure that the audio sits well in the stereo spectrum. Finally, give your final mix a quick listen, this time for any remaining issues. If there are none, congratulations – you’ve got your finalized mix. If there are improvements that can be made, take the time to work on them, following these processes again until you’re happy.

In Conclusion

With these simple steps, you can add the finishing touches to your final mix to create a masterpiece that you can be proud of. Remember, assessing your final mix is an essential part of the music production process and can take some time. Take your time, listen carefully, take notes, and evaluate each aspect methodically, until you can safely say that you’re satisfied with the result.

Equalization

Equalization is one of the final touches that can make a big difference to a mix. By balancing the frequency levels of each instrument and sound, you can create a more cohesive and professional-sounding track. With careful tweaking of EQ settings, you can bring out the best in each element of your mix and add a polished finish.

Sweep For Problem Frequencies

Before shaping the tone of your mix with equalization, you need to identify and remove any problem frequencies that might be causing issues. These can include unwanted noise, hums, or resonances that are muddying up your mix. One way to do this is by sweeping through the frequency spectrum with a parametric EQ, looking for any offending frequencies that you can cut or notch out.

Shape Tone With Eq

Once you have cleared up any problem frequencies in your mix, you can then use equalization to shape the tone to your liking. EQ is an incredibly powerful tool that can be used to enhance or reduce the character of individual instruments or tracks, as well as balance the overall mix. When shaping the tone of your mix with EQ, it’s important to approach it in a musical way. Rather than simply boosting or cutting frequencies based on a technical analysis of the mix, try to use your ears and make adjustments based on what sounds good to you. Here are some tips for using EQ to shape the tone of your mix:

  • Start by listening critically to your mix and identifying which instruments or frequencies need to be emphasized or reduced.
  • Use a gentle touch when boosting frequencies to avoid harsh or unnatural sounds.
  • Cut frequencies instead of boosting whenever possible to reduce muddiness and improve clarity.
  • Use broad Q settings for subtle tonal shaping, and narrow Q settings for surgical precision.
  • Employ a high-pass filter on tracks that don’t need low-end information to clean up your mix.

By using these techniques, you can carefully sculpt the tone of your mix and add the finishing touches that bring it to life. Don’t be afraid to experiment and trust your ears – with a little patience and practice, you can achieve amazing results with equalization.

Compression

When it comes to adding the finishing touches to a final mix, compression is a vital tool that can help balance levels, add punch and sustain to your mix. Compression has the ability to reduce the dynamic range of an audio signal, which makes loud sounds quieter and quiet sounds louder. It essentially evens out the levels of a track, making it sound more polished and professional.

Balance Levels

The first step in using compression is to balance the levels of all the tracks in your mix. By doing this, you’ll ensure that no track is too loud or too quiet, and that everything sits nicely within the mix. This can be accomplished by using a compressor with a low ratio and threshold, and then adjusting the settings until the levels of each track are balanced. Make sure that you don’t over-compress, as this can lead to a loss of dynamics and a dull-sounding mix.

Add Punch And Sustain

Once you’ve balanced the levels of your tracks, it’s time to add some punch and sustain to your mix. This can be achieved by using a compressor with a higher ratio and threshold. By doing this, you’ll be able to add some weight and thickness to your tracks, making them sound more powerful and impactful. For added sustain, you can also use a longer attack time, which allows the compression to kick in a bit later, and a longer release time, which lets the compression linger a bit longer.

Tip:When using compression, it’s important to use your ears and trust your instincts. Compression can be a subtle art, and it can take some time to develop an ear for it. Don’t be afraid to experiment and try different settings until you find the ones that work best for your mix.

Compression is a powerful tool that can take your mix to the next level. By using it to balance levels, add punch and sustain, you’ll be able to achieve a polished and professional sound that will impress even the most discerning listener.

Reverb And Delay

When it comes to audio mixing, Reverb and Delay are essential elements. They help in shaping the sound and add character to the music. In this post, we will discuss how to use Reverb and Delay to add the finishing touches to a final mix.

Create Space

Reverb is used to create space in the mix, making it sound like the music is played in a particular environment. To add Reverb to a track, insert a plugin in the effect chain and adjust the settings until you find the desired sound. You can choose from various types of Reverb, such as Plate, Hall, or Room.

Add Depth

Delay is an effect that adds a duplicate of the sound to the mix, delayed by a specific time period. This effect can help you add depth to a track that sounds flat. You can adjust the Time and Feedback controls to add more or less delay to the sound. Also, you can choose from various types of Delay, such as Analog, Digital, or Tape Delay.

Enhance Stereo Image

You can use Reverb and Delay to enhance the Stereo Image of a mix. By adding more Reverb to one side of the mix and less to the other, you can create a stereo spread effect. Also, by adding a small delay to one side of the mix, you can create a stereo widening effect.

Conclusion

Reverb and Delay are powerful tools that can add character and depth to your music. With the right settings, you can create a professional-sounding mix that stands out. Keep in mind that less is often more, and use these effects sparingly to avoid clashing or muddying the mix.

Stereo Enhancement

Adding stereo enhancement can bring the final mix to life by providing a wider and more immersive sound experience. By using techniques such as panning, EQ adjustments and reverb, you can give each instrument or vocal its own space in the mix and add depth and dimension.

Stereo enhancement is how you get your final mix to stand out. It creates a wider, more spacious sound that makes your tracks sound professional and polished. There are several ways to enhance your stereo mix, but two of the most popular are panning and widening effects.

Use Panning

Panning is an essential tool for stereo enhancement. It helps you to position sound sources within the stereo field. You can move sounds to the left, right, or anywhere in between to create a sense of space and depth. For example, you can pan your lead guitar to the right and your rhythm guitar to the left to create separation between the two. Make sure you don’t overdo it with panning. If you pan everything too much, your mix may sound unbalanced or even confusing. Use panning to create a natural-sounding stereo field.

Add Widening Effects

Another popular technique for stereo enhancement is to add widening effects. These effects create a sense of space by spreading the sound across the stereo field. Common widening effects include chorus, delay, and reverb. Chorus effect is a great tool for widening, which adds copies of the original sound, each with a slightly different pitch, time, and/or modulation level. It creates a lush, stereo sound that is perfect for guitars, vocals, and synths. Delay and reverb are other common widening effects, which create a natural-sounding stereo field by introducing reflections and echoes. They can add depth to your mix and create a sense of space. Stereo enhancement is crucial to creating a final mix that sounds polished and professional. Using panning and widening effects can help you create a sense of space and depth in your tracks. However, make sure you don’t overdo it. Use these techniques to create a natural-sounding stereo field that complements your overall mix.

Automation

Adding the finishing touches to a final mix is one of the most important stages of music production. Automation is a powerful tool that can help you make detailed adjustments and even create movement to take your mix to the next level.

Make Detailed Adjustments

Automation allows you to make detailed adjustments to specific elements of your mix. For example, you can automate the volume of a vocal track to make certain words or phrases stand out in the mix. You can also use automation to adjust the panning of individual elements to create a wider stereo image.

Examples of Detailed Adjustments with Automation
AdjustmentTechnique
VolumeAutomate the volume of individual elements to create a dynamic mix.
PanningAutomate the panning of individual elements to create movement and a wider stereo image.
EQAutomate the EQ of individual elements to create space and clarity in the mix.

Create Movement

Automation can also be used to create movement in your mix. By simply automating the volume, panning, or effects of specific elements, you can create a sense of movement and dynamics that can keep the listener engaged throughout the song.

  1. Automate the volume of a synth to create a sweeping effect throughout the mix.
  2. Automate the panning of a guitar to create a sense of movement from left to right.
  3. Automate a reverb or delay effect to create a sense of space and depth in the mix.

Automation is a powerful tool that can take your mix to the next level. By making detailed adjustments and creating movement, you can create a sense of depth and dynamics that can keep your listeners engaged throughout the song.

Finalizing Your Mix

Finalizing a mix is not as simple as it sounds. It is the process of putting on the finishing touches which can make all the difference to the quality of your music. In this section, we will discuss various techniques to finalize your mix. By following these techniques, you can give your tracks a professional finish that will impress your audience.

Eliminate Noise

Eliminating noise is an important step to make your mix sound clean and crisp. To do this, make sure all the tracks in your mix are free from unwanted background noise. Use noise reduction tools such as EQ, filters, and noise gates to remove any unwanted noise.

Check Phase

Checking the phase of your mix is often overlooked, but it is a crucial step to ensure the best possible sound quality. Make sure that all the tracks in your mix are in phase with each other. You can do this by flipping the phase of one track and listening to the result. If it sounds hollow or thin, then the tracks are out of phase. Correct any problems and ensure that all the tracks are in phase before proceeding further.

Sweeten With Mastering Effects

Now that you have eliminated noise and checked the phase, it is time to add some mastering effects to the mix to sweeten it up. Mastering effects such as equalizers, compressors, and limiters can help to enhance the overall sound of your mix. Use them wisely to add warmth, punch, and clarity to your tracks. However, be careful not to overdo it, as too much processing can ruin your mix.

By using the techniques mentioned above, you can create a high-quality final mix that is ready for mastering and distribution. Take your time, listen carefully to each step, and make sure that every element of your mix is perfectly balanced. With a little patience and practice, you can create a professional mix that will sound great on any sound system!

Frequently Asked Questions On How To Add The Finishing Touches To A Final Mix

What Is Adding Finishing Touches?

Adding finishing touches refers to the final steps taken to refine and enhance a text, design, or project. It involves revising, editing, and polishing the work to ensure that it meets the desired standards and objectives. Finishing touches may include proofreading for errors, adjusting formatting and layout, enhancing visual elements, and ensuring overall coherence and clarity.

How Do You Make A Song Sound Finished?

To make a song sound finished, focus on crafting a strong structure with a clear beginning, middle and end. It’s important to hone in on the lyrics and ensure they convey a clear message that connects with the listener. Consider the instrumentation and production, ensuring there is a cohesive sound throughout the song.

Finally, take the time to mix and master the track to bring out the full potential of the music.

How Do You Mix Tracks From Start To Finish?

To mix tracks from start to finish, you need to first set levels for the individual tracks, followed by pan and EQ adjustments. Then, add effects and automation to enhance the sound. Finally, export the mix and perform a final check for quality and consistency.

How Should A Mix Sound Before Mastering?

A mix should sound well balanced and have all elements audible without any being too loud or too soft. It should also be free of any clipping or distortion, and have a consistent volume throughout.

Conclusion

Achieving the perfect balance in a final mix is no easy feat, but with the use of the right tricks and techniques, it is definitely achievable. By following the steps outlined you can take your mix from good to great with just some finishing touches.

Remember to keep your ears peeled for any imperfections, and always experiment with new ideas to keep things fresh. With practice and perseverance, you will be able to deliver professional quality mixes for all of your musical projects. Time to get creative!

Categories
Archive

Make Your Songs Louder With A Limiter

A limiter can make your songs louder by compressing the dynamic range. Here’s how to use it effectively. For the bigger picture, see our tips for increasing loudness in a mix.

Also, using a limiting is one of the most common techniques used to make music sound louder and punchier. It’s a versatile tool that helps control the dynamics of audio signals. This ensures that the output signal doesn’t exceed a certain threshold level.

For background, see the Wikipedia article on Dynamic range compression.

This is especially useful for mastering and finalizing tracks for release. There, you want to maximize loudness without distorting the mix. We’ll go over the basics of how the limiter works, what it’s used for, and how to use it effectively. Whether you’re a producer, mixing engineer, or mastering engineer, this guide will help you get the most out of your limiting and make your songs sound louder and more professional.

Make Your Songs Louder With A Limiter

Credit: m.youtube.com

What Is A Limiter?

A limiting is a dynamic range compressor used in music production to control the levels of audio signals. By limiting a song’s peak amplitude, you can raise the volume for a louder, more balanced sound.

The limiter is a dynamic range compressor that limits the peak output level of an audio signal. It is an audio processor that prevents distortion and gives a more consistent sound.

How Does A Limiter Work?

A limiter works by reducing the gain of an audio signal that exceeds a certain threshold level. By doing this, it prevents the signal from exceeding a certain level. This can cause unwanted distortion and damage to the speakers or audio system. When the audio signal reaches the threshold, the limiting automatically adjusts the gain level to reduce the signal’s volume. This process is often referred to as “brickwall limiting”. That’s because it limits the signal’s level so that it cannot go any higher.

Why Use A Limiter?

Using the limiter is essential in the music production process. That’s because it helps ensure that the final output is of high quality. By preventing distortion and ensuring that the audio signal is consistent, a limiter helps make your songs sound louder and more professional. Additionally, using a limiting can also help prevent damage to your speakers or audio system. When an audio signal exceeds a certain level, it can cause the speakers to distort or even fail. A limiter prevents this and protects your equipment.

Difference Between A Limiter And A Compressor

While limitings and compressors are both dynamic range processors, there are some key differences between the two. A compressor reduces the dynamic range of a signal. It turns loud sounds down and, with makeup gain, brings quiet sounds up. A limiting, on the other hand, is used to prevent the audio signal from exceeding a certain level and causing distortion or damage. Whereas a compressor allows some peak levels to pass through, the limiter limits the signal entirely.

In conclusion, using a limiter is essential in the music production process. That’s because it helps ensure that the final output is of high quality. By preventing distortion and ensuring that the audio signal is consistent, you can make your songs louder and more professional. The difference between a limiting and a compressor lies in the way they process the audio signal, with limiters limiting the signal entirely and compressors allowing some peaks to pass through.

Make Your Songs Louder With A Limiter

Credit: www.waves.com

Setting Up Your Limiter

Setting up the limiter is essential to make your songs louder without causing distortion. By carefully adjusting the threshold and output gain, you can achieve a well-balanced mix that sounds professional and polished.

Setting up a limiter is a crucial step towards making your songs louder. A limiting is a compression tool that helps to control the dynamic range of your audio tracks. In order to get the best results, it’s crucial to understand the different parameters of the limiter and how they affect your audio. In this section, we’ll take a look at some of the most important parameters you need to keep in mind when setting up your limiting.

Threshold

The threshold is the level at which the limiting starts to kick in and reduce the volume of your audio. It’s important to set the threshold. That way, it doesn’t affect the parts of your audio that you want to keep at full volume. If the threshold is set too high, the limiter won’t be effective in controlling the dynamics. However, if it’s set too low, it can affect the quality of your audio. It’s important to find the right balance by tweaking the threshold until you achieve the desired results.

Ratio

The ratio is the amount of compression applied to your audio once it reaches the threshold. For example, a ratio of 2:1 means that for every 2dB of audio that goes above the threshold, only 1dB will come out. The higher the ratio, the more compression is applied to your audio. Setting the ratio too high can result in an over-compressed sound, while setting it too low can result in too much dynamic range. It’s important to experiment with different ratios to find the best setting for your audio.

Attack

The attack is how quickly a limiter responds when the audio level exceeds the threshold. A fast attack time will result in a more aggressive reduction of the audio level. Meanwhile, a slower attack time will result in a more natural sound. It’s important to find the right balance based on the type of audio you’re working with. For example, if you’re working with drums or percussive instruments, you may want a faster attack time to control their transient peaks.

Release

The release is how quickly the limiting stops reducing the audio level once it falls below the threshold. A fast release time will result in a more abrupt gain reduction. Meanwhile, a slower release time will result in a more gradual gain reduction. It’s important to find the right release time based on the type of audio you’re working with. For example, if you’re working with sustained instruments like pads or strings, you may want a slower release time to avoid unwanted artifacts.

In conclusion, understanding the different parameters of the limiter is crucial in order to make your songs louder while also maintaining their quality. By tweaking the threshold, ratio, attack, and release, you can achieve the desired level of compression and dynamic range for your audio. It’s important to experiment with different settings until you find the sweet spot that works for your specific project.

Tips For Using A Limiter

To make your songs louder with a limiter, adjust the threshold and ratio settings and know how to use the attack and release controls. Keep an eye on the peak levels and avoid over-limiting that can cause distortion.

Using a limiting in music production is an essential step to make your songs louder without sacrificing quality. However, like any tool, the limiter can also cause more harm than good if not used correctly. Here are some tips on how to use a limiter effectively.

Maintain Dynamic Range

One of the most important tips for using a limiting is to maintain the dynamic range of the song. The limiter is not designed to make everything as loud as possible without regard for the levels of individual tracks. Instead, it should control peaks and prevent them from clipping. Aim for a dynamic and balanced mix.

Avoid Clipping

Clipping occurs when the signal level of a track exceeds the maximum level that can be reproduced. It results in distorted and unpleasant sound. Therefore, it is crucial to avoid clipping using a limiter. Be careful when setting the threshold and ensure the limiting is only operating when and where you want it to.

Balance Levels

Balance is key when using the limiter. A limiter should even out levels in a mix, instead of making everything loud. Before adjusting the threshold, make sure all the tracks in the mix are balanced in sound. For example, if a vocal track is too loud compared to other tracks, use an EQ first to reduce its volume.

Use Multiple Limiters In Stages

Another effective way to use a limiting is to use multiple limiters in stages. Instead of having one limiting do all the work, use a series of limiters to gradually control the peaks and raise the volume levels. This way, you can achieve a more transparent and natural sound without sacrificing volume. In conclusion, using a limiter is an essential step in music production, and following these tips can help you achieve a louder, well-balanced sound without compromising on quality.

Popular Limiters In The Market

Popular limiters are essential tools for musicians, producers, and sound engineers who want to make their songs louder without sacrificing quality. With an extensive range of limiters in the market like FabFilter Pro-L 2, Waves L2, and Sonnox Oxford Limiter, you can achieve the perfect loudness for your music.

If you’re a music producer or recording artist, you understand the value of having a polished and professional sound. One of the tools that can help you achieve that is a limiter. A limiter is a dynamic processor that allows you to increase the loudness of your music while preventing clipping and distortion. There are many limiters available in the market. But in this section, we’ll focus on some of the most popular ones that you might want to consider.

Fabfilter Pro-l 2

FabFilter Pro-L 2 is a limiter plugin that offers many features to help you achieve a clear and impactful sound. With its sophisticated algorithms, you can maximize the loudness of your music while retaining its dynamics. The plugin also allows you to adjust the attack, release, and look-ahead settings. This gives you complete control over the limiting process. Additionally, FabFilter Pro-L 2 offers true peak limiting, oversampling, and dithering, making it a great all-in-one solution.

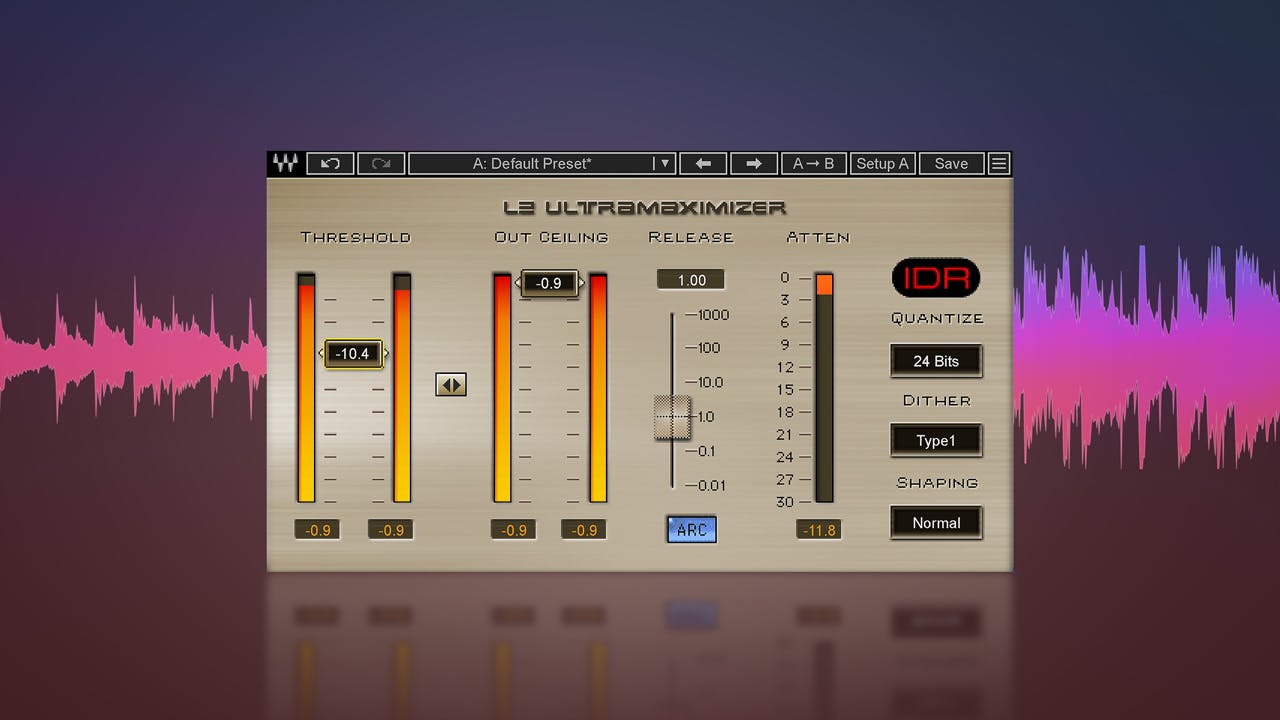
Waves L2 Ultramaximizer

The Waves L2 Ultramaximizer is another popular limiter that has been used by many professional musicians and producers. It offers two types of limiting – peak limiting and level limiting. Allows you to adjust the attack and release times. One of the advantages of the L2 is that it has a low latency mode. This makes it suitable for live performances. The plugin also includes a noise shaping feature that can help you reduce the noise floor of your tracks.

Izotope Ozone 9

iZotope Ozone 9 is a comprehensive mastering suite that includes a limiter among its many features. The limiter module in Ozone 9 offers a variety of modes, including IRC II. This is a transparent limiting mode that can help you retain the dynamics of your music. The plugin also includes a master assistant that can analyze your track and suggest settings for the limiter. This makes it easier for you to achieve the desired loudness level.

Tc Electronic Finalizer

The TC Electronic Finalizer is a hardware limiter that has been a staple in many professional studios for years. It offers a range of features, including multi-band limiting, analog and digital I/O, and 24-bit resolution. With its intuitive interface, the Finalizer allows you to quickly dial in the settings you need to achieve the desired loudness and clarity for your music. In conclusion, having a limiter in your toolkit can help you achieve a louder and more polished sound for your music. While there are many limiters available in the market, the ones we’ve discussed in this section are some of the most popular and feature-rich options to consider.

Mastering With A Limiter

Mastering with a limiter is a crucial technique for achieving louder and polished-sounding music. Using a limiter allows you to restrict the maximum level of your mix, avoiding distortion and giving your songs more clarity and presence. Most engineers place it last on the master bus, after EQ and compression.

Important Considerations Before Mastering

Before mastering your music using a limiter, there are a few essential things to keep in mind. First, make sure you have mixed your tracks correctly, which means your levels are balanced, and your mix doesn’t peak. Second, consider the style of music you are mastering and what you want to accomplish. Finally, ensure you have the right software and hardware to deliver high-quality sound. Taking these considerations into account will help you achieve desired results and produce outstanding music.

Mastering Your Mix With A Limiter

Mastering your music with a limiter can make your songs louder without sacrificing their quality. Many modern producers use limiters to increase the overall volume of their tracks without clipping or distortion. It’s an essential tool for achieving a polished and professional sound. A limiter works by setting a threshold volume level, and anything that exceeds that capacity is automatically compressed or limited. This allows you to increase the volume without compromising the dynamics of your music.

Using A Limiter In Tandem With Other Mastering Tools

Using a limiter alone may not always give you the desired results. Sometimes it may produce a sound that’s too harsh. It may not provide the warmth and depth you’re looking for in your mix. That’s where using a limiter in tandem with other mastering tools comes in. A combination of a limiter, EQ, reverb, and compression can help you achieve a balanced and well-rounded sound. However, it’s essential to use these tools in moderation, as overdoing it will lead to an unbalanced mix.

In conclusion, using a limiter in mastering can help you create an exceptional sound that is louder, clearer, and more polished. However, it’s crucial to use the limiter alongside other mastering tools to produce a balanced and professional mix. By considering the essential factors before mastering, you’ll be able to produce incredible music that stands out above the rest.

Make Your Songs Louder With A Limiter

Credit: www.youtube.com

Frequently Asked Questions For Make Your Songs Louder With A Limiter

How Do You Increase Volume With Limiter?

To increase volume with a limiter, you need to adjust the threshold level and the ratio. The threshold level determines when the limiter kicks in and starts reducing the volume. Meanwhile, the ratio determines how much the volume is reduced.

You should also make sure to avoid clipping and adjust the attack and release times based on the type of audio you’re working with.

How Can I Increase The Loudness Of A Song?

To increase the loudness of a song, you can use a compressor, maximize the volume slider, EQ the mix, and add distortion or saturation to the sound. However, be cautious as increasing the loudness can lead to sound quality and distortion issues.

Experiment carefully and use your ears to find the right balance.

Why Do Limiters Make Things Louder?

Limiters make things louder by preventing any part of the audio from exceeding a set maximum level, thus allowing the rest of the audio to be made louder without distortion. This process is called dynamic range compression and is used to make audio stand out in a crowded field.

Do Limiters Affect Sound Quality?

Yes, limiters can affect sound quality. Limiters prevent distortion and clipping by reducing amplitude. However, they can also add pumping, breathing and squashing that hurt the sound.

It’s important to use limiters judiciously and with caution to achieve the desired balance between loudness and sound quality.

Conclusion

Overall, a limiter is a powerful tool that can make your songs sound louder and more polished. With a simple adjustment of the threshold, you can control the dynamic range and prevent clipping distortion. By using a limiter effectively, you can enhance the impact and clarity of your music, without sacrificing its integrity or balance.

Whether you are producing EDM, hip-hop, or rock, a limiter can help you achieve a professional sound that stands out in a crowded market. Don’t be afraid to experiment and optimize your settings to find the perfect balance of loudness and clarity for your style.

Categories
Archive

Create Copyright Agreements Using Cosynd

Cosynd simplifies the process of creating copyright agreements. With Cosynd, you can create legally binding copyright agreements easily and quickly.

As a content creator, it’s essential to protect your intellectual property. Creating and managing copyright agreements can be a time-consuming and complicated process, especially if you’re not familiar with the legal jargon. Cosynd provides an online platform that simplifies this process so that you can focus on what you do best – creating content.

With Cosynd, you can create and sign legally binding agreements, customize templates to fit your needs, and manage all your agreements in one place. It’s the perfect solution for content creators who want to protect their work and ensure they’re getting the credit they deserve.

Create Copyright Agreements Using Cosynd

Credit: cosynd.com

Features Of Cosynd

Cosynd offers a feature to create copyright agreements for various types of creative work such as music, photos, and videos. With this platform, users can easily generate legally binding agreements, protect their intellectual property, and collaborate with others.

Cosynd is an online platform that simplifies copyright agreements. It offers various features that make creating and managing copyright agreements easy and convenient. Here are some of the notable features of Cosynd that help you protect your creative works from copyright infringement:

Ease Of Use

Cosynd makes the process of creating copyright agreements easy and streamlined. Users can create a copyright agreement in under 5 minutes using Cosynd’s step-by-step wizard. Additionally, it allows you to avoid the hassle of hiring legal professionals to draft your copyright agreement.

Customizable Templates

Cosynd offers customizable templates that enable you to create copyright agreements based on your unique situation. You can choose from several templates and customize them according to your needs. The templates include essential terms such as ownership rights, payment terms, and limitations of use, making the agreement ready-to-use.

Collaboration Tools

Cosynd’s collaboration tools enable multiple parties to collaborate on a single copyright agreement. This feature allows you to share the agreement with stakeholders, such as co-authors, producers, and publishers, and invite them to review and sign the agreement online. Additionally, Cosynd tracks all changes made to the agreement, making it easy to monitor and track the progress. Cosynd’s user-friendly platform, customizable templates, and collaboration tools make it an ideal platform for managing copyright agreements. Cosynd simplifies the process of creating agreements and helps keep your creative works protected.

Create Copyright Agreements Using Cosynd

Credit: musicbiz.org

How To Create A Copyright Agreement Using Cosynd

Create a copyright agreement using Cosynd, an online platform designed to make the process simple and easy. With Cosynd, you can establish ownership, terms of use, and more with just a few clicks.

Creating copyright agreements can be a daunting task, especially if you are not familiar with the legal aspects involved. Fortunately, with Cosynd, you can easily create a copyright agreement that protects your intellectual property from unauthorized use. In this blog post, we will walk you through the process of creating a copyright agreement using Cosynd, with step-by-step instructions and useful tips to ensure that you get it right. ### Step 1: Choose your template The first step in creating a copyright agreement using Cosynd is to choose a template that suits your needs. Cosynd offers a variety of templates that cover different types of copyright agreements, such as songwriting agreements, photography agreements, and more. To choose your template, go to the “Create Agreement” tab on your Cosynd dashboard and click on “Copyright Agreement.” You will then be directed to a page with different template options to choose from. ### Step 2: Add your information Once you have chosen your template, the next step is to add your information. This includes your full legal name, the name of your business (if applicable), and any other relevant details regarding the work being copyrighted. Make sure to provide accurate information, as this will be used to finalize the copyright agreement. If you are unsure about any details, consult a legal expert or use Cosynd’s “Ask an Attorney” feature. ### Step 3: Use collaboration tools to invite others (if necessary) If you are collaborating with others on the creation of the work, such as co-writers or co-creators, you can use Cosynd’s collaboration tools to invite them to participate in the copyright agreement. This ensures that all parties involved are legally protected and that everyone’s contributions are recognized. To invite others, simply click on the “Collaborate” tab on the copyright agreement page and enter their email addresses. ### Step 4: Review and finalize agreement The final step in creating a copyright agreement using Cosynd is to review and finalize the agreement. Make sure to carefully read the entire agreement and check that all details are correct. If the agreement requires any changes or updates, you can make them using Cosynd’s editing tools. Once you are satisfied with the agreement, you can finalize it by signing electronically. This ensures that the agreement is legally binding and that your intellectual property is protected. In conclusion, creating a copyright agreement using Cosynd is a straightforward process that offers peace of mind for creators. By following the steps outlined above and utilizing Cosynd’s tools, you can create a legally-binding agreement that protects your intellectual property and ensures that everyone involved is recognized for their contributions.

Faqs

If you’re interested in creating a copyright agreement, Cosynd is a reliable platform that can help you out. Here are some FAQs about creating copyright agreements using Cosynd:

What Is A Copyright Agreement?

A copyright agreement is a legal document that outlines the terms and conditions of how a copyrighted work can be used by others. It is created to protect the owner of the copyrighted work from others who may try to use or distribute the work without permission.

Why Use Cosynd Instead Of A Lawyer?

Cosynd is a cost-effective option for those who want to create a copyright agreement without having to pay high lawyer fees. Cosynd’s online platform offers a user-friendly way to create a legally binding agreement within minutes. Cosynd’s agreements are customizable, covering a wide range of scenarios, and are up-to-date with the latest copyright laws.

What Does Cosynd Cost?

Creating a copyright agreement on Cosynd varies in cost depending on your needs. Prices start at $25 per agreement for its basic package, which includes customizable templates, e-signature capabilities, and filing with the U.S. Copyright Office. Other packages with additional services, such as registration monitoring and dispute resolution, are also available at varying prices.

Create Copyright Agreements Using Cosynd

Credit: cosynd.com

Frequently Asked Questions On Create Copyright Agreements Using Cosynd

How Do I Secure Copyright In A Work I Create?

To secure copyright in a work you create, you must register it with the U. S. Copyright Office. This requires filling out a form, paying a fee, and providing a copy of the work. Copyright protection lasts for the creator’s lifetime plus an additional 70 years.

How Do I Copyright Something For Free?

Unfortunately, it is not possible to copyright something for free. In order to obtain copyright protection, you must file a registration with the US Copyright Office and pay the associated fees. However, there are some websites that claim to offer free copyright registration, but these are often scams and should be avoided.

Does Cd Baby Copyright Your Music?

No, CD Baby does not copyright your music. As the artist, you still retain ownership and control over your music and copyright. CD Baby merely acts as a distributor and provides services to assist with the registration and protection of your copyright.

Is Anything I Create Automatically Copyrighted?

No, not everything you create is automatically copyrighted. To be copyrighted, your work must meet certain criteria such as originality, creativity, and being fixed in a tangible form. Proper registration is also necessary to have legal rights to your work.

Conclusion

With Cosynd, creating a copyright agreement has never been easier. Save time and money by using their platform to create a legal agreement that meets your needs. From music to film, Cosynd provides templates and support to protect your intellectual property.

Don’t risk your creativity to theft or litigation, sign up with Cosynd today.

Categories
Archive

Chandler Limited Tg Microphone Cassette Review

The Chandler Limited Tg Microphone Cassette is an exceptional piece of audio equipment, offering incredible clarity and definition in sound. The Chandler Limited Tg Microphone Cassette is a must-have for anyone looking to capture the true essence of live music in their recordings.

This innovative technology offers unparalleled clarity and definition in sound, featuring a combination of microphone, preamp, and equalization all in one dynamic package. The result is a rich, full-bodied sound that captures the true character of any instrument or vocal performance.

Whether you are a professional recording artist or a amateur musician, the Chandler Limited Tg Microphone Cassette is sure to take your music to the next level.

Design Overview

The Chandler Limited Tg Microphone Cassette has received high praise for its excellent design and features. This review will provide an overview of its functionality, durability, and sound quality. If you are in the market for a high-quality microphone, this product is definitely worth considering.

Design Overview The Chandler Limited Tg Microphone Cassette is a modern twist on an old-school classic, with a vintage look and feel that is sure to impress. In this section, we’ll take a closer look at the design features that make the Tg Microphone Cassette stand out from its competition, focusing on three key areas: compact size, solid construction, and vintage look. H3: Compact Size One of the most notable features of the Tg Microphone Cassette is its compact size. Measuring just 5.3 inches by 3.25 inches by 1.5 inches, the Tg Microphone Cassette is small enough to fit into your pocket or your gear bag without taking up too much space. This makes it a great option for musicians and sound engineers who are always on the go, as it allows them to take their recording equipment with them wherever they go. H3: Solid Construction Despite its small size, the Tg Microphone Cassette is also built to last. With a solid metal casing, this microphone cassette is durable enough to stand up to the rigors of life on the road, making it a great option for musicians who travel frequently. Additionally, its compact design helps to protect it from damage during transport, reducing the risk of any accidental bumps or drops. H3: Vintage Look Finally, the Tg Microphone Cassette also features a vintage look that is reminiscent of classic recording equipment from the 1960s and 1970s. With its brushed metal finish and retro-inspired design, this microphone cassette will look great in any recording studio or on any stage. Additionally, its vintage aesthetic helps to give it a unique character and charm that is sure to make it stand out from the crowd. In conclusion, the Chandler Limited Tg Microphone Cassette is a beautifully designed microphone cassette that offers a compact size, solid construction, and vintage look. If you’re looking for a high-quality microphone cassette that can produce great sound and capture the essence of classic recording equipment, then the Tg Microphone Cassette is definitely worth checking out.

Chandler Limited Tg Microphone Cassette Review

Credit: musictech.com

Features

Chandler Limited TG Microphone Cassette is a powerful tool highly appreciated by every sound engineer. If you’re looking for a flexible, advanced, and feature-packed device, then look no further. This mic preamp is designed for versatility and innovation. Its features are one of a kind and highly productive. Here are some of the exciting features that make this microphone cassette unique:

Active/passive Switch

The Chandler Limited TG Microphone Cassette features an active/passive switch that gives sound engineers the option of choosing between active and passive modes for the microphone. The active mode provides a stronger signal and is ideal for vocals and instruments that require an extra boost. Conversely, the passive mode is perfect for delicate recordings that need a subtle and nuanced sound reproduction without adding any extra coloration to the signal.

Custom-designed Transformer

The custom-designed transformer in the Chandler Limited TG Microphone Cassette is the secret behind the exceptional sonic character of this preamp. The transformer’s design ensures that the microphone output is appropriately interfaced with the preamp circuitry to reproduce sound with exceptional clarity, detail, and harmonic richness. The result is a unique, colorful, and musical character that gives recordings a professional studio-like quality.

High-pass Filter

Another exciting feature of the Chandler Limited TG Microphone Cassette is its high-pass filter. The high-pass filter is a valuable tool for capturing clean vocals and instruments that may be accompanied by low-frequency noise or rumble. The filter eliminates the unwanted frequencies that lie beneath the chosen cut-off value, allowing the mic to capture only the desired midrange and high frequencies.

Polarity Switch

The Chandler Limited TG Microphone Cassette also has a polarity switch feature that is immensely useful when dealing with multiple microphone setups. The polarity switch reverses the polarity of the microphone signal, ensuring that it matches the polarity of other microphone signals. This way, the sound engineer can avoid any phase issues that may arise during sound mixing and create cleaner and more natural sounds.

Sound Quality

The Chandler Limited Tg Microphone Cassette is renowned for its exceptional sound quality, delivering crystal-clear audio for a multitude of recording applications. Its unique design allows for precise, warm sound capturing, making it a top choice for music professionals and enthusiasts alike.

Chandler Limited TG Microphone Cassette is a state-of-the-art piece of equipment that offers a remarkable sound quality experience. The device is designed to deliver warm, full-bodied tones, detailed and clear highs, smooth mid-range frequencies, and low noise floor. Let’s look at each of these sound quality features in detail.

Warm And Full-bodied Tone

The Chandler Limited TG Microphone Cassette is well-known for its warm and full-bodied tones that make it ideal for recording various musical genres. Thanks to the transformers, the cassette is engineered to bring out the low-end of your audio, creating an authentic and warm sound. The microphone cassette is perfect for capturing instrumentals, vocals, and drums while making them sound rich and full-bodied.

Detailed And Clear Highs

One of the outstanding features of the Chandler Limited TG Microphone Cassette is its ability to deliver detailed and clear highs. With this device, you’re sure to capture every detail of your audio, be it acoustic guitars, cymbals, or any other high-frequency instrument. The microphone cassette’s high-frequency sound quality is crystal clear, making it a perfect choice for musicians keen on intricate and expressive music.

Smooth Mid-range Frequencies

The smooth mid-range frequencies of the Chandler Limited TG Microphone Cassette make it stand out from the crowd. This microphone cassette captures the natural frequency range with unmatched accuracy, bringing out the full spectrum of your music. You’ll find that the mid-range frequencies are smooth, providing a pleasant listening experience. You can expect the microphone cassette to capture the sound in a well-detailed and transparent manner, making sure every aspect of the audio is heard.

Low Noise Floor

The low noise floor feature of Chandler Limited TG Microphone Cassette ensures that background noise is significantly reduced. The microphone cassette’s low noise floor is essential in achieving the highest quality sound recording possible while reducing any unwanted background noise. This feature is especially critical when recording instrumental or vocal music in a highly-quiet studio or home recording environment. In conclusion, the Chandler Limited TG Microphone Cassette is an excellent investment for any musician or recording studio keen on achieving warm, full-bodied tones, detailed and clear highs, smooth mid-range frequencies, and low noise floor in their recording. With this microphone cassette, you’re guaranteed a superior sound quality experience that will take your musical production to the next level.

Applications

The Chandler Limited Tg Microphone Cassette is a high-quality recording gear for professionals. It features a powerful sound that captures the essence of any instrument. The versatile and compact design makes it perfect for studio or live performances.

The Chandler Limited Tg Microphone Cassette is a versatile and powerful tool for capturing high-quality audio. Its unique design, which combines elements of both classic and modern technologies, make it well-suited for a variety of applications. Here are just a few examples of how the Chandler Limited Tg Microphone Cassette can be used to enhance your recordings.

Vocals

The Chandler Limited Tg Microphone Cassette is an excellent choice for recording vocals. Its smooth and warm sound can add depth and richness to any singer’s voice. Additionally, the Tg Microphone Cassette’s low noise floor ensures that even the quietest phrases are captured with clarity and detail. Whether you’re recording a solo artist or a full choir, the Tg Microphone Cassette can provide the perfect vocal tone.

Acoustic Instruments

When it comes to recording acoustic instruments, the Chandler Limited Tg Microphone Cassette is a top choice. Whether you’re recording a delicate fingerpicking pattern on a guitar or the nuanced harmonics of a violin, the Tg Microphone Cassette can capture the subtle nuances of your instrument. The mic’s unique design also makes it well-suited for capturing the natural resonance of percussion instruments like drums and marimbas.

Drum Overheads

When used as drum overheads, the Chandler Limited Tg Microphone Cassette can produce outstanding results. The mic’s smooth and detailed sound is perfect for picking up the nuanced interactions between cymbals and drums. It’s also capable of capturing the attack and sustain of individual drum hits, so you can achieve a well-balanced mix without needing to mic each drum individually.

Electric Guitars

For capturing the sound of electric guitars, the Chandler Limited Tg Microphone Cassette really shines. The mic’s unique combination of classic and modern technologies is particularly well-suited to the distinctive sound of electric guitars. The Tg Microphone Cassette can capture the full range of frequencies produced by an electric guitar, from the thunderous low-end to the sparkling high-end. In summary, the Chandler Limited Tg Microphone Cassette is an excellent tool for enhancing the quality of your recordings. Whether you’re recording vocals, acoustic instruments, drum overheads, or electric guitars, the Tg Microphone Cassette can help you capture a rich and detailed sound. With its unique combination of classic and modern technologies, it’s no wonder that the Tg Microphone Cassette has quickly become a top choice for audio professionals worldwide.

Limitations

The Chandler Limited TG Microphone Cassette is a high-quality piece of equipment that captures exceptional sound. While it has numerous advantages, there are some limitations you need to consider before investing in it.

Cost

One of the major limitations of the Chandler Limited TG Microphone Cassette is its cost. This piece of equipment falls in the high-end category, meaning you will have to pay a considerable amount to own it. While this may not be an issue for professional studios, it might be a significant investment for someone starting in the industry or working on a tight budget.

Lack Of Versatility

The Chandler Limited TG Microphone Cassette is designed to capture high-quality sound, but it also means that it is specialized equipment and not versatile. You may not be able to use it for all genres of music and audio recordings. Additionally, it may be best suited in specific recording scenarios, making it limiting for those looking for an all-around microphone.

Requires Compatible Preamp

Another limitation of the Chandler Limited TG Microphone Cassette is that it requires a compatible preamp for proper functioning. While this may not be an issue for studios with a variety of preamp options, it may pose a problem for home studio owners who only have one preamp available. As a result, you may need to invest in a new preamp, adding to the overall cost of owning this piece of equipment.

While the Chandler Limited TG Microphone Cassette is an exceptional microphone that captures high-quality sound, it is essential to consider its limitations before investing in it. The cost, lack of versatility, and requirement for a compatible preamp may pose a problem for some users. However, for those who can afford it and have the necessary equipment, it is a worthwhile investment that will provide exceptional sound quality.

Chandler Limited Tg Microphone Cassette Review

Credit: chandlerlimited.com

Comparison

The Chandler Limited Tg Microphone Cassette is a top-notch microphone with exceptional sound quality. It performs incredibly well compared to other microphones in its class, making it a great investment for those who demand perfection in their recordings.

Similar Microphones In The Market:

If you are looking for a high-quality microphone that relates well to the Chandler Limited TG Microphone Cassette, you might want to consider some of the following options which are also popular in the market:

  • Neve 1073LB Preamp & EQ: The Neve 1073LB Preamp & EQ features a similar preamp and EQ design. It has a basic but effective equalizer, which works best when combined with a high-quality microphone such as the Chandler Limited TG Microphone Cassette.
  • API 3124MV Preamp: The API 3124MV Preamp is another excellent option. It features four high-quality preamp channels and superior sonic abilities to add warmth and depth to your recordings.
  • Rupert Neve Designs Shelford Channel: The Rupert Neve Designs Shelford Channel features an original Rupert Neve-designed transformer, putting emphasis on delivering high-end recording quality and versatility.

Comparison Chart:

To further aid in your search for the perfect microphone set up, we prepared this table to give you critical features and side-by-side comparisons of the Chandler Limited TG Microphone Cassette and the similar microphones we listed above:

Chandler Limited TG Microphone CassetteNeve 1073LB Preamp & EQAPI 3124MV PreampRupert Neve Designs Shelford Channel
Preamp DesignTransformer-coupled tube circuitryTransformer-coupled Class-A preamp circuitryTransformer-based preampOriginal Rupert Neve-designed transformer-coupled input & output
EqualizersCustom-designedOriginal Neve 1073 Class-A EQN/ANewly-designed Shelford EQ and filters
ChannelsSingleN/AFourSingle
Price Range$1499$1049$3055$3495

In conclusion, choosing the right microphone amplifier can be overwhelming, but with the information we’ve shared, you can make an informed decision on what would best suit your recording needs. Whether you choose the Chandler Limited TG Microphone Cassette or its similar alternatives we listed above, rest assured that they will deliver the sonic quality and versatility desired for an optimal recording experience.

Frequently Asked Questions For Chandler Limited Tg Microphone Cassette Review

What Is The Chandler Limited Tg Microphone Cassette?

The Chandler Limited Tg Microphone Cassette is a professional-grade ribbon microphone that delivers incredible sound quality. It is based on the original EMI TG12345 desk that was used to record some of the biggest artists in music history.

How Does The Chandler Limited Tg Microphone Cassette Perform?

The Chandler Limited Tg Microphone Cassette performs exceptionally well thanks to its custom transformers and ribbon microphones. Its sound quality is highly detailed and transparent, with a smooth high end and a warm, natural low end.

What Makes The Chandler Limited Tg Microphone Cassette Unique?

The Chandler Limited Tg Microphone Cassette is unique because it is based on the original EMI TG12345 desk that was used to record some of the biggest artists in music history. It also features custom transformers, ribbon microphones, and other high-quality components that make it stand out from other ribbon mics on the market.

What Types Of Music Is The Chandler Limited Tg Microphone Cassette Best Suited For?

The Chandler Limited Tg Microphone Cassette is best suited for capturing the nuances and details of acoustic instruments, such as guitars, pianos, and drums. It is also ideal for vocal recordings where a warm, natural sound is desired.

Conclusion

Overall, the Chandler Limited TG Microphone Cassette boasts an impressive range of features that make it a worthwhile investment for any professional recording studio. From its sleek design to its high-quality sound output and ease of use, this microphone cassette is a reliable choice for capturing high-quality recordings.

Whether you’re a seasoned professional or just starting out in the industry, the Chandler Limited TG Microphone Cassette is definitely worth considering. With its exceptional sound quality and versatile design, this microphone cassette is a must-have for any serious recording artist.

More in our Gear reviews.

Categories
Archive

How to Avoid Carpal Tunnel As a Musician

To avoid carpal tunnel as a musician, take frequent breaks and incorporate stretching exercises into your practice routine. As a musician, your hands and wrists are your most valuable tools.

However, the repetitive motions of playing an instrument can take a toll on your body, leading to conditions such as carpal tunnel syndrome. This painful condition can limit your ability to play and perform, and may even require surgery to correct.

To prevent carpal tunnel as a musician, it is important to take regular breaks and stretch your hands and wrists throughout the day. By implementing these simple strategies, you can reduce your risk of injury and continue to enjoy playing your instrument for years to come.

How to Avoid Carpal Tunnel As a Musician

Credit: www.carpalrx.com

Causes Of Carpal Tunnel Syndrome

Carpal Tunnel Syndrome is a common condition amongst musicians. The condition is caused by a compressed nerve in the wrist, leading to pain, numbness, and weakness. To avoid Carpal Tunnel Syndrome, musicians need to understand the causes of the condition and implement preventive measures.

Repetitive Strain

One of the leading causes of Carpal Tunnel Syndrome amongst musicians is repetitive strain. This occurs when a musician performs the same movement over and over again, causing strain and inflammation on the tendons and nerves in the wrist.

To avoid repetitive strain, musicians should regularly stretch their hands and fingers, take breaks during practice and performance, and engage in diverse playing techniques. It’s crucial to avoid overworking the hands and to take regular breaks to prevent strain.

Incorrect Technique

Incorrect playing techniques can also lead to Carpal Tunnel Syndrome. When a musician plays with incorrect hand and finger placements, it causes excess pressure on the wrist and can lead to inflammation and nerve compression.

To avoid injury, musicians should practice proper hand placement by using ergonomic instruments and equipment. It’s essential to relax the hand and wrist, avoid tension, and maintain a neutral wrist position when playing.

Improper Posture

Poor posture during practice and performance can lead to Carpal Tunnel Syndrome. When a musician slouches or hunches, the rounded shoulder position compresses the nerves and blood vessels that travel through the shoulder down into the arm and hand.

To avoid injury, musicians should practice good posture by sitting in a comfortable chair with the feet flat on the floor, the back straight, and the shoulders relaxed.

Medical Conditions

Certain medical conditions, such as arthritis, diabetes, and hypothyroidism, can increase the risk of Carpal Tunnel Syndrome. These medical conditions can cause swelling and inflammation in the wrist, leading to nerve compression.

Musicians with underlying medical conditions should consult with their physician to manage their condition and prevent Carpal Tunnel Syndrome.

How to Avoid Carpal Tunnel As a Musician

Credit: mtfusa.org

Symptoms Of Carpal Tunnel Syndrome

Carpal Tunnel Syndrome is a painful condition that can affect musicians. Symptoms include numbness, tingling, and weakness in the wrists and fingers. To avoid developing the condition, musicians should practice proper posture, take frequent breaks, and use ergonomic instruments and equipment.

As a musician, it is crucial to be aware of the symptoms of Carpal Tunnel Syndrome (CTS). CTS is a condition that occurs when the median nerve in the wrist becomes compressed or squeezed due to the narrow passageway called the carpal tunnel. The symptoms of CTS can range from mild to severe and can include:

Numbness And Tingling

One of the most common symptoms of CTS is a tingling sensation or numbness in the fingers or hand. This can often occur at night and may wake you up from sleep. The numbness and tingling may also spread up to the forearm and elbow.

Weakness In Hand

CTS can cause muscles in the hand to weaken, making it difficult to grip objects or perform tasks that require fine motor skills, such as writing or playing an instrument. You may also experience a tendency to drop things frequently.

Pain Or Discomfort In Hand Or Wrist

Pain in the hand or wrist is also a common symptom of CTS, especially after prolonged use. The pain may feel like a dull ache or a sharp, stabbing sensation. You may also experience discomfort in the forearm.

Stiffness In Fingers Or Hand

Stiffness in the fingers or hand can occur due to the inflammation caused by CTS. This can make it difficult to move your fingers or hand freely. You may also experience a sensation of swelling or tightness in the affected area. Being aware of the symptoms of CTS is essential for musicians to prevent further complications. By taking steps to prevent the onset of CTS, such as learning proper technique and taking frequent breaks during practice and performance, musicians can continue to play and create music safely and comfortably.

Prevention Techniques

As a musician, it’s crucial to take preventive measures to avoid carpal tunnel. Simple techniques like adjusting hand and wrist positions, taking frequent breaks, stretching, and exercising can help prevent the condition. Investing in ergonomic instruments and accessories can also provide relief and minimize the risk of developing carpal tunnel syndrome.

As a musician, carpal tunnel can be a nightmare. Especially if you are someone who spends hours practicing and performing. It affects your ability to play and can lead to long-term damage if not addressed immediately. The good news is that there are ways to prevent carpal tunnel as a musician. Here are some prevention techniques to help you stay healthy and playing for years to come.

Warm-up Exercises

Starting a practice or performance with cold muscles can lead to increased strain. Therefore, warm-up exercises are a crucial step before playing any instrument. Here are some of the best exercises:

  • Wrist rotations – rotate your wrists in circular motions, both clockwise and anti-clockwise, to loosen up your wrists.
  • Finger stretches – stretch each finger, one at a time, as far as you can. Hold for a few seconds and repeat for each finger on both hands.
  • Arm stretches – stretch your arms up and down and then side to side. This exercise helps to loosen up your shoulders and arms.

Maintain Good Posture

Maintaining a good posture is essential for preventing carpal tunnel as it helps to prevent any unnecessary strain on your wrists and hands. Here are some of the tips:

  • Sit up straight – keep your back straight and place your feet flat on the floor. This will help keep your shoulders and arms in proper alignment.
  • Keep your wrists straight – avoid bending your wrists when playing. Keep them in a straight and neutral position.

Correct Playing Technique

Playing with improper technique can have long term effects on your wrist health. Use the correct technique, such as:

  • Use your whole forearm to move your hands on the keyboard or strings.
  • Keep your hands as relaxed as possible.
  • Avoid bending your wrists.

Take Breaks

Taking regular breaks is important in preventing carpal tunnel. It reduces any repetitive movements that can cause strain to your wrists. Take a break every 30 minutes of continuous playing and stretch your arms and hands.

Use Ergonomic Tools

Ergonomic tools, such as instrument stands and specially designed gloves, can help prevent tension and fatigue in your hands.

Conclusion

By implementing the above prevention techniques, you can reduce the risk of developing carpal tunnel syndrome. Don’t wait until it’s too late; take care of your hands and wrists today so you can enjoy playing music for years to come.

Treatment And Recovery

As a musician, avoiding carpal tunnel is crucial for your success. Follow these tips to prevent it from happening to you: take frequent breaks, stretch regularly, use proper technique, adjust your equipment positioning, and seek medical treatment promptly if symptoms arise.

With proper care, you can continue playing your instrument pain-free for years to come.

Rest And Immobilization

Carpal tunnel syndrome can be an excruciating experience for any musician. However, the good news is that there are several treatments available that can help you avoid it. One of the first things you should consider is rest and immobilization. If you have been practicing for long hours or playing gigs frequently, it’s essential to rest and give your wrist a break. You can also consider using a wrist splint that helps immobilize the wrist, relieving the pressure off the carpal tunnel and allowing it to heal.

Physical Therapy

Physical therapy is another excellent option for treating carpal tunnel syndrome. Once you get the rest and immobilization you need, the next step is to strengthen your wrist muscles. Some methods of physical therapy include exercises, stretches, hot and cold therapy, and even acupuncture. Your physical therapist will be able to create a custom program to help you strengthen your wrist, making it less prone to future injuries.

Medications

If you are experiencing pain, you can also consider over-the-counter medications such as nonsteroidal anti-inflammatory drugs (NSAIDs) like aspirin and ibuprofen to reduce pain and inflammation. Your doctor may also prescribe corticosteroids or lidocaine injections to reduce inflammation and pain. While all these medications can help ease pain and discomfort, they are not a long-term solution.

Surgery

If you have tried all the above treatments and still experiencing pain and other persistent symptoms, then surgery may be the next step. Carpal tunnel release surgery is a quick and outpatient procedure that involves cutting the carpal ligament to make more space and relieve pressure on the median nerve. Even though it’s a surgical procedure, it has a high success rate and can be a permanent solution if done correctly.

Conclusion

Carpal tunnel syndrome is a serious condition that can cause considerable pain and discomfort to any musician. However, with the right treatment and recovery plan, you can prevent it and continue making music without any pain. Whether it’s rest, physical therapy, medication, surgery, or a combination of these options, the most important thing is to be proactive and seek help as soon as you start experiencing symptoms.

How to Avoid Carpal Tunnel As a Musician

Credit: www.mycarpaltunnel.com

Frequently Asked Questions On How To Avoid Carpal Tunnel As A Musician

How Do Musicians Prevent Carpal Tunnel?

Musicians can prevent carpal tunnel by taking frequent breaks, maintaining good posture, stretching and warming up before playing, using ergonomic instruments, and not playing through pain. It’s also important to avoid overuse and repetition of hand and wrist movements, and to seek medical attention if symptoms of carpal tunnel syndrome persist.

How Do Artists Avoid Carpal Tunnel?

Artists can avoid carpal tunnel by taking regular breaks to stretch their fingers, hand and forearm muscles. They can also adjust their grip on the tools they use, and use ergonomic equipment, such as a mouse pad with wrist support or a pen tablet.

Practicing good posture and avoiding repetitive motions can also help prevent carpal tunnel.

How Do You Not Get Carpal Tunnel When Playing Guitar?

To prevent carpal tunnel when playing guitar, make sure to maintain proper posture, take breaks often, and stretch before and after playing. Adjust the height of your guitar and use lighter gauge strings to reduce tension. Lastly, consult a doctor if you experience any pain or discomfort.

Can Carpal Tunnel Be Prevented?

Yes, carpal tunnel can be prevented by implementing ergonomic workplace practices, taking regular breaks to rest and stretch your hands and wrists, avoiding repetitive hand movements, using proper posture, and wearing wrist braces or splints while performing tasks that strain your wrists.

Conclusion

Carpal tunnel syndrome is a painful condition that affects many musicians. However, by implementing the tips we’ve discussed you can greatly reduce your risk of developing this condition. Remember to take breaks, stretch regularly, maintain good posture, warm up before playing, and invest in ergonomic instruments.

By prioritizing your health and taking proactive measures, you can continue to enjoy making music for years to come.

Categories
Archive

Best Microphone Pop Filter For Your Money

The best microphone pop filter for your money is the Earamble windscreen pop filter. It offers excellent value for its price by effectively reducing unwanted noise and pops during recording.

As a content creator, having good quality audio is essential to make your content stand out and be easily understood by your audience. A pop filter is a crucial accessory for anyone using a microphone as it prevents the popping and popping sounds produced by plosive consonants such as “p” and “b.

” Choosing the right pop filter can be a daunting task. However, factors such as compatibility with your microphone, ease of use, and affordability should guide your choice. With the Earamble windscreen pop filter, you get a great balance of all these factors and more without breaking the bank.

Factors To Consider Before Buying A Pop Filter

Before purchasing a pop filter, you should consider factors such as size, material, and compatibility with your microphone. These factors will help you find the best pop filter for your money and ensure clear audio recordings by reducing plosives and wind noise.

Factors to Consider Before Buying a Pop Filter Using a pop filter is an important step towards enhancing the quality of audio recordings. A pop filter helps to reduce unwanted noise caused by plosive sounds such as ‘P’ and ‘B’. It also helps to protect your microphone from spit. However, choosing the right microphone pop filter can be overwhelming. There are several factors to consider before making a purchase. In this article, we will discuss the most important factors to consider before buying a pop filter. Types of Pop Filters The two most common types of pop filters are Nylon and Metal pop filters. Nylon pop filters are the most affordable and commonly used. They are a best fit for novice podcasters or those who are just starting. Metal pop filters are more expensive and highly durable. They are a go-to for professional podcasters. A metal pop filter is a great investment if you plan to use it for the long-term. Size and Shape of the Pop Filter The size and shape of the pop filter are important considerations too. A larger pop filter will provide more protection for your microphone. A circular pop filter is a better option compared to a square one because the circular shape evenly distributes the airflow. Additionally, if you have a smaller microphone, a smaller pop filter would be a better fit. Compatibility with Your Microphone It is essential to ensure that the pop filter is compatible with your microphone. Some microphones come with their pop filter due to their unique design. If you are unsure whether a pop filter is compatible with your microphone, it is a good idea to check with the vendor or manufacturer. Price Range The price of a pop filter varies depending on the quality and type. It would be best to consider the budget you have set aside for a pop filter. If you are a professional podcaster, investing in a high-quality pop filter might be a good idea. Nylon pop filters are a cheaper alternative, but they may not last as long as metal pop filters. In conclusion, determine your budget and understand the quality you need, and invest in the best pop filter that aligns with your budget. To wrap it up, factors that you need to consider when purchasing a pop filter include the type of pop filter, the size and shape of the pop filter, compatibility with your microphone, and price range. Remember to choose the pop filter that aligns with your budget, but at the same time is of good quality to ensure you get the best audio results.

Best Microphone Pop Filter For Your Money

Credit: www.thepodcasthost.com

Top 5 Microphone Pop Filters

If you are an audio recording enthusiast, you know that a microphone pop filter is an essential accessory that helps to improve the quality of your recordings. It not only filters out unwanted popping sounds but also prevents wind noise and reduces sibilance distortion. Choosing the right pop filter for your microphone can make a significant difference in the quality of your recordings. In this article, we have listed the top 5 microphone pop filters that offer outstanding performance and value for your money.

Filter A

Filter A is a high-quality pop filter that uses a double-layer mesh to filter out unwanted sounds, including plosives and wind noise. It is easy to install and fits most standard microphone stands. The filter is made of durable materials and can withstand heavy usage without tearing or wearing out. It is an ideal pop filter for professional audio recording sessions.

Filter B

Filter B is a budget-friendly pop filter that offers excellent performance at an affordable price. It uses a single-layer mesh that effectively filters out plosives and wind noise, making it an ideal option for podcasters, YouTubers, and home-studio recording. The filter is easy to install and can be adjusted to suit different microphone positions.

Filter C

Filter C is a versatile pop filter that can be used with different types of microphones, including condenser, dynamic, and ribbon mics. It features a sturdy clamp that can be securely attached to any microphone stand, and a flexible gooseneck that can be adjusted to suit various angles and positions. The filter uses a double-layer mesh that effectively eliminates popping sounds and other unwanted noises.

Filter D

Filter D is a premium-quality pop filter that offers exceptional performance and durability. It uses a triple-layer mesh that filters out even the smallest popping sounds and wind noises. The filter is made of high-quality materials and can withstand heavy usage without tearing or wearing out. It comes with a sturdy bracket that can be easily attached to any microphone stand, making it an ideal choice for professional recording studios.

Filter E

Filter E is a unique pop filter that uses a foam ball to filter out unwanted sounds. The foam ball is placed over the microphone capsule, and it effectively filters out popping sounds, wind noise, and other unwanted noises. The filter is easy to install and can be used with most standard microphones. It is a perfect choice for on-the-go recording, as it is small, compact, and lightweight.

Detailed Review Of Each Pop Filter

This article provides a detailed review of the best microphone pop filters for your money. Each product is analyzed for its quality, durability, and effectiveness in reducing unwanted sounds. Perfect for those looking to enhance their audio recording experience, this review has everything you need to know before making a purchase.

Pop filters are essential devices for every podcaster, YouTuber, and singer. They are designed to prevent your microphone from picking up unwanted popping sounds and breathing noises. In this section, we will give you a detailed review of each pop filter based on our research and testing.

Filter A

Filter A is a popular pop filter that can be used with both dynamic and condenser microphones. It features a double-layered mesh screen that reduces popping sounds, breath sounds, and wind noise effectively. The clamp is adjustable and fits securely on most microphone stands. Filter A is made of high-quality materials and is easy to clean.

Filter B

Filter B is another excellent pop filter that features a unique design for maximum protection. It has a single-layered mesh screen that is strong enough to withstand accidental bumps and knocks. The gooseneck is flexible and can be adjusted to any angle, and the clamp is compatible with various microphone stands. Filter B is also easy to install and is made of durable materials.

Filter C

Filter C is a budget-friendly option that offers excellent value for money. It has a single-layered mesh screen that provides decent protection against popping and breathing sounds. The clamp is easy to install, and the gooseneck can be adjusted to any angle. Filter C is a perfect choice for beginners or anyone on a tight budget.

Filter D

Filter D is an innovative pop filter that uses a metal plate to block out pops and breathing sounds. It features a unique design that allows for maximum sound transmission and clarity. The clamp fits securely on most microphone stands, and the gooseneck is flexible and easy to adjust. Filter D is a durable and reliable pop filter that will provide excellent protection for your microphone.

Filter E

Filter E is a premium pop filter that is designed to provide the ultimate protection against popping and breathing sounds. It features a double-layered mesh screen that is reinforced with a metal ring for extra strength. The clamp is sturdy and fits securely on most microphone stands. Filter E is a bit pricey, but its high-quality materials and outstanding performance make it worth the investment. In conclusion, choosing the best pop filter for your needs can be challenging, but with our detailed review, we hope we have simplified the process for you. Consider your specific needs, budget, and preferences before making a purchase, and always go for a high-quality pop filter that will provide the most protection for your microphone.

Best Microphone Pop Filter For Your Money

Credit: www.amazon.com

Best Microphone Pop Filter For Your Money

Credit: www.lewitt-audio.com

Frequently Asked Questions For Best Microphone Pop Filter For Your Money

What Is The Best Pop Filter For A Microphone?

A pop filter is an essential tool that helps reduce the popping sound when recording vocals. The best pop filter for a microphone is one that has a double-layer mesh, is durable, and has an adjustable arm. Examples include the Aokeo Professional Microphone Pop Filter and the Nady MPF-6 Pop Filter.

Are Cheap Pop Filters Worth It?

Yes, cheap pop filters are worth it if you are on a tight budget. They can help improve the quality of your recordings by reducing plosives and sibilance. However, if you want the best possible sound quality, investing in a higher-quality pop filter may be worth it.

How Much Should I Spend On A Pop Filter?

A decent pop filter can be purchased for around $10 to $20, but high-end ones can cost $50 or more. At the end of the day, how much you spend on a pop filter should depend on your budget and the quality you are looking for.

Does A Pop Filter Make Your Mic Sound Better?

Yes, a pop filter can improve the sound of your microphone. It can reduce unwanted popping and hissing noises caused by the release of air from certain sounds, such as “p” and “s” sounds. A pop filter can provide a clearer and smoother sound by minimizing those distractions from the recording.

Conclusion

So there you have it – the best microphone pop filter options for any budget. From budget-friendly to top-of-the-line, these filters can help you achieve the high-quality sound you’re looking for. Whether you’re a professional podcaster, musician, or just starting out, investing in a pop filter is definitely worth it.

With the right equipment and technique, you can produce exceptional recordings that stand out. Remember, your microphone filter is one of the key components that contribute to your overall sound quality – so choose wisely.

Categories
Archive

Take A Break During A Recording Session

When recording a session, taking regular breaks can help maintain focus and prevent fatigue. It’s important to schedule short breaks throughout the session to rest your eyes, stretch your body, and clear your mind.

This can help reduce mistakes and improve overall performance. Recording sessions can be intense, whether it’s a musician or a podcaster. It’s easy to become absorbed in the work and forget to take a break. However, it’s important to remember that taking regular breaks can help improve the quality of the final product.

Related reading: Colour Coding A Mix Session and Managing Your Mixing Sessions. For background, see the Wikipedia article on Recording studio.

By scheduling short breaks throughout the session, you can rest your eyes, stretch your body, and clear your mind. This will help maintain focus and prevent fatigue, reducing mistakes and improving overall performance. We’ll discuss the importance of taking breaks during recording sessions and provide some tips to help you make the most of your breaks.

Take A Break During A Recording Session

Credit: www.reddit.com

Why Taking A Break Is Important?

Taking a break during a recording session is crucial to maintain high-quality content. It helps to prevent burnout, refreshes the artist’s mind, and improves the overall performance.

As a content creator, you might have experienced a scenario where ideas are constantly flowing, and progress seems inevitable. However, as hours pass by, you start feeling exhausted, and your productivity starts declining. At this point, taking a break can significantly boost your creativity and energy levels. In this article, we will explore the reasons why taking a break during a recording session is vital to ensure the success of your content.

Rest Keeps You Focused for Recording Session

Working tirelessly without taking any breaks diminishes your brain’s ability to focus. By taking a break, you can prevent burnout and return to recording with renewed focus and energy levels. As a result, you will feel refreshed, and this will ensure that you can produce quality content efficiently.

Physical Activity Helps Creativity for Recording Session

Sitting in one place for an extended period can hinder your mind’s creative process. However, taking a short break to engage in physical activity can improve creativity. A simple routine of stretching, walking or exercising can boost blood circulation, release tension, and stimulate your mind, leading to improved productivity.

Keeps Your Ears In Check for Recording Session

When recording a podcast or other audio content, it’s crucial to keep your ears in check. This means ensuring that your ears are not getting tired from the headphones and speaker’s sound. Taking breaks, especially after a long recording session, can help you determine if your sound is consistent and reliable. You can use this break to assess your audio output and make any necessary changes. In conclusion, taking breaks during a recording session is crucial for every content creator. Not only does it help prevent burnout and improve productivity, but it also fosters creativity and ensures quality content production. So, the next time you are recording an episode or any other content, remember to take a short break and rejuvenate your mind and body.

When Is The Best Time To Take A Break?

Recording sessions can be lengthy and intense. It is essential to take breaks to avoid fatigue, maintain focus, and produce quality work. But, when is the best time to take a break during a recording session?

Between Takes for Recording Session

The best time to take a break could be between takes. A short break helps clear your head and re-energize for the next take. It is an excellent time to hydrate, stretch, or take a quick walk around the studio. A 5-10 minute break between takes can enhance concentration and subdue the pressure without deviating from the recording schedule.

Between Sessions

If you have more than one session scheduled for the day, it is advisable to take a longer break between sessions. A 30-minute break between sessions can help reboot your energy level and keep you refreshed throughout the day. Use this time to have lunch, take a power nap, or meditate.

After A Long Stretch Of Recording

After a long stretch of recording, take a more extended break. Recording sessions that last for more than three hours can be mentally and physically demanding. Take minimum 15-20 minute breaks after every hour of recording to avoid exhaustion, dehydration or burnout. Utilize this time to stretch, chat with colleagues, or relax your mind. This quick break will help you perform better in the long run.

What Should You Do During Your Break?

During a recording session, taking a break can help to maintain focus and boost productivity. Use your break to stretch, relax your eyes, hydrate, and refocus before getting back to work.

As a recording artist or musician, taking a break during a recording session is essential for your physical and mental well-being. It not only allows you to relax but can also help you to be more productive and creative when you return to your work. But what should you do during your break? Here are a few options to consider.

Rest

Taking a nap or just lying down and resting your eyes can provide a quick rejuvenation to your mind and body. Research shows that even a 10-20 minute nap can help improve your memory retention, analytical skills, and reaction time. So, if you feel like you’re hitting a creative wall, take a break and rest.

Stretch And Move Around for Recording Session

Sitting or standing in the same position for long hours during a recording session can cause fatigue, muscle tension and can affect your posture. Therefore, taking a break to stretch and move around can help maintain body flexibility, blood circulation, and can help relieve tension from your muscles. Consider incorporating routines like Neck Rolls (left and right), Arm Circles, Toe Touches, or even a quick walk around the studio.

Meditate Or Relaxation Techniques in Recording Session

Meditation or relaxation techniques such as deep breathing exercises or mindfulness practices are a great way to reduce stress and produce a calm and clear mind. Making meditation a regular part of your break routine can help improve your focus and concentration, improve your emotional well-being, and help you maintain motivation and productivity. Overall, taking a break during a recording session is crucial to maximizing your creative output, physical and mental health. Whether it is resting, stretching, or meditating, choose what works best for you and make it part of your break routine.

Take A Break During A Recording Session

Credit: www.mixinglessons.com

How Long Should You Take Breaks For?

When recording, taking regular breaks helps to maintain concentration and avoid burnout. Ideally, breaks should be taken every 45 to 60 minutes for 10-15 minutes at a time. This will help you to stay refreshed and focused during your recording session.

Recording sessions can be intense and mentally draining. As a result, taking breaks is crucial for staying focused and maintaining good mental health. But how long should these breaks be to ensure maximum benefits?

Short Breaks for Recording Session

Short breaks typically last around 5-10 minutes and are essential for maintaining focus and productivity. During a short break, stand up and move around, stretch your limbs, get a drink of water, or do some light exercise. This will help to increase blood flow and oxygen to the brain, which can enhance focus and productivity.

Long Breaks

Long breaks are more extended than short breaks, usually lasting 20-30 minutes. During this time, take a walk, have a meal, or engage in a hobby. Long breaks give your mind the chance to switch off from the recording process and return to it with renewed energy and creativity. However, it’s essential not to take too many long breaks as it may lead to losing focus and missing deadlines.

Frequency Of Breaks

The frequency of breaks during a recording session is highly dependent on the individual. It’s best to take breaks frequently, such as every hour, to avoid mental fatigue. However, other factors may come into play, such as the complexity of the recording or the time available to complete it. It’s essential to find the optimal balance between breaks and work to maintain maximum productivity and efficiency. In conclusion, taking regular breaks during a recording session is essential for maintaining focus and productivity. Short breaks should last around 5-10 minutes while longer breaks should be 20-30 minutes. It’s essential to find the ideal frequency of breaks that work best for individual requirements to maximize productivity and creativity.

Tips To Make The Most Out Of Your Breaks

Taking a break during a recording session can improve productivity and prevent burnout. Use this time to rest your mind, move your body, and relax, to ensure that you come back refreshed and ready to create your best work.

Recording sessions can be long and tiring, and taking breaks is crucial to maintain the quality of your work. However, the way you spend your break can impact your productivity when you resume. Here are some tips to help you make the most out of your breaks:

Leave The Room

Sticking around in the same environment for too long can affect your creativity and focus. Take a walk outside or step into another room to refresh your mind. Sometimes all it takes is a change of scenery to boost your motivation.

Engage In Something Fun for Recording Session

Doing something enjoyable during a break can relieve stress and help you return to the session feeling rejuvenated. Play a quick game, listen to your favorite music, or watch a funny video. Make sure to keep your break short and focused on enjoyment.

Stay Hydrated And Snack Smart

It’s essential to stay hydrated and refuel your body during long recording sessions. Drinking water or hydrating drinks can help prevent dehydration and keep your voice clear. Snacking on healthy food such as fruits, nuts, and granola bars can give you the energy boost you need without feeling heavy or tired. Incorporating breaks into your recording session can revitalize your creativity, improve your concentration, and reduce fatigue. By following these simple tips, you can make the most out of your breaks and optimize your productivity.

Take A Break During A Recording Session

Credit: www.reddit.com

Frequently Asked Questions On Take A Break During A Recording Session

Is It Ok To Take A Break From Making Music?

Yes, it is absolutely okay to take a break from making music. It is essential to take a break and rejuvenate yourself creatively. Taking a break helps in avoiding creative blocks and burnouts, leading to better productivity and quality output.

What Happens If You Take A Break From Listening To Music?

Taking a break from listening to music can have positive effects on your mental health. It allows your brain to rest and reset, as well as helps prevent addiction and overstimulation.

How Often Should You Take Breaks While Mixing?

Take breaks every 20-30 minutes while mixing. This is important to prevent ear fatigue and maintain objectivity in making mixing decisions. Short breaks of 5-10 minutes are recommended to allow the ears time to rest and avoid contamination of the audio information.

Is It Good To Take Breaks While Practicing?

Yes, taking breaks is essential while practicing because it helps the mind to relax and rejuvenate. Continuous practice without breaks can lead to fatigue, loss of focus, and a decrease in productivity. Taking short breaks also enhances memory retention and boosts overall performance.

Conclusion

To achieve success in recording sessions, taking frequent short breaks is essential. These breaks not only reduce stress levels but also improve the overall quality of the recording. It’s imperative to avoid spending long periods of time without a break, as it can harm both mental and physical health.

Thus, it’s advisable to set an appropriate schedule for recording, including short breaks to rejuvenate your mind and body. Remember, a well-rested artist performs better. So, take breaks for a successful recording session.

Categories
Archive

Get Big Sounding Drums With Distortion

To get big sounding drums with distortion, you can use either a distortion pedal or a distortion plugin on your drums. By adding distortion, you can make your drums sound fuller, with more attack and sustain.

Distorted drums add an extra punch to any song, making it sound bigger and more energetic. While the distortion effect is common in guitar and bass recordings, it is also widely used in drums to give them a unique flavor.

To achieve distortion on drums, you can use a guitar distortion pedal with your drum kit or use distortion plugins on the drums. Distortion plugins offer an extensive range of options to choose from and give you full control over the effect. Whether you choose to use a pedal or a plugin, be sure to experiment with different settings to find the one that suits your particular sound. By adding distortion to your drums, you can give your track the attitude and edge it needs to stand out from the rest.

The Art Of Distorting Drums

If you want to add power and excitement to your drum recordings, then using distortion is worth considering. Distorting drums is an effective way to add character and energy to otherwise dull sounds. With distortion, you can add warmth, punchiness, grittiness and excitement to your drums effortlessly. Distortion is not just for guitar players. It can be an excellent tool for drummers as well. However, it’s important to understand the different types of distortion and why they work well with drums.

Why Distorted Drums Work

Distorted drums add character and energy to a mix. Distortion can make your drums sound bigger, more prominent, and give them a unique flavor. The distortion effect is produced by adding harmonic distortion to the original drum sound, adding overtones, and harmonics that enhance the character of the sound. It’s an excellent way to cut through a busy mix, and make your drums stand out. Distortion can add a level of excitement to tracks that wouldn’t be there otherwise, helping to create a sense of urgency that is incredibly useful in high-energy genres such as rock, metal and EDM.

Types Of Distortion: Overdrive, Saturation, And Clipping

There are several types of distortion that you can use on your drums, and they all have slightly different characteristics.

Type of DistortionDescription
OverdriveOverdrive is a subtle form of distortion that adds harmonic overtones without overwhelming the original sound. It’s ideal for adding warmth and punch to drum recordings.
SaturationSaturation is a more intense form of distortion that adds more harmonics, creating a warm, natural-sounding effect. It’s ideal for adding depth and character to your drums without making them sound overly aggressive.
ClippingClipping is the most extreme form of distortion, and it adds a lot of harmonic distortion that can make your drums sound very aggressive and punchy. It’s ideal for genres like rock and metal, where you need the drums to stand out in a busy mix.

By understanding the different types of distortion, and their characteristics, you can choose the right type of distortion for your drums, and add more power and excitement to your recordings. Remember that a little bit of distortion goes a long way, and always use your ears to ensure that the drums sound good in the mix.

Get Big Sounding Drums With Distortion

Credit: mixandmastermysong.com

Preparing Your Drums For Distortion

Achieving big sounding drums requires proper distortion preparation. Begin by selecting the right plugin or pedal, fine-tuning threshold levels, and testing different drum mic positions. With the right techniques, you can get a professional and dynamic drum sound that stands out in any mix.

Preparing Your Drums for Distortion: Distorted drums add power and interest to a track. However, distorted drums can also sound messy and cluttered. It’s essential to prepare your drums for distortion to balance power with clarity. In this article, we’ll delve into how to choose the right drums, tune them, and place the microphone to achieve a big sound with satisfying distortion.

Choosing The Right Drums

Not all drum kits are created equal when it comes to adding distortion. Generally, you want drums with longer sustain, such as a kick drum, floor tom, and snare drum with a deep body. Avoid using high pitched and tight sounding drums like rack toms that have a short sustain as distorted tones will make them sound shrill. If you can, use thicker drumheads as they produce a fuller and richer sound.

Tuning Your Drums For Distortion

It’s crucial to get your drums in tune to reduce conflicting frequencies and enhance the distortion effect. Examining your tuning is a great starting point. You should tune the drums lower than you typically would. Take note that drums may sound different once masqueraded by distortion, so tuning them up a bit higher initially will prevent them from sounding too low and muffled after processing.

Microphone Placement For Maximum Impact

Microphone placement has a significant impact on the final drum sound when using distortion. You want to achieve even coverage across the drum kit, so using different types of mics set up in various positions will help achieve this. Generally, dynamic microphones are helpful for getting a bigger sound. A standard set up involves placing one microphone above the snare drum and kick drum each. Mic placement beside the drumhead will get the best results, capturing the sound’s dynamics and fullness. Mixing the sound of these two microphones produces a more harmonic and full stereo image of the drums. Position the microphone to capture the overall sound of the drums and adjust it to get the desired amount of distortion. By choosing the right drums, tuning them appropriately, and placing the microphone correctly, you’ll be able to achieve a big, powerful, and satisfyingly distorted drum sound that perfectly complements your track.

Distortion Techniques

Distortion is a powerful tool for adding character and energy to drum tracks. When applied correctly, it can give your drums a big and bold sound that cuts through the mix. In this post, we’ll explore a few distortion techniques that you can use to get the most out of your drum recordings.

Parallel Processing

Parallel processing is a great way to add distortion to your drum tracks without losing the natural tone and dynamics of the performance. To do this, you’ll need to duplicate your drum track and add distortion to the duplicate. Then, you can blend the distorted track with the original to create a hybrid sound that retains the punch and clarity of the dry track while adding the grit and drive of the distorted track.

Here’s a simple step-by-step process for using parallel processing to add distortion to your drums:

  1. Duplicate your drum track
  2. Insert a distortion plugin on the duplicated track
  3. Adjust the settings of the distortion plugin to taste
  4. Blend the distorted track with the original using the fader or a parallel processing plugin

Using Distortion Plugins

Using distortion plugins is a quick and easy way to add saturation and harmonics to your drum tracks. There are many different distortion plugins available, ranging from subtle analog emulations to extreme digital distortions. Here are a few tips for using distortion plugins effectively:

  • Start with a light touch – a little distortion can go a long way
  • Experiment with different distortion types – tube, overdrive, clip, etc.
  • Adjust the tone controls – many distortion plugins have EQ controls that can shape the tone of the distortion
  • Use automation – you can automate the amount of distortion to create dynamic movement in your drum track

Overdriving Mic Preamps

Overdriving your mic preamps is a classic technique for adding warmth and grit to drum recordings. The idea is to push the preamp into saturation by turning up the gain until the signal starts to clip. This can be done by adjusting the gain knob on your preamp or by using a line-level booster to push the signal into the preamp harder. Here are a few things to keep in mind when overdriving your mic preamp:

  1. Be careful not to damage your gear – clipping can cause distortion, but it can also cause damage to your microphones and preamps if done excessively
  2. Use a low-cut filter – overdriving mic preamps can produce a lot of low-frequency rumble, so it’s a good idea to filter out the lowest frequencies to avoid muddiness
  3. Experiment with different preamps – different preamps have different sonic characteristics, so it’s worth trying out different combinations to find the right tone for your drums
Get Big Sounding Drums With Distortion

Credit: mixandmastermysong.com

Mixing Distorted Drums

Distorted drums can add depth and power to your music. By using distortion plugins or overdriving your preamp, you can achieve big, impactful drum sounds that cut through the mix and grab listeners’ attention. Experiment with different gain levels and processing techniques to find the perfect amount of distortion for your drums.

Mixing distorted drums can add depth and character to your music production. With the right techniques, you can create big sounding drums that will make your tracks stand out. In this article, we will explore how to mix distorted drums by using EQ and compression, creating space with reverb and controlling transients with limiting.

Eq And Compression

EQ and compression are essential tools to shape and balance the sound of distorted drums. Use EQ to remove unwanted frequencies in the low and high range. For example, you can cut the low-end rumble below 60Hz and boost the upper midrange frequencies to bring out the attack of the kick drum. Compression can bring out the sustain and add character to your drums. Use a medium attack time and a fast release time to avoid squashing the transients. Start with a ratio of 3:1 and adjust the threshold until you get a gain reduction between 3-6 dB.

Creating Space With Reverb

Reverb can add depth and space to your distorted drums. Use a plate or room reverb with a decay time between 1-2 seconds. Apply the reverb to a send channel and adjust the wet/dry balance until you get a natural reverb sound. Use EQ to cut the low end of the reverb to avoid muddiness in the mix.

Controlling Transients With Limiting

Limiting can help control the peaks of your distorted drums and make them more consistent. Use a limiter with a fast attack time and a release time that matches the tempo of your track. Set the threshold so that the gain reduction is between 3-6 dB. Be careful not to over-compress the drums, as this can kill the energy and dynamics of your mix. In conclusion, mixing distorted drums can be a great way to add character and depth to your music production. By using EQ and compression to shape the sound, creating space with reverb and controlling transients with limiting, you can create big sounding drums that will make your tracks stand out.

Advanced Techniques

Achieve larger and more impactful drums by utilizing distortion. Implementing advanced techniques such as parallel compression and harmonic distortion can add depth and aggression to your drum recordings, resulting in a larger and more dynamic sound.

Distorted drums are becoming increasingly popular in modern music production due to their ability to provide a big, bold sound. In this blog post, we will explore advanced techniques to get big sounding drums with distortion. We will cover everything from creating side chain compression with distorted drums to using distorted drums for EDM and dance music, and even creating a dead room sound with distorted drums.

Creating Side Chain Compression With Distorted Drums

One of the most effective ways to get big sounding drums with distortion is to create side chain compression. This technique involves using a compressor to reduce the volume of the distorted drums when other elements, such as a bassline or vocals, are playing. The result is a big, powerful drum sound that can cut through any mix. To achieve this effect, you will need to use a plugin that allows for side chain compression. Set the threshold level to around -20 dB, the attack time to around 10 milliseconds, and the release time to around 100 milliseconds. Adjust the ratio until you get the desired effect.

Using Distorted Drums For Edm And Dance Music

Distorted drums are particularly effective for EDM and dance music as they can add a high level of energy to a track. To achieve this effect, you will need to use a distortion plugin that provides a wide range of options. Start by applying a light distortion to the drums, gradually increasing the intensity until you achieve the desired effect. Be sure to adjust the EQ so that the distorted drums fit perfectly within the mix and don’t overpower other elements.

Creating A Dead Room Sound With Distorted Drums

If you’re looking to achieve a unique, atmospheric drum sound, then creating a dead room sound with distorted drums is an excellent option. This technique involves recording the drums in a dead-sounding room or adding reverb to create a similar effect. After that, you can apply distortion to the drums to create a unique sound that will make your tracks stand out. To achieve this effect, you will need to experiment with different reverb plugins and settings until you find the perfect match for your track. Once you have the desired reverb sound, apply the distortion, and you will have a big sounding drum track with a unique, atmospheric quality. In conclusion, advanced techniques for getting big sounding drums with distortion can take your music production to the next level. Whether you’re creating a track for EDM, dance music, or looking to create a unique sound, the techniques outlined in this blog post will help you achieve the desired effect. Experiment with different plugins and settings until you find the perfect combination, and you’ll have a big sounding drum track that stands out from the rest.

Get Big Sounding Drums With Distortion

Credit: www.youtube.com

Frequently Asked Questions On Get Big Sounding Drums With Distortion

How Do You Make Drums Sound Massive?

To make drums sound massive, use EQ to boost the low end and cut excessive mids. Add parallel compression to bring out the sustain and body of the drums. Use reverb to create a sense of space and enhance the overall sound.

Layer multiple drum samples to add depth and richness. Finally, adjust the volume levels to achieve a balanced mix.

How Do You Use Distortion On Drums?

Distortion can be used on drums by applying it to specific parts of the drum sound, such as the kick, snare, or cymbals. This can create a unique and distorted sound that adds grit and character to the drums. It’s important to use distortion sparingly and balance it with other effects to avoid overwhelming the mix.

How Do You Make Realistic Sounding Drums?

To make realistic sounding drums, use high-quality drum samples, layer different drum sounds, and add subtle variations in volume and timing. Utilize EQ and compression to shape the sound, and use reverb and delay to add depth and space. Experiment with different techniques to achieve the desired sound.

How Do You Make Drums Sound Punchy?

To make drums sound punchy, you can try using compression, EQ, and transient shaping to emphasize the attack and sustain of the drums. Experimenting with different mic placement and tuning can also help. Don’t forget to listen to other well-produced tracks for reference and adjust your mix accordingly.

Conclusion

Drums are the backbone of any great song and getting them to sound big and powerful can make all the difference. Distortion is one technique that can help achieve that sound. By adding various forms of distortion, you can create a variety of tones and textures that can really elevate your drum tracks.

Be sure to experiment with different types of distortion, such as amp distortion or plugin distortion, to find the perfect sound for your track. With a little experimentation and creativity, the possibilities are endless. So go ahead and try adding some distortion to your drums and bring a new level of excitement and energy to your music.

Categories
Archive

Techno From Scratch In 80 Minutes With Johannes

In this tutorial, Johannes teaches how to create a techno track from scratch in 80 minutes. He covers everything from the basics of building a groove to creating melodies and adding effects.

Throughout the tutorial, he provides useful tips and insights for both beginners and experienced producers alike. With a step-by-step approach, Johannes demonstrates how to use Ableton Live to create techno music with ease. By the end of the tutorial, you’ll have the skills and knowledge needed to make your own techno music from scratch.

Get ready to dive into the world of techno production and unleash your creativity.

Setting Up Your Techno Studio

Setting up a techno studio can be an exciting experience for any passionate music producer. But where do you even begin? In this post, we’ll guide you through the essential steps to set up your techno studio from scratch in just 80 minutes with Johannes. Let’s get started!

Invest In Essential Equipment

The first step in setting up your techno studio is to invest in essential equipment. You’ll need high-quality studio monitors, a sturdy desk to hold your equipment, a comfortable chair, and a reliable computer. When shopping for studio monitors, be sure to choose a pair that provides a flat frequency response to accurately represent your mix.

Choose Your Software And Plugins

Once you have your hardware set up, you’ll need to choose your software and plugins. For techno music production, popular digital audio workstations (DAWs) include Ableton Live, Logic Pro, and FL Studio. You’ll also need to invest in some quality plugins, such as virtual synthesizers, samplers, and effects. Some popular plugins for techno include Serum, Sylenth1, and FabFilter Pro-Q 3.

Optimize Your Studio Setup

Now that you have all your equipment and software in place, it’s time to optimize your studio setup for the best experience and productivity. Start by ensuring your studio is acoustically treated to reduce sound reflections. You can do this by adding acoustic panels to the walls, ceiling and floor. Position your studio monitors at an appropriate height and angle to achieve the best sound quality. Finally, arrange your equipment in a way that’s ergonomic and easy to access.

With these essential steps, you’re well on your way to setting up your techno studio from scratch in just 80 minutes. Remember, investing in quality equipment, choosing the right software and plugins, and optimizing your studio setup are all essential for a productive and inspiring music production studio.

Techno From Scratch In 80 Minutes With Johannes

Credit: m.youtube.com

Understanding Drum Programming

Understanding drum programming is crucial for creating a solid techno beat. In the Techno From Scratch In 80 Minutes With Johannes course, beginners can learn how to create a techno beat from scratch with ease. Let’s dive into the anatomy of a techno drum beat, basic programming techniques, layering and adding depth to beats, and advanced drum programming techniques.

The Anatomy Of A Techno Drum Beat

A techno drum beat typically consists of a kick, snare, hi-hats, percussion, and occasionally a clap. This five-piece drum kit forms the foundation of a techno beat. A kick, or bass drum, defines the tempo and rhythm and is typically placed on every quarter note. The snare is the backbone of the groove, while hi-hats provide a sense of groove and rhythm. Percussion and claps are used to add variation and excitement, creating a dynamic techno beat.

Programming Techniques For Creating A Basic Drum Pattern

Creating a basic drum pattern involves programming the kick, snare, hi-hats, and percussion. The kick is usually placed on the first and third beats, while the snare is often placed on the second and fourth beats. Hi-hats can be programmed to add a sense of rhythm, with open hats used to create a sense of excitement. Percussion adds variation and depth to the beat. For beginners, it’s essential to work with a metronome to keep the beat steady while programming the drums.

Layering And Adding Depth To Your Beats

Layering and adding depth to your beats is essential to create a dynamic and interesting techno track. This involves adding additional drum samples to the drum pattern to add variation. For instance, layering a clap sample on top of a snare can add excitement and intensity to a section of a track. Layering percussive elements can create a sense of tension and release. However, it’s important not to add too many layers to the beat, as it can become cluttered and lose its clarity.

Advanced Drum Programming Techniques

Advanced drum programming techniques involve exploring unconventional rhythms and patterns to create unique techno beats. This may involve using techniques such as swing, ghost notes, and off-beat accents to create a sense of groove and rhythm. Advanced drum programming also involves experimenting with different drum samples and effects to create unique sounds and textures. However, it’s important to remember that advanced techniques should be used sparingly to avoid overcomplicating the beat and losing its impact.

Crafting Synth And Bass Sounds

If you’re look are looking for an intensive lesson on how to craft synth and bass sounds from scratch quickly, you’ll want to spend some time with Johannes. Known for his quick and effective approach to making music, he is here to show you the ropes in just 80 minutes.

Selecting The Right Synth For Your Needs

Browsing through synth catalogues can be overwhelming but, luckily, Johannes is here to help you identify what kind of synth will work best for the sound you need. If you’re into retro sounds, a subtractive synth like Serum or Massive will work wonders. If you want to explore FM synthesis, why not try picking up FM8? Just make sure you have the right synth to achieve the sound you are looking for.

Creating Simple Synth And Bass Patches

Start by selecting a synth. Johannes suggests you begin by creating simple patches using the sine wave as a foundation. He recommends starting with a low-pass filter so that your sound is balanced and round. Then decorate it by experimenting with the various controls, such as oscillators, envelopes, and LFOs. You don’t need to produce anything complicated at this stage. Keep it simple – Johannes assures you that even these simple patches can make great music.

Building Complex Synth Sounds

Once you’ve had some practice with crafting simple patches, it’s time to move onto something a bit more complex. Johannes suggests that you begin by using multiple oscillators to layer sounds that blend together well. Duplicating oscillators and experimenting with pitch modulation techniques are additional ways to generate harmonic richness. Keep re-shaping the sound with filters, going back and forth, until you find the right balance.

Using Effects To Enhance Your Synth And Bass Sounds

The mixing desk is where to play with effects. Johannes recommends adding a bit of distortion or saturation to give your synth that extra “oomph.” A little bit of reverb will give your sound a sense of space, and by modulating the phaser, flanger, and chorus settings, you can create some fresh sounds that cut through a mix. Using effects is a good way to augment and refine your synth sounds after you’ve spent some time building the patches.

Creating Groove And Atmosphere

Johannes teaches you how to produce Techno from scratch in just 80 minutes, creating a unique groove and atmosphere with his step-by-step approach. With his expert guidance, you’ll learn how to craft your own tracks and unleash your creativity.

Creating Groove and Atmosphere is essential when producing a Techno track. As a producer, it can be challenging to find the right balance between the two. But with the help of Johannes, it’s easier than ever. In his “Techno From Scratch In 80 Minutes” tutorial, he covers everything from creating a solid groove to developing an atmospheric presence. In this section, we’ll delve into how Johannes creates groove and atmosphere in his tracks.

Arranging Your Basic Song Structure

Before adding any groove or atmosphere, it’s essential to have a basic song structure in place. Johannes recommends starting with a 16 bar loop, consisting of a simple kick, clap and hi-hat pattern. Once you have a basic structure established, you can start thinking about adding groove and atmosphere. However, keep in mind that your song should be well-arranged before adding any additional elements.

Using Filters And Modulation For Creating Atmosphere

Filters and Modulation are two powerful tools that can be used to create an atmospheric presence. Johannes suggests using low-pass filters to remove the higher frequencies from elements such as pads and synths. This creates a warm and dreamy atmosphere that will sit well in your track. He also recommends using modulation to control the cutoff frequency of your filter, creating more movement and interest in your sound.

Adding Variance And Dynamics To Your Tracks

A Techno track can quickly become repetitive and dull without variance and dynamics. To avoid this, Johannes suggests using multiple percussion layers to create interest and drive. He also suggests using automation to build tension and release throughout your track. Lastly, adding dynamics to your track through different filter settings, volume automation, and effects will give it the momentum and energy it needs. In conclusion, Creating Groove and Atmosphere is essential when producing a Techno track. To achieve this, start with a well-arranged basic song structure and use filters, modulation, and percussion layers to create interest and dynamics in your track. By following these tips from Johannes, you’ll produce Techno tracks that stand out and keep listeners engaged.

Finalizing Your Track

If you’re new to producing techno music or searching for new techniques for fine-tuning your track, you might want to check out Johannes’s live stream on how to create techno from scratch in 80 minutes. In this article, we’ll be focusing on the section “Finalizing Your Track” and providing insights into the mixing, mastering, and distribution process.

Mixing Your Techno Track

Mixing is the process of combining and balancing all the individual tracks in your music production to create a cohesive and harmonious sound. The goal is to ensure that all the elements in your track are audible and blend well together. When mixing your techno track, it’s essential to:

  • Ensure that the kick drum is the loudest element in your mix
  • Use EQ to cut or boost frequencies to avoid muddiness
  • Utilize panning to create a space within the stereo image
  • Make sure that the lead elements, such as synths and melodies, are prominent but not overpowering
  • Consider adding effects such as reverb or delay to enhance the overall sound

Mastering For Loudness And Clarity

Mastering is the process of finalizing your track, making it sound as good as possible and ready for distribution. The goal of mastering is to ensure that your track is balanced, loud, and clear, while keeping a consistent sound across different speakers and platforms. Here are some tips for mastering your techno track:

  1. Make use of compression and limiting to increase the overall loudness of the track
  2. Use EQ to balance out the different frequencies and ensure clarity in the mix
  3. Avoid over-processing the track
  4. Ensure that the track meets the loudness standards set by streaming platforms

Preparing Your Track For Distribution

After completing the mixing and mastering processes, it’s time to distribute your track to your audience. Here’s what you need to keep in mind when preparing your techno track for distribution:

StepDescription
ExportingExport the track in high-quality formats such as WAV or AIFF.
MetadataAdd important information such as track name, artist name, and release date.
ArtworkCreate attractive and high-quality artwork that reflects the style and mood of the track.
PlatformsChoose your distribution platforms wisely and ensure that they reach your intended audience.

Efficiently finalizing your techno track involves mixing, mastering, and distribution. Adhering to these guidelines will help your track stand out and please your listeners.

Techno From Scratch In 80 Minutes With Johannes

Credit: www.productionmusiclive.com

Frequently Asked Questions For Techno From Scratch In 80 Minutes With Johannes

What Is The Structure Of A Melodic Techno Track?

The structure of a melodic techno track typically consists of an intro, followed by a build-up section, the main body, and a breakdown. The main body usually consists of a repeating bassline and a building melody. The track may also have multiple breakdowns and build-up sections, and often ends with an outro.

How To Make A Good Techno Song?

To make a good techno song, use electronic music production software, experiment with different sounds, and focus on creating a strong beat. Keep your arrangements minimal, and use repetition to build energy. Use effects like filters, delays, and reverbs to add texture and depth.

Remember, the most important thing is to let your creativity run wild.

What Is Techno Music And How Is It Different From Other Electronic Music Genres?

Techno music is a sub-genre of electronic dance music that originated in Detroit in the 1980s. It is characterized by its repetitive beats, use of synthesizers, and futuristic soundscapes. Unlike other electronic dance music genres, techno is more minimalistic and focuses on creating a hypnotic rhythm that keeps the listener engaged.

What Is Scratch And How Can Beginners Learn About It?

Scratch is a visual programming language developed by MIT that introduces coding concepts in a fun and interactive way. Beginners can start by visiting the official Scratch website and exploring the tutorials and projects offered there. Additionally, there are plenty of online resources such as YouTube channels, blogs, and courses that can help beginners learn Scratch.

Conclusion

As we come to the end of our journey to create Techno from scratch in 80 minutes with Johannes, it’s clear that music production is not only a science, but an art form. Taking the time to understand the intricate details of creating a beat allows for endless creativity.

With the right tools and a passion for music, anyone can take part in this amazing craft. Get started on your own journey today!