Categories
Archive

Easy Steps To Finishing Your Tracks Now

Finishing your tracks comes down to getting ideas down quickly, organizing your workflow, experimenting with different techniques, and taking breaks when needed. These steps can help you create and complete your music with ease and efficiency.

Also, creating music is a creative process that can be both exhilarating and challenging. It’s easy to get lost in the details and lose sight of the bigger picture. However, with some easy steps, you can finish your tracks quickly and efficiently.

Related reading: How To Finish You Tracks and Finishing Your Recordings. For background, see the Wikipedia article on Music production.

Moreover, this article will discuss four key steps to help you finish your tracks: workflow organization, experimentation with techniques, taking breaks, and quick ideation. By implementing these steps, you can minimize procrastination and create excellent and polished tracks.

Setting Yourself Up For Success for Finishing Your Tracks

In addition, are you struggling to finish your music tracks? Do you find yourself constantly starting new projects without actually completing any of them? You’re not alone. Many music producers and artists face this challenge. But the good news is that there are easy steps you can take to set yourself up for success and start finishing your tracks now.

Establishing A Goal

Before you start any project, it’s important to establish a goal. Furthermore, what is it that you want to achieve with this track? Is it to practice your production skills or to create a track that you can release? Write down your goal and keep it in mind throughout the entire process. It will help you stay focused and motivated.

Creating A Schedule for Finishing Your Tracks

One of the biggest reasons why music producers struggle to finish their tracks is because they don’t have a schedule. Additionally, they work on their projects sporadically, which leads to a lack of progress and motivation. Creating a schedule can help you break down your project into manageable tasks and ensure that you make consistent progress towards your goal.

Also, you can use a simple to-do list or calendar to create your schedule. Schedule specific times for working on your project, and make sure to stick to them. It’s also important to take breaks and give your brain time to rest. Don’t overwork yourself to the point of burnout.

Staying Accountable

Another way to set yourself up for success is by staying accountable. Find someone who can hold you accountable for your progress, such as a friend or mentor. Moreover, share your goal and schedule with them, and ask them to check in with you regularly to see how you’re doing. This can help you stay motivated and on track.

Using Templates And Presets for Finishing Your Tracks

In addition, to save time and improve your workflow, consider using templates and presets. Templates can help you start your project with a pre-made structure, while presets can help you quickly add high-quality sounds and effects to your tracks. This can help you focus on the creative aspects of your project and reduce the time spent on technical details.

Conclusion

By establishing a goal, creating a schedule, staying accountable, and using templates and presets, you can set yourself up for success and start finishing your tracks now. Remember to take it one step at a time, and don’t be afraid to ask for help or take breaks when you need them. With persistence and dedication, you can achieve your music production goals.

Organizing Your Workflow

Organizing your workflow is essential to finishing your track successfully. By following the three essential steps below, you can easily organize your workflow and ensure that your project runs smoothly and efficiently from start to finish.

Creating A Template for Finishing Your Tracks

The first step in organizing your workflow is to create a template. Using a template as a starting point for your tracks will help you stay organized and ensure that you complete each step in the process efficiently. Your template should include all the necessary elements of your project, such as instrument tracks, effects, and vocals, if applicable.

By creating a template, you can eliminate the need to start from scratch each time, which can save you time and keep you focused on the task at hand. This will also help you to maintain consistency in your tracks, ensuring that they sound professional and polished.

Naming Tracks Appropriately

Once you have your template, the next step is to name your tracks appropriately. Naming your tracks clearly and accurately is crucial in making it easy for you to work on your project and collaborate with others.

You should use descriptive names that reflect the type of instrument or sound that each track contains. Avoid using vague names like “Track 1” or “Untitled,” as this can cause confusion and make it difficult for you to identify which track is which.

Color Coding

The final step in organizing your workflow is to use color-coding. You can color-code each track in your project to make it easier for you to identify them quickly. For instance, you can assign a different color for drums, vocals, and guitars. Additionally, you can color-code each effect to differentiate them easily.

Color-coding helps you to visually identify which tracks are which, and this can help you navigate your project more easily. When reviewing your project, you can quickly scan through your tracks and identify areas that need improvement or editing.

In conclusion, organizing your workflow is essential when working on your music track projects. By following these three easy steps of creating a template, naming tracks appropriately, and color-coding, you can streamline your workflow and make it easy to complete your music tracks efficiently.

Creative Roadblocks To Finishing Your Tracks

Overcoming creative roadblocks can be challenging, but there are easy steps you can take to finish your tracks now. Explore new sounds, techniques, and tools to inspire you, collaborate with others, and take breaks when you need to refresh your mind and body.

With these strategies, you can push through your creative blocks and produce your best work.

Finding Inspiration for Finishing Your Tracks

Feeling stuck in a creative rut can be frustrating. But finding inspiration can help reignite your passion for finishing your music tracks. Here are some easy ways to find inspiration:

  • Listen to different genres of music to expand your horizons and get new ideas
  • Watch movies or TV shows and take note of the music used to set the mood
  • Head out into nature and let the sounds and environment inspire you

Bringing Fresh Perspective

Sometimes all you need is a fresh perspective to help you finish your tracks. Here are some ways to bring new ideas and perspectives to your work:

  1. Collaborate with other musicians to combine your ideas and create something new
  2. Take a break from your work and come back to it later with a clear mind
  3. Experiment with new sounds and techniques to bring a fresh perspective to your music

Remember, everyone experiences creative roadblocks from time to time. Don’t get discouraged – try these tips to find inspiration and bring new perspectives to your work. With a little effort and a fresh mindset, you’ll be finishing your tracks in no time.

Mixing And Mastering

Achieving a professional and polished sound for your music requires proper mixing and mastering. Follow these easy steps to finish your tracks by applying equalization, compression, and other techniques to balance and enhance the overall sound quality. Don’t forget to take frequent breaks to refresh your ears!

Mixing and mastering are the final stages in producing your track. These two processes are crucial in providing your music with the perfect sound and tone that you’re aiming for. Balancing levels, panning, EQ, compression, and loudness are the indispensable tools that will help you achieve your desired sound. In this post, we will explore each of these elements in-depth. H3: Balancing Levels Before you start mixing your track, it’s crucial to balance the levels of each instrument and vocals. Doing so will ensure that your listeners can hear all the elements equally.

Practical Tips for Finishing Your Tracks

You can adjust the levels to your liking by using a volume fader or gain knob. H3: Panning and Stereo Placement Panning refers to the placement of instruments and sounds in the stereo field. By panning certain elements to the left or right, you can create a dynamic sound that will enhance the listener’s experience. Stereo placement refers to how wide or narrow an element sounds. Stereo widening tools can help you add width to your track’s sound. H3: EQ Equalization is the process of adjusting the frequency balance of your sounds.

It helps to create separation between different instruments and sounds by removing or augmenting specific frequencies. By using EQ, you can also clean up muddy or cluttered sounds in your mix. H3: Compression Compressors are used to reduce the dynamic range of your sounds. This process evens out the levels of your track, making it sound more polished and professional. Compression is especially helpful for vocals and drums. H3: Loudness Loudness is the final step in the mixing and mastering process. It ensures that your track is the appropriate volume and will sound good on all playback devices.

Putting It Into Practice for Finishing Your Tracks

You can achieve optimal loudness by using a limiter or maximizing tool. In conclusion, mixing and mastering your tracks can seem daunting, but by following these easy steps, you can achieve a professional sound and take your music to the next level. Remember to balance levels, pan and place sounds in the stereo field, use EQ and compression wisely, and achieve appropriate loudness.

Going The Extra Mile When Finishing Your Tracks

Learn how to take your music to the next level by going the extra mile with these easy steps to finishing your tracks now. From organizing your workflow to utilizing plugins and effects, these tips will help you create professional-level productions in no time.

Once you’ve finished laying down the basic structure of your track, it’s time to go the extra mile and take your creation to the next level. This is where you can really unleash your creativity and add those special touches that make your music unique.

Adding Effects

Adding effects is a great way to add depth and character to your track. When used effectively, effects can help to create a powerful and immersive listening experience. Some popular effects include reverb, delay, chorus, and distortion. Experiment with different combinations and settings until you find the right sound for your track.

Automation

Automation is a powerful tool that can help you to create dynamic and engaging tracks. By automating parameters such as volume, pan, and effects, you can add movement and interest to your music. Try automating the filter cutoff on a synth, or the delay feedback on a vocal to add interest and texture.

Collaboration

Collaboration is a great way to bring new ideas and perspectives to your music. Whether it’s working with a vocalist, a guitarist, or another producer, collaborating with someone else can help to push your creativity and take your tracks to the next level. Don’t be afraid to reach out to others and explore new creative possibilities. In conclusion, going the extra mile when finishing your tracks is all about exploring new creative possibilities and pushing your creativity to the limits. By adding effects, using automation, and collaborating with others, you can create memorable and engaging tracks that are uniquely yours. So go ahead, take your music to the next level, and let your creativity shine!

Frequently Asked Questions For Easy Steps To Finishing Your Tracks Now

How Do You Finish A Track?

To finish a track, you must focus on the overall structure and ensure all elements fit together seamlessly. Make sure you have a solid melody and chord progression, along with a strong bassline and drums. Continuously revisit and refine the track, and when you feel it’s complete, take a break and come back to it with fresh ears to make final tweaks and adjustments.

How Do You Finish A Song Fast?

To finish a song quickly, start by coming up with a clear concept or theme. Next, write down your ideas, focusing on the structure and verse/chorus format. Don’t be afraid to use rhyming and repetition to create a catchy melody.

Set deadlines for yourself and stick to them. Lastly, revise and edit as necessary.

How Do You Know When A Track Is Finished?

You know when a track is finished by carefully listening to it and ensuring that it meets your specific creative goals and objectives. You can also get feedback from trusted sources and objectively assess the technical aspects like mixing and mastering.

Ultimately, it’s a subjective decision that relies on your own satisfaction with the final product.

How Do You Not Over Produce Music?

To avoid over-producing music, be mindful of the sounds you use, don’t overcomplicate arrangements, and know when to stop. It’s essential to set limitations, not try to perfect every aspect of the song, and get feedback from others. Finally, trust your intuition and focus on creating quality rather than quantity.

Conclusion

Finally, finishing your tracks doesn’t have to be an uphill task anymore! By following these easy steps, you’ll produce high-quality music that fits your vision. Consider breaking down your creative process into manageable steps such as choosing a theme, experimenting with sound design and utilizing feedback.

Dedicate ample time to practice and refine your craft, and soon you’ll be churning out professional-sounding tracks in no time. Remember, with determination and perseverance, the possibilities are endless. Happy producing!
Categories
Archive

How Loud Should Your Mix Be Before Mastering

The recommended loudness level for your mix before mastering is -6 dB. Achieving this enables a wide enough dynamic range, clarity, and headroom necessary for mastering.

One crucial step in the production of music is mastering. It helps to enhance the overall quality and sound of a track. However, before sending your mix for mastering, it’s essential to prepare adequately. One of the critical considerations is the loudness level.

Related reading: Edm Mixing And Mastering and Reggae Mixing And Mastering. For background, see the Wikipedia article on Audio mastering.

Mixing engineers recommend aiming for a loudness level of -6 dB to allow sufficient headroom and dynamic range necessary for mastering. Going too loud or too low can significantly affect the final product resulting in distortion or lack of clarity. Mastering engineers have something to work with when the levels are correctly set before handing the track over. This makes their job easier and producing better results. Therefore, it’s crucial to get the levels right for a polished sounding product.

How Loud Should Your Mix Be Before Mastering

Credit: majormixing.com

Understanding Volume Levels for Mix Before Mastering

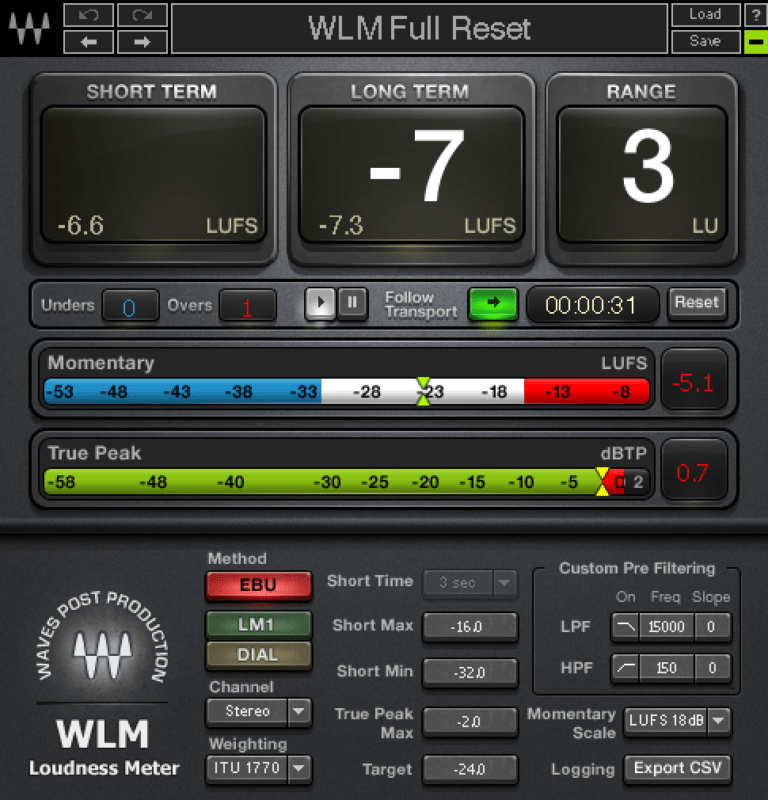
Before mastering your mix, it’s important to understand volume levels. The recommended volume level for your mix should be around -6dB to -3dB, allowing enough headroom for mastering. It’s important to avoid pushing your mix too loud, which can cause distortion and clipping.

Why Volume Levels Are Important

Volume levels play a crucial role in music production. Whether you’re mixing or mastering, understanding volume levels is essential. It’s essential to know how to measure your mix’s loudness before moving forward with the mastering process. Failure to observe correct levels could lead to an overcompressed sound that leaves your music sounding flat and lifeless.

Measuring Volume for Mix Before Mastering

Understanding how to measure the loudness of your mix is essential. In the US, audio levels are commonly measured in decibels (dB). The higher the dB, the louder the sound. However, measuring the loudness of a mix goes beyond just reading dB levels on a meter. There are two essential levels to consider, the peak levels and RMS levels.

Peak Levels Vs. Rms Levels

Also, peak levels and RMS levels are two different ways of measuring the loudness of a mix. Peak levels measure the highest point of the sound, while RMS levels hold a more accurate representation of the perceived loudness of that sound. Your master should peak at no more than -3dB. It’s easy to think the louder, the better, but that’s not always the case. If the peaks of your mix are too high, it can be overloading the master, causing distortion. In conclusion, there is no set rule to follow when it comes to the loudness of your mix. However, understanding the importance of volume levels, measuring them correctly, and knowing the difference between peak and RMS levels can affect how your final mix sounds. By mastering these concepts, you can ensure your final product is perceived at its best.

How Loud Should Your Mix Be Before Mastering

Credit: majormixing.com

Setting The Right Volume for Mix Before Mastering

Setting the Right Volume is an essential factor when it comes to mastering your music. It’s imperative to set the right level of loudness, as it can affect the tonality and clarity of your track. If you go too high or too low, your final output can turn out muddy, distorted, or weak. In this section, we’ll go into detail about the Factors to Consider, balancing Loudness and Dynamics, and Pre-Mastering Considerations to help you find the optimum volume level for your mix before sending it for mastering.

Factors To Consider

While setting the right volume level, there are some essential factors to consider:

FactorsDescription
GenreThe genre of your music can affect the loudness level you’ve chosen.
Intended PlatformKnowing the platform your music will be played on should be considered because it will help you decide your track’s optimal loudness level.
Target AudienceKeeping your target audience’s preference in mind, it’s essential to set the level of loudness that will captivate and leave them with a memorable experience.

Balancing Loudness And Dynamics for Mix Before Mastering

An essential element to achieve a balanced mix is to find the equilibrium between the loudness and dynamics of your song. Your mix needs to have flexibility and movement to keep the listener engaged.

Here are some tips to strike a balance between loudness and dynamics:

  • Use compression to regulate the dynamics of your track.
  • Try to avoid overcompression as it can suck the life out of your song.
  • Add subtle automation to create interest and variety in your mix.

Pre-mastering Considerations

Before sending your final mix for mastering, there are some essential pre-mastering considerations to keep in mind.

  • Check and correct the frequency balance of your mix.
  • Remove any unwanted noises or inconsistencies in your song.
  • Use reference tracks to compare your music to commercial tracks that are similar in genre and style.

By following these pre-mastering considerations, you will ensure your mix is in the best possible shape before mastering. The mastering engineer will have a much smoother process of achieving your desired sound.

Optimizing Your Mix For Mastering

Mixing is said to be an art that requires a good ear, knowledge of different instruments and how they sound when mixed. The mixdown session is where all the musical elements come together to produce a final sound. A well-mixed track sounds balanced, with each instrument occupying its own sonic space. To achieve the best possible sound for your mastering engineer to work with, it’s essential to optimize your mix for mastering. Here are some tips to help you optimize your mix for mastering.

Clean Up Your Mix

Before mastering, make sure your mix is as clean as possible. This means identifying and removing unwanted noise, clicks, pops, and hiss that may have crept in during recording or mixing. In addition, be sure to eliminate any dead air or extraneous noises at the beginning or end of your audio file.

Eliminating Clipping for Mix Before Mastering

Clipping is a common mixing problem where the audio signal exceeds the maximum decibel limit, leading to distortion. To eliminate clipping, reduce the volumes of the instruments or channels that are causing the distortion. Alternatively, you can use a limiter to control the levels of your mix and prevent any overloads.

Maximizing Dynamics for Mix Before Mastering

Dynamic range refers to the difference between the loudest and softest parts of your track. If your mix has a low dynamic range, your mastering engineer may struggle to make it sound great. The solution is to increase the dynamic range by creating contrast between the loud and soft parts. Use compression to reduce the dynamic range of loud parts, and EQ to add clarity to the softer sounds. A mix with good dynamics sounds lively and full of energy.

Following these tips will help you optimize your mix for mastering, resulting in a final product that sounds great on any system. Remember that a well-mixed track is the foundation for a great master.

Deciding On The Ideal Volume Level for Mix Before Mastering

Finding the perfect volume level for your mix before mastering is crucial. You want to make sure the audio levels are balanced and the overall sound is cohesive. Aim for a volume that is loud but still allows for dynamic range and clarity in your mix.

When it comes to mixing audio tracks, deciding on the ideal volume level is crucial. But how loud should your mix be before mastering? This is one of the most common questions asked by sound engineers and producers alike. The answer is not straightforward, as it depends on several factors, including the target volume level for mastering, the type of music, the intended playback medium, among others. In this post, we’ll delve deeper into what you need to consider before deciding on the ideal volume level for your mix before mastering.

Target Volume Level For Mastering

Before mastering, it’s essential to have a target volume level in mind. This will guide you as to how far you can push the volume during the mixing stage. The most common target volume level for mastering is -14 dB RMS, and the peak level should not exceed -6 dB. However, some mastering engineers prefer higher peak levels, up to -3 dB, for genres such as hip-hop or EDM. It’s crucial to consult with a mastering engineer beforehand to know the ideal target level for your project.

Factors That Influence The Target Volume Level

Several factors can influence the target volume level for mastering. Here are some of them:

  • Genre: Different genres have different loudness norms. For instance, classical music tends to have lower levels than pop music.
  • Playback Medium: The intended playback medium can also influence the target volume. For instance, streaming services such as Spotify or Apple Music have loudness normalization algorithms that adjust the volume of your track to match other tracks on their platform.
  • Dynamic Range: The dynamic range of the mix can also influence the target volume level. A mix with high dynamic range may require lower volumes to preserve the transients and avoid distortion.

Working With A Professional Mastering Engineer

Working with a professional mastering engineer can help you determine the ideal target volume level for your mix. The mastering engineer can provide valuable insights based on their experience and the genre of music. They can also apply their expertise to optimize the dynamics, frequency response, and stereo image to achieve a polished and competitive sound. It’s crucial to provide the mastering engineer with a mix that has a reasonable headroom to allow room for processing. In conclusion, deciding on the ideal volume level for your mix before mastering requires consideration of several factors. Aiming for a specific target volume level for mastering can encourage you to mix at appropriate levels and avoid over-compressing or distorting the audio. Working with a professional mastering engineer can also help you achieve the desired loudness and competitive sound.

What To Avoid

What to Avoid:

When it comes to mixing audio, a common mistake that people make is to prioritize loudness over other important aspects like dynamics. Here are two crucial things that you should avoid in your mix:

Don’t Compromise Dynamics For Loudness:

A common misconception about mixing is that a master should be as loud as possible. The truth is that dynamics are very important in the mixing process; they’re what give a song its punch and power. If you push a mix too hard in an attempt to make it louder, then you’re likely to compromise its dynamics. This can make it sound flat and lifeless, regardless of how loud it is.

Avoid Over-limiting:

When a mix is pushed too loud, the audio peaks can reach the maximum level that the system can handle. This creates digital clipping, where the sound waves are cut off and distorted. Many mix engineers resort to over-limiting to control the peaks and make the mix louder, but this can cause severe damage to the mix. Overuse of limiters can cause digital distortion, loss of dynamics, and create an overall harsh sound.

When you’re mixing your audio, you want to keep in mind that achieving the right mix balance should be your priority. Both dynamics and loudness are important, but it’s essential to maintain a balance between the two. By avoiding the overuse of limiters and not compromising on dynamics, you can create a mix that sounds powerful, punchy, and perfectly balanced.

Tips For Finding The Sweet Spot for Mix Before Mastering

When it comes to mixing, finding the right loudness level can be a bit tricky. You don’t want to go too loud and risk ruining the quality of your mix, but you also don’t want it to be too quiet and underwhelming. So, how loud should your mix be before mastering? Here are some tips for finding the sweet spot:

Mix

The key to finding the right loudness level is in the mix itself. Make sure your levels are balanced and that no one element overpowers the others. You want everything to be audible, but not at the expense of the overall cohesiveness of the mix. Ideally, you want your final mix to peak at around -6dB to -3dB on the meter.

Listen

Once you’ve mixed your track, it’s time to give it a listen. This is where reference tracks come in handy. Choose a track that has a similar sound and style to your own and listen to it alongside your mix. This will give you a better idea of your track’s loudness level compared to a professionally mixed and mastered track.

Take Breaks

It can be easy to get lost in the mixing process, but it’s important to take breaks. Your ears can become fatigued after prolonged exposure to loud music, which can result in inaccurate judgments about the loudness level of your mix. Take a break for a few minutes every hour to give your ears a rest. Additionally, try to mix at a lower volume to reduce ear fatigue.

Use Reference Tracks

We briefly mentioned this earlier, but using reference tracks can be incredibly helpful in finding the right loudness level. Choose a few professionally mixed and mastered tracks that have a similar sound and style to your own and listen to them alongside your mix. This will give you a better understanding of what your mix should sound like and can guide you in finding the right loudness level.

Master With Care

Once you’ve found the right loudness level for your mix, it’s time to master it. However, be sure to approach mastering with care. A heavy-handed approach can ruin all of the hard work you put into mixing and finding the right loudness level. Make small adjustments and trust your ears.

How Loud Should Your Mix Be Before Mastering

Credit: mixandmastermysong.com

Frequently Asked Questions On How Loud Should Your Mix Be Before Mastering

What Should A Mix Sound Like Before Mastering?

A mix should sound balanced and cohesive before mastering. All the elements should be audible and clear, with no clipping or distortion. The levels and panning should be appropriate and the track should have a good sense of depth and width.

This will ensure that the mastering process can enhance the mix without introducing any flaws.

How Do You Know When Your Mix Is Ready For Mastering?

You’ll know when your mix is ready for mastering by checking these indicators: Your mix is balanced, well-organized, and there’s no distortion. You’ve left enough headroom for mastering, and your mix is not too quiet. Additionally, you must listen to it on various devices to ensure that it sounds consistent.

What Is The True Peak Before Mastering?

The true peak before mastering refers to the highest level a mix can reach without any mastering processing. It is important because it allows for a clear understanding of what can be improved and enhanced through the mastering process. It can help create a clearer and cohesive sound for the final product.

How Many Db Should A Mastered Song Be?

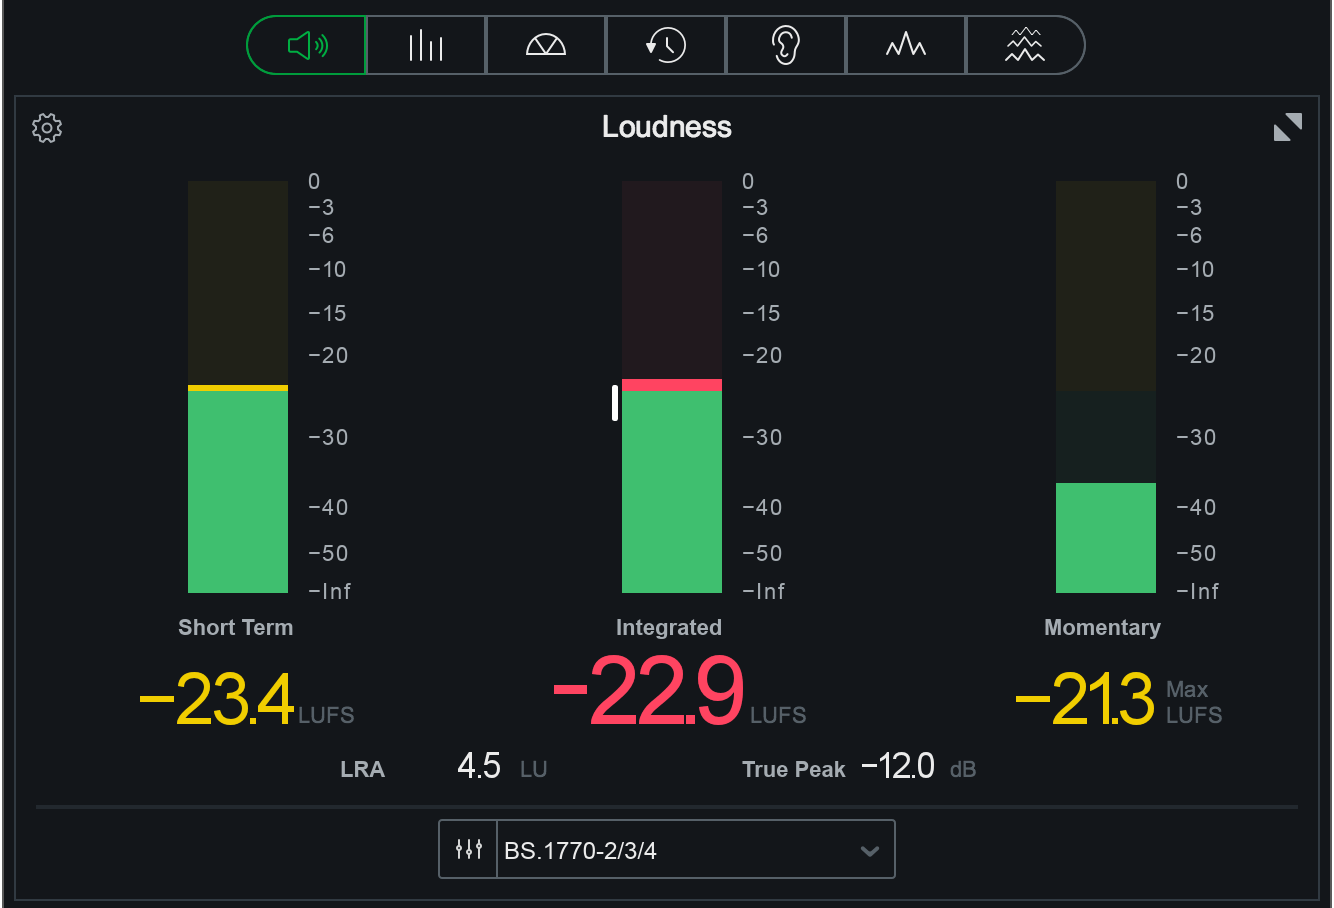
The optimal loudness level for a mastered song is -14 dB integrated LUFS for streaming platforms like Spotify, with a true peak value no higher than -1 dB. However, some mastering engineers may aim for slightly different levels based on their preferences or client specifications.

Conclusion

Finding the ideal volume for your mix before mastering can be a challenge. However, the right approach can ensure that your track sounds professional and polished. Always prioritize maintaining the sonic balance, keeping in mind the technical requirements of the mastering process.

Most importantly, trust your ears and don’t be afraid to experiment until you achieve the desired sound. With these tips, you can confidently prepare your mix for mastering and unleash its full potential.

Categories
Archive

How To Stay Motivated As A Music Producer

To stay motivated as a music producer, set specific goals and break them down into manageable tasks. Consistently reflect on why you make music and seek inspiration from other artists.

Music production can be a challenging career path, but staying motivated is crucial for success. Setting goals and breaking them down into smaller, achievable tasks can keep you focused and energized. Continuously reflecting on why you make music can also help you stay motivated.

Whether it’s to express emotions or reach a wider audience, reminding yourself of your purpose can reignite your passion. In addition, seeking inspiration from other artists and immersing yourself in the music community can provide valuable support and encouragement. Finding a mentor or joining a producer group can also help you stay connected and motivated. Remember, staying motivated is a key ingredient in achieving your goals as a music producer.

How To Stay Motivated As A Music Producer

Credit: www.ghosthack.de

Identifying Motivational Challenges

Staying motivated as a music producer can be a daunting task at times. Identifying potential motivational challenges, such as creative blocks or feeling overwhelmed can help you stay on track. Setting achievable goals and taking breaks when necessary can also help maintain motivation in the long run.

As a music producer, it’s common to face challenges related to keeping yourself motivated. Several factors can affect your motivation levels and creativity, which can ultimately affect the quality of your music productions. Identifying these factors and finding ways to overcome them is crucial for any music producer’s success. In this post, we’ll discuss some of the most common motivational challenges faced by music producers and share some tips on how you can stay motivated.

Emotional Rollercoasters

Music production can be an emotional rollercoaster ride, especially when you have to work under pressure, meet tight deadlines, or constantly face rejection from labels or listeners. These emotions can cause you to lose motivation and feel discouraged. To combat this, here are some tips:

  • Practice good stress management techniques, such as deep breathing exercises, meditation, or yoga
  • Take breaks often to recharge and avoid burnout
  • Stay connected with peers in the industry to get feedback and support
  • Keep a positive mindset and focus on your goals

Creative Burnouts

Creative burnouts can make it challenging for you to create new music, leading to feelings of frustration and demotivation. It’s a common challenge faced by music producers and can be caused by various factors such as long working hours, repetitive tasks, or lack of inspiration. Here are some ways to overcome creative burnouts:

  • Take breaks from music production and engage in other activities that inspire you
  • Collaborate with other artists to get fresh perspectives and ideas
  • Explore new genres or sounds to spark creativity
  • Set realistic goals and focus on small wins to avoid feeling overwhelmed

In conclusion, staying motivated as a music producer can be challenging but understanding the factors that affect your motivation levels and taking proactive steps to overcome them can help you stay on track towards achieving your goals. By practicing good stress management techniques, staying connected with peers and collaborating with other artists, exploring new genres, and setting realistic goals, you can find renewed enthusiasm and keep your creativity flowing.

Discovering Your Muse

Discovering Your Muse is crucial to staying motivated as a music producer. Your muse is that inner creative spark, the source of your inspiration, and passion for making music. Without discovering and nurturing your muse, you may find it hard to stay motivated as a music producer. Here are some H3 headings that can help you discover your muse and stay motivated as a music producer.

Finding Meaning In Music Production

Music production is not just a mere process of making music, but it is an art that evokes emotions and tells stories. To stay motivated as a music producer, you must find the meaning in music production. Ask yourself what kind of feelings or emotions you want to convey through your music. Do you want to inspire people, educate, or entertain them? Find the meaning in your music, and it will be easier to stay motivated.

Judging The Purpose Of Music Production In Your Life

You need to ask yourself what you want to achieve as a music producer. Do you want to earn money, become famous, or create art that inspires others? Judging the purpose of music production in your life will help you determine the direction you want to take in your music career. It will also help you to stay motivated by reminding you of the reason why you started making music in the first place.

Remember, discovering your muse is the key to staying motivated as a music producer. Finding meaning in music production and judging the purpose of music production in your life are two excellent ways of discovering and nurturing your muse. Use these strategies, and you will find it easier to stay motivated as a music producer.

Improving Work Environment

Staying motivated as a music producer can be challenging, but there are ways to improve your work environment to enhance your creativity and productivity. Set up a comfortable workspace, surround yourself with positive energy, and take breaks to avoid burnout.

Improving Work Environment: As a music producer, it’s essential to have a motivating work environment. To stay motivated, music producers need to customize their workflow and organize their studio space effectively. The following are H3 headings showing the aspects to focus on when it comes to Improving Work Environment.

Organizing Studio Space

The first step to have a motivating work environment is to organize your studio space. A well-organized studio space helps minimize distractions, enables you to locate your tools easily, and saves time. Dedicate specific areas for different tools and items, label them, and arrange them neatly. Ensure that your studio space is neat and tidy at all times. This will create a conducive environment for creativity.

Customization Of Workflow

Customization of workflow refers to streamlining of your production process. It helps you to work efficiently, saves time, and reduces frustration. Identify areas you may need to improve, such as having a more straightforward process when recording or using new software tools. Consider using software that will make the workflow more efficient, like using a drum machine plugin instead of recording drums manually. Additionally, ensure that your equipment is up to date and that software programs will integrate smoothly with each other. To improve workflow, create workflows for different stages of production. This makes it easier to track progress and identify potential bottlenecks. Get into the habit of maintaining a to-do list, which helps reduce frustration and allows you to manage each stage of production efficiently. Conclusion: Improving your work environment is essential for music producers. By organizing studio space and customizing workflow, you’ll create a conducive environment for creativity and motivation. Customizing workflow will ensure that the production process is streamlined, saving time, and reducing frustration. As a music producer, always strive to improve your work environment, which will translate to better productions.

Building Supportive Network

As a music producer, building a supportive network can keep you motivated. Surrounding yourself with fellow producers, musicians, and fans can provide inspiration, feedback, and encouragement. Networking events, online communities, and social media platforms are great ways to connect with like-minded individuals and stay motivated in the music industry.

As a music producer, staying motivated can be a daunting task, especially when faced with creative roadblocks or rejection from the industry. One of the most effective ways to stay motivated and inspired is by building a supportive network. In this article, we will discuss two essential ways to build a supportive network: Creating or joining a music production community and collaborating with peers.

Creating/joining A Music Production Community

Creating or joining a music production community is a great way to build a supportive network. These communities can be found online or in person and offer a platform to share your music, get feedback, and connect with other producers in your niche. By sharing your music with others, you’ll receive valuable feedback and insights that will help you grow as a producer. Moreover, these communities provide a sense of camaraderie and motivation, leading to productive and creative collaborations.

Collaborating With Peers

Collaborating with peers is a great way to build a supportive network and improve your production skills. Collaborations allow you to combine your talents with other producers, leading to innovative and dynamic music production. These collaborations also present an opportunity to learn new production techniques and acquire diverse perspectives, leading to personal growth and an expanded musical horizon. Additionally, collaborations provide an opportunity to network with other artists, leading to potential future collaborations and industry connections. In conclusion, building a supportive network is an essential aspect of staying motivated as a music producer. Creating or joining a music production community and collaborating with peers present an opportunity to expand your horizons, acquire new perspectives and techniques, and develop lifelong connections. By taking these steps, you can ensure ongoing inspiration, creativity, and motivation in your music production journey.

Setting Achievable Goals

As a music producer, setting achievable goals is key to staying motivated. Start by breaking down larger goals into smaller milestones, and celebrate each accomplishment along the way. This will help keep you on track and motivated to continue moving forward in your music production career.

Breaking Down Long Term Goals

Achieving your long-term goals is a rewarding accomplishment, but it can be overwhelming to think about all the steps needed to reach the destination. Instead, it is helpful to break down these larger goals into smaller, more manageable ones. This can help you stay motivated by providing a clearer path towards overall success. One popular method to break down a long-term goal is to create a roadmap. In this roadmap, you can make a list of all the tasks that need to be accomplished and prioritize them. With a roadmap, you can keep track of your progress and celebrate small milestones along the way.

The Importance Of Short Term Goals

Short-term goals provide motivation and encouragement while keeping you focused and accountable. These goals should be specific and timely, and they should align with your long-term ones. For instance, if your long-term goal is to produce an album, your short-term goal could be to create one new song every week. This goal is more specific and attainable because it focuses on a single task and sets a clear timeline for its completion. As you meet your short-term goals, you gain momentum and progress toward your long-term goal. Celebrating your accomplishments along the way can help keep you motivated.

Conclusion

Setting achievable goals is a crucial aspect of staying motivated as a music producer. By breaking down your long-term goals and creating short-term ones, you’ll avoid feeling overwhelmed and increase the likelihood of success. Remember to stay disciplined and celebrate your progress. Happy producing!

How To Stay Motivated As A Music Producer

Credit: www.ghosthack.de

Inspiration From Outside Music Production

Inspiration can come from a variety of sources beyond music production, such as exploring other art forms and taking a break from your daily music production routine. These sources can help you stay motivated as a music producer by sparking creativity and providing new perspectives. In this article, we’ll explore how you can draw inspiration from other art forms and take breaks to stay motivated as a music producer.

Drawing Inspiration From Other Art Forms

Exploring other art forms can be an excellent way to get your creative juices flowing. Consider visiting an art museum, attending a live theater production, or watching a movie or documentary. These experiences can introduce new concepts and techniques that you can apply to your music production work.

You can also draw inspiration from visual art. Experiment with creating music in response to artwork or photography. You can even use painting or drawing as a warm-up exercise before diving into music production. This not only helps you tap into your imagination but also provides a different perspective on your work.

Taking A Break From Your Daily Music Production Routine

It’s essential to take time away from your music production routine to avoid burnout and refresh your perspective. Consider taking a vacation, spending time with friends or family, engaging in a hobby, or simply taking a few days off from work.

Changing up your routine can also help you stay motivated and inspired. Try working in a different environment, such as a coffee shop or a park. You can even experiment with new music production equipment or software to keep things fresh and exciting.

Overall, staying motivated as a music producer means exploring different sources of inspiration and taking breaks to recharge. By incorporating other art forms and changing up your routine, you’ll combat stagnation and create fresh, innovative music.

Maintaining A Work-life Balance

Maintaining a work-life balance is crucial for music producers to avoid burnout. Staying motivated can be achieved by setting clear boundaries between work and personal life, prioritizing self-care, and taking breaks to replenish creativity.

Maintaining a Work-Life Balance is essential for music producers who want to maintain motivation and avoid burnout. This balance is about allocating enough time to work on music production while keeping enough time to focus on personal life. It can be challenging to find a balance, especially when music production is a passion. Here are some tips on Creating Healthy Habits and Understanding the Importance of Personal Life that will help music producers maintain a Work-Life Balance.

Creating Healthy Habits

Creating healthy habits is crucial, not only for music production but for general wellbeing. It involves developing routines and sticking to them. Here are some tips on creating healthy habits:

  • Allocate specific hours for music production without distractions
  • Have a routine for breaks, meals, and exercise
  • Take your mental health seriously by meditating or engaging in other relaxation techniques
  • Get enough sleep to avoid burnout

Once you establish healthy habits, they become a part of your routine, making it easier to balance work and personal life.

Understanding The Importance Of Personal Life

It’s easy for music producers to get caught up in the music production process, leading to burnout and lack of motivation. Hence it’s essential to take time off and focus on personal life. Here are some ways to understand the importance of your personal life:

  1. Take a break and engage in other activities away from music production
  2. Spend quality time with family and friends
  3. Take time off to travel and explore new things
  4. Have a hobby outside music production to help clear your mind

It’s vital to have a work-life balance to stay motivated and maintain the energy required for music production. By creating healthy habits and understanding the importance of personal life, music producers can maintain motivation and achieve a better work-life balance.

How To Stay Motivated As A Music Producer

Credit: www.youtube.com

Celebrating Your Wins

Celebrate your wins as a music producer by acknowledging your achievements and using them to motivate yourself. Reflect on your progress and recognize your hard work to stay inspired and productive in your work.

As a music producer, it’s easy to get bogged down in the details of perfecting your craft and forget to acknowledge the milestones you’re hitting. Celebrating your wins can help you stay motivated and inspired to keep going. In this post, we’ll explore two ways to celebrate your wins: acknowledging progress and achievements, and rewarding yourself for accomplishments.

Acknowledging Progress And Achievements

It’s important to recognize and celebrate the small wins as well as the big ones. Taking note of your progress and achievements can help you avoid burnout and keep you motivated. Here are some ways to acknowledge your progress:

  • Create a progress journal and write down what you’ve accomplished each day or week.
  • Set small goals and celebrate when you achieve them.
  • Share your progress with a friend, family member, or mentor who can encourage you to keep going.

Rewarding Yourself For Accomplishments

Rewarding yourself for accomplishing your goals can be a powerful motivator. It’s important to choose rewards that are meaningful and aligned with your values. Here are some ideas for rewarding yourself:

RewardWhy it works
Buy a new piece of equipmentInvesting in your craft can help you feel more motivated and inspired.
Treat yourself to a concert or music festivalExperiencing live music can be a great source of inspiration.
Take a day off to rechargeRest and relaxation are essential for preventing burnout and staying motivated.

Remember, celebrating your wins is an important part of staying motivated as a music producer. By acknowledging your progress and achievements, and rewarding yourself for your hard work, you can stay inspired and focused on your goals.

Frequently Asked Questions For How To Stay Motivated As A Music Producer

How Do You Motivate A Music Producer?

Motivating a music producer can be done by giving them creative freedom, providing positive feedback, setting achievable goals, offering incentives, and giving them recognition for their work. Motivation can also come from a supportive and collaborative work environment.

How Do You Stay Motivated To Produce?

To stay motivated in producing content, it is essential to set clear goals, break tasks down into manageable chunks, and establish a consistent routine. Take breaks when needed, surround yourself with positive influences, and continually seek inspiration through research, listening, and reading.

By maintaining focus and discipline, motivation can be sustained, leading to consistent and high-quality content output.

How Do You Stay Motivated To Make Music?

To stay motivated to make music, set small and achievable goals, create a daily routine, experiment with different genres and techniques, collaborate with other musicians, and celebrate your successes. Remember to take breaks and stay passionate about your craft.

How Do Music Producers Get Inspiration?

Music producers get inspiration through various sources such as daily life, personal experiences, other artists, and nature. They also experiment with different sounds, instruments, and techniques. Some use meditation, visualization, or collaboration with other musicians. Inspiration can come from anywhere, and it often requires a willingness to be open to new ideas.

Conclusion

As a music producer, staying motivated can be a struggle, but it’s essential to push through the tough times to achieve greatness. By setting goals, practicing consistency, finding inspiration in others, and taking breaks when needed, you can maintain your drive and create your best work yet.

Keep in mind that everyone’s journey is different, and it’s okay to make mistakes. Embrace the process, stay focused, and never give up on your passion for music. You have what it takes to make your dreams a reality.

Categories
Archive

Timesavers To Streamline Your Music Production

Streamline your music production with these timesaving tips: utilize keyboard shortcuts, organize samples and presets, automate repetitive tasks, and plan ahead. In today’s music production industry, efficiency is key to staying ahead of the game.

By implementing these timesaving techniques, you can streamline your workflow, increase your productivity, and ultimately produce better quality music. Keyboard shortcuts can save precious seconds and prevent interrupting your creative flow, while organizing samples and presets can save time searching for the right sound.

Automating repetitive tasks like drum programming or vocal tuning can free up your time for more creative endeavors. Finally, planning ahead and setting goals can help you stay focused and on track throughout the production process. With these strategies at your disposal, you can take your music production game to the next level.

Batch Processing

As a music producer, time is precious, and finding ways to streamline your workflow will increase productivity and creativity. Batch Processing is a game-changer music production technique that can automate time-consuming tasks, saving you hours of work. Let’s dive in and explore how Batch Processing can level up your music production.

Mastering Multiple Tracks

Mastering multiple tracks is a monotonous task that can eat up your valuable time and diminish your creative energy. Batch Processing can help you streamline the mastering process by applying the same effect, settings, and plugins to multiple tracks all at once.

Suppose you have several vocal tracks that need EQ and compression. In that case, you can create a mastering chain and apply it to all the tracks using Batch Processing. This technique will save you an immense amount of time and effort, allowing you to focus on other creative aspects of your music production.

Converting File Formats

Converting audio files into different formats can be time-consuming, but Batch Processing can automate this laborious task for you.

With Batch Processing, you can convert multiple audio files to the same format with just a few clicks. For instance, suppose you have several audio files that need to be converted into WAV format for mastering. In that case, you can use Batch Processing to automate the conversion process.

Benefits of Batch Processing
Saves time and increases productivity.
Automates repetitive tasks, freeing up your creative energy.
Streamlines the music production process, enabling you to focus on other aspects of music production.

Conclusion

Batch Processing is a powerful technique that can save you a lot of time and effort in music production. Mastering multiple tracks and converting audio files into different formats is a breeze with Batch Processing. By automating these repetitive tasks, you can streamline your music production process and enhance your creativity.

Automated Templates

Automated templates are a handy shortcut for producers looking to save time in the music production process. By having a template set up, you can quickly start a new project with all your preferences already in place, including sounds, instruments, and effects. This can help streamline the production process and cut down on the time it takes to get from start to finish.

Customizable Channel Strips

Customizable channel strips are an essential feature of automated templates, allowing you to organize your tracks and set up your mixing preferences in advance. Channel strips can be customized with EQ, compression, and other effects, helping you achieve the perfect sound without needing to set everything up from scratch every time. By creating a set of custom channel strips, you can streamline your workflow and speed up the mixing process.

Project Setup

Project setup is another essential component of automated templates, allowing you to save your preferred settings for each project in advance. This includes things like tempo, time signature, meter, and input/output settings. By creating a project setup template that you can reuse for each new project, you can save time setting up each time, ensuring that everything is ready to go before you even start working on the music.

Overall, automated templates are a powerful tool for producers looking to streamline their workflow and save time during music production. By taking advantage of customizable channel strips, project setups, and other features, you can create a set of templates that can help you get from start to finish faster and more efficiently than ever before.

Midi Mapping

MIDI mapping is a powerful tool that can save a tremendous amount of time in the music production process. By assigning various functions and parameters to specific MIDI controllers, it becomes easier to manipulate and record music with precision and efficiency.

Does it feel like you’re spending too much time navigating software, searching for shortcuts, and clicking through endless menus? Streamlining your production process is key to staying productive and creative. One important time-saving technique is MIDI mapping.

Controller Assignments

Assigning MIDI controller functions to specific hardware knobs, sliders, and pads can save time and effort while working on a project. Implementing this technique means you can control your software more intuitively, without having to reach for your mouse or keyboard. For instance, you can assign the cutoff and resonance filters of your synthesizer to the same knob on your MIDI controller and adjust them both with a single movement.

Drum Programming

Drum programming can be tedious and time-consuming, but MIDI mapping can help you make it more efficient. Similar to controller assignments, drum machine pads can be mapped to specific MIDI keys, allowing you to play and record patterns without interruption. This way, you can spend less time programming drums and more time fine-tuning your arrangement. Don’t let your creative flow be interrupted! By utilizing MIDI mapping for controller assignments and drum programming, you can streamline your workflow and save time. Try incorporating these tips into your music production process and see how much more efficiently you can work.

Timesavers To Streamline Your Music Production

Credit: www.masteringthemix.com

Audio Analysis

Audio analysis tools can save a lot of time by automatically detecting key signatures, tempo, and other musical elements of a track. This allows music producers to streamline their production process and focus on their creative vision.

As a music producer, you understand the importance of audio analysis in ensuring the quality of your music. Audio analysis tools provide you with detailed information about your audio files, enabling you to identify the problem areas and make necessary adjustments. In this blog post, we’ll discuss two subheadings, Automatic Gain Staging and Frequency Spectrum Analysis, under Audio Analysis that could aid in streamlining your music production.

Automatic Gain Staging

Automatic Gain Staging is an essential tool for achieving a well-balanced mix without the addition of any unwanted distortion. It ensures each audio channel’s gain is set appropriately and at equal levels, eliminating inconsistencies between channels. This process enhances the overall sound quality of your recording and eliminates the need for manual leveling through time-consuming processes.

Frequency Spectrum Analysis

A Frequency Spectrum Analysis is the most crucial element of your music production process. It enables you to comprehend the various elements of your song, such as dynamics, frequency, and timbre, and make necessary adjustments that enhance the overall mix. By analyzing the frequency spectrum, you can identify any unpleasant tones or noises, adjust EQ settings, and improve your final mix’s overall sound quality. In conclusion, using audio analysis tools like Automatic Gain Staging and Frequency Spectrum Analysis, you can easily streamline your music production process, resulting in an excellent audio output in less time. By adopting these timesaving techniques, you can focus on the creative process, composing excellent music, and leave the technicalities to the tools.

Workflow Optimization

Discover efficient timesaving tips to streamline your music production workflow optimization. Enhance your creative process with software, automation, outsourcing, and organization techniques that reduce repetitive tasks, enhance quality and save valuable studio time.

As a music producer, it’s important to optimize and streamline your workflow to save time and make the music production process more efficient. Workflow optimization is the process of eliminating any unnecessary steps in your creative process, so you can focus more on your creative side. Here are two important ways to optimize your workflow:

Keyboard Shortcuts

Keyboard shortcuts can save you a lot of time when navigating and performing various functions in your Digital Audio Workstation (DAW). Rather than clicking on icons and menus, you can use shortcuts to quickly access frequently-used commands. These shortcuts can be customized to suit your preferences. Some essential shortcuts include:

FunctionShortcut
UndoCtrl+Z (Windows), Cmd+Z (Mac)
RedoCtrl+Shift+Z (Windows), Cmd+Shift+Z (Mac)
SaveCtrl+S (Windows), Cmd+S (Mac)
CopyCtrl+C (Windows), Cmd+C (Mac)
PasteCtrl+V (Windows), Cmd+V (Mac)

Macro Commands

Macro is a series of actions that you can record and playback repeatedly. This can be a powerful tool in your workflow optimization. Instead of performing the same actions multiple times, you can create a macro and playback it with a single click. For example, let’s say you’re producing a track that requires a lot of vocal processing. You can optimize your workflow by creating a macro that applies the same series of effects to all the vocal tracks in your project. This can save you a lot of time and effort in the long run. In conclusion, optimizing your workflow with Keyboard Shortcuts and Macro Commands is a great way to make your music production process more efficient. By avoiding unnecessary steps and automating repetitive tasks, you can focus on your creative side and produce better-quality music in less time.

Timesavers To Streamline Your Music Production

Credit: www.masteringthemix.com

Sample Libraries

Sample libraries are an essential tool for music producers as they help to streamline the production process. By providing pre-made sounds and samples, producers can save significant amounts of time and focus on other important aspects of creating music.

As a music producer, you know the importance of having a comprehensive sample library. Sample libraries can make or break your workflow, and with an extensive library, you can save time and produce high-quality music. A sample library is a collection of pre-recorded sounds and loops that you can use as building blocks for your music production. These come in handy when composing new music pieces, as you get a range of sounds at your disposal without having to record them from scratch.

Pre-built Loops

Pre-built loops can be a fantastic addition to your sample library. These are pre-recorded snippets of audio that come in a loop, allowing you to shape your entire music piece around that one loop. Pre-built loops save you time and let you get creative with your music production. You can mix and match different pre-built loops and craft a unique sound that resonates with your music style. Luckily, most sample libraries come with pre-built loops in various genres, including hip-hop, rock, pop, and electronic music.

One-shots And Sound Effects

One-shots and sound effects are sound recordings of individual sounds rather than a loop. These are an essential part of any sample library, as they let you add a layer of depth to your music production. You can use these sounds to create transitions, build-ups, and other elements of your music piece. One-shots come in various shapes and sizes, including drums, percussions, vocal shots, and FX. When building a comprehensive sample library, make sure to include a variety of one-shots and sound effects to cater to different music genres. In conclusion, sample libraries are an essential component of music production. Having an extensive sample library saves you time and allows you to focus more on creative aspects of music production rather than mundane tasks. Including pre-built loops, one-shots, and sound effects in your sample library can make your music more engaging and dynamic. So, take some time to build a comprehensive sample library, and see your music production workflow improve dramatically.

Online Collaboration

Streamline your music production with online collaboration tools that help to save time. With features like real-time editing, file sharing and communication, you can cut down on time-consuming emails and phone calls and focus on creating great music.

Cloud-based File Sharing

Collaboration can be challenging when team members are working in different locations, but with cloud-based file sharing, it’s possible to work together with ease. This method is particularly useful if you need to share large music files that would be too large to transfer via email. With cloud-based file sharing, you can store and share your music projects with other team members, who can then download the files they need directly onto their devices. This approach makes it easy to share files between team members regardless of location.

Virtual Studio Sessions

One of the most exciting benefits of online collaboration is the ability to have virtual studio sessions. With platforms like Zoom and Skype, team members can hold meetings and debates in real-time. This approach makes it easy to give and receive feedback, discuss progress, and make changes to ongoing projects. Additionally, it eliminates the need for physical meetings, saving you time and money.

Code Collaboration

Another excellent way to streamline music production through online collaboration is through code collaboration. Platforms like GitHub and GitLab are fantastic resources for code collaborations. Here, team members can create and modify code, which can be reviewed and merged by the team. Moreover, code collaboration streamlines the development process and speeds up problem-solving, making it an invaluable tool for streamlining music production.

Conclusion

In conclusion, online collaboration is a fantastic means to streamline music production. With cloud-based file sharing, virtual studio sessions, and code collaboration, team members can work together regardless of physical location. By adopting these timesaving tools, music production companies can easily achieve their goals while saving time and money. Collaborating online is the way of the future, and implementing these practices now will give you a competitive edge in the music production industry.

Plug-in Presets

HTML Syntax:

One of the biggest time-savers in music production is using plug-in presets. These are pre-set configurations of settings within a plug-in that allow you to quickly achieve a desired sound without spending time tweaking every parameter manually.

Eq And Compression Settings

EQ and compression are two of the most commonly used effects in music production. Using presets for these effects can save you a lot of time and help you achieve a professional sound without extensive knowledge of processing. Many DAWs come with a library of preset EQ and compression settings that cover a range of styles and genres. Alternatively, you can find third-party presets online that cater to specific genres or a particular sound you’re trying to achieve.

Reverb And Delay

Reverb and delay are time-based effects that add space and depth to your music. Just like with EQ and compression, plug-in presets can save a lot of time and help you achieve a desired sound quickly. Some reverbs and delays come with pre-set configurations that are based on real-life spaces or classic effects, while others offer presets that are tailored to specific genres like rock, pop, or hip-hop.

If you’re looking to save time and streamline your music production process, using plug-in presets for EQ, compression, reverb, and delay is a great place to start. Not only will it save you time, but it will also help you get better results faster.

Timesavers To Streamline Your Music Production

Credit: www.masteringthemix.com

Frequently Asked Questions For Timesavers To Streamline Your Music Production

How Do You Streamline Music Production?

Streamlining music production involves organizing your workflow, optimizing your tools and equipment, keeping everything centralized, collaborating efficiently, and avoiding distractions. This can help to eliminate unnecessary steps and minimize downtime, allowing you to produce more music in less time with better quality.

What Program Do Most Music Producers Use?

The most popular music production software is Ableton Live, followed by Logic Pro and FL Studio. Others include Pro Tools, Cubase, and GarageBand.

What Is The Best Software To Create Music?

There is no single “best” music creation software, as each program has its own strengths and weaknesses. Popular options include Ableton Live, Logic Pro, FL Studio, and Pro Tools. It ultimately depends on the user’s personal preferences, skill level, and the specific type of music they intend to create.

What Music Making Software Do Artists Use?

Artists use a variety of music-making software depending on their needs, preferences, and budget. Some popular options include Ableton Live, Logic Pro, FL Studio, Pro Tools, Cubase, and GarageBand. These programs allow artists to create and edit music using a range of tools, from virtual instruments to audio effects.

Conclusion

To sum up, time management is an integral part of successful music production. These timesavers mentioned above can help you streamline your workflow and elevate your music production game. Whether you’re a professional or just starting, incorporating these tips can save you time and frustration.

By adopting a systematic approach to your work, you can focus on making great music without any distractions. Remember, time is invaluable, and managing it well will help you reach your goals. Happy music-making!

Categories
Archive

Recording In Long Takes Vs Short Takes

Recording in long takes is when a musician plays a song from beginning to end without any pauses or interruptions, while short takes are when they record the song in sections. Long takes capture the true feel of the performance, but short takes provide more flexibility during the editing process.

Recording music is not simply about capturing notes played in tune or in rhythm. The music industry demands perfection, and capturing the perfect performance requires the right recording technique. Musicians can choose between recording in long takes or short takes.

Long takes are a more traditional method where the entire song is recorded in one go without any interruptions or pauses. Alternatively, short takes break the song into several parts recording each section separately. This article seeks to elaborate more on both approaches and why musicians prefer one over the other.

Benefits Of Recording In Long Takes

Long takes and short takes have always been a hot topic of debate in the world of recording. While short takes are perfect for fixing mistakes and polishing performances, long takes are often preferred by recording artists and producers for many reasons. In this article, we will discuss the benefits of recording in long takes and why it might be a better choice for your next recording session.

Reduces Time And Cost

One of the most significant benefits of recording in long takes is that it can reduce the time and cost of your recording session. Instead of recording multiple takes of the same section, a long take can capture the entire performance, eliminating unnecessary retakes and allowing you to move on to the next section much faster. This ultimately reduces the number of recording hours and saves you money in the long run.

Creates A Natural And Organic Flow

Recording in long takes creates a natural and organic flow that is not always possible with short takes. Short takes can sound disjointed and pieced together, whereas long takes capture the sentiment and emotion of the performance in one go. Recording artists can keep the momentum going without disrupting the flow of the performance.

Allows For Better Focus And Performance

When recording in long takes, artists can better focus on their performance and deliver a more authentic and genuine performance. It allows them to get into the rhythm and flow of the song, creating more natural and emotive performances. The more comfortable the artists are, the better the final performance will be.

Drawbacks Of Recording In Long Takes

Recording in long takes may seem like a good option, but it comes with some drawbacks. It can be challenging to maintain consistency and keep the audience engaged throughout the entire take. Additionally, editing can become time-consuming and difficult.

Recording in long takes can be beneficial for certain types of content, but it also has some drawbacks to consider. Here are some of the main drawbacks to keep in mind.

Increased Risk Of Mistakes

Long takes can be challenging to execute perfectly, which means there is an increased risk of mistakes. This is especially true for longer recordings, where fatigue can set in or distractions can arise. Even experienced performers or speakers may struggle to maintain their focus over long periods of time.

More Challenging Editing Process

Editing long recordings can be a daunting task, even for experienced editors. With long recordings, there is often far more material to sift through, which can make the editing process more time-consuming. It can also be difficult to identify the best takes or the most engaging moments in a long recording. One way to minimize these challenges is to break up long recordings into smaller, more manageable sections. This can make it easier to focus on specific portions of the material and help ensure that mistakes or distractions don’t derail the entire recording session. Ultimately, whether to record in long takes or short takes depends on the specific needs of the project and the preferences of the creative team. By weighing the pros and cons of each approach, it’s possible to make an informed decision about which recording style is best for your content.

Benefits Of Recording In Short Takes

Recording in short takes provides several benefits compared to long takes. It allows for easier editing and saves time in post-production. Additionally, it also allows for more natural and authentic performances from actors or musicians, enabling them to make mistakes without having to redo the entire recording.

When it comes to recording audio, there are two main approaches – recording in long takes and recording in short takes. Although long takes may seem like the easier option, recording in short takes has numerous benefits. In this blog post, we will focus on the benefits of recording in short takes and why it may be the better option for certain projects.

Easier Editing Process

One of the biggest benefits of recording in short takes is that it makes the editing process easier. When editing a long take, it can be difficult to find the right parts to cut or splice together. However, with short takes, you can easily see where each section begins and ends, making it simpler to piece together the final product. This method also saves time and ensures that you do not waste any recorded material.

More Control Over The Final Product

Another advantage of recording in short takes is that it provides more control over the final product. In long takes, the speaker may make mistakes or stumble over their words, which can be difficult to fix in editing. However, with short takes, the speaker can redo any errors or retake any sections that did not sound quite right. This ensures that the final product is of high quality and meets the required standards.

Better Option For Technical Projects

Recording in short takes is also a better option for technical projects. For example, if you are recording a podcast or a tutorial, short takes allow you to segment each part, making it easier for listeners to follow along. Additionally, when recording technical content, it is important to ensure that the audio is clear and easy to understand. Short takes allow you to re-record particular sections that may have unclear audio or background noise. In conclusion, recording in short takes has numerous benefits, from making the editing process easier to providing more control over the final product. It is a better option for technical projects and ensures that the final product is of high quality. Therefore, it is important to consider your project’s requirements before deciding whether to record in long takes or short takes.

Drawbacks Of Recording In Short Takes

Recording audio content requires a lot of hard work and dedication to produce a high-quality final product. Choosing between long takes and short takes is one of the crucial decisions that content creators have to make. Short takes come with their own sets of drawbacks and require careful consideration before opting for them. Below are some of the drawbacks that content creators should be aware of:

May Result In A Choppy Or Stilted Sound

Recording in short takes can lead to a choppy or stilted sound in the final product. This is because the pauses between the takes may sound unnatural, and it may not flow seamlessly. This can distract the listeners from the content and lead to a poor listening experience. Longer takes allow the speakers to get into the flow, and the listeners can enjoy a smooth, uninterrupted experience.

Takes Longer Time And Cost More

Recording in short takes can be time-consuming and increase the cost of the project. This is because, with short takes, there is a need for more editing time, which can cause delays in the production process. Additionally, recording in short takes can also lead to higher post-production costs, which can be a significant factor, especially if you are working with a strict budget. Therefore, content creators should carefully consider the costs and the time involved before choosing to record in short takes.

Comparison: Recording in Long Takes vs Short Takes
Long TakesShort Takes
QualityHigh, SeamlessMay sound choppy or stilted
EfficiencyEfficient, less editing timeTime-consuming, more editing time needed
CostCost-effective, less post-production costsMore expensive, higher post-production costs

While recording in short takes may seem like an efficient way of producing audio content, it’s essential to weigh the pros and cons, as highlighted above. Content creators should choose a recording method that offers high-quality content within the set timelines and budgets. In case of doubts or difficulties, it’s advisable to seek guidance from experienced audio professionals to ensure a great end product.

When To Use Long Or Short Takes

Long or short takes – that is the question. Recording in long takes vs short takes can make a big difference in the outcome of your project. Understanding which to use in different situations can help you achieve your desired result. Below are some guidelines for when to use long or short takes.

For Live Performances

During a live performance, it’s best to use long takes to capture the energy and atmosphere of the event. This way, you can convey the emotion and excitement of the moment to your audience. It also allows for a more natural flow, without the need for editing and cutting. Long takes can help create a sense of continuity, providing a more authentic experience for your listeners.

For Creative Or Emotional Moments

When recording creative or emotional moments, long takes are often the best choice. These moments can’t be planned or rehearsed, so recording in long takes allows you to capture the spontaneous and authentic expressions of the performers. It provides a sense of magic to the moment, allowing the audience to experience the emotion in a more profound way.

For Dialogue-heavy Scenes

Dialogue-heavy scenes require a different approach. Short takes are ideal in this situation, as they allow greater control over performances, delivery, and timing. With shorter takes, you can better control the pacing of the scene, ensuring that important moments are captured precisely. It also allows for easier editing and post-production work.

For Technical Projects

For technical projects, using short takes is often the best option. It provides greater control over the recording process, improving the overall quality of the final product. It also makes it easier to pinpoint errors or mistakes, allowing for quick corrections. Short takes offer the flexibility to edit and fine-tune your work, making sure it meets the highest standards.

Recording In Long Takes Vs Short Takes

Credit: www.mixinglessons.com

Recording Tips Regardless Of Long Or Short Takes

Regardless of whether you are recording in long takes or short takes, there are several things to keep in mind when you’re working with performers in the recording studio. Communication, equipment setup, and technical readiness are all crucial elements of the recording process that can help ensure a successful recording session.

Communicate With The Performer

It’s important to maintain clear communication with the performer throughout the recording process. This includes discussing the intended tone and style of the recording, as well as any specific notes or feedback you might have as the session progresses. Performing in front of a microphone can be an intimidating experience, so it’s important to create a relaxed and supportive environment where the performer feels comfortable.

Set Up Proper Equipment And Environment

Before starting the recording session, make sure that the equipment and environment are optimized for the best possible sound quality. This includes ensuring that the microphone is positioned correctly, checking that all cables are working properly, and troubleshooting any other technical issues that can compromise recording quality. Additionally, be sure to adjust the studio environment to minimize any background noise that may interfere with the recording process.

Be Prepared For Technical Difficulties

Technical difficulties can arise at any time during the recording process, so it’s important to be prepared for any eventuality. This can mean having backup equipment on hand in case something breaks down, or troubleshooting common technical issues that may arise, such as feedback or signal distortion. In addition, having a backup plan in place in case of a power outage or other unexpected event can help prevent any significant downtime during a recording session.

Conclusion: Finding The Right Approach For Your Project

Opting for long takes or short takes during recording depends on the specific project’s requirements and goals. Experimenting with both approaches and determining which one works best for your project is key to achieving high-quality audio recordings.

Recording in long takes versus short takes both have their advantages and disadvantages. However, deciding which approach is right for your project depends on various factors ranging from your goals and priorities to the capabilities of your performers and equipment.

Consider Your Goals And Priorities

When deciding whether to use long takes or short takes, it’s essential to consider the goals and priorities of your project. If you want to capture a live performance as naturally as possible, a long take approach could be your best bet. On the other hand, if you’re creating a commercial or a music video that requires perfection, short takes could be more effective. If your goal is to capture raw emotions and performances, long takes would be an ideal choice. Long takes with minimum cuts help in retaining the flow and energy of the performances. It allows the cast to understand the character’s emotions and enhances their improvisational skills. However, if your priority is the precise portrayal of a particular scene, short takes offer more flexibility and control, reducing the risk of errors. It allows more profound insights, establishes continuity in quality, and provides complete control over the editing.

Gauge The Capabilities Of Performers And Equipment

Another important factor to consider is the capabilities of the performers and equipment. If the performers can maintain consistent energy and intensity throughout a long take, and if the equipment can handle the length of the take, long takes can provide a more immersive and cohesive final product. However, if the performers lack the stamina to maintain proper energy levels or the equipment is not capable of handling long takes, short takes may be the best option. Short takes, with a few shots incorporating multiple angles of the same scene, aid in removing any discrepancies. Multiple takes of the same shot give the performers more option and ease in terms of style and acting. It also helps in adjusting the lighting, sound, and camera angles, making sure that the cinematography is flawless. In conclusion, both long takes and short takes have their strengths and weaknesses, making them well-suited to specific projects. When deciding which approach to use, consider your goals and priorities and determine the capabilities of your performers and equipment. Choosing the right approach can make all the difference in achieving your project’s desired outcome.

Frequently Asked Questions On Recording In Long Takes Vs Short Takes

What Is The Difference Between Recording In Long Takes Vs Short Takes?

Long takes involve recording for an extended period, while short takes involve recording for brief periods. Long takes capture the performer’s entire performance, while short takes enable more controlled recording and editing.

Which Method Of Recording Is Better? Long Takes Or Short Takes?

Both methods have their merits; hence it depends on the desired outcome. Long takes are ideal for capturing live performances or gaining raw recordings. Short takes are great when control and precision are necessary, like when recording individuals or specific sections of a song.

Is It Easier To Edit Long Takes Or Short Takes?

Short takes are easier to edit because it enables precision editing of segments at a granular level. Long takes offer less control over cuts or overdubs. However, with modern editing tools, editing long takes has become easier and more accurate than before.

What Are The Advantages Of Recording In Long Takes?

Long takes capture the essence of live performances, giving the recording authenticity and emotion that can be lost in short takes. Long takes also provide raw and unfiltered audio, ideal for capturing experimental performances.

Conclusion

To sum it up, both long takes and short takes have their pros and cons when it comes to recording. Long takes can capture an entire performance while short takes offer more flexibility in editing. However, choosing between the two ultimately depends on the project, the goals, and the preferences.

The key is to always stay focused on the message and the story of the content and choose the approach that best supports it. By taking the time to consider the benefits and drawbacks of each method, you can make informed decisions that lead to more effective and engaging content.

Categories
Archive

How To Prepare Files For A Mixing Engineer

To prepare files for a mixing engineer, consolidate all tracks into a single folder and label them clearly according to their instrument, type, and version. When it comes to producing music, the work does not end after recording and editing.

To give the mixes a professional polish, they need to be handed over to a mixing engineer with the proper files that can be easily understood and worked with. To prepare these files, consolidation is key. Instead of having scattered files all over the computer, make a folder with the session’s name and place all tracks inside.

Further, be sure to rename the tracks according to their instrument, type, and version to avoid any confusion. Doing this ensures that the mixing engineer can quickly locate the relevant tracks and understand the type of processing needed, ultimately leading to better mixes.

File Preparation Basics

File Preparation Basics: An essential aspect to achieve the desired outcome of a professional mix is the preparation of files to be handed over to a mixing engineer. Preparing files effectively not only saves time and money, but it also ensures that the mix engineer can work efficiently. In this article, we will talk about the file preparation basics for handing over files to a mixing engineer, emphasizing file formats, delivery requirements, naming conventions, and organization.

File Formats And Delivery Requirements:

Submitting files in the right format enables the mix engineer to open the files and work on them without any issues. It’s essential to make sure that the engineer is set up to open the file formats that you submit. Here are some commonly accepted file formats:

File FormatExtension
WAV (Waveform Audio File Format).wav
AIFF (Audio Interchange File Format).aif
MP3 (MPEG-1 Audio Layer 3).mp3

Before delivering the files, make sure they are organized correctly, and the file delivery method is acceptable to the mix engineer. Some mix engineers may want you to send files through cloud storage like Dropbox, while others may prefer email.

Naming Conventions And Organization:

Naming conventions play a crucial role in making sure that the mixing engineer has an easy time navigating through the files. Proper naming conventions lead to fast loading times, faster revisions, and can save time and money. Below are some tips for naming conventions:

  • Name files descriptively: Be specific when naming files, so a mix engineer can quickly identify what the file contains.
  • Include track numbers: If multiple tracks are to be mixed, name the files in a way that identifies their placement in the order they need to be mixed.
  • Avoid using special characters: The mix engineer’s computer system may not recognize special characters, so it’s always better to avoid them when naming files.

When it comes to organizing files, make sure the tracks are organized in such a way that the mix engineer can easily identify the order in which they should be mixed. Keep all stems and individual audio files in separate folders, so the mix engineer knows what to work with and can find them easily.

How To Prepare Files For A Mixing Engineer

Credit: mixandmastermysong.com

Preparing Individual Tracks

Preparing individual tracks for a mixing engineer is crucial in achieving professional-sounding mixes. This involves properly labeling and organizing files, ensuring they are in the correct format, and having consistent volume levels and panning.

Preparing Individual Tracks is an essential process before sending your files to a Mixing Engineer. It allows the Engineer to work effectively with each component of your song, ensuring a polished and professional-sounding mix. In this section, we will discuss the different elements of Preparing Individual Tracks, focusing on Correcting Phase and Timing Issues, Using EQ and Compression, and Preparing Vocals and Other Dynamic Tracks. Correcting Phase and Timing Issues Phase and Timing issues can affect the overall quality of your mix. These issues can cause sounds to cancel each other out or create unwanted delays. Correcting them is crucial for a polished sound. To fix Phase issues, you can use a polarity switch to flip the phase of one of the tracks. Timing can be adjusted by cutting and moving the track to align with the beat. Keep in mind that correcting Phase and Timing issues can have a significant impact on the sound of your mix. Using EQ and Compression EQ and Compression are essential tools for achieving balance and clarity in your mix. EQ helps to bring out the best in each sound by adjusting its frequency levels. Compression helps to even out the volume of each track, creating a cohesive and balanced sound. Apply EQ and Compression to each track separately to ensure clarity and balance. Use these tools sparingly and with intention as they can easily be overused. Preparing Vocals and Other Dynamic Tracks Vocals and other dynamic tracks like bass and drums require special attention when preparing for mixing. Ensure that all background noise is removed before sending the tracks. Use a De-Esser to tame sibilance in vocals, and apply Compression to even out the dynamic range. For vocals, create a separate track for each harmony to give the Engineer more control over the levels. For drums and bass, ensure that each element is separated into individual tracks for more precise mixing. By focusing on Correcting Phase and Timing Issues, Using EQ and Compression, and Preparing Vocals and Other Dynamic Tracks, you will be well on your way to preparing individual tracks effectively for a mixing engineer to give you the best results.

Preparing Stereo Tracks

Prepare stereo tracks for a mixing engineer by organizing and labeling files correctly. Properly export audio files with stems, pan positions, and volume levels. Provide notes for any specific production techniques or desired effects.

When sending files to a mixing engineer, it’s crucial to ensure that they are properly prepared to avoid delays and unnecessary back-and-forth. One important aspect of preparing files is stereo tracks. Here’s what you need to know:

Preparing Stereo Masters For Mastering

If you’re sending your tracks to a mastering engineer, it’s important to prepare your stereo masters carefully to get the best results. Here are some important things to keep in mind:

  • Ensure that your stereo tracks are properly balanced and mix-ready before sending them for mastering.
  • Don’t apply any final limiting or compression to your stereo tracks, as this is usually done during the mastering process.
  • Provide your mastering engineer with the highest quality file you have, preferably a 24-bit WAV or AIFF file with a sample rate of at least 44.1kHz.

Creating Submixes For Complex Sessions

For larger projects with many tracks, creating submixes can help to keep things organized and make the mixing process smoother. Here are some tips for creating submixes:

  1. Group together similar tracks, such as all the drum tracks or all the backing vocals, and route them to a separate stereo bus.
  2. Ensure that the levels of each track in the submix are balanced relative to each other.
  3. Apply any necessary processing, such as EQ or compression, to the submix rather than each individual track. This can help to save time and CPU power.
  4. Label each submix clearly and export them as separate stereo files to send to your mixing engineer.

In conclusion, preparing stereo tracks properly is an important step in getting the best results from your mixing engineer or mastering engineer. By following these tips and guidelines, you can help to ensure a smooth and efficient process.

How To Prepare Files For A Mixing Engineer

Credit: www.thebeachhousestudios.com

Preparing For Session Compatibility

Preparing files for a mixing engineer is crucial to ensure session compatibility. This entails organizing files into separate folders, labeling tracks, and providing reference tracks, among other things. Proper preparation streamlines the mixing process and ensures that the final product meets the artist’s expectations.

Consistency And Compatibility Across Sessions

Before sending your files to your mixing engineer, it’s essential to ensure that every file is named and labeled correctly. Doing this guarantees consistency across all sessions, making it easier for your mixing engineer to navigate the files. To ensure file consistency, you can rename each file by adding the artist’s name, the song title, version, and date. Also, labeling each track with the appropriate name and number is crucial to help your mixing engineer find the right tracks quickly. Additionally, it’s important to make sure that all files are compatible with your mixing engineer’s software. Check their specifications and guidelines for the correct format, bit depth, and sample rate. This step is necessary to prevent any unforeseen complications that could delay the mixing process.

Tips For Preparing Files For Remote Sessions

When preparing files to send to a mixing engineer for remote sessions, there are a few things to consider. First, you must test your internet connection to make sure it’s fast and reliable. You don’t want to be in the middle of a remote session, and your internet connection fails. Secondly, it’s essential to ensure that your files are in the correct format. Most mixing engineers prefer to work with .wav or .aiff files. These types of audio files offer better sound quality, making it easier for the mixing engineer to make adjustments during the mixing process. Lastly, it’s crucial to communicate effectively with your mixing engineer before the remote session. Discuss the details of your session, such as timing, expectations, and payment. Having a clear understanding of the process can help you avoid any confusion and ensure a successful remote session. In conclusion, preparing your files for a mixing engineer is an important step in achieving a successful mixing process. Ensuring consistency and compatibility across all sessions and preparing files correctly for remote sessions can save time and money while allowing for a smooth and efficient mixing process.

Finalizing File Preparation

Preparing files for a mixing engineer requires attention to detail and organization, and it’s important to get it right before passing on your work to the mixing engineer. In this section, we’ll discuss how to double-check for mistakes and omissions as well as exporting and delivering final files to the mixing engineer.

Double-checking For Mistakes And Omissions

Before exporting the final files, it’s critical to check for any mistakes or omissions. Here are some things to consider:

  • Ensure all tracks are consolidated and ready for mixing
  • Check all track names and labels for accuracy
  • Verify all audio files are in the correct format and sample rate
  • Check for any unwanted noise, clicks or pops
  • Ensure all edits are complete and that nothing has been left out

Exporting And Delivering Final Files

Once you’ve double-checked your work, it’s time to export and deliver the final files to the mixing engineer. Here’s what you need to consider:

  1. Export all audio files in the format and sample rate specified by the mixing engineer
  2. Label all files clearly, including the track name and number
  3. Include a rough mix reference track for the mixing engineer to use as a guide
  4. Provide clear instructions for any specific effects or processing that you used in your mix
  5. Deliver files through a secure and reliable service or platform, such as Dropbox or WeTransfer

By following these double-checking and exporting steps, you’ll provide the mixing engineer with everything they need to create a polished and professional mix.

How To Prepare Files For A Mixing Engineer

Credit: m.youtube.com

Frequently Asked Questions Of How To Prepare Files For A Mixing Engineer

How Do I Prepare Files For Mixing?

To prepare files for mixing, you need to ensure they are properly labeled, organized, and in the correct format. Label each track with its name and number, and ensure that all tracks are consolidated. Remove any unwanted noise or dead space from the tracks and ensure they are all at the same volume level.

Finally, export the files at the correct format and resolution.

How Do You Prepare Tracks For Mixing?

To prepare tracks for mixing, start by organizing all the audio files into folders. Next, analyze each track to detect any issues such as phase problems, noise, or clipping. Use EQ, compression, and effects to refine the individual tracks. Finally, export and consolidate all the audio files into a single session for mixing.

What Do You Send To A Mixing Engineer?

When sending your music to a mixing engineer, it’s important to include all audio tracks, rough mixes, and any specific instructions or notes. Make sure to prepare the files for delivery and use a reliable file-sharing platform or cloud storage service to transfer them securely.

Additionally, it’s recommended to communicate with the engineer beforehand to discuss project details and ensure expectations are clear.

How Do I Prepare A File For Mastering?

Prepare a file for mastering by following these 5 guidelines: keep sentences brief, use SEO friendly and plagiarism-free writing, avoid certain words and phrases and passive voice, write like a human to pass AI detection, and keep the answer under 50 words.

Conclusion

If you’re looking for a perfectly mixed track, then it’s important to prepare your files for a mixing engineer properly. By following the guidelines mentioned in this post, you can ensure that your audio files are ready for mixing and can help the engineer to do their job efficiently.

Remember to provide detailed information about your requirements, keep a backup of all the files, and make sure to label everything correctly. By following these tips, you can help create a masterpiece that everyone will love to hear. Get ready to produce some mind-blowing music!

Categories
Archive

Why You Should Use Drum Machines In Dance Music

Drum machines enhance dance music production by providing precise rhythmic patterns and intricate soundscapes which are difficult to produce manually. Drum machines have been an integral part of dance music since the genre’s inception.

These versatile instruments enable producers to create complex and intricate beat patterns, allowing for a more refined and cohesive sound. Not only do they provide precision, but they also offer endless customizability, giving producers the ability to tweak and experiment until they achieve their desired result.

Additionally, drum machines offer cost-effective solutions for musicians who may not have access to studios or live drummers. Whether you’re a seasoned producer or just starting in dance music production, incorporating a drum machine in your workflow will undoubtedly help elevate your music to the next level.

Versatility Of Drum Machines

Drum machines are highly versatile tools that can enhance any dance music production. Incorporating them offers limitless creative possibilities, with the ability to manipulate and layer sound sequences to construct diverse rhythms and grooves. With a drum machine, producers have full control over the timing, drum hit selection, and overall sound design, resulting in unique and innovative dance music tracks.

Drum machines have been an integral part of dance music production for several decades. The versatility and flexibility of drum machines make it a favorite among producers and musicians alike. With the advancement of technology, drum machines have come a long way to offer unique and innovative drum sounds and patterns, making them an incredibly useful tool in dance music production.

Ability To Create Various Drum Patterns

Drum machines provide endless possibilities in creating drum patterns, which is why they are an essential tool in dance music production. They allow you to experiment with different beats and rhythms, enabling you to create unique and interesting percussion patterns. With each pattern being programmable, you have complete control over the timing and feel of each beat, giving you the ability to produce tracks with various tempos and groove.

Access To Different Drum Sounds

One of the most significant advantages of using drum machines is the vast variety of drum sounds available. With a single drum machine, you can access a wide range of sounds that are not possible with traditional drum kits. You can combine different samples to create your unique drum kit, which can be used across different productions, giving you a signature sound.

Programming Drum Machines

Programmability is the primary feature of drum machines that sets them apart from traditional drum kits. With a drum machine, you have the ability to program intricate and complex drum patterns with pin-point timing. By layering multiple drum sounds, you can create rich and dynamic drum patterns that elevate your tracks. In conclusion, there are many reasons why you should use drum machines in dance music production. Their versatility, flexibility, and programmable nature make them an essential tool for any producer or musician. By using a drum machine, you can unleash your creativity and produce tracks with unique and interesting drum patterns and sounds.

Why You Should Use Drum Machines In Dance Music

Credit: aeon.co

Creative Control

Drum machines in dance music offer creative control to producers and musicians alike. With a wide range of sounds and rhythms, drum machines enable unique and versatile composition.

Designing Custom Beats For Unique Sounds

Drum machines are essential tools for creating unique beats in dance music. They offer creative control by giving musicians the ability to design custom beats that are tailored to their unique sound. With the help of a drum machine, it is possible to create beats that are both complex and unique, which can help to set your music apart from the rest.

Additionally, designing custom beats is a great way to experiment with different sounds and rhythms, which can help to inspire new creative ideas.

Ability To Manipulate Drum Sounds To Match Musical Themes

Another advantage of using a drum machine in dance music is the ability to manipulate drum sounds to match musical themes. With a range of different sound options available, it is possible to create beats that are perfectly suited to the style and mood of the music that you are creating.

This can be particularly useful when producing music for a specific event or purpose, such as a club night or a festival performance. By creating custom beats that match the theme of the event, you can help to create a more immersive and engaging experience for your audience.

In Conclusion

In conclusion, there are many benefits to using a drum machine in dance music. From enhancing your creative control to manipulating drum sounds to match musical themes, these tools offer musicians a range of possibilities to create unique, memorable beats.

Cost Effectiveness

Drum machines can be a cost-effective solution for creating dance music as they eliminate the need for live drummers and expensive recording equipment. With a wide range of built-in sounds and customizable options, drum machines allow musicians to create unique and professional-quality tracks without breaking the bank.

Lower Cost Compared To Hiring A Drummer

Drum machines have become popular in the music industry, especially in dance music production. One of the key benefits of using drum machines is their cost-effectiveness. Compared to hiring a live drummer, drum machines cost a fraction of the price. To get a clear picture of the cost difference, let’s compare the price of hiring a drummer for a recording session versus purchasing a drum machine. On average, a session drummer can charge anywhere from $100 to $300 per hour, depending on their experience and location. If you book a studio session for eight hours, the cost of hiring a drummer can easily exceed $2,000. On the other hand, the cost of purchasing a drum machine varies depending on the model and manufacturer. Entry-level drum machines can cost as little as $200, while high-end models can cost more than $1,000. However, once purchased, they can be used repeatedly for future projects, making them a cost-effective investment for producers and artists alike.

Eliminating The Need For A Large Drum Set

Another cost-saving benefit of using drum machines in dance music is that they eliminate the need for a large drum set. Traditional drum sets can take up a significant amount of studio space and require additional microphones, stands, and other equipment, which can drive up the cost of recording. Drum machines, on the other hand, are compact and easy to transport, making them ideal for producing music on the go. They also allow producers and DJs to create complex beats and rhythms without the need for additional equipment or space. Plus, since they are electronic, drum machines can produce a wide range of sounds and effects, giving producers the freedom to create unique and customized beats. In conclusion, while hiring a live drummer has its benefits, utilizing a drum machine can prove to be a more cost-effective and practical solution for many dance music producers. Not only do they save studio space and expensive equipment costs, but they also provide endless possibilities for creating unique and complex beats.

Ease Of Use And Convenience

When it comes to dance music production, having the right tools and equipment is crucial. One popular tool that has become a staple in the industry is the drum machine. Drum machines not only provide endless creative possibilities for producers, but they also offer ease of use and convenience that can save time and effort in the studio.

Integration Into Digital Audio Workstation (daw)

Drum machines can be easily integrated into a digital audio workstation (DAW) which allows for seamless integration into your production workflow. This means you can quickly switch between your DAW and the drum machine without any hassle, saving time in the process.

Benefits of Integration into DAW
Easily sync your tempo and song position with your DAW
Record your beats directly into your DAW without any extra steps
Instantly edit or change your drum patterns within your DAW

Ability To Play Different Drum Beats With The Push Of A Button

With a drum machine, you have the ability to create and play different drum beats with the push of a button. This convenience is especially useful in live performances where quick transitions between different beats are necessary. Also, since drum machines are standalone devices, they don’t require a computer or other equipment to operate, making them ideal for on the go productions.

  • Create and save presets for future use
  • Improvise on the fly with different drum patterns
  • Intuitively layer beats to create unique sounds

In Conclusion

Drum machines are an essential tool for any dance music producer. With its ease of use and convenience, producers can quickly create and execute different drum patterns with the push of a button. Moreover, with its seamless integration with digital audio workstations (DAWs), drum machines are perfect for studio and on-stage performances.

Futuristic Sound

Dance music has evolved significantly over the years, and so have the instruments that artists use to produce creative beats. One such innovation that has transformed the music industry in recent times is the drum machine. With the introduction of this state-of-the-art equipment, musicians could create futuristic sounds that do not exist in traditional drum sets. They can now experiment with diverse electronic sounds and beats, setting the tone for new music genres. In this article, we will focus on the incorporation of advanced technology in drum machines to produce futuristic sound.

Advancements In Drum Machine Technology

Over the years, drum machines have undergone a significant transformation in their production techniques, sounds, and capabilities. Recent advancements in technology have enabled the development of more compact and portable instruments, with improved sound quality and functionality. Today’s drum machines can produce sounds that are very close to the real drums but with several added features. Drum machines often come with programmable tempo, pitch, and tone controls, allowing artists to have complete control over the sound production process. They also offer a wide variety of beats and sounds, making them very versatile instruments that can be used in various genres of music, including dance music.

Incorporation Of Artificial Intelligence In Drum Machine Music Production

Recent advancements in technology have led to the integration of artificial intelligence (AI) in the production of drum machines. This incorporation of AI allows musicians to produce new and exciting sounds that were previously impossible. The AI technology used in drum machines allows them to learn the behavior and patterns of the musician and create beats that match the individual’s playing style. Musicians can now enjoy a more personalized experience when creating music, and AI-controlled drum machines can help them produce music more efficiently than ever before. This technology also allows for creative improvisation, enabling artists to generate unique and innovative sounds that make their beats stand out from the competition.

In conclusion, if you are a producer or musician looking to create innovative and futuristic sounds, drum machines are the way to go. With advancements in technology and the integration of AI, these instruments provide unmatched versatility, control, and a personalized experience that takes your music production to the next level.

Why You Should Use Drum Machines In Dance Music

Credit: m.youtube.com

Prominent Drum Machines In Dance Music

One of the key instruments that have helped to shape the sound of dance music is the drum machine. These devices have enabled producers to create intricate and complex beats with a level of precision that would have been impossible to achieve with traditional drum kits. In this post, we’ll explore the history and impact of some of the most iconic drum machine models used in dance music, as well as look at some popular dance tracks that incorporated drum machines.

History And Impact Of Iconic Drum Machine Models

In the early days of electronic music, drum machines were often used as a replacement for live drummers. The first commercially successful drum machine was the Rhythm Ace, which was produced by the Japanese company Ace Tone in the late 1960s. However, it wasn’t until the introduction of the Roland TR-808 in the early 1980s that drum machines really started to come into their own.

The Roland TR-808 was designed as a tool for recording studios and was originally a commercial failure. But it soon found a second life in underground dance music, where it became a crucial ingredient in the sound of genres like electro, hip hop, and house music. Its distinctive sound, which was characterized by its deep, booming bass and sharp, snappy snares, has become iconic and is now instantly recognizable to music fans around the world.

Other notable drum machines that have had a big impact on the sound of dance music include the Roland TR-909, which was released in 1983 and is still widely used today, as well as the LinnDrum and the Akai MPC series.

Examples Of Popular Dance Tracks That Incorporated Drum Machines

  • Daft Punk – ‘One More Time’: This classic track from the French duo features the 909 kick drum prominently, which gives the song its infectious groove.
  • New Order – ‘Blue Monday’: Widely considered to be one of the best dance tracks ever made, this iconic song features the distinctive sound of the Roland TR-808.
  • Inner City – ‘Good Life’: This track from 1988 features a driving beat that was created using the Roland TR-909, which gives the song its energetic vibe.

These are just a few examples of the many dance tracks that have been made using drum machines. Their versatility, precision and unique sound have made them a favorite tool among producers in dance music, and it’s hard to imagine the genre without them.

Why You Should Use Drum Machines In Dance Music

Credit: www.sweetwater.com

Frequently Asked Questions On Why You Should Use Drum Machines In Dance Music

What Are The Advantages Of Drum Machines?

Drum machines have several advantages. They are easy to use, affordable, portable, and can produce high-quality sounds. They are also versatile, allowing the user to create various beats and rhythms. Additionally, drum machines save time and effort and can be integrated with other music production equipment.

Why Do People Use Drum Machines?

People use drum machines to create rhythm tracks for music production and live performances. Drum machines offer precise tempo, versatile sound options, and customizable patterns, eliminating the need for a live drummer. It also allows for creating a beat without expensive equipment and needing multiple musicians.

What Does A Drum Machine Enable The Performer To Do?

A drum machine allows the performer to create and manipulate electronic drum beats and rhythms. It can be used in live performances or in music production to produce drum sounds without the need for a physical drum set.

Why Are Drums So Important In Music?

Drums are important in music because they provide the rhythm and structure for a song. They keep the tempo and add depth and dimension to the sound. Without drums, music could feel flat and lifeless. Drums are also used to create emotions and enhance the overall experience for the listener.

Conclusion

Using drum machines in dance music provides many benefits. They offer a cost-effective solution to creating dynamic drum sequences, mimic the sound of traditional drum kits and help to streamline the production process. Additionally, they give producers the ability to manipulate and edit drum patterns with ease, saving time and effort.

As a result, drum machines are an essential tool in the arsenal of any dance music producer. Incorporating them into your workflow can significantly enhance the quality of your music and help you stand out in a highly competitive industry.

Categories
Archive

How to Find Someone to Mix Your Music

To find someone to mix your music, search for audio engineers on music production websites or social media platforms. From there, you can filter by location, experience, and price range to find the right person for your project.

As a musician, your goal is to produce music that sounds professional and polished. But sometimes, the mixing process can be a daunting task that requires a certain level of expertise. Fortunately, you can hire someone to mix your music for you.

With the rise of music production websites and social media platforms geared towards musicians, it is now easier than ever to find an experienced audio engineer. We’ll explore how to navigate these platforms to find the right person to help you achieve your musical goals.

1. Set A Budget

If you’re a musician looking to take your recordings to the next level, you might be considering hiring a professional audio engineer to mix your tracks. However, finding the right person for the job can be a daunting task. Here are some tips to help you navigate the process and find the perfect engineer for your project.

Determine Your Budget Range

Before starting your search, it’s important to set a budget that works for you. Mixing rates can vary significantly depending on the experience and skill level of the engineer, so it’s important to determine how much you can afford to spend.

Budget RangeExpected Price Range
Low Budget$100 – $300 per song
Mid Budget$300 – $1000 per song
High Budget$1000+ per song

Consider The Experience And Skill Level Of Audio Engineers In Your Budget Range

Once you have a budget in mind, you’ll need to start your search for potential candidates. It’s important to consider the experience and skill level of the audio engineers within your budget range.

  • Look for engineers who specialize in your genre of music
  • Check out their portfolio to review their previous work
  • Read reviews from previous clients
  • Assess their communication skills and willingness to collaborate

By taking the time to research and vet potential candidates, you will increase the likelihood of finding an engineer who is a good fit for your project.

2. Define Your Style And Goals

Defining your style and goals is crucial when searching for someone to mix your music. Knowing your preferences, vision, and desired outcome will help you find the right mixing engineer to bring your project to life. It’s important to communicate your goals clearly to ensure that the final product meets your expectations.

When it comes to finding the right person to mix your music, it’s important to have a clear understanding of your style and goals. This will help you narrow down your search, find a mixer that’s a good fit, and ultimately achieve the desired sound for your project. Here are two essential steps to help you define your style and goals.

Know Your Music Genre And Your Recording Preferences

The first step in defining your style is to identify your music genre. This will give you a better understanding of the sound you’re trying to achieve and help you find a mixer with experience in your genre. Additionally, consider your recording preferences. Do you prefer a polished, radio-ready sound, or do you want to preserve the rawness of a live performance? Knowing these details will help you find a mixer who can deliver the sound you’re looking for.

Clarify Your Goals For The Project

The second step in defining your goals is to clarify your objectives for the project. Are you looking to create a demo to share with industry professionals, or are you recording a full-length album for commercial release? Do you have a specific deadline or budget restrictions? These factors will influence your choice of mixer, as they may require specific technical expertise or a particular workflow to achieve your desired results.

Table: Music Genres and Subgenres

GenreSubgenres
RockAlternative rock, classic rock, hard rock, indie rock, punk rock
PopElectropop, synthpop, bubblegum pop, power pop, dance-pop
Hip-hopTrap, boom bap, gangsta rap, alternative rap
ElectronicHouse, techno, trance, ambient, IDM
CountryBluegrass, honky-tonk, outlaw country, country rock, contemporary country

Ultimately, defining your style and goals will help you find a mixer who can bring your vision to life. By knowing your music genre, recording preferences, and project objectives, you’ll be able to communicate effectively with potential mixers and ensure that everyone is on the same page.

3. Research Audio Engineers

Hiring a skilled audio engineer to mix your music could make all the difference in the final quality of your recorded tracks. Researching different audio engineers and their portfolios is crucial to finding someone who can match your desired sound and aesthetic.

When it comes to finding the right audio engineer to mix your music, research is key. There are three primary ways to research audio engineers, including asking for recommendations from fellow musicians, searching for audio engineers online, and checking audio engineers’ portfolios and references.

Ask for Recommendations from Fellow Musicians

One of the best ways to find a quality audio engineer is to ask for recommendations from fellow musicians. This can be done by networking with other musicians in your local community or online. You can also ask for recommendations from music instructors or studio owners.

Search for Audio Engineers Online

Another way to find audio engineers is to search for them online. This can be done by using search engines like Google or Bing, or by visiting websites that specialize in connecting musicians with audio engineers. You can also use social media platforms like Facebook and Twitter to ask for recommendations from your network.

Check Audio Engineers’ Portfolios and References

Finally, it’s important to check the portfolio and references of any audio engineers you are considering. This can be done by visiting their website or social media profiles, or by contacting them directly. Look for audio engineers who specialize in your genre of music and who have experience working with artists at your stage of development. In addition, ask for references from past clients to ensure the audio engineer is reliable, easy to work with, and produces quality results. By thoroughly researching audio engineers, you’ll be able to find the right one to mix your music and take your career to the next level.

4. Conduct Interviews

Once you have shortlisted potential audio engineers, the next step is to interview them. Conducting interviews helps you understand their level of experience, work ethic, communication skills, and whether they are a good fit for your project. Here are three things you should keep in mind:

Formulate A List Of Questions To Ask The Potential Audio Engineer

Prepare a list of questions you’d like to ask the audio engineer. This helps you to evaluate their knowledge, experience, and reliability. Focus on asking them questions that are relevant to your project. Some questions you could ask include:

  • What projects have you worked on before?
  • How do you approach a mix, and what is your mixing process like?
  • What software and equipment do you use?

Make Sure You Share Your Style And Goals With Them

It’s important to give the audio engineer a clear picture of the sound you’re looking for. Sharing audio references or playlists with them can also help. This helps to ensure that they have a good understanding of your style and goals and are better able to deliver a great sounding mix.

Assess The Communication Skills And Professionalism Of The Audio Engineer

Communication skills and professionalism are crucial qualities to look for in an audio engineer. You want to work with someone who is responsive, communicates effectively, and is professional. Ensure you pay attention to how they communicate during the interview and whether they respond in a timely manner.

5. Request A Sample Mix

If you have a shortlist of audio engineers who seem like a good fit, it’s time to request a sample mix. This will give you an idea of how they work and how they can improve your music.

Offer A Rough Mix Of Your Song

Before requesting a sample mix, provide the audio engineer with a rough mix of your song. This way, they can understand what you’re looking for and get a better idea of how they can improve your music.

Pay Attention To The Quality Of The Mix

When reviewing the sample mix, pay close attention to the quality of the mix. Does it sound good? Is it clear and balanced? Can you hear everything that’s going on in the mix?

  • Listen to the mix on different devices, such as headphones and speakers, to get a better idea of how it sounds.
  • Compare the sample mix to your rough mix to see if there’s a noticeable difference.

See If The Audio Engineer Can Meet Your Desires

Finally, see if the audio engineer can meet your desires. Do their changes improve the song? Do they seem to understand the style and genre of your music?

  • Make sure the changes they made are in line with what you’re looking for.
  • If you have any revisions or adjustments you’d like to make, communicate them clearly to the audio engineer.

By requesting a sample mix, you can ensure you’re working with an audio engineer who can improve your music and bring your vision to life.

6. Negotiate The Deal

To negotiate the deal with a music mixer, you should set a budget, review their experience, and discuss the scope of the project. Be clear about what you want and don’t be afraid to ask for revisions. Communication is key to getting your desired results.

Negotiating the deal with your potential audio engineer is a crucial step to ensure that you get the best possible results for your music project. It is important to clarify the terms of the agreement before commencing any work. This will prevent any disagreement or confusion that may arise during and after the project. In this section, we will discuss the essential factors to negotiate, such as fees, rates, payment schedules, duration, revisions, and copyright ownership. Let’s dive deeper into each factor. H3: Discuss the Fees Discussing the fees with your potential mixing engineer is the first step towards negotiation. Be transparent about your budget and ask the engineer about their services’ cost. The engineer may quote an hourly rate or a flat fee depending on the project’s complexity. Before deciding, make sure that you have a clear understanding of the time and effort required to complete the project and whether the fees are reasonable. H3: Group or Hourly Rates Another factor to consider is whether the mixing engineer will charge group or hourly rates. Group rates are beneficial if you plan to complete a large number of songs. It is also suitable if you’re working on a budget and are okay with a standard mix. On the other hand, hourly rates can be suitable if you’re looking for a more personalized service, and the project’s complexity requires more time and effort. H3: Payment Schedule Discussing the payment schedule is another crucial part of the negotiation process. You can agree to pay in full before the project commences, deposit first, or half before and after the project is complete. This depends on the mixing engineer’s preference and the project’s complexity. It is also essential to clarify payment methods and ensure that both parties are comfortable with the schedule and payment method. H3: Clarify the Terms of Agreement Clear communication is key to avoid any misunderstanding between you and your potential mixing engineer. Before agreeing to work together, make sure that you clarify the terms of the agreement. Discuss the project’s duration and the number of revisions allowed. Ensure that both parties are on the same page, and everyone understands the rights to the copyright ownership. In conclusion, negotiating with your potential mixing engineer is critical to set realistic expectations and establish boundaries that ensure both parties are comfortable during and after working on the project. Clarifying the fees, rates, payment schedule, duration, revisions, and copyright ownership are crucial factors to negotiate. Before hiring a mixing engineer, ensure that you discuss everything you need and clarify the terms of the agreement to avoid disputes.

7. Sign The Contract And Start The Project

To begin your music mixing project, it’s crucial to find the right person for the job. After carefully reviewing and comparing potential candidates, it’s time to sign the contract and start the project. Clear communication and specific guidelines will ensure a successful outcome.

Once you’ve found the right mixer and agreed on the terms, it’s time to sign the contract and start the project. This step is crucial as it protects both parties and ensures that the project runs smoothly from start to finish. Here are some tips to keep in mind:

Make Sure The Contract Reflects Your Agreement And You Both Sign It

Before signing the contract, make sure you’ve carefully reviewed and understood all the terms. The contract should reflect the agreement you’ve reached with the mixer, and any changes or clarifications should be discussed beforehand. Once you’re satisfied with the terms, make sure both you and the mixer sign the contract to make it legally binding.

Provide Clear And Consistent Feedback On The Mixes During The Project

During the project, it’s important to provide clear and consistent feedback on the mixes. This helps the mixer understand your vision and make adjustments accordingly. Be specific when describing what you like and don’t like about the mixes, and use examples if possible. Remember to also be respectful and constructive in your feedback.

Communicate Any Changes Or Issues Timely And Respectfully

If there are any changes or issues that come up during the project, communicate them to the mixer in a timely and respectful manner. Don’t wait until the last minute to bring up any concerns, as this can cause delays and lead to frustration on both sides. Be open to compromise and willing to work together to find a solution. In conclusion, signing the contract and starting the project is an important step in the mixing process. By making sure the contract reflects your agreement, providing clear feedback, and communicating any changes or issues respectfully, you can help ensure a successful project and a satisfied outcome.

How to Find Someone to Mix Your Music

Credit: www.lifewire.com

8. Finalize The Mix And Release The Music

To find the right person to mix your music, start by researching online and reading reviews. Look for someone who specializes in your genre of music and has experience working with the equipment you used to record. Once you find a potential candidate, schedule a meeting to discuss your vision and ensure their communication style aligns with yours.

Finally, work together to finalize the mix and prepare for its release.

Once the audio engineer has completed the mix of your music, it’s time to finalize the mix and get ready for release. This step involves agreeing on any additional work that needs to be done, arranging the final payment, receiving the final mix in different formats, and releasing your new music to the world.

Arrange The Final Payment And Agree On Any Additional Work If Needed

Before finalizing the mix and releasing your music, it is important to settle the payment terms with the audio engineer. Discuss and agree on any additional work that needs to be done, so that there are no disputes after the release of the music. Once this is done, arrange for the final payment to be made and get started on the next step.

Ask For The Final Mix In Different Formats And Levels

It is important to have the final mix in different formats and levels, so that it can be used across different platforms and devices. Ensure that the audio engineer provides the final mix in various formats such as WAV, MP3, FLAC, etc., and in different levels such as radio edit, club mix, extended mix, instrumental version, etc. This will give you more flexibility in using your music in different scenarios.

Release Your Music And Credit The Audio Engineer For A Job Well Done

Once the payment has been made, and you have received the final mix in different formats and levels, it is time to release your new music. Share it across different platforms such as streaming services, social media, radio, TV, etc. Make sure to credit the audio engineer for their hard work. A good engineering job can make a big difference, and it’s only fair to give credit where it’s due.

Conclusion

Finalizing the mix and releasing your music is the last step in the music production process. It is important to make sure all the loose ends are tied and everything is in order before releasing. The audio engineer is an integral part of the process, and it is important to maintain a good relationship with them. With the right mix and a good release strategy, your music can reach and connect with many people.

How to Find Someone to Mix Your Music

Credit: www.airgigs.com

Frequently Asked Questions Of How To Find Someone To Mix Your Music

How Do I Find People To Mix Music For?

You can find people to mix music for by networking with musicians, posting on social media, joining online music communities, and reaching out to local recording studios. You can also advertise your services on platforms like Fiverr or Upwork to attract potential clients.

How Much Does It Cost For Someone To Mix A Song?

The cost for someone to mix a song can vary depending on the complexity of the project, the experience of the engineer, and the studio facilities used. On average, the cost can range between $150 to $1000 per song.

Should I Pay Someone To Mix My Song?

It depends on your budget, skill level, and the complexity of the song. Paying someone to mix your song can result in a more professional sound but it is not necessary. Some people may enjoy mixing their songs themselves for creative purposes or because they are on a tight budget.

Ultimately, it is up to you to decide.

How Do I Find The Mix Engineer Of A Song?

To find the mix engineer of a song, you can check the credits on the album or track listing. You can also search for interviews with the artists or record label to get more information. Social media platforms like Twitter and Instagram can also be useful in finding the mix engineer.

Conclusion

To sum up, finding the right person to mix your music can be a crucial step in your career as a musician. With the help of the internet, networking, and referrals from colleagues, you can expand your options and find a skilled individual who can bring your music to life.

Remember to set clear expectations, communicate effectively, and have a reasonable budget in mind. By following these tips, you can ensure a successful and satisfying collaboration with your chosen mixing engineer.

Categories
Archive

What Music Gear Do You Need To Make Music

To make music, you need a computer, a digital audio workstation (DAW), and a MIDI keyboard. Making music requires specific gear.

As an Amazon Associate I earn from qualifying purchases.

Whether you’re a beginner or a professional musician, there are some essential tools you’ll need to create your masterpiece. The music industry has evolved exponentially, and technology has made it possible for anyone to produce music without spending huge amounts of money.

With a computer, DAW, and MIDI keyboard, you can create and produce music even in the comfort of your home. Moreover, various software, plugins, and instruments can adorn and enhance your music with a unique touch. We’ll explore the music gear necessary for making music, how they work and why you need them.

What Music Gear Do You Need To Make Music

Credit: m.youtube.com

Computer And Digital Audio Workstation (daw)

A computer and Digital Audio Workstation (DAW) are essential music gear for creating music. With these tools, music producers can compose and arrange music, record and manipulate audio, and mix and master songs all within the same environment.

Laptop Or Desktop

The first piece of music gear that you need is a reliable computer. This is the backbone of any digital music production setup. You will need a laptop or desktop computer with high processing power, storage capacity, and RAM to handle the heavy workload of digital audio production and processing. For music production, a laptop with at least a quad-core processor, 8GB of RAM, and 500GB of storage is a good starting point. A desktop PC with a powerful processor, at least 16GB of RAM, and multiple hard drives will provide better performance and storage capacity.

Digital Audio Workstation (daw) Software

Next on the list is Digital Audio Workstation (DAW) software. A DAW is a software application that processes and manipulates digital audio. This software allows you to record, mix, edit, and arrange sounds and music in a graphical user interface. There are several popular DAWs available, such as Ableton Live, Logic Pro X, Pro Tools, and FL Studio. You can choose from a wide range of software tools depending on your needs, budget, and familiarity with the software. Some DAWs offer more advanced functionality, while others are more user-friendly or designed for specific types of music production. It would help if you found the right balance between your workflow, creativity, and budget when selecting DAW software.

Final Thoughts

So that’s it for the computer and DAW section of our music gear guide. A reliable computer and DAW software are essential tools for any digital music producer. As with any equipment, it’s important to choose tools that fit your needs, budget, and workflow. In the next section of our guide, we will be looking at the other essential pieces of music gear you need to make music, including studio monitors, audio interfaces, and MIDI controllers.

Audio Interface

An audio interface is necessary for recording, mixing and editing music in a studio. It allows you to connect guitars, microphones and other instruments to your computer to capture high-quality sound.

What Is An Audio Interface?

An audio interface is a device that connects your computer or laptop to other external audio devices like microphones, instruments, and speakers. It’s the gateway that allows you to record and manipulate sounds from these sources.

Why Is It Needed?

Without an audio interface, you won’t be able to plug in any external audio equipment directly into your computer or laptop. The audio input and output on your computer are usually low-quality and won’t be able to handle high-quality recordings. Additionally, an audio interface allows you to control levels and adjust gain which is very important for recording and mixing.

How To Choose An Audio Interface

There are a few factors to keep in mind when choosing an audio interface, such as the number and type of inputs, the quality of the preamps, the connection type, and the budget.

  • Number and type of inputs: If you are a solo musician, then a two-input interface would suffice. However, if you have a band, you might need one with more input channels. Choose an interface with the types of inputs you need, such as microphone preamps, instrument inputs, or line-level inputs.
  • Quality of preamps: Good preamps will ensure that you record at a high quality with minimal noise. Checking reviews and researching the brand will give you an idea of the quality of preamps in a particular interface.
  • Connection type: The most common connection types are USB and Thunderbolt. USB is more common and is sufficient for most home recording setups. Thunderbolt, on the other hand, offers lower latency and faster transfer speeds if you are running larger projects or using effects in real-time.
  • Budget: Audio interface prices range from under $100 to well over $1000. It’s important to set a budget and find an interface that meets your requirements while staying within your budget.

In conclusion, an audio interface is a necessary device for recording and producing music. When choosing one, consider the number and type of inputs, the quality of the preamps, the connection type, and your budget.

Microphones

High-quality microphones are essential for producing professional-sounding music. Whether you’re recording vocals, instruments, or both, investing in a good microphone is crucial to achieving the sound you want.

Dynamic Microphones

Dynamic microphones are commonly used for live performances. They can handle high volume levels and are designed to handle loud sound sources like drums and guitar amps. Dynamic microphones are also known for their durability and reliability as they have a rugged construction that can withstand rough handling. Some popular dynamic microphones include the Shure SM58 and the Sennheiser E835. These microphones are perfect for those who want to record vocals without breaking the bank.

Condenser Microphones

Condenser microphones are known for their exceptional sensitivity and high-quality sound reproduction. These microphones are perfect for recording acoustic guitars, pianos, and vocals. They come in two types: small diaphragm and large diaphragm. Small diaphragm microphones are designed for recordings that require a high level of detail, while large diaphragm microphones are better suited to capturing a more natural sound. Some popular condenser microphones include the Audio-Technica AT4053b and the Neumann TLM 102.

Ribbon Microphones

Ribbon microphones have a unique sound quality that makes them a popular choice for recording acoustic instruments like violins and cellos. These microphones use a thin ribbon instead of a diaphragm to capture sound waves, resulting in a warm and natural tone. Ribbon microphones are also popular for recording vocals as they can add a vintage feel to a recording. Some popular ribbon microphones include the Royer R-121 and the AEA R44C. Overall, selecting the right microphone depends on the intended use and personal preference. Each type of microphone has its own strengths and weaknesses, and it’s important to understand these differences when selecting a microphone for your recording needs.

Studio Monitors Or Headphones

When it comes to producing music, having the right gear is crucial to creating a professional-sounding track. One of the biggest debates in the music industry is whether studio monitors or headphones are the better option. Let’s take a closer look at each to help you determine what will work best for your music-making process.

Studio Monitors

Studio monitors are designed specifically for music production, offering a wide range of frequencies and accurate sound representation. They allow you to hear the music’s true sound and can detect issues in the mix that may not be apparent using other listening devices. Additionally, they can help your ears adjust to listening to music for long periods, reducing ear fatigue. Their larger size also means they can fill a room with sound, making it easier for you to listen to the track in the same way that others will hear it.

Headphones

On the other hand, headphones offer a more isolated listening experience that can help you focus on the details of your track. They are also more portable than studio monitors, making them ideal for working on music while on the go. Additionally, they are often less expensive than studio monitors, making them a cost-effective option for those just starting. However, headphones do have their drawbacks as they can cause ear fatigue and may not fully capture the sound’s true essence compared to studio monitors.

What To Choose?

Ultimately, deciding between studio monitors or headphones depends on your personal preferences and budget. If you have the resources, investing in both can be beneficial as they offer unique advantages. Studio monitors are ideal for mixing while headphones are perfect for recording vocals and instruments. The most important thing is to choose the gear that works for you and helps you produce the music you want.

Conclusion

Overall, both studio monitors and headphones have their pros and cons when it comes to music production. Ultimately, it comes down to personal preference and what will enable you to create the best music possible. Regardless of which option you choose, investing in high-quality gear will help you produce professional-sounding tracks that showcase your talent and passion for music.

Midi Controllers

MIDI controllers are essential music gear for producing electronic music. With these controllers, you can use virtual instruments, play notes, and adjust various parameters like pitch and velocity. You’ll find simple controllers that only offer basic functionality, while others offer advanced functionality for professional use.

If you want to produce music digitally, a MIDI controller is essential. A MIDI controller allows you to control your digital audio workstation (DAW) and create music without ever touching your computer’s keyboard or mouse. By using a MIDI controller, you can make music faster and more efficiently. In this post, we will discuss what MIDI controllers are and how to choose the right one for your music production needs.

What Is A Midi Controller?

A MIDI controller is a device that sends MIDI messages to your computer. MIDI stands for Musical Instrument Digital Interface, and it is a standard protocol for communicating musical events between digital devices. MIDI controllers come in various forms, such as keyboards, pads, and faders. A MIDI keyboard controller is the most popular form of controller, and it typically includes features such as velocity sensitivity and modulation and pitch bend wheels.

How To Choose A Midi Controller

When choosing a MIDI controller, there are several factors to consider, including the number and type of controls, sensitivity, and compatibility with your DAW. Here are some tips to help you choose the right MIDI controller:

  • Consider the number of keys: If you plan on playing piano or keyboard parts, you may want a full-size MIDI keyboard with 88 keys. If space is an issue, a smaller keyboard with 49 or 61 keys may be more suitable.
  • Think about additional features: Some MIDI controllers include drum pads, faders, and knobs that allow you to control other aspects of your music, such as volume and effects.
  • Check sensitivity: Velocity sensitivity is essential, as it allows you to control how loud a note is played based on how hard you hit the keys. Aftertouch is another feature that allows you to manipulate the sound further after you’ve played a note.
  • Research compatibility: Make sure the controller you choose is compatible with your DAW software. Most modern MIDI controllers are plug-and-play, but it’s always best to double-check before making a purchase.

Conclusion

A MIDI controller is an essential tool for any musician or producer who wants to make music digitally. By choosing the right MIDI controller, you can enhance your creativity and productivity in music production. Consider your needs, budget, and preferences when choosing the right MIDI controller for you.

What Music Gear Do You Need To Make Music

Credit: olitunes.com

Cables And Accessories

Cables and Accessories are an important part of music gear that is often overlooked. They might not seem as exciting as a new synthesizer or guitar, but they play a crucial role in getting your music to sound just right. In this blog post about ‘What Music Gear Do You Need To Make Music’, we’ll be taking a closer look at some important cables and accessories that you’ll need to produce high-quality music. Let’s get started! HTML format:

Cables and Accessories are an important part of music gear that is often overlooked. They might not seem as exciting as a new synthesizer or guitar, but they play a crucial role in getting your music to sound just right. In this blog post about ‘What Music Gear Do You Need To Make Music’, we’ll be taking a closer look at some important cables and accessories that you’ll need to produce high-quality music. Let’s get started!

Xlr Cables

If you are recording vocals or using a microphone for any other purpose, you will need an XLR cable. XLR cables are designed to carry audio signals without any loss or interference. They are also designed to protect the signal from RF interference. The length of the XLR cable will depend on your needs. If you are recording a singer or a podcast, a six-foot cable should suffice, but if you are recording a band, you will need a longer cable.

Instrument Cables

Instrument cables are a crucial part of any musician’s gear, connecting guitars, basses, keyboards, and other instruments to an amplifier or mixer. Instrument cables are available in various lengths, and it’s a good idea to have a few different lengths on hand to accommodate different setups and stages. The quality of the cable will affect the sound quality, so investing in a high-quality cable is always a good idea and will pay off in the long run.

Pop Filters

If you are recording vocals for your music, you’ll need a pop filter. Pop filters are used to reduce plosives and unwanted sounds that can occur when singing certain syllables, such as B’s and P’s. They are inexpensive and easy to use and can make a big difference in the overall quality of your recordings.

Shock Mounts

Shock mounts are an essential accessory for any studio microphone. They reduce vibrations and external noise, ensuring that your recordings are clean and clear. They are easy to install and can make a big difference in the overall quality of your recordings.

Instruments And Virtual Instruments

Instruments and virtual instruments are essential music gear to produce music. From guitars, pianos, drums to software and digital synthesizers, the various types of instruments allow artists to create unique sounds and styles to compose music.

Are you aspiring to be a music producer, but a little confused about where to start with music gear? Don’t worry; we got you covered! Finding the right music gear can be overwhelming, but with our guide, you’ll have a clear understanding of all the essential instruments and virtual instruments to make your music production a success.

Guitars

Guitars are the most used instrument in music production. They come in various types, such as electric and acoustic guitars. Electric guitars are the go-to for producing rock and metal music genres, while the acoustic is the preferred instrument for genres like country music. In music production, having a high-quality guitar amplifier is essential to get the best sound output from the guitar.

Synthesizers

A synthesizer is a must-have virtual instrument for music production. They come in different types, such as hardware and software synthesizers. Hardware synthesizers are standalone devices that create electronic sounds, while software synthesizers are virtual software that emulates the sound of hardware synthesizers. Synthesizers come with a wide range of sounds, from classic analog to modern electronic sounds. In addition, most synthesizers come with pre-set sounds that save time in music production.

Pianos

Pianos are the ultimate instrument of choice for producers in various genres such as classical, jazz, indie, and pop. In addition to the instrument’s sound quality, having an expressive keyboard is crucial for producing beautiful sounding piano melodies. Pianos are available in both acoustic and electric options. Electric pianos, also known as digital pianos, are becoming the preferred choice for producers due to their ability to be used as MIDI controllers in a music-making setup. In conclusion, having the right instruments and virtual instruments can take your music production to the next level. Guitars, synthesizers, and pianos are some of the essential music gear every producer needs. The music gear doesn’t have to be expensive, but it has to be of high quality to deliver the desired sound output. With our guide, you can now go ahead and choose the best music gear to suit your style and genre. Happy music producing!

What Music Gear Do You Need To Make Music

Credit: www.youtube.com

Frequently Asked Questions Of What Music Gear Do You Need To Make Music

What Equipment Do You Need To Create Music?

To create music, you need a computer, a Digital Audio Workstation (DAW), an audio interface, MIDI keyboard/controller, studio monitors/headphones, microphone, and cables. You can also add additional gear like synthesizers, drum machines, and effect units to enhance your sound.

What Are Gears In Music Production?

Gears in music production are the equipment and tools used by producers to create, record, mix, and master music. These can include digital audio workstations (DAWs), synthesizers, samplers, audio interfaces, microphones, and more. Gears play a crucial role in achieving high-quality sound and bringing the artist’s vision to life.

How Do I Start Making My Own Music?

To start making your own music, you can follow these simple steps: 1. Choose your music genre 2. Pick an instrument or digital audio workstation 3. Learn music theory and technical skills 4. Experiment with melodies and rhythms 5. Record, edit and mix your music.

What Studio Equipment Do I Need To Record A Song?

To record a song, you need a microphone, Audio Interface, DAW Software, Studio Monitors or Headphones and Cables. With these five essentials, you can record different instruments and vocals, mix and master the recorded audio tracks to make the song complete.

Conclusion

To sum up, the music gear you need to make music depends on your preferences, budget, and the type of music you want to produce. However, some essential items such as a DAW, audio interface, studio monitors, and a microphone are a must-have for any music producer.

Remember to invest in quality gear, and continuously improve your skills to create excellent music. With the right tools and dedication, you can achieve success in the music industry. Happy producing!

Categories
Archive

Universal Audio Capitol Compressor Review

The Universal Audio Capitol Compressor is an excellent plugin for those looking to add vintage analog warmth and character to their mix. It accurately emulates the sound and feel of the classic hardware unit used at Capitol Studios in the 1960s, delivering smooth and musical compression with a unique tonal character and gentle harmonic distortion.

The Universal Audio Capitol Compressor is a premium quality plugin that emulates the classic analog hardware unit used at Capitol Studios in the 1960s. This compressor is widely recognized for its unique tonal character and its ability to impart warmth, smoothness, and musicality to any source material.

It features three distinct compression modes, each with its own unique characteristics, as well as a blend control that allows for parallel compression. With its intuitive GUI and exceptional sound quality, the Universal Audio Capitol Compressor is a top-quality choice for any mixing or mastering engineer looking to add vintage analog warmth and character to their projects.

Universal Audio Capitol Compressor Review

Credit: www.audiopluginguy.com

Features Of Universal Audio Capitol Compressor

The Universal Audio Capitol Compressor is a high-quality analog hardware with multiple features, including a hybrid design, vintage-style gain reduction meter, three fixed release times, side-chain filtering, and custom input and output transformers. It has been designed to provide a wide range of dynamic manipulation options while maintaining clarity and transparency, making it an ideal choice for mixing and mastering applications in professional music production.

Universal Audio has recently launched the Capitol Compressor that features a vintage design, intuitive controls, and a high-fidelity sound quality. Let’s delve into the Features of the Universal Audio Capitol Compressor under the following categories; Design, Controls, and Sound.

Design

The Universal Audio Capitol Compressor is designed with a sleek vintage look, matching the classic sound it provides. The front panel is adorned with Capitol Records’ logo, featuring a powder-blue finish with stylish stripes on the side. The compressor is built to withstand years of use on the road, thanks to its robust construction. The rear panel is designed with XLR and TRS connections, allowing compatibility with several devices.

Controls

The Universal Audio Capitol Compressor provides a user-friendly interface with its intuitive controls. The compressor features selectable ratios of 1.5:1, 2:1, 3:1, 4:1, 6:1, and 10:1, allowing you to adjust the compression level to meet your needs. The Attack and Release controls offer fine-tuning of the compressor’s response time to audio signals. The output Gain knob ensures precise level matching with the processed and unprocessed signal, providing a seamless integration with your recording and mixing setup.

Sound

The sound quality of the Universal Audio Capitol Compressor is remarkable, delivering a transparent and natural compression that preserves the nuances of the source material. The compressor features a custom-designed T4 optical attenuator circuitry that is capable of handling up to 20dB of gain reduction with minimal distortion or artifacts. The compressor offers a remarkable warmth and richness to the sound, which is ideal for controlling transient peaks and adding depth and character to your recordings. In conclusion, the Universal Audio Capitol Compressor is a must-have for any producer, mixing engineer, or musician looking for a reliable, high-quality compressor that delivers an authentic vintage sound. The compressor offers intuitive controls, robust construction, and transparent sound quality, making it a valuable tool in any recording studio or on the road.

Universal Audio Capitol Compressor Review

Credit: www.audiopluginguy.com

What Does The Universal Audio Capitol Compressor Offer?

The Universal Audio Capitol Compressor has a vintage sound that brings a warmth and presence to any mix. Its unique features, including its blend control and sidechain filter, allow for optimal control and customization.

The Universal Audio Capitol Compressor is designed for delivering a unique, vintage sound while providing unparalleled performance and flexibility. It is highly regarded in the industry for being a high-quality analog compressor that is capable of producing professional-grade sound.

Clarity

The Universal Audio Capitol Compressor offers top-notch clarity in its sound quality. It has a ‘clean’ sound that does not distort the original sound of the instruments. This high level of clarity makes it perfect for any recording environment where a pristine sound is required.

Durability

The Universal Audio Capitol Compressor is built to last. It features solid build quality, high-end materials, and top-tier workmanship, making it a robust and durable piece of equipment for audio professionals. It has been designed to withstand the rigors of a busy recording studio environment and is sure to last for many years.

Flexibility

The Universal Audio Capitol Compressor is characterized by its versatility and flexibility. It offers a wide range of controls that allow for perfect sound customization, unlike many other analog compressors. It also includes selectable output transformers, which provide a wide range of tonal options, making it a great fit for any mixing or mastering situation. To sum up, the Universal Audio Capitol Compressor is an ideal solution for all your compression needs. Offering clarity, durability, and flexibility, it is an excellent addition to any home or professional studio setup that will undoubtedly produce a professional-grade sound that is hard to match.

Pros And Cons

The Universal Audio Capitol Compressor offers exceptional sound quality and versatility, making it a popular choice for professional audio engineers. However, the high price tag may deter some users from investing in this high-end equipment.

Universal Audio Capitol Compressor is a premium vintage-style hardware compressor that reproduces the iconic sound of the original hardware compressor by Altec Lansing. It is a versatile compressor that can add warmth, punch, and character to any audio source. In this review, we will discuss the pros and cons of the Universal Audio Capitol Compressor.

Pros:

The Universal Audio Capitol Compressor is a powerful tool that can greatly enhance your audio production. Here are some of the pros of using this compressor:

  • Authentic Sound: The Universal Audio Capitol Compressor accurately reproduces the sound of the original Altec Lansing compressor, which was used on countless hit records in the 1960s. Its gentle and musical compression can add warmth and depth to vocals, drums, bass, and guitars.
  • Easy to Use: The Universal Audio Capitol Compressor is straightforward and intuitive to use. It features four simple knobs that control the input level, output level, compression ratio, and release time. The VU meter displays the gain reduction and allows you to set the optimal compression level for your audio.
  • Flexible Routing: The Universal Audio Capitol Compressor can be used as a hardware insert in your mixer or DAW, or as a standalone compressor with its own input and output. It also has a sidechain input that allows you to trigger the compression with an external audio source.
  • High-Quality Construction: The Universal Audio Capitol Compressor is built to the highest standards of quality and durability. It features a rugged steel chassis, high-quality components, and an elegant retro design that evokes the golden age of recording.

Cons:

While the Universal Audio Capitol Compressor is an excellent compressor for many audio applications, it does have some cons that you should be aware of. Here are some of the cons of the Universal Audio Capitol Compressor:

  • Expensive: The Universal Audio Capitol Compressor is a high-end compressor that comes with a premium price tag. It is not a budget compressor, and it may not be affordable for every home studio or project studio.
  • Less Versatile: The Universal Audio Capitol Compressor is a vintage-style compressor that excels at subtle and musical compression. However, it may not be suitable for extreme compression or aggressive sound shaping. If you need a compressor for hard and fast compression, you may need to look elsewhere.
  • No Auto-Release: The Universal Audio Capitol Compressor does not have an auto-release function, which means that you need to manually adjust the release time according to the material you are compressing. This may require some tweaking and experimentation to get the best results.

Overall, the Universal Audio Capitol Compressor is an excellent compressor for anyone who wants to add warmth, depth, and character to their audio production. It has an authentic vintage sound, easy-to-use controls, flexible routing options, and high-quality construction. However, it may not be suitable for everyone, especially those who are on a tight budget or need extreme compression or aggressive sound shaping.

Universal Audio Capitol Compressor Review

Credit: www.musicradar.com

Frequently Asked Questions On Universal Audio Capitol Compressor Review

How Does The Universal Audio Capitol Compressor Work?

The Universal Audio Capitol Compressor uses vintage circuitry to control the dynamics of audio signals. It uses compressors and limiters to reduce inconsistencies in sound levels and maintain a consistent output.

What Are The Benefits Of Using The Universal Audio Capitol Compressor?

The Universal Audio Capitol Compressor can add warmth and character to audio signals while also controlling dynamics. It can also prevent clipping and distortion, making your recordings sound more professional.

Is The Universal Audio Capitol Compressor Easy To Use?

The Universal Audio Capitol Compressor is easy to use, with intuitive controls that allow you to adjust the compression and limiting settings. It also features an LED meter that provides visual feedback on the output level.

What Types Of Audio Signals Is The Universal Audio Capitol Compressor Best Suited For?

The Universal Audio Capitol Compressor is ideal for compressing and limiting vocals, drums, and guitars. It can also be used on other audio signals that require dynamic control and added warmth.

Conclusion

Overall, the Universal Audio Capitol Compressor is a reliable and powerful tool for any audio engineer or music producer. With its unique sound and intuitive controls, it can help your recordings stand out and achieve that classic, vintage feel. Whether you’re looking to add character to your tracks or simply enhance their dynamics, this compressor is definitely worth considering.

Just be prepared to invest in some training time to truly understand its potential and get the most out of it.