Categories
Archive

Dark Textures And Soundscapes For Techno

Dark textures and soundscapes are essential elements for creating techno music. These sounds are known for their complexity and often unsettling nature, adding depth and ambience to techno tracks.

As a genre that emphasizes experimentation and creative exploration, techno music has evolved over the years with the inclusion of new sounds and production techniques. Dark textures and soundscapes provide a unique opportunity for producers to craft immersive sonic landscapes that transport listeners to otherworldly realms.

From eerie pads and ominous drones to distorted noise and industrial percussion, these elements allow producers to showcase their creativity and push the boundaries of what techno can be. We’ll explore the role of dark textures and soundscapes in techno and provide some tips for incorporating them into your productions.

Dark Textures And Soundscapes For Techno

Credit: www.productionmusiclive.com

The Role Of Dark Textures And Soundscapes In Techno Music

Dark textures and soundscapes play a significant role in creating the distinctive and atmospheric techno sound. By manipulating these elements, techno producers can create complex layers of sound that entice and captivate listeners. With an emphasis on driving percussion and expansive soundscapes, techno music relies on the use of dark, textured soundscapes to create an immersive and hypnotic listening experience.

Techno music is a genre that is characterized by its dark and hypnotic soundscapes. It is a style of electronic dance music that originated in Detroit in the early 1980s and has since spread around the world. Dark textures and soundscapes play a crucial role in creating the distinctive atmosphere and mood of techno music.

Creating Atmosphere And Mood

The use of dark textures and soundscapes in techno music is instrumental in creating a specific atmosphere and mood that is unique to the genre. These sounds create a sense of tension and unease that is essential to the overall feel of the music. The repetitive, intense rhythms of techno are accented by the use of these sounds, adding depth and complexity to the music.

Adding Depth And Complexity To The Music

The use of dark textures and soundscapes also adds depth and complexity to the music. These sounds are used to create a sense of space and dimensionality that is not present in other genres of music. They add richness to the sound and make the music more interesting to listen to. In addition, they create a sense of movement that is essential to the danceable nature of techno music.

Creating Tension And Release

Another important role of dark textures and soundscapes in techno music is the creation of tension and release. These sounds are used to build tension throughout a track, creating a sense of anticipation and excitement. They are then released through the use of a breakdown or drop, providing a moment of release and euphoria for the listener. This is a crucial aspect of techno music and is a defining characteristic of the genre. In conclusion, the use of dark textures and soundscapes is essential to the creation of techno music. They create atmosphere and mood, add depth and complexity, and create tension and release. Without these sounds, techno music would not have the same hypnotic, danceable quality that makes it so popular around the world.

How To Make Dark Textures And Soundscapes For Techno?

Learn how to create dark textures and soundscapes for techno by experimenting with various effects and plugins like reverb, delay, and distortion. Utilize ambient sounds and field recordings to add depth and atmosphere to your tracks.

Dark textures and soundscapes are crucial elements in the creation of techno music, giving it depth and a unique character that sets it apart from other genres. But how do you make these dark textures and soundscapes for techno? In this post, we’ll explore the steps involved in creating the perfect dark textures and soundscapes for your techno tracks, including choosing the right sounds, layering and processing textures and soundscapes, using automation and effects to create movement, and experimenting with different arrangements. ### Choosing the Right Sounds Choosing the right sounds is the first step in creating dark textures and soundscapes for techno. When selecting sounds, it’s essential to choose those that are rich in harmonics and have a lot of character. Sounds originating from analog synthesizers are ideal for creating dark textures and soundscapes as they have a warm, full-bodied sound that can be manipulated in a variety of ways. Check out these sounds to incorporate into your tracks: – Pads – Atmospheres – Drones – Ambient FX – Impacts – Risers – Noise ### Layering and Processing Textures and Soundscapes Layering and processing textures and soundscapes is the next step after choosing suitable sounds. Always ensure that the sounds you select complement each other well. Layers of different sounds create a dense and exciting texture. Just layering isn’t sufficient. Adding effects such as reverb, delay, compressor, distortion, and chorus give your sound complexity and dimension. Consider these processing techniques: – Introduce distortion to remove clarity – Add a touch of reverb or delay to create a sense of space – Experiment with chorus to add depth to pads or drones – Use granular synthesis for shaping organic sounds. ### Using Automation and Effects to Create Movement Automation and effects are your best friend when it comes to creating movement in the soundscapes. By using automation, you can vary the effect parameters so that they continually change and build up tension in the soundscape. Effects like delay, reverb, and granulation can provide movement by modulating the sound and adding odd rhythms. Use automation creatively, alongside the effects, to create unique and engaging techno textures. ### Experimenting with Different Arrangements Finally, once you have chosen, layered, and processed the sounds and utilized automation and effects, it’s time to experiment with different arrangements to create a finished track. Rearrange the sequences, change the effects, and tweak the automation to find the right balance. You can create a more engaging and original sound by using your intuition and trying out different variations. In conclusion, making dark textures and soundscapes for techno is a captivating and intuitive process. Remember to always choose the right sounds, layer and process them creatively, use automation and effects to add movement, and experiment with different arrangements. With these tips and techniques, you’ll be able to create unique and engaging soundscapes that will help your techno tracks stand out.

Inspiring Examples Of Dark Textures And Soundscapes In Techno

Dark textures and soundscapes can add depth and intensity to techno music. The use of foreboding tones and layered sounds can inspire a feeling of mystery. Some artists use a complex mix of electronic and organic sounds to create a dark and dreamlike atmosphere, resulting in a haunting auditory experience.

Dark textures and soundscapes are an essential part of techno music that gives it a deeper and more intense feeling. These sounds evoke a range of emotions in the listener, from unease to euphoria. The use of dark textures and soundscapes helps to create an immersive atmosphere, drawing in the listener and transporting them to another world. In this article, we’ll explore some inspiring examples of dark textures and soundscapes in techno, highlighting the work of techno legends such as Richie Hawtin, Ben Klock, and Adam Beyer.

Richie Hawtin – Minus/orange 1

One of the pioneers of techno music, Richie Hawtin has been at the forefront of the genre since the early 1990s. His use of dark sounds and textures can be heard throughout his extensive discography, but perhaps most notably on his 2005 album ‘Minus/Orange 1’. The album is a masterclass in atmospheric techno, with tracks like ‘Orange’ and ‘Minus’ featuring eerie soundscapes and brooding basslines. Hawtin’s unique production style creates a sense of tension and unease that is perfect for the dancefloor.

Ben Klock – Subzero

Ben Klock is a techno DJ and producer from Berlin, known for his deep, dark sound. His 2009 track ‘Subzero’ is a prime example of his use of atmospheric textures, featuring a haunting melody and a deep, driving bassline. The track’s eerie soundscape creates a sense of unease that is perfect for the dancefloor. Klock is an expert at creating a sense of tension and release in his music, making him a favorite among techno fans.

Adam Beyer – Spaceman

Adam Beyer is a Swedish techno DJ and producer known for his relentless beats and atmospheric soundscapes. His track ‘Spaceman’ from 2011 showcases his skill in creating a deep and textured atmosphere. The track features a hypnotic, driving beat, with sweeping synths and haunting sounds that create a sense of otherworldliness. Beyer’s ability to create a sense of drama and intensity with his music has made him one of the most respected DJs in the techno scene. In conclusion, these inspiring examples demonstrate the pivotal role of dark textures and soundscapes in creating a unique atmosphere in techno music. The use of these elements helps to create a sense of depth and intensity, drawing the listener into the music and creating an unforgettable experience on the dancefloor. Whether you’re a seasoned techno fan or new to the genre, paying attention to the use of dark textures and soundscapes in your favourite tracks can deepen your understanding and appreciation of the genre.

Dark Textures And Soundscapes For Techno

Credit: www.productionmusiclive.com

Dark Textures And Soundscapes In Techno Production Techniques

The techno music genre has always been known for its unique and unconventional sound. One of the key elements that make techno music stand out is its use of dark textures and soundscapes. The use of these elements results in an eerie, haunting, and mysterious sound.

Creating Textures With Hardware And Software Synthesizers

Hardware and software synthesizers are incredibly powerful tools for creating dark textures and soundscapes in techno music. Hardware synthesizers, such as the Roland TB-303, have been used in techno music since the very beginning. The ability to create unique sounds and textures that are difficult or impossible to replicate with software is what makes hardware a great addition to any techno producer’s setup.

The use of software synthesizers, on the other hand, allows producers to experiment with a virtually unlimited number of sounds and textures. Software synthesizers like SERUM, Massive, and Sylenth1 are popular go-to options for creating dark textures in techno music.

Sampling And Manipulating Field Recordings

Another technique that techno producers use to create dark textures and soundscapes is sampling and manipulating field recordings. Field recordings are sounds that are recorded outside of the studio environment. These sounds can be anything from environmental sounds like wind, water, and birds to industrial sounds like machinery, cars, and trains.

Producers can record these sounds and manipulate them in their productions to create dark and atmospheric textures. Techniques such as time-stretching, granular synthesis, and spectral processing can be applied to these recordings to create unique sounds and textures that fit perfectly into a techno track.

Working With Reverb, Delay, And Other Effects

Reverb, delay, and other effects are essential tools for creating atmospheres and textures in music. These effects can be used to create a sense of depth and space in a track, making the listener feel as if they are in a different location. Reverb and delay can also be used to create eerie and mysterious textures that fit perfectly into a techno track.

Producers can experiment with different reverb and delay settings to create unique sounds and textures. In addition to reverb and delay, effects like distortion, saturation, and filtering can also be used to create dark and atmospheric textures in techno music.

The Effect Of Dark Textures And Soundscapes On The Dancefloor

Dark textures and soundscapes have a powerful effect on the dance floor, especially in the techno genre. The use of low frequencies, ambient noises and distorted sounds creates a moody and intense atmosphere that enhances the overall experience for dancers.

As the beats and rhythms pulse through the space, the immersive sonic environment helps to transport audiences on a journey of sonic exploration.

Creating A Sense Of Community

Dark textures and soundscapes have a powerful effect that can quickly create a sense of community on the dancefloor. The eerie and haunting sounds offer a unique experience that connects people on a deeper level. As the music progresses, people find themselves intertwined with the rhythm and the people around them. The sense of belonging helps individuals let go of their inhibitions and feel more confident in expressing themselves. The dark textures and soundscapes are a crucial element in creating a community-like atmosphere where people can enjoy the music as a unified whole.

Encouraging Immersion And Focus

The dark textures and soundscapes used in techno music offer an immersive experience that encourages focus on the music. When the soundscapes are well-designed, they can transport individuals to a different world and help them concentrate on the music. The textures create patterns that grab the listener’s attention and encourage them to become completely absorbed in the sound. This level of immersion can lead to a deeper understanding and appreciation of the music, making the experience much more enjoyable.

Driving The Energy Of The Rhythm

The dark textures and soundscapes in techno music are not only there to add ambiance, but they also play a crucial role in driving the energy of the rhythm. The textures provide depth and complexity to the sound, amplifying the beat and making it more compelling. The soundscapes have the power to take the listener on a journey, building anticipation, and then delivering a satisfying release. As a result, people on the dancefloor become more energized and fully invested in the music’s rhythm, further exemplifying the dark textures and soundscapes’ role in techno music.

Dark Textures And Soundscapes For Techno

Credit: www.productionmusiclive.com

Balancing Dark And Light Elements In Techno Music

Techno music is known for its industrial sound, dark textures, and soundscapes that create a hypnotic atmosphere. However, to make techno music more interesting and engaging, it’s essential to balance dark and light elements. It’s this balance that will create a dynamic listening experience that can take people on an emotional journey.

Creating Contrast For A More Dynamic Listening Experience

Contrast is a crucial element in creating a dynamic listening experience. Without contrast, the music can become monotonous and uninteresting. In techno music, we can create contrast by using a combination of light and dark elements. For example, adding a melodic element to an otherwise dark soundscape can create an emotional response that can take people on a journey.

Experimenting With Different Levels Of Darkness

Another way to add balance to techno music is by experimenting with different levels of darkness. This could mean using different textures and soundscapes that create an eerie feeling, or incorporating lighter sounds that provide a contrast to the darkness. By playing around with these elements, you can add depth and complexity to your tracks.

Combining Textures And Soundscapes With Melodies And Harmonies

One way to achieve balance in techno music is by combining textures and soundscapes with melodies and harmonies. This will give the track a more structured and refined sound, ensuring that the dark elements don’t overwhelm the listener. By combining these different elements, you can create a dynamic and engaging sound that keeps people coming back for more.

Ultimately, balancing dark and light elements in techno music is all about experimentation and finding what works best for you. By incorporating a variety of textures, soundscapes, melodies, and harmonies, you can create a dynamic and engaging sound that takes your listeners on an emotional journey. So, go ahead and experiment, and see where your creativity takes you!

Frequently Asked Questions For Dark Textures And Soundscapes For Techno

What Are Dark Textures In Techno Music?

Dark textures in Techno music refer to sounds and elements that create a mysterious and moody atmosphere. They can be created with synths, samples, and effects.

What Is The Importance Of Soundscapes In Techno?

Soundscapes in Techno music add depth and character to the track. They create an immersive experience, taking the listener on a journey through different sonic environments.

How Can I Create My Own Dark Textures And Soundscapes In Techno?

You can create your own dark textures and soundscapes in Techno using synths, samples, and effects. Experiment with different combinations to find the perfect sound.

What Are Some Examples Of Techno Tracks With Dark Textures And Soundscapes?

Some examples of Techno tracks with dark textures and soundscapes include “The Sky Was Pink” by Nathan Fake, “Deadmau5 – Faxing Berlin” by Deadmau5, and “The Bells” by Jeff Mills.

Conclusion

Dark textures and soundscapes have become an indispensable part of techno music. The depth and complexity that they add to techno create a unique and unforgettable experience for the listener. With the use of innovative production techniques, producers are able to create sounds that evoke emotions, tell stories and invite audiences to lose themselves in the music.

Adding such elements to your techno tracks can help you distinguish yourself from the crowd and connect with your listeners at a deeper level. So why not incorporate some dark textures and soundscapes in your next techno production? It might just take your music to the next level.

Categories
Archive

Vocalign Project Vs Pro In Studio One

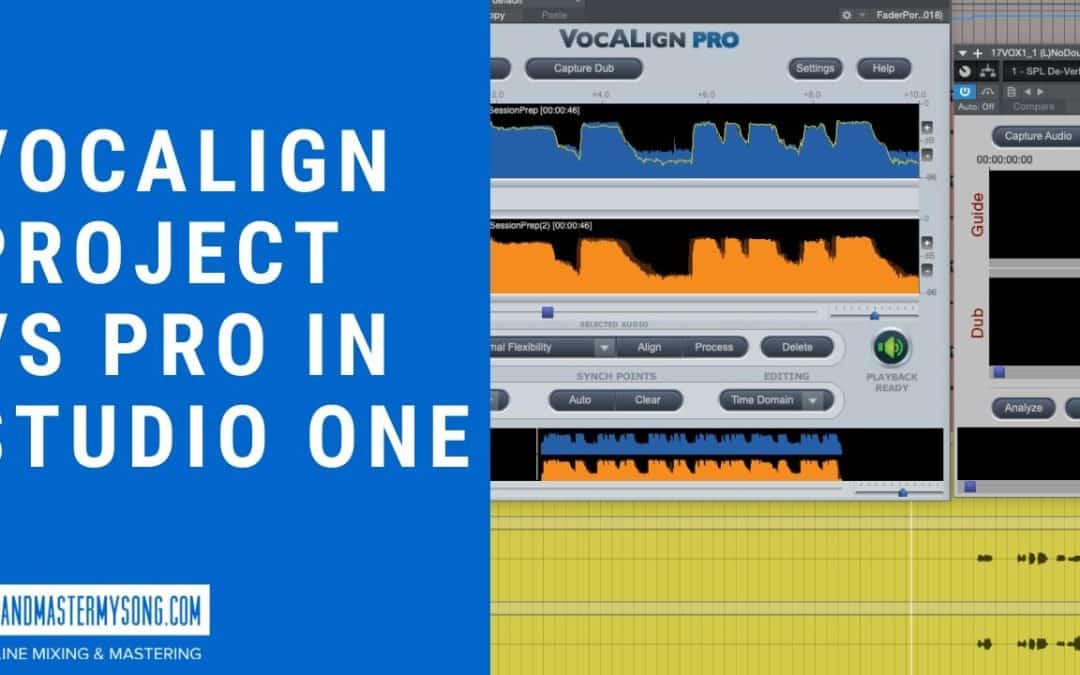
Vocalign Project and Pro in Studio One are both used for aligning audio tracks but Pro in Studio One has more advanced features than the Vocalign Project. If you’re a music producer or audio engineer, you know that aligning multiple tracks is a crucial part of music production.

VocAlign Project and Pro in Studio One are two software solutions that help you achieve this. VocAlign Project is a simple plug-in that aligns one audio track to another, which is ideal for basic alignment tasks. On the other hand, Pro in Studio One not only aligns tracks but also allows you to edit the timing of the audio, adjust the pitch, and even create harmonic tracks.

We will delve into the differences between VocAlign Project and Pro in Studio One and help you decide which software would best suit your needs.

Features Of Vocalign Project

Aligning vocals manually can be a time-consuming and tedious process. Fortunately, with Vocalign Project, you can align your vocals in no time. Vocalign Project is a plugin that fits right into your DAW, allowing you to easily synchronize multiple vocal tracks to achieve the perfect sound. Here are some of its great features:

Alignment Options

In the Vocalign Project, there are different alignment options that you can choose from depending on what you require. You can choose the basic quick alignment which is perfect for a time saver. Alternatively, you can opt for an advanced setting if you wish to access more specific parameters and customize your alignment process.

Timing Adjustments

Timing adjustments are made easy with Vocalign Project. You can align syllables to match the timing of the lead vocal with just a click of a button. No more manual adjustments when you have this plugin on board.

Pitch Control

Vocalign Project also comes with pitch control which allows you to adjust the pitch of each vocal track. This feature is great for making subtle adjustments and ensuring that each vocalist’s pitch is in harmony with the rest of the group.

These are just the tip of the iceberg when it comes to what you can achieve with Vocalign Project. If you’re looking to save time on aligning vocals or achieve the perfect sound either for music or voiceover work, then this plugin is definitely worth considering.

Features Of Pro In Studio One

Pro in Studio One comes with exceptional features that make it easier for users to edit tracks and automate their projects. While Vocalign Project is a powerful plugin, Pro in Studio One offers flexibility and customization options for vocals and other instruments.

The Pro version of Studio One has several features that make it a preferred choice for vocal alignment and pitch editing. With its advanced tools, it offers fine-tuned control to ensure that you get the perfect vocal alignment. This blog post focuses on the features of Pro in Studio One, exploring how it compares to the Vocalign Project. By the end of this post, you’ll have a clear understanding of what each tool brings to the table, helping you make the right choice for your project. So, let’s get started!

Manual Alignment Tools

The manual alignment tools in Pro version Studio One are unparalleled, giving you complete control over the process. From intuitive drag-and-drop tools to more complex timeline-based micro-editing, you get a wide range of options to choose from. This can be especially useful when working with complex tracks that require precision to get right. With Studio One Pro, there’s no room for error, ensuring that your vocals are perfectly aligned every time.

Advanced Pitch Editing

One of the key features of Pro version Studio One is its advanced pitch editing capabilities. This feature lets you fix any pitch issues in your recording, ensuring that your vocals sound pitch-perfect. From subtle corrections to more extreme alterations, you can make adjustments to pitch, timing, and more. This powerful tool offers unparalleled control over your recordings and is a must-have for anyone who wants to get the most out of their vocal tracks.

Real-time Monitoring

Another impressive feature of Pro in Studio One is real-time monitoring. This feature ensures that you can monitor your recordings in real-time, enabling you to make any necessary adjustments on the fly. This saves you time and allows for more efficient workflow, ensuring that you can get things done quickly and effectively. It’s especially useful when working with large vocal tracks that require significant amounts of editing. In conclusion, the Pro version of Studio One is a powerful tool that offers a comprehensive suite of features for vocal alignment and pitch editing. Its manual alignment tools, advanced pitch editing capabilities, and real-time monitoring make it a reliable choice for any artist or producer who wants to create the perfect vocal track. So, whether you’re a seasoned professional or just starting, consider giving Studio One Pro a try. You won’t be disappointed!

Workflow Comparison

Vocalign Project and Pro in Studio One are two popular options for audio alignment in music production. Both tools offer unique advantages and limitations, so it’s important to compare their workflows to determine which suits your specific needs.

Ease Of Use

Vocalign Project and Pro in Studio One are two popular tools used for alignment and pitch correction in the music industry. Both tools are equally easy to use, and users can get the desired results with just a few clicks. In Vocalign Project, users can simply select the “Guide” and “Dub” tracks and press the “Align” button to align the two tracks perfectly. Similarly, in Pro in Studio One, users can use the “Audio Bend” feature to adjust the timing and pitch of their audio tracks with ease.

Time Efficiency

When it comes to time efficiency, Vocalign Project is the clear winner. With its advanced algorithms, users can align and pitch correct audio tracks in just a few seconds. On the other hand, Pro in Studio One can take a bit longer to achieve similar results. However, any difference in time taken is negligible, especially when you consider the customizability options offered by Pro in Studio One.

Customization Options

Pro in Studio One offers more customization options than Vocalign Project. Users can adjust the pitch, time, and formant of their audio tracks with precision. They can also use the “Melodyne Integration” feature to make advanced adjustments to notes within a track. While Vocalign Project does offer some customization options, it falls short when compared to Pro in Studio One. In conclusion, both Vocalign Project and Pro in Studio One are great tools for audio alignment and pitch correction. While Vocalign Project is easier to use and quicker to achieve desired results, Pro in Studio One offers more customizability options. Ultimately, the choice between the two tools depends on the user’s specific needs and preferences.

Vocalign Project Vs Pro In Studio One

Credit: www.synchroarts.com

Vocalign Project Vs Pro In Studio One

Credit: mixandmastermysong.com

Frequently Asked Questions On Vocalign Project Vs Pro In Studio One

What Is The Difference Between Vocalign Project And Pro?

VocAlign Project is a plugin for audio editing software that aligns the timing of multiple tracks. VocAlign Pro is a more advanced version that offers additional features such as pitch alignment and ARA integration.

Is Vocalign Included In Studio One?

No, VocAlign is not included in Studio One. However, Studio One has its own time alignment tool called “Align Tracks,” which can perform similar functions to VocAlign.

What Is The Difference Between Vocalign Ultra And Revoice Pro?

VocAlign Ultra and Revoice Pro are both vocal alignment software used for music production. The main difference is that VocAlign Ultra is a plugin that works with any DAW, while Revoice Pro is a standalone program that can also be used as a plugin.

VocAlign Ultra focuses specifically on aligning vocal tracks, while Revoice Pro has a broader range of features, including pitch correction and doubling.

What Is Vocalign Project?

VocAlign is a software program that synchronizes and aligns multiple vocal tracks in music production. It minimizes the manual editing time, improves the quality of vocals, and enhances the overall sound of the track.

Conclusion

After comparing Vocalign Project and Pro, it is clear that both software have their unique strengths. Vocalign project offers more control and customization, while Pro is easier to use and delivers quicker results. Ultimately, the choice between the two depends on the user’s specific needs and preferences.

Regardless of which option you choose, both Vocalign Project and Pro are powerful tools that can greatly improve your vocal alignment process in Studio One.

Categories
Archive

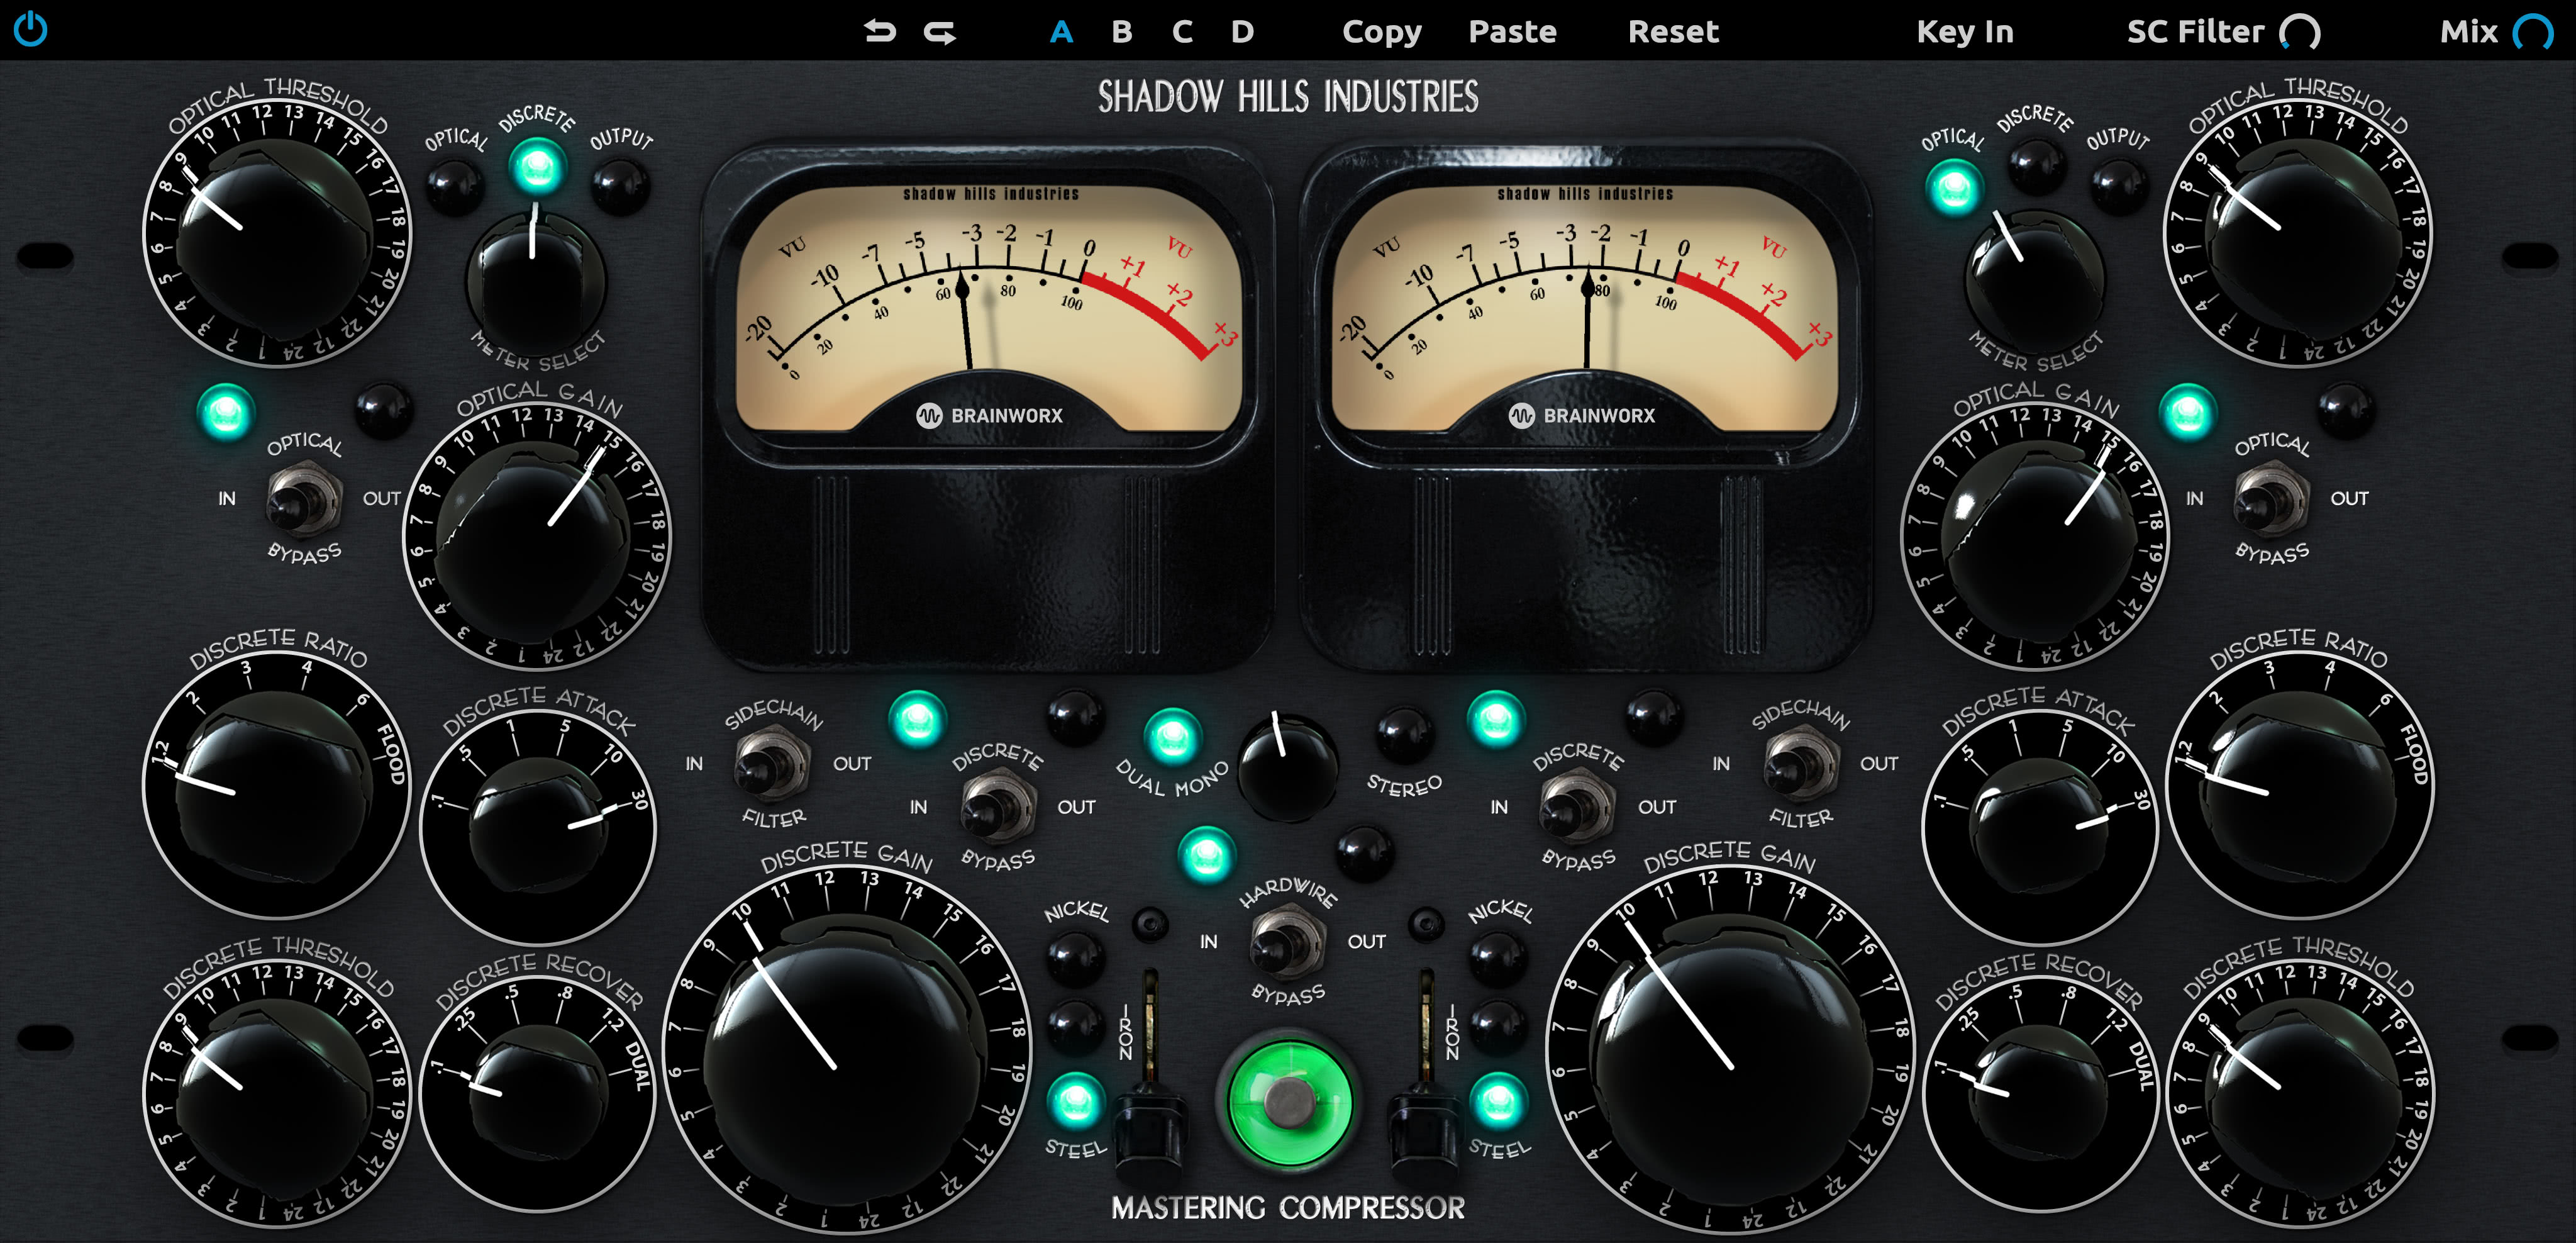
The Shadow Hills Mastering Compressor

The Shadow Hills Mastering Compressor is a high-end hardware compressor used for mastering audio. Engineers love its warm, vintage sound and the character and depth it adds to tracks.

Also, the compressor features multiple controls for fine-tuning the sound, including threshold, ratio, attack and release times, and makeup gain. Additionally, it has a switchable optical section and a transformer-coupled output, both of which contribute to its unique sound. Also, the Shadow Hills has become a favorite among many high-profile producers and engineers in the music industry, and is often used on high-profile albums and soundtracks.

Related reading: Prism Sound Maselec Mla 2 Mastering Compressor and Best Multiband Compressor Plugins For Mixing And Mastering.

Features Of The Shadow Hills Mastering Compressor

Moreover, this compressor is a high-end analog compressor with unparalleled features. In addition, it includes four compressors in one, a transformer matrix, sidechain filtering and several operating modes. This compressor is a must-have for professional mastering engineers looking for the ultimate precision and control over their mix.

In addition, the unit is a top-of-the-line compressor renowned for its exceptional sound quality and versatility. For example, its extensive range of features has made it a favorite among mastering engineers and music producers alike. Let’s take a closer look at the different features of the Shadow Hills.

Variable Mu Compression for Shadow Hills Mastering Compressor

Furthermore, this compressor uses a variable mu tube compressor section. As a result, as a result, it provides smooth, warm, rich compression that you can adjust to fit any genre. The variable mu circuit controls dynamics transparently. This adds character and depth to the sound without compromising its integrity.

Three Compression Circuits for Shadow Hills Mastering Compressor

Additionally, the unit features three different compression circuits, each with its unique sound character and dynamics. However, the first circuit is a discrete class A optical compressor, perfect for adding warmth and smoothness to vocals, guitars, and drums. The second circuit is a VCA compressor, ideal for controlling fast transients and adding punch and density to drums and bass. The third circuit is a fet compressor, which delivers a more aggressive and upfront compression suitable for modern music styles.

Side-chain Filter

Also, the Shadow Hills comes equipped with a side-chain filter. This allows engineers to shape the compression response by isolating specific frequencies. The filter enables engineers to tailor the compressor’s response. This allows them to target specific frequency ranges and enhance the overall musicality of the mix.

Stereo Linking

Moreover, this compressor features advanced stereo linking capabilities that allow engineers to link the compressor’s two channels for optimal stereo imaging and balance. Stereo linking ensures that both channels receive the same amount of compression, maintaining the proper stereo image.

Vu Meters

In addition, the unit comes with a pair of high-quality VU meters that provide accurate level readings and precise monitoring of the compressor’s gain reduction. The meters allow engineers to make quick and informed decisions. This ensures that the compression settings are always optimized for the best possible sound. In conclusion, the Shadow Hills is a versatile and powerful compressor that offers a myriad of features for every type of music producer. Its innovative design and high-quality components make it a must-have tool for any mastering studio or professional music producer.

The Shadow Hills Mastering Compressor

Credit: www.uaudio.com

Advantages Of The Shadow Hills Mastering Compressor

Furthermore, this compressor is one of the most sought-after compressors in the music industry. Shadow Hills designed it for mastering, and producers and engineers love it. Here are some of the advantages of using the unit:

Transparent Sound

The Shadow Hills also has a reputation for transparent sound. Additionally, it enhances the audio without adding any coloration, providing a natural and detailed sound. This means that the compressor can work on many genres, from classical music to rock and pop.

Versatile Compression Options

Also, this compressor offers a range of compression options, making it a versatile tool for any mastering needs. It has three compression circuits, and you choose one based on the music. These circuits offer different compression ratios and attack/release times. This lets you tailor the compression to the track you are mastering.

The unit also features six different selectable ratios, including 1.2:1, 1.5:1, 2:1, 3:1, 4:1, and 6:1. Moreover, this allows for even greater control over the sound. Additionally, the compressor has a high-pass sidechain filter you can set at 90Hz, 150Hz or 250Hz to shape its behavior.

High-quality Build

The Shadow Hills has a rugged, durable design that lasts. This compressor has been hand-built with high-quality components, ensuring its longevity. The front panel uses aircraft-grade aluminum, and the chassis uses heavy-duty steel. This compressor also features an illuminated VU meter and large knobs for easy adjustment. This makes it user-friendly and practical for use in any studio environment.

Applications Of The Shadow Hills Mastering Compressor

The unit is a top-of-the-line compressor known for its excellent sound and dynamic range. It is one of the most versatile compressors on the market today, making it an essential tool for recording, mixing, and mastering engineers.

Mastering

Mastering engineers use the Shadow Hills widely because it gives the final mix an ultra-smooth, transparent sound. It has a unique mix control feature that allows the user to blend the original signal with the compressed signal, enhancing the mix in subtle ways. Additionally, it has a variable release time control that ensures the compressor adapts to the dynamics of the music and avoids over-compression.

Mixing

This compressor is also a go-to choice for mixing engineers. It has a high-pass sidechain filter that can prevent the low end from triggering the compressor. This results in a more controlled and focused sound. Moreover, it has a selectable ratio control that ranges from 1.2:1 to 20:1. This provides ultimate flexibility in shaping the dynamics of the mix.

Tracking

The unit is also useful during tracking sessions. Many studio engineers favor it for its larger-than-life sound. This can add character and warmth to the recording. It has a switchable input transformer that can add harmonic distortion and saturation. This results in a vintage and analog-like sound.

The Shadow Hills Mastering Compressor

Credit: www.plugin-alliance.com

Comparison With Other Hardware Compressors

The Shadow Hills sets itself apart from other hardware compressors with its unique “opto-class A” design. This combines the best features of both optical and VCA compressors. This results in a compressor that offers superior sound quality and greater control over dynamics.

When it comes to hardware compressors, this compressor is often compared to other industry leaders in its category. Let’s take a closer look at how it measures up against the SSL G Series Compressor, Empirical Labs Distressor. The Manley Variable Mu Compressor.

Ssl G Series Compressor

The SSL G Series Compressor is a legendary compressor used by many engineers on virtually every type of music over the years. It offers smooth, transparent compression. While the SSL G Series is often used for stereo bus compression, the unit is a popular choice for mastering. The Shadow Hills is considered to be more versatile, with a wide range of control over various parameters. In contrast, the SSL G Series Compressor has a simpler control scheme with fewer options.

Empirical Labs Distressor

The Empirical Labs Distressor is another widely used compressor. It is known for its ability to create a wide range of analog-style compression effects, including vintage-style compression. This compressor, on the other hand, is known for its transparency and high-fidelity compression. While the Distressor is popular for adding coloration and distortion to the signal, the Shadow Hills is a favorite among engineers seeking to preserve the integrity of the recording.

Manley Variable Mu Compressor

The Manley Variable Mu Compressor is a tube compressor that is known for its musical and warm compression characteristics. The Shadow Hills Mastering Compressor, while also known for its warmth and analog-style compression, has a wider range of controls over various parameters. Additionally, the Shadow Hills offers advanced features such as discrete op-amp selection, sidechain filtering, and wet/dry mixing, features that the Manley Variable Mu Compressor doesn’t have. In conclusion, while each of these compressors has its own unique characteristics and benefits, the Shadow Hills Mastering Compressor distinguishes itself with its exceptional versatility, high-fidelity and transparency. The Shadow Hills Mastering Compressor is a top choice for many engineers. It works for mastering and for general compression jobs.

Comparison With Software Compressors

When it comes to mastering, one of the most important tools in your arsenal is a high-quality compressor. Many engineers rank the Shadow Hills Mastering Compressor among the best hardware compressors. It offers great sound and precise control. But how does it compare to software compressors, which are often more affordable and easier to use?

Universal Audio La-2a

The Universal Audio LA-2A is a classic hardware compressor that has been emulated in software form many times. But while software emulations can sound great, there is simply no substitute for the real thing. The Shadow Hills Mastering Compressor offers unparalleled clarity and depth, with a level of warmth and richness that software compressors struggle to replicate.

Waves Api 2500

Another popular software compressor is the Waves API 2500, which is modeled after the classic API 2500 hardware compressor. While the Waves plugin is certainly capable of producing great results, it lacks the tactile interface and nuanced control of the Shadow Hills Mastering Compressor. With its precise stepped controls and powerful analog circuitry, the Shadow Hills compressor allows you to fine-tune your sound in ways that software plugins simply can’t match.

Fabfilter Pro-c 2

The FabFilter Pro-C 2 is a versatile software compressor that offers many features and a sleek, intuitive interface. However, like most software compressors, it can sometimes sound sterile or digital compared to its hardware counterparts. The Shadow Hills Mastering Compressor, on the other hand, has a warm, organic sound that adds character and depth to your audio. Whether you’re mastering an album or a single track, the Shadow Hills delivers excellent results.

The Shadow Hills Mastering Compressor

Credit: www.sweetwater.com

Frequently Asked Questions For The Shadow Hills Mastering Compressor

Is Shadow Hills Mastering Compressor Good?

Yes, Shadow Hills Mastering Compressor is a high-quality compressor that produces a warm and natural sound. It is a popular choice among professional audio engineers due to its versatility and ability to enhance the dynamics of any mix.

What Type Of Compressor Is Shadow Hills Mastering Compressor?

The Shadow Hills Mastering Compressor is a Vari-Mu type compressor. This uses vacuum tubes to compress and control the dynamic range of an audio signal.

What Is The Difference Between Shadow Hills Mastering Compressor Class A And Regular?

The Shadow Hills mastering compressor Class A and regular compressors differ in quality and sound. The Class A version offers more warmth, clarity, and detail due to its analog components and circuitry. It also has more customization options and better control over dynamics, making it a preferred choice for high-end mastering professionals.

What Is The Amek Mastering Compressor Based On?

The Amek Mastering Compressor is based on the design of the original SSL bus compressor. Its circuit includes a high voltage gain stage and RMS level detection to achieve a transparent and open sound. It has become a popular mastering tool in many studios around the world.

Conclusion

The Shadow Hills Mastering Compressor is an exceptional tool for audio engineers and music producers who want to achieve top-notch sound quality. Its advanced features, versatile controls, and unparalleled performance make it a game-changer in the world of audio compression.

Whether you’re mastering a track or mixing an album, this compressor can provide you with an exceptional level of precision and power. So, if you’re serious about your music production and looking for the best results, the Shadow Hills Mastering Compressor is definitely worth considering.

For more background, see Dynamic range compression on Wikipedia.

Categories
Archive

How To Sample The Kick Drum From Any Track

To sample the kick drum from any track, use a digital audio workstation with a frequency spectrum analyzer to isolate and extract the desired frequency range. This process involves identifying the fundamental frequency of the kick drum and then using EQ or filtering to enhance and isolate it.

Sampling the kick drum from any track can be a useful technique for music producers and remixers who want to incorporate a particular sound or groove into their own work. It involves isolating the kick drum sound from a pre-existing track and extracting it as a separate audio sample.

The process typically involves using a digital audio workstation (DAW) with a frequency spectrum analyzer to identify the fundamental frequency range of the kick drum and then using EQ or filtering to enhance and isolate it. This technique is particularly useful for genres of music that rely heavily on the beat, such as electronic dance music (EDM) and hip-hop.

Start With Choosing A Track

If you are a music producer, you know that the kick drum is one of the most important elements of any track. Sampling the perfect kick drum from other tracks can take your music production skills to the next level. However, not every track has the perfect kick drum for you to sample. In this post, we will guide you on how to sample the kick drum from any track, starting with choosing the right track.

Look For Tracks With Good And Defined Kick Drums

The first step in sampling the perfect kick drum is to choose the right track. Ideally, you want to look for tracks with good and defined kick drums. This means that the kick drum should be the main element of the track and should be loud enough to be heard clearly. You can use Spotify or any other streaming service to browse through tracks and find the one that has the kick drum you want to sample.

It’s important to note that not every genre of music features a prominent kick drum. For example, classical music and some rock music may not feature a prominent kick drum. Therefore, it’s important to choose a track from a genre that features a prominent kick drum. There are several genres of music that feature prominent kick drums, including hip hop, EDM, and pop.

Choose Tracks That Have Isolated Kick Drum Sounds

Once you have found a track that features a good and defined kick drum, the next step is to choose a track that has isolated kick drum sounds. This means that the kick drum should be played separately from other elements of the track. You can tell if a track has isolated kick drum sounds by listening to it carefully. If the track has a lot of other instruments playing over the top of the kick drum, it may be difficult to isolate the kick drum sound.

You can also use audio editing software to isolate the kick drum sound. Some audio editing software allows you to remove other instruments from the track, leaving only the kick drum sound. This can make it easier to sample and use the kick drum sound in your own tracks.

Sampling kick drums from other tracks can be a great way to add depth and complexity to your music. However, it’s important to choose the right track and look for isolated kick drum sounds. By following these tips, you can sample the perfect kick drum from any track and take your music production skills to the next level.

How To Sample The Kick Drum From Any Track

Credit: synthwavepro.com

Tools Required For Sampling

To sample the kick drum from any track, you will need a digital audio workstation, a high-quality headphone, and an audio interface. Additionally, you can use plugins such as equalizers, filters, and compressors to enhance the kick drum’s sound and create a perfect sample for your track.

Sampling a kick drum from any track requires several tools. You’ll need a digital audio workstation (DAW) to capture the sound in high-quality. Some popular choices include Logic Pro X, Ableton Live, and FL Studio. Secondly, audio editing software like Adobe Audition or Audacity will allow you to isolate the kick drum from the rest of the track. Thirdly, you should invest in a good pair of headphones or studio monitors to ensure you can hear the nuances of the kick drum. This will help ensure that the sample you capture is of the highest quality, and will sound great in your own productions. When using a Digital Audio Workstation, you will have the tools necessary to sample audio from a track. The most important feature is the audio input channel, which allows you to record audio and capture the track you want to sample. Additionally, you can use the editing tools on your DAW to adjust the levels and position of the sound, and to remove any unwanted parts. Audio editing software, such as Adobe Audition or Audacity, will allow you to isolate the kick drum from the audio track. You can use the waveform display to identify the precise location of the kick drum in the track. With some quick editing, you can isolate the kick drum and export it as a separate audio file. Finally, you’ll need a good pair of headphones or studio monitors. These will help you to hear the kick drum more clearly, allowing you to capture a high-quality sample that will sound great in your final production. Good headphones or monitors can help reveal the nuances of the sound and provide a clearer overall picture of the audio.

Identify And Isolate The Kick Drum

To sample the kick drum from any track, you need to identify and isolate it. One way to do this is by using EQ to cut out the frequencies of all the other instruments and boost the frequencies of the kick drum.

This will make it stand out and easier to sample.

When sampling the kick drum from any track, the first step is to identify and isolate the kick drum sound. This can be done in several ways, but the most effective method is using an equalizer or EQ to isolate the kick drum track from the song. Here are the steps to locate and isolate the kick drum sound using EQ:

Locate The Segment Of The Track With The Desired Kick Drum Sound

To locate the segment of the track with the desired kick drum sound, you have to listen carefully to the song. The kick drum sound is usually a deep, low-frequency sound that occurs with a beat. Look for a segment of the song where the kick drum is most prominent, which could be the beginning or end of a section, or during a breakdown. Once you identify the segment of the song with the desired kick drum sound, you can proceed to isolate it.

Use Eq To Isolate The Kick Drum Track From The Song

To use the EQ to isolate the kick drum track from the song, you have to load the audio file into an audio editor or digital audio workstation (DAW) that has an EQ plugin. Once you load the audio file, open the EQ plugin and apply a low-pass filter to the audio track. The low-pass filter will cut off all frequencies above the kick drum sound, leaving only the low-end frequencies that make up the kick drum sound. Adjust the low-pass filter until you are left with only the kick drum sound, then export the isolated kick drum audio track. This isolated kick drum track can be used in your own productions or sampled for further manipulation. The resulting kick drum sound will be of high quality and can be used in any style of music. In conclusion, identifying and isolating the kick drum sound from any track is an essential skill for any music producer or beatmaker. With the use of an EQ plugin, you can easily isolate the kick drum sound and add it to your own productions. Remember, always listen carefully to the song and adjust the EQ until you are left with only the desired kick drum sound.

How To Sample The Kick Drum From Any Track

Credit: m.youtube.com

Editing The Sampled Kick Drum Track

Learn how to extract the kick drum from any track and enhance it with editing techniques. Transform a mediocre beat into a powerful foundation for any music production.

Cut The Desired Kick Drum Portion From The Track

To start editing the sampled kick drum track, the first step is to cut the desired kick drum portion from the track. This can be done easily in most audio editing software programs by using the waveform view of the track and zooming into the section where the kick drums are located. Once you have identified the section you want to use, simply highlight it and use the cut command to separate it from the rest of the track.

Use Audio Enhancement Tools For Better Quality

After cutting the desired kick drum portion, the next step is to enhance the quality of the sample. One way to do this is to use audio enhancement tools such as equalizers, compressors, and limiters. An equalizer can help to adjust the frequencies of the sample, making it sound clearer and more defined. A compressor can help to even out the volume levels of the sample, making it sound more consistent. A limiter can help to prevent the sample from clipping or distorting, ensuring it sounds clean and well-balanced. Overall, editing the sampled kick drum track involves cutting the desired portion from the track and using audio enhancement tools to improve its quality. With some practice and experimentation, even novice producers can create high-quality kick drum samples that sound great in their productions.

Exporting And Saving The Sample

To sample the kick drum from any track, you can use a digital audio workstation software to extract the necessary sound. Once you have your desired sample, it can be exported and saved for later use in your music production projects.

Export The Newly-created Kick Drum Sample In A Lossless File Format

After you have created your sample, the next step is to export it in a lossless file format. Lossless file formats such as WAV or AIFF maintain the quality of the sample without compromising it. To export the sample, follow these simple steps:

  1. Select the newly-created sample in your DAW (Digital Audio Workstation).
  2. Go to the “File” menu and select “Export” or “Export Audio.”
  3. Choose the file format you want to export it as. WAV or AIFF are the recommended formats.
  4. Choose the destination folder where you want to save the sample.
  5. Click “Export” or “Save.”

Correctly Name And Save The Sample With Relevant Metadata

Naming and saving your sample correctly is crucial for organization purposes. You want to make sure that you can easily find and use your sample in the future. Here are some tips on how to properly name and save your sample:

  • Include the name of the track the sample was taken from.
  • If possible, include the BPM (beats per minute) of the track.
  • Add a descriptive term to the name of the sample, such as “hard kick” or “punchy kick.”
  • Organize your samples into folders by genre or type.
  • Add relevant metadata such as the key of the track or any other notes you want to remember about the sample.

By following these steps, you can easily find and use your kick drum sample in future tracks.

How To Sample The Kick Drum From Any Track

Credit: www.youtube.com

Applying The Kick Drum Sample

Now that you’ve extracted a kick drum sample from a track, it’s time to apply it in your own digital audio workstation (DAW) for further use. Follow these steps to insert and adjust the kick drum sample:

Insert The Kick Drum Sample In Your Own Daw

First, go to your DAW and create a new audio track. Then, simply drag and drop the extracted kick drum sample from the folder where you saved it onto the new audio track you just created.

If you’re using a different DAW, the process might vary slightly, but the basic idea is the same – you need to create a new track and then import the kick drum sample onto that track.

Adjust The Sample As It Fits With The Rest Of Your Mix

After adding the kick drum sample to your DAW, you may need to adjust it to fit in with the rest of your mix. Here are some tips:

  • Volume Control: Adjust the volume level of the kick drum sample to make sure it’s not too loud or too quiet compared to the rest of your mix.
  • EQ: Apply some equalization (EQ) to the kick drum sample to make it blend in more effectively with the rest of your track. Try cutting some of the low end if it sounds too boomy, or boosting some of the mid-range frequencies to make it punchier.
  • Compression: Use compression on the kick drum sample to even out the dynamics and give it more sustain or punch, depending on what you need.
  • Layering: If the extracted kick drum sample doesn’t sound full or rich enough, try layering it with other kick drum samples to make it sound more complete.

Remember that every kick drum sample will be different, and you’ll need to use your ears to judge how it fits in with the rest of your mix. Take your time and experiment until you find the right sound that fits with your song.

Experimenting

Learn to create your own unique kick drum sound by experimenting with sampling techniques. You can sample the kick drum from any track and apply it to your own music with a little creativity.

Try Different Samples With Various Effects

Mixing different samples with various effects is an excellent way to experiment with kick drum sounds. You can add a touch of distortion, saturation, and even reverb to the kick drum samples to create unique sounds. With this technique, you can manipulate the sample’s transient, tail, low-end, and mid-range. The goal here is to find a unique kick drum sound that complements your track.

Create Your Own Original Kick Drums By Layering And Processing

One of the most exciting aspects of sampling kick drums is the ability to layer and process sounds to create your own original kick drum sound. For instance, you can layer a natural kick drum sound with a synthesized one to create a unique, punchy, and powerful hit. Experiment with different processing techniques, including EQ, compression, and distortion, until you achieve the sound you’re after. Remember, the key to creating original kick drums is experimentation and creativity. To summarize, sampling kick drums is a critical production skill that can help take your sound to the next level. By experimenting with different samples and processing techniques, you can create unique and original kicks that set your tracks apart.

Practice And Patience

Practice and patience are key when it comes to sampling the perfect kick drum from any track. It takes time and effort to find the right sound that fits perfectly with your production. However, with the right approach and mindset, you can greatly improve your ability to sample kick drums with much ease. Follow these tips below:

Keep Practicing To Develop An Ear For Finding The Right Samples

  • Take some time out of your daily routine to focus on listening to different tracks and finding the right sample kick drums. Pick a track and isolate its kick drum and analyze its quality, tone, and frequency.
  • Once you are confident in identifying the individual elements of the kick drum, practice blending them together to form your perfect sample.
  • It’s important to note that the more you practice, the better you will become and soon you will find yourself sampling kick drums from any track with ease.

Be Patient With The Process And Try Again If The First Sample Does Not Work Well

  • Not every kick drum sample you select and blend will work alongside your production. However, it’s important that you do not become frustrated or discouraged by this process.
  • Instead, take a step back and try again with a different kick drum sample from another track. Take the time you need to explore all of your options and push yourself to experiment with different sounds.
  • It may take some time and patience, but with a positive attitude and an open mind, you will eventually find the perfect sample kick drum that brings your production to life.

By implementing these tips, you’ll find that practicing regularly and being patient with the process will enhance your ability to sample kick drums from any track with ease. Remember to keep your mind open to experimentation and to trust your instincts when it comes to selecting the best samples for your production.

Frequently Asked Questions Of How To Sample The Kick Drum From Any Track

How Do You Sample A Kick Drum?

To sample a kick drum, you need to record it using a microphone or through an electronic drum kit. Once recorded, you can process the sound using audio editing software, such as EQ, compression, and distortion, to achieve the desired tone and texture.

Finally, save the sample for future use in music production.

How Do You Steal A Kick From A Song?

To steal a kick from a song, you need to isolate the drum sounds by removing other elements using equalizers and filters. Check for clear and isolated kicks with stronger beats and use editing tools to isolate and transfer them to your track.

Can You Sample Drums From A Song?

Yes, you can sample drums from a song. However, it’s important to note that it may be subject to copyright laws. It’s recommended to get permission from the copyright holder or use royalty-free samples to avoid any legal issues. Additionally, some songs may not have drum tracks that are isolated enough to sample effectively.

How Do You Synthesize A Kick Drum?

To synthesize a kick drum, select a sample or use a synthesizer to create a sound that resembles a kick drum. Adjust the envelope to shape the sound and add effects like compression, EQ, and distortion to enhance the impact.

Experiment with various techniques until you achieve the desired sound.

Conclusion

So there you have it, a simple method to sample the kick drum from any track. Through careful analysis and use of digital tools, this technique can give you the perfect foundation for your next track. Always keep in mind proper attribution of any samples you use, and don’t be afraid to experiment and explore different sounds.

With a bit of practice, you too can perfect your sampling skills and take your music to the next level.

Categories
Archive

Ways To Arrange Your Music Like A Pro

To arrange your music like a pro, start by categorizing your songs by genre and tempo. Then, create playlists based on themes and moods using software like Spotify or iTunes.

As a music lover, you probably have a vast collection of songs on your phone or computer. However, finding the perfect song to match your mood can be challenging if your music library is unorganized. But don’t worry, arranging your music like a pro is not as complicated as you may think.

With a little effort and some helpful tips, you can easily categorize your songs, create playlists, and achieve a perfect music collection that matches your preferences. We’ll discuss some easy ways to arrange your music like a pro, so you can enjoy your favorite tunes without any hassle.

Create A Music Library

Organizing your music library like a pro involves creating a system to sort and store your favorite songs. This can be accomplished by categorizing by genre, artist, or mood, and creating playlists for different occasions. Aim for a library that is easy to navigate and enjoyable to listen to.

Creating a music library is crucial for any music enthusiast. It helps in managing your music collection and accessing your favorite music with ease. However, creating a music library is not just about organizing music files in a folder. It’s about arranging your music in a way that makes sense and is easy to navigate. In this post, we will discuss some ways to arrange your music like a pro, starting with cleaning up your music collection.

Clean Up Your Music Collection

Before creating a music library, you need to clean up your music collection. A music library should only contain the music that you listen to regularly. By cleaning up your music collection, you can remove duplicates, broken files, and songs that you no longer listen to, freeing up space on your hard drive.

Organize Files By Genre

Once you have cleaned up your music collection, the next step is to organize files by genre. Organizing music by genre makes it easier to find songs and albums that fit a specific mood or occasion. For instance, if you want to listen to some upbeat music, you can quickly navigate to your “pop” or “electronic” folder.

Tag Your Music Files

Tagging your music files is essential for creating a music library. Tags contain metadata like artist name, album title, release year, and genre, making it easier to find songs and albums quickly. You can use software like MusicBrainz Picard or TagScanner to tag your music files programmatically. In summary, creating a music library is a great way to manage your music collection. By cleaning up your music collection, organizing files by genre, and tagging your music files, you can make your music library more accessible. So, start creating your music library today and take the first step towards becoming a pro at arranging music.

Ways To Arrange Your Music Like A Pro

Credit: m.youtube.com

Use Music Management Software

Music management software is a must-have for arranging your music like a pro. It helps categorize your music library, create playlists, and even provides download links for your favorite tracks. Get your hands on music management software and organize your music like a pro in no time.

If you’re someone who loves music and enjoys spending hours curating playlists, then you know how difficult it can be to manage your music library. Keeping a track of all the music files on your computer and mobile phone can be overwhelming, especially if you have a vast collection. This is where music management software comes in handy. In this section, we’ll explore the benefits of using music management software and popular software options that you can use to manage your music collection.

Benefits Of Music Management Software

Music management software can elevate your music experience by making it easier to organize and manage your music library. Here are some benefits of using music management software:

Effortlessly organize large music librariesEdit and manage metadata informationCreate custom playlists and smart playlistsDrag and drop tracks and albumsAutomatically remove duplicate tracksSynchronize music across devices

Popular Music Management Software

There are several music management software options that you can choose from depending on your preferences and requirements. Here are three of the most popular options:

  1. Apple Music/iTunes: If you’re an Apple user, then you’re already familiar with Apple Music/iTunes. It’s an all-in-one music management software that is compatible with macOS and Windows.
  2. MediaMonkey: MediaMonkey is a popular option for Windows users. It offers an extensive set of features that go beyond basic music management.
  3. Spotify: While Spotify isn’t primarily a music management software, it offers users the ability to easily create and manage playlists, making it a great option for those who frequently listen to music on-the-go.

Using music management software can take your music listening experience to the next level, making it less stressful and more enjoyable. With the benefits and software options mentioned above, you can easily manage your music collection like a pro.

Organize Your Playlists

Effortlessly organize and arrange your music playlists like a professional with these expert tips. From using descriptive titles to utilizing playlist folders, you’ll discover the best ways to keep your music library in order for an enjoyable listening experience.

Creating a perfect playlist requires proper planning and organization. Whether you are listening to music on your phone, computer, or music player, organizing your playlists will make it easier for you to access your favorite songs. In this section, we will discuss three effective ways to organize your playlists like a pro.

Grouping Similar Songs

Grouping similar songs is an effective way to organize your playlists. This will allow you to find your preferred songs faster. For instance, you can organize your songs by the decade, artist, genre, or mood. In addition, you can create subcategories such as “Romantic Songs,” “Party Songs,” and “Workout Songs.” This way, when you are in the mood to listen to particular music, you can access them quickly.

Separating Soft And Hard Songs

Separating soft and hard songs is an excellent way to avoid awkward transitions. For example, a slow ballad followed by a hard rock song can give an unpleasant experience when listening to your playlist. By sorting them out by tempo or music style, you can have a smooth flow of music without any disturbing surprises. This way, your playlist will make sense and help you enjoy your music to the fullest.

Putting Together Party Playlists

A party playlist is different from other playlists. It should have a collection of upbeat songs that will keep the party going. When creating a party playlist, start with a few high-tempo tracks that will set the mood for the party. Then, follow up with genre-specific songs that will appeal to all guests. Finally, end with a few tracks that will leave a lasting impression on your guests. Creating an organized party playlist will make your party more memorable, and you’ll be remembered as the party master. In conclusion, organizing your playlists will provide you with a better musical experience. Whether you are a casual listener or a die-hard fan, arranging your music will help you access your favorite tracks faster, avoid awkward transitions and create a more appealing playlist. Try out these tips and make your playlists like a pro.

Ways To Arrange Your Music Like A Pro

Credit: www.renegadeproducer.com

Keep Your Music Collection Up To Date

Organizing your music collection can be a daunting task, but with the right techniques, you can do it like a pro. Keep your music up to date by creating playlists, organizing by genre/singer, utilizing music management software, and staying consistent with your system.

As music enthusiasts, we all love to collect our favorite tracks and create a library that we can access anytime we want. However, with the ever-increasing collection, it can get challenging to keep track of everything and manage them properly. To enjoy your music to the fullest, keeping your music collection up to date is vital. In this blog post, we will discuss some of the ways you can take your music organization to the next level.

Delete Unwanted Tracks

One of the essential things to keep your music collection updated is to get rid of unwanted tracks. At times, we tend to download entire albums of an artist even if we are not particularly interested in some of the songs. It makes it hard to navigate through our music library. So, it’s essential to go through our collection and delete any tracks we don’t enjoy anymore or don’t fit our music taste. Here are some quick tips to help you get started with deleting unwanted tracks:

  • Filter out the songs you haven’t played in a while
  • Create a ‘delete’ playlist and add tracks you want to remove
  • Don’t be afraid to remove whole albums if you don’t love all the songs

Keep New Music Separate

As music lovers, we come across new songs and artists we want to try out regularly. It’s essential to organize your new music separately to prevent them from getting mixed up with your current library. One way to do this is by creating a separate smart playlist that automatically adds newly downloaded songs to it. Another way is by creating a folder or playlist that you name after the current year, allowing you easy access to newly downloaded tracks and a straightforward way to identify which tracks are new.

Regularly Update Your Music Library

Finally, another critical aspect of keeping your music library updated is to update it regularly. Over time, our music taste changes, and we might stop enjoying songs and artists that were once favorites. Deleting those tracks and continually adding new music will ensure your library stays up to date, and you always have access to the music that resonates with your current preferences. Set a regular schedule for updating your library and stick to it. In conclusion, keeping your music collection up to date is crucial in ensuring you have a hassle-free music experience. By deleting unwanted tracks, organizing new music separately, and updating your library regularly, you can take your music library organization to the next level.

Create Music Backups

Organizing your music collection like a pro includes creating music backups to protect your files from being lost. Whether you use an external hard drive or cloud storage, having a backup plan ensures that you’ll always have access to your favorite tunes.

Creating backups for your music is possibly the most important aspect of managing and organizing your music library. Whether you are a professional musician, music producer, or someone who just loves listening to music, losing your entire music collection can be a huge pain. In this part, we will discuss why you need music backups, types of backup storage, and how often you should back up your music.

Why You Need Music Backups

Backing up your music is the most important thing you should do to ensure you never lose your music collection. Your music library is digital, which means it is vulnerable to various risks such as computer crashes, theft, hardware malfunction, virus attacks, and so on. Unlike physical copies of music, losing your digital music is far more painful. It’s like losing all the memories attached to your favorite songs. Therefore, having backups of your music library will give you peace of mind and the assurance that nothing would happen to your collection and you can listen to your favorite songs anytime, anywhere.

Types Of Backup Storage

Choosing the right type of backup storage is crucial. There are different types of backup storage available, including external hard drives, USB flash drives, cloud storage, and so on. An external hard drive is an excellent option for storing your music library as it provides high storage capacity and reliability. Cloud storage is another excellent option as it allows you to access your music library from any device with an internet connection. USB flash drives are cheap and convenient, so that they are ideal for small music libraries. When it comes to selecting the right type of storage, it depends on your specific needs and preferences.

How Often To Backup Your Music

It is essential to back up your music regularly. For instance, you can back up your music weekly or monthly, depending on how often you add new music. If you have a large music library and you are constantly adding new albums or songs, it is recommended to back up your music more frequently. In case of accidental deletion of files, you can retrieve them from your backup storage. Therefore, ensure you back up your music regularly, without fail. In conclusion, backup your music library is incredibly crucial. By backing up your music library, you can rest assured that your music collection is safe and you can listen to it anytime, anywhere. Choose the right type of storage and back up your music regularly to ensure all your music stays safe.

Ways To Arrange Your Music Like A Pro

Credit: m.youtube.com

Frequently Asked Questions Of Ways To Arrange Your Music Like A Pro

How Should Songs Be Arranged?

Songs should be arranged in a thoughtful way that allows for a clear musical structure. This includes creating an engaging intro, building to the chorus, and adding variation to keep listeners interested. The arrangement should also complement the lyrics and melody, while remaining cohesive throughout the song.

How Do You Arrange Existing Music?

To arrange existing music, start by analyzing its structure. Identify key elements like melody, harmony, and rhythm. Use these elements to create an outline for the arrangement. Decide on the instrumentation and any additional parts needed. Finally, record and mix the arrangement, paying attention to balance and dynamics.

How Do You Arrange Pieces Of Music?

Arranging pieces of music requires careful planning and consideration of various elements, such as melody, harmony, rhythm, and instrumentation. The process involves manipulating these components to create a cohesive and enjoyable musical experience for the listener. It also involves decision-making regarding structure, form, and dynamics to create a compelling and engaging piece of music.

How Do You Legally Arrange Music?

Legally arranging music involves obtaining the proper licenses and permissions from the copyright holders. This can include mechanical licenses for reproducing and distributing the music, synchronization licenses for using the music in visual content, and performance licenses for public performances.

It is important to research and follow the guidelines set forth by the copyright laws.

Conclusion

To sum up, arranging music may seem like a daunting task, but with the right mindset and techniques, anyone can do it like a pro. Whether you opt for traditional methods by organizing your songs into albums, or newer, digital techniques by creating playlists and smart playlists, the most important thing is to find a system that works for you and stick to it.

By keeping your music collection organized, you’ll be able to easily find and enjoy your favorite tunes, no matter where you are. So start organizing today, and see how much easier and enjoyable listening to music can be!

Categories
Archive

How to Make Song Louder Without Losing Quality

To make a song louder without losing quality, use a limiter or compressor with caution. These tools can amplify sounds without distortion or loss of fidelity.

Making a song louder is essential for music enthusiasts and producers who want their songs to stand out. However, increasing volume can often lead to distorted sounds or reduced quality. Fortunately, there are several ways to amplify a song’s volume without losing its quality.

Using tools like limiters or compressors can help boost sound levels without any distortion or loss of fidelity. Careful usage of these tools is essential to ensure the desired outcome. We will explore some practical ways to make a song louder without altering its quality.

Benefits Of A Louder Song

Louder songs can have several benefits, including better sound quality and increased energy. However, increasing the volume can also lead to distortion and loss of clarity. To make a song louder without sacrificing quality, it’s important to use the right tools and techniques.

Why It’s Important To Have A Loud Song

When it comes to music, sound quality is a critical factor for every listener. A louder song not only catches the attention of potential listeners but also delivers a more immersive listening experience. It can help the song stand out from others, increasing its chances of getting the attention of radio stations, music supervisors, or other music industry professionals.

The Impact Of A Louder Song On The Listener

Music is an art form that involves human emotions, and a louder song can effectively convey emotions to the listener. It can also create a more dynamic and engaging listening experience, providing listeners with a sense of excitement and energy. When a song is loud, it can also enhance the feelings of satisfaction and pleasure for the listener.

However, sometimes increasing the volume of a song can cause it to lose sound quality or become distorted. In this blog post, we will discuss the best ways to make a song louder without compromising its quality.

How To Make A Song Louder Without Losing Quality

  • Adjust volume levels – The first and most obvious step to make a song louder is to adjust the volume. However, boosting the volume too much can lead to audio distortion or clipping.
  • Use a limiter – A limiter is an audio plugin that restricts the maximum level of an audio signal. Using a limiter can help prevent clipping and keep the volume consistent throughout the song.
  • Compression – Compression is another technique used to control volume levels. It reduces the dynamic range of the audio by decreasing the volume of the louder parts and increasing the volume of the quieter parts. This technique can effectively enhance the loudness of a song.
  • Equalization – Equalization adjusts the frequency balance of an audio mix. Boosting the bass and low-end frequencies can also make a song sound louder without losing quality.
  • Mastering – All songs go through a mastering process before being released. A mastering engineer can use various techniques such as compression, EQ, and limiting to increase the overall volume of the song without affecting its quality.

By following these techniques, you can make your song louder without losing quality. It will create an immersive listening experience while also catching the attention of potential listeners and industry professionals.

How to Make Song Louder Without Losing Quality

Credit: www.quora.com

Understanding Audio Compression

Learn how to make your songs louder without compromising on quality by understanding audio compression. Use compression to balance the dynamic range and prevent distortion, making your music sound full and professional.

How Audio Compression Works

Understanding audio compression is essential for anyone looking to make their audio louder without compromising its quality. Compression is the process of reducing the dynamic range of an audio signal, which is the difference between the loudest and quietest parts of the audio. This is done by reducing the amplitude of the loudest parts of the audio and boosting the quieter parts, resulting in a more balanced sound. Compression is achieved using a compressor, which is a device that adjusts the volume of an audio signal based on a set of predetermined parameters. These parameters include the threshold, ratio, attack time, release time, and makeup gain. Each parameter plays a crucial role in determining the amount of compression that is applied to the audio signal.

Why Audio Compression Affects Loudness

Audio compression affects loudness because it reduces the dynamic range of the audio signal. By reducing the difference between the loudest and quietest parts of the audio, compression allows you to increase the overall volume without causing distortion or clipping. This is because the compressor ensures that the audio signal remains within a certain range, preventing it from becoming too loud or too quiet. However, it is important to note that simply increasing the volume of an audio signal using compression does not necessarily result in a louder sound. This is because the loudness of an audio signal is determined by a range of other factors, including frequency response, distortion, and room acoustics.

The Relationship Between Compression And Dynamic Range

The relationship between compression and dynamic range is crucial to understanding how to make a song louder without losing quality. Compression reduces the dynamic range of an audio signal, which allows you to increase the overall volume. However, too much compression can result in a loss of detail and clarity, leading to a flat and lifeless sound. To ensure that your audio retains its dynamic range while still being loud, it is important to use compression in moderation and to adjust the compressor parameters according to the specific needs of your audio. This will help to preserve the original character and tone of the audio while allowing you to achieve the desired loudness. In conclusion, understanding audio compression is essential for anyone looking to make their audio louder without sacrificing quality. By using compression in moderation and adjusting the compressor parameters appropriately, you can achieve a more balanced and dynamic sound while still increasing the overall volume of your audio.

Techniques For Making A Song Louder

To make a song louder without sacrificing quality, one should use proper compression and equalization techniques. Boosting the volume without any consideration of the sound frequencies can also improve loudness. However, one should always keep in mind not to over-compress, as it can result in a distorted sound.

Techniques for Making a Song Louder Creating a high-quality song requires a lot of time and effort, but it all goes to waste if the volume is too low. Increasing the loudness of a song can sometimes cause the quality to suffer, which is why it needs to be done carefully. Several techniques can be employed to make a song louder without losing quality. In this article, we will explore the following techniques in detail: Limiting, Clipping, Multiband Compression, EQ AdjustmentsAdding Harmonics.

Limiting

Limiting is a technique that helps increase the overall volume without clipping. It works by setting a threshold above which the volume will be reduced. This technique ensures that no parts of the song exceed a certain volume limit. A limiter applies a constant ratio of attenuation above the threshold, which allows for the song to be louder overall without reducing sound quality.

Clipping

Clipping is another technique for making a song louder but should be used sparingly as it can introduce distortion. Clipping happens when the volume exceeds the maximum level, resulting in a distorted sound. It is recommended to use clipping to bring out the elements of the song that seem muffled or too quiet. Using clipping on the entire song can result in a poor-quality sound.

Multiband Compression

Multiband compression employs several compressors for the different frequencies of a song. It allows for certain frequencies to be compressed more than others, resulting in an overall increase in volume. This technique is beneficial when a song has frequency issues. For instance, if the bass, midrange, or treble is overpowering, multiband compression can help create a more balanced sound.

Eq Adjustments

EQ adjustments can be a powerful tool when it comes to increasing the volume of a song without losing quality. If a song has a lot of different instruments, some parts may be getting lost under other sounds. EQ adjustments allow for each element of the song to be heard clearly, resulting in a louder yet more natural sound. These adjustments can involve raising the volume on certain frequency ranges by small amounts, tweaking the frequencies to create more depth, or cutting certain frequencies altogether.

Adding Harmonics

Adding harmonics is a technique that applies saturation to a song, resulting in a more pronounced sound. These harmonics are created by overdriving a sound source and creating a more expressive midrange. The result is a fuller sound that can sometimes feel like a more significant volume increase. Adding harmonics should be done with caution to prevent over-saturation or over-compression, which can lead to mixing issues. In conclusion, while increasing the loudness of a song may seem like a simple task, it requires skill and precision to get it right. Employing the above techniques can help create a natural, fuller sound without sacrificing the overall quality of the song. Experimenting with different combinations of these techniques can lead to exciting new sounds and ultimately make a song sound louder and more impactful.

Best Practices For Maintaining Quality

The process of making a song louder without losing quality requires best practices that maintain the song’s natural sound. These practices include avoiding excessive gain reduction, maintaining a healthy signal-to-noise ratio, maintaining dynamic range, and listening for distortion or artifacts. In this section, we will delve into these best practices for maintaining quality and ensure that the song does not lose its original clarity and quality.

Avoiding Excessive Gain Reduction

When making a song louder, it is essential to avoid excessive gain reduction. Gain reduction is the process of attenuating the gain of an audio signal when it passes a certain threshold. If too much reduction is applied, the song’s overall sound quality will be negatively impacted, and parts of the song may become inaudible, making it hard to enjoy the song. Therefore, to ensure good quality, only apply the necessary amount of reduction and avoid excessive gain reduction.

Maintaining A Healthy Signal-to-noise Ratio

Maintaining a healthy signal-to-noise ratio is another crucial practice for maintaining quality. Signal-to-noise ratio (SNR) refers to the level of the signal in comparison to the background noise. Therefore, if the SNR is poor, the song’s quality will suffer because the background noise will overpower the song’s natural sound. Ensure to maintain a healthy SNR by minimizing noise levels and increasing the strength of the original signal.

Maintaining Dynamic Range

A song’s dynamic range is the difference between the quietest and loudest parts of the song. Maintaining it is essential in ensuring quality. Overcompression of the song reduces its dynamic range, resulting in it sounding flat and lifeless. To maintain a song’s dynamic range, use light compression and ensure the mix has enough headroom before mastering.

Listening For Distortion Or Artifacts

Artifacts can occur in a song when it is made louder. Therefore, it is essential to listen to the song for any distortion or artifacts that may have occurred. Artifacts are unpleasant sounds such as clipping that can damage the song’s sound quality. Ensure the song remains distortion-free to maintain its clarity and enjoyability.

Balancing Loudness And Quality

Mixing and mastering a song can be a tricky process, especially when it comes to making it sound louder without compromising the quality. The key is to strike a balance between loudness and maintaining the original sound quality.

The Importance Of Balance

The ultimate goal of mastering a song is to make it sound as good as possible. However, some may feel that louder is always better. But pushing the volume too loud can lead to sound distortion and loss of quality. Thus, it is important to achieve an optimal balance between loudness and sound quality.

Different Approaches For Balancing Loudness And Quality

One approach is to make use of the available headroom by compressing the mix appropriately. This approach is effective in handling peaks and troughs and ensuring that the volume remains consistent. Another approach is to use a limiter to set a maximum volume threshold to prevent the track from being overly loud.

Understanding Lufs And Rms Levels

LUFS (Loudness Units Relative to Full Scale) and RMS (Root Mean Square) levels can help in maintaining a balance between loudness and quality. The LUFS measures loudness, while the RMS measures the average volume level of a track. When mastering a song, it is crucial to keep these levels in check to maintain consistency.

How to Make Song Louder Without Losing Quality

Credit: www.reddit.com

How to Make Song Louder Without Losing Quality

Credit: www.omarimc.com

Frequently Asked Questions For How To Make Song Louder Without Losing Quality

How Can I Increase The Volume Of My Music Without Losing Quality?

To increase the volume of your music without losing quality, you can use an audio normalization tool that analyzes the sound’s volume and adjusts it to a consistent level. You can also use a limiter to control the peaks of the audio and avoid clipping.

Ensure that you keep the input levels at a healthy range to avoid distortion.

How Can I Increase The Loudness Of A Song?

To increase the loudness of a song, you can use a mastering software or app like Audacity, iZotope Ozone, or Lurssen Mastering Console. You can also compress the audio to even out the volume levels and apply EQ to boost the bass and treble.

Make sure not to overdo it, as this can cause distortion.

How Can I Make A Song Louder Without Distortion?

To make a song louder without distortion, you can use EQ and compression. Use EQ to boost the frequencies that give the song its power and energy. Use compression to control the dynamic range and make the quieter parts louder.

Additionally, you can use limiters to prevent clipping and distortion.

How Can I Make My Audio Louder?

To make your audio louder, you can try increasing the volume within your media player or editing software. Another option is to use external speakers or headphones with their own volume controls. Some audio editing software also allows for amplification or normalization of audio levels.

Alternatively, you can invest in a dedicated sound amplifier or external audio processing unit.

Conclusion

Achieving a louder song without losing quality is possible by following some of the techniques discussed above. Among them, the use of EQ, compression, and limiting can make a significant difference in the overall loudness of the track. However, it is essential to maintain a good balance between loudness and quality to avoid distortions and other issues.

Remember, there is no one-size-fits-all approach, and it’s up to you to experiment with different techniques until you find the right mix for your track. With patience and practice, you’ll eventually find the perfect balance between loudness and quality.

Categories
Archive

Why is Marketing Your Music Important

Marketing your music is crucial as it helps you reach a wider audience and increase your chances of success. As a musician, you need to market your music to showcase your talent, create a brand, and ultimately make a living.

Marketing can help you gain traction in the music industry, leading to more shows, album sales, and recognition. In today’s digital age, the music industry is more competitive than ever before. With millions of artists vying for the spotlight, it can be challenging to get your music noticed.

That’s where marketing comes in. By building a strong online presence, promoting your music on social media, and collaborating with other artists and influencers, you can reach a wider audience, build a loyal fanbase, and increase your chances of success. The importance of marketing your music in today’s industry cannot be overstated, and it’s something every musician should prioritize to achieve their goals.

Why is Marketing Your Music Important

Credit: www.greaserelease.co

Maximizing Your Audience Reach

As a musician, marketing your music is essential to reach a wider audience and maximize your potential. With effective marketing strategies, you can create a loyal fan base and expand your reach beyond your immediate circle. Don’t overlook the importance of promoting and sharing your music with the world.

Music is a form of expression that can connect with people on an emotional level. As a musician, it’s your dream to share your creations with the world. However, without marketing, your music might not reach your intended audience. Hence, it’s crucial to find ways to maximize your audience reach. In this blog post, we will discuss how using social media platforms and understanding your target audience can help you achieve your goal.

Utilizing Social Media Platforms

Social media has become a game-changer for musicians. With millions of active users on various platforms, it’s an excellent way to reach potential fans. You can use social media platforms to promote your music, connect with your audience, and build your brand. Here are some ways to utilize social media:

  • Create a social media page for your music on platforms like Facebook, Twitter, and Instagram.
  • Post regular updates about your music, behind-the-scenes clips, and teasers of your upcoming releases.
  • Engage with your fans by responding to their comments and messages.
  • Collaborate with other artists or music-related businesses to expand your reach and audience base.

Understanding Your Target Audience

Knowing your target audience is essential to maximizing your audience reach. Understanding their preferences and interests can help you create music that resonates with them. Here are a few ways to understand your target audience:

  • Use analytics tools to analyze your audience demographics, interests, and engagement on social media platforms.
  • Conduct surveys and polls to gather direct feedback from your audience.
  • Research other successful artists in your genre and analyze their audience base to identify common trends.
  • Identify the platforms or events your target audience is likely to be present at and promote your music there.

In conclusion, marketing your music is imperative to reach your intended audience. With social media and understanding your target audience, you can maximize your audience reach and build a loyal fanbase. So, start implementing these strategies and watch your music career take off!

Why is Marketing Your Music Important

Credit: www.quitegreat.co.uk

Building Your Brand

Marketing your music is crucial for building your brand in today’s competitive industry. It helps establish your personal brand image, increases visibility, and attracts potential fans and investors to help expand your reach and influence.

As a musician, building your brand is vital for success in the music industry. This involves creating a unique identity and developing a consistent marketing strategy. By doing so, you can establish yourself as an artist and attract a loyal audience. Let’s dive into these strategies further.

Creating A Unique Identity

To stand out in the sea of musicians, you need to create a unique identity that sets you apart from others. This can include your stage name, logo, visual style, and sound. Your identity should reflect your personality, music style, and values. For example, if your music is edgy and rebellious, your visual branding should reflect that with bold colors and typography. On the other hand, if your music is smooth and soulful, your branding should have a more elegant and refined look. Creating a unique identity helps your audience remember and recognize you amidst the many artists out there.

Developing A Consistent Marketing Strategy

Once you have established your unique identity, you need to develop a consistent marketing strategy that aligns with your brand. This includes creating a content calendar and promoting your music across various platforms such as social media, websites, and music streaming services. Your marketing strategy should also have consistent messaging and visuals to reinforce your brand identity. This will help you build trust and credibility with your audience. Consistently promoting your music helps your audience stay engaged with your brand and increases the chances of your music being discovered. In conclusion, building your brand is crucial to your success as a musician. A unique identity and consistent marketing strategy will help you stand out from the crowd and attract loyal fans. Start developing your brand today to take your music career to the next level.

Increasing Your Sales And Revenue

Marketing your music is crucial for increasing your sales and revenue. By reaching your target audience through various platforms, you can promote your music and create a strong brand image, leading to more streams, downloads, and live show bookings.

As a musician, getting your music out there and in front of potential fans is crucial in order to generate sales and revenue. Marketing your music can help increase your audience and make you more profitable. Here are some key benefits of music marketing.

Generating Buzz And Hype

Marketing your music helps generate buzz and hype around your music before it is even released. By creating a comprehensive marketing plan, you can create anticipation and excitement amongst your fans, which can translate into increased sales. Utilizing social media platforms like Instagram and Twitter can help you reach a wider audience and attract new fans. Reach out to bloggers, influencers, and media outlets to promote your music and share your story.

Monetizing Your Music

Marketing your music can also help you monetize your music beyond just selling albums or singles. Utilize streaming services such as Spotify and Apple Music to reach a wider audience and generate streaming revenue. Create merchandise that fans can purchase, such as t-shirts, posters, or stickers. Consider offering exclusive content or experiences to fans who sign up for your email list or follow you on social media. In conclusion, marketing your music is key to increasing your sales and revenue. By generating buzz and hype, and monetizing your music through various channels, you can create a sustainable income from your passion. Focus on building a strong brand and engaging with your fans consistently to keep the momentum going.

Establishing Industry Connections

Establishing industry connections is crucial for emerging musicians, and marketing plays a vital role in this process. Effective marketing strategies will help you reach out to fans, gain visibility, and attract the attention of key music industry players such as record labels, producers, and agents.

Establishing Industry Connections Establishing industry connections is one of the most crucial aspects of marketing your music. No matter how talented you are, if you lack connections and exposure, it will be challenging to break into an industry that is inundated with aspiring artists. Networking with music industry professionals can help you garner the much-needed exposure, secure performance and collaborative opportunities, and open doors to partnerships that can take your music career to the next level. Networking with Music Industry Professionals Networking with music industry professionals is fundamental when it comes to marketing your music. You need to connect with the right people who can help you with your music career. A well-established network of music industry professionals, such as music producers, marketing professionals, and promoters, can help you garner opportunities that would be difficult to secure on your own. You can attend music shows, seminars, and other events that are attended by music industry professionals to establish valuable connections. Securing Performance and Collaborative Opportunities Marketing your music is all about creating a buzz and generating interest in your music. Networking with music industry professionals can help you secure performance and collaborative opportunities that you would otherwise not be able to access. Being part of the right networks will open doors to potential gigs and collaborative opportunities, such as working on a soundtrack for a movie or collaborating with other musicians on a new project. In conclusion, establishing connections with music industry professionals is essential if you are looking to take your music career to the next level. Networking with professionals can help you get the exposure you need, secure collaborative opportunities, and establish a fan base that can make you a successful professional artist in the music industry.

Case Studies: Successful Music Marketing Campaigns

Successful music marketing campaigns benefit artists by increasing exposure, creating a larger fan base, and boosting sales. Case studies have shown that effective marketing strategies, including social media promotion, targeted advertising, and collaborations with popular brands, can make all the difference for aspiring musicians looking to make it big in the industry.

Marketing your music is crucial for success in the modern music industry. With the rise of social media and streaming platforms, music marketing has become an essential tool for artists to reach their audience and grow their fan base. In this section, we will explore successful music marketing campaigns and analyze the strategies used by top music marketers. By studying these case studies, you can learn from successful techniques and apply them to your own music marketing campaign.

Analyzing The Strategies Of Top Music Marketers

One of the most notable music marketing campaigns was utilized by Taylor Swift for her album “1989”. Swift employed a multi-faceted approach that included everything from in-app activations on popular social media platforms to strategic album release dates. Additionally, Swift engaged fans on numerous platforms, including Twitter and Instagram, with a focus on promoting the album. Her album sold 1.29 million copies in the US in just its first week, making it the highest-selling album of the year. Another successful case study is the music marketing campaign of Beyoncé’s self-titled album. Without warning or any prior announcements, Beyoncé dropped the entire album and exclusive music videos on iTunes using a unique approach. Social media was used to create and encourage the buzz surrounding the album. By uniquely launching the entire album, Beyoncé reframed how the music industry conducts album releases, which ultimately boosted sales.

Applying Successful Techniques To Your Own Campaign

By analyzing these case studies, you can learn a lot from top music marketers’ strategies and how they target their audience. Here are some successful techniques to incorporate into your music marketing campaign:

  • Engage your audience on social media.
  • Create unique content that leverages popular platforms.
  • Release music unexpectedly to create buzz.
  • Tap into your fan base to amplify your reach.

In summary, the case studies discussed in this section show the critical role that marketing plays in music industry success. By analyzing successful music marketing campaigns and applying the strategies of top music marketers, you can stand out in the industry, increase your fan base, and achieve your goals.

Why is Marketing Your Music Important

Credit: bandzoogle.com

Potential Obstacles And How To Overcome Them

Marketing your music is important, but potential obstacles such as the saturation of the industry and lack of resources can hinder progress. Overcome these challenges by building a strong online presence, networking, and being innovative in your approach.

Limited Resources And Budget Constraints

When it comes to promoting your music, limited resources and budget constraints can sometimes feel like a major setback. Fortunately, there are many affordable ways to market your music without breaking the bank. Here are a few cost-effective strategies:

  • Utilize social media platforms like Facebook, Twitter, and Instagram to connect with your fans and promote your music.
  • Create an email list and send out regular updates to keep your fans engaged and invested in your music.
  • Collaborate with other artists to cross-promote each other’s work and expand your audience.
  • Take advantage of free promotion opportunities like submitting your music to blogs, online radio stations, and music festivals.

Remember, success in the music industry is not solely dependent on how much money you spend on marketing, but rather how effectively you connect with your audience.

Competition And Oversaturation

In today’s digital age, the music industry is more saturated and competitive than ever before. However, this doesn’t mean there aren’t opportunities for emerging artists to make their mark. Here are some tips for standing out in a crowded field:

  • Develop a unique sound and brand that is authentic to you.
  • Network with fans, other artists, and industry professionals to build your reputation and expand your reach.
  • Look for niche markets and subgenres where you can establish yourself as an expert or leader.
  • Continuously create and release new music to stay relevant and top-of-mind for your audience.

By staying true to yourself and your music, you can differentiate yourself from the competition and find success in the industry.

Navigating The Complexities Of Digital Marketing

Digital marketing can be overwhelming, especially for artists who are just starting out. However, with some basic knowledge and a few key strategies, you can effectively market your music online. Here are some tips for getting started:

  • Develop a website or online presence where fans can learn more about you and your music.
  • Create and maintain a presence on social media platforms that are relevant to your audience.
  • Utilize search engine optimization (SEO) techniques to help fans find your music.
  • Pay for advertising on social media platforms or Google to expand your reach.

While digital marketing can seem overwhelming, remember that it’s a process that takes time and effort to perfect. Keep experimenting with different strategies to find what works best for you.

Frequently Asked Questions For Why Is Marketing Your Music Important

Why Is Music Branding Important?

Music branding is important because it helps musicians create a unique identity and stand out in a crowded industry. It helps in building a strong relationship with fans, generating new revenue streams, creating market differentiation and in boosting a brand’s online and offline presence.

What Are The Benefits Of Music In Advertising?

Music in advertising serves as a powerful tool to captivate and engage the audience’s attention. It evokes emotions, generates interest, and enhances recall. Research has also revealed that music can influence consumer behavior and purchase decisions, making it an effective tactic for brand promotion.

What Does A Music Marketing Person Do?

A music marketing person promotes and advertises music artists or bands through various channels such as social media, digital platforms, radio, and live events. They also analyze and research market trends, develop marketing strategies, and manage budgets to increase awareness and sales of the artist’s music.

How Do You Market Music Effectively?

To market music effectively, you need to focus on building a strong social media presence, creating engaging content, collaborating with other musicians and influencers, consistently releasing new music, and utilizing advertising and email marketing strategies. Additionally, networking and performing live shows can also help increase your reach and fan base.

Conclusion

As a musician, marketing your music is vital to reach your target audience, stand out from the crowd, and gain recognition in the industry. Through marketing, you can showcase your unique sound, build a fan base, and increase opportunities for live performances and collaborations.

Whether you are just starting out or an established artist, effective music marketing can make all the difference in achieving your career goals. So, don’t be afraid to invest time, effort, and resources into promoting your music and let your talent shine.

Categories
Archive

Cubase Doesn’t Recognize Midi Keyboard

To fix Cubase not recognizing a MIDI keyboard, check if the connections are properly made and if the keyboard is powered on. Here’s what you can do to troubleshoot the issue.

If you’re a music producer or a composer working in Cubase, it can be frustrating when your MIDI keyboard suddenly stops working. With so many potential causes and troubleshooting steps, it can be difficult to know where to start. But don’t worry, we’ve got you covered.

We’ll walk you through some common reasons why Cubase might not be recognizing your MIDI keyboard. From checking the connections to configuring the MIDI device manager, we’ll help you get to the bottom of the problem so you can get back to making music.

Check Your Connections

To troubleshoot when Cubase doesn’t recognize your MIDI keyboard, it’s essential to check your connections thoroughly. Ensure that the MIDI cable is plugged in securely into your computer’s USB port and your keyboard’s MIDI output. If the problem persists, try resetting your MIDI device or reinstalling its drivers.

Check Your Connections Cubase is a powerful music production software that caters to the needs of both beginners and professionals. However, it can be frustrating when you connect your MIDI keyboard to your computer only to find out that Cubase doesn’t recognize it. The problem may not always be with the software, and sometimes, it could be a matter of checking your connections. Here are a few things to consider when your Cubase doesn’t recognize MIDI keyboard.

Midi Cable

The MIDI cable is one of the most crucial parts of the connectivity chain. It connects the MIDI controller to the interface, which translates the MIDI signals to the computer. A faulty MIDI cable could be the reason why Cubase doesn’t recognize your MIDI keyboard. Check if the cable is properly inserted into the keyboard and your computer. Try using a different cable to see if that solves the problem.

Usb Connection

Using a USB connection is one of the easiest ways to connect your MIDI keyboard to your computer. However, USB ports can sometimes fail to recognize the device connected to them. If you’re using a USB connection to connect your MIDI keyboard to your computer, make sure that the USB port is working correctly. Try plugging in another device to see if it works. If the USB port is faulty, you may need to replace it. If you’re using a USB hub, disconnect it, and connect the keyboard directly to your computer. A USB hub can sometimes interfere with the signal and prevent Cubase from recognizing the MIDI keyboard.

Other Considerations

If your MIDI keyboard has a power switch, make sure that it’s turned on. Some MIDI keyboards require an external power source, so double-check if yours needs one. Also, make sure that your MIDI keyboard is compatible with Cubase. Check the manufacturer’s website to see if there are any updates available for the MIDI keyboard’s firmware, or if there are any known issues with Cubase. In conclusion, if Cubase doesn’t recognize your MIDI keyboard, the problem might not always be with the software. By checking your connections, you can quickly identify and solve the issue. By ensuring that your MIDI cable and USB connection are perfect, and your MIDI keyboard is compatible, you can enjoy producing music with Cubase without any hindrances.

Cubase Doesn'T Recognize Midi Keyboard

Credit: www.amazon.com

Check Midi Settings

To troubleshoot the issue of Cubase not recognizing your MIDI keyboard, check the MIDI settings. Ensure that the keyboard is properly connected, activated, and selected as the input. Additionally, ensure that the correct MIDI input port is selected in Cubase’s device setup.

If you’re running into the issue where Cubase isn’t recognizing your MIDI keyboard, the first thing you should do is check your MIDI settings. There are a few different settings that could be causing the problem, but most of them are located within Cubase itself.

Midi Input

The first thing you should check is the MIDI Input settings in Cubase. To do this, go to the Devices menu, then select Device Setup. From there, click on MIDI Input, and make sure that your MIDI keyboard is selected as the input device. If you don’t see your keyboard listed, it may not be properly connected to your computer, or you may need to install some drivers.

Midi Channel

Another thing to check is the MIDI Channel settings. To do this, go to the Devices menu again, and select VST Connections. From there, click on MIDI, and check that the MIDI channel for your MIDI keyboard is set to the correct channel. If it’s not, you may not be able to hear any sound from your keyboard when playing notes in Cubase.

Additional Tips

If you’ve checked both of these settings and are still having trouble, there are a few other things you can try. First, try unplugging your MIDI keyboard and plugging it back in. This can sometimes solve connectivity issues. If that doesn’t work, try resetting your MIDI preferences in Cubase by going to Preferences > MIDI > MIDI Port Setup, and clicking Reset. Finally, make sure that your keyboard is set to the correct MIDI mode (usually either USB MIDI or MIDI), and that it’s powered on. By checking these MIDI settings, you should hopefully be able to resolve any issues you’re having with Cubase not recognizing your MIDI keyboard. Happy music-making!

Check Cubase Settings

To troubleshoot the issue of Cubase not recognizing the MIDI keyboard, it’s necessary to check the settings of Cubase. Ensure that the keyboard is connected and configured correctly by going through the audio settings and the device setup configuration of Cubase.

If you have connected your MIDI keyboard to Cubase but it is not recognized, the first thing you should do is check the software settings. Here are some simple steps you can take to troubleshoot the issue.

Midi Devices

To ensure your MIDI keyboard is recognized by Cubase, you need to ensure it is selected as a MIDI input device. To do this, go to the ‘Devices’ tab on the top menu and select ‘MIDI Device Manager.’ Check that the model of your MIDI keyboard is in the list of devices. If it is not, click ‘Add’ and choose your keyboard from the list of available devices.

Studio Setup

Another possible reason why Cubase isn’t recognizing your MIDI keyboard is that it is not set up correctly in the Studio Setup. To check this, go to ‘Studio Setup’ under the ‘Devices’ tab. In the MIDI Port Setup window, check that your keyboard is set up as a MIDI input device. If it is not, select it from the list of available devices.

Other Possible Solutions

If the above steps do not work, then there might be some other issues with your setup. Here are some other possible solutions to try:

  • Make sure your MIDI keyboard is turned on and properly connected to your computer.
  • Check that your MIDI cable is connected properly.
  • Update your MIDI device drivers.
  • Restart your computer and Cubase software.
  • Try using a different USB port to connect your MIDI keyboard.
  • Check that your MIDI device is compatible with your version of Cubase.

By following these simple steps, you can troubleshoot why Cubase is not recognizing your MIDI keyboard. Remember to double-check all your settings and connections to ensure they are correct. Happy music-making!

Update Your Drivers

If you’re facing the issue of Cubase not recognizing your MIDI keyboard, then updating your drivers is one of the best solutions. The drivers are software programs that allow your computer to communicate with external hardware devices, such as your MIDI keyboard or audio interface. Outdated drivers can cause compatibility issues, leading to problems in recognizing the MIDI keyboard in Cubase. Updating your drivers is an easy fix that can help you get back to creating music in no time.

Midi Keyboard Driver

The MIDI keyboard driver is a software package that enables communication between your MIDI keyboard and Cubase. To update your MIDI keyboard driver, follow these steps:

  1. Go to the manufacturer’s website.
  2. Locate the support section and search for the driver downloads for your specific model and operating system.
  3. Download and install the latest driver for your MIDI keyboard.

Audio Interface Driver

The audio interface driver is another important software package that ensures proper communication between your computer and your audio interface. To update the audio interface driver, follow these steps:

  1. Go to the manufacturer’s website.
  2. Locate the support section and search for the latest driver downloads for your specific model and operating system.
  3. Download and install the latest driver for your audio interface.

After updating both drivers, restart your computer and launch Cubase. Try connecting your MIDI keyboard again, and Cubase should recognize it. Updating your drivers helps ensure your MIDI keyboard and audio interface are compatible with Cubase.

Reset Your Midi Keyboard

If you are having trouble using your MIDI keyboard in Cubase, the first solution to try is resetting your keyboard. When your MIDI keyboard has an incorrect configuration or communication error, resetting it can resolve the issue. In this article, we will guide you on how to factory reset or update firmware on your MIDI keyboard to ensure Cubase recognizes it.

Factory Reset

Resetting your MIDI keyboard to the factory settings is the most common way of fixing issues with it. This process erases all the settings you’ve made on the keyboard and returns it to its factory state. The steps may vary depending on the brand and model of your MIDI keyboard, but here are the general guidelines:

  1. Turn off your MIDI keyboard and disconnect it from your computer.
  2. Refer to the user manual of your MIDI keyboard on how to factory reset it.
  3. After resetting, connect your MIDI keyboard to your computer and open Cubase. It should now recognize your keyboard.

Firmware Update

If resetting your MIDI keyboard did not resolve the issue, updating its firmware may help. A firmware update replaces your MIDI keyboard’s current software with a new version that contains bug fixes and improved functionality. Here are the steps to follow:

  1. Check the manufacturer’s website for the latest firmware update for your MIDI keyboard.
  2. Download and install the firmware update following the instructions provided.
  3. Restart Cubase and see if your MIDI keyboard is now recognized.

In conclusion, resetting or updating the firmware of your MIDI keyboard are the two most common ways of fixing issues with Cubase not recognizing it. If these solutions do not work, make sure you have properly connected your MIDI keyboard to your computer and check if there’s any damage or issues with it. With these steps, you will be able to get back to making music with your MIDI keyboard in no time!

Cubase Doesn'T Recognize Midi Keyboard

Credit: forums.steinberg.net

Try A Different Daw

If you are facing issues with Cubase not recognizing your MIDI keyboard, then it’s time to try a different Digital Audio Workstation (DAW). This problem can occur due to various reasons, and switching to a different DAW could help resolve this issue. Let’s look at two other popular DAWs, Pro Tools and Logic Pro, and how they handle MIDI keyboard recognition:

Pro Tools

Pro Tools is a powerful DAW that’s widely used in the music industry. It’s compatible with a wide range of MIDI controllers and handles MIDI input seamlessly. Simply connect your MIDI keyboard to your computer, and Pro Tools should recognize it automatically. If not, you may need to check your MIDI settings or consult the user manual for further assistance.

Logic Pro

Logic Pro is another popular DAW, especially among Mac users. It also has excellent MIDI support and recognizes most MIDI controllers out of the box. If you’re experiencing issues with Cubase recognizing your MIDI keyboard, Logic Pro is certainly worth a try. Just connect your MIDI keyboard to your computer, open Logic Pro, and start creating your masterpiece!

So, if you’re tired of troubleshooting your MIDI keyboard issue with Cubase, give Pro Tools or Logic Pro a shot. You might be surprised at how well they recognize your MIDI input and how easily you can get back to creating your music.

Contact Technical Support

One might encounter an issue where their Cubase software fails to recognize their MIDI keyboard. In such a situation, it is advisable to contact the technical support team for the necessary assistance and trouble-shooting.

Contact Technical Support is the next step to take if Cubase doesn’t recognize your MIDI keyboard. Whether you’re a beginner or a professional musician, this issue can be frustrating because it affects your creative process. Fortunately, customer support is always available to help you troubleshoot and resolve the issue. In this article, we’ll explore some of the ways you can contact technical support to get your MIDI keyboard working again.

Midi Keyboard Manufacturer

The first place to start is with the manufacturer of your MIDI keyboard. Most manufacturers have a dedicated support website where you can find troubleshooting guides, software downloads, and other helpful resources. You can also contact their customer support team via phone or email to get assistance with your issue. Be sure to have your product name, model number, and purchase date ready when you reach out to them.

Cubase Customer Support

If you’ve already checked with the manufacturer and your MIDI keyboard is still not recognized by Cubase, the next step is to contact Cubase customer support. You can reach them via email or phone, and they will help you troubleshoot the issue. It’s important to be as detailed as possible when describing the problem, including any error messages or codes that you’ve encountered. They may also ask you to provide additional information about your system setup, so be prepared to answer these questions.

Additional Tips

Before you contact technical support, there are a few additional tips that you can try to resolve the issue. First, make sure that your MIDI keyboard is plugged in correctly and is turned on. If it’s a USB MIDI keyboard, try unplugging it and plugging it back in. You can also try restarting your computer and opening Cubase again. If none of these solutions work, it’s time to contact technical support. In conclusion, if your MIDI keyboard is not recognized by Cubase, there are several steps you can take to resolve the issue. Start with the manufacturer’s website, move on to Cubase customer support, and try some additional troubleshooting tips before reaching out. With a little patience and persistence, you’ll be back to making music in no time.

Cubase Doesn'T Recognize Midi Keyboard

Credit: forums.steinberg.net

Frequently Asked Questions Of Cubase Doesn’t Recognize Midi Keyboard

Why Is Cubase Not Picking Up Midi Keyboard?

Cubase might not recognize the MIDI keyboard due to incorrect hardware connectivity or setup. Check if the keyboard is correctly plugged in and configured in the MIDI devices page. Moreover, update the drivers and firmware of both Cubase and the MIDI keyboard and check again.

Why Is My Midi Keyboard Not Being Detected?

Your MIDI keyboard not being detected could be due to a power issue, outdated drivers, faulty USB/midi cable, or incorrect settings. Try restarting your computer, checking connections, and updating drivers. If the problem persists, seek professional assistance.

How Do I Enable Midi Keyboard In Cubase?

To enable MIDI keyboard in Cubase, first, connect your MIDI keyboard to the computer using a USB cable. Then, open the Cubase software and go to the “Studio” tab. Click on “Studio Setup” and select “MIDI Port Setup. ” Select your MIDI keyboard from the list and click “OK.

” Now your keyboard should be enabled in Cubase.

Why Can’t I Hear My Midi Keyboard In Cubase?

Check if your MIDI keyboard is properly connected to your computer and make sure it is selected as the input device in Cubase. Make sure that the MIDI track is armed for recording and that the correct MIDI channel is selected.

You may also need to check your audio output settings.

Conclusion

In order to fix the issue of Cubase not recognizing your MIDI keyboard, it is important to check all the necessary connections and settings. Make sure your keyboard is selected as the MIDI input in Cubase’s preferences and that the MIDI driver is properly installed.

Additionally, it’s always a good idea to keep your software and drivers up to date. By following these steps, you can easily troubleshoot the problem and continue making music without any interruptions.

Categories
Archive

Hit Maker Mixing And Mastering Engineers

Hit Maker Mixing and Mastering Engineers are experts in enhancing the sound quality of music through mixing and mastering techniques. They combine different audio tracks and apply advanced audio processing techniques to produce a balanced and polished final product.

As a music producer or artist, the quality of your music is paramount to your success. Hit Maker Mixing and Mastering Engineers are professionals who hold the key to delivering top-notch musical productions. Their expertise in audio processing techniques, coupled with years of experience, ensures that the final product meets and exceeds industry standards.

A well-done mixing and mastering job can elevate the sound quality of music, making it richer, fuller, and more enjoyable to listen to. Therefore, it is essential to collaborate with a reputable Hit Maker Mixer and Mastering Engineer to help take your music to the next level.

Mixing Engineers

Hit maker mixing and mastering engineers are essential in today’s music industry. They have a great ear for sound and can tune it to perfection. Mixing engineers make sure that every element of the song is in sync, the vocals are clear and the instruments are balanced perfectly to create a polished final product.

When it comes to music production, mixing engineers have a significant impact on the final sound. They are responsible for taking individual recorded tracks and blending them together into a cohesive and polished song. With skilled hands, they work to enhance the musicality of the song and amplify its emotional impact.

Job Description:

Mixing engineers use a variety of techniques to manipulate the sound of each individual instrument or vocals to make it sound perfect with the others. They achieve balance, clarity, and depth in the mix, ensuring that each element is heard in the right proportion. They tweak the EQ, adjust levels, pan tracks, and apply effects like reverb, compression, and delay. They also edit and time-align the tracks, removing any unwanted clicks or pops.

Skills Required:

Mixing engineers need knowledge of recording techniques, music theory, and applicable software tools such as Pro Tools, Logic Pro, or Cubase. They need critical listening skills, an ear for detail, and an understanding of different music styles. They should know how to communicate and collaborate with the artist and the producer. They must be able to work under tight deadlines and manage multiple tasks efficiently.

Importance In Music Production:

The role of a mixing engineer is crucial in music production. They are the bridge that connects the vision of the artist and the producer to the final product. They shape the song’s tonality, dynamics, and vibe, and make sure that it sounds good on different playback systems. They add value to the recording process by bringing in fresh perspectives, creative ideas, and technical expertise. A well-mixed song can elevate an artist’s career and captivate a global audience. In conclusion, a mixing engineer’s job can make or break a song’s potential success. Their skills and expertise go beyond just combining tracks together; they breathe life into music and transform it into a work of art.

Mastering Engineers

Mastering engineers are an integral part of music production. They are responsible for the final touches that make a recording sound polished and complete. The work of a mastering engineer involves a combination of technical skill and artistry, as they strive to create a cohesive and balanced sound that reflects the artist’s vision. Here, we’ll explore the job description, skills required, and the importance of mastering engineers in music production.

Job Description

The primary responsibility of mastering engineers is to prepare the final mix for distribution. They work with the mixed tracks produced by recording and mixing engineers, using a combination of technical processes and artistic judgment to create the finished product. This includes optimizing the levels, EQ, balance, and dynamic range of a recording, as well as applying corrective processes as needed.

Mastering engineers must also ensure that the final recording is formatted for the intended distribution method, whether it be vinyl, streaming, CD, or other format. Additionally, they must listen to the final product in a range of listening environments to ensure that it sounds consistent and balanced across various playback systems.

Skills Required

Mastering engineers must have a deep understanding of music production and the technical processes involved in creating a polished recording. They should have experience with a variety of software and hardware tools used in the mastering process, and be able to apply these tools in a way that enhances the artist’s vision for the final product. Technical skills required of a mastering engineer include familiarity with audio editing software, processing hardware, and digital audio workstations.

However, mastering engineers must also have a keen sense of artistic judgment, with an ability to identify and enhance the emotional impact of a recording. They must have a discerning ear for detail, as well as an ability to communicate with artists and producers in order to achieve the desired sound. Many mastering engineers also offer feedback to the recording and mixing engineers, helping to improve the quality of the recording throughout the production process.

Importance In Music Production

The work of a mastering engineer is crucial in ensuring that a recording sounds polished and professional. Poorly mastered recordings can be harsh, unbalanced, and fatiguing to the listener, while a well-mastered recording can be immersive, dynamic, and emotionally engaging. The ultimate goal of the mastering engineer is to create a final recording that is faithful to the artist’s vision, and that translates well across a range of listening environments.

In modern music production, the role of the mastering engineer is perhaps more important than ever. With the rise of streaming services and digital distribution, listeners are consuming music in a variety of environments and playback systems. A well-mastered recording will sound great whether it’s being played on a high-end home theater system or a pair of earbuds. The mastering engineer’s role in achieving this goal cannot be overstated.

In Conclusion

Mastering engineers are a critical part of the music production process, responsible for the final touches that make a recording shine. Their technical expertise and artistic judgment ensure that a recording is optimized for distribution, and that it sounds great whether it’s being played on a high-end sound system or a pair of cheap earbuds. As such, mastering engineers play a vital role in ensuring that music is enjoyed as it was intended to be heard.

Tools Of The Trade

Hit maker mixing and mastering engineers rely on a variety of tools to perfect their craft. From digital audio workstations to spectrum analyzers, these professionals use a range of cutting-edge technology to create polished tracks that are ready for commercial release.

When it comes to mixing and mastering, the tools of the trade are crucial for a Hit Maker to achieve excellent results. Working with the right tools can make all the difference in the final product. The two main categories of tools when it comes to mixing and mastering music are Hardware and Software. Understanding how these tools work can help you choose the right Hit Maker to work with.

Hardware

Hit Makers have an array of hardware tools available to them, from high-end studio monitors to mixing consoles and processors. These tools aid in critical listening, signal processing, and mixing among others. Some of the commonly used hardware tools include:

Hardware ToolsDescription
Studio MonitorsThese are high-quality speakers specifically designed for music production, they help Hit Makers to hear every detail of the sound being produced.
Mixing ConsoleA mixing console is used for controlling volume, tone, and panning of multiple audio signals. It allows the Hit Makers to adjust each sound and have a good blend of all audio signals.
HeadphonesHeadphones provide Hit Makers with an option to isolate sounds, making it easy to mix tracks when working in environments with background noise.

Software

As digital audio technology has advanced, many Hit Makers now rely heavily on software tools for mixing, mastering, and music production. The software tools provide a lot of flexibility for mixing and mastering, such as equalization, compression, and effects processing. Some of the commonly used software tools include:

  • Digital Audio Workstation: A DAW is a software application used by Hit Makers for recording, editing, and producing audio files. It allows Hit Makers to manipulate the recorded sound and apply different effects to enhance the quality.
  • Equalizers: This software tool balances the different frequencies of the sound, ensuring that each frequency has the right balance and is audible enough.
  • Compressors: Compressors reduce the dynamic range of an audio signal, both increasing the overall volume of a track and reducing its peaks, which ensures that every sound is audible.
  • Limiter: This software tool is mostly used during the mastering process to make sure that the track does not clip or distort when played on any audio device.

The choice of tools that a Hit Maker uses will depend on their style, specifications of the hardware, and the project’s requirements. With years of experience and solid knowledge of the tools, a great Hit Maker can turn your music into a masterpiece.

Hit Maker Mixing And Mastering Engineers

Credit: www.masteringthemix.com

Key Differences Between Mixing And Mastering

Hit maker mixing and mastering engineers have distinct roles to play in music production. Mixing is the process of blending individual tracks together, while mastering involves giving the mixed tracks a final sheen. The key difference lies in the fact that mixing engineers work with individual tracks while mastering engineers work with the full mix.

When it comes to music production, one of the most crucial aspects is mixing and mastering. Both processes are fundamental to the overall sound quality of the final product, but they serve slightly different purposes. The main goal of mixing is to blend all the individual instruments and vocals together to create a cohesive and balanced sound. In contrast, mastering involves making small adjustments to the mixed tracks, giving them a final polish and creating a consistent sound across all the tracks.

The Main Goal

The primary objective of mixing is to ensure that all the recorded tracks are combined into one final stereo mix that sounds excellent in terms of volume, level, tonality, and balance. A mixing engineer must ensure that each element in the mix is audible, without one instrument overpowering another. They must also apply various EQ, compression, and reverb effects to ensure that the mix sounds cohesive. On the other hand, the main goal of mastering is to ensure that the final mix sounds as good as possible on all playback devices. A good mastering engineer takes the mixed tracks and applies various processing techniques like compression, EQ, and limiting to create a loud and punchy mix with a consistent tonal balance. They ensure that the final recording meets industry standards and is ready for distribution.

The Technical Process

The technical process of mixing involves adjusting levels, panning, EQ, compression, reverb, and other effects to create a cohesive balance. A mixing engineer must have good ears, a deep understanding of sound theory, and music production skills to create a great mix. They must also ensure that each element in the mix is audible, without one instrument overpowering another. In contrast, mastering engineers focus on making minor adjustments to the mixed tracks, using their technical expertise and creativity to bring out the best in the music. They must have excellent listening skills and know how to use specialist mastering tools to achieve the desired sound. They also check the final mix for any technical issues like clicks, pops, and distortion before delivering the final master. In conclusion, mixing and mastering are two essential processes in music production that require different skills and techniques. While the mixing engineer blends all the individual tracks together to create a cohesive sound, the mastering engineer puts the final gloss on the track to ensure that it sounds perfect on all playback devices. By understanding these differences, it becomes easier to appreciate the vital roles that mixing and mastering engineers play in delivering high-quality musical recordings.

Top Hit Maker Mixing And Mastering Engineers

Hit maker mixing and mastering engineers are essential for achieving high-quality sound production. They are experts in sound blending, editing, and mastering. To create a top hit, these engineers use their skills to bring the best out of an artist’s work.

If you are looking for hit maker mixing and mastering engineers to collaborate with, you must be searching for experts in the music industry with an undeniable track record of creating top hits. Hit makers are known for their exceptional skills in producing high-quality music that is pleasing to the ears.

Profile Of Hit Makers

Hit makers are mixing and mastering engineers that are well-known in the music industry for their mastery in producing hit songs. They have often worked with high-profile musicians and record labels, which makes them highly sought after. Their work includes taking raw audio recordings and producing finished songs that sound polished and ready to be played on the radio. They use advanced tools and techniques to produce high-quality sounds that meet or exceed industry standards.

Notable Achievements

Hit makers are celebrated for their most notable achievements, which include producing some of the most famous and popular songs in music history. Some of their hit songs have topped charts and received numerous awards. Notable achievements for hit makers include Grammy awards, platinum and multi-platinum certifications, and being on the Billboard charts. Hit makers’ work has also helped artists achieve critical acclaim and commercial success, resulting in greater visibility for themselves and their clients.

Clients And Collaborations

Hit makers collaborate with some of the biggest names in music. They work with artists to create hit songs that will propel them to success, and with record labels to help promote their clients. Some notable clients and collaborations of hit makers include Michael Jackson, Prince, Beyoncé, and Justin Bieber, to name but a few. They have also worked with major record labels such as Sony, Warner, and Universal. In conclusion, top hit maker mixing and mastering engineers are among the most sought after music professionals in the industry. From their profiles to their notable achievements and collaborations, they bring a wealth of experience to the table. If you are an artist, working with a hit maker is a sure way to help get your music to the top of the charts.

Collaboration Between Artists And Engineers

Collaboration between artists and engineers is an essential aspect of music production. It involves aligning the creative vision of the artist with the technical expertise of the engineer. Hit maker mixing and mastering engineers play a critical role in ensuring that the final product reflects the artist’s vision while meeting industry standards.

Creative Vision Alignment

One of the keys to a successful collaboration is aligning the creative vision of the artist with the engineer’s technical expertise. The mixing and mastering engineers work closely with the artist to understand their goals, preferences, and style. This enables them to bring the artist’s vision to life while ensuring that the final product is polished, cohesive, and competitive within the industry.

Effective Communication

Effective communication between the artist and the engineer is crucial throughout the production process. The engineer must be able to articulate technical terms and concepts in a way that the artist can understand. In addition, the artist must be able to communicate their feedback and preferences clearly to the engineer. Having open and honest communication ensures that both parties are on the same page and can work together to achieve the desired outcome.

The collaboration between the artist and the engineer is a partnership, with both parties working towards a common goal. Hit maker mixing and mastering engineers bring expertise, technical skills, and an objective perspective that complements the artist’s creativity. Effective communication and creative vision alignment are key to producing high-quality music that resonates with audiences and meets industry standards.

Evolution Of Mixing And Mastering In Music Production

Music production has come a long way since the time of wax cylinder recordings and mono sound systems. Today, the music industry is increasingly competitive, with producers and artists always on the hunt for new ways to create and share high-quality music. One of the most important aspects of any music production process is mixing and mastering. This process determines the sound quality of the final product and can make or break a song. In this blog post, we take a closer look at the evolution of mixing and mastering in music production, breaking it down into a historical overview, current trends, and future predictions.

Historical Overview

In the early days of music recording and production, mixing and mastering were relatively simple processes. Recordings were made onto wax or vinyl cylinders, which were then played back on mono sound systems. Mixing involved manually adjusting the levels and balance of different sound sources, while mastering involved fine-tuning the final sound quality for playback on various systems. With the advent of magnetic tape and stereo sound systems in the 1950s and 60s, mixing and mastering became more complex, but the basic principles remained the same.

Current Trends And Future Predictions

One of the biggest trends in mixing and mastering over the past decade has been the rise of digital technology. Digital audio workstations (DAWs) have replaced analog tape machines and mixing consoles, and plugins have replaced physical outboard gear. This has made mixing and mastering more accessible to a wider range of producers and artists, allowing them to create high-quality music without breaking the bank.

In the future, we can expect even more advancements in mixing and mastering technology, including more refined artificial intelligence tools, machine learning algorithms, and virtual reality environments for music production. These advances will make it easier than ever for producers and artists to create music with incredible sound quality and ensure their music stands out in an increasingly crowded marketplace.

Overall, the evolution of mixing and mastering in music production has been driven by a desire for greater sound quality, accessibility, and creativity. As technology continues to advance, we can expect more exciting developments in this space, helping music producers and artists to reach new heights of sonic excellence.

Hit Maker Mixing And Mastering Engineers

Credit: www.masteringthemix.com

Frequently Asked Questions Of Hit Maker Mixing And Mastering Engineers

Who Are The Famous Mastering Engineers?

Some of the most renowned mastering engineers in the music industry are Bob Ludwig, Bernie Grundman, Ted Jensen, Emily Lazar, and Brian Lucey.

Can You Be A Mixing And Mastering Engineer?

Yes, it is possible to be a mixing and mastering engineer. This requires skills in both areas, including knowledge of software and equipment, understanding of sound engineering principles, and experience with the mixing and mastering process. It is important to have a strong ear for sound and be able to make critical decisions during the mastering process to ensure the final product sounds its best.

How Do Mixing And Mastering Engineers Get Paid?

Mixing and mastering engineers get paid based on their experience, reputation, and the complexity of the project. They may receive a flat fee or a percentage of the project’s total budget. Some may negotiate royalties based on album sales.

Do Mixing And Mastering Engineers Get Royalties?

No, mixing and mastering engineers typically do not receive royalties. Their job is to prepare a recording for commercial release, not to contribute to the creative process of songwriting or production. They are usually paid a one-time fee or an hourly rate for their services.

Conclusion

Hit Maker Mixing And Mastering Engineers are essential to the music industry. They possess the technical expertise required to enhance the production quality of a recording. Hiring a professional for your mixing and mastering needs ensures that your music is polished and sounds its best for your audience.

It’s a small investment that yields significant returns for your music career. Give your songs the best chance of success by working with Hit Maker Mixing And Mastering Engineers.

Categories
Archive

Ben Bohmer Writing A Track From Scratch

Ben Bohmer demonstrates his process for crafting a track from the ground up in this informative video. Throughout the tutorial, he shares valuable insights on how to keep things simple while layering sounds and incorporating rhythmic elements.

As an Amazon Associate I earn from qualifying purchases.

If you’re an aspiring music producer looking for some guidance in the songwriting process, then Ben Bohmer’s tutorial is definitely worth checking out. In this video, he takes a blank slate and shares his step-by-step process as he creates a brand new track.

Whether you’re a beginner or a seasoned producer, there’s sure to be something to learn from Ben’s approach. From crafting a memorable melody to layering various sounds and adding rhythmic elements, this tutorial covers a lot of ground and is sure to provide valuable insights into the songwriting process.

Ben Bohmer Writing A Track From Scratch

Credit: www.productionmusiclive.com

Getting Started

For all music enthusiasts, Ben Bohmer’s masterclass on writing a track from scratch was a treasure chest of knowledge and experience. The session has helped in unlocking the creative musician in you, teaching everything from choosing a key, designing a sound, creating a chord progression, and more. Bohmer’s approach to music production is unique and exciting, providing insight into his artistic process. In this blog post, we’ll dive into the steps he took for getting started on creating a track.

Choosing A Key

Choosing a key is an essential factor that comes into play when creating music. The key determines the general mood of the music and works in harmony with the melody. In his masterclass, Ben Bohmer emphasizes the importance of creating the melody first before choosing a key. The melody should influence the tonality of the key and not the other way around.

Designing A Sound

The sound design process begins with creating the sound or musical element that you intend to use in your track. A good practice is to use analog synths or drum machines, which produce warm and organic sounds. Ben Bohmer recommends exploring different variations of the sound and recording them in real-time for a more natural feel. This process results in unique sounds that complement the track and evoke different emotions.

Creating A Chord Progression

Creating a chord progression involves choosing a series of chords that harmonize with the melody. The progression should take the listener on an emotional journey that builds up to a climax and resolves to create the desired mood. Bohmer emphasizes that the chords should be simple, but the melody playing with them should be creative. A great way to practice is to combine different chord progressions to see what works best for the song.

Building The Track

Ben Bohmer takes us on a journey of producing a track from scratch. Beginning with a melody, he builds the layers of percussion, chords, and bass to form a cohesive sound. Through each step, Bohmer provides valuable tips and insights into the creative process of music production.

Building the Track Ben Böhmer is a German DJ and producer who is known for his melodic and atmospheric deep house tracks. In his recent video, he takes us on a journey of creating a track from scratch. In this post, we will explore the process of building the track, from adding drums and percussion to creating the bassline, and finally writing the melody. Adding Drums and Percussion To start building a track, Ben begins by adding drums and percussion. He starts with a simple kick and clap pattern and gradually adds hi-hats, cymbals, and various percussion elements to create a groove. For this track, he uses a combination of live recordings and samples for his percussion. Creating the Bassline The next step in building the track is to create the bassline. Ben starts by creating a simple bassline using a synthesizer, then adds variations to create movement and interest. He uses a combination of low-pass and high-pass filters to shape the sound of the bassline. Writing the Melody The final step is to write the melody. Ben approaches this step by first figuring out the key and scale of the track. He then improvises on his keyboard until he finds a melody that fits the mood of the track. Once he has a melody he likes, he spends time refining and developing it, adding different elements and experimenting with different sounds until he is happy with the final result. In conclusion, building a track is a creative process that requires experimentation and patience. By adding drums and percussion, creating a bassline, and writing a melody, Ben Böhmer shows us how to take a simple idea and turn it into a complete track.

Arrangement And Structure

Ben Bohmer demonstrates the importance of arrangement and structure in electronic music production. In this video, he writes a track from scratch, carefully arranging and structuring different elements to create a cohesive and engaging final product.

When it comes to producing music, one of the most critical aspects is arranging and structuring the different sections of a track. In this blog post, we will delve into the process of renowned German music producer Ben Bohmer, who recently shared his insights on writing a track from scratch. In particular, we will focus on the subheading of arranging and structuring a song, discussing how Ben decides on the intro and outro, builds the breakdown, and crafts the build-ups and drops.

Deciding On The Intro And Outro

For many songs, the intro and outro set the tone and provide a sense of context for the listener. According to Ben, he often starts his tracks with a simple chord progression or melody and then gradually adds layers and elements to build tension and momentum. Once he has created a compelling intro, he then considers how to end the song effectively. Ben believes that endings are just as important as beginnings and that the outro should be “memorable, emotional, and leave listeners wanting more”. To accomplish this, he often experiments with different instrumental arrangements, tempos, and moods until he finds the perfect fit.

Building The Breakdown

The breakdown is an essential section of any track as it offers a moment of reflection and allows the listener to catch their breath before the next section. For Ben, the breakdown is an opportunity to showcase intricate melodies and textures. He often plays with different instruments and soundscapes to create a “hypnotic and dreamy” feel that takes the listener on a journey. Additionally, Ben emphasizes the importance of keeping the breakdowns short and sweet, as prolonged breaks can lead to loss of interest from the listener.

Crafting The Build-ups And Drops

Build-ups and drops are arguably some of the most exciting parts of a track as they build tension and provide moments of release. According to Ben, his build-ups typically begin with a gradual increase in tempo, pitch, and intensity, building suspense until the drop. He likes to experiment with different sound effects, such as filters, risers, and white noise, to create a sense of anticipation. In contrast, the drops are often characterized by explosive basslines, climactic melodies, and thunderous percussion. Ben believes that having a “strong and impactful” drop is crucial to keeping listeners engaged and energized. In conclusion, Ben Bohmer’s approach to arranging and structuring a track highlights the importance of creating an emotional and engaging journey for the listener. By experimenting with different elements and techniques, from chord progressions to sound effects, he creates music that is both intricate and accessible. Whether you are a producer or a music enthusiast, learning from Ben’s insights can help you create compelling and memorable tracks.

Mixing And Mastering

Ben Bohmer, a music producer, shares his process of writing a track from scratch, covering aspects such as mixing and mastering. He enlightens viewers on techniques he uses to ensure individual elements of the track sound great together.

Mixing and Mastering: Balancing Levels, Adding Effects, and Mastering the Final Mix Ben Bohmer, a rising star in the electronic music scene, recently showed his fans how he wrote a track from scratch in a live-streamed production session. In the process of creating the track, he demonstrated essential music production skills, including mixing and mastering. Balancing Levels The first step in mixing involves balancing levels, which is crucial for ensuring all elements of a track can be heard and contribute to the overall sound. Ben started by reducing the volume on some sounds and increasing it on others before playing them together to evaluate their balance. He went back and forth several times, adjusting the levels until he was satisfied with the outcome. Adding Effects Next, Ben added effects to the various elements of the track to make them more interesting and stand out. He used a reverb effect to create a sense of depth and space in the mix, and a delay effect to add a sense of rhythm and motion. EQ and compression were also applied to ensure that the mix was clear and each element could be heard distinctly. Mastering the Final Mix After the mixing process, Ben moved on to mastering the final mix, which involved making sure that the entire track sounded cohesive and professional. He mastered the track by using EQ, compression, and other effects to balance the levels and enhance the overall sound quality. This final step is crucial in the production process, as it can make or break the success of a track. In conclusion, balancing levels, adding effects, and mastering the final mix are crucial steps in producing a professional-sounding track. As Ben Bohmer demonstrated, taking the time to properly mix and master a track can elevate it from mediocre to exceptional.

Collaboration And Feedback

Ben Bohmer showcases the power of collaboration and feedback in his track creation process. From working with talented musicians to gathering feedback from fans, his creative process involves a combination of musical exploration and community engagement.

Collaboration and feedback are key aspects to any music production process, and Ben Bohmer’s approach to writing a track from scratch is no exception. In this post, we will explore how Ben works with vocalists and musicians, as well as how he seeks feedback from peers and mentors to ensure his tracks achieve their full potential.

Working With Vocalists And Musicians

Ben Bohmer’s approach to collaborating with vocalists and musicians is rooted in communication and flexibility. He believes that it is essential to establish a clear and open channel of communication to ensure that everyone is on the same page. Additionally, he stresses the importance of being open to feedback and suggestions from the collaborators, as it can lead to unexpected and exciting directions for the song. To achieve an effective collaboration, Ben emphasizes the importance of finding a balance between the vocal/musical presence and the dance floor appeal of a song. He believes that the vocals and music should complement each other, elevating the overall emotional impact of the song.

Getting Feedback From Peers And Mentors

Ben Bohmer understands that seeking feedback from mentors and peers is an essential part of the creative process. He says that getting a fresh perspective from someone else can provide valuable insights on a song’s strengths and weaknesses, helping him refine his tracks further. To get helpful feedback, Ben looks for people with varied music backgrounds and experiences. He values the opinions of both long-time industry professionals and fresh perspectives from emerging artists. By doing so, he can get a broad range of feedback that helps him see a song from different angles and further strengthen the final product. In conclusion, collaboration and feedback are essential aspects of music production, and Ben Bohmer’s approach emphasizes the importance of open communication and a willingness to receive feedback from others. Through working with vocalists and musicians and getting feedback from peers and mentors, he continually aims to refine his tracks and push boundaries in electronic music.

Ben Bohmer Writing A Track From Scratch

Credit: www.productionmusiclive.com

Frequently Asked Questions For Ben Bohmer Writing A Track From Scratch

What Synths Does Ben Bohmer Use?

Ben Bohmer uses a variety of synths in his music, including the Korg Minilogue, Moog Sub 37, and Access Virus. He also incorporates software synths such as Omnisphere and Serum in his productions.

What Kind Of Techno Is Ben Bohmer?

Ben Böhmer is an artist who specializes in melodic and progressive techno.

What Is Ben Bohmer Known For?

Ben Bohmer is a German DJ and producer known for his deep, melodic, and emotional electronic music.

What Software Does Ben Bohmer Use To Produce Music?

Ben Bohmer mainly uses Ableton Live software to produce his music.

Conclusion

To conclude, witnessing Ben Bohmer write a track from scratch can be an inspiring and educational experience for any music producer. From his thoughtful approach to sound selection, refined mixing techniques, and keen attention to detail, every step of the process reveals the creativity and expertise required to produce high-quality electronic music.

By sharing his process, Ben Bohmer has unlocked a world of possibilities for aspiring producers, offering a glimpse into the art of making music that resonates with audiences worldwide.