Absolutely, anyone can learn music production. It just takes dedication, practice, and the right tools.
Music production can seem overwhelming to beginners, but with the right mindset and resources, it is a skill that can be honed. Despite popular belief, music production is not just for the musically inclined, but for anyone looking to develop their creativity and technical abilities.
With the expansion of technology, there has never been a better time to learn this field. We will explore the basics of music production and provide tips for aspiring music producers to help them take their first steps into this exciting and rewarding field.
Credit: www.wikihow.com
Breaking It Down
Learning music production is an attainable goal for anyone. With a combination of practice, dedication, and the right resources, individuals of all skill levels can master this craft. Whether you’re a beginner or an experienced musician seeking to expand your skill set, music production is within reach.
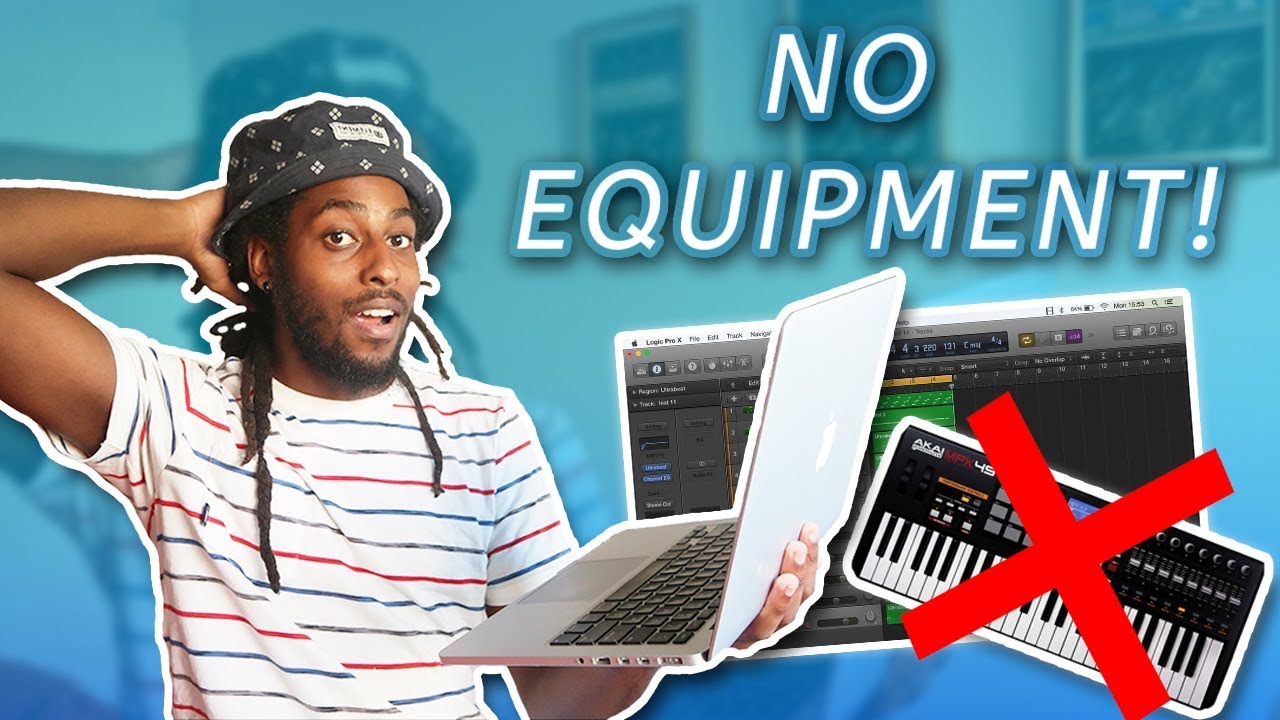
Breaking it Down Learning music production may seem like a daunting task, but breaking it down into manageable steps can make it much more approachable. In this article, we’ll go through the fundamentals of music production, the equipment and software needed, sound design, mixing and mastering techniques, and the importance of music theory. Fundamentals of Music Production Before diving into the technical side of music production, it’s important to understand the basics of music theory and composition. Even if you’re not a musician, understanding concepts like chord progressions, melody, and rhythm can help you create better music. A solid foundation in music theory will also make it easier to communicate with other musicians and producers. Equipment Needed To start producing music, you’ll need some basic equipment. A computer or laptop is essential, as well as studio-quality headphones or speakers. MIDI controllers, microphones, and audio interfaces are also useful tools to have, but they’re not strictly necessary when getting started. Software Needed The most important tool for music production is digital audio workstation (DAW) software. There are many options on the market, including popular choices like Ableton Live, FL Studio, and Logic Pro X. Choosing the right DAW for your needs is important, as each software has its own strengths and weaknesses. Sound Design Sound design is the art of creating and manipulating sounds to fit into a musical composition. This can involve recording and processing real-world sounds, synthesizing electronic sounds, and using effects like reverb and delay. Learning sound design techniques is crucial for creating unique and interesting music that stands out from the crowd. Mixing and Mastering Techniques Mixing and mastering are the final steps in the music production process. Mixing involves balancing the different elements of a track, while mastering involves adding finishing touches like compression and EQ. Both are essential for creating professional-sounding music that translates well to different playback systems. The Importance of Music Theory While it’s possible to create great music without a deep understanding of music theory, learning the fundamentals will make the production process much easier. Understanding how chords work together, how to create tension and release, and how rhythm can affect a track’s energy will help you create more cohesive and effective music. In conclusion, anyone can learn music production by breaking it down into manageable steps. By understanding the fundamentals of music theory, investing in basic equipment and software, learning sound design and mixing/mastering techniques, and appreciating the importance of music theory, you can create music that stands out from the crowd.
Credit: www.productionmusiclive.com
Learning Resources
Learning resources for music production are widely available online, and anyone can learn the art with the right guidance and practice. From tutorials to courses and community forums, there are numerous resources to help aspiring music producers hone their skills and create quality soundtracks.
Learning Resources are essential in learning music production, regardless of whether you are a beginner or an intermediate producer. These resources not only give you an in-depth understanding of music production but also help you hone your skills to perfection. In this section, we have compiled a list of some of the best learning resources that you can use to learn music production. YouTube Tutorials One of the most accessible and free resources for learning music production is YouTube tutorials. With hundreds of videos available, you can find tutorials on any topic related to music production. These tutorials range from basic concepts to advanced techniques, making it a perfect resource for both beginners and intermediates. Some popular channels for music production tutorials include Music Tech Help Guy, Point Blank Music School, and ADSR.Online Courses Another excellent way to learn music production is through online courses. These courses are designed to give you an in-depth understanding of music production, covering everything from basic concepts to advanced techniques. Some popular online music production courses include Berklee Online, Coursera, and Udemy. These courses are typically paid, but they can be worth investing in if you are serious about learning music production. Mentorship Programs Mentorship programs are an excellent way to learn music production, especially if you prefer a more personalized approach. These programs are designed to pair you with an experienced music producer who can guide you through the learning process. The mentor can provide feedback, tips, and advice that are tailored to your specific needs, helping you progress much faster. Some popular mentorship programs include Producertech and Sound Coaching.Practice Exercises Practice exercises are a great way to apply what you have learned in music production and refine your skills. These exercises typically involve working on specific production techniques or recreating popular songs. By doing practice exercises, you can get hands-on experience in music production and develop the skills necessary to produce quality music. Networking with other Producers Networking with other producers can help you learn music production in a more collaborative environment. By connecting with other producers, you can share tips, techniques, and feedback, helping you progress faster and develop a more diverse skill set. Networking can be done on various platforms, including Facebook Groups, Reddit, Discord, and LinkedIn. In conclusion, there are several resources available to learn music production, and you should choose the one that works best for you. Whether it’s YouTube tutorials, online courses, mentorship programs, practice exercises, or networking with other producers, there’s always something to learn to take your music production skills to the next level.
Credit: aimm.edu
Frequently Asked Questions On Can Anyone Learn Music Production
Is It Hard To Learn Music Production?
Learning music production can be challenging, but it is not necessarily hard. With time, patience, and practice, anyone can learn how to produce music. The learning process involves understanding the software, music theory, and sound design. It is essential to take courses, practice frequently, and be open to trying new things.
Can Anyone Learn To Produce Music?
Yes, anyone can learn to produce music with some dedication, practice, and a willingness to learn. There are various resources available online, such as tutorials and online courses, where beginners can gain knowledge and start learning about music production. However, it requires time, patience, and effort to master the skills.
Can Anyone Become Music Producer?
Yes, anyone can become a music producer with determination, passion, talent, and hard work, along with knowledge on music theory, technical production skills, and creativity. Learning from experts, practicing with music software, networking, and promoting one’s work can increase the chances of success in the competitive music industry.
How Do I Teach Myself Music Production?
To teach yourself music production, start by setting goals and finding resources online or in books. Learn about music theory, software and hardware, and workflow. Practice and experiment with different techniques and styles, and seek feedback from other producers. Join online communities and attend workshops or classes.
Continuously refine your skills to improve your productions.
Conclusion
Learning music production may seem overwhelming for beginners, but it’s definitely not impossible. With dedication, hard work, and the right resources, anyone can learn and master music production. From taking online courses to networking with industry professionals, there are a plethora of options available for aspiring music producers.
However, it’s important to remember that the journey to success in music production is a gradual process and requires patience, persistence, and a love for the craft. With the right mindset and resources, anyone can become a music producer and achieve their dreams of creating amazing music.
Remastered Music refers to an updated version of an original recording, where the audio quality is improved through modern technological advancements. Remastering can include various changes, such as adjusting the levels, enhancing the clarity, and reducing unwanted noise.
Remastering is a process that has become more common in recent years due to the increased demand for digital music. With the rise of streaming services, remastering has become a popular way to ensure that classic albums and songs sound their best when played through modern devices and platforms.
While some purists argue that remastering can alter the original artistic vision, many music enthusiasts appreciate the opportunity to hear their favorite songs in a clearer, more vibrant way. Overall, remastering has become an important part of the music industry, allowing listeners to enjoy their favorite artists in the best quality possible.
What Is Remastered Music?
Music has undergone many transformations over the years, from the vinyl records of the 1950s to the digital downloads of today. One such transformative process is music remastering. In simple terms, remastered music is a new version of an older recording, released with improved sound quality. Remastering music is not just about making it louder; it involves enhancing the audio quality by carefully considering every element of the original recording, from its dynamics and tone to its clarity and balance.
The Definition Of Remastered Music
Remastering music is the process of restoring and enhancing sound quality of an original recording to match current audio standards. Every remastered song or album retains the same arrangements, instruments, and vocals as the original version. The difference lies in the overall sound quality, which is greatly improved through the use of modern technology and techniques.
Why Is Remastering Music Done?
Remastering music is done for several reasons. Firstly, the original recordings may not meet current sound quality standards, especially if they were made using older audio technologies. Remastering helps to improve the sound quality of old recordings and make them sound more vibrant and dynamic. Secondly, artists and record labels may want to re-reissue classic recordings to commemorate an important anniversary or event. In such cases, remastering music helps to retain the authenticity and integrity of the original recording while bringing it up to modern standards.
A Brief History Of Remastering Music
Remastering music has been around for ages, but the process has evolved greatly over the years. Initially, remastering involved creating new high-quality copies of original recordings from scratch. Later on, with the advent of digital technologies, remastered music could be created by converting original analog recordings into digital formats and applying digital signal processing techniques. Today, sophisticated software tools and advanced algorithms make it possible to remaster music to a level of detail and precision that was unthinkable just a few decades ago.
Credit: www.youtube.com
The Science Behind Remastering Music
Remastering is a process used to enhance the quality of an existing recording. It involves taking the original recording and enhancing it using modern audio engineering techniques. Remastering music can breathe new life into classic recordings, making them sound more vibrant and dynamic. In this post, we will look at the science behind remastered music and the techniques used to achieve the desired result.
The Importance Of Dynamic Range
Dynamic range is the difference between the loudest and softest parts of an audio recording. When remastering music, audio engineers aim to preserve or enhance the dynamic range to bring out the best in the music. This is done by tweaking the balance of various elements of the original recording like bass, drums, and vocals, etc. Changes in volume can affect an individual’s experience of listening to music, and therefore, engineers have to ensure that the new mix of music provides a clear distinction between soft and loud parts of the recording.
Eq And Frequency Spectrum
The frequency spectrum is a range of audio frequencies that make up a sound. When remastering music, audio engineers typically use EQ (equalization) to adjust the frequency spectrum. EQ can add or diminish certain frequencies in a recording to enhance or minimize aspects of an audio recording. For example, they may need to add more bass to a track to give the music more weight or clarity. Likewise, vocals may need to be EQ’d to make them stand out clearly from the other elements of the song.
Mastering Techniques Used In Remastering
Remastering is a mastering process that includes EQ, compression, and limiting. EQ shaping is used to fit the frequencies used in an audio recording, while compression is used to equalize the volume levels of the tracks. Lastly, limiting is used to prevent distortion by limiting the overall volume range of a recording. The result is a more dynamic and cleaner recording that can again play across audio systems of different specifications without losing its original sound quality.
Remastering is a technical process that breathes new life into an existing recording. The result is a cleaner, more dynamic, and well-balanced version of the original recording. By balancing the dynamic range, adjusting the frequency spectrum, and using mastering techniques, audio engineers can enhance the sound quality of an existing recording and make it sound better than ever.
The Benefits Of Remastered Music
Remastered music refers to the process of enhancing the quality of original recordings. Often performed on older songs or albums, remastering can result in a cleaner, clearer sound. By bringing new life to classic tracks, remastered music offers listeners an opportunity to experience familiar songs in a whole new way.
Remastered music is a process of enhancing and improving the sound quality of an existing audio recording. Remastering involves enhancing the original recording by removing unwanted noise, improving clarity, and adding depth to the audio. This process ensures that the new version of the audio is in harmony with the intended vision of the music, and this method brings an array of benefits.
Improved Sound Quality
Remastering music is a great way of improving the sound quality of the original recording. The process removes the noise and distortion that may have accrued over time, giving the sound a clear and crisp quality. The bass, mid, and treble levels are often equalized throughout the track, giving a balanced sound quality. This process also brings out the subtleties of the mix that may have been lost in the original version.
Increased Clarity And Detail
A remastered track can bring out details that were previously buried in an original recording. The process makes it possible to hear subtleties in the mix such as reverbs, echoes, and harmonics that may have been missed in the original mix. The end result of remastering is usually an audio recording that’s clearer and more detailed than the original.
Emphasis On The Artist’s Intentions
Remastering audio ensures that the original intention of the artist is preserved. The process tries to replicate what the artist had in mind and tries to create a recording that represents the artist’s intentions as accurately as possible. Remastering ensures that the listener’s experience is as close as possible to what the artist intended, giving a more authentic listening experience. In conclusion, remastered music improves the sound quality of an existing recording, bringing out details and subtleties missed in the original. Remastered versions of audio recordings enable listeners to experience music as close as possible to the artist’s intended vision.
The Process Of Remastering Music
Remastered music refers to the process of enhancing the audio quality of previously recorded tracks. It involves going back to the original recording and removing any background noise or distortion, boosting the levels, and ensuring that the music sounds the way the artist intended.
The result is a more polished and superior sound quality that can be enjoyed by listeners.
Remastering music is the process of enhancing the sound quality of an original recording. It involves transferring the original recording into a digital format, improving the audio quality, and creating a new and improved master copy. The process requires a lot of skill, expertise, and specialized equipment. In this blog post, we will explore the detailed process of remastering music, looking particularly at the preparation and transfer of original recordings, digitally enhancing sound quality, and the quality control and final mastering process.
Preparation And Transfer Of Original Recordings
Before any remastering can take place, the original recordings need to be located, cleaned, and digitized. This can be a complicated process, especially if the recordings are old or damaged. The recordings are then transferred to a digital format, such as WAV or AIFF, using specialized equipment. Once the original recording is in digital format, it can be processed in various ways to enhance the sound quality.
Digitally Enhancing Sound Quality
The next step in the process is to digitally enhance the sound quality of the original recording. This involves using a range of specialized software and hardware tools to adjust the frequency response, remove any unwanted background noise, and improve the overall audio clarity. This process requires a lot of expertise and skill, as it is essential to maintain the original character and feel of the recording while still improving the overall sound quality.
Quality Control And Final Mastering
Once the sound quality has been enhanced, the final step is the quality control and final mastering process. During this stage, the remastering engineers carefully listen to the remastered audio, making small adjustments to ensure that it sounds as good as possible. Once everyone is satisfied with the final product, the audio is transferred onto a master copy, which can be used to create the final version of the remastered audio. In conclusion, remastering music is a complex process that requires a lot of skill, expertise, and specialized equipment. However, it is an essential process that allows us to preserve and improve the quality of classic recordings for future generations. The preparation and transfer of original recordings, digitally enhancing sound quality, and quality control and final mastering process are all crucial steps in the remastering process.
The Impact Of Remastered Music On Popular Titles
Remastered music refers to improving the original sound quality of a recording. When applied to popular titles, this enhances the listening experience and allows audiences to appreciate the music in a modern context. Remastered music has a significant impact on the industry as it breathes new life into old classics, attracts new audiences, and revitalizes the music scene.
Music remastering has become increasingly popular over the years. Remastering music involves taking the original recording, improving its sound quality, and releasing it with the updated audio. The impact of remastered music on popular titles is significant in several ways.
A Comparison Of Original And Remastered Versions
Remastered music provides fans with a chance to experience the original music in a whole new way. When comparing the original and remastered versions, fans can hear the difference in sound quality, clarity, and overall tonality. The remastering process involves optimizing the audio from the original recordings, so the new version sounds more defined, balanced, and dynamic.
The Influence Of Remastered Music On Fans And Collectors
Remastered music enhances the fan experience by bringing new life to previously recorded music. It also provides collectors with new versions of their favorite albums, making it a must-have in their collections. The updated audio produced from remastering technology provides collectors with a higher value music collection.
The Significance Of Remastered Music In Preserving Cultural History
Remastered music plays an essential role in preserving cultural history. It ensures that the original architecture of the music is protected and made available for future generations. This ensures that the unique sounds and cultural relevance of the original recording will not be lost over time. Remastered music also allows music historians to study and evaluate the changes that occur to music over time, giving further insight into musical evolution. In conclusion, remastered music has become increasingly vital in preserving the cultural heritage of music and enhancing the listening experiences of fans and collectors. A comparison of original and remastered versions can reveal the significant difference in sound quality and clarity. Furthermore, remastered music continues to maintain its impact on popular titles and their cultural significance.
Challenges In Remastering Music
Remastering music is a time-consuming and challenging task that requires a lot of expertise. It is a process where older recordings are improved to meet the current audio standards. The goal is not only to enhance the quality of sound but also to make it sound great on newer audio systems. Despite the benefits of remastering, the process poses several challenges.
The Ethics Of Remastering
The primary challenge with remastering music is the ethical debate. Many people argue that the original recording should never be tampered with as it removes the authenticity of the recording. Additionally, remastered music may lose its historic and cultural significance. However, others believe that remastering is necessary to preserve the quality of older recordings to current standards for future generations to enjoy.
Difficulties In Acquiring Original Recordings
Another challenge with remastering music is acquiring the original recording. Many older recordings were lost, misplaced, or destroyed over the years. In some cases, only copies of the original recordings are available, which do not match the original quality. This makes the process of remastering difficult and challenging.
Challenges In Restoring Damage And Noise
Restoring damage and noise in older recordings is also a significant challenge in remastering music. Older recordings were often made on analog tapes that wear out over time and can contain tape hiss, pops, and clicks. Eliminating these defects without affecting the integrity of the recording takes a lot of time and expertise. Similarly, issues like dynamics, stereo imaging, and overall tonality need to be addressed with precision to restore the original sound as accurately as possible.
Contemporary Remastering Trends And Techniques
Remastered music refers to the process of enhancing or updating a previously recorded track’s audio quality. Contemporary remastering trends and techniques involve advanced technology and software, which allow for improved sound clarity and depth without altering the original track’s character.
Through these techniques, remastered music can provide an even more immersive listening experience for fans and new listeners alike.
The Use Of Artificial Intelligence
The use of Artificial Intelligence (AI) is a modern remastering technique that is gaining popularity among sound processors. AI software is designed to identify and isolate sound flaws and enhance the quality of audio recordings. It can identify audio signals that are masked and remove unnecessary sounds to improve the overall audio quality. AI-powered software can also make the process of remastering faster, efficient, and accurate.
Focus On Vinyl And Analog Mastering
The resurgence of vinyl has led to a focus on vinyl and analog mastering. Many sound processing companies are investing in vinyl mastering equipment that was previously thought to be obsolete. Such equipment can bring back the warmth and original sound of the recording without compromising the quality. Analog mastering offers the potential of sound quality over digital. Mastering engineers are now using analog signal processors like tube equalizers and compressors in addition to their digital counterparts to achieve a unique sound.
The Future Of Remastering Music
The future of remastering music is exciting, as it is anticipated that there will be more advanced remastering techniques. In the coming years, we are likely to see an increase in the use of machine learning algorithms that will assist sound processors in detecting and correcting sound flaws. We are also likely to see a continued focus on analog mastering and vinyl, as the demand for the warm sound quality of vinyl continues to increase. Additionally, virtual and augmented reality technology could be used to create immersive audio experiences that will enable listeners to enjoy music in a whole new way. In conclusion, the development of modern remastering trends and techniques is revolutionizing the way music is remastered, improving the quality of audio and keeping up with modern technological advances. The future of remastering music looks promising, and we can expect to see further innovations in the coming years.
Credit: entertainment.howstuffworks.com
Credit: headphonesaddict.com
Frequently Asked Questions On What Does Remastered Music Mean
Is Remastered Music Better?
Remastered music is often considered better as it involves cleaning up and enhancing the original recording. This results in a clearer and more balanced sound with improved dynamic range. However, some purists argue that the original recording is better as it captures a certain rawness and authenticity.
Ultimately, the preference is subjective and depends on personal taste.
What Does It Mean When Sound Is Remastered?
Remastering sound involves taking a previously recorded audio track and improving its quality. This process involves enhancing the sound’s clarity, reducing noise, and boosting the overall sound quality. Remastering is often done to improve the sound of older recordings and to bring them up to modern standards.
Why Are All Songs Remastered?
Remastering is the process of enhancing the quality of previously recorded music by improving its sound. Songs are remastered to ensure better sound quality, especially for modern playback systems. The process can also help restore lost or degraded audio data.
What Is The Difference Between Remaster And Remake Music?
Remastering music involves enhancing the quality of the original tracks without changing the underlying content, while remaking music involves creating new versions of the original tracks with significant changes in the instrumentation, arrangement, and overall sound.
Conclusion
To summarize, remastered music may be a familiar term, but its meaning extends beyond just a re-release or an upgrade in audio quality. It involves a meticulous process employing the latest technology to restore an original recording and refine it to match modern standards.
The result is an enhanced listening experience that preserves the essence of the music while giving it a fresh appeal. Fans can now enjoy classic tunes in a way that feels current, thanks to remastering.
To make a synthesizer sound better, adjust the EQ, experiment with different effects, and consider layering sounds. As a musician or producer, you want every element in your musical creation to sound great.
The synthesizer is no exception. Whether you are creating music for a film score, a video game, or your band’s latest track, getting the right sound from your synthesizer is crucial. However, enhancing the sound of your synthesizer can be a daunting task, especially if you are relatively new to music production.
This article will provide some tips on how to make your synthesizer sound better. From adjusting the EQ to experimenting with different effects, we will guide you through some of the best ways to create great synth sounds. So, let’s dive in!
Choose The Right Synthesizer
If you want to create great music, you need the right equipment, and that includes a high-quality synthesizer. Choosing the right synthesizer is crucial because it can make all the difference between a great-sounding track and one that’s mediocre at best.
Analog Vs. Digital
One of the first things you need to consider when choosing a synthesizer is whether you want an analog or digital model. Both have their advantages and disadvantages, and the choice ultimately depends on what kind of sound you’re looking for.
Analog Synthesizers: These synthesizers use analog circuits and components to create their sound. They have a warm, rich sound that’s great for creating vintage-style music. Analog synthesizers are also known for their hands-on controls, which make it easy to manipulate and shape sounds in real-time.
Digital Synthesizers: These synthesizers use digital signal processing (DSP) to create their sound. They offer a more precise and clean sound that’s ideal for modern genres like EDM and hip-hop. Digital synthesizers usually come with a wide range of preset sounds, making them a popular choice for musicians who want quick and easy access to a variety of sounds.
Preset Vs. Custom
Another important consideration when choosing a synthesizer is whether you want a preset or custom model.
Preset Synthesizers: These synthesizers come with pre-programmed sounds that you can access with the push of a button. They’re great if you’re looking for a wide range of sounds and don’t have the time or expertise to create your own custom sounds.
Custom Synthesizers: These synthesizers allow you to create your own unique sounds from scratch. They offer more flexibility and control over the sound, but they can be more time-consuming and require a deeper understanding of sound synthesis.
Ultimately, the choice between an analog or digital synthesizer and a preset or custom model depends on your personal preferences and the kind of music you want to create. Take your time to research different models and read reviews from other users before making a purchase, and you’re sure to find the perfect synthesizer for your needs.
Credit: musictech.com
Understand The Signal Flow
Understand the Signal Flow: Improve Your Synthesizer Sound
If you’re looking to make your synthesizer sound better, understanding the signal flow is a critical first step. By grasping how audio gets processed through the various components of your synth, you’ll be able to adjust your settings strategically to achieve a richer, fuller sound.
Oscillators
The first component in the signal flow is the oscillator. Essentially, this is the sound source in your synthesizer. Whether you’re using a sawtooth, square, pulse, or other waveform, the oscillator generates a raw signal that’s then refined by the other components. To enhance your sound, experiment with different waveforms and tweak the settings to find the right frequency for your sound.
Filters
After the signal leaves the oscillator, it goes through the filter. This component removes certain frequencies from the sound, depending on the filter’s settings. Using the filter creatively can make your synthesizer sound more complex and interesting. Try adjusting the cutoff frequency or resonance to find the right combination for your track.
Amplifiers
Once the signal has been refined by the oscillator and filter, it’s time to amplify the sound before sending it to your speakers. The amplifier component boosts the volume of the signal. Using the amplifier creatively can also add some interesting texture and warmth to the sound. Try experimenting with the gain and envelope settings to further refine your sound.
By understanding the signal flow and how to tweak each component, you can take your synthesizer sounds to the next level. Try experimenting with different settings and techniques to find the perfect sound for your tracks.
Experiment With Modulation
Experimenting with modulation is one of the best ways to make your synthesizer sound better. By using different types of modulation, such as frequency modulation or ring modulation, you can add depth and complexity to your sound and create unique textures.
Modulation is an essential tool for making your synthesizer sound better. It allows you to add movement, complexity, and depth to your sound, making it more interesting and unique. There are different types of modulation, including envelopes, LFOs, and modulation matrix, each with its own unique characteristics.
Envelopes
Envelopes are one of the most basic and essential modulation tools. They control how the sound changes over time, shaping the amplitude, filter, or pitch. Typically, an envelope has four stages: attack, decay, sustain, and release. By tweaking the envelope settings, you can create a wide variety of sounds, from crisp plucks to long pads.
Lfos
LFO stands for low-frequency oscillator, which produces a repeating waveform that can modulate various sound parameters. LFOs are useful for creating vibrato, tremolo, filter sweeps, and other effects that require rhythmic modulation. You can adjust the waveform shape, frequency, and depth to achieve different results.
Modulation Matrix
A modulation matrix is a more advanced modulation tool that allows you to assign various sources and destinations for modulation. It works like a virtual patchbay, where you can connect different sources (e.g., LFO, envelope, velocity, aftertouch) to various destinations (e.g., filter cutoff, oscillator pitch, effect parameter). This gives you endless possibilities for shaping your sound. Experimenting with modulation is a great way to make your synthesizer sound better. By using envelopes, LFOs, and modulation matrix creatively, you can add depth, movement, and uniqueness to your sound. Don’t be afraid to experiment with different settings and combinations to find the perfect sound for your track.
Use Effects Wisely
Use Effects Wisely is one of the key elements to make synthesizer sound better. Synth players often make use of effects to enhance their sound, but effects can be overwhelming if not used wisely. In this blog, we will discuss how to use effects like reverb, delay, and chorus to enhance your synthesizer sound.
Reverb
Reverb adds depth and space to your sound and is useful for creating a more natural and realistic sound. However, overusing reverb can make your sound muddy and undefined. It’s best to use reverb sparingly, between 10-30% mix, depending on the effect you want to achieve. For example, if you’re looking for a large concert hall sound, you may increase the reverb level to 30%. In contrast, if you’re going for a dry, upfront sound, 10% may be sufficient.
Delay
Delay is great for creating rhythmic patterns and adding complexity to your sound. For a more pronounced effect, use longer delay times, and for a subtler effect, use shorter delay times. You can also play with the feedback and mix settings to achieve the desired effect. Like reverb, it’s easy to overuse delay, leading to a cluttered and confusing sound. Therefore, it’s best to use delay sparingly, especially on fast or complex playing.
Chorus
Chorus is a fantastic effect for adding warmth and richness to your sound. It creates the illusion of multiple instruments playing the same part simultaneously. Chorus can be subtle or bold, but it’s best not to use too much of it. Too much chorus can cause your sound to lose clarity and definition. For best results, use chorus sparingly, setting the rate and depth to create depth and character in the sound.
Play With The Eq
One of the most important elements of creating a great synthesizer sound is to play with the EQ. EQ (equalization) is essentially the process of balancing individual frequencies in a soundwave, allowing you to enhance certain elements while toning down others. In this post, we’ll discuss some basic principles of EQ, including boosting vs. cutting and correcting frequency bands to make your synthesizer sound better.
Basic Eq Principles
The basic principles of EQ are simple to understand. By manipulating specific frequency bands, you can add more warmth, clarity, and depth to your synthesizer sound. There are two primary types of EQ adjustments: boosting and cutting.
Boosting Vs. Cutting
Boosting is the process of enhancing a particular frequency by making it louder relative to the rest of the mix. This is often used to add more presence to a sound or to make it stand out from the crowd. Cutting is the opposite of boosting and involves attenuating or reducing a frequency to minimize its impact on the mix. Cutting can be used to eliminate unwanted sounds, to remove harshness or noise, or to simply clean up the mix.
Frequency Bands
One of the most important aspects of EQ is understanding the different frequency bands. You can think of these as distinct areas of the sound spectrum, each with its own characteristics and applications. Here is a breakdown of some of the most important frequency bands:
Frequency Band
Description
Applications
Bass
20Hz-250Hz
Add warmth and depth to synthesizer sounds.
Low-Midrange
250Hz-800Hz
Control the characteristics of the sound.
Midrange
800Hz-2kHz
Allows for clarity and detail in the sound.
High-Midrange
2kHz-4kHz
Helps cut through the mix and adds presence.
Highs
4kHz-20kHz
Add sparkle and shine to the sound.
By understanding these frequency bands and applying basic EQ principles to them, you can take your synthesizer sound to the next level. So don’t be afraid to play around with the EQ settings on your synthesizer and experiment with different frequency bands to find the perfect sound for your tracks.
Credit: m.youtube.com
Master The Art Of Layering
One of the most critical aspects of making a synthesizer sound better is mastering the art of layering. It is the process of combining multiple sounds and creating a unique blend that enhances the overall sonic texture. It is a combination of creativity and technical skills that give musicians a chance to experiment with different sounds, explore new ideas and create original music.
Lead Synths
Lead synths are the high-pitched sounds that carry the melody of a song. They are the most prominent element of any track and give it a unique identity. To make your synthesizer sound better, experiment with layering multiple lead synths to create a fuller and richer sound. You can use different filters, modulation, and effects to create a unique texture that complements the melody of your track.
Pads
Pads are the background sounds that fill up the space and create a sense of depth and space. They add a layer of emotion and ambiance to your music, making it more immersive. To make your pads sound better, you can layer different pads with varying frequencies and timbres to create a rich and full sound. You can use effects like reverb and delay to enhance the sound and create a more natural and organic feel.
Basslines
Basslines are the foundation of any track. They set the tone and mood for the rest of the song and give it a sense of rhythm and groove. To make your basslines sound better, layer different bass sounds to create a more complex and textured sound. You can use effects like distortion and compression to give your bass more depth and presence.
By mastering the art of layering, you can make your synthesizer sound better and take your music to the next level. Experiment with different sounds, textures, and effects to create a unique blend that complements the melody, rhythm, and vibe of your track.
Optimize Your Playing Technique
Enhance your synthesizer sounds by optimizing your playing technique. Experiment with different effects and settings to find the perfect balance and create unique sounds for your music.
Velocity And Expression
The velocity of a synthesizer note refers to how hard or soft a key is pressed while playing. By adjusting the velocity for each note, the sound can become more expressive and dynamic. Try experimenting with different velocities to add more interest to your melody. Similarly, expression is another way of controlling how the notes are played. By using the modulation wheel or aftertouch, you can add vibrato or other desirable effects.
Glide And Legato
Glide and legato are two techniques used to connect notes in a seamless and fluid way. Glide allows one note to slide into the next, producing a smooth transition between them. Legato, on the other hand, is when notes are played in a connected and flowing manner, without any gaps or silences in between them. By using the correct amount of glide and/or legato, you can create a more natural and harmonious sound.
Pitch Bend And Mod Wheel
The pitch bend and mod wheel are also essential tools when it comes to making your synthesizer sound better. Pitch bend allows you to change the pitch of a note, creating a subtle or dramatic effect. The mod wheel is used to control various parameters of the sound, such as vibrato, filter cutoff, and resonance. By adjusting these settings, you can create a more unique and personalized sound. In conclusion, optimizing your playing technique is the key to improving the sound of your synthesizer. By adjusting parameters such as velocity, expression, glide, legato, pitch bend, and mod wheel, you can add more interest and variation to your melodies. With practice, you’ll be able to create more dynamic, fluid, and expressive sounds.
Practice And Experiment
To make your synthesizer sound better, it’s important to practice and experiment with different settings and sound combinations. Take the time to learn your instrument and try new things to find the perfect sound for your music. Keep practicing, and your skills will continue to grow.
Daily Routine
To make synthesizer sounds better, the first and foremost thing is to practice and experiment daily. Practice all aspects of the synthesizer, such as learning how to play scales, chords, and arpeggios. Spend time experimenting with different sound parameters, like LFO rates, envelopes, modulation, and filters. Try to create your own unique sound patches and presets. This way, you’ll be able to create new sounds that you may have never used before.
Recording And Sampling
Recording and sampling are other great ways to make your synthesizer sounds better. Recording your synthesizer’s output can lead to some unique and unexpected sounds. Experiment with different microphone placements and recording techniques. Sampling is the process of recording a small part of a sound and then playing it back as a loop. Sampling opens up many possibilities for sound shaping, and can lead to some truly amazing and creative sounds.
Collaboration
Collaboration is an essential and effective way to make your synthesizer sounds better. Working with other musicians or sound designers can help you to learn new tricks, techniques and gain valuable feedback. It’s also a great way to combine different styles and genres together, which can result in unique and inspiring sounds. Consider joining a synthesizer or music production community to find like-minded individuals and potential collaborators. In summary, practicing and experimenting is key to making synthesizer sounds better. Recording and sampling can add unique and unexpected sounds to your music. Collaboration with others can help you learn new techniques while pushing you to create unique and creative sounds. By following these tips, you can take your synthesizer sounds to the next level.
Frequently Asked Questions Of How To Make Synthesizer Sound Better
How Can I Make My Synth Sound More Natural?
To make your synth sound more natural, try incorporating subtle variations in pitch, velocity, and timing in your playing. Use the modulation and expression controls on the synthesizer to add vibrato, tremolo, and other effects that mimic acoustic instruments. Experiment with different attack and release settings to create a more realistic sound.
Additionally, using samples and layering different sounds can also enhance the natural quality of your synth.
How Can I Make My Synth Sound More Analog?
To make your synth sound more analog, try adding subtle oscillator drift, using low-pass filters, adding noise, experimenting with different envelopes, and utilizing chorus and delay effects. These techniques can give your synth a warm, vintage sound similar to analog synths from the past.
What Makes A Synth Sound Fat?
A fat synth sound is achieved by adding harmonic content to the sound. This can be done by layering multiple oscillators or using effects such as distortion, chorus and reverb. Additionally, using a low pass filter and emphasizing the bass frequencies can also help create a fuller sound.
How Do You Make Synths Hit Harder?
To make synths hit harder, you can try the following techniques: adjust the attack and release settings, add distortion or saturation, layer different sounds together, pan the synth in the stereo field, and use sidechain compression. Experiment with these techniques to find the right combination that works for your track.
Conclusion
To sum up, making your synthesizer sound better requires a combination of technical knowledge and creative experimentation. By understanding the different components of sound creation and manipulation, you can fine-tune your synth to achieve the perfect sound for your music.
Additionally, exploring new techniques, such as using effects pedals or incorporating live performances, can add a unique and dynamic element to your music. With these tips and a willingness to explore and experiment, you can take your synthesizer sound to the next level.
Yes, Distrokid Musician Plus is worth it as it offers unlimited uploads, worldwide distribution, and a range of promotional tools for an affordable yearly fee. Distrokid Musician Plus is a music distribution service that enables independent artists to release their music on all major platforms, including Spotify, Apple Music, and Amazon Music.
The service offers unlimited uploads, artist-friendly terms and conditions, and a range of promotional tools, such as Spotify Canvas, for an affordable yearly fee. Distrokid Musician Plus also offers features like Shazam and TikTok integration, Spotify pre-save, and YouTube content ID at no extra cost.
The service has become increasingly popular among upcoming artists due to its excellent value for money and user-friendly interface. If you are an independent musician looking for an affordable and convenient way to distribute your music, Distrokid Musician Plus is definitely worth considering.
Credit: www.youtube.com
What Is Distrokid Musician Plus?
DistroKid Musician Plus is a digital music distribution service that offers unlimited uploads and multiple features to help independent musicians. The service is worth the additional cost as it provides access to important tools like revenue splitting, customizable release dates, and YouTube monetization.
Overview
DistroKid Musician Plus is an upgraded version of DistroKid, a popular music distribution service. This service is designed for musicians who want to distribute their music to multiple platforms such as Spotify, Apple Music, Amazon, and others. DistroKid Musician Plus comes with additional features that are not available in the standard DistroKid package.
Features
DistroKid Musician Plus offers several features that can help musicians grow their music career. Some of these features include:
Instant Verify: This feature allows musicians to get verified on Spotify, which means that they can update their artist image, access Spotify for Artists, and get a blue checkmark.
Customizable Label Name: With DistroKid Musician Plus, musicians can create their own label name, which will be displayed on all the streaming platforms.
Priority Support: Musicians who subscribe to this service get priority support from the DistroKid support team.
YouTube Money: This feature allows musicians to monetize their music on YouTube, which means that they can earn revenue from their music videos.
Shazam and Siri: DistroKid Musician Plus includes the ability to get your music recognized on Shazam and Siri voice recognition systems.
Lossless Audio: With this feature, musicians can distribute their music in lossless audio quality, which is a high-quality music file format that contains all the audio data from the original recording.
Overall, DistroKid Musician Plus is a great investment for musicians who want to distribute their music to multiple platforms and take their music career to the next level. With its innovative features, the service can help musicians gain more exposure and make more money from their music.
Benefits Of Distrokid Musician Plus
DistroKid Musician Plus offers musicians unique benefits, such as unlimited song uploads, instant royalty splits, and customizable artist pages. With its affordable pricing and user-friendly interface, DistroKid Musician Plus is worth the investment for any serious musician looking to distribute their music online.
DistroKid is one of the most popular digital music distribution services available today. However, their Musician Plus plan offers several additional features that are worth considering. Here are some of the benefits of DistroKid Musician Plus:
Increased Revenue
With DistroKid Musician Plus, artists can keep more of their earnings from streaming services like Spotify and Apple Music. The plan allows for 100% of streaming revenue to go directly to the artist. In comparison to other music distribution services, DistroKid Musician Plus offers some of the best payouts for artists.
Additional Features
DistroKid Musician Plus offers a range of additional features that can help artists grow their music career. Some of these features include:
Customizable release dates – You can choose the release date for your music
YouTube Money – Get paid for plays on YouTube
Shazam and Instagram integration – Make your music easily discoverable on these platforms
HyperFollow – A landing page for your music with easy pre-save options and unique Fan Links
iTunes & Spotify Trends data – Track where your music is doing well around the globe and more
Better Distribution
One of the biggest advantages of using DistroKid Musician Plus is the improved distribution of your music. In addition to distribution on popular music platforms like Spotify, Apple Music, and Amazon Music, the plan also includes distribution to lesser-known platforms like Deezer and Tidal. This ensures that you reach a wider audience and have a better chance of turning a profit. Conclusion: In conclusion, the benefits of DistroKid Musician Plus are clear. For artists looking to take their music career to the next level, this plan can offer increased revenue, additional features, and better distribution. Overall, it’s a smart choice for anyone serious about making a living as a musician.
Pricing Of Distrokid Musician Plus
DistroKid Musician Plus offers a range of services at an affordable price of $35 per year. With access to distribution to over 150 digital stores and streaming platforms, daily streaming and sales reports, and custom label options, DistroKid Musician Plus is definitely worth it for musicians looking to get their music out to the world.
As an independent musician or band, getting your music out to the world is not always an easy task. This is where DistroKid Musician Plus comes in. It is an online distribution service that makes music distribution faster, simpler, and more affordable for independent artists. The platform offers various pricing plans, and in this article, we will focus on the pricing of DistroKid Musician Plus.
Monthly
DistroKid Musician Plus offers a monthly payment option of $19.99 per year. This subscription comes with various benefits such as unlimited music uploads, automatic licensing for YouTube, personalized label name, and instant Spotify verification. Additionally, artists can get access to weekly Spotify trend reports that help them make informed decisions on their marketing strategies.
Yearly
DistroKid Musician Plus yearly subscription is priced at $89.99 for one year. This option offers all the benefits that come with the monthly subscription but at a discounted price that saves up to 40%. The annual payment option is suitable for artists who want to make a long-term commitment to music distribution and save on costs.
Comparison To Competitors
Compared to other music distribution services, DistroKid Musician Plus offers affordable pricing plans that come with valuable features. For instance, competitors such as TuneCore and CD Baby charge $29.99 and $49.99, respectively, for a single album upload, whereas DistroKid Musician plus allows unlimited music uploads for a flat annual or monthly fee. This pricing model is suitable for emerging artists who want to distribute their music without breaking the bank. In conclusion, DistroKid Musician Plus offers an affordable pricing model that comes with valuable features such as unlimited music uploads, automatic licensing, and personalized label name. Whether you choose the monthly or yearly subscription, DistroKid Musician Plus offers exceptional value for aspiring independent artists looking to make their music accessible to a global audience.
Credit: routenote.com
How Distrokid Musician Plus Compares To Other Services
When it comes to music distribution services, DistroKid is a name that often comes up. With the recent addition of their Musician Plus plan, artists are now offered even more options and features. However, it can be difficult to determine whether this plan is worth it compared to other similar services. In this article, we will take a look at how DistroKid Musician Plus compares to other distribution services, specifically Spotify for Artists, CD Baby Pro, and TuneCore.
Spotify For Artists
Spotify for Artists is a well-known platform that allows artists to connect with fans, analyze their statistics, and edit their profiles. While it is not a music distribution service, it is important to note its features as it can contribute to an artist’s success.
Unlike DistroKid’s Musician Plus, Spotify for Artists is free.
It offers detailed analytics and allows artists to create personalized playlists.
Spotify for Artists has a partnership with Songkick, which allows artists to promote their upcoming shows directly on their Spotify profile.
Cd Baby Pro
CD Baby Pro is a distribution service that offers a variety of features for artists, including publishing administration, YouTube monetization, and sync licensing.
DistroKid’s Musician Plus plan is less expensive than CD Baby Pro.
CD Baby offers publishing administration, which means they can collect royalties for both the composition and recording of a song.
CD Baby also offers physical distribution options, such as producing CDs and vinyl.
Tunecore
TuneCore is another popular music distribution service that offers various features, including YouTube monetization and publishing administration.
DistroKid’s Musician Plus plan is less expensive than TuneCore’s pricing tiers.
TuneCore offers a sync licensing service, which allows artists to earn money when their music is used in TV shows, movies, and video games.
TuneCore also offers physical distribution options, such as producing CDs and vinyl.
In conclusion, while each distribution service offers different features, DistroKid’s Musician Plus plan stands out for its affordability. However, it is important for artists to consider what features are most important to them and choose a service accordingly.
Faqs About Distrokid Musician Plus
DistroKid Musician Plus provides a range of benefits to musicians, including unlimited song uploads, customizable artist profiles, and a variety of promotional tools. For those who are serious about their music career, the added perks of this service make it worth the investment.
DistroKid Musician Plus is a fantastic music distribution service that helps you get your music on all major streaming platforms and stores with ease. However, like any other service, there are some things you need to know before signing up. In this section, we will be addressing some frequently asked questions about DistroKid Musician Plus.
What Is The Upload Limit?
When it comes to uploads, DistroKid has got you covered. With their Musician Plus plan, you can upload an unlimited number of releases for an entire year. That means you can upload as many singles, EPs, and albums as you want without worrying about hitting a limit. This is great news for prolific artists who want to put out as much music as possible.
Is Distrokid Easy To Use?
Yes, DistroKid is extremely easy to use. The platform has a clean and intuitive interface that makes it easy to navigate even for beginners. All you have to do is create an account, upload your music, fill in the necessary information, and DistroKid will take care of the rest. One of the best things about DistroKid is their fast turnaround time. In most cases, your music will be live on streaming platforms within 24-48 hours.
How Long Does It Take To Get Paid?
DistroKid has one of the quickest payout systems in the industry. Once your music starts generating revenue, DistroKid will automatically collect your earnings and deposit them into your bank account. You can choose to get paid either weekly or monthly, depending on your preference. DistroKid also offers a detailed earnings dashboard that lets you track your streams, downloads, and revenue in real-time. Overall, DistroKid Musician Plus is definitely worth it for independent musicians who want to distribute their music on all major platforms and stores. With its affordable pricing, unlimited uploads, and fast payout system, DistroKid is an excellent choice for any artist looking to get their music out there without breaking the bank.
Reviews From Other Musicians
Many musicians swear by DistroKid Musician Plus, citing its affordability and ease of use. Reviews frequently praise its customer service, music distribution options, and helpful resources on how to make money from music.
As an independent musician, you want your music to be accessible to a wider audience. One of the ways to do this is by distributing your music across different streaming platforms. This is where DistroKid comes in. With its Musician Plus plan, the platform promises to offer several features that can help you expand your reach, including access to Spotify Canvas, YouTube Content ID, and Shazam integration. But is DistroKid Musician Plus worth it? Let’s look at reviews from other musicians who have tried the platform.
Positive Reviews
Many musicians have shared their positive experiences with DistroKid’s Musician Plus plan. One of the most cited benefits is the wide range of streaming platforms that DistroKid distributes to, including Spotify, Apple Music, Amazon Music, TIDAL, and more. This ensures your music can reach a wider audience. Additionally, some have mentioned how easy it is to upload their music using DistroKid’s platform. They appreciate the ability to customize their release date and the option to choose if their music is released as a single, EP, or album. Some users have also praised DistroKid’s customer service. They have mentioned how helpful and responsive the support team is in addressing their concerns. Musicians also love DistroKid’s royalty-splitting feature, which makes it easy to share earnings with their collaborators.
Negative Reviews
While many musicians have positive experiences with DistroKid, some have shared their negative experiences. One recurring complaint is the inability to edit or change certain aspects of their uploaded music, such as the song title or album art. This can be frustrating, especially if the musician notices an error or needs to make a change. Another common issue is the limited options for customizing album or single artwork. Some musicians have also mentioned how slow the distribution process can be, with some releases taking longer than expected. While this may not be a dealbreaker for everyone, it can be an issue for those who need their music to be released as soon as possible. Overall, most musicians seem to have positive experiences with DistroKid’s Musician Plus plan. While there are some drawbacks to consider, such as limited customization options and distribution delays, the platform’s features and broad range of streaming platforms make it worth considering for independent musicians looking to expand their audience.
Credit: soundtechinsider.com
Frequently Asked Questions For Is Distrokid Musician Plus Worth It
What Are The Benefits Of Distrokid Musician Plus?
DistroKid Musician Plus offers features such as the ability to upload an unlimited amount of songs, automatic split payments for collaborators, and access to more detailed sales data. It also provides priority customer support and the option to distribute cover songs.
What Is The Difference Between Distrokid Ultimate And Musician Plus?
DistroKid Ultimate offers unlimited music distribution, while Musician Plus limits to 100 uploads per year. Ultimate also features instant Spotify verification, personalized label names, and storefront customization, which are not available in Musician Plus.
What Is The Best Plan On Distrokid?
The best plan on DistroKid would depend on your music distribution needs. Their most popular plan, for a yearly fee of $19. 99, allows for unlimited distribution to over 150 platforms, while also offering various other features such as YouTube and Spotify monetization.
Ultimately, it’s up to individual artists to determine which plan aligns most with their goals.
What Is The Disadvantage Of Distrokid?
DistroKid’s disadvantage is the lack of customization options for album distribution and pricing.
Conclusion
Based on the above analysis, we can conclude that DistroKid Musician Plus offers certain benefits that are worth considering for independent musicians. The unlimited uploads, customizable label name, and affordable pricing are some of the key features that make DistroKid Musician Plus stand out.
Ultimately, the decision to sign up for DistroKid Musician Plus should depend on the individual needs and goals of the artist. It is important to carefully consider all the options available before making a decision.
Mixing a song typically takes anywhere from a couple of hours to several days, depending on the complexity of the track and the experience of the mixer. Mixing a song is an essential step in the music production process, where all the individual tracks are combined together to create a final mix that sounds cohesive and balanced.
The process involves adjusting levels, panning, EQ, compression, reverb, and other effects to get the right sound. The time it takes to mix a song varies depending on the complexity of the track, the number of instruments and vocal tracks, the style and genre of music, and the experience of the mixer.
A simple song with just a guitar and vocals might only take a few hours, while a complex orchestral piece with multiple layers could take several days to mix properly. Ultimately, the goal is to make the song sound the best it possibly can, so it’s worth taking the time to do it right.
What Happens Before Mixing A Song?
Mixing a song is a critical part of music production. It’s the process that gives a song its final sound and makes it ready for release. But before starting the mixing process, there are different stages that should be completed, which we’ll be discussing in this post.
Recording
The first stage before mixing a song is recording. During the recording process, every instrument part and vocal track is captured. This can take a few hours to several days, depending on the complexity of the song and the number of instruments used. It’s essential to record each instrument correctly to ensure that it sounds great during mixing.
Editing
After recording, the next step is editing. Editing involves removing noise or unwanted sounds during recording, aligning the timing of the instruments and vocals, and adding effects to improve the song’s quality. This stage can take several hours to a few days, depending on the length of the song and the complexity of the editing process.
Mixing
Finally, we get to the mixing stage. Mixing involves blending all the tracks recorded during the recording process into a seamless track. The mixer will add EQ, compression, and other effects to enhance the sound quality of the song. The mixing stage can take several hours to several days, depending on the length and complexity of the song.
Overall, how long it takes to mix a song depends on the song’s duration, complexity, and the mixer’s skill level. However, most professional mixers can finish a song’s mixing process in a few days up to a week.
What Is Mixing?
What Is Mixing?
In music production, mixing refers to the process of combining individual audio tracks into a final stereo or surround sound mix. The goal of mixing is to balance all the elements of the track, enhance each element’s sound quality, and create a cohesive and balanced sound that matches the artist’s vision.
Definition
Mixing involves adjusting various elements of an audio track, including the levels of different instruments and vocals, panning them in the stereo field, applying EQ, compression, reverb, and other effects, and manipulating the overall dynamics and stereo image of the track.
Goals
The first goal of mixing is to achieve a balanced and clear sound in which all the elements of the track can be heard distinctly, without any muddiness, harshness, or interference.
The second goal is to enhance and improve the individual sounds of each element, making them sound more punchy, warm, bright, or whatever the artist intends.
The third goal is to create a sense of space, depth, and dimension in the track, using various effects and techniques to make the mix sound wider, deeper, or more immersive.
The final goal of mixing is to prepare the mix for mastering, which involves making final adjustments to EQ, volume, and dynamics, preparing the mix for distribution and playback on various platforms and devices.
Depending on the complexity of the track, the quality of the recordings, the experience of the engineer, the tools and techniques used, and the artist’s preferences, mixing a song can take anywhere from a few hours to several days or weeks.
How Long On Average Does It Take To Mix A Song?
Mixing a song takes anywhere from a few hours to a few days, depending on the complexity of the track, the individual capabilities of the mixer, and other factors. Some mixers prefer to mix a song by themselves without involvement from the artist while others believe in artist input.
The process of mixing a song is crucial to ensure that all instruments and vocals are balanced and sound great. An experience audio engineer can mix a song in a few hours, while others may take days to complete the process. The time taken to mix a song largely depends on various factors such as the complexity of the song, quality of the source recording, type of equipment used, and the audio engineer’s expertise.
Factors Affecting Mixing Time
The complexity of a song’s arrangement is the primary factor that determines the time taken to mix a song. More complex songs with multiple layers of instruments, sound effects, and vocals might take longer to mix. Additionally, the quality of the source recording affects the time spent during the mixing process. A well-recorded track with a clean sound requires less mixing time than a poorly recorded track. The type of mixing equipment used also affects the time taken to mix a song. Pro-level studio equipment provides more features and options to the audio engineer, which might extend the mixing time.
Estimation Formula
There is no specific formula to estimate the time taken to mix a song, as the time required can vary vastly based on multiple factors. However, on average, a professional audio engineer takes between 3 to 6 hours to mix a song. However, if the song is more complex, the audio engineer might require more time to ensure that the mix sounds balance and clear. In conclusion, the time required to mix a song varies based on several factors. While some audio engineers can mix a song in a few hours, others might require days to complete the mixing process. As a result, it is challenging to give an exact estimation of the time it takes to mix a song. However, understanding the factors influencing the mixing process can help you appreciate the work involved in creating a fantastic mix.
Credit: majormixing.com
Who Mixes A Song?
Who Mixes A Song?
Mixing a song is an integral part of the music production process. A well-mixed song can make or break an album, which is why it’s crucial to have a skilled professional to handle the task. But who exactly are the people responsible for mixing a song?
Roles & Responsibilities
1. Mixing Engineer: A mixing engineer is a specialist who mixes audio tracks to create a cohesive, balanced sound. They use various techniques to manipulate the levels, frequencies, and stereo image of each instrument and vocal in a song, and layer them together to create a complete mix. The mixing engineer works closely with the producer, band, or artist to ensure that their vision is achieved in the final mix.
2. Assistant Engineer: The assistant engineer is responsible for setting up the recording and mixing equipment, running cables, and monitoring the recording session. They also often take care of software updates and computer maintenance. The assistant engineer supports the mixing engineer by handling mundane tasks, allowing them to focus on the creative aspects of the mix.
3. Producer: The producer is responsible for the overall sound and vision of the project. They work closely with the mixing engineer to ensure that the mix aligns with their creative direction and reflects the intended style and genre of the music. The producer may also contribute to the mix creatively by providing feedback and suggestions.
How Long Does Mixing A Song Take?
The time it takes to mix a song can vary greatly depending on the complexity of the music, the experience of the team, and the budget. A simple rock or pop song with a basic arrangement can take as little as a few hours to mix, while a complex orchestral composition can take several days or even weeks.
The number of tracks and individual parts that need to be mixed also plays a significant role in determining the timeline. A song with only a few instruments and vocals may require only a few days to mix, while a song with dozens of layers and tracks may take much longer.
Ultimately, the most important factor in determining the time it takes to mix a song is the quality of the final mix. Rushing a mix can result in a subpar finished product, while taking extra time to perfect the mix can make all the difference in creating a professional-sounding song.
How To Ensure Efficient Mixing Workflow
To ensure an efficient mixing workflow, the time it takes to mix a song can vary depending on several factors such as the producer’s level of experience, the complexity of the track and the length of the song. However, it is recommended to allocate a minimum of 3-5 hours per song to guarantee a thorough mixing process.
Mixing a song requires time, patience, and skills in order for the song to sound great. One of the essential factors that can help you determine how long mixing a song will take is the efficient workflow of the mixing process. To ensure efficiency in your mixing workflow, you need to consider a few aspects crucial in the preparation, communication, and feedback process.
Preparation
Before you start mixing a song, adequate preparation is key to ensure an efficient workflow. The following steps will help you to prepare yourself to mix a song easily.
Organize your files and session before starting to mix a song; place all the essential mixing files in a specific folder.
Identify the essential elements of the song, such as vocals, drums, and any other instruments and effects.
Make sure you have all the necessary mixing tools to get started.
Identify the best mixing environment, where you can focus and not be distracted.
Communication
Communication is an integral part of ensuring efficient workflow when mixing a song. Communication is essential between the artist and the mixing engineer. Here are some tips to improve communication during the mixing process.
Identify the artist’s preferences; get in touch with them to understand the kind of sound they want.
While mixing the song, communicate with the artist to ensure that you are on the same page.
Use straightforward language to explain any technical issues; this allows the artist to be more involved in the mixing process.
Feedback
Feedback is an integral part of ensuring an efficient workflow during mixing a song since it allows clients to give their input on the mixing process. The following tips can help you to ensure you get the right feedback to enhance workflow.
Provide regular updates to the artist or client during the mixing process to ensure that they are aware of any changes made.
Ask the artist for their opinion on certain elements of the mix to ensure that they are satisfied with the sound.
Provide the artist with different versions of the mix to ensure that they can choose the one that best suits them.
In conclusion, the efficient workflow of mixing a song is essential to ensure that the final product is high-quality and that the mixing process does not take an extended period. By focusing on the preparation, communication, and feedback process, you are better positioned to achieve efficient workflow during the mixing process.
Credit: m.youtube.com
Frequently Asked Questions Of How Long Does Mixing A Song Take
How Hard Is It To Mix A Song?
Mixing a song can be challenging, depending on the level of complexity and the skills of the person mixing it. However, with proper training, practice, and experience, anyone can become proficient at mixing songs. It also helps to have a good ear, attention to detail, and access to the right tools to produce a professional-quality mix.
How Long Does It Take To Audio Mix?
The time it takes to audio mix can vary depending on several factors, including the length of the audio, the complexity of the mix, and the experience of the audio engineer. However, it typically takes several hours to a few days to complete an audio mix.
How Much Does It Cost To Mix A Song?
The cost of mixing a song varies depending on the complexity and length of the track, as well as the experience and location of the mixing engineer. On average, you can expect to pay anywhere from $50 to $500 per song.
How Long Does It Take To Prepare A Song?
The time it takes to prepare a song depends on various factors such as the complexity of the music, lyrics, and the artist’s overall experience and creativity. Some musicians can compose a song in a few hours, while others may take days or even months to come up with a complete track.
Conclusion
The amount of time it takes to mix a song can vary depending on various factors. It is important to ensure that you have all the necessary equipment and software to produce a quality mix. However, taking too long to mix a song can affect its marketability.
Therefore, always strive to strike a balance between quality and time management. With the right approach, you can achieve a mix that meets your desirable standards without taking up too much time.
To make beats on your laptop, you need to download software designed for music production and invest in good quality headphones. Creating beats on a laptop has become easier than ever before, thanks to advancements in music production technology.
Whether you’re a seasoned producer or a beginner, making music on your laptop can be an exciting and fulfilling experience. However, it all starts with choosing the right software for the job. Also, there’s a vast array of music production software available, each with unique features and functionality.
Additionally, investing in good quality headphones or speakers can help you hear every detail in your beats and ensure your music sounds great on all devices. In addition, we’ll explore some tips to help you make the most of your laptop for creating beats.
Credit: www.productionmusiclive.com
Choosing Software to Make Beats on Your Laptop
If you are a budding music producer and want to make beats on your laptop, choosing the right software is crucial for your success. Moreover, with countless options available in the market ranging from free to paid ones, deciding on the perfect software can be overwhelming. Let’s dive into the most important factors to consider when choosing the right software for making beats on your laptop.
Free Vs. Paid Software
While free software may seem like a tempting option when you’re on a tight budget, it’s important to understand that you may not get the robust features and functionality of a paid software. However, if you’re just starting, free software can be a great option to get your feet wet. Furthermore, some popular free beat making software includes LMMS, Garageband, and Audacity. Paid options like Ableton Live, FL Studio, and Logic Pro offer more options, features, and better quality sounds. Ultimately, the decision between a free or paid software will depend on how much you are willing to invest in your music production.
Ease Of Use
The software you choose to make beats on your laptop must be intuitive and easy to use. No one wants to spend hours figuring out how a software works when they should be producing music. Some software is user-friendly, while others are more complex and require some training. Also, free software such as GarageBand is relatively easy to use. Meanwhile, some paid software like Ableton Live and FL Studio may require a learning curve.
Laptop Compatibility for Making Beats
It’s vital to ensure the software you choose is compatible with your laptop’s operating system and has the necessary technical specifications. In addition, check out the software’s minimum requirements to operate to ensure your laptop can handle it. If your laptop is old and doesn’t have the necessary specifications, you may need to upgrade it or choose software that is less demanding.
In conclusion, choosing the right software for making beats on your laptop is crucial. Finally, consider the factors discussed, such as free vs. paid software, ease of use, and compatibility with your laptop. Whether you choose free or paid software, remember that practice and consistency are what will help you improve and achieve success in your music production.
Setting Up Your Laptop Workspace for Beats
If you want to make beats on your laptop, the first step is to set up your workspace properly. Furthermore, a well-organized workspace can help you be more productive and efficient. It can also prevent distractions that can interrupt your creative flow. In this section, we’ll go over some essential steps to set up your workspace for beat-making success.
Clearing Your Desk Space
Before you start making beats on your laptop, make sure your desk is clean and uncluttered. Also, this will give you plenty of space to work and help you stay focused on your music. Remove any unnecessary items from your desk that may distract you, such as papers, books, or other electronic devices. Make sure you have enough room for your laptop, keyboard, and any other equipment you plan to use.
Setting Up External Equipment
If you plan to use any external equipment, such as a MIDI keyboard or a mixing console, set them up before you start working on your beats. In addition, ensure that all connections are secure, and the devices are functioning correctly. Organize your cables and keep them neat to prevent any tripping hazard. Keep the external equipment close enough, so you don’t have to stretch too far to reach them.
Optimizing Laptop Performance for Beats
Your laptop’s performance can affect how well you can make beats on it. Therefore, optimizing your laptop’s performance can ensure that it runs smoothly, and you can produce high-quality beats. Next, here are some optimization tips to follow:
Close all unnecessary applications to free up your laptop’s memory. You can do this manually or use an application like CCleaner.
Disable any automatic updates, notifications, or pop-ups that can interrupt your workflow.
Make sure your laptop is free of malware and viruses by using antivirus software.
Consider upgrading your laptop’s RAM or storage if you think it’s necessary.
Keep your laptop’s battery charged or plugged into a power source, as music production can be intensive and drain your laptop’s battery quickly.
By following these steps, you can set up your workspace for optimal beat-making productivity on your laptop. At this point, you are ready to start your music production journey on your laptop.
How to Make Beats on Your Laptop, Step by Step
Creating your beat is an exciting process, and with just a laptop, you can create your own beats from scratch. There are different software and tools you can use to get started, and by experimenting and practicing, you’ll be able to create unique, personal beats for your music.
Making beats on your laptop is a fun and creative process. With the right tools and a few tips, you can create beats that sound just as good as professional productions. In this section, we’ll go over the key steps to creating your beat. Understanding Beat Structure Before you start creating your beat, it’s important to understand the basic beat structure. Most beats follow a four-bar loop structure, with each bar containing four beats. The first beat in each bar is usually the kick drum, followed by other percussion elements like snare, hi-hats, and claps. Understanding this basic structure will help you create beats that are easy to listen to and follow.
Starting Your Project
To start your beat, open your preferred digital audio workstation (DAW) on your laptop. Create a new project and set the tempo to your desired BPM. Start by laying down your kick drum in the first bar. Add other percussion elements like snare, hi-hats, and claps in subsequent bars.
Don’t worry about getting everything perfect just yet; you can make changes as you go along. Selecting and Manipulating Sounds One of the keys to creating a great beat is selecting the right sounds and manipulating them to fit your composition. Browse through your sound library or sample packs to find sounds that fit the vibe you’re going for. Once you’ve selected your sounds, experiment with EQ, compression, and other effects to make them fit better in your mix. You can also chop, pitch, or reverse your sounds to add variation and interest to your composition.
Layering and Mixing Your Tracks
To add depth and complexity to your beat, consider layering multiple tracks on top of each other. For example, you can layer a low-end bass track with a mid-range synth track to create a fuller sound. When mixing your tracks, make sure each element sits well in the mix and doesn’t overpower the others. Use EQ, compression, and other effects to balance the levels and frequencies of each track. In conclusion, creating your beat is a fun and rewarding process that requires a bit of patience and experimentation. With these tips, you can make beats that sound great and express your own unique sound.
Credit: m.youtube.com
Adding Effects And Polish
If you’ve followed the previous sections, you now have the foundation of your beat laid out. However, a beat isn’t truly complete without some added “polish”: effects, transitions, fades, and other finishing touches can really bring a track to life. In this section, we’ll cover how to add these extra elements to your beat to take it to the next level.
Using Effects To Enhance Your Sound
Effects can give your beat a distinct character and style. For example, reverb can create a sense of space and depth in your sounds. Meanwhile, distortion can add grit and texture. There are a ton of different effects to choose from, and experimenting with them is half the fun!
Most DAWs have built-in effects plugins that you can apply to your tracks. To add an effect, simply select the track you want to modify and choose the effect you want to apply from the plugin menu. From there, you can adjust the parameters of the effect to fine-tune the sound.
Adjusting Volume And Eq
Volume and EQ are two of the most important tools in mixing a beat. By adjusting the volume of each individual track, you can create a balanced mix where each element of the beat is audible and well-defined. EQ, on the other hand, allows you to shape the sound of each track by boosting or cutting specific frequencies.
To adjust the volume of a track, simply drag the fader up or down on the mixer. To adjust the EQ, use the built-in EQ plugin or a third-party EQ plugin. Start by cutting out any frequencies that are muddying up the sound, then boost the frequencies that are most important to the track.
Adding Transitions And Fades
Transitions and fades are important for creating a sense of movement and progression in your beat. A smooth transition can help segue between different sections of the song. Meanwhile, a fade can help create a natural ending.
To add a transition, use a crossfade or other transition effect between two clips. To add a fade, simply select the end of the clip and choose the type of fade you want to apply from the menu.
Finalizing Your Beat For Export
Once you’re happy with the way your beat sounds, it’s time to export it to a file that you can share with others. To do this, choose “Export” from your DAW’s menu and select the file format you want to use (MP3, WAV, etc.). Make sure to name your file something descriptive so that others know what they’re listening to!
Effect
What it Does
Reverb
Creates a sense of space and depth
Distortion
Adds grit and texture
Adjust the volume levels for a balanced mix
Use EQ to shape the sound of each track
Add transitions and fades for a sense of movement and progression
Export your beat to a file for sharing
Sharing the Beats You Make
Learn how to make your own beats on your laptop and share them with the world! With a few simple techniques and software programs, you can create professional-quality beats at home. Get started today and unleash your creativity!
Making beats on your laptop is just the first step towards becoming a successful music producer. Once you have created your masterpiece, sharing it with the world is the next important step. Sharing your beat can help you get feedback, gain followers, and possibly even sell your music. In this section, we will explore different ways to share your beat and get it heard by as many people as possible.
Uploading To Soundcloud Or Youtube
Uploading your beat to SoundCloud or YouTube is a great way to get your music heard by a wide audience. With over hundreds of millions of users on these platforms, you can potentially reach a huge fan base. Simply create an account, upload your beat, add relevant tags and descriptions, and share the link on social media or other platforms.
Collaborating With Other Producers
Collaborating with other producers can help you reach new audiences and expand your skills as a music producer. Working with someone who has a different style or perspective can result in entirely new sounds and beats. You can find other producers to collaborate with through online forums, social media platforms, and music production communities.
Submitting Your Beat To Online Marketplaces
Submitting your beat to online marketplaces such as Beatstars and Airbit can help you sell your music and earn money. These platforms are designed to connect producers with artists who are looking for beats. All you need to do is create an account, upload your beat, and set a price. When an artist purchases your beat, you will earn a commission. In conclusion, there are many ways to share your beat and get it heard by a wide audience. Whether you choose to upload your beat to SoundCloud or YouTube, collaborate with other producers, or submit your beat to online marketplaces, the key is to get your music out there. With patience, hard work, and a little bit of luck, you can build a dedicated fan base and become a successful music producer.
Credit: www.careersinmusic.com
Frequently Asked Questions On How To Make Beats On Your Laptop
Can You Make Beats On Your Laptop?
Yes, you can make beats on your laptop using various software programs specifically designed for music production. Some popular options include FL Studio, Ableton Live, and Logic Pro. These programs allow you to create and manipulate different sounds, loops, and samples to create your own unique beats.
How Can I Create My Own Beats?
To create your own beats, you can use a digital audio workstation (DAW) software. This offers various virtual instruments and sound libraries. Start by selecting a tempo and time signature, then experiment with different beats, patterns, and sounds. You can also record your own sounds and mix them in with the virtual instruments.
Practice and patience are key to mastering beat-making skills.
How To Make Beats On Computer For Free?
You can make beats on your computer for free by using online beat makers or downloading free beat making software. Some popular options include LMMS, SunVox, and GarageBand. You can also find free drum kits and samples online to use in your beats.
Experiment with different software and sounds to find the best fit for your needs.
What Software Do You Use To Make Beats?
There are several software options for making beats, including FL Studio, Ableton Live, Logic Pro, and Pro Tools. The choice ultimately depends on personal preference, budget, and desired features.
Conclusion
To sum up, making beats on your laptop is not a difficult task. With the right software and equipment, anyone can create their own unique beats and music. However, it takes time and effort to master the art of beat-making.
Remember to experiment with different sounds and techniques to find your own style. Lastly, always keep learning and exploring new ways to keep your beats fresh and exciting. Happy beat-making!
A synthesizer keyboard can cost anywhere from $100 to $5000 or more. Synthesizer keyboards are a popular tool for musicians, producers, and hobbyists looking to create unique sounds and experiment with different styles of music.
These keyboards can range greatly in price depending on their features, brand, size, and overall quality. Entry-level models can be found for as low as $100, while high-end professional models can cost upwards of $5000 or more. Some of the top brands in the market include Yamaha, Korg, Roland, and Moog, among others.
When shopping for a synth, it’s important to consider your skill level, musical genre, and personal preferences to find a model that suits your needs and budget.
Factors Affecting Synthesizer Keyboard Prices
Keyboard synth prices vary depending on several factors, including the brand, number of keys, sound quality, and features such as built-in effects and recording capabilities. Higher-end keyboards can cost thousands of dollars, while budget-friendly options can be found for under $100.
Factors Affecting Synthesizer Keyboard Prices If you are in the market for a synthesizer keyboard, you might be wondering how much you should expect to pay for one. In general, the price of a synthesizer can vary depending on several factors. In this section, we will discuss the main factors that affect synth prices: brand, features, keyboard type, and availability of accessories. Brand The brand of a keyboard synth plays a significant role in determining the price. Some brands, like Yamaha and Korg, are known for their high-quality and durable instruments.
Practical Tips for Synthesizer Keyboard
As a result, their synthesizers tend to be more expensive than those made by lesser-known brands. However, it’s worth noting that some lesser-known brands can still produce excellent synths at a more affordable price point. Features Another important factor is the features that come with the keyboard synth. Some keyboards may have more advanced features, such as a larger number of sound presets, built-in effects, or more keys. These additional features will generally increase the price of the keyboard. On the other hand, if you don’t need all of these extra features, there are plenty of affordable options available.
Keyboard Type The type of keyboard you choose will also determine the price. Synthesizers come in various types, such as digital, analog, and hybrid. Digital keyboards are often more affordable, while analog keyboards tend to be on the pricier side. Hybrid keyboards offer a balance between the two, providing the best of both worlds. Availability of Accessories Finally, the availability of accessories can also impact the price of a synth. Accessories, like keyboard stands and cases, can be essential for protecting your instrument and making it easier to play.
Putting It Into Practice for Synthesizer Keyboard
Some keyboards come with accessories included, while others require you to purchase them separately. Depending on your needs, this could affect the overall cost of your keyboard synth. In conclusion, there are several factors that affect the price of a synthesizer, including the brand, features, keyboard type, and availability of accessories. By understanding these factors, you’ll be better equipped to find the perfect synth for your needs and budget.
The Impact Of Brand On Synthesizer Keyboard Prices
The brand of a keyboard synth can significantly impact its price. High-end brands like Yamaha and Roland tend to cost more, while lesser-known brands may offer more affordable options. Investing in a well-known brand can provide better quality and longer-lasting equipment.
Synthesizer keyboards come in different brands, sizes, features, and prices. The brand of a synthesizer keyboard has a significant impact on its price. While some people believe that expensive brands are worth the extra costs, others argue that some cheaper options offer just as much value. In this post, we will explore the popular brands of synthesizer keyboards and their price ranges, to help you make an informed decision when shopping for a synthesizer keyboard.
Popular Brands And Their Price Range
There are several popular brands of synthesizer keyboards that you can consider when shopping for one. Each brand has its unique features, and the price varies significantly. Here are some popular synth brands and their price ranges:
Brand
Price Range ($)
Korg
500 – 4000
Yamaha
200 – 5000
Moog
800 – 8000
Nord
900 – 4000
Arturia
200 – 2500
As you can see, the price range of synthesizer keyboards varies greatly depending on the brand. While some brands offer entry-level keyboards that are affordable, others offer high-end keyboards for professional use, which are much more expensive.
Are Expensive Brands Worth The Extra Costs?
When it comes to purchasing a synthesizer keyboard, there is always the question of whether expensive brands are worth the extra costs. While it is true that some expensive brands offer higher quality and better features, it’s not always the case. Some cheaper options still offer excellent features and are perfect for beginner and intermediate users. Ultimately, the choice between an expensive or cheaper synthesizer keyboard comes down to your needs and budget. If you are a professional musician and need a high-end synthesizer keyboard, then an expensive brand might be worth the extra costs.
However, if you are a beginner or intermediate user, a cheaper brand with good features may be a better option. In conclusion, the brand of a synthesizer keyboard influences its price significantly. Chose a brand based upon your needs and budget, and you will get the best value for your investment.
The Role Of Features In Determining Synthesizer Keyboard Prices
When it comes to buying a synthesizer keyboard, one of the most important factors to consider is its features. A synthesizer keyboard can have a wide variety of features that range from basic to advanced, and each of these features can impact its price. Understanding the role of features in determining synthesizer keyboard prices can help you make an informed decision when buying one.
Polyphony
Polyphony refers to the number of voices a synthesizer keyboard can play at once. A keyboard with higher polyphony can play more notes at once, which is particularly useful for complex songs. Synthesizer keyboards with a low polyphony tend to be less expensive, while those with higher polyphony can cost more. A beginner or intermediate player may find a keyboard with lower polyphony suitable, while advanced musicians may require a higher polyphony to create more complex music.
Sound Quality
Sound quality is a critical feature in determining the price of a synthesizer keyboard. High-quality synthesizer keyboards have better sound quality and are equipped with advanced sound engines, which can better mimic the sound of real instruments. The quality of the building materials also impacts the sound quality of the keyboard. Some high-end models come with built-in speakers, which make the sound even better. A keyboard with superior sound quality may cost more, but it is worth investing in because it can enhance the overall sound quality of your music.
Midi Compatibility
MIDI compatibility allows you to connect your synthesizer keyboard to other MIDI devices such as computers, sequencers, and drum machines. The MIDI compatibility feature enables the keyboard to communicate with other devices and control them. A keyboard with MIDI compatibility can help you use your keyboard in a professional setting, like recording studios. A keyboard with a higher level of MIDI compatibility can cost more than one without it.
Hardware Connectivity
Hardware connectivity refers to the various ports and connectors that are present in the keyboard. It includes USB ports, headphones, microphone jacks, and audio outputs. Having more ports and connectors provides more flexibility when connecting and using the keyboard with other devices. A keyboard with advanced hardware connectivity features may be costly but can be a valuable investment for professional musicians working on complex projects.
When looking at synthesizer keyboard prices, always consider the role that features play, and invest in the keyboard with the features that you need.
Credit: www.youtube.com
Types Of Synthesizer Keyboards And Their Price Range
Synthesizer keyboards come in many types with varying features and functionality. The price range can be anywhere from a few hundred dollars to thousands of dollars for more advanced models. It depends on the brand, quality, and features that come with it.
If you’re in the market for a synthesizer keyboard, you may be wondering how much they typically cost. The answer isn’t straightforward since synthesizer keyboards come in different types and price ranges. Here we’ll break down the three most common types of synthesizer keyboards and their average price ranges.
Analog Synthesizers
Analog synthesizers are some of the oldest synthesizers available. They use analog circuits to create sound, making them a popular choice for musicians looking for classic synth sounds. Analog synthesizers tend to be pricier than digital synthesizers as they require more technical parts to ensure the sound is to a high quality. Expect to pay anywhere between $400 and $3,500 for an analog synthesizer keyboard.
Digital Synthesizers
Digital synthesizers are often more affordable than their analog counterparts. They use digital signal processing to create and modify sound, which means they tend to offer a broader range of sounds compared to analog synthesizers. Digital synthesizer keyboards typically cost between $100 and $2,000.
Hybrid Synthesizers
Hybrid synthesizer keyboards combine both analog and digital synthesis techniques, resulting in a unique sound. As you can imagine, these synthesizers are usually more expensive than either analog or digital instruments on their own. Expect to pay between $500 and $3,000 for a hybrid synthesizer keyboard. Overall, synthesizer keyboard prices can vary widely, depending on the type of synthesizer and the features it offers. We hope this article has given you a good sense of the different types of synthesizer keyboards available and their average price points. Do your research and invest in a synthesizer keyboard that meets your needs and budget for the best results.
Accessories That Affect Synthesizer Keyboard Prices
Synthesizer keyboard prices are affected by accessories like pedals, stands, and cases. A high-quality keyboard stand or a specialized pedal could increase the price, but it’s important to consider the value they bring to the setup as a whole.
When it comes to purchasing a synthesizer keyboard, there are a few things to consider that can affect the overall price. Aside from the brand and features, accessories can also play a huge factor. Here, we will take a closer look at pedals, amplifiers, and cases.
Pedals
Pedals are important accessories for synthesizer keyboards, as they offer different functionalities to enhance the overall sound. There are several types of pedals available, including sustain pedals, expression pedals, and volume pedals. The price of pedals can range from $20 to $200, depending on the brand and functionality.
Amplifiers
Amplifiers are another essential accessory for synthesizer keyboards. They are necessary to produce sound and increase the volume of the keyboard. Amplifiers come in a wide range of sizes and configurations, offering different levels of output power and sound quality. The price of amplifiers can vary significantly, depending on the brand and specifications. A basic amplifier can cost around $50, while a high-end one can go up to thousands of dollars.
Cases
Cases are necessary to transport and protect your synthesizer keyboard. Hard cases made of plastic or metal are more expensive but offer better protection. On the other hand, soft cases or gig bags are more portable and affordable but provide minimal protection. The price of cases can range from $20 to $300, depending on the material and size. In conclusion, when purchasing a synthesizer keyboard, it is important to consider the accessories that come with it, as they can add significantly to its overall cost. Pedals, amplifiers, and cases are essential accessories that can affect the price of a synthesizer keyboard.
Credit: www.youtube.com
How To Choose And Buy The Best Synthesizer Keyboard For Your Needs
Finding the perfect synthesizer keyboard that suits your needs can be challenging, especially when considering the price. Look for features such as the sound quality, the number of keys, the instrument’s weight, and additional functions to determine how much you’re willing to spend.
When it comes to buying a synthesizer keyboard, the options can be overwhelming. With so many models and brands available, it can be hard to know where to start and what to consider. That’s why it’s essential to define your needs and budget first, research and compare available models, and buy from a reputable dealer.
Define Your Needs And Budget First
Before you begin your search for a synthesizer keyboard, it’s crucial to define your needs and budget. Think about why you want to buy a synthesizer keyboard. Do you want it for live performances or recording? Do you need a specific type of sound or feature? Deciding on your needs will help narrow down your options. In addition to defining your needs, it’s also important to set a budget. Synthesizer keyboards vary widely in price, so deciding on a budget will help you focus on models that fit your price range.
Research And Compare Available Models
Once you’ve identified your needs and budget, it’s time to research and compare available models. Look for models that fit your needs and budget, and read reviews from other users to see how they have performed in real-life scenarios. When comparing models, consider factors like synthesizer type, number of keys, sound quality, and additional features. Look for models that offer a good balance of features and price, and that have a good reputation for reliability and durability.
Buy From A Reputable Dealer
When buying a synthesizer keyboard, it’s important to buy from a reputable dealer. This ensures that you are getting a quality product that will perform as advertised. Look for dealers that specialize in musical instruments and have a good reputation for customer service. In addition to buying from a reputable dealer, it’s also important to consider the warranty and return policy. Make sure you are comfortable with the terms and conditions before making your purchase. In conclusion, choosing and buying the best synthesizer keyboard for your needs requires defining your needs and budget, researching available models, and buying from a reputable dealer. By following these steps, you can make an informed decision that will result in a quality instrument that meets your needs and fits your budget.
Credit: www.bananas.com
Frequently Asked Questions On How Much Is A Synthesizer Keyboard
How Much Does Synthesizer Cost?
The cost of a synthesizer varies greatly depending on the brand, features and quality. Basic models can cost around $50, while higher-end options can cost over $3000. Ultimately, it comes down to your budget and the level of functionality and quality you’re looking for.
What Is A Good Beginner Synthesizer?
A good beginner synthesizer would be the Korg Volca Keys. It has an easy-to-use interface, a variety of sound options, and compact size. Additionally, it is affordable and has a built-in sequencer.
Should I Get A Keyboard Or A Synthesizer?
It depends on your needs. If you want to play live or with a band, then a keyboard is a better choice. However, if you want to create or produce music, then a synthesizer will give you more sound design options and flexibility.
Ultimately, you should consider what you want to use the instrument for before making a decision.
How Do You Tell If A Keyboard Is A Synthesizer?
A keyboard that is a synthesizer generates sounds electronically, replicating traditional instruments or creating new ones. Look for features such as sound presets, filter controls, and modulation options. Additionally, synthesizers usually lack features such as weighted keys or sustain pedals that are common in keyboard pianos.
Conclusion
The market offers a variety of options for synthesizer keyboards, from entry-level to highly professional models. Various factors can affect their price, including quality, features, and brand reputation. Choosing the best synthesizer keyboard depends on your budget, needs, and purpose of use.
Research and comparison can help you find the right product for you. Ultimately, investing in a synthesizer keyboard can enhance your musical creativity and performance. Now go ahead and make an educated purchase decision!
Free VST acoustic instruments are available for download online. These virtual instruments can be used in music production software to create realistic acoustic sounds.
Acoustic instruments produce sounds that are natural and pleasing to the ear, making them a popular choice in music creation. However, not everyone has access to a wide range of physical instruments. This is where Virtual Studio Technology (VST) acoustic instruments come in handy.
They allow users to access a variety of acoustic sounds, all from the comfort of their computer. Additionally, many of these VSTs are available for free, making them accessible to aspiring musicians who may not have the budget for expensive sound libraries. We will explore some of the best free VST acoustic instruments available for download.
Credit: www.native-instruments.com
Advantages Of Free Vst Acoustic Instruments
Free VST acoustic instruments offer numerous advantages, including access to high-quality sounds without the expensive price tag. Whether you’re a music producer or a hobbyist, free VST plugins provide a wide variety of realistic acoustic sounds that can enhance any project.
Acoustic instruments like guitar, drums, and piano have been the backbone of music for centuries. With modern technology, musicians can now create realistic and high-quality sounds without having to own expensive and bulky instruments. Free VST (Virtual Studio Technology) Acoustic Instruments offer an easy and accessible solution to create authentic soundscapes. Besides, there are several other advantages of using free VST acoustic instruments, such as:
High-quality Sound Samples
Free VST Acoustic Instruments come with high-quality sound samples that have been recorded by professionals using real instruments. This ensures that the sound produced is authentic and realistic, thereby enhancing the overall quality of the music. These samples are also available in various formats, including WAV, MP3, and MIDI.
Compatibility With Major Daws
Free VST Acoustic Instruments are compatible with all major DAWs (Digital Audio Workstations) such as Cubase, Ableton Live, and FL Studio. This means that you can easily use them within your existing workflow. You do not have to worry about whether they will be compatible with your DAW, and you can create music without any interruptions.
Customization Options
Free VST Acoustic Instruments offer a wide range of customization options. Musicians can tweak the sound samples, adjust the volume, and add different effects to create their unique sound. This allows them to produce music that matches their style, giving them the freedom to create music without any limitations. In summary, Free VST Acoustic Instruments offer several advantages, including high-quality sound samples, compatibility with major DAWs, and customization options. By incorporating these instruments in their music, musicians can create authentic soundscapes and produce music that matches their unique style.
Credit: www.youtube.com
Top Free Vst Acoustic Instruments
Acoustic instruments are the backbone of any good music production. Whether it’s a soulful guitar or a powerful grand piano, acoustic instruments can add warmth, depth, and character to your tracks. While high-end VSTs can come with a hefty price tag, free options can rival expensive commercial plugins in quality and versatility. In this article, we’ll explore the top free VST acoustic instruments that offer a range of expressive and realistic sounds.
Spitfire Audio Labs
Spitfire Audio LABS is a popular plugin that offers an extensive library of free virtual instruments. The plugin features a wide range of acoustic instruments, including pianos, strings, and percussion. One of the standout instruments is the Soft Piano, which offers a gentle, organic sound perfect for ballads and background music. LABS also features a variety of experimental instruments, such as the Frozen Strings and Choir, which can add a unique touch to any production.
Pianobook
Pianobook is a community-driven project that offers free, royalty-free virtual instruments. The plugin is curated by a team of professional composers and sound designers, who contribute their own samples to the library. Pianobook features an extensive range of piano and keyboard instruments, including upright pianos, toy pianos, and harpsichords. The plugin also includes a collection of non-piano instruments, such as guitars, cellos, and choirs.
Ample Guitar M Lite Ii
Ample Guitar M Lite II is a realistic-sounding acoustic guitar plugin that offers a range of strumming patterns and techniques. The plugin features a variety of guitar models, including a Martin D-41 and Gibson J-45. The plugin allows for fine-tuned control over the guitar’s sound, with options for adjusting the pick position, string resonance, and fret noise. Ample Guitar M Lite II is an excellent choice for producers looking to add authentic-sounding acoustic guitar to their tracks.
How To Install And Use Free Vst Acoustic Instruments
Learn how to easily install and use free VST acoustic instruments in your music production. With a large variety of options available, you can add realistic sounding instruments to your tracks without breaking the bank or sacrificing quality.
Looking for free acoustic instruments for your DAW projects? VST (Virtual Studio Technology) acoustic instruments might be just what you’re looking for. VSTs are software-based plugins that simulate the sounds of real musical instruments. In this blog post, we’ll guide you through the process of installing and using free VST acoustic instruments in your DAW.
Download And Install A Vst Host
Before getting started, you’ll need a VST host installed on your computer. A VST host is a software application that enables VST plugins to work with your DAW. Some popular VST hosts include Ableton Live, FL Studio, and Reaper.
Download Your Free Vst Instrument
There are numerous websites that offer free VST acoustic instruments. Some of the most popular sites include Native Instruments, Spitfire Audio, and Waves. Once you’ve found a VST instrument you want to use, simply download the software and save it to a folder on your computer.
Add The Vst Instrument To Your Daw
To add the VST instrument to your DAW, you’ll need to open your VST host application first. Then, look for the “Plugins” or “VST Instruments” section and click on “Add Plugin.” A dialog box will appear, and you’ll need to select the folder where you saved the VST instrument to find and select it.
Adjust Settings And Start Playing
Once you’ve successfully added the VST instrument to your DAW, you can start playing! Many VST instruments come with different settings and parameters that you can adjust to achieve your desired sound. Experiment with different settings until you find the perfect sound for your project. In conclusion, installing and using free VST acoustic instruments can add a whole new dimension to your music production endeavors. By following these simple steps, you’ll be on your way to enhancing your musical creations with realistic, high-quality acoustic instrument sounds.
Credit: m.youtube.com
Tips For Getting The Most Out Of Free Vst Acoustic Instruments
Enhance your music production with free VST acoustic instruments by customizing the settings and adjusting the sounds to fit your track. Experiment with different effects and techniques to achieve the perfect sound for your project.
If you’re a music producer or composer, you probably know how important acoustic instruments are. But acquiring high-quality acoustic instruments can be expensive. Thanks to technology, now anyone can make music using free VST acoustic instruments. However, not everyone knows how to make the most out of these virtual instruments. Here are a few tips that can help you get the most out of free VST acoustic instruments.
Experiment With Different Articulations
One of the biggest advantages of VST instruments is that they allow you to switch between different articulations with just a few clicks. Different articulations can give your music a unique flavor and make it sound more realistic. Experiment with different articulations to find the perfect sound for your track. You can use articulations like staccato, legato, vibrato, and more to create a dynamic range of sounds.
Use Effects To Shape The Sound
While using free VST acoustic instruments, you might feel that the sound is too dry or doesn’t fit your track. But don’t worry, you can use effects to improve the sound of your instrument. Effects like reverb, delay, and EQ can help shape the sound to your personal preferences. Try different effects and adjust the settings until you find the sound you want.
Layer Multiple Sounds For A Unique Sound
If you want to take your music to the next level, consider layering different VST acoustic instruments. Layering can give your music a full, rich sound, and make it more interesting. You can layer a piano with a guitar or a cello with a violin to create a unique combination of sounds. Experiment with different combinations and see what works for your track. In conclusion, free VST acoustic instruments have opened up a whole new world of opportunities for music producers and composers. By following these tips, you can make the most out of these virtual instruments and create amazing music that sounds just as good as the real thing. Happy composing!
Frequently Asked Questions On Free Vst Acoustic Instruments
Where Can I Get Free Vst Instruments?
You can get free VST instruments from various sites including VST4Free, Bedroom Producers Blog, and Plugin Boutique. These sites offer a wide range of VST instruments for free download and use in your music production projects.
Is Komplete A Vst?
No, Komplete is not a VST. It is a software package that includes various VST instruments and effects, along with other tools and resources for music production.
What Vst Instruments Do Professionals Use?
Professionals use a range of VST instruments, such as Kontakt, Omnisphere, and Serum. Kontakt provides access to a vast library of realistic orchestral and ethnic sounds, while Omnisphere has a wide range of synthesizer options and sound manipulation tools. Serum offers modern, cutting-edge sounds, popular in electronic music genres.
How Do I Add An Instrument To Vst?
To add an instrument to VST, you need to follow these steps: 1. Download and install the VST plugin that contains your desired instrument. 2. Open your music software and scan for new plugins. 3. Locate the newly installed plugin and load it into your project.
4. Choose your desired instrument and start creating music.
Conclusion
Overall, free VST acoustic instruments are an excellent solution for beginners, those on a budget, or anyone seeking to expand their musical capabilities. These software plugins offer high-quality sound, versatility, and convenience, without the need for expensive equipment or instrument rentals.
By taking advantage of these free resources, you can explore your creativity, enhance your productions, and refine your skills. So, whether you’re a hobbyist or a professional, be sure to check out the countless free VST acoustic instrument options available online.
To brand yourself as a musician, utilize social media platforms to showcase your talents and engage with your audience. As a musician, creating an online brand is essential in gaining exposure and connecting with potential fans.
An effective branding strategy includes defining your unique style and image, creating a professional website, and consistently sharing your music through various digital channels. Utilize social media platforms like Instagram, YouTube, and Twitter to showcase your music, engage with fans, and promote upcoming events.
Collaborating with other musicians and industry professionals can also help expand your audience and brand. By implementing a strong branding strategy, you can establish yourself as a prominent and successful musician in the digital world.
Credit: blog.discmakers.com
Why Branding Matters For Musicians
Creating a strong brand as a musician is essential to stand out in the competitive industry. Your brand reflects your music style, personality, and values, attracting the right audience and opportunities. By building a consistent brand image through social media, website, merchandise, and live performances, you can establish a loyal fan base and increase your chances of success.
Creating A Strong Identity
As a musician, you need to differentiate yourself from other artists. To do this, you need to create a strong identity that defines who you are and what you stand for. Your identity should be unique and memorable so that fans can easily recognize you. This can be accomplished through things like distinctive stage attire, memorable album art, or unique logos. By creating a strong identity, you give fans something to connect with and remember you by.
Establishing A Reputation
Your reputation is everything in the music industry. Building and maintaining a good reputation is crucial to your success. You want to be known as a talented, reliable, and professional musician. Every interaction you have with fans, industry professionals, and other musicians contributes to your reputation. By consistently delivering high-quality performances, responding to messages in a timely manner, and treating others with respect, you establish a positive reputation that can lead to more opportunities in the future.
Growing Your Fanbase
A strong brand can help you grow your fanbase. By creating a clear and consistent image, you can attract fans who are interested in your style of music and relate to your identity. Social media is a powerful tool to connect with fans and build your brand. Regularly posting updates, sharing behind-the-scenes content, and engaging with your followers can help you build a strong fanbase. When fans feel like they have a personal connection with you, they are more likely to support you and share your music with others. In conclusion, branding is crucial for musicians who want to establish themselves, stand out from the crowd, and build a loyal fanbase. By creating a strong identity, establishing a positive reputation, and connecting with fans through social media, you can create a successful brand that supports your music career.
Defining Your Brand As A Musician
As a musician, branding yourself is crucial to build recognition and increase your fan base. Define your unique style and image, craft a strong bio, use consistent branding across social media platforms and merchandise, and engage with your audience in authentic ways to create a memorable brand.
As a musician, defining your brand is crucial to differentiate yourself from the rest of the industry. Your brand is what sets you apart and helps you establish a unique identity in the market. It encompasses your music genre, style, image, message, and fan base. Here are the important aspects you need to consider when defining your brand as a musician.
Identifying Your Niche
Identifying your niche is the first step towards defining your brand. A niche is a specific area within the music industry that you specialize in, such as jazz, rock, blues, or hip-hop. By identifying your niche, you can focus on creating music and building relationships with fans that resonate with your style. Take time to research your competition and find the gap in the market that you can fill with your unique sound.
Developing Your Unique Style
Developing a unique style is what sets you apart from other musicians in your niche. Your style includes your musical arrangements, vocals, instrumentation, and even your fashion sense. Your unique style should be consistent across all your music releases, social media platforms, and live performances. Experiment with different elements and take feedback from your fans to refine your style and stand out from the crowd.
Clarifying Your Message
Clarifying your message is about communicating your story, values, and beliefs to your audience. Your message should be clear, concise, and relatable to your target audience. It helps you connect with your fans on a more emotional level and build a loyal following. Consider what message you want to convey through your music and use it as a guiding force for your brand identity. To conclude, defining your brand as a musician is crucial for building a successful career in the music industry. Identify your niche, develop a unique style, and clarify your message to stand out from competitors and connect with your audience on a deeper level. Remember, your brand should be consistent across all platforms to create strong brand recognition and establish a strong online presence.
Build A Cohesive Online Presence
Establishing a strong online presence is a crucial aspect of branding yourself as a musician. Create a cohesive image across all social media platforms and your website with consistent branding elements, including logos, colors, and imagery. Interact with fans, post quality content regularly, and optimize your site with relevant keywords to boost your online visibility.
As a musician, building a strong online presence is crucial in creating and sustaining your brand. One way to establish a cohesive online presence is by creating a professional website and optimizing your social media profiles. Consistency is key, so it’s important to incorporate visual consistency throughout all your online channels. Below are some tips for building a cohesive online presence that reflects your personal brand.
Creating A Website
Having a website is essential in establishing your online presence as a musician. Your website is where you can showcase your biography, upcoming events, and music. To effectively create a website that aligns with your brand, consider the following:
Use a domain name that is easy to remember and reflective of your brand name
Showcase high-quality images and videos of yourself performing
Include a biography that highlights your achievements and experiences
Make it easy for fans to connect with you through a contact form or social media links
Optimizing Your Social Media Profiles
Social media is a powerful tool in building your brand as a musician. It’s important to optimize your social media profiles to ensure they align with your brand. Consider the following tips:
Platform
Tips
Facebook
Use a high-quality profile picture and cover photoInclude your website and contact information in your bioShare updates about your music, upcoming events, and behind-the-scenes moments
Twitter
Use a professional profile picture and header imageInclude your website and contact information in your bioTweet updates about your music and personal moments
Instagram
Use a high-quality profile picture and bioShare visually appealing posts that showcase your music and personalityUse relevant hashtags to make your posts discoverable
Visual Consistency
Visual consistency is crucial in creating a cohesive online presence across all your channels. This includes the use of similar colors, fonts, and design elements that align with your brand. Consistency makes it easier for fans to recognize your brand and engage with your content. In conclusion, building a cohesive online presence is essential in establishing your brand as a musician. By creating a professional website, optimizing your social media profiles, and incorporating visual consistency, you can effectively showcase your music and personality to the world.
Collaborating With Other Musicians And Brands
Collaborating with other musicians and brands is an effective way to brand yourself as a musician. By networking and working with like-minded professionals, you can increase your exposure and reach new audiences. Leverage collaborations to showcase your unique sound and style, while aligning yourself with brands that align with your values and image.
When it comes to establishing a successful career as a musician, branding is everything. One crucial aspect of branding is collaborating with other musicians and brands. This not only helps you expand your network but also opens the door to various opportunities that can help you grow and establish yourself in the industry. In this blog post, we will discuss some of the ways in which you can collaborate with other musicians and brands to elevate your brand and career.
Networking Opportunities
Networking with other musicians and brands can help you establish new connections, broaden your fan base, and expand your knowledge in the industry. Attend events, such as music festivals and conferences, where you can meet and interact with other musicians and industry professionals. Use social media to connect with musicians who inspire you or share similar music genres. Collaborate on songs, projects, or gigs to elevate both your brands and help each other grow.
Cross-promotion
Cross-promotion is another effective way to collaborate with other musicians and brands. This technique involves promoting each other’s music, merchandise, or services on each other’s platforms. Create posts that showcase each other’s work and link to each other’s websites or social media accounts. Collaborate on a music video that showcases both your talents and helps spread the word about each other’s music. By doing this, you can leverage each other’s fan base and reach a wider audience.
Sponsorship Deals
Sponsorship deals are another way to collaborate with brands that share the same values and appeal to the same target audience. Reach out to brands that align with your brand and aesthetics. Look for products or services that are relevant to your music, such as music accessories or equipment. In exchange for promoting their products, you can receive free merchandise, equipment, or even financial support. Partnering with brands can also help you gain exposure to their audience and increase your credibility in the industry. In conclusion, collaborating with other musicians and brands is crucial for establishing and growing your career as a musician. It offers networking opportunities, cross-promotion, and the potential for sponsorship deals. By leveraging these partnerships, you can expand your network, reach a wider audience, and establish yourself as a credible and successful musician.
Marketing Your Music With Your Brand
As a musician, establishing your brand is essential to marketing your music. Your brand must convey your unique identity and style, and it should be consistent across all platforms. By branding yourself, you can stand out from the competition and attract a loyal fan base.
As a musician, it’s crucial to create an identity that resonates with your target audience. This is where branding comes in. By defining your brand, you are essentially creating a unique personality that sets you apart from other musicians.
Leveraging Your Brand To Sell Music
One of the most significant advantages of having a strong brand is the ability to sell your music more effectively. Consumers are more likely to choose artists that they feel connected to. Using your brand, you can create emotional ties with your listeners, which can translate into better sales.
Incorporating Branding Into Your Live Shows
Your live shows are an excellent opportunity to showcase your brand. Consider incorporating branding elements into your stage setup, such as backdrops, lighting, and logos. You could also encourage your fans to wear your merchandise during your performances, further reinforcing your brand and building a sense of community.
Using Merchandise To Reinforce Your Brand
Merchandise is another effective way to reinforce your brand. When designing your merchandise, focus on creating items that resonate with your target audience and incorporate your brand aesthetic. For example, if you are catering to a younger audience, consider designing items such as phone cases and hats that incorporate your logo or tagline. In conclusion, as a musician, branding yourself is crucial to your success. By leveraging your brand, incorporating branding into your live shows, and using merchandise to reinforce your identity, you can connect with your audience, build a loyal following, and increase your sales.
Navigating The Music Industry With Your Brand
As a musician, carving out a brand identity is crucial for success in the competitive music industry. Navigating this industry with your brand requires consistency in your image and message on all social media and marketing platforms. Whether it’s through your music, merchandise, or personal appearance, your brand should reflect your unique style and values.
Navigating The Music Industry With Your Brand As a musician, branding yourself is crucial for success in the highly competitive and ever-evolving music industry. Knowing how to properly navigate the industry with your brand is essential to attracting industry attention, differentiating yourself from other musicians, and securing gigs and bookings. Here’s how: Attracting Industry Attention To attract industry attention, your brand should be unique and memorable. Focus on creating a consistent message that resonates with your audience and showcases your unique talents and personality. Utilize social media platforms like Instagram or Twitter to post regular updates about your music, new releases, and upcoming events to keep your audience engaged and attract new fans. Differentiating Yourself From Other Musicians To differentiate yourself from other musicians, create a unique selling point that sets you apart from the rest. This could be a distinctive sound, style or stage presence. Additionally, collaborating with other artists, working with unique producers or featuring unique musical elements in your work, can also set you apart. Securing Gigs And Bookings Securing gigs and bookings is all about building relationships and networking with industry professionals. Attend music conferences, industry events, and meet as many people as possible in the industry to build valuable connections. Be sure to have an electronic press kit (EPK) that includes your bio, music samples, and social media links readily available to complete the picture. In conclusion, branding yourself in the music industry is a continuously evolving process and the success rate of your brand will be defined by how well you navigate the scene. By taking the time to create a unique and memorable brand, differentiating yourself from other musicians and networking with industry professionals, you’ll be well on your way to establishing a strong presence in the music industry.
Measuring The Success Of Your Branding Efforts
As a musician, it is essential to measure the success of your branding efforts. This can be done through analyzing your online presence including social media engagement, website traffic, and streaming platform statistics. Tracking these metrics will help you make the necessary adjustments to improve and strengthen your brand.
As a musician, building a personal brand is crucial for establishing a successful career in the music industry. However, your brand will only be effective if it resonates with your target audience, and that’s where measurement comes in. You need to analyze the results of your branding efforts to determine whether they are achieving the desired outcome. Here are the three key metrics you should use to measure the success of your branding efforts:
Analyzing Social Media Metrics
Social media is a powerful tool for musicians looking to build their brand. To measure the effectiveness of your social media efforts, you need to analyze your metrics, including the number of followers, likes, shares, comments, and reach. These metrics indicate how engaged your followers are with your content. When analyzing social media metrics, consistency is key. You need to regularly post content and monitor your metrics over an extended period to identify trends and make informed decisions.
Tracking Fan Engagement
Fan engagement is a crucial metric in measuring the success of your branding efforts. Engaged fans are more likely to attend your shows, purchase your merchandise, and recommend your music to others. You can track fan engagement by monitoring the number of downloads, streams, ticket sales, and merchandise sold. Additionally, you can create surveys to gather feedback from your fans, which can help you adjust your branding efforts to meet their preferences and needs.
Measuring Financial Roi
While measuring financial return on investment (ROI) may not be the most exciting metric, it is crucial in determining the success of your branding efforts. Financial ROI helps you determine whether your branding efforts are generating income. You can track financial ROI by calculating the revenue generated from ticket sales, merchandise sales, and music streams. You can also compare the costs incurred in your branding efforts, such as social media advertising, with the revenue generated. By tracking financial ROI, you can determine which branding efforts are worthwhile and adjust your strategy accordingly. In conclusion, measuring the success of your branding efforts is crucial for establishing a successful career in the music industry. Analyzing social media metrics, tracking fan engagement, and measuring financial ROI are three key metrics you should use to determine the effectiveness of your branding efforts. By consistently tracking these metrics, you can make informed decisions and adjust your branding efforts accordingly.
Staying Authentic While Building Your Brand
As a musician, it’s important to stay true to your roots while building your brand. Authenticity can set you apart from the competition and help you connect with your audience on a deeper level. By sharing your unique story and personality, you can create a strong and memorable brand that resonates with your fans.
As a musician, building a brand is essential to your success. However, it can be challenging to maintain authenticity while crafting a unique image. To build a brand that truly represents you, there are some key factors to keep in mind.
Maintaining Creative Control
When building a brand, it’s essential to maintain creative control. As a musician, it’s crucial to have a unique sound and style that sets you apart. Don’t let your brand be dictated by outside forces or trends. Stay true to your musical vision and nurture it.
Staying True To Your Vision
Your brand should be an extension of your artistic vision. Stay true to yourself and your music. Your brand should be authentic, and your image should resonate with your fans. Don’t fake your personality or change your style to fit in with a particular brand image. Being true to yourself will help you connect with your audience on a deeper level.
Balancing Branding And Artistic Expression
Branding is essential, but it’s equally important to let your music do the talking. Balancing branding and artistic expression is crucial. Your music should be the core of your brand, and it should reflect your unique voice and style. Your brand should enhance your music, not detract from it. In conclusion, building a brand is an essential aspect of a musician’s career. However, it’s important to stay authentic and true to your vision while crafting your image. Maintain creative control, stay true to yourself, and balance branding with artistic expression to build a brand that truly represents you.
Credit: m.youtube.com
Frequently Asked Questions For Branding Yourself As A Musician
How Do I Brand Myself As A Musician?
To brand yourself as a musician, start by establishing a unique and memorable image or persona for yourself. Create high-quality music, and use social media and other digital platforms to promote your work and engage with fans. Network with industry professionals, collaborate with other artists, and consistently produce content to keep your brand fresh and relevant.
How Do I Brand Myself As An Artist?
To brand yourself as an artist, you should focus on defining your unique style, creating a portfolio that showcases your work, networking with other artists and industry professionals, building a strong online presence through social media and a personal website, and engaging with your audience through events, exhibitions, and collaborations.
Consistency and authenticity are key to establishing a strong brand as an artist.
Why Personal Branding Is Important For Musicians?
Personal branding is crucial for musicians because it helps them stand out in a crowded industry, establish their unique identity, connect with fans, and increase their value and revenue. It also helps them create a consistent image, build credibility, and attract more opportunities.
A strong personal brand can open up new doors and lead to long-term success.
How Do I Sell Myself As A Musician?
To sell yourself as a musician, identify your unique sound and brand yourself accordingly. Use social media to promote your music and connect with fans and industry professionals. Network with other musicians and attend events to increase visibility. Showcase your talent through live performances and share your music through streaming services and online platforms.
Remember to stay authentic to your style and continue to perfect your craft.
Conclusion
As a musician, branding yourself is crucial to stand out in a highly competitive industry. By developing a unique image, identifying your target audience, and utilizing social media platforms, you can establish a strong presence and attract loyal fans. Keep in mind the importance of consistency and authenticity in your branding efforts.
With dedication and effort, you can elevate your music career and achieve success.
The Fj V Series Neve Vr Channel is a high-quality audio mixing console. It features preamp, EQ, and dynamics processing, making it a versatile tool for recording and mixing music.
Also, as an audio engineer, having a reliable mixing console is crucial to achieving a professional sound. It is a popular choice for many professionals thanks to its performance and versatility. This console features high-quality preamps, EQ, and dynamics processing, allowing engineers to fine-tune the sound to their liking.
Additionally, it offers excellent routing and connectivity options, making it easy to integrate into any studio setup. Whether you’re recording a live band or mixing a solo artist, it is a strong addition to any engineer’s toolkit.
Credit: m.youtube.com
Credit: reverb.com
Frequently Asked Questions On Fj V Series Neve Vr Channel
What Is Fj V Series Neve Vr Channel Used For?
It is a channel strip for audio mixing and processing, with a wide range of professional features.
What Are The Benefits Of Using It?
Using it can noticeably improve the sound quality of your recordings. For example, this results in a more professional and polished sound. It offers a range of features, including compression, EQ, and reverb, to shape and refine sound.
How Does It Work?
The channel strip passes audio through several stages, including amplifiers, filters, and processors. As a result, it allows the user to control the levels of different frequencies and elements of the sound, adjusting and balancing them to create a final, polished mix.
Is Fj V Series Neve Vr Channel Suitable For Home Recording Studios?
While it is aimed at professional studios, it also suits high-quality home recording setups. Its features and capabilities can help produce a more professional sound quality, even in a smaller setting.
Conclusion
To sum up, the Fj V Series Neve VR Channel is the perfect choice for professionals who demand the highest standards in their audio production. Equipped with state-of-the-art features and exceptional sound quality, this channel strip delivers outstanding results every time.
Whether you are a seasoned sound engineer or a novice, this channel strip is an investment that pays off in the long run. So, upgrade your studio today and take your audio production to new heights with the Fj V Series Neve VR Channel.