Categories
Archive

How To Mix Vocals In Ableton Live

To mix vocals in Ableton Live, adjust the levels and EQ, apply compression, add reverb and delay. Achieving a balanced vocal mix is key for a polished and professional sounding track in Ableton Live, and by following these steps you can achieve just that.

Start by adjusting the levels of the individual vocal tracks so that they are balanced and cohesive. Make sure to use EQ to remove any unwanted frequencies and emphasize the desired ones. Applying compression will help to even out the dynamics of the vocals and create a more consistent sound.

Finally, add reverb and delay effects to add depth and space to the vocals. With these steps in mind, you can create a great vocal mix in Ableton Live.

How To Mix Vocals In Ableton Live

Credit: www.antidoteaudio.com

Preparing Your Vocals

Learn how to prepare your vocals for mixing in Ableton Live by following simple steps such as recording in a quiet environment, adjusting volume and panning, and applying basic effects like compression and EQ. By properly preparing your vocals, you can achieve a professional and polished sound in your mix.

Preparing Your Vocals Before getting into the nitty-gritty of mixing vocals in Ableton Live, it’s crucial to prepare the vocals first. This includes recording the vocals and organizing the vocal files. Here’s what you need to do: Recording Vocals The first step in preparing your vocals is to record them properly. This includes selecting the right microphone, setting up the microphone, and ensuring a noise-free environment. Here are some tips for recording vocals: – Use a condenser microphone to capture the finer details of the vocals. – Set up the microphone at the appropriate height and distance from the singer. – Use a pop filter to eliminate unwanted popping sounds caused by plosive consonants. – Make sure the recording environment is quiet and free from external noises. Organizing Vocal Files After recording vocals, it’s important to organize the vocal files properly. This means naming the files appropriately and grouping them into different sections based on the song sections. Here are some tips for organizing the vocal files: – Name the files based on the singer’s name and song section for easy identification. – Use colors to differentiate between different sections of the song. – Group the files based on the song sections such as verse, chorus, bridge, or ad-libs. By following these practices, you will be able to maintain an organized workflow and a professional output. Once you have properly prepared your vocals, you can start mixing them in Ableton Live with confidence.
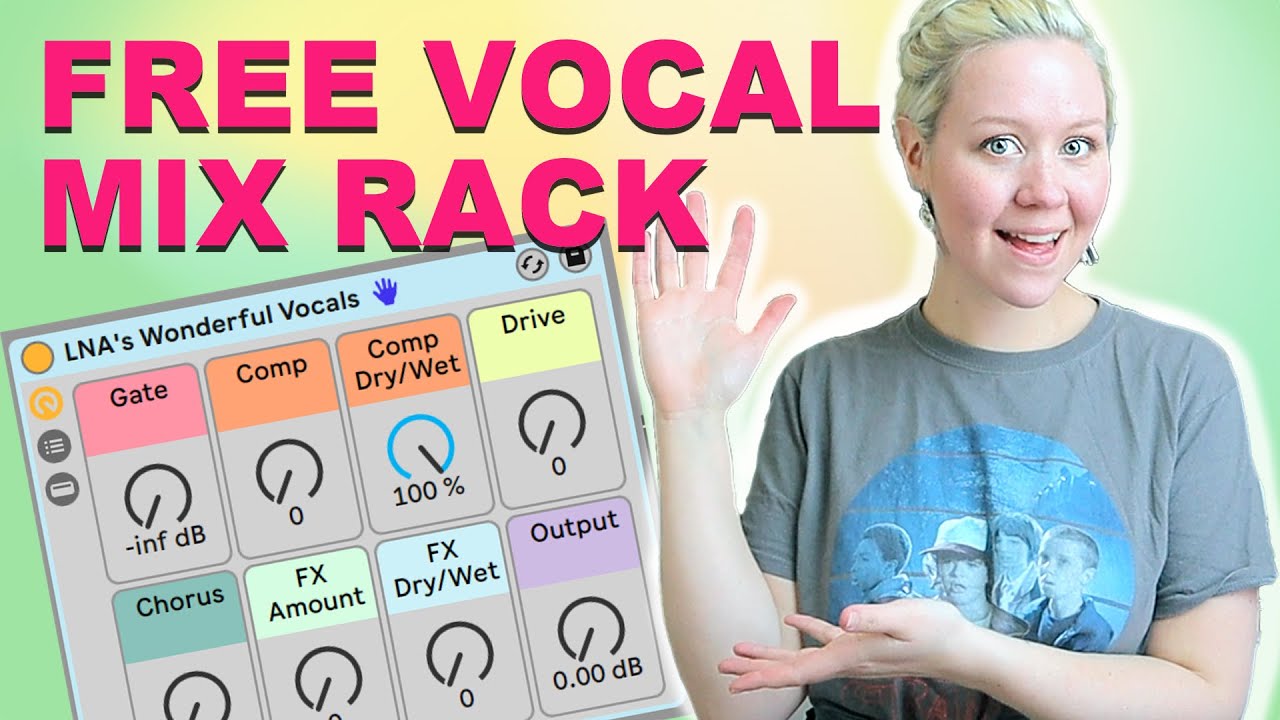
How To Mix Vocals In Ableton Live

Credit: www.youtube.com

Setting Up Your Project

To mix vocals in Ableton Live, start by organizing your tracks and setting up a mix bus. Then, apply EQ and compression to clean up and enhance the vocals. Experiment with reverb and delay effects to add depth and dimension to your vocal mix.

Setting Up Your Session

Before you start to mix vocals in Ableton Live, it’s crucial to set up your project properly. This will not only save time but will ensure that you have everything in place to produce a top-notch vocal mix. So, let’s dive into the essential steps you need to take to prepare your session.

Importing Vocal Tracks

Once you’ve set up your session, it’s time to import your vocal tracks. You can do this by clicking “File” and selecting “Import Audio.” Once you’ve selected your vocal tracks, they will appear in the “Audio Clips” section of the session view. Here are some things to keep in mind when importing your tracks:

  • Make sure that each vocal track is in a separate audio clip.
  • Ensure that all tracks are in the same BPM and key.
  • Make sure that each track has enough headroom so that they don’t clip or distort.

Setting Up Track Routing

In Ableton Live, you can use groups to route multiple tracks together. Grouping allows you to apply effects and processing to multiple tracks simultaneously, making it easier and more efficient to mix your vocals. Here are some tips to keep in mind when setting up your track routing:

  • Create a group for your vocal tracks by selecting them all and clicking “CMD/Ctrl-G.”
  • Name your group accordingly (e.g., “Vocals Group”) to keep things organized.
  • Create a new audio track to use as your “master” vocal track.

Setting Up Your Master Track

Now that you have your vocal tracks imported and set up in a group, it’s time to set up your master track. Your master track will be the track that you apply your final processing to before exporting the mix. Here are some tips to keep in mind:

  • Insert effects onto your master track (e.g., EQ, compression, reverb, delay).
  • Ensure that your master track is not clipping and has enough headroom.
  • Use your master track to balance the overall level of your vocal mix.

By following these steps, you should have a solid foundation for mixing vocals in Ableton Live. The next steps involve processing your vocals to give them the sound you want. But before you start adding effects, make sure that you have set up your session correctly.

Understanding Eq

Understanding EQ is a crucial aspect of mixing vocals in Ableton Live. EQ, or equalization, allows you to manipulate the frequency content of your vocal recordings. With the proper understanding and use of EQ, you can achieve a polished and professional-sounding mix. In this section, we’ll cover two key techniques for using EQ when mixing vocals: Using High-Pass Filters and Cutting Out Unnecessary Frequencies.

Using High-pass Filters

Consider using a high-pass filter to remove any low-end rumble or unwanted noise on your recording. Low-frequency noise, such as traffic outside or the hum of an air conditioning unit, can easily creep into your recording. High-pass filters are designed to eliminate these unwanted sounds by removing the low-frequency content of the audio signal. In Ableton Live, you can find the high-pass filter in the EQ Eight plugin under the ‘Filter’ section. Simply adjust the cutoff frequency until you achieve the desired effect.

Cutting Out Unnecessary Frequencies

To achieve a well-balanced mix, you’ll want to remove any unnecessary frequencies from your vocal recording. In most cases, you’ll want to cut out some mid-range frequencies, which can cause your mix to sound muddy. Use the EQ Eight plugin in Ableton Live to make these adjustments. Start by analyzing the frequency content of your vocal track using the EQ Eight’s Spectrum Analyzer feature. Look for any peaks or dips in the frequency response and adjust accordingly. By removing the unnecessary frequencies, you will create more space in the mix and allow the vocals to shine through.

Adding Compression

One essential technique in mixing vocals in Ableton Live is adding compression. This can help balance out the vocal track and bring out its dynamics. With careful tweaking, compression can help polish the overall sound of the vocals in your mix.

Adding Compression: When it comes to mixing vocals in Ableton Live, adding compression is a crucial step. Compression helps to smooth out levels by reducing the dynamic range of the vocal track. This can help to make softer parts of the vocal more audible and control louder parts of the performance, ensuring maximum clarity and consistency. In this section, we’ll discuss how to use compression to create a polished vocal mix in Ableton Live. Using Compression to Smooth Out Levels: The first step in using compression to mix vocals in Ableton Live is to smooth out the levels. Start by inserting a compressor on the vocal track. Then, set the threshold to around -20dBFS and the ratio to around 3:1. Adjust the attack time to a fast setting, such as 5ms, and the release time to a slower setting, around 100ms. This will help to control the volume of the vocal track and keep it at a consistent level throughout the performance. Adjusting Compression Settings: Once you’ve set your initial compression settings, it’s time to fine-tune them to enhance the vocal sound. Start by adjusting the threshold to find the sweet spot where the compressor is just starting to kick in. This will help to even out the levels without squashing the performance too much. From there, you can adjust the ratio to increase or decrease the amount of compression applied, depending on your preference. Next, focus on adjusting the attack and release times. A faster attack time will allow the compressor to respond more quickly to sudden peaks in the audio, while a slower release time will help to maintain the intended vocal tone. Use your ears to find the best settings for your particular vocal track. You can also experiment with adding makeup gain to bring the overall level of the vocal up. In conclusion, using compression is a critical step when mixing vocals in Ableton Live. Setting the right compression parameters can help to balance the levels and bring out the best in the performance. By using the tips and techniques outlined in this section, you can create a polished and professional vocal mix that stands out.

Applying Effects

One of the important steps in mixing vocals in Ableton Live is applying effects. By using effects like EQ, compression, reverb, and delay, you can enhance the tone and character of the vocals while keeping them balanced with the rest of the mix.

Applying Effects is the most crucial part while mixing vocals in Ableton Live. It is where you can create the desired sound and polish the vocals to perfection. Apart from EQ and Compression, the effects play a vital role in bringing life to the vocals. In this article, we will take a deep dive into two of the popular vocal effects – reverb and delay. We will also explore adding creative effects to bring in more character and uniqueness to the vocals. Using Reverb Reverb is the most commonly used effect in mixing vocals. It can add depth, warmth, and make vocals sound bigger than they are. When using reverb, make sure that you don’t overdo it, as it can make the vocals sound muddy and unclear. Here are the steps to apply reverb in Ableton Live: 1. Click on the Audio Effect Rack. 2. Add the Reverb effect from the Audio Effects section. 3. Adjust the parameters of the Reverb effect to your liking. 4. Use the Dry/Wet knob to adjust the amount of reverb added to the vocals. Adding Delay Delay is another crucial effect in mixing vocals. It can add rhythm, space, and depth to the vocals. Similar to reverb, overdoing delay can make the vocals sound cluttered and messy. Here’s how to apply delay to your vocals: 1. Click on the Audio Effect Rack. 2. Add the Delay effect from the Audio Effects section. 3. Adjust the parameters of the Delay effect to your liking. 4. Use the Dry/Wet knob to adjust the amount of delay added to the vocals. Adding Creative Effects Apart from reverb and delay, there are several creative effects that you can use to add more character and uniqueness to your vocals. Some popular creative effects are: 1. Chorus 2. Flanger 3. Distortion 4. Pitch Correction When using creative effects, make sure that they complement the vocals and don’t overpower them. Experiment with these effects to find what works best for your vocals. In conclusion, applying effects is a vital process while mixing vocals in Ableton Live. Reverb and Delay are the two most used effects in vocal mixing, and adding creative effects can bring more character and uniqueness to the vocals. Remember, not to overdo the effects, and always experiment to find the perfect balance.

Creating Vocal Harmonies

Achieving rich vocal harmonies is a key element to any successful recording. In Ableton Live, you can mix vocals using effects such as reverb, chorus, and delay to create a dynamic blend of vocal harmonies that elevate your track to the next level.

Creating Vocal Harmonies is an important aspect of mixing vocals in Ableton Live. It adds dimension and depth to the lead vocal track, creating a richer sound that captures the listener’s attention. In this section, we will discuss the process of recording harmonies, as well as using pitch correction to enhance the harmonies’ quality.

Recording Harmonies

Recording harmonies involves singing along with the lead vocal track on multiple tracks, creating a layered effect. To achieve this effect, it is essential to ensure that the harmonies’ timing and pitch match the lead vocals. To record harmonies in Ableton Live, you can follow these steps:

  1. Right-click on an empty audio track and select “Insert Audio Track” to add a new audio track.
  2. Arm the new audio track by clicking on the “Arm Session Recording” button.
  3. Record the harmony part while listening to the lead vocal track.
  4. Repeat the process for additional harmony parts on separate audio tracks.

Using Pitch Correction For Harmonies

Pitch correction is a highly useful tool that can enhance the quality of your harmonies in Ableton Live. It helps to ensure that all the notes are in tune and helps to create a polished sound. Here’s how you can use pitch correction to improve vocal harmonies:

  1. Select the audio clip you want to apply pitch correction to in Ableton Live.
  2. Open the “Audio Effects” panel and select “Pitch” from the list of options.
  3. Click on the “Auto” button to enable pitch correction.
  4. Adjust the “Amount” parameter to correct the pitch.
  5. Repeat the process for each harmony part.

In conclusion, Creating Vocal Harmonies is a great way to add depth and dimension to your lead vocal track. Recording harmonies and utilizing pitch correction can help take your vocal mixing to the next level, creating a professional-sounding finished product. Use these tips to experiment with your vocal tracks, and you’ll notice the difference in your music recordings.

Automation And Control

In Ableton Live, mixing vocals is made easy with the efficient automation and control features. Accurate adjustments and edits can be achieved with just a few clicks, guaranteeing a professional sounding final product.

In order to achieve a professional-sounding vocal mix, proper automation and control is crucial. This allows you to adjust volume levels, panning, stereo imaging, and other aspects of the vocal sound to create a cohesive and balanced mix.

Automating Volume Levels

One way to utilize automation in your vocal mixes is by adjusting volume levels. This involves using automated faders to raise or lower the volume of specific vocal tracks at various points throughout the song. This is especially useful for managing vocal dynamics and ensuring that the vocals are always sitting comfortably in the mix, without being too loud or too quiet.

Using Panning And Stereo Imaging

Another important aspect of vocal mix automation is using panning and stereo imaging. This involves assigning specific vocal tracks to either the left or right side of the stereo field, or adjusting the stereo image to create a wider or narrower sound. This can help provide more clarity and separation between vocal tracks, as well as add depth and dimension to the mix. To achieve this, you can use Ableton Live’s automation tools to automate panning, stereo width, and other parameters. For example, you could try panning the lead vocal slightly to the left, the ad-libs to the right, and the harmonies in the center to create a more interesting and dynamic vocal sound. In conclusion, automation and control are essential components in creating a professional-sounding vocal mix in Ableton Live. By utilizing automated volume levels and panning/stereo imaging, you can ensure that the vocals are sitting comfortably in the mix and provide depth and separation, resulting in a cohesive and well-balanced vocal sound.

Finalizing Your Mix

Once you have properly mixed your vocals in Ableton Live, it’s time to finalize your mix. Finalizing the mix involves comparing your mix to reference tracks and exporting your final mix.

Comparing Your Mix To Reference Tracks

Comparing your mix to reference tracks is an essential step in finalizing your mix. A reference track is a professionally mixed and mastered song that you use as a benchmark for your own mix. It helps you identify any areas where your mix may be lacking and make necessary adjustments.

Steps to Compare Your Mix to Reference Tracks
1. Choose several reference tracks in the same genre as your song.
2. Match the volume of your mix to the reference tracks.
3. Listen to each track and take notes on any differences you hear in the frequency balance, stereo image, dynamics, and overall tonality.
4. Use the notes you took to make any necessary adjustments to your mix.

Exporting Your Final Mix

Once you are satisfied with your mix, it’s time to export your final mix. Exporting your mix requires a few important steps to ensure your mix sounds the way you intend it to sound.

  1. Make sure all your tracks are properly labelled.
  2. Ensure your mix has plenty of headroom, leaving at least -3 dBFS peak level to avoid distortion.
  3. Select the appropriate export settings, including the sample rate and bit depth.
  4. Choose the appropriate file format and name your file.
  5. Export your mix, making sure to listen to it one last time to ensure it’s exactly how you want it.

Following these steps will help you finalize your mix in Ableton Live and ensure your vocals sound clear and professional.
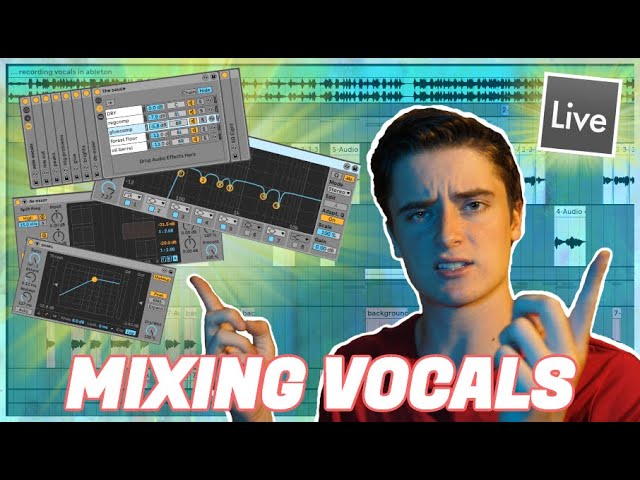
How To Mix Vocals In Ableton Live

Credit: m.youtube.com

Frequently Asked Questions Of How To Mix Vocals In Ableton Live

Can You Mix Vocals In Ableton?

Yes, you can mix vocals in Ableton. Ableton provides various features and effects to process vocals, including EQ, compression, reverb, delay, and more. You can also use third-party plugins to enhance your vocals’ sound quality and create a polished mix.

Is Ableton Good For Vocals?

Yes, Ableton is a great software for recording and editing vocals. It offers a range of vocal processing tools and effects to enhance the sound quality, and its easy-to-use interface makes it simple to edit and manipulate recordings. With Ableton, you can create professional-sounding vocal tracks that are well-suited for both live performances and studio recordings.

How Do You Mix Vocals Properly?

To mix vocals properly: 1. Start by ensuring a clean and clear recording. 2. Use EQ to remove any unwanted frequencies and enhance the best aspects of the vocals. 3. Apply compression to even out the levels and add presence.

4. Use reverb and/or delay to add depth and space. 5. Finally, adjust the levels of the vocals in relation to the other instruments in the mix.

How Do I Equalize Vocals In Ableton?

To equalize vocals in Ableton, use the built-in EQ Eight plug-in or a third-party equalizer. First, identify which frequencies need to be boosted or cut to improve the vocal sound. Then, adjust the EQ controls accordingly to achieve the desired effect.

Finally, use automation to vary the vocal EQ throughout the track as needed.

Conclusion

Mixing vocals in Ableton Live can be a challenging yet rewarding experience. By carefully understanding and utilizing features such as EQ, compression, and reverb, you can achieve a professional and polished sound. Remember to make small adjustments, listen to your mix in different environments, and trust your ears.

With practice and patience, you can produce a vocal mix that truly shines. Happy mixing!

Categories
Archive

A Complete Guide For Mixing Music

This complete guide offers essential tips and techniques for mixing music. Learn how to balance the sounds, create depth, enhance the dynamics and add effects to produce a professional-sounding mix.

Mixing music is an art form that requires both technical know-how and creative skill. Whether you’re a seasoned music producer or just starting out, this guide will provide you with all the information you need to take your mixes to the next level.

From setting up your sessions and organizing your tracks to understanding EQ, compression, and reverb, you’ll learn how to create a polished and cohesive mix that showcases the best qualities of each individual sound. With a range of practical tips and insider knowledge, this guide is perfect for anyone who wants to achieve a professional-sounding mix.

Preparing To Mix Music

Get ready to create an outstanding music mix with our complete guide for mixing music. This article will provide you with the fundamentals of preparing to mix music and give you tips on how to take your mixing skills to the next level.

Learn about essential techniques, software and hardware for efficient audio mixing.

Preparing to mix music is not just a matter of putting all the tracks together and adjusting the levels. It requires a careful process of listening to the individual elements of the song and making decisions about how they will fit together in the final mix. To make the most out of your mixing efforts, it is crucial to approach it with a goal in mind. Below are essential steps and elements to consider in preparing to mix music.

Steps To Prepare For Music Mixing

To have a successful mixing session, it’s essential to have a plan and approach it systematically. Below are some essential steps to take when preparing to mix music:

  1. Listen to the rough mix of the song to understand the structure and arrangement of the track.
  2. Create a session template and set up your DAW with the necessary plugins, EQs, compressors, and other tools.
  3. Organize your session by color-coding the tracks and grouping similar elements together.
  4. Make sure all the tracks are in phase and correctly aligned with each other.
  5. Balance the levels of all individual tracks to get a rough mix that sounds good. This step is crucial as it sets the foundation for all further mixing decisions.

Identifying The Elements Of The Song

To mix music effectively, you need to understand the different elements that make up the song. Here are the primary elements to consider:

  • Drums: The drums are the backbone of the track and provide the rhythm and groove. It’s essential to pay attention to the kick and snare sounds, as they are the most prominent in the mix.
  • Bass: The bass provides the low-end frequencies that give the track warmth and depth. It’s essential to get the bass level right, as too much can cause the mix to sound muddy and unclear.
  • Guitar: Whether it’s electric or acoustic, the guitar provides a significant part of the melody and harmony of the track. Make sure to balance the level and panning of the guitar tracks effectively.
  • Keys: The keyboard or piano provides chords and textures to fill out the sound of the track. Pay attention to the level and panning of the keyboard tracks to fit with the other elements in the mix.
  • Vocals: The vocals are usually the most important part of the track and are the focal point of the mix. Make sure to balance the level of the lead vocal with backing vocals and harmonies effectively.

By taking the time to prepare and identify the elements of the song, you’ll be able to make better mixing decisions and create a final mix that sounds great. Remember, mixing music is a creative process that requires patience, focus, and attention to detail. With these steps in mind, you’ll be on your way to creating a professional-sounding mix in no time.

A Complete Guide For Mixing Music

Credit: mixingmonster.com

Setting Up The Mixing Environment

Mixing music is an intricate process that requires precision and patience. As a music producer, setting up the mixing environment is crucial to achieving a top-quality mix. In this section, we’ll delve into the essential aspects of setting up your mixing environment, such as choosing the right room, positioning the speakers, and implementing acoustic treatment.

Choosing The Right Room

The first step in setting up your mixing environment is choosing the right room. Not every room is suitable for mixing music. When selecting a room, consider the size of the room, the shape of the room, and the materials used to construct the room. You need to choose a room that has sufficient space, minimal echo, and is built with materials that dampen sound vibrations. Avoid mixing in a room that has hard surfaces such as tile or concrete as they reflect sound waves and interfere with your mix.

Positioning The Speakers

Speaker placement is crucial in setting up your mixing environment. You need to position the speakers in the room such that they give you the most accurate representation of sound. The primary consideration when positioning speakers is the sweet spot, which is the area where the sound is most accurate. Place your speakers at a distance from each other to form an equilateral triangle with your listening position. Ensure that the speakers are at ear level and angled towards your ears.

Acoustic Treatment

Acoustic treatment plays a critical role in ensuring the accuracy of your sound mix. The goal of acoustic treatment is to control sound reflections and reduce excessive reverb. To implement acoustic treatment, you need to add acoustic panels and bass traps to your mixing room. Acoustic panels absorb high-frequency soundwaves while bass traps absorb low-frequency soundwaves. Place bass traps in corners where low frequencies tend to accumulate and scatter acoustic panels around the room to reduce echo and reflections.

The Steps To Mix Music

Learn how to mix music like a pro with our complete guide. Follow our step-by-step process to master the art of balancing tracks, applying effects, and creating a cohesive sound that will captivate your listeners. Discover the secrets to success in music mixing today.

As a music producer, mixing music is one of the most important parts of the process. It is the final touch that can make or break the quality of your project. Mixing involves combining different sounds and tracks to create a balanced, polished, and professional-sounding product. In this guide, we will take you through the essential steps required to mix music.

Setting The Levels And Balance

The first step in mixing music is setting the levels and balance. This involves adjusting the volume levels of each track to ensure that they blend well together. Start by setting the volume of the lead instrument, vocal or melody. Then, adjust the volume of the other tracks around it to create an overall balance. A useful tool for checking volume levels is a VU meter or a waveform meter. It is crucial to achieve the perfect balance between all the tracks as this forms the foundation of your mix.

Equalization

Once you have set the levels and balance, the next step is equalization. EQ allows you to control the frequencies of each track, creating more room for each element to breathe. It is essential to use an equalizer to cut out the unwanted frequencies, especially the low-end rumble that can take up a lot of headroom. You can use a spectrum analyzer to identify the frequencies that need to be reduced. EQ is an important tool and can be used creatively to give individual tracks their personality and space.

Compression

Compression is an essential tool in mixing music. It helps to control the dynamic range of audio signals by reducing the volume of the loudest parts. This creates more room for the quieter parts, making the overall mix sound more consistent and polished. A compressor works by reducing the volume of the audio signal when it exceeds a certain threshold. It is essential to use compression wisely to avoid over-compressing, which can make the mix sound lifeless.

Reverb And Delay

Reverb and delay are essential tools in mixing music. They add character, depth, and space to individual tracks and the overall mix. Reverb is used to simulate the sound of a room or space, while delay creates echoes and repeats of the audio signal. It is essential to use reverb and delay sparingly, as using too much can make a mix sound muddy and cluttered. A good way to understand how much reverb or delay to use is to listen to popular songs in your genre.

Other Effects

In addition to reverb and delay, there are other effects that can be used to enhance your mix. These include chorus, flanger, phaser, distortion, and others. It is important to use these effects sparingly and only when necessary, as they can easily clutter your mix. Always experiment with different effects but don’t overuse them.

Automation

Automation is the final step in mixing music. It involves automating track volume, panning, and effects to create dynamic changes throughout the song. Automation can be used to create seamless transitions between different sections of a song or to emphasize specific parts. It is essential to use automation wisely, as too much can sound unnatural and jarring. Mixing music is both an art and a science. It takes time, practice, and patience to achieve a polished and professional-sounding mix. By following these essential steps, you can create a balanced, dynamic, and cohesive mix that stands out from the rest. Remember to always experiment, use your ears, and trust your instincts. Happy mixing!

Mixing Techniques And Tips

Learn about the best mixing techniques and tips for music production with our comprehensive guide. From EQ and compression to reverb and delay, we cover all the essentials for achieving a professional sound.

Mixing is an essential part of music production. It involves balancing and blending all the individual tracks of a song to create a cohesive and polished final mix. To achieve this, you need to have a good understanding of mixing techniques and tips that can take your music production to the next level. In this article, we’ll cover the most important mixing techniques and tips that you should know to create a professional-sounding mix.

Creating Space In The Mix

One of the most important mixing techniques is creating space in your mix. This means giving each instrument or element in the mix its own frequency range and panning position to avoid clutter and make it more distinguishable. Here are some ways to create space in your mix:

  • Use EQ to cut the frequencies that are not needed for each instrument. This makes room for other instruments in the frequency spectrum.
  • Pan instruments in different positions in the stereo field to give them their own space and prevent them from clashing with other instruments.
  • Add reverb and delay to create a sense of space and depth to the mix. However, be careful not to overdo it, as it can make the mix sound muddy.

Panorama

Another important mixing technique is panning. Panning refers to the placement of instruments in the stereo field. Here are some tips for panning your tracks:

  • Pan the bass and kick drum to the center to give the mix some solidity and punch.
  • Pan your overheads and cymbals to the sides to create a sense of depth.
  • Use the “haas effect” to create the illusion of width, but use it sparingly to avoid phase cancellation and comb filtering.

Using Subtractive Eq

Equalization (EQ) is a powerful tool that can help you shape the sound of each instrument in the mix. One of the most important EQ techniques you should know is the subtractive EQ. This involves cutting the frequencies that are not needed for each instrument, instead of boosting the frequencies that you want to emphasize. Here are some tips for using subtractive EQ:

  • Start with a low-cut filter to remove any low-end frequencies that are unnecessary.
  • Cut the harsh frequencies in the mid-range to make the instruments sound smoother and less harsh.
  • Remove any overlapping frequencies between instruments to create space and clarity in the mix.

Grouping Tracks

Grouping tracks can help you organize your mix and make it easier to manage. Here are some ways to group your tracks:

  • Group instruments of the same type, such as drums, guitars, and vocals.
  • Create sub-groups for specific elements, such as a bass group for the bass and kick drum, or a rhythm group for guitars and keyboards.
  • Use busses or send tracks to create parallel processing or to apply effects to multiple tracks at once.

Using Reference Mix

A reference mix is a professionally produced song that you use as a benchmark for your own mix. Here are some tips for using a reference mix:

  • Find a reference mix that is similar in genre and style to your own track.
  • Listen to the reference mix on different systems to get a better understanding of how it sounds on different speakers.
  • Compare your mix to the reference mix to identify areas that need improvement.

Importance Of Taking Breaks

Mixing for long periods can be fatiguing, both physically and mentally. This can affect your decision-making and the overall quality of your mix. Taking breaks can help you avoid ear fatigue and refresh your ears. Here are some tips for taking breaks:

  • Take a 10-15 minute break every hour to rest your ears and prevent ear fatigue.
  • Listen to music that you enjoy during your breaks to relax and reset your ears.
  • Go for a walk or do some light exercise to get some fresh air and rejuvenate your mind.

In Conclusion

Mixing music is a complex process that involves many different techniques and tips. By understanding and implementing these techniques, you can create a professional-sounding mix that showcases your musical talents. Always remember to take breaks and listen to your mixes on different systems to get a better understanding of how they sound. With time, patience, and practice, you can achieve the perfect mix that you’ve always dreamed of.

Mastering Your Mix

Mastering Your Mix is a comprehensive guide for music enthusiasts wanting to learn the art of mixing. This guide covers everything from eq and compression to reverb and delay, providing invaluable tips for crafting the perfect mix.

The Purpose Of Mastering

Mastering is the final step in the music production process. It is the art of creating a cohesive and balanced final version of your mix. The main purpose of mastering is to enhance the overall sound quality, level out any volume inconsistencies, and help the music translate well across different playback systems.

The Steps To Master A Mix

The mastering process involves several steps. Here are some of the essential and basic steps you should follow:

  1. Set the overall volume – Adjust the volume of your mix so that it is at an appropriate level for all listening environments. Do this by setting the peak volume level using a limiter or a compressor.
  2. EQ the mix – Use equalization to balance the frequency levels by removing any unwanted frequencies and boosting necessary ones.
  3. Apply Compression – Use a compressor to control dynamics and balance levels between instruments.
  4. Add Stereo Width – Add depth and space to your mix and open up the stereo field.
  5. Apply Limiting – Limiting maximizes the volume of your mix without clipping, making it sound loud and impactful.
  6. Export and Listen – Listen to your mastered mix on various speakers to ensure it translates well across different playback systems.

The Importance Of Good Mastering

Good mastering can make or break a song. Mastering can make a great mix sound excellent, and a poor mastering job can ruin an otherwise great mix. The process refines the mix and brings out the intended sound while making it sounds cohesive and balanced in any listening environment.

Professional Mastering Vs Diy Mastering

Professional mastering is done by specialized engineers who use advanced equipment and techniques to achieve optimal sound. DIY mastering, on the other hand, is done by the musician or producer, using plugins or software to do the mastering process. While DIY mastering may be less expensive, professional mastering can yield a more polished and refined mix that will sound great on different playback systems. Professional mastering engineers provide a fresh, objective perspective that can improve the sound and quality of your final mix. In conclusion, mastering your music is an essential step in music production and should not be overlooked. With the knowledge and understanding of the process, you can create a mix that is both cohesive and balanced, ensuring that your music sounds great on all speakers. Whether you choose to use a professional mastering engineer or do it yourself, the focus should be on achieving the optimal mix that reflects your sound.

A Complete Guide For Mixing Music

Credit: www.musicguymixing.com

Frequently Asked Questions Of A Complete Guide For Mixing Music

How Do You Mix Songs Step By Step?

To mix songs step by step, follow these key steps: 1. Choose two songs that have similar tempo and musical key. 2. Mark the beats of each song on a mixing software like Serato or Traktor. 3. Match the beats of both songs to create a seamless transition.

4. Adjust the levels of each track to create a balance in volume. 5. Apply EQ and effects as needed to enhance the overall sound.

How Do You Professionally Mix Audio?

To professionally mix audio, you need to start with a clean recording and use equalization and volume adjustments to balance the levels and frequencies. Compression and effects like reverb can also enhance the sound. Use a reference track to compare and adjust the mix.

Practice and experimentation are key.

What Is Needed To Mix Music?

To mix music, you need a computer with mixing software, a digital audio workstation (DAW), headphones or monitors, and a basic understanding of audio engineering. You may also need a MIDI controller, a microphone, and a soundcard for higher quality mixing.

What Order Should You Mix?

For mixing ingredients, follow the general rule of adding liquids first, then dry ingredients, and finally, mix-ins like nuts or chocolate chips. However, always check the recipe for specific instructions and follow them accordingly.

Conclusion

In wrapping up, mixing music is a complex process that requires a keen ear, deep knowledge, and a lot of practice. But with these tips, you can achieve professional-sounding results. Remember to start with proper gain staging, use EQ effectively, place tracks in the stereo field, use compression wisely, and add effects like reverb and delay.

Practice makes perfect, so keep experimenting and improving your mixing skills to achieve the desired results. Ultimately, good mixing will breathe life into your music and make it stand out.

Categories
Archive

Do Professional Musicians Mess Up

Yes, professional musicians do mess up during performances. Despite their years of training and experience, even the best musicians can make mistakes on stage.

Performing live music can be a nerve-wracking experience, even for seasoned professionals. The pressure of playing in front of an audience and the adrenaline rush can cause even the most skilled musicians to make mistakes from time to time. However, how they handle these errors and continue the performance distinguishes the great musicians from the average ones.

The ability to recover seamlessly is a hallmark of a professional musician. In fact, some of the greatest live performances in history have included mistakes that were turned into unforgettable moments. This article will delve deeper into the phenomenon of musicians messing up and how it affects their performance.

Do Professional Musicians Mess Up

Credit: ukuleleunderground.com

The Pressure Of Being A Professional Musician

Professional musicians are some of the most talented and hardworking individuals in the entertainment industry. They possess a unique ability to create beautiful melodies and bring them to life on stage. However, with great talent comes immense pressure, especially when it comes to live performances.

The High-stakes Environment Of Live Performance

Live performances can be quite nerve-wracking for professional musicians. In a high-stakes environment, even the slightest mistake can have a significant impact on the overall performance. The pressure to get everything right can be overwhelming, and it’s not uncommon for musicians to make mistakes during a live show.

Even the most experienced and talented musicians can make mistakes, and it’s essential to remember that it’s all part of the live performance experience. Messing up is a normal part of being a musician, and it’s how you recover from those moments that truly count.

The Fear Of Letting Fans And Collaborators Down

Professional musicians are not only accountable to themselves but also to their fans and collaborators. Many musicians fear letting down their fans, as they are the ones who support their careers and attend their shows. Collaborators, including band members and producers, also rely on musicians to bring their A-game to the table. The fear of letting these individuals down can add to the pressure of a live performance and increase the likelihood of making mistakes.

However, it’s crucial to keep in mind that fans and collaborators are also human and understand that mistakes happen. Professional musicians need to focus on delivering top-quality performances while also being authentic and genuine, even if that means making mistakes from time to time.

In conclusion, being a professional musician is not an easy feat. It requires immense talent, hard work, and dedication, all while navigating the pressure of live performances. The fear of messing up may be ever-present, but it’s essential to remember that mistakes happen, and what truly matters is how musicians recover and deliver an unforgettable performance.

Common Mistakes Made By Professional Musicians

Professional musicians are not immune to making mistakes during performances, despite their years of training and practice. From forgetting lyrics to hitting the wrong note, even the most experienced musicians can mess up.

Professional musicians are well-trained, experienced and highly skilled in their craft. However, even seasoned performers may experience performance flaws. It is not uncommon for these professionals to make mistakes on stage, which may come out as technical errors, memory lapses, communication breakdowns or equipment malfunctions. In this section, we’ll delve into these common mistakes and how they can impact a musician’s performance.

Technical Errors

Technical errors are common in live performances, regardless of the artist’s experience level. Technical errors can happen due to not being familiar with the venue’s sound setup, using new equipment, or even simple human error. Examples of technical errors include feedback, incorrect notes played, and microphone malfunctions. To minimize these mistakes, a musician should do a sound check beforehand to ensure all equipment is working correctly. Being familiar with the venue before performing and working with a technician can also help ensure a smooth performance.

Memory Lapses

Memory lapses are another common mistake made by professional musicians. Even the most accomplished musicians can forget the lyrics, melody, or chord progression during a performance. Memory lapses can happen due to anxiety, fatigue, or jitters. To minimize memory lapse mistakes, a musician should practice their material repeatedly until they know it by heart. Taking breaks before a performance can also reduce the chances of fatigue and anxiety.

Miscommunication With Bandmates

Band members can sometimes miscommunicate with each other, resulting in mistakes during a performance. These miscommunications can occur when band members are playing out of sync or playing the wrong parts. Misunderstandings may arise due to misinterpretation or mistakes in communication. To minimize miscommunications, effective communication is critical. All band members should clarify their roles and responsibilities in the group beforehand. Each member should also practice independently to ensure they know their parts and come prepared for rehearsals and performances.

Equipment Malfunctions

Equipment malfunctions can happen unexpectedly, even to the most experienced musicians. Examples of equipment malfunctions include instruments breaking, amplifiers overheating, or power failures. These issues can quickly ruin a performance and leave the artist feeling frustrated. To minimize equipment malfunction issues, musicians should ensure that all equipment is adequately maintained and serviced before a performance. It is also advisable to have backup instruments and an alternative power source readily available in case of emergencies. In sum, mistakes happen to even the most experienced professional musicians, and they can be detrimental to the overall performance. Musicians must take the necessary steps to minimize and mitigate these common mistakes, and always be prepared to deal with unforeseen challenges.

How Professional Musicians Handle Mistakes

Even professional musicians mess up during performances. However, they know how to handle mistakes gracefully. They stay calm, improvise, and blend in with the rest of the band to maintain the flow of the music.

As a member of the audience, you probably won’t notice when a professional musician messes up. However, it’s a different story for the musicians themselves who strive for perfection during live performances.

Working On Improving

Despite having years of experience and countless hours of practice, mistakes can still happen. Professional musicians are aware of this and continuously work on improving their skills – be it on a technical or emotional level. They attend workshops, masterclasses, and work with coaches to refine their craft. By doing so, they increase their chances of being able to recover smoothly if a mistake happens during a live performance.

Embracing The Imperfect Qualities Of Live Shows

Live performances are unique because they offer unscripted and authentic moments. These are the traits that can draw in audiences who are often seeking a genuine connection with the performers. Professional musicians understand that the unscripted character of live shows gives rise to unpredictable circumstances, leading to minor mistakes. However, it’s the way they handle these blips that can convert them into memorable moments.

Making The Most Of Mistakes

Professional musicians know that they will make mistakes, so they come prepared to own up to them. Some even plan to make intentional mistakes, as these can add a dash of humor or a unique touch to their performance. Yet, it all comes down to how they handle these mistakes in the moment. By embracing them, they can transform a mistake into a moment of artistic innovation. For instance, a musician can add a few extra beats, improvise, or add a new dimension to the song.

Minimizing Mistakes Through Mental Preparation

Psychological preparation before a performance is an essential aspect of professional musicianship. Mental preparedness fosters focus and readiness, enabling musicians to stay composed during a live show and avoid an avalanche of mistakes. They do it by rehearsing and visualizing a performance in their heads, mentally going over the steps of a piece. This visualization training helps in creating a mental blueprint, which can significantly minimize mistakes during live shows. In conclusion, professional musicians understand that mistakes can happen during live performances. However, they embrace these blips and have techniques to minimize them. By working on improving, embracing imperfections, making the most of mistakes, and mental prep, they can give memorable performances, leaving audiences wanting more.

Real-life Examples Of Professional Musicians’ Mistakes

Even the most experienced professional musicians make mistakes during performances. From missing a note or a cue to forgetting lyrics, it happens to the best of them. However, their ability to recover from these mishaps is what sets them apart and proves their mastery in the industry.

Real-Life Examples of Professional Musicians’ Mistakes Professional musicians are admired for their incredible talent and stage presence. They spend countless hours rehearsing and perfecting their performances to provide their audiences with an unforgettable experience. However, even the most experienced musicians make mistakes onstage. In this article, we’ll look at some real-life examples of professional musicians’ mistakes and how they handled them. Stage Falls and Mishaps Stage falls and mishaps are not uncommon for musicians, especially those who love to engage with their crowd. During a concert in Edmonton, Canada, in 2013, pop sensation Justin Bieber fell down a flight of stairs mid-performance, but he quickly got back on his feet and continued singing as if nothing happened. Similarly, Pink, known for her acrobatic performances, had a mishap while performing at the 2017 VMA awards. She remained professional, dusted herself off, and continued her performance flawlessly. Lyric Mix-Ups Lyric mix-ups are another mistake that can happen to even the most experienced musicians. During her performance of the National Anthem at the 2018 Super Bowl, pop star Pink forgot some of the lyrics. To her credit, she seamlessly recovered and finished the song beautifully. Similarly, in 2017, country music star Garth Brooks forgot the words to one of his classic songs while performing in Kentucky. However, he laughed it off and continued with the show. Instrument Breaks Musicians can encounter instrument problems that can cause an interruption in their performance. During a 2016 concert in Glasgow, Adele’s microphone cut out mid-performance. Quick to think on her feet and not wanting to disappoint her fans, she continued the rest of the song without a microphone so the crowd could still hear her. Similarly, while performing in London, guitar legend Eric Clapton’s guitar string broke mid-song. After a few moments of hesitation, he calmly replaced the string, tuning it perfectly and resumed playing the song. Vocal Slip-Ups Even the most successful singers can experience a vocal slip-up. During her 2018 Grammy Awards performance, Demi Lovato experienced a stumble in one of her vocal notes. Despite the hiccup, she continued singing and finished the song strongly. Similarly, in 2014, Bradley Cooper and Lady Gaga had a minor slip-up during their performance at the Oscars. Cooper forgot one of the lines, but they continued with the song in harmony, never faltering. In conclusion, professional musicians are human, like all of us, and can make mistakes. What sets them apart is their ability to recover from these mistakes and continue delivering memorable performances. By acknowledging and gracefully handling their mistakes, these musicians show their true professionalism and unwavering commitment to their craft.

The Audience’s Perception Of Mistakes

Professional musicians make mistakes on stage like everyone else. However, their audience’s perception of mistakes is often positive, making the experience more authentic and humanizing. The way performers recover from mistakes can even elevate their performances and create memorable moments for the audience.

As a listener at a live concert, have you ever noticed that sometimes even professional musicians make mistakes? Surprisingly, this can happen even to the most skilled and experienced performers. The audience, on the other hand, perceives these mistakes in their own unique ways. In this post, we will explore the topic of mistakes made by professional musicians and how the audience perceives them.

The Importance Of Professionalism

Professional musicians are first and foremost, expected to perform their best at all times, despite external factors such as stress, nerves, or technical difficulties. Mistakes by professional musicians are therefore seen as unprofessional by some audience members, especially in genres like classical music, where precision and technicality are highly valued. To some degree, mistakes by professional musicians can jeopardize their reputation, but it ultimately depends on the situation and the extent of the error.

The Humanization Of Performers Through Mistakes

Mistakes made by professional musicians are not always perceived negatively by the audience. In fact, they can serve as a reminder that the musicians on stage are human just like everyone else. Accordingly, when a musician makes a mistake, their reactions are often what the audience will remember. Whether it’s laughing it off, keeping a straight face, or apologizing immediately after the mishap, these reactions can create a personal connection between the performer and the audience.

The Tolerance For Mistakes In Different Musical Genres

Different genres of music have different levels of tolerance for mistakes made by professional musicians. Jazz, for example, is a genre that is characterized by improvisation and spontaneity. In jazz, a mistake can be seen as a new opportunity to create something unique and interesting. In contrast, a mistake in a classical music performance can be seen as a failure to meet expected standards. It is important to note, however, that each audience member may perceive mistakes differently, regardless of the genre. In summary, mistakes made by professional musicians can be perceived positively or negatively by the audience depending on various factors. While it is important for musicians to strive for perfection, mistakes can sometimes create a connection with the audience and provide an opportunity for creativity. Ultimately, it is up to individual audience members to decide how they will perceive these errors, and it is important for performers to be mindful of this.

Do Professional Musicians Mess Up

Credit: www.quora.com

Frequently Asked Questions For Do Professional Musicians Mess Up

Do Professional Orchestras Make Mistakes?

Yes, professional orchestras can make mistakes during a performance due to various reasons such as technical difficulties, miscommunication, or human error. However, they are trained to minimize these mistakes and to deliver a high-quality performance.

Do Bands Ever Mess Up At Concerts?

Yes, bands can mess up at concerts. Performance mistakes can happen due to various reasons, such as technical issues, nerves, or simply human error. However, experienced and professional musicians often have contingency plans and can quickly recover from mistakes. Ultimately, a live concert experience is unique and can add to the charm and excitement of a performance.

What Do Musicians Struggle With The Most?

Musicians struggle the most with consistent income, finding reliable band members, and navigating the complex music industry. They also face challenges with self-promotion and maintaining a balanced lifestyle while pursuing their passion.

Do Musicians Struggle Financially?

Yes, many musicians struggle financially. It is a highly competitive industry with low pay for up-and-coming artists. The average income for professional musicians is also lower than other careers. Most musicians rely on gigs, merchandise sales, and streaming revenue to make ends meet.

COVID-19 has also impacted musicians’ income due to canceled concerts and events.

Conclusion

Overall, the answer to the question of whether professional musicians mess up is a resounding “yes”. Despite their years of training and practice, even the most skilled musicians can make mistakes during a performance or recording. However, these mistakes are often not noticeable to the audience, and may even add a human element to the music that makes it all the more relatable.

It’s important for musicians to not be too hard on themselves when they do make mistakes, and to instead focus on the joy of playing music.

Categories
Archive

Limiting Your Options While Mixing

Limiting your options while mixing is crucial for achieving a cohesive and polished final product. By carefully selecting and committing to a set of tools, effects, and processing techniques, you can ensure that your mix remains focused and effective.

Mixing is a complex art that requires a delicate balance of creativity and technical skill. As such, it’s important to approach the process with a clear plan in mind. One effective strategy is to limit your options early on, selecting a specific set of tools, effects, and processing techniques to work with throughout the mixing process.

This can help you stay focused and avoid getting bogged down in endless experimentation and tinkering. Additionally, by committing to a specific set of tools and effects, you can develop a deeper understanding of how they work together, allowing you to achieve a more cohesive and polished final product.

Why Limiting Your Options Is Good

Limiting your mixing options might seem counterproductive, but in fact, it’s an essential aspect of producing a clear and focused mix. Many beginners and even experienced producers often tend to jump around from plugin to plugin. Keeping the choices more restrained can help to prevent indecisiveness and provide a more efficient workflow. Here are a few discussed reasons why limiting your options is good.

Achieve Clarity In Your Mix

Too many options can overwhelm and distract you from achieving clarity in your mix. Most plugins have a variety of presets, each with multiple options that can easily distract you. Limiting choices gives you a better chance of making decisions faster and reducing decision fatigue.

  • When given too many options, decision-making becomes harder.
  • Better control over the mix outcomes.
  • More control over elements in the mix.

Eliminate Time-wasting Predicaments

When given too many options, you may spend countless hours trying to perfect tiny details in your mix, ultimately sacrificing time that could be used more efficiently. By minimizing your mixing options to essential plugins, you might save some priceless time and produce a more effective mix.

  1. Limiting your options can reduce decision fatigue
  2. Full automation of the mixing process.
  3. Quick turnaround time on mix completion.

Limiting your options can be an excellent way to unlock your creative potential. You can pay more attention to the technical aspects of the mix, and the results can be impressive. Use the given tips to simplify the plugins you use when mixing. You’ll surprise yourself at the outcome.

Common Mixing Mistakes To Avoid

When mixing audio, it’s important to avoid limiting your options by committing to specific effects or levels too early in the process. Keeping options open and experimenting with different approaches allows for flexibility and creativity in the final mix.

When it comes to mixing, it’s important to avoid certain mistakes that could compromise the quality of your audio. One of the most significant errors that people make is not limiting their options, which can lead to overcompensation and confusion. Other common mixing mistakes to avoid include not having a clear objective before mixing, overusing effects and plugins, and mixing in solo mode. Let’s dive deeper into these three factors.

Not Having A Clear Objective Before Mixing

Before you even begin the mixing process, it’s essential to have a clear objective in mind. What is it that you want to achieve with your mix? Do you want to emphasize the vocals or the instruments? Are you aiming for a certain mood or atmosphere? Without a definite goal, you’ll be mixing blindly, which can lead to frustration and a subpar result. Take the time to establish your objective before diving into the mixing process.

Overusing Effects And Plugins

Effects and plugins are fantastic tools that can enhance your mix, but they should be used with caution. One of the most common mixing errors is overusing effects such as reverb, compression, or EQ. Too much of these effects can make your mix sound muddy and washed out, so it’s essential to exercise restraint and use them sparingly. Remember, less is often more in the mixing process.

Mixing In Solo Mode

Mixing in solo mode can be a great way to focus on individual tracks or instruments, but it’s crucial never to mix solely in solo mode. When you listen to a single track on its own, it can sound fantastic, but it may not sound so great when it’s blended with the rest of the tracks in your mix. It’s essential to listen to your mix as a whole and make adjustments based on the big picture. Mixing in solo mode is a useful tool, but don’t rely on it too heavily. In conclusion, by avoiding these three common mistakes, you can elevate the quality of your mix and ensure that it sounds fantastic. Remember to limit your options, have a clear objective, use effects and plugins sparingly, and mix in both solo and normal modes. By following these guidelines, you’ll be well on your way to creating a professional-sounding mix that will impress and engage your audience.

Techniques For Limiting Your Options

When it comes to mixing, limiting your options can actually be beneficial. By setting boundaries and focusing on a select few elements, you can create a cohesive and impactful sound. Experiment with different techniques such as using fewer tracks, simplifying melodies, and sticking to a specific style or genre.

Mixing can be a daunting task, especially when faced with a plethora of options in front of you. To ensure that you don’t get lost in the sea of choices, limiting your options while mixing is a great way to streamline your process and produce better results. Here are three techniques you can use to limit your options.

Setting A Time Limit For Each Mix Session

Time management is key to successful mixing, and setting a time limit for each mix session is a great way to stay focused and avoid the endless tinkering that can lead to overmixing. Dedicate a specific block of time for each mix session, and work on as many tracks as you can within that timeframe.

Limiting The Number Of Plugins And Effects You Use

As tempting as it may be to keep adding more plugins and effects to your mix, overusing them can lead to a muddled and confusing sound. Limit yourself to a specific number of plugins and effects for each mix, and only use them when they’re truly necessary.

Mixing With Only A Few Tracks At A Time

Focusing on just a handful of tracks at a time can help you to keep your priorities straight and avoid getting lost in the mix. Choose a few key tracks and focus on getting those sounding the way you want, before moving on to the next group. This will help you stay organized and keep the big picture in mind. Overall, limiting your options while mixing can help you to stay focused, efficient, and ultimately produce a better mix. By setting a time limit for each session, limiting the number of plugins and effects, and mixing with only a few tracks at a time, you can streamline your process and achieve the results you’re aiming for.

Benefits Of Limiting Your Options

Limiting your options while mixing can actually result in a better final product. By narrowing down your choices, you can focus on the ones that really work well together and avoid decision fatigue. This can lead to a more cohesive and polished mix overall.

As a sound mixer, you may think that having unlimited options is a good thing. The truth is, it can actually hinder your creativity and productivity. By limiting your options, you give yourself a chance to focus on what really matters and produce a better mix. Here are some benefits of limiting your options.

Forced Creativity

Less is more – this phrase is particularly relevant when it comes to mixing. By limiting your options, you force yourself to be more creative with what you have. When you have fewer tools to work with, you are pushed to find new and innovative ways to achieve the sound you’re looking for. This can lead to a more unique and exciting mix that stands out from the crowd.

Clarity In Your Mix

With too many options at your disposal, it’s easy to get lost in the mix. When you limit your choices, you simplify the process and can focus on what’s important – achieving a clear, balanced sound. By removing unnecessary options, you can bring clarity to your mix and ensure that each element is given the attention it needs to shine through in the final mix.

Efficient Use Of Time

Mixing can be a time-consuming process, especially when you have a lot of options to sift through. By limiting your choices, you can work more efficiently and make decisions more quickly. This means you can spend less time tinkering with settings and more time on the creative aspects of the mix.

Better Mix Decisions

One of the biggest advantages of limiting your options is that it helps you make better mix decisions. When you have fewer options, you are forced to prioritize and make deliberate choices regarding which sounds and effects to use. This can lead to a more cohesive and intentional mix, rather than one that is cluttered with unnecessary elements. In conclusion, limiting your options can be a powerful tool for sound mixers. It can help to spur creativity, bring clarity to your mix, save time, and lead to better overall mix decisions. So, next time you sit down to mix a track, try limiting your choices and see how it affects your process and final product.

Frequently Asked Questions For Limiting Your Options While Mixing

Should You Use Limiters When Mixing?

It depends on your preference and the type of music you are mixing. Limiters can be useful in controlling peaks and increasing overall loudness, but if used improperly they can negatively affect the dynamics and natural sound of the mix.

It’s important to understand how to use limiters correctly and make informed decisions based on the specific needs of each mix.

Should I Use A Limiter Before Mastering?

Yes, you should use a limiter before mastering. A limiter helps control the dynamic range of the mix, preventing any clipping or distortion when played on different devices. However, it’s important to use it in moderation, as too much limiting can lead to a loss of dynamics and a “squashed” sound.

How Much Limiting Is Mastering?

Mastering can be limiting if too much compression and limiting is applied, leading to reduced dynamic range and unnatural sound. However, when done correctly by a skilled mastering engineer, it can improve clarity, loudness, and overall quality of the final mix without compromising the original sound.

What Does A Limiter Do In Music Production?

A limiter is a device used in music production to prevent the audio signal from exceeding a certain level, which can cause distortion and damage to equipment. It restricts the dynamic range of the audio, allowing it to be played louder without distortion.

By doing so, the limiter ensures a consistent and controlled sound output.

Conclusion

Limiting your options while mixing can have significant advantages. By focusing on a few key elements, you can simplify your mixing process, achieve a clean and balanced sound, and save valuable time. Keep in mind that limitations can be liberating and push you to be more creative.

Use these tips to narrow down your choices and elevate your mixes to the next level. Remember, less is often more. Happy mixing!

Categories
Archive

How To Get Great Sounds Fast

To get great sounds fast, start with quality equipment and record in a good acoustic environment. Whether you’re a podcaster, musician, or sound engineer, getting great sounds quickly is essential.

It can be the difference between capturing a magical moment and missing the opportunity. However, achieving a high-quality sound can be time-consuming and difficult, especially for beginners. Having the right equipment and recording in a suitable environment can make a significant difference, as can following some simple tips.

We will explore some of the ways you can get great sounds fast. We’ll look at microphone positioning, preamps, room acoustics, equalization, compression, and more. By the end, you will have a better understanding of the strategies for getting fantastic sounds without spending hours behind the mixer.

Start With Quality Samples

If you want to get great sounds fast, starting with quality samples is the way to go. Samples are the building blocks of any track, and having high-quality samples at your disposal can speed up your workflow considerably. In this article, we’ll take a look at some tips on how to choose the best samples and get great sounds fast.

Choose Samples From Reputable Sources

When it comes to choosing samples, it’s important to select them from reputable sources. There are many websites and online marketplaces that offer samples for free or for a price, but not all samples are created equal. Some sources may offer poorly recorded or low-quality samples, which could end up costing you more time in the long run.

To ensure you’re getting high-quality samples, consider using sample packs from well-known companies or established artists. If you’re unsure about the quality of a particular sample pack, do your research and read reviews from other producers.

Listen To The Samples Before Downloading

Another important tip when choosing samples is to listen to them before downloading. This may seem like a no-brainer, but many producers make the mistake of downloading samples without listening to them first.

By listening to samples before downloading, you can get a better idea of how they will fit into your track and whether they are suitable for your needs. Take the time to preview samples and listen to them in context with your other tracks to ensure they are the right fit.

Conclusion

Starting with quality samples is the key to getting great sounds fast. By choosing samples from reputable sources and listening to them before downloading, you can ensure that your tracks have the right ingredients for success.

Use Presets

Using presets is a great way to get professional and high-quality sounds fast. By selecting the right preset, you can save time in adjusting each individual sound or effect to achieve the desired outcome. This can be particularly helpful for those who are new to music production or are experimenting with different sounds.

Are you getting bogged down trying to create the perfect sound design? While it’s important to experiment and find the right combination of effects, plugins, and processing, it can be time-consuming. Fortunately, one of the quickest ways to get great sounds fast is by using presets. Presets are pre-configured settings that allow you to load an effect or plugin with a specific sound or setting. Here’s how to make the most out of presets:

Experiment With Presets

One of the best things about using presets is the ability to experiment with different sounds quickly. Most plugins and effect units come loaded with a variety of presets, each tailored to a specific style or genre. Don’t be afraid to try different presets and see which ones work best for you. Scroll through the list and try them one by one, listening to each as you go.

Make Small Adjustments To Tailor The Sound To Your Needs

While presets can save you time by getting you close to the sound you want, they’re not always perfect. Every track is different, and sometimes the presets might need slight adjustments to match your specific track. Use your ears and make small adjustments to tailor the sound to your needs. Common tweaks include adjusting the EQ, adding reverb or delay, or tweaking the modulation settings. Remember, the aim is to enhance the preset, not completely change it. Using presets is a great way to speed up your workflow and get great sounds fast. Experiment with presets, make small adjustments, and enjoy the ease and convenience of preset sound design.

Layer Sounds

Layer Sounds offers a vast selection of professional-sounding audio samples that can enhance your music productions. Their easy-to-use interface allows you to discover and incorporate great sounds into your music quickly and efficiently.

Layering is one of the quickest and most efficient ways to get great sounds that stand out from the rest. By layering sounds, you can create complex textures that will give your music more depth and richness. This technique involves using multiple sounds and blending them together to form a cohesive whole. In this post, we’ll explore some tips and tricks for layering sounds to help you get the best results possible.

Combine Different Sounds For More Complex Textures

When layering sounds, it’s important to choose sounds that complement each other. Try experimenting with different combinations of sounds until you find ones that work well together. For instance, you could use a high pitched sound like a chime and combine it with a low frequency pad. Using these two sounds together will create a more complex texture than using either sound individually.

Eq Each Layer To Reduce Clashing Frequencies

When layering sounds together, it’s crucial to make sure that the frequencies of each layer aren’t clashing with one another. Clashing frequencies can result in a muddy and indistinguishable sound. To avoid this issue, use an equalizer to reduce any overlapping frequencies in your layered sounds. For example, if your bassline and kick drum are clashing, try using a high-pass filter to remove some of the bass frequencies from the kick drum. In conclusion, layering sounds is a simple and effective way to create more complex textures in your music production. By combining different sounds and using an equalizer to balance out frequencies, you can achieve a fuller, richer sound that will make your music stand out. Remember to experiment with different sound combinations and to take your time getting each layer just right.

Add Effects

Elevating your sound with the addition of effects can enhance your music in just a few steps. Experimentation with different effect types such as reverb, delay, and distortion can create unique sounds quickly.

Try Out Different Reverb And Delay Settings

Reverb and delay are two essential effects that can add depth and space to your sounds, whether it’s a vocal track, guitar riff, or synth melody. Experiment with different types of reverb, such as hall, plate, or spring, to achieve the desired effect. To create a sense of space, increase the decay time and adjust the wet/dry mix to taste. For a more subtle effect, try using a shorter decay time and a lower wet/dry mix. Similarly, delay can also help create a sense of depth and add movement to your sounds. Try using different delay times, feedback, and modulation settings, and experiment with syncopation to create interesting rhythms. Remember, less is often more when it comes to using effects, so don’t overdo it.

Use Distortion To Add Character To Your Sound

Distortion is an effect that can add grit and character to your sounds, whether you’re working with guitars, synths, or drums. It can create a range of tones, from subtle warmth to aggressive overdrive. Using distortion, you can take a clean sound and make it sound more distorted, or take an already distorted sound and make it even more aggressive. To get great sounds fast, try using presets or starting with a low gain setting before adjusting to taste. Distortion can also be used creatively to add interest to your sounds. Try using it on a synth lead to add some edge, or on a drum track to make it sound more raw and powerful. Again, less is often more when it comes to distortion, so experiment until you find the right balance.

Pay Attention To Eq

To quickly improve the quality of your sound, pay attention to EQ. EQ, or equalization, allows you to alter the balance of frequencies in your audio, helping to diminish problematic frequencies and enhance the overall sound. By making targeted adjustments, you can achieve a cleaner, more impressive final product.

EQ or equalization is an incredibly powerful tool that can help you achieve great sounds for your music tracks. When it comes to mixing, it’s essential to pay attention to the EQ as it plays a crucial role in shaping the overall sound of your mix. Here are some useful tips on how to use EQ effectively to get great sounds fast.

Use Eq To Cut Out Unwanted Frequencies

The first step towards achieving great sounds is to identify and eliminate unwanted frequencies. For instance, if your kick drum sounds too boomy, it might be because of low-frequency buildup. You can use a high-pass filter to cut out the unwanted frequencies and to make the kick drum sound tight and punchy. Similarly, if you’re dealing with a guitar track that sounds too harsh, you can use a low-pass filter to remove the high frequencies that make it sound unpleasant. By cutting out the unwanted frequencies, you can make room for the important elements in your mix and achieve a well-balanced sound.

Boost The Presence Of The Sound With Eq

EQ allows you to highlight specific frequencies in your mix, which can help bring out the character and presence of the sound. For instance, if you have a vocal track that sounds dull and lacks presence, you can use a boost around 2-5 kHz to add some clarity and make the vocal sound more present in the mix. Similarly, if you have a bassline that sounds thin and weak, you can use a boost around 80-100 Hz to add some warmth and body to the sound. By boosting the right frequencies, you can enhance the character and personality of your mix and make it sound more polished and professional. In conclusion, EQ is an incredibly powerful tool that can help you achieve great sounds for your music tracks. By knowing how to use EQ effectively, you can eliminate unwanted frequencies and highlight the important elements in your mix, leading to a well-balanced and professional sounding mix.

Don’t Overdo It

Getting great sounds quickly is essential when it comes to music production. No one wants to spend hours tweaking settings to find the perfect sound. However, it’s essential not to overdo it when you’re trying to produce a track quickly.

Avoid Adding Too Many Layers

Adding too many layers to your track can be overwhelming and create a cluttered sound. Instead, focus on adding layers that complement each other. For example, if you have a lead synth, you might consider adding a bass synth that plays a complementary pattern.

Moreover, If you’re adding vocals to the track, make sure they’re not competing with other sounds in the mix. Keep your track clean and simple, allowing each sound to breathe and have its own space.

Don’t Overuse Effects Or Eq

Overusing effects or EQ can be tempting, especially if you have a limited time to work on your track. However, too much processing can make your sounds unnatural or distort them. So, it’s better to use effects and EQ judiciously.

Furthermore, start with a small amount of effects like delay or reverb. Then listen to how it changes the sound and make necessary adjustments. Similarly, use EQ to sculpt the frequency response instead of making drastic changes.

Remember, less is often more when it comes to music production. So, use effects and EQ sparingly, keeping the track balanced and natural.

Reference Other Tracks

To get great sounds fast, a useful tip is to reference other tracks. Listening to your favorite songs and analyzing their sound can help you understand how they achieved their sound and apply those techniques to your own music production.

It’s a simple yet effective trick that can elevate your sound quickly.

Compare Your Sound With Professional Tracks

When it comes to music production, a good mix is essential for any sound to be appreciated. One way to achieve this is by reference other tracks. By comparing your sound to established professional tracks, you can identify gaps and make necessary adjustments to improve your sound quality. To make a good comparison, try to choose a reference track that aligns with the genre and mood of your production. Listen carefully to the track and take notes on the levels and frequencies of each element. Take note of the balance, the amount of bass, and the clarity of each sound to get a clear idea of the tonality and stereo field. Once you have a good understanding of the reference track, compare it to your own mix. In doing so, you may identify areas that need improvement, such as the levels of certain instruments or the overall balance of the mix.

Aim For A Balanced Mix

Balancing your mix is the key to getting great sounds fast. A balanced mix ensures that each element of the track is audible and contributing to the overall sound without being overpowering. When aiming for a balanced mix, start by boosting the levels of the high and low frequencies. This will give the track a fuller sound. Next, adjust the levels of each element of the mix, focusing on reducing the volume of any overcrowded elements. This will give each element its own space in the mix, making it stand out. To achieve a balanced mix, take note of the placement of each sound in the stereo field. Panning your instruments will help to give your tracks a more spacious and immersive sound. By panning, you can create a depth to the mix, which will make each element sound more distinct. By following these simple steps and comparing your mix to professional tracks, you can get great sounds quickly and easily. It’s all about understanding your mix and balancing it to achieve the best possible sound.

How To Get Great Sounds Fast

Credit: www.youtube.com

Practice

Getting great sounds fast is a skill that takes time to develop. There are no shortcuts, no magic formulas. The only way to get better is to practice. Here are a few ways to help you improve your sound quickly:

Keep Experimenting With Different Techniques

The more you practice, the better you will become at understanding the different techniques that are available to you. As you experiment, you will find out what works for you and what doesn’t. Don’t be afraid to try new things, as the more you experiment, the more you will learn about sound design. It might take some time, but by exploring different techniques you will eventually find your own unique sound.

Don’t Be Afraid To Try New Sounds

When you’re focused on creating a specific sound, it’s easy to get stuck in a rut. But there is a whole world of sounds out there waiting to be explored. Don’t be afraid to try new things, whether it’s a different instrument, a new plugin, or a new effect. The more you experiment with different sounds, the more you will learn about what is possible in music production. In addition, you never know where your experimentation might take you. Some of the most innovative music producers are those who are not afraid to break the rules and try new things.

Remember, practice is the key to getting great sounds fast. Take the time to experiment with different techniques and sounds, and you’ll be amazed at how quickly you can become a sound design expert.

How To Get Great Sounds Fast

Credit: www.digitaldjtips.com

Frequently Asked Questions On How To Get Great Sounds Fast

How Do You Master Really Loud?

To master really loud, use compression to even out the volume levels and add limiting to prevent peaks. Adjust EQ to control any harsh or piercing frequencies. Proper gain staging is key, so ensure each track is at an appropriate level before adding effects.

Use reference tracks to compare your mix and make adjustments.

What Makes A Song Feel Fast?

The tempo, rhythm, beat and instrumentation can make a song feel fast. Faster tempos with a prominent beat and fewer pauses between lyrics or notes convey a sense of urgency and speed. The use of percussion instruments also contributes to the feeling of speed.

How Important Is Room Treatment When Getting Great Sounds?

Proper room treatment is essential in achieving high-quality sounds. The room’s acoustics can significantly affect the recordings, leading to unwanted reflections, echoes, and resonances. You can treat the room by using absorbers, diffusers, and bass traps to balance out the reflections and reduce the room’s reverb time.

What Are The Best Microphones For Recording Music?

The best microphones for recording music depend on the type of sound you want to capture. Generally, condenser microphones are perfect for recording vocals, acoustic guitars, and drums. Ribbon microphones are ideal for capturing natural and warm sounds, such as brass, strings, and woodwinds.

Dynamic microphones, on the other hand, are suitable for recording loud and high-pressure sound sources like guitar amps.

Conclusion

In just a few steps, you can take your music to the next level with great sounds. By choosing the right software, instruments, and effects, you can improve the quality of your tracks. Experimenting with different sound settings and techniques can bring fresh new energy to your music.

Don’t be afraid to try new things, and keep learning to refine your skills. With a little effort and knowledge, you’ll be producing professional-level sounds in no time. Happy musical journey!

Categories
Archive

Best Midi Keyboards Under 500

The best MIDI keyboards under $500 are the Akai MPK Mini MK3, Novation Launchkey Mini Mk3, Arturia MiniLab MkII, Native Instruments Komplete Kontrol M32, and M-Audio Oxygen Pro 49. These keyboards offer a range of features such as velocity sensitive keys, programmable pads, and assignable knobs, making them perfect for producing music on a budget.

As an Amazon Associate I earn from qualifying purchases.

With their compact size, ease of use, and affordable price, these MIDI keyboards are ideal for beginners and professionals alike. MIDI keyboards are essential tools for musicians that desire to create music on their computers. They offer an array of features such as assignable knobs, velocity sensitive keys, programmable pads, and more.

Finding a MIDI keyboard with a budget under $500 can be challenging, but it’s not impossible. Several reliable brands offer high-quality, affordable keyboards with extended features that can rival expensive ones. This article will highlight the best MIDI keyboards under $500 without compromising their functionality. So, whether you’re a beginner or an experienced producer, these MIDI keyboards are sure to meet your needs.

Midi Keyboard Basics

Discover the top MIDI keyboards under $500 for beginners and musicians on a budget. These keyboards come with a range of essential features like velocity sensitivity, weighted keys and pitch bend, allowing you to create music with ease.

What Is A Midi Keyboard?

A MIDI keyboard is an electronic musical instrument that uses the Musical Instrument Digital Interface (MIDI) protocol to communicate with other MIDI devices, such as computers, sound modules, and synthesizers. Essentially, a MIDI keyboard is a controller that sends MIDI data to these devices, allowing you to create and manipulate sound.

Why Do You Need A Midi Keyboard?

If you’re a musician or a music producer, a MIDI keyboard is an essential tool. Compared to other musical instruments, MIDI keyboards offer a wide variety of sounds, effects, and customization options. Additionally, they allow you to control multiple devices at once, making the production process more efficient. When choosing a MIDI keyboard, there are several factors to consider, such as the number of keys, the size, the connectivity options, and the overall functionality. Fortunately, there are plenty of high-quality MIDI keyboards available at affordable prices. In fact, here are some of the best MIDI keyboards under $500:

BrandModelNumber of KeysPrice
AkaiMPK Mini MkII25$119
M-AudioKeystation 61 Mk361$199
NovationLaunchkey 61 MkII61$269
ArturiaKeyLab Essential 4949$249
MidiplusX4 mini49$109

Overall, investing in a reliable MIDI keyboard can significantly enhance your musical journey. Whether you’re a beginner or a seasoned professional, a MIDI keyboard is a versatile and powerful tool that can help you create and produce your best work.

Features To Look For In A Midi Keyboard

One of the key features to consider when shopping for a MIDI keyboard under $500 is the number of keys and their sensitivity. It’s important to also look for velocity-sensitive keys and pads, assignable knobs and buttons, compatibility with your DAW, and any additional features like a pitch bend or modulation wheel.

If you are in the market for a MIDI keyboard under $500, it is essential to understand the critical features to look for. These features can significantly influence your music production experience and determine the value you get for your money. In this post, we will look at the three most critical features that can help you make an informed decision: Key count and size, Knobs, faders, and pads, and Connectivity options.

Key Count And Size

The number of keys and size of a MIDI keyboard significantly affect your playing experience, and it’s essential to consider these factors before making a purchase decision. MIDI keyboards’ key counts typically vary from 25 to 88 keys, and every size caters to specific needs. If you are looking to produce music that requires complex arrangements, then a keyboard with 61 or 88 keys would be most suitable. If you need a portable Keyboard for live performances, a 25- or 32- key MIDI keyboard would suffice. Therefore, it’s essential to understand your needs to choose the optimal key count.

Knobs, Faders, And Pads

MIDI keyboards come with various control options, including knobs, sliders, and pads that can be useful for music production and live performances. Knobs can be used to control instrument volume levels and effects, while pads can trigger samples and loops. Faders, on the other hand, are useful in controlling mixer channel volumes, panning, and other parameters. Therefore, it’s essential to ensure your MIDI keyboard comes with enough knobs, faders, and pads to cater to your music production needs.

Connectivity Options

MIDI keyboards can be connected to different devices, including computers, smartphones, and tablets. The connectivity options available in your MIDI keyboard can significantly influence its usability and compatibility with your music production setup. Look for a MIDI keyboard with USB, MIDI, and Bluetooth connectivity options to ensure it can be used with various devices. USB connectivity is essential for using the keyboard with a computer, while MIDI connectivity is useful for connecting to other MIDI-enabled devices like synthesizers. In conclusion, the key count and size, knobs, faders, and pads, and connectivity options are the three most crucial features to look for in a MIDI keyboard. It’s essential to choose a MIDI keyboard that meets your music production needs, both in terms of functionality and ease of use. By considering these features, you should be able to find a MIDI keyboard that fulfills your music production desires.

Top 5 Best Midi Keyboards Under $500

This article explores the top five best MIDI keyboards under $500, perfect for both beginners and professionals. These keyboards offer a range of features, including excellent sound quality and a variety of controls, ensuring a comfortable and enjoyable playing experience.

Are you looking for a high-quality MIDI keyboard that won’t break the bank? Thankfully, you don’t need to spend a fortune to get one of the best MIDI keyboards on the market. In this article, we’ll take a look at the top 5 best MIDI keyboards under $500. We’ve handpicked these five keyboards based on their features, build quality, and price – so you can be sure you’re getting a great deal. The Akai Professional MPK Mini MK3 is a compact MIDI keyboard with 25 velocity-sensitive keys. With eight backlit MPC-style pads, eight assignable knobs, and a built-in arpeggiator, this keyboard is perfect for producers or beatmakers who want a portable solution without sacrificing functionality. The MPK Mini MK3 even comes with a software bundle including MPC Beats, AIR Hybrid plugin, and a range of sample packs. If you need a larger keyboard, the Novation Launchkey 49 may be the right choice for you. Featuring 49 velocity-sensitive keys, 16 RGB backlit pads, nine faders, and eight knobs – this keyboard offers a wide range of controls and is perfect for both studio and live performances. The Launchkey 49 also includes Ableton Live Lite, a range of VSTs, and a software bundle that provides everything you need to get started. The M-Audio Oxygen 49 MKIV is a semi-weighted keyboard that features 49 velocity-sensitive keys, eight assignable knobs, and nine faders. With its intuitive layout and easy-to-use controls, this keyboard is perfect for beginners and professionals alike. The Oxygen 49 MKIV also includes a range of software such as Ableton Live Lite, SONiVOX Twist, AIR Music Tech Xpand!2, and more. The Nektar Impact GX49 is a budget-friendly MIDI keyboard that doesn’t compromise on features. With 49 velocity-sensitive keys, eight assignable knobs, and a dedicated transport control section – this keyboard is ideal for musicians on the go. The Impact GX49 also includes Nektar DAW Integration for popular DAWs such as Ableton Live, Logic Pro X, and more. Finally, we have the Alesis VI49 – a powerful MIDI keyboard with 49 velocity-sensitive keys and 16 RGB backlit pads. With its semi-weighted keys and aftertouch functionality, the VI49 offers a great playing experience for both keyboards and pianists. The VI49 also includes a software bundle with Air Music Tech Velvet, Mini Grand, and a range of sample packs to get you started. In conclusion, these are the top 5 best MIDI keyboards under $500 that offer excellent features, performance, and value for money. Whether you’re a producer, composer, or musician – any of these keyboards will help you take your music to the next level.

Best Midi Keyboards Under 500

Credit: djcity.com.au

Akai Professional Mpk Mini Mk3

The Akai Professional MPK Mini MK3 is one of the best-selling and most affordable midi keyboards under $500. It features 25 velocity-sensitive keys, eight MPC-style pads, and eight assignable knobs, making it perfect for music production on the go.

The Akai Professional MPK Mini MK3 is a feature-packed MIDI controller that is suitable for beginners and seasoned musicians alike. It is one of the best MIDI keyboards under 500, offering an impressive combination of design, build quality, and key features that meet the needs of modern-day musicians.

Design And Build Quality

The MPK Mini MK3 has a sleek and compact design, making it a perfect portable option for musicians who like to create music on-the-go. It features 25 velocity-sensitive mini keys, which deliver a comfortable and responsive playing experience. The keyboard has a professional feel to it, with its pitch and modulation controls, octave buttons, and sustain pedal input making it versatile and functional.

Key Features

The MPK Mini MK3 comes equipped with an impressive array of key features that allow musicians to create music with ease. It has 8 backlit velocity-sensitive MPC-style pads, which can be used to trigger samples, loops, and even virtual instruments. The keyboard has an intuitive layout, with dedicated buttons for frequently used functions like the arpeggiator, note repeat, and panic button. Additionally, the MPK Mini MK3 also comes with a powerful software bundle that includes various plugins, delivering a range of virtual instruments and effects.

Pros And Cons

Here are some key pros and cons of the Akai Professional MPK Mini MK3:

ProsCons
Compact and portable designMini keys may not be suitable for everyone
Feature-packed with a range of key featuresSome users may prefer a more extensive keyboard mapping
Intuitive layout with dedicated buttons for frequently used functionsNot suitable for professional-level music production
Powerful software bundle that includes various pluginsNo pads’ sensitivity control

In conclusion, the Akai Professional MPK Mini MK3 is an excellent choice for musicians looking for a compact, portable, feature-packed MIDI controller. It offers a professional feel design with responsive mini keys and a range of key features that make it a versatile option for music production. Its software bundle adds value for money by providing users with a range of virtual instruments, effects, and plugins to explore.

Novation Launchkey 49

Novation Launchkey 49 is a top-of-the-line MIDI keyboard. Its 49 keys provide it with enough range to handle any composition or performance, while its many programmable knobs and faders give it the flexibility to fit into any setup. It’s a great choice for anyone looking for a versatile keyboard under $500.

Novation Launchkey 49 is one of the best MIDI keyboards under $500. This keyboard has become a popular choice for both beginners and professionals in the music industry. The Novation Launchkey 49 is known for its efficient workflow, excellent build quality, and ease of use. In this article, we will discuss the design and build quality of the Novation Launchkey 49, key features, as well as its pros and cons.

Design And Build Quality

The Novation Launchkey 49 has a sleek and modern design that sets it apart from other MIDI keyboards under $500. The keyboard features a matte black finish with a silver Novation logo in the center. The keys are full-sized and have a nice touch and feel to them. The Novation Launchkey 49 is built to last, with a sturdy and durable construction that can withstand years of heavy use. The keyboard is USB-powered, making it effortless to use on the go.

Key Features

The Novation Launchkey 49 has several key features that make it stand out in its price range. It has 49 full-sized velocity-sensitive keys, eight rotary knobs, nine faders, and 16 RGB backlit velocity-sensitive pads. The keyboard also has a dedicated pitch and modulation wheel, a transpose button, and octave up/down buttons. The Novation Launchkey 49 is compatible with all major DAW software, including Ableton Live, Logic Pro X, and FL Studio.

Pros And Cons

Like all products, the Novation Launchkey 49 has its pros and cons. Here is a list of the keyboard’s advantages and disadvantages: Pros:Cons: – Limited number of keys compared to some keyboards in the same price range – The keys are not weighted, which may not suit piano players In conclusion, the Novation Launchkey 49 is an excellent choice for those looking for a reliable MIDI keyboard under $500. It has a modern design, excellent build quality, and several key features that make it stand out in its price range. The Novation Launchkey 49’s pros outweigh its cons, making it an excellent investment for both beginners and professionals.

M-audio Oxygen 49 Mkiv

The M-Audio Oxygen 49 MKIV is one of the best midi keyboards under $500. It boasts 49 full-size velocity-sensitive keys, eight assignable knobs, nine assignable faders, and a variety of other features aimed at making music production easier and more intuitive.

The M-Audio Oxygen 49 MKIV is a popular MIDI keyboard that has been well-received by musicians of all skill levels. With a reasonable price tag of under $500, it has been a go-to option for many looking for a high-quality keyboard without breaking the bank. Let’s take a closer look at the design and build quality, key features, and pros and cons of this keyboard.

Design And Build Quality

The M-Audio Oxygen 49 MKIV has a sleek design that is both aesthetic and functional. It has a silver metallic finish with black control knobs and keys. The keyboard is lightweight, weighing only 6.2 pounds, making it easily portable. It measures 32.2 x 10.6 x 3.6 inches, which is a perfect size for those with limited space. The keys are semi-weighted and have velocity sensitivity, allowing for a natural and responsive playing experience. The device also comes with eight velocity-sensitive trigger pads, which are perfect for triggering drums, samples, or other sound effects.

Key Features

The M-Audio Oxygen 49 MKIV has a range of features that make it a great MIDI keyboard choice. One standout feature is the inclusion of assignable knobs, buttons, and faders. The keyboard boasts eight assignable knobs, nine assignable faders, and nine assignable buttons, providing musicians with numerous customization options. The keyboard also integrates well with popular digital audio workstations such as Ableton Live, Pro Tools, and Logic Pro X, with automatic mapping of certain functions. Additionally, the device has a built-in LCD screen, which makes it easy to adjust and manipulate settings on the go.

Pros And Cons

Like any product, the M-Audio Oxygen 49 MKIV has its pros and cons. It’s important to weigh both before purchasing. Here are a few to consider: Pros:

  • Lightweight and portable
  • Eight velocity-sensitive pads for playing drums or triggering samples
  • Assignable knobs, buttons, and faders for customization
  • Direct link to popular digital audio workstations
  • Built-in LCD screen for easy navigation of settings

Cons:

  • The keyboard only has 49 keys, which may not be suitable for those needing a wider range
  • The semi-weighted keys may not feel as responsive or natural as fully weighted keys
  • The device may not be compatible with some older computer systems

Overall, the M-Audio Oxygen 49 MKIV is a versatile and reliable MIDI keyboard that is perfect for musicians looking for a high-quality instrument without breaking the bank. Its lightweight design, assignable knobs, and compatibility with popular digital audio workstations make it a great option for those looking to take their music production to the next level.

Nektar Impact Gx49

The Nektar Impact GX49 is one of the best MIDI keyboards under 500. With its compact size and features like customizable velocity curves, it’s a great option for musicians who need a portable and powerful keyboard for their music production needs.

Nektar Impact GX49 is a highly recommended MIDI keyboard under $500 for its exceptional built quality and features. It has been designed with the musician in mind, making it easy to use and practical at the same time.

Design And Build Quality

The design of the Nektar Impact GX49 is sleek and modern. It is compact and lightweight, making it easy to transport while keeping the quality performance intact. The keyboard has a rugged build quality which allows it to withstand the rigors of being on the road. The keys are made of top quality materials which make playing an enjoyable experience. They are also velocity-sensitive, allowing for expressiveness in your playing. The keyboard has an ergonomic design that enables you to play comfortably and for long hours without straining.

Key Features

The Nektar Impact GX49 has a variety of features that make it stand out among other keyboards in its price range. Some of these features include:

  • 49 velocity-sensitive keys
  • Eight velocity-sensitive pads
  • Octave up/down buttons
  • Transport and navigation buttons
  • Pitch bend and modulation wheels
  • USB bus powered

Pros And Cons

Like any other product, the Nektar Impact GX49 has its pros and cons:

ProsCons
Compact and lightweightNot compatible with iOS devices
Sturdy build qualityNo aftertouch functionality
Easy to use and set upKeys are a bit too stiff for some users
Wide range of features for its priceNo sustain or expression pedal inputs
Compatibility with almost all DAWs

Overall, the Nektar Impact GX49 is a highly recommended MIDI keyboard for those who are in search of affordable yet high-quality musician equipment. With its sleek and modern design, top-quality materials, and versatile features, it has become increasingly popular among musicians.

Alesis Vi49

The Alesis VI49 is one of the best midi keyboards under $500. It features 49 semi-weighted keys with aftertouch and 16 velocity-sensitive pads, providing a great playing experience for producers and musicians alike.

The Alesis VI49 is a popular MIDI keyboard that caters to both beginner and professional musicians. It is a relatively affordable keyboard compared to other models with similar features. The VI49 has some unique features that make it stand out from others in its price range. This section will provide detailed information on the design and build quality, key features, as well as the pros and cons of the Alesis VI49.

Design And Build Quality:

The Alesis VI49 has a sleek and modern design. It is made of high-quality materials that ensure durability and longevity. The keyboard is made of semi-weighted keys that provide the player with a balanced feel of a piano. The keyboard also has eight velocity-sensitive pads that can be used to trigger samples or play drums. It comes with pitch and modulation wheels, which provide more expressive control over your sounds. The VI49 also has a comprehensive LED screen, making it easy to navigate and customize your settings. The keyboard is lightweight and compact, making it easy to carry around for gigs or rehearsals.

Key Features:

The key features of the Alesis VI49 are what make it stand out from other models in its price range. It has a total of 49 semi-weighted keys, eight velocity-sensitive pads, and four assignable knobs and buttons that can be used to control your DAW (Digital Audio Workstation). The VI49 also comes with a comprehensive software package, which includes Ableton Live Lite, AIR Music Technology’s Xpand!2, and SONiVOX Twist 2.0. These software packages provide you with the necessary tools to start producing music right out of the box. The VI49 is also USB-powered, making it easy to set up and use on the go.

Pros And Cons:

ProsCons
1. Affordable price compared to other models with similar features.1. The semi-weighted keys can feel a little stiff for some pianists.
2. Comprehensive software package that includes Ableton Live Lite and other software.2. The eight pads might not be enough for some drummers or producers.
3. Lightweight and compact design, making it easy to carry around.3. Some users might prefer more assignable buttons and knobs.

Overall, the Alesis VI49 is an excellent MIDI keyboard that provides great value for its price. It has a modern design, semi-weighted keys, and a comprehensive software package that makes it a great choice for beginners or professionals. Although it might not have as many features as other models on the market, the VI49’s features are sufficient for most musicians. Its pros outweigh the cons, making it a popular choice among musicians looking for a budget-friendly MIDI keyboard with great features.

Best Midi Keyboards Under 500

Credit: www.gearank.com

Frequently Asked Questions For Best Midi Keyboards Under 500

What Is The Best Midi Keyboard Brand?

It’s subjective, but some top brands for MIDI keyboards are Akai, Novation, and Roland. All have a good reputation for build quality, durability, and features. It’s important to consider your budget, intended use, and personal preferences before making a purchase.

What Midi Keyboard Should I Buy Beginner?

For beginners, a good MIDI keyboard to buy is the Akai MPK Mini MKII. It’s affordable and has everything you need, including 25 keys, eight backlit pads, and knobs for adjusting volume and other settings. Plus, it works well with most recording software.

Is Akai A Good Midi Keyboard?

Yes, Akai is a reputed brand for MIDI keyboards and has a range of good-quality models suitable for beginners to professionals. The keyboards are known for their responsive keys, easy-to-use interface, and compatibility with various software and DAWs.

How Do I Choose A Good Midi Keyboard?

To choose a good MIDI keyboard, consider the number of keys, sensitivity, and weight. See if it has features like modulation, pitch, and sustain wheels, and programmable pads and knobs. Check if it’s compatible with your device, and if it has a solid build and good quality keys.

Conclusion

To conclude, investing in a quality midi keyboard under $500 can greatly benefit both amateur and professional musicians alike. The recommendations provided offer a range of options with various features to suit different needs and preferences. By considering factors such as connectivity, compatibility, and number of keys, musicians can make an informed decision and elevate their music production experience.

Remember to prioritize quality and functionality over aesthetics when making a purchase.

Categories
Archive

Sound Design Tips Arturia Mini V3

To achieve groundbreaking sound design with Arturia Mini V3, explore the modulation options and experiment with the oscillator modes. Arturia Mini V3 is a virtual synthesizer designed to replicate the iconic Minimoog Model D synth.

Also, Sound designers can harness the power of the advanced modulation options to create new and unique sonic textures. The synthesizer features three oscillators and a noise generator that can be mixed and matched to produce a range of timbres. Additionally, users can modify the modulation matrix to alter the signal path for complex sound designing.

Related reading: Akai Mpk Mini Review and Cubase Stops Playing When Minimized. For background, see the official Arturia website.

Moreover, the filter section can be adjusted to create a wide range of sounds, from punchy bass to resonant lead tones. With its advanced modulation options, intuitive interface, and authentic sound, the Mini V3 is an excellent choice for sound designers looking to explore new creative avenues.

Sound Design Tips Arturia Mini V3

Credit: www.productionmusiclive.com

Know Your Arturia Mini V3

In addition, explore the endless possibilities of sound design with this Minimoog emulation. Get the most out of this powerful synthesizer with these helpful sound design tips.

Know Your Arturia Mini V3 The Arturia Mini V3 is a software synthesizer that emulates the classic Minimoog Model D. It’s a powerful tool for sound designers looking to create iconic sounds from the past. The plugin boasts a simple interface and is easy to use, but there are some tips and tricks that can help you get the most out of it. In this article, we’ll take a closer look at the interface, sound characteristics, and offer sound design tips for the synth. Interface Overview The Mini V3 has a simple interface that is easy to navigate.

Additionally, the main screen is divided into two parts: the oscillator section and the filter section. The oscillators generate sound, while the filter shapes the sound. The user interface looks like a physical synthesizer with knobs, buttons, and sliders that you can use to shape your sound. There are also virtual patch cables that allow you to connect different modules. Sound Characteristics This Minimoog emulation has a warm, analog sound that is reminiscent of the classic Minimoog Model D. It has three oscillators, each with its own waveform, and a noise generator.

Practical Tips for Arturia Mini V3

Also, the filter has a distinctive character with a resonant peak that can work for emphasis or dramatic effect. The envelope generators can shape the sound over time, while the LFO can add movement and modulation. The plugin also has a variety of effects to enhance your sound, such as chorus, delay, and reverb. Sound Design Tips 1. Experiment with the filter – The filter is one of the most important components of the sound of the synth. Experiment with the filter cutoff frequency and resonance to create unique sounds. 2.

Moreover, use the virtual patch cables – The virtual patch cables allow you to connect different modules and create complex sounds. Try routing the LFO to the filter cutoff or the envelope generator to the oscillator pitch to create unique effects. 3. Get creative with modulation – The modulation matrix allows you to create complex modulations. Try using the envelope generator or LFO to modulate the filter cutoff frequency or the oscillator pitch to create movement and interest in your sounds. 4.

Putting It Into Practice for Arturia Mini V3

Use effects sparingly – While it’s tempting to add lots of effects to your sound, they can quickly become overwhelming. Use effects such as reverb or chorus sparingly to enhance your sound, rather than overpower it. Conclusion In conclusion, the Mini V3 is a versatile and powerful software synthesizer that deserves a place in your sound design toolbox. In addition, by experimenting with the interface, exploring the sound characteristics, and using the sound design tips, you can create iconic sounds from the past or unique sounds of your own. This Minimoog emulation is a must-have for any sound designer who wants to create classic analog sounds.

Crafting Your Sound for Arturia Mini V3

Furthermore, crafting your unique sound has never been easier with these sound design tips using the synth. Experiment with different waveforms, filters, and modulation to create your own signature sound and stand out from the crowd.

Additionally, crafting your sound is an art form that requires a lot of patience and dedication. If you’re a music producer or sound designer looking to create unique and captivating sounds, you need to have the right tools and skills to help you achieve your goals. One of the tools you can use to create remarkable sounds is the Mini V3. This virtual synthesizer is an updated version of the classic Mini V. It’s a powerful tool that allows users to create a broad range of sounds, including bass, lead, and pad sounds. Here are some sound design tips to help you get the most out of this Minimoog emulation, and craft your sound to perfection.

Choosing The Right Waveform

The waveform you choose has a significant impact on the overall sound you create. Also, the synth has several waveform options to choose from, including sine, sawtooth, triangle, and square. These waveforms are fundamental building blocks to create your unique sound. Each waveform has its characteristics, and the key is to experiment with them to find your desired sound. Sine waveforms, for example, are smooth and have a pure tone, making them ideal for creating sub-bass sounds. Sawtooth waveforms, on the other hand, have a sharp sound and a rich harmonic content, perfect for creating lead and bass sounds.

Understanding Filters

Moreover, Filters are essential components of the Mini V3, and they help shape the sound you create. The filters come in different types, including low-pass, high-pass, band-pass, and notch filters. Filters work by cutting or boosting specific frequencies, which can change the character and tone of your sound. So, it’s crucial to understand how filters work to craft your sound effectively. Low-pass filters remove high-frequency sounds and are ideal for creating warm and mellow sounds. High-pass filters, on the other hand, remove low-frequency sounds, giving your sound more clarity and definition.

Working With Envelopes

In addition, envelopes control how a sound starts, evolves, and ends over time. This Minimoog emulation has three types of envelopes: amplitude, filter, and pitch envelopes. Amplitude envelopes control the volume of your sound, while filter envelopes affect the cutoff frequency of the filter. Pitch envelopes, on the other hand, change the pitch of the sound over time. To create a more dynamic sound, you can use the envelopes to modulate different parameters simultaneously.

Using Modulation Sources

Furthermore, Modulation sources can add depth and animation to your sound. The Arturia Mini V3 has various modulation sources that you can use to create unique sounds. These modulation sources can be applied to parameters such as filter cutoff or pitch. For example, the LFO can add vibrato to your sound, creating a more interesting and lively effect. Overall, the Arturia Mini V3 is an ideal tool for sound designers and music producers, allowing them to create unique and captivating sounds. By choosing the right waveform, understanding filters, working with envelopes and modulation, you can take your sound design skills to the next level.

Advanced Techniques

Additionally, explore the limitless possibilities of sound design using Arturia Mini V3. Learn advanced techniques to create unique and captivating tones that will elevate your music production to the next level.

Also, advanced Techniques: If you want to add movement and depth to your sound design, the Arturia Mini V3 can be a powerful tool. This virtual instrument uses advanced synthesis techniques to recreate the sound of classic analog synthesizers, and it offers a range of features that can help you achieve a professional-quality sound. Here are some advanced techniques to help you get the most out of the Arturia Mini V3: Creating Movement with LFOs: One way to add movement to your sound is to use low-frequency oscillators (LFOs).

These oscillators produce a waveform that can be used to modify various parameters of the sound, such as the amplitude, filter cutoff, or pitch. Moreover, to create movement with LFOs in the Arturia Mini V3, follow these steps: 1. Choose a LFO waveform from the menu. 2. Assign the LFO to the parameter you want to modulate. 3. Adjust the rate and depth of the modulation to get the desired effect. Incorporating Effects Processing: Another way to add depth and character to your sound is to use effects processing.

Key Points to Remember

The Arturia Mini V3 has a range of built-in effects, including distortion, chorus, delay, and reverb. You can use these effects to create more complex and interesting sounds, and to add a sense of space and atmosphere to your music. To incorporate effects processing in the Arturia Mini V3, follow these steps: 1. Choose the effect you want to use from the menu. 2. Adjust the settings of the effect to get the desired effect. 3. Experiment with different combinations of effects to create unique sounds.

Exploring the Arpeggiator and Sequencer: Finally, the Arturia Mini V3 also features an arpeggiator and sequencer that can be used to create complex rhythms and melodies. These tools can help you create complex arrangements and patterns that would be difficult to achieve manually. To explore the arpeggiator and sequencer in the Arturia Mini V3, follow these steps: 1. Choose the arpeggiator or sequencer from the menu. 2. Adjust the settings of the tool to get the desired effect. 3. Experiment with different patterns and rhythms to create unique sounds.

Overall, the Arturia Mini V3 is a powerful tool for sound design that offers a range of advanced features for creating movement and depth in your music. By using LFOs, effects processing, and the arpeggiator and sequencer, you can achieve a professional-quality sound that stands out from the crowd.

Sound Design Tips Arturia Mini V3

Credit: www.productionmusiclive.com

Tips For Mixing Mini V3 Sounds

Discover the sounds of Arturia Mini V3 by mixing them with these tips. Experiment with different settings and effects to create unique and captivating sounds that will bring life to your music production.

The Arturia Mini V3 is a virtual analog synthesizer that provides various sound design possibilities. As a sound designer, it is essential to ensure that each sound produced is mixed effectively to create a well-balanced musical journey for the listener. In this section, we will provide tips for mixing Mini V3 sounds to help you achieve a professional sound quality.

Balancing Frequencies

When mixing Mini V3 sounds, it is crucial to ensure that frequencies are balanced properly. You can achieve this by adjusting the levels of each sound in the mix. You can also use equalizers to cut or boost specific frequencies to create a more balanced mix. For instance, if you have a bass-heavy synthesizer sound, you can reduce the bass frequencies in other instruments in the mix to make room for the bass sound to cut through.

Adjusting Panning And Stereo Width

Panning and stereo width play a significant role in creating a three-dimensional sound field. You can use panning to position each sound in the stereo field, creating a more immersive experience for the listener. For instance, you can pan the lead synth sound to the right side, while the bass sound is panned to the left. You can also use stereo wideners to make sounds wider, creating a bigger soundscape.

Applying Creative Fx

Applying creative FX to your Mini V3 sounds can add depth and character to your mix. Use effects such as reverb, delay, chorus, and distortion to enhance your sounds and create a unique sonic signature. For instance, you can add a long reverb to a lead sound to create a sense of space, or add a bit of distortion to a bass sound to make it stand out in the mix. In conclusion, the Arturia Mini V3 provides you with numerous sound design possibilities. By balancing frequencies, adjusting panning and stereo width, and applying creative FX, you can take your Mini V3 sounds to the next level. Remember to experiment with different techniques to find what works best for your particular mix.

Troubleshooting Common Issues

Mastering sound design with Arturia Mini V3 is a great experience, but sometimes common issues occur. Here are some troubleshooting tips to help you overcome any challenges. Ensure your MIDI and audio settings are correctly configured, and experiment with different sound presets to achieve the desired result.

As a sound designer, you may encounter various issues when using Arturia Mini V3. Some common issues include clipping and distortion, muddy mixes, and CPU overload. In this section, we will discuss some tips and tricks to troubleshoot these problems effectively and ensure your sound design process goes smoothly.

Preventing Clipping And Distortion

Clipping and distortion are common problems that occur when the signal level exceeds the maximum input level of a device. To prevent clipping and distortion when using Arturia Mini V3, follow these tips:

  • Adjust input levels: Ensure that the input levels are not too high. Reduce the input levels if they are too high to prevent clipping and distortion.
  • Use the gain control: The gain control is a useful tool to adjust the input levels and ensure that they are within the acceptable range. In addition, use it to control the levels and prevent clipping and distortion.
  • Use a limiter: A limiter can be used to limit the output level and prevent clipping and distortion.

Avoiding Muddy Mixes

Muddy mixes occur when the frequencies in the mix overlap and create an undefined or unclear sound. To avoid muddy mixes when using Arturia Mini V3, follow these tips:

  • EQ your tracks: Use EQ to remove unnecessary frequencies that overlap in your mix and adjust the levels of each frequency to create a clear and defined sound.
  • Use panning: Adjust the panning of each track to create separation between the tracks and reduce the overlapping of frequencies.
  • Use compression: Compression can be used to control the levels of each track and ensure that they don’t overlap and create a muddy mix.

Dealing With Cpu Overload

CPU overload occurs when the processing power of your computer is overwhelmed and unable to handle the workload. To deal with CPU overload when using Arturia Mini V3, try these tips:

  • Reduce the number of plugins: Use only the necessary plugins and remove the ones that are not needed to free up processing power.
  • Use freeze or bounce features: Freeze or bounce individual tracks or groups of tracks to reduce the processing load on your computer.
  • Upgrade your computer: If your computer is old or outdated, consider upgrading to a newer model with higher processing power to handle the workload.

By following these tips, you can troubleshoot common issues that may occur when using Arturia Mini V3 and ensure that your sound design process goes smoothly without any interruptions.

Sound Design Tips Arturia Mini V3

Credit: m.youtube.com

Frequently Asked Questions On Sound Design Tips Arturia Mini V3

What Is Arturia Mini V3?

Arturia Mini V3 is a virtual analog synthesizer that emulates the classic Minimoog Model D. It is a powerful software instrument that provides musicians with endless possibilities for creating electronic sounds.

How Does Arturia Mini V3 Differ From The Original Minimoog Model D?

Arturia Mini V3 offers an expanded feature set that includes additional waveforms, modulation options, and effects. It also has a built-in arpeggiator and a high-quality filter.

What Are Some Sound Design Tips For Using Arturia Mini V3?

Experiment with different waveforms, use the filter to shape the sound, and add modulation to create movement and interest. Don’t be afraid to try unconventional settings and techniques. Save your favorite presets for future use.

Can I Use Arturia Mini V3 In My Digital Audio Workstation (daw)?

Yes, Arturia Mini V3 can be used in any DAW that supports VST, AU, or AAX plug-ins. It is compatible with popular DAWs such as Ableton Live, Logic Pro X, and Pro Tools.

Conclusion

To wrap up, sound design is a crucial aspect of music production. With Arturia Mini V3, you can bring your music to life with unique, high-quality sound effects. By following the tips and tricks outlined you can enhance your sound designs and stand out in a saturated market.

Remember to experiment with the Mini V3’s numerous features and use your creativity to achieve your desired sound. With this application, the sky’s the limit.

Categories
Archive

Create Unique Sounds In Simple Ways

Creating unique sounds is simple and can be done in various ways. We will explore some of the most effective ways to create unique sounds that will make your music stand out from the rest.

Also, from utilizing different types of instruments to experimenting with sound effects and techniques, we’ll cover everything you need to know to start creating your own original sounds and music. Also, whether you’re a beginner or an experienced musician, these tips will help you unlock your creativity and take your sound to the next level.

Related reading: Unique Ways To Level Up Your Audio Mix and Proven Sampling Techniques for Unique Sound Creation. For background, see the Wikipedia article on Sound design.

So let’s get started!

Explore Your Environment for Unique Sounds

Moreover, discover new and creative ways to produce one-of-a-kind sounds from your surrounding environment. In addition, transform everyday objects into musical instruments and explore the various tones they can produce. With a little experimentation, you can create distinctive sounds in simple ways.

In addition, one of the simplest ways to create fresh sounds is by exploring your environment. For example, this means that you can use the sounds around you to create something completely new! This method is commonly used in movie sound design and music production because it allows you to create something that nobody else has heard before. In this article, we will look at two simple ways to explore your environment.

Record Ambient Sounds

Furthermore, the first way to explore your environment is by recording ambient sounds. As a result, Ambient sounds are the sounds that are present in your environment all the time. These include sounds like birds chirping, car horns honking, and people talking. You can record these sounds using a digital recorder or even your smartphone. Once you have recorded the sounds, you can use editing software to manipulate them and create something new. For example, you could slow down the sound of a car horn honking to create a low droning sound, or you could loop the sound of birds chirping to create a relaxing background track.

Use Household Items for Unique Sounds

Another way to explore your environment is by using household items. However, you might be surprised at the sounds you can create with everyday objects! For example, you can use a metal spoon to create a high-pitched ringing sound, or you can use a rubber band to create a twanging sound. Additionally, by experimenting with different objects, you can create a library of original sounds that you can use in your music or sound design. Overall, exploring your environment is a great way to create unique sounds. With a little creativity and experimentation, you can turn everyday sounds into something completely new!

Create Unique Sounds In Simple Ways

Credit: m.youtube.com

Experiment With Different Tools

Also, Experimenting with different tools is a simple way to create unique sounds. Then, by trying out new equipment and software, you can discover innovative ways of manipulating audio.

Experiment With Different Tools: When it comes to creating unique sounds, experimenting with different tools can be a game-changer. In short, using synthesizers, keyboards, and drum machines, among other tools, can help you add an incredible range of sounds to your tracks with ease. Moreover, synthesizers and Keyboards: Synthesizers and keyboards are essential tools for any music producer. They enable you to program unique and complex sounds, which you cannot achieve through conventional instruments. With the help of a synthesizer, you can create sounds that are not possible through traditional instruments.

For instance, it can generate various waveforms like sine, triangle, sawtooth, and square. While at it, you can also adjust the attack time, decay time, sustain level, and release time. Drum Machines: Drum machines are also a popular tool used in music production. In addition, they are an excellent choice for anyone looking to create drum sounds digitally. Drum machines have evolved over the years and now have more features than ever before. For instance, they have options to add chorus, reverb, and other effects to drum sounds. In conclusion, Experimenting with different tools can help you create unique sounds quickly.

Practical Tips for Unique Sounds

Furthermore, synthesizers and keyboards and drum machines are just the tip of the iceberg. There are many other tools you can use, and it’s always worth exploring new instruments to create new sounds. Give yourself some time to experiment, and you might end up developing a signature sound that will take your music to the next level.

Utilize Digital Software for Unique Sounds

Additionally, utilizing digital software is a simple way to create unique sounds. From synthesizers to drum machines, there are various tools available to explore and experiment with sound creation. With the right software, it’s easy to unlock your creativity and produce something truly one-of-a-kind.

Also, utilize Digital Software: One of the easiest ways to create unique sounds is by utilizing digital software. Thanks to advancements in technology, aspiring musicians can easily access a wide range of digital audio workstations (DAWs) and virtual plugins to produce and experiment with different sounds. In this section, we’ll explore how you can use these tools to add a touch of originality to your music productions. Digital Audio Workstations (DAWs): DAWs are software applications that allow you to record, edit, and mix digital audio. They are essential tools for all music creators, from beginners to professionals.

Some of the most popular DAWs include Ableton Live, FL Studio, Logic Pro X, and Pro Tools. With DAWs, you can easily manipulate audio files to create unique sounds. You can chop up and rearrange samples, add effects, and adjust the pitch and tempo of recordings. Moreover, you can use the software to layer sounds and instruments to create complex textures and harmonies. DAWs are incredibly versatile, and once you get familiar with the interface, you’ll be able to unleash your creativity in no time.

Putting It Into Practice for Unique Sounds

Virtual Plugins: One of the advantages of using digital software is the ability to incorporate virtual plugins into your productions. Plugins are software programs that add specific effects or sounds to your audio. They can be standalone programs or work as part of a DAW. There are many different types of plugins to explore, each contributing unique sounds to your productions. For instance, you might use a synthesizer plugin to create a futuristic sound, a reverb to add depth and dimension, or a distortion plugin to give your sounds a gritty edge.

The great thing about using virtual plugins is that you can experiment with different combinations until you find the perfect match for your track. Many plugins also offer presets or templates that you can use as a starting point before customizing to your liking. With so many options at your disposal, there’s no excuse not to create truly unique sounds. In Conclusion: Utilizing digital software is a simple but effective way to create unique sounds. With DAWs and virtual plugins, you have the power to manipulate audio files and add effects that contribute to your originality.

Whether you’re a seasoned producer or just getting started, digital software opens up a world of possibilities for creating music that stands out from the crowd.

Emphasize Texture And Layering

Creating unique sounds is an essential skill for any music producer. One way to achieve this is by emphasizing texture and layering. Layering involves combining sounds to create an entirely new one, which can help add depth and complexity to your music. On the other hand, texture refers to the character of the sound that can be rough, smooth, crisp, or mellow. By adjusting the texture and layering sounds, you can create something unique and memorable.

Add Effects for Unique Sounds

Effects can significantly impact the texture of a sound by adding depth, space, and color. Adding effects to individual layers can bring out their character and highlight their unique qualities. Effects such as reverb, delay, chorus, or distortion can all have a dramatic impact on the sound’s character. Experimenting with different effects and their combinations can help you create something entirely new.

Manipulate Samples

Manipulating samples involves chopping, stretching, and rearranging pre-existing sounds. By chopping and rearranging a sample, you can create a unique melody or rhythm that’s entirely different from the original. Stretching or compressing a sample can also change the texture and character of the sound. By experimenting with different editing techniques, you can create something that’s uniquely yours.

In Conclusion

Emphasizing texture and layering is a crucial technique to create unique sounds. By adding effects and manipulating samples, you can bring out the unique qualities of individual sounds and create something that’s entirely new.

Think Outside The Box

In creating unique sounds, it’s important to think outside the box and experiment with different elements that might not seem typical. By incorporating unusual elements and using vocal sound effects, you can add depth and character to your sounds that will make them stand out from the rest.

Incorporate Unusual Elements

When it comes to adding unique elements to your sounds, be creative and unafraid to experiment. Consider adding non-conventional items to your recordings like household items, organic matter, or even entire rooms. These unusual elements can add a certain ambiance or texture that is unique and memorable.

If you’re working with electronic sounds, try experimenting with software and plugins to achieve a distinct sound. By manipulating sounds through distortion, filtering, and modulation, you can create something truly unique.

Use Vocal Sfx for Unique Sounds

Vocal sound effects are a great way to create unique sounds that will add emotion and expression to your recordings. Consider using a variety of SFX like vocal chops, stutter effects, and pitched vocals. By incorporating these SFX at different tempos and pitches, you can create interesting and dynamic sounds that will add a lot of depth to your compositions.

Make sure to also experiment with different microphone techniques when recording vocals, as they can also play a big part in creating a unique sound.

Create Unique Sounds In Simple Ways

Credit: www.sweetwater.com

Keep It Simple And Minimalistic for Unique Sounds

Creating unique sounds does not have to be complicated. Keeping it simple and minimalistic can often produce the most distinct and captivating results. Experiment with different elements and trust your instincts to discover your own signature sound.

Keep It Simple And Minimalistic: Create Unique Sounds In Simple Ways

When it comes to producing unique sounds, beginners often think they need to add multiple layers to create a complex mix. However, the key to producing a distinct and interesting sound is by keeping it simple and minimalistic. By focusing on one or a few key elements, simplifying and reducing unnecessary components, you can create a unique sound that stands out.

Focus On One Element

When you’re trying to create a unique sound, focusing on one element is essential. It could be a single instrument such as a guitar riff or bassline, a sample, or a unique sound effect. By focusing on one element, you can identify the core sound and build your track around it. The more complex sounds you add, the more crowded and chaotic the track becomes, losing its unique quality.

Simplify And Reduce

Simplifying and reducing extraneous sounds and elements can bring focus to your track and enhance its unique quality. For instance, by removing instruments or effects that clutter the mix, you may create a more spacious and ethereal sound. It’s all about identifying essential components and simplifying the mix, can make your sound stand apart from others. With these simple tips, you can create unique sounds and enhance your track’s distinct quality. Remember to keep it simple and minimalistic and focus on one element. Then, continue to simplify and reduce unnecessary components. Approach music production with an intention to create a unique sound that sounds different from others.

Collaborate With Others

Collaboration is key when it comes to creating unique sounds in simple ways. Working with others allows for the combination of different perspectives and skill sets, resulting in a more diverse and interesting final product. Whether it’s through brainstorming, jamming, or sharing samples, collaborating can take your music to the next level.

Collaboration is one of the most effective ways to enhance your creativity as a sound designer. By working with others, you can combine different skills, ideas, and experiences to create unique sounds that stand out. In this article, we’ll explore how you can collaborate with others to take your sound design to the next level.

Involve Vocalists

Vocalists can bring a new dimension to your sound design. Collaborating with a singer or rapper can open up new possibilities for you to experiment with vocal processing and sampling. You can ask the vocalist to record different sounds and phrases that you can then manipulate to create something original. You can also use their voice as an instrument, layering it with other sounds to create a unique texture.

Work With Producers

Producers are essential collaborators for any sound designer. They can help you refine your sound, mix your tracks, and provide feedback on your ideas. Working with a producer can also be a great learning experience, as you can gain insight into the production process and learn new techniques. You can bring your sound ideas to the producer and they can help you turn it into a polished track. Collaboration is an effective way to enhance your sound design skills, but it can also be a way to build your network and connect with others in the industry. By working with others, you can showcase your skills and creativity, and potentially attract new clients and opportunities. So, don’t be afraid to reach out to vocalists, producers, and other sound designers, and start collaborating today!

Practice And Experiment Constantly

Creating unique sounds is an essential aspect of music production. One of the best ways to achieve this is by practicing and experimenting with different techniques continually. By doing so, you allow yourself to explore new sounds and come up with ideas that you may not have thought of before.

Don’t Be Afraid To Try New Techniques

When it comes to music production, it’s crucial to be open to new ideas and techniques. Don’t be afraid to try out new instruments, samples, or plugins, as they could provide the inspiration you need. You may come across some failures along the way, but remember that these failures can lead to new, unique sounds that set you apart.

Experiment With Different Genres

Another way of creating unique sounds is by experimenting with different genres. Combining elements from various genres can lead to interesting and exciting sounds. You never know what sound you might create by experimenting with different styles. For instance, you could try incorporating a hip-hop beat into a pop song or using an electronic synth in a rock ballad.

By practicing and experimenting with new techniques and genres, you can discover new ways to create unique sounds in your music production. Remember to keep an open mind and never stop learning and exploring.

Create Unique Sounds In Simple Ways

Credit: www.amazon.com

Frequently Asked Questions For Create Unique Sounds In Simple Ways

How Can I Make My Sound Unique?

To make your sound unique, experiment with different effects and techniques, layering sounds, and incorporating unconventional instruments or objects. Take inspiration from various genres and cultures. Don’t be afraid to break the rules and push boundaries. Practice and hone your style until it becomes distinctively yours.

How Do You Make Something Sound Interesting?

To make something sound interesting, use active and descriptive language that appeals to the reader’s emotions. Use varied sentence structures and avoid cliches and passive voice. Keep it concise and compelling, showcasing the unique qualities of the subject matter. Remember to write for humans first and optimize for search engines second.

How Do We Make Different Sounds Sound Different?

Sounds are made distinguishable from each other through variations in pitch, tone, intensity, and timing. These unique properties of sound waves affect how our brains perceive and interpret the different sounds.

What Is A Thing That Can Make Sounds?

An object that can produce sound is known as an instrument or a source of sound. It can be anything from a guitar to a whistle or a car horn.

Conclusion

Creating unique sounds doesn’t have to be a daunting or complex process. With the simple tips we’ve showcased throughout this post, anyone can elevate their sound game and set themselves apart from the crowd. By experimenting with instruments and sound manipulation tools, practicing mindful listening, and taking advantage of technology, you can produce sounds that reflect your style and personality.

Whether you’re a seasoned musician or a beginner, keep in mind that there are no limits when it comes to creating unique sounds. So, let your creativity shine and have fun with it!

Categories
Archive

Can a Piano Be Used As a Bass

No, a piano cannot be used as a bass. The piano has strings and hammers that produce different tones than a standard bass guitar.

Although they both produce low notes, the sound quality and style differ significantly. A piano is a percussive instrument that produces a range of tones depending on which keys are pressed, while a bass guitar produces a single note per string.

The two instruments can be used together to create a unique sound, but they cannot be interchanged. Musical genres such as jazz and classical have a long history of pairing these instruments to produce a rich, full sound that complements each other. Overall, these instruments have their distinct uses, and it’s essential to understand the differences to produce the best quality of sound desired.

Different Types Of Pianos

Pianos come in different types, but can they be used as a bass instrument? Upright and grand pianos can produce some low pitch tones that resemble bass notes, but they lack the necessary sustain and tone for a proper bass sound.

However, hybrid pianos and digital pianos with built-in bass sounds can be used as a functional bass instrument.

If you are a musician or a music lover, you must be well aware of the fact that pianos come in various shapes and types. Each type of piano has its unique features and sound effects that add value to the music. While some pianos are designed for classical music, some are designed for jazz and pop. In this blog post, we will discuss the different types of pianos that exist and their individual sound effects that make them distinctive. Below we discuss some of the different types of pianos:

Grand Pianos

Grand pianos are large, beautiful, and have curved sides and a lid that opens up to produce a rich sound. They are available in various sizes, ranging from five feet to nine feet in length and have the ultimate sound quality that makes them perfect for classical music. The larger the size of the grand piano, the louder and richer the sound it produces. Moreover, their action mechanism is more responsive, and the double precision of the hammer-strings produces a sound that is always in tune.

Upright Pianos

Upright pianos are also known as vertical pianos and are commonly found in homes, schools, and music studios. They have a vertical frame, strings, and soundboard, and hence they require less floor space as compared to grand pianos. They produce a softer and gentle sound that is more suitable for modern music. The hammers on upright pianos are also located vertically, providing excellent action and control to the pianist.

Digital Pianos

Digital pianos are the most advanced type of pianos that use electronic circuitry to produce sound. They are relatively smaller in size and can be easily transported from one place to another. They are equipped with advanced features like recording, sound effects, metronomes, and digital displays that add value to the music. They simulate the sound of grand and upright pianos, and the keys respond to the touch and playing style of the pianist. In conclusion, while pianos are primarily designed for producing melodious notes, their different types provide unique sound effects suitable for various music genres. From the sound of the grand piano for Classical music, the soft and gentle sound of an upright piano, to the advanced features digital pianos bring, each type of piano has its distinctive qualities.

Can a Piano Be Used As a Bass

Credit: www.amazon.com

Can A Piano Produce Bass Notes?

The piano can produce bass notes, but its range is limited. It cannot entirely substitute the bass instrument, but it can be used to cover the bass notes in music pieces. Proper hand placement can produce a deeper sound, but a trained ear may still identify it as piano notes.

When people think about a piano, the first thing that comes to mind is probably not bass notes. After all, it is known as a melodic instrument that produces a wide range of notes, from high-pitched to middle-range ones. However, many piano players and composers have discovered that a piano can indeed produce bass notes and even full basslines with the right technique.

Using The Left Hand Technique

One of the most common ways to produce bass notes on a piano is by using the left hand technique. This technique involves playing chords in the left-hand position, with the thumb playing the lowest note in the chord. By doing so, the pianist can create a strong bassline that underpins the melody played with the right hand. To make the bass notes sound even more prominent, players often use the sustain pedal.

Using The Sustain Pedal

The sustain pedal is an essential tool that allows pianists to sustain the sound of the notes they play. When used in combination with the left-hand technique, it can help create a rich and resonant bassline that fills the room. The pedal works by lifting all the dampers off the strings, allowing them to vibrate freely and create a sustained sound that blends with the other notes.

Using Octave Transposition

Octave transposition is another way to create a richer bassline on the piano. This technique involves playing the same notes but in a lower or higher octave. By playing in a lower octave, pianists can create a more powerful sound that emphasizes the bass frequencies. Similarly, playing in a higher octave can add a more melodic and brighter sound to the bassline. In conclusion, a piano can indeed produce bass notes and even full basslines with the right techniques. Whether you choose to use the left-hand technique, the sustain pedal, or octave transposition, it all comes down to personal preference and the style of music you want to play. Give it a try and see for yourself how a piano can be used as a bass, and take your music to the next level!

Limitations When Using A Piano As A Bass

Using a piano as a bass may seem like a viable option, but it has its limitations. The piano’s low register notes lack the resonance of a bass guitar and the sustain can be shorter. Additionally, playing a bassline on a piano can be challenging due to the keyboard layout.

Although it is possible to use a piano as a bass, there are certain limitations to consider. These limitations can impact the sound quality and playability of the instrument. In this section, we will explore the limitations of using a piano as a bass, specifically the limited range and different tone quality.

Limited Range

One of the most significant limitations of using a piano as a bass is the limited range. Typically, a piano only has 88 keys, whereas a bass guitar has up to 24 frets. This means that the piano’s lowest note, which is A0, is not as low as the E1 on a four-string bass guitar. Due to this, playing low notes on a piano can be difficult, and the resulting sound may not be as rich or full as that produced by a bass guitar.

Different Tone Quality

Another limitation of using a piano as a bass is the difference in tone quality. While a piano can produce a moderate bass sound, it doesn’t have the same tone as a bass guitar. As a result, it may not sound as natural or accurate when playing basslines that are typical in genres such as jazz, blues, and rock. Additionally, the different tone quality could change the overall musical experience as a bass player. Although it can add some unique characteristics to compositions, the pianos’ sound does not match the traditional bass sound. Hence, it may not provide the desired quality of sound that is expected from a bass guitar. In conclusion, using a piano as a bass can be an interesting experiment, mainly when you want to create something new. However, bass players looking for the traditional bass sound and exemplary playability should stick to using dedicated bass guitars. The limited range and different tone quality of using a piano as a bass might impact the overall quality of any composition.

Can a Piano Be Used As a Bass

Credit: www.amazon.com

Alternative Options For Bass Notes

While a piano has a powerful and versatile range, its capability to replace a bass guitar is limited. However, there are several alternative options available for musicians who want to incorporate bass notes in their music.

Electronic Keyboards With Bass Sounds

Electronic keyboards with bass sounds offer a viable option for musicians looking to add bass notes to their music without a bass guitar. Keyboards have the added advantage of being able to mimic a variety of instruments, including bass guitars. Modern keyboards have a range of bass sounds that can be adjusted, allowing musicians to create a variety of unique bass sounds. Additionally, keyboards come in different sizes, making them a portable and versatile option.

Synthesizers

Synthesizers are another popular option for musicians looking for alternative bass sounds. Unlike keyboards, synthesizers are designed specifically for creating sounds, including bass sounds. They offer more control, enabling musicians to manipulate sounds and create unique bass sounds. Synthesizers are also compact and lightweight, making them a convenient option for musicians on the go.

Bass Guitars

Finally, if the desired outcome is specifically to have the sound of a bass guitar, then a bass guitar would be the most suitable option. A bass guitar has thicker strings that allow for a deep and distinct sound that cannot be achieved with a piano or synthesizer. Additionally, bass guitars have unique playing techniques that create a particular feel and style of music that cannot be replicated by other instruments.

While a piano cannot replace a bass guitar, there are alternatives available for musicians looking for similar sounds. Electronic keyboards with bass sounds and synthesizers are popular options, while a bass guitar remains the most appropriate instrument for obtaining a distinct bass sound.

Can a Piano Be Used As a Bass

Credit: quotefancy.com

Frequently Asked Questions For Can A Piano Be Used As A Bass

Can Piano Substitute For Bass?

No, piano cannot entirely substitute for bass. While the piano can play bass lines to some extent, it doesn’t replicate the distinct sound and feel of the bass. The bass guitar provides a backbone to the music that a piano can’t entirely emulate.

Therefore, it’s essential to have a bass player in a band or arrangement.

Can You Play Bass On Piano?

Yes, you can technically play bass on a piano by using the left hand to play the lower octaves and notes. However, the sound may not be as authentic as an actual bass guitar and the technique may vary.

Can A Keyboard Replace Bass?

No, a keyboard cannot fully replace a bass. Although it can produce bass-like sounds, it lacks the physical and tonal nuances that come with playing an actual bass instrument. Moreover, a keyboard’s sound is often sampled or synthesized, while a bass produces unique acoustic vibration that adds depth and warmth to a performance.

Do Pianos Have Bass?

Yes, pianos have bass. The low tones produced by the piano are called bass. It is played by the left hand on the lower keys of the piano. The size and quality of the piano affect the clarity, richness, and power of the bass sound.

Conclusion

To conclude, a piano can be used as a bass but it is not a replacement for an actual bass instrument. While it can produce deep sounds, it lacks the unique properties and features that a bass guitar or upright bass possess.

Nonetheless, playing the piano can enhance your understanding of bass notes and complement your overall musical knowledge. Ultimately, it depends on the preferences and needs of the individual musician.

Categories
Archive

Pro Tools First Quick Punch

Pro Tools First Quick Punch is a feature used in music production to quickly fix mistakes in recorded tracks. This feature enables users to re-record parts of a song from a particular point, without having to redo the entire track.

As a music producer, precision and technical expertise are crucial to ensure that your tracks are of high quality. One of the most useful features in the production process is the Quick Punch function, found in a popular music editing software, Pro Tools First.

Quick Punch enables you to make quick edits of your recorded tracks without having to redo the entire song. This feature comes in handy when you need to fix certain parts of the recording that were not correctly executed. This article will guide you on how to use the Quick Punch feature in Pro Tools First to help you achieve optimal results in your music production.

Pro Tools First Quick Punch

Credit: www.mixinglessons.com

Setting Up Quick Punch In Pro Tools First

Learn how to set up Quick Punch for Pro Tools First, a feature that allows you to punch in and out of a recording effortlessly. With this tool, you can focus on your creativity without worrying about technicalities.

Setting Up Quick Punch in Pro Tools First Quick Punch-In is an essential feature in Pro Tools First for seamless recording. It allows you to punch in on a track while the session is playing, editing on the fly without the need of stopping the playback. Setting up Quick Punch-In in Pro Tools First is a breeze, and this section will guide you through the entire setup process. Configuring Preferences Before you can begin, you need to ensure that your Pro Tools First preferences are correctly configured. In the Preferences window, head over to the “Operation” tab, click “Quick Punch-In,” and ensure that the “Enable Quick Punch-In” checkbox is ticked. You can also configure other settings available in this window, depending on your preferences. Creating or Loading a Session Create a new session or open an existing one in Pro Tools First. You can choose any session template, but we recommend using the Blank Session template. Choosing a Quick Punch-In Mode Next, you need to choose the Quick Punch-In mode. Pro Tools First offers two modes: “Normal” and “Pre-Roll.” In Normal mode, the session plays continuously until you hit the punch-in record button. On the other hand, in Pre-roll mode, the session plays back for a specified number of beats or bars before punching in. To choose your preferred mode, head over to the Transport window, click on the Quick Punch-In button, then select your mode. Selecting Tracks for Punch Recording Once you have selected the Quick Punch-In mode, you can now choose the tracks you want to punch record. To do this, select the tracks in the edit window that you want to punch record. In the Edit window, click on the notes, then use either the SHIFT or COMMAND key to select multiple tracks. In Conclusion Setting up Quick Punch-In in Pro Tools First requires you to configure your preferences, choose a quick punch-in mode, select the tracks you want to record, and you are good to go. With Quick Punch-In, you can now record any session seamlessly, and refine your recordings without hassle.

Pro Tools First Quick Punch

Credit: m.youtube.com

Using Quick Punch To Record And Edit Audio

Quick Punch is a useful feature in Pro Tools First that allows you to easily record and edit audio. With Quick Punch, you can quickly preview and punch in and out of recordings, making it a valuable tool for musicians and podcasters alike.

Using Quick Punch to Record and Edit Audio Quick Punch is a great feature in Pro Tools First that helps in recording and editing audio with great ease. With the Quick Punch feature, one can easily fix or change small sections of a recording without having to re-record the entire section from scratch. This feature is a great time saver and enables sound designers to work efficiently and effectively.

Initiating A Quick Punch Recording

Initiating a Quick Punch in Pro Tools First is quite straightforward. All one needs to do is locate the Quick Punch Record button and click on it. The button is easily visible, and its icon is recognizable by two red arrows pointing to the right. Once the Quick Punch Record button is clicked, the recording process starts, but only the section that is being recorded is saved. To avoid recording over existing parts, it’s essential to make sure that the section to be recorded is selected.

Stopping A Quick Punch Recording

Stopping a Quick Punch recording is just as easy as starting it. Locate the stop button, which is easily recognizable by a square symbol. Once the button is clicked, the recording process stops, and the newly recorded section is automatically saved. This feature helps in ensuring that the selected section is recorded correctly and in an efficient manner.

Reviewing And Editing Quick Punch Recordings

Once the Quick Punch recording is saved, it’s essential to review it and make any necessary changes or edits. This can be done by using the zoom feature of Pro Tools First and analyzing the recorded section frame by frame. With this approach, it’s easy to spot any errors and correct them with great ease. Editing Quick Punch recordings in Pro Tools First is a user-friendly process, and the software provides useful tools such as cut, copy, and paste, which simplifies the editing process. Overall, Quick Punch is a valuable feature in Pro Tools First that enables sound designers to record and edit audio efficiently and accurately. With its easy-to-use interface, recording, editing, and playback becomes a seamless process.

Tips For Using Quick Punch In Pro Tools First

Learn how to use the Quick Punch feature in Pro Tools First for seamless recording sessions. Use this powerful tool to capture perfect takes, make corrections, and adjust your mixes with ease. With these tips, you’ll be able to streamline your workflow and achieve better results in no time.

Quick Punch is a valuable tool for recording audio in Pro Tools First. It helps users to correct mistakes in real-time during a recorded performance. To ensure that you make the most of this tool, follow these tips when using Quick Punch in Pro Tools First.

Practice Punching In And Out

Practice makes perfect, and this is particularly true when it comes to using Quick Punch in Pro Tools First. To develop your skills, begin by practicing punching in and out repeatedly in a controlled environment until you can do it smoothly and seamlessly. It will help you to avoid any mistakes or delay during the actual recording.

Use Headphone Mixes To Monitor Audio

When recording with Quick Punch in Pro Tools First, it’s essential to monitor audio to ensure that you capture the best quality audio possible. Utilize headphone mixes to keep an ear on your recording while you are playing or singing. It would help if you also made sure that the headphone mix doesn’t have too much noise or distractions.

Keep An Eye On The Time

Recording with Quick Punch in Pro Tools First requires you to pay very close attention to timing. Ensure that you are starting and stopping in the correct places by setting clear in and out markers. Moreover, always pay attention to the recording time, so you don’t waste your recording time by recording longer than required.

Experiment With Different Quick Punch Modes

Pro Tools First provides different Quick Punch Modes. Experiment with the various modes until you find the one that works the best for you. The modes include:

  • Auto-Input: Punch-in starts automatically when the track reaches record mode.
  • Out of Input: Records up to half a second before the punch in, ensuring no audio is lost.
  • Pre-Input: Gives you more flexibility with setting punch-in and punch-out points.

By following these tips, new Pro Tools First users and seasoned experts in audio recording can effectively utilize Quick Punch to capture high-quality recordings without wasting too much time.

Common Issues And Troubleshooting

Quick Punch issues are common in Pro Tools First and can be frustrating for users. These issues can be caused by various factors such as system performance, buffer size, or incorrect settings. Troubleshooting these issues often involves adjusting these settings, updating drivers, or seeking help from Pro Tools forums or customer support.

Quick Punch is a valuable feature of Pro Tools First that allows users to record over a mistake or missed section without re-recording the entire track. However, it is not uncommon for users to face issues that may affect their workflow. In this section, we will discuss the most common problems faced by users and provide troubleshooting tips.

Audio Dropouts Or Glitches

Audio dropouts or glitches are a common issue faced by Pro Tool First Quick Punch users. These issues may occur due to insufficient processing power or RAM, system settings, or other factors. Here are some troubleshooting tips to help you resolve such issues:

  • Close all unnecessary applications to free up processing power and RAM
  • Adjust buffer size in the playback engine settings to optimize system performance
  • Disable plugins that are not in use as they may consume valuable system resources
  • Update your audio interface drivers to ensure they are compatible with the current version of Pro Tools First

Incorrect Punch In/out Points

Incorrect Punch In/Out points can lead to issues in the playback, making your recording sound unnatural. Here are a few tips to help ensure that your punch in/out points are correct:

  • Listen to the track and identify the exact point where the error occurred
  • Insert your punch in/out points using the nudge feature to fine-tune the selection
  • Zoom in on the audio waveform to ensure that the punch points are precisely set
  • Avoid setting punch points too close together as it may cause issues in the playback

Session Not Saving Or Loading Properly

In some cases, users may face issues with Pro Tools First Quick Punch session not saving or loading correctly. Here are some tips to help troubleshoot such issues:

  • Ensure that you have properly named your session file and saved it to a location where you have write access
  • Check that the session file is not corrupted or damaged by running a file verification test
  • Access the Pro Tools First preferences menu and check that your audio interface is selected as the playback engine
  • Upgrade your Pro Tools First version to the latest release as it may resolve any known issues

In conclusion, Quick Punch feature in Pro Tools First is a valuable tool for recording but may come with its own set of challenges. However, with the tips and troubleshooting techniques provided above, you should be able to overcome any issues that you may encounter.

Pro Tools First Quick Punch

Credit: m.youtube.com

Frequently Asked Questions Of Pro Tools First Quick Punch

How Do I Turn On Quick Punch In Pro Tools?

To turn on quick punch in Pro Tools, press the “Option” key (Mac) or “Alt” key (Windows) while clicking the record button. This enables the quick punch mode, allowing for punch-ins and punch-outs to be recorded quickly without stopping the playback.

What Is The Shortcut For Quick Punch?

The shortcut for a quick punch varies depending on the device or software being used. However, in most programs, the shortcut is either Ctrl+K (Windows) or Command+K (Mac).

How To Do Quick Punch?

To do a quick punch, start by standing with your feet shoulder-width apart and your dominant foot slightly behind the other. Next, bring your dominant fist back and then quickly thrust it forward towards your target while twisting your hips and shoulders.

Remember to breathe out as you make contact with your target and to keep your other fist up by your face for defense. Practice with a punching bag or with a trainer to perfect your technique.

What Is The Difference Between Track Punch And Quick Punch In Pro Tools?

Track punch records an entire track when the recording is initiated, while Quick punch allows recording to start and stop at selected points, enabling precise editing. In short, Track punch is for continuous recording, and Quick punch is for selective recording.

Conclusion

Quick Punch is a powerful feature that can greatly improve your editing workflow in Pro Tools First. By allowing you to quickly fix mistakes and make precise edits with ease, Quick Punch can save you time and frustration. With a few simple steps, you can enable Quick Punch and start using it to your advantage.

Whether you’re a beginner or a seasoned Pro Tools user, Quick Punch is a feature you’ll want to add to your editing toolbox. So take some time to experiment with it and see how it can enhance your editing process.

Happy editing!