Categories
Archive

What Are Transients in Audio

Transients in audio are sudden changes in sound amplitude that occur within a short period of time. They are responsible for the sharp attacks and decays of musical notes and can greatly impact the overall perceived quality of audio recordings.

Transients are often caused by the initial waveforms generated by musical instruments or by the recording and mixing processes applied to audio signals. Transients play a crucial role in modern music production. Understanding how to manipulate them can help audio engineers achieve a better sound balance, create more dynamic mixes, and add clarity and definition to individual tracks.

To do this, they use a variety of tools such as transient shapers, compressors, and equalizers. We will explore in more detail what transients are, how they work, and how they can be leveraged to create better sounding audio.

What Are Transients in Audio

Credit: unison.audio

Defining Transients

As an audio enthusiast, you may have come across the term “transients” when reading about sound production or tweaking your audio gear. Transients are a crucial aspect of audio and play a significant role in determining sound quality. In this article, we’ll define transients, explore their basics, and highlight why they matter in audio.

Transient Basics

Transients can be defined as the quick, sharp changes in a sound waveform that create its attack and initial impact. Simply put, transients are the short-lived bursts of sound that happen before the sound decays. They are incredibly crucial in sound reproduction as they create a sense of clarity, definition, and presence for the listener. Transients can be found in all types of sounds, ranging from the plucking of guitar strings to the beating of drums and the chirping of birds.

The visual representation of a sound waveform shows transients as short, sharp spikes in the signal. A transient spike begins with a sudden increase in amplitude, followed by a rapid decrease in amplitude, creating an almost triangular shape in the waveform. These transient spikes can be challenging to capture, mix, or master, and they require careful attention to preserve their sonic detail and impact.

Why Transients Matter

The importance of preserving transients in audio cannot be overstated. They add clarity and intelligibility to sounds, making it easier to distinguish between various components of a mix, even at low volumes. Transients also create a sense of edge and punch in the sound that makes it more impactful and dynamic. They are an essential part of the overall sonic character of a sound, especially in genres such as rock, pop, and EDM, where the rhythm and groove are paramount.

Transients can significantly affect how we perceive audio quality. If too many transients are lost or distorted during the recording, mixing, or mastering process, the sound can end up sounding dull, lifeless, and lacking in detail. Separating and preserving transients can help achieve a cleaner mix with less masking between sounds and a more accurate representation of the original recording.

In conclusion, transients are a critical aspect of audio that define its attack, presence, and impact. They are the short-lived, sharp changes in a sound waveform that are responsible for its clarity and definition. Preserving transients is crucial in creating a clean mix with accurate sound representation, especially in genres where rhythm and groove are essential.

Transient Detection

As an audio engineer or producer, it’s essential to comprehend every aspect of sound, and transients in audio occur frequently. They are a brief spike in the audio signal, and they happen for a short period. Transient detection involves identifying these sudden changes and then analyzing and manipulating them individually. This article will focus on different transient detection techniques, such as peak level detection and envelope detection.

Peak Level Detection

Peak level detection is one of the transient detection techniques that recognize the highest magnitude values in an audio signal. This technique is effective in detecting very fast and high-impulse waveforms. When audio levels exceed the specified threshold, the peak detection algorithm identifies and flags these peaks in the signal.

Envelope Detection

Envelope detection involves analyzing a signal’s changes in amplitude over time. It detects the changes in slower waveforms and is less sensitive to very fast transients than peak detection. Envelope detection helps to isolate the signal’s overall amplitude changes involving the attack, decay, sustain, and release phases.

In conclusion, understanding transient detection is a significant part of audio engineering and production. Peak level detection and envelope detection are some of the techniques used to identify and analyze sudden changes in an audio signal. Using these techniques will go a long way in improving the quality of your audio productions.

Transient Shaping Techniques

Transients in audio refer to the sudden changes in sound waveforms. Depending on the type of music and recording conditions, transients can significantly affect the overall sound quality. Transient shaping techniques can be used to control and shape these transients to improve the sound of a recording.

Transients are brief spikes of sound that occur in any sound wave. They are responsible for the initial impact of a sound and determine its perceived clarity, punch, and definition. Transient shaping techniques allow us to modify these sound spikes and control the sonic characteristics of any audio track. Here are some of the most common transient shaping techniques:

Transient Cut

Transient cut is a technique that involves reducing the amplitude of the transient spikes in an audio track. This is usually done with a transient shaper or a dynamic equalizer. By reducing the transient spikes, we can reduce the perceived loudness of a sound, making it more transparent or less aggressive. This technique is commonly used in mastering, where we want to reduce harshness or sibilance in vocals or cymbals.

Transient Boost

Transient boost is the opposite of cut. It involves increasing the amplitude of transient spikes in an audio track. This technique can add punch, definition, and clarity to any sound, making it stand out in a mix. Transient boost is commonly used in mixing, where we want to enhance the attack of drums, guitars, or synths. This technique is usually done with a transient shaper or a compressor with a fast attack time.

Transient Recovery

Transient recovery is a technique that involves restoring the natural decay of a sound after its initial transient. This is usually done with a transient designer or an expander. By restoring the natural decay, we can add sustain, body, and depth to any instrument. This technique is commonly used in mixing, where we want to make sounds more realistic or atmospheric. Transient recovery can be particularly useful for drums, where we want to emphasize the room sound or the reverb tail. In summary, transient shaping techniques are powerful tools for controlling the initial impact and the natural decay of any sound. They can help us achieve a wide range of sonic effects, from subtle transparency to aggressive punch, from realistic depth to dreamy atmosphere. Whether you’re a mixing engineer, a mastering engineer, or a music producer, understanding transient shaping techniques is essential for achieving professional-sounding audio tracks.

Transient Control In Mixing And Mastering

Transients in audio refer to short-lived, sudden changes in volume that add the punch and impact to sounds. The proper control of transients in mixing and mastering can make a significant difference in the clarity and overall quality of the final audio output.

Transients are short-lived audio signals that are present in audio recordings. They can be caused by instruments, vocals, or other sound sources in the recording. Transient control is a vital aspect of audio mixing and mastering. It involves manipulating the amplitude and length of transients to enhance the overall sonic quality of the recording.

Transient Control In Mixing

Transient control in mixing involves modifying the transient content of individual tracks before they are combined into a final mix. This can be achieved through various techniques, such as volume automation, equalization, compression, and transient shapers. Using these tools, a mixing engineer can shape the transients of each instrument to make it sit better in the mix. For instance, reducing the attack of a kick drum can create a more rounded sound that blends well with the bass guitar.

Transient Control In Mastering

While transient control in mixing is essential, it is equally important in mastering. During mastering, the engineer is responsible for ensuring that the entire mix sounds cohesive, balanced, and polished. This requires careful control of transients to avoid distortion or loss of clarity in the final master. Techniques like multi-band compression, limiting, and transient processing are used to tame any unruly peaks and bring out the best in the mix. In conclusion, transient control is an essential component of audio mixing and mastering. By precisely shaping the transients, engineers can enhance the rhythmic impact, add energy and excitement to the track, and create a better connection with the audience. Understanding the use of transient control can lead to better sonic quality, improved mixes and allow for listening pleasure.

Tools For Transient Manipulation

Transients in audio refer to short-lived, quick bursts of sound energy that occur when a sound begins and ends. Tools for transient manipulation can be used to shape and enhance these sonic events, allowing for greater control over the overall sound.

Tools for Transient Manipulation Transients in audio can add a unique character to music, but in some cases, they need to be manipulated or adjusted to improve the overall sound quality. Luckily, there are several tools available to help with transient manipulation. Let’s take a closer look at some of the essential tools that sound engineers use for transient shaping.

Transient Shaper Plugins

One of the most common tools for transient shaping is a transient shaper plugin. These plugins work by enhancing or reducing the attack or release of transients in an audio recording. They allow sound engineers to modify transients without affecting the rest of the audio signal. A transient shaper plugin can be useful for shaping percussive instruments or restoring the punch to a recording that lacks transient response.

Compressors And Limiters

Compressors and limiters are dynamic processing tools that can also be used for transient manipulation. They work by reducing the dynamic range of an audio signal, making the quieter parts louder and the louder parts quieter. Compressors can be helpful in controlling sharp transients that might cause clipping or distortion in a recording. Limiting can help sound engineers achieve a consistent signal level by limiting the overall loudness of the track.

Eq And Saturation

EQ and saturation are other tools that can be used for transient manipulation. An equalizer can be used to boost or cut certain frequency ranges, which can affect the presence or clarity of transients. Saturation can be helpful for adding warmth or character to a recording by accentuating transients. Both EQ and saturation can be used to add color or character to an audio signal, which can help it stand out in a crowded mix. In conclusion, transient shaping is an essential part of audio processing and sound engineering. With the right tools, sound engineers can effectively manipulate transients to improve the overall sound quality of their recordings. By using tools like transient shaper plugins, compressors and limiters, and EQ and saturation, sound engineers can achieve a more dynamic and polished sound for their music productions.

Examples Of Transient Processing

HTML format suitable for WordPress:

If you’re working with audio tracks, it’s important to understand the role that transients play in the sound quality of your recordings. To get the most out of your audio tracks, you need to know how to properly process transients. Here are some examples of how transient processing is used in different elements of an audio track.

Drums

Drums are a great example of how to use transient processing. Since drums often have sharp transients and can dominate a mix, reducing their overall level can help make room for other elements in the track. For example, setting a faster attack time on a compressor applied to the kick drum can help control its attack and sustain, which in turn can create more space for other elements in the mix.

Bass

When it comes to bass, transient processing can help make the lower frequencies of your track stand out. By boosting the attack and sustain of the bass guitar, for example, you can make its presence in the mix more pronounced without drowning out other frequencies. Applying a bit of saturation or distortion to the bass can help bring out its harmonics, which can also aid in cutting through a busy mix.

Vocals

Vocals are one of the most important elements in any mix, and can benefit from the proper use of transient processing. Controlling the attack and sustain of the vocals can help them sit more naturally within the mix, while also preventing sibilance and plosives from standing out. Applying a de-esser or dynamic equalizer with a fast attack time can help keep the vocals under control, while also maintaining their character and presence.

In conclusion, transient processing is an essential technique for getting the most out of your audio tracks. By using the examples provided above, you can achieve greater clarity and balance in your mixes, while also creating more space for other elements to shine.

What Are Transients in Audio

Credit: joeysturgistones.com

Frequently Asked Questions For What Are Transients In Audio

What Is An Example Of A Transient Sound?

A clap, balloon pop, or gunshot are examples of transient sounds. These are short-lived noises that do not have a sustained tone or frequency.

What Are Transients In Mastering?

Transients in mastering refer to short bursts of high frequency and amplitude sounds that occur in a music track. These sounds could be percussion hits, cymbal crashes, or other sharp sounds. They are important to manage during mastering to ensure a balanced and clear sound without any distortion.

What Is The Meaning Of Transients?

In electronics, transients refer to short-term voltage spikes or surges that occur in a circuit. These transients can damage sensitive electronic components, which is why circuit designers often include protection mechanisms to prevent them. Transients can be caused by a variety of factors, including lightning, switching events, and electromagnetic interference.

What Does Transience Mean In Music?

Transience in music refers to the quality or characteristic of a sound or tone that is short-lived or transient, and quickly fades away after it is produced. It can be described as the degree to which a sound decays after it reaches its peak volume level.

Transience is an essential component in creating drum sounds.

Conclusion

Ultimately, understanding what transients are in audio can greatly enhance your music production skills. Whether you’re a beginner or a seasoned professional, having knowledge of transients will allow you to manipulate and produce sound more effectively. By understanding the science behind transients, you can create a sonic palette that stands out in today’s competitive music industry.

So, next time you’re tweaking the settings on your audio gear, remember that transients play a significant role in shaping the sound you hear. Happy producing!
Categories
Archive

Renaming Your Audio Channels

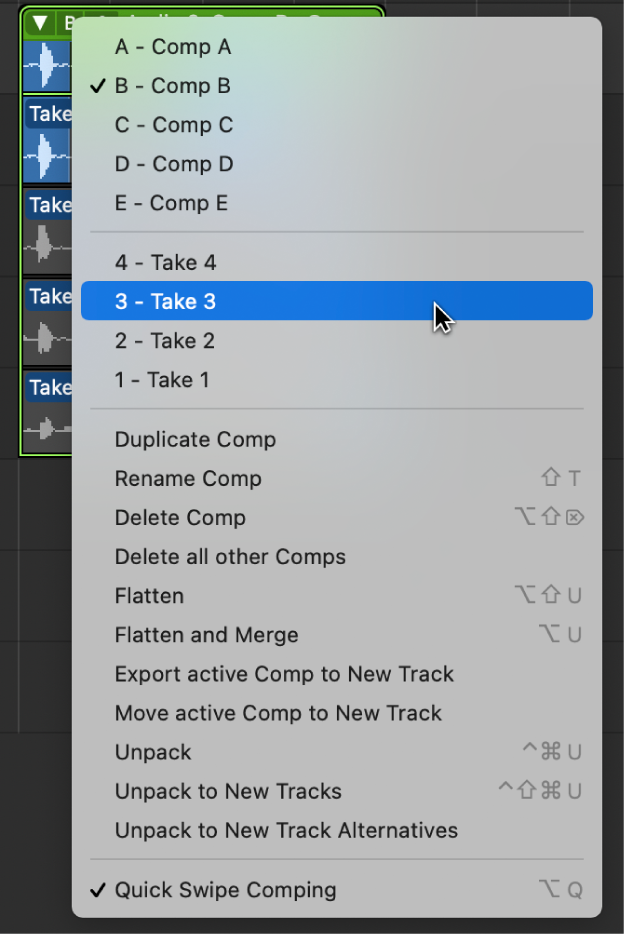
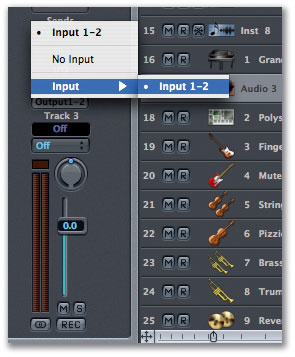
To rename your audio channels, simply right-click on the channel and select “Rename.” Renaming your audio channels can make your audio editing process more organized and efficient.

Giving descriptive names to your channels can also help you quickly identify specific tracks during editing. Audio editing can be a complex process, especially when dealing with multiple channels. Renaming your channels to reflect their content can help you easily recognize individual tracks within the mix.

This can save you time and frustration and make the editing process more enjoyable. Additionally, if you work with a team of audio editors, descriptive channel names can help everyone stay on the same page and ensure their edits mesh seamlessly with yours. We’ll explore some best practices for renaming your audio channels and discuss the benefits of this simple yet effective technique.

Renaming Your Audio Channels

Credit: support.apple.com

Why Rename Your Audio Channels

Renaming your audio channels can greatly improve your workflow and productivity while reducing confusion. By assigning clear and descriptive names to your channels, you can easily identify and manipulate specific parts of your audio mix, making the editing process much more efficient.

Renaming audio channels may seem like a small task, but this simple action can make a big difference in your audio workflow. By renaming your audio channels, you can streamline your workflow, make it easier to identify each channel, and avoid miscommunication and errors. In this post, we will focus on these three reasons in detail and explore how renaming your audio channels can help you achieve these benefits.

Organize And Streamline Audio Workflow

Organizing your audio channels can be very helpful for your audio workflow. Instead of having generic labels like “Channel 1” or “Channel 2,” renaming your channels with specific labels can help you easily navigate through your mix and quickly find the channels you need. Having a well-organized audio workflow can save you time, help avoid confusion, and make your work more efficient.

Make It Easy To Identify Channels

Renaming your audio channels with specific labels can also make it easier to identify each channel. For instance, naming the channels based on the instruments or sounds they represent can provide a clear understanding of what sounds are heard through the channel. This way, you don’t have to keep guessing which channel has what sound. Renaming your audio channels will be very helpful when you need to make quick changes, and you don’t have to waste time guessing or testing.

Avoid Miscommunication And Errors

Miscommunication can occur when the audio channel label does not properly describe what is on the channel. Using generic labels, such as “Channel 1,” can lead to miscommunication among team members, causing errors in the final product. Incorrect labeling can lead to delays in the production process. Renaming your audio channels allows everyone involved in the production to quickly and easily identify the audio channels without confusion. In conclusion, renaming your audio channels is a small task that can have a big impact on your audio workflow. It can help streamline your workflow, make identifying channels easier, and prevent miscommunication and potential errors. So, take the time to rename your audio channels, and see the difference it can make in your audio production.

Steps To Rename Audio Channels

Learn how to rename your audio channels with these simple steps. You can easily customize the name of each channel for easier identification and organization. Follow the step-by-step guide to rename your audio channels for a more efficient production process.

Steps to Rename Audio Channels When working with audio files, it’s essential to have properly labeled audio channels to avoid confusion and ensure accurate editing and mixing. Renaming audio channels is a task that should be done carefully and clearly to avoid any complications down the line. In this article, we’ll discuss the steps you can follow to rename your audio channels in your audio software, along with updating your project documentation. Identify the Audio Channels to Rename The first step in renaming your audio channels is to identify the channels that need to be renamed. You may have multiple channels in your file, and it can be easy to lose track of which channels are which if they are not labeled clearly. Take some time to listen to each channel and determine which ones need to be renamed. Choose New Names for the Channels Once you’ve identified the channels to rename, the next step is to choose new names for them. It’s essential to choose names that clearly represent the channel’s content, making it easy to understand at a glance. A good practice is to use a naming convention that includes a prefix followed by a descriptive name. For example, “VO” followed by the speaker’s name for voiceover channels. Rename the Channels in Your Audio Software Now that you have chosen new names for your audio channels, it’s time to rename them in your audio software. The process may vary based on your software; however, most software will have a feature to rename channels. Use the new names you have chosen and ensure that you are renaming the correct channels. Updating Your Project Documentation Lastly, it’s essential to update your project documentation to reflect the name changes made to your audio channels. This step ensures that all team members are aware of the changes and can avoid confusion. Updating your project documentation should include updating the file name and description to reflect the new channel names. In conclusion, renaming your audio channels is an essential step in ensuring a well-organized audio project. Follow the steps discussed above to rename your audio channels carefully, ensuring accuracy and clarity.

Best Practices For Renaming Audio Channels

Renaming your audio channels is essential for better organization. To follow best practices, keep channel names concise and descriptive, use consistent naming conventions, and avoid special characters or symbols.

Renaming audio channels might seem like an easy task, but it requires attention to detail and should be done with care. Properly renaming your audio channels can help improve your workflow and organization. Here are some best practices to keep in mind when renaming your audio channels:

Be Consistent In Naming Conventions

To avoid confusion, it’s essential to be consistent when naming your audio channels. Choose a naming convention and stick to it across all channels. For instance, if you’re using numbers to name your channels, ensure that they are numbered sequentially from left to right. This consistency helps your team to understand the system in place and use it correctly.

Use Short But Descriptive Names

Use short names that still convey the information you need to sort and organize your audio files effectively. Long names will only take up space and might even be harder to read and remember. Always choose a name that is relevant and descriptive enough to convey the required information quickly.

Avoid Using Special Characters Or Spaces

When renaming your audio channels, avoid using any special characters or spaces. These characters can cause issues when uploading and downloading files. It’s best to stick to alphanumeric characters and dash (-) or underscore (_) to separate words accurately.

Make Sure Your Team Is Informed Of The Changes

Once you’ve renamed your audio channels, be sure to inform your team members about the changes you’ve made. This step ensures that everyone is aware of what each channel stands for, which helps in organizing audio files and streamlining workflow. In conclusion, proper renaming of your audio channels is essential in organizing your audio files and improving workflow. By adhering to the best practices mentioned above, you can ensure that your channel names are consistent, descriptive, and easy to navigate. With these practices in place, your audio channel organization and workflow will undoubtedly become a smooth process.

Renaming Your Audio Channels

Credit: www.soundonsound.com

Tools For Renaming Audio Channels

As an audio professional, you understand the importance of organizing your channels for better workflow and higher efficiency. Renaming your audio channels is an essential aspect of organizing digital audio workstations (DAWs) and mixing consoles. In this blog post, let’s take a look at some of the tools available to help you rename audio channels and maintain a professional workflow.

Daw Software

Most digital audio workstations provide native capabilities to rename channels. This feature is usually accessed by right-clicking on the channel and selecting the option to rename it. DAWs also offer customizable keyboard shortcuts to make the process even more efficient. Ensure that you get familiar with your software’s capabilities before looking at plugins or automated solutions.

Audio Channel Renaming Plugins

If you require additional features beyond what your DAW provides, consider using audio channel renaming plugins. While several plugins are available, many come with a price. The Rename-It plugin is an excellent option with a free version that offers much functionality. The plugin allows you to create templates for naming your channel strips and tracks automatically. You can also rename multiple channels simultaneously, saving time and effort.

Batch Renaming Tools

Batch renaming tools are excellent solutions for renaming audio channels in batches. These tools save you a considerable amount of time and energy by allowing you to rename multiple channels at once. Programs such as NameChanger (MacOS) and Bulk Rename Utility (Windows) are free and straightforward to use. Batch renaming tools use various parameters such as predefined names, text replacement, counters, and more to rename channels.

Automated Project Documentation Tools

Effective project documentation is critical to audio engineers and producers. Automating the documentation process can save time and minimize errors. Automated documentation tools come in handy, especially when multi-track recording is involved. Programs such as Sononymous Audio Renamer automate the documentation process by generating a detailed list of channel names. The tool reads and extracts metadata, providing comprehensive documentation for the project.

Common Mistakes To Avoid When Renaming Audio Channels

When renaming your audio channels, it’s important to avoid common mistakes. These can include using confusing or irrelevant names, not properly labeling channels, and failing to be consistent in your naming conventions. By following best practices, you can ensure that your audio channels are organized and easy to navigate.

Are you tired of working with messy or confusing audio channel names? Renaming audio channels can streamline your workflow and help you stay organized. However, renaming audio channels can also be a tedious process that requires attention to detail. In this guide, we’ll discuss some common mistakes to avoid when renaming audio channels to help make the renaming process smoother.

Not Updating Project Documentation

One of the most common mistakes people make when renaming audio channels is forgetting to update their project documentation. If you’re working on a team or need to transfer your project to another person, it’s important to keep your documentation up-to-date. Neglecting to update documentation can cause confusion and slow down the workflow. Make it a habit to update your project documentation whenever you rename an audio channel.

Forgetting To Update Audio Plugin Configurations

Another mistake people make when renaming audio channels is forgetting to update their audio plugin configurations. Audio plugins can save unique settings for each channel, which can become problematic if you don’t update them after renaming a channel. Make sure to update the audio plugin configurations for the renamed channels to ensure that everything continues to work smoothly.

Using Confusing Or Ambiguous Names

When renaming audio channels, it’s essential to choose names that are clear and descriptive. If you use ambiguous or confusing names, it can slow down your workflow and cause confusion for others on your team. Be sure to use names that accurately describe the audio channel and its contents. If you’re unsure what to name a channel, take a moment to brainstorm and choose a name that is specific and easy to understand.

Not Testing The Renamed Channels In Your Audio Workflow

Finally, a mistake people make when renaming audio channels is not testing the renamed channels in their audio workflow. After you rename a channel, be sure to test it, making sure that everything works correctly. Renamed audio channels can cause unexpected problems, so it’s important to test them in your audio workflow thoroughly. Take the time to test your renamed channels and fix any issues that arise. In conclusion, renaming audio channels can be a tedious but necessary process. By avoiding the common mistakes outlined in this guide, you can save time and keep your workflow organized. Remember to update your project documentation, audio plugin configurations, choose clear and descriptive names, and test your renamed channels thoroughly.

Frequently Asked Questions On Renaming Your Audio Channels

Where Can You Rename An Audio Track?

You can rename an audio track using various media players or editing software. Right-click on the audio file and select “Rename” or go to the “Properties” menu to change the name. Alternatively, use editing software to rename the audio track before exporting or saving it.

How Do You Change The Name Of An Audio File?

To change the name of an audio file, you can right-click on the file and select “Rename. ” Type in the new name and press Enter. Alternatively, you can select the file, press F2, type in the new name, and press Enter.

Why Can’t I Rename Audio Tracks In Premiere Pro?

In Premiere Pro, audio tracks cannot be renamed directly because they are closely linked to project files. However, you can create a custom Label Color for each track to help identify them easily. To rename an audio track, you need to rename the source file within the Project panel.

Can I Name Tracks In Premiere Pro?

Yes, you can name tracks in Premiere Pro. It’s easy to do; just right-click on the track header and select “Rename. ” Then, type in the new name and hit “Enter” on your keyboard. This will help you keep better track of your timeline as you work on your project.

Conclusion

Overall, renaming your audio channels is a simple yet effective way to improve the organization and user experience of your audio content. By following the tips outlined in this post, you can ensure that your audio channel names are concise, descriptive, and easy to understand.

Remember to consider your audience and the platform on which your content will be hosted when choosing your channel names. With these best practices in mind, you can optimize your audio content for discoverability and engagement.

Categories
Archive

Is Reaper Good For Beginners

Reaper is a good software for beginners due to its simple and user-friendly interface. Reaper is a digital audio workstation that has gained popularity among musicians, producers, and sound engineers.

It is known for its customizable interface, advanced features, and affordability. Despite its powerful capabilities, Reaper is a great option for beginners due to its straightforward and intuitive interface. The software offers a variety of tools and features that are easy to navigate and understand, making it an excellent choice for those who are just starting out in the world of music production.

Additionally, Reaper has a large community of users who provide support, tutorials, and resources for new users. Overall, Reaper is a fantastic option for beginners who are looking for a powerful and user-friendly digital audio workstation.

Understanding Reaper’s Interface

Reaper’s interface may appear daunting to beginners at first glance, but it’s designed to be user-friendly and customizable. With a bit of exploration and experimentation, newcomers can quickly adapt to the platform and confidently begin producing music.

Reaper is a digital audio workstation that is an excellent choice for beginners. People often have questions about whether Reaper is a good choice for beginners and how user-friendly it is. This post will delve into understanding the interface of Reaper and make it easier to navigate for beginners.

Navigation And Menus

Navigation is an essential part of using any software. Reaper’s interface is straightforward, and the navigation menu is simple to use. The various functions are easily accessible through the main menu bar at the top of the screen. Reaper also includes a customizable toolbar that allows you to access your frequently used functions quickly.

Track Control Panels

Reaper’s interface is designed explicitly for multi-track recording, editing, and mixing. The track control panel in Reaper is the hub of everything you need to do while working on a track. Everything from adding volume envelopes to adding effects can be accomplished via these panels. The great thing about Reaper is that it allows you to customize the control panel to fit your workflow and needs.

Mixer Panel

The mixer panel in Reaper is where all tracks are routed to the main output. It is one of the most critical panels in Reaper, and it provides an excellent overview of your project. It helps you understand how each track interacts with others and how to make changes to improve your mix. The interface is simple yet powerful and allows for total control over all mixing functions. In conclusion, Reaper is an excellent choice for beginners looking for a user-friendly interface. The navigation and menus are simple, and the track control and mixer panels provide all the necessary tools for recording, editing, and mixing. With its customizable interface and comprehensive features, Reaper is an excellent choice for both beginners and professionals alike.

Features For Beginners

If you’re looking for a digital audio workstation (DAW) that offers a comprehensive set of features for beginners, look no further than Reaper. While it’s true that Reaper can be used by professionals for intricate audio editing projects, it’s also an excellent choice for those who are just starting out and want to get a feel for what a DAW can do. Let’s take a closer look at some of the key features of Reaper that make it a great choice for beginners.

A Comprehensive Set Of Effects

Reaper includes a wealth of built-in effects that make it easy for beginners to get started with audio editing. From basic EQ and compression to more advanced effects like reverb and delay, Reaper has everything you need to create and enhance your audio tracks. Additionally, Reaper supports third-party VST plugins, meaning that you can expand your effects library even further as you become more experienced.

Flexible Routing

When it comes to routing audio within a DAW, Reaper stands out with its flexibility. Whether you’re working with a simple two-track project or a complex multi-track recording, Reaper allows you to easily route audio to different tracks or buses, making it easy to balance levels and apply effects. With Reaper, you can even route audio from one track to another in real-time, allowing for creative experimentation and sound design.

Virtual Instruments

In addition to its effects and routing capabilities, Reaper also offers built-in virtual instruments. These software instruments allow you to create and edit MIDI-based compositions, even if you don’t have a physical keyboard or other MIDI controller. From synthesizers and drum machines to pianos and orchestra samples, Reaper’s virtual instrument library is extensive and versatile, making it an excellent tool for exploring different genres of music.

In conclusion, Reaper is an excellent choice for beginners who are just starting to explore the world of audio editing and music production. With a comprehensive set of built-in effects, flexible routing capabilities, and extensive virtual instrument library, Reaper offers everything you need to create high-quality audio tracks and unleash your creativity.

Recording And Editing Audio In Reaper

Reaper is a great audio recording and editing software for beginners. With its simple interface and affordable price, it’s a popular choice for podcasters and musicians alike. With a bit of practice, even those with no previous experience can learn to use Reaper effectively.

If you’re new to audio recording and editing but want full-featured digital audio workstation (DAW) software, you may wonder if Reaper is a suitable choice. The answer is yes – it’s intuitive and affordable but offers power and flexibility. Here’s how to get started with recording and editing audio in Reaper.

Setting Up Audio Devices

When you launch Reaper for the first time, it prompts you to configure audio settings, including input devices, output devices, and sample rate. You need to connect your microphone or instrument to your computer and check that it’s detected and selected in Reaper’s audio preferences. If you have multiple input or output devices, you can choose them per track or per project.

Creating A New Project

To create a new project in Reaper, you need to specify the template, tracks, and other settings. You may want to select a template that matches your recording needs, such as voice-over, podcast, or music. Reaper provides a wide range of default templates or lets you create your own. You can also add tracks that correspond to the number of audio sources you want to record or import. Each track has its volume, pan, effects, and other options.

Recording Audio

Once you’ve set up your hardware and project, you can start recording audio in Reaper. You can arm the tracks you want to record on, set their input levels, and choose a recording mode, such as overdubbing, replace or mix. You can also enable monitoring to listen to your input in real-time, apply effects and compression, and control the playback speed and pitch. When you’re done, you can stop recording, save your project and export it to various audio formats.

Editing Audio

After recording, you can edit your audio in Reaper with a wide range of tools. You can trim and split clips, adjust their volume and fades, align and quantize them, and apply time and pitch effects. You can also use Reaper’s built-in MIDI editor to create music or import and edit existing MIDI files. Reaper’s UI is customizable, so you can choose which tools and windows to show or hide, depending on your workflow and preferences. In conclusion, Reaper is an excellent choice for beginners who want to dive into recording and editing audio, whether it’s for personal or professional use. It may have a learning curve, but once you get used to its features and workflow, you’ll appreciate its versatility and affordability. Give Reaper a try and see how it works for you!

Midi In Reaper

Reaper is a great DAW for beginners looking to use MIDI. Its user-friendly interface and customizable features make it easy to use, even for those new to music production. With Reaper, users can easily navigate and manipulate MIDI data to create their desired sound.

If you’re a beginner in the world of digital audio workstations, you’ve probably heard about Reaper as it’s one of the most cost-effective DAWs available. Reaper is known for its powerful MIDI editing capabilities, making it a popular choice for composers, producers and musicians. In this article, we’ll explore whether it’s good for beginners and dive into the different MIDI functionalities in Reaper.

Midi Setup

Before working with MIDI in Reaper, it’s essential to have a suitable MIDI setup. Fortunately, Reaper makes it very easy to set up and use MIDI devices. In Reaper, you can use either a virtual MIDI device or an external hardware MIDI device. To configure your MIDI setup in Reaper, you need to navigate to Preferences > MIDI Devices. From here, you can enable devices, input, and output ports.

Midi Editing

The MIDI editing functionality is where Reaper shines. It has an extensive range of tools for MIDI editing, including velocity editing, note selection, and velocity scaling. It allows you to edit MIDI notes and velocities efficiently and quickly. You can easily quantize MIDI notes, change the pitch, adjust note lengths and create complex compositions using the MIDI editor. Reaper also has a MIDI editor that enables you to edit events and automation within the MIDI clips.

Virtual Instrument Usage

Reaper’s virtual instrument functionality is very powerful and straightforward to use. Using virtual instruments in Reaper is a great way to create realistic-sounding instrument tracks without the need for expensive hardware. Reaper comes with a range of built-in virtual plug-ins that you can use to create different instrument sounds. You can also use third-party virtual instruments by inserting them into Reaper’s virtual instrument rack. Reaper also supports MIDI controller inputs, which enables you to control virtual instruments in real-time using a MIDI controller. In Conclusion, Reaper is a perfect tool for beginners who want a powerful and straightforward DAW for MIDI editing. The functionality and ease of use make it a popular choice for producers, composers and musicians alike. With its extensive MIDI editing capabilities and virtual instrument support, it’s the best DAW for MIDI-centric compositions.

Workflow Tips For Beginners

Reaper is a great digital audio workstation for beginners due to its user-friendly interface and low-cost. Along with its ease of use, Reaper also offers a wide range of features and customization options to enhance your workflow and creativity.

When it comes to digital audio workstations (DAWs), Reaper is considered to be a powerful option for beginners. However, like any software, the learning curve can be steep at first. In this section, we’ll provide some workflow tips for beginners to help you get started with Reaper, including customizing key commands, using Reaper with other DAWs, and working with templates.

Customizing Key Commands

One of the most important things you can do to increase your workflow efficiency in Reaper is to customize your key commands. Reaper has a vast array of keyboard shortcuts that allow you to quickly access and control various functions within the software. However, you might find that the default key commands are not as intuitive or efficient for your way of working. To customize your key commands in Reaper, simply go to Options > Customize Menus/Toolbar. From here, you can assign new key commands to any function you like, or modify existing key commands to better suit your needs. By taking the time to set up your key commands according to your preferences, you can save yourself a lot of time and effort in the long run.

Using Reaper With Other Daws

If you’re used to working with other DAWs like Pro Tools or Logic, it can be intimidating to switch to a new software. However, Reaper is designed to make the transition as smooth as possible. Reaper supports a wide range of audio formats and plugins, and its user interface is highly customizable, so you can set it up to look and feel similar to the DAW you’re used to. Reaper also has a feature called “ReaWire”, which allows you to use Reaper as a plugin within other DAWs (or vice versa). This can be incredibly helpful if you’re already familiar with another DAW and want to use some of Reaper’s unique features without having to switch completely.

Working With Templates

Templates can be a huge time-saver in Reaper, especially if you find yourself repeatedly setting up the same workflow or effects chain for different projects. Reaper allows you to create your own custom templates, or you can use one of the many pre-made templates that come bundled with the software. To create a new template, simply set up your desired workflow, track layout, effects chain, etc., and then go to File > Save Project Template. You can then use this template as a starting point for future projects, saving you the time and hassle of setting everything up from scratch each time. In conclusion, by customizing your key commands, using Reaper with other DAWs, and working with templates, you can increase your workflow efficiency and make your experience with Reaper more enjoyable. Remember, never be afraid to experiment and find the workflow that works best for you.

Pros And Cons Of Reaper For Beginners

If you are new to digital audio workstations (DAWs), Reaper is an excellent choice for beginners. However, it’s important to understand the pros and cons of Reaper before you start using it. In this post, we will explore the advantages and drawbacks of Reaper for beginners.

Pros

1. User-Friendly Interface

Reaper’s user interface (UI) is customizable, making it easier for beginners to learn and use. The UI is also designed to reduce clutter, which can be overwhelming for beginners.

2. Affordable

Reaper is affordable compared to other DAWs on the market. It offers a free trial period before you purchase the license. Even after purchasing, it is affordable and doesn’t require any additional purchases or upgrades.

3. Cross-Platform

Reaper is available on multiple platforms, including Windows, macOS, and Linux, making it an excellent choice for beginners who use different operating systems.

4. Lightweight

Reaper is lightweight and optimized to run on lower-end systems, making it run smoothly without any lag, even on an older PC or Mac.

Cons

1. Limited Pre-Loaded Plugins

While Reaper offers a powerful stock plugin, it offers very few pre-loaded plugins compared to other DAWs, such as Logic Pro X or Ableton Live. However, this shortfall is compensated for by the extensive plugin compatibility of Reaper.

2. Steep Learning Curve

Reaper can be daunting for beginners who are unfamiliar with the technical aspects of DAWs. There are many options, shortcuts, and functions that can be difficult for beginners to grasp. However, the software documentation and the online community are invaluable resources for reducing the learning curve.

3. Minimal Editing Features for Midi and Audio Clips

Reaper’s audio and midi editing features are not as flexible and robust as other DAWs. Hence, performing complex editing tasks using Reaper may require additional efforts by using scripts or plug-ins.

In conclusion, Reaper is an excellent DAW for beginners with its affordable pricing, cross-platform functionality, and lightweight initiative. The availability of a free trial of Reaper allows beginners to try the software before purchasing and getting accustomed to it. However, the drawbacks, such as the steep learning curve, lack of pre-loaded plugins, and minimal editing features for midi and audio clips, should be considered to understand how to maximize use of the software.

Is Reaper Good For Beginners

Credit: www.reddit.com

Frequently Asked Questions On Is Reaper Good For Beginners

Is Reaper User Friendly?

Yes, REAPER is considered user-friendly due to its customizable interface, intuitive navigation, and extensive documentation and tutorials available for users. It also offers a free trial period for users to become familiar with its features before purchasing.

Is Reaper Easier Than Fl Studio?

It depends on individual preferences and skill levels. Both DAWs have their unique interface and features. Some users may find REAPER easier to use, while others may prefer FL Studio. It’s recommended to try both before deciding which suits you best.

Is Reaper Really That Good?

Yes, REAPER (Rapid Environment for Audio Production, Engineering, and Recording) is an excellent digital audio workstation (DAW). It offers a wide range of features, including multi-channel recording, editing, mixing, and mastering capabilities. REAPER is also highly customizable and compatible with many plugins and virtual instruments.

Is Reaper Used Professionally?

Yes, REAPER is widely used by professional musicians, producers, and engineers for recording, editing, and mixing audio. It is a powerful and affordable digital audio workstation that offers advanced features and compatibility with various plugins and hardware devices.

Conclusion

Reaper is an excellent DAW for beginners because of its easy-to-use interface, affordable price, and powerful features. It has a variety of tools, plugins, and effects that can help you create high-quality music. Moreover, its compatibility with Mac and Windows operating systems makes it accessible for a wide range of users.

Ultimately, if you are a beginner looking for a reliable, user-friendly, and budget-friendly DAW, Reaper is definitely worth considering.

Categories
Archive

Tips For Repairing Bad Recordings

To repair bad recordings, start by identifying the issue and using appropriate tools to remove or reduce unwanted noise or distortion. Then, use equalization and other editing techniques to enhance the overall sound quality.

Repairing bad recordings can be challenging, but it’s essential if you want to produce high-quality audio content. Whether you’re working on a podcast, music production, or any other audio project, you need to ensure that the sound is clear and clean.

Sometimes, recordings may have unwanted noise or distortion, requiring careful editing to restore them to their best possible quality. We’ll discuss some tips and techniques for repairing bad recordings, including identifying the issue, using the right tools, and utilizing editing techniques to enhance the sound quality. With these tips, you’ll be able to transform your bad recordings into polished and professional-sounding audio content.

Common Causes Of Bad Recordings

Poor equipment, room acoustics, improper microphone placement and wrong mic selection are some common causes of bad recordings. To repair bad recordings, use EQ to adjust frequency balance, reduce noise and enhance clarity. Also, use compression to control dynamics, reverb to add space and depth, and adjust levels to ensure good balance.

Poor Microphone Placement

When it comes to recording audio, microphone placement is crucial. Poor microphone placement can lead to a number of problems, such as low volume and unwanted background noise. It’s important to place your microphone where it can capture the best sound possible. You should also be aware of the proximity effect, which causes an increase in bass frequencies when the microphone is placed close to the source. Some tips for proper microphone placement include:

  • Place the microphone at a distance of 6-12 inches away from the source.
  • Position the microphone at a 45-degree angle to the source.
  • Avoid placing the microphone too close to reflective surfaces.

Equipment Malfunction

Equipment malfunction is another common cause of bad recordings. If your equipment is not functioning properly, it can produce unwanted noise or low quality recordings. It’s important to regularly maintain your equipment and ensure it’s in good working condition. Here are some tips to prevent equipment malfunction:

  • Regularly clean and maintain your equipment.
  • Store your equipment in a dry and safe place.
  • Replace any worn or damaged parts immediately.

Room Acoustics

Room acoustics can greatly affect the quality of your recordings. If your room has poor acoustics, it can lead to unwanted echoes, reverb, and noise. It’s important to choose a room with good acoustics and, if necessary, make modifications to improve the sound quality. Consider the following tips to improve room acoustics:

  • Use acoustic treatment such as foam panels and bass traps.
  • Avoid recording in rooms with hard, reflective surfaces.
  • Use carpets and drapes to minimize sound reflection.

By being mindful of these common causes of bad recordings and implementing these tips, you’ll have a better chance of producing high quality recordings. Remember that proper microphone placement, equipment maintenance, and room acoustics can make a big difference in the final product.

Preparing For A Recording Session

To repair a bad recording, it’s essential to prepare for a recording session thoroughly. Start by ensuring that the recording room is soundproofed and acoustically treated, select quality equipment and instruments, and minimize background noise. It’s critical to listen keenly while recording and address any issues as they arise to prevent making the same mistakes repeatedly.

Preparing for a Recording Session When it comes to recording audio, there are a number of factors you need to consider to ensure a successful outcome. Before you even start recording, you must take the time to prepare both yourself and your recording space. Preparation can help you avoid mistakes that could lead to bad recordings. In this post, we will focus on tips for repairing bad recordings, and in particular, how to prepare for a recording session. Check Equipment Beforehand Before you record, ensure that all your equipment is functioning correctly. This includes microphones, cables, headphone jacks, and preamps. In addition, any software or hardware you plan to use should be up to date and properly configured. Test your equipment thoroughly so that you can identify and address any issues before the recording session. Prepare the Recording Space A well-prepared recording space is crucial for getting good recordings. The space should be free from noise and other distractions as these can affect the quality of your recordings. You should also ensure that the room has adequate sound insulation and acoustics. Soft materials such as carpets, curtains, and upholstered furniture can help reduce sound reflections. Additionally, you should control the temperature and humidity in the room, as these can also affect the quality of your recordings. Consider Hiring a Professional If you’re not confident in your ability to record audio, you may want to hire a professional to do it for you. A professional can help you to achieve high-quality audio recordings by providing expertise and equipment that you may not have. Additionally, they can help you to save time and money in the long run, as they are more likely to get it right the first time. By following these tips, you can help to ensure that your recording session goes smoothly, and that you get the best possible results. Remember to check your equipment beforehand, prepare your recording space, and consider hiring a professional if needed. With these preparations, you’ll be well on your way to achieving high-quality audio recordings.

Techniques For Repairing Bad Recordings

If you have a bad recording, don’t worry! There are techniques available to repair it. You can try using noise reduction, equalization, compression, and other tools to salvage your recordings and make them sound better.

Bad recordings can ruin a project, but not all hope is lost. With some simple techniques, you can restore the audio to a listenable state. Here are some effective techniques for repairing bad recordings.

Equalization

Equalization is a versatile tool for repairing bad recordings. With EQ, you can emphasize or de-emphasize specific frequencies, which can make the audio sound more balanced. If your recording is lacking in bass or high-end, using EQ can help. One helpful technique is to use a high-pass filter, which reduces low-end frequencies that can muddy up a recording. Conversely, a low-pass filter can tame harsh high-end frequencies. Keep in mind that too much EQ can make the audio sound unnatural, so use it sparingly.

Compression

Compression is a popular tool for leveling out the dynamics of a recording. This is helpful when a recording has a mix of quiet and loud parts. Compression reduces the dynamic range, making the quiet parts louder and the loud parts quieter. When using compression, it’s important to find the right balance. Too much compression can make the audio sound flat and lifeless, while too little compression won’t have much effect. A good rule of thumb is to aim for 4-6 dB of gain reduction.

Noise Reduction

Noise reduction is a crucial tool for removing unwanted noise from a bad recording. Hiss, hum, and other background noise can ruin an otherwise good recording. Noise reduction tools use algorithms to analyze the audio and remove the unwanted noise. However, noise reduction can have side effects, such as reducing the quality of the audio or introducing artifacts. It’s important to use noise reduction carefully and only when necessary. Additionally, recording conditions can impact the amount of noise in the recording, so it’s important to be mindful during the recording process. In conclusion, these techniques for repairing bad recordings can be a lifesaver for producers, musicians, and engineers. Whether it’s EQ, compression, or noise reduction, each tool has its unique applications. By using these techniques in conjunction, you can turn a bad recording into a polished product.

Using Eq To Improve Recordings

Enhancing the sound quality of a recording through equalization (EQ) is a great way to fix unwanted noises or imbalances. Using the proper EQ settings can help repair bad recordings, including eliminating background noise, boosting clarity, and improving overall sound.

Recording bad-quality audio can lead to disappointment, but it doesn’t mean that you have to abandon it altogether. Fortunately, there are several ways to improve bad recordings using equalization (EQ). EQ is a powerful tool that can help to enhance and make adjustments to specific frequency ranges. Here are some tips for using EQ to improve recordings.

Identify Problem Frequencies

The first step in using EQ to improve bad recordings is to identify problem frequencies. These frequencies can be detected by listening carefully to the audio and paying attention to the parts that sound off or muffled. Use an EQ plugin or software to highlight and cut any frequencies that seem to interfere with the recording quality. By knowing the problem frequencies, you can apply EQ adjustments accordingly.

Use High-pass And Low-pass Filters

Another useful EQ tool for improving recordings is high-pass and low-pass filters. High-pass filters help remove unwanted low-frequency contents, while low-pass filters eliminate high-frequency noises. These filters can be applied to individual tracks as well as the entire mix for a cleaner and tighter sound.

Adjust Levels

Adjusting levels is essential in achieving a clear and balanced recording. EQ can help in the level-matching process by bringing down elements that are too loud while boosting those that are too quiet. By applying EQ compensations to different tracks, it will be easier to achieve an evenly balanced and well-mixed recording. In summary, using EQ can greatly enhance and improve bad recordings when used in the right way. Take time to experiment, practice and familiarize yourself with the tools so that you can achieve a professional sound for your recordings.

Implementing Compression

Implementing compression is a valuable tip for repairing bad recordings. It can help reduce unwanted noise, smooth out uneven levels, and improve the overall sound quality of the recording. By compressing the audio signal, you can achieve a more balanced and polished sound that is easier on the ears.

Implementing Compression If you’ve ever recorded a track, only to realize later that the quality just isn’t up to par, you’re not alone. Fortunately, there are tools at your disposal that can help to improve the quality of your recordings. One such tool is compression. Compression can help to even out levels and balance of your recordings to make them sound more polished and professional. Understanding Compression Before you can effectively implement compression, it’s important to understand what it does. Compression works by reducing the dynamic range of a track. This means that it will bring the levels of loud parts of a track down while bringing the levels of soft parts of a track up. This creates a more consistent level throughout the track, making it easier to hear everything. Choosing the Right Settings When it comes to using compression, choosing the right settings is crucial. The settings you choose will largely depend on the type of recording you’re working with and the effect you’re trying to achieve. In general, when you’re recording something that has a lot of dynamic range, such as an acoustic guitar, you’ll want to use more compression. Conversely, when you’re recording something that has a smaller dynamic range, such as a bass guitar, you’ll want to use less compression. Applying Compression to Specific Tracks Once you’ve chosen the right compression settings, it’s time to apply compression to specific tracks. In most cases, you’ll want to apply compression to tracks that have a lot of variation in volume. This can include things like vocals, drums, and horns. When applying compression to a specific track, it’s important to be gentle. Apply too much compression, and you’ll end up with a track that sounds overly compressed and unnatural. In conclusion, compression is an essential tool for improving the quality of your recordings. By understanding what it does, choosing the right settings, and applying it carefully to specific tracks, you can create recordings that sound more polished and professional. Remember to always be gentle when applying compression, and experiment with different settings to find the right balance.

Tips For Repairing Bad Recordings

Credit: www.youtube.com

Removing Background Noise

Background noise is one of the most common issues with bad recordings. It can be distracting and ruin the overall quality of your audio. If you’re struggling with removing background noise, don’t worry! Here, we’ll explore some effective tips for identifying and removing different types of noise from your recordings.

Identifying Types Of Noise

Before you start removing background noise, it’s essential to identify what kind of noise is present in your recording. Is it white noise, such as the hiss of recording equipment or electrical interference? Or is it more specific, like the hum of an air conditioner or the sound of traffic outside your window? Identifying the type of noise will help you choose the right method for removing it.

Using Noise Reduction Software

Noise reduction software is an excellent option for removing background noise from your recordings. There are many different programs available, from free options like Audacity to more premium options like Adobe Audition. Using noise reduction software involves analyzing your audio to identify the unwanted noise and then applying filters to remove it. This method can be highly effective, but it’s important to use it correctly to avoid impacting the overall quality of your audio.

Manually Removing Noise

If you don’t have access to noise reduction software or prefer a more hands-on approach, you can manually remove noise from your recordings. This involves listening to your audio and identifying the sections with unwanted noise, then removing them by using specialized editing tools. Manually removing noise can be time-consuming but can yield great results if done correctly.

Conclusion

Removing background noise is an important part of repairing bad recordings. By identifying the type of noise and using the right tools and techniques, you can significantly improve the overall quality of your audio. Whether you choose to use noise reduction software or manually remove noise, taking the time to fix these issues is well worth the effort.

Tips For Enhancing Vocals

When it comes to repairing flawed recordings, enhancing vocals is often the most challenging aspect. Thankfully, there are a few easy tips that can dramatically improve the sound quality of your vocals.

Using Delay And Reverb

Delay and reverb are two of the most common effects used to enhance vocals. Adding a bit of reverb can give vocals a more ethereal, atmospheric sound, while delay can create a sense of depth and space. Be sure to experiment with different amounts of each effect to find the right balance.

Layering Vocal Tracks

If your vocals sound thin or weak, try layering multiple tracks on top of each other. This can help fill out the sound and make it feel more full and rich. Just be sure not to go overboard – too many layers can quickly become overwhelming.

Harmonizing With Backing Vocals

Adding backing vocals can take your vocal tracks to the next level. Harmonizing with additional vocal parts can add depth and complexity to the song, creating a more compelling sound overall. Just be sure to keep the harmony parts simple and in keeping with the overall mood and tone of the song.

Finalizing The Mix

In order to salvage bad recordings, it is important to carefully finalize the mix. This involves adjusting levels, adding effects, and fine-tuning the overall sound to create a polished finished product. With the right techniques, even a rough recording can be transformed into a high-quality piece of music.

Once you have addressed the issues with your bad recording and adjusted the levels and effects, it’s time to finalize the mix. Finalizing the mix involves making sure that all the elements of your track sit well together and that the overall sound is balanced. Here are some tips for finalizing your mix:

Panning And Balance

One of the most important elements of finalizing your mix is panning and balance. Panning is the process of adjusting the stereo placement of your sound sources. Make sure that you have a good balance between the left and right channels, and that each instrument has its own space in the stereo field. Use panning to create a sense of space and depth in your mix.

Adding Effects

Once you have the balance and panning sorted out, it’s time to add some effects. Effects can add character and depth to your mix, but use them sparingly. Make sure that you are enhancing the sound rather than masking it with effects. Reverb, delay, and compression are all popular effects used in mixing. Use them to create a sense of cohesion and space in your mix.

Exporting And Saving The Final Mix

Finally, when you are happy with the mix, it’s time to export and save your final mix. Make sure that you set the file format to WAV or AIFF, as these are high-quality formats that will preserve your mix. Save the file with a clear and concise name that reflects the content of the track. When you export your final mix, make sure that you listen to it on different devices and in different environments to make sure that it sounds good everywhere. In conclusion, finalizing your mix is an important part of the recording process. With the right panning, balance and adding of effects, you can create a cohesive and professional-sounding mix. Always make sure to save your final mix in a high-quality format and listen to it on different devices to ensure that it sounds good everywhere.

Tips For Repairing Bad Recordings

Credit: www.masteringthemix.com

Frequently Asked Questions On Tips For Repairing Bad Recordings

How Do I Fix Poor Quality Audio?

To fix poor quality audio, you can try the following steps: 1. Increase the volume of the audio file. 2. Use an audio editing software to remove background noise. 3. Adjust the equalizer settings to enhance the sound quality. 4. Use a high-quality microphone while recording audio.

5. Ensure that the audio file is in a compatible format and not compressed.

How Do You Clean Up A Bad Voice Recording?

To clean up a bad voice recording, you can use audio editing software like Audacity. First, import the file and apply noise reduction filters or equalization. You can also try enhancing the volume or using a speech recognition tool. Once you’re satisfied with the output, export the file in a compatible format.

Can Bad Audio Be Fixed?

Yes, bad audio can be fixed using various audio editing software that can remove background noise, adjust the volume, and enhance the overall quality. However, the extent to which bad audio can be fixed depends on the severity of the issue.

It’s always best to ensure high-quality audio when recording to avoid having to fix bad audio later.

How Can I Improve The Quality Of Already Recorded Audio?

To improve the quality of already recorded audio, you can use audio editing software and tools to remove background noise, adjust levels, and enhance clarity. Audacity, Adobe Audition, and iZotope RX are popular options. You can also consider using a noise reduction plugin or a professional mastering service for optimal results.

Conclusion

Repairing bad recordings can seem like a daunting task, but with the right tools and techniques, it can be manageable. Remember to check your levels, use noise reduction software, and experiment with EQ and compression. Taking time to properly edit and mix your recording can make a huge difference in the final product.

Don’t be afraid to try out new techniques and always strive for improvement. With these tips, you can turn a bad recording into a polished masterpiece. Keep practicing and never give up!

Categories
Archive

Sending Audio Files With Bounce Boss

Bounce Boss allows users to easily send audio files through a cloud-based platform. With few simple steps, one can upload, share and receive tracks via email links or direct downloads.

Also, in today’s digital age, audio files have emerged as a crucial part of everyday life. Also, from musicians to podcasters and voice actors to filmmakers, everyone needs to share, send or receive audio tracks at some point. The platform, a cloud-based platform, has made it easier for people to share audio files without any hassle.

Related reading: Bounce Audio and Cloudbounce Review: Unveiling the Audio Mastering Magic. For background, see the official Bounceboss website.

Moreover, it allows users to upload their audio files, share them via email or direct download links, and get feedback on their work. In addition, with its user-friendly interface and advanced features, the service has become a go-to platform for professionals in the audio industry who want to collaborate and share their work with ease.

Sending Audio Files With Bounce Boss

Credit: bounceboss.co.uk

Advantages Of Using Bounce Boss

In addition, sending audio files can be a challenge. For example, not all online file-sharing services are created equal, and sending and receiving high-quality audio files can sometimes be a frustrating and time-consuming process. The platform offers a solution for audio professionals who need to send and receive audio files quickly and easily. In this article, we’ll discuss some of the advantages of using the service for sending audio files.

Easy Audio File Transfer

Furthermore, with the platform, sending audio files is quick and simple. As a result, the user-friendly interface enables users to send audio files with minimal clicks. The drag-and-drop feature makes it easy to upload and send audio files without the need for time-consuming downloads. Even better, the recipient of the audio file does not need to be a Bounce Boss user. The recipient can simply click on the link in the email and download the audio file.

High-quality Audio Files

Additionally, the service provides audio professionals with the ability to send high-quality audio files without any loss of quality. However, the service supports high-resolution audio files and enables users to send uncompressed WAV files. With the platform, there’s no need to worry about file compression or loss of quality during transfer. As a result, audio professionals can rest easy knowing that their audio files will arrive at their destination sounding just as good as when they sent them.

Flexible File Sharing Options

Also, the service offers flexible file-sharing options for audio professionals who need to send audio files to multiple recipients. Then, the service enables users to send audio files to as many recipients as they need without the need for multiple uploads. Additionally, users can customize the download settings, such as adding metadata, cover art, and notes, to make it easier for recipients to identify and understand the audio file.

Moreover, in summary, the platform offers a solution for audio professionals who need to send and receive high-quality audio files quickly and easily. With the service, sending audio files is easy, the audio files maintain their quality during transfer, and users have flexible options for file sharing. In short, try Bounce Boss today and see how it can simplify your audio file transfer needs!

Sending Audio Files With Bounce Boss

Credit: www.masteringthemix.com

Sending Audio Files With Bounce Boss

Sending audio files with the platform is a hassle-free process that ensures high-quality results. Similarly, with its easy-to-use interface, you can quickly upload your files and share them with anyone, anywhere in the world. Say goodbye to emails and complicated file-sharing processes and hello to the service.

Sending audio files can be a daunting task, especially when you’re unsure of the best method to use. Also, fortunately, with the platform, sending audio files has never been easier. In this article, we’ll be discussing the steps to follow when sending audio files with the service, focusing on uploading audio files, selecting a transfer method. This adds recipients and setting up delivery notification.

Uploading Audio Files

The first step when sending audio files with the platform is uploading the audio files to the site. In addition, you can upload files in two ways. The first method involves dragging and dropping the files onto the website. Meanwhile, the second involves clicking on the “Add Files” button and selecting the files from your device. Once the upload finishes, the files are ready to send to your recipients.

Selecting A Transfer Method

After the files have been successfully uploaded, the next step is selecting a transfer method. For example, the service offers a range of transfer methods, including email, SMS, and WhatsApp. Each of these methods has its advantages and disadvantages, with email being the most popular option due to its convenience and widespread use.

Adding Recipients

Adding recipients is the next step in sending audio files with Bounce Boss. When adding recipients, you have the option of adding them manually or uploading them from a CSV file. As a result, it’s important to ensure that the recipients’ details are accurate to avoid delivery errors.

Setting Up Delivery Notification

The final step in sending audio files with Bounce Boss is setting up the delivery notification. With this feature, you’ll receive notifications once the files have been delivered to the recipients. You can send the notifications via email or SMS, depending on your preference. In conclusion, sending audio files with Bounce Boss is a simple and straightforward process that can be done in a few steps. By following the steps outlined in this article, you can easily upload audio files, select a transfer method, add recipients and set up delivery notification – all in one convenient platform.

Receiving Audio Files With Bounce Boss

Easily and securely send audio files with Bounce Boss. Receive files directly in your inbox with no need to create an account or log in.

Receiving Audio Files with Bounce Boss is easy and efficient. Accessing the Download Portal is the first step. Simply open your email and click the unique download link provided by Bounce Boss. The link takes you to the Download Portal, where you can download all the audio files in one go. Downloading Audio Files is a breeze. Once you are logged into the Download Portal, you can simply click on the ‘Download All’ button and save the files to your desired location. Alternatively, you can select individual files to download separately.

Listening to Audio Files is also simple with Bounce Boss. You can play the audio files directly from the Download Portal to verify the quality and content. If you prefer to listen to audio files on-the-go, you can download them to your mobile device or computer and listen offline. Sharing Audio Files is effortless with Bounce Boss. You can easily share audio files with anyone by sending them the unique download link provided in the email. Alternatively, you can download the audio files and share them through cloud storage, messaging apps, or social media platforms.

Practical Tips

In summary, Bounce Boss is an efficient and user-friendly way to send and receive audio files. Accessing the Download Portal, Downloading Audio Files, Listening to Audio Files, and Sharing Audio Files are all easy tasks that can be done effortlessly. Try Bounce Boss today and experience a hassle-free way of handling your audio files.

Sending Audio Files With Bounce Boss

Credit: bounceboss.co.uk

Frequently Asked Questions Of Sending Audio Files With Bounce Boss

How Do I Attach An Audio File To An Email?

To attach an audio file to an email, first, compose a new email and click on the “attach file” icon. Then, select the audio file from your computer and click “attach”. Some email providers may have size limitations for attachments, so make sure your file is within the size limit before sending.

What Is Stereo Bouncing?

Stereo bouncing is the process of combining multiple audio tracks into a single stereo audio file. It involves adjusting the levels, panning, and equalization of each track to create a cohesive, balanced final mix. This technique is commonly used in music production and audio engineering.

How To Send Audio Files With Bounce Boss?

Sending audio files with Bounce Boss is easy. Simply drag and drop your audio file into the upload area and add your recipient’s email address. Bounce Boss will take care of the rest, sending your audio file securely and efficiently.

How Large Of A File Can I Send With Bounce Boss?

Bounce Boss supports files up to 2GB in size. This means you can send even large audio files with ease. If you need to send larger files, consider using a file compression tool like WinZip to reduce the size of your audio files.

Conclusion

Overall, Bounce Boss is a powerful and intuitive platform for sending high-quality audio files. It provides a seamless experience for both audio professionals and clients, allowing for easy sharing and collaboration. With its advanced features such as file protection, customizable branding, and messaging, Bounce Boss offers a unique and efficient way to deliver audio content.

Whether you’re a musician, sound designer, or podcast producer, Bounce Boss is definitely worth considering as your go-to file transfer tool. Sign up for a free trial today and experience its benefits for yourself!

Categories
Archive

Compression Release Explained

Compression release is the control that decides how quickly a compressor lets go once the signal falls back below the threshold. Attack gets most of the attention, yet the release time often has a bigger effect on how natural, punchy or squashed a track feels.

Getting compression release right is what separates gain control that feels invisible from compression that draws attention to itself. This guide explains what the control does, what typical values sound like, and how to pick a setting for common sources.

What Compression Release Actually Does

Compression release and attack curve showing gain reduction over time

A compressor watches the level of the incoming signal. When that level crosses the threshold, the unit turns the gain down by an amount set by the ratio. When the level drops again, the gain has to come back up to unity. The release time is how long that recovery takes. On most designs it is quoted in milliseconds, and many manufacturers define it as the time needed to recover a set portion of the gain reduction rather than all of it, so two units with the same number on the dial can still sound different.

The general theory of dynamic range control, including attack, release, knee and ratio, is covered well in the Wikipedia article on dynamic range compression. The short version: attack shapes the front of each note, while release shapes everything after it.

Think of compression release as the tail end of the gain envelope. It also affects how much the effect is heard on quiet material, since slow recovery keeps quieter passages turned down too.

Fast Versus Slow Release

A fast setting, roughly 5 to 50 ms, lets the gain bounce back almost immediately. That raises quiet details between hits, such as room tone, breaths and ghost notes, which can make a source sound louder and more aggressive. Push it too far and the gain starts following individual cycles of low-frequency waveforms, which produces audible distortion on bass and kick drums.

A slow setting, roughly 300 ms to over a second, keeps the gain turned down for longer. The result is smoother and more even, but the compressor may never fully recover before the next note arrives. When that happens, gain reduction piles up, the track sits permanently quieter, and transients lose their impact.

Medium values, roughly 80 to 250 ms, are where many engineers start, because they recover between most musical events without chasing the waveform.

Reading the Gain Reduction Meter

Compressor plugin release control and gain reduction display

The meter is the most reliable guide. Play the loudest section and watch the needle or LED bar. With a sensible setting, the meter should move with the music: it dips on each hit and comes back toward zero before the next one. If it hovers at a fixed amount and barely moves, the setting is probably too slow. If it flickers wildly and the sound gets grainy, it is probably too fast.

Setting Release to the Tempo

Timing the recovery to the song helps the compressor breathe with the groove. One beat at a given tempo lasts 60,000 divided by the BPM, in milliseconds. At 120 BPM a quarter note is 500 ms, an eighth note is 250 ms and a sixteenth note is 125 ms. A useful starting point is to choose a note value so the gain is back near zero just before the next important hit, then fine-tune by ear. Treat the maths as a starting point rather than a rule, because the shape of the recovery curve differs from unit to unit.

Tempo-matched compression release is especially effective on drum buses and loops, where every hit lands on the grid.

Auto-Release and Program-Dependent Designs

Many compressors offer an auto setting. Instead of one fixed time, the unit varies its recovery based on the material: short peaks get a quick recovery while sustained loud passages get a slower one. Some classic optical and bus compressors behave this way naturally, often with a two-stage curve that recovers part of the gain quickly and the rest slowly. Auto modes are a good choice for mix buses, vocals and any source with a wide mix of short and long events, because they reduce pumping without making the compressor sluggish.

Compression Release Settings by Source

The values below are starting points, not presets. Always adjust while listening in context.

  • Lead vocals: 40 to 150 ms. Faster settings bring up breaths and consonants; slower settings keep the vocal level steady through long phrases.
  • Kick drum: 50 to 150 ms, timed so the gain recovers before the next kick. Too fast on a long, boomy kick can distort the low end.
  • Snare: 50 to 120 ms. A faster recovery lifts the body and ring after the crack.
  • Drum room mics: fast settings around 20 to 60 ms combined with a high ratio give the classic exploding room sound.
  • Bass guitar: 100 to 300 ms. Very fast values can follow the waveform and add unwanted grit.
  • Acoustic guitar: 100 to 250 ms for an even strum without obvious movement.
  • Mix bus: 100 to 600 ms or auto, with only 1 to 3 dB of gain reduction.

Common Mistakes

  • Setting it with the track soloed only. Pumping that sounds obvious alone may disappear in the mix, and vice versa.
  • Ignoring the attack. Attack and release interact. A slow attack with a fast recovery behaves very differently from a fast attack with a slow one.
  • Chasing loudness. A very fast release makes things louder, and louder often sounds better at first. Match levels with the makeup gain before judging.
  • Over-compressing to fix arrangement problems. If a part only works with heavy gain reduction, the fix might be in the performance or the edit.

A Quick Workflow

  • Set the ratio and threshold so you see 3 to 6 dB of gain reduction on the loudest parts.
  • Start at the slowest release and turn it faster until the sound starts to breathe with the groove.
  • Back off slightly when you hear pumping or distortion you did not intend.
  • Check the meter: it should return close to zero between phrases or hits.
  • Bypass and level-match to confirm the change is an improvement.

Using Pumping on Purpose

Not every audible movement is a problem. Dance, hip-hop and rock productions often use deliberate pumping, where the whole mix ducks on each kick and swells back up. To get it, set a fast attack, a release timed to a quarter or eighth note, and enough gain reduction for the movement to be clear. Sidechain the compressor from the kick if you want the effect to stay tied to the beat even when other parts change.

Release and Attack Work Together

Because the two controls interact, it helps to adjust them as a pair. Our guide to the compressor attack setting explains how the front of the envelope works, and pairing that with the advice above covers the full shape of what a compressor does to a note.

Final Thoughts

Compression release is less about a magic number and more about matching the recovery of the compressor to the rhythm and decay of the source. Use the tempo maths for a starting point, watch the gain reduction meter, and let your ears make the final call. Once the release breathes with the music, the compressor stops sounding like an effect and starts sounding like part of the performance.

Categories
Archive

Music Producer Cheat Sheets

Music Producer Cheat Sheets are quick-reference guides, often in PDF format, aimed at helping producers master audio engineering, composition and production concepts. These cheat sheets typically provide a condensed, easy-to-understand summary of production processes that users can consult for guidance while working on music production projects.

Also, Music production can be a complicated process that requires a high level of technical expertise and creative skills. Even experienced producers can find themselves stumped when working on large and complex projects. Also, this is where reference charts come in. They provide a quick and easy way for music producers to reference key concepts when they need them.

Related reading: EQ Cheat Sheet: What Each Frequency Range Does and Panning Cheatsheet. For background, see the Wikipedia article on Music production.

Moreover, we will explore what music producer quick guides are, what they can do for producers. In addition, some of the best cheat sheets available today.

Want the full set? Download our free 390+ Producer Cheat Sheets, a library collected over four years covering mixing, mastering, production, plugins, DAWs, vocals, techniques and workflow. In addition, sign up for a free account and download the whole collection.

Music Producer Cheat Sheets

Credit: www.productionmusiclive.com

Popular Music Producer Cheat Sheets

Furthermore, popular music producer quick guides are essential tools for producers who want to create high-quality music. As a result, these reference charts contain shortcuts, tips and tricks, and essential information that can help music producers to improve their music production skills and create better music.

As a music producer, getting the best sound can be challenging since there are a lot of factors to consider. While experience and creativity are essential, having some quick guides can significantly help in speeding up the production process without compromising quality. However, here are some of the most popular cheat sheets for music producers.

Mixing Cheat Sheet

Additionally, the mixing process can be overwhelming, and it’s easy to get lost in the sea of plugins and controls. Then, a mixing cheat sheet can help by outlining the essential steps and techniques to get the desired sound. Some of the topics covered in mixing cheat sheets usually include EQ, compression, and reverb. Some examples of mixing cheat sheets include:

  • A Step-by-Step Mixing Checklist
  • Basic Mixing Techniques
  • Mixing Tips and Tricks

Mastering Cheat Sheet

Also, mastering is the final stage of the production process. It’s essential to get it right since it determines how the final product sounds. In short, mastering cheat sheets provide a detailed guide on how to master your tracks effectively. Some of the topics that are included in mastering cheat sheets include compression, equalization, and loudness optimization. Some examples of mastering cheat sheets include:

  • Mastering Essentials
  • Mastering Checklist
  • How to Master Your Music

Eq Cheat Sheet

Equalization is a crucial technique in music production since it allows you to shape the sound by emphasizing or reducing specific frequencies. Similarly, an EQ cheat sheet provides a frequency chart that outlines the fundamental frequencies of different instruments and vocal ranges, making it easier to equalize them effectively. Moreover, some examples of EQ cheat sheets include:

InstrumentFundamental Frequency
Kick60-80 Hz
Snare200-250Hz & 800-1000Hz
Acoustic Guitar80-100Hz & 2-3kHz

Compression Cheat Sheet

In addition, Compression is an indispensable tool in music production that allows you to control the dynamic range of your audio. Also, a compression cheat sheet provides a guide on how to use compressors effectively, including recommended settings and techniques. Some examples of compression cheat sheets include:

  • Compression Settings for Different Instruments
  • Sidechain Compression Techniques
  • Parallel Compression Tips

Vocal Processing Cheat Sheet

Furthermore, Vocals are usually the focal point of most songs, and it’s essential to get them right. A vocal processing cheat sheet provides tips and techniques on how to record, edit, and process vocals effectively. Some examples of vocal processing cheat sheets include:

  • Recording Tips for Vocals
  • How to Edit Vocals
  • Advanced Vocal Processing Techniques

Additionally, using cheat sheets in music production can help you save time and achieve better results. By familiarizing yourself with these popular music producer cheat sheets, you can significantly improve your music production skills.

Music Producer Cheat Sheets

Credit: www.pinterest.ca

How To Create Your Own Music Producer Cheat Sheet?

Creating a music producer cheat sheet can be helpful for both beginners and experienced producers. Include basic and advanced tips, shortcuts, and technical details that can serve as a quick reference guide. Use clear and concise language, and consider organizing the information in categories or subtopics.

Creating your own music producer cheat sheet is a valuable asset that can help you improve your skills as a music producer. By identifying the areas of music production in which you struggle, you can create a cheat sheet tailored to your specific needs. In this blog post, we will discuss the three essential steps you need to take to create your own music producer cheat sheet. These steps include identifying your weaknesses, collating high-quality information, and organizing information in a manner that suits you.

Identify Your Weaknesses

Before creating your cheat sheet, it’s crucial to identify the areas in which you need improvement. This may include mixing, mastering, or even music theory. Take some time to assess your skills and pinpoint the areas where you lack confidence.

Collate High-quality Information

Once you’ve identified your weaknesses, it’s time to gather high-quality information to include in your cheat sheet. The internet is a vast resource for information on music production, but it’s important to ensure that the information you gather is accurate and reliable. Seek out trusted sources, such as industry blogs, forums, and tutorial videos.

Organize Information In A Manner That Suits You

Now that you’ve gathered high-quality information, it’s time to organize it in a manner that suits your learning style. Consider using bullet points, tables, or an ordered list to make the information more digestible. It’s also essential to keep your cheat sheet brief and concise. Use short sentences and avoid unnecessary information. In conclusion, creating your own music producer cheat sheet is an excellent way to improve your skills as a music producer. By identifying your weaknesses, collating high-quality information, and organizing it in a manner that suits your learning style, you can create a valuable asset that will help you in your music production journey.

How To Effectively Incorporate Music Producer Cheat Sheets In Your Workflow?

If you are a music producer, you understand the importance of staying organized and efficient during the production process. In such a creative field, there are often moments of inspiration that can quickly lead to distractions and derail your progress.

Fortunately, music producer cheat sheets can be a valuable tool to help you stay on track and streamline your workflow. Here are some ways you can effectively incorporate cheat sheets into your production process:

Read Them Before Starting A Session

One effective way to use music producer cheat sheets is to review them before starting a production session. This can help you refresh your knowledge on a particular technique or process, allowing you to jump into the session with a clear understanding of what needs to be done.

Some popular cheat sheets for music producers include ones for EQ and compression settings, audio file formats, and MIDI keyboard shortcuts. By reviewing these cheat sheets beforehand, you can save time and increase your productivity in the session.

Use Them As References In Your Daw

Another way to incorporate cheat sheets into your production workflow is to use them as references while working in your DAW (Digital Audio Workstation). Having quick access to parameters, formulas, and keyboard shortcuts can speed up your workflow without having to leave your DAW and search the internet.

You can also print out cheat sheets and keep them near your workstation for easy reference. This way, you can quickly glance at them while you are working on a particular track.

Quiz Yourself With Your Cheat Sheets

Finally, a fun way to incorporate cheat sheets into your workflow is to quiz yourself on their contents. This may sound daunting, but it can be an effective way to improve your memory and retention of music production techniques.

As you quiz yourself, consider making notes on particularly challenging concepts or processes. These notes can then be used to create your own custom cheat sheets tailored to your individual needs.

By incorporating music producer cheat sheets into your workflow, you can stay organized, efficient, and focused during your production sessions. Whether you read them beforehand, use them as references, or quiz yourself on their contents, cheat sheets can be an effective tool in the creative process. Try incorporating them into your workflow and see how they can benefit your music production.

Music Producer Cheat Sheets

Credit: www.productionmusiclive.com

Frequently Asked Questions For Music Producer Cheat Sheets

How Do I Prepare To Be A Music Producer?

To prepare to become a music producer, you can take courses in audio engineering and music theory, practice with music production software, network and collaborate with other music industry professionals, and work on developing your own unique sound. It’s also important to stay up-to-date with current music trends and incorporate them into your productions.

How Can I Be The Best Music Producer?

To be the best music producer, focus on developing your technical skills, keep up with industry trends, network with industry professionals, experiment with different sounds and genres, and constantly create and innovate. Dedication and hard work are key to improving your craft and getting ahead in the competitive industry.

How Much Money Does A Music Producer Make?

The amount of money a music producer makes varies greatly depending on their level of experience, successes, and industry rates. Top producers can make millions, while those just starting out may earn very little or work for free to gain exposure.

Ultimately, a producer’s income is based on their talent, work ethic, and networking abilities.

What Are The Stages Of Music Production?

The stages of music production include pre-production, recording, editing, mixing, and mastering. Pre-production involves planning and preparation. Recording is the actual capturing of the music. Editing involves refining the recorded music. Mixing is where the individual tracks are combined. Mastering is the final polish to the entire mix.

Conclusion

As a music producer, it can be difficult to keep track of all the technicalities that go into producing quality tunes. Fortunately, by utilizing a music producer cheat sheet, you can streamline the process and make sure you’re hitting all the necessary points to make your music shine.

From mixing tips to mastering techniques, these cheat sheets are a lifesaver for any producer looking to improve their sound. So go ahead and take advantage of this invaluable tool to create the best possible music you can.

Categories
Archive

Habits Of Successful Musicians

Successful musicians establish a daily practice routine and prioritize their goals. To achieve success in the music industry, consistency is key.

Creating a career in the world of music can be challenging, to say the least. Whether you aspire to be a professional musician, songwriter, producer, or music manager, the journey to achieving success is a long and winding road. Despite the difficulties, there are many habits that successful musicians practice to help them stay focused and achieve their goals.

These habits include establishing a daily practice routine, setting goals and priorities, seeking out feedback from others, and continually pushing themselves out of their comfort zones. We will delve deeper into these habits and explore how they can help aspiring musicians to attain success in their musical career.

Habits Of Successful Musicians

Credit: giamusic.com

Set Goals

Set goals and establish routines are essential habits of successful musicians. Successful musicians do not leave their achievements to chance; they plan and set goals for themselves, ensuring that they stay focused and dedicated to their craft. These habits help them achieve their aspirations and stay productive.

Successful musicians didn’t get to where they are by accident; they set goals and worked tirelessly to achieve them. Having clear-cut objectives makes it easier to measure progress and stay motivated. Here are some tips on how to set goals for your music career.

Create A Vision For Your Career

Before you set your goals, you need to have a vision for your career. What kind of musician do you want to be? What are your core values as a performer? What sets you apart from other artists? Once you have a clear understanding of who you are as an artist, you’ll be able to set goals that align with your vision.

Break Down Long-term Goals Into Actionable Steps

Long-term goals can be overwhelming, and you may not know where to start. That’s why it’s essential to break them down into smaller, actionable steps. For instance, if your goal is to record an album, you can break it down into steps like writing the songs, rehearsing with your band, finding a recording studio, and mastering the final product.

Track Your Progress

Setting goals is the easy part; the hard part is sticking to them. One way to stay on track is to monitor your progress regularly. Set up a system to measure your progress weekly or monthly, depending on the type of goal. For instance, if your goal is to learn a new instrument, you can track your progress by recording yourself playing and reviewing the videos regularly.

Stay Accountable

Having a support system can be helpful in holding yourself accountable. Share your goals with your bandmates, friends, or family, and ask them to check in on your progress regularly. You can also find an accountability partner who has similar goals, and you can support each other as you work towards your objectives.

Celebrate Achievements

When you achieve your goals, take time to celebrate your achievements. Celebrating your success serves as motivation to keep pushing towards future goals. You can celebrate by throwing a small party with friends, treating yourself to a special item, or simply acknowledging your achievement and taking pride in it. Setting goals is a crucial first step in the journey to becoming a successful musician. By creating a vision of your career, breaking down long-term goals, tracking your progress, staying accountable, and celebrating your achievements, you’ll be well on your way to achieving success as a musician.

Practice Consistently

One of the most important habits of successful musicians is practicing consistently. This means setting aside a specific time each day or week to focus on improving your musical skills. By doing so, you’ll be able to develop your abilities and produce better results over time. In this post, we’ll be discussing how to build a regular practice routine and focus on technique and skill-building.

Build A Regular Practice Routine

In order to practice consistently, it’s important to build a regular routine. This means finding a time of day or week that works best for you and sticking to it. Whether it’s early in the morning or late at night, find a time when you can focus on your music without any distractions. By doing so, you’ll be able to develop your skills more effectively and efficiently.

Focus On Technique And Skill-building

When practicing regularly, it’s important to focus your efforts on technique and skill-building. This means working on specific skills and exercises that will help you improve your musical abilities. By doing so, you’ll be able to perform more effectively and confidently. Make sure to set specific goals and track your progress to keep yourself motivated.

In conclusion, practicing consistently is one of the most important habits of successful musicians. By developing a regular practice routine and focusing on technique and skill-building, you’ll be able to improve your musical abilities and achieve your goals.

Seek Out Opportunities

Successful musicians cultivate the habit of seeking out opportunities to showcase their talents, whether it’s through gigs, collaborations, or networking with industry professionals. By constantly putting themselves out there, they increase their chances of getting noticed and elevating their careers to the next level.

Be Proactive About Finding Gigs And Opportunities To Perform

A successful musician knows the value of being proactive in seeking out opportunities to perform gigs. Waiting for opportunities to come knocking at your door may not be the best approach. Instead, you should be actively looking for gigs and seeking opportunities to showcase your skills to new audiences.

How to be proactive in finding gigs?

  • Make connections with local talent agencies, booking agents, and event planners. Be sure to keep in touch with them regularly, so you’re always top of mind when new opportunities arise.
  • Join local musician groups and forums. They are an excellent source of information, and you may come across gigs that you wouldn’t have found otherwise.
  • Attend music festivals and industry events to network with other musicians and to learn about upcoming gigs or opportunities.

Take Advantage Of Social Media And Online Platforms To Reach New Audiences

In today’s digital age, social media and online platforms provide a fantastic opportunity for musicians to showcase their talents to a broad audience. Many musicians have found success using social media platforms to promote their music, connect with fans, and even book gigs.

How to use social media to reach new audiences?

  • Create a professional profile on social media platforms such as Facebook, Instagram, and Twitter, with high-quality images/videos and an engaging bio.
  • Regularly share high-quality videos of your performances, behind-the-scenes content, and new music to engage your existing followers and to attract new ones.

Utilize online platforms to get gigs

  • Join online talent agencies such as GigSalad, GigMasters, and The Bash to create a professional profile and find gigs.
  • Use YouTube to showcase your abilities and connect with fans and talent scouts.
  • Collaborate with other musicians and create music videos that can be shared on YouTube and other online platforms.

The key to success is to continuously seek out new opportunities and utilize all available resources to reach new audiences. By being proactive and using social media and online platforms, musicians can take their careers to the next level.

Habits Of Successful Musicians

Credit: giamusic.com

Collaborate And Network

Successful musicians know the value of collaboration and networking. By working with others, they can exchange ideas, gain new perspectives and create unique sounds. Networking helps them connect with industry professionals and expand their opportunities for growth.

Work With Other Musicians And Artists To Expand Your Reach

Successful musicians understand the importance of collaborating with other musicians and artists. Collaborations not only expose your music to new audiences but also provide you with an opportunity to learn from other talented professionals in the industry. When you work with others, you can bring new perspectives to your music and create something truly unique and innovative. Moreover, collaborations can open doors to new opportunities and expand your reach as a musician.

Attend Industry Events And Connect With Other Professionals In The Music Industry

Networking is another crucial aspect of building a successful music career. Attending industry events like music festivals, conferences, and workshops can help you connect with other professionals in the music industry. Through networking, you can build relationships with people who can help you grow your career, including producers, managers, agents, or other musicians. Additionally, attending events provides you with an opportunity to showcase your talent, meet potential collaborators, and get exposure to new audiences.

Maximize Your Online Presence

In today’s digital age, it’s crucial to have a strong online presence to build a successful music career. This includes having an up-to-date website, social media accounts, and regularly releasing music on streaming platforms. A well-designed website can showcase your music and help fans discover your work. Social media platforms like Instagram, Twitter, and Facebook can provide a platform for you to connect with fans, other musicians, and industry professionals. By regularly releasing music on streaming services like Spotify, Apple Music, and Tidal, you can attract more listeners and grow your fan base.

Foster A Strong Work Ethic

Finally, successful musicians understand the importance of maintaining a strong work ethic. This means dedicating time and effort to your craft, regularly practicing, and being open to criticism and feedback. It’s also crucial to set realistic goals and stay focused on achieving them. Building a successful music career takes hard work, persistence, and patience. By staying motivated and disciplined, you can achieve your goals and make a name for yourself in the music industry.

Be Adaptable

One of the most significant habits of successful musicians is their ability to be adaptable. In a constantly evolving industry, it’s crucial to constantly develop and refine your craft to stay relevant and appeal to diverse audiences.

Be Open To New Genres And Styles Of Music

Opening yourself up to new genres and styles of music is essential for growth as an artist. By exposing yourself to new sounds, rhythms, and techniques, you can broaden your musical knowledge and incorporate new elements into your own work. For example, you can experiment with blending different genres or infusing traditional sounds with modern elements.

Embrace New Technologies And Tools To Enhance Your Music

Advancements in technology have revolutionized the way music is created and consumed. Successful musicians embrace new tools and technologies to enhance their music and stay ahead of the game. For example, you can use digital tools to produce, record, and distribute your music, collaborate with other artists, and engage with fans.

Remember, being adaptable means constantly evolving and exploring new avenues. By staying open-minded and embracing change, you’ll be better equipped to navigate the ever-changing landscape of the music industry and achieve success as a musician.

Habits Of Successful Musicians

Credit: giamusic.com

Stay Organized

Successful musicians understand the importance of staying organized in their daily routines. From scheduling practice sessions to managing their finances, organization allows musicians to maximize their productivity and focus on their craft. Adopting this habit can lead to greater success in the music industry.

Being a musician goes beyond creating great music. As a musician, you are your brand, and like any business owner, you need to manage your activities to be successful. Staying organized is an essential trait that every successful musician possesses. In this section, we will discuss the various ways to stay organized as a musician.

Keep Track Of Bookings, Finances, And Other Important Details With A Management System

To stay on top of your music career, you need to have a management system in place. This system should help you track all essential details, such as bookings, finances, contracts, and other important details. A good management system will help you stay organized, save time, and ensure that none of the details fall through cracks. One of the best management systems for musicians is the artist management software. This software provides an all-in-one solution that helps you manage your music career. With this software, you can track bookings, contracts, finances, and even communicate with your fans. Additionally, you can get reports that give you insights into your music business.

Use Scheduling Tools To Maintain Balance

Musicians need to find a balance between their career and personal life. With so many activities to manage, it’s easy to lose track of what’s important. Scheduling tools can help keep you on track and maintain balance. Tools like Google Calendar, Trello boards, and Asana help you schedule your activities and track your progress. With these tools, you can create a to-do list, set deadlines, and create reminders. Additionally, they help you prioritize your activities and ensure that you don’t miss out on anything important.

Conclusion

As a musician, staying organized is critical to your success. By keeping track of your bookings, finances, and other important details, you can focus on creating great music. Additionally, by using scheduling tools, you can maintain balance and manage your time effectively. Remember, successful musicians are not just great artists, but they are also great managers who know how to stay organized.

Take Care Of Your Health

Successful musicians understand the importance of maintaining good health habits. Regular exercise, healthy eating, and adequate rest are all crucial for performing at their best on stage. By taking care of their physical and mental health, musicians can continue creating music that speaks to audiences around the world.

As a musician, it’s easy to get caught up in the demands of your craft and neglect your health. However, taking care of your body and mind is vital to your success. Here are some habits of successful musicians to ensure you prioritize your health:

Maintain Physical And Mental Health Through Exercise And Stress-management Techniques

One of the best ways to stay healthy as a musician is by exercising regularly. This not only improves your physical health but also your mental well-being. Stress-management techniques such as meditation and yoga can also help keep your mind calm and your body relaxed. Take a walk between recording sessions or practice stretching exercises to reduce stiffness.

Prioritize Self-care To Prevent Burnout

Musicians are often juggling an array of commitments, from rehearsals to gigs to recording sessions. It’s essential to set boundaries and prioritize self-care to prevent burnout. This can include taking regular breaks, getting enough sleep, and spending time with loved ones. Seek out activities that bring joy and relaxation to your life. To sum up, taking care of yourself should always be a top priority. Prioritizing your physical and mental health will ultimately lead to greater success both professionally and personally. Incorporate these habits of successful musicians into your daily routine to maintain a healthy and fulfilling life.

Continuously Learn And Improve

Successful musicians continuously learn and improve their skills. They take up new challenges, attend workshops, and practice consistently to enhance their musical abilities, which sets them apart from the rest.

Successful musicians are always looking for ways to enhance their skills and grow their careers. They understand that the music industry is constantly evolving, and to stay relevant, they need to continuously learn and improve. This section will highlight two ways successful musicians achieve this.

Stay Up-to-date With Industry Trends And Advancements

To succeed in the music industry, musicians must be aware of the latest trends and technology. They need to be aware of new promotional tactics, how to use social media to their advantage, and the latest music production software. One way they keep up to date with industry advancements is by attending conferences and workshops, reading industry publications, and following industry experts on social media platforms. Successful musicians also collaborate and network with their industry peers to learn from their experiences and stay informed about new opportunities. With this approach, they can stay ahead of the game and take advantage of new trends and opportunities before their competition.

Focus On Constant Self-improvement And Growth

Successful musicians understand that they must always work on improving their skills and knowledge to stand out in their industry. They consistently reflect on their performances, identify areas that need improvement, and find ways to address those areas. Self-improvement requires setting realistic goals and creating action plans that enable musicians to achieve them. They might, for instance, schedule regular practice sessions, hire a vocal coach or producer to refine their skills, or enroll in online courses to learn new skills. In conclusion, staying up-to-date with industry trends and advancements, focusing on constant self-improvement, and developing resilience and a positive attitude are crucial for success in the music industry. With these habits, musicians can keep their fans entertained and enhance their careers.

Frequently Asked Questions For Habits Of Successful Musicians

What Is The Habits Of A Successful Musician Series?

The Habits of a successful musician series is a collection of informative videos that covers essential topics on the music industry, including music production, performance, marketing, and more. The series aims to help aspiring musicians develop effective habits that can lead to success in their careers.

What Defines A Successful Musician?

A successful musician is someone who has achieved their personal goals and has established a strong fan base. They have honed their craft, created quality music and made a name for themselves in the industry. They also possess good business skills and effectively manage their career, creating new opportunities and maintaining a positive public image.

How Do Musicians Get So Good?

Musicians get good by practicing consistently, listening to and studying different styles of music, and striving for perfection. They also learn from more experienced musicians and attend music schools or workshops. It takes dedication, discipline and hard work to become a skilled musician.

What Is The Lifestyle Of A Musician?

The lifestyle of a musician can vary greatly depending on their level of success and work style. They may travel frequently for gigs, work long and irregular hours, network with other musicians and industry professionals, and balance pursuing their passion with financial responsibilities.

They must also constantly practice and hone their craft.

Conclusion

In short, successful musicians have certain habits that contribute to their success. From consistent practice and dedication, to networking and marketing themselves effectively, they put in the hard work required to achieve their goals. However, it’s important to remember that success looks different for everyone, and what works for one person may not work for another.

Ultimately, finding your own path and staying true to your passion are key components of success in the music industry.

Categories
Archive

Cubase Record Button Not Working

To fix Cubase record button not working, try resetting preferences or checking audio device settings. Cubase is a popular digital audio workstation that offers a range of features and tools for music production and recording.

However, sometimes users may face issues with the record button not working, which can be frustrating. If you’re experiencing this problem, it can be caused by various factors such as corrupted preferences, outdated drivers, or incorrect audio device settings. We will discuss some tips and tricks that you can use to resolve the issue and get back to recording your music.

Whether you’re a beginner or an experienced user, these solutions can help you fix the problem and ensure that your recording workflow is smooth and efficient.

Possible Causes

If you are a musician or a music producer, and you use Cubase software for recording, you might encounter an issue where the record button in Cubase does not work, and you are unable to record your audio. This can be a frustrating problem, especially when you are in the middle of a recording session. There can be several causes of this issue, and in this article, we will discuss them in detail.

Incorrect Audio Driver Selection

One of the most common causes of the Cubase record button not working is the incorrect audio driver selection. When you install Cubase, it detects the existing audio drivers on your system and selects the most appropriate one. However, if you have recently installed new hardware or updated your operating system, the audio driver settings might have changed, causing the record button to stop working. To solve this problem, you need to go to the ‘Device Setup’ menu in Cubase and select the correct audio driver for your system.

Disabled Recording Track

Another possible cause of the Cubase record button not working is the disabled recording track. When you create a new project in Cubase, you need to create a new recording track to record your audio. Sometimes, you might accidentally disable the recording track, which can cause the record button to stop working. To fix this issue, you need to go to the ‘Track List’ menu in Cubase and enable the recording track.

Incorrect Audio Input Selection

The third possible cause of the Cubase record button not working is the incorrect audio input selection. When you record audio in Cubase, you need to select the correct audio input for your system. If you have multiple audio inputs, such as a microphone and a guitar, you need to select the correct input before recording. Sometimes, you might accidentally select the wrong input, which can cause the record button to stop working. To solve this issue, you need to go to the ‘Device Setup’ menu in Cubase and select the correct audio input for your system.

By understanding these possible causes, you can troubleshoot the Cubase record button not working issue and continue to record your music without any interruptions.

Cubase Record Button Not Working

Credit: m.youtube.com

Basic Checks

Cubase is a powerful digital audio workstation that is widely used by musicians, producers, and engineers. However, it’s not uncommon for users to experience issues with the software, such as the record button not working. If you’re one of them, don’t worry! Before you start worrying about complicated fixes, there are some basic checks you can perform to see what’s causing the problem. In this post, we’ll guide you through the process of checking inputs and outputs as well as recording settings, two common culprits behind the Cubase record button malfunction.

Checking Inputs And Outputs

The first thing you should verify when experiencing recording issues in Cubase is whether your inputs and outputs are correctly set up. This is especially important if you’re using external hardware, such as a microphone or an audio interface. Follow these steps to make sure everything is in order:

  1. Open your Cubase project and select “Devices” from the top menu.
  2. Click on “Device Setup” and select “VST Audio System”.
  3. Make sure the correct input/output buses and ASIO driver are selected. If you’re not sure what to choose, refer to your hardware manual or contact the manufacturer for assistance.
  4. Close the Device Setup window and go to “Studio” in the top menu.
  5. Choose “Audio Connections” and check that the inputs and outputs are correctly assigned. You should see the name of your device and the corresponding channels in the connections tabs.

If everything looks fine but you still can’t record, try testing with a simple audio file to confirm the issue is not with your hardware or cable connections.

Checking Recording Settings

If the inputs and outputs are properly configured but you still can’t record, it’s possible that your recording settings are not set up correctly. Follow these steps to check your recording settings:

  1. Go to “Project” in the top menu and select “Project Setup”.
  2. Click on the “Record” tab and check the settings for “Record File Type”, “Record Mode”, “Record on Selected Track only”, and “Record on any MIDI Channel”.
  3. Make sure the “Record on Selected Track only” option is unchecked, unless you want to record on a specific track.
  4. Verify that the “Record in Editor” option is checked if you’re recording MIDI data.
  5. If you’re recording audio, make sure the “Record Mode” is set to “Mix” or “Overdub” and not “Replace”.
  6. Lastly, check that the “Record File Type” is set to an appropriate format for your needs, such as WAV or MP3.

If all settings are correct, try restarting Cubase and attempting to record again. If the problem persists, you may need to troubleshoot further or seek help from the Cubase community or technical support.

Troubleshooting Tips

Are you experiencing problems with the Cubase Record Button Not Working? Don’t worry, we’ve got you covered. This troubleshooting guide provides tips that can help you fix the issue and get back to making music.

Updating And Reinstalling Audio Drivers

If the Cubase Record Button Not Working is due to audio drivers, updating or reinstalling them might help fix the problem. Here are the steps:

  1. Go to the Device Manager by pressing the Windows Key + X and selecting Device Manager.
  2. Expand the Sound, Video, and Game Controllers tab and locate your audio device.
  3. Right-click on the device and select Update Driver or Uninstall Device.
  4. If you update the driver and the problem persists, try uninstalling and reinstalling the driver.
  5. Restart your computer.

Checking Third-party Plugins

Third-party plugins can sometimes cause conflicts with Cubase and prevent the Record Button from working as expected. To check for conflicts:

  • Go to Devices > Plugin Information and select the VST Plug-Ins tab.
  • Disable all third-party plugins and restart Cubase.
  • If the Record Button starts working, enable your plugins one by one until you identify the problematic one.
  • Remove the problematic plugin or consider updating it to a newer version.

Resetting Preferences

If the Record Button Not Working issue persists, resetting preferences can sometimes help. Here’s how:

  1. Close Cubase and go to the following folder: C:\Users\[user name]\AppData\Roaming\Steinberg\Cubase[X]\_preferences.
  2. Backup and remove all the files in this folder.
  3. Restart Cubase, which will create fresh preferences.

These tips should help you fix the Cubase Record Button Not Working issue. If none of these tips works, it’s recommended to contact the Cubase support team for further assistance.

Working With Cubase

If you are a musician or music producer, then you must have heard of Cubase. Cubase is one of the most popular digital audio workstations (DAWs) available in the market. It offers an extensive range of features and tools to help users create, record, edit, and mix music. However, like any other software, Cubase can have its share of issues. One of the most common problems that users face while using Cubase is the record button not working.

Using Alternative Recording Methods

If you encounter an issue with the record button in Cubase, one of the best solutions is to try using alternative recording methods. You can try recording using the “punch in” and “punch out” features. This method allows you to start recording after a certain point and stop recording before a specific point. If that doesn’t work, you can try using a different audio interface or routing your audio inputs and outputs differently.

Working With Midi Recordings

If you are having trouble recording MIDI data in Cubase, there could be several reasons that the record button is not working. One of the most common solutions to this issue is to check your MIDI connections and settings. Ensure that your MIDI controller is connected and configured correctly. Additionally, you may also try resetting your MIDI preferences or updating your drivers to resolve the MIDI recording problem.

Cubase Support

If you are having trouble with Cubase’s record button not working, our Cubase support team can assist you. We provide expert guidance on resolving this issue so you can get back to producing your music with ease. Contact us today for immediate assistance.

Cubase is a popular Digital Audio Workstation (DAW) that allows musicians and sound engineers to create, record, and edit music. Though Cubase is known for its reliability, sometimes users face issues such as the Cubase Record button not working. In such cases, the Cubase Support team can be of great help in resolving the issue. Here are some ways to connect with the support team and get your Cubase issues resolved quickly.

Contacting Tech Support

If you encounter a problem while working with Cubase, contacting the tech support team is the fastest way to get a resolution. You can submit a support ticket through the Cubase website or directly send an email to support@steinberg.de. Make sure to provide detailed information about the issue, including the version of Cubase you are using, your operating system, and any error messages you have received. This will help the support team identify and resolve the issue quickly.

Using Cubase Forums And User Groups

Another way to get help with Cubase-related issues is to join online forums and user groups. These communities have experienced Cubase users who are willing to offer support and advice to those who need it. The Cubase forums hosted by Steinberg have sections dedicated to different aspects of the software, including recording, editing, and mixing. You can also find Cubase user groups on social media platforms such as Facebook and LinkedIn, where you can connect with other Cubase users and seek their advice.

Cubase Support: Conclusion

In conclusion, if you are facing issues with Cubase, don’t panic. The software has a dedicated support team to help you resolve any issues you might be facing. Additionally, you can always seek assistance from online communities such as forums and user groups. By following the above-mentioned steps, you can get your Cubase issues resolved quickly and get back to focusing on your music creation process.

Frequently Asked Questions For Cubase Record Button Not Working

Why Can’t I Record In Cubase?

Cubase may not record due to several reasons such as incorrect audio driver selection, a lack of disk space, or incorrect configuration of input/output devices. Check your settings and ensure that you have selected the correct audio driver and there is enough disk space.

How Do I Enable Recording In Cubase?

To enable recording in Cubase, you need to click on the “+” icon in the audio track list, select “Audio” or “Instrument” track, arm the track by clicking on the “R” button, and start recording by hitting the record button.

You can also set up your inputs and outputs in the project setup window before recording.

Where Is The Record Button On Cubase?

To access the record button in Cubase, locate the transport panel at the top of the interface. The record button is denoted by a small red circle. Click on it to begin recording audio or MIDI.

How Do I Record Audio In Cubase?

To record audio in Cubase, first, create an audio track by going to Project > Add Track > Audio. Then, select your audio interface from the Devices menu. Choose the input source for the track, arm the track for recording, and press the record button.

Adjust the input gain levels to ensure optimal recording quality.

Conclusion

To sum up, the Cubase record button not working can be frustrating for music producers and engineers. However, there are several solutions to this issue, including checking device connections, updating software, and resetting the program preferences. By following these steps, it is possible to fix the issue and continue creating high-quality music tracks using Cubase.

Remember, taking time to troubleshoot problems can save valuable time and money in the long run.

Categories
Archive

How Do Musician Earplugs Work

Musician earplugs work by reducing the overall level of sound without sacrificing sound quality. They achieve this by using filters that attenuate specific frequencies, allowing the user to hear all frequencies at a lower volume.

For musicians, hearing damage is a real concern due to exposure to loud sound levels during rehearsals and performances. Traditional earplugs often distort sound, but musician earplugs allow for a more balanced sound experience while offering protection. These earplugs come in different filter strengths that allow for customization depending on the musician’s individual needs.

In addition, they are typically more comfortable and durable, making them a worthwhile investment for musicians looking to protect their hearing without sacrificing sound quality. The use of musician earplugs has become increasingly popular and is a wise choice for anyone seeking long-term hearing protection.

How Do Musician Earplugs Work

Credit: www.quora.com

How Musician Earplugs Work

Musician earplugs are crafted to protect the ears of professional musicians while performing to extremely high decibels. The level of noise during a musical performance can reach up to 120 decibels, which poses a significant threat to the ears of the artists and the audience. To safeguard hearing while showcasing their talent, most musicians wear earplugs. These plugs work in a unique manner to provide quality sound while reducing the risk of hearing damage.

Design And Construction

These earplugs come with a specialized design and construction process that allows for convenient and comfortable use. Most earplugs have interchangeable, detachable, and washable ear tips that can fit any ear size. The tips sit comfortably in the ear canal and utilize soft, pliable materials to prevent irritation and accommodate better placement. The plugs are also hypoallergenic and manufactured with medically approved and safe materials for sensitive skin. Additionally, the earplugs feature a unique design that creates a seal that helps to reduce the loudness of sound that reaches the inner ear and protects hearing.

Noise Reduction Rating (nrr)

The noise reduction rating (NRR) is an essential measure of the effectiveness of musician earplugs in lowering decibel exposure levels. The NRR represents the level of sound reduction that the plugs provide. Commonly, musician earplugs have a range of NRR from 9 to 25 decibels, which is a perfect range for reducing the noise in the environment and preventing hearing damage. The range also preserves the delicate nuances of sound, making music sound natural and preserving the ear’s sensitivity and accuracy despite lower volumes.

Frequency Response

Musician earplugs are made specifically to lower the loudness of high-frequency sounds while leaving low-frequency sounds intact. They provide a flat attenuation response, which reduces the volume of sound across different frequency bands and results in the natural sound of music while protecting hearing. Even better, they reduce the level of potentially harmful sound to non-damaging levels, which allows musicians to perform with ease while minimizing the risks of lasting hearing damage.

Sound Quality

One of the primary goals of musician earplugs is to maintain the quality of sound while reducing the decibel levels. Whether on-stage or in the audience, wearing musician earplugs reduces the risk of hearing damage while providing an accurate and trustworthy sound experience without distortion. Therefore, the plugs facilitate excellent sound quality – clear, undistorted, and true to the source; without causing discomfort or hearing fatigue even after prolonged use.

How Do Musician Earplugs Work

Credit: www.earmarkhc.com

Different Types Of Musician Earplugs

Musician earplugs come in different types such as filtered, non-linear, and custom-fitted. They work by reducing sound levels without distortion, allowing musicians to hear clearly and protect their hearing.

Different types of musician earplugs are available in the market today, each with their unique features and functionalities. As a musician or music enthusiast, protecting your hearing while enjoying the sweet melodies of your favorite tunes is important. In this article, we’ll take a closer look at the different types of musician earplugs you can choose from.

Custom Earplugs

Custom earplugs offer a personalized fit for your ears, hence the name “custom”. They are designed to fit your ear canals for maximum protection and comfort. The process of making custom earplugs involves taking an impression of your ears and using it to create a mold for your custom earplugs. The benefits of custom earplugs include superior noise reduction, comfortable and secure fit, and durability. Custom earplugs are ideal for musicians who frequently perform on stage or music lovers who frequently attend concerts.

Non-custom Earplugs

Non-custom earplugs are available in a range of configurations and sizes, and you can buy them from various online and physical stores. They are constructed to insert into your ear canal, and they come in different materials, such as foam or silicone. Non-custom earplugs come with different noise reduction ratings, so it’s important to choose one that best suits your needs. Non-custom earplugs are affordable and easy to carry around, so they’re ideal for music lovers who are always on the move.

In-ear Monitors

In-ear monitors are ideal for musicians who perform regularly on stage, especially in loud environments. In-ear monitors offer a custom fit and provide a range of options for sound quality. They first model your ear canals to create a mold that will fit your ears, and you can choose from a single driver or multiple driver monitors to deliver different frequencies. In-ear monitors reduce sound levels without affecting the sound quality, making them ideal for musicians who want to customize their sound.

Electronic Earplugs

Electronic earplugs are designed to protect your ears from loud sounds while still allowing you to hear conversations and music. They have a microphone and speakers, which allow you to adjust the sound levels, so you don’t miss any details. They are particularly beneficial for musicians as they help them maintain sound quality while still protecting their hearing. Electronic earplugs are also ideal for music enthusiasts who want to maintain the sound quality of their music while protecting their hearing. In conclusion, the type of musician earplug you choose will depend on your lifestyle, needs, and budget. Whether you choose custom earplugs, non-custom earplugs, in-ear monitors, or electronic earplugs, it’s important to understand the features and functionality of each option to make the best decision. With the right musician earplugs, you can protect your ear health and enjoy your favorite music for years to come!

Benefits Of Using Musician Earplugs

Musician earplugs work by reducing the overall volume of sound entering the ear while still maintaining the quality of the sound. This helps musicians and concert-goers to protect their hearing and avoid potential hearing loss and tinnitus. Additionally, musician earplugs can also improve the clarity of sound and enhance the overall listening experience.

Musician earplugs work by reducing the volume of sound that enters the ear canal while maintaining the sound quality. They are designed to filter out harmful noise levels without distorting the sound of music. Generally, they come with varied levels of noise attenuation so that musicians can choose the level of noise protection that they need. Musician earplugs work based on a filter mechanism that allows soundwaves to enter the ear while blocking harmful noise levels.

Protection Against Hearing Loss

Musician earplugs protect users against hearing loss by reducing the amount of noise that enters the ear. This is important because extended exposure to high sound levels can damage the hair cells in the ear, causing irreversible damage to hearing abilities. Musician earplugs offer varying degrees of protection against noise-induced hearing loss, and they are an essential accessory for any musician or music enthusiast.

Improved Sound Quality

One of the benefits of using musician earplugs is that they maintain the sound quality while reducing noise levels. The earplugs act as a filter, allowing only a safe level of sound to enter the ear canal. This ensures that the music is not distorted and that users can enjoy the full experience of the music without harming their hearing.

Reduced Risk Of Tinnitus

Musician earplugs reduce the risk of tinnitus by filtering out harmful noise levels. Tinnitus is a condition characterized by a ringing or buzzing noise in the ear, which can be caused by prolonged exposure to loud sounds. Musicians and music enthusiasts are particularly vulnerable to this condition, as they are often exposed to high sound levels. By reducing the risk of tinnitus, musician earplugs help users maintain their hearing health and enjoy music for years to come.

Increased Comfort And Wearability

Musician earplugs are designed to be comfortable, lightweight, and easy to wear. They come in a variety of sizes, shapes, and materials to fit different ear types. The earplugs are also adjustable, allowing users to find the perfect fit for their ears. This ensures that users can wear the earplugs comfortably for extended periods without experiencing discomfort or pain. In conclusion, musician earplugs are an essential accessory for anyone who loves music and cares about their hearing health. They protect users against hearing loss and tinnitus, improve sound quality, and are comfortable and easy to wear.

How To Choose The Right Musician Earplugs

If you’re a musician, you know how important it is to protect your hearing. But not all earplugs are created equal. In fact, there are musician-specific earplugs that are designed to protect your ears without distorting the sound quality. Here’s how to choose the right musician earplugs:

Consider Your Needs

Before you invest in musician earplugs, you need to consider your needs. What type of music do you play? Where do you perform? How often do you perform? These are all important questions to ask yourself before selecting the right earplugs. For example, if you’re a drummer, you may need heavier-duty earplugs than if you’re a singer.

Consult With An Audiologist

It’s a good idea to consult with an audiologist before selecting musician earplugs. An audiologist can perform a hearing test to assess your current hearing levels and make recommendations based on your individual needs. They may also be able to provide custom fitted musician earplugs that offer superior protection and comfort.

Try Different Types Of Earplugs

Not all musician earplugs are the same, so it’s important to try different types to find what works best for you. Some earplugs are made with different materials, while others have different shapes and sizes. Experiment with different options until you find the earplugs that offer the best protection and sound quality.

Read Reviews And Ask For Recommendations

Lastly, it’s a good idea to read reviews and ask for recommendations before purchasing musician earplugs. Look for reviews from other musicians who have similar needs and styles of music. You can also ask for recommendations from other performers or your audiologist. By doing your research and taking the time to find the right earplugs, you can protect your hearing while still enjoying the music you love.

How Do Musician Earplugs Work

Credit: www.hearing-center.net

Frequently Asked Questions Of How Do Musician Earplugs Work

How Do Musicians Ear Plugs Work?

Musicians ear plugs work by reducing the volume of sound that enters the ear without altering its quality. They contain filters that cut down on harmful noise while allowing for a clear listening experience. This in turn helps protect the ear from damage caused by exposure to loud music and noise.

What Do Musicians Hear In Their Earpieces?

Musicians hear themselves, other band members, and potentially a click track (metronome) and other sound effects in their earpieces.

Are Musician Earplugs Better Than Regular Earplugs?

Yes, musician earplugs are better than regular earplugs because they provide better sound quality, reduce the risk of hearing damage, and are specifically designed for musicians who need to protect their ears while still being able to hear music accurately.

Can You Still Hear The Music At Concerts With Earplugs?

Yes, you can still hear the music at concerts with earplugs. Earplugs are designed to reduce the volume of sound without distorting it. Therefore, you can still hear the music, but at a safer volume level that won’t cause damage to your ears.

Conclusion

To sum up, musician earplugs are designed specifically to provide maximum protection to musicians’ ears without compromising the quality of sound they produce. They work by reducing the volume of external noise entering the ear canal, thus reducing the risk of hearing damage.

By choosing the right type of earplugs, musicians can protect their hearing while still enjoying their music performance. It is essential that they invest in good quality earplugs and have their hearing regularly checked to prevent long-term hearing loss.