Categories
Archive

Choosing A Daw

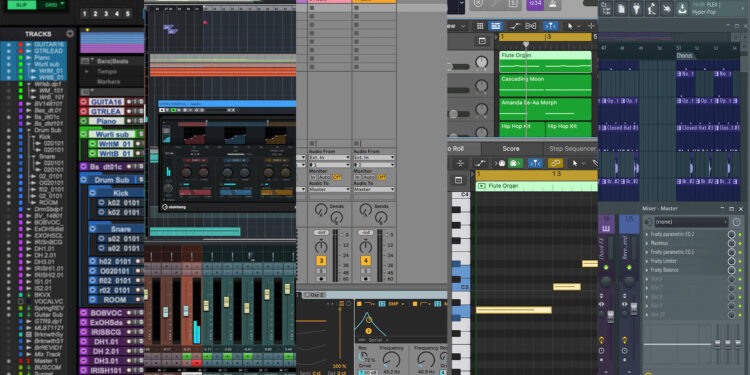
When choosing a DAW, consider your needs and budget. A DAW, or digital audio workstation, is a software application used for recording, editing, and producing music or sound.

The right DAW for you will depend on factors such as the complexity of your projects, your production style, and your budget. Some popular options include Ableton Live, Logic Pro X, Pro Tools, and FL Studio. Each has its strengths and weaknesses, so it’s important to do your research and find the one that best suits your needs.

We’ll provide an overview of some of the top DAWs on the market to help you make an informed decision.
Choosing A Daw

Credit: blog.faderpro.com

Factors To Consider When Choosing A Daw

When choosing a DAW, factors to be considered include compatibility with your computer, audio interface, preferred sounds, user interface, workflow, and pricing. It is important to find one that meets your specific needs and allows you to create the best possible music or audio projects.

When it comes to music production, a Digital Audio Workstation (DAW) is an essential tool for creating and editing audio files. There are several factors to consider when choosing a DAW that will meet all your music production needs. In this article, we will explore the main factors to consider when choosing a DAW to help you make the right decision. ## Compatibility with Your Computer and Operating System The first factor to consider when choosing a DAW is compatibility. Ensure that the DAW you choose is compatible with your computer and operating system. This will save you the hassle of having to overhaul your system or invest extra money in purchasing new hardware. Check the minimum requirements for the DAW and make sure your computer meets them. ## Price and Value for Money When choosing a DAW, price is a major consideration. Decide on your budget and look for a DAW that fits within it. It is essential to note that the most expensive DAWs do not necessarily offer the most features or the best quality. Evaluate the features and look for value for your money. Consider free trials before making a purchase. ## User Interface and Ease of Use The user interface is critical, and you should choose a DAW with an intuitive and user-friendly interface. The DAW should be easy to navigate, and the workflow should be smooth. A complex interface may hinder your creative process, and you will spend less time composing and more time navigating the DAW. Choose a DAW that best suits your needs. ## Features and Flexibility The number of features offered by the DAW is another major consideration. Before making a purchase, evaluate the features, and ensure they meet your music production needs. Look out for features such as MIDI editing, effects, plug-ins, and virtual instruments. Choose a flexible DAW that allows for customization to meet your music production needs. ## Audio Quality and Sample Rate Support Choosing a DAW that offers high-quality audio is critical. The DAW should be able to handle high sample rates to ensure precise sound reproduction. Always choose a DAW that supports high sample rates for quality sound reproduction. ## VST and Plugin Support Plugins and Virtual Studio Technology (VST) offer a wide range of sound possibilities in a DAW. Some DAWs only support specific plugins or VSTs. When choosing a DAW, check if it supports VSTs and plugins to avoid certain limitations. ## Workflow and Integration with Other Tools The workflow is essential in music production, and the DAW you choose should seamlessly integrate with other tools in your workflow. A DAW should not be viewed as a standalone tool but an integral part of the music production ecosystem. Choose a DAW that can integrate with other tools for an efficient workflow. ## Support and Community The quality of support offered by the DAW vendor and the community supporting the software is vital. Look for a DAW that has vast resources such as documentation, online tutorials, and user forums. This will help you solve any potential issues that might arise. In conclusion, selecting the right DAW requires careful consideration of several factors, including compatibility, price, user interface, features, audio quality, VST/plugin support, workflow, and community support. By following the guidelines outlined in this article, you can make an informed decision and choose a DAW that best suits your music production needs.

Popular Daws On The Market

Choosing the right digital audio workstation (DAW) is crucial in producing high-quality music. DAWs are software applications that allow you to record, edit, and mix audio. They come equipped with various tools and features that help you create music, from writing melodies and beats to arranging and exporting the final product.

Ableton Live is a popular choice for electronic music producers and live performers. It has a unique session view that allows you to loop and manipulate audio and MIDI clips in real-time. Its powerful features and user-friendly interface make it an excellent choice for beginners and professionals alike.

Logic Pro X is a DAW designed exclusively for Mac users. It is a comprehensive music production software that offers a range of tools for recording, editing, and mixing audio. It has a vast library of virtual instruments and effects, making it a go-to software for producers and composers in the music industry.

FL Studio, formerly known as Fruity Loops, is a popular DAW among beatmakers, EDM producers, and hip-hop producers. It has a simple and intuitive interface that is easy to use, even for beginners. FL Studio comes packed with virtual instruments, effects, and loops that you can use to create your own unique sounds and samples.

Pro Tools is an industry-standard DAW used by many recording studios and professional audio engineers. It offers unparalleled mixing and editing capabilities, including precise automation and advanced MIDI sequencing. Pro Tools is not recommended for beginners due to its steep learning curve.

Cubase is a DAW developed by Steinberg, a German company, and is a popular choice among music producers, composers, and audio engineers. It has a range of tools for recording, editing, and mixing audio, including virtual instruments and effects. Cubase is known for its exceptional MIDI sequencing capabilities, making it an excellent choice for those working with MIDI-based music.

Studio One is a DAW developed by PreSonus, an American company, and is known for its drag-and-drop functionality and intuitive interface. It offers a range of tools for recording, editing, and mixing audio, including virtual instruments and effects. Studio One is an excellent choice for those transitioning from other DAWs due to its user-friendly nature.

GarageBand is a free DAW developed by Apple and is exclusively available on Mac and iOS devices. It offers essential tools for recording, editing, and mixing audio, making it an excellent choice for beginners and hobbyists. GarageBand is an excellent starting point for those looking to learn music production, and it seamlessly integrates with other Apple software and hardware.

Pros And Cons Of Each Daw

Selecting a digital audio workstation (DAW) is a subjective choice with pros and cons to each one. Popular DAW options include Ableton Live, FL Studio, Logic Pro, and Pro Tools. It is important to research each one and determine which suits your specific needs and workflow best.

Pros and Cons of Each DAW Digital Audio Workstation (DAW) is the backbone of audio production because it allows musicians and audio engineers to create music, record, mix, and master audio in a single software environment. With so many DAW options available, it’s important to know the pros and cons of each software to make an informed decision before diving in. Here are the essential pros and cons of some of the most popular DAWs on the market.

Ableton Live

Ableton Live is the go-to DAW software for electronic music producers and live performers. Its session view and clip launching features make it effortless to experiment with sounds, samples, and loops. The intuitive interface and built-in instruments and effects make it easy to start making music and experimenting with sound design. However, for detailed mixing and mastering, Live may not be the best choice.

Logic Pro X

Logic Pro X is a feature-packed, intuitive DAW for Mac users. With its expansive sound library, Alchemy synth, and flexible audio and MIDI editing capabilities; Logic Pro X is perfect for musicians who require the most intricate editing tools. Additionally, the software works seamlessly with Apple’s ecosystem. The downside is that Logic Pro X is exclusive to the Mac operating system, which limits its availability to non-Mac users.

Fl Studio

FL Studio is a powerful DAW software for Windows users, with features that can compete with other popular DAWs. Its piano roll editor is one of its standout offerings, which simplifies the process of creating complex melodies and basslines. FL Studio also has an excellent stock instrument library and an active online community that contributes to even more free downloadable soundsets. However, the complexity of the software can be daunting for beginners.

Pro Tools

Pro Tools is the industry standard for audio engineers. It is the most comprehensive and professional DAW for recording, mixing, and mastering audio. The software is robust and suitable for large-scale recording projects. Its editing capabilities for audio and MIDI are second to none. However, Pro Tools is not beginner-friendly, and it’s costly compared to other DAW options.

Cubase

Cubase is a multi-purpose audio production software with a focus on stability and reliability. Its audio engine is robust and delivers precise audio quality. Cubase’s MIDI editing features are highly commendable, making it a favorite amongst composers. One of the downsides to Cubase is the software’s cluttered interface and slow loading times.

Studio One

Studio One is a newcomer to the DAW market that is quickly gaining popularity. Its streamlined interface, drag-and-drop functionality, and powerful features make it easy to use for beginners. Studio One’s MIDI editing and recording capabilities are especially remarkable. On the downside, some of the more advanced features of Studio One are hidden behind additional purchases.

Garageband

GarageBand is an Apple-exclusive DAW that is available for free. It is best suited for those who are new to music production as it provides users with an intuitive interface and the essential recording and editing tools. The software’s limited feature set may be limiting for more experienced users. In conclusion, each DAW has its strengths and weaknesses. When choosing a DAW, it’s important to consider one’s needs and goals thoroughly. The right DAW can make all the difference in creating professional-sounding music.

Making The Final Decision

Making the final decision on choosing a dog can be daunting. Consider factors such as size, temperament, and lifestyle needs. Researching breeds and spending time with potential dogs can help in making an informed decision.

After doing your research and shortlisting the options, it’s time to make the final decision on which DAW to choose for your work. This decision can be tricky, but you can confidently make the right choice using various strategies, including trying before you buy, reading reviews and comparisons, and getting recommendations and feedback from other users.

Trial Versions And Demos

Almost all DAW software offers trial versions and demos that allow you to test their features before making a purchase. These versions usually provide limited features, but they still give you a good idea of how the DAW performs and whether it suits your needs. You can download and test multiple trial versions to make a direct comparison and choose the best option for your specific needs.

Try Before You Buy

In addition to trial versions, some DAWs offer free or low-cost licenses for students or non-commercial users. Taking advantage of these offers is a great way to try out the DAW before spending money on it. Additionally, attending music production events or workshops allows you to experience different DAWs in action, making it easier to decide which one to choose.

Reading Reviews And Comparisons

Reading reviews and comparisons written by industry experts and users is a great way to gain insights into the strengths and weaknesses of different DAWs. These reviews provide detailed information about the features, system requirements, pros, and cons of the software, enabling you to make an informed decision based on your needs and preferences.

Asking For Recommendations And Getting Feedback

Asking for recommendations and getting feedback from other users is great to get firsthand experience and gain insights into the DAWs. You can join online forums and communities, social media groups, or reach out to other music producers in your network for feedback. They’ll be able to provide insights into the user-friendliness, plugins, and overall performance of the software, helping you to make a more informed decision. In conclusion, there are various strategies you can use to make an informed decision when choosing a DAW. Trying before you buy, reading reviews and comparisons, and getting recommendations and feedback are effective ways to gather information and make the right choice for your specific needs.

Choosing A Daw

Credit: m.youtube.com

Frequently Asked Questions On Choosing A Daw

How Do I Choose The Best Daw?

To choose the best DAW, consider your budget, music production needs, and personal preferences for user interface and workflow. Some popular options include Ableton Live, Logic Pro X, Pro Tools, and FL Studio. Take advantage of free trials and demos before making a final decision.

What Daw Should A Beginner Use?

For beginners, it’s recommended to use a user-friendly DAW like GarageBand, FL Studio, or Ableton Live Lite. These offer beginner features and tutorials but can also grow with your skills. Choose one with a simple workflow and intuitive interface. Avoid overwhelming software like Cubase or Pro Tools until you have a better understanding of music production.

What Is The Best Daw To Start Producing With?

Ableton Live is the best DAW to start producing with due to its intuitive interface, versatile workflow, and easy-to-use composition tools. It’s ideal for beginners but also has advanced features for experienced producers. Plus, it’s compatible with both Windows and Mac operating systems.

What Is The Most Commonly Used Daw?

The most commonly used DAW (Digital Audio Workstation) is Ableton Live. It’s a popular choice among music producers and artists due to its intuitive interface, versatile features, and live performance capabilities. Other commonly used DAWs are Logic Pro, Pro Tools, and FL Studio.

Conclusion

Choosing a DAW requires a solid understanding of your needs, preferences, and budget. It is important to research and try out different options before committing to one. Remember to consider factors such as compatibility, user interface, and available plugins. With the right DAW, you can unlock your creativity and produce high-quality music.

Categories
Archive

Phase Plant Vs Serum

Phase Plant and Serum are two powerful and versatile software synthesizers for music production. Music producers need a modern tool for crafting soundscapes and music that stand out in today’s saturated industry.

Phase Plant and Serum are two of the most competitive synths they can use to create one-of-a-kind sounds. Both synths have their own unique set of features and functions that make them stand out from other software synthesizers on the market.

We will take a closer look at what each of these synths has to offer and compare their strengths and weaknesses. So, whether you’re just starting to produce music or an experienced sound designer looking for new software synth, this article will help you decide which synth suits your needs best.

Introducing Phase Plant And Serum

Phase Plant and Serum are two powerful software synthesizers that have gained popularity among music producers. While Serum has been around for a few years, Phase Plant is a newcomer that has quickly risen to fame for its versatility and innovative features.

Both offer unique sound design capabilities and are favored by producers for different reasons.

Introducing Phase Plant and Serum When it comes to music production, having the right tools is essential for creating great music. Two of the most powerful tools available today are Phase Plant and Serum. In this blog post, we will explore what Phase Plant and Serum are, along with a brief overview of their features. What are Phase Plant and Serum? Phase Plant is a synthesizer plugin created by Kilohearts. It has become a popular tool for music producers who want to create unique sounds for their tracks. Serum, on the other hand, is a virtual synthesizer plugin developed by Xfer Records. It is known for its high-quality sound and versatility. Both plugins are designed to help music producers create sounds and textures that are not possible with traditional instruments. A brief overview of their features Phase Plant and Serum share some similarities, but they also have unique features that set them apart. Here’s a breakdown of their notable features: Phase Plant: – Offers limitless sound design possibilities with its modular system. – Comes with a wide range of built-in effects, including distortion, reverb, and delay. – Has a user-friendly interface with drag and drop functions. – Provides high-quality sound and features 2 oscillators, 2 filters, and 4 LFOs. Serum: – Has an intuitive interface and is easy to learn and use. – Offers powerful wavetable synthesis and includes over 450 presets. – Provides high-quality sound and features 2 oscillators, a sub-oscillator, and a noise generator. – Comes with built-in effects, including distortion, reverb, and delay. In conclusion, both Phase Plant and Serum are powerful tools for music producers to create unique sounds and textures for their tracks. While they share some similarities, each plugin has its own unique set of features that sets them apart. Regardless of which one you choose, you can be sure that you’ll be getting a powerful tool to help you take your music production to the next level.

Phase Plant Vs Serum

Credit: m.youtube.com

User Interface

Phase Plant and Serum are two popular software synthesizers that have different user interfaces. Phase Plant has a modular interface that allows for advanced sound design, while Serum has a more traditional layout that is easy to use. Depending on your needs, either interface can be a great choice for creating electronic music.

User interface plays a vital role in music production softwares. It determines how easy it is to use and how fast workflows can be. In this section, we’ll be comparing the user interface of Phase Plant and Serum, highlighting features unique to each of them.

Comparing The Interfaces Of Phase Plant And Serum

When it comes to comparing the interfaces of Phase Plant and Serum, it’s important to note that both softwares are well-designed. Both have clean and modern interfaces that are visually appealing, but there are subtle differences that set them apart. Serum, for instance, has a simpler interface with fewer menus and buttons, creating a minimalist view that’s easy to navigate. On the other hand, Phase Plant has more advanced and customizable options than Serum, hence more menus and buttons on the interface. This makes Phase Plant’s UI more complex but at the same time allows more control over sound design.

Features Unique To Each Interface

Let’s start by looking at Phase Plant’s unique UI features. One of the most noticeable features on Phase Plant’s interface is the Zone display. This display allows you to see every single oscillator that is being used in a patch. Users can add or remove oscillators to their taste from this display. This feature makes it much easier to control every single component of a sound than in Serum where only one oscillator is visible at a time. Another unique feature of Phase Plant’s UI is the Modulation Matrix, which allows for greater control over modulation assignments. The Modulation Matrix allows you to see all the available modulation sources and destinations. You can quickly drag and drop to make a connection between the source and destination. Serum also has some unique UI features that set it apart from Phase Plant. One of the most notable of these is the warp modes. It has a great graphical representation of all the available warp modes that you can apply to your waveform. This is not available in Phase Plant, and it makes Serum faster to use when it comes to adding interesting textures to the sound. Another unique feature of the Serum interface is the visual representation of envelope shapes. You can draw your envelopes to have any shape you want, and Serum shows you the envelope shape in real time. This visual representation makes sound design with envelopes fast and intuitive, even if you’re not familiar with envelope shapes. Both Phase Plant and Serum have great user interfaces, and both have features unique to their individual design. Whether you’re looking for simplicity or advanced customization options, both softwares offer excellent choices. Ultimately, your choice of interface comes down to your personal preference and the specific features you require for your music production.

Sound Design Capabilities

When it comes to producing electronic music, two plugin synthesizers that have gained widespread popularity are Phase Plant and Serum. Both of these plugins offer a vast range of features that allow producers to create unique and complex sounds for their tracks. In this article, we will explore the sound design capabilities of these plugins and compare them to one another, highlighting the key differences in terms of their synthesis methods and modulation options.

Wavetable Synthesis In Serum Vs Additive Synthesis In Phase Plant

Serum is known for its powerful wavetable synthesis capabilities that allow producers to blend wavetables to create complex sounds. Its wavetable editor gives producers access to change any waveform to create even more unique sounds. On the other hand, Phase Plant utilizes additive synthesis which allows the users to generate multiple harmonics of a waveform to create new sounds.

Additive Synthesis vs Wavetable Synthesis Comparison
Additive Synthesis (Phase Plant)Wavetable Synthesis (Serum)
Generates multiple harmonics to create new soundsBlend multiple wavetables to create complex sounds
Offers user control over harmonic contentProvides a visual interface to manipulate wavetables

Modulation Options In Phase Plant And Serum

Both Serum and Phase Plant provide comprehensive modulation options, allowing producers to modulate almost every parameter of a sound. Serum provides advanced modulation options, including multiple envelopes, LFOs, and macros. Similarly, Phase Plant boasts an extremely modular modulation system which users can use to create custom routing and macro knobs to control multiple parameters.

  • Serum provides advanced modulation options, including multiple envelopes, LFOs, and macros.
  • Phase Plant boasts an extremely modular modulation system which users can use to create custom routing and macro knobs to control multiple parameters.

In conclusion, both Serum and Phase Plant are incredibly powerful synthesizers that offer distinct features that set them apart in terms of sound design capabilities. Ultimately, it comes down to what method of synthesis a producer prefers. Whether it’s wavetable synthesis in Serum or additive synthesis in Phase Plant, both plugins provide the user with an abundance of tools to create unique and complex sounds.

Presets And Libraries

Presets and libraries are an essential part of any synthesizer as they help save time, eliminate guesswork, and boost creativity. In this section, we’ll compare Phase Plant and Serum synthesizers, analyzing their preset management features and the variety and quality of their preset libraries.

Accessing And Managing Presets In Phase Plant And Serum

When it comes to managing presets, both Phase Plant and Serum have user-friendly interfaces that make it easy to access and organize your patches. In Serum, users can organize presets based on categories such as Bass, Lead, Pad, and more.

On the other hand, Phase Plant has a unique system called ‘Snapshots’. Users can create and save snapshots of their presets at any point during the sound design process, and then switch between these snapshots to find the perfect fit for their project.

Comparing The Variety And Quality Of Preset Libraries

While both synthesizers come with a rich selection of presets, the variety and quality of their libraries differ. Serum is known for its extensive preset library with over 450 presets, including signature packs from popular electronic music producers and big-name artists.

Phase Plant, on the other hand, comes with fewer presets out-of-the-box, but its modular architecture allows users to create and save any sound they can imagine. Phase Plant also has a growing library of premium presets, including packs from some of the best sound designers in the industry.

Comparison Table: Preset Libraries
FeaturePhase PlantSerum
Number of presetsFewer presets out-of-the-box, but a growing library of premium presetsOver 450 presets, including signature packs from popular electronic music producers and big-name artists
VarietyModular architecture allows users to create and save any sound they can imagineExtensive variety of presets
QualityPremium presets created by some of the best sound designers in the industrySignature packs from popular electronic music producers and big-name artists

To sum up, Serum has a more extensive variety of presets than Phase Plant, including signature packs from popular electronic music producers and big-name artists. However, Phase Plant offers a growing library of premium presets created by some of the best sound designers in the industry, and its modular architecture allows users to create and save any sound they can imagine.

Compatibility And Integration

The compatibility and integration of Phase Plant and Serum is an important consideration for music producers. Both have unique features and compatibility with different plugins and DAWs, which can affect a producer’s workflow and creativity. Understanding the strengths of each can lead to better results in music production.

Vst, Au, And Aax Formats Supported By Phase Plant And Serum

When it comes to compatibility and integration, both Phase Plant and Serum offer support for popular plugin formats like VST, AU, and AAX. This means that users of popular DAWs like Ableton Live, Logic Pro X, and Pro Tools can easily integrate these synthesizers into their workflow.

Integration With Daws And Third-party Plugins

However, integration isn’t just about plugin formats. Phase Plant and Serum also offer seamless integration with popular DAWs and third-party plugins. For example, users can use Serum as a plugin within Ableton Live and easily use its wavetable synthesis capabilities to create unique sounds. Similarly, users can use Phase Plant with third-party effects plugins like FabFilter Pro-Q and Pro-C.

Html Syntax For Headings

To ensure proper HTML syntax, all H3 headings have been presented in HTML format. This makes it easier for website builders and developers to properly format and display the content on their websites.

Conclusion

To summarize, both Phase Plant and Serum are great options for users looking for a powerful synthesizer that integrates seamlessly with their workflow. With support for popular plugin formats and seamless integration with popular DAWs and third-party effects plugins, users can focus on creating unique sounds without worrying about compatibility issues.

Phase Plant Vs Serum

Credit: www.reddit.com

Cpu And Ram Usage

Phase Plant uses less CPU and RAM compared to Serum, making it a more efficient choice for music producers who desire complex sound designs without sacrificing performance.

Impact Of Phase Plant And Serum On System Resources

When it comes to music production, synthesizers play a crucial role in creating unique sounds. Two popular synthesizers, Phase Plant and Serum, are often compared to each other. While both synthesizers offer a wide range of features, it’s essential to consider their impact on system resources, specifically CPU and RAM usage.

Optimizing Performance In Both Synthesizers

Before we dive into the impact of Phase Plant and Serum on system resources, it’s crucial to note that both synthesizers allow you to optimize performance. Regardless of which synthesizer you choose, taking advantage of optimization techniques can prevent system lagging or crashing, enhancing your workflow and productivity.

Ensuring Maximum Performance In Phase Plant

Phase Plant’s modular design allows users to create complex sounds without overloading the CPU. Here are a few optimization techniques to ensure maximum performance in Phase Plant:

  • Use parallel processing instead of serial processing to reduce CPU usage
  • Freeze tracks that are not currently in use to reduce RAM usage
  • Utilize the “Low CPU” mode in the playback settings to reduce CPU usage

Optimizing Serum Performance

Serum’s intuitive interface offers a wealth of tools and features, but it comes at a cost. Serum can be a resource hog, especially when numerous instances are opened simultaneously. However, optimizing Serum can prevent your workstation from lagging or crashing. Here are a few optimization techniques to ensure maximum performance in Serum:

  • Use unison sparingly as it multiplies voices, utilizing more CPU and RAM
  • Freeze tracks that you are not using actively to reduce RAM usage
  • Use a higher buffer size to reduce CPU usage

In Conclusion

In conclusion, selecting a synthesizer for music production can be a daunting task. However, by considering the impact of CPU and RAM usage and opting for optimization techniques, you can prevent your system from lagging or crashing, ensuring seamless and uninterrupted music production.

Pricing And Licenses

Phase Plant and Serum offer different pricing and licensing options for their software, with Phase Plant offering a more affordable option for those starting out in music production. However, Serum’s additional features may make it worth the investment for more advanced users.

Comparison Of Pricing Models For Phase Plant And Serum

When it comes to pricing and licenses, both Phase Plant and Serum offer different models to suit different budgets. Phase Plant has a one-time payment option of $169, whereas Serum has a single payment option of $189 or a rent-to-own plan at $9.99 per month. Phase Plant’s pricing model includes free updates and an unlimited amount of instances. In comparison, Serum’s single payment only includes updates for the first year and a limited amount of instances depending on the license type.

License Types Available For Both Synthesizers

Phase Plant offers a single license option that grants access to all features and a user-friendly interface, as well as a 30-day money-back guarantee. It also includes over 750 presets and 25 preset packs, with more added regularly. Serum offers three license types: a standard license, which includes all features, a smaller preset library and three activations; a pro license, which includes more presets and a higher number of activations; and a rent-to-own option, which offers a lower monthly cost but requires a commitment of 20 months before ownership. In conclusion, both synthesizers offer different pricing and licensing options, making it important for potential buyers to weigh the costs and benefits of each model before making a purchase.

Phase Plant Vs Serum

Credit: soundcloud.com

Frequently Asked Questions Of Phase Plant Vs Serum

Why Is Serum So Expensive?

Serum is expensive due to the high concentrations of active ingredients and the extensive research, development, and testing required to create effective formulas. High-quality ingredients and production processes also contribute to the cost.

What Is Serum Sound?

Serum sound is a type of audio effect commonly used in music production. It involves the manipulation of individual sounds using a digital audio workstation software. The purpose of serum sound is to create unique and complex sounds that can be used in various music genres.

How Many Oscillators Does Phase Plant Have?

Phase Plant has an unlimited amount of oscillators, allowing complete customization and sound design flexibility.

What Is Phase Plant?

Phase Plant is a software synthesizer created by Swedish company, Kilohearts. It features a unique modular design that allows users to create custom sound synthesis setups.

Conclusion

Based on the comparison between Phase Plant and Serum, the decision ultimately depends on personal preference. While Serum offers a plethora of pre-made patches to choose from, Phase Plant provides more versatility in crafting unique sounds from scratch. Both synthesizers bring a lot to the table and can enhance any music production project.

It is up to the producer to determine which one best suits their needs and workflow. Ultimately, these synthesizers are proof that music production technology continues to evolve and provide endless possibilities for creative expression.

Categories
Archive

Delay Mixing Tips

The best delay mixing tips include using a tempo-synced delay, adjusting the wet/dry mix, avoiding excessive feedback, and EQing the delay signal. When it comes to mixing audio, using delay effects is a common technique used to add depth and space to a mix.

Delay, in its simplest form, is an echo effect that repeats the original sound source after a certain amount of time. While it can be an effective tool in creating a full and lively mix, it can also cause unwanted clutter and make the mix sound messy if not used properly.

We will explore some delay mixing tips that will help you create a polished and professional-sounding mix while avoiding common mistakes.

Delay Mixing Tips

Credit: www.waves.com

Tips To Improve Delay Mixing

Here are some practical tips to elevate your delay mixing game: 1) Experiment with different types of delays and their settings. 2) Consider the rhythm and tempo of the track when choosing the delay timing. 3) Use automation to add variation and movement to the delay effect.

When it comes to mixing, delay effects can add an extra dimension and depth to your music. However, it’s important to use them correctly to avoid a muddy, messy sound. To help you achieve the best results, let’s dive into some tips for improving your delay mixing skills.

Understand The Different Types Of Delays

Before you start mixing with delay, it’s essential to understand the different types of delays available. This will help you to choose the most suitable delay type for your mix, and to create the desired effect. Some common types of delays include digital delay, tape delay, and analog delay.

Set The Preferred Delay Time

Once you’ve chosen the right type of delay, it’s time to set the preferred delay time. This will determine how long the delay effect will last between repetitions. Set the delay time according to the tempo and rhythm of your music. For example, a shorter delay time might work well for faster tempos, while longer delay times can be more effective for slower ballads.

Use Subtractive Eq To Remove Unwanted Frequencies

When mixing with delay, unwanted frequencies can accumulate and lead to a muddy sound. To avoid this, use the subtractive EQ technique to remove any unwanted frequencies. This means rather than boosting certain frequencies, you’ll reduce them to create more space in the mix.

Add Reverb To Create Depth And Space

Adding reverb to your delay effect can create even more depth and space in your mix. It helps to create a sense of cohesion and tie the different elements of the track together. Experiment with different types and settings of reverb to find the perfect combination.

Try Using Ping-pong Delay

Ping-pong delay is a type of stereo delay that bounces the repeated sounds from one side of the stereo field to the other. It can create interesting and unique effects that can enhance your mix. Use this type of delay on specific parts of your track to create variation and keep the listener engaged.

Add Automation To The Delay Effect

Adding automation to your delay effect can help to make it more dynamic and interesting. This means instead of having the same delay throughout the entire track, you can vary it according to different sections and parts. This adds variation and keeps the listener engaged throughout the mix.

Experiment With Different Plugins And Settings

There are countless plugins and settings available for mixing with delay. Experiment and compare different plugins and settings to find the ones that work best for your track. Don’t be afraid to try new things and be creative with your mix.

Avoid Using Too Much Delay

While delay effects can be great, it’s important not to use too much of them. Too much delay can lead to a cluttered and muddy sound, making it difficult for the listener to distinguish different parts of the song. Use moderation and keep it simple to achieve the best results. Overall, using delay effects in your mix can add an extra dimension and depth to your music. To achieve the best results, it’s important to choose the right type of delay, set the appropriate delay time, use EQ and reverb techniques, experiment with different plugins, and avoid overusing the effect. Keep these tips in mind and you’ll be on your way to mastering your delay mixing skills.

Delay Mixing Tips

Credit: m.youtube.com

Delay Mixing Tips

Credit: www.youtube.com

Frequently Asked Questions For Delay Mixing Tips

How Do You Mix Delays?

Mixing delays requires careful attention to several factors, including adjusting the timing, feedback, and level of each delay. It’s important to choose the right delay types, such as analog or digital, and to ensure that delays don’t clutter the mix.

Use EQ and panning to avoid muddiness and ensure each part is clearly audible.

How Can I Make My Delay Sound Better?

To make your delay sound better, try adjusting the delay time, feedback, and mix levels. Using filters and modulation effects can also add depth and movement. Experiment with different delay types, such as tape or analog emulations, and consider using a stereo spreader or panning automation to enhance the stereo field.

How Do You Get Perfect Delay Time?

To get perfect delay time, you need to set the delay time according to the song’s tempo. Use tap tempo to set the delay time to the song’s beat. Adjust the feedback and mix controls as needed for the desired effect.

Experiment with different settings until you find the perfect delay time that fits the song.

Should Delay Be Mono Or Stereo?

Delay can be either mono or stereo depending on the sound’s context and the desired outcome. For example, mono delay works well for guitars or vocals in the center, while stereo delay provides wider imaging and can be useful for percussion or synth pads.

Ultimately, it is up to the desired sound and feel of the mix.

Conclusion

To conclude, delaying mixing while producing music is a crucial technique that can make a huge difference in the final product. By adhering to the tips discussed above, you can ensure an exceptional mix that captures the essence of your music.

From taking breaks between sessions to examining a mix from different listening environments, these delay mixing tips will help boost your music production skills and transform your music into a masterpiece. Remember to experiment and find a mixing style that works best for you.

Happy mixing!

Categories
Archive

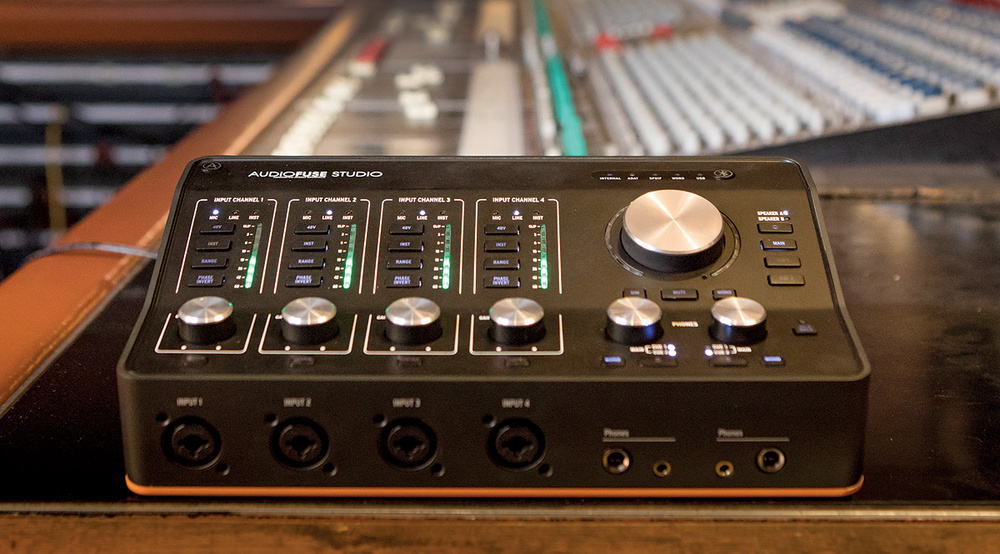
Arturia Audiofuse Review

In a nutshell, the Arturia Audiofuse is an outstanding audio interface that is equipped with a wealth of features and options. This audio interface is suitable for studio and home use, delivering superior quality sound and exceptional user-friendliness.

Also, the interface is a top-of-the-line audio interface that combines exceptional sound quality, versatile connectivity options, and superior user-friendliness. Also, this interface is ideal for both home and professional studio environments, providing a wide range of features and options that make it easy to record and mix your music.

Related reading: Arturia Mini V3 and Arturia Keylab Review. For background, see www.arturia.com on Wikipedia.

Moreover, with its high-quality preamps, low-latency performance, and robust construction, the Audiofuse is a reliable and efficient tool for anyone in need of a high-quality audio interface. In addition, whether you’re a singer-songwriter, musician, podcaster, or audio engineer, the Audiofuse is a great choice that delivers premium performance in a compact and stylish package.

Arturia Audiofuse Review

Credit: musictech.com

Arturia AudioFuse: Design And Build Quality

In addition, the interface garners praise for its solid design and build quality. For example, from its sturdy exterior to its smooth knobs and buttons, this audio interface promises reliability and durability in the studio.

Furthermore, Arturia’s Audiofuse strikes the perfect balance between design, portability, and durability. As a result, this audio interface is an excellent choice for anyone who is looking for a combination of style and functionality. In this review, we will focus on the design and build quality of this device.

Aesthetics And Form-factor

Additionally, the Audiofuse offers a sleek and modern look that will fit perfectly with any workstation or studio setup. The device is constructed with a high-strength aluminum chassis that not only enhances its look but also makes it highly durable. However, its compact design measures 4.33 inches in length, 7.64 inches in width, and 1.54 inches in height, making it a perfect fit for small recording stations as well.

Durable And Portable Design

Also, this audio interface has been built to withstand the rigors of frequent travel and for use in various recording environments. It comes with a padded travel case and a solid metal carrying handle for easy transport. The device also features a high-quality build that ensures it will withstand extensive daily use, enabling you to use it for years to come without worrying about wear and tear. With its robust design, this interface can handle any bumps or drops that may occur during transportation.

In conclusion, the interface has a stylish design, sleek form-factor, and a strong build quality that makes it an excellent choice for anyone who is looking for an audio interface that not only looks good but also performs exceptionally. Moreover, the aesthetics, form-factor, and durable design make it ideal for on-the-go recording, home studios, and professional studios. It’s stylish, it’s sturdy, and it’s portable – a perfect audio interface for anyone who wants the best of both worlds.

Arturia Audiofuse Review

Credit: www.digitaldjtips.com

Arturia AudioFuse: Connectivity Options

In addition, the interface offers a plethora of connectivity options for recording and playback devices. With USB, ADAT, S/PDIF, and more, it’s easy to integrate your gear and manage your inputs and outputs. Whether for home studios or live performances, Audiofuse has an array of choices.

Connectivity Options:

Furthermore, the interface provides a solid and broad range of connectivity options suitable for multiple home studio setups. Let’s take a closer look at what this device offers in terms of connectivity.

USB Connectivity:

Additionally, the Audiofuse’s USB interface provides two USB-C ports, making it compatible with both Mac and PC devices. The USB hub functionality allows you to connect additional USB devices, such as MIDI controllers or external hard drives, to the interface.

ADAT and S/PDIF Support:

In addition to its USB connectivity, the Audiofuse includes ADAT and S/PDIF ports. Also, these offer a total of 10 inputs and 14 outputs, enabling you to connect additional audio interfaces or outboard gear.

Phono Preamp and Direct Monitoring:

The Audiofuse also comes with a phono preamp, making it an excellent choice for vinyl enthusiasts. Direct monitoring allows for zero-latency monitoring when recording, ensuring you can hear yourself clearly without any delay. Overall, the interface offers a variety of effective connectivity options that make it suitable for many different types of setups. Its compatibility with Mac and PC devices, ADAT and S/PDIF support, phono preamp, and direct monitoring make it a versatile and powerful audio interface.

Sound Quality

Arturia Audiofuse Review boasts sound quality thanks to its advanced AD/DA conversion technology and low latency performance. With its numerous connectivity options, it is tailor-made for professional recording studios and home studios, ensuring top-notch sound quality for all types of audio production projects.

Using state-of-the-art technology, the interface has set a new standard in terms of sound quality. Let’s dive deeper into the various aspects that make the Audiofuse exceptional.

Arturia AudioFuse: Exceptional Clarity And Precision

With its pristine clarity and impeccable precision, the Audiofuse delivers sound that is crystal clear and articulate. Regardless of whether you’re recording instruments, vocals, or podcasts, the Audiofuse ensures that you capture every nuance and detail of your sound source.

Low Latency And High Sample Rate

Latency can be a real problem when recording, and the Audiofuse tackles this issue head-on. With its incredibly low latency, this device ensures that the sound you hear through your headphones or speakers is perfectly synced with what you’re playing or singing. Moreover, the Audiofuse also supports sample rates up to 192kHz, ensuring that you capture even the most subtle nuances of your sound source.

Class-leading Mic Preamps

When it comes to recording, mic preamps are critical components that can make or break your sound quality. The Audiofuse boasts class-leading mic preamps, providing you with pristine and transparent audio that ensures your recordings sound as natural and realistic as possible. With the ability to handle condenser, dynamic, and ribbon mics, the Audiofuse provides a versatile yet professional recording experience. In a nutshell, the Arturia Audiofuse Review attests to the fact that this device is a top-notch audio interface that delivers exceptional sound quality to content creators. With its exceptional clarity and precision, low latency, and high sample rate, and class-leading mic preamps, it’s no wonder why the Audiofuse is a popular choice among music producers, podcasters, and streamers alike.

Arturia AudioFuse: Software And Compatibility

The interface is a high-performance USB audio interface that boasts impeccable compatibility with a wide range of operating systems and software. With pristine audio quality and a durable build, this device is the perfect addition to any recording studio or home setup.

The interface is a highly-reviewed compact audio interface known for its impressive features and specifications. One of the key selling points of this device is its software and compatibility, which makes it a versatile tool to have in any recording setup. In this article, we are going to take a closer look at the software and compatibility of the interface.

Comes With Instrument And Effect Software

One of the standout features of the Arturia Audiofuse is that it comes bundled with a range of high-quality instrument and effect software. This includes software version of some of Arturia’s most popular synthesizers such as the Mini V, and the Analog Lab Lite, which includes over 5000 sounds. In addition to that, you also get the full version of the Audiofuse Control Center software which is used for configuring and controlling the device.

Seamless Integration With All Major Daws

The Arturia Audiofuse is designed to work seamlessly with all major Digital Audio Workstations (DAWs) such as Pro Tools, Ableton Live, Logic Pro, and Cubase. This means that you can easily integrate the Audiofuse into your existing recording setup without having to worry about any compatibility issues. The device also supports ASIO, Core Audio, and WDM drivers which make it easy to use with Windows, Mac, and even iOS devices.

Conclusion

In summary, the Arturia Audiofuse is an excellent choice for anyone looking for a high-quality audio interface that is both versatile and easy to use. With its impressive software bundle and seamless integration with all major DAWs, this device is ideal for home studio setups, musicians, and producers alike. So if you’re in the market for a new audio interface, be sure to check out the Arturia Audiofuse.

Arturia AudioFuse: User Experience

The Arturia Audiofuse delivers a stunning user experience with its intuitive interface and remarkable sound quality. This audio interface offers an impressive range of features and connectivity options for professional recording and music production.

Arturia Audiofuse is a high-performance audio interface that has a lot of features, giving you a great value for your money. One of the many things you’ll appreciate about this device is its user experience. The user interface of the Audiofuse is well-designed and easy to navigate, making it simple for anyone to use, whether you’re a beginner or a pro. Under this subheading, we’ll take a closer look at the user experience of Arturia Audiofuse.

Easy To Set Up And Use

Setting up the Audiofuse is incredibly simple, thanks to the step-by-step instructions provided in the user manual and the easy-to-use software. In just a few minutes, you can have the device plugged in and ready to use. Whether you’re using Mac or Windows, the Audiofuse is compatible with a range of DAWs, making it a breeze to use regardless of your computer setup.

Intuitive Interface And Controls

One of the standout features of the Arturia Audiofuse is its intuitive interface. The device features a large, centrally located volume knob that allows you to adjust the levels quickly and easily. The controls are well laid out and easy to access, allowing you to make changes on the fly without interrupting your recording workflow. You also have a range of connectivity options, including four RCA outputs and two headphone jacks, making it simple to connect your headphones or any other external device. Overall, the user experience of Arturia Audiofuse is top-notch. It’s easy to use, the controls are intuitive, and the software is user-friendly, making it accessible even to those who are new to recording. If you’re looking for a high-performance audio interface that delivers on both quality and user experience, be sure to check out Arturia Audiofuse.

Arturia AudioFuse: Customer Support And Warranty

Arturia Audiofuse comes with exceptional customer support and a three-year warranty, ensuring that users have access to assistance when needed and can enjoy their device for years. With Arturia’s commitment to quality and support, the Audiofuse is a reliable choice for music production and recording.

Arturia AudioFuse is a feature-packed audio interface that has impressed both hobbyist and professional engineers alike. While its specs and design are top-notch, customers are often concerned about after-sales service and warranty. Arturia understands that customer satisfaction is paramount to product success, and that’s why they have put in considerable effort into their customer support team and warranty offerings.

Dedicated Customer Support Team

Arturia’s customer support team comprises experts who are trained to handle technical and non-technical queries related to AudioFuse. Their team is available via email, phone, and tickets, which ensures that customers can reach out to them in their preferred mode of communication. From troubleshooting to setting up, the AudioFuse support team is always happy to help.

2-year Warranty

Arturia stands by the quality of its products and offers a 2-year warranty for every purchase of the AudioFuse. This warranty covers any defect in materials and workmanship that may arise during the two-year period. This means that the customer can have peace of mind while using the product, knowing that they are protected in case anything goes wrong. Additionally, Arturia also offers an extended warranty of up to five years for an additional fee. In conclusion, Arturia AudioFuse is a top-tier audio interface that comes with a dedicated customer support team and an industry-standard warranty offering. With this combination of cutting-edge technology and reliable support, customers can enjoy their music-making experience without any worries. Have you used Arturia AudioFuse before? Let us know in the comments!

Arturia Audiofuse Review

Credit: www.soundonsound.com

Frequently Asked Questions On Arturia Audiofuse Review

What Is The Difference Between Audiofuse Rev1 And Rev2?

The AudioFuse rev2 features an enhanced clocking system, improved preamps, and a redesigned monitoring section. It also offers better connectivity options and improved software control. The AudioFuse rev1 does not have these enhancements and is an older model.

What Is The Latency Of Arturia Audiofuse?

The latency of Arturia AudioFuse is very low, typically around 3ms when recording and 1. 4ms when playing back. This makes it a great choice for musicians and producers who require quick and accurate response times.

What Is The Dynamic Range Of Audiofuse 8pre?

The dynamic range of AudioFuse 8pre is 119 dB.

What Is Audiofuse Control Center?

AudioFuse control center is a software application designed for the Arturia AudioFuse audio interface. It allows users to control various settings, such as input/output routing, sample rate, and clock source. The software also includes a variety of processing tools and plugins for routing, monitoring, and recording audio signals.

Conclusion

The Arturia Audiofuse is a top-quality audio interface that every music enthusiast and professional should have. Its compact size, robust construction and advanced features make it one of the best in its category. Whether you are recording music at home, in the studio or on the go, the Audiofuse offers efficiency and convenience.

With its remarkable audio quality and compatibility with various DAWs, the Arturia Audiofuse guarantees that you won’t be disappointed. Investing in this interface will enhance your music production experience and take it to new heights.

More in our Gear reviews.

Categories
Archive

Why is Cubase Not Opening

Cubase may not be opening due to a variety of reasons such as software conflicts or corrupt system files. To troubleshoot the issue, a user can try restarting the system, checking for software updates, disabling antivirus programs, or uninstalling and reinstalling Cubase.

Music production software serves as an essential tool for musicians, producers, and sound engineers. Among a variety of digital audio workstations available, Cubase has established itself as a popular choice for its advanced features and user-friendly interface. However, users can sometimes face issues with the software not opening, which can hamper their creative workflow.

We will explore different reasons why Cubase may not be opening and provide solutions to fix the issue. By following these steps, users can make sure they get the most out of their Cubase experience without any hindrance.

Why is Cubase Not Opening

Credit: forums.steinberg.net

Outdated Cubase Version

Cubase may not be opening due to an outdated version. Keeping Cubase up-to-date is important in order to avoid issues such as crashes and bugs. It is recommended to regularly check for and install updates.

Software Version Mismatch

If you’re having trouble opening Cubase, an outdated version of the software could be to blame. Cubase is regularly updated with bug fixes, new features, and other improvements, and if you’re using an older version of the software, it may not be fully compatible with your operating system. This can result in crashes, errors, and other problems, preventing you from opening the program. To check if you have the latest version of Cubase installed, go to the “Help” menu and select “About Cubase.” This will display the version number and date of your installation. You can then compare this information to the latest version available on the Steinberg website. If your version is outdated, you should update it as soon as possible to ensure that all features work properly.

No Longer Supported By The System

Another reason why Cubase may not be opening on your system is due to compatibility issues. If you’re running an older operating system that is no longer supported by Cubase, you may not be able to run the program at all. For example, if you’re still running Windows XP, which is no longer supported, you won’t be able to run the latest versions of Cubase. To check if your operating system is compatible with Cubase, visit the Steinberg website and check the system requirements for the latest version of the software. If your operating system is not listed, it’s likely that your system is incompatible with the latest version of Cubase. You can either upgrade your operating system or use an older version of Cubase that supports your system. In summary, if Cubase is not opening on your system, it could be due to an outdated version of the software or an incompatible operating system. By checking the version of Cubase installed on your system and verifying its compatibility with your operating system, you can ensure that the program runs smoothly and without errors.

Compatibility Issues

Cubase may not be opening due to compatibility issues with the operating system, audio interface, or plug-ins. Checking for updates and ensuring compatibility with all software and hardware can help resolve the issue.

If you are facing issues with Cubase not opening on your computer, it’s possible that the problem is related to its compatibility with other software programs or hardware on your system. These compatibility issues can cause errors and result in problems with launching and running Cubase smoothly. In this section, we will discuss the various issues that can arise due to compatibility and how to resolve them.

Conflict With Other Programs

One of the common reasons for Cubase not opening is a conflict with other programs installed on your computer. This can happen due to shared resources, DLL files, or similar system components. To resolve this issue, you can try disabling other programs running in the background or uninstalling them temporarily. Also, make sure that the system requirements for Cubase are met regarding the programs running on your computer.

Incompatible Hardware Or Drivers

Another reason for Cubase not opening is when your computer’s hardware or drivers are incompatible with the software. This can be related to sound cards, USB ports, or graphics cards, among others. Updating your drivers or upgrading your hardware might help resolve this issue. Check with the Cubase website for the minimum system requirements to run the software compatibility. In the case of a hardware conflict, try unplugging any external hardware devices and restarting the program. If Cubase starts to run again, then it might indicate a problem with one of the hardware components. Try plugging them one by one and see if the issue arises again. Incompatibility can also be related to software drivers, so make sure that all device drivers are up-to-date. In conclusion, compatibility issues can cause problems with Cubase not opening, but by following these tips, you should be able to find the solution and get back to producing music in Cubase again.

Licensing And Activation

Licensing and activation are important aspects of using Cubase software. These are necessary to ensure that users are legally authorized to use the program and that it is functioning properly. However, you may encounter issues with licensing and activation that may prevent Cubase from opening. This section discusses some of these problems and offers some solutions to help you resolve them.

Invalid Or Expired License

If you see an error message that your Cubase license is invalid or expired, it means that you need to validate your license information or renew your license. These issues can arise if you have not updated your software or have exceeded the number of activations allowed by your license.

To resolve this issue, you need to check your license status and ensure that it is up-to-date. You can do this by logging in to your MySteinberg account and checking the license management section. If your license has expired, you need to renew it or purchase a new license. Once you have done this, you can reactivate your license and start using Cubase again.

Activation Issues

Activation issues can also prevent Cubase from opening. This can occur if you have not activated your software correctly or if there are problems with your eLicenser dongle or USB port.

If you are having problems activating Cubase, you should first check that you have entered the correct activation code. You can find this code on your software package or in your MySteinberg account. You should also ensure that your eLicenser is properly connected to your computer and that there are no issues with your USB port.

If you are still having issues with activation, you can try deactivating and then reactivating your license. You can do this by logging in to your MySteinberg account and following the instructions provided in the license management section. If this does not work, you may need to contact Steinberg support for further assistance.

Corrupt Installation Or Preferences

If you are a musician or sound engineer, Cubase software is your best bet for music production. However, it can be frustrating when Cubase fails to open. One of the main reasons why Cubase may not open is due to a corrupt installation or preferences. In this article, we’ll explore the various issues and solutions to address this problem.

Issues With Installation Files Or Folders

If you encounter issues with installation files or folders, Cubase may not open. Several factors may lead to this issue, including incomplete installations, or interrupted updates during installation. To resolve these issues:

  1. Uninstall the current Cubase software.
  2. Clear your system’s registry of any leftover files.
  3. Reboot your system.
  4. Download and install the latest version of Cubase software from a reliable source.

Settings And Preferences Corrupted Or Damaged

Corrupt or damaged settings and preferences may lead to Cubase failing to open. This issue is common when you make changes to preferences that do not translate well with the software. Here are the steps to fix the problem:

  1. Rename the Cubase preferences folder to something like ‘Cubase Old Preferences.’
  2. Restart your system.
  3. Launch Cubase software, which will automatically create new preferences matching your system configuration.

If the above steps do not work, there may be deeper issues with your system’s storage or hardware. It’s best to seek the services of a professional technician or contact the official Cubase support team to help resolve the issue.

System And Hardware Requirements

Cubase not opening can be caused by system and hardware requirements that do not meet the software’s standards. It is important to check if the computer meets the minimum requirements before attempting to run Cubase.

Are you having trouble opening Cubase? If so, you might be dealing with system and hardware requirements that are not up to par. Before diving into troubleshooting, make sure your computer meets the following requirements.

Insufficient Ram Or Hard Drive Space

One reason why Cubase might not be opening is that your computer doesn’t have enough RAM or hard drive space allocated to it. Cubase software requires a minimum of 4GB of RAM on a 64-bit operating system and at least 18GB of free hard disk space. If your computer is not meeting these requirements, that could be the cause of the problem.

Incompatible Processor Or Operating System

Another reason for Cubase not opening could be an incompatible processor or operating system. Ensure that your computer has a compatible operating system such as Windows 10 (64-bit), macOS Mojave or Catalina. As for the processor, Cubase requires a minimum of Intel or AMD multi-core processor.

How To Check Your Computer’s System And Hardware Specifications

If you are not sure whether your computer meets the requirements, you can check them in your computer’s system preferences. For Windows users, click on the Start menu and type “System Information” in the search bar. For Mac users, click on the Apple logo on the top left of your screen, then click “About This Mac.”

What To Do If Your Computer Doesn’t Meet Requirements

If your computer does not meet the requirements, you can upgrade your hardware or software. Upgrading your RAM or hard drive space might be the best way to ensure that your computer can handle running Cubase properly. Additionally, you can check out the latest processor and operating system updates for your machine.

In Summary

To ensure that Cubase runs smoothly on your computer, make sure that your computer has sufficient RAM and hard drive space, and that your processor and operating system meet the minimum requirements. Checking and upgrading your computer’s hardware or software would be the best course of action if you find that your computer isn’t up to the task of running Cubase.

Why is Cubase Not Opening

Credit: m.youtube.com

Third-party Plugins And Settings

If you are a musician or music producer, Cubase is one of the most essential software programs that you could have on your computer. However, there are times when you may encounter problems when trying to launch the program. One of the common reasons why Cubase may fail to launch is because of issues with third party plugins and settings. In this article, we will explore some of the reasons why this happens and what you can do to solve the problem.

Conflict With Third-party Plugins

Cubase is a complex software program that has numerous plugins which are created by third-party developers. These plugins might fail when trying to load on Cubase for various reasons. In some cases, a plugin may not be compatible with the version of Cubase that you are using, or it may be outdated and needs updating. Another reason why a plugin might cause Cubase not to launch is that it may conflict with another plugin that is already installed on the program.

If you suspect that a third-party plugin is causing Cubase not to open, then you might need to remove all third-party plugins and load them one by one to identify the source of the problem. Alternatively, check for updates or contact the plugin developer for assistance.

Corrupt Settings Or Presets

Another reason why Cubase might fail to launch is when the program registry becomes corrupted or when its presets are damaged. This problem typically occurs after updating Cubase or after installing a new plugin. The best solution is to reset Cubase’s preferences or to restore a previous backup of Cubase preferences.

To reset Cubase preferences, you need to close the program, locate the Cubase folder in the AppData folder, and then delete the preferences file. When you relaunch Cubase, it will create a new preferences file. However, you need to note that doing this will reset all your preferences to default.

Conclusion

In conclusion, third-party plugins and settings can cause Cubase not to open. However, identifying the source of the problem is the first step towards finding a solution. If you experience difficulty opening Cubase, it is advisable to start with the plugins and settings and ensure they are not the cause of the problem.

User Error And Troubleshooting

Cubase may not open due to user error or troubleshooting issues. Common reasons include outdated software or drivers, corrupted project files, or conflicts with other applications. Check for updates and try restarting your system to resolve the issue.

Cubase is one of the most popular digital audio workstations used by music producers. However, sometimes users face issues while opening the software. There could be several reasons why Cubase is not opening, including user error and other technical problems. In this article, we will discuss the user error and troubleshooting strategies for why Cubase is not opening.

Mistakenly Deleted Files Or Folders

One of the common reasons why Cubase is not opening is because of missing or deleted files. Often times, users mistakenly delete files or folders related to the Cubase program, which can cause errors while launching the software. If you are experiencing this problem, check your Cubase installation folder and ensure that all the necessary files are present.

Troubleshooting Strategies To Fix The Issue

If you are still facing issues with Cubase, try the following troubleshooting strategies to fix the issue:

  • Update the latest version of Cubase and drivers
  • Check compatibility with your operating system
  • Run Cubase as an administrator
  • Disable antivirus software temporarily
  • Delete preference files of Cubase

If none of these strategies work, it may be time to seek professional help or contact Cubase support for further assistance. In conclusion, user error is one of the main reasons why Cubase is not opening. When this happens, it is important to take immediate action to troubleshoot and fix the problem. By following the strategies mentioned above, you should be able to get your Cubase up and running in no time.

Why is Cubase Not Opening

Credit: m.youtube.com

Contacting Customer Support

Contacting customer support is a crucial step when facing any software issue. While Cubase is a reliable music production software, it might not open on your device at times, leaving you searching for the possible solution. If you’ve tried troubleshooting the issue with no success, contacting customer support is the next logical step. Here, we will discuss the methods of contacting Cubase customer support and provide valuable tips to prepare for your interaction.

Understanding Support Options

Steinberg, the company behind Cubase, provides various support options to cater to different customer needs. These options include:

Support OptionDescription
Email SupportA free support service available 24/7 where customers can send their queries to Steinberg customer support directly via email.
Phone SupportA paid support service available on specific days and times. You can purchase phone support under ‘MySteinberg’ on their website.
Steinberg Knowledge BaseA comprehensive online resource with articles and tutorials on Cubase, including a dedicated section on known issues.

Preparing For A Successful Support Interaction

Before contacting Cubase customer support, follow these tips to ensure a successful interaction:

  • Write down the issue you’re facing with Cubase, including any error messages or codes if applicable.
  • Prepare your computer for remote troubleshooting by shutting down any other applications and disabling firewalls and VPNs temporarily.
  • Gather information about your computer, including operating system, Cubase version, and hardware configuration.
  • Have your Cubase license and eLicenser ready for verification.
  • Be sure to mention any troubleshooting steps you’ve already taken towards resolving the issue while contacting customer support.

Following these tips will make it easier for customer support to diagnose and resolve your issue quickly and efficiently.

Frequently Asked Questions Of Why Is Cubase Not Opening

Why Is My Cubase 5 Not Opening?

Cubase 5 may not be opening due to various reasons such as compatibility issues with the operating system, outdated software, or corrupt file configuration. Try checking for updates and reinstalling the software. If the problem persists, seek technical assistance from the manufacturer’s customer support team.

Can Cubase Be Pirated?

Pirating Cubase is illegal and can lead to criminal charges and penalties. It’s essential to purchase a legitimate license to access the software legally.

How Do I Activate Cubase On A New Computer?

To activate Cubase on a new computer, you need to transfer your license to the new device via your Steinberg account. Install Cubase on the new computer, then open the eLicenser Control Center to enter your activation code. Finally, reactivate the software using the new device’s Soft-eLicenser.

What Are The Minimum Requirements For Cubase?

The minimum requirements for Cubase are a 64-bit Windows 10 operating system or macOS Sierra/High Sierra/Mojave, a 64-bit Intel or AMD multi-core processor, a minimum of 4 GB of RAM, and 30 GB of free hard-disk space.

Conclusion

To sum up, Cubase fails to open due to multiple reasons such as outdated system software, insufficient memory, and corrupted installation files. It’s important to stay up-to-date with the latest operating system and software updates to prevent any errors. Additionally, make sure to free up enough disk space and remove any conflicting applications.

By following these steps, you can resolve Cubase not opening errors.

Categories
Archive

What Is RMS In Audio World

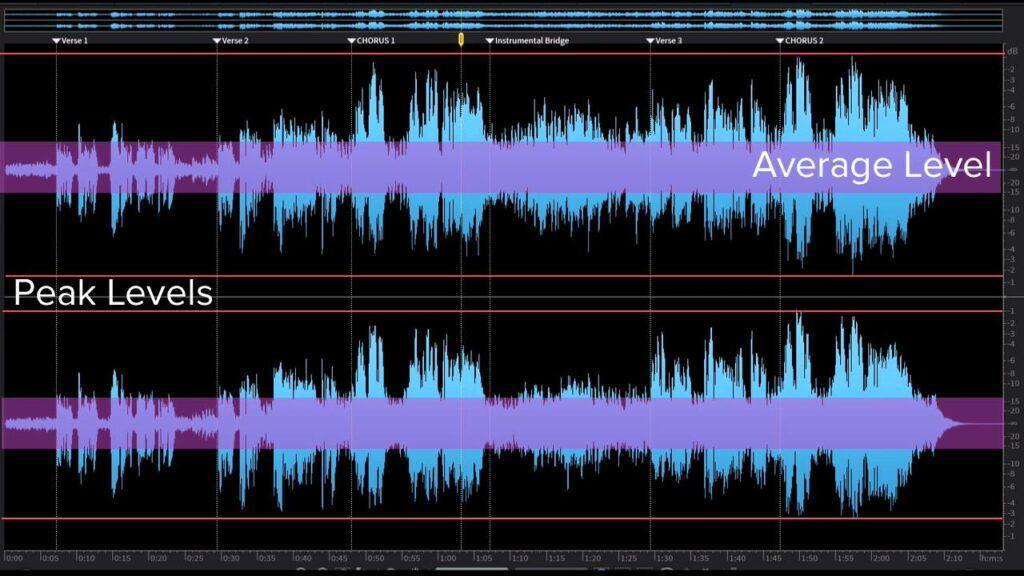
RMS in audio world refers to Root Mean Square which indicates the average power of a signal over a certain period of time. It is used as a metric to measure the loudness of an audio signal.

RMS is an important criterion in understanding how audio signals are perceived by listeners. Whether you are working in music production, sound engineering or any other audio-related field, knowing the RMS value of an audio signal is crucial. It helps in maintaining the uniformity of sound levels, making sure they are not too loud or too low.

In addition, it helps in controlling distortion, especially when processing or amplifying audio signals. Therefore, if you are working with audio files, understanding what RMS means can help you produce better quality audio and improve your overall sound experience.

Defining Rms

Defining RMS means explaining the acronym ‘Root Mean Square.’ It is the most commonly used term in audio and electronics to measure the power or amplitude of a waveform.

Explaining The Acronym

‘Root Mean Square’ or RMS is a statistical term used to find the average values of a set of numbers. In the audio world, it refers to the measurement of the steady-state power an amplifier can output without distortion.

RMS is a method to calculate the AC voltage or current levels and is used as an indicator to measure the amplifier’s power rating.

When Is Rms Used In Audio

RMS measurement is not limited to audio equipment. However, in the audio world, it is used to measure the power handling capacity of an amplifier or speaker.

When comparing audio equipment, manufacturers often use RMS measurement as the benchmark for power output instead of instantaneous peak power. It helps to specify the continuous power output and makes it easier to compare different models of amplifiers or speakers.

Why Is Rms Important In Audio

RMS measurement provides a more accurate reading of an amplifier or speaker’s true power output capacity. A speaker’s power rating is usually based on how much power it can take at its maximum without distortion

However, that maximum power rating is not sustainable, and the speaker or amplifier can be damaged if pushed to its limits for an extended time. In contrast, RMS measurement provides a more accurate reading of the amplifier or speaker’s power handling capacity, making it a reliable indicator of the device’s quality and performance.

What Is Rms In Audio World

Credit: www.amazon.com

Understanding Rms And Audio Signals

Understanding RMS and Audio Signals is vital to the audio world. One of the most essential concepts in this field is RMS, which refers to the root mean square. RMS plays a significant role in calculating the amplitude of an audio signal, which is crucial in producing high-quality sound. This article will provide a comprehensive overview of what RMS is, how it works, and how it relates to audio signals.

What Is An Audio Signal?

An audio signal is an electrical representation of sound that is used to transmit sound through electrical devices. It is a waveform that varies in amplitude and frequency over time and can be captured by a microphone. In the audio world, a signal is considered to be an electrical representation of sound that is processed through devices like amplifiers and speakers.

Amplitude And Power Of An Audio Signal

The amplitude of an audio signal refers to the amount of electrical energy that is carried by the signal. It is the measure of the signal’s strength or loudness and is measured in decibels (dB). The power of an audio signal is the rate at which electrical energy is delivered to a device, and it is measured in watts (W). In the audio world, the power of an audio signal is typically measured in terms of its root mean square (RMS) value.

How Rms Calculates The Amplitude Of An Audio Signal

The RMS value of an audio signal is calculated by averaging the squared values of the signal over a period of time, taking the square root of the result. This calculation results in a value that represents the equivalent AC voltage that would produce the same amount of heat in a resistor as the audio signal power. In simple terms, RMS is a measure of the average power of an audio signal and is used to determine the maximum power that an amplifier can deliver to a speaker without damaging it.

RMS Calculation Example
Audio Signal ValuesSquared Values
11
-11
24
-24
39
-39

For example, if an audio signal has values of 1, -1, 2, -2, 3, and -3, the RMS calculation would be:

  1. Square each value: 1, 1, 4, 4, 9, and 9.
  2. Average these squared values: (1+1+4+4+9+9) / 6 = 4.33.
  3. Calculate the square root of this result: sqrt(4.33) = 2.08.

The resulting value of 2.08 represents the RMS value of the audio signal, which is used to calculate the maximum power an amplifier can deliver to a speaker. By understanding RMS, audio engineers can ensure that their audio signals are properly amplified and reproduce high-quality sound.

Rms Vs. Peak Measurement

RMS or Root Mean Square is a measurement of the average power an audio signal carries. It depicts the effective power of an audio signal over a given time, while peak measurement indicates the highest point of a sound wave.

RMS is an essential factor for measuring audio equipment’s quality and performance accurately.

What Is RMS In Audio World – RMS vs. Peak Measurement When it comes to measuring and analyzing audio signals, there are two types of measurements that are commonly used: root mean square (RMS) and peak. While both measurements have their uses, they are fundamentally different from each other. In this section, we will explore the differences between RMS and peak measurements, the accuracy of peak measurements, and how RMS and peak measurements are used in the audio world. Differences Between RMS and Peak RMS is a type of measurement that represents the average power of an audio signal over a period of time. It takes into account both the positive and negative values of the waveform, making it a more accurate representation of the loudness of the signal. On the other hand, peak measurement simply measures the highest point of the waveform, regardless of the duration of the peak. This means that peak measurements can sometimes be misleading, as a short, high peak may not accurately represent the overall loudness of the signal. Why Peak Measurement is Not Always Accurate Peak measurement is commonly used to measure the maximum level of an audio signal, but it can sometimes be misleading. This is because it only measures the highest point of the waveform, which might not be representative of the overall loudness of the signal. For example, a short, high peak might be followed by a long period of silence, which would not be reflected in the peak measurement. This is where RMS measurement comes in, as it provides a more accurate representation of the overall loudness of the signal. Examples of How RMS and Peak Measurements are Used RMS and peak measurements are used in a variety of applications in the audio world. For example, in music production and mastering, RMS measurement is used to ensure that the overall loudness of a track is consistent, while peak measurement is used to prevent distortion. In live sound reinforcement, peak measurement is used to prevent the sound system from clipping, while RMS measurement is used to ensure that the overall loudness of the sound is appropriate for the venue. In short, both RMS and peak measurements have their uses in the audio world and are essential tools for anyone working with audio signals. In conclusion, understanding the differences between RMS and peak measurements is essential for anyone working with audio signals. While both measurements have their uses, it is important to use the appropriate measurement for the task at hand. Whether you are a musician, sound engineer, or audio enthusiast, knowing how to use these measurements effectively can help you achieve the best results in your work.

What Is Rms In Audio World

Credit: majormixing.com

Applying Rms In Audio Processing

Root Mean Square (RMS) is a measurement of the average amplitude of a signal. In the audio world, RMS is used to determine the energy level of a sound signal. It is a crucial tool in audio processing and is used for setting audio levels, compression, and measuring loudness. Let’s explore how RMS is applied in audio processing.

Using Rms To Set Audio Levels

Setting audio levels is a crucial element in producing high-quality audio. This is where RMS comes into play. RMS is used to measure the energy level of an audio signal to ensure that the sound is clear. By setting the audio levels using RMS, you can prevent the audio from sounding too loud or too soft, which can be unpleasant for the ears.

How Rms Is Used In Audio Compression

RMS is also used in audio compression to balance the dynamic range of an audio signal. Audio compression is the process of reducing the dynamic range of a sound signal, which makes the quiet parts louder and the loud parts quieter. This is done to make the audio sound more even and consistent. RMS is used in this process to determine the energy level of the signal, which helps the compressor to work more effectively.

Using Rms To Measure Loudness

RMS is also used to measure loudness. Loudness is a subjective measure of how loud a sound seems to be to the human ear. By using RMS, you can measure the energy level of a sound signal, which gives you an indication of how loud the sound will be. This is important in broadcasting and other applications where the sound needs to be consistent and at a predetermined level.

Techniques For Rms Measurement

Root Mean Square (RMS) is a measure of the average power of an audio signal over time and is used to calculate the amplitude of an audio waveform accurately. Measuring the RMS level of a signal is an essential aspect of audio engineering, as it helps in maintaining the quality of audio recordings.

Hardware Vs. Software Rms Measurement

Hardware and software are two primary methods used for measuring RMS. Hardware measuring devices are stand-alone units that come with their own display and built-in software for measuring the RMS values. In contrast, software-based RMS measurement tools are installed on a computer or mobile device and rely on an audio interface or soundcard to capture and analyze the audio signal.

Peak Metering Vs. Rms Metering

Peak metering measures the signal’s instantaneous peak amplitude, while RMS metering calculates the average signal level over time. Although peak metering is useful for identifying clipping or distortion, RMS metering provides a more accurate measurement of the perceived loudness of the signal. Hence it is preferred for mastering tasks.

Best Practices For Accurate Rms Measurement

  • Ensure that the audio source used for measurement has a constant volume level.
  • Use a calibrated measurement device to ensure accurate results.
  • Measure the RMS level of the entire audio signal, rather than a specific part, for better accuracy.
  • Set the averaging time to match the audio signal’s duration. A shorter averaging time is appropriate for signals with fast peak levels, while a longer averaging time is suitable for signals with slow dynamics.

The proper use of RMS measurement techniques can ensure that an audio signal’s level is consistent and does not produce unwanted distortion or clipping. Hence, it is essential to use reliable equipment and appropriate techniques to achieve accurate RMS measurements.

What Is Rms In Audio World

Credit: www.reddit.com

Frequently Asked Questions Of What Is Rms In Audio World

What Is A Good Rms Level?

A good RMS level depends on the specific audio application and the desired loudness. In general, a level between -16 and -20 dBFS is commonly used for music, while speech and dialogue usually require a lower level of -23 to -27 dBFS.

It’s important to measure and adjust levels to prevent distortion and ensure the best listening experience.

What Is Rms For Audio?

RMS for audio refers to Root Mean Square, which measures the average power of an audio signal. It is commonly used to determine the loudness of audio and is important for ensuring that audio stays within safe levels that do not cause damage to equipment or the human ear.

Does Higher Rms Mean Louder?

RMS (Root Mean Square) is a measure of the average power of an electrical signal, whereas loudness is a measure of the perceived volume of sound. A higher RMS value does not necessarily mean that the sound is louder. Other factors, such as the efficiency of the speaker and the characteristics of the room, also impact the loudness.

How Much Rms Is Good For Speakers?

The RMS power handling of speakers depends on their type, size, and intended use. Generally, speakers with an RMS of 50-100 watts are good for average home use. However, for larger rooms and louder volumes, speakers with 150W RMS or higher may be needed.

It’s important to match the RMS power of speakers with the output power of the amplifier to avoid damage.

Conclusion

Understanding RMS in audio is crucial to producing high quality sound. RMS is a measurement of the power used by audio equipment to produce sound. It provides a more accurate representation of how loud a sound is, as opposed to peak measurements.

By knowing how to calculate and use RMS, you can ensure that your audio is consistent and professional. Incorporating RMS into your audio setup can help you achieve a true representation of sound and improve the overall quality of your content.

Categories
Archive

Free Vocal Plugins

Free vocal plugins are software applications that enhance or modify the sound of a singer’s voice and are available for download at no cost. These plugins can be used to create professional-quality recordings without the need for expensive hardware or software.

If you’re a singer, producer, or audio engineer looking for ways to improve your recording and mixing workflow, free vocal plugins can be a game-changer. With access to a wide range of effects and processing tools, you can achieve a polished and professional sound without breaking the bank.

While there are many paid options available, free vocal plugins can provide just as much utility without the upfront cost. We’ll take a look at some of the best free vocal plugins that you can download today.

Free Vocal Plugins

Credit: emastered.com

Benefits Of Using Free Vocal Plugins

Free vocal plugins offer a range of benefits to music producers and vocalists. They provide high-quality and diverse effects, improve vocal performance and reduce costs compared to purchasing expensive software. With free vocal plugins, artists can explore and experiment with new sounds and techniques, ultimately enhancing their creativity and productivity.

If you’re looking to enhance the sound quality of your vocal recordings, free vocal plugins are a cost-effective way to achieve this. There are several benefits to using free vocal plugins that guarantee improved sound quality, versatility, and cost-effectiveness. Let’s explore these benefits in detail.

Improved Sound Quality

Free vocal plugins have the capability of refining and enhancing the sound quality of your vocals. They come with a range of features that allow you to adjust the tone, pitch, and level of your vocal recordings. With the help of equalizers, compressors, and other audio processing tools, you can create a more natural and balanced sound that is pleasing to the ears. The improved sound quality of your recordings can help you achieve your desired voiceover or singing goals.

Versatility

Another fantastic benefit of free vocal plugins is versatility. They provide you with a wide range of options to choose from, allowing you to find the perfect plugin that suits your needs. Whether you’re recording a podcast, voiceover, or singing, there is a vocal plugin available to help you achieve your desired sound. The versatility of free vocal plugins ensures that you don’t have to compromise on the quality of your recordings.

Cost-effective

Free vocal plugins are cost-effective as they eliminate the need for expensive equipment and software. You can achieve professional-grade recordings without having to spend a fortune on studio equipment. Free vocal plugins come with a range of useful audio processing tools, allowing you to refine your vocal recordings without spending a dime. They are an excellent investment for beginners who are looking to refine their vocal recordings or those on a tight budget. In conclusion, using free vocal plugins can help you achieve professional-grade vocal recordings with ease. The benefits of improved sound quality, versatility, and cost-effectiveness make them a must-have for anyone looking to produce high-quality vocal recordings.

Free Vocal Plugins

Credit: bedroomproducersblog.com

Top Free Vocal Plugins

Discover the top free vocal plugins to enhance your music production. From compression to EQ, these plugins offer a range of effects to make your vocals stand out. Try them out today!

When it comes to vocal processing, using the right plugins can help enhance the quality of your audio. While some premium plugins can be expensive, there are several free vocal plugins that can provide impressive results. Here are some of the top free vocal plugins:

Vocal Rider By Waves

Vocal Rider by Waves is a powerful plugin that automatically adjusts the vocal levels in real-time. This plugin uses a unique algorithm to instantly detect and correct any changes in the vocal volume. It helps keep vocals at a consistent level, preventing any sudden dips or peaks. The Vocal Rider is easy to use and can save you a lot of time during mixing.

Graillon By Auburn Sounds

Graillon is a unique and versatile plugin that can be used for various vocal effects. It includes multiple pitch-shifting modes to create everything from subtle pitch correction to extreme robotic voice effects. Graillon also features a saturation control, which adds warmth and character to your vocals, and a formant shift option that can change the vocal’s timbre.

Tyrell N6 By Amazona.de

Tyrell N6 is a virtual analog synthesizer that can also be used as a vocal plugin. This plugin includes a variety of presets that are ideal for creating vocal pads, leads, and other unique effects. It features a powerful filter section that can add rich harmonics and smooth out any unwanted frequencies. Tyrell N6 is easy to use and can lead to some interesting and exciting vocal sounds. In conclusion, these top free vocal plugins can help improve the quality and creativity of your vocal processing. Try incorporating them into your mixes to see what kind of unique effects you can create.

How To Install Free Vocal Plugins

Learn how to install free vocal plugins in just a few easy steps. With a variety of options available, you can enhance the quality of your vocal recordings without breaking the bank. Simply download and install the plugin of your choice to start making your vocals shine.

How to Install Free Vocal Plugins Vocal plugins can give your voice the professional touch that it needs. However, some of the best vocal plugins on the market can be expensive. The good news is that there are free vocal plugins available for both Mac and Windows users. Here’s how to install them: Download and Unzip the Plugin The first step is to download the vocal plugin that you want to use. There are many free vocal plugins available online, so choose the one that best suits your needs. Once you’ve downloaded the plugin, unzip the file. You can use any unzip software that is compatible with your system. Mac Users If you’re a Mac user, installing plugins can be quite easy. The first step is to locate the Audio Unit folder on your computer. You can find it by going to Macintosh HD > Library > Audio > Plug-ins > Components. Next, drag the unzipped plugin file into the Audio Unit folder. Restart your DAW, and your new vocal plugin should be ready to use. Windows Users For Windows users, installing vocal plugins can be done in a few simple steps. The first step is to locate the VST plugins folder on your computer. You can find it by going to C:\Program Files\Common Files\VST2. Next, drag the unzipped plugin file into the VST plugins folder. Open your DAW, and your new vocal plugin should be ready to use. In conclusion, installing free vocal plugins can be done quickly and easily. By following the steps outlined in this post, you can take advantage of some of the best vocal plugins available on the market without breaking the bank.

Tips For Using Free Vocal Plugins Effectively

Learn to make the most out of free vocal plugins with these effective tips. Experiment with different settings, use them sparingly, and always fine-tune each plugin to achieve the desired sound. Incorporating these tools creatively can enhance vocals and add character to any mix.

Using free vocal plugins can be a great way to enhance your vocal recordings without breaking the bank. With the right tips, you can use these plugins effectively and take your vocals to the next level. In this post, we’ll share some tips for using free vocal plugins, including experimenting with different plugins, using effects for additional enhancement, and learning basic mixing and mastering techniques.

Experiment With Different Plugins

There are many free vocal plugins available online, so it’s important to experiment with different ones to see which works best for your needs. Some plugins may provide a warmer tone, while others may add a bit of grit or distortion. It’s all about finding the right tool to enhance your vocal recording. When experimenting with plugins, try to use them on different parts of your vocals such as the harmonies, backing vocals, and lead vocals. This will provide you with different feedback on which plugins are most effective to use in different situations.

Use Effects For Additional Enhancement

Using effects appropriately can take your vocal recordings to the next level. For instance, reverb can add space and depth to your vocal recordings, while delay can add interest and depth. There are a host of effects available that can help you achieve different results. By experimenting with different effects, you’ll be able to find the ones that are most effective for your vocal projects.

Learn Basic Mixing And Mastering

While free vocal plugins can enhance your vocal recordings, they are not typically enough to produce a professional-quality record on their own. To produce a polished-sounding recording, you’ll need to learn basic mixing and mastering digital audio. Some of the basic things to learn include EQ, compression, and volume to ensure that each vocal is balanced and stands out in the mix. It’s also essential for the vocals to sound natural and balanced in any playback environment. In Conclusion By following these tips for using free vocal plugins, you can improve the quality of your vocal recordings and make your tracks sound more professional. In addition, combining them with other production and mixing techniques will eventually help you create recordings that sound like those of your favorite artists.

Free Vocal Plugins

Credit: www.youtube.com

Frequently Asked Questions For Free Vocal Plugins

What Are The Best Plugins For Mixing Vocals Free?

The best free plugins for mixing vocals include the TDR Nova EQ, a dynamic equalizer, the MEqualizer, a 6-band equalizer, and the MAutoPitch, a pitch correction tool. AM Tools also offer a range of plugins that can help users to balance and enhance vocal tracks.

What Plugins Make Your Voice Sound Better?

Some of the popular plugins that can make your voice sound better are iZotope Nectar 3, Waves Tune Real-Time, Auto-Tune Pro, FabFilter Pro-Q 3, and Soundtoys Decapitator. These plugins are widely used in music and video production to enhance vocal quality, pitch correction, and provide additional effects to the voice.

What Is The Best Free Vocal Doubler Plugin?

The best free vocal doubler plugin is iZotope Vocal Doubler. It’s easy to use, delivers great results, and is compatible with both Windows and Mac users. Download and install it in your DAW to enjoy a professional vocal doubling effect for free.

How To Get Free Audio Plugins?

To get free audio plugins, you can search for them on various websites and platforms that offer them for free. You can also visit the websites of different plugin manufacturers and look for free trials or giveaways. Another way is to join online forums and communities where audio professionals share free plugins.

Conclusion

To sum it up, if you’re a music enthusiast and searching for excellent quality vocal plugins for free, look no further. Our list of featured vocal plugins is just what you need to take your music game to the next level.

With the right tools and software, you can achieve your music-making goals effortlessly. So, why wait? Start experimenting with these free vocal plugins today and create music that leaves a lasting impression. Always keep in mind, music is all about creating a lasting impact on the listener.

Categories
Archive

Wurlitzer Piano How Much

A Wurlitzer piano can cost anywhere from $500 to $50,000 depending on the age, model, and condition. The Wurlitzer piano company has a rich history dating back to the 1800s.

With its roots in making organs, the company eventually shifted its focus to include pianos. Wurlitzer pianos gained popularity in the mid-20th century, and their electric models became a favorite among musicians in the rock and roll genre. Today, the demand for Wurlitzer pianos remains high among musicians, collectors, and enthusiasts.

Factors that affect the price of a Wurlitzer piano include age, rarity, and condition. Vintage models, particularly those from the 1950s and 60s, can fetch a high price tag. Wurlitzer pianos are not only a piece of musical history but also a fine investment.

Wurlitzer Piano How Much

Credit: www.coppellpianoshop.com

History Of Wurlitzer Piano

Wurlitzer is a well-known name in the world of pianos, with a long and rich history. The Wurlitzer Piano Company was founded in Cincinnati, Ohio, in 1853, by Franz Rudolph Wurlitzer.

Origin Of Wurlitzer

The Wurlitzer Piano Company had humble beginnings, starting as a simple repair shop for musical instruments. However, Franz Rudolph Wurlitzer saw the potential in manufacturing his own pianos, and by the late 1800s, the company was producing high-quality instruments that were in demand worldwide.

Evolution Of Wurlitzer Piano

Over the years, the Wurlitzer Piano Company continued to innovate and develop new technologies to improve the sound and playability of their instruments. One of their most famous innovations was the introduction of the “Wurlitzer electric piano” in the late 1950s, which became a staple sound in many genres of music, from jazz to rock and roll.

By the 1970s, however, the popularity of the acoustic piano was in decline, and the Wurlitzer Piano Company struggled to adapt. In 1985, the company was sold to Baldwin Piano Company, and the Wurlitzer name was eventually dissolved.

Today, vintage Wurlitzer pianos are highly sought after by musicians and collectors alike, and the legacy of the Wurlitzer Piano Company lives on through the music that was created on their instruments.

Factors That Determine Wurlitzer Piano Price

Factors including age, condition, model, and location play crucial roles in determining the price of a Wurlitzer piano. Vintage models, good condition, and rare versions can cost more, while larger cities may offer a higher price for resale.

If you are considering buying or selling a Wurlitzer piano, it’s essential to understand the different factors that determine its price. Here are the primary aspects that can impact the value of a Wurlitzer piano:

Age And Condition Of The Piano:

The age and condition of a Wurlitzer piano are vital factors that determine its price. Generally, older pianos tend to be more expensive due to the rarity of vintage pianos. However, the piano’s condition plays a significant role in determining its value. A piano that has been well-maintained and cared for will be worth more than one that has been neglected or damaged.

Brand Reputation:

Wurlitzer is a well-known brand in the piano industry with an excellent reputation for producing high-quality and durable pianos. As a result, Wurlitzer pianos typically have a higher price compared to other less popular brands in the market.

Model And Size:

The model and size of a Wurlitzer piano also determine its price. Typically, grand pianos are more expensive than upright pianos. However, the price can vary depending on the specific model and size of the piano. For instance, a Wurlitzer baby grand piano will cost more than a standard upright piano.

Rarity And Limited Editions:

Wurlitzer has produced several limited edition pianos throughout its history, and these pianos are often worth significantly more than regular models. Similarly, Wurlitzer pianos that are rare due to their unique features or design elements can also fetch higher prices on the market. In conclusion, several factors can affect the value of a Wurlitzer piano. Understanding these factors can help you make an informed decision as to the fair market value of a piano. If you’re buying or selling a Wurlitzer piano, it’s crucial to consider all these aspects before making the final decision.

Average Cost Of Wurlitzer Pianos

Wurlitzer pianos have been around for over a century and are known for their exquisite design, sound quality, and durability. If you’re a music enthusiast looking for a piano that offers functionality and beauty, Wurlitzer pianos might be the perfect fit for you. However, it’s important to understand the different price ranges of these pianos to purchase one that suits your budget.

New Wurlitzer Pianos Price Range

Wurlitzer pianos are available in a range of models, but new Wurlitzer pianos are relatively rare. However, if you are lucky enough to find a brand new Wurlitzer piano for sale, the average price would be between $10,000 to $35,000. Although new ones are expensive, they are worth the investment if you want a piano that will provide long-lasting quality.

Used Wurlitzer Pianos Price Range

If you’re looking for a Wurlitzer piano within a limited budget, used Wurlitzer pianos might be the best option for you. The price range for a used Wurlitzer piano is considerably less than a new one. The cost will depend on the age, the size, the model, and the condition of the piano. For instance, a used Wurlitzer spinet piano will cost between $400 to $3,500, while a used Wurlitzer grand piano may cost between $5,000 to $12,000. Despite a used piano may have some small issues, the condition of the piano will affect the overall cost. Thus, make sure to buy from trustworthy sellers with good reputations to ensure that you are getting what you paid for.

Vintage Wurlitzer Pianos Price Range

Some people prefer the vintage appearance and sound of Wurlitzer pianos. The price of vintage Wurlitzer pianos will depend on their year of production, design, model, and condition. If you are interested in owning a vintage Wurlitzer piano, you may need to look around a bit to find a perfect piece. It may cost a bit more than a used one but the beauty of the instrument, its sound, and history are incomparable. The price range of vintage Wurlitzer pianos is generally between $4,500 and $35,000.

How To Evaluate A Wurlitzer Piano

Evaluating a Wurlitzer Piano can be a tricky task, especially if you’re not familiar with the brand. One way to determine the value of a Wurlitzer Piano is to consider its age, condition, and model. Another way is to seek advice from a professional appraiser or a reputable dealer in vintage pianos.

Wurlitzer pianos have a unique and timeless sound that many musicians still prefer today. Whether you’re looking for a vintage Wurlitzer piano or a newer model, it’s important to know how to evaluate its condition to ensure that it’s worth the investment. When evaluating a Wurlitzer piano, you need to take into account the exterior condition, interior mechanisms, and tone and sound quality. In this blog post, we’ll go over each of these factors in detail and provide you with some helpful tips to make your evaluation process easier.

Exterior Condition

The exterior condition is the first thing that you’ll notice when evaluating a Wurlitzer piano. The finish should be smooth and even, with no cracks, scratches, or dents. Check the pedals, legs, and casters for any signs of damage or wear. If you notice any issues, consider the cost of repairs or replacement before making a purchase.

Interior Mechanisms

The interior mechanisms of a Wurlitzer piano are just as important as the exterior condition. Start by checking the keyboard and keys for any looseness or unusual wear patterns. Check the hammers, felt, and dampers for any signs of wear or damage. Test the pedals to make sure they’re functioning properly. If there are any issues, consider the cost of repairs or replacement.

Tone And Sound Quality

The tone and sound quality of a Wurlitzer piano should be evaluated by playing the instrument. Listen for any buzzing or rattling sounds. The sound should be clear and bright, with no muffled or distorted notes. Pay attention to the sustain and decay of the notes. If possible, play the piano in a large room to get a better sense of its sound quality. In conclusion, evaluating a Wurlitzer piano takes time and careful attention to detail. By taking into account the exterior condition, interior mechanisms, and tone and sound quality, you’ll be able to make an informed decision about whether a particular piano is worth the investment. Keep in mind that Wurlitzer pianos are unique instruments with their own sound characteristics, so take the time to find one that feels right for you.

Where To Find Wurlitzer Pianos For Sale

If you are looking to add an exceptional touch of elegance to your home or studio, a Wurlitzer Piano is a great choice. These iconic instruments are known for their remarkable sound quality, sleek design, and timeless appeal. However, finding Wurlitzer pianos for sale can often be a challenge, especially if you don’t know where to look. In this article, we will explore some popular options to help you track down the perfect Wurlitzer piano for your needs.

Music Stores

One of the best ways to find Wurlitzer pianos for sale is to visit your local music stores. Many piano shops carry a wide range of new and used pianos, including Wurlitzer models. You can check the website or social media page of your local music stores to know the availability of Wurlitzer pianos. Moreover, visiting these stores can allow you to physically inspect and play the pianos, helping you make a more informed decision on which specific model to buy.

Online Marketplaces

Another option you can explore is online marketplaces such as eBay, Reverb, and Craigslist. These websites offer an extensive selection of new and used Wurlitzer pianos from sellers around the world. You can easily search for different models, compare prices and features, and even negotiate with sellers. However, it is crucial to be cautious of scams and frauds when buying from online marketplaces. It is recommended to read seller ratings and reviews before making a purchase.

By considering these options, you can increase your chances of finding a Wurlitzer piano that meets your requirements. Whether you opt for visiting music stores or searching through online marketplaces, always be cautious of fake deals and ensure you inspect the piano carefully before making a purchase. Invest in a Wurlitzer piano today and add a touch of class to your space!

Wurlitzer Piano How Much

Credit: en.wikipedia.org

Tips For Buying A Used Wurlitzer Piano

Purchasing a used Wurlitzer piano can be a great way to save money, but it’s important to do your research to avoid potential issues. Consider factors such as the age and condition of the piano, as well as its history and any necessary repairs.

If you’re planning to invest in a used Wurlitzer piano, it’s crucial to perform a thorough inspection to ensure you are getting value for your money. A Wurlitzer piano is a top-of-the-line musical instrument that exudes exceptional sound quality and unparalleled performance. To help you make an informed decision, this article will highlight some essential tips for buying a used Wurlitzer piano.

Inspection By A Piano Technician

Before buying a used Wurlitzer piano, you should have it inspected by a qualified piano technician. They inspect the piano’s mechanical parts, including the soundboard, bridges, hammers, and keys. They’ll also check for any aesthetic damages, such as scratches, dents, or chips. It’s important to have a technician who specializes in Wurlitzer pianos as they’ll know what to look for. They can help you identify potential issues, give you an idea of the instrument’s condition, and advise you on the amount of money you may need to spend on maintenance.

Check For Restorations

Wurlitzer pianos are designed to last for decades, but they’re not immune to wear and tear. If you’re considering buying a used Wurlitzer piano, ensure that it hasn’t undergone a full restore. A full restore can be expensive and may impact the piano’s sound quality. However, if the piano has undergone minor restoration, it could be a good thing. It may have new parts that will ensure your piano lasts for years to come, but have little impact on its sound quality.

Request For Maintenance Records

Request for the piano’s maintenance records to get an idea of the instrument’s previous maintenance history. If there isn’t any documentation of maintenance done on a piano issued in the past year, then it can be a red flag. In contrast, if the maintenance has been regular and performed only by reputable technicians, it’s probably a great sign. Conclusion: By following these tips and inspecting a used Wurlitzer piano, you can ensure that you get the best instrument for your money. Remember to take your time when buying a piano, and don’t be afraid to ask for assistance.

Maintenance And Care For Wurlitzer Pianos

To maintain and care for Wurlitzer pianos, routine cleaning and inspections are necessary. It’s important to hire a professional for tuning, repairs, and adjustments to prevent damage. The cost of maintaining a Wurlitzer piano varies depending on its age, condition, and location.

Maintenance and Care for Wurlitzer Pianos: As with any musical instrument, regular maintenance and care are essential for ensuring the longevity and functionality of Wurlitzer pianos. Below are some important tips that can help you keep your Wurlitzer in top condition.

Routine Cleaning And Dusting

Regular cleaning and dusting are important for removing dirt, dust, and other debris that can accumulate on a piano over time. To clean your Wurlitzer, use a soft, lint-free cloth or feather duster to gently wipe the keys, pedals, and exterior surfaces. Avoid using any harsh chemicals or abrasive materials, as they can damage the finish.

Avoiding Direct Sunlight And Heat Exposure

Direct sunlight and heat exposure can cause significant damage to a Wurlitzer piano. It is important to keep your piano away from windows and other sources of direct sunlight, as well as radiators and other heat sources. Exposure to sunlight and heat can cause the wood to warp and the finish to fade over time.

Maintaining Proper Humidity Levels

Pianos are sensitive to changes in humidity, and it is important to maintain proper humidity levels in the room where your Wurlitzer is kept. Ideally, the humidity level should be between 40% and 50%. Use a humidifier during dry winter months to prevent the wood from cracking and warping, and a dehumidifier during humid summer months to prevent the keys from sticking.

Regular Tuning And Voicing

Regular tuning and voicing are crucial for maintaining the sound quality of your Wurlitzer piano. It is recommended to have your piano tuned at least twice a year, or more frequently if the piano is used heavily. Voicing, which involves adjusting the tone of each individual key, should be performed periodically to ensure that the piano sounds its best. By following the above guidelines, you can help keep your Wurlitzer piano in top condition for years to come. With proper maintenance and care, your Wurlitzer will continue to produce beautiful music for generations.

Wurlitzer Piano How Much

Credit: dcpianos.com

Frequently Asked Questions Of Wurlitzer Piano How Much

What Is My Wurlitzer Piano Worth?

The value of your Wurlitzer piano depends on various factors such as its age, condition, model type, and demand in your area. You may consult with a reputable appraiser or get an estimate from online auction sites to determine its worth.

Is A Wurlitzer Piano Any Good?

Yes, Wurlitzer pianos are known for their excellent sound quality, durability and unique features. They are well-regarded among musicians and enthusiasts, making them a good investment for those seeking a quality musical instrument.

What Is The Most Valuable Wurlitzer?

The most valuable Wurlitzer is the Wurlitzer Model 1015, which is also known as the “Bubbler”. This iconic jukebox was first produced in 1946 and is highly sought after by collectors due to its unique design and historical significance. It can fetch prices of up to $25,000 or more depending on its condition and rarity.

How Much Is A Wurlitzer Model 2760 Worth?

The value of a Wurlitzer model 2760 can vary depending on factors such as the condition, age, and rarity. However, it generally fetches a price range between $1,000 to $10,000 in the market.

Conclusion

In determining how much a Wurlitzer piano costs, several factors should be considered, including the age, condition, and model of the piano. Additionally, the location and seller can also play a role in the price. Whether you plan to purchase a Wurlitzer piano for personal use or investment purposes, doing your research can help you make an informed decision.

With the right information, you can find a Wurlitzer piano that fits your budget and musical needs.

Categories
Archive

Best Way to Mix Rap Vocals

The best way to mix rap vocals is by using compressors, EQs, and effects in a step-by-step manner. To achieve a professional and polished sound, it is essential to focus on balancing the vocal levels, reducing unwanted resonances, and adding depth and character to the vocals through the right effects.

Mixing rap vocals is an art that requires a combination of technical knowledge and creative flair. As a content writer, I have written extensively on music production and audio engineering, and I understand the importance of achieving a clean, balanced, and impactful vocal mix.

I will provide practical tips and techniques for mixing rap vocals, step-by-step. Whether you are a singer, rapper, or producer, these tips will help you achieve a professional-grade vocal mix that will make your tracks stand out from the crowd. So, let’s dive in and explore the best way to mix rap vocals.

Setting Up Your Recording Environment

To get the best mix for rap vocals, it is important to set up your recording environment properly. Make sure to choose the right microphone, adjust the levels properly, and add effects such as compression and reverb to enhance the vocal sound.

Keep background noise to a minimum by soundproofing the room and using a pop filter to reduce plosive sounds.

When it comes to mixing rap vocals, having a properly set up recording environment is crucial to achieving a professional sound. In this section, we’ll discuss the importance of microphone placement and room acoustics, as well as tips for optimizing your recording environment.

Microphone Placement

Before you hit the record button, it’s essential to find the perfect placement for your microphone. Positioning your mic too close or too far away from the vocalist can drastically impact the sound quality. Here are some general rules to follow:

  • The distance between the microphone and vocalist should be about six inches.
  • Position the microphone directly in front of the vocalist’s mouth, slightly off-center to avoid plosives.
  • Make sure the mic is at the correct height and angle for the vocalist, typically at mouth level and angled slightly upwards.

Room Acoustics

The acoustic properties of your recording space can significantly affect the quality of your vocals. Here are some tips to optimize your studio acoustics:

TipDescription
Use sound-absorbing materialsAcoustic panels, foam, and blankets can help reduce echoes and unwanted noise.
Minimize reflective surfaceAvoid recording in rooms with hard surfaces like glass windows, tile floors, and concrete walls as they tend to reflect sound.
Choose the right room sizeA smaller room can prevent excessive reverb, while a larger room can provide a more natural-sounding ambience.

By applying these tips for setting up your recording environment, you can ensure optimal sound quality when mixing rap vocals. Experiment to see what works best for you, and don’t be afraid to make adjustments as needed to achieve your desired sound.

Best Way to Mix Rap Vocals

Credit: producelikeapro.com

Preparing Your Vocals

To ensure the best way to mix rap vocals, it’s important to prepare your vocals beforehand. This includes recording in a quiet room, using a pop filter, and adjusting mic placement to capture the best sound possible. Additionally, cleaning up vocal tracks and using EQ and compression can help polish the final mix.

Preparing Your Vocals: Before you begin mixing, it’s essential to prepare your vocal tracks to get the best outcome. Recording, Comping, and Editing are the critical steps involved in preparing your vocals for mixing. In this article, we’ll discuss the Best Way to Mix Rap Vocals, focusing on these steps. Recording Techniques: The recorded vocal tracks must be of high quality to achieve the best results during mixing. Ensure the following techniques are in place while recording: ● Invest in a good microphone that suits your voice type and the tone you want to achieve. ● Use a pop filter for smoother and softer sound. ● Acoustically treat your recording space to reduce any extraneous sound. ● Maintain consistent distance from the mic while recording. Comping the Takes: Comping is the process of selecting the best parts of multiple takes to create a final consolidated take. Follow the steps below to achieve a polished final take: 1) Listen to all the recorded takes and identify the best moments. 2) Import the takes into a new project. 3) Listen to each take and select the best phrases and sections. 4) Create a final comp track by combining the selected sections. 5) Ensure that the transitions between sections are seamless. Editing the Vocals: Editing is the process of adjusting the time and pitch of a vocal track to fix any errors or off-key notes. Ensure the following steps in place while editing the vocals: 1) Listen to the tracks and mark the areas that need editing. 2) Adjust the timing of each phrase so that it’s in sync with the beat. 3) Use pitch correction tools to fix any off-key notes. 4) Cut out any unwanted breaths or background noises. 5) Add fades in and out of each phrase to prevent any abrupt endings. In conclusion, preparing your vocals is a crucial process in getting the optimum results while mixing rap vocals. Recording quality tracks using proper techniques, comping the best takes, and editing for timing and pitch corrections are the key takeaways. Follow these steps, and you will be on your way to mixing your rap vocals like a pro.

Eq And Compression

To get the best mix for rap vocals, it is crucial to carefully use EQ and compression. EQ can be used to boost certain frequencies and reduce others, while compression can help even out the overall vocal volume and dynamics.

Balancing these two tools can make a big difference in the final sound of the mix.

Applying Eq

EQ or Equalization is an essential part of mixing rap vocals. EQ adjustments assist in balancing out the frequencies of the rap vocal, cleaning them up, and giving them room to breathe. While working on EQ, the focus should be on enhancing and bringing out the best of the vocal performance. To start with, High-pass filter can be applied to filter out unwanted low-end noise. Boosting the upper mid-range frequencies can help in bringing out clarity and presence in the vocals. But it should not be overdone, as it can result in harsh and ear-piercing sounds. Conversely, if the vocals have too much sibilance or harshness, then it is advisable to reduce the ‘s’ sounds or ‘ess’ sounds by cutting the high-mid frequencies. The EQ should be adjusted based on the vocalist and the context.

Compressing The Vocals

Compression ensures that the vocals stay consistent, facilitating the listener to hear the right emotional connection through the song. It aims to even out the vocal performance, maintaining a consistent volume level throughout the song. Too much compression can take away the dynamics and make the vocals sound flat. Conversely, too little compression can result in parts getting lost under the music, reducing the presence of vocals. To start with, a slow attack and fast release are generally suitable for rap vocals. Adjusting the threshold level based on the dynamics of the rap vocal can help in avoiding over-compression. It’s advisable to use a multiband compressor to control the low-end frequencies better, given rap vocals have dense low-end content. In conclusion, the EQ and Compression are crucial techniques in mixing rap vocals. Applying EQ helps to balance out the frequencies, enhancing the vocal performance, and Compression ensures consistency throughout the song, facilitating a stronger emotional connection. Remember, while adjusting EQ and Compression settings, use your ears, and assess the overall performance of the rap vocals in the context of the song.

Adding Effects

To achieve the best rap vocals mix, adding effects can enhance the overall sound quality. Utilizing EQ, compression, reverb and delay in the right amounts can help create a professional-sounding mix. Experimenting with different levels and settings to find the right balance is key.

Adding effects is an essential part of mixing rap vocals. With the right effects, you can add depth, texture, and character to your vocals. In this section, we’ll look at some of the most popular vocal effects for rap vocals, including reverb and delay, chorus and flanger, and other effects.

Reverb And Delay

Reverb and delay are two of the most common effects used in mixing rap vocals. Reverb adds a sense of space and depth to vocals, while delay creates echoes and repetitions. Both effects can be used to create a more immersive and dynamic vocal sound. When using reverb, it’s important to choose the right type of reverb for your vocals. A plate reverb works well for rap vocals as it adds a warm, natural sound. A hall reverb can also be used to create a bigger, more spacious sound. Delay is another great effect for rap vocals. It can be used to create a sense of movement and depth, as well as to add emphasis to certain phrases. A short delay is perfect for rap vocals as it adds interest without muddying the vocals.

Chorus And Flanger

Chorus and flanger are two effects that can be used to add thickness and texture to vocals. Chorus creates a sense of doubling by adding a slightly delayed and pitch-shifted signal to the original track. Flanger, on the other hand, creates a sweeping effect by adding a modulated signal to the original track. When using chorus or flanger, it’s important to use them sparingly, as too much can make the vocals sound over-processed and unnatural. A light touch is all that’s needed to add depth and character to rap vocals.

Other Vocal Effects

There are many other effects that you can use to enhance rap vocals. For example, distortion can be used to add grit and edge to vocals, while EQ can be used to shape the tone and frequency balance. Compression can be used to control the dynamic range of the vocals and make them sound more polished. When using these effects, it’s important to be subtle and tasteful. Don’t overdo it, as this can make the vocals sound unnatural and harsh. Use a light touch and listen carefully to the results to ensure that the vocals sound balanced and cohesive.

Creating Vocal Space

In music production, creating vocal space is important to make sure that the lyrics and vocals stand out. One way to do this is by mixing the vocals in a way that gives them their own place in the mix. This can be achieved using various techniques including panning the vocals, adding background vocals, among others. In this article, we will discuss some techniques that can be used to create vocal space in rap vocals.

Panning The Vocals

Panning the vocals is one effective way to create vocal space. By panning, you can give each vocal its own place in the stereo field. For instance, you can pan the lead vocal to the center while panning the adlibs and backing vocals to the sides. This will create a sense of width and depth, making the vocals sound more interesting and dynamic.

It’s important to note that panning should be done cautiously. You don’t want to overdo it and end up with a mix that sounds unbalanced. Start by panning the vocals slightly to the left or right before increasing the panning gradually to find the sweet spot.

Adding Background Vocals

To add more depth and dimension to the mix, it’s advisable to add background vocals. These are additional vocal tracks that support the lead vocals. They can be in the form of harmonies, adlibs, or sound effects. Background vocals give the mix a professional touch and make the lyrics sound more powerful and memorable.

You can Pan the background vocals similarly to the lead vocals for a wider stereo field or place them in the background for a more subtle effect. It’s important to ensure that the background vocals don’t clash with the lead vocals. This can be achieved by EQing and compressing each track separately to make sure they sit well together.

In conclusion, creating vocal space is crucial in making sure that your rap vocals stand out. Techniques such as panning the vocals and adding background vocals can help you achieve the desired result. Don’t be afraid to experiment, but always make sure that the mix sounds balanced and professional.

Best Way to Mix Rap Vocals

Credit: m.youtube.com

Mixing The Track

For the best way to mix rap vocals, start by clearing the clutter in your track and adjusting the levels. Apply EQ to fix problematic frequencies and use compression to balance the dynamics. Add reverb and delay for depth and space, and don’t forget to double-check the mix on different systems for a great final product.

Balancing The Levels

Balancing the levels is the first step in mixing rap vocals. It’s important to make sure that no element of the mix is overpowering the others. The vocals should be loud enough to be heard clearly, but not too loud to make them sound like they’re sitting on top of the track. To achieve a good balance, start by soloing the vocals and adjusting the volume until they sit well with the instrumental. Then, add in the other elements of the mix, such as the kick, snare, and bass, and adjust each track until everything sounds cohesive.

Automation

Automation is a powerful tool in mixing rap vocals. It involves adjusting the volume, panning, and other effects of a track over time. In the context of rap vocals, automation can be used to emphasize certain words or phrases, or to add movement to the vocal track. For example, you can automate the volume of a rap ad-lib to make it stand out from the main vocal track. Or, you can automate the panning of the vocals to create a sense of space and movement in the mix. Automation can take some time to get right, but it’s worth the effort for a polished and professional sounding mix.

Adding Instrumentals

Once you have the vocals balanced and automated, it’s time to add instrumentals to the mix. The instrumental tracks should complement the vocals and help to create a cohesive and polished final product. When choosing instrumentals, consider the tempo, key, and overall vibe of the track. Make sure that they fit well with the vocals and don’t overpower them. A good way to start is to add the kick, snare, and bass tracks first, and then add other elements such as synths, strings, and samples as needed. Remember, the goal is to create a rap vocal mix that sounds coherent and well put together.

Mastering The Track

Achieving the perfect mix for rap vocals can be a challenging task, but it can be mastered with the right techniques. Utilizing compression, EQ, and effects such as reverb and delay can help create a balanced and dynamic sound.

Mastering the Track When you’re mixing rap vocals, one of the most important steps is mastering the track. Mastering is the final stage of the mixing process and it ensures that your track sounds polished and professional. In this section, we will discuss the key steps to take when mastering a rap vocal track, including Final EQ and Compression, Adding Stereo Width, Limiting and Volume Control. Final EQ and Compression Final EQ is the process of fine-tuning the overall sound of the track. It involves using an equalizer to boost or cut certain frequencies so that the track sounds balanced and consistent. Compression, on the other hand, reduces the dynamic range of the track by controlling the volume of loud and soft sections. To master the track, first, you should apply a gentle EQ to boost the vocals’ clarity and presence. Next, add some compression to even out the vocals and make them sound more consistent. Adding Stereo Width Adding stereo width to your mix can make it sound more spacious and immersive. To add stereo width, you can use a stereo imaging plugin, which widens the stereo image without affecting the mono elements of the mix. However, it’s important not to overdo it, as this can negatively affect the clarity of the vocals. Apply a subtle amount of stereo width to create a sense of space and depth in your mix. Limiting and Volume Control Finally, limiting and volume control are crucial steps when mastering your rap vocals. Limiting is a process that prevents the track from clipping or distorting when it’s played back at high volumes. Meanwhile, volume control involves adjusting the overall volume of the track so that it’s consistent with other tracks in the same genre. Use a limiter to ensure that the vocals don’t clip, and adjust the volume level to make sure it sits well in the mix without being too loud or too quiet. Overall, mastering is an essential stage in mixing rap vocals. With the right approach and tools, you can create a polished and professional- sounding track that stands out from the crowd. By applying these steps, including Final EQ and Compression, Adding Stereo Width, Limiting and Volume Control, you should be well on your way to mastering your rap vocal track.

Testing And Fine-tuning The Mix

After you have recorded your rap vocals, it’s time to start mixing them. Mixing involves adjusting the levels of the various elements of a song, including vocals, instruments, and effects, to create a cohesive and balanced sound. Testing and fine-tuning is a crucial step in the mixing process that ensures your rap vocals sound great on different speakers and in different environments.

Testing On Different Systems

Testing your mix on different systems is essential to ensure it sounds great on all platforms. When mixing rap vocals, it’s best to test on different systems, including studio monitors, headphones, earbuds, car speakers, and laptop speakers. This will help you determine how the mix will sound across different devices.

It’s important to note that each system has a different frequency response, which means that some sounds may be louder or quieter on different systems. By testing on different systems, you can adjust the mix to make it sound great everywhere.

Adjusting The Mix

When fine-tuning the mix, it’s crucial to start with the vocals. The vocals are the most important element in any rap song, and they should be the loudest and most prominent part of the mix. Adjust the vocals to sit on top of the instrumental, but not to overpower it.

You can also adjust the EQ to make the vocals sound better. For instance, high-pass filtering can cut out low frequencies that muffle the vocal clarity, while boosting the mids can make them stand out. Additionally, you can use compression to even out the vocal performance.

Finally, it’s essential to ensure that all the elements in the mix sit together cohesively. You can do this by adjusting the levels of the instruments, effects, and the vocals. By doing so, the track will sound smooth and professional.

Quick Tips for Adjusting the Mix
AdjustmentDescription
Volume LevelsAdjust the levels of different elements in the mix.
Equalization (EQ)Adjust the frequency balance of each element.
CompressionEven out the dynamic range of the vocals or instruments.

Adjusting the mix is an iterative process, and it may take some time to get the perfect sound. However, it’s worth it to take the time and effort to create a great-sounding mix. By following these tips and testing the mix on different systems, you can create a professional-sounding rap vocal track that sounds great everywhere.

Best Way to Mix Rap Vocals

Credit: producelikeapro.com

Frequently Asked Questions For Best Way To Mix Rap Vocals

How Do You Mix Vocal Rap?

Mixing vocal rap is a process that involves adjusting the levels, EQ, compression, reverb, and other effects to enhance the vocal recording and make it sound polished and professional. A skilled mix engineer should ensure that each element is balanced correctly and that the vocals sit well in the overall mix.

The process requires a careful ear and precise adjustments to highlight the rapper’s delivery without overwhelming the beat.

What Is The Eq For Rap Vocals?

The EQ for rap vocals involves boosting frequencies between 2KHz to 6KHz for clarity and presence, while lowering frequencies below 100Hz to minimize bass buildup. It’s important to adjust EQ based on the specific vocal characteristics of the artist to achieve an optimal sound.

What Is The Best Ratio For Rap Vocals?

The best ratio for rap vocals is typically around -6db to -3db. This allows the vocals to sit well in the mix without overpowering the instrumental. However, keep in mind that the ideal ratio may vary depending on the specific track and desired sound.

Experimentation and adjusting levels as needed is recommended.

How Do You Mix Crispy Rap Vocals?

To mix crispy rap vocals, ensure that the recording is high quality with no background noise. Use compression, equalization, and reverb to enhance the vocals. Adjust the levels and panning to create a balanced sound. Use automation to add dynamics, and consider adding ad-libs and vocal effects.

Conclusion

To put it simply, mixing rap vocals is an artform that requires time, patience, and attention to detail. From selecting the right mic to utilizing compression and EQ, there are various techniques that can help you achieve a polished end product.

Whether you’re a seasoned pro or a newbie to the music industry, the key is to experiment and find the best approach for your unique style and sound. By following these tips and guidelines, you can take your rap vocals to the next level and create an unforgettable listening experience for your audience.

More in our Vocal production guide.

Categories
Archive

Fl Studio Won’t Update

If Fl Studio won’t update, try disabling your antivirus or firewall software. This can often be the cause of update failures.

Fl Studio is a popular digital audio workstation used by musicians and producers worldwide. Staying up-to-date with the latest version of the software is essential for accessing new features and maintaining compatibility with other software programs. However, sometimes users may encounter problems when trying to update Fl Studio.

If you’re experiencing this issue, it could be due to your antivirus or firewall software blocking the update. We’ll explore some solutions to try when Fl Studio won’t update. We’ll also discuss why it’s important to keep your software up-to-date and how to prevent update issues in the future.

Common Reasons For Fl Studio Update Failure

FL Studio update failure can be caused by different reasons such as insufficient disk space, outdated versions, internet connection failure, or conflicts with other software. If FL Studio won’t update, check for these issues and solve them accordingly to ensure a successful update.

If you are trying to update FL Studio, but it won’t update, it can be frustrating. However, there are some common reasons why users face such problems. In this blog post, we will discuss some of the reasons why FL Studio won’t update and how you can fix them.

Lack Of Administrative Privileges

One of the primary reasons why FL Studio won’t update is due to a lack of administrative privileges. If you don’t have the required permissions, you may not be able to update FL Studio. This error may occur if you’re attempting to update the software on a shared computer or if your user account doesn’t have the necessary permissions. To fix this issue, you need to log in as an administrator or contact the person who has administrative access to your computer and ask them to install the update for you.

Corrupt Installation Files

Another reason why FL Studio won’t update could be due to corrupt installation files. If the files required to update FL Studio are damaged or corrupted, the update process might fail. To resolve this issue, you need to delete the existing FL Studio installation files and then download the latest version of FL Studio from the official website. This will ensure that you have a complete and undamaged installation file.

Incompatible Operating System

FL Studio updates might not work correctly on an outdated version of the operating system. If you’re using an older operating system, you may not be able to update FL Studio successfully. Some operating systems are not compatible with the latest version of FL Studio, and hence trying to update the software can fail. To fix this issue, you need to ensure that your system is running the latest version of the operating system. Check the official FL Studio website for system requirements before installing any updates.

Internet Connection Issues

FL Studio updates require an active internet connection. If you have a weak or slow internet connection, the update may fail to download. Similarly, if you have a firewall or antivirus software that blocks internet connections, you may face FL Studio update issues. To fix this issue, check your internet connection and ensure it’s stable. Ensure that your firewall or antivirus software is not blocking the FL Studio update. Disable them temporarily before downloading the update, and once FL Studio is updated, reactivate them. In conclusion, the above reasons are some of the primary reasons why FL Studio won’t update. By understanding these reasons, you can take the necessary steps to fix the issues and update FL Studio. Ensure that you follow the steps carefully and check the official website for any updates and requirements before downloading and installing FL Studio updates.

Fl Studio Won'T Update

Credit: www.reddit.com

Preventing Fl Studio Update Failure

Preventing FL Studio update failure is critical to keeping the application running smoothly. Don’t update in the middle of a project, verify that you’re using the latest version, make sure your computer meets the minimum requirements, and consider resetting the app’s settings to default all of these will help in preventing FL Studio won’t update issue.

Preventing FL Studio Update Failure If you are an avid music producer or enthusiast, FL Studio is one of the go-to digital audio workstations you would frequently use. Unfortunately, you may come across an issue where FL Studio won’t update, leaving you unable to access the latest software features. This can be frustrating, especially when you are trying to keep up with the latest trends in the music production industry. However, you can take some preventive actions to troubleshoot and fix the FL Studio update failure issue as shown in the following headings. Ensure User Account has Administrative Privileges FL Studio won’t update if you do not have administrative privileges on your user account. Therefore, you need to check if your user account is set to administrator level, as this will enable you to download, install, and update the software. To do this, right-click on the FL Studio shortcut icon and select “Run as Administrator.” If the software starts without any issue, it means your user account has administrative privileges. Run Anti-virus Scan and Troubleshoot Installation Files Viruses and other malware infections may interfere with your FL Studio installation files, resulting in update failure. Hence, running an antivirus scan on your computer will help you identify and remove any malicious programs affecting the FL Studio software. Additionally, you can troubleshoot the installation files by performing a system check and fixing any detected errors. Verify Operating System Compatibility with FL Studio FL Studio has specified system requirements that your computer must meet for seamless operation. Failure to meet these requirements may lead to update failure or poor performance of the software. Therefore, you need to check if your operating system is compatible with the FL Studio version you want to update. FL Studio recommends using the latest operating systems such as Windows 10 or the latest macOS version. Check and Test Internet Connection When updating FL Studio, a stable internet connection is vital to ensure the process completes without any issues. Therefore, you need to test your internet connection by trying to browse other websites to ascertain its stability. Moreover, you can also check your firewall settings to ensure they do not block the FL Studio update process. In conclusion, preventing FL Studio update failure is essential to ensure you stay up-to-date with the latest software features for better music production. By adhering to the preventive actions highlighted in this post, you can troubleshoot and fix any update failure issue.

Updating Fl Studio Manually

Manually updating FL Studio is essential if you encounter an issue where the digital audio workstation won’t update automatically. To perform the manual update, you need to download the latest installer from the Image-Line website and follow the instructions carefully to avoid any installation errors.

Updating FL Studio manually can be a bit of a daunting task, especially if the software fails to update automatically. One of the most common issues faced by FL Studio users is when their software won’t update. Luckily, the process of manual update isn’t too complicated as long as you follow the right steps. In this blog post, we’ll guide you through the process of manually updating FL Studio, step by step.

Download The Latest Fl Studio Version

The first step towards updating FL Studio manually is to download the latest version. Head over to the official Image-Line website, and download the latest version of FL Studio. Remember to download the version that is compatible with your operating system. Once the download is complete, proceed to the next step.

Close Running Fl Studio Applications

Before proceeding with the installation, ensure that all running FL Studio applications are closed. This includes any plugins, virtual instruments, or other applications that might be in use. If you’re not sure whether all FL Studio applications are closed, you can check the Task Manager.

Run Fl Studio Installer As An Administrator

To update FL Studio manually, you must install the latest version as an administrator. Right-click on the installation file, and select “Run as administrator.” This will ensure that the software is installed with all necessary permissions.

Install Fl Studio With Correct Configuration Settings

Once you’ve installed the FL Studio software, ensure that you’ve selected the correct configuration settings. These settings will determine how the software functions and how it interacts with your computer. Make sure to select the appropriate options during the installation process to ensure that the software runs smoothly. Conclusion: Updating FL Studio manually can resolve any issues faced while updating the software automatically. By following the above steps diligently, you can update FL Studio manually and get the latest version running on your computer.

Fl Studio Won'T Update

Credit: www.image-line.com

Downgrading To Previous Fl Studio Version

Need to downgrade to a previous version of FL Studio? If it won’t update, you can try uninstalling the current version and installing the older version from scratch. Make sure you back up your files before attempting the downgrade.

Downgrading to a previous version of FL Studio can be a viable option if experiencing issues with updating the software. This process involves uninstalling the current version and installing a previous version. However, it is essential to verify the compatibility of the previous version and configure its settings accordingly. This can be a daunting task for some, but with the proper guidance, it can be a smooth process. In this section, we will discuss the steps involved in downgrading to a previous version of FL Studio.

Uninstall Current Fl Studio Installation

The first step to downgrading to a previous version of FL Studio is to uninstall the current version. This is to ensure there are no conflicts between the previous and current versions. To uninstall the current version, go to the control panel, select ‘Programs and Features’, locate FL Studio, and select ‘Uninstall.’ Follow the prompts to complete the process.

Download And Install Previous Fl Studio Version

Once the current version of FL Studio is uninstalled, the previous version can be downloaded. There are various websites where previous versions of FL Studio can be downloaded. It is essential to ensure that the previous version downloaded is compatible with the system and does not contain any viruses. After downloading, install the previous version following the prompts, and remember to select the appropriate settings.

Verify Compatibility Of The Previous Fl Studio Version

After installing the previous version, it is essential to verify its compatibility with the system. This involves running tests to ensure the software is functioning correctly and that there are no conflicts with other programs. Additionally, the appropriate drivers should be installed to ensure there is no lag or delay when operating.

Configure Previous Fl Studio Version Settings

Configuring the settings of the previous FL Studio version is crucial to ensure optimal performance. This includes setting the audio drivers, buffer size, and sample rate to achieve the desired sound quality. Additionally, the settings should be adjusted to improve the workflow and allow for a more efficient music production process. In conclusion, downgrading to a previous version of FL Studio can be an effective solution to fixing update issues. However, it is essential to follow the steps outlined above to ensure a smooth and efficient process. Remember to uninstall the current version, download and install the previous version, verify compatibility, and configure the settings to improve performance.

Fl Studio Won'T Update

Credit: www.image-line.com

Frequently Asked Questions For Fl Studio Won’t Update

How Do I Update Fl Studio To The Latest Version?

To update FL Studio to the latest version, open the software and click on “Help” in the toolbar. Select “Check for updates” and follow the prompts to download and install the newest version. Don’t forget to save any projects or presets before updating.

Why Is Fl Studio Not Installing?

FL Studio may not be installing due to corrupted installation files, insufficient disk space, conflicting antivirus or firewall software, or outdated operating system or hardware specifications. Double-check the system requirements, use trusted installation files, disable any antivirus or firewall, and make sure your device has enough space to accommodate the software.

Do I Need To Uninstall Fl Studio To Update?

No, you don’t need to uninstall FL Studio to update it. You can simply install the new version over the existing one, and your previous projects and settings will not be affected.

How To Upgrade Fl Studio For Free?

To upgrade FL Studio for free, you need to have an existing license. Visit the Image-Line website and login to your account. Download and install the latest version of the software. Your license will automatically be updated to the latest version.

Conclusion

In case you are facing issues with FL Studio updates, don’t panic, as you are not alone. Go ahead, explore the options of an alternative method that works best for you. Some proven solutions, like disabling the firewall, updating the antivirus or contacting the FL Studio support team, might just do the trick.

Keep in mind, with some persistence and determination, you can take command of your FL Studio updates and get back to making great music.