Categories
Archive Audio Production

Should You Get Your Mixtape Mastered? Unleash the Power of Professional Audio Quality

Getting your mixtape mastered can enhance sound quality and make it more professional. However, it’s not always necessary, especially for beginners or those on a budget.


Mastering can provide a more polished and consistent feel to your music, but it’s important to weigh the cost and benefits based on your goals and audience. Whether you decide to master your mixtape or not, the most crucial aspect is the quality of your music and how well it resonates with your target audience.


Ultimately, the decision to master your mixtape should align with your artistic vision and budget constraints.


The Importance Of Professional Audio Quality

The Importance of Professional Audio Quality cannot be overlooked when it comes to ensuring your mixtape stands out in a competitive music industry.

Enhancing The Listening Experience

  • Professional mastering enhances the clarity and balance of your mixtape.
  • It ensures each element of your music is heard with precision.

Setting A Professional Standard

  1. Professional mastering sets your mixtape apart and signals a commitment to quality.
  2. It elevates your music to industry-standard levels, making it radio-ready.
Should You Get Your Mixtape Mastered? Unleash the Power of Professional Audio Quality


Credit: mmrmagazine.com


Understanding The Role Of Mastering

Mastering plays a crucial role in enhancing the overall quality and sonic consistency of a mixtape. It involves the final stage of audio production, where the audio tracks are refined to achieve a professional sound.

In mastering, the sound of each track is polished by adjusting levels, equalization, and compression to ensure a cohesive and balanced sonic output.

Mastering helps in balancing the levels of individual tracks and ensuring coherence across the entire mixtape, resulting in a seamless listening experience for the audience.

https://www.youtube.com/watch?v=ZHXD-BlKyL8


Benefits Of Professional Mastering

Optimizing Sound For Various Devices

Professional mastering ensures that your mixtape sounds great on all types of devices, from smartphones to high-end speakers. This process fine-tunes the audio to deliver a consistent and high-quality listening experience across different platforms and equipment.

Stand Out In A Crowded Market

By investing in professional mastering for your mixtape, you can distinguish your music from the competition. The attention to detail and overall polished sound achieved through mastering can elevate your mixtape, making it stand out and grab the listener’s attention in a saturated market.

Preparing For Distribution

Professional mastering is essential for preparing your mixtape for distribution. It ensures that the audio meets the industry standards and technical requirements, making it ready for streaming platforms, physical copies, and various distribution channels. This leads to better reception and accessibility for your music.

Should You Get Your Mixtape Mastered? Unleash the Power of Professional Audio Quality


Credit: www.facebook.com


Factors To Consider Before Mastering


Before getting your mixtape mastered, it’s crucial to consider the quality of the original mix, the expertise of the mastering engineer, the goals for your music, and your budget. Evaluating these factors will help determine if mastering is the right choice for your mixtape.

Before taking the leap and getting your mixtape mastered, there are several factors that you should carefully consider. It’s important to evaluate the quality of the original recording, your budget and resources, as well as the expertise of the producer. Let’s take a closer look at each of these factors:

Quality Of The Original Recording

One of the key factors to consider before diving into the mastering process is the quality of your original recording. Keep in mind that mastering can enhance the overall sound and polish your mix, but it won’t be able to completely fix a poorly recorded track. If you’ve captured a clean and well-balanced recording, it can greatly benefit from the mastering stage.

Here are some aspects to consider regarding the quality of your original recording:

  • Is the recording free from background noise and distortion?
  • Are the vocals and instruments properly balanced?
  • Does the mix have sufficient dynamics and clarity?

If your original recording checks these boxes, then it’s likely a good candidate for mastering.

Budget And Resources

Another significant factor to contemplate is your budget and available resources. While mastering is an essential step in the music production process, it’s important to assess whether your financial resources align with the cost of professional mastering services. Remember, mastering studios and engineers come with a price tag.

Consider the following when evaluating your budget and resources:

  • Do you have the financial means to invest in professional mastering services?
  • Can you dedicate the necessary time and effort for self-mastering?
  • Are there online resources or plugins that fit within your budget?

By carefully considering your budget and available resources, you can make an informed decision about how to proceed with mastering your mixtape.

Producer’s Expertise

The expertise of the producer handling your mixtape can significantly impact the mastering process and the final outcome of your tracks. It’s crucial to assess the skills and experience of the producer before making any decisions.

Here are some aspects to keep in mind regarding the producer’s expertise:

  • Does the producer have a proven track record in mastering similar genres?
  • What is their level of experience and knowledge in audio engineering?
  • Can they effectively communicate and understand your artistic vision?

Choosing a producer who specializes in your genre and understands your artistic vision can help ensure your mixtape receives the utmost attention and care during the mastering process.

In conclusion, before deciding whether to get your mixtape mastered, it’s important to consider the quality of the original recording, your budget and resources, as well as the expertise of the producer. Taking these factors into account will help you make an informed decision that aligns with your goals and resources.

Choosing The Right Mastering Engineer

When it comes to getting your mixtape mastered, finding the right mastering engineer is crucial. The mastering engineer can make or break the final sound of your mixtape, polishing it to perfection and ensuring it translates well across different platforms and audio systems. Here are two important factors to consider when choosing the right mastering engineer: experience and portfolio, as well as communication and collaboration.

Experience And Portfolio

Experience is key when it comes to selecting a mastering engineer. Look for someone who has a proven track record in the music industry and has worked on projects similar to yours. A mastering engineer with experience knows how to bring out the best in your mixtape, enhancing the dynamics and clarity while maintaining its overall artistic vision. Don’t be afraid to ask for their portfolio or samples of their previous work. This will give you an idea of their expertise and the quality of their mastering.

Communication And Collaboration

Effective communication and collaboration with the mastering engineer are essential for achieving the desired outcome. A good mastering engineer should listen to your goals and vision for the mixtape and be open to your input and feedback throughout the process. They should be able to understand your musical style and preferences and adjust their techniques accordingly. Look for a mastering engineer who is responsive, easy to communicate with, and values your creative input. This collaboration will ensure that the final master meets your expectations.
Should You Get Your Mixtape Mastered? Unleash the Power of Professional Audio Quality


Credit: mixingmonster.com


Frequently Asked Questions On Should You Get Your Mixtape Mastered


How Can Mastering Enhance The Quality Of Your Mixtape?


Mastering takes your mixtape to the next level by ensuring consistent volume levels, enhancing clarity, and adding professional polish. It can make a significant difference in the overall sound quality and make your mixtape stand out from the competition.


What Are The Benefits Of Getting Your Mixtape Professionally Mastered?


Professional mastering ensures that your mixtape sounds the best it can be across different playback systems. It improves the overall balance, clarity, and depth, and optimizes the sound for various formats and platforms. This helps your mixtape sound professional and appealing to listeners.


How Does Mastering Help In Achieving A Cohesive Sound For Your Mixtape?


Mastering brings all the songs on your mixtape together, ensuring they have a consistent sound and feel. It helps in adjusting the tonal balance, controlling the dynamics, and creating a seamless transition between tracks. This creates a cohesive and enjoyable listening experience for your audience.


Is It Possible To Master Your Mixtape Yourself?


While it is possible to attempt mastering your mixtape yourself, it requires specialized skills, experience, and knowledge of mastering techniques. Professional mastering engineers have a trained ear and access to advanced tools, resulting in a superior final product. Investing in professional mastering can ultimately save you time and ensure a high-quality result.


Conclusion


Mastering your mixtape can make a significant difference in the final product. It’s the finishing touch that can elevate the quality and make your music stand out. With professional mastering, you can ensure that your mixtape sounds polished and professional, leaving a lasting impression on your audience.


Ultimately, investing in mastering can be a crucial step towards achieving musical success.
Categories
Archive Audio Production

Producing EDM Songs: Unlock the Power of Better Mixing & Mastering

To produce EDM songs for better mixing and mastering, focus on sound selection and clean arrangements. Pay attention to EQ, compression, and effects during the production process to achieve a polished end result.


Creating EDM music requires a good understanding of the genre’s elements, such as chord progressions, sound design, and arrangement. By following specific guidelines during the production stage, you can set yourself up for success in the mixing and mastering phases.


We will explore effective strategies for producing EDM songs that will result in a well-balanced and professional sound. By implementing these techniques, you can elevate your production quality and make the mixing and mastering process smoother and more efficient. Let’s dive in to discover how you can enhance your EDM production skills.


Choosing The Right Software And Tools

If you want to create high-quality EDM songs, selecting the right software and tools is crucial. This guide will help you make informed decisions when it comes to choosing the best digital audio workstation (DAW) and plugins for sound design.

Selecting The Ideal Digital Audio Workstation

When it comes to producing EDM tracks, the Digital Audio Workstation (DAW) you choose plays a significant role in the sound quality and overall production process.

Exploring Plugins For Sound Design

  • Plugins are essential tools that enhance sound quality in EDM production.
  • When selecting plugins, consider factors like compatibility and functionality.
  • Different plugins offer various features for sound manipulation and effects.

Understanding The Basics Of Edm Mixing

Ensuring that each element in the mix is clearly audible and positioned correctly is key. Adjust volume levels and pan appropriately to create a balanced soundstage.

Equalization helps sculpt the frequency spectrum of each instrument while compression evens out the dynamics. Use these tools judiciously.

Mastering Techniques For Edm

Mastering techniques play a crucial role in shaping the final sound of an EDM track. By understanding the dynamic range and loudness, as well as effectively utilizing limiters and multiband compression, producers can achieve professional-grade results in their EDM mixes.

Understanding Dynamic Range And Loudness

Dynamic range refers to the difference between the quietest and loudest parts of a song. For EDM tracks, it’s essential to strike a balance that allows impact while still maintaining clarity. Utilizing mastering tools to control the dynamic range ensures that the overall sound is punchy and full without sacrificing detail.

Utilizing Limiters And Multiband Compression

Limiters are essential for controlling the peak levels in an EDM mix. By setting a threshold, limiters prevent the signal from clipping, allowing for a louder and more impactful mix. Similarly, multiband compression enables precise control over different frequency ranges, ensuring that the mix remains balanced and powerful throughout.

Producing EDM Songs: Unlock the Power of Better Mixing & Mastering


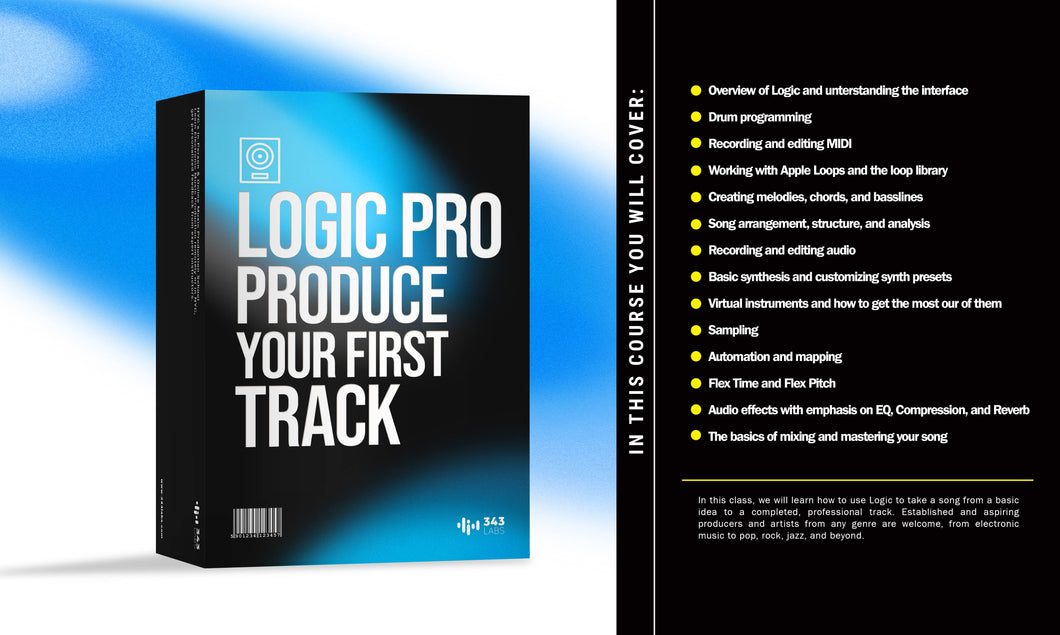
Credit: shop.343labs.de


Creating Impactful Edm Mixes


Produce impactful EDM mixes by focusing on producing EDM songs for optimal mixing and mastering. Utilize effective techniques and software to enhance the overall sound quality and create dynamic and engaging mixes that resonate with the audience. Mastering the art of EDM production can elevate the impact and quality of your mixes.

Creating a powerful and impactful mix is essential for any EDM producer looking to make their songs stand out. The combination of unique synth sounds, powerful basslines, and energetic drum grooves can take your track to the next level. In this article, we will explore two crucial aspects of producing EDM songs for better mixing and mastering: layering and processing synth sounds, and crafting powerful basslines and drum grooves.

Layering And Processing Synth Sounds

In EDM music, synth sounds play a vital role in creating the signature sound and atmosphere of a track. However, using just one synth sound may not give your mix the depth and complexity it needs. Layering multiple synth sounds can add richness and character to your music. Here are some tips for layering and processing synth sounds:

  • Choose a combination of different synth sounds that complement each other.
  • Assign each synth sound to a separate track in your DAW for better control and manipulation.
  • Adjust the volume levels of each synth sound to prevent any overpowering or clashing frequencies.
  • Apply individual processing techniques such as EQ, compression, and reverb to each synth sound to enhance their sonic qualities.
  • Experiment with panning and stereo imaging to create a wide stereo field and spatial depth in your mix.

By layering and processing synth sounds effectively, you can create a sonic landscape that is both captivating and immersive.

Crafting Powerful Basslines And Drum Grooves

Powerful basslines and energetic drum grooves are the foundation of any EDM track. They provide the rhythm and drive that make listeners want to dance. To craft impactful basslines and drum grooves, consider the following techniques:

  • Choose the right sounds for your bassline and drums, ensuring they complement each other.
  • Use sidechain compression to give your bassline and kick drum a tighter and punchier sound.
  • Experiment with different rhythmic patterns and variations to create interest and energy in your drum grooves.
  • Add subtle fills, transitions, and variations to keep the momentum going throughout the track.

Remember, a well-crafted bassline and drum groove will not only make your track more engaging but also create a solid foundation for the other elements in your mix.


Refining Your Sound With Advanced Techniques

Producing electronic dance music (EDM) requires more than just a good beat and catchy melodies. To truly stand out from the crowd and create professional-sounding tracks, it’s essential to refine your sound using advanced techniques. These techniques go beyond the basics of mixing and mastering, allowing you to add movement, interest, depth, and width to your EDM songs. In this article, we will explore two important techniques that can take your sound to the next level: applying automation for movement and interest, and utilizing spatial effects for depth and width.

Applying Automation For Movement And Interest

Automation is a powerful tool that allows you to control various parameters of your music over time. By automating parameters such as volume, panning, filters, and effects, you can create dynamic and engaging EDM tracks that capture the listener’s attention. Here are a few ways you can use automation to add movement and interest to your songs:

  • Create build-ups and breakdowns by automating the volume and filters to gradually increase or decrease intensity.
  • Add excitement to your drops by automating the panning of certain elements, creating a sense of movement across the stereo spectrum.
  • Add variation to repetitive sections by automating effects such as delay or reverb, making each repetition slightly different and more interesting.
  • Experiment with automating the parameters of virtual instruments, like the filter cutoff or oscillator pitch, to create evolving and evolving sounds.

Utilizing Spatial Effects For Depth And Width

In EDM production, creating a sense of depth and width is crucial to achieving a professional and immersive sound. Spatial effects can help you achieve this by manipulating the stereo image of your mix. Here are a few spatial effects you can use to enhance the depth and width of your EDM tracks:

  1. Reverb: Use reverb to create a sense of space and depth in your mix. Apply different amounts of reverb to different elements, placing them in a virtual acoustic environment.
  2. Delay: Experimenting with delay settings can add depth and width to your mix. Try using short delay times to create stereo widening effects or longer delay times to add a sense of space.
  3. Stereo Imaging: Utilize stereo imaging plugins to manipulate the placement and width of individual elements in the stereo field. This can create a more expansive and immersive sound.
  4. Haas Effect: The Haas effect involves introducing a slight delay to the mono signal, creating the perception of width without the risk of phase cancellation. This effect can be useful for widening lead melodies or vocals.

By applying automation for movement and interest, and utilizing spatial effects for depth and width, you can take your EDM productions to new heights. These advanced techniques will help you stand out in a crowded music scene and deliver professional-sounding tracks that resonate with your audience. So start experimenting and refining your sound today!


Producing EDM Songs: Unlock the Power of Better Mixing & Mastering


Credit: www.blackghostaudio.com


Frequently Asked Questions Of Producing Edm Songs For Better Mixing And Mastering


Q: What Are Some Tips For Producing Edm Songs?


A: To produce EDM songs, focus on creating catchy melodies, using innovative sound design, and crafting engaging arrangements. Pay attention to layering and balancing the different elements in your mix, and make use of automation techniques to create dynamics. Don’t forget to experiment with different effects and plugins to add depth and texture to your tracks.


Q: How Can I Improve The Mixing Of My Edm Songs?


A: To improve the mixing of your EDM songs, start by ensuring that each element in the mix has its own space and is not clashing with other elements. Use EQ to carve out frequencies for each instrument, apply compression to control dynamics, and add reverb and delay to create depth and ambience.


Regularly reference your mix on different playback systems to ensure it translates well.


Q: What Are Some Tips For Mastering Edm Songs?


A: When mastering your EDM songs, aim to achieve a balanced frequency response, a loud but dynamic sound, and consistency across your tracks. Use EQ and compression to enhance the mix, apply stereo imaging techniques to widen the sound, and use a limiter to increase the overall loudness.


Don’t overdo the mastering process to avoid losing clarity and punch in your mix.


Conclusion


Incorporating these tips will greatly improve the overall quality of your EDM songs, making the mixing and mastering process more efficient. By focusing on aspects such as sound selection, arrangement, and frequency balance, you can ensure that your tracks sound professional and stand out in the competitive EDM scene.


Keep experimenting and refining your production skills to achieve the best results.

Categories
Archive Audio Production

What Are The Best Mics For Recording Rap Vocals? Unveiling the Ultimate Picks!

As an Amazon Associate I earn from qualifying purchases.

The best mics for recording rap vocals are the Shure SM7B and the Neumann U87. These mics provide optimal sound quality and clarity for rap performances.


For aspiring rappers or established artists looking to elevate their recording quality, choosing the right microphone is crucial. The Shure SM7B is known for its versatility and ability to capture dynamic vocals, making it a popular choice among rap artists.


On the other hand, the Neumann U87 offers unmatched clarity and depth, ideal for capturing the nuances and intricacies of rap vocals. Whether you’re spitting fiery bars or delivering smooth melodies, having the right microphone can make a significant difference in the quality of your recordings. By investing in top-notch mics like the Shure SM7B or Neumann U87, you can ensure that your rap vocals shine in the studio.

What Are The Best Mics For Recording Rap Vocals? Unveiling the Ultimate Picks!


Credit: slate.com


Selecting The Right Microphone

When it comes to recording rap vocals, selecting the right microphone is crucial for capturing the artist’s unique tone and delivery.

The Importance Of Choosing The Right Mic

Choosing the right microphone can make all the difference in the clarity, depth, and overall quality of the rap vocals.

Factors To Consider When Selecting A Mic

  • Budget: Ensure the mic fits within your budget without compromising quality.
  • Microphone Type: Consider dynamic or condenser mics based on sound characteristics.
  • Polar Pattern: Cardioid pattern focuses on the vocals while minimizing background noise.
  • Frequency Response: Look for mics with a wide frequency response range for versatility.
Microphone Model Best For
Shure SM7B Warm and smooth vocals
Audio-Technica AT2020 Budget-friendly option with clear sound
Neumann TLM 102 High-end mic for professional-grade recordings

Top Microphones For Recording Rap Vocals

Rap vocals require top-quality microphones to capture the nuances of the artist’s voice. The right microphone can make or break the recording process.

Dynamic Microphones

Dynamic microphones are rugged and perfect for live performances. They can handle high sound levels and are great for emphasizing the clarity and punch in rap vocals.

Condenser Microphones

Condenser microphones are ideal for studio recordings due to their sensitivity and accuracy. They capture details and nuances in rap vocals with precision.

Ribbon Microphones

Ribbon microphones offer smooth and warm sound quality, making them a popular choice for rap vocals. They add a vintage touch to recordings.

Key Features To Look For In A Rap Vocal Mic

Rap vocals require a specific type of microphone that can capture the dynamic and powerful nature of the genre. When selecting a mic for recording rap vocals, there are several key features to consider to ensure the best sound quality possible. From sensitivity and frequency response to durability and versatility, the right mic can make a significant difference in the final recording.

Sensitivity And Frequency Response

Rap vocals demand a microphone with high sensitivity to capture the nuances of the artist’s delivery. Look for mics with a wide frequency response to capture both the low-end richness and the high-end clarity of rap vocals. A mic with a flat frequency response is essential to accurately reproduce the vocals without adding coloration or distortion that could affect the recording quality.

Durability And Build Quality

The physical build of the mic is crucial for withstanding the intense use typical in rap vocal recording sessions. Solid construction and quality materials ensure durability and longevity, while features such as shock mounts and internal pop filters can help to protect the microphone from damage caused by intense vocal performances.

Versatility And Adaptability

A rap vocal mic should be adaptable to different recording environments and performance styles. Look for a microphone that offers versatility in use, whether it’s for studio recording, live performances, or mobile setups. A flexible polar pattern allows the mic to adjust to various vocal techniques and can enhance the recording capabilities in diverse settings.

What Are The Best Mics For Recording Rap Vocals? Unveiling the Ultimate Picks!


Credit: www.latimes.com


Comparative Analysis Of Leading Mic Models

Choosing the right microphone for recording rap vocals is crucial to capture the essence and power of the artist’s performance. With numerous options available in the market, it can be overwhelming to make a decision. That’s why we have prepared a comprehensive comparative analysis of four leading mic models to help you find the perfect match for your recording needs. In this section, we will take a closer look at the pros and cons of Model 1 vs. Model 2 and Model 3 vs. Model 4.

Model 1 Vs. Model 2

When it comes to recording rap vocals, Model 1 and Model 2 are two popular choices among artists and sound engineers. Let’s compare these two models based on their key features:

Model Sensitivity Polar Pattern Frequency Range Price
Model 1 High Cardioid 20Hz-20kHz $200
Model 2 Medium Supercardioid 30Hz-20kHz $300

As seen in the table, Model 1 offers higher sensitivity, making it ideal for capturing detailed nuances in rap vocals. On the other hand, Model 2 boasts a supercardioid polar pattern which effectively reduces background noise. The wider frequency range of Model 2 allows for better reproduction of low-end frequencies. However, it comes with a higher price tag compared to Model 1.

Model 3 Vs. Model 4

If you are looking for alternatives to Model 1 and Model 2, Model 3 and Model 4 are worth considering. Let’s compare these two models based on their key features:

Model Sensitivity Polar Pattern Frequency Range Price
Model 3 Medium Bi-directional 20Hz-18kHz $250
Model 4 High Hypercardioid 30Hz-20kHz $350

Model 3 offers a medium sensitivity level and a bi-directional polar pattern, making it suitable for recording rap vocals in a controlled studio environment. On the other hand, Model 4 provides higher sensitivity and a hypercardioid polar pattern, allowing for greater isolation of the vocal source. Its extended frequency range ensures a more accurate representation of the rap vocals. However, it comes with a higher price compared to Model 3.

Tips For Getting The Most Out Of Your Mic

When it comes to recording rap vocals, having the right microphone is crucial to achieving a professional sound. However, it’s not just about the mic itself—it’s also about how you use it. To help you make the most of your recording sessions, here are some tips that will improve the quality of your rap vocals.

Optimizing Mic Placement

Proper mic placement is essential for capturing the true essence of your rap vocals. When recording, position the microphone at a distance of about 6 to 8 inches from your mouth. This will ensure that you capture the nuances and details of your voice while minimizing any plosive sounds or unwanted background noise.

Additionally, experiment with microphone angles to find the sweet spot that flatters your voice the most. Tilting the microphone slightly upwards or downwards can make a noticeable difference in the recorded sound.

Utilizing Pop Filters And Shock Mounts

Pop filters and shock mounts are invaluable accessories that can greatly enhance the quality of your rap vocal recordings. Pop filters help minimize plosive sounds caused by hard consonant sounds like “p” and “b” that can create unwanted bursts of air hitting the microphone.

Shock mounts, on the other hand, isolate the microphone from vibrations and handling noise, resulting in cleaner recordings. They are especially useful when working in home studios or environments with less-than-ideal acoustics.

Understanding Eq And Compression For Rap Vocals

EQ (equalization) and compression play a significant role in shaping the sound of rap vocals and bringing them to the forefront in a mix. EQ allows you to adjust the frequency response of your vocals, emphasizing certain frequencies to enhance clarity or to reduce harshness.

Compression, on the other hand, helps control the dynamic range of your vocals, making sure that all the lines are audible and consistent in volume. It adds a sense of polish and professionalism to your recordings, helping your rap vocals sit perfectly in the mix.

To use EQ and compression effectively, start with subtle adjustments and make small tweaks as needed. It’s important to trust your ears and experiment with different settings until you achieve the desired results.

By implementing these tips, you can take your rap vocal recordings to the next level. Optimizing mic placement, utilizing pop filters and shock mounts, and understanding EQ and compression techniques will help you capture the essence and energy of your rap vocals with clarity and professionalism.

What Are The Best Mics For Recording Rap Vocals? Unveiling the Ultimate Picks!


Credit: www.billboard.com


Frequently Asked Questions Of What Are The Best Mics For Recording Rap Vocals


What Are The Best Mics For Recording Rap Vocals?


When it comes to recording rap vocals, the best mics to consider are the Shure SM58, Audio-Technica AT2020, and Neumann U87. These microphones are known for their exceptional sound quality, durability, and versatility, making them perfect for capturing the unique tone and delivery of rap vocals.


Conclusion


Choosing the perfect mic for recording rap vocals can make a significant impact on the overall sound quality of your music. By considering factors such as microphone type, frequency response, and polar pattern, you can find the best mic to showcase your unique vocal style.


Experimenting with different options and seeking expert advice can help you find the mic that elevates your rap recordings to the next level.


https://www.youtube.com/watch?v=cGj__P6Q0nw


Categories
Archive Audio Production

How To Mix Rap Vocals For Beginners: Mastering Pro Techniques

To mix rap vocals for beginners, adjust levels, apply EQ, add compression for clarity and reverb for depth. Mixing rap vocals requires balancing the different elements of the track to achieve a polished and professional sound.


As a beginner, mastering these techniques can enhance the overall quality of your rap vocals and make them stand out in a competitive industry. Developing a solid foundation in mixing will allow you to showcase your artistry effectively. By following some basic steps and experimenting with different settings, you can create a unique and impactful sound that resonates with your audience.


With practice and dedication, you can improve your mixing skills and take your rap vocals to the next level.

How To Mix Rap Vocals For Beginners: Mastering Pro Techniques


Credit: blog.bandlab.com


Understanding Rap Vocals Mixing

Rap vocals mixing is a crucial aspect of producing high-quality rap music. Understanding the fundamentals of how to mix rap vocals is essential for beginners looking to enhance their sound. By mastering the basics and key elements of rap vocal mixing, you can take your music to the next level.

Basic Concepts

  • Start with a clean vocal recording.
  • Adjust the levels to ensure vocals stand out.
  • Utilize EQ to enhance vocal clarity.

Key Elements

  1. Compression to control dynamics.
  2. Reverb and delay for depth and space.
  3. Panning vocals for a wider sound.

Setting Up Your Workspace

Setting up your workspace is crucial for achieving professional results when mixing rap vocals. A well-organized and optimized workspace can enhance your workflow and improve the quality of your mixes.

Choosing The Right Software

When selecting software for mixing rap vocals, consider programs like Pro Tools, Logic Pro, or Ableton Live.

Setting Up Your Mixing Environment

Ensure your workspace has a comfortable chair and proper lighting to reduce eye strain.

  • Position your monitor at eye level to prevent neck strain.
  • Invest in quality studio headphones for accurate audio playback.
  • Organize your plugins and tools in an easily accessible manner.

“` Remember to optimize your workspace to maximize your productivity and creativity when mixing rap vocals.

Preparing The Vocal Tracks

Preparing the vocal tracks is a crucial step in the process of mixing rap vocals for beginners. A well-prepared vocal track can make the mixing process smooth and efficient, resulting in a professional sound. In this section, we will discuss the essential steps for preparing the vocal tracks before diving into the actual mixing process.

Cleaning Up The Audio

Before beginning the mixing process, it’s important to ensure that the vocal tracks are free from any unwanted noises or distractions. Start by listening carefully to the raw vocal tracks and identifying any background noise, clicks, pops, or breath sounds. Use a noise reduction plugin to eliminate any unwanted noise while preserving the natural qualities of the vocals.

Applying Basic Eq And Compression

Basic EQ and compression are essential for preparing the vocal tracks. Begin by applying a high-pass filter to remove any low-frequency rumble or noise. Then, use a parametric EQ to enhance the vocal tone by adjusting the frequency ranges. Following this, apply gentle compression to smooth out the dynamics and ensure a more consistent vocal performance throughout the track.

How To Mix Rap Vocals For Beginners: Mastering Pro Techniques


Credit: www.youtube.com


Advanced Mixing Techniques

Once you have mastered the basics of mixing rap vocals, it’s time to delve into the realm of advanced techniques. These techniques will help you take your mixes to the next level, giving your vocals that professional and polished sound. In this section, we will explore two important aspects of advanced mixing: using effects and automation, as well as balancing vocals with instrumentals.

Using Effects And Automation

Effects and automation are powerful tools that can add depth, character, and movement to your rap vocal mixes. Here are some ways you can harness the power of effects and automation:

  1. EQ: Use an equalizer to enhance the clarity and balance of your vocals. Cut frequencies that clash with instruments and boost frequencies that bring out the presence and character of the vocals.
  2. Reverb: Apply reverb to give your vocals a sense of space and depth. Experiment with different reverb settings to find the right level and tail length.
  3. Delay: Add delay to create rhythmic patterns or to give the vocals a sense of dimension. Play around with the delay settings to achieve the desired effect.
  4. Compression: Use compression to control the dynamic range of the vocals and make them sit well in the mix. Set the threshold, ratio, attack, and release settings according to the characteristics of the vocals.
  5. Panning: Pan the vocals to create a wider stereo image. Experiment with panning techniques to find the ideal placement that complements the other elements in the mix.
  6. Automation: Use automation to control the volume, panning, and effects parameters over time. Automate the vocals to add movement and variation, making the mix more dynamic and engaging.

Balancing Vocals With Instrumentals

A crucial aspect of mixing rap vocals is finding the right balance between vocals and instrumentals. Here are some tips to help you achieve this:

  1. Leveling: Set the volume levels of the vocals and instrumentals so that neither one dominates the mix. Use your ears and reference tracks to guide your leveling decisions.
  2. EQ and Sidechain Compression: Use EQ to carve out spaces in the instrumental frequencies to make room for the vocals. Apply sidechain compression to automatically lower the instrumental volume when the vocals are present, creating more clarity and separation.
  3. Spatial Positioning: Place the vocals in the center of the stereo image, while spreading out the instrumentals across the stereo field. This helps create a clear distinction between the vocals and instrumentals.
  4. Arrangement: Rearrange or edit instrumental parts as needed to create space for the vocals. Sometimes, removing or simplifying certain elements can make the vocals stand out more.
  5. Reference Mixing: Use commercial rap tracks as references to understand how vocals are balanced with instrumentals in professional mixes. Analyze and learn from these references to improve your own mixing skills.

By harnessing the power of effects and automation, and finding the perfect balance between vocals and instrumentals, you can take your rap vocal mixes from good to great. These advanced techniques will help you create professional-sounding mixes that are sure to impress.

Mastering Your Rap Vocal Mix


Learn essential techniques for mixing rap vocals as a beginner. Discover the key ingredients and step-by-step process to elevate your vocal mix, creating a professional and polished sound for your rap tracks. Master the art of balancing EQ, compression, and effects to make your rap vocals stand out in the mix.

To truly make your rap vocals shine, you’ll need to master your mix. Mastering involves applying final touches, reviewing, and fine-tuning your rap vocal mix until it reaches its full potential. In this section, we’ll explore two important steps: applying final touches and reviewing and fine-tuning.

Applying Final Touches

Applying final touches is all about adding that extra polish to your rap vocal mix. Here are some key steps to consider:

  1. Equalization (EQ): Use EQ to balance the frequency range of your vocal track. Boost or cut certain frequencies to enhance clarity and remove any unwanted resonance.
  2. Compression: Apply compression to control the dynamic range of your vocals. This helps to even out the volume and make your vocals sound more consistent.
  3. Effects: Experiment with effects like reverb, delay, and chorus to add depth and ambiance to your rap vocals. Keep in mind not to overdo it; moderation is the key.
  4. Stereo Imaging: Use stereo imaging techniques to create a wider soundscape for your rap vocals. Pan certain elements left or right to achieve a balanced and immersive mix.

Reviewing And Fine-tuning

Reviewing and fine-tuning is a crucial step to ensure your rap vocal mix is at its best. Here’s what you should focus on:

  • Level Balancing: Check the relative volume of each element in your mix, making sure your rap vocals are prominent and well-balanced with the instrumental.
  • Panning: Pan supporting vocal tracks, ad-libs, or background vocals slightly to the sides to create separation and depth.
  • Auditioning on Different Devices: Test your mix on various playback systems, such as headphones, car speakers, and studio monitors, to ensure it translates well across different platforms.
  • Detail Enhancement: Listen closely for any imperfections or unwanted noises in your rap vocal mix. Use tools like de-essers and noise reduction plugins to address these issues.

By dedicating time to apply final touches and review and fine-tune your rap vocal mix, you’re maximizing the potential of your vocals and creating a professional-sounding result. Remember to trust your ears and make adjustments until you’re satisfied with the outcome.

Frequently Asked Questions For How To Mix Rap Vocals For Beginners


What Are The Key Steps To Mix Rap Vocals?


To mix rap vocals effectively, start by cleaning up the vocals, adjusting the volume and panning, adding EQ and compression, enhancing presence with effects like reverb and delay, and ensuring a balanced mix by listening to the track as a whole.


How Do I Clean Up Rap Vocals Before Mixing?


To clean up rap vocals, remove background noise using noise reduction plugins, apply de-essing to reduce sibilance, and use a high-pass filter to eliminate low-end rumble. Use the spectral editor to fix any pitch or timing issues and remove any unwanted breath sounds or pops.


Why Is Compression Important In Rap Vocal Mixing?


Compression is essential in rap vocal mixing as it evens out the vocal performance by reducing the dynamic range. This ensures that softer parts are brought up and louder parts are controlled, resulting in a more balanced and polished vocal sound.


Compression also adds thickness and presence to the vocals.


Conclusion


Mastering the art of mixing rap vocals takes time and practice. With the right techniques and tools, you can achieve a professional sound. Remember to focus on EQ, compression, and effects to enhance the vocals. Pay attention to details and continue learning new methods to improve your skills.


Your dedication will lead to remarkable results.


Categories
Archive Audio Production

Why Do Independent Artists Need To Have Demo Recordings: The Key to Success!

Having demo recordings is crucial for independent artists to showcase their talent and attract industry attention. Demos help artists demonstrate their unique sound and style efficiently.


For independent artists, demo recordings serve as their first impression on record labels, agents, and fans. These recordings are essential for securing gigs, attracting collaborations, and establishing credibility in the competitive music industry. In a sea of aspiring musicians, a well-produced demo can set an artist apart and create valuable opportunities for exposure and growth.


Demonstrating versatility, creativity, and potential through demo recordings can be the key to unlocking a successful music career.

Why Do Independent Artists Need To Have Demo Recordings: The Key to Success!


Credit: playlistpush.com


The Importance Of Demo Recordings

Demo recordings are essential for independent artists to showcase their talents and attract opportunities.

Showcasing Talent And Versatility

  • Demo recordings highlight artists’ unique abilities and diverse skills.
  • They serve as a portfolio to demonstrate vocal range, instrumental prowess, and songwriting talent.
  • These recordings create a lasting impression on industry professionals and fans.

Attracting Opportunities

  1. Well-crafted demos grab the attention of music producers, labels, and promoters.
  2. They open doors to live performances, collaborations, and potential record deals.
  3. Demo recordings act as a powerful marketing tool to build a fan base and increase visibility.
Why Do Independent Artists Need To Have Demo Recordings: The Key to Success!


Credit: blog.groover.co


Quality Matters

When it comes to being an independent artist, Quality Matters especially when it comes to demo recordings. First Impressions Count and having a Competitive Edge can make all the difference. Let’s delve deeper into why high-quality demo recordings are crucial for independent artists.

First Impressions Count

First impressions are paramount for capturing the attention of industry professionals and potential fans. Your demo recordings serve as your initial introduction, making it essential to showcase your talent with top-notch quality.

Competitive Edge

H3 headings are effective in enhancing the structure of your content as they provide clear organization and improve readability.

https://www.youtube.com/watch?v=ae44-DKVn9w


Building A Professional Portfolio

Building a Professional Portfolio is essential for independent artists looking to make their mark in the music industry. A demo recording serves as a powerful tool in demonstrating an artist’s talent, range, and potential. Establishing a solid portfolio not only impresses stakeholders but also provides a means for artists to confidently present themselves in the competitive music landscape.

Establishing Credibility

Having a professional demo recording is a crucial step for independent artists in establishing their credibility within the industry. Potential collaborators, producers, and industry professionals often require a tangible demonstration of an artist’s capabilities. A well-produced demo showcases the artist’s skills and versatility, bolstering their credibility and making them more appealing to potential partners.

Creating A Brand Identity

A demo recording not only showcases an artist’s musical talents but also plays a significant role in crafting their brand identity. Through the demo, artists can effectively convey their unique style, genre, and musical vision. This creates a definitive brand identity that resonates with their target audience and sets them apart in a crowded marketplace.

Networking And Promotion


Independent artists need demo recordings for networking and promotion. These recordings showcase their talent and help them stand out in the competitive music industry. Having high-quality demos can grab the attention of industry professionals and open doors to new opportunities for exposure and collaboration.

Engaging Industry Professionals

Networking is essential for independent artists, especially when it comes to engaging industry professionals. These professionals, including producers, record label executives, and talent scouts, can open doors to opportunities that may not be accessible otherwise. Having high-quality demo recordings is a key way to capture their attention and showcase your talent effectively. With a compelling demo, industry professionals are more likely to take notice and consider working with you on future projects. Your demo serves as your calling card, enabling you to make a memorable first impression and establish meaningful connections with those who can help further your career.

Reaching Wider Audiences

In addition to networking with industry professionals, having demo recordings is crucial for reaching wider audiences. When you share your demos on platforms like SoundCloud, YouTube, or Spotify, you have the potential to connect with listeners from around the world. Your demo acts as a snapshot of your artistry, giving listeners a taste of your unique sound and style. By promoting your demos through social media and other online channels, you can attract a larger fan base and gain exposure to music fans who may not have discovered you otherwise. This increased visibility can lead to new opportunities, such as live performances, collaborations, and even potential partnerships with brands looking to connect with independent artists. Below is a breakdown of why independent artists need to have demo recordings in terms of networking and promotion:

Reasons Benefits
Engaging Industry Professionals Showcases talent effectively and helps establish connections.
Reaching Wider Audiences Increases visibility and attracts a larger fan base.

Overall, having demo recordings is essential for independent artists as it enables them to network with industry professionals and reach wider audiences. By investing time and effort into creating high-quality demos, artists can increase their chances of success and open doors to new opportunities in the highly competitive music industry.

Investing In Future Success


Investing in demo recordings is crucial for independent artists to showcase their talent and secure future success. These recordings serve as a powerful tool for attracting industry professionals and connecting with a wider audience, ultimately paving the way for career advancement in the competitive music industry.

Long-term Career Goals

Investing in demo recordings is a crucial step for independent artists looking to achieve their long-term career goals. Without a professionally recorded demo, it becomes challenging for artists to showcase their talent to industry professionals and music enthusiasts. A well-crafted demo not only demonstrates an artist’s musical abilities but also acts as their calling card in the highly competitive music industry.

Demo recordings serve as a representation of an artist’s style, skill, and potential, helping them make a lasting impression on potential listeners and industry insiders. They can be the key to opening doors to opportunities such as securing record deals, attracting collaborations, and getting gigs at reputable venues.

To make a mark in the industry and achieve long-term success, independent artists need to recognize the value of demo recordings and make them a priority in their career strategy.

Setting The Stage For Progress

Demo recordings set the stage for progress in an artist’s career by providing a tangible representation of their musical prowess. These recordings act as a stepping stone that allows artists to move forward, attract attention, and expand their reach. By investing in professionally recorded demos, artists position themselves as serious contenders in the industry, demonstrating their commitment to their craft.

A high-quality demo helps artists stand out from the crowd, capturing the attention of music industry professionals who are constantly on the lookout for fresh talent. This attention can lead to valuable connections, mentorship opportunities, and increased exposure. Demo recordings also serve as a valuable tool for self-evaluation, enabling artists to refine and improve their skills.

By setting the stage for progress through demo recordings, independent artists pave the way for their own growth, development, and recognition within the music industry.

Why Do Independent Artists Need To Have Demo Recordings: The Key to Success!


Credit: www.mellostudio.com


Frequently Asked Questions Of Why Do Independent Artists Need To Have Demo Recordings


Why Should Independent Artists Have Demo Recordings?


Having demo recordings is crucial for independent artists as it showcases their talent, helps them attract potential listeners and industry professionals, and opens doors to opportunities for gigs, collaborations, and record deals. Demo recordings serve as a professional representation of an artist’s skill and potential, making them an essential tool for success in the music industry.


Conclusion


Demo recordings are essential for independent artists to showcase their talent and attract potential fans and industry professionals. These recordings help in creating a strong online presence and increase opportunities for live performances and collaborations. By investing in high-quality demo recordings, artists can elevate their music careers and stand out in the competitive music industry.

Categories
Archive Audio Production

Drum And Bass Clashing: Supercharge Your Fix with These 3 Power Ways!

Drum and Bass clashing? Here are 3 ways to fix it quickly and effectively.


In the fast-paced world of music production, clashes in Drum and Bass tracks can be a common issue that can hinder the overall quality of the music. However, with a few simple techniques, you can easily resolve these conflicts and create a seamless and harmonious sound.


By implementing the right EQ adjustments, focusing on sound selection, and using automation creatively, you can ensure that your Drum and Bass tracks blend together seamlessly. Let’s dive into these three key strategies to address any clashing issues and elevate the quality of your music production.


Credit: www.vtechkids.com


History Of Drum And Bass

Drum and bass music has a rich history that traces back to its Jamaican roots and has evolved over time to gain mainstream recognition.

Jamaican Roots

The roots of drum and bass can be traced back to Jamaica, where sound system culture played a significant role in its development.

Evolution And Mainstream Recognition

Drum and bass has evolved from its early days in Jamaica to become a prominent genre in the mainstream music industry worldwide.

Its fast tempo and heavy basslines have captured the attention of music lovers and DJs alike, making it a staple in clubs and festivals.

Drum And Bass Clashing: Supercharge Your Fix with These 3 Power Ways!


Credit: www.al.com


Characteristics Of Drum And Bass


Drum and Bass, a genre known for its high-paced beats and intense energy, often faces the issue of clashing elements. To address this, DJs can focus on seamless transitions, harmonizing contrasting elements, and creating a cohesive flow to fix the clash in their mixes.


With these methods, the raw energy of Drum and Bass can be harnessed to create a seamless and immersive experience for the audience.

Tempo And Rhythm

Drum and Bass music is known for its fast tempo and complex rhythms, typically ranging from 160 to 180 beats per minute. The intense pace creates an energetic atmosphere that drives the music forward.

Basslines And Breakbeats

The basslines in Drum and Bass are deep and prominent, providing a powerful foundation for the tracks. Breakbeats, characterized by syncopated rhythms and chopped-up drum loops, add a dynamic and experimental element to the genre.

Impact Of Drum And Bass


Discover the impact of Drum and Bass clashing and learn three effective strategies to resolve it. Enhance your music mixing skills and create cohesive beats with these practical solutions. Unlock the potential of your sound and elevate your Drum and Bass compositions to new heights.

Cultural Influence

Drum and Bass music has permeated various cultures, influencing fashion, art, and dance. Its high energy beats and intense rhythms have been a driving force in underground scenes, contributing to a sense of community and belonging among its enthusiasts. From the UK where it originated to cities worldwide, its impact can be felt in the vibrant and diverse subcultures it has fostered.

Global Subgenres

The influence of Drum and Bass extends globally, giving rise to diverse subgenres that cater to different tastes and styles. From Liquid Funk to Neurofunk, the genre has evolved to accommodate a wide spectrum of sounds, appealing to a diverse audience. Furthermore, its fusion with other musical styles has given birth to innovative subgenres, enriching the global music landscape.

3 Ways To Fix Drum And Bass Clashing

1. Emphasize Communication between Artists and Producers

2. Foster Collaboration to Merge Diverse Styles

3. Promote Inclusivity and Respect within the Community

Clashing In Drum And Bass

Drum and Bass, a genre known for its high-energy beats and pulsating basslines, is no stranger to clashes that occur within its music production. These clashes can hinder the overall impact and quality of the track. In this blog post, we will explore the definition and origins of clashing in Drum and Bass, as well as delve into the technical aspects that contribute to this issue. Additionally, we will offer three effective ways to fix clashing in Drum and Bass for an enhanced listening experience.

Definition And Origins

Clashing in Drum and Bass refers to a phenomenon where different elements of a track, such as drums, bass, melodies, or vocals, collide and create an unpleasant sonic interference. This clash disrupts the intended balance and can distort the overall mix, making it less enjoyable for listeners.

Origins of clashing in Drum and Bass can be traced back to the early days of the genre’s development. As producers experimented with complex rhythms, intricate basslines, and harmonies, the probability of clashes increased. With the fast-paced nature of Drum and Bass, ensuring cohesion between different elements became a critical challenge for artists.

Technical Aspects

The technical aspects that contribute to clashing in Drum and Bass can vary, but several key factors are primarily responsible. These factors include:

  1. Frequency Overlap: When different elements within a track are competing for the same frequency range, clashes can occur. For example, if the kick drum and bassline occupy similar frequencies, they can interfere with each other, resulting in an undesirable clash.
  2. Phase Issues: Phase cancellation can happen when two or more waveforms of the same frequency align in opposite phases, leading to a reduction or cancellation of sound. This issue can cause certain elements to lose their impact or disappear entirely, contributing to the overall clash.
  3. Lack of Dynamic Range: Insufficient dynamic range management can create clashes in Drum and Bass tracks. This refers to the difference between the softest and loudest sounds within a mix. If all elements are consistently at high volume, it becomes harder to distinguish and appreciate individual components, leading to a sonic clash.

To fix clashing issues in Drum and Bass and maintain a clean and powerful mix, producers must address these technical aspects and employ specific techniques and sound design strategies. By doing so, they can ensure each element has its own space within the frequency spectrum and enhance the overall clarity and impact of their tracks. In the next section, we will explore three effective ways to fix clashing in Drum and Bass.

Supercharging Your Drum And Bass Fix


Elevate your Drum and Bass experience with practical solutions for overcoming clashes. Discover 3 effective strategies to harmonize beats seamlessly and enhance your music production skills effortlessly.

Layering And Syncopation

In the world of drum and bass, layering and syncopation are essential techniques that can take your beats to the next level. Layering involves combining multiple drum samples together to create a fuller, more complex sound. By blending different elements such as kicks, snares, and hi-hats, you can achieve a unique and distinctive drum pattern that stands out.

Syncopation, on the other hand, adds a sense of rhythmic nuance and complexity to your drum and bass tracks. It involves placing emphasis on off-beats and creating unexpected accents within the rhythm. This technique can make your beats more groove-oriented and give them a dynamic feel that will keep your listeners on their toes.

Drum and Bass Layering and Syncopation
Image by Pixabay

Effect Processing And Modulation

To truly supercharge your drum and bass fix, effect processing and modulation techniques are a must. These techniques allow you to manipulate and shape the sound of your drums, adding depth, texture, and movement to your tracks.

One way to enhance your drum and bass beats is through the use of effects such as reverb, delay, and distortion. Reverb can give your drums a sense of space and ambience, while delay can create interesting echoes and repeats. Distortion, on the other hand, can add grit and intensity to your drums, making them punchier and more aggressive.

Modulation techniques, such as using filters, phasers, and flangers, can also add a unique flavor to your drum and bass tracks. These effects can alter the frequency, amplitude, and phase of your drums, resulting in interesting and evolving sounds that will captivate your audience.

Live Performance Techniques

When it comes to drum and bass, live performance techniques can bring a whole new dimension to your music. Live performance allows you to improvise, experiment, and interact with your audience in real-time, creating a truly memorable and engaging experience.

One technique you can explore is the use of drum pads and controllers. These devices allow you to trigger samples, loops, and effects on the fly, giving you the freedom to manipulate and shape your beats in a live setting. By combining live drumming with electronic elements, you can create a dynamic and energetic performance that will leave the crowd wanting more.

Another live performance technique to consider is incorporating live instruments into your drum and bass tracks. Whether it’s a guitar solo, a saxophone riff, or even a vocal performance, adding live instruments can bring a unique and organic feel to your music. This combination of electronic and live elements can result in a truly immersive and captivating performance that will set you apart from the crowd.

Drum And Bass Clashing: Supercharge Your Fix with These 3 Power Ways!


Credit: www.keymag.co.uk


Frequently Asked Questions Of Drum And Bass Clashing Heres 3 Ways To Fix It


Q: Why Are The Drums And Bass Clashing In My Mix?


A: Drums and bass can clash when they occupy similar frequency ranges. This can cause muddiness and loss of separation in your mix.


Conclusion


Addressing clashing in drum and bass can improve music production quality. Emphasize sound selection, EQ, and compression. Incorporating these techniques will mitigate clashing and enhance the overall mix. Take the time to refine your approach and elevate your drum and bass tracks.


https://www.youtube.com/watch?v=GM8zLpy3qj8


Categories
Archive Audio Production

Things You Should Never Say To Your Audio Engineer Or The Guy Mixing Your Song: Avoid These Common Mistakes

Never say “Can you make it sound like [insert famous artist]?” Or “I could have done that at home.”


Communicate respectfully with your audio engineer to achieve the best results for your song. Building a positive and collaborative relationship with your engineer is key to creating a successful and satisfying music production experience. By understanding what not to say and how to effectively communicate your needs, you can ensure a productive and harmonious working relationship with the person mixing your music.


This will ultimately lead to a higher quality final product that both you and your engineer can be proud of. Remember, clear communication and mutual respect are essential for a successful music production process.


Credit: www.facebook.com


Misconceptions About Audio Engineers

Assumptions About Their Job

Audio engineers are not just “button pushers”. They have technical expertise.

Unrealistic Expectations

Expecting a perfect mix in one take is not feasible. Patience is key.

Common Mistakes In Communication

Proper communication with your audio engineer is vital for a successful music project. Avoiding certain phrases can prevent misunderstandings and enhance collaboration.

Dicating Instead Of Collaborating

Avoid telling your audio engineer exactly what to do; instead, engage in a collaborative conversation regarding your vision.

Disregarding Their Input

Don’t overlook your audio engineer’s expertise and suggestions; they have valuable insights to improve the project.

The Impact Of Negative Comments

Negative comments can have a significant impact on the working relationship between an artist and their audio engineer or mixer. It’s crucial to remember that effective communication and a supportive atmosphere are essential for a successful collaboration. Using disparaging or undermining language towards your audio engineer can lead to potential issues that may affect the quality of the final product.

Undermining Their Expertise

Disregarding the expertise and experience of your audio engineer by questioning their technical decisions or skills can lead to strained relations. It’s important to trust the professional abilities of your audio engineer, as they have the necessary knowledge to ensure that your music sounds its best.

Creating A Hostile Environment

Negative comments can create a hostile environment and hinder effective teamwork. Encouraging open and respectful communication with your audio engineer fosters a positive working environment where both parties can freely exchange ideas and creativity without fear of criticism or judgment.

Effective Collaboration Strategies

Collaborating with your audio engineer or the guy mixing your song is crucial for achieving the best possible outcome. By fostering open communication and respecting their expertise, you can ensure a smooth and productive collaboration process. Here are some strategies to keep in mind:

Open Communication

Effective collaboration starts with open communication. Clearly conveying your vision, preferences, and expectations to your audio engineer can help them understand your goals and work towards achieving them. Be open and honest about your likes and dislikes, as this will give the engineer a better understanding of the sound you’re aiming for.

In addition to expressing your musical preferences, it’s equally important to listen to the engineer’s suggestions and feedback. Remember, they have a deep understanding of audio and years of experience in mixing songs. By maintaining open communication, you can foster a collaborative environment where ideas can be freely shared and explored.

Respecting Their Expertise

It’s vital to respect the expertise of your audio engineer or the person responsible for mixing your song. They have the technical knowledge and skills required to enhance the sonic quality of your track. Trust their judgment and allow them to use their expertise to make the necessary adjustments and improvements.

While it’s natural to have a specific sound in mind, it’s essential to remember that audio engineering is an art form. Your engineer may suggest alternative approaches or techniques that could elevate your song to new heights. By giving them space to work and respecting their expertise, you create a collaborative environment that encourages creativity and innovation.

Collaborate, Don’t Dictate

When working with an audio engineer, it’s important to collaborate rather than dictate. While you know best what you want your music to sound like, the engineer is the technical expert who can transform your vision into reality. Instead of rigidly insisting on specific changes, try to provide constructive feedback and engage in a dialogue.

Avoid using harsh or dismissive language when discussing your desired changes or edits. Instead, focus on explaining your intentions and discussing alternative approaches. Remember, collaboration is a two-way street, and by actively engaging with the engineer’s ideas, you can create a final mix that satisfies both parties.

Building A Positive Relationship

When working with an audio engineer or the person responsible for mixing your song, it is crucial to establish a positive relationship. This partnership is essential for producing the best possible sound and ensuring a smooth workflow. By understanding and respecting each other’s roles, you create an atmosphere of trust and collaboration. Building such a relationship requires acknowledging their efforts, offering constructive feedback, and maintaining effective communication.

Acknowledging Their Efforts

Acknowledging the efforts of your audio engineer or mixer is an excellent way to foster a positive working relationship. These professionals dedicate their time and expertise to bring your musical vision to life. By recognizing and appreciating their contributions, you create an atmosphere of mutual respect and motivation. It’s essential to show gratitude for their hard work, be it through a simple thank you or expressing admiration for their technical skills.

Offering Constructive Feedback

Constructive feedback is an invaluable tool for improving your final product and strengthening your relationship with your audio engineer or mixer. When providing feedback, it is important to offer constructive criticism rather than negative comments. Focus on specific aspects of the mix or specific areas in which you’d like to see improvement. Be clear, concise, and respectful in your communication, ensuring your feedback is delivered in a way that encourages growth and productivity.

Remember:

  • Phrase your feedback in a constructive manner, highlighting the areas you appreciate and suggesting potential changes.
  • Be specific about the elements you want to enhance or adjust, such as the vocals, instrument balance, or overall clarity.
  • Use examples from other songs or references to help convey your preferences.
  • Engage in an open dialogue with your audio engineer or mixer, encouraging them to share their thoughts and ideas.

By offering constructive feedback, you establish an environment of collaboration, where both parties work together towards a common goal. This collaboration leads to better results and a stronger relationship based on trust and understanding.

Things You Should Never Say To Your Audio Engineer Or The Guy Mixing Your Song: Avoid These Common Mistakes


Credit: www.nytimes.com


Things You Should Never Say To Your Audio Engineer Or The Guy Mixing Your Song: Avoid These Common Mistakes


Credit: www.sweetwater.com


Frequently Asked Questions Of Things You Should Never Say To Your Audio Engineer Or The Guy Mixing Your Song


What Are Some Things You Should Never Say To Your Audio Engineer?


Some things you should never say to your audio engineer include “Can you make it sound like this popular song? ” Or “We don’t need to test the sound levels, right? ” Remember, trust their expertise and let them do their job.


Communicate clearly, but avoid questioning their skills.


Why Is It Important To Communicate Effectively With Your Audio Engineer?


Effective communication with your audio engineer is crucial to ensure your desired sound is achieved. Clear communication helps in conveying your vision, preferences, and any concerns. It also avoids misunderstandings and saves time during the mixing process. A solid communication foundation leads to a successful partnership with your audio engineer.


How Can Miscommunication Affect The Outcome Of Your Song?


Miscommunication can greatly impact the outcome of your song. If you fail to communicate your expectations or preferences, the end result may not align with your vision. Additionally, misunderstandings can cause delays, wasted time, and frustration for both you and your audio engineer.


Open and clear communication is key to achieving the best possible outcome.


Conclusion


In the end, effective communication with your audio engineer is crucial for a successful recording process. Cultivate a positive and respectful working relationship to ensure the best possible results for your music. By being mindful of the things you say and the way you say them, you can set the stage for a productive collaboration.


Categories
Archive Audio Production

Why Your Mixing Doesn’t Sound Professional: Unlocking the Secrets to Studio-Quality Sound

Your mixing lacks a professional sound due to improper EQ, levels, and FX usage. To ensure a polished mix, focus on balancing frequencies, setting appropriate levels, and using effects sparingly and purposefully.


A professional-sounding mix elevates the overall quality of your music and enhances listener experience. By addressing key aspects like EQ, levels, and FX usage, you can achieve a more polished and refined sound that captivates your audience. In the following sections, we will delve deeper into these key factors and provide actionable tips to help you enhance the professionalism of your mixes.


Common Mixing Mistakes

Mismatched Levels

Mismatched levels cause balance issues in your mix.

Cluttered Frequencies

Cluttered frequencies make your mix sound muddy.


Credit: www.amazon.com


Importance Of High-quality Monitoring

Choosing The Right Studio Monitors

Studio monitors are crucial for accurate sound reproduction. Low-quality monitors can skew your perception of the mix.

When selecting studio monitors, prioritize flat frequency response for true representation.

Utilizing Acoustic Treatment

Acoustic treatment is essential for minimizing reflections and ensuring a balanced listening environment.

Proper acoustic treatment enhances clarity and accuracy in your mixes.

Understanding Signal Processing Tools


Improve your mixing with a deeper understanding of signal processing tools. Learn how to enhance the professional sound of your mixes through effective use of compression, EQ, and other processing techniques. Gain insights into why mastering these tools is essential for achieving a polished and professional sound.

Understanding Signal Processing Tools Signal processing tools play a crucial role in achieving professional-sounding mixes. By mastering the use of compressors, equalizers, reverb, and delay, you can enhance the quality and clarity of your audio productions.

Compressor And Equalizer Techniques

Utilize compressors to control the dynamic range of your audio, ensuring consistent volume levels. Employ equalizers to adjust the frequency balance, cutting or boosting specific bands to enhance the overall tonal quality.

Effective Use Of Reverb And Delay

Employ reverb to add spatial depth and create a sense of acoustical space. Implement delay to create a sense of spaciousness and atmosphere, adding depth and movement to the sound. These signal processing tools, when harnessed effectively, can transform your mixes and elevate them to a professional standard.

Why Your Mixing Doesn't Sound Professional: Unlocking the Secrets to Studio-Quality Sound


Credit: www.nytimes.com


Achieving Cohesive Mixes

When it comes to creating professional-sounding mixes, achieving cohesion is crucial. A cohesive mix brings together all the elements, creating a seamless and balanced listening experience. In this post, we will explore the key factors that contribute to achieving cohesive mixes.

Balancing Instrumentation

One of the essential aspects of achieving cohesive mixes is balancing the instrumentation. Each instrument should occupy its own sonic space without overpowering or clashing with other elements in the mix. By carefully balancing the volume levels of different instruments, you can ensure that each element is heard clearly without overwhelming the others.

Another technique to achieve balanced instrumentation is by carving out a unique frequency range for each instrument. This involves using equalization to reduce or boost specific frequencies where instruments compete for sonic space. By doing this, you allow each instrument to shine and be heard distinctly without causing a cluttered mix.

Additionally, using panning can help in creating separation and clarity among instruments. By placing instruments at different positions on the stereo field, you provide them with their own space and avoid sonic masking. For example, you can pan guitars slightly left and right while keeping the vocals centered, creating a wider and clearer mix.

Creating Spatial Depth

To achieve a professional-sounding mix, it is essential to create spatial depth. This involves positioning elements in the mix to give them a sense of depth and space.

One way to create spatial depth is by using reverbs and delays. By adding varying amounts of reverb and delay to different elements, you can simulate a sense of depth and create a more immersive listening experience. For instance, adding a subtle reverb to a vocal track can make it sound like it’s occupying a space within the mix, rather than sounding upfront and dry.

In addition to reverbs and delays, utilizing stereo imaging techniques can also enhance spatial depth. This includes widening instruments, using stereo widening plugins, or applying mid-side processing to separate the center and sides of the mix. By carefully spreading out elements in the stereo field, you can create a sense of width and space, further enhancing the overall depth of the mix.

https://www.youtube.com/watch?v=bApTxO2a4ac


Professional Workflow And Techniques

In order to achieve a professional sounding mix, it is crucial to have a solid workflow and utilize effective techniques. A professional workflow ensures that each step of the mixing process is executed efficiently and systematically, while applying techniques that enhance the overall quality of the mix. In this article, we will explore two key aspects of a professional workflow and techniques that can significantly improve the sound of your mixes: utilizing reference tracks and mix bus processing.

Utilizing Reference Tracks

1. Selecting the Right Reference Track

Choosing the right reference track is fundamental to achieving a professional sound. Look for a reference track that matches the genre, vibe, and overall sonic quality you desire for your mix. Analyze the track’s frequency balance, dynamics, and spatial characteristics as a benchmark.

2. Comparing Your Mix to the Reference Track

When working on your mix, regularly compare it to the reference track to identify potential areas that lack clarity, balance, or depth. Pay attention to the overall tonal balance, the placement of instruments in the stereo field, and the level of individual elements in relation to each other.

3. Making Adjustments Based on the Reference Track

Use the reference track as a guide to make necessary adjustments in your mix. Consider modifying the EQ settings to achieve a similar tonal balance, adding or reducing compression for dynamics control, and implementing spatial effects to create a similar sense of depth. However, ensure that you maintain the uniqueness and individuality of your mix.

Mix Bus Processing

1. Applying Proper Gain Staging

Proper gain staging is crucial to avoid distortion or unnecessary noise in your mix. Ensure that the gain levels of individual tracks are optimized before they reach the mix bus. Keep an eye on the master fader level as well, making sure it doesn’t consistently hit the peak level and compromise the overall clarity.

2. Employing Mix Bus Compression

Utilize mix bus compression as a tool to glue the individual tracks together and enhance the overall dynamics of your mix. Apply gentle compression settings, considering the mix as a whole. Be mindful of the attack and release times to maintain the natural transients and avoid squashing the mix.

3. Doing Subtle Mix Bus EQ

A subtle mix bus EQ can further shape and refine the overall sound of your mix. Address any tonal imbalances by using gentle boosts or cuts in the appropriate frequency ranges. Bear in mind that the goal is to enhance the mix’s overall sonic character, not to drastically alter the individual elements.

Why Your Mixing Doesn't Sound Professional: Unlocking the Secrets to Studio-Quality Sound


Credit: www.practical-music-production.com


Frequently Asked Questions On Why Your Mixing Doesnt Sound Professional


Why Does My Mixing Sound Amateur?


Your mixing may sound amateur due to lack of proper EQ, compression, and effects usage. It’s important to understand the principles of audio processing and apply them correctly to achieve a professional sound.


How Can I Improve The Quality Of My Mixes?


To improve your mixes, focus on proper gain staging, use reference tracks for comparison, and take breaks during the mixing process. Additionally, consider investing in quality monitors and acoustically treating your listening environment for accurate sound reproduction.


What Are Common Mistakes That Make Mixes Sound Unprofessional?


Common mistakes that make mixes sound unprofessional include excessive use of effects, poor stereo imaging, lack of attention to detail, and improper balance between instruments and vocals. Additionally, neglecting the importance of correct levels and frequencies can greatly affect the overall quality.


Conclusion


Achieving professional-sounding mixes takes time, practice, and attention to detail. By focusing on sound selection, levels, and processing, you can elevate your mixes to a new level of quality. With dedication and the right techniques, you can overcome the common pitfalls that prevent your mixes from sounding professional.


Keep striving for improvement and trust in your abilities.

Categories
Archive Audio Production

Upload Your Music to Spotify & Apple Music for Free: Powerfully Promote Your Tracks

You can easily upload your music to Spotify and Apple Music for free. Utilize their platforms to reach wider audiences.


Uploading your music to popular streaming platforms like Spotify and Apple Music is essential for gaining exposure and reaching a larger audience. By making your music easily accessible to listeners, you can increase your chances of being discovered and potentially growing your fan base.


We will discuss the step-by-step process of uploading your music to these platforms for free, providing you with valuable insights on how to get your music out to the world.

Upload Your Music to Spotify & Apple Music for Free: Powerfully Promote Your Tracks


Credit: spotifyinsider.com


The Power Of Spotify And Apple Music

Spotify and Apple Music are two of the most popular streaming platforms, offering a vast reach and audience engagement for musicians worldwide.

Benefits Of Streaming Platforms

  • Instant access to a vast global audience
  • Promotion and discoverability opportunities
  • Analytics and insights to monitor performance

Reach A Global Audience

Streaming platforms like Spotify and Apple Music allow artists to share their music with a diverse global audience, breaking geographical barriers.

By leveraging these platforms, independent artists can reach listeners in various countries without the need for costly marketing campaigns.

Uploading Your Music For Free

Uploading your music for free to platforms like Spotify and Apple Music opens up endless opportunities for artists to reach a wide audience. With the right tools and knowledge, you can share your music with the world without any upfront costs.

Utilizing Distributors

Utilize music distributors like DistroKid, TuneCore, or CD Baby to upload your music to Spotify and Apple Music for free. These platforms help you distribute your music to major streaming services, ensuring your songs reach a global audience.

Understanding Royalties

Gain insight into how royalties work in the music industry to ensure you receive fair compensation for your music. Familiarize yourself with streaming royalties and how they are calculated to make informed decisions about your music distribution.

Promoting Your Tracks

After successfully uploading your music to Spotify and Apple Music, the next crucial step is to promote your tracks effectively. Creating a solid marketing strategy and utilizing social media platforms are essential in gaining visibility and attracting more listeners to your music.

Creating A Marketing Strategy

When promoting your music, it’s vital to have a clear and comprehensive marketing strategy in place. Start by identifying your target audience and understanding their preferences. This will help tailor your promotional efforts to resonate with potential listeners.

Utilizing Social Media

Social media platforms offer a powerful avenue for promoting your music. Engage with your audience by regularly posting updates, behind-the-scenes content, and sneak peeks of upcoming releases. Utilize targeted advertising options and collaborate with influencers to expand your reach.

Upload Your Music to Spotify & Apple Music for Free: Powerfully Promote Your Tracks


Credit: blog.groover.co


Maximizing Your Visibility

Maximizing your visibility on Spotify and Apple Music is of utmost importance to gain traction and increase your chances of success as an artist. By optimizing your profile and engaging with your fans effectively, you can make sure that your music gets the attention it deserves. Here are some tactics you can employ to maximize your visibility on these platforms:

Optimizing Your Profile

When it comes to optimizing your profile on Spotify and Apple Music, paying attention to details can make a significant difference. These platforms provide various sections where you can showcase your music and connect with your audience.

Here’s how you can optimize your profile:

  1. Choose a catchy profile picture: Selecting an eye-catching and memorable profile picture can make a strong and lasting impression on your audience.
  2. Write a compelling artist bio: Use this section to showcase your unique story, style, and achievements. Make sure to focus on what sets you apart from other artists.
  3. Tag your genres accurately: Tagging your music with the relevant genres helps your target audience discover your tracks more easily.
  4. Create engaging playlists: Curate playlists that not only highlight your own music but also include tracks from artists who share a similar style or vibe. This not only boosts your visibility but also shows support for fellow musicians.

Engaging With Fans

Engaging with your fans is a crucial aspect of maximizing your visibility and building a loyal fan base on Spotify and Apple Music.

Here are some effective ways to engage with your fans:

  • Respond to comments and messages: Take the time to reply to fans who show support or reach out to you. This demonstrates your appreciation for their support and encourages them to stay connected.
  • Host Q&A sessions: Conducting live Q&A sessions with your fans allows you to connect with them on a more personal level. This interaction builds a strong bond and gives your fans a chance to get to know you better.
  • Share exclusive content: Reward your loyal fans by offering them exclusive content such as behind-the-scenes footage, sneak peeks of upcoming releases, or acoustic versions of your songs. This makes your followers feel valued and keeps them engaged with your music.
  • Collaborate with fans: In addition to collaborating with other artists, consider involving your fans in your creative process. Whether it’s through contests, remix competitions, or fan-sourced lyrics, giving your fans a chance to contribute fosters a sense of community and strengthens their connection to your music.

By optimizing your profile and engaging with your fans authentically, you can enhance your visibility on Spotify and Apple Music. Remember, a solid online presence and active engagement are vital for standing out in the competitive music industry. So, get creative, connect with your audience, and let your music shine!

Measuring Success

As an aspiring musician, getting your music on popular streaming platforms like Spotify and Apple Music is just the first step towards achieving success. To truly gauge how well your music is resonating with your audience, you need to measure its performance and listener engagement. This will allow you to make informed decisions and tailor your music promotion strategy accordingly. In this article, we will explore two crucial aspects of measuring success:

Analyzing Streaming Data

One of the key ways to measure the success of your music on streaming platforms is by analyzing the streaming data. Streaming platforms provide valuable insights into how many times your songs have been streamed, the region where your listeners are located, and the playlists where your music has been added. By gaining access to this data, you can effectively track the popularity and reach of your music.

Here are some important metrics you should focus on when analyzing streaming data:

  1. Number of streams: This metric indicates the number of times your songs have been played, giving you an idea of how popular they are.
  2. Listener demographics: Understanding the age, gender, and location of your listeners can help you identify your target audience and tailor your marketing efforts accordingly.
  3. Playlist placements: Identifying the playlists where your songs have been added can give you insights into which curators are supporting your music and help you build relationships with them for future releases.

Tracking Listener Engagement

While the number of streams is an important metric, it only tells a part of the story. To truly measure success, you need to track listener engagement. This involves understanding how listeners interact with your music, such as how long they listen to your tracks, whether they skip any songs, and whether they add your songs to their personal playlists.

Here are some ways you can track listener engagement:

  • Playthrough rate: This metric measures the percentage of listeners who listened to your entire song without skipping. A high playthrough rate indicates that your music is engaging and resonating with your listeners.
  • Adds to playlists: When listeners add your songs to their personal playlists, it signals that they enjoy your music and want to listen to it again. Tracking the number of playlist adds can give you insights into your music’s long-term appeal.
  • Comments and feedback: Engaging with your audience by responding to comments and feedback can provide valuable insights into how your music is being received and help you build a loyal fanbase.

By analyzing streaming data and tracking listener engagement, you can gain a comprehensive understanding of how well your music is performing on Spotify and Apple Music. This data-driven approach will enable you to refine your music promotion strategies, target your audience effectively, and ultimately achieve greater success in the competitive world of streaming music.

Upload Your Music to Spotify & Apple Music for Free: Powerfully Promote Your Tracks


Credit: spotifyinsider.com


Frequently Asked Questions Of Upload Your Music To Spotify And Apple Music For Free


Can I Upload My Music To Spotify And Apple Music For Free?


Yes, you can upload your music to Spotify and Apple Music for free by using distribution services like DistroKid or TuneCore. These services allow independent artists to easily upload their music to these platforms and reach a wider audience without expensive fees or contracts.


How Do I Upload My Music To Spotify And Apple Music?


To upload your music to Spotify and Apple Music, you can use a distribution service like DistroKid or TuneCore. These services provide a user-friendly platform where you can upload your songs, set a release date, and choose the platforms you want your music distributed to.


They handle the logistics and make sure your music is properly delivered to these streaming platforms.


What Are The Benefits Of Uploading My Music To Spotify And Apple Music?


Uploading your music to Spotify and Apple Music offers several benefits. Firstly, it allows your music to reach a wider audience and potentially gain more exposure. Secondly, it can generate revenue through streaming royalties. Additionally, these platforms provide valuable insights and analytics to help you understand your audience better and make informed decisions about your music career.


How Long Does It Take For My Music To Be Available On Spotify And Apple Music?


Once you’ve uploaded your music to a distribution service like DistroKid or TuneCore, it usually takes a few days for your songs to be available on Spotify and Apple Music. However, the exact timeframe may vary depending on the distribution service and the platforms themselves.


It’s a good idea to plan your release in advance to allow for any necessary processing time.


Conclusion


Uploading your music to Spotify and Apple Music for free is a great way to reach a wider audience. Take advantage of these platforms to showcase your talent and connect with fans worldwide. Don’t miss out on the opportunity to expand your reach and grow your music career.


Start uploading now!


Categories
Archive Audio Production

How To Mix Hi Hats In Any Genre : Master the Art of Hi Hat Mixing

To mix hi hats in any genre, adjust volume levels, pan settings, and EQ for desired sound. Experiment with different patterns and effects for unique results.


Hi hats play a crucial role in shaping the groove and energy of a track, making it essential to mix them effectively. By understanding the characteristics of different hi hat sounds and knowing how to blend them seamlessly within a mix, you can enhance the overall impact of your music.


Whether you’re creating a dynamic beat for a hip-hop track or a driving rhythm for a dance tune, mastering the art of hi hat mixing will elevate the quality and cohesiveness of your music production. Let’s explore some expert tips and techniques to help you achieve professional-sounding hi hat mixes across various genres.

How To Mix Hi Hats In Any Genre  : Master the Art of Hi Hat Mixing


Credit: www.masteringthemix.com


Understanding Hi Hats

Understanding Hi Hats is crucial for achieving a well-balanced sound in music production. Hi-hats are a key element of a drum kit, responsible for adding rhythm, energy, and dynamics to a track.

Differentiating Hi Hats In Various Genres

Hi-hats vary significantly across different music genres, influencing the overall vibe and feel of a song. Let’s explore how hi-hats differ based on the genre:

  • Rock: Loud and prominent, often played with intensity.
  • Hip-hop: Crisp and sharp, with intricate patterns and variations.
  • Electronic: Wide range of sounds from tight and precise to loose and airy.
  • Jazz: Subtle and nuanced, typically played with a lighter touch.

Importance Of Hi Hat Mixing

Proper hi-hat mixing is essential for creating a professional, polished sound in any genre. When mixed well, hi-hats can help drive the rhythm, enhance the groove, and add excitement to the music.

Techniques For Hi Hat Mixing

Balancing The Hi Hat With Other Elements

Hi-hats play a crucial role in shaping the rhythm and feel of a track, so it’s essential to find the right balance with other elements.

Applying Eq And Compression To Hi Hats

Proper EQ adjustments can help the hi-hats cut through the mix without overpowering other elements, while compression can add consistency and control.


Creative Hi Hat Mixing

Hi hats play a crucial role in defining the groove and rhythm in music production across various genres. Achieving a well-balanced and unique sound for hi hats is essential for creating a captivating mix. Creative hi hat mixing involves utilizing various techniques such as exploring pan and stereo imaging as well as applying effects to achieve distinct and engaging hi hat sounds. Let’s dive into these creative approaches to elevate your hi hat mixing game.

Exploring Pan And Stereo Imaging

Utilizing pan and stereo imaging techniques can significantly enhance the spatial presence and width of hi hats within a mix. By adjusting the pan position of hi hat samples, you can create a sense of movement and separation within the stereo field. Additionally, experimenting with stereo imaging plugins allows you to widen or narrow the stereo image of hi hats, enabling you to sculpt a more expansive and immersive sonic landscape.

Utilizing Effects For Unique Hi Hat Sounds

Adding effects to hi hats presents an opportunity to infuse character and personality into the sound. Applying subtle reverb can impart a sense of space and depth, while using delay effects can introduce rhythmic complexities to the hi hat patterns. Moreover, experimenting with modulation effects like chorus or flanger can yield unconventional and attention-grabbing textures, transforming ordinary hi hats into captivating sonic elements.

How To Mix Hi Hats In Any Genre  : Master the Art of Hi Hat Mixing


Credit: blog.native-instruments.com


Pro Tips For Hi Hat Mixing

Mixing hi hats is a crucial aspect of any genre, as these small but mighty cymbals add rhythm, energy, and groove to your tracks. To help you achieve a professional and dynamic sound, we’ve compiled some pro tips for hi hat mixing that you can apply to any genre.

Layering Hi Hat Samples

One effective technique for getting the perfect hi hat sound is to layer different samples together. By blending multiple hi hat samples, you can create a unique and full-bodied sound that cuts through the mix. Here’s how you can do it:

  1. Choose two or more hi hat samples with different characteristics. For example, you can combine a closed hi hat with a more open or metallic one.
  2. Adjust the volume levels of each sample to achieve a balanced and cohesive sound. You can emphasize certain elements by boosting their volume or attenuating others.
  3. Experiment with panning the hi hats slightly to create a wider stereo image. This can add depth and dimension to your mix.

Utilizing Automation For Dynamic Hi Hat Patterns

A good mix is all about creating variation and movement. By utilizing automation, you can breathe life into your hi hat patterns and make them more dynamic. Here are some tips:

  • Create changes in velocity throughout the hi hat pattern to mimic the nuances of a live drummer. This can be done by increasing the volume for accents and decreasing it for ghost notes, adding a sense of realism to your programmed drums.
  • Experiment with panning automation to pan hi hat hits from left to right and vice versa. This can create a swirling motion that adds excitement and interest to your mix.
  • Try automating different effects on the hi hats, such as filtering, delay, or reverb. This can add variation and texture to your hi hat patterns, making them more engaging.

By implementing these pro tips for hi hat mixing, you’ll be able to elevate the quality of your tracks and create captivating rhythms that stand out. Don’t be afraid to experiment and trust your ears to find the perfect hi hat sound for your genre.

Hi Hat Mixing In Specific Genres

When it comes to mixing hi hats, each genre has its own unique sound and style. Understanding how to achieve the desired hi hat mix for different genres can greatly enhance the overall impact and energy of your tracks. In this article, we will explore techniques and tips for mixing hi hats in three popular genres: Hip Hop and Trap, Rock and Metal, and Electronic and Dance Music.

Hip Hop And Trap

In Hip Hop and Trap music, the hi hats play a crucial role in driving the rhythm and adding extra flair to the beats. To achieve a punchy and pronounced hi hat mix:

  1. Finding the right hi hat samples that complement the overall vibe of your track is essential. Look for samples with a crisp and sharp attack, and experiment with different sounds to find the perfect fit.
  2. Use EQ to shape the hi hat sound. Boosting the high frequencies can bring out the desired brightness and clarity, while attenuating the low frequencies can eliminate any unwanted muddiness.
  3. Consider applying some light compression to even out the dynamics of the hi hats and make them sit well in the mix. Be careful not to overcompress, as it can lead to an unnatural sound.
  4. Panning the hi hats slightly off-center can add width and depth to the mix.

Rock And Metal

Rock and Metal genres often demand a different approach to hi hat mixing. Here are some tips to achieve a powerful and balanced hi hat mix:

  1. Start by selecting hi hat samples that have a suitable attack and sustain for the genre. Look for samples that can cut through the dense guitar riffs and pounding drums.
  2. EQ is crucial in shaping the hi hats for Rock and Metal. Boosting the midrange frequencies can help the hi hats stand out and add aggression to the mix.
  3. Applying moderate compression can help control the dynamics of the hi hats, especially during fast and intense passages.
  4. Experiment with panning the hi hats to find the right position that blends well with the other instruments in the mix.

Electronic And Dance Music

Hi hats in Electronic and Dance Music often serve as the backbone of the rhythm and drive the energy of the track. To create a captivating hi hat mix:

  1. Choose hi hat samples that have a clean and crisp sound, with a well-defined attack and decay.
  2. Use EQ to emphasize the desired frequencies of the hi hats. Boosting the high frequencies can enhance the brightness and presence of the hi hats.
  3. Applying subtle amounts of reverb or delay to the hi hats can add depth and create an atmospheric ambience.
  4. Consider sidechain compression to make the hi hats duck or pulse in sync with other elements of the track, like the kick drum or bassline.

How To Mix Hi Hats In Any Genre  : Master the Art of Hi Hat Mixing


Credit: emastered.com


Frequently Asked Questions For How To Mix Hi Hats In Any Genre


How Do I Mix Hi Hats In Any Genre?


To mix hi hats in any genre, start by selecting the right hi hat samples that match the style of music. Adjust the volume and panning of the hi hats to fit within the overall mix. Use EQ to shape the sound and add some air or brightness.


Apply compression to control the dynamics and add depth with reverb or delay effects.


What Is The Role Of Hi Hats In A Mix?


Hi hats add rhythm, texture, and energy to a mix. They provide a sense of groove and enhance the overall musicality. Hi hats can also help establish the tempo and drive the track forward. Properly mixing hi hats ensures they sit well in the mix and contribute to the overall balance and feel of the song.


How Can I Make Hi Hats Stand Out In The Mix?


To make hi hats stand out in the mix, try the following techniques. Use EQ to boost the high frequencies and cut any unwanted frequencies. Adjust the volume to make them more prominent without overpowering other elements. Experiment with panning to create width and stereo imaging.


Adding a touch of reverb or delay can also help create space and make hi hats more noticeable.


Conclusion


In mastering the art of mixing hi-hats in any genre, practice and experimentation are key. By understanding the role of hi-hats, using the right techniques, and being open to creative exploration, you can elevate your music production. With a strong foundation, you can confidently adapt and excel in diverse musical landscapes.