Categories
Archive

Beginner Microphone Technique: Master the Art of Captivating Communication

To improve beginner microphone technique, ensure you speak clearly in a proper distance and angle to the microphone. Developing good microphone technique is crucial for optimal sound quality and delivery in various settings.

Whether you are recording a podcast, conducting interviews, or performing live, understanding the basics of microphone placement and usage can significantly enhance your audio production. By mastering microphone technique, you can improve the clarity, volume, and overall quality of your recordings or performances.

In this guide, we will explore essential tips and practices to help beginners enhance their microphone skills and achieve professional-level audio results.

Choosing The Right Microphone

Newbie microphone technique is crucial for quality sound production. Selecting the right microphone depends on your recording environment and the type of content you’re creating. Consider factors such as condenser vs. dynamic microphones, polar patterns, frequency response, and connectivity options to make an informed decision.

Considering Different Microphone Types

When selecting a microphone, understanding the different types available is crucial. Various microphones serve different purposes, such as dynamic, condenser, and ribbon. Each type has distinct characteristics ideal for specific applications.

Understanding Polar Patterns

Polar patterns determine a microphone’s sound sensitivity directionality. Common patterns include cardioid, omnidirectional, and bi-directional. It is essential to pick the right pattern based on the intended usage to achieve optimal sound quality.

When it comes to Choosing the Right Microphone, consider the microphone types and polar patterns.

  • Dynamic: Durable and suitable for live performances.
  • Condenser: Capture detailed sound, ideal for studio recordings.
  • Ribbon: Produce warm tones, great for capturing natural sound.

Cardioid pattern: Captures sound from the front, ideal for isolating vocals or instruments.

  1. Omnidirectional pattern: Picks up sound from all directions, suitable for capturing ambient noise.
  2. Bi-directional pattern: Records from front and back, perfect for interviews or duets.
Beginner Microphone Technique: Master the Art of Captivating Communication

Credit: www.amazon.com

Optimizing Microphone Placement

Optimizing Microphone Placement:

Determining The Ideal Distance

Positioning the microphone at ideal distance is crucial for clear audio recording.

Minimizing Background Noise

Reducing background noise will improve recording quality significantly.


Mastering Vocal Projection

Mastering vocal projection is crucial for any aspiring singer or public speaker. The ability to effectively project your voice can greatly enhance your performance and impact on your audience. It involves controlling the volume and clarity of your voice, and a vital part of achieving this is proper microphone technique.

Breathing Techniques

Proper breathing is the foundation of vocal projection. Utilizing diaphragmatic breathing, where you breathe from your diaphragm rather than your chest, provides the necessary support for powerful and consistent projection. To practice this, lie down and place a hand on your abdomen. Inhale deeply, feeling your abdomen rise, then exhale slowly, allowing it to fall. Repeat this exercise regularly to develop proper breathing habits.

Utilizing Mic Technique For Clarity

Understanding mic placement is essential for achieving clarity and consistent sound. Position the microphone approximately a fist’s distance away from your mouth to prevent plosive sounds. This will minimize the impact of breath patterns and ensure a clear, unobstructed sound. Additionally, maintaining a consistent distance from the microphone while singing or speaking allows for a balanced sound without sudden volume fluctuations.

Beginner Microphone Technique: Master the Art of Captivating Communication

Credit: www.amazon.com

Effective Use Of Microphone Features

Enhance your beginner microphone technique by mastering essential microphone features for optimal performance and quality sound output. Understanding how to adjust settings and utilize functions effectively can elevate your audio recording and communication skills. Mastering these features will help you capture clear and professional sound in your recordings.

When it comes to getting the best sound quality from your microphone, it’s important to not only focus on proper technique but also take advantage of the various features that your microphone provides. By utilizing these features effectively, you can enhance the audio clarity, reduce unwanted noise, and tailor the sound according to your specific needs. In this article, we will explore two key microphone features that can significantly improve your recordings: utilizing pop filters and adjusting gain and EQ.

Utilizing Pop Filters

Pop filters are a crucial tool when it comes to achieving a clear and professional-sounding recording. They are specifically designed to reduce plosive sounds, like the harsh “pop” that occurs when pronouncing words with a strong “p” or “b” sound. These pops can distort the audio and make it difficult to understand the intended message. By placing a pop filter in front of your microphone, you can effectively filter out these unwanted sounds, ensuring a smoother and cleaner recording. Pop filters work by diffusing the airflow caused by plosive sounds, preventing them from directly hitting the sensitive diaphragm of the microphone. This simple yet effective accessory can make a world of difference in the quality of your recordings, providing a professional sound that is free from distracting pops and bursts of air. It is recommended to position the pop filter about two inches away from the microphone, ensuring that it covers the entire area where your voice will be projected.

Adjusting Gain And Eq

Another crucial aspect of microphone technique is adjusting the gain and EQ settings. These features allow you to control the volume and tone of your voice to achieve the desired sound for your specific application. The gain control, often represented by a knob or slider, adjusts the microphone’s sensitivity to sound. Increasing the gain amplifies the audio signal, while decreasing it reduces the volume. It’s important to find the right balance, avoiding excessive gain that can lead to distortion and clipping, or too little gain that results in a weak and unclear sound. Experiment with different gain levels and test your recordings to find the ideal setting that captures your voice accurately without any unwanted noise. EQ, short for equalization, allows you to shape the tone of your voice by adjusting the frequency response of the microphone. It lets you emphasize or reduce specific frequencies to achieve a more balanced and pleasing sound. For example, if your voice sounds too boomy, you can reduce the low frequencies using the EQ controls. On the other hand, if your voice lacks presence, boosting the mid-range frequencies can help it cut through the mix. Understanding the basics of EQ and experimenting with different settings can significantly enhance the overall sound quality of your recordings. By effectively utilizing pop filters and adjusting the gain and EQ settings, you can take full advantage of your microphone’s features and achieve professional-sounding recordings. Whether you’re starting a podcast, recording vocals for a song, or delivering presentations, paying attention to these microphone techniques will ensure your voice is clear, crisp, and captivating.

Refining Your Speaking Style

When it comes to effective communication, refining your speaking style is essential. One key aspect of this is understanding how to manipulate your voice to engage and captivate your audience. In this article, we’ll focus on two important techniques that can help you refine your speaking style: pacing and intonation, and engaging the audience.

Pacing And Intonation

Pacing and intonation play a crucial role in creating a dynamic and interesting audio experience for your listeners. By varying the speed at which you speak and the way you emphasize certain words or phrases, you can add depth and emotion to your message.

Here’s how you can use pacing and intonation to enhance your speaking style:

  1. Vary your pace: By occasionally speeding up or slowing down, you can create a sense of excitement or emphasize important points. This keeps your audience engaged and prevents monotony.
  2. Emphasize key words: Place emphasis on important words or phrases to make them stand out. This can be done by slightly raising your voice or emphasizing those words with a change in pace or tone.
  3. Use pauses effectively: Pauses can be just as powerful as words. They allow your audience to process information and build anticipation. Use strategic pauses to create impact and add emphasis to your speech.

Engaging The Audience

Engaging your audience is crucial for maintaining their interest and ensuring your message gets through. Here are some techniques you can use to engage your audience effectively:

  • Address your audience directly: Use inclusive language like “you” and “we” to make your listeners feel involved and connected to your message. This creates a sense of personal connection and keeps them engaged.
  • Tell stories: Humans are naturally drawn to stories. Incorporating relevant anecdotes and narratives into your speech can captivate your audience and help them relate to your message on a deeper level.
  • Encourage participation: Ask questions, invite your audience to share their thoughts or experiences, and encourage them to participate in the conversation. This fosters a sense of involvement and makes your speech more interactive.
  • Use humor: Appropriate humor not only lightens the mood but also helps to create a positive and enjoyable experience for your audience. It breaks the ice and helps to build a connection with them.

By refining your speaking style through techniques like pacing and intonation, as well as engaging your audience using interactive methods, you can become a confident and captivating speaker. Practice these techniques regularly, and soon you’ll be able to deliver your message with impact and leave a lasting impression on your listeners.

Beginner Microphone Technique: Master the Art of Captivating Communication

Credit: medium.com

Frequently Asked Questions On Beginner Microphone Technique

What Are The Different Microphone Techniques Used By Beginners?

Beginners can use various microphone techniques such as the close-miking technique for capturing more direct sound, the ambient technique for capturing the room’s natural reverb, and the stereo technique for creating a wider sound image.

How Do I Properly Position The Microphone For Recording Vocals?

To record vocals, position the microphone slightly above the singer’s mouth at a distance of about 6-8 inches. This helps to capture the singer’s natural tone and reduce plosive sounds. Experiment with different angles and distances to find the best position for your desired sound.

What Is The Importance Of Using A Pop Filter With A Microphone?

A pop filter is important because it helps to reduce plosive sounds caused by certain letters and sounds such as “p” and “s”. It acts as a shield for the microphone, preventing these sounds from being too harsh or distorted in the recording.

Using a pop filter results in clearer and more professional-sounding vocals.

How Can I Prevent Microphone Feedback During Live Performances?

To prevent microphone feedback during live performances, ensure that the speakers are positioned correctly and not facing the microphone. Use a proper sound system with adequate power and EQ settings. Experiment with microphone placement, and make sure the stage monitors are at an appropriate volume level to avoid feedback.

Conclusion

Incorporating proper microphone technique is crucial for beginners in the field of audio recording. By maintaining a consistent distance and angle, and using pop filters when necessary, you can achieve clear and professional sound quality. These techniques will help you avoid common pitfalls and enhance your overall recording experience.

Happy recording!

Categories
Archive

Recording At Home: Unlock the Secrets to Studio-Quality Sound

Recording at home requires basic equipment like a microphone and audio interface. Setting up a dedicated space will improve sound quality and reduce background noise.

By following these tips, you can create professional-grade recordings in the comfort of your home studio. Ready to embark on your recording journey? Recording at home is a cost-effective and convenient way to create music, podcasts, and more. With the right equipment and setup, you can achieve high-quality results without breaking the bank.

Let’s explore the essential tools and techniques needed to set up your home recording studio for success. Whether you’re a beginner or seasoned pro, these tips will help you produce top-notch recordings from the comfort of your own space.

Recording At Home: Unlock the Secrets to Studio-Quality Sound

Credit: en.wikipedia.org

Setting Up Your Home Recording Space

Choosing The Right Room

Consider room size, natural light, and layout for optimal recording conditions.

Soundproofing And Acoustic Treatment

  • Use soundproofing materials like foam panels and bass traps to reduce noise.

  • Strategically place rugs, curtains, and furniture to improve acoustics.

Essential Equipment For High-quality Recording

Essential Equipment for High-Quality Recording

Invest in quality microphones for clear sound capture. Consider condenser and dynamic microphones for different purposes.

  • Pop filters and shock mounts reduce unwanted noise and vibrations.
  • Microphone stands help achieve the desired positioning for optimal recording.
  • XLR cables maintain signal integrity between microphones and audio equipment.

An audio interface connects microphones to the computer for recording. Choose one with multiple input/output options.

  1. Select a reliable DAW software for editing and mixing recorded audio tracks.
  2. Focusrite Scarlett Solo and PreSonus AudioBox are popular audio interfaces.
  3. Ableton Live and Pro Tools are versatile DAW options used by many professionals.

Mastering The Recording Process

Recording at home can be an exciting and rewarding endeavor, whether you’re an aspiring musician, podcaster, or content creator. While creating a professional quality recording at home may seem daunting, mastering the recording process is achievable with some fundamental knowledge and techniques.

Optimizing Mic Placement

Proper mic placement is crucial in capturing clear and balanced audio. Position the microphone at a distance of approximately 6-12 inches from the sound source and adjust the angle to achieve the desired sound. Experimenting with different placements can help find the optimal position for capturing the best audio quality.

Understanding Sound Engineering Basics

Having a basic understanding of sound engineering principles can greatly enhance the recording process. Knowledge of concepts such as signal flow, equalization, and compression can help in achieving professional-sounding recordings. Learning about these fundamentals can empower home recording enthusiasts to refine their audio production skills.

Utilizing Techniques For Professional Audio Production

Recording at home has become increasingly popular over the years, allowing musicians and producers to create high-quality audio without the need for expensive studio time. However, to achieve a professional-sounding result, it’s essential to utilize various techniques for audio production. In this post, we’ll explore two key techniques: layering and multi-tracking, and applying mixing and mastering techniques.

Layering And Multi-tracking

Layering and multi-tracking are powerful techniques that can take your recordings to the next level. Layering involves recording multiple tracks of the same instrument or vocal part and blending them together to create a rich and full-bodied sound. Each track can be carefully EQ’d, compressed, and panned to achieve the desired result. By layering different takes, you can capture different nuances and create a more dynamic and polished performance.

Multi-tracking, on the other hand, allows you to record different instruments or vocal parts separately and combine them later during the mixing process. This technique offers greater control over each element, enabling you to adjust the volume, EQ, and effects independently. It also allows for experimentation and creativity, as you can try out different arrangements and harmonies to enhance the overall composition.

Applying Mixing And Mastering Techniques

Mixing and mastering are crucial stages in the audio production process that help refine the sound and ensure it translates well across various listening platforms. During mixing, you’ll balance the levels of each track, apply EQ and compression to enhance clarity and dynamics, and add effects such as reverb and delay to create depth. Proper EQ’ing and panning will help ensure that every instrument has its own space in the mix, while compression will control the dynamic range.

Mastering, the final step, involves applying overall EQ adjustments, subtle compression, and limiting to ensure the audio sounds consistent and polished across different playback systems. It also involves fine-tuning the level and spacing between tracks to create a cohesive and professional-sounding album or song. It’s worth considering professional mastering services to achieve optimal results if you lack experience in this area.

By utilizing these techniques for professional audio production, you can elevate the quality of your home recordings and compete with studio-produced tracks. Remember, practice and experimentation play key roles in mastering these techniques, so don’t be afraid to make mistakes and learn from them. With dedication and the right tools, you can achieve remarkable results in your home recording studio.


Tips For Achieving Studio-quality Sound At Home

Recording at home can be a convenient and cost-effective way to create music or podcasts. However, achieving studio-quality sound can be a challenge. With the right knowledge and techniques, you can elevate your recordings to a professional level. In this blog post, we will explore some tips that will help you achieve studio-quality sound at home.

Effective Use Of Equalization (eq)

Equalization, commonly known as EQ, is a powerful tool that allows you to shape the frequency response of your recordings. By boosting or cutting specific frequencies, you can enhance certain elements or fix problems in your recordings. Here are some tips to effectively use EQ:

  1. Start with a clean slate: Before applying EQ, make sure your recording is free from noise or unwanted artifacts.
  2. Identify problem frequencies: Listen closely to your recordings and identify any frequencies that sound harsh or muddy.
  3. Use subtractive EQ: Instead of always adding EQ, try removing frequencies that are causing problems. This can help create a more balanced and natural sound.
  4. Experiment with different EQ shapes: Different EQ curves, such as bell, shelf, or high-pass filters, can have varying effects on your recordings. Experimentation is key to finding the right sound.
  5. Avoid excessive EQ: While EQ can be useful, too much of it can result in an unnatural and thin sound. Use EQ sparingly and always trust your ears.

Utilizing Reverb And Delay Effects

Reverb and delay are popular effects used to add depth and spatial feel to recordings. By creating the illusion of a physical space, you can make your recordings sound more professional. Here are some tips for using reverb and delay effects:

  • Choose the right type of reverb: Whether it’s a plate, hall, or room, each type of reverb imparts a different character to your recordings. Experiment with different settings to find the one that suits your sound.
  • Adjust the reverb decay time: The decay time determines how long it takes for the reverb to fade away. Short decay times are suitable for a tight sound, while longer decay times can create a more spacious feel.
  • Use delay to add depth: Delay is a powerful effect that can create interesting rhythmic patterns and add depth to your recordings. Experiment with different delay times and feedback settings to achieve the desired effect.
  • Balance the wet and dry signals: Finding the right balance between the dry (original) and wet (effected) signals is crucial. Too much reverb or delay can overwhelm the original sound, while too little may not create the desired effect.

By following these tips, you can elevate your home recordings to a professional level. Remember, achieving studio-quality sound requires practice and experimentation. Take the time to fine-tune your recordings and trust your ears to guide you towards the best results.

Recording At Home: Unlock the Secrets to Studio-Quality Sound

Credit: www.amazon.in

Recording At Home: Unlock the Secrets to Studio-Quality Sound

Credit: mastering.com

Frequently Asked Questions For Recording At Home

Can I Record Professional-quality Audio At Home?

Yes, with the right equipment and techniques, you can achieve professional-quality audio recordings at home. Invest in a good microphone, soundproof your room, and use software for editing and mixing to enhance your recordings and achieve the desired professional sound.

What Equipment Do I Need For Recording At Home?

To get started with recording at home, you’ll need a few key pieces of equipment. This includes a microphone, audio interface, headphones, and a computer with recording software. Additionally, you may want to consider investing in acoustic treatment to improve the sound quality in your recording space.

How Can I Soundproof My Home Recording Studio?

You can soundproof your home recording studio by using acoustic treatment materials like foam panels, bass traps, and diffusers. These materials absorb and diffuse sound waves, reducing unwanted echo and external noise. Additionally, you can use thick curtains, rugs, and bookshelves to further dampen sound within your space.

What Software Can I Use For Recording And Editing At Home?

There are numerous software options available for recording and editing audio at home. Some popular choices include Audacity (free), Pro Tools, Logic Pro, Ableton Live, and GarageBand (for Mac users). Research and choose a software that suits your specific needs and preferences.

Conclusion

To wrap up, home recording can be an enriching and rewarding experience for any musician. From setting up a home studio to capturing high-quality music, the potential is limitless. With the right tools and knowledge, you can unleash your creativity and bring your music to life from the comfort of your own space.

Categories
Archive

Audio Mastering History : A Journey Through Time

Audio mastering is the final stage of the music production process. It involves enhancing the sound quality and preparing the music for distribution.

The history of audio mastering dates back to the early days of recorded music when engineers focused on optimizing the playback quality of vinyl records. Over the years, advancements in technology have transformed the mastering process, enabling engineers to achieve greater precision and clarity in the final sound.

With the rise of digital music formats and streaming services, mastering has become a crucial step in ensuring that music sounds its best across various platforms. Mastering engineers play a vital role in helping artists and producers achieve the desired sonic characteristics for their music.

Audio Mastering History : A Journey Through Time

Credit: www.travsonic.com

The Early Days

Audio mastering has a rich history that dates back to the early days of sound recording. Understanding the evolution of audio technology is crucial to appreciating the advancements made in this field.

invention Of Sound Recording

Thomas Edison invented the phonograph in 1877, a groundbreaking invention that allowed sound to be recorded and played back mechanically. This marked the beginning of sound recording technology.

evolution Of Audio Technology

  • Year 1915: The introduction of electrical recording revolutionized the industry.
  • Year 1948: The first commercial stereo recordings were released, providing a more immersive listening experience.
  • Year 1980s: The shift to digital recording transformed the way audio was processed and mastered.
Audio Mastering History : A Journey Through Time

Credit: thechurchstudio.com

The Rise Of Studio Mastering

The Rise of Studio Mastering

Introduction Of Mastering Process

Studio Mastering emerged in the mid-20th century to refine audio quality before distribution.

Impact On Music Production

Studio Mastering resulted in polished sound enhancing overall music quality.


Digital Revolution

With the rise of digital technology, the audio mastering process underwent a significant transformation, leading to a revolutionary shift in the music industry. This period saw the emergence of new techniques and tools that allowed for more precise and efficient audio mastering, ultimately reshaping the way music was produced and consumed.

Transition To Digital Mastering

The transition to digital mastering marked a pivotal moment in the history of audio production. This shift from analog to digital technology brought about unprecedented opportunities for enhancing sound quality and creative possibilities. It enabled mastering engineers to work with greater precision and control, resulting in a more polished and refined audio output.

Advancements In Audio Tools

During the digital revolution, advancements in audio tools played a pivotal role in shaping the landscape of audio mastering. The introduction of sophisticated software and hardware allowed for more intricate manipulations of sound, empowering engineers to achieve unparalleled clarity and fidelity in the final master. This period also witnessed the integration of innovative algorithms and processing techniques, paving the way for a new era of sonic excellence.

Modern Techniques

Audio mastering has evolved over the years with the emergence of modern techniques that have greatly enhanced the quality and impact of music. In this section, we will explore the role of mastering engineers and the future of audio mastering.

Role Of Mastering Engineers

Mastering engineers play a crucial role in the audio production process. Their expertise lies in fine-tuning and polishing the final mix of a recording to ensure it sounds its best across various playback systems. Through the use of advanced software and hardware tools, they are able to enhance the overall clarity, balance, and depth of the audio.

Mastering engineers employ a range of techniques to achieve exceptional sound quality. They carefully adjust the levels of each track, ensuring that instruments and vocals sit well together and nothing gets lost in the mix. They also apply compression and equalization to shape the tonal balance, making sure that the lows, mids, and highs are well-balanced and pleasing to the ear.

In addition, mastering engineers use stereo widening techniques to create a sense of space and dimension in the audio. This allows the music to translate well across a wide range of listening environments, from car stereos to club sound systems. Furthermore, they apply harmonic enhancement to add warmth and richness to the overall sound, making it more engaging and immersive.

The Future Of Audio Mastering

The future of audio mastering looks promising, thanks to advancements in technology and the continued demand for high-quality sound. With the rise of streaming platforms and online distribution, there is a greater need for audio that translates well across different devices and formats.

One of the key developments in audio mastering is the use of artificial intelligence (AI) algorithms to automate certain aspects of the process. AI-powered mastering tools can analyze the audio and make intelligent decisions to enhance its quality. While these tools cannot replace the expertise of human mastering engineers, they can assist in streamlining the workflow and providing alternative options for creative exploration.

Another emerging trend is the focus on immersive audio formats such as Dolby Atmos and binaural audio. These formats aim to create a more immersive and lifelike listening experience by incorporating three-dimensional sound elements. Mastering engineers are adapting to these formats by employing specialized techniques that allow for precise placement and movement of audio objects in a virtual sound space.

In conclusion, modern techniques in audio mastering have revolutionized the way music sounds, allowing for enhanced clarity, balance, and depth. The role of mastering engineers remains pivotal in ensuring a polished final product, while advancements in technology open up new possibilities for the future of audio mastering.

Audio Mastering History : A Journey Through Time

Credit: www.linkedin.com

Frequently Asked Questions Of Audio Mastering History

What Is Audio Mastering?

Audio mastering is the final step in the music production process. It is the process of preparing and optimizing a song for distribution, ensuring consistent playback across different systems and formats. Mastering enhances the overall sound quality, balances the levels, and adds a professional touch to the audio.

Why Is Audio Mastering Important?

Audio mastering is important because it polishes the final mix of a song, making it sound better and more professional. It ensures that the audio translates well on different devices and platforms, providing a consistent and enjoyable listening experience for the audience.

Mastering also helps to optimize the audio for different mediums like streaming, radio, and CDs.

What Are The Benefits Of Audio Mastering?

Audio mastering offers several benefits. It enhances the overall sound quality, making the music more engaging and immersive. It ensures that the levels are properly balanced and the audio translates well across various playback systems. Mastering also adds a polished and professional touch to the audio, making it more appealing to listeners.

How Is Audio Mastering Different From Mixing?

Audio mixing is the process of blending and balancing multiple individual tracks to create a cohesive and sonically pleasing mix. On the other hand, audio mastering focuses on the finalization and optimization of the mixed audio. It involves fine-tuning the audio to achieve a balanced and consistent sound across all tracks, adding depth, clarity, and maximizing the overall loudness.

Conclusion

In the ever-evolving landscape of music production, audio mastering continues to play a crucial role in delivering high-quality sound. As we traced its history, we discovered how mastering has shaped the way we experience music. Understanding its roots is key to appreciating how this art form has evolved and continues to influence the music industry today.

Categories
Archive

Unlock the Power: Online Recording Studio Benefits

Online recording studios offer convenience and flexibility for musicians to create high-quality music remotely. With easy access to professional equipment and skilled engineers, artists can collaborate seamlessly from anywhere around the world.


This modern approach allows for efficient music production without the constraints of traditional studios, saving time and reducing costs for projects of all sizes. Musicians can simply log in, record tracks, and receive expert guidance in real-time, enhancing their creativity and productivity.


The user-friendly interface and instant sharing capabilities make online recording studios a valuable tool for the modern music industry, revolutionizing the way artists work and connect.


Credit: on.substack.com

The Rise Of Online Recording Studios

Convenience And Flexibility

Online recording studios offer unmatched convenience and flexibility for artists.

With online sessions, musicians can record from anywhere at any time.

Artists can easily schedule sessions to suit their own timetable.

Access To Professional Equipment And Engineers

Virtual studios provide access to top-notch equipment and skilled engineers.

Artists get the opportunity to work with professionals remotely.


Credit: www.microsoft.com

Cost-effective Solutions

Looking to save on studio expenses? With cost-effective solutions, an online recording studio offers benefits like remote collaboration, easy access to professional tools, and affordable pricing. This option can streamline your recording process while staying within your budget.

Reduced Overheads

By utilizing an online recording studio, artists can significantly reduce their operational costs.

Affordable Access To High-quality Equipment

Online studios offer affordable access to top-notch equipment without the hefty price tag.

Collaboration And Networking

When it comes to online recording studios, collaboration and networking are vital aspects that offer immense benefits to musicians and industry professionals. In today’s digital age, the ability to connect and collaborate globally has opened up new opportunities, allowing artists to work with talents from around the world and connect with industry professionals for guidance and exposure.

Global Collaboration Opportunities

Online recording studios provide global collaboration opportunities, enabling musicians to work together irrespective of geographical boundaries. Through virtual interfaces and file-sharing platforms, artists can easily collaborate on projects, contributing their expertise regardless of their physical location. This opens up a world of possibilities, allowing for diverse influences and creative input from various cultural and musical backgrounds.

Connection With Industry Professionals

Utilizing online recording studios facilitates direct connection with industry professionals, such as producers, engineers, and other music experts. The digital platform enables easy communication and feedback, allowing artists to seek guidance, mentorship, and industry exposure. This direct connection with professionals can significantly enhance an artist’s visibility and access to industry insights, ultimately boosting their career opportunities.

Tech Advancements And Audio Quality

In the world of recording studios, technological advancements have revolutionized the way audio is produced, resulting in higher-quality sound than ever before. These advancements have paved the way for innovative recording software and hardware that offer artists and producers a range of benefits. From crystal-clear sound production to user-friendly interfaces, the advancements in technology have truly transformed the recording experience.

High-quality Sound Production

One of the most significant benefits of online recording studios is the ability to achieve high-quality sound production. With advancements in digital technologies, artists can now capture every detail and nuance of their performances with pristine clarity. Whether it’s a delicate vocal melody or the rich resonance of an instrument, the sophisticated audio equipment and software used in online studios preserve the authenticity and fidelity of the sound.

Innovative Recording Software And Hardware

Another advantage of online recording studios is the availability of innovative recording software and hardware. These tools provide a range of features that enhance the recording process and empower artists to unleash their creativity. From intuitive user interfaces to advanced effects and plugins, the software available in online studios allows for effortless navigation and customization of the recording environment. Moreover, the hardware options include state-of-the-art microphones, sound processors, and studio monitors that deliver exceptional audio quality and accuracy.

The combination of cutting-edge software and hardware not only facilitates a seamless recording experience but also opens up a world of possibilities for experimentation and exploration. With access to a wide array of virtual instruments, effects, and plugins, artists can unleash their creativity and push the boundaries of their musical creations.

Challenges And Considerations

While there are numerous benefits to using an online recording studio, it’s essential to be aware of the challenges and considerations that come with it. Ensuring a smooth recording experience is crucial for any musician or podcaster, so let’s explore two key areas to focus on: internet connection and latency issues, as well as security and privacy concerns.

Internet Connection And Latency Issues

One of the primary considerations when using an online recording studio is the quality of your internet connection. A stable and reliable connection is essential to ensure seamless audio streaming and real-time collaboration with other musicians or producers. Poor internet speeds can lead to frustrating delays or disruptions during recording sessions, resulting in a compromised final product.

Another related challenge is latency, which refers to the delay between when you play or sing a sound and when you hear it through your headphones. This delay can be caused by various factors, including the distance between your location and the server hosting the online studio platform. While some latency is inevitable, it’s crucial to choose an online recording studio that minimizes latency to ensure an optimal recording experience.

Security And Privacy Concerns

Given the digital nature of online recording studios, security and privacy should be top priorities. When using these platforms, it’s essential to trust that your recordings and personal information are protected from unauthorized access or potential data breaches. Before selecting an online recording studio, thoroughly research their security measures and ensure they use encryption protocols to safeguard your files.

Moreover, consider the privacy policies of the online recording studio. Make sure the platform respects and protects your intellectual property rights and doesn’t store your recordings indefinitely without your consent. Additionally, it’s advisable to use a secure internet connection and regularly update your devices and software to minimize any potential vulnerabilities.

Unlock the Power: Online Recording Studio Benefits


Credit: m.facebook.com

Frequently Asked Questions Of Online Recording Studio Benefits

What Are The Benefits Of An Online Recording Studio?

Online recording studios offer convenience and flexibility, allowing musicians to record quality tracks from the comfort of their own homes. With access to professional equipment and experienced engineers, artists can achieve professional-quality recordings at a fraction of the cost of traditional studios.


Additionally, online studios provide the opportunity to collaborate with producers and musicians from around the world.

How Does An Online Recording Studio Work?

In an online recording studio, the artist uploads their raw audio files to the platform, where an engineer works on mixing, editing, and adding effects remotely. The artist can communicate their specific requirements, and the engineer will tailor the sound accordingly.


The final mix is then sent back to the artist for approval or further revisions, creating a seamless remote collaboration process.

Can Online Recording Studios Provide High-quality Sound?

Yes, online recording studios can provide high-quality sound. These studios utilize professional-grade equipment and employ skilled engineers who are experienced in achieving studio-quality recordings remotely. With advanced technology and efficient communication tools, online studios can ensure that the sound meets industry standards, delivering exceptional audio results.

Are Online Recording Studios Cost-effective?

Online recording studios offer cost-effective solutions for musicians. Traditional studios typically come with high rental costs and additional expenses. Online studios eliminate these expenses, allowing artists to save money while still receiving professional quality recordings. Moreover, the ability to work remotely reduces travel and accommodation costs associated with traditional studio sessions.

Conclusion

To sum up, the benefits of using an online recording studio are undeniable. With its convenience, flexibility, and cost-effectiveness, it is a game-changer for musicians and content creators. The ability to collaborate remotely and access professional tools makes it a valuable resource in today’s digital landscape.


Embracing online recording studios opens up endless possibilities for creating high-quality audio content.

Categories
Archive

How to Optimize Your Laptop for Music Production: Boost Your Musical Creativity

To optimize a laptop for music production, increase RAM and storage, update software, and use external audio interfaces for better performance. Enhance processing power and minimize latency by modifying power settings and disabling unnecessary background programs.

Music production requires a laptop with robust capabilities to handle complex software and plugins effectively. Optimizing your laptop for this purpose is crucial to ensure smooth workflow and high-quality output. By implementing specific modifications and upgrades, you can significantly enhance the performance of your device for music production tasks.

We will explore various strategies and tips to optimize your laptop specifically for music production needs.

How to Optimize Your Laptop for Music Production: Boost Your Musical Creativity

Credit: www.synthesia.io

Choosing The Right Laptop

Considerations For Music Production

It is crucial to consider various factors when selecting a laptop for music production.

Recommended Specifications

  • Processor: Look for at least a quad-core processor for smooth performance.
  • RAM: Opt for a minimum of 16GB RAM to handle resource-intensive music software.
  • Storage: Consider SSD storage for faster loading times and data transfer.
  • Display: A high-resolution display can enhance your visual workflow.
  • Ports: Ensure the laptop has the necessary ports for external audio interfaces and controllers.
  • Battery Life: Longer battery life is beneficial for uninterrupted music sessions.
How to Optimize Your Laptop for Music Production: Boost Your Musical Creativity

Credit: tommydecibel.com

Setting Up Your Daw And Plugins

Learn how to optimize your laptop for music production by setting up your digital audio workstation (DAW) and plugins efficiently. This will improve performance and enhance your overall music production experience. Understanding the best practices for DAW setup and plugin management will help you create high-quality music without any technical hindrances.

Optimizing Digital Audio Workstation (daw)

After installing your DAW, reduce buffer size for low latency. Adjust sample rate to 44.1kHz for standard quality.

Disable unnecessary features to speed up processing. Organize session folders for easy access. Update drivers regularly for performance.

Utilize multi-core processing for optimal speed. Limit track counts for efficiency. Freeze tracks to reduce CPU load.

Managing Audio Plugins

  • Arrange plugins by type for quick selection. Remove unused plugins to declutter workspace.
  • Regularly update plugins for compatibility. Use reputable plugin sources for quality assurance.
  • Test each plugin to ensure functionality. Keep plugins folder organized for easy navigation.

Optimize plugin presets for seamless workflow. Avoid excessive plugins to prevent overload. Maintain plugin versions for stability.

Maximizing System Performance

Sure, I can help you with that. Here’s an engaging section for your blog post using HTML format. “`html

Maximizing system performance is essential for a seamless music production experience on your laptop. By optimizing your laptop’s components and settings, you can ensure that it operates at its best, allowing you to focus on creating and producing music without any technical hindrances.

Utilizing Ram And Storage

RAM and storage play crucial roles in music production. Ensure your laptop has sufficient RAM for running multiple audio tracks, plugins, and software simultaneously. Opt for a minimum of 8GB RAM but consider 16GB or 32GB for larger projects. Additionally, prioritize SSD storage over HDD for faster data access and quicker loading times of audio files and software.

Managing Cpu Usage

CPU usage directly impacts the performance of music production software. Close background applications and processes to free up CPU resources. Utilize a reliable task manager to monitor and manage CPU usage, ensuring that your music production software receives the necessary processing power without competing with other applications.

Enhancing Audio Quality

To enhance audio quality on your laptop for music production, consider optimizing settings, using quality headphones, and investing in an external sound card. Adjusting buffer size and sample rates can also improve overall audio performance while producing music.

In the world of music production, audio quality is paramount. Whether you’re a seasoned producer or just starting out, ensuring your laptop is optimized for high-quality audio output is crucial. By upgrading your sound card and audio interface, as well as calibrating for the best audio performance, you can take your music production to the next level.

Upgrading Sound Card And Audio Interface

One of the first steps in enhancing audio quality on your laptop is to upgrade your sound card and audio interface. These components are responsible for converting digital audio signals into analog signals for your speakers or headphones. A better sound card and audio interface can significantly improve the sound reproduction and overall audio fidelity. When upgrading your sound card, look for one that supports high-resolution audio formats such as FLAC or ALAC. It should also have low latency and a high signal-to-noise ratio (SNR). By investing in a sound card with these features, you can eliminate distortion and unwanted noise, resulting in cleaner and more accurate audio playback. For professional-grade audio production, consider getting an external audio interface. These devices provide multiple inputs and outputs, allowing you to connect different audio sources and monitors. Look for an audio interface that supports a high sampling rate and has low-latency drivers for real-time recording and monitoring.

Calibrating For High-quality Audio Output

Once you’ve upgraded your sound card and audio interface, it’s important to calibrate your laptop for optimal audio output. Calibration ensures that what you hear is accurate and consistent, allowing you to make informed decisions during the music production process. To calibrate your laptop, start by adjusting the equalizer settings. A well-balanced EQ can enhance the clarity and definition of your audio, bringing out the nuances in your music. Experiment with different EQ settings to find the ideal balance for your specific genre or style. Additionally, consider using room correction software or hardware. These tools measure the acoustic properties of your listening environment and apply corrections to compensate for any irregularities. This helps to minimize unwanted resonances and reflections, resulting in a more accurate audio playback. Lastly, don’t forget to update your audio drivers and software regularly. Manufacturers often release updates that optimize performance and address any issues. Keeping your drivers and software up to date ensures a stable and reliable audio production environment. By implementing these strategies, you can enhance the audio quality on your laptop for music production. Remember to upgrade your sound card and audio interface, calibrate for high-quality audio output, and stay updated with the latest drivers and software. With these optimizations in place, you’ll be able to create music that sounds professional and polished.

Maintaining Your Optimized Setup

Now that you have optimized your laptop for music production, it’s important to maintain your setup to ensure optimal performance. By regularly performing system maintenance, implementing backups, and protecting your data, you can prevent any unexpected issues and keep your laptop running smoothly.

Regular System Maintenance

Regular system maintenance is crucial for keeping your laptop in top shape for music production. Here are some key tasks you should perform:

  1. Keep software up to date: Regularly check for updates for your operating system and music production software to ensure you have the latest features and security patches.
  2. Remove unnecessary files: Regularly clean up your hard drive by deleting temporary files, clearing your browser cache, and uninstalling unused programs. This will free up disk space and improve performance.
  3. Defragment your hard drive: Performing regular disk defragmentation can optimize file placement and improve access times, resulting in faster loading of music production projects.
  4. Scan for malware: Run regular antivirus and anti-malware scans to detect and remove any malicious software that could slow down your laptop or compromise your project files.
  5. Optimize startup processes: Disable unnecessary startup programs to speed up your laptop’s boot time and allocate more system resources to music production.

Backups And Data Protection

Backing up your music production projects and important data is crucial to avoid potential disasters. Follow these steps to protect your work:

  1. External drive backups: Use an external hard drive or SSD to regularly back up your music production projects. This ensures that even if your laptop fails, your work is safely stored.
  2. Cloud storage: Utilize cloud storage services like Google Drive, Dropbox, or OneDrive for an additional layer of backup. This protects your files in the event of physical damage or loss of your external drive.
  3. Automatic backup software: Consider using automated backup software that continuously backs up your files in the background, providing real-time protection.
  4. Password protection: Encrypt your backup drives and use strong passwords to protect your sensitive music production files from unauthorized access.

By following these regular system maintenance and backup practices, you can ensure that your optimized laptop for music production remains in excellent condition. This will allow you to focus on creating outstanding music without worrying about technical setbacks or data loss.

How to Optimize Your Laptop for Music Production: Boost Your Musical Creativity

Credit: www.whistlingwoods.net

Frequently Asked Questions Of How To Optimize Laptop For Music Production

How Do I Optimize My Laptop For Music Production?

To optimize your laptop for music production, make sure it has sufficient RAM and processing power. Close unnecessary programs and disable background tasks. Use an external hard drive for storing audio files and install a reliable antivirus software. Lastly, update your audio drivers and keep your laptop clean from dust and debris.

What Software Is Best For Music Production On A Laptop?

Software like Ableton Live, FL Studio, Logic Pro, and Pro Tools are popular choices for music production on laptops. Each offers unique features and user-friendly interfaces. Experiment with different software to find the one that suits your workflow and creative needs.

How Can I Improve The Sound Quality On My Laptop For Music Production?

To improve sound quality on your laptop for music production, consider connecting external studio monitors or headphones to get more accurate and detailed representation of your music. Invest in a high-quality audio interface for better sound recording and processing. Additionally, use audio plugins and EQ to fine-tune your sound.

Can I Use A Regular Laptop For Music Production?

Yes, you can use a regular laptop for music production. However, ensure that it meets the minimum system requirements of your chosen software. Opt for a laptop with a fast processor, ample RAM, and sufficient storage space. Consider upgrading your laptop’s components if necessary.

Conclusion

Incorporating these optimization techniques into your laptop for music production can significantly enhance your creative process. By ensuring sufficient RAM, storage, and processing power, you can avoid glitches and delays that hinder your workflow. Additionally, implementing the recommended software adjustments will streamline your music production tasks, allowing you to create high-quality tracks efficiently.


Categories
Archive

Always Double Track Guitars : Master the Art

Always double track guitars to create a fuller and more impactful sound in your music production. By layering two identical guitar takes, you can achieve a thicker sound with enhanced depth and richness.

Doubling guitars is a common technique used in various music genres to add texture and warmth to the mix. When done properly, double tracking can make your guitar parts stand out and elevate the overall quality of your recordings. Whether you’re working on a rock anthem or a mellow ballad, doubling guitars can take your music to the next level and make a lasting impression on your listeners.

The Benefits Of Double Tracking

Double tracking guitars adds depth by layering multiple recordings. The sound becomes richer and more expansive, giving the music a full-bodied feel.

By double tracking, the guitar tone is enriched, creating a more textured sound. It adds nuances and intricacies that elevate the overall listening experience.

Always Double Track Guitars  : Master the Art

Credit: www.ebay.com

Techniques For Double Tracking

Adjusting Timing And Tuning

To maximize the impact, adjust timing and tuning slightly for a fuller sound.

Exploring Different Panning

Experiment with varied panning settings to create depth and width in your double-tracked guitars.

Challenges And Solutions

When it comes to recording, mixing, and producing guitar tracks, one of the common challenges faced by musicians and producers is maintaining the integrity and consistency of double-tracked guitar recordings. Achieving a natural and balanced sound while avoiding phasing issues can be a hurdle, but with the right approach, it is possible to overcome these challenges and ensure a professional and polished result.

Avoiding Phasing Issues

Double-tracking guitars can present phasing issues when the timing between the two tracks is not perfectly aligned. This can lead to a loss of clarity and definition in the sound, causing the guitars to sound thin and less impactful. To avoid phasing problems, it is crucial to carefully align the timing of the two tracks. This can be achieved by using features such as track delay or manually adjusting the timing to ensure synchronization.

Maintaining Consistency

Another challenge when double-tracking guitars is maintaining consistency across both tracks. Any variations in playing dynamics, tone, or timing can result in a lack of cohesion between the two recordings, leading to an unbalanced and disjointed sound. To address this, it is essential to ensure that the performance, tone, and playing technique remain consistent between the double-tracked recordings. Additionally, using the same equipment and settings for both tracks can contribute to a more unified and harmonious result.

Tips For Effective Double Tracking

Tips for Effective Double Tracking

When it comes to creating a rich and full guitar sound, double tracking is a technique that can take your music to the next level. By recording the same guitar part twice and panning each recording to opposite sides of the stereo field, you can achieve a wider, more immersive sound that adds depth and dimension to your tracks. In this article, we’ll explore some tips to help you master the art of effective double tracking.

Choosing The Right Guitar And Amp

Choosing the right guitar and amp is crucial when it comes to double tracking. Here are a few factors to consider:

  • Tone: Opt for a guitar with a versatile tone that can suit a variety of genres and styles. This allows you flexibility when recording different parts.
  • Quality: Ensure your guitar is well-made and properly set up. A well-maintained guitar will produce a cleaner and more focused sound.
  • Amp Selection: Experiment with different amplifiers to find one that complements your guitar. Consider amps that offer a range of tones and built-in effects.

Experimenting With Layering

When it comes to double tracking, layering is the key to achieving a full and textured sound. Here are some tips to help you experiment with layering effectively:

  1. Variation: Try playing the part slightly differently each time you double track. This can include variations in timing, dynamics, or adding embellishments to the second recording.
  2. Panning: Pan the initial recording to one side and the second recording to the opposite side. Experiment with the panning placement to find the sweet spot for your mix.
  3. Effect Usage: Consider adding subtle effects, such as reverb or delay, to one or both recordings. This can add depth and create a sense of space in the mix.

By following these tips, you can enhance the impact and presence of your guitar tracks through effective double tracking. Remember to experiment and trust your ears to find the best approach for each song. Happy recording!


Creative Applications

Always Double Track Guitars offers a range of creative applications that allow you to take your guitar playing to new heights. From embracing imperfections to incorporating effects, these techniques can add depth and complexity to your sound. Let’s dive into some exciting ways you can utilize Always Double Track Guitars to enhance your music.

Embracing Imperfections

One of the key advantages of Always Double Track Guitars is its ability to embrace imperfections in your playing. Rather than striving for a perfectly polished sound, double tracking allows for a more organic and textured tone. By recording multiple takes of the same guitar part and combining them, you create a sense of richness and character.

Embracing imperfections can add warmth and depth to your music, making it sound more alive and genuine. It captures the nuances and subtleties that can get lost in a single guitar track, resulting in a more dynamic and captivating performance.

Incorporating Effects

The use of effects pedals can elevate your guitar sound to another level, and Always Double Track Guitars provides the perfect foundation for bringing those effects to life. By double tracking your guitar parts, you create a stereo image that can be enhanced and manipulated with various effects.

For example, you can experiment with different delay settings on each track, creating a spacious and atmospheric sound. You can also add modulation effects, such as chorus or flanger, to one track while leaving the other clean for a contrasting effect.

Incorporating effects with double tracking opens up a world of sonic possibilities. It allows you to create unique textures and ambiances, making your guitar playing stand out and capturing the listener’s attention.

Always Double Track Guitars  : Master the Art

Credit: www.amazon.com

Always Double Track Guitars  : Master the Art

Credit: www.vulture.com

Frequently Asked Questions On Always Double Track Guitars

Why Should I Double Track Guitars In My Recordings?

Double tracking guitars adds depth and richness to your recordings by creating a fuller sound. It can make your guitar parts stand out and sound more professional.

What Equipment Do I Need To Double Track Guitars?

To double track guitars, you’ll need a recording interface, a microphone, and a DAW (Digital Audio Workstation) software. You can use any electric or acoustic guitar for double tracking.

How Do I Double Track Guitars In My Recordings?

To double track guitars, record your guitar part once and then record it again using the same settings. Pan one track to the left and the other to the right to create a stereo effect. Make sure to play the parts as similarly as possible for a tight sound.

What Are The Benefits Of Double Tracking Guitars?

Double tracking guitars can make your recordings sound bigger and more professional. It adds a wider stereo image and gives your guitar parts more presence and depth. It can also help your guitar parts cut through the mix and stand out.

Conclusion

To sum up, double tracking guitars can significantly enhance the depth and richness of your sound. By layering multiple guitar tracks, you can create a powerful and vibrant sound that sets your music apart. Embracing this technique will undoubtedly take your recordings to the next level and captivate your audience.

Categories
Archive Audio Production

What are the Best Vst Plugins : Top Picks for Unleashing Sonic Power

The best VST plugins include Serum, Kontakt, Omnisphere, and FabFilter for high-quality sound production. These plugins offer versatile features and enhance music production.


Musicians and producers rely on VST plugins to create unique and professional-sounding tracks. Having access to high-quality plugins can dramatically elevate the quality of music production. With a wide range of VST plugins available in the market, it can be overwhelming to choose the best ones for your specific needs and preferences.


In this guide, we will explore some of the top VST plugins that are popular among music producers and artists. Whether you are looking to create electronic music, hip-hop beats, or film scores, having the right set of VST plugins can make a significant difference in your production process. Let’s dive into the world of VST plugins and discover the best tools to take your music to the next level.

What are the Best Vst Plugins : Top Picks for Unleashing Sonic Power


Credit: www.facebook.com


The Power Of Vst Plugins

A Must-have For Music Producers

VST plugins are essential tools for music producers in creating unique sounds.

They offer a wide range of virtual instruments and effects to enhance music production.

Revolutionizing Music Production

VST plugins have revolutionized music production by providing endless possibilities.

  • They allow for innovative sound design and creative experimentation.
  • Musicians can easily access high-quality sounds and tailor them to their unique style.
What are the Best Vst Plugins : Top Picks for Unleashing Sonic Power


Credit: www.ghosthack.de


Choosing The Right Vst Plugins

When selecting the best VST plugins for your music production needs, Choosing the Right VST Plugins is crucial to achieving the desired sound quality and creative outcomes.

Understanding Your Sound Needs

Identify the sound you aim to create: Understanding Your Sound Needs guides your selection to the right VST plugins.

Compatibility And Integration

Ensure seamless integration with your DAW system: Compatibility and Integration prevent technical issues and optimize your workflow.


Top Vst Plugins For Sonic Power


Discover the top VST plugins for sonic power that offer exceptional sound quality and versatility. Explore a range of innovative plugins designed to enhance your music production, including dynamic processors, virtual synthesizers, and effects modules. Elevate your sound with these best-in-class VST plugins and take your music to the next level.

The world of music production requires the use of top-quality VST plugins to achieve the sonic power that sets tracks apart. Here, we have compiled a list of the best VST plugins to elevate your sound to its highest potential.

Dynamic Equalizers

Dynamic equalizers play a crucial role in shaping the tonal balance of a mix. This type of VST plugin not only allows the user to adjust individual frequency bands but also responds dynamically to the audio signal, offering incredible precision and control over the sound.

Virtual Synths And Instruments

Virtual synths and instruments are essential tools for adding depth and character to your compositions. With a wide range of sounds and features, these VST plugins enable musicians and producers to craft unique melodies and harmonies that stand out in any genre.

Creative Effects And Modulation

Creative effects and modulation VST plugins open the door to endless sonic experimentation. From time-based effects like reverbs and delays to dynamic modulation tools such as choruses and phasers, these plugins provide the means to create innovative soundscapes and textures.

Mastering And Mixing Tools

The mastering and mixing stage is where a track reaches its full potential. The right VST plugins in this category can make a significant difference in achieving a polished and professional sound. Whether it’s multiband compressors, stereo imagers, or spectrum analyzers, these tools are essential for achieving a balanced and impactful final mix. In the world of music production, having access to the best VST plugins for sonic power is essential. From dynamic equalizers and virtual synths to creative effects and mastering tools, each of these VST plugins plays a crucial role in shaping and enhancing the sonic characteristics of a track.

Maximizing The Potential Of Vst Plugins


Unlock the full potential of your music production with the best VST plugins, designed to enhance your sound and creativity. Explore a range of top-rated plugins that offer versatile features and superb quality to elevate your music production to new heights.

Exploring Sound Design Possibilities

VST plugins offer an incredible range of possibilities when it comes to sound design. With these powerful tools at your disposal, you can unlock a whole new world of creativity and take your music production to the next level.

From powerful synthesizers to realistic virtual instruments, VST plugins provide an expansive library of sounds that can be sculpted and manipulated to suit your unique artistic vision. Whether you’re working on electronic music or creating a cinematic score, these plugins offer endless creative potential.

By experimenting with different effects, filters, and modulation options, you can shape your sounds in ways you never thought possible. Whether you’re looking to create dreamy atmospheres, gritty basslines, or intricate layers of sound, VST plugins provide the tools to bring your ideas to life.

Optimizing Workflow And Efficiency

One of the greatest advantages of using VST plugins is their ability to streamline your workflow and enhance efficiency. With their intuitive interfaces and customizable features, these plugins allow you to work more effectively and get your ideas out faster.

Gone are the days of spending hours tweaking knobs and sliders to achieve the desired result. VST plugins provide an array of presets and user-friendly controls that allow you to dial in the perfect sound with just a few clicks.

Additionally, many VST plugins offer drag-and-drop functionality, allowing you to easily import samples, loops, and MIDI files into your projects. This not only saves time but also provides a seamless integration of various elements, allowing you to focus on the creative process rather than technicalities.

Moreover, VST plugins can be used with your favorite digital audio workstation (DAW), eliminating the need for external hardware and streamlining your setup. Whether you’re a bedroom producer or a professional composer, this level of convenience and flexibility can greatly enhance your productivity.

The Future Of Vst Plugins

Discover the boundless possibilities of VST plugins and embrace the ever-evolving world of music production. In this blog post, we’ll explore the future of VST plugins and how they are shaping the landscape of modern music creation. From advancements in technology to expanding creative boundaries, we’ll delve into the exciting developments that are revolutionizing the way musicians, producers, and audio enthusiasts harness the power of VST plugins.

Advancements In Technology

As technology continues to advance at an unprecedented pace, the same can be said for VST plugins. With each passing year, developers are pushing the boundaries, harnessing the latest technologies to create plugins that offer unparalleled control, sonic quality, and an immersive user experience. These advancements allow artists to bring their ideas to life with remarkable detail and precision, ensuring that the final product truly reflects their creative vision.

Advancements Benefits
Realistic Emulations Recapture the warmth and character of vintage gear with stunning accuracy.
Machine Learning Plugins that learn and adapt to your preferences, providing tailor-made sounds.
Cloud Integration Access your favorite plugins from anywhere, collaborate seamlessly, and share presets effortlessly.

Expanding Creative Boundaries

The future of VST plugins is not just about technical advancements, but also about expanding creative boundaries. With an ever-growing library of innovative plugins, artists can explore new sonic landscapes and experiment with unique sounds that were once unimaginable. From synthesizers that push the limits of sound design to dynamic effects processors that add depth and character to recordings, the possibilities for artistic expression are limitless.

  • Discover new genres by blending existing styles with innovative plugin combinations.
  • Transform ordinary sounds into extraordinary creations with advanced modulation and manipulation tools.
  • Integrate visual elements into your music production with plugins that combine audio and visual synthesis.

The future of VST plugins is an exhilarating journey of exploration and innovation. As technology continues to evolve and creative boundaries expand, musicians and producers have access to an ever-expanding palette of sonic tools. Embrace the future and let VST plugins elevate your music production to new heights.

What are the Best Vst Plugins : Top Picks for Unleashing Sonic Power


Credit: medium.com


Frequently Asked Questions On What Are The Best Vst Plugins


What Vst Do Most Producers Use?


Most producers use popular VST plugins like Serum, Omnisphere, Kontakt, and Massive for their music production needs.


What Plugins Do Pros Use?


Pros often use performance optimization plugins like WP Rocket, SEO tools like Yoast SEO, and security plugins such as Wordfence. They also rely on form-building plugins like Gravity Forms and custom development plugins like Advanced Custom Fields for more functionality.


What Is The Best Virtual Instrument?


The best virtual instrument depends on personal preference, but popular choices include Native Instruments Komplete, Spectrasonics Omnisphere, and Arturia V Collection. Factors like versatility, sound quality, and user interface should be considered when choosing the best fit for your needs.


Which Company Has The Best Plugins?


The company that offers the best plugins is subjective and depends on your specific needs. However, popular options include WooCommerce for e-commerce websites, Yoast for SEO optimization, and Contact Form 7 for contact forms. Do thorough research to find the ideal plugins for your website requirements.


Conclusion


When it comes to choosing the best VST plugins, it’s important to consider your specific needs and preferences. With the wide range of options available, you can enhance your music production experience and achieve professional results. Remember to explore different VST plugins to find the ones that work best for you.


Unlock your creativity and take your music to the next level with the right VST plugins for your projects.

Categories
Archive

Mixing Vocals: Unleash the Power of Perfect Sound

Mixing vocals involves adjusting levels, EQ, compression, and effects to enhance the vocal performance. Through this process, the vocals are balanced with the instrumental track to create a cohesive and professional sound.


Moreover, mixing vocals is crucial in bringing clarity and emotion to the song, ensuring that the vocals stand out and connect with the listener. By utilizing techniques such as panning, reverb, and delay, mix engineers can achieve a polished and dynamic vocal sound that complements the overall production.


We will explore the essential steps and best practices for mixing vocals to help you achieve a professional-sounding mix.


The Importance Of Vocal Mixing

Vocal mixing is a crucial aspect of audio production that can make or break a song. The importance of vocal mixing cannot be overstated, as it plays a significant role in enhancing the overall quality and impact of a track. When vocals are mixed effectively, they can evoke emotions, create a connection with the listener, and bring the lyrics to life.

Enhancing The Emotional Impact

Mixing vocals with precision can amplify emotions conveyed in the lyrics, delivering a powerful message to the listener. By adjusting tone, reverb, and volume, emotional nuances can be accentuated, resonating deeply with the audience.

Balancing The Vocal With Instrumentation

A well-mixed vocal track strikes a perfect balance with the accompanying instruments, allowing each element to complement the other harmoniously. This balance ensures that vocals are not overshadowed or lost amidst the music, creating a cohesive sound.

Essential Tools And Techniques

When it comes to crafting professional-sounding vocal tracks, understanding essential tools and techniques is crucial. Utilizing the right tools and techniques can elevate your vocal mix to the next level.

Understanding Eq And Compression

EQ and compression are fundamental tools in vocal mixing. EQ adjusts the frequency balance, enhancing clarity and removing unwanted frequencies. Compression smoothens out dynamics and maintains consistency.

Utilizing Reverb And Delay Effectively

Reverb and delay can add depth and space to vocals. Reverb simulates room reflections, while delay creates echoes. Use them subtly to avoid overwhelming the vocal mix.

  • Adjust EQ to carve out space for vocals
  • Apply gentle compression to even out dynamics
  • Experiment with different reverb types for ambience
  • Use delay sparingly to enhance vocal phrases

Mastering these tools and techniques can significantly enhance the quality of your vocal mixes. Remember, practice and experimentation are key to achieving the desired vocal sound.

Tips For Achieving Clarity And Depth

When it comes to mixing vocals, achieving clarity and depth is essential for creating a professional and polished sound. Utilizing specific techniques can help emphasize the vocal presence while adding a sense of space and dimension to the overall mix. By incorporating strategic vocal layering and panning, you can enhance the clarity and depth of the vocals, elevating the quality of the finished product.

Utilizing Vocal Layering

  • Layering vocals involves recording multiple takes of the same vocal part and blending them together. This technique can add fullness and depth to the vocals.
  • Experiment with different vocal textures and harmonies to create a rich and dynamic sound. Consider incorporating ad-libs or backing vocals to enhance the overall vocal performance.
  • Pay attention to the timing and phrasing to ensure the layers complement each other and create a cohesive vocal arrangement.
  • Use EQ to carve out space for each layer, ensuring that they don’t compete with each other in the mix.

Creating Space With Panning

  1. Panning the vocal tracks can help create a sense of width and space within the mix. Experiment with panning individual vocal layers to different positions in the stereo field to achieve a spacious and immersive sound.
  2. Consider using automation to vary the panning positions throughout the song, adding movement and interest to the vocal arrangement.
  3. Avoid hard panning for lead vocals to maintain a centered focus, while reserving wider panning for background vocals or ad-libs.

Mixing Vocals: Unleash the Power of Perfect Sound


Credit: www.amazon.com

Common Pitfalls To Avoid

When it comes to mixing vocals, there are a few common pitfalls that many producers and engineers fall into. These pitfalls can negatively impact the quality and impact of the final mix, so it’s important to be aware of them and take steps to avoid them. In this section, we’ll explore two of the most common pitfalls: overuse of processing and ignoring the importance of pre-production. By understanding and avoiding these pitfalls, you can achieve a polished and professional vocal mix that stands out.

Overuse Of Processing

One of the biggest pitfalls in mixing vocals is the overuse of processing. It’s easy to get carried away with plugins and effects, thinking that more processing will automatically result in a better sound. However, applying too much processing can actually have the opposite effect, leading to a muddy or unnatural vocal sound.

When processing vocals, it’s important to remember that less is often more. Instead of piling on multiple compressors, EQs, and reverbs, focus on using a few high-quality plugins strategically. Take the time to listen critically to the vocals and identify which aspects need improvement. Then, apply processing sparingly and tastefully to enhance those specific areas.

Additionally, be cautious of using presets as a one-size-fits-all solution. While presets can be helpful starting points, they should be treated as a guide rather than a definitive solution. Every vocal recording is unique, so take the time to adjust plugin settings to fit the specific characteristics and tonal qualities of the vocalist.

Ignoring The Importance Of Pre-production

Another common pitfall in vocal mixing is ignoring the importance of pre-production. Pre-production refers to the phase of the production process where the vocals are prepared before the recording even begins. Many producers and engineers overlook this crucial step, but it can have a significant impact on the final mix.

During pre-production, it’s important to work closely with the vocalist to ensure that they are well-prepared and comfortable. This includes selecting the right microphone, discussing vocal techniques, and addressing any potential performance issues. By taking the time to perfect the vocal recording before the mixing phase, you can save valuable time and effort later on.

Furthermore, paying attention to the arrangement and overall production during pre-production can greatly improve the vocals’ place in the mix. Clearing up any clashing frequencies or excessive instrumentation beforehand can prevent the vocals from getting lost or sounding disjointed in the final mix.

In conclusion, avoiding common pitfalls in vocal mixing, such as overuse of processing and ignoring pre-production, can greatly enhance the quality and impact of the final mix. By keeping these pitfalls in mind and taking proactive measures to avoid them, you can achieve a professional and polished vocal mix that truly shines.

Mastering The Art Of Vocal Mixing

Vocals are often the most important element in a song, and getting them to sound just right is the key to a professional and polished mix. However, achieving a perfect vocal mix is an art that requires skill, practice, and an understanding of the technical aspects involved. In this article, we will explore two crucial aspects of mastering the art of vocal mixing – developing a keen ear and continuous learning and experimentation.

Having a well-trained ear is one of the most essential attributes of a successful vocal mixer. It enables you to identify subtle nuances in the vocal performance and make informed decisions while processing and balancing the vocals within the mix. Here are a few tips to help you develop a keen ear:

  1. Study Vocal Recordings- Listen to a wide range of vocal recordings across different genres to understand the intricacies and techniques used by experienced vocal mixers. Analyzing well-mixed vocals can provide insights into how to achieve clarity, presence, and a balanced sound.
  2. Train Your Listening Skills- Practice critical listening by focusing on different aspects of the vocal mix like tonal balance, dynamics, and effects processing. Pay attention to how these elements interact with the rest of the instruments in the mix.
  3. Experiment with Different Processing Techniques- Train your ears to identify the impact of various vocal processing techniques such as EQ, compression, reverb, and delay. Make small adjustments and evaluate the changes in the sound to understand the effect of each processing tool.
  4. Seek Feedback- Share your mixes with experienced mixers and seek their feedback. Constructive criticism can help you identify areas for improvement and refine your listening skills.

The world of audio engineering is constantly evolving, and staying updated with the latest techniques and tools is crucial for improving your vocal mixing skills. Here are some ways to continue learning and experimenting:

  • Read Books and Online Resources- Explore books, articles, and online resources that cover the subject of vocal mixing. Look for sources that provide practical tips and techniques from industry professionals.
  • Participate in Online Communities- Join forums and discussion groups dedicated to audio engineering and vocal mixing. Engage with fellow mixers, ask questions, and share your experiences to gain insights and learn from others.
  • Take Online Courses- Enroll in online courses or tutorials that focus specifically on vocal mixing. These courses often provide structured learning materials, exercises, and assessments to help you progress and refine your skills.
  • Experiment with Different Approaches- Don’t be afraid to try out new ideas and techniques. Every vocal is unique, and experimenting with different processing chains, effects, and creative approaches can lead to interesting and innovative results.

By actively developing your listening skills and continuously expanding your knowledge, you can master the art of vocal mixing. Remember, it takes time and practice to refine your skills, so be patient and enjoy the process of creating captivating vocal mixes.

Mixing Vocals: Unleash the Power of Perfect Sound


Credit: www.facebook.com

Frequently Asked Questions Of Mixing Vocals

How Do I Mix Vocals For A Professional Sound?

To achieve a professional sound when mixing vocals, start by addressing any recording issues like background noise or excessive reverb. Then, use EQ to enhance the vocal presence and clarity. Apply compression to control the dynamics and make the vocals sit well in the mix.


Lastly, use effects like reverb and delay to add depth and dimension to the vocals.

What Is The Importance Of Panning Vocals?

Panning vocals is crucial as it helps create a sense of space and width in the mix. By spreading the vocals across the stereo field, you can give them a more immersive and natural feel. However, be cautious not to go overboard with panning, as vocals need to remain centered and prominent for intelligibility.

Should I Use Auto-tune When Mixing Vocals?

The use of auto-tune is subjective and depends on the artistic vision of the song. Auto-tune can be used to correct pitch inconsistencies and achieve a polished sound. However, it should be applied sparingly to maintain a natural and authentic performance.


Use your ears and adjust the auto-tune settings to taste, ensuring it enhances rather than detracts from the vocals.

How Can I Make My Vocal Harmonies Sound Cohesive?

To make vocal harmonies sound cohesive, ensure that each harmony part is in tune and blends well with the lead vocal. Use EQ to carve out sonic space for each vocal part, allowing them to coexist without clashing. Apply subtle reverb or delay to unify the harmonies and create a sense of depth.


Experiment with different arrangements to find the most pleasing combinations.

Conclusion

Mastering the art of mixing vocals is crucial for creating a professional sound. By implementing the right techniques and tools, you can enhance the clarity and impact of the vocals in your audio project. With practice and dedication, you can achieve a pristine vocal mix that elevates the overall quality of your music.

Categories
Archive

Home Recording Tips: Master the Art of Sound

For home recording tips, ensure a quiet space, use good quality equipment and experiment with mixing techniques. When it comes to recording music at home, there are several key factors to consider.

Creating a comfortable and quiet environment is essential to ensure high-quality recordings. Investing in good quality recording equipment such as microphones, audio interfaces, and headphones can make a significant difference in the final sound. Experimenting with different mixing techniques can help you achieve the desired balance and clarity in your recordings.

By following these tips, you can set yourself up for success in home recording and create professional-grade music from the comfort of your own space.

Home Recording Tips: Master the Art of Sound

Credit: www.practical-music-production.com

Setting Up Your Home Recording Space

Home Recording Tips: Setting Up Your Home Recording Space

Designing An Acoustically Sound Environment

Creating a space with proper acoustics is vital for high-quality recordings.

  • Choose a room with minimal echo and sound-absorbing materials.
  • Hang thick curtains or acoustic foam panels on walls to reduce reflections.
  • Position your recording equipment away from hard surfaces to minimize reverberation.

Essential Equipment For Quality Recording

Investing in the right equipment can significantly enhance your recordings.

  1. A good quality microphone is essential for capturing clear sound.
  2. Consider a pop filter to reduce plosive sounds when recording vocals.
  3. Acquire a headphone monitor for precise audio monitoring during recording.

Mastering Microphone Techniques

Understanding Different Types Of Microphones

Microphones come in various types. Two common ones include condenser and dynamic microphones.

A condenser microphone is sensitive and ideal for capturing subtle nuances, while a dynamic microphone is robust and suitable for loud sound sources.

Optimizing Mic Placement For Various Instruments

  • Position the microphone closer for detailed sound and farther for a more ambient effect.
  • For acoustic instruments, experiment with placement angles to capture the rich tones.
  • Use a pop filter to reduce plosives and enhance vocal recordings.

Perfecting The Recording Process

Home Recording Tips: Perfecting the Recording Process

When it comes to home recording, perfecting the recording process is essential in achieving professional-level results. From setting the levels and gain structure to utilizing effects and signal processing, there are several crucial factors to consider to ensure high-quality recordings.

Setting Levels And Gain Structure

Setting levels and gain structure is key to achieving balanced and clear audio recordings. Proper gain staging helps in avoiding unwanted distortion and noise. To optimize this, use a consistent input volume, adjust input gain levels on the interface, and monitor input levels on your digital audio workstation (DAW) meters.

Utilizing Effects And Signal Processing

Utilizing effects and signal processing can greatly enhance the quality of your recordings. Basic effects like reverb, delay, and compression can add depth and presence to the sound. Experimenting with EQ, modulation, and other processing tools can help tailor the recordings to your liking, bringing out the best in every track.

Home Recording Tips: Master the Art of Sound

Credit: www.mellostudio.com

Editing And Mixing Like A Pro

Editing and mixing are crucial steps in the home recording process that can take your tracks from amateur to professional. By paying attention to the arrangement and efficiency of your tracks, as well as balancing and enhancing the mix, you can achieve studio-quality results right from the comfort of your own home.

Arranging And Editing Tracks Efficiently

Efficiently arranging and editing your tracks is essential to avoid clutter and ensure a clean, well-organized recording. Here are some tips to help you get started:

  • Group Similar Instruments: Grouping similar instruments together, such as guitars or drums, makes it easier to edit and process them as a unit.
  • Use Color Coding: Assigning different colors to each track can help you visually organize your project and quickly identify different instruments or parts.
  • Naming and Labeling: Clearly labeling each track with its corresponding instrument or part will help you navigate through your project more efficiently.
  • Trimming and Cutting: Remove any unwanted silence or unnecessary parts from your recordings to ensure a tight and polished final product.

Balancing And Enhancing The Mix

Once your tracks are arranged and edited, it’s time to focus on balancing and enhancing the mix. Follow these tips to achieve a professional-sounding mix:

  • Panning: Experiment with panning to create separation and width in your mix. Place instruments or vocals at different points in the stereo field to give them their own space.
  • Volume Levels: Pay attention to the volume levels of each track to achieve a balanced mix. Use automation to adjust the levels of individual tracks when necessary.
  • EQ and Compression: Use equalization (EQ) to shape the tonal balance of each instrument and compression to control dynamic range and add cohesion to the mix.
  • Add Effects: Explore the use of reverb, delay, and other effects to add depth, dimension, and character to your mix.

By following these editing and mixing tips, you can take your home recordings to the next level. Remember, practice and experimentation are key to developing your own personal style and achieving the professional sound you desire.

Achieving Professional Sound Quality

Looking to achieve professional sound quality for your home recordings? Follow these key tips to elevate the quality of your recordings, including investing in good microphones, creating a suitable recording environment, and utilizing proper editing techniques to enhance the overall sound.

Achieving Professional Sound Quality When it comes to home recording, one of the main goals is to achieve professional sound quality. Having a polished and well-produced track can make all the difference in the impact your music has on its listeners. In this section, we will explore two important aspects of achieving professional sound quality: understanding audio mastering basics and tips for polishing your final mix.

Understanding Audio Mastering Basics

To achieve that professional sound quality, understanding the basics of audio mastering is crucial. Audio mastering is the final step in the post-production process, where your mix is balanced, enhanced, and optimized for distribution. Here are some key points to keep in mind when it comes to audio mastering:
  • Know Your Tools: Familiarize yourself with the tools used in the mastering process, such as compressors, EQs, and limiters. Understanding how these tools work and how to use them effectively will help you achieve the desired sound.
  • Focus on Dynamics: Pay attention to the dynamic range of your mix. Too much compression or limiting can result in a loss of dynamics and make your mix sound flat and lifeless. Aim for a balanced mix with controlled dynamics.
  • Set the Right Levels: Ensure that your mix has appropriate levels, avoiding clipping and distortion. Keep an eye on the peak levels and make adjustments if necessary.
  • Consider the Environment: When mastering, it’s important to consider the environment in which your music will be listened to. Different mediums, such as streaming platforms or physical CDs, have different requirements and limitations. Tailor your mastering process accordingly.

Tips For Polishing Your Final Mix

Polishing your final mix is another crucial step in achieving professional sound quality. This stage focuses on refining and enhancing your mix to ensure every element shines. Here are some tips to help you polish your final mix:
  1. Gain Staging: Pay attention to the gain staging throughout your mix. Make sure each track is properly leveled, avoiding any unnecessary clipping or distortion.
  2. EQ and Frequency Balance: Use EQ to fine-tune the frequency balance of your mix. Aim for clarity and balance, ensuring that each instrument occupies its own space in the mix.
  3. Effective Use of Effects: Utilize effects like reverb, delay, and modulation in a tasteful manner. Enhance the depth and spaciousness of your mix without overpowering the elements.
  4. Panning and Stereo Imaging: Experiment with panning and stereo imaging to create a wide and immersive soundstage. Ensure each element has its proper place in the stereo field.
  5. Detail-oriented Editing: Pay attention to the small details, such as crossfades, fades, and edits. These details can make a significant difference in the overall polish of your mix.
By understanding the audio mastering basics and implementing these tips for polishing your final mix, you can take your home recordings to the next level of professional sound quality. Experiment, be patient, and trust your ears as you strive for the best possible result. Happy recording!
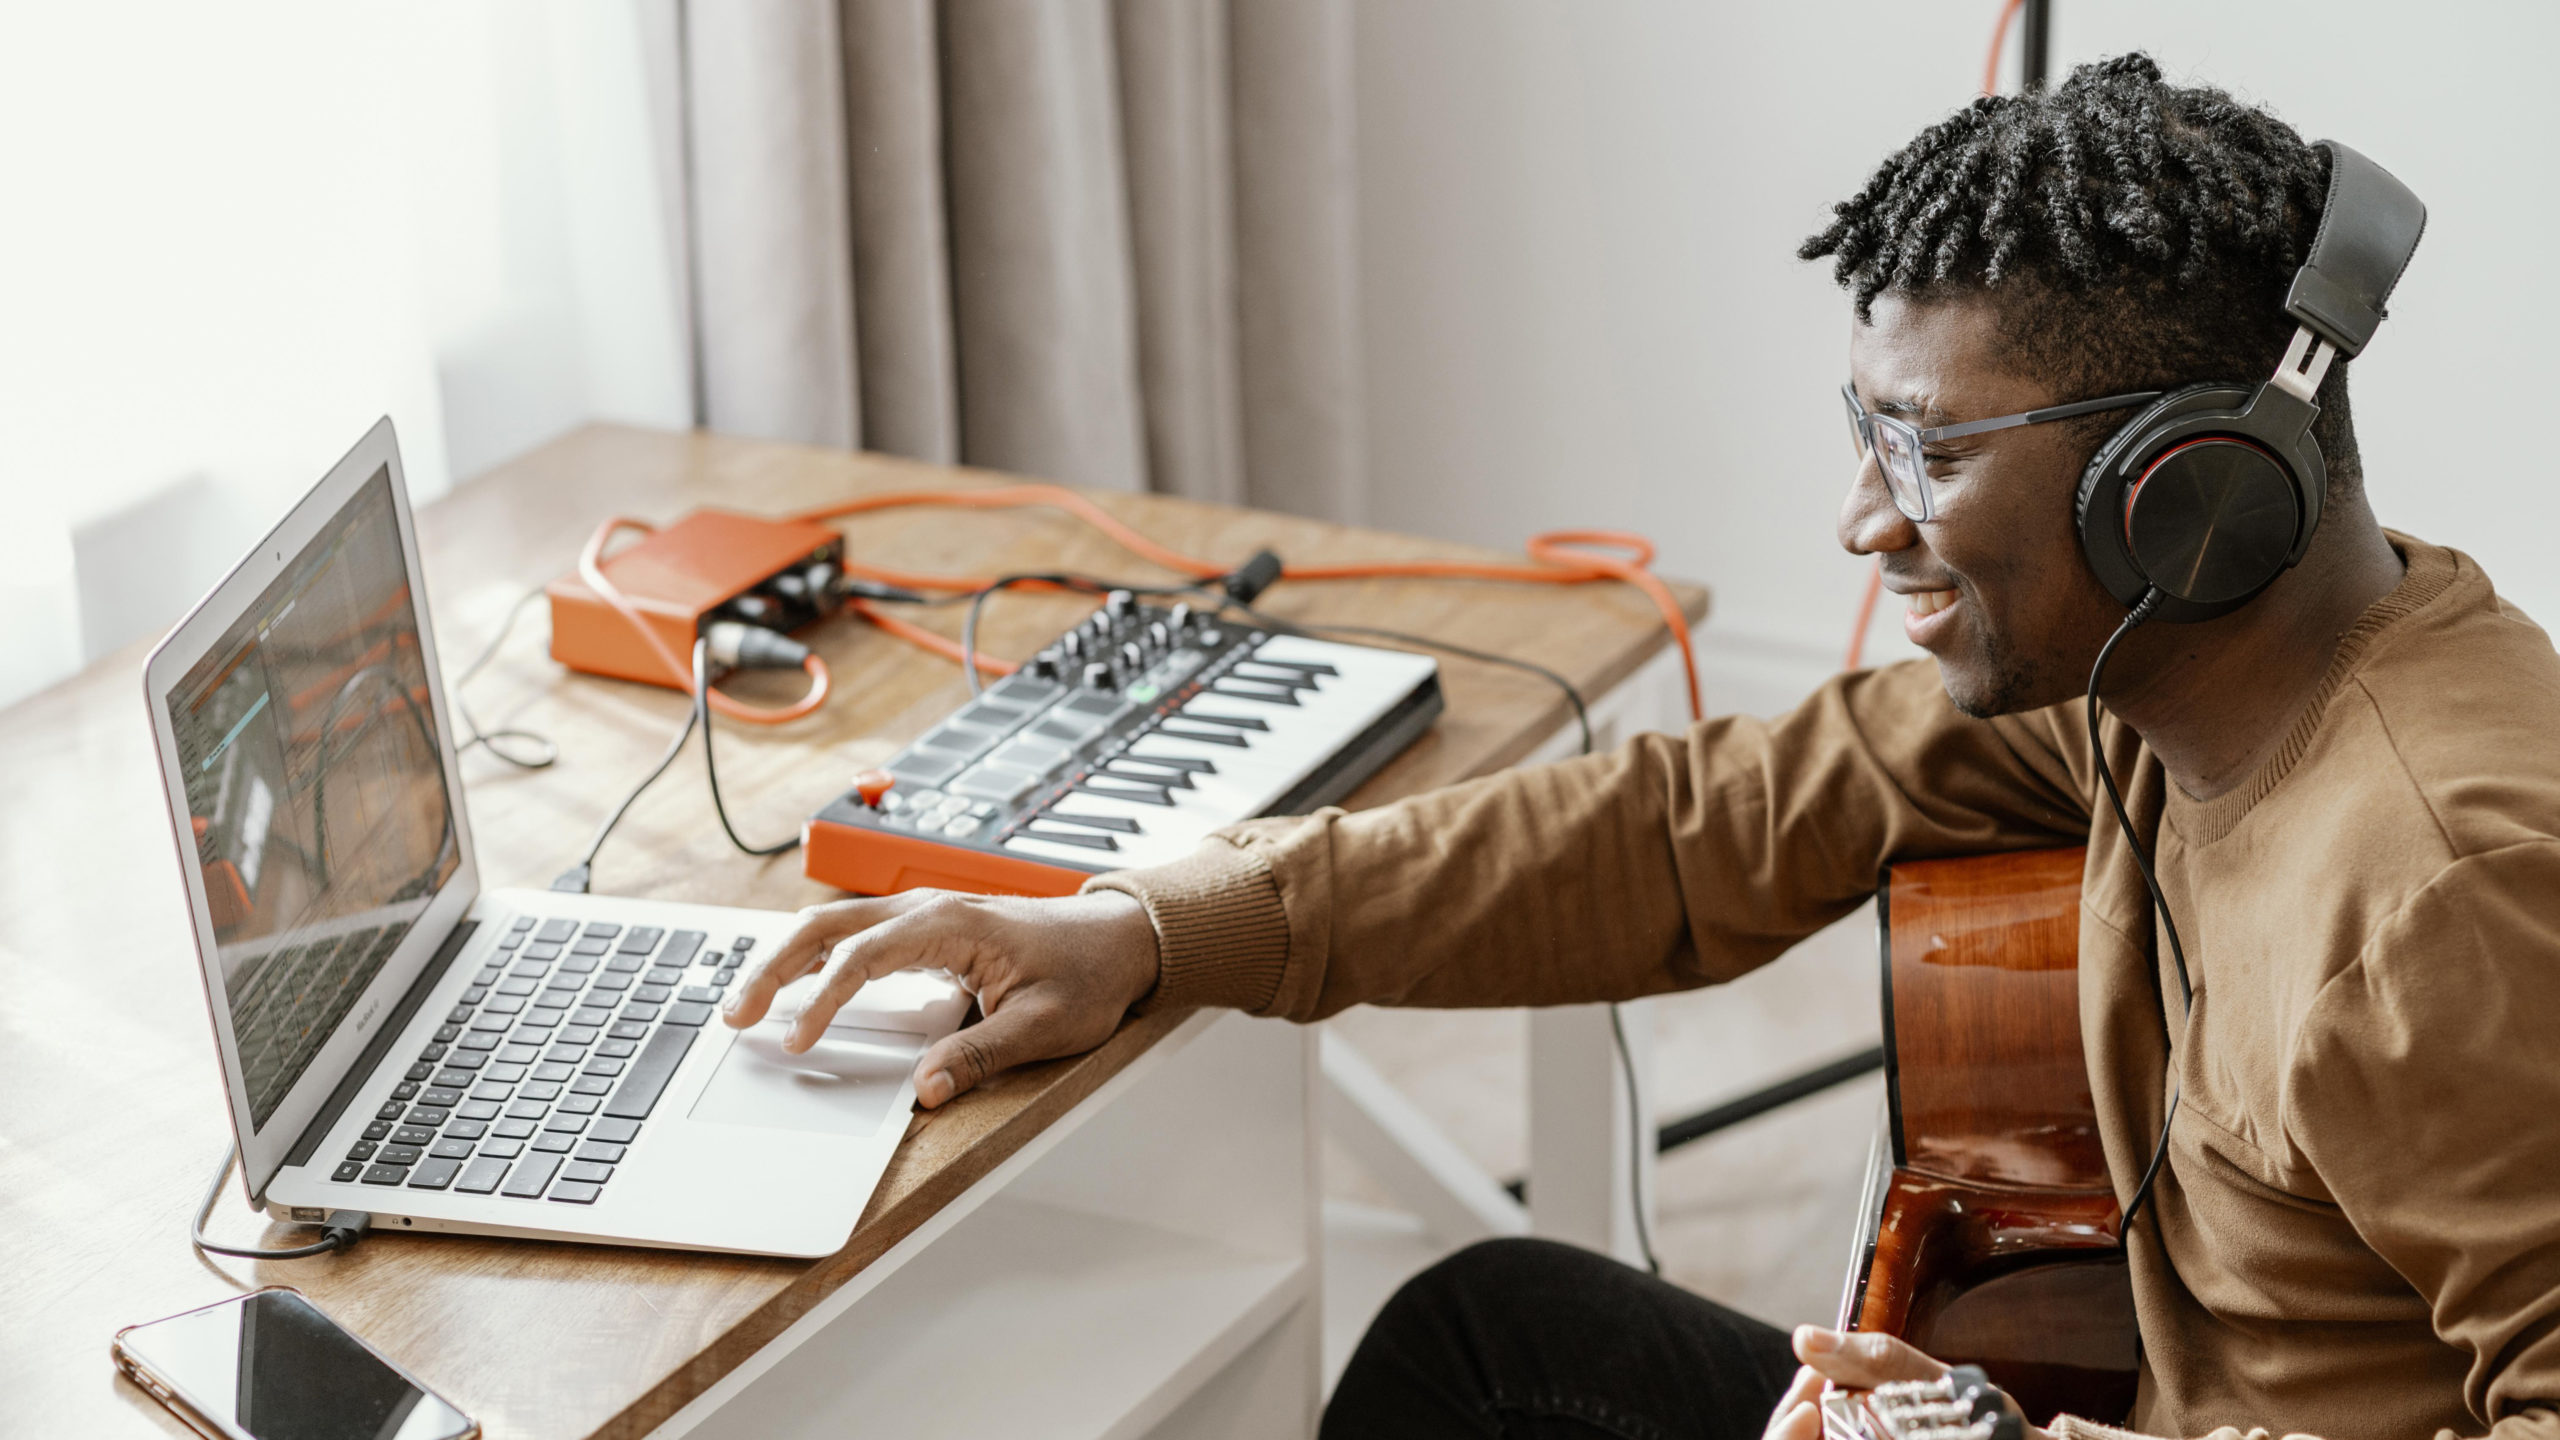
Home Recording Tips: Master the Art of Sound

Credit: www.pinterest.com

Frequently Asked Questions For Home Recording Tips

How Can I Set Up A Home Recording Studio?

Setting up a home recording studio requires a quiet space, a computer, an audio interface, microphones, headphones, and recording software. Make sure to optimize the acoustic treatment of your room and invest in quality equipment to get the best sound quality.

What Are Some Essential Equipment For Home Recording?

To start your home recording setup, you will need a good audio interface, condenser or dynamic microphones, quality headphones, and a digital audio workstation (DAW) software. Additionally, consider using pop filters, microphone stands, and acoustic treatment to enhance your recordings.

How Can I Improve The Sound Quality Of My Home Recordings?

To improve the sound quality of your home recordings, focus on acoustic treatment, use high-quality microphones, eliminate background noise, experiment with microphone placement, and utilize post-production techniques such as EQ and compression. Regular practice and developing your recording skills will also contribute to better sound quality.

Conclusion

To sum up, home recording can be an exciting journey with the right tools and techniques. By implementing the tips discussed in this blog post, you can enhance the quality of your recordings and unleash your creativity. Whether you are a beginner or experienced, these tips will help you achieve professional-grade results from the comfort of your own home.


Categories
Archive

How to Supercharge Your PC for Music Production

To optimize a PC for music production, upgrade your RAM, invest in a fast SSD, and use a powerful processor. Additionally, customize your settings for audio performance and ensure that your software and plugins are up to date.

When it comes to getting the best sound quality and performance out of your computer for music production, optimizing your PC is crucial. By following some key steps and making necessary adjustments, you can ensure that your system is running efficiently and effectively for your music projects.

Let’s explore some tips on how to optimize your PC for music production to enhance your creative process and output.

How to Supercharge Your PC for Music Production

Credit: www.walmart.com

Choosing The Right Hardware

Processor And Ram

Consider a high-performance processor and ample RAM for smooth music production.

Solid State Drives

Opt for SSDs over HDDs for faster loading times and enhanced stability.

Audio Interfaces

Invest in quality audio interfaces for low latency and high fidelity sound recording.

How to Supercharge Your PC for Music Production

Credit: output.com

Optimizing Your Operating System

Optimizing your operating system is crucial for achieving peak performance in music production. By implementing performance tweaks and updating drivers, you can ensure your PC is running smoothly and efficiently for your music projects.

Performance Tweaks

  • Disable unnecessary background processes.
  • Adjust your power settings for high performance.
  • Clear temporary files and cache regularly.

Driver Updates

  1. Regularly check for updates for your audio interface drivers.
  2. Update graphics card drivers for improved visual performance.
  3. Ensure all chipset drivers are up to date for optimal system functionality.

Selecting The Best Digital Audio Workstation (daw)

When it comes to music production, selecting the best Digital Audio Workstation (DAW) is crucial for optimizing your PC. Your DAW is the central component for recording, editing, and producing music, so it’s essential to choose the right one for your needs. Let’s delve into the factors to consider when selecting the best DAW for your music production endeavors.

Compatibility And Integration

Compatibility and integration play a vital role in selecting the best DAW for music production. Ensure that the DAW you choose is compatible with your operating system, such as Windows or Mac. Additionally, consider the compatibility of the DAW with your hardware, including your audio interface and MIDI controllers. Seamless integration with third-party plugins and virtual instruments is also crucial to maximize your creative possibilities.

Resource Management

Efficient resource management is imperative for a seamless music production workflow. A DAW with optimized resource management ensures that your PC can handle the demands of recording and processing audio without lag or latency. Look for a DAW that offers customizable buffer settings, efficient CPU utilization, and streamlined disk streaming to maximize your PC’s performance.

How to Supercharge Your PC for Music Production

Credit: www.amazon.com

Utilizing Plug-ins And Virtual Instruments

To optimize your PC for music production, consider utilizing plug-ins and virtual instruments to streamline the creative process. By leveraging these tools, you can enhance the quality of your productions while minimizing the strain on your computer’s resources, resulting in a more efficient workflow.

Effectively Managing Resources

When it comes to optimizing your PC for music production, effectively managing resources is crucial. This means ensuring that your computer’s processing power and memory are optimized to handle the demands of using plug-ins and virtual instruments.

  • Close unnecessary background applications and processes to free up CPU and RAM.
  • Consider upgrading your computer’s hardware, such as adding more RAM or using a faster processor, to better handle resource-intensive tasks.
  • Organize your project files and samples in a logical manner to minimize the time spent searching for specific files.
  • Regularly clean up your hard drive by deleting unnecessary files and emptying the recycle bin.

Quality Vs. Quantity

When it comes to utilizing plug-ins and virtual instruments for music production, it’s important to strike a balance between quality and quantity. While it may be tempting to load up your project with numerous effects and instruments, it can lead to performance issues and hinder the creative process. Consider the following:

  1. Choose plug-ins and virtual instruments carefully, prioritizing quality over quantity. Opt for trusted, reliable options that offer the necessary features and functionality without excessive resource usage.
  2. Disable unused plug-ins and virtual instruments to free up resources and reduce processing burden.
  3. Experiment with different presets and optimization settings within your plug-ins to achieve desired sounds without sacrificing performance.
  4. Consolidate multiple similar tracks or instruments into a single track when possible to reduce resource usage.

Workflow Efficiency And Best Practices

Enhance music production workflow by optimizing your PC setup. Implement best practices for efficiency in software usage and hardware configuration. Streamline processes to achieve high-quality music production results.

File Organization

Efficient file organization is crucial for smooth music production workflows. When your project files are organized and easily accessible, you can save time and avoid the frustration of searching for specific files or samples.

One of the best practices for file organization in music production is to create a logical folder structure. Start by creating a main folder for each project, and within that, create subfolders for specific components such as audio files, MIDI files, samples, and plugins. Consider using meaningful and descriptive names for your folders, so you can quickly identify what they contain.

In addition to folder organization, it’s also helpful to name your files descriptively. When you save a project file or audio file, use names that accurately reflect the content and purpose of the file. This can make it easier to locate and use specific files later on.

For example:

Folder Structure File Naming
Project Name Project_Name_2021
– Audio Files Bassline_01.wav
– MIDI Files Lead_Synth.mid
– Samples Kick_Drum_01.wav
– Plugins EQ_Plugin_01.dll

Backup And Recovery

Regularly backing up your music production files is essential to ensure the security and integrity of your work. Accidents happen, computers crash, and hard drives fail, so having backups guarantees that you won’t lose all your progress and hard work.

There are several backup methods you can employ. One effective approach is to use cloud storage services like Dropbox or Google Drive. These platforms offer automatic sync and version control, meaning that your files will be continuously updated and backed up to the cloud as you work. This provides peace of mind, as you can easily recover previous versions of your files if needed.

Another option is to use external hard drives or network-attached storage (NAS) devices. By regularly copying your project files and related assets to these backup devices, you create an offline backup that can be accessed even if you lose your internet connection.

Remember to establish a routine for backing up your files. Set a schedule that works for you, whether it’s backing up after each recording session or once a week. Consistency is key to safeguard your valuable music projects.

Frequently Asked Questions For How To Optimize Pc For Music Production

How Can I Optimize My Pc For Music Production?

To optimize your PC for music production, start by closing unnecessary background applications and disabling visual effects. Ensure that you have sufficient RAM and a powerful processor. Use an external hard drive for storing large music files and regularly update your audio drivers.

Consider investing in a dedicated audio interface for better sound quality.

Is It Necessary To Have A Powerful Pc For Music Production?

Having a powerful PC is crucial for music production as it allows for smooth multitasking and reduces latency issues. A powerful processor and sufficient RAM ensure that you can run multiple audio plugins and virtual instruments without any performance hiccups.

It also helps in rendering and exporting high-quality audio files efficiently.

How Much Ram Do I Need For Music Production?

For music production, it is recommended to have a minimum of 8GB of RAM. However, if you work with large sample libraries or complex projects, 16GB or more would be ideal. The additional RAM allows for smoother playback, faster rendering, and improved overall performance, especially when using resource-intensive plugins and virtual instruments.

Conclusion

Optimizing your PC for music production is crucial for a seamless and efficient workflow. By following the steps and tips mentioned in this blog post, you can enhance the performance of your computer and maximize its potential for music production.

Remember, a well-optimized PC can significantly improve the quality and output of your music projects.