Categories
Archive

How to Get Better at Mixing Music : Master the Art

To get better at mixing music, practice regularly and study tutorials from industry professionals. Developing a solid understanding of audio equipment and mastering different techniques can also greatly improve your mixing skills.


Music mixing is both an art and a science, blending technical knowledge with creative intuition. By honing your skills in this craft, you can elevate your music productions to a professional level. Whether you are a beginner or an experienced music producer, continuous learning and experimentation are key to enhancing your mixing abilities.


This guide explores effective strategies to help you improve your mixing skills and create high-quality audio recordings that stand out in the competitive music industry. Let’s dive into actionable tips and techniques that will take your mixing expertise to the next level.


Understanding The Basics Of Mixing Music

Music mixing is a crucial aspect of producing high-quality soundtracks. By understanding the basics of mixing music, you can enhance the overall quality of your music compositions. Let’s delve into the key elements that can help you improve your mixing skills.

Importance Of Mixing Music

Mixing music is essential as it balances various elements to create a cohesive and harmonious audio experience. It involves blending different tracks and instruments to eliminate clutter and enhance clarity.

Basic Components Of Mixing Music

Equalization: Adjusting frequencies for a balanced sound. Panning: Placing instruments at different points in the stereo field. Compression: Controlling dynamic range for a consistent volume. Reverb & Delay: Adding depth and space to the music.

How to Get Better at Mixing Music  : Master the Art


Credit: www.amazon.com


Setting Up Your Mixing Environment


When setting up your mixing environment, ensure it is well-organized and has proper acoustics and lighting. Position your equipment ergonomically to optimize workflow and minimize fatigue. Implement soundproofing and invest in quality monitors to enhance your mixing experience.

Choosing The Right Equipment

Optimizing Your Workspace

Setting up your mixing environment is crucial for enhancing your music mixing skills. Choosing the Right Equipment is the first step to ensure high-quality sound output. Start with a reliable computer, professional-grade headphones, and studio monitors. Consider a digital audio workstation for seamless mixing.

Choosing The Right Equipment

Studio monitors, headphones, and DAW are essential. Consider factors like sound quality and compatibility.

Optimizing Your Workspace

Create an environment with minimal noise and distractions. Position monitors at ear level for accurate sound. Use acoustic treatment like foam panels to minimize echo and enhance sound clarity.

Optimizing Your Workspace

Maintain a clutter-free and organized workspace. Incorporate proper lighting and comfortable seating. Use acoustic treatments for improved sound quality.


Mastering Essential Mixing Techniques

Becoming proficient in mixing music requires mastering essential techniques that lay the foundation for producing high-quality and balanced sound. Understanding how to balance levels and panning as well as grasping the nuances of equalization and frequency are critical components of mastering the art of mixing music.

Balancing Levels And Panning

Balancing levels involves adjusting the volume of individual tracks to ensure they complement each other and prevent any one element from overpowering the rest. Panning, on the other hand, determines the placement of sound within the stereo field, creating a sense of depth and space in the mix.

Understanding Equalization And Frequency

Equalization, often referred to as EQ, allows for the manipulation of the frequency content within each track, enabling you to sculpt the tonal balance and remove unwanted frequencies. Understanding frequency is crucial as it determines the pitch and timbre of a sound, and knowing how to manipulate it is essential for achieving clarity and separation in your mix.

How to Get Better at Mixing Music  : Master the Art


Credit: www.facebook.com


Exploring Advanced Mixing Strategies

When it comes to mixing music, there are always new strategies and techniques to explore that can take your mixes to the next level. In this section, we will delve into advanced mixing strategies that will help you enhance your sound and create professional-quality mixes.

Utilizing Effects And Automation

To achieve a polished and dynamic mix, it is crucial to make effective use of effects and automation. By incorporating effects such as reverb, delay, and chorus, you can add depth and character to individual tracks, making them stand out in the mix. Moreover, automation allows you to control volume, panning, and parameters over time, allowing for seamless transitions and added interest.

Creating Spatial Depth And Dimension

Creating spatial depth and dimension in your mix is essential for a professional sound. By using techniques like panning, you can position elements within the stereo field, making the mix sound wider and more immersive. Additionally, using EQ and reverb can create a sense of space, making the listener feel like they are in the room with the instruments.

A great way to achieve spatial depth is by using the ‘Haas effect’, which involves delaying one stereo channel slightly to create the perception of depth and width. This technique can add an extra dimension to your mix and enhance the overall listening experience.

Furthermore, utilizing binaural panning, a technique that takes advantage of the way our ears perceive sound, can result in a realistic and three-dimensional mix. By carefully placing sounds in the stereo field with the help of plugins or panning automation, you can create a sense of space and depth that immerses the listener.

Key Points Key Benefits
Use effects like reverb and delay to add depth and character to tracks Enhances overall sound and adds interest
Automation allows for seamless transitions and precise control over elements Creates dynamic and polished mixes
Utilize panning, EQ, and reverb to create spatial depth and dimension Makes the mix more immersive and professional-sounding
Experiment with the Haas effect for added depth and width Enhances the listening experience and adds dimension to the mix
Consider binaural panning to create a realistic and three-dimensional mix Immerses the listener and adds realism to the sound

By utilizing these advanced mixing strategies, you can elevate your mixes and bring them to a professional level. Experiment with different techniques and find what works best for your music. Remember, practice makes perfect, so keep refining your skills and never stop exploring new ways to improve your mixing abilities.

Refining Your Mixing Skills

When it comes to music production, one of the most crucial skills to master is mixing. The art of blending different audio elements to create a cohesive and balanced final product can elevate your tracks to a professional level. To refine your mixing skills and take your music to the next level, there are two key areas you should focus on: practicing critical listening and seeking feedback and collaboration.

Practicing Critical Listening

In order to improve your mixing abilities, it is essential to develop a keen sense of critical listening. This involves actively analyzing and evaluating various aspects of your audio, including frequency balance, panning, dynamics, and spatial effects. By training your ears to identify and diagnose issues in your mix, you will be able to make informed decisions and apply the necessary adjustments. Here are some tips to help you hone your critical listening skills:

  • Listen to a wide variety of music genres and styles to expose yourself to different mixing techniques.
  • Use high-quality studio monitors or headphones that accurately represent sound across the frequency spectrum.
  • Make use of reference tracks to compare your mix to professionally produced songs, focusing on elements such as clarity, depth, and balance.
  • Take breaks during long mixing sessions to refresh your ears and prevent listener fatigue.
  • Experiment with soloing individual tracks or frequency ranges to isolate and examine specific elements of your mix.

Seeking Feedback And Collaboration

No matter how skilled you become as a mixer, there is always room for improvement and new perspectives. Seeking feedback and collaborating with others can provide valuable insights and help you discover new techniques. Here are some ways to actively seek feedback and collaborations:

  1. Join online communities or forums where you can share your work with fellow musicians and producers, exchange feedback, and participate in mixing challenges.
  2. Consider working with a mentor or taking part in workshops or courses that offer personalized feedback and guidance.
  3. Invite other musicians, producers, or audio engineers to collaborate on your projects, as their ideas and input can bring fresh creativity and expertise to your mix.
  4. Attend music production events, such as conferences and showcases, where you can connect with industry professionals and gain valuable feedback.

By practicing critical listening and actively seeking feedback and collaboration, you will continually refine your mixing skills and cultivate a unique and professional sound. Remember to always be open to learning and exploring new techniques, as the art of mixing is a never-ending journey.

How to Get Better at Mixing Music  : Master the Art


Credit: www.bmi.com


Frequently Asked Questions Of How To Get Better At Mixing Music


How Can I Get Better At Sound Mixing?


To improve sound mixing, practice regularly, experiment with different techniques, and listen critically to your work. Utilize online tutorials and courses for guidance and stay updated on industry trends. Networking with experienced professionals can also provide valuable insights and feedback.


How Can I Mix Songs Better?


To mix songs better, adjust volume levels, EQ frequencies, and pan instruments for a balanced sound. Use effects and automation creatively. Practice and listen critically for improvement.


How Long Does It Take To Get Good At Mixing?


It varies based on practice and dedication, but generally takes months to years. Daily practice and learning from experience are key.


Is It Hard To Mix Music?


Mixing music can be challenging, but with practice and knowledge of audio engineering techniques, it becomes easier. It requires attention to detail, understanding of different instruments and vocals, and mastering the software used. Overall, while it may have a learning curve, it is not unachievable.


Conclusion


Mastering the art of mixing music takes time and dedication, but the results are worth it. By understanding the principles of mixing, practicing consistently, and seeking feedback, you can enhance your skillset. Remember to trust your instincts and allow room for experimentation.


Keep evolving and refining your techniques to achieve the best mix possible.
Categories
Archive Audio Production

Find the Best Locations for VST Plugins on Mac

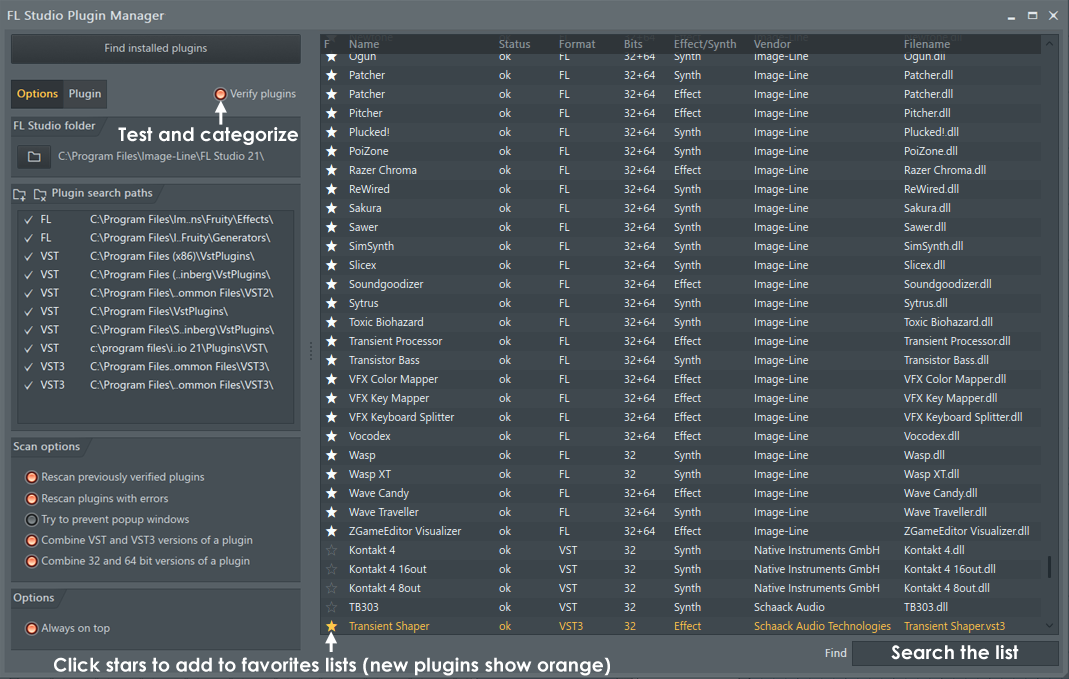
VST plugins on Mac are typically located in the VST plugins folder within the audio software. When you install a new VST plugin on your Mac, the plugin files will be placed in the appropriate directory for your digital audio workstation to access them seamlessly.


Finding these plugins is essential for enhancing your music production workflow and accessing a wide range of virtual instruments and effects. By understanding where the VST plugins are stored on your Mac, you can easily manage and organize your plugins to create professional-quality music tracks efficiently.


Let’s explore the process of locating and working with VST plugins on your Mac system in more detail.

Find the Best Locations for VST Plugins on Mac


Credit: www.image-line.com


Choosing The Right Locations For Vst Plugins

Understanding Vst Plugins

VST plugins are essential tools for music production on Mac systems.

The Importance Of Choosing The Right Location

Organizing VST plugins in the correct locations ensures smooth functionality.

Built-in And Custom Vst Plugin Locations On Mac

Explore where VST Plugins are located on Mac, focusing on Built-in and Custom VST Plugin Locations.

Built-in Locations For Vst Plugins

By default, VST plugins are placed in specific system folders on Mac.

  • System-wide VST plugins reside in the Library folder on the Macintosh HD.
  • User-specific VST plugins are located in the Library folder within the user’s Home directory.

Creating Custom Locations For Vst Plugins

Customizing VST plugin locations on Mac can enhance organization and accessibility.

  1. Establish a dedicated folder for VST plugins anywhere on your Mac.
  2. Configure your music production software to recognize this custom folder.
  3. Ensure the new VST plugin location is updated in your software’s preferences.

Managing Vst Plugin Locations On Mac

Managing VST Plugin Locations on Mac involves understanding how to move VST plugins to different locations and organizing them effectively. By knowing how to do this, you can optimize your workflow and keep your VST plugins organized for seamless access.

Moving Vst Plugins To Different Locations

To move VST plugins to different locations on your Mac, follow these simple steps:

  1. Create a new folder in your desired location for organizing the VST plugins.
  2. Locate the VST plugin files in their current location on your Mac.
  3. Copy the VST plugin files from their current location and paste them into the newly created folder.
  4. Open your digital audio workstation (DAW) and configure the plugin settings to point to the new location of the VST plugins.

By following these steps, you can easily move your VST plugins to different locations on your Mac without disrupting their functionality within your DAW.

Organizing Vst Plugins Effectively

Effectively organizing your VST plugins on Mac can enhance your productivity and creativity. Consider the following tips for organizing your VST plugins:

  • Use descriptive folder names to categorize your VST plugins based on their type or function.
  • Create subfolders within your main VST plugin folder to further classify plugins by manufacturer or specific use.
  • Utilize tagging or labeling features within your DAW to easily search for and access specific VST plugins.
  • Regularly review and clean up unused or outdated VST plugins to keep your collection streamlined and efficient.

By implementing these organizational strategies, you can maintain a well-structured and easily accessible library of VST plugins on your Mac, enabling you to focus on your music production without unnecessary clutter.

Find the Best Locations for VST Plugins on Mac


Credit: www.productionmusiclive.com


Troubleshooting Vst Plugin Location Issues On Mac

One of the most frustrating issues for Mac users who rely on VST plugins is when they can’t locate their plugins. Whether you’re a music producer, sound engineer, or simply an enthusiast, this problem can halt your creative workflow and leave you scratching your head. But fear not! In this article, we’ll explore the common causes behind missing VST plugin errors on Mac and provide you with simple solutions to get your plugins back on track.

Resolving Missing Plugin Errors

When you open your favorite digital audio workstation (DAW) or audio editing software and discover that it can’t find your beloved VST plugins, it’s important to take a calm and systematic approach to troubleshoot this issue. Here are some steps you can follow to resolve missing plugin errors:

  1. Verify Plugin Installation: Double-check if you’ve correctly installed the plugins on your Mac. Ensure they are located in the appropriate VST plugin folder, as specified by your DAW or software.
  2. Check Plugin Compatibility: Before blaming your Mac or software, check the plugin’s compatibility with your operating system and DAW. Some plugins may not have support for newer macOS versions, causing them to be incompatible.
  3. Rescan Plugins: Depending on your DAW or software, you might need to manually rescan for plugins. This action prompts the program to search for any new plugins or re-establish connections with missing ones. Look for the plugin rescan option in your software’s preferences or settings.
  4. Repair or Reinstall: If a specific plugin continues to remain elusive despite your best efforts, consider repairing or reinstalling it. Some plugins have built-in repair options, while others may require a complete reinstallation process. Refer to the plugin’s documentation for instructions.
  5. Seek Support: When all else fails, don’t hesitate to seek support from the plugin developer or software manufacturer. They have likely encountered this issue before and can provide specialized guidance to help you resolve the missing plugin error.

Dealing With Compatibility Problems

Compatibility problems can be a significant roadblock for Mac users, as not all VST plugins are designed to work seamlessly across different software versions and operating systems. To overcome compatibility issues, consider the following steps:

  1. Update Your Software: Keep your DAW or audio editing software up to date with the latest software updates. These updates often include bug fixes and new features that improve compatibility with various plugins.
  2. Plugin Updates: Regularly check for plugin updates and install them if available. Developers often release updates to address compatibility issues and improve performance.
  3. Virtualization Options: If you’re still encountering compatibility hurdles, consider using virtualization software. Programs like WineBottler or Parallels Desktop enable you to run Windows-based VST plugins on your Mac. This workaround can be useful if a specific plugin is only available for Windows.


Optimizing Vst Plugin Performance On Mac


To optimize VST plugin performance on Mac, locate the VST plugin folder in the system’s audio software. Once found, move the VST plugins to this folder to ensure efficient and seamless operation within the DAW. Regularly updating the plugins and clearing unnecessary ones can also help maintain Mac’s VST performance.

Optimizing System Settings For Vst Plugins

When it comes to optimizing VST plugin performance on your Mac, tweaking the system settings can make a significant difference. By making a few adjustments, you can ensure that your VST plugins run smoothly and deliver the best sound quality possible.

To optimize system settings for VST plugins, follow these simple steps:

  1. Maintain Sufficient System Resources: Close unnecessary applications and processes that hog system resources to free up memory and processing power for your VST plugins.
  2. Update macOS: Keep your macOS up to date to ensure compatibility with the latest VST plugin versions and fix any underlying performance issues.
  3. Enable Low-Latency Mode: If your DAW (Digital Audio Workstation) supports it, enable low-latency mode to reduce the audio processing delay, resulting in a more responsive and real-time experience.
  4. Allocate Sufficient Disk Space: Ensure that you have ample disk space for your VST plugin libraries and sound libraries to prevent any performance issues or system slowdowns due to lack of storage.
  5. Disable Unnecessary Background Services: Disable any unnecessary background services, such as automatic software updates or cloud syncing, to minimize system resources consumed by non-essential tasks.

Maximizing Efficiency For Better Sound Production

Maximizing efficiency is crucial for achieving top-notch sound production with your VST plugins on Mac. By following these tips, you can enhance your workflow and maximize the potential of your VST plugins:

  • Organize Your Plugin Library: Arrange your VST plugins in a structured manner to easily locate and access them during your creative process.
  • Use the Proper Plugin Format: Ensure that you are using the correct plugin format (VST, AU, or AAX) for your DAW. Using the optimal format improves compatibility and avoids performance issues.
  • Monitor CPU Usage: Keep an eye on your CPU usage while using VST plugins. If there are instances of heavy CPU load, consider freezing or bouncing tracks to minimize CPU strain.
  • Adjust Buffer Size: Fine-tune your buffer size settings based on your system capabilities and project requirements. Lower buffer sizes reduce latency but increase CPU usage, while higher buffer sizes increase latency but decrease CPU usage.
  • Consider External Audio Processors: If your Mac’s processing power is limited, offloading some audio processing to external audio processors can alleviate the strain on your system and optimize the performance of your VST plugins.

Find the Best Locations for VST Plugins on Mac


Credit: www.sweetwater.com


Frequently Asked Questions For Where Are Vst Plugins On Mac


How Do I Find My Plug-ins On My Mac?


To find your Plug-Ins on a Mac, open Finder, go to Applications, find the Plug-Ins folder, and view your installed Plug-Ins.


How Do I Access Vst Plug-ins?


To access VST Plug-Ins, open your music production software and navigate to the plug-ins section. Click on “Add Plug-In” or a similar option and select the VST Plug-In from the list. Adjust settings as needed and start using the plug-in in your project.


Where Are My Plug-ins On Mac Ableton?


To locate your plug-ins in Mac Ableton, go to Preferences > Plug-Ins, and verify the correct folder path. Ensure your plug-ins are in the designated folder for Ableton to recognize them. If the issue persists, rescan your plug-ins in the same section of preferences.


What Is Vst On A Mac?


VST on a Mac is a plugin format used for audio software. It allows users to add virtual instruments and effects to their digital audio workstation. The VST (Virtual Studio Technology) format is widely supported and offers a wide range of options for music production on Mac computers.


Conclusion


Finding VST plugins on Mac is essential for music production. Utilizing reliable sources and understanding installation processes ensure a seamless experience. Remember to keep your plugins organized and updated for optimal performance. With these tips, you can enhance your music production on Mac with ease.

Categories
Archive Audio Production

Can You Upgrade FL Studio? Discover the Power of Upgrading Today!

Yes, you can upgrade FL Studio easily through their website to access new features and improvements. Upgrading FL Studio can enhance your music production experience by providing access to the latest tools and functionalities.


It ensures that you are working with the most up-to-date version of the software, allowing you to create high-quality music efficiently. Upgrading also often includes bug fixes and performance optimizations, ensuring a smoother workflow. Whether you are a beginner or a seasoned producer, staying updated with the latest version of FL Studio can help you stay ahead in your music production journey.


By regularly upgrading the software, you can take advantage of new features and innovations that can elevate your music to the next level.


The Benefits Of Upgrading


Upgrading FL Studio offers a range of benefits, including access to new features, improved performance, and enhanced creativity. With regular updates and new versions available, upgrading allows users to stay current with the latest tools and capabilities. Keep your music production system up to date and take advantage of the advanced features FL Studio has to offer.

The Benefits of Upgrading Access to the Latest Features Upgrade FL Studio to access the latest features and tools for enhanced creativity. Improved Performance and Stability Experience improved performance and stability with the upgraded FL Studio version. Think of upgrading as unlocking a whole new world of possibilities. By upgrading FL Studio, users get access to advanced tools and features. New updates can lead to improved workflow efficiency. Enjoy a smoother and faster experience while working on music projects. Enhancing the stability of the software prevents unexpected crashes.

What’s New In The Latest Version?

Discover the exciting updates and enhancements that come with the latest version of FL Studio. From improved plugins to enhanced workflow features, the new version promises to elevate your music production experience.

Enhanced Plugins And Instruments

Explore the updated plugins and instruments in FL Studio that are designed to bring your creativity to the next level. With improved sound quality and an expanded range of options, these tools will empower you to create stunning music effortlessly.

Workflow Improvements

Experience smoother workflow with the latest version of FL Studio. New features and optimizations have been implemented to streamline your music production process, allowing you to focus on what matters most – creating music that resonates.

How To Upgrade Fl Studio

Upgrade your FL Studio software to take your music production to the next level. Knowing how to upgrade FL Studio is essential for users looking to access the latest features and improvements. This guide will walk you through the purchasing and license options and the step-by-step upgrade process.

Purchasing And License Options

Before you initiate the upgrade, it’s crucial to understand the purchasing and license options available for FL Studio. Here’s a brief overview:

  • FL Studio Fruity Edition: This edition is suitable for beginners and includes entry-level features.
  • FL Studio Producer Edition: Ideal for intermediate users seeking advanced features and expanded plugin support.
  • FL Studio Signature Bundle: Geared towards professionals, this bundle offers all the features of the Producer Edition along with additional plugins and tools.

Once you’ve determined the appropriate edition, you can proceed with upgrading to a higher version based on your production needs.

Step-by-step Upgrade Process

Ready to upgrade your FL Studio software? Follow these steps:

  1. Open the FL Studio application on your computer.
  2. Navigate to the ‘Help’ menu and select ‘About’ to check your current version and registration status.
  3. Visit the official FL Studio website and log in to your account to access the upgrade options.
  4. Choose the desired edition you wish to upgrade to and follow the prompts for payment and license verification.
  5. Once the upgrade process is complete, download and install the new version of FL Studio on your computer.
  6. Launch the upgraded software and verify the updated features and functionality.
Can You Upgrade FL Studio? Discover the Power of Upgrading Today!


Credit: www.image-line.com


Testimonials And Success Stories


Discover inspiring testimonials and success stories about upgrading FL Studio for enhanced music production experiences. Hear how users achieve seamless integration and elevated creativity with this powerful software upgrade. Unlock the potential of FL Studio today and join the community of satisfied musicians.

Producers’ Experiences With Upgrading

Testimonials and success stories from producers who have upgraded their FL Studio software are a testament to the undeniable impact it has had on their creative output. By hearing directly from those who have made the leap to the latest version, you can gain valuable insights into the benefits and advantages of upgrading your FL Studio.

Impact On Creative Output

Upgrading FL Studio can have a profound impact on your creative output, allowing you to take your music production to new heights. Producers who have experienced the benefits of upgrading rave about the enhanced features and tools that enable them to explore untapped potential. One such producer, John_DJ, shares his success story of upgrading FL Studio: “Before upgrading, I was limited by the older version’s functionality. But with the new version, I now have access to a wide range of plugins, effects, and samples that have not only expanded my sound palette but also injected a new sense of inspiration into my music.” Another producer, BeatMaster99, explains how upgrading FL Studio transformed his creative process: “The updated interface and streamlined workflow have made a significant difference in the way I approach my music. Everything feels more accessible, and I can focus more on my ideas rather than getting caught up in technicalities.” The success stories of these producers highlight the tangible positive impact that upgrading FL Studio can have on your creative journey. It opens up a world of possibilities, allowing you to experiment, innovate, and bring your artistic vision to life like never before. Whether you are a seasoned producer aiming to stay at the cutting edge of music production or a beginner looking to make your mark in the industry, upgrading FL Studio is a crucial step. It unlocks a wealth of features and improvements that are designed to help you reach your full creative potential. Don’t just take our word for it – the testimonials and success stories from producers who have embraced the upgrade speak volumes. Their experiences illustrate how upgrading FL Studio has enhanced their creative output, empowering them to produce music that resonates and captivates listeners worldwide. So, if you’re ready to take your music production journey to the next level, upgrading FL Studio is an investment that can truly make a difference. Join the ranks of successful producers and reap the rewards of a software upgrade that promises to revolutionize the way you create, compose, and produce music.

Maximizing Your Upgraded Fl Studio

Upgrading your FL Studio can greatly enhance your music production experience. With a range of advanced features and optimizations, you can take your creativity to the next level. In this article, we will explore the advanced features of FL Studio and provide tips to optimize your workflow for maximum productivity.

Exploring Advanced Features

FL Studio offers a wide range of advanced features that can help elevate your music production. Here are some key features to explore:

  • Playlist: The playlist allows you to arrange and layer your patterns, audio clips, and automation data. Take advantage of the powerful drag-and-drop functionality to easily experiment and create complex compositions.
  • Mixer: The mixer in FL Studio offers extensive mixing capabilities. Utilize the various built-in effects, routing options, and advanced automation features to fine-tune your sound and achieve professional-quality mixes.
  • Piano Roll: The piano roll is a fundamental tool for composing melodies, chords, and complex patterns. Take time to familiarize yourself with the vast array of editing options available to create intricate melodies and harmonies.
  • Sampler Channels: FL Studio’s sampler channels allow you to manipulate and play back audio files with flexibility. Experiment with different sample packs or import your own sounds to add uniqueness to your tracks.
  • Plugins: FL Studio offers a vast collection of plugins, including synthesizers, effects, and mastering tools. Dive into the world of plugin exploration to add depth, texture, and character to your music.

Tips For Optimizing Workflow

To make the most of your upgraded FL Studio, consider the following tips to optimize your workflow:

  1. Keyboard Shortcuts: Familiarize yourself with FL Studio’s keyboard shortcuts to streamline your workflow and navigate the software more efficiently.
  2. Custom Templates: Create customized templates with your preferred settings, tracks, and plugins to save time when starting new projects.
  3. Organized File Management: Maintain a well-organized folder structure for your project files, samples, and plugins to quickly locate and access your assets.
  4. Utilize Templates: Take advantage of FL Studio’s built-in templates or create your own to jumpstart your creative process.
  5. MIDI Controllers: Incorporate MIDI controllers into your setup to enhance your workflow and add a tactile element to your music production.

By exploring FL Studio’s advanced features and implementing these workflow optimizations, you can maximize your upgraded FL Studio and unlock your full potential as a music producer. Happy producing!

Can You Upgrade FL Studio? Discover the Power of Upgrading Today!


Credit: support.image-line.com


Can You Upgrade FL Studio? Discover the Power of Upgrading Today!


Credit: www.amazon.com


Frequently Asked Questions On Can You Upgrade Fl Studio


Can I Upgrade My Edition Of Fl Studio?


Yes, you can upgrade your edition of FL Studio to access more advanced features and tools.


Is Fl Studio Upgrade Free?


Yes, FL Studio offers free lifetime updates and upgrades after purchasing the software license.


How Do You Update Your Fl Studio?


To update your FL Studio, go to the Image-Line website, log in to your account, and download the latest version. Install the update by running the downloaded file and following the on-screen instructions. Finally, open FL Studio, and it will be updated to the latest version.


Can You Have Both Fl Studio 12 And 20?


Yes, you can have both FL Studio 12 and 20. They are different versions of the software.


Conclusion


Upgrading FL Studio can enhance your music production experience. From improved features to better performance, the benefits are substantial. Always ensure you have the necessary system requirements and back up your data before upgrading. Keep an eye out for discounts and promotions to make the upgrade even more cost-effective.


Categories
Archive Audio Production

Do You Have to Pay for Distrokid? Unraveling the Pricing and Payment Methods

Yes, you have to pay for DistroKid. It offers subscription plans starting at $19.99 per year.


DistroKid is a popular music distribution service that allows independent artists and musicians to distribute their music to various online platforms such as Spotify, Apple Music, and Amazon Music. While DistroKid does offer free options, such as its standard plan that allows artists to release an unlimited number of songs and keep 100% of their earnings, most of its more advanced features are available through paid subscription plans.


By paying for DistroKid’s services, artists can access tools like unlimited song uploads, customizable label name, and daily sales statistics, making it a valuable platform for musicians looking to promote and distribute their music effectively.


Credit: distrokid.com


What Is Distrokid?

What is DistroKid? DistroKid is a popular music distribution service, allowing artists to easily upload, distribute, and monetize their music across various online platforms.

Overview

DistroKid provides independent musicians with a user-friendly platform to share their music with a global audience.

Key Features

  • Easy Distribution: Quickly upload your music to major streaming platforms like Spotify and Apple Music.
  • Fast Turnaround: Your music can be live on streaming services in as little as 24-48 hours.
  • Unlimited Uploads: No limit on the number of tracks or albums you can release through DistroKid.
  • Keep 100% of Earnings: DistroKid does not take a percentage of your royalties, allowing you to retain full control.
  • Artist Promotion Tools: Access to promotional features like Spotify for Artists and customizable hyperfollow landing pages.
Do You Have to Pay for Distrokid? Unraveling the Pricing and Payment Methods


Credit: m.facebook.com


Distrokid Pricing Plans

Understanding the DistroKid pricing plans can help you decide which option best suits your needs as a musician. DistroKid offers different plans tailored to meet the requirements of individual artists, musicians, and labels. Each plan comes with its own set of features and pricing structure to accommodate various needs in the music industry.

Standard Plan

The Standard Plan is suited for independent artists who want to distribute their music to popular streaming platforms. With a flat yearly fee, you can upload unlimited songs and albums, keep 100% of your royalties, and receive reliable customer support from DistroKid. This plan is a great starting point for musicians looking to establish their presence in the digital music landscape.

Musician Plus Plan

The Musician Plus Plan offers additional benefits beyond the Standard Plan, making it ideal for artists who seek enhanced features. With this plan, you can access detailed sales analytics, customize your music’s release date, and utilize tools for promoting your music on social media platforms. The Musician Plus Plan is a step up for musicians aiming to amplify their music career and audience engagement.

Label Plan

The Label Plan is tailored for record labels and music distributors who manage multiple artists and catalogs. With features like team collaboration, customized price splits, and advanced reporting tools, the Label Plan is designed to streamline the distribution process for labels handling a diverse roster of artists. This plan ensures efficient management and distribution of music for established labels in the industry.


Payment Methods

Your payment methods on DistroKid are an essential aspect to consider, ensuring you can efficiently receive your royalties. Understanding how payments are processed and the available withdrawal options can help you effectively manage your music distribution finances.

Understanding Royalties

When your music is streamed or downloaded, you are entitled to receive royalties. DistroKid calculates your earnings from these activities, ensuring that you receive your compensation promptly and accurately. The platform provides transparent reports, enabling you to track your earnings from different music streaming services and online stores.

Withdrawal Options

DistroKid offers various withdrawal methods to access your royalties. You can choose to receive payments through PayPal, direct bank deposits, or other convenient options. The platform strives to make the withdrawal process effortless, allowing you to access your earnings with minimal hassle.

Additional Costs And Considerations

The world of music distribution can be complex and overwhelming, especially when it comes to understanding the costs and considerations involved. While DistroKid offers an affordable and convenient platform for independent artists and musicians to distribute their music across various streaming platforms, it’s important to be aware of any additional expenses that may arise. In this article, we will explore some of these costs and considerations, including UPC and ISRC fees, as well as YouTube Content ID.

Upc And Isrc Fees

A UPC (Universal Product Code) is a unique identifier used to track and sell music products. DistroKid provides UPCs for free, saving you the hassle and expense of obtaining one elsewhere. This code is essential for your music to be recognized and accurately reported across different platforms and stores.

An ISRC (International Standard Recording Code) is a unique identifier assigned to each recording within a song or album. This code helps track and report music usage for licensing and royalty purposes. DistroKid offers ISRC codes for free, making it easier for you to manage and track your music’s performance.

Youtube Content Id

YouTube Content ID is a powerful tool that helps protect your original music on the platform. DistroKid’s partnership with YouTube Content ID ensures that your music is identified and protected against unauthorized use. However, it’s important to note that YouTube Content ID is an additional service that comes with its own costs.

If you choose to enable YouTube Content ID through DistroKid, there are additional fees depending on the number of tracks you wish to protect. The pricing structure varies, but it provides an effective way to safeguard your music on one of the largest streaming platforms.

In conclusion, while DistroKid offers an affordable and user-friendly music distribution service, it’s crucial to consider any additional costs involved. UPC and ISRC fees may not be a concern, as DistroKid provides them for free. However, if you decide to protect your music on YouTube through Content ID, extra charges will apply. By understanding these considerations, you can make an informed decision about the most suitable distribution plan for your music.

Comparing Distrokid With Other Distributors


With DistroKid, there is a flat fee for unlimited uploads, making it a cost-effective option compared to other distributors. This eliminates the need to pay per release or for additional services, providing a budget-friendly alternative for independent artists and labels.

If you’re an independent musician looking to distribute your music, you may have come across DistroKid as an option. However, before making a decision, it’s important to compare DistroKid with other distributors in terms of pricing and user experience.

Pricing Comparison

When it comes to pricing, DistroKid offers a straightforward and affordable model. For just $19.99 per year, you can distribute unlimited songs to over 150 music platforms, including Spotify, Apple Music, and Amazon. This flat fee structure is particularly appealing for musicians who release a large amount of music throughout the year.

In comparison, other distributors often charge per release or have tiered pricing models that can quickly add up. Some platforms may charge as much as $9.99 per single or $49.99 per album, which can become costly if you regularly release new music.

User Experience

DistroKid also excels in terms of user experience. Their platform is simple and intuitive, allowing musicians to easily upload and manage their music. With a clear and streamlined process, you can quickly get your music out to the world without any hassle.

Moreover, DistroKid offers useful features such as instant access to Spotify for Artists, allowing you to claim your profile and access valuable insights. They also provide daily sales and streaming updates, giving you real-time information on how your music is performing on various platforms.

In contrast, other distributors may have clunky interfaces or provide limited artist support. Some platforms may take longer to process music uploads, causing delays in getting your music live. Additionally, certain distributors may not offer the same level of transparency when it comes to sales and streaming data.

In conclusion, when comparing DistroKid with other distributors, it’s clear that DistroKid stands out. With its affordable pricing and user-friendly interface, it offers independent musicians an efficient and cost-effective way to distribute their music and gain valuable insights into their audience.

Do You Have to Pay for Distrokid? Unraveling the Pricing and Payment Methods


Credit: www.linkedin.com


Frequently Asked Questions Of Do You Have To Pay For Distrokid


Can I Use Distrokid For Free?


No, DistroKid is not free. They offer a paid subscription for distributing music to online platforms.


Does It Cost Money To Use Distrokid?


Yes, there is a yearly fee to use DistroKid for unlimited music uploads and distribution.


What Happens If You Don’t Pay For Distrokid?


If you don’t pay for DistroKid, your music might be taken down from streaming platforms.


Why Did Distrokid Charge Me 40 Dollars?


DistroKid charged you $40 because that is the price for their service.


Conclusion


Distrokid offers a valuable service for independent musicians. Its straightforward pricing model and user-friendly platform make it a top choice for music distribution. While there are fees involved, the benefits and support provided can outweigh these costs, especially for those serious about establishing a music career.

Categories
Archive Audio Production

Which One is Better Tunecore Or Distrokid: Unveiling the Ultimate Winner

DistroKid is generally preferred over TuneCore for its lower fees and faster release times. DistroKid’s streamlined process and cost-effective pricing make it a top choice for independent artists seeking to distribute their music quickly and affordably.


With DistroKid, artists can easily upload unlimited tracks with an annual flat fee, while TuneCore charges per release, making it more expensive for musicians releasing multiple songs. Additionally, DistroKid offers features like content ID and daily sales statistics, making it a more comprehensive option for musicians looking to manage their music distribution effectively.


Ultimately, DistroKid’s user-friendly platform and competitive pricing structure make it a better choice for musicians looking to distribute their music efficiently.

Which One is Better Tunecore Or Distrokid: Unveiling the Ultimate Winner


Credit: medium.com


Comparing Tunecore And Distrokid


Considering which music distribution service to choose between Tunecore and DistroKid can be daunting. While both offer similar features such as worldwide distribution and fast payouts, DistroKid comes with a flat annual fee, making it more budget-friendly for independent artists.


Additionally, DistroKid provides unlimited uploads, making it a better option for artists with a large volume of content.

Features And Services

Tunecore: Offers music distribution to all major platforms.

  • DistroKid: Known for affordable annual fee for unlimited uploads.
  • Tunecore: Provides publishing administration services.
  • DistroKid: Offers features like automatic splits, hyper follow, etc.

Pricing Plans

  Tunecore DistroKid
Cost Per release pricing Annual fee for unlimited uploads
Features Publishing administration services Automatic splits, hyper follow, etc.
Additional Fees UPC and ISRC fees No additional fees

Both Tunecore and DistroKid offer valuable services, but the choice depends on your specific needs and budget.

Distribution And Publishing


When deciding between Tunecore and DistroKid for distribution and publishing, it’s essential to consider factors like pricing, services, and user experience. Evaluate each platform based on your specific needs and goals to determine the better fit for your music career.


Comparing their features and benefits can help you make an informed decision.

Platform Reach

“` Distribution and publishing are critical aspects of choosing between TuneCore and DistroKid. “`html

Revenue Collection

“` Platform Reach: – TuneCore offers direct distribution to over 150 stores and streaming platforms. – DistroKid, in comparison, distributes to more than 150 online stores and streaming services. Revenue Collection: – TuneCore provides detailed revenue reports and allows artists to keep 100% of their earnings. – DistroKid also offers transparent revenue reporting and artists can retain 100% of their royalties. Whether you choose TuneCore or DistroKid, both platforms prioritize artists’ control and transparency in distribution and revenue collection.

Artist Support And Resources

When comparing Tunecore and DistroKid, the level of artist support and available resources is a crucial factor for independent artists. Both platforms offer a range of tools and materials to assist artists in promoting their music and expanding their knowledge. Let’s dive into the unique artist support and resources provided by each platform.

Promotional Tools

Tunecore: Tunecore provides artists with promotional tools such as social media link-ups, feature.fm integration, and YouTube Sound Recording Revenue (SRR) collection. These resources help artists market their music effectively across various digital platforms.

DistroKid: DistroKid offers promotional tools including Spotify pre-save campaigns, hyperfollow smart-links, and YouTube Content ID. These tools empower artists to reach wider audiences and amplify their presence on popular streaming services.

Educational Materials

Tunecore: In addition to promotional tools, Tunecore provides educational materials such as blog articles, industry insight videos, and trending reports. These resources enable artists to stay informed about industry trends and develop effective strategies for their music careers.

DistroKid: DistroKid offers educational resources like the “How-To” guides, music publishing administration, and copyright management information. These materials equip artists with the knowledge and skills necessary to navigate the complexities of music distribution and rights management.

Which One is Better Tunecore Or Distrokid: Unveiling the Ultimate Winner


Credit: www.youtube.com


User Experience And Interface

When it comes to distributing your music online, Tunecore and Distrokid are two popular platforms that provide independent musicians with the opportunity to get their music out into the world. Both platforms offer a range of features and benefits, but what sets them apart is the user experience and interface they provide.

Dashboard Comparison

The dashboard is the central hub where you can manage and monitor your music distribution and sales. Tunecore and Distrokid offer user-friendly dashboards that are designed to make the process as smooth as possible.

Tunecore:

Tunecore’s dashboard provides a clean and intuitive interface, allowing you to easily navigate through your account. The platform offers detailed statistics on your music sales, streams, and royalties, helping you to track your progress and make informed decisions.

Additionally, Tunecore’s dashboard offers various tools and resources to help you understand and optimize your music distribution. From promotional opportunities to detailed reporting, you have access to valuable insights that can help you grow as an artist.

Distrokid:

Distrokid’s dashboard is known for its simplicity and efficiency. It presents the necessary information in a straightforward manner, making it easy to manage your music and distribution settings. The platform allows you to customize your release settings, such as release dates and territories, with just a few clicks.

One of the standout features of Distrokid’s dashboard is the sleek and organized design. You can easily keep track of your earnings and stream data, allowing you to evaluate the success of your music and make data-driven decisions.

Customer Support

Whenever you encounter an issue or have a question, it’s crucial to have reliable customer support. Both Tunecore and Distrokid offer customer support services to assist musicians along their distribution journey.

Tunecore:

Tunecore provides customer support through email and live chat. Their team is responsive and knowledgeable, ensuring that you receive timely assistance whenever you need it. Whether you have a technical issue or require guidance, Tunecore’s customer support is there to help.

Distrokid:

Distrokid offers customer support through email, with a team dedicated to addressing your queries and concerns. Their customer support team is reputed for their prompt and helpful responses, ensuring that you receive the assistance you need to resolve any issues that may arise during the distribution process.

The user experience and interface of a music distribution platform play a significant role in your overall experience as an artist. Whether you prefer Tunecore’s detailed dashboard or Distrokid’s streamlined design, both platforms offer a user-friendly experience that empowers you to distribute your music efficiently. And with reliable customer support available, you can feel confident knowing that assistance is just a click away.

The Verdict


Deciding between Tunecore and DistroKid for music distribution? The Verdict – DistroKid shines with quick releases and cost-effective services appealing to independent artists, whereas Tunecore offers more comprehensive features suited for established musicians. Both platforms cater to different needs, making it essential to choose based on your specific requirements.

Key Considerations

Before we reveal the recommended platform, let’s consider the key factors that will help you make an informed decision between Tunecore and DistroKid:

  • Cost: Evaluate the pricing plans offered by each platform and consider which one aligns with your budget.
  • Distribution Reach: Look for information on the platforms’ partnerships and distribution networks to ensure your music reaches a wide audience.
  • Features: Compare the features offered by Tunecore and DistroKid, such as royalty collection, analytics, and promotional tools.
  • Customer Support: Research the level of customer support provided by each platform, including response time and availability.
  • Artist Rights: Consider the ownership and control you have over your music when using each platform.

Recommended Platform

After careful consideration, our recommended platform is DistroKid. Here’s why:

  1. Affordability: DistroKid offers competitive pricing plans, making it an excellent choice for both established artists and independent musicians.
  2. Vast Distribution Network: With partnerships including Spotify, Apple Music, and more, DistroKid ensures that your music reaches a broad audience across various streaming platforms.
  3. Easy-to-Use Features: DistroKid’s user-friendly interface allows musicians to seamlessly upload and manage their music, while offering additional tools like Shazam and YouTube Content ID.
  4. Swift Customer Support: DistroKid is renowned for its responsive customer support, ensuring that any questions or issues you encounter are addressed promptly.
  5. Artist-Friendly Policies: DistroKid empowers artists by allowing them to retain full ownership and control over their music, keeping their creative rights intact.

While Tunecore also has its merits, including its direct licensing deals, DistroKid emerges as the superior choice due to its all-encompassing features, affordability, and artist-friendly policies. By choosing DistroKid, you can focus on what really matters—creating, distributing, and monetizing your music.

Which One is Better Tunecore Or Distrokid: Unveiling the Ultimate Winner


Credit: www.linkedin.com


Frequently Asked Questions On Which One Is Better Tunecore Or Distrokid


Why Tunecore Is Better Than Distrokid?


TuneCore offers better distribution, wider range of stores, and detailed sales and streaming reports. Its yearly subscription pricing is more cost-effective and offers better value for musicians. Additionally, TuneCore provides publishing administration services to help artists collect their royalties globally.


Is There A Better Distributor Than Distrokid?


No, DistroKid is already a top distributor with comprehensive features and competitive pricing.


Which Music Distributor Is The Best?


The best music distributor depends on your specific needs. Some popular options are TuneCore, DistroKid, and CD Baby. Consider factors such as distribution networks, pricing, and additional features to choose the best fit for you.


How Much Does Tunecore Pay For 1,000 Streams?


TuneCore pays roughly $3-$5 for 1,000 streams. This amount can vary and depends on factors like location and platform.


Conclusion


Both Tunecore and DistroKid offer unique benefits for independent musicians. Your decision should depend on your specific needs and goals. Consider factors like pricing, distribution channels, and additional features. By carefully evaluating these aspects, you can choose the platform that best aligns with your music career aspirations.


Make an informed decision for your music distribution needs.


Categories
Archive Audio Production

Does Fl Studio Cost Money? Find Out the Price Tag for Fl Studio

Yes, FL Studio does cost money, with various pricing options for different editions offered. FL Studio is a popular digital audio workstation (DAW) software used by music producers and musicians worldwide.


It offers a range of features and tools for creating, recording, and editing music. One of the notable aspects of FL Studio is its user-friendly interface, making it accessible to both beginners and experienced users. While the software does come at a cost, its pricing is competitive compared to other DAWs in the market.


In addition to its affordability, FL Studio provides regular updates and customer support, enhancing the user experience. Whether you’re a budding music producer or a seasoned professional, FL Studio offers a versatile platform for unleashing your creativity and producing high-quality music.


How Much Does Fl Studio Cost?

FL Studio, a popular digital audio workstation for music production, offers various versions with different pricing options.

Different Versions

FL Studio comes in different editions catering to the needs of beginners, professionals, and everything in between.

Pricing Options

FL Studio offers the following pricing options:

  • Fruity Edition: The most basic version, great for beginners, priced at $99.
  • Producer Edition: Intermediate version with more features, priced at $199.
  • Signature Bundle: Advanced version with additional plugins, priced at $299.
  • All Plugins Edition: Complete package with all plugins included, priced at $899.

Each version offers a different set of features and tools to meet the specific requirements of users at different skill levels.

Does Fl Studio Cost Money? Find Out the Price Tag for Fl Studio


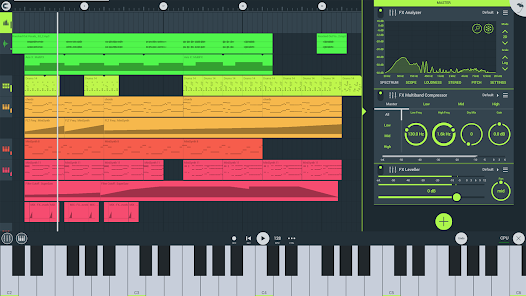
Credit: play.google.com


Fl Studio Editions

FL Studio offers various editions to cater to different user needs and budgets. Let’s explore the different FL Studio Editions available:

Fl Studio Fruity Edition

This edition is perfect for beginners looking to start creating music effortlessly.

Fl Studio Producer Edition

The Producer Edition is well-suited for those who want to take their music production skills to the next level.

Fl Studio Signature Bundle

For those seeking a comprehensive package with advanced features, the Signature Bundle is the ideal choice.

Fl Studio Pricing

If you’re considering using FL Studio for your music production needs, one of the first things you’ll want to know is the pricing. FL Studio, a popular digital audio workstation, offers different purchasing options to cater to various user preferences. Let’s take a closer look at the FL Studio pricing plans and what they include.

Lifetime Free Updates

One of the key benefits of purchasing FL Studio is the access to lifetime free updates. This means that once you have purchased a version of FL Studio, you will receive all future updates and improvements without any additional cost. This ensures that you’ll always have access to the latest features and enhancements, keeping your music production software up to date.

Additional Plugins

Another aspect to consider in FL Studio pricing is the availability of additional plugins. FL Studio offers a range of plugins that users can choose to add to their setup for enhanced functionality. These plugins can include virtual instruments, effects, and other tools to expand the capabilities of the software. Users have the flexibility to select and purchase only the plugins that align with their specific needs, allowing for a customized and tailored experience.

Does Fl Studio Cost Money? Find Out the Price Tag for Fl Studio


Credit: www.facebook.com


Fl Studio Trial Version

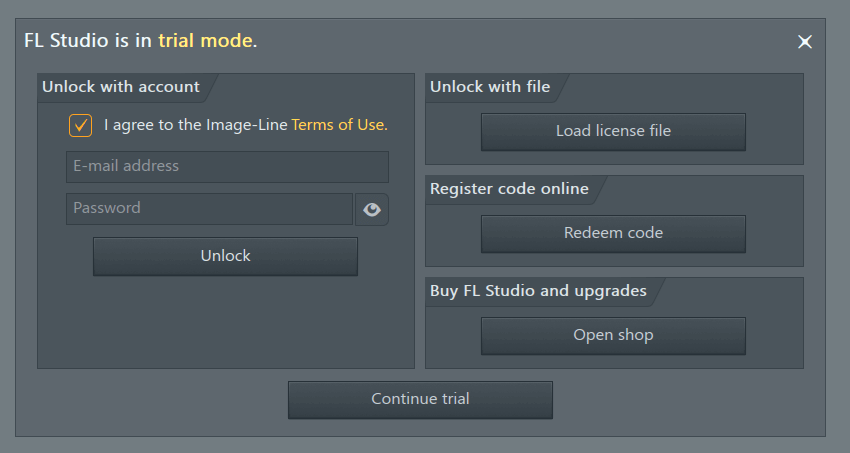
FL Studio is a popular digital audio workstation that offers a free trial version for users who want to give it a try before making a purchasing decision. This trial version allows you to experience the software’s features and capabilities firsthand, helping you determine whether it meets your needs and suits your workflow. In this blog post, we will explore the features and limitations of the FL Studio trial version, giving you a comprehensive overview of what you can expect when using this free version.

Features

Despite being a trial version, FL Studio offers a range of powerful features that make it a favorite among music producers and enthusiasts alike. Here are some of the notable features you can enjoy when using the FL Studio trial version:

  • Sequencing: FL Studio allows you to create complex music compositions through its intuitive and versatile sequencer. With its drag-and-drop functionality, you can easily arrange patterns, beats, and melodies to bring your musical ideas to life.
  • Mixer: The trial version includes an extensive mixer with various audio effects and plugins, giving you the flexibility to mix and master your tracks with precision.
  • Synthesizers and Samplers: FL Studio offers a wide range of synthesizers and samplers, allowing you to create unique sounds and experiment with different tones. From virtual analog synths to realistic instruments, the trial version provides access to a diverse collection.
  • Audio Recording and Editing: You can record and edit audio directly within FL Studio. Whether it’s vocals, live instruments, or sound effects, the trial version enables you to capture and refine your recordings effortlessly.
  • Plugin Support: The FL Studio trial version supports third-party plugins, expanding your creative possibilities even further. With access to an extensive library of plugins, you can enhance your music production with additional instruments, effects, and processing tools.

Limitations

While the FL Studio trial version offers a great opportunity to explore its features, it does come with a few limitations. These limitations are designed to encourage users to purchase the full version if they find the software beneficial for their music production needs. Here are the main limitations you should be aware of:

  1. Save Projects: One of the primary limitations of the trial version is the inability to save projects. Although you can work on your compositions and experiment with the software, you won’t be able to save your progress unless you purchase the full version.
  2. Plugin Persistence: The trial version does not save your previously installed plugins. If you’ve added third-party plugins to your project during the trial period, you’ll need to reinstall them when you upgrade to the full version.
  3. Rendering and Exporting: The trial version does not allow you to render or export your projects. This means you won’t be able to save your finished tracks as audio files until you upgrade to the full version.
  4. Time Restrictions: Another limitation of the trial version is the time restrictions imposed on certain features. Some advanced functions, such as time stretching, audio quantization, and automation editing, are time-limited and will cease to function after a specific duration.

Although the trial version of FL Studio has its limitations, it still provides an excellent opportunity to familiarize yourself with the software and explore its capabilities. Whether you’re a beginner or a professional, the trial version allows you to assess FL Studio’s suitability for your music production requirements without committing to a purchase.

Conclusion And Recommendations

After carefully considering the various versions and their associated costs, it is evident that FL Studio offers a range of options to cater to different user needs and budgets. Here are some key points to consider when choosing the right version:

Choosing The Right Version

FL Studio provides multiple editions, including the free trial version, Fruity Edition, Producer Edition, and Signature Bundle. Each version offers different features and functionalities, allowing users to select the one that aligns with their specific requirements and skill levels.

To determine which version is best for you, consider the following factors:

  1. Level of Expertise: Assess your proficiency in music production. If you are a beginner, the Fruity Edition may suffice, whereas advanced users might benefit from the more extensive capabilities of the Producer Edition or Signature Bundle.
  2. Desired Features: Identify the features you need to achieve your desired sound and style. Compare the features offered in different versions and choose the one that provides the tools necessary for your creative process.
  3. Budget: Evaluate the cost of each version in relation to your overall budget. The free trial version is a great starting point, but if you require additional functionality, investing in a paid version could prove worthwhile.

Value For Money

FL Studio offers great value for money, considering the extensive features and professional-grade capabilities it provides. Despite the cost of the paid versions, the software’s versatility and long-standing reputation make it a worthy investment for music producers.

When assessing the value for money, consider the following aspects:

  • Quality of Sound: FL Studio allows you to create high-quality sounds and achieve professional results. This quality surpasses the investment made in purchasing the software.
  • Futureproofing: FL Studio regularly releases updates and improvements, ensuring that your investment remains relevant and up-to-date in the music production landscape.
  • Longevity: FL Studio boasts a large and dedicated user base, contributing to the availability of tutorials, resources, and plugins. This community support adds value to your investment and facilitates ongoing learning and growth.

Ultimately, choosing the right version of FL Studio boils down to understanding your specific requirements and budget, while considering the features and value each version offers. Regardless of the version you select, FL Studio provides a powerful and intuitive platform for music production, making it an excellent choice for both beginners and professionals alike.

Does Fl Studio Cost Money? Find Out the Price Tag for Fl Studio


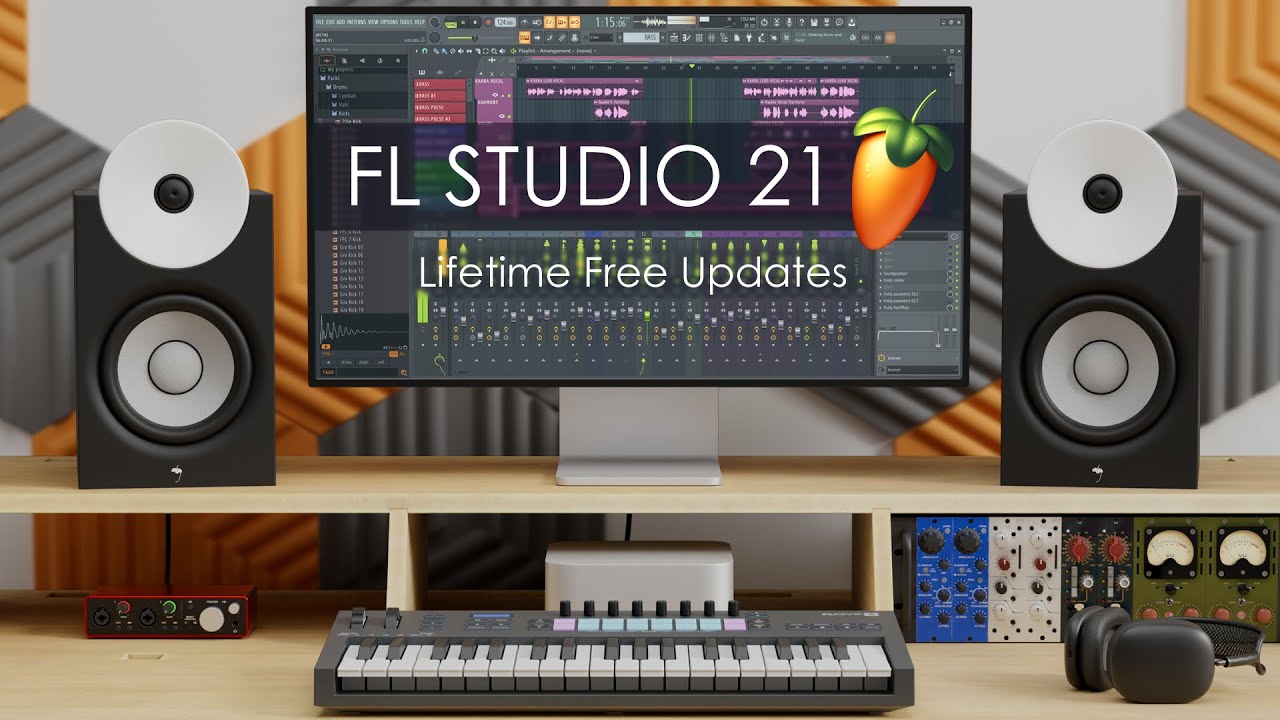
Credit: www.image-line.com


Frequently Asked Questions Of Does Fl Studio Cost Money


Is Fl Studio Free?


No, FL Studio is not free. It is a paid digital audio workstation software.


How Much Does The Fl Studio Cost?


FL Studio costs range from $99 to $899 depending on the version you choose.


Do You Have To Buy Fl Studio Every Year?


No, FL Studio is a one-time purchase and does not need to be bought every year.


Do You Have To Pay Fl Studio Monthly?


No, FL Studio doesn’t require monthly payments. You can purchase it once and receive lifetime free updates.


Conclusion


FL Studio does have a cost attached but offers various pricing options. Whether you choose the free trial or the paid version, the features and benefits make it a worthwhile investment for music producers. Understanding the pricing details will help you make the right decision for your needs.


Categories
Archive Audio Production

What is the Difference between Mixing And Mastering a Song? Uncover the Keys to Audio Perfection

Mixing involves balancing and adjusting individual tracks in a song, while mastering is the final step in the post-production process, focusing on polishing the overall sound quality. The difference lies in the specific tasks each process covers, with mixing dealing with track levels and effects, and mastering focusing on enhancing the overall clarity, loudness, and cohesiveness of a complete song.Both essential for achieving professional sound, mixing and mastering play distinct roles in the production of high-quality music, ensuring that each element of the song is optimized for maximum impact.


Let’s delve deeper into these crucial stages to understand how they contribute to creating a polished and cohesive final product.

What is the Difference between Mixing And Mastering a Song? Uncover the Keys to Audio Perfection


Credit: www.facebook.com


The Basics Of Mixing And Mastering

Mixing and mastering are vital stages in the music production process that can significantly impact the quality of a song. Understanding the differences between mixing and mastering is key to creating a professional-sounding track.

Mixing Defined

Mixing involves blending and balancing individual tracks within a song to create a cohesive sound. It focuses on adjusting levels, panning, and adding effects to enhance the overall mix.

Mastering Defined

Mastering is the final step in the production process where the overall sound of the mix is polished to achieve a consistent and balanced final product. It involves optimizing the audio for various playback systems.

What is the Difference between Mixing And Mastering a Song? Uncover the Keys to Audio Perfection


Credit: www.amazon.com


Key Differences


Mixing a song involves balancing and blending all individual tracks to create a cohesive sound, while mastering focuses on enhancing the overall audio quality and preparing the final mix for distribution. Mixing deals with individual elements, such as volume levels and effects, whereas mastering addresses the entire track, ensuring consistency and clarity.

Purpose And Process Gap

Mixing focuses on blending individual tracks to create a cohesive sound.

Mastering involves enhancing the overall quality, ensuring consistency across all tracks.

Skill Set Variation

In mixing, knowledge of audio software and sound manipulation is crucial.

Mastering requires expertise in audio dynamics and finalizing the polished sound.


Understanding Mixing

Balancing Tracks

Mixing is the process where all the individual tracks are combined to create the final stereo mix. This involves balancing the levels of each track to ensure that all the instruments and vocals can be heard clearly. The goal is to create a cohesive and balanced sound, where no single element overpowers the others.

Adding Effects And Eq

Once the tracks are balanced, mixing involves adding effects and equalization (EQ) to enhance the overall sound. Effects like reverb, delay, and compression can be used to add depth, space, and dynamic control to the mix. EQ is utilized to adjust the frequency balance of the individual tracks, ensuring that each instrument occupies its own sonic space in the mix.

What is the Difference between Mixing And Mastering a Song? Uncover the Keys to Audio Perfection


Credit: www.facebook.com


Unraveling Mastering

In the world of audio production, the terms mixing and mastering are often used interchangeably. However, these two processes have distinct roles in bringing a song to its full potential. While mixing involves blending individual tracks and elements of a song, mastering focuses on giving the final mix a polished and professional touch. In this article, we will delve deeper into the process of mastering and understand its importance in achieving a high-quality, well-balanced sound.

Polishing The Final Mix

Mastering can be likened to putting the final coat of polish on a freshly painted masterpiece. It involves carefully fine-tuning the already mixed tracks, making small adjustments to ensure a cohesive and balanced sound. During the mastering process, a mastering engineer will focus on refining the overall tonal balance, enhancing the dynamics, and adding clarity and depth to the mix.

To accomplish this, the mastering engineer will utilize a variety of tools and techniques, such as equalization (EQ), compression, stereo wideners, and harmonic enhancers. These tools work together to address any issues that may have been missed during the mixing stage and bring out the best qualities of the music.

Optimizing For Playback

One of the primary goals of mastering is to optimize the final mix for playback on a wide range of devices and systems. Whether it’s on headphones, car speakers, or high-end studio monitors, the mastered version should sound consistent and translate well across various playback platforms.

To achieve this, the mastering engineer will carefully analyze the mix and make adjustments to ensure it sounds great on all systems. This involves making sure the overall volume level is appropriate, addressing any frequency imbalances, and ensuring the dynamics of the song are preserved. Additionally, the engineer may apply techniques such as dithering and format conversion to prepare the master for different distribution channels, such as streaming platforms or CDs.

By optimizing the mix for playback, mastering allows the music to be enjoyed in its full glory, regardless of the listening environment. It ensures that the song delivers its intended emotional impact and engages the listener from start to finish.

Overall, while mixing brings all the elements of a song together, mastering takes the final mix and polishes it to perfection. It is the last step in the audio production process that adds the finishing touches, making the music shine and sound its best.

The Quest For Audio Perfection

The quest for audio perfection in the music industry is an ongoing process that involves various stages. Two of the most crucial stages, which significantly impact the final product, are mixing and mastering. While both processes work towards enhancing the quality of the sound, they serve different purposes and are carried out at different stages of the production. Understanding the difference between mixing and mastering is essential for musicians, producers, and audio engineers seeking to achieve the utmost audio excellence.

Impact On Sound Quality

Mixing and mastering have distinct roles in improving the sound quality of a song. Mixing focuses on the individual elements of the song, such as the instruments, vocals, and effects. It involves adjusting the volume levels, panning, equalization, and adding effects like reverb or delay. The primary goal of mixing is to ensure that each element blends together harmoniously, creating a balanced and cohesive sound.

Mastering, on the other hand, takes a broader approach to enhancing the overall sound quality of the entire song or album. It involves optimizing the levels and dynamics, fine-tuning the frequency balance, and ensuring consistency across tracks. Mastering also involves adding additional processing, such as compression or stereo enhancement, with the aim of making the song sound polished and professional across different playback systems.

In summary, while mixing focuses on the individual elements of the song, mastering concentrates on refining the entire sound to achieve a cohesive and professional end result.

Role In Captivating The Audience

Mixing and mastering play crucial roles in captivating the audience and creating an emotionally engaging listening experience. The meticulous adjustments made during the mixing process have a direct impact on how the audience perceives the song. Elements like the positioning of instruments in the stereo field, the clarity of the vocals, and the overall balance between different elements significantly influence the emotional impact of the music.

Mastering, on the other hand, ensures that the song sounds consistent, balanced, and appealing across different playback systems. By refining the levels, dynamics, and frequency balance, mastering allows the music to translate well across various platforms, such as speakers, headphones, or car stereos. This consistency in sound quality is essential to captivate the audience and grab their attention from the first note to the last chord.

Ultimately, the combination of meticulous mixing and skilled mastering enhances the sonic qualities of a song, captivating the audience and bringing the artist’s vision to life.

Frequently Asked Questions Of What Is The Difference Between Mixing And Mastering A Song


Do I Need Mixing Or Mastering?


For a polished and professional sound, both mixing and mastering are essential stages in music production. Mixing balances and enhances individual tracks, while mastering ensures overall clarity and consistency. It’s best to include both in your music production process.


Which Is Harder Mixing Or Mastering?


Mastering is generally considered harder than mixing as it involves final touches to enhance and balance the overall sound. Both are crucial stages in music production.


Does Mastering Make A Song Sound Better?


Yes, mastering can enhance the overall sound quality of a song by polishing the audio and balancing frequencies.


Does Mixing And Mastering Make A Big Difference?


Mixing and mastering can make a big difference in the final quality of a song. It enhances the overall sound by balancing the levels, improving clarity, and adding polish. It ensures that the audio is cohesive, dynamic, and ready for distribution, making a significant impact on the overall listening experience.


Conclusion


To sum up, while mixing and mastering share similarities, they serve distinct purposes in the music production process. Mixing focuses on blending individual tracks and shaping the overall sound, while mastering aims to optimize the entire mix for distribution. Both are crucial for achieving a professional and polished final product.


Understanding the difference is essential for musicians and producers.

Categories
Archive Audio Production

How Many People Can Use FL Studio: The Limitless Musical Journey!

FL Studio licenses are for a single user, limiting the usage to one person per license. The software is designed for individual use.


FL Studio, a popular digital audio workstation, offers a user-friendly interface for music production. It allows creators to compose, arrange, edit, mix, and master various musical genres. With a wide range of features and tools, FL Studio caters to both beginners and experienced producers.


Whether you’re a musician, producer, or DJ, FL Studio provides a versatile platform to unleash your creativity. From MIDI support to audio recording capabilities, FL Studio offers a comprehensive solution for all your music production needs. Join the FL Studio community and dive into the world of limitless possibilities for creating exceptional music compositions.


The Reach Of Fl Studio

User Base Growth

FL Studio has seen a meteoric rise in its user base.

  • Regular updates and user-friendly interface contribute to its popularity.
  • Music enthusiasts and professionals alike are drawn to its versatile features.
  • Community engagement drives continuous growth and innovation.

Global Accessibility

FL Studio’s accessibility knows no bounds.

  1. Available in multiple languages, fostering inclusivity.
  2. Cross-platform compatibility ensures easy access worldwide.
  3. Online tutorials and support forums enhance user experience.
How Many People Can Use FL Studio: The Limitless Musical Journey!


Credit: www.linkedin.com


Demographic Diversity

Age Groups

  • Teens
  • Young adults
  • Middle-aged individuals
  • Senior citizens

Professional Vs. Hobbyist Users

  • Professional musicians
  • Aspiring music producers
  • Amateur beatmakers
  • Sound enthusiasts


Collaborative Possibilities

Remote Collaboration

With FL Studio, remote collaboration becomes seamless. Artists and producers can work together from different locations, leveraging the software’s robust sharing and version control features. This allows multiple contributors to work on the same project simultaneously, enhancing efficiency and creativity.

Community Engagement

FL Studio fosters a vibrant community of musicians and producers. Its user-friendly interface and comprehensive tools encourage community engagement, enabling users to share ideas, techniques, and even project files. This collaborative environment not only facilitates knowledge sharing but also inspires new creative endeavors.

Educational Impact

FL Studio, with its powerful and versatile features, has made a significant impact in the field of education. From institutional integration to enhanced learning opportunities, this software has revolutionized the way music production is taught and learned.

Institutional Integration:

With its user-friendly interface and comprehensive tools, FL Studio has seamlessly integrated into various educational institutions. From music schools to universities, educators have recognized the value of incorporating this software into their curriculum.

FL Studio provides students with hands-on experience in music production, allowing them to explore their creative abilities and develop essential skills. Its compatibility with both Mac and PC platforms makes it accessible to a wide range of institutions, ensuring that more students can benefit from its educational features.

Learning Opportunities:

FL Studio offers a multitude of learning opportunities for students of all levels. Whether they are beginners or advanced musicians, this software provides a platform for students to experiment, create and produce high-quality music.

By using FL Studio, students can enhance their understanding of music theory, composition, and arrangement. The software’s extensive library of virtual instruments and effects enables students to explore different genres and musical styles, expanding their horizons and fostering their creativity.

The collaborative nature of FL Studio allows students to work together on projects, improving their teamwork and communication skills. This collaborative environment not only enhances the learning experience but also prepares students for future professional collaborations.

Additionally, FL Studio provides students with real-world experience by simulating the music production process used in professional studios. By working with industry-standard tools and techniques, students can develop the skills needed for a successful career in music production.

The Future Of Fl Studio

The future of FL Studio looks promising with the continuous advancements in technology and evolving market trends. FL Studio, also known as Fruity Loops Studio, is a popular digital audio workstation (DAW) that offers a wide range of features for music producers, composers, and DJs. It allows users to create, mix, and produce high-quality music tracks with ease. In this article, we will explore the future of FL Studio by discussing the technological advancements and market evolution.


Technological Advancements

The developers behind FL Studio are constantly working to enhance the software and incorporate new technologies to stay ahead in the dynamic music production industry. These technological advancements ensure that FL Studio remains a top choice for music professionals and enthusiasts.

  • Seamless Integration: FL Studio integrates smoothly with various hardware and software devices, enabling users to connect MIDI controllers, keyboards, and other equipment effortlessly. This seamless integration enhances the overall music production experience.
  • Innovative Plugins: FL Studio offers an extensive collection of plugins that extend its functionality. From synthesizers and effects processors to mastering tools and virtual instruments, these plugins enhance the creative possibilities for users.
  • Real-time Collaboration: The future of FL Studio includes features that enable real-time collaboration between multiple users. This allows music producers, composers, and artists to work together on projects remotely, enhancing creativity and productivity.

Market Evolution

The music industry is constantly evolving, and FL Studio adapts to the changing market trends to meet the demands of its users effectively. Here are some aspects of the market evolution that shape the future of FL Studio:

  1. Mobile Music Production: With the increasing popularity of smartphones and tablets, music production on mobile devices is becoming more prevalent. FL Studio offers a mobile version compatible with both iOS and Android platforms, enabling users to create music on the go.
  2. Online Communities: The future of FL Studio involves building a strong online community where users can collaborate, share their creations, and seek inspiration from fellow musicians. These communities provide valuable resources, feedback, and opportunities for growth.
  3. Streaming and Content Creation: The rise of streaming platforms and online content creation has opened new avenues for musicians and producers. FL Studio supports the integration of streaming services, allowing users to distribute their music effortlessly and reach a wider audience.
Technological Advancements Market Evolution
  • Seamless Integration
  • Innovative Plugins
  • Real-time Collaboration
  1. Mobile Music Production
  2. Online Communities
  3. Streaming and Content Creation

The future of FL Studio is exciting, with technological advancements improving the user experience and market evolution opening up new possibilities for music producers. Whether you are a professional musician or a hobbyist, FL Studio is a versatile and powerful tool that will continue to empower your creativity in the years to come.

How Many People Can Use FL Studio: The Limitless Musical Journey!


Credit: www.edmprod.com


How Many People Can Use FL Studio: The Limitless Musical Journey!


Credit: www.nstuffmusic.com


Frequently Asked Questions For How Many People Can Use Fl Studio


Can I Use Fl Studio On 2 Computers?


Yes, FL Studio can be used on two computers with a single license for personal use.


Can 2 People Use The Same Fl Studio Account?


No, only one person can use a FL Studio account at a time. Sharing accounts violates the terms of service.


Can Two People Work On Fl Studio?


Yes, two people can work on FL Studio simultaneously by sharing the project file and collaborating.


How Much People Use Fl Studio?


FL Studio is used by tens of thousands of people worldwide. It’s a popular choice for music production.


Conclusion


FL Studio can be used by multiple people with the right licensing. Its collaborative features and flexibility make it an ideal choice for music production teams and multi-user environments. Understanding how to manage licensing and ensuring proper communication among users can maximize the potential for collaboration in FL Studio.

Categories
Archive Audio Production

Should I Upload 16 Bit Or 24 Bit to Spotify: Unleashing the Audio Quality Impact

For uploading to Spotify, choose 24-bit audio for higher quality and greater dynamic range. This will enhance the listening experience on the platform.


Uploading music to Spotify requires careful consideration of the format to ensure optimal sound quality. One key decision to make is whether to upload in 16-bit or 24-bit format. Choosing the right bit depth can significantly impact the quality of your music on the streaming platform.


We will discuss the differences between 16-bit and 24-bit audio, explore the advantages of uploading 24-bit files to Spotify, and provide guidance on optimizing your music for the best possible listening experience for your audience.

Should I Upload 16 Bit Or 24 Bit to Spotify: Unleashing the Audio Quality Impact


Credit: www.amazon.com


The Difference Between 16 Bit And 24 Bit Audio

Understanding Bit Depth: Bit depth refers to the number of bits used to represent the audio signal in digital form.

Bit Depth Explained

16 Bit Audio: Offers 65,536 possible values per sample, suitable for most consumer-grade audio needs.

24 Bit Audio: Provides 16,777,216 possible values per sample, offering higher resolution and dynamic range.

Audio Quality Comparison

  • 16 Bit: Standard for CD-quality audio, suitable for most online platforms like Spotify.
  • 24 Bit: Enhances audio quality, ideal for professional music production and high-fidelity systems.

Understanding Spotify’s Audio Requirements

When uploading music to Spotify, it’s crucial to comply with their recommended audio settings to ensure optimal streaming quality for your listeners. Here we delve into the details of Spotify’s audio requirements and explore whether to upload your tracks in 16 bit or 24 bit format.

Spotify’s Preferred Format

  • Spotify recommends uploading tracks in 24-bit WAV files for the highest audio quality.
  • 24-bit files offer greater dynamic range and fidelity compared to 16-bit files.
  • By uploading in 24-bit format, you provide users with a more immersive listening experience.

Impact On Streaming Quality

  • Choosing 24-bit over 16-bit can enhance the clarity and richness of your music on Spotify.
  • Higher bit depth allows for more detail in the audio, resulting in a more refined sound.
  • While 24-bit files may be larger in size, the improved audio quality they offer is worth the trade-off.

Factors Influencing Audio Quality

Dynamic Range Consideration

The dynamic range of 16-bit audio is approximately 96 dB, while 24-bit audio offers a dynamic range of 144 dB. This difference allows 24-bit audio to capture greater detail and subtlety in quiet and loud passages, resulting in a more natural and immersive sound. Therefore, for optimal audio quality on Spotify, uploading audio in 24-bit format is recommended.

Compression Effects

Spotify uses a compression codec called Ogg Vorbis, which can affect the quality of your audio. When uploading 16-bit audio, the compression process may introduce artifacts and degradation, especially in complex or dynamic passages. On the other hand, 24-bit audio provides more headroom for the compression process, resulting in better-preserved audio quality. Thus, opting for 24-bit audio can mitigate the negative impact of compression on your Spotify tracks.

Should I Upload 16 Bit Or 24 Bit to Spotify: Unleashing the Audio Quality Impact


Credit: www.reddit.com


Choosing The Right Bit Depth For Your Music

When it comes to uploading your music to Spotify, choosing the right bit depth is crucial. Bit depth determines the resolution and dynamic range of your audio files. While Spotify accepts both 16-bit and 24-bit files, understanding the differences and considerations for different genres and mastering is essential to ensure your music sounds its best on the platform.

Considerations For Different Genres

Each genre of music has its unique characteristics and demands. It is important to consider these aspects when deciding on the appropriate bit depth for your tracks. Here’s a breakdown of the considerations for different genres:

Genre Recommended Bit Depth
Electronic 24-bit
Classical 24-bit
Hip Hop 24-bit
Rock 16-bit
Pop 16-bit

Electronic, classical, and hip hop genres often feature intricate and detailed arrangements that can benefit from the increased dynamic range provided by 24-bit files. On the other hand, rock and pop genres, known for their energetic and straightforward sound, typically sound great in 16-bit.

Mastering And Final Delivery

Mastering plays a significant role in preparing your music for release on platforms like Spotify. It involves fine-tuning the mix, adjusting levels, and enhancing the overall sound quality. When mastering your tracks, it is recommended to work with the same bit depth as the original recordings. This ensures consistency and minimizes the risk of any unwanted artifacts or quality loss.

However, when it comes to delivering your finalized tracks to Spotify, there are some additional considerations. Due to streaming limitations and bandwidth requirements, Spotify converts all audio files to their Ogg Vorbis format, which is encoded at a bit depth of 16-bit regardless of the original file’s bit depth. Therefore, unless your music contains extensive dynamic range that necessitates 24-bit recordings during the mastering process, 16-bit is more than sufficient for final delivery to Spotify.

To summarize, when deciding on the appropriate bit depth for your music on Spotify, consider the characteristics of your genre and the mastering process. While 24-bit offers greater dynamic range, 16-bit is more than capable of delivering high-quality sound on the streaming platform. Select the option that aligns with your genre and ensures a consistent and enjoyable listening experience for your audience.


Optimizing Audio Quality For Streaming Platforms

When it comes to uploading your audio to streaming platforms like Spotify, maintaining the best possible quality is essential. To ensure your music sounds its best and reaches a wider audience, there are a few best practices to keep in mind. Following these guidelines will help you optimize your audio quality and provide an enjoyable listening experience for your audience.

Quality Preservation Techniques

To preserve the quality of your audio when uploading to platforms like Spotify, it’s crucial to follow some proven techniques. These techniques will help retain the fidelity and detail of your music, ensuring it doesn’t lose its impact during the streaming process.

Bit Depth: The bit depth refers to the number of bits used to represent each audio sample. While both 16-bit and 24-bit are common options, choosing the right bit depth can make a significant difference in audio quality. For streaming platforms, 16-bit is the recommended option, as it provides a good balance between quality and file size. Uploading 24-bit audio may result in larger file sizes without a noticeable improvement in sound quality.

Sample Rate: The sample rate determines the number of audio samples captured per second. For streaming platforms, a sample rate of 44.1 kHz is the industry standard and is widely supported across devices. Higher sample rates like 96 kHz or 192 kHz can offer better detail but may result in larger file sizes and compatibility issues with certain devices.

File Format: It’s important to upload your audio in a format that is widely supported by streaming platforms. The most common and recommended format is the lossy AAC format with the .m4a extension. This format ensures efficient encoding and playback while maintaining good audio quality. Avoid uploading uncompressed formats like WAV or AIFF, as they can result in larger file sizes and streaming issues.

Additional Considerations

In addition to the best practices mentioned above, here are a few more considerations to keep in mind when uploading your audio to streaming platforms:

  • Mastering: Prioritize proper mastering to optimize your tracks for streaming. It helps ensure that your music sounds consistent and balanced across different playback systems.
  • Metadata: Provide accurate and complete metadata for your tracks. This includes information like song title, artist name, album art, and genre. Well-curated metadata enhances the discoverability of your music.
  • Volume Levels: Aim for a balanced and consistent volume level across your tracks. Avoid excessive loudness, as it can result in distortion and listener fatigue.
  • Monitor Your Uploads: After uploading your music, take the time to regularly monitor the audio quality and playback of your tracks. This allows you to identify any issues and make necessary corrections promptly.
Should I Upload 16 Bit Or 24 Bit to Spotify: Unleashing the Audio Quality Impact


Credit: www.amazon.com


Frequently Asked Questions On Should I Upload 16 Bit Or 24 Bit To Spotify


What Bit Rate Should I Upload To Spotify?


The recommended bit rate for uploading to Spotify is 320 kbps for optimal sound quality. High bit rates ensure a better listening experience for your audience.


Is 16-bit Or 24-bit Audio Better?


24-bit audio is better than 16-bit as it offers higher resolution and dynamic range. It captures more detail and reduces noise for superior audio quality.


What Is The Best Bit Depth For Spotify?


The best bit depth for Spotify is 16-bit, providing high audio quality for streaming.


What Is The Best Format To Upload To Spotify?


The best format to upload to Spotify is a high-quality audio file in MP3 format at a bitrate of at least 320 kbps. This ensures optimal sound quality for your music on the platform.


Conclusion


The choice between 16-bit and 24-bit for Spotify largely depends on your production quality and the listener’s equipment. While 24-bit offers higher resolution, 16-bit may suffice for most listeners. Ultimately, it’s essential to experiment with both options and consider the trade-offs specific to your music.

Categories
Archive Audio Production

Unveiling the Limitations of FL Studio Trial: A Comprehensive Insight

The limitations of FL Studio Trial include no save option and restricted access to plugins. Despite its popularity among music producers, the trial version hinders full functionality.


While users can explore the software’s features, they face obstacles in creating and saving their projects efficiently. This limitation can impede the workflow and overall user experience for those seeking to fully utilize FL Studio’s capabilities. Additionally, the lack of access to premium plugins in the trial version may limit the creative possibilities for users.


Understanding these restrictions is important for users to decide whether to invest in the full version of FL Studio for their music production needs.


The Fl Studio Trial Version

The FL Studio trial version comes with certain limitations that users should be aware of before deciding to fully commit to the software.

Limited Features And Functionality

The trial version of FL Studio is designed to give users a taste of the full software, but it lacks many of the advanced features available in the paid version.

  • Limited access to plugins and instruments
  • Restrictions on project files saving
  • No VST plugin support

Restricted Export Options

When using the FL Studio trial, users are often limited in their ability to export or save their projects in various formats.

  1. Limited export formats available
  2. Watermarking on exported audio files
Unveiling the Limitations of FL Studio Trial: A Comprehensive Insight


Credit: www.capradio.org


Challenges Faced By Users


The trial version of FL Studio poses limitations for users, including the inability to reopen saved projects, export audio, and record. These challenges can hinder the full exploration of the software’s capabilities, limiting users’ ability to create and produce music effectively.

Difficulty In Project Saving

Users often struggle with saving their projects in the FL Studio trial version.

They encounter challenges in preserving their work due to restricted saving capabilities.

Lack Of Access To Premium Plugins

FL Studio trial users do not have access to premium plugins.

This limitation hinders their ability to explore the full range of plugin features.

Workarounds And Alternatives

When using the FL Studio trial, it’s essential to be aware of its limitations and explore workarounds and alternatives to maximize your production capabilities. Below, we’ll delve into various strategies for overcoming constraints and enhancing your music creation process.

Utilizing Stock Plugins Effectively

FL Studio’s trial version offers a limited selection of stock plugins, which may restrict your creative options. However, you can still make the most of these in-built tools by delving deeper into their functionalities. Experiment with different settings and explore unconventional applications to unlock their full potential.

Using External Software For Additional Features

While the trial version of FL Studio imposes restrictions on certain advanced features, seeking external software can offer a solution. Incorporating third-party plugins and software enables you to access a broader array of effects, instruments, and production tools. By integrating these external resources, you can expand your creative palette and compensate for the limitations of the trial version.

Unveiling the Limitations of FL Studio Trial: A Comprehensive Insight


Credit: www.linkedin.com


Impact On Productivity And Creativity

Introduction:

When it comes to music production software, FL Studio is a popular choice for many aspiring musicians and producers. However, the trial version of FL Studio does come with certain limitations that can have a significant impact on productivity and creativity. In this article, we will explore the constraints on workflow efficiency and how the trial version of FL Studio can potentially inhibit creative exploration.

Constraints On Workflow Efficiency:

The trial version of FL Studio imposes several constraints on the user’s workflow efficiency, limiting their ability to work seamlessly and efficiently. These constraints include:

  • The trial version lacks access to certain advanced features, such as audio recording, Edison recording, and audio clips. This can be particularly limiting for musicians and producers who rely heavily on these features in their creative process.
  • The trial version does not support external plugin instruments, limiting the user to the stock plugins provided by FL Studio. This can hinder the user’s ability to experiment with different sounds and textures, ultimately affecting their workflow efficiency.
  • Exporting projects in the trial version is limited to MP3 and WAV formats only. This means that users cannot export their projects in high-quality formats such as FLAC, AIFF, or OGG, which may be essential for professional purposes.

Inhibiting Creative Exploration:

The trial version of FL Studio also inhibits creative exploration by imposing certain limitations on the user’s ability to experiment and push the boundaries of their creativity. These limitations include:

  • The trial version restricts the number of tracks that can be added to a project, limiting the user’s ability to create complex compositions and arrangements. This can be frustrating for musicians and producers who want to explore intricate melodies and harmonies.
  • The trial version does not allow users to save their projects and reopen them later. This means that any progress made in a session using the trial version is lost once the software is closed, hindering the user’s ability to refine and develop their ideas over time.
  • Furthermore, the trial version displays occasional reminders to purchase the full version, which can be distracting and disrupt the user’s creative flow.

Conclusion And Recommendations


The limitations of the FL Studio trial include restricted access to advanced features and limited saving capabilities, hindering full project exploration and export functionality. To overcome these constraints, users are recommended to upgrade to the full version for unrestricted usage and enhanced creative possibilities.

The FL Studio trial version is a fantastic way for beginners to explore the world of digital audio workstations (DAWs) without committing to a paid software. However, it comes with certain limitations that may hinder more advanced users or those looking for specific features.

Considerations Before Purchasing The Full Version

If you find yourself enjoying the FL Studio trial and wish to unlock its full potential, there are a few considerations to keep in mind before purchasing the full version. Firstly, the trial version of FL Studio does not allow you to reopen saved projects, meaning you won’t be able to continue your work if you decide to upgrade. This can be a significant limitation for those who have invested time and effort into their projects while using the trial version. Additionally, the trial version only allows the use of plugin presets, limiting your ability to create entirely unique sounds. When purchasing the full version, you gain access to a vast library of plugins and the ability to fully customize your sounds, giving you more creative freedom.

Exploring Other Daw Options

While FL Studio is undoubtedly a popular choice, it’s essential to consider other DAW options before making your final decision. Exploring other software can help you find the one that best suits your needs and preferences. One alternative worth considering is Ableton Live, which offers a unique and intuitive workflow specifically geared towards electronic music production. Another option is Logic Pro X, a DAW developed by Apple that provides comprehensive recording, editing, and mixing capabilities for Mac users.

FL Studio Ableton Live Logic Pro X
✓ Beginner-friendly interface ✓ Optimized for electronic music production ✓ Comprehensive recording and editing capabilities
✓ Extensive library of samples and plugins ✓ Real-time performance features ✓ Advanced mixing tools
✗ Limited reopening of saved projects ✓ Wide range of third-party integration ✓ Exclusive to Mac users

In conclusion, while the FL Studio trial is a great starting point for beginners, it does have limitations that may hinder more advanced users. To fully unlock its potential, purchasing the full version is recommended. However, it’s crucial to explore other DAW options to ensure you find the one that best suits your needs. Remember, every musician has their unique preferences, so take the time to experiment and find the perfect DAW for your creative journey.

Unveiling the Limitations of FL Studio Trial: A Comprehensive Insight


Credit: www.facebook.com


Frequently Asked Questions On What Are The Limitations Of Fl Studio Trial


What Limitations Does Fl Studio Free Have?


FL Studio free has limitations like no audio recording, limited plugins, and no automation save feature.


Is There A Limit On Fl Studio Free Trial?


The FL Studio free trial has no time limit. You can use it for as long as you like, but with some feature restrictions.


Is Fl Studio Free Trial Good?


FL Studio’s free trial is excellent, offering a glimpse into its powerful features for music production. With a user-friendly interface and numerous creative tools, it’s suitable for beginners and professionals alike. Give it a try to experience its potential before deciding to purchase the full version.


Can I Sell Music Made With Fl Studio Trial?


Yes, you can sell music made with FL Studio trial as long as you purchase the full version.


Conclusion


While the FL Studio trial offers a glimpse into its capabilities, it does come with limitations. The inability to save projects and lack of access to premium features may hinder the full experience. Despite this, the trial version can still be beneficial for beginners to explore the software’s basic functions and determine if it suits their needs.