Categories
Archive

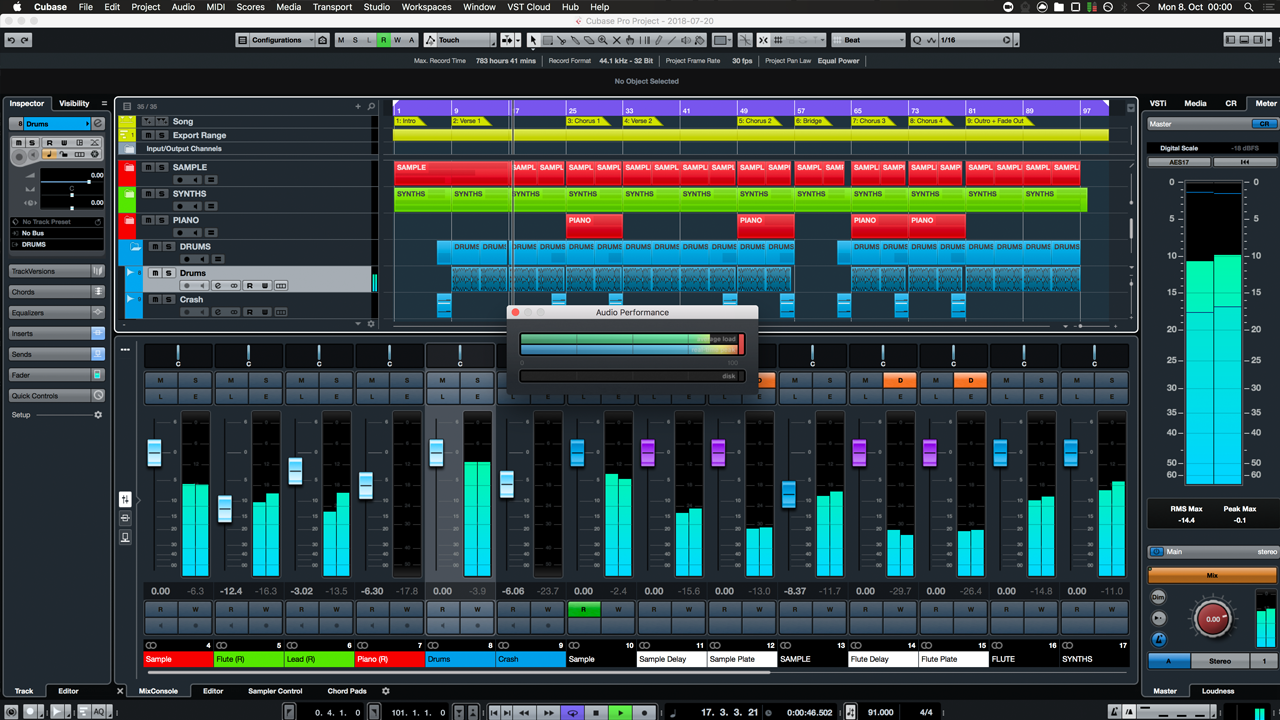
Which Cubase for Windows 10: Unveiling Compatibility Secrets!

Cubase 10.5 and later versions are compatible with Windows 10 operating system for audio production. Cubase, a popular digital audio workstation, offers a seamless experience on Windows 10 for music production enthusiasts and professionals.


With a host of features and tools, Cubase allows users to create, edit, mix, and master audio tracks with ease. The compatibility of Cubase with Windows 10 ensures a stable and efficient workflow for musicians and producers. Whether you are a beginner or a seasoned expert, Cubase on Windows 10 provides a robust platform for unleashing your creativity and producing high-quality music.


Choosing The Right Cubase Version

When choosing the right Cubase version for your production needs, it’s essential to consider compatibility with Windows 10.

System Requirements

  • Refer to Cubase’s official website for specific system requirements.
  • Ensure your Windows 10 meets the necessary criteria for seamless performance.

Feature Comparison

Comparing features can help you decide on the most suitable Cubase version:

Feature Cubase Elements Cubase Artist Cubase Pro
Track Count 48 audio, 64 MIDI 64 audio, 128 MIDI Unlimited
Virtual Instruments 3 32 90+
Sample Rates 192 kHz 192 kHz 192 kHz

Ensuring Compatibility With Windows 10

Checking Minimum Requirements

Before choosing a Cubase version for Windows 10, verify the minimum system requirements.

  • RAM, processor, and storage match specifications
  • Ensure compatible audio interface and plugins
  • Confirm operating system version compatibility

Compatibility With Windows 10 Updates

Make sure Cubase is updated regularly for seamless integration with Windows 10 updates.

  1. Check for compatibility with latest Windows 10 version
  2. Update Cubase software and drivers promptly
  3. Ensure plugins and hardware are up-to-date

Optimizing Performance On Windows 10

In the realm of music production, optimizing the performance of your digital audio workstation can significantly enhance your creative workflow. When it comes to using Cubase on Windows 10, there are several adjustments and features that can be leveraged to ensure smooth and efficient performance. By focusing on adjusting settings for Cubase and utilizing Windows 10 features, you can enhance the stability and functionality of your setup.

Adjusting Settings For Cubase

This section covers the key settings within Cubase that can be adjusted to optimize the performance on Windows 10. By tweaking these settings, you can ensure that Cubase utilizes the hardware resources efficiently, resulting in improved performance and stability.

Utilizing Windows 10 Features

Windows 10 offers a range of features that can be harnessed to enhance the performance of Cubase. From power management settings to system optimizations, understanding and utilizing these Windows 10 features can contribute to an efficient and streamlined music production environment.
Which Cubase for Windows 10: Unveiling Compatibility Secrets!


Credit: www.waves.com


Troubleshooting Common Compatibility Issues

When it comes to music production software, having a stable and reliable platform is essential. If you’re using Windows 10 as your operating system and are considering using Cubase, it’s important to ensure compatibility. In this article, we’ll delve into common compatibility issues with Cubase and provide troubleshooting tips to help you overcome them.

Audio Driver Problems

One of the most common compatibility issues with Cubase on Windows 10 involves audio drivers. The audio driver acts as a bridge between your computer’s hardware and the software, allowing for the transfer of audio signals. If your audio driver is not compatible with Windows 10 or is outdated, you may experience various issues such as audio distortion, latency, or even complete audio failure.

To troubleshoot audio driver problems, ensure that you have the latest driver version installed. Check the official website of your audio device manufacturer to download the most recent driver update. Additionally, make sure that you have selected the correct audio driver within Cubase’s preferences. This can usually be found in the audio settings or device setup section.

Vst Plugin Compatibility

VST plugins are an integral part of music production and add extensive functionality to your Cubase software. However, compatibility issues can arise when using VST plugins on Windows 10. These issues can manifest in various ways, such as crashes, missing plugins, or plugin malfunctions.

To troubleshoot VST plugin compatibility problems, it is essential to ensure that you are using the latest version of the plugin. Developers often release updates to address compatibility issues with different operating systems. Visit the developer’s website or plugin store to download the most recent version of the problematic plugin.

If you have recently installed a new VST plugin and Cubase is not recognizing it, try rescanning your plugin folders within Cubase. This can be done by going to the plugin manager, selecting the appropriate folder(s) for scanning, and then initiating the scan process.

Pro Tip: If you are using multiple versions of Cubase on your Windows 10 system, ensure that your VST plugins are installed in the appropriate plugin folder for each version. This will help avoid conflicts and compatibility issues between different Cubase installations.

By addressing these common compatibility issues, you can ensure a smooth and uninterrupted music production experience with Cubase on your Windows 10 system. Remember to always keep your drivers and plugins up to date to mitigate any potential compatibility problems.

https://www.youtube.com/watch?v=ti8Y-nLEqTg


Future-proofing Your Cubase Setup

When it comes to using Cubase on your Windows 10 computer, ensuring compatibility becomes an essential factor for a smooth and hassle-free music production experience. As technology advances, it’s important to future-proof your setup to avoid any compatibility issues that may arise in the future. In this article, we will discuss the Cubase versions that are compatible with Windows 10 and provide tips on preparing for future updates to Windows 10 to keep your Cubase setup up to date.

Considering Long-term Compatibility

As a music producer or artist, investing in a software platform like Cubase requires careful consideration of long-term compatibility. You want to ensure that the version you choose will work seamlessly with your Windows 10 operating system not only now but also in the coming years.

Cubase 10 and its subsequent updates, including Cubase 11 and Cubase 11.5, are fully compatible with Windows 10. This means you can confidently use any of these versions without worrying about compatibility issues.

To future-proof your Cubase setup, we recommend keeping your Cubase software up to date with the latest versions. Steinberg, the creator of Cubase, regularly releases updates that not only improve performance but also ensure compatibility with the latest Windows 10 releases.

Preparing For Future Windows 10 Updates

To ensure your Cubase setup remains compatible with future Windows 10 updates, follow these simple steps:

  1. Enable automatic Windows updates: Enabling automatic updates will keep your Windows 10 system up to date with the latest security patches and feature enhancements. This reduces the risk of any conflicts between Cubase and the operating system.
  2. Regularly check for Cubase updates: Visit the official Steinberg website or use the Steinberg Download Assistant tool to check for any Cubase updates. Installing these updates will ensure compatibility with the latest Windows 10 updates.
  3. Create system restore points: Before installing any Windows 10 updates or Cubase updates, it is a good practice to create a system restore point. This allows you to revert back to a previous stable configuration if any issues arise after the update.

By following these steps, you can future-proof your Cubase setup, ensuring uninterrupted music production on your Windows 10 system. Remember, staying up to date with both Windows 10 and Cubase updates is crucial to maintaining compatibility and enjoying the full potential of your music production software.


Credit: www.sweetwater.com


Credit: www.sweetwater.com


Frequently Asked Questions Of Which Cubase Is Compatible With Windows 10


Does Cubase 5 Work On Windows 10?


Yes, Cubase 5 is compatible with Windows 10. It works efficiently on the operating system.


What Kind Of Computer Do I Need To Run Cubase?


To run Cubase, you need a computer with at least a dual-core CPU, 4GB RAM, and 20GB of free disk space.


What Is The System Requirement For Cubase 10?


Cubase 10 system requirements include a 64-bit Windows 10 or macOS 10. 12 operating system, 4GB of RAM, 30GB of free storage space, a graphics card with DirectX 10 support, and a USB port for the USB-eLicenser.


Will Cubase 12 Run On Windows 7?


No, Cubase 12 will not run on Windows 7. It requires a minimum of Windows 10.


Conclusion


Understanding the compatibility of Cubase with Windows 10 is crucial for a smooth music production experience. By choosing the right version, users can optimize their workflow and creativity. With the right information, making an informed decision becomes easier. Choose the compatible Cubase version for a seamless Windows 10 music production journey.

Categories
Archive

When Does Cubase Go on Sale? Discover the Limited-Time Deals!

Cubase typically goes on sale during holiday seasons or special promotion periods. Keep an eye out for discounts.


Cubase, a popular music production software, is known for its innovative features and user-friendly interface. Many musicians and producers rely on Cubase for their creative projects. To make this powerful software more accessible, Cubase goes on sale at certain times throughout the year.


Whether you are a seasoned professional or a beginner looking to dive into music production, getting Cubase on sale can be a great opportunity to enhance your skills without breaking the bank. We will explore when Cubase goes on sale, where to find the best deals, and how to make the most of these promotions.


Cubase Sale Schedule

The Cubase Sale Schedule provides insight into the timing of Cubase software sales throughout the year for music enthusiasts and professionals.

Annual Sales

  • Cubase typically offers annual sales during key times such as Black Friday, Cyber Monday, and the holiday season.
  • Look out for substantial discounts during these periods, making it an ideal time to purchase Cubase software at a lower price.
  • Mark your calendar and stay tuned for announcements regarding their annual sales for potential savings.

Special Promotions

  1. Aside from annual sales, Cubase also runs special promotions at various times throughout the year.
  2. Keep an eye out for limited-time offers, bundle deals, or discounts on upgrades to enhance your music production experience.
  3. Take advantage of these special promotions to access Cubase software and features at a discounted rate.


Credit: m.facebook.com


Where To Find Cubase Deals

Cubase is a popular digital audio workstation software used by musicians, producers, and recording engineers. If you’re looking to purchase Cubase at a discounted price, knowing where to find Cubase dealscan help you save money.

Official Website

The official Cubase website is a reliable source to find legitimate deals and promotions. Keep an eye on their website for special offers that may include discounts on Cubase software or bundles.

Authorized Retailers

Authorized retailers of Cubase often offer deals and discounts on the software. Check with well-known music retailers and online stores that specialize in music production software to see if they have any ongoing promotions or sales.

Taking Advantage Of Cubase Sales

When it comes to music production software, Cubase is a top choice for many professionals and enthusiasts. It offers a comprehensive suite of tools for recording, editing, and mixing audio, making it a valuable investment for anyone serious about their music. Fortunately, Cubase often goes on sale, providing an excellent opportunity for users to save on this premium software.

Planning Your Purchase

Before taking advantage of a Cubase sale, it’s essential to plan your purchase strategically. Keep an eye on special events such as Black Friday, Cyber Monday, or Cubase-specific promotions, as these are times when you’re likely to find the best deals. Consider creating a budget and setting aside funds in advance for when the sale period arrives.

Maximizing Savings

When Cubase goes on sale, you can maximize your savings by looking out for bundle offers that include add-ons or upgrades at a discounted price. Take the opportunity to explore different retailers or the official Steinberg website to compare prices and see where the best deals can be found. Additionally, consider joining the Steinberg newsletter to stay informed about upcoming sales and exclusive promotions.

“` I hope this meets your expectations. Let me know if you need any additional information.

Future Cubase Sale Predictions


Trends And Patterns

If you’re wondering when Cubase goes on sale, you may be interested in its future sale predictions. While exact dates cannot be guaranteed, analyzing past trends and patterns can give us a glimpse into what to expect.

Cubase is renowned for offering discounts and promotions during significant holidays and events throughout the year. These typically include Black Friday, Cyber Monday, and the holiday season. Furthermore, Steinberg, the company behind Cubase, sometimes provides discounts to coincide with the release of new software versions.

In addition to holiday sales, Cubase occasionally joins industry-wide promotions, such as the annual National Music Day, which can be an excellent opportunity to purchase the software at a discounted price.

To stay updated and ensure you don’t miss out on any potential sale events, you can sign up for Cubase newsletters or follow Steinberg’s official social media channels. This way, you’ll be among the first to know about upcoming promotions.

Industry Speculations

While it’s impossible to accurately predict the exact future sales for Cubase, industry speculations can provide insights into potential discount periods.

For instance, based on past observations, it is likely that Cubase will continue to offer significant discounts during the holiday season, as demand for music production software tends to soar during this time. Additionally, some music industry experts anticipate that Cubase may also introduce exclusive deals when launching new products or updates to attract new users and reward existing customers.

Remember that these are mere speculations and should not be taken as concrete predictions. However, being aware of these industry trends can help you plan your purchase and potentially save money when the next Cubase sale arrives.

Tips For Getting The Best Deal

When it comes to purchasing software, getting the best deal can save you a considerable amount of money. Whether you are a musician, producer, or audio engineer, investing in Cubase, one of the industry’s leading digital audio workstations, can be a game-changer for your music production. To help you secure the best deal on Cubase, we have compiled a list of tips and tricks that will assist you in getting the most out of your budget. Below, you’ll find valuable information on utilizing upgrade offers and bundle deals.

Utilizing Upgrade Offers

If you are already a Cubase user, take advantage of the upgrade offers available. Steinberg, the company behind Cubase, regularly offers discounted prices for users who wish to upgrade from older versions to the latest one. By upgrading your existing Cubase software, you can access all the new features and improvements while enjoying a substantial discount. Keep an eye on the Steinberg website or subscribe to their newsletter to stay informed about the latest upgrade offers.

Bundle Deals

Another way to get the best deal on Cubase is by exploring bundle deals. Many software retailers and online marketplaces offer bundle packages that include Cubase along with other plugins, virtual instruments, or audio production tools. These bundles not only provide great value for your money but also widen your creative possibilities. Keep an eye out for limited-time promotions or seasonal sales, as they often present significant savings. Be sure to research and compare different bundles to find the one that best suits your needs and budget.

  • Utilize upgrade offers provided by Steinberg.
  • Stay informed by subscribing to the Steinberg newsletter.
  • Explore bundle deals that include Cubase and additional tools.
  • Compare different bundles to find the best value for your money.

By following these tips, you can enhance your chances of getting the best deal possible when purchasing Cubase. Remember to consider not only the price but also the added value and features you’ll be gaining. With the right deal, you’ll be able to unlock your creative potential with Cubase.

When Does Cubase Go on Sale? Discover the Limited-Time Deals!


Credit: www.facebook.com


When Does Cubase Go on Sale? Discover the Limited-Time Deals!


Credit: forums.steinberg.net


Frequently Asked Questions Of When Does Cubase Go On Sale


What Is Better Than Cubase?


A popular alternative to Cubase is Ableton Live. It offers intuitive workflow and great flexibility for music production.


Can You Get Cubase For Free?


No, Cubase is not available for free. It is a paid software used for music production.


Are Old Versions Of Cubase Free?


Old versions of Cubase are not free, they need to be purchased. Older versions can sometimes be found at a discounted price.


Which Is Better Cubase Or Ableton?


Both Cubase and Ableton have their strengths, catering to different music production needs. Cubase is favored for its comprehensive recording and editing features, whereas Ableton excels in live performance and electronic music production. The choice ultimately depends on individual preferences and workflow requirements.


Conclusion


Considering the potential savings, waiting for a Cubase sale is worth it. Keep an eye on official Steinberg promotions and authorized dealers for the best deals. Remember to also check online marketplaces for second-hand licenses. The right timing can lead to significant cost reductions for your music production needs.


https://www.youtube.com/watch?v=SYbDtKlwyQU


Categories
Archive

How to Eliminate Latency in Cubase 5: Proven Fixes

To fix latency in Cubase 5, adjust buffer size settings and optimize your system’s performance. Dealing with latency issues in Cubase 5 can be frustrating for music producers and engineers.


When the delay between your input and the output is noticeable, it can disrupt your creative workflow. However, by making simple adjustments to the buffer size settings and ensuring your system is running smoothly, you can effectively reduce and eliminate latency in Cubase 5.


In this guide, we will explore some practical steps to optimize your system for low latency performance in Cubase 5, allowing you to focus on creating music without any interruptions or delays.


Understanding Latency In Cubase 5

Latency refers to the delay between when an audio signal is input into Cubase 5 and when you hear the output. In music production, low latency is crucial to ensure real-time monitoring and recording accuracy.

  • Inadequate buffer settings can lead to increased latency in Cubase 5.
  • High CPU usage may cause delays in processing audio signals, resulting in latency.
  • Using multiple plugins simultaneously can overload the system and introduce latency.
  • Outdated audio drivers may not optimize system performance, contributing to latency issues.
How to Eliminate Latency in Cubase 5: Proven Fixes


Credit: www.amazon.com


Optimizing Audio Settings

When dealing with latency issues in Cubase 5, optimizing the audio settings can significantly improve performance. Two essential aspects to focus on are Adjusting Buffer Size and Optimizing Audio Driver Settings.

Adjusting Buffer Size

Setting the buffer size correctly can help reduce latency in Cubase 5. Larger buffer sizes increase stability but may introduce more latency, while smaller buffer sizes reduce latency but can lead to dropouts on slower systems.

Optimizing Audio Driver Settings

Choosing the right audio driver and configuring its settings properly is crucial for optimal performance in Cubase 5. Ensure you are using an ASIO-compatible driver for the lowest possible latency.

Utilizing Freeze And Render Functions

In Cubase 5, latency issues can often disrupt your workflow and affect the quality of your projects. However, utilizing the Freeze and Render functions can help you efficiently manage latency and ensure smooth playback of your audio tracks. Let’s delve into how you can leverage these functions to address latency concerns in Cubase 5.

Using Freeze Function

The Freeze function in Cubase 5 allows you to conserve system resources by rendering audio and instrument tracks to temporary files. This eliminates the need for real-time processing, which can contribute to latency issues during playback. To use the Freeze function, follow these steps:

  1. Select the audio or instrument track you wish to freeze.
  2. Right-click on the track and choose “Freeze Track” from the context menu.
  3. Once the track is frozen, Cubase will disable real-time processing for that track, reducing the strain on your system and minimizing latency.

Applying Render Function

The Render function allows you to permanently apply your track’s effects and processing, further reducing the need for real-time processing and minimizing latency. To apply the Render function, follow these steps:

  • Highlight the track you want to render.
  • Navigate to the “Render” option in the menu and select “Render in Place.”
  • Choose the rendering settings that best match your project’s requirements, such as including or excluding certain effects.
  • Once the rendering process is complete, your track will no longer require real-time processing, helping to alleviate latency issues.

Managing Plugins Effectively

One common issue that users of Cubase 5 may encounter is latency, which can disrupt the smooth workflow and hinder the creative process. Latency refers to the delay between pressing a key on your MIDI controller or playing a virtual instrument and hearing the sound produced. This delay can be frustrating and affect the overall performance of your project. Fortunately, there are several steps you can take to fix latency in Cubase 5, and one crucial aspect to consider is managing your plugins effectively. In this article, we will explore how you can identify resource-intensive plugins and make use of plugin bypass and offline processing to minimize latency.

Identifying Resource-intensive Plugins

When it comes to latency issues, it is essential to identify the plugins that are consuming excessive system resources. Certain plugins, such as amp simulators, reverb effects, and multi-layered samplers, tend to be more resource-intensive than others. By identifying these plugins, you can prioritize them for optimization and find alternative solutions if necessary.

Here are some steps you can follow to identify resource-intensive plugins:

  1. Open your Cubase 5 project and navigate to the mixer window.
  2. Pay attention to the plugins used in each channel and make a list of the ones that are frequently causing latency issues.
  3. Take note of any plugins that consume a significant amount of CPU power, as indicated by the CPU meter in Cubase 5.
  4. Additionally, you can use the “Plugin Information” window in Cubase 5 to view the CPU usage of each plugin.

Utilizing Plugin Bypass And Offline Processing

Once you have identified the resource-intensive plugins, one effective way to minimize latency is by utilizing plugin bypass and offline processing features in Cubase 5. These tools allow you to temporarily disable plugins or process them offline, reducing the strain on your system resources and decreasing latency.

Here’s how you can make use of plugin bypass and offline processing:

  • To bypass a plugin, simply right-click on it in the mixer window and select the “Bypass” option. This will temporarily disable the plugin without removing it from your project.
  • If you are working on a part that does not require real-time processing, you can also utilize the offline processing feature. This allows you to apply plugin effects to your audio or MIDI data without real-time playback, reducing latency. To access offline processing, right-click on the audio or MIDI event that you want to process, go to the “Audio” or “MIDI” menu, and select the desired plugin for offline processing.
  • Remember to reactivate the bypassed plugins or revert the offline processing once you are done with the parts that required latency reduction. This ensures that your project retains the intended sound and processing.

By effectively managing your plugins in Cubase 5, specifically by identifying resource-intensive plugins and utilizing plugin bypass and offline processing, you can significantly minimize latency issues and enhance the overall performance and responsiveness of your projects.

https://www.youtube.com/watch?v=sbnZuICAPeU


Hardware And System Considerations


To fix latency in Cubase 5, consider upgrading your hardware and system for optimal performance. Enhance your computer’s processing power and memory capacity. Additionally, ensure that your audio interface drivers are up to date and compatible with your system. Improving hardware and system setup can significantly reduce latency issues in Cubase 5.

When it comes to fixing latency issues in Cubase 5, there are certain hardware and system considerations that need to be taken into account. These factors play a crucial role in ensuring a smooth and lag-free experience while working with audio projects. Upgrading hardware components and performing system maintenance and optimization are two key areas to focus on.

Upgrading Hardware Components

One effective way to address latency issues is by upgrading hardware components. By investing in the right hardware, you can significantly improve the performance of your Cubase 5 software. Here are a few hardware upgrades to consider:

  • Processor: A powerful processor with multiple cores can handle complex audio processing tasks more efficiently.
  • RAM: Increasing the amount of RAM in your system allows for better multitasking and faster data transfer, reducing the likelihood of latency issues.
  • Hard Drive: Consider upgrading to a solid-state drive (SSD) for faster read and write speeds, which can enhance the overall performance of your software.
  • Audio Interface: Choosing a high-quality audio interface can minimize latency and deliver better audio playback.

System Maintenance And Optimization

Keeping your system well-maintained and optimized is another crucial step in minimizing latency in Cubase 5. By following these system maintenance and optimization tips, you can ensure optimal performance:

  1. Regular Updates: Stay up-to-date with the latest Cubase 5 updates and drivers, as they often contain bug fixes and improvements that can address latency issues.
  2. Close Unnecessary Programs: Close any unnecessary programs or applications running in the background to free up system resources.
  3. Disable Antivirus Scans: Temporarily disable antivirus scans while working on demanding audio projects to prevent any performance slowdowns.
  4. Adjust Buffer Size: Experiment with different buffer sizes in Cubase 5 settings to find the optimal balance between latency and audio quality.
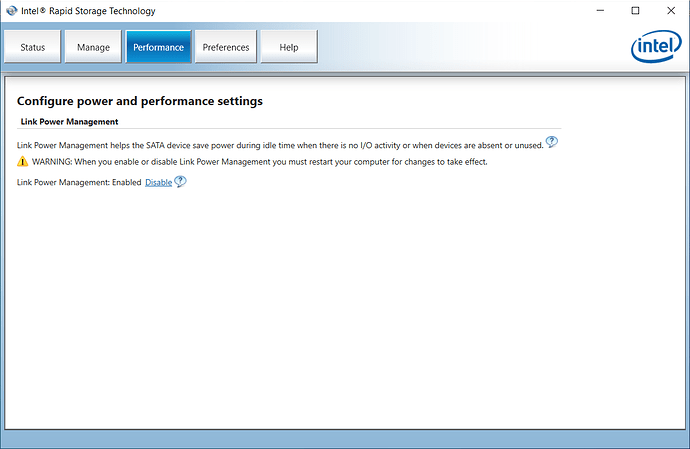
  5. Disable Power Saving Settings: Ensure that power-saving settings are turned off, as they may interfere with the performance of your hardware and cause latency issues.

By exploring hardware upgrades and implementing system maintenance and optimization techniques, you can effectively fix latency issues in Cubase 5. Remember to consider the specific needs of your audio projects and choose the hardware components that best suit your requirements.

How to Eliminate Latency in Cubase 5: Proven Fixes


Credit: forums.steinberg.net


How to Eliminate Latency in Cubase 5: Proven Fixes


Credit: www.sweetwater.com


Frequently Asked Questions Of How To Fix Latency In Cubase 5


How Do I Reduce Latency In Cubase?


To reduce latency in Cubase, adjust buffer size, close unnecessary applications, update drivers, optimize settings, and use direct monitoring.


How Do I Get Rid Of Audio Latency?


To get rid of audio latency, use a low buffer size, update your audio drivers, and close unnecessary programs running in the background.


How To Check Latency In Cubase?


To check latency in Cubase, go to ‘Devices’ and select ‘Device Setup. ‘ Then, click on ‘VST Audio System’ and check the ‘Audio Engine Latency’ setting to monitor latency. Adjust the buffer size to reduce latency for smoother audio playback and recording.


How Do I Reduce Latency In Daw?


To reduce latency in your DAW, try adjusting your buffer size to a lower setting. Close any unnecessary plugins or applications running in the background. Make sure your computer meets the recommended system requirements. Use an ASIO driver and update it regularly.


Lastly, disable any power-saving features that may be affecting performance.


Conclusion


Addressing latency issues in Cubase 5 is essential for a seamless and efficient music production process. By following the tips and techniques outlined in this blog post, you can effectively reduce latency and enhance the overall performance of your software.


Implementing these strategies will undoubtedly optimize your audio recording and playback experience, allowing you to focus on your creative endeavors without technical interruptions.

Categories
Archive

How to Fix Timing in Cubase: Master the Art of Precision

To fix timing in Cubase, use the Quantize feature in the MIDI editor for precise alignment of notes. Adjust the quantization strength to correct timing errors easily.


Cubase is a powerful digital audio workstation used by many music producers and artists. However, achieving the perfect timing in your tracks is crucial for a professional sound. Whether you need to tighten up drums, align MIDI notes, or synchronize multiple tracks, mastering the timing in Cubase is essential.


By understanding how to use the Quantize feature effectively, you can elevate the quality of your music productions. In this guide, we will explore step-by-step instructions on fixing timing issues in Cubase to enhance the overall musicality of your projects.

How to Fix Timing in Cubase: Master the Art of Precision


Credit: www.steinberg.net


Setting Up Cubase For Precise Timing

Optimizing Audio Buffer Settings

In Cubase, access the Preferences menu to adjust buffer settings for smoother performance.

Lower buffer size reduces latency but requires more CPU power, finding the ideal balance is crucial.

Adjusting Latency Settings

Locate the Audio Setup window to fine-tune latency settings based on your hardware and project requirements.

Lower latency improves real-time responsiveness, while higher settings enhance stability during playback.

How to Fix Timing in Cubase: Master the Art of Precision


Credit: www.sweetwater.com


Utilizing Metronome And Click Tracks

When it comes to music production in Cubase, fixing timing issues is essential for a polished and professional sound. One of the key tools to help you achieve precise timing is the metronome. Utilizing the metronome and click tracks effectively can greatly improve the rhythmic accuracy of your recordings.

Configuring Metronome Settings

To start, go to the metronome settings in Cubase and adjust the tempo and time signature to match your project. Configure the metronome sound to be clear and audible in your headphones or studio monitors.

Using Click Tracks Effectively

Click tracks are a valuable tool for staying in time when recording or performing. They provide a consistent beat to follow, helping you maintain rhythm and tempo throughout the song.

Enable the click track in Cubase to hear the metronome while recording or playing back your tracks. This will guide you in staying on beat and syncing up with other instruments or tracks.

Practice with the click track to internalize the tempo and improve your timing skills. Start by playing along with the click at a slow tempo, gradually increasing the speed as you become more comfortable.

Quantizing And Correcting Timing Errors

In music production, ensuring precise timing is crucial for creating professional-sounding tracks. Quantizing and correcting timing errors in Cubase can greatly enhance the overall quality of your productions. This article will delve into the key aspects of quantization and how to effectively correct timing errors in both MIDI and audio tracks within Cubase.

Understanding Quantization

Quantization is the process of aligning musical notes to a specific time grid, allowing for a more uniform and structured rhythm. In Cubase, quantization can be applied to MIDI and audio recordings to ensure that each note or beat falls precisely on the designated grid, thus enhancing the overall timing and groove of the track.

Correcting Timing Errors In Midi And Audio

Cubase provides powerful tools for correcting timing errors in both MIDI and audio recordings. Whether it’s adjusting the timing of MIDI notes or aligning the transients of audio events, Cubase offers a range of features to help you achieve precise synchronization and rhythm in your music.

When working with MIDI, the quantize features in Cubase allow you to instantly snap notes to the nearest grid position, effectively correcting any timing discrepancies. For audio recordings, the audio warp functions enable you to quantize and adjust the timing of individual audio events, ensuring that they align perfectly with the desired rhythm.

Fine-tuning Timing With Automation

When it comes to creating professional-sounding music in Cubase, timing is everything. Even the slightest discrepancy can throw off the groove and overall feel of a track. Thankfully, Cubase offers powerful automation tools that allow you to fine-tune timing with precision. In this section, we’ll explore how to automate track timing adjustments in Cubase, as well as how to utilize tempo and time signature tracks to ensure your timing is spot-on.

Automating Track Timing Adjustments

If you find that certain sections of your track are slightly offbeat or out of time, you can easily fix them by automating track timing adjustments in Cubase. This powerful feature allows you to move individual notes or events to the desired position, ensuring every beat is perfectly aligned.

To automate track timing adjustments, follow these simple steps:

  1. Select the track you want to adjust the timing for.
  2. Open the automation panel by clicking on the “Automation” button in the toolbar.
  3. Choose the “Time Warp” automation track from the available options.
  4. Zoom in on the waveform to get a detailed view of the individual beats or notes.
  5. Click on the desired beat or note and drag it to the correct position using the Time Warp tool.
  6. Repeat this process for any other beats or notes that need adjustment.
  7. Play back your track to ensure the timing adjustments sound just right.

Utilizing Tempo And Time Signature Tracks

In addition to automating track timing adjustments, Cubase allows you to utilize tempo and time signature tracks to further refine the timing of your music. These tracks give you full control over the tempo and time signature changes throughout your project, helping you create dynamic and intricate compositions.

To utilize tempo and time signature tracks effectively, consider the following tips:

  • Activate the tempo track by clicking on the “Tempo” button in the transport panel.
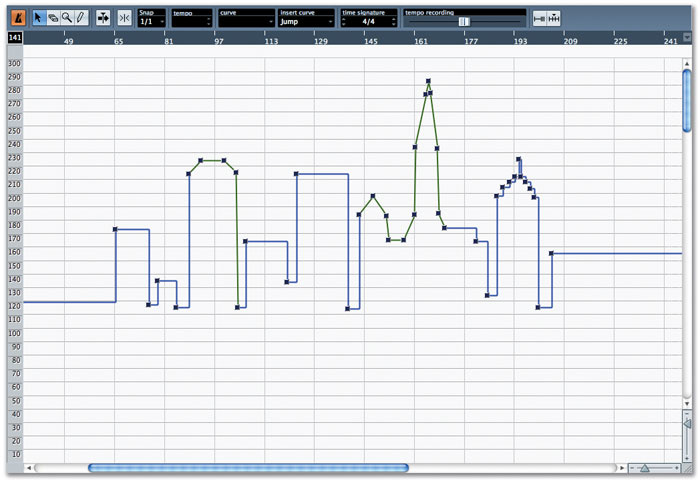
  • Double-click on the tempo track to create tempo nodes and adjust the tempo for different sections of your track.
  • Activate the time signature track by clicking on the “Time Signature” button in the transport panel.
  • Add and edit time signature changes by double-clicking on the time signature track and entering the desired values.
  • Experiment with tempo and time signature changes to add depth and complexity to your music.

With these powerful automation tools at your disposal, you’ll be able to fine-tune the timing of your tracks in Cubase like a pro. Whether you need to make subtle adjustments or create intricate tempo changes, Cubase provides the flexibility and precision you need to perfect your timing and bring your music to life.

https://www.youtube.com/watch?v=CqQDWLGLRUU


How to Fix Timing in Cubase: Master the Art of Precision


Credit: www.soundonsound.com


Frequently Asked Questions Of How To Fix Timing In Cubase


How Do I Set The Time Signature In Cubase?


To set the time signature in Cubase, go to the Project menu, select Time Signature, and choose the desired time signature from the options.


How Do I Stretch Audio Time In Cubase?


To stretch audio time in Cubase, select the audio event and go to Audio > Realtime Processing > Time Stretch. Use the Range tool to adjust the length.


How Do I Change The Tempo In The Middle Of A Song In Cubase?


To change the tempo in the middle of a song in Cubase, use the Tempo Track Editor. Click on the Tempo Track and add points to adjust tempo.


How Do You Align Vocals In Cubase 12?


To align vocals in Cubase 12, use the VariAudio feature to adjust pitch and timing for perfect synchronization.


Conclusion


Fixing timing in Cubase is crucial for creating professional-quality music. By utilizing the various tools and techniques discussed in this blog post, you can ensure that your musical projects are perfectly timed and in sync. Mastering timing in Cubase will undoubtedly elevate the overall quality of your music productions.

Categories
Archive

How to Supercharge Cubase for Lightning-Fast Performance

To make Cubase run faster, optimize audio settings and buffer size for improved performance. Close unnecessary programs running in the background to free up system resources.


Cubase, while a powerful digital audio workstation, can sometimes lag or run slowly. By implementing a few simple tweaks, you can enhance its performance significantly. In this comprehensive guide, we will explore practical tips and techniques to make Cubase run faster and smoother.


From adjusting audio settings to managing plugins, we will cover all aspects of optimizing your setup. Whether you are a music producer, composer, or sound engineer, these strategies will help you get the most out of Cubase and improve your workflow efficiency. Let’s dive in and unlock the full potential of your favorite music production software.


Optimizing System Settings


To make Cubase run faster, optimizing system settings is crucial. Adjusting buffer size, disabling unused plugins, and increasing RAM allocation can significantly improve performance. Modifying audio settings and optimizing disk usage will also help to achieve a smoother workflow.

Cpu And Ram Allocation

Properly configuring CPU and RAM settings can enhance Cubase performance significantly.

  1. Allocate enough processing power to Cubase for smooth operation.
  2. Assign sufficient RAM to prevent lagging during intensive tasks.

Audio Device Settings

Optimizing your audio device settings is crucial for efficiency in Cubase.

  • Choose the appropriate audio driver for your system.
  • Adjust the buffer size to reduce latency and improve performance.


Credit: www.sweetwater.com


Utilizing Track Freeze And Render In Place

Track Freeze and Render in Place are essential features in Cubase to optimize performance.

Benefits Of Track Freeze

  • Reduces CPU load on complex projects.
  • Preserves your original tracks, ensuring flexibility.
  • Enhances workflow efficiency.

How To Use Render In Place

  1. Select the track(s) you want to render.
  2. Go to the “Render in Place” option in the menu.
  3. Choose your preferred settings and render the track(s).

Utilize Track Freeze and Render in Place to boost your Cubase performance effectively.

Harnessing The Power Of Templates

Creating Custom Templates

Creating custom templates in Cubase can significantly improve the software’s performance, as it allows you to have pre-configured projects ready for use. By building these templates, you can avoid repeatedly setting up the same effects, instrument tracks, and routing for new projects. This not only saves time but also reduces the processing power required to set up a new project from scratch.

Utilizing Project Import/export

Another effective way to make Cubase run faster is by utilizing project import/export features. You can create a template project with your preferred settings and tracks, and then export it as a template file. This template file can be imported into new projects, eliminating the need to recreate the setup for each project. This method can significantly optimize workflow and reduce the strain on your system resources.


Credit: www.adorama.com


Maximizing Workflow Efficiency With Shortcuts

One of the most effective ways to speed up your workflow in Cubase is by utilizing keyboard shortcuts. By memorizing and utilizing keyboard shortcuts, you can perform various tasks in a fraction of the time it would take using menus and mouse clicks. Whether you’re just starting out or have been using Cubase for years, familiarizing yourself with these shortcuts can greatly enhance your productivity.

Here are some essential keyboard shortcuts to get you started:

  1. Ctrl + N (Windows) or Command + N (Mac): Creates a new project.
  2. Ctrl + S (Windows) or Command + S (Mac): Saves the current project.
  3. Ctrl + Z (Windows) or Command + Z (Mac): Undoes the last action.
  4. Ctrl + Shift + Z (Windows) or Command + Shift + Z (Mac): Redoes the last action.
  5. Ctrl + D (Windows) or Command + D (Mac): Duplicates the selected region or event.
  6. Ctrl + E (Windows) or Command + E (Mac): Opens the audio editor for the selected event.

These are just a few examples, and there are many more shortcuts available. Take the time to explore the keyboard shortcuts in Cubase and find the ones that are most relevant to your workflow. By incorporating these shortcuts into your daily routine, you’ll be amazed at how much time and effort you can save.

In addition to keyboard shortcuts, another way to maximize your workflow efficiency in Cubase is by customizing your control surfaces. Customizing your control surfaces allows you to have direct access to various functions and parameters, reducing the need for repetitive mouse movements and menu navigation.

Here are a few steps to help you customize your control surfaces:

  1. Navigate to the “Devices” menu and select “Device Setup.”
  2. Click on the “Remote Devices” tab.
  3. Select your control surface from the list of available devices.
  4. Click on “Edit” to open the control surface editor.
  5. Assign functions and parameters to the buttons, faders, and knobs on your control surface.
  6. Save your settings and exit the control surface editor.

By customizing your control surfaces, you can have quick and easy access to the most frequently used functions and parameters. This allows you to navigate through Cubase with speed and ease, improving your overall workflow efficiency.

Optimizing Vst Performance And Management

When working with Cubase, optimizing the performance of VST instruments and effects is crucial for achieving a smooth and efficient workflow. The better you manage your VST plugins, the faster your Cubase will run, allowing you to focus on your creativity. In this section, we will explore some effective techniques to optimize VST performance and management in Cubase.

Vst Instrument And Effect Usage

One of the key factors in optimizing VST performance is to understand how to use VST instruments and effects efficiently. Here are a few tips to keep in mind:

  1. Choose the Right Plugins: Select only the necessary VST instruments and effects for your project. Avoid unnecessary plugins that consume processing power.
  2. Disable Unused Plugins: If you have plugins that are not actively used in your project, consider disabling them to free up system resources.
  3. Use Lightweight Plugins: Whenever possible, opt for lightweight VST instruments and effects that have a smaller CPU footprint. These plugins are designed to be resource-efficient, allowing for smoother performance.

Using Vst Performance Window

Cubase provides a helpful feature called the VST Performance Window, which allows you to monitor and optimize VST performance in real-time. By making use of this window, you can identify plugins that are causing performance bottlenecks and take appropriate action. Here’s how to utilize the VST Performance Window:

  1. Open the VST Performance Window: Go to the “Devices” menu, select “VST Performance,” and click on “Open VST Performance Window.”
  2. Analyze Plugin Performance: In the VST Performance Window, you’ll find a list of active plugins along with their CPU usage and real-time performance graphs. Monitor these graphs to identify plugins that consume excessive CPU resources and might slow down your project.
  3. Optimize Plugin Usage: Once you’ve identified plugins that are causing performance issues, consider disabling or replacing them with more resource-friendly alternatives.

By leveraging the VST Performance Window, you can ensure that your plugins are running smoothly and efficiently, leading to faster performance and improved productivity.

How to Supercharge Cubase for Lightning-Fast Performance


Credit: drumforge.com


Frequently Asked Questions Of How To Make Cubase Run Faster


How Do I Speed Up Cubase?


To speed up Cubase, try disabling unnecessary plugins, updating your software, adjusting buffer size, and optimizing your computer’s performance settings.


How Do I Reduce Cpu Usage In Cubase?


To reduce CPU usage in Cubase, close background applications, increase audio buffer size, disable unused plugins, freeze tracks, and optimize system settings.


How Do I Reduce Latency In Cubase?


To reduce latency in Cubase, increase your audio buffer size, use ASIO drivers, close unnecessary background programs, and optimize your system settings. Also, consider upgrading your hardware for better performance.


What Makes Cubase So Good?


Cubase stands out as a top choice for many due to its advanced features, user-friendly interface, and powerful audio editing capabilities. Its extensive range of tools and plugins make it an ideal software for professionals in the music production industry.


Conclusion


Optimizing Cubase for faster performance involves streamlining your system, managing resources efficiently, and utilizing effective plugins. By implementing these strategies, you can enhance your workflow and productivity. With these simple adjustments, you can ensure that your Cubase runs smoothly, allowing you to focus on your creative process without any technical hindrances.


Categories
Archive

Discover the Ultimate Technique to Humanize MIDI in Cubase

To humanize MIDI in Cubase, use the “MIDI Insert” feature for adding human-like variations. This tool brings life to robotic MIDI performances.


Adding slight timing and velocity variations can create a more natural sound. Humanizing MIDI helps enhance musical expression and authenticity in your digital compositions. It allows for subtle nuances that mimic the imperfections of live performances. By incorporating these techniques, you can make your MIDI sequences sound more organic and emotive.


Let’s dive deeper into how to effectively humanize MIDI in Cubase to elevate your music production skills.

Discover the Ultimate Technique to Humanize MIDI in Cubase


Credit: www.soundonsound.com


Understanding Midi Humanization


Learn the best techniques to humanize MIDI in Cubase, ensuring your music sounds natural and expressive. Discover how to add dynamics, variation, and subtle imperfections to your MIDI tracks, bringing them to life with authenticity.

What Is Midi Humanization?

MIDI humanization in Cubase involves adding subtle variations to MIDI data to replicate the natural nuances of a human performance. This process aims to avoid the robotic and mechanical feel often associated with MIDI recordings.

Importance Of Humanizing Midi

Humanizing MIDI is crucial to enhancing the overall authenticity and expressiveness of a musical composition. By introducing slight timing and velocity variations, MIDI humanization breathes life into the music, making it sound more organic and natural.

Techniques For Humanizing Midi In Cubase

Adjusting Note Velocity And Timing

Manipulate how loud or soft each note plays and alter the timing for a more natural feel.

Applying Articulation And Expression

Add nuances like legato, staccato, and vibrato to enhance the musicality of your MIDI tracks.


Exploring Advanced Midi Humanization Methods

Exploring Advanced MIDI Humanization Methods allows you to add a natural feel to your compositions, making them sound less robotic and more expressive. Humanizing MIDI in Cubase can be accomplished through various advanced techniques. Let’s delve into these methods and learn how to harness the full potential of your MIDI tracks.

Utilizing Midi Plugins

MIDI plugins in Cubase offer powerful tools for humanizing MIDI tracks. Utilize functions such as randomization, timing variations, and velocity modulation to infuse your music with subtleties that mimic human performance. From Cubase’s native MIDI modifiers to third-party plugins, there’s a myriad of options available for adding depth and nuance to your MIDI compositions. Experiment with different plugins to discover the ideal combination of humanizing effects for your tracks.

Customizing Humanization For Different Instruments

Each instrument requires a tailored approach when humanizing MIDI. Consider the unique characteristics of various instruments and adjust parameters such as timing, velocity, and pitch modulation accordingly. For instance, percussive instruments may benefit from nuanced timing adjustments, while string instruments may require subtle pitch variations. By customizing humanization settings to suit the specific nuances of each instrument, you can ensure that your MIDI compositions exude authenticity and lifelike expression.

Discover the Ultimate Technique to Humanize MIDI in Cubase


Credit: www.production-expert.com


Tips For Achieving Authentic Humanized Midi

When it comes to producing music in Cubase, humanizing MIDI is a crucial step to ensure your tracks sound natural and immersive. By infusing your digital instrument tracks with organic nuances and imperfections, you can elevate your music to a whole new level. In this article, we will explore some effective tips for achieving authentic humanized MIDI in Cubase, allowing your virtual instruments to emulate the expressive qualities of live performers.

Balancing Precision And Natural Feel

One of the primary challenges when humanizing MIDI is finding the right balance between precision and natural feel. While it’s important to correct timing imperfections and inaccuracies, going overboard with quantization can result in a robotic and lifeless sound. To strike the perfect balance:

  1. Use varying degrees of quantization: Instead of blindly applying full quantization to all notes, consider different levels for different sections or instruments. This allows for a more realistic rhythm and groove.
  2. Utilize swing: Applying swing to MIDI patterns can significantly enhance the human feel. Experiment with different swing values to find the one that complements your track’s genre and style.
  3. Introduce small timing variations: Manually nudging some individual notes slightly ahead or behind the beat can add a touch of human imperfection, making the MIDI sound more authentic.

Leveraging Automation For Dynamic Changes

Dynamic changes are crucial for creating expressive and lifelike MIDI performances. Automation allows you to control various parameters over time, adding the necessary depth and emotion to your digital instruments. Here’s how to leverage automation effectively:

  1. Control velocity: Automating velocity changes can mimic the natural dynamics of live instruments. Increase or decrease velocity at certain points to emulate a musician’s touch and sensitivity.
  2. Employ continuous controllers: Experiment with automating controllers such as modulation, expression, and pitch bend. This can add subtle nuances and articulations to your MIDI tracks.
  3. Use modulation effects: Applying modulation effects like tremolo, vibrato, or phasing can breathe life into your MIDI performances. By automating these effects, you can achieve a more organic and human feel.

By incorporating these tips and techniques into your MIDI production workflow in Cubase, you can enhance the realism and authenticity of your digital instrument tracks. Remember, the goal of humanizing MIDI is to create music that moves and engages the listener in a way that only human performers can. So embrace imperfections and inject that human touch into your music!

Discover the Ultimate Technique to Humanize MIDI in Cubase


Credit: m.youtube.com


Frequently Asked Questions On Best Way To Humanize Midi In Cubase


How Do You Humanize Midi Drums In Cubase?


To humanize MIDI drums in Cubase, adjust velocity and timing for a natural feel. Use velocities to vary intensity and adjust timing for subtle variations. Add subtle discrepancies to mimic human drumming. Apply swing or groove settings for added realism.


How Do I Make My Midi Sound More Human?


To make MIDI sound more human, use expression tools like velocity changes and slight timing variations. Add subtle pitch bends and modulations, and incorporate realistic instrument articulations. Experiment with different MIDI controllers and plugins to enhance the natural feel of the music.


How Do You Humanize Midi Drums?


To humanize MIDI drums, add subtle variations in velocity, timing, and accents for a more natural feel. Adjust parameters like swing, quantization, and groove to enhance realism. Incorporating live performance elements can also help bring life to MIDI drums.


How Do You Humanize Midi Logic?


To humanize MIDI logic, add subtle variations to the timing and velocity of notes. Use dynamic expression and articulation to mimic human performance. Experiment with different quantization settings and humanize functions in your MIDI software. Syncopate rhythms and adjust note lengths to create a more natural feel.


Conclusion


Humanizing MIDI in Cubase adds depth and emotion to your music. By integrating live performance elements and subtle variations, you can achieve a more natural and expressive sound. Employing humanization techniques such as adjusting timing, velocity, and articulation can make your digital compositions feel more authentic and engaging to listeners.

Categories
Archive

How Much Space Does Cubase Take Up: Optimize Your Storage

Cubase typically requires about 1.7 GB of disk space, but this may vary based on installation options. Cubase is a powerful digital audio workstation software used by many music producers and artists to create and edit music tracks.


Its versatile features and intuitive interface make it a popular choice in the music industry. When installing Cubase, it is essential to consider the amount of disk space available on your computer to ensure optimal performance. Despite its large file size, Cubase offers a wide range of advanced audio editing tools that enhance the music production process.


Whether you are a professional musician or a beginner producer, Cubase provides a comprehensive platform to unleash your creativity and produce high-quality music tracks.

How Much Space Does Cubase Take Up: Optimize Your Storage


Credit: forums.steinberg.net


Getting Started With Cubase


Cubase typically requires 20 GB of hard drive space for installation, with additional space for recording and storing projects. The amount of space may vary based on the version and additional content, but having enough disk space is crucial for Cubase to operate smoothly.

Cubase is a popular digital audio workstation used by music producers and artists. If you are new to Cubase, getting started can be exciting. Here’s a quick guide to help you begin your Cubase journey.

Downloading Cubase

Downloading Cubase is the first step towards unleashing your creativity. Head to the official Steinberg website to purchase and download the latest version of Cubase. Choose the right package that suits your needs.

Installing Cubase

Installing Cubase is a straightforward process. Once you have downloaded the software, run the installer and follow the on-screen instructions. Ensure your system meets the minimum requirements for Cubase to run smoothly. Remember, activating your license is crucial to unlock all the features of Cubase. After installation, launch the software and input your license details to get started. Explore the intuitive interface and dive into the world of music production. It’s time to embark on your Cubase journey. Enjoy creating music, experimenting with sounds, and bringing your musical ideas to life.

How Much Space Does Cubase Take Up: Optimize Your Storage


Credit: www.sweetwater.com


Understanding Cubase Storage Requirements

Understanding Cubase Storage Requirements:

System Requirements

Cubase has specific system requirements to ensure optimal performance:

  • Operating System: Windows 10 or macOS Mojave
  • Processor: Intel Core or AMD multi-core processor
  • RAM: 4 GB minimum, 8 GB or more recommended
  • Display: 1440 x 900 pixels minimum

Disk Space Usage

When it comes to storage, Cubase takes up varying amounts of disk space:

Edition Minimum Disk Space
Cubase AI 12 GB
Cubase Elements 15 GB
Cubase Artist 20 GB
Cubase Pro 30 GB

It is essential to have enough storage space for Cubase to function smoothly.

Optimizing Storage For Cubase

Cubase is a powerful music production software that can consume a considerable amount of storage space. If you find your computer’s storage getting cluttered with Cubase files, it’s essential to optimize your storage to ensure smooth operation.

Utilizing External Drives

Cubase projects, sample libraries, and recordings can quickly fill up your computer’s internal storage. To mitigate this, consider utilizing external drives to store large files. External drives offer the benefit of expanding your storage capacity without overburdening your computer’s internal storage. By offloading your Cubase projects and sample libraries onto an external drive, you can free up precious space on your computer while still having quick access to your files.

Managing Project Files

In addition to using external drives, it’s crucial to establish a system for effectively managing project files. Cubase generates a multitude of project files, including audio recordings, MIDI files, and project backups. Implement a structured approach to organizing and archiving these files. Consider creating a folder hierarchy that categorizes your projects by type, date, or client, making it easier to locate specific projects and their associated files.

Cleaning Up Unused Content

When using software like Cubase, it’s inevitable that you’ll accumulate a large amount of data over time. From project files to audio samples and plugins, it can all add up and take a significant amount of space on your computer’s storage. Cleaning up unused content is an essential task that every Cubase user should consider to free up space and ensure optimal performance. In this article, we’ll explore two effective methods for cleaning up unused content in Cubase: removing redundant files and archiving old projects.

Removing Redundant Files

One of the first steps to clean up unused content in Cubase is to remove redundant files. These files are often created during the recording and editing process but are no longer necessary for your projects. They can include unused audio clips, duplicate files, or old versions of tracks.

To identify and remove redundant files, you can follow these simple steps:

  1. Open your Cubase project and navigate to the Media Pool.
  2. Sort the files by size or date to identify the largest or oldest ones.
  3. Select the files you want to remove and right-click to access the context menu.
  4. Choose the “Delete Selected” option to permanently remove these files from your project.

By regularly removing redundant files, you can reduce the amount of storage space occupied by your Cubase projects, leading to a faster and more efficient workflow.

Archiving Old Projects

Another effective method for cleaning up unused content in Cubase is to archive old projects. Over time, you might accumulate a large number of projects that are no longer actively used but still take up valuable storage space.

Archiving old projects means safely storing them in a different location, such as an external hard drive or cloud storage, while removing them from your active Cubase workspace. Archiving not only frees up space but also helps you stay organized and easily access projects when needed.

To archive old projects, follow these steps:

  1. Identify the projects that are no longer actively used.
  2. Create a new folder on your external hard drive or cloud storage specifically for archived projects.
  3. Copy the project files to the newly created archive folder.
  4. Once the files are safely stored, you can delete them from your active Cubase workspace.

Archiving old projects provides a neat and organized workspace in Cubase, ensuring that you have enough space for new projects and maintaining optimal performance.

By implementing these methods and regularly cleaning up unused content, you can ensure that Cubase takes up only the necessary space on your computer, freeing up storage and maintaining a smooth and efficient workflow.

Maximizing Efficiency With Plugins And Samples

When it comes to producing music with Cubase, managing the space it takes up on your computer is essential. In this blog post, we will explore how to optimize your usage of plugins and samples to ensure your projects run smoothly while taking up minimal disk space.

Streamlining Plugin Usage

Plugins are a crucial part of any music production setup, but they can also be resource-intensive. To maximize efficiency, here are a few tips:

  • Consider the necessity of each plugin. Disable or remove any plugins that you are not actively using in your projects.
  • Utilize plugin presets. Many plugins, especially software instruments, come with preconfigured settings that can be a great starting point for your sound design. This saves you from having to use multiple plugins to achieve similar results.
  • Invest in high-quality plugins. While free plugins can be tempting, they often lack optimization. Premium plugins, on the other hand, are designed to provide better performance with fewer resources.

Organizing Sample Libraries

Sample libraries can quickly consume significant amounts of storage space, making it important to organize them efficiently:

  1. Utilize a dedicated drive for sample storage. This helps separate the sample libraries from the main Cubase installation and allows for easy expansion if needed.
  2. Group similar samples into folders. Organizing your sample libraries by category, such as drums, vocals, or orchestral, can make it easier to find the sounds you need and reduce the time spent browsing through an extensive library.
  3. Consider using sample management software. There are various third-party applications available that help with organizing, tagging, and searching through large sample collections. These tools can save you time by allowing you to quickly locate the specific samples you want to use.
How Much Space Does Cubase Take Up: Optimize Your Storage


Credit: www.nextlevelsound.com


Frequently Asked Questions For How Much Space Does Cubase Take Up


How Many Gigs Is Cubase?


Cubase requires approximately 22 GB of storage space. It’s important to ensure your device meets this requirement for smooth operation.


What Is The File Size Of Cubase 10?


The file size of Cubase 10 varies, depending on the specific version and included features.


How Much Ram Do I Need For Cubase 12?


For Cubase 12, you need a minimum of 4GB RAM, but 8GB or more is recommended for better performance.


Why Is Cubase So Expensive?


Cubase is expensive due to its advanced features and powerful capabilities for music production. Its high-quality software, professional-grade plugins, and regular updates contribute to its price. The investment is worth it for musicians and producers who require top-notch tools for creating and editing music.


Conclusion


So, Cubase doesn’t consume much space, making it an efficient choice for music production. With its powerful features and minimal system requirements, it’s suitable for both beginners and professionals. Whether you have a small or large storage capacity, Cubase won’t take up much space, allowing you to focus on creating music.


https://www.youtube.com/watch?v=pql3mpWrUFY


Categories
Archive

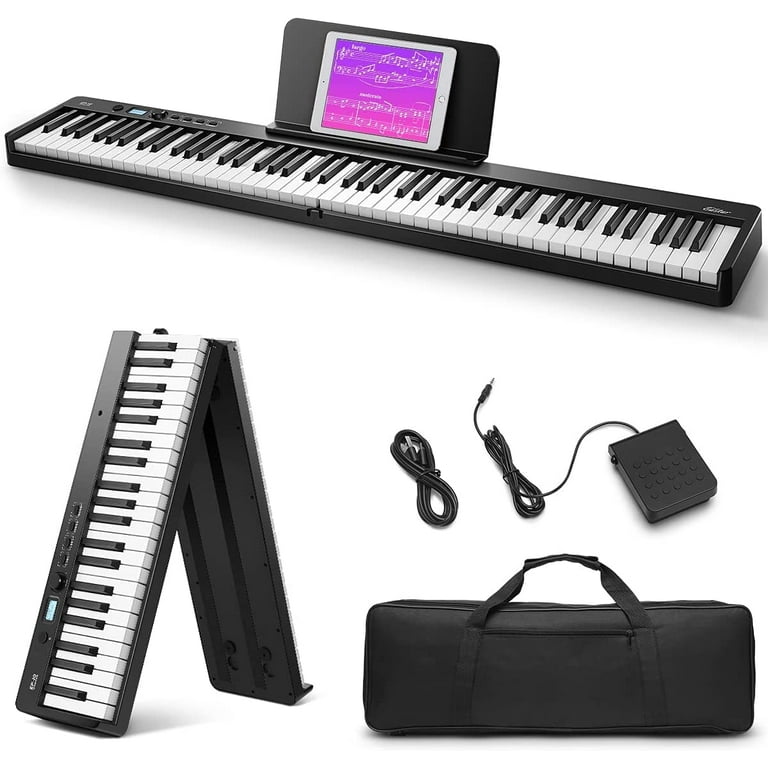
Discover the True Weight: How Do You Know If Piano Keys are Weighted?

Weighted piano keys typically feel heavier to press down compared to non-weighted keys. This can be determined by the resistance and responsiveness of the keys when played.


Weighted keys are commonly found on digital pianos and high-quality acoustic pianos, providing a more authentic playing experience for pianists. The weight of the keys is achieved through the use of counterweights or graded hammer action mechanisms, simulating the feel of a traditional acoustic piano.


This feature is preferred by many musicians as it allows for a more nuanced and expressive performance. Understanding whether your piano keys are weighted can enhance your playing and make practicing more enjoyable.


The Importance Of Weighted Piano Keys

Weighted piano keys mimic the feel of an acoustic piano.

They provide resistance for fingers, aiding in forming proper techniques.

Players can control dynamics better with weighted keys.

Weighted keys allow for varying touch sensitivity while playing.

Emotional expression in music is heightened with weighted keys.

Players can achieve nuanced phrasing and dynamics adjustments.

Discover the True Weight: How Do You Know If Piano Keys are Weighted?


Credit: www.amazon.com


How Weighted Piano Keys Work

Weighted piano keys mimic the feel of a traditional acoustic piano, providing players with a more realistic touch and responsive playing experience.

Mechanical Components

Weighted piano keys are achieved through the use of specific mechanical components within the keyboard.

  • Hammer action mechanism
  • Weighted keybed
  • Springs for resistance

Simulating Acoustic Pianos

Weighted piano keys work by simulating the resistance and feel of acoustic pianos.

  1. Weighted keys create a heavier touch
  2. Hammer mechanism replicates acoustic piano hammers
  3. Keybed simulates the weight distribution of a real piano

Identifying Weighted Piano Keys

Identifying whether piano keys are weighted or non-weighted is essential for both beginner and experienced piano players. Weighted keys mimic the feel of an acoustic piano, providing a more authentic playing experience. This section will explore the differences between weighted and non-weighted keys and various testing methods to determine the key action of a piano.

Weighted Vs. Non-weighted Keys

Weighted keys are designed to replicate the feel of an acoustic piano, featuring individual balancing mechanisms for each key. On the other hand, non-weighted keys are lighter and do not offer the resistance and responsiveness of a traditional piano. As a result, the touch and performance of weighted keys are more akin to an acoustic piano, while non-weighted keys are better suited for electronic and digital keyboards.

Testing Methods

Several methods can be utilized to determine whether piano keys are weighted. One simple approach is visual inspection: examining the construction and design of the keyboard can provide clues about the key action. Additionally, pressing down on the keys and assessing the level of resistance and responsiveness can help identify whether the keys are weighted or non-weighted.

Discover the True Weight: How Do You Know If Piano Keys are Weighted?


Credit: www.sweetwater.com


Benefits Of Weighted Piano Keys


Weighted piano keys offer improved touch sensitivity and enhanced control over dynamics and expression, making them ideal for pianists. To determine if your piano keys are weighted, simply press a key lightly and then with more force – weighted keys will require more pressure to produce a louder sound.

The benefits of weighted piano keys go beyond just the feel and aesthetics of playing a piano. They are actually crucial for developing finger strength and enhancing dynamic control. Let’s explore these benefits in detail:

Developing Finger Strength

Weighted piano keys play a vital role in developing finger strength, particularly in beginners and intermediate players. The added weight in the keys requires more effort from the fingers, forcing them to press down with precision and control.

Benefits of Developing Finger Strength:
– Improved dexterity and finger coordination
– Increased control over soft and loud dynamics
– Enhanced ability to play intricate melodies and complex chords

By regularly practicing on a piano with weighted keys, pianists can strengthen their finger muscles over time. This increased finger strength translates into more precise and controlled playing, allowing pianists to tackle challenging pieces with greater ease.

Enhancing Dynamic Control

Weighted piano keys significantly improve a pianist’s dynamic control, enabling them to play with varying levels of loudness and softness. As pianists exert more pressure on the keys, the weighted action of the keys responds by producing a more pronounced sound.

This enhanced dynamic control is particularly important for expressive playing. It allows pianists to accurately convey emotions and nuances within a piece, creating a more captivating musical experience for both themselves and their audience.

Benefits of Enhancing Dynamic Control:
– Expressive interpretation of a wide range of musical genres
– Ability to emphasize certain notes or phrases
– A more resonant and dynamic sound from the instrument

With weighted keys, pianists have greater control over volume and can effortlessly transition between playing softly and with more power. This control enhances the musicality of their performances, allowing them to unlock the full potential of their playing abilities.


Choosing The Right Weighted Keys Piano

When it comes to purchasing a piano, one important consideration to keep in mind is whether the piano keys are weighted or not. Weighted piano keys mimic the feel of an acoustic piano, which is crucial for pianists to develop proper finger technique, strength, and control. Choosing the right weighted keys piano can greatly enhance your playing experience, whether you are a beginner or an advanced player.

Considerations For Beginners

For beginners, it is essential to have a piano with weighted keys that closely resemble those of an acoustic piano. This allows beginners to develop the necessary finger strength and dexterity required for playing intricate melodies and chords. Here are some important features to consider when selecting a weighted keys piano as a beginner:

  • Weighted Keys: Ensure that the keys are fully weighted and have the right amount of resistance, similar to the touch of an acoustic piano. This will help in building proper finger technique and control.
  • Touch Sensitivity: Look for a piano with touch-sensitive keys. This means that the volume and tone of the sound will vary depending on how hard or soft you strike the keys. This feature allows for expressive playing and dynamics.
  • Number of Keys: Consider the number of keys you need. A standard piano has 88 keys, but there are also models available with fewer keys, suitable for beginners who are just starting their musical journey.
  • Compact Design: If you have limited space, you may want to consider a piano with a compact design, such as a digital piano or a keyboard. These instruments often come with weighted keys and offer portability options.

Features For Advanced Players

As you progress and become more experienced in playing the piano, there are additional features and considerations to look for in a weighted keys piano. These features are designed to accommodate the needs and preferences of advanced players:

  • Hammer Action: Look for pianos that offer hammer action keys. This simulates the feel of an acoustic piano, where the keys feel heavier in the low end and lighter in the high end.
  • Touch Customization: Advanced players may require the ability to customize the touch sensitivity of the keys. Some pianos offer the option to adjust the sensitivity to match individual playing styles.
  • Sound Quality: Pay attention to the sound quality of the instrument. Advanced players typically prefer pianos that offer a wide range of realistic and expressive sounds, with the ability to customize and fine-tune.
  • Pedals: Consider the availability of pedals. An acoustic piano typically has three pedals – sustain, sostenuto, and soft. Look for a piano that offers at least a sustain pedal for more expressive playing.

Choosing the right weighted keys piano depends on your skill level, preferences, and budget. By considering the needs of beginners and advanced players, you can make an informed decision and find the perfect instrument that will enhance your musical journey.

Discover the True Weight: How Do You Know If Piano Keys are Weighted?


Credit: www.walmart.com


Frequently Asked Questions Of How Do You Know If Piano Keys Are Weighted


What Is The Difference Between Weighted And Unweighted Piano Keys?


Weighted piano keys have resistance similar to an acoustic piano, providing a realistic feel for better dynamics. Unweighted keys are lighter and don’t offer the same resistance, suitable for beginners or those focusing on portability.


Do All Pianos Have Weighted Keys?


Not all pianos have weighted keys. Weighted keys are usually found in digital and acoustic pianos for a realistic feel.


What Do Weighted Keys Feel Like?


Weighted keys feel similar to the touch of a traditional piano, offering resistance and a more authentic playing experience. The keys respond to varying pressures, providing a realistic and expressive feel for the player.


Are Weighted Keys Harder To Play?


Weighted keys are not harder to play, but they provide a more realistic piano playing experience. The keys are designed to mimic the feel of an acoustic piano, with heavier resistance in the lower keys and lighter in the higher keys.


This allows for better control and expression while playing.


Conclusion


It’s essential to understand the weight of piano keys for a rich musical experience. Weighted keys offer a realistic feel and enhance the player’s control and expression. This detailed guide sheds light on the importance and characteristics of weighted piano keys.


Next time you are in search of a keyboard, keep these tips in mind for a more authentic playing experience.

Categories
Archive

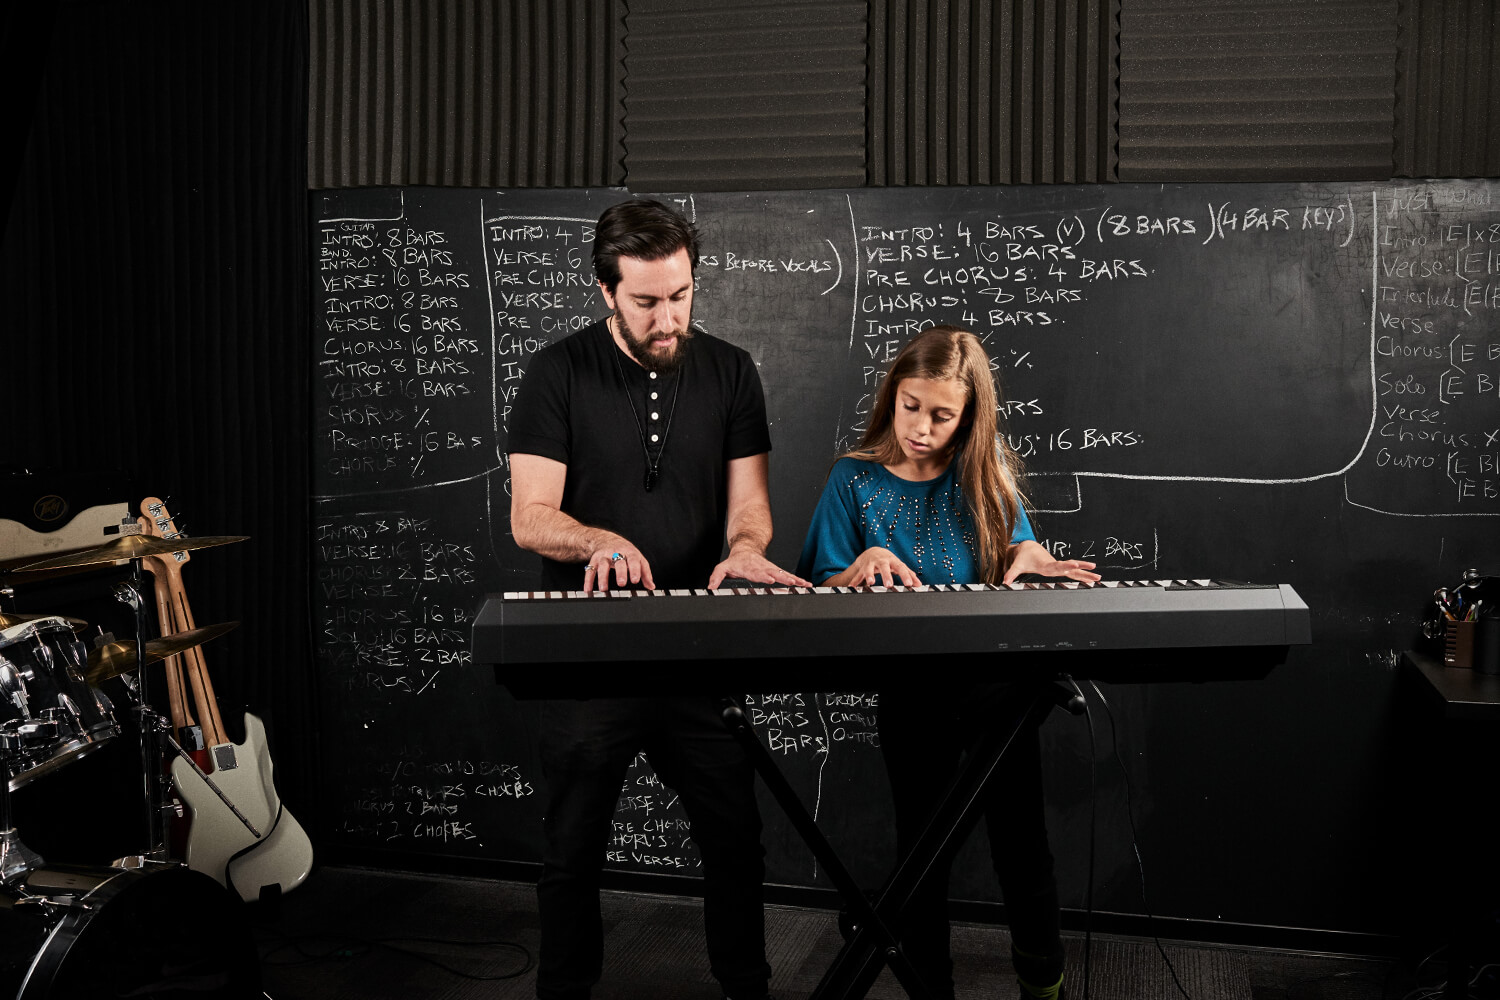
When is the Best Time for a Child to Learn Piano?

The best time for a child to learn piano is typically between the ages of 6 to 9. During this period, children have developed sufficient motor skills and cognitive abilities to grasp musical concepts effectively.


Learning to play the piano at a young age can have numerous benefits for a child’s development. It can enhance their cognitive skills, improve hand-eye coordination, boost creativity, and increase overall academic performance. Additionally, playing the piano can instill discipline, patience, and perseverance in children.


Introducing a child to music early on can also cultivate a lifelong passion for the arts. Considering these factors, parents may want to consider enrolling their child in piano lessons during the optimal age range for maximum learning potential and growth.

When is the Best Time for a Child to Learn Piano? Discover the Optimal Age!


Credit: www.schoolofrock.com


Early Introduction To Music

Introducing children to music at a young age has a multitude of benefits that extend beyond just enjoyment.

Benefits Of Early Music Education

  • Enhances cognitive development
  • Improves motor skills
  • Boosts creativity and self-expression

Impact On Brain Development

Research shows that early exposure to music can have a significant impact on brain development.

  1. Strengthens neural connections
  2. Improves memory retention
  3. Enhances language processing

Physical And Cognitive Readiness


Children show optimal physical and cognitive readiness to learn the piano around age 5 to 6. At this stage, they can focus, follow instructions, and coordinate their hands and fingers. It’s the best time to introduce them to the instrument and lay a strong foundation for their musical development.

Child’s readiness to learn piano depends on physical and cognitive development.

Fine Motor Skills Development

Encourage piano learning once child develops fine motor skills for precise finger movements.

Cognitive Development And Attention Span

Consider cognitive abilities and attention span – vital for sustained piano practice.

Emotional Readiness

Emotional readiness is a crucial factor when considering the best time for a child to learn piano. It involves the child’s ability to understand and express emotions, as well as their readiness to handle the challenges and discipline that come with learning an instrument. Emotional readiness plays a significant role in determining a child’s success and enjoyment of piano lessons.

Interest And Enthusiasm

Children should display a genuine interest and enthusiasm for learning the piano. Their eagerness to engage with music and explore the instrument reflects their emotional readiness. Parents and teachers should observe the child’s willingness to participate in piano activities and their curiosity about music in general as indicators of readiness.

Ability To Handle Frustration

Learning the piano can be a challenging and sometimes frustrating experience. Children need to possess the emotional resilience and patience to handle setbacks and difficulties that arise during practice sessions. Their ability to manage frustration and maintain motivation in the face of obstacles is an essential aspect of emotional readiness for learning the piano.

Social And Environmental Factors


Exploring the social and environmental factors that influence a child’s readiness to learn piano is crucial. The best time for a child to start learning piano depends on their individual interests, developmental stage, and support system at home. Providing a nurturing and encouraging environment can greatly enhance a child’s musical journey.

Family Support And Encouragement

When it comes to learning the piano, one crucial factor that can greatly influence a child’s progress is the level of family support and encouragement they receive. Having a nurturing and encouraging home environment plays a significant role in a child’s motivation and dedication to learning an instrument.

A supportive family provides a solid foundation for a child’s musical journey, as it fosters a positive attitude and a sense of belonging. Parents who show an active interest in their child’s piano lessons can greatly impact their child’s commitment and enthusiasm. Engaging in conversations about their progress and attending recitals or performances can make the learning experience more rewarding and enjoyable for the child.

Benefits of Family Support:

  1. Boosts a child’s self-confidence and self-esteem.
  2. Creates a sense of accountability and responsibility.
  3. Fosters a love and appreciation for music within the family unit.
  4. Strengthens the parent-child bond through shared experiences.

Access To Resources And Instruction

Another crucial social and environmental factor that can determine the best time for a child to learn piano is their access to resources and quality instruction. A child’s progress and development in playing the piano greatly rely on the availability of proper tools, materials, and a competent teacher.

Access to resources, such as a well-maintained piano or keyboard, sheet music, and educational books, is essential for a child’s learning experience. The presence of these resources allows for regular practice and exploration of different musical genres and techniques.

Equally important is the role of a qualified and knowledgeable piano teacher. A skilled instructor can guide the child through their musical journey, teaching them proper techniques, music theory, and providing valuable feedback. A supportive relationship between the child and their teacher can greatly enhance their progress and further ignite their passion for music.

Finding The Right Balance


Discovering the perfect timing for a child to start piano lessons involves considering their readiness and interest in music. Encouraging a passion for music from a young age can lead to a harmonious balance in their development.

Avoiding Pressure And Burnout

One of the key factors in finding the right balance when it comes to a child learning piano is to avoid putting excessive pressure on them. Children need time to learn at their own pace and enjoy the process. Pushing a child too hard, especially at a young age, can lead to burnout and a dislike for the instrument. Ensuring that practice sessions are manageable and enjoyable will help cultivate a positive attitude towards piano playing.

Nurturing A Love For Music

Another important aspect of finding the right balance is nurturing a love for music in your child. Exposing them to a variety of musical genres and allowing them to explore different types of music can help spark their interest and passion for the piano. Encouraging creativity and self-expression through music will help your child connect with the instrument on a deeper level.

Creating A Supportive Environment

To create the best environment for your child to learn piano, it’s important to be supportive and encouraging. Provide positive reinforcement and praise for their efforts and progress, no matter how small. Creating a routine that includes designated practice times will help your child develop discipline and consistency in their learning journey.

Setting Realistic Expectations

Setting realistic expectations is crucial in finding the right balance. Understanding that progress takes time and patience is essential for both the parent and the child. It’s important to celebrate small victories and milestones along the way, while also acknowledging that there will be challenges and setbacks. Being realistic about the amount of time and effort required to become proficient in playing the piano will help manage expectations and prevent frustration.

Building A Support Network

building a support network of like-minded individuals can greatly contribute to finding the right balance for your child’s piano journey. Connecting with other parents and music teachers can provide valuable insights and resources. Seeking guidance from experienced professionals can help navigate any challenges that may arise and ensure your child receives the best possible support in their musical development.

When is the Best Time for a Child to Learn Piano? Discover the Optimal Age!


Credit: www.schoolofrock.com


When is the Best Time for a Child to Learn Piano? Discover the Optimal Age!


Credit: www.hoffmanacademy.com


Frequently Asked Questions On When Is The Best Time For A Child To Learn Piano


Is 4 Years Old Too Early To Learn Piano?


No, 4 years old is not too early to start learning the piano. Children can begin learning basic piano skills at this age. It can have positive effects on their cognitive development and lay the foundation for a lifelong love of music.


How Often Should A 7 Year Old Practice Piano?


A 7-year-old should practice the piano for about 20-30 minutes a day to develop their skills effectively. Consistency and regular practice are key to progress at this age.


Can 2 Year Old Learn Piano?


Yes, a 2-year-old can start learning the piano. However, it is important to note that their focus and attention span may be limited at this age. Simplified activities and short practice sessions can be introduced to develop their musicality.


How Long Does It Take For A Child To Learn Piano?


On average, it takes a child around 2-4 years to learn the piano proficiently. Daily practice and consistent lessons are key. Each child’s progress may vary based on their dedication and natural aptitude for music. Regular practice and encouragement are essential for skill development.


Conclusion


The best time for a child to learn piano is during their early years. This allows them to develop crucial musical skills and a strong foundation. With the right support and encouragement, children can benefit greatly from starting piano lessons at a young age.


Investing in their music education early can set them up for a lifetime of musical enjoyment and growth.


Categories
Archive

Unlock New Possibilities: Transform Your Digital Piano into a MIDI Controller

Yes, a digital piano can be used as a MIDI controller. This allows you to create music digitally using your piano.


Digital pianos are a versatile tool in modern music production, doubling as a high-quality instrument and a MIDI controller. With the capability to transmit MIDI signals via USB or MIDI cables, digital pianos can control virtual instruments and software synthesizers on your computer.


This integration provides musicians with the convenience of recording and composing music directly on their computers using the expressive touch and sound of a piano. Whether you are a beginner or a seasoned musician, using a digital piano as a MIDI controller opens up endless possibilities for creativity and production in the digital music realm.


Understanding Midi

What Is Midi?

MIDI stands for Musical Instrument Digital Interface.

It is a communication protocol used in music production.

Midi Applications In Music Production

MIDI allows digital instruments to communicate with each other.

It enables control of various parameters and functions.

With MIDI, a digital piano can be used as a MIDI controller.

It assigns different sounds and effects to keys.

MIDI data can be recorded, edited, and played back easily.

Unlock New Possibilities: Transform Your Digital Piano into a MIDI Controller


Credit: www.amazon.com


Connecting Your Digital Piano To A Computer

Connecting your digital piano to a computer allows for a seamless integration of your musical instruments with digital software and recording programs. Whether you are a beginner or a professional musician, using your digital piano as a MIDI controller opens up a world of possibilities for creating, recording, and producing music.

Using Midi Cables

MIDI cables are a traditional method for connecting your digital piano to a computer. These cables transmit data between devices, allowing for communication and control. By connecting your digital piano to your computer using MIDI cables, you can control virtual instruments, record MIDI data, and create music in your favorite digital audio workstation (DAW).

Utilizing Usb Connections

USB connections provide a convenient and straightforward way to connect your digital piano to a computer. Many modern digital pianos come equipped with USB ports that can be used for both power and data transmission. By utilizing a USB connection, you can easily send MIDI data to your computer, control software instruments, and record your performances directly into your DAW.

Choosing The Right Software

When it comes to using a digital piano as a MIDI controller, choosing the right software is crucial for a seamless and efficient music production experience. The software you select will determine the level of compatibility and functionality with your digital piano, ultimately influencing the quality of your music creation process. Let’s explore the key aspects of software selection for utilizing a digital piano as a MIDI controller.

Daw Compatibility

Digital Audio Workstation (DAW) compatibility is a vital consideration when using a digital piano as a MIDI controller. Before selecting software, ensure that it is fully compatible with your preferred DAW, such as Ableton Live, Logic Pro, or FL Studio. The software should seamlessly integrate with your DAW to enable smooth communication between your digital piano and the music production environment.

Specialized Midi Controller Software

Another aspect to consider is the availability of specialized MIDI controller software that is designed to maximize the functionality of your digital piano. These software options offer advanced features specifically tailored for MIDI controller usage, allowing you to customize and optimize the performance of your digital piano within the software environment. Some popular specialized MIDI controller software includes MainStage and Cantabile Performer, offering enhanced control and flexibility for digital piano users.

Unlock New Possibilities: Transform Your Digital Piano into a MIDI Controller


Credit: www.amazon.com


Exploring Creative Possibilities


Discover the endless possibilities of using a digital piano as a MIDI controller, unlocking a world of creative opportunities for music production and composition. Dive into the seamless integration of technology and music with this versatile instrument.

Customizing Midi Mapping

Customizing MIDI mapping on a digital piano opens up a whole new world of creative possibilities. By assigning specific MIDI messages to different keys and controls on the piano, you can tailor your playing experience to your unique needs and preferences. Whether you want to control various parameters of your virtual instruments or trigger effects and samples in your DAW (Digital Audio Workstation), customizing MIDI mapping allows you to seamlessly integrate your digital piano into your creative workflow.

With just a few simple steps, you can remap the keys on your digital piano to trigger specific MIDI notes or chords. For example, you can assign your piano’s lower keys to play bass notes while the higher keys play melody lines. This opens up a whole new realm of creativity, enabling you to experiment with different chord progressions and melodies all from the comfort of your digital piano.

But it doesn’t stop there. Customizing MIDI mapping also allows you to control various parameters of your virtual instruments. Using the knobs, sliders, and buttons on your digital piano, you can adjust parameters like volume, modulation, and pitch bend in real-time. This hands-on control adds a level of expressiveness to your performances, allowing you to infuse your music with your own unique style and emotion.

Integration With Virtual Instruments

One of the key advantages of using a digital piano as a MIDI controller is its seamless integration with virtual instruments. Virtual instruments, also known as VSTs (Virtual Studio Technology), are software-based emulations of traditional instruments, synthesizers, and other sound sources. When your digital piano is connected to a computer or MIDI-enabled device, it can act as a conduit for controlling these powerful virtual instruments.

By connecting your digital piano to your preferred DAW, you can access a vast array of virtual instruments to enhance your music production. From realistic piano sounds to lush orchestral sections and cutting-edge synthesizers, the possibilities are virtually limitless. Your digital piano becomes not only a traditional instrument but also a gateway to a world of sonic exploration and experimentation.

Imagine seamlessly switching between different virtual instruments as you compose, layering rich textures and blending different sounds to create your unique sonic tapestry. With a digital piano as your MIDI controller, you have the freedom to explore the versatile realm of virtual instruments, pushing the boundaries of your creativity.

Unlock New Possibilities: Transform Your Digital Piano into a MIDI Controller


Credit: novationmusic.com


Frequently Asked Questions On Can A Digital Piano Be Used As A Midi Controller


How Do I Use My Digital Piano As Midi?


To use your digital piano as a MIDI, connect it to your computer or MIDI-enabled device using a USB or MIDI cable. Then, select the piano as your MIDI input device in your music software or DAW. Your digital piano is now ready to communicate with and control MIDI-compatible devices.


Do I Need A Midi Controller If I Have A Digital Piano?


A MIDI controller supplements a digital piano to expand sound options and control software. It’s beneficial, not essential.


Can I Use My Keyboard As A Midi Controller?


Yes, you can use your keyboard as a MIDI controller to play and record music electronically.


Can I Use Roland Go Piano As Midi Controller?


Yes, you can use the Roland GO:PIANO as a MIDI controller for music production or live performances.


Conclusion


To sum up, a digital piano can indeed be used as a MIDI controller, offering versatility and convenience for musicians. With its ability to produce high-quality sounds and interface with various music software, it opens up a world of creative possibilities.


Embracing the technology of digital pianos as MIDI controllers can enhance music production and performance experiences.