Categories
Archive

Where to Find and Optimize Cubase Key Commands

Cubase Key Commands are stored in the Key Commands.xml file located within the Cubase program folder. This file contains all the key bindings and settings for your Cubase software.


For musicians and producers using Cubase, the key commands feature is essential for streamlining workflow and increasing productivity. By assigning specific functions to keyboard shortcuts, users can quickly navigate the software without the need to click through menus. Understanding where Cubase stores key commands helps users back up their settings, transfer them to other computers, or customize shortcuts to their preference.


We will explore the importance of key commands in Cubase and how users can easily access and manage them for a more efficient music production experience.
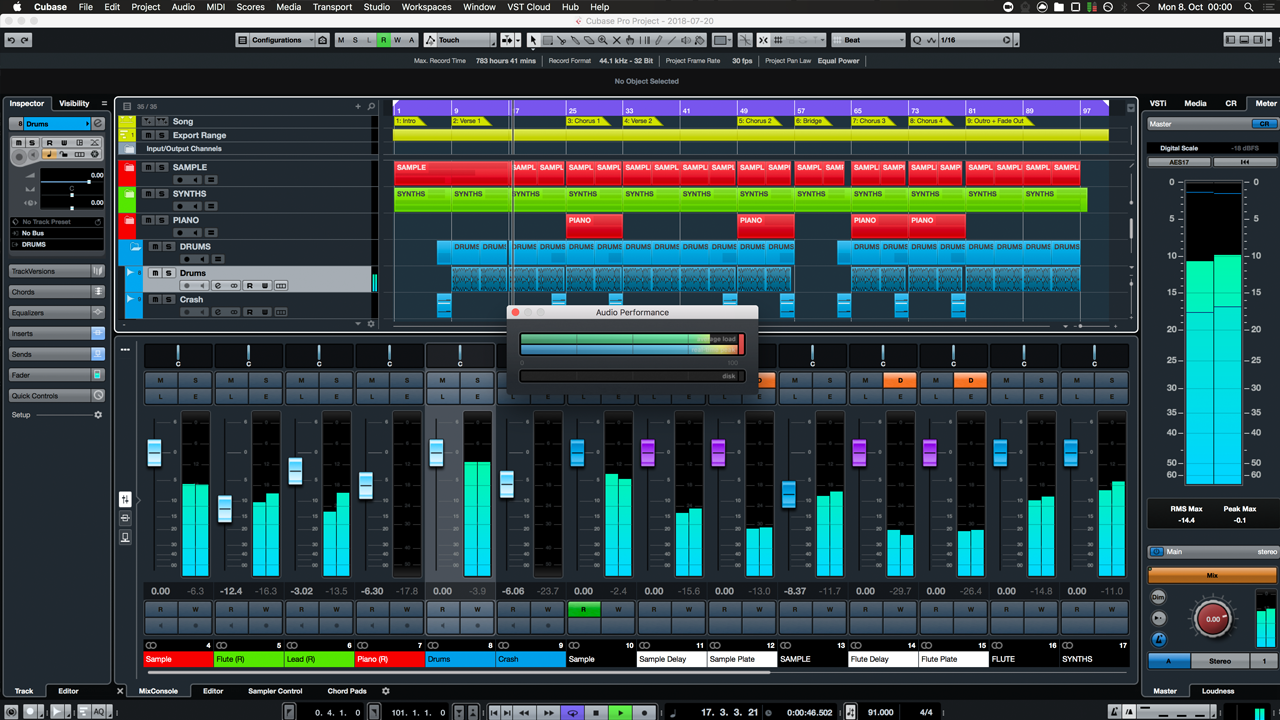
Where to Find and Optimize Cubase Key Commands


Credit: www.nextlevelsound.com


Default Cubase Key Commands

Understanding The Default Key Commands

Cubase key commands are essential shortcuts for faster workflow in Cubase.

By default, Cubase key commands are stored and can be easily accessed and customized.

Commonly Used Default Key Commands

  • Transport Control: Play, Stop, Record
  • Editing Functions: Cut, Copy, Paste
  • Navigation: Zoom In/Out, Move Cursor

Default key commands in Cubase are designed for efficiency and productivity.

Finding Key Commands In Cubase


Cubase Key Commands are stored in a specific location within the Cubase software, making it easy to access and customize shortcuts for a more efficient workflow. Discover where to find these commands and enhance your Cubase experience.

Navigating The Key Commands List

Navigating through the key commands list in Cubase allows users to access various shortcuts effortlessly.

Filtering Key Commands

Filtering key commands in Cubase assists in quickly finding specific commands for increased efficiency. In Cubase, key commands are stored in a central location for easy access. To navigate the key commands list, go to the “Edit” menu and select “Key Commands.” Once in the Key Commands window, you can search for specific commands or browse through different categories. To filter key commands, you can use the search bar or sort commands by name or key combination. By customizing key commands and filtering them based on your preference, you can streamline your workflow in Cubase.

https://www.youtube.com/watch?v=SZplgYVLhmc


Optimizing Cubase Key Commands

Optimizing Cubase Key Commands can greatly enhance your workflow efficiency and speed up your music production process. By identifying frequently used functions and customizing key commands, you can tailor Cubase to suit your unique workflow, allowing for seamless navigation and increased productivity.

Identifying Frequently Used Functions

Before customizing key commands, it’s essential to identify the functions you use most frequently within Cubase. This can include tasks such as creating new tracks, adjusting volume levels, or applying specific effects. Take note of the actions you find yourself performing repeatedly to streamline your workflow effectively.

Customizing Key Commands

Customizing key commands in Cubase allows you to assign specific keyboard shortcuts to frequently used functions, eliminating the need to navigate through menus each time. By accessing the Key Commands window, you can easily reassign or create new shortcuts for a wide range of actions, enabling you to work more efficiently and with greater precision.

Where to Find and Optimize Cubase Key Commands


Credit: forums.steinberg.net


Increasing Efficiency With Key Commands


Cubase key commands are stored in the Key Commands dialog, allowing users to customize and access shortcuts for various functions. By efficiently managing key commands, users can streamline their workflow and improve productivity within the Cubase environment. This feature benefits users by providing a convenient and organized method for accessing and customizing key commands, ultimately enhancing their overall music production experience.

Increasing Efficiency with Key Commands Creating personalized key command sets Using key commands effectively When it comes to working efficiently in Cubase, using key commands is essential. Key commands are combinations of keyboard shortcuts that allow you to perform common functions and tasks more quickly. By utilizing key commands, you can save time and streamline your workflow, ultimately increasing your efficiency in the music production process. One of the advantages of Cubase is the ability to create personalized key command sets. This means that you can customize the key commands to fit your specific workflow and preferences. This is particularly useful if you frequently use certain functions or if you prefer a different set of shortcuts for specific tasks. To create personalized key command sets in Cubase, simply navigate to the “Key Commands” section in the “Studio” menu. Here, you can assign key commands to various functions, such as recording, playback, editing, and more. It’s incredibly easy to do, and by tailoring the key commands to your needs, you can work even more efficiently. Using key commands effectively is not just about assigning shortcuts; it’s also about understanding and utilizing them in a strategic way. One of the best ways to ensure you’re using key commands effectively is to familiarize yourself with the default key commands in Cubase. By knowing the default key commands, you can quickly access common functions without having to search for them in the menus. Moreover, it can be beneficial to group key commands according to specific tasks or functions. For example, you might create a set of key commands for editing tasks, another set for mixing tasks, and so on. This way, you can easily switch between different key command sets based on the task at hand, further enhancing your efficiency. When using key commands in Cubase, it’s important to remember that muscle memory plays a significant role. By practicing and using key commands consistently, you can train your muscle memory to automatically perform certain actions without having to consciously think about it. This can greatly speed up your workflow and make your production process more fluid. In conclusion, key commands are a powerful tool in Cubase for increasing your efficiency and productivity. By creating personalized key command sets and utilizing them effectively, you can streamline your workflow and perform tasks more quickly and effortlessly. So, take some time to explore the key commands in Cubase, customize them to your needs, and watch your productivity soar.

Where to Find and Optimize Cubase Key Commands


Credit: steinberg.help


Frequently Asked Questions Of Where Are Cubase Key Commands Stored


Where Are Cubase Key Commands Saved?


Cubase key commands are saved in the Key Commands file within the Cubase program settings.


Where Are Cubase Settings Stored?


Cubase settings are stored in the AppData folder on Windows and Library folder on Mac.


How Do I Import Key Commands Into Cubase?


To import key commands into Cubase, go to File > Key Commands > Import Key Commands. Choose the key commands file and select Open. Your custom key commands will be imported.


Where Are Cubase Presets Saved?


Cubase presets are saved in the Presets folder under the Cubase installation directory.


Conclusion


To sum up, knowing where Cubase key commands are stored is essential for efficient workflow. Understanding the location of these commands can save time and enhance productivity in music production. By having easy access to key commands, users can streamline their creative process and focus on their art.


Explore the key command settings to customize and optimize your experience with Cubase.

Categories
Archive

Which is Better Cubase Or Pro Tools: Making the Ultimate Choice

In the music production world, Pro Tools is preferred for its industry-standard reputation over Cubase. When it comes to choosing between Cubase and Pro Tools for music production, users often face a common dilemma.


Both software tools have their strengths and weaknesses. Understanding the key differences between Cubase and Pro Tools can help you determine which one is better suited to your specific needs. We will compare the features, functionality, and overall performance of Cubase and Pro Tools to help you make an informed decision.


Whether you are a music producer, composer, or audio engineer, selecting the right digital audio workstation (DAW) is crucial for unleashing your creativity and maximizing your productivity.


Comparing Cubase And Pro Tools

Cubase and Pro Tools are two popular digital audio workstations used by professionals in the music industry. Let’s explore their differences in User Interface, Audio Recording and Editing, and MIDI Capabilities.

User Interface

  • Cubase: Offers a sleek and intuitive interface with customizable features.
  • Pro Tools: Known for its classic layout and functionality, preferred by many industry professionals.

Audio Recording And Editing

  • Cubase: Provides efficient audio recording and robust editing tools for detailed post-production work.
  • Pro Tools: Renowned for its high-quality audio recording capabilities and precision editing features.

Midi Capabilities

  • Cubase: Excels in MIDI capabilities, offering advanced tools for MIDI composition and manipulation.
  • Pro Tools: While capable in MIDI functions, Pro Tools is more focused on audio recording and editing.

Workflow And Features

In comparing Cubase and Pro Tools, examining their workflow and features is crucial. Both DAWs offer a range of capabilities that cater to different user preferences.

Integration With Hardware

Cubase and Pro Tools seamlessly integrate with various hardware devices, enhancing the overall music production experience.

Plugin And Software Compatibility

Both DAWs offer extensive plugin and software compatibility, allowing users to expand their creative possibilities effortlessly.


Mixing And Mastering

When it comes to mixing and mastering, both Cubase and Pro Tools have their own set of strengths and weaknesses. Let’s explore how these DAWs compare in the realm of mixing and mastering.

Automation And Control Surfaces

Cubase: Provides robust automation features, including the ability to automate virtually any parameter within the software, offering extensive control over the mixing process.

Pro Tools: Known for its intuitive and customizable control surfaces, Pro Tools offers seamless integration with various hardware controllers, allowing for precise control over mixing and automation.

Signal Processing And Effects

Cubase: Boasts a wide array of built-in signal processing and effects plugins, enabling users to apply professional-quality processing directly within the software.

Pro Tools: Offers a comprehensive selection of industry-standard signal processing and effects plugins, providing users with a versatile toolkit for crafting polished and professional mixes.

Which is Better Cubase Or Pro Tools: Making the Ultimate Choice


Credit: www.amazon.com


Collaboration And Compatibility

When it comes to music production, finding the right software that caters to your needs is crucial. Two popular options in the industry are Cubase and Pro Tools. Both offer a wide range of features and capabilities, but today we will discuss the crucial aspect of collaboration and compatibility. How well do these software solutions work when it comes to file compatibility and transfer, as well as offering collaborative tools and options?

File Compatibility And Transfer

In terms of file compatibility and transfer, both Cubase and Pro Tools offer excellent support for various audio formats. Cubase allows you to import and export popular file types, such as WAV, AIFF, and MP3, making it easy to work with audio files from different sources.

On the other hand, Pro Tools also provides seamless integration with different file formats, allowing you to work with audio files recorded on other platforms. This compatibility ensures that you can easily collaborate with artists or producers who use different software.

Collaborative Tools And Options

Collaboration is essential in the world of music production, and both Cubase and Pro Tools offer a range of tools and options to facilitate this process.

  • Cubase:
    • Project sharing: Cubase allows you to share your projects with others, making it easy to collaborate on a single file. This feature ensures seamless teamwork and reduces the need for file transfers.
    • Remote collaboration: With Cubase, you can collaborate with artists remotely by using a feature called VST Connect. This allows you to connect with other musicians and record their vocals or instrumentals directly into your project.
    • Cloud integration: Cubase offers cloud-based storage integration, allowing you to store and share your project files securely. This feature simplifies the process of collaborating with artists or producers located in different parts of the world.
  • Pro Tools:
    • Collaborative options: Pro Tools provides various collaborative options, such as Playlist collaboration and Avid Cloud Collaboration, which allow multiple users to work on the same project simultaneously.
    • Session sharing: Pro Tools offers session sharing capabilities, enabling you to easily share sessions with other Pro Tools users. This allows for real-time collaboration, with multiple users making changes to the project in sync.
    • Integration with Avid Link: Avid Link is a platform that connects artists, producers, and studios. Pro Tools integrates seamlessly with Avid Link, making it easy to collaborate and share project files within the industry.

In conclusion, both Cubase and Pro Tools provide excellent collaboration and compatibility features. Whether you prefer Cubase’s project sharing and remote collaboration capabilities or Pro Tools’ playlist collaboration and Avid Cloud Collaboration, both software options offer solid solutions for working collaboratively in the music production industry.

Cost And Accessibility


When comparing Cubase and Pro Tools, it’s essential to consider their cost and accessibility. Cubase offers a more affordable option with a range of features suitable for beginners and enthusiasts. On the other hand, Pro Tools provides more accessibility with its compatibility across various platforms and a well-established user base.

Pricing And Licensing

Let’s dive into the cost and accessibility of Cubase and Pro Tools, two popular digital audio workstations (DAWs) often used in the music production industry. One crucial factor to consider when choosing a DAW is the pricing and licensing options they offer. Cubase offers a range of pricing options to cater to different user needs. The most affordable version, Cubase Elements, provides essential features and functionalities at a budget-friendly price. For more advanced capabilities, you can upgrade to Cubase Artist or Cubase Pro, which offer a wider range of tools and plugins. Cubase also has different licensing options, including perpetual licenses and subscription-based models. This flexibility allows users to choose the most suitable licensing option based on their preferences and budget. On the other hand, Pro Tools offers several versions to cater to different user requirements. Pro Tools First is a free version that provides limited features but serves as a good starting point for beginners. Pro Tools Standard and Pro Tools Ultimate offer more advanced features, such as surround sound capabilities and extensive plugin support. Pro Tools also offers different licensing options, including perpetual licenses and subscription-based models, giving users the flexibility to choose the most convenient and cost-effective option.

System Requirements And Support

Aside from pricing and licensing, it’s crucial to consider the system requirements and support provided by Cubase and Pro Tools. Cubase has specific system requirements that users need to meet for optimal performance. These requirements typically include a minimum processor speed, RAM, and hard drive space. It’s essential to check your computer’s specifications and ensure they meet Cubase’s requirements to avoid any compatibility issues. Steinberg, the company behind Cubase, provides comprehensive support through online forums, tutorials, and dedicated technical support teams to assist users with any issues they may encounter. Pro Tools also has specific system requirements that users need to meet to ensure smooth operation. These requirements typically include a compatible operating system, processor speed, RAM, and hard drive space. It’s vital to check your computer’s specifications and ensure they meet Pro Tools’ requirements to avoid any compatibility problems during installation and usage. Avid, the company behind Pro Tools, provides support through their online knowledge base, forums, and customer support to help users troubleshoot and resolve any issues they may face. In conclusion, when considering the cost and accessibility of Cubase and Pro Tools, it’s crucial to analyze their pricing and licensing options, as well as their system requirements and support. By evaluating these aspects, you can make an informed decision based on your budget, needs, and the compatibility of the software with your existing hardware.

Which is Better Cubase Or Pro Tools: Making the Ultimate Choice


Credit: blog.groover.co


Which is Better Cubase Or Pro Tools: Making the Ultimate Choice


Credit: www.sweetwater.com


Frequently Asked Questions Of Which Is Better Cubase Or Pro Tools


What Is Better Cubase Or Pro Tools?


Both Cubase and Pro Tools are popular DAWs, but Cubase is better for MIDI editing and virtual instruments while Pro Tools excels in audio recording and editing. Ultimately, the choice depends on your specific needs and preferences.


Do Pros Use Cubase?


Yes, many professional musicians and producers use Cubase for its advanced features and high-quality audio production capabilities.


What Is Better Than Cubase?


A popular alternative to Cubase is Ableton Live, known for its intuitive interface and powerful features. It’s favored by electronic musicians and DJs for its live performance capabilities. Pro Tools is another industry standard choice, widely used in professional recording studios for its robust mixing and editing tools.


Is Pro Tools Still The Best Daw?


Yes, Pro Tools is still considered the best DAW (Digital Audio Workstation) due to its advanced features, professional-grade tools, and industry-standard reputation. Its intuitive interface and robust functionality make it a top choice in the music production and recording industry.


Conclusion


Both Cubase and Pro Tools offer a range of features for music production. Your choice should depend on your specific needs and preferences. Consider the interface, workflow, and compatibility with your hardware and software. Ultimately, the best DAW is the one that meets your requirements and enhances your creativity.

Categories
Archive

Cubase Render in Place Not Working: Troubleshooting Tips for Seamless Productions

Cubase Render in Place not working? Check the project settings and update Cubase to troubleshoot.


Experiencing issues with Cubase Render in Place not functioning properly can be frustrating for music producers. When relying on this feature for quick audio rendering within the Cubase software, encountering problems can disrupt workflow efficiency. By addressing potential issues such as incorrect project settings or outdated software versions, users can efficiently resolve the Render in Place not working situation.


We will explore common reasons for this problem and provide practical solutions to ensure a smooth rendering process in Cubase. Let’s dive into troubleshooting steps to help you overcome this obstacle and get back to creating music without interruptions.

Cubase Render in Place Not Working: Troubleshooting Tips for Seamless Productions


Credit: makingmusic101.com


Common Issues With Cubase Render In Place

Common Issues with Cubase Render in Place:

Audio Or Midi Tracks Not Rendering

In Cubase, when attempting to use Render in Place for audio or MIDI tracks, sometimes the processing does not complete successfully, resulting in frustration for users.

Incomplete Or Frozen Render Process

Another common issue faced by Cubase users is encountering incomplete or frozen render processes, halting the intended workflow and causing delays.

Troubleshooting Steps

If you encounter issues with Cubase Render in Place not working as expected, follow these troubleshooting steps to resolve the problem.

Check Audio And Midi Track Settings

Make sure that your audio and MIDI track settings in Cubase are properly configured for rendering.

  • Check that the input and output routings are set correctly.
  • Ensure that the media type for each track is appropriate for rendering.

Adjust Buffer Size And Sample Rate

Optimize your buffer size and sample rate settings to enhance the rendering process.

  1. Lower the buffer size to reduce latency.
  2. Set the sample rate to match the audio file to be rendered.

Resolve Plugin Compatibility Issues

Identify and address any plugin compatibility issues that may be affecting the rendering function.

  • Update your plugins to the latest versions.
  • Disable any potentially conflicting plugins.


Utilizing Workarounds

For many Cubase users, encountering the frustrating issue of “Cubase Render in Place Not Working” can bring creative workflows to a halt. However, there are workarounds that can help you continue working seamlessly. Let’s explore some alternative methods to achieve the desired results when faced with this situation.

Using Export Functions Instead

When encountering issues with Cubase Render in Place, utilizing export functions can be a viable alternative. By exporting the audio or MIDI tracks you wish to process, you can achieve similar outcomes to what would have been accomplished through rendering in place.

Exploring Third-party Rendering Tools

If Cubase’s native rendering functions are not working as expected, exploring third-party rendering tools can provide a solution. There are various external software options available that can seamlessly integrate with Cubase and offer advanced rendering capabilities, enabling you to achieve the desired results.

Cubase Render in Place Not Working: Troubleshooting Tips for Seamless Productions


Credit: www.bhphotovideo.com


Optimizing Cubase For Rendering

When using Cubase for rendering, it is essential to ensure that it operates efficiently and smoothly. One common issue that users face is Cubase Render in Place not working properly. This can be frustrating, as it hampers the workflow and limits productivity. Fortunately, there are various ways to optimize Cubase for rendering, ensuring a seamless experience.

Software Updates And Maintenance

Regular software updates and maintenance are crucial to keep Cubase running smoothly. Steinberg, the developer of Cubase, frequently releases updates that address bugs, improve performance, and introduce new features. It is essential to stay up-to-date with these updates to ensure that any known issues, such as the Render in Place problem, are resolved.

In addition to installing updates, maintaining your computer system is also important. Keeping your operating system, audio drivers, and other hardware-related software updated can significantly improve Cubase’s performance. Outdated drivers or conflicting software can lead to compatibility issues and hinder rendering processes.

Performance Optimization Tips

Optimizing performance is key to a smooth rendering experience in Cubase. Here are some tips to enhance performance:

  • Minimize Background Processes: Close unnecessary applications and processes running in the background to free up system resources for Cubase.
  • Adjust Buffer Size: Experiment with the buffer size in the audio settings to find a balance between low latency and stable performance during rendering.
  • Manage Plug-ins: Disable or remove unused or resource-heavy plug-ins from your projects as they can slow down rendering.
  • Ensure Sufficient RAM: Having enough RAM available is crucial for smooth rendering. Consider upgrading your system if you frequently encounter performance issues due to insufficient memory.
  • Store Media Files on Separate Drives: Keeping your audio and video files on separate drives can help distribute the load and improve performance during rendering.

Seeking Additional Support

If you’re experiencing issues with Cubase Render in Place not working as expected, don’t worry. There are several avenues you can explore to find the assistance you need to resolve this frustrating problem. In this section, we will discuss two primary options: utilizing Cubase Community Forums and contacting Cubase Support.

Utilizing Cubase Community Forums

One valuable resource for troubleshooting Cubase issues is the Cubase Community Forums. These forums provide a platform for users to connect with fellow musicians, producers, and audio engineers who may have encountered similar problems.

When using the forums, be sure to provide a clear and concise description of the issue you are facing with Cubase Render in Place. Give details such as the steps you’ve taken, any error messages you’ve encountered, and the specific version of Cubase you are using. This will help the community members understand your problem better and provide more accurate solutions.

In addition to seeking help from the community, you can also benefit from browsing through existing threads. Often, you’ll find that others have posted about similar issues, and their discussions may hold valuable insights and workarounds that can assist you in resolving the problem.

Contacting Cubase Support

If you prefer a more direct approach, consider reaching out to Cubase Support. They have a team of knowledgeable professionals who can provide individualized assistance based on your specific issue. To contact Cubase Support, you can visit their official website and submit a support ticket or send an email to their dedicated customer support email address.

When contacting Cubase Support, make sure to provide them with detailed information about the problem you’re facing with Cubase Render in Place. Include any relevant screenshots, error messages, or steps to reproduce the issue. The more information you can provide, the better equipped they will be to assist you effectively.

Remember, reaching out for support is an essential step in overcoming technical obstacles. Whether you choose to engage with the Cubase Community Forums or contact Cubase Support directly, the key is to communicate your issue clearly and provide all the necessary details. By doing so, you increase the chances of finding a solution to get Cubase Render in Place working smoothly.

Cubase Render in Place Not Working: Troubleshooting Tips for Seamless Productions


Credit: vintageking.com


Frequently Asked Questions For Cubase Render In Place Not Working


How Do I Render In Place In Cubase 11?


To render in place in Cubase 11, select the audio or MIDI event, right-click, and choose “Render in Place. ” Customize options and click “Render. “


What Is The Difference Between Render In Place And Bounce In Cubase?


In Cubase, render in place creates new audio or MIDI files within the project. Bounce outputs a new audio file, combining multiple tracks or effects for sharing or further editing.


How Do I Render Audio In Cubase?


To render audio in Cubase, go to the audio track, select the section you want to render, then go to “File” tab and choose “Export Audio Mixdown. ” Set your desired settings and click “Export” to render the audio file.


How Do I Render Midi Tracks In Cubase?


To render MIDI tracks in Cubase, first select the MIDI tracks you want to render. Then go to the “File” menu, choose “Export,” and select “Audio Mixdown. ” In the dialogue box, set your preferences and click “Export. ” Your MIDI tracks will be rendered as audio.


Conclusion


It’s frustrating when Cubase Render in Place isn’t working as expected. However, by following the troubleshooting tips mentioned in this post, you can easily overcome these issues and get back to creating music without any hindrances. Keep experimenting and learning to make the most out of your recording experience.

Categories
Archive

Why Can’T I Hear Anything in Cubase : Troubleshooting Tips to Restore Sound

In Cubase, you may not hear anything due to incorrect audio settings or hardware issues. Troubleshoot and adjust preferences for sound output.


When using Cubase for your audio projects, experiencing sound playback issues can be frustrating. Not being able to hear any audio in Cubase can disrupt your workflow and creative process. There are several reasons why this issue may occur, ranging from simple software settings to more complex hardware issues.


By identifying and resolving the root cause of the problem, you can ensure seamless audio playback in Cubase and continue working on your projects without interruptions. Following some troubleshooting steps will help you pinpoint the issue and find a solution to get the sound back in your Cubase software.


Common Issues With Sound In Cubase


Having trouble hearing sound in Cubase? This issue can be caused by various factors, including incorrect audio settings, hardware connectivity problems, or conflicting software. Check your audio device settings and connections, update your drivers, and ensure that the correct inputs and outputs are selected in Cubase to troubleshoot this problem.

Audio Setup Problems

Having audio setup issues can cause sound problems in Cubase. Make sure your audio interface is properly connected and selected in the software.

Muted Tracks Or Channels

Check if any tracks or channels are accidentally muted, which could be hindering the sound output in Cubase.

Checking Audio Settings


Experiencing issues with audio output in Cubase may indicate incorrect settings. Ensure proper configuration of audio preferences for sound playback within the software to troubleshoot and resolve the issue effectively. Familiarize yourself with the audio settings to troubleshoot sound-related problems efficiently.

Configuring Audio Interfaces

To troubleshoot audio issues in Cubase, start by configuring your audio interfaces properly. Make sure the correct audio device is selected in the DAW settings.

Adjusting Input And Output Levels

Check and adjust the input and output levels on your audio interface to ensure they are not too low or too high. Proper levels prevent distortion or inaudible sound.

Resolving Software Configuration Issues

When working in Cubase, encountering issues with hearing sound can be frustrating. However, many times, this problem can be resolved through careful troubleshooting and adjusting software configurations. In this post, we will discuss common reasons for not hearing anything in Cubase and how to address them, with a focus on resolving software configuration issues.

Updating Drivers

If you are experiencing sound issues in Cubase, outdated drivers could be the culprit. Software drivers are essential for communicating between the operating system and audio hardware. Ensure that your audio interface, sound card, and other related drivers are up to date.

Checking System Preferences

Reviewing your system preferences is crucial for troubleshooting sound issues in Cubase. Check the audio settings in Cubase to verify that the correct input and output devices are selected. Additionally, ensure that the system’s sound preferences are properly configured, including the default audio output device and volume settings.

Why Can'T I Hear Anything in Cubase : Troubleshooting Tips to Restore Sound


Credit: www.reddit.com


Troubleshooting Workspace And Routing

You’ve fired up Cubase, excited to start working on your latest audio project, only to find that you can’t hear anything. Frustrating, right? Don’t worry, we’ve got you covered. In this section, we will delve into the troubleshooting steps you can take to ensure that your workspace and routing settings in Cubase are properly configured to restore that sweet sound you’ve been longing to hear.

Inspecting Signal Routing

The first step in troubleshooting your audio woes is to inspect the signal routing within Cubase. Make sure your audio tracks are connected to the correct input and output channels, allowing the audio signal to flow through seamlessly. To do this:

  1. Open your project in Cubase and navigate to the Mixer window.
  2. Check that the input and output routing for your audio tracks are properly set.
  3. Ensure that the output channels are routed to your desired playback device, such as your headphones or speakers.
  4. Adjust the levels and routing as necessary, being mindful of any potential clashes between tracks or bus assignments.

By carefully inspecting and adjusting the signal routing, you can easily resolve any issues related to the audio signal not reaching your ears. Now, let’s move on to evaluating the VST connections.

Evaluating Vst Connections

VST (Virtual Studio Technology) connections play a crucial role in determining how audio is processed and routed within Cubase. To evaluate your VST connections:

  1. Navigate to the Studio menu and select VST Connections.
  2. Ensure that your audio inputs and outputs are correctly configured.
  3. Check that the proper audio device is selected as your ASIO driver. If necessary, update or reinstall the driver.
  4. Verify that the sample rate and buffer size are set appropriately for your project.

By carefully evaluating and adjusting your VST connections, you can overcome any obstacles preventing audio from being transmitted effectively within Cubase. Now that you’ve inspected signal routing and evaluated VST connections, you’re one step closer to resolving the issue of not hearing anything in Cubase.

Hardware And Cables Inspection

When it comes to troubleshooting audio issues in Cubase, one of the first areas you should investigate is your hardware and cables. Problems with these components can often lead to sound-related difficulties within the software. In this section, we will discuss the importance of inspecting your hardware and cables to ensure optimal audio performance.

Checking Connections

To begin your hardware and cables inspection, it is crucial to check all the connections associated with your audio setup. Make sure that all cables are firmly secured and plugged into the correct ports. Loose connections can cause intermittent audio or no sound at all. Take a moment to visually inspect each connection and gently push them in to ensure a snug fit.

In addition to checking physical connections, it’s essential to examine the software settings related to your audio device. Verify that the correct audio driver is selected within Cubase, and if necessary, update the driver software for your audio interface or sound card to ensure compatibility. These steps can help resolve any issues stemming from incorrect settings.

Testing Audio Cables

The next step in the hardware and cables inspection process is to test your audio cables for any potential faults. Faulty cables can be a common cause of audio problems in Cubase. To test each cable, follow these simple steps:

  1. With your audio interface or sound card powered off, disconnect the cables from both ends.
  2. Inspect each cable for any physical damage, such as cuts, frayed wires, or bent connectors. Replace any damaged cables as needed.
  3. Reconnect the cables, ensuring they are securely plugged in at both ends.
  4. Test your audio setup by playing back audio in Cubase. If you can hear sound, your cables are functioning correctly. If not, proceed to the next troubleshooting step.

If you’ve completed these steps and are still experiencing issues with audio playback, it may be helpful to try alternative cables or test your audio setup on another device. Doing so can help determine if the problem lies with your hardware or cables, allowing you to take appropriate action.

Why Can'T I Hear Anything in Cubase : Troubleshooting Tips to Restore Sound


Credit: forums.steinberg.net


Why Can'T I Hear Anything in Cubase : Troubleshooting Tips to Restore Sound


Credit: forums.steinberg.net


Frequently Asked Questions On Why Can’t I Hear Anything In Cubase


Why Is There No Sound Coming Out Of Cubase?


Check if the audio devices are properly connected and configured in Cubase settings. Ensure all cables are plugged in securely.


How Do I Hear Cubase?


You can hear Cubase by connecting your audio interface to speakers or headphones. In Cubase, set the input and output devices in the Device Setup menu. Play your project to hear the audio through your selected output. Adjust volume and settings as needed for optimal sound.


Why Is Cubase Not Recording Audio?


Cubase may not be recording audio due to incorrect audio device settings. Ensure the correct input device is selected in Cubase’s audio preferences. Check if the audio interface is properly connected and configured on your computer. Adjust the input volume and make sure your microphone or instrument is working correctly.


Why Is There No Sound On My Mac Cubase 12?


If there is no sound on your Mac Cubase 12, try these troubleshooting steps: Check your Mac’s audio settings, ensure the correct audio output is selected, restart Cubase, update audio drivers, and test with headphones or external speakers.


Conclusion


Addressing audio issues in Cubase requires a systematic troubleshooting approach. By examining potential software and hardware conflicts, adjusting settings, and ensuring proper connections, users can often resolve sound-related challenges. Furthermore, seeking assistance from online forums or professional support services can offer valuable insights for resolving complex auditory problems within the software.


https://www.youtube.com/watch?v=0ppJ12Xq_Mo


Categories
Archive

What Does Cubase 12 Pro Come With: Unleash Your Musical Creativity

Cubase 12 Pro comes with advanced audio recording, editing, and mixing features for music production. It also includes a wide range of virtual instruments and effects plugins.


In addition, Cubase 12 Pro offers support for high-resolution audio formats and comprehensive MIDI capabilities, making it a versatile tool for professional music producers and composers looking to create high-quality music efficiently. With its intuitive user interface and powerful workflow enhancements, Cubase 12 Pro is a top choice for musicians and producers who demand precision and flexibility in their music production process.


Whether you are recording live instruments, arranging complex compositions, or mixing and mastering tracks, Cubase 12 Pro provides all the tools you need to bring your musical ideas to life. This latest version continues to set industry standards for music production software, offering cutting-edge features and capabilities to suit the needs of modern music creators.


Introducing Cubase 12 Pro


Cubase 12 Pro boasts a range of new features and enhancements, such as a redesigned audio engine, advanced MultiTap Delay, and an updated Score editor. The software also includes new plugin processors, improved key and drum editors, and enhanced audio alignment and channel strip features, making it a powerful tool for music production.

Cubase 12 Pro is the latest version of Steinberg’s renowned digital audio workstation, packed with cutting-edge features to enhance your music production experience. Let’s delve into the exciting new additions and improvements you can expect in this release.

New Features

  • Advanced Audio Engine: Empowering you with top-notch performance for seamless music production.
  • MPE Support: Dive into the world of expressive MIDI capabilities for innovative music creation.
  • Scale Assistant: Ensure your melodies and harmonies are always on point with intelligent scale detection.
  • Sampler Track 2: Elevate your sound design with enhanced sampling features and creative possibilities.

Improved User Interface

  • Streamlined Workflow: Navigate through Cubase effortlessly with a revamped interface for increased productivity.
  • Customizable Workspaces: Tailor your workspace to suit your preferences and optimize your creative process.
  • Visual Enhancements: Enjoy a visually appealing design that enhances user experience and readability.

In Cubase 12 Pro, you’ll find a perfect blend of innovation and user-friendly enhancements to fuel your musical journey to new heights.


Credit: www.facebook.com


Enhanced Audio Recording And Editing

Cubase 12 Pro comes packed with powerful features for enhancing audio recording and editing capabilities.

Advanced Recording Capabilities

  • Multi-track recording for capturing multiple audio sources simultaneously.
  • Support for high-resolution audio formats for pristine sound quality.
  • Real-time monitoring to ensure accurate recording levels.

Efficient Editing Tools

  1. User-friendly interface that makes editing tasks intuitive and efficient.
  2. Flexible editing options for precise adjustments to audio tracks.
  3. Time-stretching and pitch-shifting features for creative editing possibilities.

Midi And Instrument Features

Expanded Midi Functionality

Cubase 12 Pro brings an array of advanced features aimed at enhancing MIDI functionality. With the capability to handle complex compositions and intricate arrangements, the MIDI features in Cubase 12 Pro empower users to unleash their creative potential. From improved editing tools to comprehensive controller integration, this version takes MIDI capabilities to the next level.

Integrated Instrument Library

The integrated instrument library in Cubase 12 Pro offers a vast selection of high-quality virtual instruments, catered to meet the diverse needs of modern music production. Boasting a rich palette of sounds, including synths, orchestral instruments, and percussion, this library provides musicians with an extensive toolkit for crafting captivating musical pieces. Additionally, the seamless integration of these instruments into the workflow streamlines the creative process, enabling users to explore and experiment with new sonic possibilities effortlessly.

What Does Cubase 12 Pro Come With: Unleash Your Musical Creativity


Credit: ise.edu.al


Mixing And Mastering Capabilities


Discover Cubase 12 Pro with advanced mixing and mastering capabilities for professional audio production. Elevate your sound quality to the highest level with a wide range of tools and features included in the software.

Professional Mixing Tools

When it comes to audio production, having powerful mixing tools at your disposal is essential. With Cubase 12 Pro, you can expect a comprehensive set of professional-grade mixing tools that will take your music to new heights. Whether you’re a seasoned audio engineer or a beginner, these tools are designed to help you achieve the perfect mix.

With Cubase 12 Pro, you’ll have access to a wide range of features that allow you to fine-tune every aspect of your mix. From EQ and compression to reverb and delay, these tools give you the flexibility and control you need to create a polished and professional sound.

One of the standout features of Cubase 12 Pro’s mixing capabilities is its advanced automation system. This feature allows you to automate various parameters in your mix, such as volume, panning, and effects. With precise control over your automation, you can create dynamic and expressive mixes that bring your music to life.

Integrated Mastering Suite

In addition to its powerful mixing tools, Cubase 12 Pro also includes an integrated mastering suite. Mastering is the final step in the audio production process, and it involves fine-tuning your mix to ensure it sounds great on all types of playback systems.

With Cubase 12 Pro’s integrated mastering suite, you can take your mix to the next level. This suite includes a range of tools and features that allow you to optimize the tonal balance, dynamics, and loudness of your music. Whether you’re mastering a single track or an entire album, these tools will help you achieve a professional and polished sound.

One of the key features of Cubase 12 Pro’s mastering suite is its comprehensive set of metering tools. These tools provide valuable insights into the technical aspects of your mix, such as peak and RMS levels, stereo width, and frequency distribution. By utilizing these tools, you can make informed decisions and ensure your music meets industry standards.

https://www.youtube.com/watch?v=_gEzS2FNt38


Workflow Optimization


Discover how Cubase 12 Pro enhances workflow optimization with intuitive features like advanced MIDI editing, audio warping, and customizable key commands. Experience seamless integration, pristine sound quality, and efficient project management tools designed to elevate your music production process.

Customizable Workspace

One of the standout features of Cubase 12 Pro is its customizable workspace, which enhances your workflow like never before. With a few clicks, you can arrange the interface elements to suit your preferences. This level of personalization allows you to focus on what matters most: the music. You can resize and reposition windows, panels, and toolbars so that everything is exactly where you want it. Need a larger mixer view? No problem. Prefer to have your transport controls at the top? Easy. Customizing your workspace means you can work more efficiently and effortlessly, making the music creation process a true joy.

Streamlined Project Management

In the world of music production, efficient project management is paramount. Cubase 12 Pro understands this need and delivers a streamlined experience that allows you to stay organized and focused on your creative process. With features like project folders, track archives, and track visibility management, you can easily navigate and manage even the most complex projects. By keeping your projects neatly organized, you can quickly locate and access the files and tracks you need, minimizing distractions and maximizing productivity.

What Does Cubase 12 Pro Come With: Unleash Your Musical Creativity


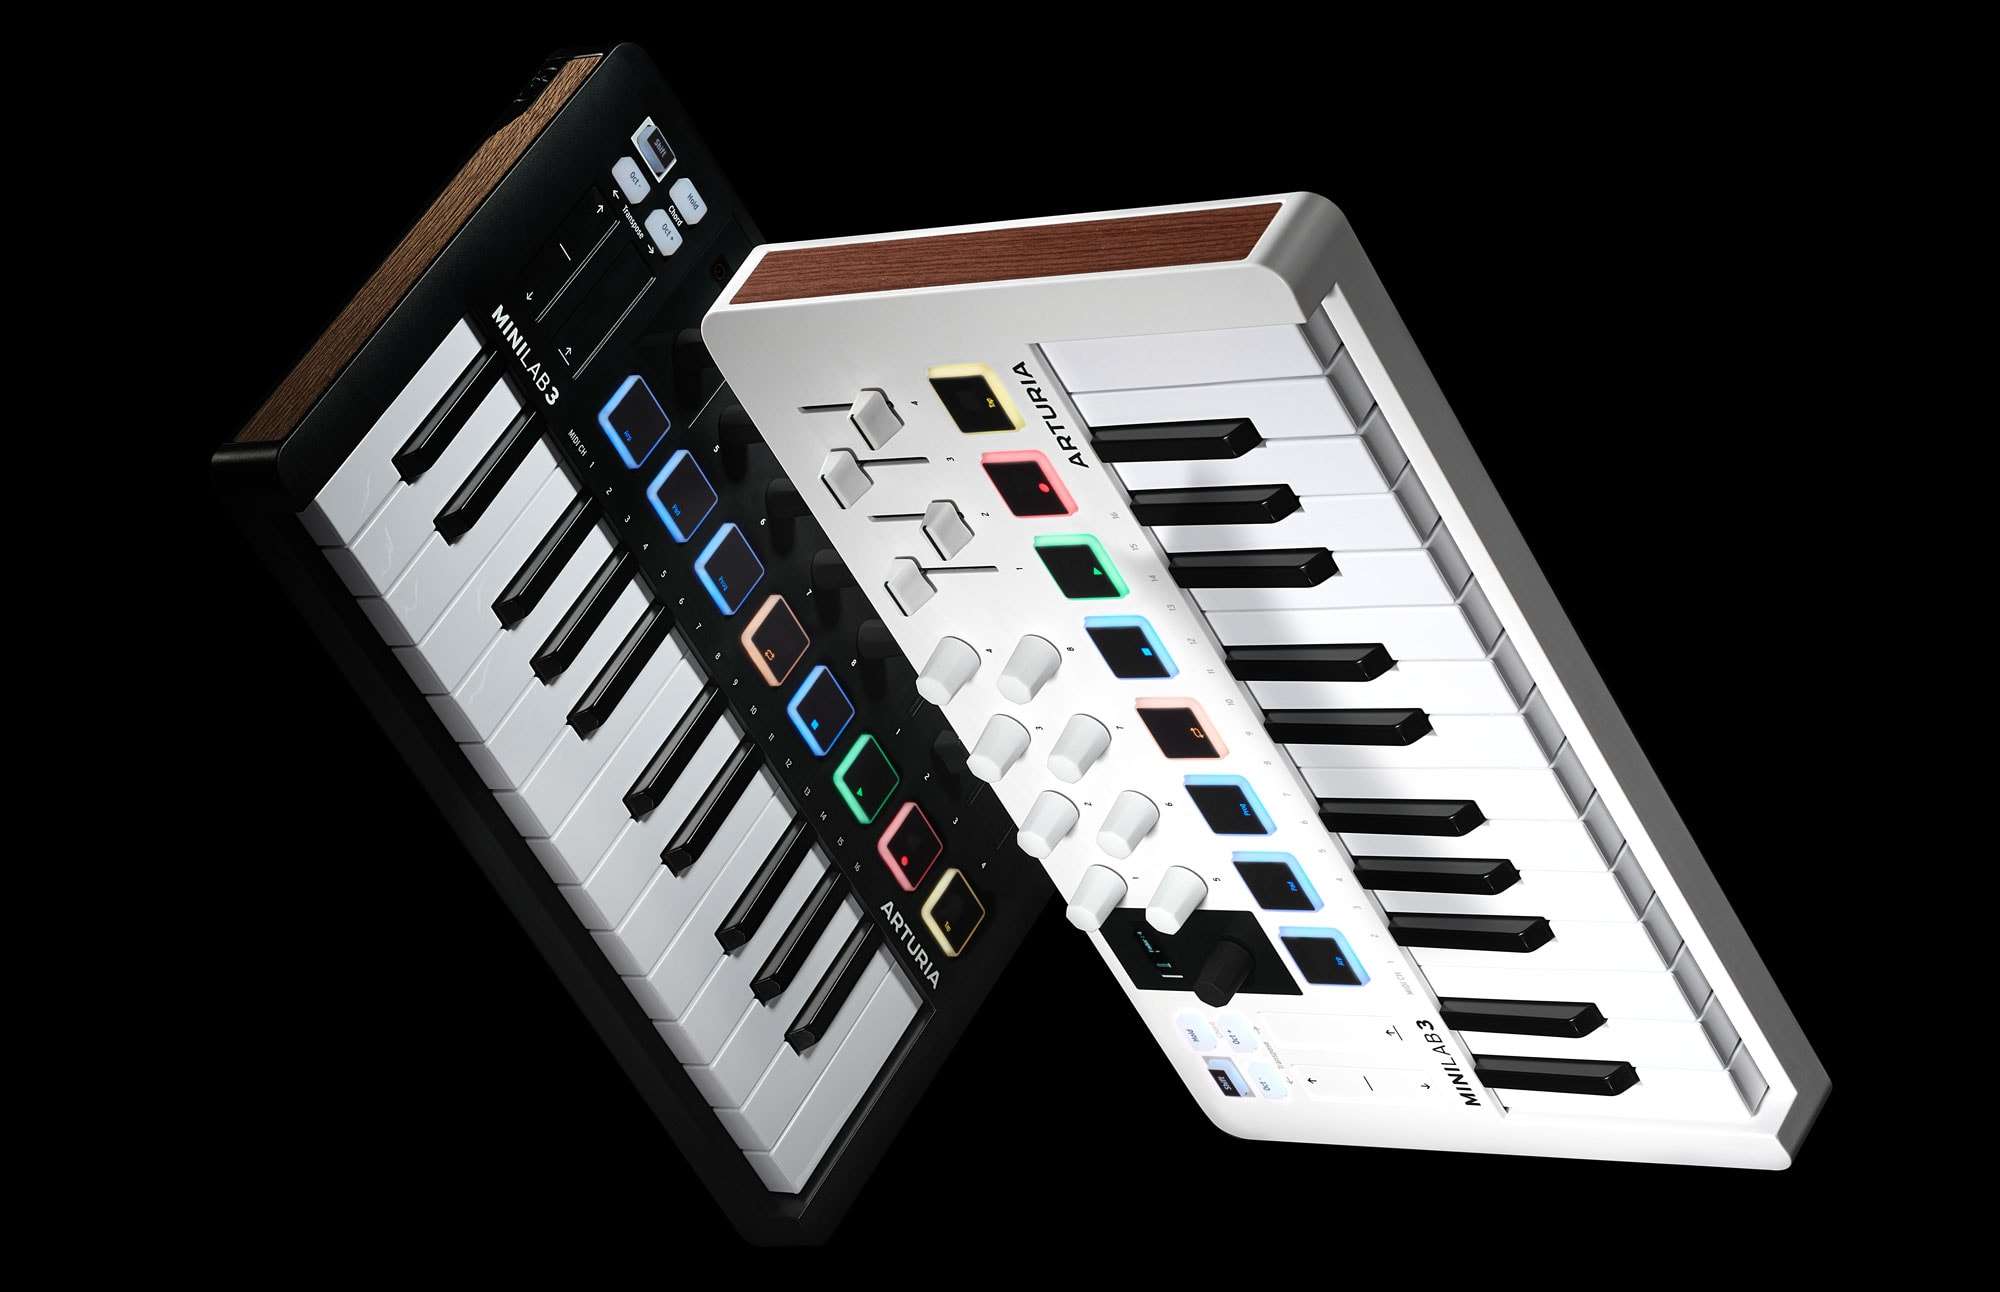
Credit: www.arturia.com


Frequently Asked Questions For What Does Cubase 12 Pro Come With


What Does Cubase 12 Pro Include?


Cubase 12 Pro includes advanced music production features for recording, editing, mixing, and mastering. It offers a range of virtual instruments, audio effects, and MIDI tools for professional music creation. Additionally, it comes with updated features and improved performance for an enhanced music production experience.


What Plugins Come With Cubase 12?


Cubase 12 includes a wide range of plugins for music production, such as EQ, compressor, reverb, delay, and more. These plugins offer a variety of effects and tools to enhance your audio recordings and mix.


Does Cubase Come With Vst Instruments?


Yes, Cubase comes with VST instruments.


Is Cubase 12 Pro Good?


Yes, Cubase 12 Pro is good for professional music production, offering advanced features, intuitive workflow, and high-quality sound. It provides a wide range of tools and options suitable for experienced musicians and audio engineers.


Conclusion


Cubase 12 Pro offers a comprehensive range of features for music producers and creators. With its advanced tools for recording, editing, and mixing, this software provides a powerful platform for professional music production. Whether you’re a seasoned pro or a newcomer, Cubase 12 Pro has everything you need to bring your musical ideas to life.

Categories
Archive

Which is the Best Cubase Version : Unveiling the Ultimate Powerhouse

The best Cubase version varies based on individual needs and preferences. Cubase Pro 11 is currently a popular choice among professional music producers.


It offers advanced features, stable performance, and regular updates, making it suitable for users looking for a comprehensive music production software. Cubase Pro 11 provides a wide range of tools for recording, mixing, and mastering audio tracks, making it a versatile option for creating high-quality music.


Whether you are a beginner or an experienced producer, Cubase Pro 11 offers a user-friendly interface and robust functionality to meet your music production needs. With its innovative technology and industry-standard plugins, Cubase Pro 11 stands out as a top choice for many music professionals.


Credit: soundrivemusic.com


The Evolution Of Cubase

From Its Origins To Present Day

Cubase, a renowned digital audio workstation, has continuously evolved over the years.

Advancements In Technology

With each new version, Cubase has introduced groundbreaking features and technology.

Which is the Best Cubase Version  : Unveiling the Ultimate Powerhouse


Credit: blog.truefire.com


Key Features Of Cubase


The key features of Cubase, such as its intuitive interface, comprehensive audio editing tools, and advanced mixing capabilities, make it a leading choice for music production. Each version offers unique upgrades and improvements, ultimately making it difficult to determine the best one as it depends on individual preferences and needs.

Understanding Its Unique Functionalities

Cubase stands out for its unique features tailored to music production.

It offers a variety of tools for composing, recording, and editing music.

Exploring Its Advanced Tools

Cubase provides advanced tools like VST instruments and audio effects.

Users can benefit from its mixing and mastering capabilities.

Comparison Of Cubase Versions

When it comes to choosing the right version of Cubase, it’s essential to understand the differences between each option to ensure it aligns with your music production needs. Let’s compare the features and capabilities of Cubase Elements, Cubase Artist, and Cubase Pro to help you make an informed decision.

Cubase Elements Vs Cubase Artist

Cubase Elements is designed for entry-level music producers, offering essential features such as MIDI editing, audio recording, and a variety of virtual instruments and effects. On the other hand, Cubase Artist caters to intermediate users with advanced composition and mixing tools, as well as greater support for third-party plugins and advanced audio processing capabilities.

Cubase Artist Vs Cubase Pro

For those seeking professional-grade music production software, Cubase Pro is the ultimate choice. It provides an extensive range of features including comprehensive audio editing, advanced mixing and mastering tools, integrated scoring features, and support for surround sound production. Cubase Artist, while powerful, falls short in terms of the advanced capabilities and comprehensive toolset offered by Cubase Pro.

Choosing The Right Cubase Version

Choosing the right Cubase version is crucial for both beginners and professional producers. With a range of options available, it can be overwhelming to determine which version is best suited for your needs. In this blog post, we will explore the considerations for beginners as well as the suitability for professional producers to help you make an informed decision.

Considerations For Beginners

As a beginner, it is important to choose a Cubase version that offers the right balance of features and ease of use. Here are some factors to consider:

  • Price: Budget is often a key consideration for beginners. Cubase Elements is an affordable option that provides essential features without breaking the bank.
  • User interface: A user-friendly interface is crucial for beginners to navigate through the software easily. Cubase Elements offers a streamlined interface, making it beginner-friendly.
  • Features: Look for a version that provides the necessary features for your music production needs. Cubase Elements offers a range of tools and effects to get you started.
  • Support and learning resources: As a beginner, having access to tutorials, documentation, and a supportive community can be tremendously helpful. Cubase Elements offers extensive learning resources to assist beginners in their journey.

Suitability For Professional Producers

Professional producers require a Cubase version that offers advanced features and robust capabilities. Here are some factors to consider:

  • Advanced features: Cubase Pro is the flagship version that provides a comprehensive set of advanced features for professional music production. It offers a vast range of tools and effects to enhance creativity and workflow.
  • Scalability: Professional producers often work with complex projects that require scalability. Cubase Pro offers unlimited audio, MIDI, and instrument tracks, allowing for intricate productions.
  • Integrated plugins: Cubase Pro comes with a wide selection of integrated plugins, including audio processors, virtual instruments, and effects, offering professional-quality sound right out of the box.
  • Collaboration: Collaboration is key in the professional music industry. Cubase Pro offers advanced collaboration features, allowing for seamless teamwork and project sharing.

Ultimately, the best Cubase version depends on your specific needs and level of expertise. Whether you are a beginner starting your musical journey or a professional producer looking for advanced capabilities, Cubase offers a range of versions to cater to different requirements. Consider the factors discussed above and make an informed decision to ensure a seamless music production experience.


Maximizing Your Cubase Experience


Maximize your Cubase experience by determining the best version for your needs. Compare features and performance to achieve optimal results in your music production journey. Choose the Cubase version that aligns with your requirements for a seamless and efficient workflow.

Understanding The Power Of Cubase

Cubase, developed by Steinberg, is a powerful digital audio workstation that has become a go-to choice for many music producers and audio engineers. Whether you are a beginner or an experienced user, understanding the power of Cubase is essential in elevating your music production game. With a wide range of features and capabilities, this software allows you to unleash your creativity and bring your musical ideas to life.

One of the key strengths of Cubase is its intuitive user interface, designed to streamline your workflow and make the music production process more efficient. From arranging and recording to mixing and mastering, Cubase provides a comprehensive set of tools that cater to your every need. Its advanced audio and MIDI editing capabilities ensure precision and flexibility in your music production endeavors.

Moreover, Cubase supports a wide range of audio formats and plugins, enabling you to enhance your tracks with professional-grade effects and virtual instruments. Whether you want to create realistic orchestral compositions or experiment with unique soundscapes, Cubase has got you covered. With its extensive library of sounds and samples, you can explore endless possibilities and push the boundaries of your creativity.

In addition to its powerful features, Cubase offers seamless integration with hardware controllers and other essential audio equipment. This allows you to have a more tactile and hands-on approach to music production, making the experience even more immersive and enjoyable. With Cubase, you have the flexibility to use your preferred tools and devices, creating a personalized setup that suits your specific needs.

Exploring Advanced Techniques And Tips

Now that you have a solid understanding of Cubase’s capabilities, it’s time to explore advanced techniques and tips that will take your music production skills to the next level. Here are some valuable pointers to maximize your Cubase experience:

  • Optimize your workflow: Customize your workspace, create templates, and utilize key commands to speed up your workflow and save time during the production process.
  • Utilize automation: Experiment with automation to add depth and dynamics to your tracks. Automate volume, panning, and effect parameters to create dynamic and engaging music.
  • Master MIDI editing: Dive deeper into Cubase’s MIDI editing capabilities. Learn how to quantize, humanize, and manipulate MIDI notes to add expressiveness and realism to your compositions.
  1. Explore advanced audio processing: Delve into Cubase’s audio processing tools and effects. Experiment with EQ, compression, reverb, and other plugins to achieve the desired sonic qualities in your mixes.
  2. Learn mixing techniques: Study the art of mixing and implement techniques such as balancing levels, panning, EQing, and using effects to create professional-sounding mixes.

By exploring these advanced techniques and tips, you’ll be able to unlock the full potential of Cubase and elevate your music production to new heights. Remember, practice and experimentation are key in mastering any software, and Cubase is no exception. Embrace the possibilities, unleash your creativity, and create music that resonates with your audience.

Which is the Best Cubase Version  : Unveiling the Ultimate Powerhouse


Credit: www.sweetwater.com


Frequently Asked Questions Of Which Is The Best Cubase Version


Which Version Of Cubase Is Best?


The best version of Cubase depends on your specific needs and preferences. Consider factors like features, price, and compatibility with your system.


What Is The Difference Between Cubase Pro And Cubase Le?


Cubase Pro offers advanced features for professional music production. Cubase Le, being a beginner’s version, has limited features for entry-level users.


Is Cubase 11 Stable?


Yes, Cubase 11 is stable and reliable for professional music production.


What Is The Difference Between Cubase Elements And Cubase Artist?


Cubase Elements is a basic version with essential features, while Cubase Artist offers more advanced tools for enhanced creative capabilities. Cubase Artist includes more instruments, effects, and content libraries compared to Cubase Elements.


Conclusion


Choosing the best Cubase version depends on your specific needs and preferences. Consider factors such as features, compatibility, and budget to make an informed decision. Each version offers unique benefits and limitations, so take the time to evaluate your requirements before making a purchase.


Ultimately, the best version for you is the one that meets your individual needs and enhances your music production experience.

Categories
Archive

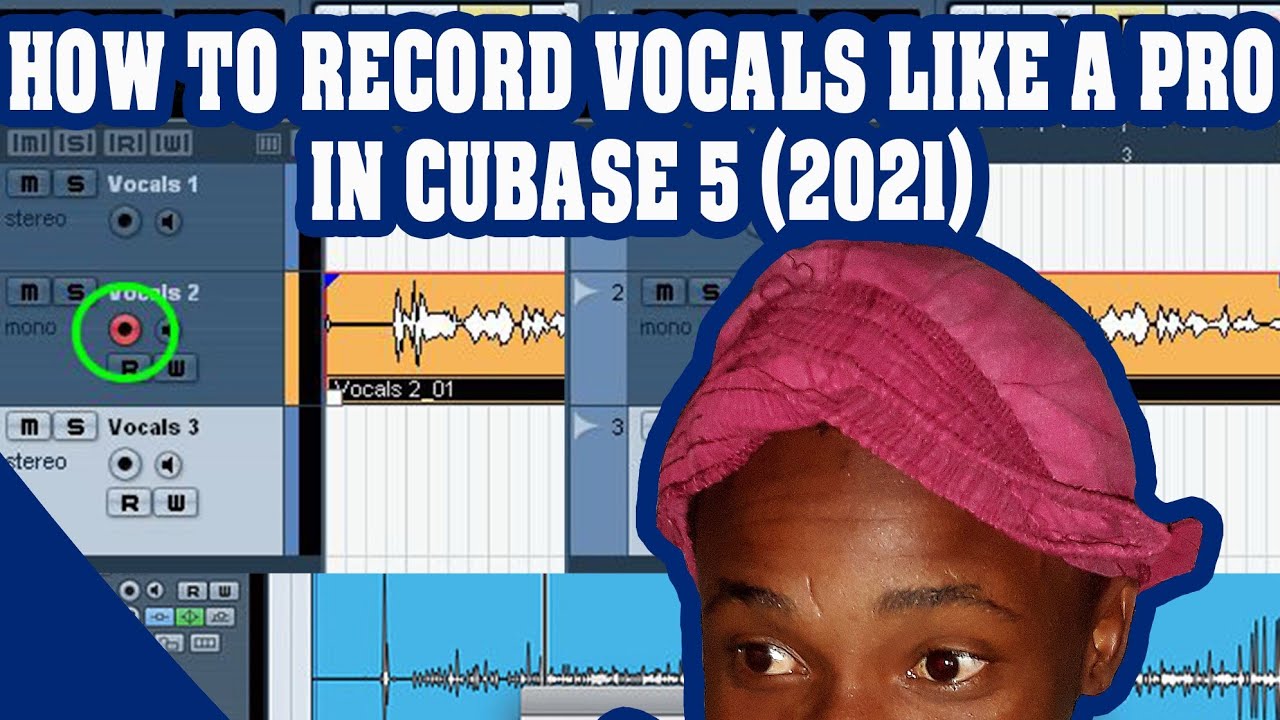
How to Use Cubase 5 to Record Like a Pro

To use Cubase 5 to record, open the software, create a new project, set up your audio interface, and select your input source. Are you looking to take your music production skills to the next level?


Cubase 5 is a powerful digital audio workstation that can help you create professional-quality recordings right from your computer. With its intuitive interface and robust features, Cubase 5 provides musicians and audio engineers with everything they need to capture, edit, and mix their music.


In this guide, we will walk you through the steps to use Cubase 5 for recording your tracks and unleash your creativity in the world of digital music production. Let’s dive in and start making music with Cubase 5!


Credit: www.haydockmusic.com


Setting Up Your Workspace

Setting up your workspace in Cubase 5 is crucial for an efficient recording process. Let’s dive into optimizing your audio settings and customizing your toolbars to streamline your workflow.

Optimizing Your Audio Settings

  • Access the ‘Devices’ menu.
  • Select ‘Device Setup’.
  • Adjust buffer size for optimal performance.

Customizing Your Toolbars

  1. Go to ‘File’ > ‘Preferences’ > ‘Toolbars’.
  2. Drag and drop tools to customize your toolbar.
  3. Save your customized toolbar layout.

Mastering The Basics


Learn the essentials of using Cubase 5 to record your music with expert guidance. Discover step-by-step instructions for setting up your recording session, using virtual instruments, and capturing high-quality audio. Elevate your music production skills and create professional-sounding recordings with ease.

Mastering the BasicsTo use Cubase 5 for recording, understanding the basics is crucial.

Understanding The Timeline And Tracks

The timeline in Cubase 5 displays the progression of audio tracks in a project. Tracks are individual layers of audio that can be recorded, edited, and mixed.

Ensure to organize tracks sequentially for a clear workflow. Utilize markers to segment sections for easier navigation.


Recording And Editing Audio

Before recording audio, set the correct input source and adjust levels to prevent distortion. Use headphones to monitor the input signal.

During recording, make use of the punch-in/out feature for precise editing. Edit audio clips by trimming, splitting, and applying effects.

  • Record in a quiet environment to avoid background noise.
  • Keep backups of your recordings in case of accidental loss.


Mastering these basics will lay a solid foundation for your audio recording projects in Cubase 5.

Utilizing Advanced Features

Utilizing advanced features in Cubase 5 can help take your recording to the next level. Whether you’re a professional producer or a hobbyist musician, understanding how to make the most of advanced features can enhance the quality of your recordings and bring your creativity to life.

Using Midi And Virtual Instruments

With Cubase 5, you can harness the power of MIDI and virtual instruments to add depth and complexity to your recordings. MIDI allows you to control and manipulate the timing, pitch, and velocity of musical notes, giving you the ability to achieve precise and expressive performances. By integrating virtual instruments, you can access an extensive library of sounds and create dynamic, lifelike instrumental tracks to enrich your compositions.

Applying Effects And Automation

One of the key advanced features of Cubase 5 is its robust set of audio effects and automation tools. These allow you to enhance the sound of your recordings with reverbs, delays, compressors, and more, adding depth and texture to your tracks. Additionally, automation enables you to dynamically control various parameters over time, such as volume, panning, and effects settings, allowing for intricate and polished productions.

Mixing And Mastering Your Tracks

Once you have recorded your tracks in Cubase 5, the next step is to mix and master them to achieve a professional sound. Mixing involves balancing the different elements of your tracks, while mastering focuses on applying final touches and optimizing the overall sound quality. In this section, we will discuss how to balance your mix and apply mastering techniques using Cubase 5.

Balancing Your Mix

When it comes to mixing your tracks in Cubase 5, finding the right balance between the various elements is crucial for achieving a polished and cohesive sound. Here are some steps to help you achieve a well-balanced mix:

  1. Organize your tracks: Start by organizing your tracks in the mixer window, grouping similar elements together for easier navigation.
  2. Set proper levels: Ensure each track is at an appropriate volume level relative to the rest of the mix. Pay attention to the overall balance of instruments, vocals, and effects.
  3. Pan your tracks: Pan each track left or right in the stereo field to create a sense of space and separation. This can help prevent clutter and make each element more distinguishable.
  4. Add EQ: Use equalization to shape the tonal balance of each track. Cut unwanted frequencies and enhance the desired ones to achieve clarity and separation.
  5. Apply dynamics: Use compression and other dynamic processors to control the dynamic range of individual tracks. This helps maintain consistency and prevent certain elements from overpowering others.
  6. Add effects: Apply desired effects such as reverb, delay, or modulation to add depth and ambiance to your mix. Be mindful of not overusing effects and maintaining clarity.
  7. Create automation: Use automation to control the volume, panning, and effects parameters over time. This adds movement and dynamics to your mix.

Applying Mastering Techniques

Once your mix is balanced, it’s time to enhance the overall sound quality using mastering techniques. Cubase 5 provides a range of tools and effects to help you achieve a professional sounding master. Here are some techniques to consider:

  1. Mastering EQ: Apply gentle equalization to shape the overall frequency balance and make subtle tonal adjustments to enhance clarity and balance.
  2. Compress and limit: Use compression and limiters to control the dynamic range of the final mix. This helps achieve a consistent volume level and prevents clipping.
  3. Add stereo enhancement: Utilize stereo widening techniques to create a wider sound image. However, use this technique sparingly to avoid losing mono compatibility.
  4. Apply dithering: When exporting your final master, apply dithering to prevent distortion and loss of quality caused by reducing the bit depth.
  5. Listen critically: Utilize reference tracks and A/B comparison to ensure your master stands up to professional recordings. Trust your ears and make adjustments accordingly.

By following these steps and experimenting with different techniques, you can elevate your recordings to a professional level using Cubase 5. Remember to trust your ears, take breaks, and always strive for the best possible sound.

https://www.youtube.com/watch?v=cl95_8Tu_uA


Collaboration And Sharing

One of the greatest advantages of using Cubase 5 for recording is its ability to facilitate collaboration and sharing. Whether you’re working on a music project with a fellow musician or need to share your work with others, Cubase 5 offers various features that make the process seamless and efficient.

Exporting Your Projects

When you’ve finished recording and editing your project in Cubase 5, it’s time to share it with others. Exporting your projects is a straightforward process that allows you to convert your work into a file format that is universally accessible.

To export your project, follow these simple steps:

  1. Go to the File menu at the top of the screen.
  2. Select Export from the dropdown menu.
  3. Choose the desired file format for your project, such as MP3 or WAV.
  4. Specify the destination folder where you want to save the exported file.
  5. Click Export to complete the process.

By exporting your projects in a popular file format, you can easily share your work with collaborators, upload it to streaming services, or burn it onto a CD for distribution.

Working With Others On Cubase

Cubase 5 provides useful tools for collaborating with other musicians or producers on the same project. Here are some features that facilitate teamwork:

  • Project Sharing: Cubase 5 allows you to share your entire project with other Cubase users. Simply save your project in a shared folder, and other users can access it, make edits, and contribute to the project.
  • VST Connect: This feature enables real-time collaboration with musicians or producers located miles away. With VST Connect, you can record and communicate with collaborators remotely, making it easy to work with artists from different parts of the world.
  • Collaboration Plugins: Cubase 5 offers various collaboration plugins that allow you to share individual tracks or channels with other users. This makes it convenient for musicians to work on their respective parts without interfering with the entire project.

Whether you’re part of a band, a music producer or an aspiring artist, Cubase 5’s collaboration and sharing capabilities take your recording experience to the next level. With its intuitive features and seamless compatibility, working together on music projects becomes more efficient and enjoyable.

How to Use Cubase 5 to Record Like a Pro


Credit: m.youtube.com


How to Use Cubase 5 to Record Like a Pro


Credit: forums.steinberg.net


Frequently Asked Questions Of How To Use Cubase 5 To Record


How Do I Record A Song In Cubase 5?


To record a song in Cubase 5, open the software, create a new project, set up your audio input, arm the track for recording, press record, edit and mix your song, and finally export the final track.


How Do You Record On Cubase?


To record on Cubase, simply create a new audio track, select your input source, adjust levels, and hit the record button.


Why Can’t I Record In Cubase?


Ensure your audio interface is properly connected and selected as the input device in Cubase. Check your microphone and instrument connections, as well as the input settings in Cubase. Make sure tracks are armed for recording and that the correct input channels are selected for recording.


How Do I Get Sound On Cubase 5?


To get sound on Cubase 5, make sure your audio interface is properly connected and recognized by your computer. Check the device settings in Cubase to ensure the correct audio driver is selected. Adjust the audio output settings in Cubase and on your computer to ensure the sound is not muted or too low.


Conclusion


Cubase 5 is a powerful tool for recording and producing music. Its user-friendly interface and diverse features make it a top choice for musicians and producers. By following the tips outlined in this blog post, you can effectively use Cubase 5 to record your music with professional quality.


Start creating your masterpiece today!

Categories
Archive

How Much Ram Does Cubase Need? Get Optimal Performance Now!

Cubase requires a minimum of 4GB RAM for optimal performance. 8GB RAM or more is recommended for larger projects and smoother operation.


Cubase’s RAM requirements play a crucial role in determining the software’s performance and stability during audio production. By having adequate RAM, users can run multiple plugins, virtual instruments, and effects seamlessly, enhancing their workflow and creative capabilities. Furthermore, sufficient RAM ensures that recording, editing, and mixing processes remain efficient without any lag or performance issues.


In essence, investing in the right amount of RAM for Cubase can significantly improve the overall music production experience for users.

How Much Ram Does Cubase Need? Get Optimal Performance Now!


Credit: www.production-expert.com


Minimum Ram Requirements For Cubase

Understanding the importance of RAM for Cubase performance

Understanding The Importance Of Ram For Cubase Performance

Cubase, being a powerful digital audio workstation, relies heavily on the computer’s RAM for seamless operation. RAM, or Random Access Memory, is a crucial hardware component that directly impacts a system’s ability to process and run complex audio projects. In simple terms, the more RAM your system has, the better it will be able to handle large Cubase projects without experiencing performance issues.

Recommended Ram For Different Versions Of Cubase

When it comes to the recommended RAM for different versions of Cubase…

Factors That Impact Cubase Ram Usage

When using Cubase, the amount of RAM is crucial for optimal performance. Several factors directly influence the RAM usage of this digital audio workstation.

Exploring The Key Factors Affecting Ram Usage In Cubase

  • Track Count: The more tracks you have in your project, the higher the RAM usage.
  • Audio Resolution: Working with higher sample rates and bit depths increases RAM demand.
  • Complexity of Effects: Using intensive processing effects consumes more RAM.

Effects Of Plugins And Virtual Instruments On Ram Consumption

  1. Plugins: Each plugin added to a project impacts RAM usage, especially CPU-intensive ones.
  2. Virtual Instruments: Loading multiple virtual instruments can strain RAM resources.

The Role Of Sample Libraries In Ram Requirements

Sample libraries play a significant role in determining the amount of RAM needed. Larger libraries with high-quality samples demand more RAM to load and play efficiently.

Optimizing Ram Usage In Cubase


Discover the ideal RAM usage for Cubase to optimize performance and enhance your workflow. Learn how much RAM your Cubase setup requires to run smoothly without any lag or performance issues.

Essential Tips For Maximizing Ram Efficiency In Cubase

Cubase, a powerful digital audio workstation, requires adequate RAM for optimal performance. Follow these tips to maximize RAM efficiency:

  • Close unnecessary programs and tabs to free up RAM.
  • Remove any unused plugins and samples from your project.

Streamlining Your Project To Reduce Ram Usage

To reduce RAM usage in Cubase:

  1. Delete unneeded tracks and regions from your project.
  2. Consolidate and bounce tracks to free up RAM.

Managing Plugins And Virtual Instruments Effectively

Optimize plugin and instrument usage in Cubase:

  • Use only essential plugins for your project.
  • Set buffer sizes appropriately to manage plugin load.

Utilizing Freeze And Track Bouncing Features In Cubase

Leverage the freeze and track bouncing features in Cubase:

  1. Freeze tracks to temporarily reduce RAM usage.
  2. Bounce tracks to audio to lighten the CPU load.
How Much Ram Does Cubase Need? Get Optimal Performance Now!


Credit: www.waves.com


Extending Ram Capacity For Cubase

When it comes to running Cubase smoothly, having enough RAM is crucial. The RAM (Random Access Memory) of your computer directly impacts its performance when running resource-intensive software like Cubase. In this section, we’ll explore how you can extend your RAM capacity to optimize your experience with Cubase.
Options For Increasing Ram Capacity In Your Computer

  • Upgrading: Adding higher capacity RAM modules.
  • Expansion: Utilizing additional RAM slots on the motherboard if available.
  • Virtual Memory: Configuring virtual memory to supplement physical RAM.

Exploring The Benefits Of Adding More Ram For Cubase

Improved Performance: With more RAM, Cubase can handle larger and more complex projects without slowdowns or crashes.

Multitasking: Increased RAM allows for smooth multitasking, enabling you to run more plugins and processes simultaneously.

Considerations When Upgrading Your Ram For Cubase

  1. System Requirements: Ensure compatibility with Cubase and your computer’s motherboard.
  2. Budget: Consider the cost of the RAM upgrade in relation to the performance benefits.
  3. Installation: Familiarize yourself with the installation process or seek professional assistance.


Monitoring Ram Usage In Cubase


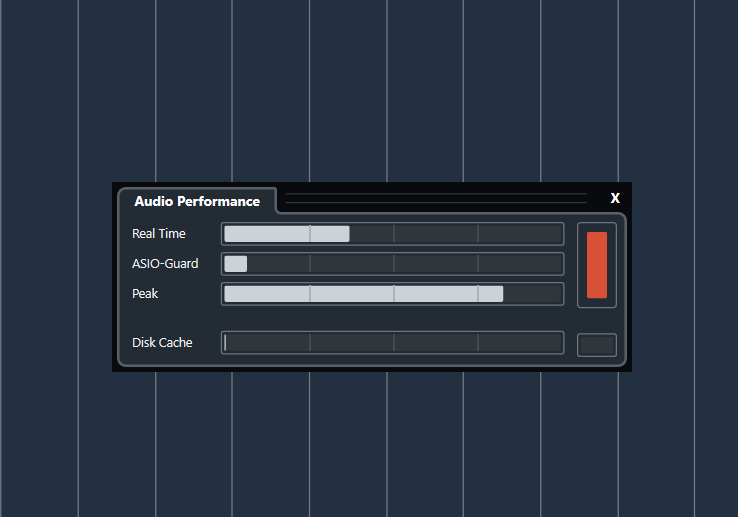
Cubase’s RAM usage can vary based on the project’s size and complexity. To monitor it effectively, keeping an eye on the task manager can help maintain optimal performance. Generally, for smooth operation, Cubase requires a minimum of 4GB RAM, but complex projects may benefit from 8GB or more.

Tools And Techniques For Monitoring Ram Usage In Cubase

Monitoring RAM usage in Cubase is essential to ensure optimal performance and prevent any potential issues that may arise due to insufficient memory. Luckily, Cubase provides several tools and techniques to help you keep track of your RAM usage efficiently.

One such tool is the System Usage Meter, which displays real-time information on how much RAM your project is consuming. To access this tool, go to the “Window” menu, select “System Usage” and check the “VST System Link” box. The meter will then appear, providing you with an accurate representation of your RAM usage.

Another technique is to use the Task Manager on your computer to monitor the RAM usage of Cubase. To do this, simply right-click on the taskbar and select “Task Manager”. In the “Processes” tab, you’ll find a list of all running applications, including Cubase. Look for the “Memory” column to see how much RAM Cubase is using.

Identifying Potential Bottlenecks And Optimizing Performance

Identifying potential bottlenecks that may affect Cubase’s performance is crucial to maintain smooth playback and avoid any interruptions during your creative process. One common bottleneck is running out of available RAM. However, with proper monitoring and optimization, you can overcome this issue.

By keeping an eye on the System Usage Meter and Task Manager, you can identify which areas of your project require more memory. If you notice that your RAM usage is reaching its limit, there are several steps you can take to optimize performance.

First, you can freeze tracks that are not currently in use. This reduces the load on your RAM by temporarily rendering those tracks inactive. You can do this by right-clicking on a track and selecting “Freeze”.

Next, consider increasing your buffer size. A larger buffer size reduces the strain on your system’s resources, including RAM, by allowing Cubase to process audio in larger chunks. However, keep in mind that increasing the buffer size may introduce higher latency, so find a balance that works for your specific needs.

Recommended Practices For Maintaining Optimal Ram Performance

To ensure that Cubase performs at its best, it’s essential to follow recommended practices for maintaining optimal RAM performance. Here are a few tips:

  1. Regularly save and close projects that are not in use. This frees up valuable memory and improves overall system performance.
  2. Avoid using unnecessary virtual instruments or plugins. Evaluate your project and only use the ones you truly need. Unused and idle instruments contribute to higher RAM usage.
  3. Consider upgrading your hardware if you frequently find yourself reaching the limits of available RAM. Adding more memory to your system can greatly improve Cubase’s performance, allowing for larger and more complex projects.

By following these practices, you can ensure optimal RAM performance in Cubase, making your music production workflow smoother and more efficient.

How Much Ram Does Cubase Need? Get Optimal Performance Now!


Credit: forums.steinberg.net


Frequently Asked Questions Of How Much Ram Does Cubase Need


Is 8gb Ram Enough For Cubase?


Yes, 8GB RAM is generally enough for Cubase, but performance may vary depending on specific plugins and workload.


Is 4gb Ram Enough For Cubase?


Yes, 4GB of RAM is enough for Cubase, but may limit performance with large projects.


What Are The Minimum Requirements For Cubase 12?


The minimum requirements for Cubase 12 include a 64-bit Windows 10 operating system or macOS Mojave. A minimum of 4 GB of RAM and 30 GB of free disk space is required. A compatible audio interface and internet connection for installation and activation are also necessary.


What Are The Minimum Requirements For Cubase For Mac?


The minimum requirements for Cubase on Mac are: a macOS 10. 15 or higher, Intel Core i series or AMD Ryzen processor, 4 GB RAM (8 GB recommended), 30 GB free disk space, and a display with a minimum resolution of 1440 x 900 pixels.


Conclusion


The RAM requirements for Cubase depend on your specific needs. Allocate memory wisely to optimize performance. Consider your budget and usage patterns. Understanding the RAM needs tailored to your requirements can enhance your music production experience. Make informed decisions that align with your goals.

Categories
Archive

What is the Difference between Cubase And Nuendo

Cubase is a music production software, while Nuendo is geared more towards audio post-production. Cubase focuses on music creation, mixing, and editing, whereas Nuendo is specialized for film and television audio post-production tasks.


Cubase is popular among music producers for its intuitive interface and comprehensive features, while Nuendo is preferred by audio professionals in the film and television industry due to its advanced post-production tools and surround sound capabilities. Although both Cubase and Nuendo are developed by Steinberg, they cater to different sectors within the audio industry.


Understanding the key differences between Cubase and Nuendo can help users choose the right software based on their specific needs and requirements.

What is the Difference between Cubase And Nuendo  : A Complete Comparison


Credit: forums.steinberg.net


Key Features

Audio Recording And Editing

Cubase: Cubase offers a user-friendly interface for audio recording and editing.

Nuendo: Nuendo provides advanced audio recording and editing features for seamless production.

Midi Capabilities

Cubase: Cubase includes robust MIDI capabilities for music composition and arrangement.

Nuendo: Nuendo excels in MIDI capabilities, offering precise control over music production.

Audio Mixing And Processing

Cubase: Cubase offers a variety of tools for audio mixing and processing, enhancing sound quality.

Nuendo: Nuendo provides professional-grade audio mixing and processing tools for high-quality output.

Compatibility And Integration


Cubase and Nuendo are professional music production software with slight differences. Cubase caters more to the music industry, while Nuendo focuses on audio post-production for film and television. Both offer compatibility and integration with various hardware and software, making them versatile options for different audio needs.

Hardware Integration

Cubase and Nuendo both offer seamless hardware integration.

Focusrite Thunderbolt interfaces fully integrate with both software.

Software Compatibility

Both Cubase and Nuendo are compatible with various plugins.

  • Virtual instruments from Native Instruments are supported.
  • Third-party VST instruments and effects are easily integrated.

Workflow And User Interface

When it comes to music production software, Cubase and Nuendo are two popular digital audio workstations (DAWs) that are widely used in the music industry. While both are developed by Steinberg, there are some key differences between the two, particularly in terms of workflow and user interface.

User Interface

One of the major differences in the user interface of Cubase and Nuendo is the color scheme and layout. Cubase has a darker color scheme, whereas Nuendo has a lighter, more neutral color palette. Additionally, the arrangement of elements and menus may vary slightly between the two programs.

Workflow Efficiency

When it comes to workflow efficiency, both Cubase and Nuendo offer a range of features to streamline the music production process. Cubase is known for its intuitive interface and customizable workflow options, allowing users to arrange and edit tracks with ease. On the other hand, Nuendo is designed with a focus on post-production and offers advanced features for audio post-production, making it particularly suited for film and television work.

What is the Difference between Cubase And Nuendo  : A Complete Comparison


Credit: www.steinberg.net


Target Audience


Looking for the differences between Cubase and Nuendo? Both audio software are designed for different audiences. Cubase is ideal for songwriters, while Nuendo is catered toward post-production professionals, offering advanced features for film and television projects.

When it comes to music and audio production, different professionals have different needs. Understanding the target audience of music production software is crucial in order to choose the right tool for the job. Two popular options in the industry are Cubase and Nuendo. While both programs are developed by Steinberg, they are tailored to specific types of professionals. Let’s explore the target audience of each software:

Music Production Professionals

Music production professionals, such as musicians, composers, and producers, require software that offers comprehensive tools and functionalities to bring their musical ideas to life. Cubase, with its intuitive interface and extensive range of virtual instruments, MIDI capabilities, and audio processing options, caters precisely to the needs of music producers.

Here are some key features that make Cubase a favorite among music production professionals:

  • High-quality virtual instruments, including synthesizers, drum machines, and samplers.
  • Advanced MIDI editing capabilities to fine-tune and manipulate musical performances.
  • A vast array of audio effects and plugins for mixing and mastering projects.
  • Flexible audio recording and editing functionalities, allowing artists to experiment with different recording techniques and arrangements.

With its comprehensive feature set, Cubase empowers music production professionals to create, arrange, and mix music with precision and flexibility.

Audio Post-production Professionals

On the other hand, audio post-production professionals, such as sound designers, film composers, and audio engineers, have different requirements when it comes to software. They need tools that focus on audio editing, sound design, and post-production workflows. Nuendo, developed with these professionals in mind, offers a specialized set of features and functionalities that cater to the demands of the audio post-production industry.

Here are some key features of Nuendo that make it popular among audio post-production professionals:

  • Advanced mixing and surround sound capabilities, perfect for film, television, and game audio.
  • Extensive audio editing tools, including spectral editing and advanced automation features.
  • Dedicated features for dialogue editing, sound effects processing, and audio restoration.
  • Tight integration with industry-standard surround sound formats and immersive audio technologies.

With its focus on post-production workflows and specialized audio editing tools, Nuendo provides the precise set of features that audio post-production professionals need to create immersive soundscapes for various mediums.

What is the Difference between Cubase And Nuendo  : A Complete Comparison


Credit: m.youtube.com


Frequently Asked Questions Of What Is The Difference Between Cubase And Nuendo


Which Is Better Nuendo Or Cubase?


Nuendo and Cubase offer similar features but cater to different needs. Nuendo is ideal for post-production and game audio, while Cubase is better for general music production. Choose based on your specific requirements for the best results.


Is Nuendo Good For Music Production?


Nuendo is excellent for music production due to its advanced features and compatibility with professional workflows.


Do Professionals Use Cubase?


Yes, many professional music producers and audio engineers use Cubase for its advanced features and capabilities.


What Is Nuendo Used For?


Nuendo is a professional audio software used for music and post-production. It offers advanced mixing, editing, and recording tools. It is widely used by musicians, sound engineers, and filmmakers for its comprehensive features and high-quality audio processing capabilities.


Conclusion


Both Cubase and Nuendo offer powerful audio production tools. While Cubase is more popular among electronic musicians, Nuendo is often preferred by professionals in film and game sound design. Understanding the specific needs of your project can help you choose the right digital audio workstation for your creative endeavors.


https://www.youtube.com/watch?v=UYvx-Y6aia4


Categories
Archive

How to Master: Live Performance with Cubase

To use Cubase for live performance, set up your project with key commands for seamless control. Cubase is a powerful digital audio workstation (DAW) popular among music producers and performers.


While it’s commonly used in studio settings, it can also be a valuable tool for live performance. By configuring your project with key commands, assigning shortcuts to essential functions, and organizing your tracks for quick access, you can optimize Cubase for a live setting.


Additionally, utilizing the program’s flexible routing options and incorporating virtual instruments for enhanced sound capabilities can elevate your live performance experience. With the right setup and preparation, Cubase can be a reliable and versatile tool for delivering an impressive live show.

How to Master Live Performance with Cubase


Credit: www.soundonsound.com


Choosing The Right Equipment

When it comes to using Cubase for live performances, choosing the right equipment is crucial for a seamless and professional show. This involves selecting the ideal instruments and picking the best audio interfaces to enhance your performance.

Selecting The Ideal Instruments

  • Consider the type of instruments you will be using in your live performance.
  • Ensure your instruments are of high quality and suitable for live environments.
  • Test each instrument with Cubase to ensure compatibility and optimal performance.

Picking The Best Audio Interfaces

  1. Research different audio interfaces that are compatible with Cubase software.
  2. Choose an audio interface that offers low latency for real-time processing.
  3. Consider the number of inputs and outputs required for your specific setup.


Credit: www.steinberg.net


Setting Up Cubase For Live Performance

Configuring Audio And Midi Settings

Ensure optimal sound quality by adjusting audio and MIDI settings in Cubase.

  • Access ‘Device Setup’ in Cubase menu to set up audio interface and MIDI devices.
  • Choose the appropriate audio driver compatible with your system for low latency.
  • Adjust buffer size to optimize performance and reduce audio delays.

Creating Customized Templates

Streamline your live performances by creating customized templates in Cubase.

  • Open a new project and customize it with your preferred track layouts.
  • Add effects, instruments, and routing configurations for quick access during performances.
  • Save the template for future use and easy setup before each live show.
https://www.youtube.com/watch?v=kWvAN9-2v8M


Optimizing Live Performance Workflow

When it comes to live performance, optimizing your workflow in Cubase can significantly enhance the experience for both the performer and the audience. Incorporating a seamless and efficient workflow can lead to a more polished and professional live show. In this post, we’ll explore how to utilize Cubase for live performance, with a focus on optimizing your workflow for a smooth and dynamic performance.

Utilizing Looping And Playback Features

Looping and playback features play a crucial role in live performance, allowing artists to create dynamic and layered sounds. Cubase offers a wide range of options for looping and playback, providing flexibility and control over your live sets. Utilizing these features effectively can elevate your performance to new heights.

Incorporating Midi Controller Mapping

MIDI controller mapping is essential for customizing your live performance setup in Cubase. By mapping MIDI controllers to specific parameters within Cubase, you can have hands-on control over various aspects of your performance, such as triggering loops, adjusting effects, and manipulating virtual instruments. This level of customization empowers performers to create unique and personalized live experiences that captivate audiences.

How to Master Live Performance with Cubase


Credit: www.steinberg.net


Maximizing Sound Quality And Effects

When it comes to live performances, sound quality and effects play a vital role in creating a captivating experience for the audience. Cubase, a powerful music production software, offers a range of features that can help you maximize the sound quality and enhance the effects of your live performance.

Applying Dynamic Eq And Compression

Dynamic EQ and compression are essential tools for controlling the dynamics of your audio and ensuring a balanced mix. With Cubase, you can easily apply these effects to individual tracks or the master output, giving you precise control over the sound.

Here’s how you can apply dynamic EQ and compression in Cubase:

  1. Select the track or tracks you want to apply dynamic EQ or compression to.
  2. Open the “Inserts” tab in the Inspector panel.
  3. Click on the “+” button to add an insert effect.
  4. Choose the dynamic EQ or compressor plugin from the list of available plugins.
  5. Adjust the parameters of the plugin to achieve the desired effect. You can control the threshold, ratio, attack, release, and other settings to shape the dynamics of your audio.
  6. Listen to the effect in real-time and make further adjustments if needed.

Utilizing Cubase’s Built-in Effects

In addition to dynamic EQ and compression, Cubase provides a wide range of built-in effects that can elevate your live performance. These effects include reverb, delay, chorus, and many more, allowing you to add depth, space, and texture to your sound.

To utilize Cubase’s built-in effects effectively, follow these steps:

  • Select the track you want to add an effect to.
  • Open the “Effects” tab in the Inspector panel.
  • Click on the “+” button to add an effect.
  • Browse through the various effect categories and choose the one that suits your sound.
  • Adjust the parameters of the effect to achieve the desired result. You can control parameters such as wet/dry mix, decay, feedback, and modulation to shape the effect to your liking.
  • Experiment with different effects and combinations to find the perfect sound for your live performance.

By applying dynamic EQ and compression, and utilizing Cubase’s built-in effects, you can take your live performance to the next level, delivering an unforgettable sonic experience to your audience.

Mastering Stage Presence And Interaction


Mastering stage presence and interaction is crucial for a captivating live performance using Cubase. Learn how to engage and captivate your audience while using this powerful software. Elevate your performances with tips and techniques to own the stage with Cubase for live shows.

Engaging The Audience With Visuals

One of the key aspects of mastering stage presence and interaction is engaging the audience with captivating visuals. While Cubase is primarily known as a powerful digital audio workstation, it also offers several features that allow you to incorporate visuals into your live performance. With a visually stunning backdrop on stage, you can create a mesmerizing experience for your audience, capturing their attention and enhancing their overall engagement.

Integrating Live Instrumentation

Another effective way to master stage presence and interaction is by integrating live instrumentation into your Cubase performance. By incorporating live instruments such as guitars, keyboards, or drums, you can add an organic and dynamic element to your live show. Playing live instruments not only showcases your musical talent but also creates a unique experience for your audience, making your performance more memorable and engaging.

Frequently Asked Questions On How To Use Cubase For Live Performance


Do Professionals Use Cubase?


Yes, professionals commonly use Cubase for music production due to its advanced features and user-friendly interface.


Is Ableton Live Better Than Cubase?


Ableton Live is better for live performances and electronic music creation, while Cubase is preferred for traditional music production. Choose based on your specific needs and workflow preferences.


Is Cubase Better Than Fl Studio?


Cubase and FL Studio are both popular digital audio workstations. The choice between them depends on personal preferences and needs. Cubase is known for its versatility and professional features, while FL Studio is renowned for its user-friendly interface and intuitive workflow.


Both are capable music production platforms.


Is Cubase Good For Music Production?


Yes, Cubase is good for music production due to its versatile features and user-friendly interface. It offers a wide range of tools for recording, editing, and mixing audio, making it a popular choice among professionals and beginners in the music industry.


Conclusion


To sum up, Cubase offers a wide range of tools and features for live performance, allowing musicians to create, mix, and manipulate music in real-time. With its intuitive interface and powerful capabilities, it has become a popular choice for live performers.


By following the tips and techniques mentioned in this blog post, you can effectively use Cubase to enhance your live performances and captivate your audience. Embrace the full potential of Cubase for a seamless and unforgettable live experience.