Categories
Archive

Studio Monitor Setup: The Ultimate Guide to Optimize Your Sound

Setting up studio monitors involves placing them at ear level, forming an equilateral triangle with your listening position to ensure accurate sound reproduction. Proper setup is essential for optimal audio quality and mixing accuracy.


Before diving into the technicalities of studio monitor setup, you should first understand the basics of how studio monitors work and why their positioning matters. By following some key guidelines, you can create an effective, balanced sound environment in your studio.


This article will cover the steps and tips required to set up studio monitors correctly, helping you achieve the best possible audio performance for your recording and mixing needs.

Studio Monitor Setup: The Ultimate Guide to Optimize Your Sound


Credit: www.blackghostaudio.com


Choosing The Right Studio Monitors

Understanding Your Needs

Consider room size, mixing style, and budget.

Comparing Different Types And Sizes

Key factors: near-field, mid-field, active, passive, and driver size.

Setting Up Your Studio Monitors

Properly setting up your studio monitors is crucial for achieving accurate sound reproduction in your workspace. From optimizing speaker placement to calibrating your monitors, these steps play a key role in ensuring the best audio quality.

Optimizing Speaker Placement

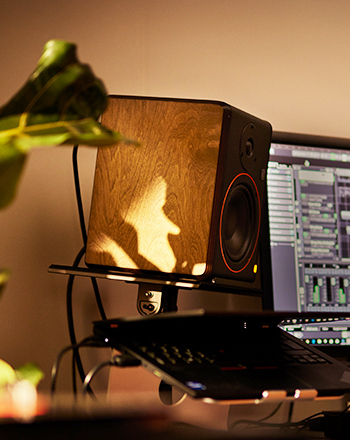
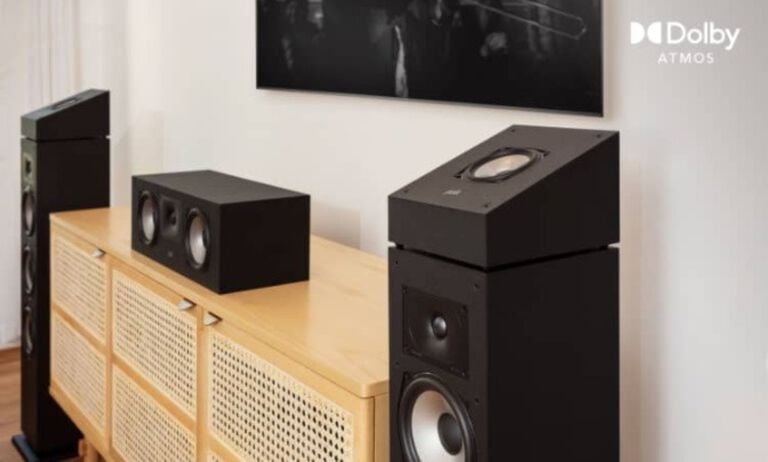
When positioning your studio monitors, create an equilateral triangle with your listening position. This means the distance between each speaker and your ears should be equal. Place the monitors at ear level to achieve optimal listening experience. Avoid placing them directly against walls to prevent sound reflections and distortions.

Calibrating Your Monitors

Before calibrating, ensure that your room is acoustically treated to minimize reflections. Use a calibration microphone and software to measure the frequency response of your monitors. Adjust the monitor’s settings based on the calibration results to achieve a flat frequency response. Regular monitoring calibration is essential for accurate sound reproduction.


Understanding Acoustic Treatment

When setting up a studio monitor, it’s crucial to consider acoustic treatment. This process involves addressing the sound reflections and resonances within the listening environment. Proper acoustic treatment can minimize distortions and improve the accuracy of the sound reproduction, allowing for better mixing and mastering results.

Identifying Problematic Frequencies

Before implementing any acoustic treatment, it’s essential to identify the problematic frequencies in the room. This can be done using measurement tools or by simply listening for areas where certain frequencies become exaggerated or muffled. Identifying these problematic frequencies is the first step in creating an effective acoustic treatment plan.

Implementing Acoustic Solutions

Once problematic frequencies have been identified, it’s time to implement acoustic solutions. This can involve various techniques and products such as bass traps, diffusers, absorbers, and acoustic panels. Each of these solutions targets specific issues within the frequency range, helping to create a more balanced and controlled listening environment.

Utilizing Monitor Controller And Eq


Maximize your studio monitor setup with a monitor controller and EQ. Achieve crystal-clear sound and precise audio adjustments for optimal mixing and mastering. Enhance your listening environment and elevate the quality of your music production.

Utilizing Monitor Controller and EQ

Maximizing Control and Flexibility

When it comes to setting up your studio monitor system, one important aspect that cannot be overlooked is the utilization of a monitor controller. A monitor controller acts as a central hub, allowing you to control and adjust the volume levels of your monitors, as well as switch between various audio sources.

By incorporating a monitor controller into your setup, you maximize your control and flexibility in managing your audio monitoring environment. It provides you with a convenient way to fine-tune the volume levels, enabling you to accurately hear and analyze your mix from different listening positions.

When selecting a monitor controller, consider features such as multiple inputs and outputs, talkback functionality, and headphone amplification. These additional features provide an extra layer of convenience and functionality to your studio setup, allowing for seamless monitoring and communication.

Applying EQ Techniques

Applying equalization (EQ) techniques to your studio monitor setup is another crucial step in achieving optimal sound reproduction. EQ allows you to manipulate the frequency response of your monitors, helping you address any imbalances or deficiencies in your audio playback.

One essential tool for applying EQ is a dedicated graphic or parametric equalizer. These EQ units provide you with precise control over the different frequency bands, allowing you to boost or cut specific frequencies as needed. By utilizing proper EQ techniques, you can finely shape the tonal balance of your mix, ensuring that each instrument and element is accurately represented.

Graphic Equalizers

Graphic equalizers display a series of sliders or knobs, each representing a specific frequency band. These sliders can be adjusted to boost or cut the corresponding frequencies, providing a straightforward and intuitive way to shape your audio playback. When using a graphic equalizer, take advantage of its visual representation to identify and address any problematic frequencies in your mix.

Parametric Equalizers

Parametric equalizers, on the other hand, offer more advanced control over the audio spectrum. They allow you to adjust not only the amplitude (boost or cut) but also the center frequency and bandwidth of each frequency band. This precise control gives you the flexibility to target specific problem areas in your mix and apply corrective EQ.

In conclusion, by utilizing a monitor controller, you enhance your control and flexibility in managing your studio monitor system. Additionally, applying EQ techniques using graphic or parametric equalizers enables you to finely shape the tonal balance of your mix, resulting in accurate sound reproduction. Take advantage of these tools to elevate the quality of your studio monitoring setup.

Maintaining And Monitoring Your Studio Monitors

When it comes to maintaining and monitoring your studio monitors, there are a few important steps you can take to ensure optimal performance. In this section, we will cover some key aspects of maintaining and monitoring your studio monitors, including cleaning and maintenance tips, and conducting regular sound checks.

Cleaning And Maintenance Tips

Your studio monitors are an essential tool for producing high-quality music and audio. To keep them in top condition, it’s important to regularly clean and maintain them. Here are some tips to help you with this:

  1. Keep them dust-free: Dust can accumulate on the surface and inside your studio monitors, affecting their overall performance. Use a soft, lint-free cloth to wipe away any dust regularly.
  2. Avoid liquid cleaners: Never use liquid cleaners directly on your studio monitors, as they can damage the electronics. Instead, dampen the cloth with a small amount of water or mild non-abrasive cleaning solution, and gently wipe the surface.
  3. Clean the drivers: Over time, the drivers of your studio monitors can accumulate dust and debris. Use a soft brush or compressed air to remove any particles from the driver cones and vents carefully.
  4. Check the cables: Regularly inspect the cables and connectors of your studio monitors for any signs of wear or damage. Replace damaged cables promptly to ensure optimal performance.
  5. Monitor the environment: Keep your studio monitors in an environment with stable temperature and humidity levels. Excessive heat or moisture can damage the internal components, so it’s important to maintain a suitable environment.

Conducting Regular Sound Checks

To ensure that your studio monitors are delivering accurate and balanced sound, conducting regular sound checks is crucial. Here are a few steps you can follow to conduct an effective sound check:

  • Positioning: Make sure that your studio monitors are correctly positioned in your studio space. Refer to the manufacturer’s guidelines for the optimal placement.
  • Calibration: Use a reference track or test tone to calibrate the volume levels of your studio monitors. This will help ensure consistent and accurate sound reproduction.
  • Frequency response: Test the frequency response of your studio monitors using an equalizer or frequency sweep. Make adjustments if necessary to achieve a balanced sound across different frequencies.
  • Audition different audio sources: Listen to a variety of audio sources, such as different genres of music, podcasts, or movies, to assess how your studio monitors handle different types of audio.
  • Monitor for any abnormalities: Pay attention to any buzzing, distortion, or other unusual sounds coming from your studio monitors. If you notice any abnormalities, troubleshoot the issue or seek professional assistance if needed.
Studio Monitor Setup: The Ultimate Guide to Optimize Your Sound


Credit: www.polkaudio.com


Studio Monitor Setup: The Ultimate Guide to Optimize Your Sound


Credit: www.palmer-germany.com


Frequently Asked Questions On Studio Monitor Setup


How Should I Set Up My Studio Monitors?


Position studio monitors at ear level when seated, forming an equilateral triangle with your head. Angle them inward slightly. Keep them away from walls to avoid reflections. Experiment with placement for optimal sound. Use isolation pads to reduce vibrations.


What Is The 38 Rule For Studio Monitors?


The 38 rule for studio monitors states that speakers should be placed at a 38-degree angle towards the listener. This optimizes sound projection and enhances the listening experience.


How Far Apart Should Speakers Be In A Studio Monitor?


In a studio monitor setup, speakers should be positioned 3-5 feet apart for an optimal listening experience. This distance helps create a balanced stereo image and accurate sound reproduction. Experimenting with speaker placement can further enhance the listening environment.


What Is The Sweet Spot For Studio Monitors?


The sweet spot for studio monitors is the ideal listening position where the sound is accurately balanced. It’s the point where the speakers are positioned at ear level and form an equilateral triangle with your head. This ensures you hear the most accurate and balanced sound reproduction.


Conclusion


A well-calibrated studio monitor setup is crucial for audio professionals and enthusiasts. By considering room acoustics, speaker placement, and quality monitors, you can achieve accurate sound reproduction. This not only enhances the listening experience but also improves the overall quality of your audio productions.


Invest in a reliable setup and experience the difference in your sound.
Categories
Archive

Mid Side Processing: Unlock the Untapped Potential

Mid Side Processing involves separating the mono and stereo components of an audio signal to manipulate them independently for better control over the stereo image. By decoding the mid and side signals, adjustments can be made to the spatial and tonal characteristics of the mix.


When used effectively, Mid Side Processing can enhance the depth and width of a mix, improve clarity, and fix stereo balance issues. It is a versatile technique commonly used in audio production to create a more engaging and immersive listening experience.


By understanding how to properly apply Mid Side Processing, audio engineers can elevate the quality of their mixes and achieve a professional sound that stands out.


Credit: medium.com


The Basics Of Mid Side Processing

Mid Side Processing is a powerful audio processing technique used in mixing and mastering to manipulate the stereo image of a track. It involves separating the mono (center) and stereo (sides) content of a stereo signal, allowing for independent processing of each component. This technique can enhance clarity, width, and depth in a mix, making it a valuable tool for audio engineers and producers.

What Is Mid Side Processing?

Mid Side Processing involves splitting a stereo audio signal into two components: the mid signal (containing the mono information that is panned center) and the side signal (containing the stereo information that is panned left or right). This separation allows for targeted processing and manipulation of the stereo field, offering greater control over the spatial characteristics of a mix.

How Does Mid Side Processing Work?

Mid Side Processing works by encoding and decoding the stereo signal to extract the mid and side components. This is typically done using a mid-side encoder to split the signal into mid and side components, apply processing as needed, and then decode the signals back into stereo. Common processing techniques applied to the mid and side signals include EQ, compression, reverb, and stereo enhancement effects.

Applications Of Mid Side Processing

Mid Side Processing is a powerful technique in audio engineering that allows for precise manipulation of the stereo image. By separating the “mid” (center) and “side” (sides) signals of a stereo mix, engineers can apply different processing to each component, resulting in a wide range of creative possibilities.

Enhancing Mix Clarity

Enhancing Mix Clarity – By adjusting the levels of the mid and side signals independently, engineers can improve the clarity and focus of individual elements in a mix.

Manipulating Stereo Image

Manipulating Stereo Image – Mid Side Processing enables engineers to widen or narrow the stereo image, creating a sense of space and depth in the mix.

Tools For Mid Side Processing

For those seeking dedicated hardware solutions, various independent companies offer dedicated mid-side processing tools. These specialized units are designed to provide precise and surgical control over mid-side content. They often come with intuitive control interfaces, allowing engineers to dial in the exact amount of processing required. Some models even offer unique features such as stereo width adjustment and phase manipulation.

In modern Digital Audio Workstations (DAWs), mid-side processing techniques can be applied using specialized plugins. These plugins allow for encoding, decoding, and manipulation of mid-side signals within the software environment. They often provide visual indicators and controls for adjusting the mid and side components separately. Advanced plugins may offer additional functionalities such as stereo enhancement, harmonic excitement, and spatial manipulation.


Credit: www.amazon.com


Best Practices For Mid Side Processing

When it comes to audio processing, Mid Side (M/S) processing is a powerful technique that can greatly enhance your mixes. By separating the audio into mid and side signals, you have precise control over the stereo width and balance of your mix. However, to achieve optimal results, it is important to follow some best practices for Mid Side processing.

Balancing The Mid And Side Signals

One of the key aspects of Mid Side processing is finding the right balance between the mid and side signals. The mid signal contains all the audio that is centered in the stereo image, such as lead vocals and bass instruments, while the side signal represents the audio that is spread out across the stereo image, including elements like reverb and stereo effects.

To achieve a balanced mix, it is crucial to focus on the levels of the mid and side signals. You should ensure that the mid signal is prominent and well-defined, while the side signal enhances the stereo width without overpowering the mix. This can be achieved by adjusting the volume and EQ settings for each signal separately.

Avoiding Phase Issues

Phase cancellation can occur when the mid and side signals are not in phase with each other. This can lead to a loss of clarity and a lack of definition in the stereo image. To avoid phase issues, it is important to closely monitor the phase relationship between the mid and side signals.

There are several techniques to ensure phase coherence in Mid Side processing. Firstly, you can use phase correlation meters or plugins to visually analyze the phase relationship. Secondly, you can try flipping the phase of either the mid or side signal and listen for any changes in the stereo image. Lastly, you can use Mid Side processing plugins that automatically take care of phase coherence for you.

By following these best practices for Mid Side processing, you can achieve a well-balanced mix with an enhanced stereo image. Remember to carefully balance the mid and side signals to achieve the desired effect, and always be mindful of any phase issues that may arise. With practice and attention to detail, you can take full advantage of the power of Mid Side processing in your audio productions.

Advanced Tips And Techniques

Mid Side processing is a powerful technique that can greatly enhance your audio production. In this section, we will explore some advanced tips and techniques for using Mid Side processing to take your sound design to the next level. Whether you are looking to add depth and width to your mix or create unique and interesting soundscapes, these tips will help you achieve professional and creative results.

Creative Sound Design With Mid Side Processing

If you want to take your sound design to new heights, Mid Side processing is a valuable tool to have in your arsenal. By manipulating the mid and side components of a stereo signal separately, you can create immersive and spatial audio effects. Here are some creative ways to use Mid Side processing:

  • Stereo widening: By boosting the side signal and reducing the mid signal, you can expand the stereo width of a sound, making it sound larger and more spacious.
  • Centering vocals or instruments: If you have a stereo recording with off-center vocals or instruments, you can use Mid Side processing to bring them to the center of the mix without affecting the stereo image of the other elements.
  • Unique panning effects: By applying different processing to the mid and side signals, you can create interesting and dynamic panning effects that move the soundstage around the listener.
  • Creating depth: By applying reverb and delay effects differently to the mid and side signals, you can create a sense of depth and space in your mix, placing certain elements closer or further away from the listener.

These are just a few examples of how Mid Side processing can be used creatively for sound design. Don’t be afraid to experiment and push the boundaries of what is possible!

Parallel Processing With Mid Side

Parallel processing is a technique that involves blending a heavily processed signal with the original signal to achieve a desired effect. When combined with Mid Side processing, parallel processing can lead to even more interesting and unique results. Here’s how you can use parallel processing with Mid Side:

  1. Mid Side parallel compression: Apply heavy compression to the mid and side signals separately, and then blend them back with the original signals. This can help to control the dynamics of the mix while preserving the stereo image.
  2. Mid Side parallel saturation: Use saturation plugins on the mid and side signals separately, and then blend them back with the original signals. This can add warmth and character to the mix without sacrificing its width.
  3. Mid Side parallel EQ: Apply EQ adjustments to the mid and side signals separately, and then blend them back with the original signals. This can help to shape the tonal balance of the mix with greater precision.

Parallel processing with Mid Side gives you even more control over the stereo image and allows you to add depth, width, and character to your mix.


Credit: www.santafenewmexican.com


Frequently Asked Questions Of Mid Side Processing


What Is A Mid Side Processor?


A mid-side processor is an audio tool used to manipulate the stereo field. It separates the center and side signals, allowing independent control. This can enhance stereo imaging and spatial depth in recordings. It is commonly used in mixing and mastering to adjust and optimize the stereo spread of audio.


What Is Mid Process?


Mid process refers to the stage occurring between the beginning and end of a particular task or project.


Is Mid Side Processing Necessary?


Mid side processing is not necessary but can enhance spatial imaging and depth in audio production.


What Is Mid Side For Mastering?


Mid side for mastering is a technique that separates the mono and stereo elements of a mix. It allows for individual processing of the middle and side channels to enhance clarity and width in the final master. This technique can help achieve a more balanced and polished sound.


Conclusion


In the world of audio production, mid-side processing offers versatility and control. Understanding its techniques can elevate your sound to new heights. By incorporating this method, you can achieve a clearer, more balanced mix. With the right application, mid-side processing can truly revolutionize your music production process, leading to professional and polished results.


https://www.youtube.com/watch?v=cjt1drvcljA


Categories
Archive

Demystifying Bus Compression: Unlocking Its Power

Understanding bus compression involves reducing dynamic range of audio signals for more consistent levels in mixes. It enhances overall clarity.


Bus compression is a vital tool in audio production to balance different elements. It helps to glue the individual tracks together, creating a more cohesive and polished sound. By applying compression to the entire mix or a group of tracks, you can control peaks and make the overall audio more cohesive.


This technique is commonly used in genres like rock, pop, and electronic music to achieve a professional and radio-ready sound. We will delve into the basics of bus compression, its benefits, how to set it up, and some tips for using it effectively in your music production.


Credit: fastercapital.com


The Basics Of Bus Compression


Bus compression is an essential aspect of audio mixing, allowing you to control the dynamics of multiple tracks at once. By sending multiple tracks to a single compressor, you can create a more cohesive and powerful sound. Understanding bus compression is crucial for achieving professional-sounding mixes.

What Is Bus Compression?

Bus compression is a technique used to apply compression to multiple tracks or channels collectively.

Why Use Bus Compression?

Bus compression ensures cohesive, consistent sound by leveling the dynamics of several tracks together. It glues elements of a mix.

Types Of Bus Compression

Bus compression is an essential tool in audio mixing to enhance the dynamics of multiple tracks simultaneously. There are two primary types of bus compression techniques commonly used: Parallel Compression and Serial Compression.

Parallel Compression

Parallel Compression is a technique where an uncompressed mix of a track is blended with the heavily compressed version of the same track. It helps to retain the natural dynamics of the original track while adding punch and sustain to the overall sound.

Serial Compression

Serial Compression involves applying compression directly to the bus or group of tracks. This method allows for a more cohesive and consistent sound across all the tracks while controlling peaks and dynamics effectively.


Setting Up Bus Compression In Your Mix

Welcome to the world of bus compression. When it comes to setting up bus compression in your mix, selecting the right bus for compression and adjusting compression settings are crucial steps that can significantly impact the overall sound of your mix.

Selecting The Right Bus For Compression

Before diving into bus compression, it’s essential to choose the appropriate bus that will benefit from compression. Identify the elements within your mix that could benefit from cohesive dynamic control, such as the drum bus, vocal bus, or instrument bus. Selecting the right bus is key to achieving a balanced and polished mix.

Adjusting Compression Settings

After selecting the bus for compression, it’s time to adjust the compression settings. Start by setting the threshold to control the level at which the compression kicks in. Adjust the ratio to determine the amount of compression applied. Fine-tune the attack and release settings to shape the transients and sustain of the compressed signal. Always ensure to use your ears and make subtle adjustments to achieve the desired sound.

Common Mistakes To Avoid

When it comes to bus compression, avoiding common mistakes can make a significant difference in the quality of your final mix. By understanding the potential pitfalls and taking appropriate precautions, you can achieve a well-balanced and polished sound that enhances your music. In this article, we will discuss two common mistakes to avoid when using bus compression: over-compressing the bus and neglecting gain staging.

Over-compressing The Bus

One of the most common mistakes that producers and engineers make when applying bus compression is over-compressing, which can lead to an unnatural and squashed sound. It’s essential to strike a balance between adding cohesion and control to the mix while preserving the dynamics and musicality of the individual tracks.

So how can you avoid over-compressing the bus? Here are a few strategies:

  1. Set a Reasonable Threshold: When setting the threshold, ensure that the compressor is only activating when necessary. Adjust the threshold so that it gently glues the elements together without excessively squashing the dynamics.
  2. Avoid Excessive Ratio: Be mindful of the compression ratio and avoid going too extreme. Aim for ratios that offer smooth and transparent compression rather than heavy-handed reduction.
  3. Use Your Ears: Always trust your ears and listen critically. If you notice that the mix sounds overly compressed, dial back the compression settings and reevaluate.

By implementing these practices, you can avoid the pitfall of over-compressing the bus, allowing your mix to retain its natural dynamics and musicality.

Neglecting Gain Staging

Gaining staging is another crucial aspect of bus compression that often gets overlooked. Neglecting proper gain staging can result in unwanted distortion, noise, and an overall unbalanced sound. To achieve optimum results, it’s important to pay attention to the level of each track in your mix.

Here are some tips to help you avoid neglecting gain staging:

  1. Set Proper Levels: Before applying bus compression, make sure the individual tracks are well-balanced and sitting at appropriate levels in the mix. This will prevent unnecessary gain adjustments downstream and ensure a cleaner and more controlled sound.
  2. Consider Pre-Compression Gain Adjustments: If needed, make gain adjustments on individual tracks before applying bus compression. This will help you attain the desired balance and avoid excessive compression.
  3. Monitor Output Levels: Keep an eye on the output levels of your bus compressor to avoid clipping and distortion. Adjust the output gain accordingly to maintain a healthy and balanced mix.

By diligently addressing gain staging, you can avoid the mistake of neglecting this crucial step and produce a cleaner and more professional mix overall.

Creative Uses Of Bus Compression

Bus compression is a powerful tool in the world of audio production. While its primary purpose is to control dynamics and balance the levels of different audio elements, it can also be used creatively to bring unique character and cohesion to a mix. In this section, we will explore two key ways to creatively utilize bus compression: Glueing Mix Elements Together and Adding Character to the Mix.

Glueing Mix Elements Together

One of the most common uses of bus compression is to “glue” mix elements together. Imagine a scenario where you have multiple tracks of drums or guitars that you want to sound like a cohesive unit. By sending these tracks to a bus and applying compression, you can subtly blend them together, creating a more cohesive and unified sound.

When applying bus compression to glue mix elements together, it’s essential to choose the right settings. Start by setting a fairly low compression ratio, around 2:1 or 3:1, and a medium attack and release time. This will allow the compression to gently control the dynamics while preserving the natural transients of each element.

In addition to compression settings, you can also experiment with different types of compression, such as analog emulations or vintage-style compressors. These can add a touch of color and warmth to the mix, further enhancing the glue effect.

Adding Character To The Mix

Another creative use of bus compression is to add character to the mix. By applying more aggressive compression settings, you can impart a unique sonic flavor to your mix. This is particularly useful if you’re aiming for a specific genre or style that demands a certain level of intensity and impact.

To add character to the mix, consider using higher compression ratios, faster attack and release times, and lower thresholds. These settings will create a more noticeable compression effect, causing the mix elements to pump and breathe in a musical way.

Remember, when adding character through bus compression, it’s essential to maintain a balanced and controlled mix. It’s easy to overdo it and end up with an overly compressed and distorted sound. Take your time to adjust the settings and listen carefully to how each element interacts with the compression effect.

In conclusion, understanding the creative uses of bus compression can elevate your audio productions to the next level. Whether you’re looking to glue mix elements together or add character and impact to your mix, bus compression is a valuable and versatile tool. Experiment with different settings and compressors, and don’t be afraid to push the boundaries. With practice and experimentation, you’ll find your unique style and achieve the desired results in your mixes.


Credit: medium.com


Credit: www.dn-africa.com


Frequently Asked Questions On Understanding Bus Compression


What Is 2 Bus Compression?


2 bus compression is a technique used in mixing audio. It involves applying compression to multiple tracks simultaneously to improve overall sound quality and control dynamics.


What Should The Compression Setting Be On A Drum Bus?


Set the compression on a drum bus based on the mix’s needs. Generally, start with a 4:1 ratio and adjust the threshold for smooth dynamics control.


What Ratio For Mix Bus Compression?


For mix bus compression, aim for a ratio between 2:1 and 4:1. This helps glue your mix together without squashing dynamics.


What Kind Of Compressor Do I Need For A Mix Bus?


For a mix bus, you would need a compressor that can bring all the tracks together and enhance the overall sound. Look for a compressor with transparent and subtle compression to maintain the audio’s dynamics. It should also have variable attack and release times to suit different music genres and styles.


Conclusion


Bus compression is a powerful tool for enhancing audio productions. By understanding its principles and applications, audio engineers can achieve better clarity and impact in their mixes. With the right approach, bus compression can bring cohesion and balance to a mix, elevating the overall listening experience for the audience.

Categories
Archive

5 Types Of Reverb: Master the Art of Acoustic Echoes

**5 Types Of Reverb: Plate, Spring, Hall, Room, Convolution. Plate reverb uses metal plate vibration, spring relies on actual springs, hall recreates large acoustic spaces, and room mimics smaller environments.


Convolution replicate specific real-life spaces based on digital impulse responses. ** Reverb is an essential effect in music production, adding depth, ambience, and character to audio recordings. By understanding the different types of reverb available, you can achieve various sonic textures and enhance the overall sound quality of your tracks.


Each type of reverb has its unique characteristics, suited for different musical genres and applications. Experimenting with plate, spring, hall, room, and convolution reverbs can help you create a rich, immersive sound that complements your music production style. Whether you prefer a subtle, natural ambience or a more dramatic, atmospheric effect, the choice of reverb type can greatly impact the final result of your mix.

5 Types Of Reverb: Master the Art of Acoustic Echoes


Credit: reverb.com


Understanding Reverb

Reverb is an essential audio effect that adds depth and dimension to sound, mimicking the natural acoustics of various spaces. Understanding the different types of reverb can help you create the perfect auditory environment for your recordings.

Room Reverb

Room reverb emulates the sound reflections in a physical room, adding warmth and authenticity to the audio.

Plate Reverb

Plate reverb is created by vibrating a metal plate to produce reverberations, offering a rich and smooth sound effect.

Spring Reverb

Spring reverb uses springs to reflect and reverberate sound waves, delivering a unique and characteristic twangy effect.

Hall Reverb

Hall reverb simulates the acoustics of a concert hall, providing a spacious and immersive sound experience.

Chamber Reverb

Chamber reverb replicates the reverberations in a confined space, offering a tighter and more controlled sound effect.


Credit: reverb.com


Credit: www.amazon.com


Frequently Asked Questions Of 5 Types Of Reverb


What Are The Five Sources Of Reverb?


The five sources of reverb are room, plate, hall, spring, and chamber. Each gives a distinct sound characteristic.


What Are The Two Main Types Of Reverb?


The two main types of reverb are spring reverb and plate reverb. They provide different textures and spatial effects to audio.


What Are The Three Types Of Reverberation?


The three types of reverberation are early reflections, late reflections, and decay. Early reflections are the initial sound reflections that arrive at the listener’s ear within the first 50 milliseconds. Late reflections are the subsequent reflections that occur after the initial sound.


Decay refers to the gradual fading of the sound over time.


What Is The Best Type Of Reverb For Vocals?


Plate reverb is the best type for vocals, providing a warm and smooth sound. It enhances the vocals without overwhelming them.


Conclusion


Understanding the different types of reverb is essential for creating a captivating and dynamic sound. Whether you’re using plate, spring, hall, chamber, or convolution reverb, each type offers its unique characteristics. Selecting the right reverb can elevate your music to new heights and enhance the overall listening experience.


Mastering these various reverb types opens up a world of creative possibilities for any audio project.


Categories
Archive

How Do You Know If a Piano is Good: Unveiling the Secrets

You can tell if a piano is good by checking its sound, touch, and overall condition. When evaluating a piano’s quality, consider factors such as tone clarity, key responsiveness, and structural integrity.


An excellent piano should have a balanced tone across all keys, feel smooth and consistent while playing, and show minimal signs of wear and tear. Additionally, seek the advice of a professional piano technician for a comprehensive assessment. Remember that a good piano is one that not only sounds great but also feels comfortable to play, making it a worthwhile investment for music enthusiasts and players of all skill levels.


Exploring Different Piano Types

Acoustic Pianos

Acoustic pianos use strings and hammers to produce sound, offering a traditional and rich musical experience.

Digital Pianos

Digital pianos replicate the sound and feel of an acoustic piano but come with modern features like recording capabilities.

Hybrid Pianos

Hybrid pianos combine the best of acoustic and digital pianos, blending classic sound with technological advancements.

How Do You Know If a Piano is Good: Unveiling the Secrets


Credit: m.youtube.com


Key Features To Look For

Listen for a rich, resonant tone that is balanced across all octaves.

Check the responsiveness of the keys and ensure they provide nuanced expression.

Test the piano’s build quality and how well it sustains sound.

Understanding The Brand And Model


When evaluating a piano’s quality, it’s crucial to consider the brand and model. Careful research and asking experts can help determine a good piano. Understanding the reputation and specifications of different brands and models will guide your decision in finding a high-quality instrument.

Understanding the Brand and Model: When evaluating the quality of a piano, understanding the brand and model is essential. The brand and model of a piano can provide valuable insights into its craftsmanship, reputation, and performance. By delving into the specifics of established brands and comparing different models and series, you can make an informed decision about the quality of a piano.

Researching Established Brands

Researching established piano brands is a crucial step in determining the quality of a piano. Look for well-known and reputable brands that have a history of producing high-quality instruments. Some renowned piano brands include Steinway & Sons, Yamaha, Kawai, and Bosendorfer, among others. Ensure that you explore the background, history, and reputation of each brand to gain a clear understanding of their commitment to craftsmanship and quality.

Comparing Models And Series

When considering a specific piano model, it’s important to compare different models and series within the same brand. Assess the features, materials, and technologies used in each model to determine its quality and performance. Look for information about the construction, sound production, and durability of the piano. Compare the specifications and reviews of different models to identify the strengths and weaknesses of each, enabling you to make a well-informed decision. In summary, understanding the brand and model of a piano is a pivotal aspect of evaluating its quality. Researching established brands and comparing different models and series can provide invaluable insights into the craftsmanship and performance of a piano.

Seeking Professional Advice

When looking to determine whether a piano is of good quality or not, seeking professional advice is an essential step. Consulting piano technicians and receiving recommendations from piano instructors are two of the most effective ways to gain valuable insights and make an informed decision about the piano you are considering.

Consulting Piano Technicians

Piano technicians are experts who specialize in evaluating and servicing pianos. Their extensive knowledge and experience enable them to assess the quality, condition, and playability of the instrument. When it comes to determining if a piano is good, scheduling a consultation with a piano technician can provide you with valuable information.

Here are a few reasons why consulting a piano technician is crucial:

  1. Expert Evaluation: A piano technician can thoroughly examine the piano’s action, soundboard, strings, hammers, and other components to identify any potential issues or signs of poor quality.
  2. Tonal Quality: The technician can assess the piano’s tonal qualities, checking for a well-balanced and clear sound that resonates harmoniously throughout the entire keyboard.
  3. Playability: By testing the piano’s responsiveness, touch, and overall feel, the technician can determine if the instrument offers a comfortable and enjoyable playing experience.

Receiving Recommendations From Piano Instructors

Piano instructors, being professionals in the field, possess a wealth of knowledge about various piano models and brands. Their expertise allows them to identify pianos that offer exceptional quality and are suitable for different skill levels. Seeking recommendations from piano instructors can offer valuable guidance in your piano search.

Here’s why receiving recommendations from piano instructors is beneficial:

  1. Experience and Expertise: Piano instructors have extensive experience with different pianos, having taught numerous students on various instruments. They can provide reliable insights into which pianos have consistently proven to be of high quality and offer long-term value.
  2. Suitable for Your Needs: Piano instructors are familiar with the unique requirements and aspirations of their students. They can recommend pianos that match your skill level, playing style, and musical goals, ensuring that you choose an instrument that complements your abilities and aspirations.
  3. Trustworthy Objective Opinions: Piano instructors have no vested interest in promoting specific piano brands or models and can provide honest feedback based on their professional judgment. This unbiased perspective can be invaluable when making a decision.

Testing And Evaluating The Instrument


To determine the quality of a piano, testing and evaluating the instrument is essential. Check for even key weight, consistent sound across octaves, and responsive pedals for a thorough assessment to determine if the piano meets your standards.

Playability And Responsiveness

When determining the quality of a piano, one crucial aspect to consider is its playability and responsiveness. A good piano should feel comfortable to play and respond accurately to the touch of the pianist.

Here are some factors to keep in mind during the evaluation process:

  1. Action: The action of a piano refers to the mechanism that connects the keys to the hammers. A well-designed action should provide a smooth and consistent feel throughout the keyboard. It should also allow for precise control over dynamics.
  2. Key Weight: The weight of the keys determines how much force is required to depress them. Ideally, a piano should have keys that are neither too heavy nor too light. Keys that are too heavy can strain the hands and fingers, while keys that are too light can make it difficult to control the sound.
  3. Touch Sensitivity: A high-quality piano should feature touch-sensitive keys. This means that the volume and tone of the sound should vary depending on the force with which the keys are pressed. This allows for dynamic expression and musicality.

By considering these factors, you can assess the playability and responsiveness of a piano, ensuring that it meets your needs and preferences.


Sound Projection And Harmonic Integrity

Another crucial aspect to evaluate when determining the quality of a piano is its sound projection and harmonic integrity. A good piano should produce a rich, balanced, and resonant sound that fills the room.

Here are a few factors to consider when testing the sound quality of a piano:

  • Tone: Pay attention to the overall tone of the piano. It should be clear, warm, and pleasing to the ear. Avoid any harsh or overly bright tones.
  • Dynamics: A high-quality piano should be capable of producing a wide range of dynamics, from soft and subtle to powerful and bold. Test the piano’s ability to respond to your playing technique and adjust the volume accordingly.
  • Sustain: The sustain refers to how long the sound of a note continues after it is played. A good piano should have a balanced sustain, neither too short nor too prolonged. The sustain should also be consistent across all registers of the keyboard.
  • Harmonic Richness: When playing chords or multiple notes simultaneously, listen carefully for any discrepancies or muddiness in the sound. A high-quality piano will maintain clarity and harmonic integrity, allowing each note to ring out distinctively.

By testing the sound projection and harmonic integrity of a piano, you can ensure that it possesses the sonic qualities necessary for a rewarding musical experience.


Credit: www.amazon.com


Credit: www.amazon.com


Frequently Asked Questions Of How Do You Know If A Piano Is Good


How Do You Know If A Piano Is Good Quality?


You can determine a piano’s quality by checking the craftsmanship, materials, sound quality, brand reputation, and price point.


How Do I Choose A Good Piano?


When selecting a piano, consider your skill level, available space, and budget. Test various pianos to find the best sound and touch for your preferences. Research different brands and types, such as acoustic or digital pianos, to find the right fit for your needs.


Is A 20 Year Old Piano Still Good?


A 20-year-old piano can still be good, depending on its condition and maintenance. Regular tuning and proper care can help maintain its quality and playability. Consider getting a professional assessment and inspection before making a decision.


What Is The Average Lifespan Of A Piano?


The average lifespan of a piano is around 70 to 100 years. It can vary depending on factors like maintenance, usage, and quality of construction. Regular tuning, climate control, and proper care can help prolong its lifespan.


Conclusion


Identifying a good piano requires careful consideration of its sound, touch, and build quality. It’s essential to test the instrument and seek professional advice for an informed decision. Whether you’re a beginner or a seasoned player, investing in a high-quality piano will ensure a satisfying playing experience for years to come.


Categories
Archive

Mixing With Samples : Unleash the Power of Sound

To effectively mix with samples, ensure they are high quality and complement the overall song. Adjust levels carefully.


Mixing with samples can elevate your music production by adding depth and texture to your tracks. By seamlessly integrating samples, you can create a unique and captivating sound that captures your audience’s attention. Whether it’s a drum loop, vocal snippet, or instrument riff, samples can be powerful tools to enhance your music.


We’ll explore how to incorporate samples into your mix effectively, balance them with original elements, and achieve a cohesive and professional sound. Mastering the art of mixing with samples can take your music to the next level and set you apart as a producer.


Credit: www.facebook.com


The Art Of Sampling

Sampling is the heart of modern music production, allowing artists to blend and rework existing sounds to create something new.

Sampling Techniques

  • Chop and rearrange snippets of music
  • Time stretch to alter tempo and pitch
  • Layer multiple samples for depth

Legality Of Sample Use

Understanding copyright laws is crucial when using samples in your music. Be sure to obtain proper permissions.


Credit: robsummers.co.uk


Choosing The Right Samples

When it comes to Mixing With Samples, choosing the right samples is crucial for creating high-quality music. Understanding Sample Quality and Matching Samples to Genre are essential steps in this process.

Understanding Sample Quality

Sample quality directly impacts the overall sound of your music. Ensure samples are recorded and processed well to maintain clarity and crispness.

Matching Samples To Genre

Choose samples that align with the specific genre you are producing. Different genres have distinctive elements that should be reflected in the samples selected.

https://www.youtube.com/watch?v=9XRxZckeF5M


Sample Manipulation Techniques

When it comes to music production, sample manipulation techniques play a crucial role in creating unique sounds and arrangements. By manipulating audio samples, producers can add their own creative twist to existing sounds, thus giving their tracks a distinct and personalized feel. In this post, we will explore some of the most powerful and popular sample manipulation techniques that can elevate your mixing and production game.

Pitch And Time Stretching

Pitch and time stretching are essential sample manipulation techniques that allow producers to alter the pitch and duration of audio samples. By adjusting the pitch, producers can change the tone and character of a sample, making it match the key of the track or creating unique harmonic textures. Time stretching, on the other hand, enables producers to manipulate the tempo and duration of samples without affecting their pitch, facilitating seamless integration into a track with varying tempos.

Layering And Processing Samples

Layering and processing samples involve combining multiple audio samples to create complex and rich textures. Through layering, producers can blend different sounds to produce unique timbres and harmonies, enhancing the depth and complexity of their tracks. Moreover, by applying various processing techniques such as EQ, compression, and modulation to layered samples, producers can further sculpt and mold their sounds to achieve the desired sonic characteristics.

Creative Sampling In Production

When it comes to music production, one of the most creative and versatile techniques is sampling. By taking snippets of pre-recorded sounds and manipulating them, producers can add unique textures and layers to their tracks. In this blog post, we will explore the art of creative sampling in production, focusing on sample-based composition and innovative sound design with samples.

Sample-based-compositionsample-based Composition/sample-based-composition

In sample-based composition, producers build their tracks by using samples as the foundation. Samples can be anything from drum beats, vocal chants, or even field recordings. By carefully selecting and arranging these samples, producers can create intricate and captivating compositions. This technique allows artists to harness the power of existing recordings and infuse their tracks with new life.

When it comes to sample-based composition, it’s all about finding the perfect balance between originality and familiarity. Producers often spend hours digging through crates of vinyl records or browsing online sample libraries in search of that one perfect sound. Once the samples are selected, they can be chopped, stretched, and rearranged to fit the desired tempo and groove of the track. Mixing different samples together can lead to unexpected combinations and create a sound that is truly unique.

Innovative-sound-design-with-samplesinnovative Sound Design With Samples/innovative-sound-design-with-samples

Not only can samples be used in composition, but they also play a crucial role in sound design. With the right tools and techniques, producers can transform ordinary sounds into other-worldly textures and effects. One popular method is granular synthesis, where samples are broken down into tiny grains and rearranged to create complex and evolving sounds.

Another technique is layering multiple samples together to create a rich and unique sonic landscape. By combining different elements from various samples, producers can design sounds that were previously unimaginable. Whether it’s blending a field recording of rain with a synthesized pad or layering multiple drum samples to create a larger-than-life beat, the possibilities are endless.

In conclusion, creative sampling in production opens up a world of possibilities for producers and allows them to push the boundaries of their art. With sample-based composition and innovative sound design, producers can create tracks that are truly one-of-a-kind. By harnessing the power of samples and using their creativity, they can transform ordinary sounds into extraordinary sonic experiences.

Ethical Use Of Samples

When creating music, using samples can be an excellent way to enhance your sound and add diversity to your tracks. However, it’s crucial to use samples ethically, respecting the copyrights of the original creators and crediting the sources appropriately. In this section, we’ll explore some important guidelines for ethically using samples in your music production.

Respecting Copyrights

Copyright laws protect the original creators’ rights, ensuring they receive recognition and compensation for their work. As a responsible music producer, it’s essential to respect these copyrights when using samples. This means obtaining the proper licenses or permissions before incorporating someone else’s work into your own.

If you come across a sample you’d like to use in your music, take the time to review its copyright status. Some samples may be offered under Creative Commons licenses, which may allow you to use them freely under certain conditions. However, other samples may require explicit permission or licensing agreements.

To avoid any legal issues, it’s best to acquire samples from reputable sources that offer clear licensing guidelines. By doing so, you can be confident that you’re using the samples within the boundaries of the law.

Crediting Original Sources

In addition to respecting copyrights, it’s crucial to credit the original sources of the samples you use. By giving credit where it’s due, you acknowledge the hard work and creativity of the original creators, ensuring they receive the recognition they deserve.

When using samples in your music, include the necessary credits in the liner notes, album artwork, or track descriptions. Clearly state the name of the original creator, the title of the work, and any relevant information that allows listeners to easily find the source.

By crediting the original sources, you not only demonstrate your integrity as a music producer but also contribute to a culture of respect and collaboration within the music community.

To summarize, respecting copyrights and crediting original sources are essential aspects of ethically using samples in music production. By following these guidelines, you not only adhere to the law but also show appreciation for the talented artists who have contributed to the creation of the samples you incorporate into your own work.

Mixing With Samples  : Unleash the Power of Sound


Credit: www.amazon.com


Frequently Asked Questions On Mixing With Samples


What Is Sampling And Mixing?


Sampling is the process of using small portions of audio to create new music. Mixing is blending and adjusting multiple tracks to create a balanced and polished sound. Both are essential in music production and can impact the overall quality of a song.


Is It Ok To Use Samples In Music?


Yes, it’s okay to use samples in music as long as you have the proper rights and permissions. Sampling can add creativity and unique elements to your music, but be sure to comply with copyright laws.


Can You Make Music With Just Samples?


Yes, you can create music with just samples by combining them in unique ways to produce original tracks.


How Do You Use Samples Legally?


To use samples legally, ensure you have the rights or permission, understand the terms for use, attribute the source, and refrain from using copyrighted material without approval. Always seek legal advice if unsure about usage.


Conclusion


To wrap up, incorporating samples into your music production can greatly enhance your sound. By carefully selecting and manipulating samples, you can add depth and creativity to your tracks. Experimenting with different samples opens up new possibilities for your music.


Embrace the versatility of samples and use them to elevate your productions.

Categories
Archive

Writing A Song: Master the Art with these 5 Powerful Tips

Writing a song involves crafting lyrics and melody to evoke emotions and tell a story. Begin by brainstorming ideas and finding inspiration for your song.


Songwriting is an art form that allows you to express your thoughts and emotions through music and words. To create a compelling song, start by identifying a theme or message you want to convey. Develop a unique and catchy melody that complements your lyrics.


Remember to stay true to your style and emotions when crafting your song. Experiment with different chord progressions and song structures to find the perfect fit for your composition. Through creativity and passion, you can create a song that resonates with listeners and leaves a lasting impact.


Credit: promixacademy.com


Finding Inspiration

When it comes to writing a song, finding inspiration is key. Discover ways to ignite your creativity and craft compelling lyrics that resonate with your audience.

Listen To Various Genres

Explore different music genres for fresh ideas and unique melodies.

Draw From Personal Experiences

Tap into your life stories for authentic and emotional lyrics that connect with listeners.


Credit: www.npr.org


Crafting Compelling Lyrics


Crafting compelling lyrics is essential for creating a captivating song. To write a powerful song, lyrics must evoke emotion and convey a meaningful message. Incorporating vivid imagery and relatable themes can help make the lyrics resonate with listeners, resulting in a memorable and impactful song.

Crafting compelling lyrics is an art form that can captivate listeners and convey emotions effectively. When writing a song, the lyrics play a vital role in engaging the audience and leaving a lasting impact.

Tell A Story

Musical storytelling allows the audience to connect with the song on a deeper level. Craft lyrics that weave a narrative or evoke a specific emotional response to make your song memorable.

Use Vivid Imagery

Paint a vivid picture through lyrics by utilizing descriptive language and sensory details. Engage the imagination of the listener with colorful imagery that brings the song to life.

Melody And Chord Progression

When it comes to writing a song, the melody and chord progression are crucial elements that can set the mood and tone of the music. Crafting a captivating melody and choosing the right chord progression can elevate a song to new heights, making it memorable and impactful to the listeners.

Experiment With Melodies

Creating a unique and memorable melody is essential for a song’s success. Start by experimenting with different musical notes to find a catchy sequence that resonates with the song’s theme. Consider the emotional response you want to evoke and let that guide your melody composition. Play around with rhythm, pitch, and intervals to discover what works best for the song.

Explore Different Chord Sequences

The chord progression forms the backbone of the song and sets the harmonic structure. Explore various chord sequences to find the right balance between tension and resolution. Experiment with different inversions and voicings to add depth to the music. Consider the relationship between the melody and the chord progression to ensure they complement each other, creating an engaging musical experience.

Structuring Your Song

When it comes to writing a song, one of the key elements to consider is the structure. The structure of a song provides a framework for the various sections and helps to create a sense of flow and progression. In this blog post, we will explore different song structures and how they can be used to enhance your songwriting. In this section, we will focus on the Verse-Chorus Format, Bridge, and Middle 8.

Verse-chorus Format

The Verse-Chorus format is perhaps the most common and widely used song structure. It consists of alternating between verses and choruses, creating a catchy and memorable pattern. The verse is typically used to tell a story or convey a message, while the chorus is the part that is repeated and often contains the main hook or melody of the song. This structure provides a sense of familiarity and allows the listener to easily sing along and remember the song.

Bridge

A bridge is a section that is used to provide a contrast to the verses and chorus. It often comes after the second chorus and provides a new and different musical and lyrical element to the song. The bridge can help to build anticipation and add a sense of excitement or surprise. It can also be used to introduce new lyrical content or explore a different perspective. The bridge acts as a transitional section between the chorus and the next verse, creating a dynamic and interesting song structure.

Middle 8

The middle 8, also known as the “eight bar” or “middle eight,” is a section that typically occurs in the middle of the song. It gets its name from the original length of eight bars, although it can vary in length. The middle 8 serves as a break from the repetitive verses and choruses and adds a new harmonic and melodic element to the song. It is often used to introduce a new melody or chord progression and can provide a moment of reflection or change in mood. The middle 8 allows for creative exploration and can take the song in a new direction before returning to the familiar structure.

Overall, structuring your song is essential for creating a cohesive and engaging piece of music. Whether you choose the Verse-Chorus format, incorporate a bridge, or add a middle 8, the song’s structure helps to guide the listener through the journey of your music. Experimenting with different song structures can bring new life to your songwriting and keep your audience hooked.


Refining Your Work

Once you’ve completed the initial draft of your song, the next step is to refine your work and make it the best it can be. This process involves seeking feedback from others, and then thoroughly editing and polishing your song. By taking these steps, you can improve the quality and impact of your song, making it even more enjoyable for your listeners.

Seek Feedback

Getting feedback from others is a crucial part of the songwriting process. It allows you to gain valuable insights and perspectives that can help you identify areas for improvement. Reach out to fellow musicians, friends, or trusted listeners and ask them to give your song a listen. Encourage them to be honest and provide constructive criticism.

Feedback can come in various forms:

  • Positive feedback highlights the strengths of your song and can give you the confidence to move forward.
  • Constructive criticism points out areas that need improvement, whether it’s the lyrics, melody, or overall structure.
  • Objective feedback focuses on the technical aspects of your song, such as the sound quality or the arrangement.
  • Subjective feedback explores the emotional impact and overall feel of your song.

Consider collecting feedback from multiple sources to get a well-rounded perspective. Remember that not all feedback will resonate with you, and it’s important to trust your own artistic vision. However, be open to suggestions that align with your goals for the song.

Edit And Polish

Once you have gathered feedback, it’s time to put it to use. Start by going through your song with a critical eye, focusing on areas highlighted by the feedback received. Here are some editing and polishing tips:

  1. Review the lyrics and check for any inconsistencies, awkward phrasing, or clichés. Simplify and clarify your message to ensure it resonates with your audience.
  2. Consider the melody and chord progressions. Are they engaging and memorable? Experiment with different arrangements and harmonies to find what works best for your song.
  3. Pay attention to the structure of your song. Is there a clear verse-chorus-bridge pattern? Does it flow smoothly from section to section? Revise if necessary.
  4. Take note of the dynamics and pacing of your song. Adjust the tempo, volume, and instrumentation to create a more impactful listening experience.
  5. Listen critically to the overall sound. Are there any distracting background noises or technical issues? Ensure that the audio quality is clean and professional.

Remember, the editing process may require several rounds of revisions. Don’t be afraid to make changes and experiment with different ideas. Trust your instincts and continue refining your song until you feel it fully captures your artistic vision.


Credit: venngage.com


Frequently Asked Questions On Writing A Song


How Do You Write A Song For Beginners?


To write a song for beginners, start with simple lyrics and a catchy melody. Play around with chord progressions and structure. Let your emotions and experiences inspire the song. Keep refining and practicing to find your unique style. Collaborate with others to gain new perspectives.


How To Write A Song With No Experience?


To write a song with no experience, start with a simple melody and lyrics. Focus on your emotions and thoughts. Practice and experiment with different styles. Collaborate with experienced musicians for guidance. Keep learning and refining your craft.


How A Song Should Be Written?


A song should be written with a catchy melody, relatable lyrics, and a strong emotional impact. Start with a hook, create a memorable chorus, and use vivid imagery. Structure the song with verse, chorus, and bridge sections, and ensure the lyrics flow naturally with the music.


What Is The Formula For Writing A Song?


The formula for writing a song includes creating catchy melodies, meaningful lyrics, and a compelling song structure. It involves expressing emotions, telling a story, or conveying a message through music. Experimenting with chord progressions, rhythm, and instrumentation can add depth to the composition.


Conclusion


To sum up, writing a song requires creativity and passion. Through thoughtful brainstorming, lyrical expression, and musical composition, one can create a captivating piece. It’s important to remain authentic and connect with the audience on a personal level. With dedication and practice, anyone can master the art of songwriting and share their stories with the world.

Categories
Archive

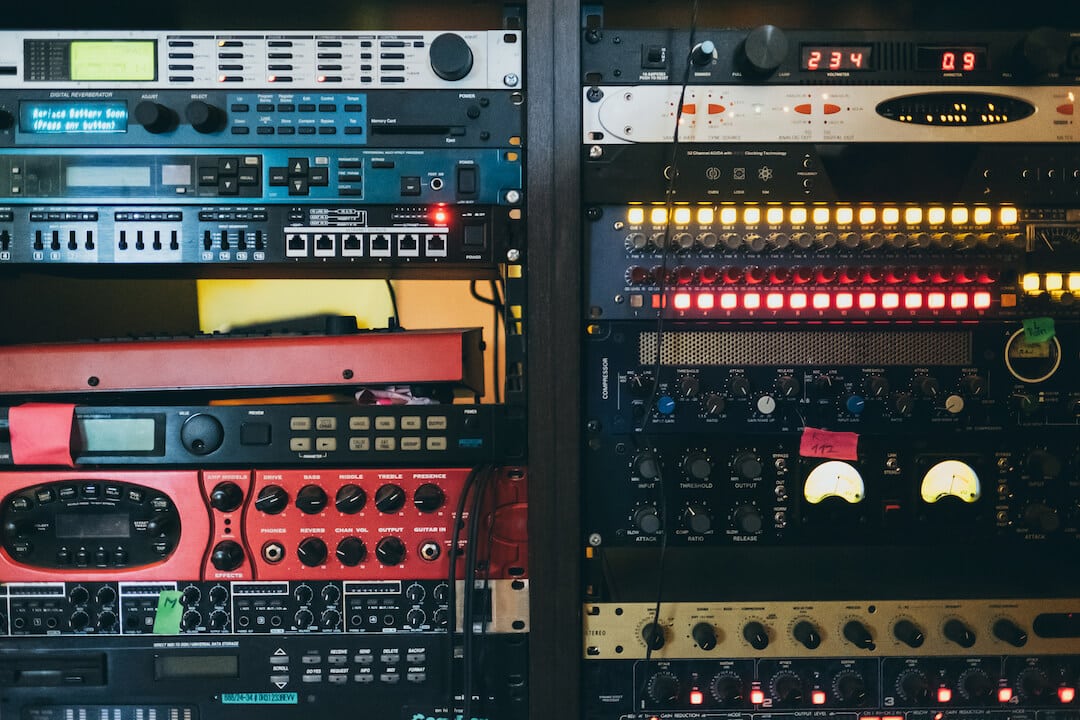
Audio Effects Processors : Unleash the Power of Sound

Audio effects processors modify audio signals in real-time for enhanced sound quality and creative effects. These devices are essential in recording and live sound environments to adjust and manipulate audio characteristics.


From equalizers and compressors to reverbs and delays, audio effects processors play a crucial role in producing professional and captivating audio experiences. With the ability to shape and enhance sound with precision, audio effects processors empower musicians, producers, and sound engineers to push the boundaries of creativity and achieve the desired sonic result.


Whether in a studio setting or on stage, these tools are indispensable for achieving high-quality audio production.

Audio Effects Processors  : Unleash the Power of Sound


Credit: www.signalsounds.com


The Evolution Of Audio Effects Processors

Early Developments

Early audio effects processors were basic, with limited functionality.

Digital signal processing revolutionized audio effects with greater precision.

  • Analog effects paved the way for digital advancements.
  • Developments like reverb and delay enhanced audio quality.

Impact On Music Production

Audio effects processors transformed music production workflows.

Producers leveraged effects to create diverse sounds and textures.

  1. Effects processors enabled unprecedented creativity in music.
  2. Artists could experiment with new sounds and innovate.

Emerging Trends

New technologies are driving advancements in audio effects processors.

Trend Description
AI Integration AI algorithms optimize effects for unique applications.
Modular Systems Users can customize effects chains for tailored results.

Software-based effects processors offer flexibility and convenience.

“` You can copy and paste the above HTML code into a WordPress post to present a structured and SEO-optimized section about the evolution of audio effects processors.

Types Of Audio Effects Processors

Audio effects processors enhance sound quality in various ways, categorized into different types based on their functions and applications. Understanding the various types of audio effects processors can help you choose the right tool for your audio projects and improve the overall audio quality.

Dynamics Processors

Dynamics processors are essential tools in audio production that help control the dynamic range of audio signals, ensuring a more balanced and consistent sound output.

Key Features of Dynamics Processors:

  • Compressor
  • Expander
  • Gate

Time-based Processors

Time-based processors manipulate the time domain of audio signals, adding spatial effects and enhancing the sense of depth and dimension in audio recordings.

Key Features of Time-Based Processors:

  1. Reverb
  2. Delay
  3. Chorus

Frequency-based Processors

Frequency-based processors focus on modifying the frequency content of audio signals, allowing for precise tonal adjustments and creative sound shaping.

Key Features of Frequency-Based Processors:

Equalizer Filter

By leveraging these different types of audio effects processors, audio engineers and musicians can achieve professional-sounding results and elevate the overall listening experience.

Choosing The Right Audio Effects Processor

When it comes to enhancing the sound quality of your audio recordings, choosing the right audio effects processor is crucial. With a wide array of options available in the market, understanding your needs and considering the key features of audio effects processors are vital in making an informed decision.

Understanding Your Needs

Before delving into the plethora of audio effects processors available, it’s essential to assess your specific requirements. Understanding the nature of your audio projects, whether it’s music production, podcasting, or live sound reinforcement, will aid in determining the most suitable type of audio effects processor for your needs.

Key Features To Consider

When selecting an audio effects processor, several key features demand your attention to ensure optimal performance and functionality:

  • Compatibility: Ensure compatibility with your existing audio setup, whether it’s hardware or software-based.
  • Versatility: Look for processors that offer a wide range of effects to cater to diverse audio processing needs.
  • User Interface: An intuitive user interface is essential for seamless navigation and operation, especially for live performances.
  • Connectivity: Consider the connectivity options such as inputs, outputs, and compatibility with peripherals.
  • Signal Processing: Assess the quality and capabilities of the signal processing to achieve desired sonic enhancements.
Audio Effects Processors  : Unleash the Power of Sound


Credit: musixon.org


Utilizing Audio Effects Processors In Production

In the world of music production, audio effects processors play a vital role in shaping the final sound of a recording. These powerful tools allow producers and engineers to enhance sound quality and achieve creative sound manipulation, resulting in professional-sounding tracks that capture the listener’s attention. In this article, we will explore two essential aspects of using audio effects processors in production: enhancing sound quality and creative sound manipulation.

Enhancing Sound Quality

When it comes to producing high-quality audio, sound quality is of utmost importance. Audio effects processors offer a range of techniques and tools that can significantly improve the overall quality of a recording. Here are some ways you can enhance sound quality using audio effects processors:

  1. Equalization: With the help of an equalizer, you can adjust the frequency balance of a sound by boosting or cutting specific frequencies. This allows you to shape the tonal characteristics of individual instruments or tracks, ensuring they sit well in the mix.
  2. Compression: Compression is a technique used to control the dynamic range of a sound. By applying compression, you can make the quiet parts of a recording louder and the loud parts quieter, resulting in a more balanced and polished sound.
  3. Reverb and Delay: These effects add depth and spaciousness to your recordings, making them sound as if they were recorded in a larger room or a specific environment. Reverb creates a sense of natural ambience, while delay adds echoes and repeats.
  4. Stereo Imaging: Audio effects processors like stereo wideners and spatial enhancers allow you to manipulate the stereo image of your recordings. With these tools, you can make sounds wider, narrower, or move them around in a three-dimensional space, enhancing the overall depth and width of your mix.

Creative Sound Manipulation

While enhancing sound quality is crucial, audio effects processors also open up a world of creative possibilities for sound manipulation. These tools enable producers and engineers to experiment and push the boundaries, resulting in unique and captivating sounds. Here are some ways you can unleash your creativity using audio effects processors in production:

  • Distortion and Overdrive: By applying distortion or overdrive effects, you can add grit, warmth, and character to your recordings. These effects are commonly used in genres like rock and electronic music, adding energy and attitude to the sound.
  • Modulation Effects: Modulation effects like chorus, flanger, and phaser can create swirling, swirling, or sweeping sounds that add movement and interest to your tracks. These effects are particularly effective on guitars, synths, and vocals.
  • Time-based Effects: Effects such as pitch shifting, time stretching, and granular synthesis can drastically transform the original sound source, resulting in otherworldly and surreal textures. These effects are perfect for sound design and experimental productions.
  • Vocal Processing: Audio effects processors offer a variety of tools specifically designed for vocal processing. From pitch correction to vocal doubling, these effects can transform a mediocre vocal performance into a professional and polished one.


Mastering Audio Effects Processors

Audio effects processors are essential tools for professional sound engineers, musicians, and producers. They allow you to shape and enhance the sound of your recordings, giving them that polished and professional touch. Mastering audio effects processors take your sound to the next level, providing the final adjustments and enhancements to make your tracks sound incredible on any sound output device. In this section, we will explore some advanced techniques and optimization strategies for mastering audio effects processors.

Advanced Techniques

When it comes to mastering audio effects processors, there are a few advanced techniques that can help you achieve the best possible sound. These techniques involve using a combination of different effects processors to fine-tune and enhance specific aspects of your audio.

  • Parallel Compression: This technique involves blending compressed and uncompressed versions of your audio to balance the dynamics and add thickness and depth to your sound.
  • Multi-Band Compression: By dividing the audio signal into different frequency bands and applying compression individually to each band, you can have precise control over the dynamics of your mix.
  • Stereo Widening: Using stereo widening effects can create a sense of space and depth, making your mix sound more immersive and expansive.
  • Transient Shaping: Transient shaping effects allow you to control the attack and sustain of individual sounds, making them punchier or smoother depending on your desired artistic effect.

Optimizing For Different Sound Outputs

When mastering audio effects processors, it’s crucial to consider the different sound outputs your tracks will be played on. It’s essential to optimize your audio for various devices and environments to ensure consistent and high-quality sound reproduction.

Sound Output Optimization Techniques
Headphones Enhancing stereo width and spatial details, balancing low frequencies, and ensuring clarity in mid and high frequencies.
Speakers Adjusting the mix for balanced frequency distribution, optimizing stereo imaging, and minimizing phase cancellation.
Car Audio Systems Emphasizing mid and high frequencies for better clarity, reducing excessive bass, and considering potential ambient noise.
Club Sound Systems Focusing on powerful low-end reproduction, managing peak levels, and considering the impact of extreme volume.
Audio Effects Processors  : Unleash the Power of Sound


Credit: www.avid.com


Frequently Asked Questions For Audio Effects Processors


What Is The Difference Between Effects And Processors?


Effects are sound manipulators used to alter an audio signal, such as reverb or delay. Processors modify the character of the sound, like EQ or compression. Effects create unique sounds, while processors enhance the quality of the audio. Both play crucial roles in audio production and shaping sound.


What Is A Processing Effect In Music?


A processing effect in music alters sound through effects like reverb, delay, or distortion for creative enhancements.


What Are Audio Effects Called?


Audio effects are typically referred to as sound effects or simply effects in the music and entertainment industry.


What Is A Guitar Effect Processor?


A guitar effect processor is a device that modifies a guitar’s sound using various effects like distortion and reverb. It enhances the music output by adding different effects to the guitar’s tone.


Conclusion


Audio effects processors play a crucial role in enhancing the sound quality of music and audio productions. From reverb and delay to EQ and compression, these devices offer a wide range of creative possibilities for musicians and audio engineers. By understanding the functions and applications of these processors, you can elevate your audio productions to new heights.

Categories
Archive

Portable Recording Solutions: Unleash Your Creativity Anywhere

As an Amazon Associate I earn from qualifying purchases.

Portable recording solutions provide flexibility and convenience for on-the-go professionals and enthusiasts. These compact devices offer high-quality audio capture anytime, anywhere.


When it comes to recording on the move, users seek portable solutions that deliver professional-grade results. From field journalists to musicians, the need for portable recording equipment is steadily increasing. We will explore the top portable recording solutions available on the market and their features to help you find the perfect fit for your recording needs.


Whether you are capturing interviews, live music, or ambient sounds, having a portable recording device in your arsenal can elevate the quality of your recordings without compromising on mobility.


Credit: www.insta360.com


The Rise Of Portable Recording

Portable recording solutions have revolutionized the way we capture sound.

The Evolution Of Recording Technology

Recording technology has evolved tremendously over the years.

The Impact Of Portable Recording On Creativity

Portable recording has unleashed new levels of creativity.


Credit: www.hypershop.com


Advantages Of Portable Recording Solutions

Flexibility And Mobility

Portable recording solutions provide flexibility and mobility for capturing audio on the go.

Cost-effectiveness

Portable recording solutions offer cost-effectiveness compared to traditional studio setups.

Quality And Performance

Despite their size, portable recording solutions provide quality sound performance for professional recordings.

https://www.youtube.com/watch?v=M95qPFkIvq4


Key Features To Look For

When looking for a portable recording solution, there are several key features to consider to ensure that it meets your needs for on-the-go recording. Key features to consider include Portability and Durability, Compatibility and Connectivity, and Battery Life and Power Options.

Portability And Durability

For a portable recording solution, portability and durability are essential. The device should be lightweight and compact, making it easy to carry around. Additionally, it should be durable enough to withstand the rigors of travel and frequent use.

Compatibility And Connectivity

When selecting a portable recording solution, it’s crucial to consider its compatibility and connectivity features. Make sure the device is compatible with various operating systems and recording software, and offers seamless connectivity options such as USB, Bluetooth, or Wi-Fi for effortless data transfer.

Battery Life And Power Options

The battery life and power options of a portable recording solution are vital. Look for a device with long battery life to support extended recording sessions. Additionally, consider whether it offers multiple power options, such as rechargeable batteries, USB charging, or external power sources for added flexibility.

Popular Portable Recording Devices


Looking for portable recording solutions? Discover popular portable recording devices for on-the-go audio and video capture. From handheld recorders to pocket-sized devices, find the perfect solution for your recording needs. Convenient, versatile, and high-quality, these devices are ideal for content creators, journalists, and musicians.

Handheld Audio Recorders

One of the most popular portable recording devices available today is the handheld audio recorder. These compact devices are designed to be easily carried around, making them ideal for musicians, journalists, podcasters, and anyone else who needs to capture high-quality audio on the go. Handheld audio recorders come with a variety of features and capabilities, allowing users to record in various formats and settings. Let’s take a closer look at some of the top handheld audio recorders on the market.

Portable Multi-track Recorders

Portable multi-track recorders are another type of portable recording device that has gained popularity among musicians, sound engineers, and producers. These devices offer the ability to record multiple tracks simultaneously, enabling users to create professional-quality recordings even outside the studio. Portable multi-track recorders come equipped with built-in microphones, inputs for external microphones and instruments, and often include features like onboard effects, digital mixing, and editing capabilities. Whether you’re a musician wanting to capture your ideas on the go or a professional needing to record live performances, portable multi-track recorders are an essential tool.

Smartphone Recording Accessories

In today’s digital age, smartphones have become a staple in our lives. They are not only used for communication and entertainment but also offer the convenience of capturing high-quality audio. Smartphone recording accessories enhance the recording capabilities of your smartphone, allowing you to capture professional-grade audio in various situations. These accessories include external microphones, portable audio interfaces, and specialized apps that enhance the recording quality and provide additional features such as sound effects, mixing options, and easy file management. With smartphone recording accessories, you can turn your phone into a versatile and portable recording device. In conclusion, portable recording devices have revolutionized the way we capture audio on the go. Handheld audio recorders, portable multi-track recorders, and smartphone recording accessories provide musicians, podcasters, journalists, and other professionals with the tools they need to create high-quality recordings anytime, anywhere. Whether you’re a beginner or a professional, investing in a portable recording device will take your recordings to the next level. Capture every moment, record every sound, and unleash your creativity with these popular portable recording devices.

Choosing The Right Solution For You

A portable recording solution can be a game-changer for content creators on the go. Whether you’re a musician, podcaster, or journalist, having the ability to capture high-quality audio anywhere is crucial. However, with so many options available, it can be overwhelming to find the perfect fit for your needs. In this section, we will explore three key factors to consider when choosing a portable recording solution: assessing your recording needs, considering budget and long-term use, and exploring user reviews and recommendations.

Assessing Your Recording Needs

Before diving into the world of portable recording solutions, it’s important to determine exactly what you need from your setup. Consider the following:

  1. The type of content you’ll be recording (music, interviews, podcasts, etc.)
  2. The environments you’ll be recording in (outdoors, studio, noisy locations)
  3. The number of inputs and tracks you require
  4. Any specific features or functionalities that are important to you

Having a clear understanding of your recording needs will help you narrow down your options and focus on the solutions that offer the right set of features for you.

Considering Budget And Long-term Use

Your budget plays a significant role in your decision-making process. It’s essential to strike a balance between the quality of the recording solution and its affordability. Consider the long-term use of the device as well:

  1. How often will you be using it?
  2. Will you be upgrading or expanding your setup in the future?
  3. Does the solution offer room for growth and compatibility with other recording equipment?

By considering both your budget and long-term plans, you can make an informed decision that meets your needs now and in the future.

Exploring User Reviews And Recommendations

One of the most effective ways to gauge the performance and reliability of a portable recording solution is by exploring user reviews and recommendations. Take the time to read testimonials and feedback from other content creators who have used the product:

  1. Look for reviews that highlight the stability and quality of the recordings
  2. Pay attention to user experiences in different recording environments
  3. Consider the overall satisfaction and longevity of the device

By listening to the experiences of others, you can gain valuable insights that may influence your decision.


Credit: www.facebook.com


Frequently Asked Questions For Portable Recording Solutions


What Is The Best Portable Voice Recorder?


The Olympus WS-853 is considered the best portable voice recorder due to its high-quality audio recording and affordability.


What Is The Best Home Recording Device?


The best home recording device is the Focusrite Scarlett 2i2. It offers high-quality audio recording, easy setup, and compatibility with most recording software.


What Is A Secret Recording Device Called?


A secret recording device is called a “spy recorder” or “covert recording device. ” It is used for discreetly capturing audio or video without detection.


What Can Be Used As A Recording Device?


Recording devices can include smartphones, digital voice recorders, audio recorders, camcorders, and computer software. They capture audio and video for various purposes like interviews, lectures, music, and more.


Conclusion


Portable recording solutions offer flexibility and convenience for capturing high-quality audio in various settings. With the advancement of technology, these portable devices provide professional-grade sound recording on the go. Whether you’re a musician, journalist, or podcaster, investing in a portable recording solution is a valuable asset for your creative endeavors.

Categories
Archive

How to Determine If a Used Piano is Good: Essential Tips

To tell if a used piano is good, check for keys’ responsiveness and overall sound quality. Inspect for structural integrity and any signs of wear and tear to ensure it’s in good condition.


Investing in a quality used piano can be a wise decision for both beginners and experienced musicians. A good piano can enhance your playing experience and provide you with years of musical enjoyment. By carefully examining key factors such as sound quality, condition, and durability, you can make an informed decision when purchasing a used piano.


Whether you’re a student, professional musician, or simply an enthusiast, selecting a high-quality and well-maintained used piano can greatly impact your musical journey.

How to Determine If a Used Piano is Good: Essential Tips


Credit: pianomovingart.com


Researching The Brand

When purchasing a used piano, one crucial step is researching the brand to determine its quality and value. By focusing on the brand reputation and common issues associated with specific piano brands, you can make an informed decision.

Check The Brand Reputation

  • Look for well-known and reputable piano brands such as Yamaha, Steinway, or Kawai for assurance of quality.
  • Check customer reviews and ratings online to gauge the overall satisfaction and reliability of the brand.
  • Consider the longevity of the brand in the market as established brands often maintain higher standards of craftsmanship.

Research Common Issues

  1. Identify typical problems associated with the brand by consulting piano technicians or online forums.
  2. Check for common issues such as sticky keys, loose pedals, or tuning stability that may affect the performance of the piano.
  3. Compare common problems across different brands to make a well-informed decision when evaluating a used piano.

Inspecting The Exterior

When considering a used piano purchase, thorough inspection of the exterior is crucial. It gives insight into the instrument’s overall condition. Here’s how to go about inspecting the exterior:

Check For Physical Damage

  • Look for any scratches, cracks, or dents on the outer casing.
  • Check if the legs and pedals are securely attached and not wobbly.
  • Ensure the lid opens and closes smoothly without any issues.

Inspect The Keys And Hammers

  • Examine each key for consistent resistance and responsiveness.
  • Check for any chipped or broken keys that may affect the piano’s performance.
  • Inspect the hammers for signs of wear and tear, such as grooves or felt deterioration.

https://www.youtube.com/watch?v=QP3ArTVMDMU


Assessing The Sound Quality

Assessing the sound quality of a used piano is crucial when determining its overall condition and value. Sound quality can be subjective, but there are specific factors to consider when assessing it. By focusing on the tone, resonance, and the quality of the soundboard, you can effectively determine if a used piano is of good quality.

Test The Tone And Resonance

When evaluating a used piano, it’s essential to test the tone and resonance it produces. Start by playing each key in succession, listening for consistent tone and resonance across the entire keyboard. A good piano will have a balanced and rich tone, with each note resonating clearly and evenly. Listen attentively for any signs of dead or muffled notes, which could indicate internal issues with the instrument.

Evaluate The Soundboard

The soundboard plays a significant role in the overall sound production of a piano. Inspect the soundboard for cracks, warping, or other damages that could affect its ability to resonate effectively. When playing the piano, pay attention to the volume and quality of sound produced. A well-maintained soundboard will project a clear and robust sound, enhancing the overall tonal quality of the piano.

How to Determine If a Used Piano is Good: Essential Tips


Credit: www.hoffmanacademy.com


Checking Internal Components

When purchasing a used piano, it is essential to thoroughly check its internal components to determine its overall quality and condition. By examining the action mechanism, inspecting the strings and tuning pins, you can gain insights into the instrument’s playability and longevity. This article will guide you through the process of assessing these internal components of a used piano, helping you ensure that you make a worthwhile investment.

Examine The Action Mechanism:

The action mechanism of a piano refers to the intricate system of levers and hammers that translate the pressing of keys into the production of sound. To gauge the quality of this mechanism:

  1. Observe the responsiveness of the keys: Press a few keys gently and firmly to test how quickly the hammers return to their original position.
  2. Check for consistent key weight: Play different keys across the keyboard and ensure that the weight feels even throughout.
  3. Inspect the hammer alignment: Open the top lid of the piano and visually assess if the hammers are aligned parallel to the strings. Any misalignment may result in uneven sound production.

Inspect The Strings And Tuning Pins:

The condition of the strings and tuning pins greatly impacts the sound quality and playability of the piano. Here are some steps to assess these components:

  • Check for string corrosion and rust: Look closely at the strings for any signs of corrosion or rust. These can affect the tone and resonance of the piano.
  • Inspect tuning pin tightness: Gently try to turn a few tuning pins with a specialized tuning lever. If they feel loose or if they don’t hold pitch, it might indicate that the piano will require extensive tuning and maintenance.
  • Look for any broken or worn-out strings: Visually inspect the strings for any signs of damage or wear. Broken or worn-out strings should be replaced to ensure optimal sound quality.

By thoroughly examining the action mechanism, strings, and tuning pins of a used piano, you can make an informed decision regarding its quality. Remember, investing time in assessing the internal components will help you determine if the piano is in good condition and if it will provide you with years of musical enjoyment.

Consulting A Professional

When buying a used piano, it’s essential to consult with a professional to ensure you’re making a wise investment. Seeking expert evaluation and asking for the maintenance history are crucial steps that can help you determine if a used piano is good. Here’s what you need to know:

Seek Expert Evaluation

One of the most reliable ways to determine the quality and condition of a used piano is by having an expert evaluate it. A professional piano technician or a qualified piano dealer can assess various aspects, including the instrument’s overall condition, structural integrity, and tone quality. They have the knowledge and experience to spot any potential issues or repairs that the piano may need.

During an evaluation, the expert will carefully inspect the piano’s external features, such as the cabinet, keys, pedals, and strings. They will also test the piano’s functionality, checking for proper key action, pedal response, and sound quality. Based on their expertise, they can provide advice on whether the piano is worth purchasing and if any repairs or adjustments are necessary.

Ask For Maintenance History

When assessing a used piano, it’s crucial to ask for the instrument’s maintenance history. This information can give you valuable insights into how well the piano has been cared for over the years. It is advisable to request documentation or records of past tunings, services, and repairs.

A well-maintained piano typically suggests that it has received regular attention, which is indicative of a previous owner’s commitment to its upkeep. On the other hand, a piano with a vague or nonexistent maintenance history might pose a higher risk of hidden problems or neglect.

Additionally, the maintenance history can shed light on any major repairs or rebuilding work that the piano might have undergone. This knowledge can help you evaluate the piano’s long-term durability and overall value.

Remember, a reputable seller should be willing to provide you with detailed maintenance information, so don’t hesitate to ask. If they cannot provide any records or seem evasive about the piano’s history, it may be a red flag that further investigation is needed.

How to Determine If a Used Piano is Good: Essential Tips


Credit: m.facebook.com


Frequently Asked Questions Of How To Tell If A Used Piano Is Good


How Do I Know If My Second Hand Piano Is Good?


Check the piano’s condition, age, brand, and tuning. Look for any damage or wear. Play each key to check for consistent sound and responsiveness. Consider hiring a piano technician for a professional evaluation.


Is It A Good Idea To Buy A Second Hand Piano?


Buying a second-hand piano can be a good idea to save money while still getting a quality instrument. Make sure to inspect for any damage or wear before purchasing. It’s essential to have it tuned and maintained by a professional piano technician.


How Can You Tell The Quality Of A Piano?


Quality of a piano is determined by brand reputation, craftsmanship, materials used, sound clarity, and touch responsiveness.


What Should I Look For In A Good Piano?


When choosing a good piano, consider factors like sound quality, touch responsiveness, durability, and brand reputation. Look for a piano that suits your needs and offers a good balance of tone and playing feel. Evaluate the instrument in person and seek advice from piano professionals.


Conclusion


Purchasing a used piano requires thorough examination to ensure its quality. By paying attention to the sound, key responsiveness, and overall condition, you can make an informed decision. Additionally, seeking the expertise of a professional piano technician can provide valuable insight.


Choosing a good used piano will enhance your music journey and bring joy for years to come.