Categories
Archive

How Many Acoustic Panels Do I Need: Optimize Your Sound!

To determine the number of acoustic panels needed, calculate based on room size and acoustic goals. Typically, one panel per 10 square feet is a rough starting point.


Choosing the correct quantity of acoustic panels for your space requires a strategic approach. Balance is key—you need enough panels to effectively manage sound reflections without over-dampening the room. To kick off the process, measure the room’s dimensions and consider the function of the space.


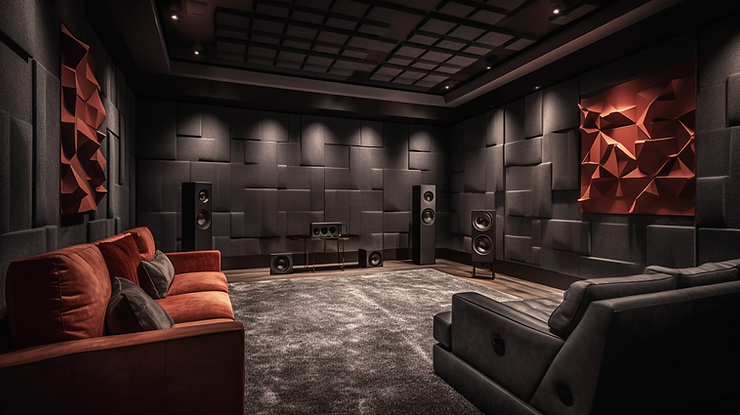
Is it a recording studio requiring pristine sound clarity, or a home theater where you want to enhance the audio experience? Understand the surface materials in your environment; hard surfaces reflect sound, while softer materials absorb it. Armed with this knowledge, you can craft a sound treatment plan that uses the right amount of acoustic panels to achieve your audio ambitions. Remember, room shape and existing furnishings also influence the acoustics, so factor these in to reach an optimal setup.
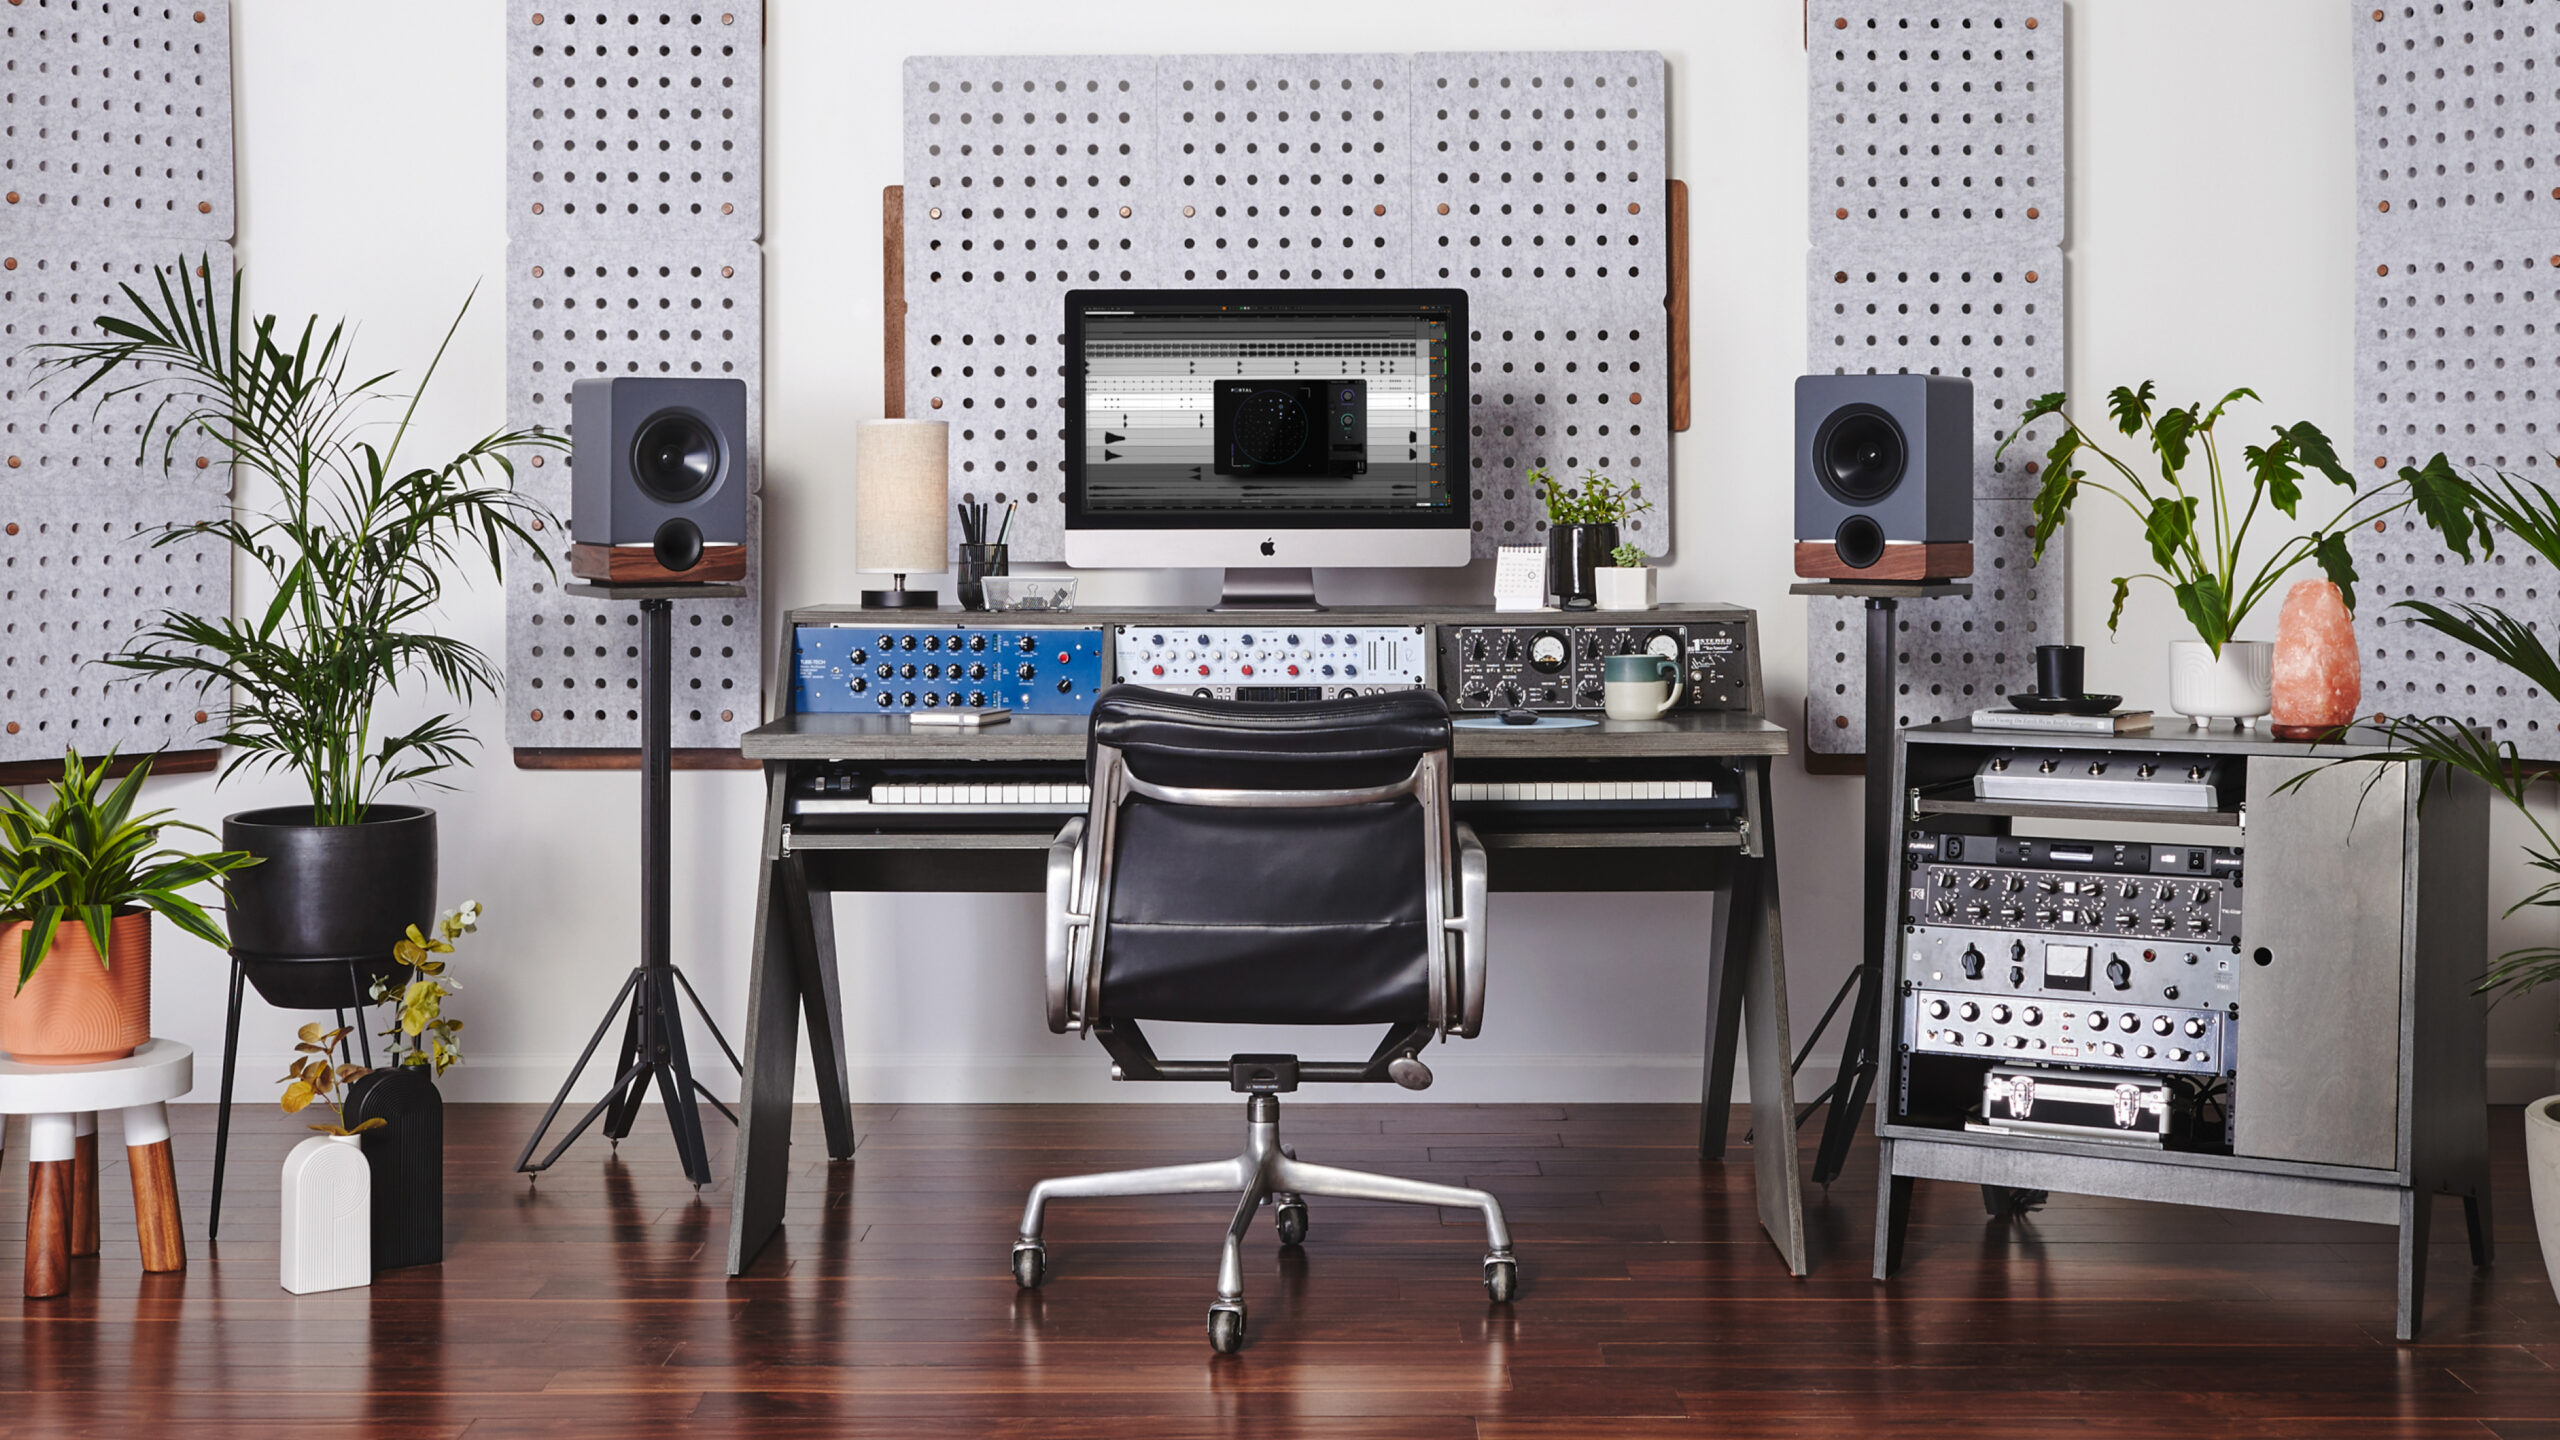
How Many Acoustic Panels Do I Need: Optimize Your Sound!


Credit: blog.burtonacoustix.com


Assessing The Acoustic Needs Of Your Space

Determining how many acoustic panels you need starts with understanding your space. The goal is to achieve balanced sounds. Consider room size and existing conditions for best results.

Room Size And Volume

The dimensions of your space are critical. Larger areas often require more panels for effective sound control. To calculate, multiply length by width by height. This gives you the volume. Large volumes often mean more echo. Smaller rooms may need fewer panels but strategic placement is key.

A simple formula for initial assessment:

  • Measure your room in feet or meters.
  • Find the total cubic volume (length x width x height).
  • Adjust for high ceilings where sound can get trapped.

Remember, odd-shaped rooms may need special attention.

Existing Acoustic Conditions

Your current acoustic environment matters. Hard surfaces reflect sound. Carpets, curtains, and furniture absorb it. Assess the balance:

  1. Examine your space for hard floors, bare walls, and large windows.
  2. Note any existing soft furnishings like sofas or bookshelves.
  3. Assess the current echo or reverberation by clapping.

Rooms with more reflective surfaces usually need more panels.

The number of people typically using the space also affects acoustics. Crowded rooms absorb sound more than empty ones. So consider daily usage. Measure, listen, and feel the sound. With this data, you can plan for the right number of acoustic panels.

Acoustic Panels Explained

Transform your space with the magic of soundproofing using acoustic panels. Whether it’s for your home studio, office, or entertainment room, understanding the basics of acoustic panels is essential. These simple additions can drastically improve sound quality and reduce unwanted noise. Let’s dive in to uncover how many you might need, and why they’re so effective.

Types Of Acoustic Panels

Different spaces require different acoustic solutions. Selecting the correct type of panel is crucial for optimal sound absorption. Here’s a breakdown:

  • Fabric Wrapped Panels: These combine aesthetics and functionality for everyday spaces.
  • Perforated Acoustic Wood Panels: Perfect for chic, modern interiors with their natural wood finish.
  • Foam Panels: Easy-to-install options for budget-conscious setups.
  • Acoustic Art Panels: Merge art with soundproofing by printing any image onto the panel.
  • Bass Traps: Designed to catch low frequencies and are best for corners.

How Acoustic Panels Work

Acoustic panels absorb sound waves, reducing echoes and reverberation. They are not all created equal, however. Performance depends on size, density, and placement. Here’s a simple explanation:

Panel Type Sound Absorption Placement
Fabric Wrapped High Walls
Wood Panels Moderate Walls & Ceilings
Foam Panels Variable Selective Wall Areas
Art Panels Custom Walls as Décor
Bass Traps Low Frequencies Corners

By placing acoustic panels correctly, you can tailor your room for clear, crisp sound. Whether it’s a lively podcast recording or an intimate music session, the right panels in the right places make all the difference.

Determining Panel Quantity

Figuring out the number of acoustic panels needed for a space can be tricky. It’s not just about the panels; it’s about the right amount. You need enough to manage the sound, but too many can be overkill. The goal is a balanced, acoustically pleasing environment.

Calculating Coverage Area

Start with the room size. Measure the length, width, and height. Calculate the total square footage. Consider both wall and ceiling space. Each panel typically covers a set square footage. Estimate how much wall area you want to cover. Aim for coverage that addresses your acoustic needs without overcrowding the space.

Use this simple formula:

Room Area (sq ft) x Desired Coverage Percentage = Coverage Area (sq ft)

  • Room Area: Length x Width
  • Desired Coverage Percentage: A general guide is 15-30% for mixed-use spaces.

Standard Recommendations

There are recommended standards for different types of rooms:

Room Type Coverage Recommendation
Home Theaters 30-50% of the wall area
Recording Studios 25-75% depending on usage
Offices 10-30% for improved speech clarity
Restaurants 15-30% to reduce background noise

Consider your specific use-case. A quiet study room needs less coverage than a lively music studio. Aim for a balance in reverberation times and speech clarity. Remember, a space that sounds good feels good!

Placement Strategies For Maximum Efficiency

Understanding Placement Strategies for Maximum Efficiency is crucial when installing acoustic panels. The correct quantity and strategic positioning transform a room’s acoustic quality. Let’s explore the best ways to place your panels for stellar soundproofing.

Strategic Points For Panel Placement

Identifying strategic points for panel placement is the first step. Focus on these areas:

  • Reflection Points: Install panels at the first point where sound waves bounce.
  • Ceiling and Corners: Sound often collects here, so don’t overlook these spots.
  • Behind Speakers: Place panels to prevent direct sound bouncing.
  • Listened-Focused Zones: Target areas where the clarity of sound is vital.

Use this simple technique: Sit in your listening spot, have a friend move a mirror along the wall, and wherever you see the speakers, put a panel.

Avoiding Common Placement Mistakes

Avoid mistakes for the best sound experience. Keep these tips in mind:

  • Don’t Overcrowd Panels: More panels won’t always mean better sound.
  • Mind the Gaps: Leaving spaces between panels can help disperse sound.
  • Not Just Walls: Consider the ceiling and even the floor for some spaces.
  • Balance Absorption and Diffusion: The right mix prevents over-dampening a room.

Remember, the goal is to reduce echos and improve sound quality, not to eliminate all reverberation.

Fine-tuning Panel Placement For Specific Applications

The effective placement of acoustic panels is key to creating the perfect audio environment. Specific applications, from studios to home theaters, demand a tailored approach to panel placement. It’s not just about the quantity, but also about the strategic positioning of each panel for the best sound absorption, diffusion, and overall acoustical harmony. Below, we’ll explore how to fine-tune panel placement for various applications to enhance your listening experience.

Tailoring For Recording Studios

In a recording studio, sound clarity and control are vital. Sound engineers must carefully place acoustic panels to achieve a balanced sound:

  • Focus on the ‘sweet spot’: Where the sound producer or engineer sits, use panels to prevent reflections.
  • First reflection points: Place panels at these locations to minimize echo and maintain sound quality.
  • Ceiling and corners: Add bass traps and ceiling panels to manage low frequencies and vertical reflections.

Experiment with spacing and listening to adjustments, ensuring the best audio results for recording.

Optimizations For Home Theaters

Create the ultimate home cinema experience with well-placed acoustic treatments:

  • Surround sound focus: Enhance surround speaker performance with side-wall panel placement.
  • Front wall panels: Position panels to absorb sound directly from the screen to reduce audio distortion.
  • Seating area consideration: Install panels around the central audience seating area for clearer dialogue and effects.

Orient panels for an immersive audio-visual show right in your living room.

Adapting To Multipurpose Spaces

Spaces with varied use require flexible acoustic solutions:

  • Modular designs: Use portable or adjustable panels to suit different activities.
  • Balance absorption and diffusion: Combine panel types for an adaptable acoustic setting.
  • Activity-based placement: Move panels based on the event’s acoustic needs, from meetings to music sessions.

Adjust these versatile solutions to accommodate any event’s sound demands.

How Many Acoustic Panels Do I Need: Optimize Your Sound!


Credit: cnchanta.en.made-in-china.com


Measuring The Impact Of Your Acoustic Panels

Before sticking acoustic panels on your walls, knowing their effect is crucial. Good testing can guide you in figuring out how many panels you need. This will save both time and money. Let’s understand how you can measure their impact.

Pre And Post Installation Testing

Testing before and after installing acoustic panels is vital.

  • Space Review: Begin by evaluating your room’s acoustics.
  • Sound Measurements: Use a decibel meter to record noise levels.
  • Reverb Time: Check how long a sound lasts in your space.
Action Tool Goal
Record Noise Decibel Meter Baseline Data
Check Reverb Clap Test/Recorder Identify Echo Issues

Install the panels next. Repeat testing. Compare results to assess panel impact.

Subjective Versus Objective Assessments

Personal feelings on sound quality matter too.

  • Subjective: Ask others for feedback on the sound in your room.
  • Objective: Analyze the numbers from pre and post testing.

Do you feel the difference? Do your tests show the difference?

How Many Acoustic Panels Do I Need: Optimize Your Sound!


Credit: m.facebook.com


Frequently Asked Questions On How Many Acoustic Panels Do I Need


What Factors Determine The Number Of Acoustic Panels?


Room size and layout, wall material, and the level of sound dampening desired are key factors that impact the requirement for acoustic panels. Assessing these will guide the quantity needed.


How Do I Calculate Acoustic Panels Needed?


Measure your room’s dimensions and identify reflective surfaces. Consulting an acoustic treatment calculator or a professional can provide an estimate tailored to your space’s acoustics.


Does Room Shape Affect Acoustic Panel Quantity?


Yes, irregular room shapes may require more panels for effective sound absorption. Corners and angles can create complex reflections needing additional treatment.


Can Furnishings Affect Acoustic Panel Requirements?


Furniture and soft furnishings can absorb sound, potentially reducing the number of acoustic panels needed. Each room’s unique contents should be considered when determining panel quantities.


Conclusion


Determining the exact number of acoustic panels required hinges on your room’s characteristics and sound goals. An accurate assessment of your space ensures optimal acoustics. For personalized guidance, consider consulting an expert. Embrace clarity in your audio experience by investing wisely in acoustic treatment.


Remember, achieving the perfect sound environment is well within reach with the right planning.


Categories
Archive

Using Limiters On Individual Tracks: Master Your Mix with Precision

Limiters on individual tracks are used to control peaks and prevent clipping in audio recording. Proper limiter settings ensure optimal sound quality.


Enhancing your audio production with limiters on individual tracks can make a significant difference in the final outcome. By effectively managing peaks and preventing distortion, limiters help maintain a balanced and professional sound. Understanding how to utilize limiters on individual tracks can elevate the overall quality of your recordings.


Whether you’re working on music, podcasts, or multimedia projects, mastering the use of limiters can result in cleaner and more polished audio. In this guide, we will explore the ins and outs of using limiters on individual tracks to help you achieve top-notch audio production.

Using Limiters On Individual Tracks: Master Your Mix with Precision


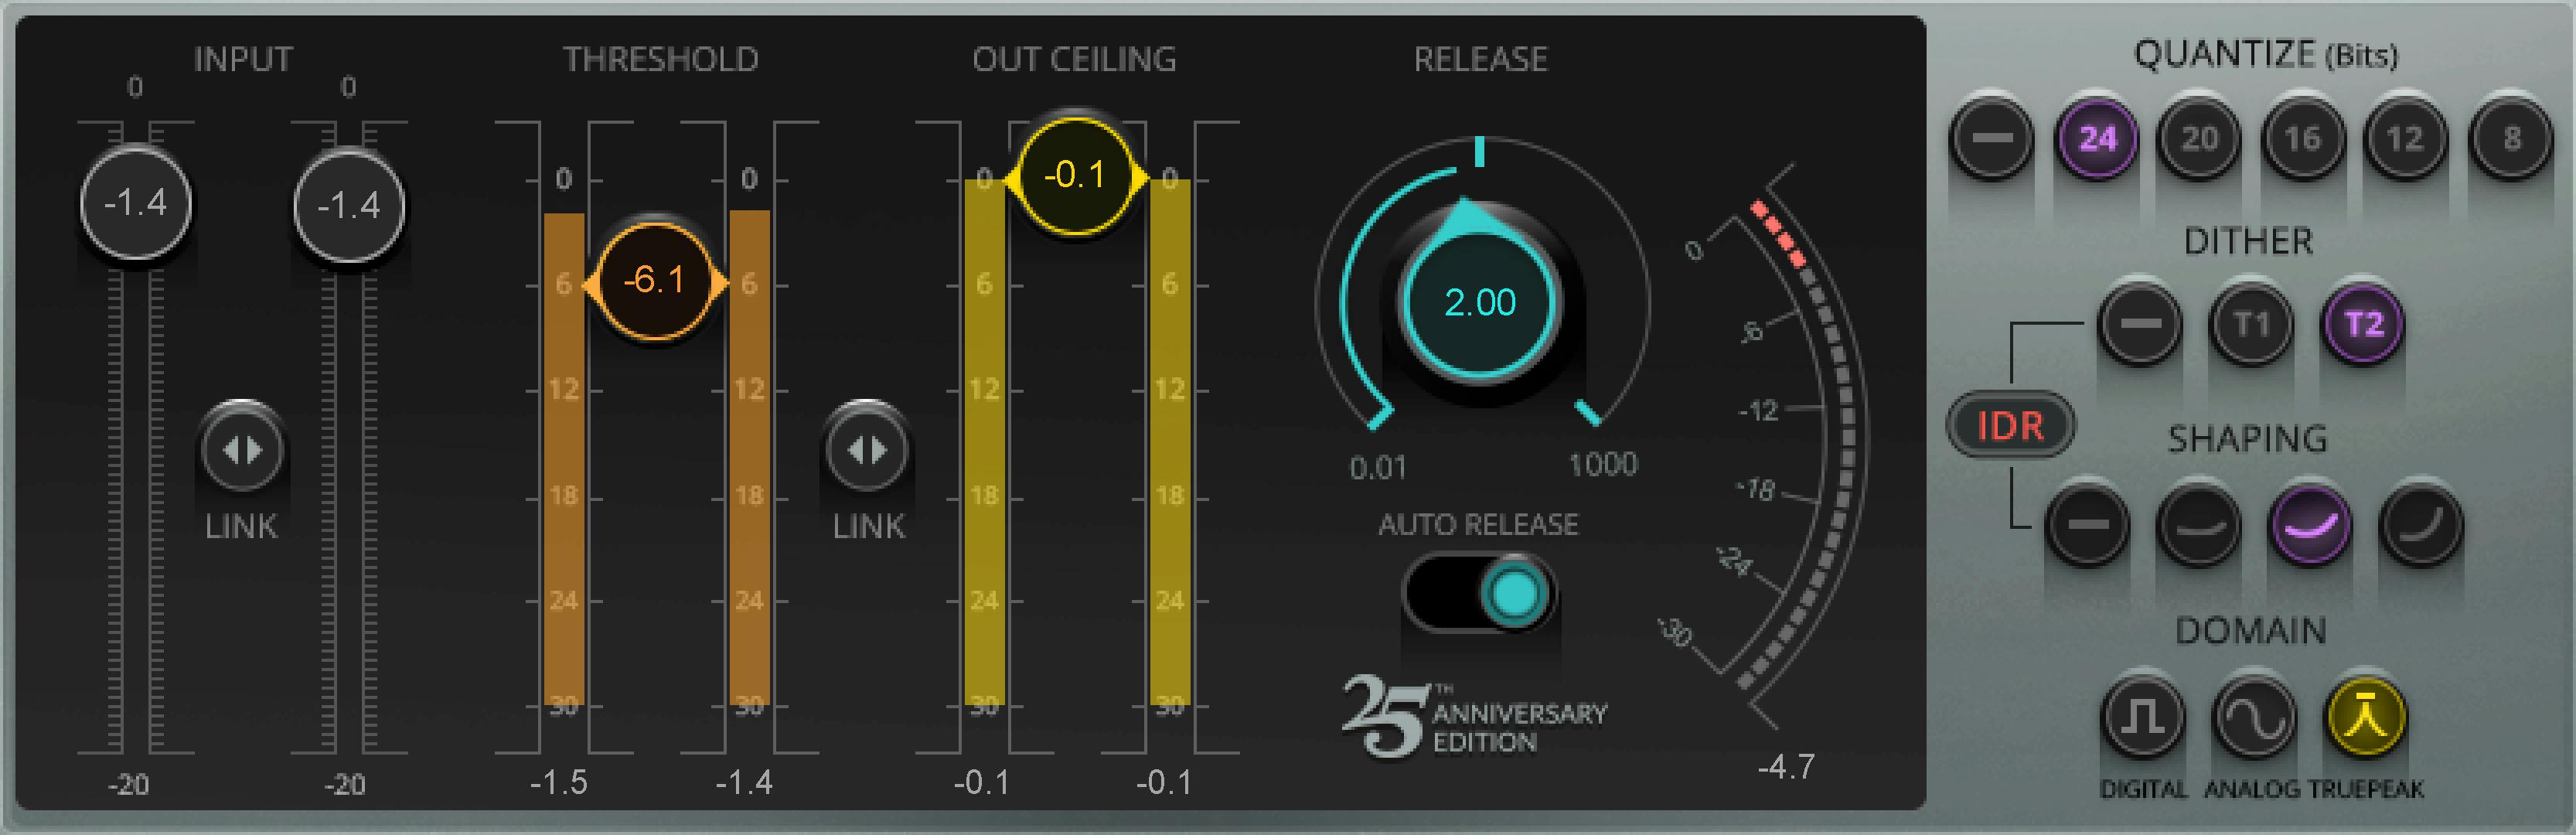
Credit: www.waves.com


Types Of Limiters


Limiter types can be used effectively on individual tracks to control dynamics and prevent any clipping or distortion. These limiters are valuable tools in audio production, providing a way to maintain a balanced and polished sound.

Peak Limiters

Peak limiters are used to stop the signal from surpassing a set maximum level.

Leveling Limiters

Leveling limiters maintain a consistent volume level across the track.

Using Limiters On Individual Tracks: Master Your Mix with Precision


Credit: www.roexaudio.com


Choosing The Right Limiter Settings

Choosing the Right Limiter Settings: When using limiters on individual tracks, it’s crucial to set the parameters accurately to achieve optimal results.

Understanding Threshold And Ratio

  • Threshold: Determines at what point the limiter kicks in, set it just below the peak level.
  • Ratio: Indicates how much the limiter reduces the volume once the threshold is crossed.

Setting Attack And Release Times

  • Attack: Controls how quickly the limiter responds to peaks, adjust for a balanced sound.
  • Release: Determines how long it takes for the limiter to stop reducing gain, set appropriately for natural dynamics.

Advanced Techniques For Using Limiters

When it comes to mastering the art of audio engineering, using limiters on individual tracks is an advanced technique that can significantly elevate the quality and impact of your sound. Incorporating multi-faceted strategies such as multiband limiting and parallel compression with limiters can offer an unprecedented level of control and finesse over the audio output. Understanding and adeptly implementing these advanced limiter techniques can lead to a polished and professional sound that rivals the productions of industry experts.

Multiband Limiting

Multi-band limiting is an advanced approach that allows for precise control over specific frequency ranges within a track. This technique divides the audio signal into separate bands, each with its own limiter, enabling targeted adjustments depending on the frequency content. By fine-tuning the limiting settings for individual frequency bands, engineers can effectively manage problematic frequencies and optimize the overall balance and clarity of the sound.

Parallel Compression With Limiters

Parallel compression with limiters involves blending the heavily limited or compressed version of a track with the original uncompressed signal. This technique preserves the dynamics and transient details of the original track while enhancing the overall impact and perceived loudness. By utilizing limiters in parallel compression, audio professionals can achieve a delicate balance between dynamics preservation and powerful sound reinforcement, yielding a polished and commercially appealing audio mix.

Avoiding Common Mistakes

When it comes to audio production, using limiters on individual tracks can be a powerful tool to achieve a polished and professional sound. However, it’s important to be cautious and avoid common mistakes that can negatively impact the overall mix. In this article, we will explore two common mistakes to avoid when using limiters: over-limiting and ignoring the overall mix context.

Over-limiting

Over-limiting occurs when the limiter is pushed too hard, resulting in excessive reduction in dynamics and unwanted distortion. While it may seem tempting to make every track as loud as possible, it’s crucial to strike a balance and preserve the natural dynamics of the audio. Here are some key points to keep in mind:

  1. Set appropriate threshold: Start by setting the threshold of the limiter to a level where it only engages during transient peaks, rather than constantly limiting the audio signal. This allows the track to breathe and retain its dynamics.
  2. Use gain makeup sparingly: Instead of compensating for excessive limiting by applying heavy gain makeup, consider revisiting the mix and addressing any issues at the source.
  3. Test with different output levels: It’s essential to test the mix at various output levels, including lower volumes. This ensures that the track sounds good across different listening devices and environments.

Ignoring The Overall Mix Context

While working on individual tracks, it’s easy to get lost in the details and forget about the bigger picture—the overall mix. Ignoring the context of the mix can result in imbalances and inconsistencies. To avoid this, keep the following in mind:

  1. Constantly reference the mix: Regularly switch between the individual track being limited and the rest of the mix to ensure that it fits cohesively with the other elements. Pay attention to the relative balance and any potential masking issues.
  2. Consider the dynamic range of other tracks: Take into account the overall dynamic range of the mix and how the limited track contributes to it. It’s essential to strike a balance between individual track dynamics and the overall dynamics of the mix.
  3. Collaborate with a fresh pair of ears: Asking for feedback from a trusted colleague or audio engineer can provide valuable insights and help you avoid overlooking mix context issues.

Avoiding these common mistakes when using limiters on individual tracks will contribute to a more transparent and balanced mix. By striking the right balance between preserving dynamics and considering the overall mix context, you can achieve a professional sound that captivates listeners.

Using Limiters On Individual Tracks: Master Your Mix with Precision


Credit: www.uaudio.com


Frequently Asked Questions For Using Limiters On Individual Tracks


Should You Put A Limiter On Individual Tracks?


Yes, you should use a limiter to control peaks and prevent clipping on individual tracks to maintain balanced audio levels.


When Should You Use A Limiter?


Use a limiter to prevent audio peaks from clipping, maintain consistent volume levels, and protect your speakers. Use it when mastering music or to control dynamics.


Is It Bad To Put A Limiter On The Master Track?


Using a limiter on the master track is not inherently bad, but excessive limiting can result in a loss of dynamics and affect overall audio quality. It’s important to use it in moderation to prevent distortion and maintain a balanced mix.


Should You Use A Limiter On Vocals?


Yes, using a limiter on vocals helps control sudden loud peaks and ensures a more consistent volume level throughout the recording. It can also help improve clarity and intelligibility, making the vocals stand out in the mix. Overall, a limiter can enhance the quality of vocal recordings.


Conclusion


Incorporating limiters on individual tracks can significantly enhance the overall sound quality and offer greater control over the mix. By understanding the different types of limiters and their specific applications, you can effectively achieve a balanced and professional result in your audio productions.


Implementing these techniques can elevate your music and make it stand out in today’s competitive industry. Experimenting with various limiters and understanding their impact will allow you to develop your unique sound and unleash your creativity.


https://www.youtube.com/watch?v=GrtEbZcfaxo


Categories
Archive

How Do Acoustic Panels Work: Soundproof Your Space!

Acoustic panels absorb sound waves, reducing reverberation and echoing in a room. They enhance sound quality by dampening noise levels.


Managing the acoustics of a space is crucial for comfort and audio clarity, whether in a recording studio, home cinema, or open office layout. Acoustic panels are a go-to solution for achieving such an environment. They consist of sound-absorbing materials like foam or mineral wool, which trap sound waves and prevent them from bouncing back into the space.


By installing these panels, you can significantly improve speech intelligibility and overall auditory experience. Not only do they serve a functional purpose, but acoustic panels also come in various designs, adding an aesthetic touch to interiors. Their application is widely recognized in areas where control over sound is essential, offering a simple yet effective method to attain acoustic balance and reduce noise pollution.

How Do Acoustic Panels Work: Soundproof Your Space!


Credit: www.soundproofcow.com


Introduction To Acoustic Panels

Think of a library, a studio, or even a lively restaurant. The sound in these spaces can be loud or just a whisper. Acoustic panels help manage these sounds. They keep the noise comfortable for everyone. Let’s dive into how these panels work and why they are so important in modern spaces.

Essential Role In Modern Spaces

In today’s world, acoustic panels play a big role. Let’s explore why:

  • Improves Sound Quality: They clean up the audio in a room.
  • Reduces Noise: Loud spaces get much quieter.
  • Boosts Privacy: Conversations stay private, as sound does not travel far.
  • Enhances Comfort: Noisy environments become more relaxing.

Beyond these, there are more benefits. They help in places like schools and offices. Everyone can focus better without extra noise.

What Are Acoustic Panels?

Now, let’s understand what these panels are all about:

  • Material: They are made from sound-absorbing materials like foam or fiber.
  • Placement: You find them on walls or ceilings.
  • Design: They come in various sizes and colors.
  • Function: These panels trap sound waves. This stops echoes and noise.

This is the basic idea behind acoustic panels. They are tools to control sound. By using them, we create spaces where sound acts the way we want it to.

How Do Acoustic Panels Work: Soundproof Your Space!


Credit: andorwillow.com


The Science Behind Sound Absorption

The Science Behind Sound Absorption can sometimes feel like magic, but it is grounded in the very real principles of physics.

Understanding Sound Waves

Sounds move through the air like ripples on water. When these sound waves hit walls or objects, they bounce back, creating echoes.

  • Waves carry energy.
  • Higher waves mean louder sounds.
  • Soft surfaces catch sound waves.

Acoustic panels work by trapping these waves. They prevent echoes and reduce noise.

Mechanics Of Soundproofing

Soundproofing isn’t just about absorbing sound. It’s about creating a barrier.

Material Type Soundproofing Action
Dense Blocks sound waves
Soft Absorbs sound waves

Acoustic panels combine these materials. They reduce sound from bouncing and escaping.

Types Of Acoustic Panels

Understanding the different types of acoustic panels is key to optimizing sound in any space. Here’s how they differ:

Fabric-wrapped Panels

Fabric-wrapped acoustic panels offer both functionality and aesthetics. They consist of:

  • Absorbent acoustic foam or fiberglass core.
  • Wrapped in decorative fabric.

These panels reduce echo and improve sound clarity.

Perforated Acoustic Wood Panels

Perforated acoustic wood panels blend design with sound absorption. Characteristics include:

  1. Wood panels with holes or grooves.
  2. Backed with sound-absorbing materials.

Their structure traps and diffuses sound waves.

Foam Panels

Foam panels are a popular choice for:

Installation Area Benefits
Studios Simple installation
Home Theaters Cost-effective

They absorb sound frequencies to reduce noise pollution.

How Do Acoustic Panels Work: Soundproof Your Space!


Credit: m.youtube.com


Installation Tips And Tricks

Welcome to our ‘Installation Tips and Tricks’ guide for acoustic panels. Proper installation can make a huge difference in sound control. Let’s dive into the best ways to install acoustic panels for maximum effectiveness.

Identifying The Strategic Spots

Before installation, finding the right spots is crucial. Strategic placement ensures optimal sound absorption.

  • Check for areas with high echo.
  • Consider spots directly opposite noise sources.
  • Use the ‘clap test’ to identify reflective surfaces.

Placing panels at these points reduces sound reflections. This enhances the overall acoustic quality of your space.

Diy Vs. Professional Installation

Decide whether to DIY or hire a professional. This depends on your comfort level and skills.

DIY Installation Professional Installation
  • Cost-effective
  • Personal satisfaction
  • Customizable
  • Higher cost
  • Expertise
  • Efficiency

DIY may seem intimidating, but detailed guides are available. Pro assistance guarantees precision and saves time.

Ensure wall surfaces are clean before installation. This improves panel adhesion. Use adhesives or mounting hardware compatible with your wall type. Follow safety protocols while using tools.

Maintenance And Care For Longevity

To keep your acoustic panels performing optimally, proper maintenance is key. Simple steps ensure longevity and maintain sound quality. Cleaning them the right way and knowing when to replace them can save time and money. This guide will outline the necessary care to help your panels last longer and work better.

Cleaning And Upkeep

Regular cleaning extends an acoustic panel’s life and preserves its appearance. Dust lightly with a soft cloth or use a vacuum with a brush attachment. Avoid harsh chemicals or water, as they can damage the fabric and the internal material. For spot cleaning, a gentle fabric cleaner is best. Test it on a small area first.

  • Dust panels monthly to prevent build-up.
  • Use a vacuum on a low setting for deeper cleaning.
  • Spot clean when necessary with recommended solutions.

When To Replace Your Panels

Acoustic panels are durable, but they don’t last forever. Signs of wear may signal it’s time for replacement. Look for fading, fabric tears, or a decrease in sound absorption. If a panel gets damaged by water or heavy impact, consider replacing it to maintain acoustical integrity.

Sign Action
Fading color Plan for replacement.
Material breakdown Prioritize immediate change.
Reduced performance Test acoustics, replace if needed.

Check panels annually for signs of wear. Replacing panels in a timely manner ensures the best acoustical performance in your space.

Measuring The Effectiveness

Understanding the effectiveness of acoustic panels is crucial for optimal sound quality. The right tools and comparison methods are necessary. They help us assure the panels perform as expected.

Tools To Gauge Sound Reduction

Different tools exist for measuring sound reduction efficiency:

  • Sound Level Meters: Devices that measure the intensity of sound in decibels (dB).
  • Decibel Meters: Handy tools, often available as apps, to monitor sound levels before and after installation.
  • Frequency Analyzers: Help to determine the frequency range that the panels are effectively absorbing.
  • Room Acoustic Analysis Software: Complex software for professionals to analyze multiple sound properties and provide detailed reports.

Using the correct tool is essential for accurate measurements, ensuring that acoustic panels are meeting their purpose effectively.

Comparing Before And After Scenarios

Comparative analysis is essential to evaluate the panels’ impact on sound quality.

  1. Record the ambient room sound levels without panels.
  2. Install the acoustic panels as recommended.
  3. Measure the new sound levels in the same room conditions.

Noticeable differences should emerge that demonstrate the panels’ effectiveness. These may include:

Aspect Before After
Echo Present Reduced/Removed
Clarity Low High
Sound Level High dB Lower dB

Detailed comparisons lay the foundation for understanding the value that the acoustic panels bring. Moreover, they allow for further tuning to achieve the desired sonic environment.

Frequently Asked Questions For How Do Acoustic Panels Work


How Effective Are Acoustic Panels?


Acoustic panels effectively reduce unwanted echoes and improve sound quality within a space. Their efficiency depends on the panel’s material, size, and placement. Properly installed, they significantly enhance auditory experiences in environments like studios and home theaters.


Do Acoustic Panels Keep Sound In Or Out?


Acoustic panels primarily absorb sound to prevent echo and improve sound quality in a room. They can somewhat reduce sound transmission, but are not designed to block sound completely from entering or leaving a space.


What Are The Disadvantages Of Acoustic Panels?


Acoustic panels can be costly and may detract from a room’s aesthetic. Installation requires time and effort, and they might not completely block out noise. Over time, they can accumulate dust and may require professional cleaning or replacement.


How Do You Use An Acoustic Panel?


To use an acoustic panel, first identify the area with excess noise. Securely mount or hang the panel on walls or ceilings to absorb sound. Arrange panels strategically across the space for optimal sound dampening. Regular maintenance ensures long-term effectiveness.


Conclusion


Acoustic panels play a pivotal role in managing sound quality. They absorb unwanted noise, enhancing listening experiences in various settings. Effective placement transforms acoustics, whether in studios or public spaces. To optimize a space for sound, consider integrating these soundproofing allies.


Embrace the quiet with acoustic panels.


Categories
Archive

Mixing Low End Kick Bass: Mastering the Art of Powerful Audio

To mix low end kick bass effectively, use EQ to carve out space for each element. Enhance the clarity and punchiness of the kick while reducing muddiness in the low end.


Achieving a balanced and powerful low end in your mix requires skillful attention to detail. By implementing these techniques, you can ensure that your kick bass complements the overall mix and provides a solid foundation for your music. With a clear understanding of how to manipulate frequencies and dynamics, you can create a professional-sounding mix that leaves a lasting impact on your listeners.


Let’s explore some practical tips and strategies for mixing low end kick bass to enhance the overall quality of your music productions.


The Importance Of Low-end Kick Bass


The low-end kick bass plays a crucial role in mixing, providing depth and power to the overall sound. It anchors the track and enhances the rhythmic drive, creating a solid foundation for the mix. Balancing its frequencies with precision is essential for achieving a clear and defined low-end presence.

Low-end kick bass is vital for a powerful audio mix. It contributes to the foundation and impact of the sound, anchoring the music and providing depth and warmth to the overall composition.

Creating Impactful Sound

  • Mixing low-end kick bass properly enhances the overall impact of the music.
  • It adds energy and drive to the track, engaging listeners and creating a memorable listening experience.
  • Properly balanced low-end frequencies can elevate the entire mix and make it more dynamic.

Foundation Of Audio Mix

  1. Low-end kick bass serves as the foundation of the audio mix, holding everything together.
  2. It provides a solid anchor for other elements to build upon, creating a cohesive and balanced sound.
  3. Without a well-defined low-end kick bass, the mix can feel weak and lacking in depth.
Mixing Low End Kick Bass: Mastering the Art of Powerful Audio


Credit: www.izotope.com


Understanding Low-end Frequencies

Understanding Low-End Frequencies:


Recognizing Sub-bass, Bass, & Lower Mids

Sub-bass, bass, and lower mids are crucial elements in mixing low-end kick bass effectively.

Frequency Range Importance

Understanding the importance of frequency ranges helps in achieving a balanced and powerful kick bass sound.

Techniques For Enhancing Low-end Kick Bass


Achieve a powerful low-end kick bass by employing advanced mixing techniques. Utilize EQ to boost frequencies, apply compression strategically, and layer sound to enhance depth and impact. Experiment with different settings to achieve a balanced and full-bodied kick sound in your mix.

Enhancing the low-end kick bass is crucial for achieving a powerful and balanced mix. Effective techniques such as EQ and frequency sculpting, as well as compression and sidechain, can significantly boost the impact and clarity of the low-end kick bass in your music production.

Eq And Frequency Sculpting

Using EQ to enhance the low-end kick bass involves strategic manipulation of frequencies to achieve a well-defined and punchy sound. By cutting unwanted low frequencies and boosting the fundamental range, you can bring out the weight and presence of the kick bass. Additionally, sculpting the midrange frequencies can help to add clarity and definition to the kick, ensuring it stands out amidst other elements in the mix.

Compression And Sidechain

Employing compression techniques is essential for controlling the dynamic range of the low-end kick bass. By applying gentle compression, you can level out the peaks and bring up the quieter elements, resulting in a more consistent and impactful bass presence. Additionally, utilizing sidechain compression allows the kick bass to dynamically carve space for other elements, such as the bassline or other instruments, ensuring a clear and defined low-end without compromising overall balance and clarity in the mix.

Leveraging Layering And Sampling

When it comes to mixing low-end kick bass, one effective technique is leveraging layering and sampling. Blending different drum samples can enhance the overall sound and create a more powerful kick bass. By combining various samples, you can achieve a unique and customized sound that suits your mix perfectly.

In addition to blending drum samples, incorporating synthesized kicks into your mix can add depth and variety. Synthesized kicks allow you to control every aspect of the sound, from the attack to the tail. This flexibility gives you the opportunity to create a kick that complements the existing elements of your mix and brings it to life.

When blending drum samples and incorporating synthesized kicks, keep in mind the following tips:

Blending Drum Samples

  • Choose samples that complement each other: Select drum samples that have different characteristics, such as one with a punchy attack and another with a deep sustain. Blending these samples will create a well-rounded kick bass sound.
  • Adjust volume and EQ: Experiment with the volume levels of each sample to find the right balance. Additionally, use EQ to shape the sound and prevent any frequency clashes.
  • Add layers gradually: Start with one sample as the foundation and slowly add additional samples to build on that foundation. This gradual layering process will help you maintain clarity and prevent an overwhelming sound.

Incorporating Synthesized Kicks

  1. Create your own synthesized kick: Use a synthesizer plugin or software to design a kick sound that suits your mix. Experiment with different parameters, such as pitch, decay, and distortion, to achieve the desired result.
  2. Blend synthesized kicks with drum samples: Once you have created your synthesized kick, blend it with your selected drum samples. This combination will give your kick bass additional character and allow for more creative possibilities.
  3. Layering with care: As with blending drum samples, ensure that the synthesized kick is layered gradually to avoid overpowering other elements in your mix.

By leveraging layering and sampling techniques, you can take your low-end kick bass to the next level. Experiment with different combinations of drum samples and synthesized kicks to find the perfect sound for your mix. Remember to adjust volume levels, use EQ to shape the sound, and layer gradually to maintain clarity. With these techniques, you can create a powerful and dynamic kick bass that drives your music forward.

Balancing Low-end With Other Instruments

When it comes to mixing low-end kick bass, one of the biggest challenges is achieving a well-balanced sound that complements the other instruments in the mix. Without proper balance, the low-end can easily overpower the rest of the music, resulting in a muffled and muddy final mix. To help you overcome this challenge, here are some essential techniques to consider.

Avoiding Muddiness

To avoid muddiness in your low-end, it’s crucial to carve out space for each instrument in the frequency spectrum. This can be achieved by using a combination of EQ and sidechain compression. EQ allows you to selectively boost or cut specific frequencies in each instrument, ensuring they all have their own dedicated space in the mix. Avoid overlapping frequencies among instruments, especially in the low-end range, to prevent muddiness.

Dealing With Conflicting Frequencies

Conflicting frequencies can arise when different instruments share similar frequency ranges, causing them to clash and create unwanted sonic problems. When it comes to balancing low-end, it’s important to pay attention to conflicting frequencies and address them accordingly. One effective technique is to use dynamic EQ, which allows you to dynamically cut frequencies when two instruments clash. This helps to maintain clarity and separation in the low-end and ensures that each instrument can be heard distinctly.

Another method to deal with conflicting frequencies is through proper panning and stereo imaging. By spreading out instruments across the stereo field, you can create more space for each instrument and reduce the likelihood of frequency clashes. Remember to use these techniques judiciously and make subtle adjustments to preserve the naturalness and cohesiveness of the mix.

Utilizing Sidechain Compression

In addition to EQ and dynamic EQ, sidechain compression is a powerful tool for balancing the low-end with other instruments. By sidechaining the kick bass with other instruments, you can prioritize and emphasize the low-end by momentarily ducking the conflicting instruments when the kick bass hits. This technique ensures that the kick bass retains its prominence while still allowing other instruments to be heard clearly, resulting in a tighter and punchier low-end mix.

Overall, achieving a balanced low-end with other instruments is crucial for a professional and polished mix. By employing techniques such as EQ, dynamic EQ, panning, and sidechain compression, you can effectively manage and control the low-end frequencies, preventing muddiness and frequency conflicts, and ultimately create a mix that sounds cohesive and solid.

Mixing Low End Kick Bass: Mastering the Art of Powerful Audio


Credit: www.waves.com


Mixing Low End Kick Bass: Mastering the Art of Powerful Audio


Credit: www.crutchfield.com


Frequently Asked Questions For Mixing Low End Kick Bass


How Do You Mix Bass And Kick Together?


To mix bass and kick together, start by EQing each to avoid frequency clashes. Adjust levels for balance, side-chain the kick to the bass, and use compression for cohesion. Experiment with different techniques until the bass and kick sound unified in the mix.


How Do You Mix Low Ends?


To mix low ends, use high-pass filters to clean up the bottom end. Also, consider cutting out frequencies that clash, and use compression and EQ to improve clarity and balance. Mixing in mono can help with low-end balance too.


Should Bass Be Lower Than Kick?


Yes, the bass should generally be lower than the kick. This helps create a balanced and dynamic sound. The kick provides the foundation and the bass complements it with lower frequencies.


What Level Should My Kick Be In A Mix?


The level of your kick in a mix should be carefully balanced to ensure it fits well with other elements. There is no one-size-fits-all answer, as it depends on the genre, style, and personal preference. Experiment with different levels to find the right balance, ensuring it is audible yet not overpowering other elements.


Conclusion


In wrapping up, mastering the low end of your kick bass is crucial for a polished and professional sound. By using the techniques outlined in this blog post, you can achieve a balanced and impactful low end that will enhance your music production.


Keep experimenting and refining your approach to achieve the perfect low end mix.


https://www.youtube.com/watch?v=O2mzqlaBZbk


Categories
Archive

Acoustic Panels for Ceiling: Enhance Your Space’s Acoustics!

Acoustic panels for ceilings enhance sound quality by reducing noise and echoes. They are essential for optimizing acoustics in various spaces, from home theaters to conference rooms.


Investing in acoustic panels for your ceiling can transform a noisy, reverberant area into a clear-sounding space. Ideal for both commercial and residential settings, these panels work by absorbing sound waves, thereby diminishing sound reflections that can muddle audio clarity.


Their practicality extends to recording studios, offices, and educational institutions, where clear sound is imperative. Available in several materials, sizes, and designs, ceiling acoustic panels not only improve auditory experiences but can also add an aesthetic touch to your interiors. Their installation is considered a smart move for anyone looking to create an acoustically pleasant environment without compromising on style.


Why Invest In Ceiling Acoustic Panels

Good acoustics improve our daily lives. Spaces with great sound make us feel better. Ceiling acoustic panels are key for this. These panels cut noise and echo. They let us hear clearly.

Balancing Sound In The Room

Looking for clear sound? Ceiling acoustic panels are a must. They manage echo in rooms. Sound gets soft and balanced.

  • Reduce harsh echoes
  • Keep conversations easy to understand
  • Help in controlling sound levels

Aesthetics Meets Functionality

Beautiful designs meet sound control. Ceiling panels come in many styles. They enhance room look and feel.

Design Function
Colors and Textures Sound Absorption
Shapes and Sizes Noise Reduction

Types Of Acoustic Panels For Ceilings

Revamping your space with acoustic panels for ceilings can lead to improved sound quality and aesthetic appeal. With various types to choose from, the perfect fit for your area is within reach. Let’s explore the types of acoustic panels for ceilings to help you make an informed decision about your acoustic treatment options.

Fabric Wrapped Panels

Fabric wrapped panels offer aesthetic flexibility and sound absorption. These are available in different colors and sizes to match your decor. They consist of a sound-absorbing core material, like fiberglass, covered with fabric. These panels can reduce echo and improve speech clarity.

Perforated Acoustic Wood Panels

Perforated acoustic wood panels bring a natural touch to sound control. They have holes or slits that allow sound to pass through and get absorbed by backing materials. These panels blend seamlessly with wooden aesthetics and are often used in auditoriums and conference rooms for their effective sound dampening qualities.

Foam Acoustic Panels

Foam acoustic panels are popular for their efficiency and ease of installation. Made of polyurethane or melamine foam, they can alter sound energy into heat. These panels are cost-effective solutions for studios and home theaters, cutting down on excess reverberation.

Customizable Acoustic Panel Options

For those who require unique solutions, customizable acoustic panel options are the answer. Custom panels can be cut into various shapes and printed with personalized designs. They address specific soundproofing needs and allow for creativity, making them a perfect choice for unique spaces.

Deciding On The Right Panels For Your Ceiling

Deciding on the right acoustic panels for your ceiling is a key step in improving the sound quality of a room. It helps in reducing noise, controlling echo, and enhancing the clarity of speech and music. Let’s explore the factors to consider to ensure the best choice for your space.

Considering Room Size And Ceiling Height

The dimensions of the room significantly affect acoustic panel selection. Large rooms or those with high ceilings often require more coverage or specialized panels to effectively absorb sound. Let’s look at the details:

  • Volume and surface area: Calculate the room’s volume to estimate the necessary amount of acoustic treatment.
  • Reflection points: Identify walls and surfaces where sound bounces back to prioritize panel placement.

Material And Design Considerations

Acoustic panels come in a variety of materials and designs, each with its unique sound-absorbing properties.

  1. Fiber Materials: Panels made of fibers like cotton or wool are great for high-frequency absorption.
  2. Foam Panels: These are lightweight and can absorb mid to high frequencies effectively.
  3. Wooden Panels: Add elegance while buttering low-frequency sounds.

Choose a design that complements your interior and meets your acoustic needs.

Installation And Mounting Systems

Selecting the proper installation method is crucial for both safety and effectiveness. Here’s what to consider:

  • Direct Mount: Ideal for smaller panels, perfect for pinpointed sound control.
  • Cloud Mounting: Suspend panels from the ceiling for enhanced sound absorption and aesthetic appeal.
  • Track Systems: Allows for easy panel adjustment and is suitable for larger installations.
Acoustic Panels for Ceiling: Enhance Your Space's Acoustics!


Credit: sound-zero.com


Installation Tips For Optimal Acoustics

Installing acoustic panels on the ceiling can transform a noisy room into a peaceful space. Proper installation is key to achieving the best sound control. Follow these tips to ensure your acoustic panels work effectively.

Tools And Prep Work

Before starting, gather the right tools. Here’s what you need:

  • Measuring tape
  • Stud finder
  • Drill with bits
  • Screws and anchors
  • Level
  • Chalk line or laser level

Preparing the ceiling is next:

  1. Determine panel layout for even coverage.
  2. Find and mark stud locations.
  3. Use chalk line to mark guide lines.

Step-by-step Installation Process

Installation is straightforward if you follow these steps:

  1. Hold the first panel against the ceiling.
  2. Mark drill holes using the panel’s mounting points.
  3. Drill holes and insert anchors if needed.
  4. Secure the panel with screws. Use a level to ensure it’s flat.
  5. Repeat for remaining panels, checking alignment.

Troubleshooting Common Issues

Sometimes problems arise. Here’s how to fix them:

Issue Solution
Panels not level Adjust screws and use a level to align.
Uneven spacing Measure and adjust according to layout.
Poor sound improvement Check for gaps and seal them properly.

Beyond The Ceiling: A Holistic Approach To Acoustics

Imagine a space where every sound is crystal clear. This is the power of a holistic acoustic approach. It’s not just about acoustic panels for the ceiling. It’s about treating every surface in a room to create the perfect sound environment. This blog section digs deep into how integrating different elements can enhance overall acoustics. From walls and floors to furnishing and upkeep, discover the full spectrum of soundproofing.

Integrating Wall And Floor Treatments

Walls and floors play a huge role in acoustics. Sound bounces, and these surfaces can either amplify noise or dampen it. Use the right materials, and the space will sound better.

  • Choose absorbent wall panels that complement those on the ceiling.
  • Install thick carpets or specialized acoustic flooring to reduce echo.

Furnishing For Better Sound

Select furniture that not only looks good but also improves sound quality. Soft, plush items can absorb noise, leading to clearer acoustics.

Furniture Type Acoustic Benefit
Soft sofas and chairs Sound absorption
Bookshelves Diffuse sound waves

Regular Maintenance For Acoustic Panels

Keep panels performing at their best with regular cleaning and checks. Dust and dirt can affect how sound is absorbed.

  1. Vacuum panels gently to remove surface dust.
  2. Check for any signs of damage that might need repair.
  3. Ensure panels are firmly attached and haven’t come loose over time.
Acoustic Panels for Ceiling: Enhance Your Space's Acoustics!


Credit: arktura.com


Case Studies: Transformations With Ceiling Acoustic Panels

Ceiling acoustic panels are revolutionizing interior spaces. They enhance sound quality and offer aesthetic appeal. This section dives into real-life transformations. We’ll explore how varied sectors benefit from ceiling acoustic panels.

Home Theaters And Listening Rooms

Private residences have seen dramatic improvements. Familiar complaints of echoes and noise pollution resolved with ease.

  • Clarity of sound achieved for immersive experiences.
  • Design flexibility helps blend with room aesthetics.
  • Material variety matches unique needs.

One case study showcases a suburban home theater. Family movie nights transformed with crisp, clear audio. Distractions from other rooms now a thing of the past.

Restaurants And Acoustic Challenges

Eateries confront sound issues. Managing diners’ buzz while maintaining ambiance is key.

Before Installation After Installation
Noise levels high Conversations clear
Ambiance disrupted Atmosphere perfected

A bistro in the city center exemplifies success. The installation of ceiling acoustic panels has seen diners stay longer and return often.

Commercial Spaces And Privacy Concerns

Office spaces are embracing acoustic ceiling solutions. Confidential discussions need privacy. Ambient noise distractions reduced.

  1. Productivity rises as noise pollution drops.
  2. Private meetings remain discreet.
  3. Work environment aesthetics improved.

A high-profile law firm now boasts an environment conducive to concentration. Client comfort and trust levels at all-time highs.


Acoustic Panels for Ceiling: Enhance Your Space's Acoustics!


Credit: www.armstrongceilings.com


Frequently Asked Questions On Acoustic Panels For Ceiling


Do Acoustic Panels Work On Ceiling?


Yes, acoustic panels effectively reduce noise when installed on ceilings. They absorb sound waves and prevent echo, enhancing room acoustics.


How Do You Attach Acoustic Panels To The Ceiling?


To attach acoustic panels to the ceiling, use adhesive to secure directly or install mounting brackets to hold the panels in place. Ensure the surface is clean and measure accurately for even placement. Safety should be your top priority during installation.


What Is The Best Soundproofing For Ceilings?


The best soundproofing for ceilings typically involves using mass-loaded vinyl (MLV), acoustic panels, or soundproofing drywall to dampen noise. Installing resilient channels can further isolate ceiling drywall from noise transmission.


Are Acoustic Ceiling Tiles Worth It?


Acoustic ceiling tiles effectively reduce noise, making them a valuable investment for enhancing sound quality and comfort in interior spaces. They are also aesthetically versatile and can improve insulation.


Conclusion


Summing up, ceiling acoustic panels are essential for optimal sound quality. They reduce noise, enhance clarity, and can add a touch of style. Whether it’s for a home theater, studio, or office, these versatile panels promise an improved auditory experience.


Consider upgrading your ceiling with acoustic panels and enjoy the difference they make.

Categories
Archive

Acoustic Panels for Studio: Ultimate Sound Solutions!

Acoustic panels enhance sound quality by reducing unwanted noise in studios. They’re essential for clear audio production.


Acoustic panels are vital for any recording or broadcasting space, serving as a sound absorption solution to mitigate echo and reverberation. This is crucial for professionals seeking to achieve the best possible sound environment within a studio setting. By installing these panels, sound waves are dampened, which helps to prevent them from bouncing off hard surfaces and creating a muddled audio experience.


As a result, recordings are crisper and more precise. An array of materials, such as foam or fiber, can be used to construct these panels, each offering varying degrees of sound absorption. Optimal studio sound quality necessitates strategic placement of acoustic panels to target specific areas where sound tends to reflect, achieving a balanced and controlled acoustic environment suitable for high-quality audio production.


The Role Of Acoustic Panels In Studio Sound Quality

High-quality sound is essential for any studio. Acoustic panels play a major role in achieving this. They capture and manage sound waves. This helps in creating a cleaner audio environment. Let’s dive into the specifics of how acoustic panels can enhance your studio’s sound quality.

Enhancing Clarity And Reducing Noise

Studios often struggle with unwanted noise and echo. Acoustic panels help by absorbing excess sound. This results in clearer audio. Here’s how they improve your studio:

  • Control reverberation: They reduce echo for better sound clarity.
  • Minimize background noise: Panels lower the impact of outside noise.
  • Improve speech intelligibility: Words become more distinct. This is crucial for vocal recordings.

Impact On Recording And Playback

Good acoustic treatment means better recording quality. Acoustic panels influence both recording and playback in your studio:

  1. They enhance microphone performance. This picks up cleaner sounds.
  2. During playback, they ensure a true sound representation. This helps in accurate mixing and mastering.
  3. Musicians perform better in a well-treated space. It allows them to hear themselves clearly.
Acoustic Panels for Studio: Ultimate Sound Solutions!


Credit: www.audimute.com


Types Of Acoustic Panels Available

When setting up a studio, sound quality is key. Acoustic panels help improve it. There are different panels for any need. Let’s look at some common types.

Fabric Wrapped Panels

Fabric wrapped panels blend well with studio decor. They absorb sound waves. This reduces echo. These come in various colors and sizes.

  • Effective sound absorption
  • Customizable design options
  • Easy to mount

Foam Panels

Foam panels are popular for their ease of use. They are lightweight and affordable. They cut down on mid to high frequency echoes.

  • Simple to install
  • Cost-effective
  • Good for general use

Wooden Diffusers

Wooden diffusers scatter sound. They create an even sound field. Ideal for a natural aesthetic. They are best for studios with live recording.

  • Enhances sound clarity
  • Visually appealing
  • Durable

Bass Traps For Low Frequency Control

Bass traps tame low frequencies. They are placed in studio corners. Bass traps prevent bass build-up. This makes sound clear and balanced.

  • Essential for accurate sound
  • Improves overall acoustics
  • Focuses on low-end absorption

Key Considerations When Choosing Acoustic Panels

Having the right acoustic panels makes all the difference for a studio’s sound quality. The panels help control echoes and reduce noise. It is important to choose the best panels for a studio. This section looks at what to think about when picking acoustic panels.

Material And Build Quality

The quality of the materials used in acoustic panels affects how they control sound. Panels come in different materials like foam, fabric, or wood. High-quality materials can capture sound better. Users should look for strong, long-lasting panels that can stand up to wear and tear.

Size And Thickness For Optimal Performance

The size and thickness of acoustic panels link to how well they perform. A bigger and thicker panel will usually absorb more sound. Studios vary in size, and so do their soundproofing needs. It’s key to match the panels’ size and thickness to the studio’s requirements for the best outcome.

  • Small rooms: Thinner panels may work.
  • Large spaces: Thicker and more panels are often better.

Flame Retardancy And Safety Standards

Safety is crucial when installing acoustic panels in any setting. Panels should meet local flame retardancy standards. This minimizes the risk of fire spreading. Always check for a panel’s fire rating before buying.

Acoustic Panels for Studio: Ultimate Sound Solutions!


Credit: andorwillow.com


Installation Tips For Maximum Effectiveness

Setting up acoustic panels in your studio can transform muddy sound into clear, crisp audio. Install these panels correctly, and your recordings will thank you. Let’s dive into making the most of your acoustic treatment.

Strategic Placement For Sound Absorption

Sound waves bounce around your studio. Place acoustic panels where they hit the most. Here’s a simple guide:

  • First reflection points: These are spots on the wall that catch sound directly from the speakers. A mirror trick helps you find them. Sit in your mix position and have someone move a mirror along the walls. Mark where you see the speakers. This is where panels should go.
  • Ceiling and corners: Don’t ignore these areas. Sound loves to hide here. Add panels to the ceiling above your mix spot. Corners can trap bass. Bass traps fit perfectly here.
  • Door and windows: These surfaces reflect too. Treat them with panels or thick curtains. Remember, the goal is even sound absorption around the room.

Avoiding Common Installation Mistakes

Common errors can reduce a panel’s effectiveness. Here’s a list to avoid:

Mistake Tip
Using glue directly on the wall Use mounting brackets or adhesive strips to prevent damage and allow air to flow behind the panel.
Leaving gaps between panels Fit panels snugly to ensure seamless sound absorption.
Ignoring manufacturer instructions Every panel type is unique. Follow the specific installation guide provided.

Correct installation is vital. It ensures your studio sounds its best.


Maintaining And Upgrading Your Acoustic Treatment

Acoustic panels keep your studio sounding its best. Like all good things, they need care to perform well.

Regular Cleaning And Care

Dirt and dust can affect your panel’s performance. Regular cleaning is essential.

  • Use a soft brush to remove surface dust.
  • Vacuum with a gentle attachment for deeper cleaning.
  • Avoid water and harsh chemicals; they can damage the panels.

When To Consider Panel Replacement

Panels won’t last forever. Look for signs of wear and tear.

  1. Check for fading or discoloration.
  2. Inspect for physical damage like dents or frays.
  3. Listen for changes in sound quality.

Upgrading can bring new improvements to your sound. Consider replacement every few years.

Sign Action
Fabric Tears Replace Panel
Core Material Deterioration Replace Panel

Real-world Examples: Acoustic Panels In Action

Dive into how acoustic panels elevate recording quality. Real-world studios showcase their drastic improvements. Witness now how your audio space can transform.

Case Studies Of Professional Studios

Professional studios gain clarity and precision with acoustic panels. Let’s explore successful installations.

  • Studio A: Struggled with echo; panels eliminated reverberation.
  • Studio B: Low frequency issues; panels balanced sound profile.
  • Studio C: Vocal clarity needed; crisp vocals achieved post-panel.

Before And After: The Audible Difference

Discover the transformation. Acoustic panels quash noise issues. Experience the before and after.

Aspect Before Panels After Panels
Reverb Time Long and muddy Short and controlled
Clarity Muffled Clear and distinct
Bass Response Boomy and undefined Even and smooth

Audio samples provide audible evidence. Sound clarity transforms after panel installation. Listener satisfaction skyrockets.

Acoustic Panels for Studio: Ultimate Sound Solutions!


Credit: output.com


Frequently Asked Questions Of Acoustic Panels For Studio


Where Should Acoustic Panels Be Placed In A Music Studio?


Place acoustic panels at first reflection points, which are the walls to the sides, front, and back of the listening position, as well as the ceiling. Also, consider areas behind speakers and at room corners to reduce bass buildup and flutter echoes.


How Do I Soundproof My Studio?


To soundproof your studio, install dense acoustic panels, use bass traps in corners, and seal gaps with weather stripping or acoustic caulk. Float the floors with rubber mats and hang heavy curtains over windows and doors.


What Is The Difference Between Soundproof Panel And Acoustic Panel?


Soundproof panels block noise from entering or exiting a space, while acoustic panels improve sound quality within a room by reducing echo and reverberation.


Do Acoustic Panels Improve Sound Quality?


Yes, acoustic panels enhance sound quality by reducing unwanted echoes and reverberation, leading to clearer audio in a room. They absorb excess sound, improving the listening environment.


Conclusion


Acoustic panels are a crucial investment for any studio aiming to achieve professional sound quality. They reduce unwanted noise and enhance audio clarity. Remember, optimal placement is key to their effectiveness. To transform your studio space, consider adding these sound solutions for a noticeable improvement in your recordings.

Categories
Archive

Comparing Your Mixes: Unlocking the Secret to Stellar Sound

Comparing your mixes helps identify discrepancies and improve sound quality. It is essential for achieving a balanced audio output.


When assessing different mixes, consider factors such as volume levels, EQ settings, and dynamics processing. By making detailed comparisons, you can pinpoint areas for enhancement and refine your sound. This process is crucial for ensuring professional-sounding music production. Analyzing mixes thoroughly allows you to make informed decisions and elevate the overall quality of your audio projects.


Make use of listening tools and reference tracks to aid in this critical evaluation process. By honing your mixing skills through comparison, you can create impactful and polished soundscapes that resonate with your audience.


Credit: www.jpl.nasa.gov


The Art Of Mixing Music

The art of mixing music involves blending different audio elements harmoniously to create a cohesive and impactful final product. It requires precision, creativity, and a keen ear for detail.

Importance Of Mixing

Achieving the perfect mix is crucial for a polished and professional sound. Without proper mixing, the individual tracks can get lost or overshadow each other.

  • Balanced mix enhances clarity and depth of the music.
  • Proper mixing ensures all instruments are heard distinctly.
  • It creates a sonically pleasing experience for the listeners.

Key Elements Of A Great Mix

A great mix incorporates various key elements to bring out the best in the music.

  1. Balancing: Adjusting the volume of each track to create unity.
  2. Panning: Placing sounds across the stereo field for spatial depth.
  3. EQ: Enhancing clarity by fine-tuning frequencies of each instrument.
  4. Compression: Smoothing out dynamics for a cohesive sound.


Credit: www.nytimes.com


Understanding The Impact Of Mixing

When it comes to mastering the art of producing music, understanding the impact of mixing is crucial. Mixing can dramatically influence the final product, shaping the sound and feel of a song through various techniques and adjustments.

How Mixing Affects The Final Product

The way elements are blended in a mix can impact how they are perceived by listeners. Proper mixing can enhance clarity, depth, and balance in a track, bringing out the best in each instrument or vocal.

By adjusting levels, panning, EQ, and effects, mixing engineers can create a cohesive and polished sound that captures the essence of the music and engages the audience.

Common Challenges In Mixing

  • Clashing frequencies can muddy up a mix.
  • Inconsistent levels may result in an imbalanced sound.
  • Mixing in a subpar acoustical environment can lead to inaccurate judgments.

Overcoming these challenges requires skill, experience, and a keen ear for detail. Addressing these issues effectively can elevate the quality of a mix and ensure that the final product meets the desired standards.

Tools And Techniques For Effective Mixing

Mixing is a crucial stage in the music production process, where various tracks and elements are combined to create a balanced and polished sound. To achieve an effective mix, it’s essential to utilize the right tools and techniques. Let’s explore the tools and techniques for effective mixing that can elevate the quality of your mixes.

Essential Mixing Tools

When it comes to mixing music, having the right tools at your disposal can make all the difference. Here are some essential tools that every audio engineer should have:

  • Digital Audio Workstation (DAW): A powerful DAW serves as the centerpiece for mixing, offering a range of editing and processing capabilities.
  • Quality Monitors and Headphones: Accurate monitoring is crucial for making informed mixing decisions, so investing in high-quality monitors and headphones is key.
  • Signal Processors: Tools such as equalizers, compressors, and reverbs are essential for shaping and enhancing individual audio tracks.
  • Metering Tools: Visualizing audio levels and frequencies through metering tools helps ensure proper balancing and clarity in the mix.

Proven Mixing Techniques

Effective mixing requires more than just having the right tools; it also involves employing proven techniques to achieve a cohesive and professional sound. Here are some proven mixing techniques to consider:

  1. Gain Staging: Proper gain staging ensures that the audio signals maintain optimal levels throughout the mixing process, preventing distortion and preserving headroom.
  2. Frequency Balancing: Balancing the frequency content of each track and ensuring that different elements occupy their respective frequency ranges can lead to a more defined and clear mix.
  3. Panning and Stereo Imaging: Utilizing panning and stereo imaging techniques can create a sense of space and depth within the mix, enhancing its overall impact.
  4. Dynamic Control: Applying dynamic processing techniques such as compression and expansion can help control the dynamics of individual tracks and achieve a more consistent and polished sound.
Comparing Your Mixes: Unlocking the Secret to Stellar Sound


Credit: hello.podium.page


Comparing Different Mixes


Evaluating and comparing different mixes is crucial for ensuring a high-quality output. By carefully analyzing and contrasting your mixes, you can identify potential areas for improvement and make informed decisions to enhance the overall sound and balance of your music.

When it comes to creating a great mix, one of the most important steps is comparing different mixes. This process allows you to analyze and evaluate your work, identify the strengths and weaknesses, and improve the overall quality of your music.

Analyzing and Evaluating Mixes

Analyzing and evaluating mixes helps you get a clear understanding of how each element in your track is blending together. To effectively analyze your mixes, you should consider the following factors:

  • Balance and Levels: Are all the instruments and vocals in the mix well-balanced and at the appropriate volume levels?
  • Panning and Stereo Imaging: Is the stereo image properly constructed, giving each element its own space in the mix?
  • Frequency Balance: Do the different frequencies (bass, midrange, and treble) complement each other?
  • Dynamics and Compression: Are the dynamics controlled and the compression settings appropriate for each element?

Identifying Strengths and Weaknesses

Once you have analyzed and evaluated your mixes, it’s crucial to identify the strengths and weaknesses. This process helps you understand what aspects of your mix are working well and what needs improvement. Here are some key areas to focus on when identifying strengths and weaknesses:

  • Clarity and Definition: Are the individual instruments and vocals clear and well-defined in the mix?
  • Depth and Dimension: Does the mix have depth, creating a sense of space and separation between different elements?
  • Creative Choices: Are the creative choices you made in the mix enhancing the song and creating the desired emotional impact?
  • Mix Translation: Does the mix sound good on different listening systems such as headphones, car speakers, and studio monitors?

Remember, comparing different mixes is an essential step in the music production process. By carefully analyzing and evaluating your mixes and identifying their strengths and weaknesses, you can make informed decisions to enhance the overall quality of your music.

https://www.youtube.com/watch?v=BqoLLoUDZV4


Unlocking The Secret To Stellar Sound


Discover the key to exceptional audio quality by evaluating and contrasting your music mixes. Learn how to enhance your sound output and create a stellar listening experience. Gain insights into perfecting your mixes for optimal results.

Applying Insights To Elevate Your Mixes

In the world of music production, comparing your mixes is a crucial step in the pursuit of sonic excellence. By listening to your mix alongside professional, well-mixed tracks, you can gain invaluable insights that will help you unlock the secret to creating a stellar sound.

But how exactly can you apply these insights to elevate your mixes? Let’s explore some key strategies that can take your music productions to the next level:

Achieving Professional-level Sound

  1. Focus on proper balance: Achieving a professional-level sound starts with establishing the right balance between the different elements in your mix. Ensure that each instrument and vocal sits well in the mix, allowing every part to shine without overpowering the others.
  2. Pay attention to dynamics: Dynamic range is crucial in creating depth and clarity in a mix. Utilize compression, EQ, and volume automation to control the peaks and valleys in your tracks, ensuring that the transitions between soft and loud sections are smooth and seamless.
  3. Enhance the frequency spectrum: Your mix should cover the entire frequency spectrum without any frequency ranges overpowering others. Use EQ to carve out space for each element and make sure that no frequencies are clashing, resulting in a well-balanced and polished sound.
  4. Add depth with reverb and delay: Spatial effects like reverb and delay can add depth and dimension to your mix. Experiment with different settings and placements to create a sense of space, making your mix sound more immersive and professional.
  5. Precision with panning: Panning allows you to position elements in the stereo field, enhancing the overall width and separation of your mix. Carefully decide the placement of each instrument to create a balanced and enjoyable listening experience.
  6. Stay organized with proper gain staging: Gain staging ensures that the levels of each track are optimized for a clean and distortion-free mix. Keep an eye on your meters and make adjustments to prevent clipping and maintain a healthy signal flow.

By applying these insights, you can elevate your mixes to a professional level, capturing the essence of your musical vision and leaving a lasting impression on your listeners. Remember, the secret to stellar sound lies in continuously refining your skills, experimenting, and staying open to new techniques and approaches.

Frequently Asked Questions For Comparing Your Mixes


How Do You Compare Mixes?


To compare mixes, evaluate taste, consistency, and ingredients to determine the best option for your needs.


How Do You Evaluate A Mix?


To evaluate a mix, assess the balance of different elements and their contribution to the overall sound. Consider the levels, panning, and frequency balance to ensure a cohesive and dynamic mix. Listen on various playback systems to check for consistency and make necessary adjustments.


How Do I Make My Mixes Sound Better?


To make your mixes sound better, follow these tips: 1. Use EQ and compression to balance and enhance the individual elements in the mix. 2. Pay attention to the arrangement, ensuring all parts complement each other. 3. Add depth and dimension with reverb and delay effects.


4. Use automation to create movement and dynamics. 5. Take breaks and listen with fresh ears to ensure clarity and balance.


How Do You Know If Your Mix Sounds Good?


To determine if your mix sounds good, trust your ears and listen for a balanced and clear sound. Pay attention to the levels of each instrument and make sure nothing stands out too much or gets lost. Use reference tracks and test on different devices to ensure it translates well.


Conclusion


To sum up, it’s crucial to compare your mixes to ensure the best quality. By understanding the strengths and weaknesses of each mix, you can refine and enhance your final product. Using various comparisons, you can create a balanced and polished mix that captivates your audience.


Start comparing your mixes today and see the difference!

Categories
Archive

Stem Mastering Techniques : Boost Your Tracks with Proven Methods

Stem mastering involves processing groups of tracks before the final mixdown, enhancing clarity and cohesiveness in songs. By focusing on individual elements, stem mastering can achieve a more polished sound.


Many audio engineers use stem mastering to address specific aspects of a mix, such as improving dynamics, frequency balance, and stereo width. By examining and adjusting stems separately, engineers can fine-tune the overall sound of a track with greater precision.


Utilizing specialized tools and techniques, stem mastering can result in a more professional and cohesive final mix, making it a valuable step in the audio production process.


What Is Stem Mastering

Stem mastering is a specialized audio production technique used to enhance the quality and dynamics of a final mix. In stem mastering, individual groups of audio tracks, known as stems, are processed separately before being masterfully combined to create a polished and cohesive sound.

Benefits Of Stem Mastering

Stem mastering offers enhanced control over different elements of the mix, resulting in a more precise and customizable mastering process. It allows for targeted adjustments to specific sections of the audio, leading to a more polished and professional final product.

Difference Between Stem Mastering And Stereo Mastering

In stem mastering, individual audio groups are processed independently, whereas stereo mastering involves working with a single stereo mix. This distinction enables stem mastering to provide greater flexibility in shaping the final sound, offering a higher level of detail and clarity compared to stereo mastering.


Credit: www.mdpi.com


Setting Up For Stem Mastering

When preparing individual stems for stem mastering, focus on organizing each element meticulously.

  • Ensure clean cuts at the beginning and end of each stem.
  • Label stems clearly for easy identification and manipulation.
  • Trim silence and excess noise to maintain a clear audio signal.

Quality stem files lay the foundation for successful stem mastering.

  1. High-resolution files preserve audio integrity during processing.
  2. Properly exported stems retain dynamics and clarity.
  3. Organized stems facilitate efficient workflow and better results.
https://www.youtube.com/watch?v=MY6yxLlCy08


Key Stem Mastering Techniques

Stem mastering involves the processing and balancing of individual groups of instruments or sounds, known as stems, before they are combined into a final mix. This approach allows for more precise control over the various elements of a track, resulting in a cleaner and more professional sound. In this section, we will explore the key stem mastering techniques that can significantly impact the overall quality and clarity of your music.

Balancing Levels And Frequencies

Adjusting the volume levels of each stem is crucial for achieving a well-balanced mix. By carefully adjusting the levels of the individual stems, you can prevent any particular element from overpowering the rest of the mix, ensuring that every instrument or sound has its place in the sonic landscape.

Identifying and addressing frequency conflicts among stems is vital to create a cohesive and harmonious mix. By using equalization (EQ) to adjust the frequencies of each stem, you can carve out space for different elements, reducing muddiness and enhancing clarity.

Applying Compression And Eq To Stems

By applying compression to individual stems, you can control the dynamic range and ensure a more consistent level of each element. This helps to maintain a cohesive and balanced sound throughout the entire track.

Using EQ on individual stems allows you to shape the tonal balance and character of each instrument or sound, making them fit together seamlessly within the context of the mix. By pinpointing and addressing problematic frequencies, you can enhance the overall clarity and fidelity of the music.


Credit: www.simplilearn.com


Advanced Stem Mastering Approaches

Here is an introduction to the advanced stem mastering approaches, focusing on two essential techniques: utilizing parallel processing and adding harmonic excitement with saturation.

Utilizing Parallel Processing

Parallel processing is a powerful technique used in stem mastering to enhance the dynamics, width, and overall impact of a mix. It involves splitting the stems into different processing chains, each with its unique set of plugins and settings. By doing so, you can apply specific processing tools to each stem independently, resulting in a more controlled and polished final mix.

Parallel processing enables you to experiment with various effects, such as compression, EQ, and reverb, ensuring each stem is handled with precision and tailored to its specific needs. It helps to bring out the best in individual elements of the mix, while also preserving the overall coherence and balance. By implementing parallel processing techniques, you can achieve a highly refined and professional sound.

Adding Harmonic Excitement With Saturation

Saturation is a key element in stem mastering that adds warmth, depth, and character to the mix. This technique involves introducing controlled amounts of harmonic distortion to the stems, mimicking the pleasant overtones and saturation of analog equipment. By doing so, you can enhance the perceived loudness and energy of the track without sacrificing its clarity and dynamics.

Through the use of saturation plugins, you can selectively add harmonic excitement to specific stems, such as drums, vocals, or guitars, adding color and richness to their sound. The result is a mix that is more vibrant, lively, and captivating to the listener’s ear.

It’s important to note that a delicate balance is required when applying saturation in stem mastering. Too much saturation can lead to an overly distorted and muddy mix, while too little may not produce the desired impact. By experimenting with different saturation plugins and settings, you can find the perfect balance that elevates your mix to the next level.

By utilizing parallel processing and adding harmonic excitement with saturation, you can take your stem mastering to new heights. These advanced techniques provide the tools and flexibility needed to sculpt your mix with precision, ensuring every element shines and captures the listener’s attention. Incorporate these approaches into your mastering workflow and witness the transformation they bring to your music.

Tips For Successful Stem Mastering


Mastering techniques for stems is vital for achieving balanced, professional sound. Use software tools to ensure consistency and clarity across all stems, apply compression carefully, EQ for depth and punch, and leverage bus processing to enhance cohesion. Paying attention to these details can make your stem mastering more successful.

When it comes to stem mastering, following a few key tips can help you achieve the best results. Here are two important aspects to consider:

Maintaining Headroom And Dynamic Range

One crucial factor in stem mastering is maintaining headroom and dynamic range. Headroom refers to the space between the loudest peak of your audio and 0 dBFS (decibels relative to full scale). This allows the audio to breathe and prevents any distortion or clipping.

Similarly, dynamic range is the difference between the quietest and loudest parts of your audio. Preserving dynamic range ensures that the elements within your music can be heard clearly and retain their impact. Here are a few tips to achieve this:

  1. Firstly, ensure that no individual stem is too close to 0 dBFS. Leave ample headroom to avoid any potential issues during the mixing and mastering process. Typically, keeping the peaks below -3 dBFS is recommended.
  2. Balance the levels of your stems to create a cohesive mix. Adjust the volume of each stem so that they all have similar perceived loudness.
  3. Use compression and limiting techniques carefully to control the dynamics of each individual stem. Applying compression can help to even out the levels and create a more polished sound.
  4. Avoid excessive equalization (EQ) adjustments on individual stems. Instead, focus on EQing the mix as a whole to enhance the overall tonal balance without compromising the individual stems.

Keeping The Focus On Musical Elements

While mastering stems, it’s essential to keep the focus on the musical elements of the track. This involves enhancing the impact, clarity, and overall feel of the music. Here are a few tips to achieve this:

  • Begin by listening critically to the mix and identifying the strengths and weaknesses of each stem.
  • Use precise EQ adjustments to highlight the important elements of each stem. This can help to bring out the desired tonal characteristics and improve clarity.
  • Consider using stereo imaging techniques to widen the stereo field and create a sense of space for each stem.
  • Apply creative effects, such as reverb or delay, to add depth and dimension to individual stems while maintaining their musical integrity.
  • Regularly reference the master mix while working on the stems to ensure that the overall musical balance is maintained.


Credit: www.linkedin.com


Frequently Asked Questions On Stem Mastering Techniques


Is Stem Mastering Better?


Yes, stem mastering can provide more control and customization options over individual elements in the mix.


How Do You Bounce Stems For Mastering?


To bounce stems for mastering, solo each track, set levels, add effects, export individually, and assemble in a new project.


What Are The Basic Mastering Techniques?


Basic mastering techniques include equalization, compression, stereo enhancement, and limiting. These techniques are used to balance the frequencies, control dynamics, widen the stereo image, and maximize the volume of a track. By applying these techniques, a mastering engineer can make a mix sound polished and professional.


What Is The Difference Between Stereo And Stem Mastering?


Stereo mastering involves processing the final mixdown of a song or audio track, focusing on overall tonal balance and volume. Stem mastering goes a step further, by separating the mix into individual groups of instruments or elements, allowing for more precise control over the final sound.


Conclusion


In mastering a stem track, an essential part of the mixing process, the right techniques can make all the difference. With the right tools and approaches, you can achieve a professional sound that sets your music apart. Keep experimenting with different methods to find the best fit for the unique characteristics of each track.

Categories
Archive

Analog Vs Digital Audio: The Ultimate Showdown

Analog audio is continuous, while digital audio is represented by discreet samples. Analog offers smoother sound, whereas digital provides precise reproduction.


In today’s technology-driven world, understanding the distinction between analog and digital audio is crucial for both audio enthusiasts and professionals. Analog audio involves a continuous signal that faithfully mirrors the original sound wave, resulting in a smooth and natural sound.


On the other hand, digital audio translates sound into binary code, allowing for precise reproduction and manipulation. This article delves into the key differences between analog and digital audio, their respective strengths and weaknesses, and how these technologies have shaped the audio industry. Whether you are a music lover, a sound engineer, or simply curious about the inner workings of audio technology, read on to discover the fascinating world of analog and digital audio.


Credit: www.ebay.com


Sound Quality

When it comes to audio, sound quality is a crucial element that can significantly impact the overall listening experience. Whether it’s analog or digital, the quality of audio can vary based on the format in which it is stored and reproduced.

Analog Audio Quality

Analog audio quality refers to the reproduction of sound using physical, continuous waveforms. This method captures and translates sound waves directly, preserving the nuances and subtleties in the original recording, resulting in a warm and rich audio experience.

Digital Audio Quality

Digital audio quality, on the other hand, involves converting sound waves into a series of numerical values. This process allows for precise encoding and reproduction of sound, delivering a clean and accurate representation of the original recording with minimal distortion.


Credit: hitecrcd.com


Advantages And Disadvantages

When considering Analog vs. Digital audio, each technology has its own set of advantages and disadvantages.

Advantages Of Analog Audio

  • Rich, warm sound quality
  • Smooth transitions between different tones
  • Ability to produce natural, organic sounds

Disadvantages Of Analog Audio

  • Potential for signal degradation over time
  • More susceptible to interference and noise
  • Limited storage and editing capabilities

Advantages Of Digital Audio

  • Crystal-clear sound reproduction
  • Endless storage possibilities
  • Easy editing and manipulation of audio files

Disadvantages Of Digital Audio

  • Possible loss of depth and warmth in sound
  • Susceptibility to compression artifacts
  • Complexity in understanding digital audio technology
https://www.youtube.com/watch?v=DCqjYzRNnsE


Storage And Accessibility


When considering storage and accessibility of audio, the key distinction lies between analog and digital formats. Analog audio relies on physical mediums like tapes and vinyl, whereas digital audio is stored as data in electronic devices, offering greater accessibility and ease of storage.

Analog Audio Storage And Accessibility

Analog audio recordings are stored in physical formats like vinyl records or cassette tapes. Accessing analog audio requires the physical presence of the medium and playback equipment. Digitizing analog audio involves converting it to a digital format for easier storage and access.

Digital Audio Storage And Accessibility

Digital audio files can be stored on various devices like computers, smartphones, or cloud servers. Accessing digital audio is convenient as files can be easily shared, streamed, or downloaded. Digital audio allows for metadata tagging, making it easier to organize and search for specific tracks.

Analog Vs Digital Audio: The Ultimate Showdown


Credit: musicbymattie.com


Frequently Asked Questions On Analog Vs Digital Audio


Is Analog Sound Better Than Digital?


Analog sound is not necessarily better than digital sound. Each has its own unique characteristics and advantages. Analog sound reproduces a continuous wave, while digital sound converts sound waves into binary code. The preference for one over the other depends on personal taste and the desired sound quality.


What Is The Difference Between Analog And Digital Sound Processing?


Analog sound processing uses continuous signals while digital sound processing uses numerical data. Analog provides a smooth and natural sound, while digital offers precise control and enhanced flexibility.


Is A Audio Speaker Analog Or Digital?


An audio speaker is an analog device that converts electrical signals into sound waves. It operates using continuous voltage fluctuations to produce sound.


What Is The Difference Between Analog And Digital Audio Interface?


Analog audio interfaces transmit sound in continuous waves, while digital interfaces convert sound into numerical data for transmission.


Conclusion


In the end, both analog and digital audio have their unique strengths and qualities. It ultimately comes down to personal preference and the specific needs of the user. Whether you appreciate the warmth of analog or the precision of digital, both formats offer an enriching listening experience.


Choose what suits you best.

Categories
Archive

Vocal Recording Techniques: Master the Art of Captivating Vocals

For vocal recording, use a quality microphone in a soundproof room to capture clear and crisp vocals. Implementing proper microphone placement and experimenting with distance and angle can enhance the recording quality.


Understanding the characteristics of different microphones and learning how to control mic sensitivity are crucial for achieving the desired vocal sound. When it comes to vocal recording techniques, it’s essential to pay attention to microphone choice and placement. By using the right equipment and optimizing recording settings, you can capture high-quality vocals that stand out in your music production.


Whether you’re recording vocals for a song, podcast, or voice-over, implementing these techniques will help you achieve professional results. We’ll explore various vocal recording techniques and offer tips to improve your recording process.

Vocal Recording Techniques: Master the Art of Captivating Vocals


Credit: www.practical-music-production.com


Choosing The Right Microphone


Choosing the right microphone for vocal recording techniques is crucial to capturing clear and professional-quality vocals. Consider the specific characteristics of your voice, the intended use of the recordings, and the environment in which you’ll be recording. Whether you opt for a dynamic or condenser microphone, selecting the right one can make a significant difference in the final sound.

Condenser Vs. Dynamic

Choosing the right microphone for vocal recording can greatly impact the quality of your sound.

When deciding between condenser and dynamic microphones:
– Condenser microphones are sensitive and capture more detail.
– Dynamic microphones are rugged and handle high sound pressure levels better.

Consider the following factors when selecting a microphone:
– Vocal characteristics and tonal quality.
– Recording environment and sound isolation.
– Budget and intended use of the microphone.

Considerations For Different Vocal Tones

Each microphone type is suited for different vocal tones:
– Condenser microphones excel with airy and detailed vocals.
– Dynamic microphones are ideal for powerful and loud vocals.

Experiment with both microphone types to find the one that best suits your vocal style and recording needs.

Setting Up The Recording Space


Achieving optimal vocal recording involves setting up a suitable space. Ensure a quiet environment, control sound reflections, and use acoustic treatment for better quality recordings. Position the microphone correctly to capture clear vocals without unwanted background noise.

Setting Up the Recording Space

Optimizing Room Acoustics

Optimizing room acoustics plays a crucial role in creating high-quality vocal recordings.

Strategically position acoustic panels to absorb excess sound reflections within the room.

Consider utilizing bass traps in corners to minimize low-frequency build-up, improving overall sound clarity.

Use Of Soundproofing Materials

Choose soundproofing materials like acoustic foam, bass traps, and sound barriers to reduce unwanted noise interference.

  • Acoustic foam panels on walls can absorb mid to high frequencies.
  • Bass traps in corners address low-frequency issues effectively.
  • Sound barriers such as thick curtains or blankets help isolate sound.

Mic Placement And Technique

When it comes to achieving professional-grade vocal recordings, mic placement and technique play a pivotal role. The way a microphone is positioned and utilized can significantly impact the quality and clarity of the recorded vocals. Understanding the nuances of mic placement and technique is essential for capturing the best sound possible.

Distance And Angle

Distance and angle are crucial aspects of mic placement for vocal recording. The distance between the microphone and the vocalist affects the proximity effect, which can impact the bass response of the recording. Generally, a distance of around 6-8 inches from the mouth is ideal for most vocal recordings.

Pop Filters And Shock Mounts

Using pop filters is essential for minimizing plosives and sibilance in vocal recordings. Placing a pop filter a few inches from the microphone helps in reducing unwanted bursts of air that can cause distortion. Additionally, investing in a shock mount can mitigate vibrations and handling noise, resulting in cleaner and smoother vocal recordings.

Vocal Recording Techniques: Master the Art of Captivating Vocals


Credit: blog.native-instruments.com


Preamp And Eq Settings

One of the key factors in achieving a professional-sounding vocal recording is getting the right preamp and EQ settings. These settings can make a significant difference in the overall sound quality and clarity of your vocal recordings. In this section, we will explore the essential techniques for optimizing input levels and using EQ to enhance vocal clarity.

Optimizing Input Levels

Setting the optimal input level is crucial to capturing the full dynamics of a vocal performance without introducing any unwanted distortion or noise. To achieve this, follow these steps:

  1. Start by setting the preamp gain at a moderate level.
  2. Have the vocalist perform a few test phrases and monitor the input levels on your recording software.
  3. Ensure that the loudest parts of the performance reach close to 0dB without any clipping.
  4. If the signal is too weak, gradually increase the preamp gain until the desired level is reached.

Remember, it is better to have a slightly lower input level and bring up the volume during the mixing process than to have it too hot and risk distortion in the recording.

Using Eq To Enhance Vocal Clarity

EQ is a powerful tool that can help bring out the best in a vocal recording and make it stand out in a mix. Here are some tips for using EQ to enhance vocal clarity:

  • Start by using a high-pass filter to remove any unwanted low-frequency rumble or noise.
  • Identify the frequency range where the vocals sound the most prominent and apply a gentle boost in that area to bring out the desired character.
  • Use a narrow-band EQ to cut any frequencies that may be causing muddiness or harshness.
  • Consider using a de-esser to tame sibilance and control excessive “s” and “sh” sounds.
  • Always remember to make subtle adjustments and listen carefully to how each change affects the overall sound.

By using EQ effectively, you can ensure that the vocals sit well in the mix and have the clarity and presence they need to shine.

https://www.youtube.com/watch?v=h4T4VJOZHSA


Recording And Editing Tips

When it comes to vocal recording, getting the right sound can make or break your project. Here are some handy tips to help you achieve a professional vocal recording and successfully edit your tracks for the best results.

Managing Breath Sounds

Breath sounds are an inevitable part of vocal recordings, but they can distract from the overall performance if not managed properly. Here are some techniques to minimize breath sounds:

  • Position the microphone appropriately:

To reduce breath sounds, position the microphone slightly above or below the singer’s mouth rather than directly in front of it. This helps to capture the vocals while minimizing the intensity of breath sounds.

  • Use a pop filter:

A pop filter helps to reduce plosive sounds caused by puffs of air hitting the microphone. It acts as a shield between the singer and the microphone, effectively minimizing unwanted breath noises.

  • Adjust the singer’s technique:

Encourage the singer to take quieter breaths to reduce the intensity of breath sounds. Additionally, ask them to turn their head slightly away from the microphone when taking deep breaths.

Dealing With Vocal Fatigue

Vocal fatigue can affect the quality and consistency of vocal recordings, especially during long recording sessions. To prevent and manage vocal fatigue, consider the following:

  • Warm up the voice:

Before starting a recording session, warm up the voice with simple vocal exercises. This helps to relax the vocal cords and prevents strain during extended periods of singing or speaking.

  • Take regular breaks:

Allow the singer to rest their voice and take short breaks between recording takes. This gives the vocal cords an opportunity to recover and prevents overexertion.

  • Maintain proper hydration:

Ensure that the singer stays hydrated by drinking enough water. Hydration is crucial for maintaining vocal health and preventing dryness or strain.

  • Avoid excessive processing:

During the editing process, be cautious not to over-process the vocals. Excessive pitch correction or heavy effects can further strain the voice and compromise the natural sound.


Credit: www.amazon.com


Frequently Asked Questions For Vocal Recording Techniques


What Methods Are Used To Record Vocals?


Vocals are recorded using microphones to capture the singer’s voice. Pop filters help reduce plosive sounds. A vocal booth can minimize background noise. Compression and EQ are used for audio enhancement. Multiple takes are recorded for best performance.


How Do You Record Vocals Properly?


To record vocals properly, choose a quiet space, use a quality microphone, set the right input level, reduce background noise, and use pop filters. Practice good microphone technique and use headphones to monitor the recording for best results.


What Is The Best Pattern For Recording Vocals?


The best pattern for recording vocals depends on the desired sound. However, a popular choice is the cardioid pattern, which focuses on capturing sound from the front while minimizing background noise. Experimenting with different patterns can help achieve the desired effect.


How Do You Record Your Voice Perfectly?


To record your voice perfectly, follow these steps: 1. Choose a quiet environment with minimal background noise. 2. Use a high-quality microphone that suits your needs. 3. Adjust the microphone distance to optimize voice clarity. 4. Conduct a sound test to adjust audio levels and remove distortions.


5. Speak clearly and confidently to ensure a smooth recording.


Conclusion


To sum up, mastering vocal recording techniques takes dedication and practice. By employing the right equipment, creating the optimal recording environment, and honing your vocal performance, you can achieve professional-sounding results. Remember to experiment, have patience, and always strive for improvement.


With these tips, you can take your vocal recordings to the next level and make an impact in the music industry.