Categories
Archive

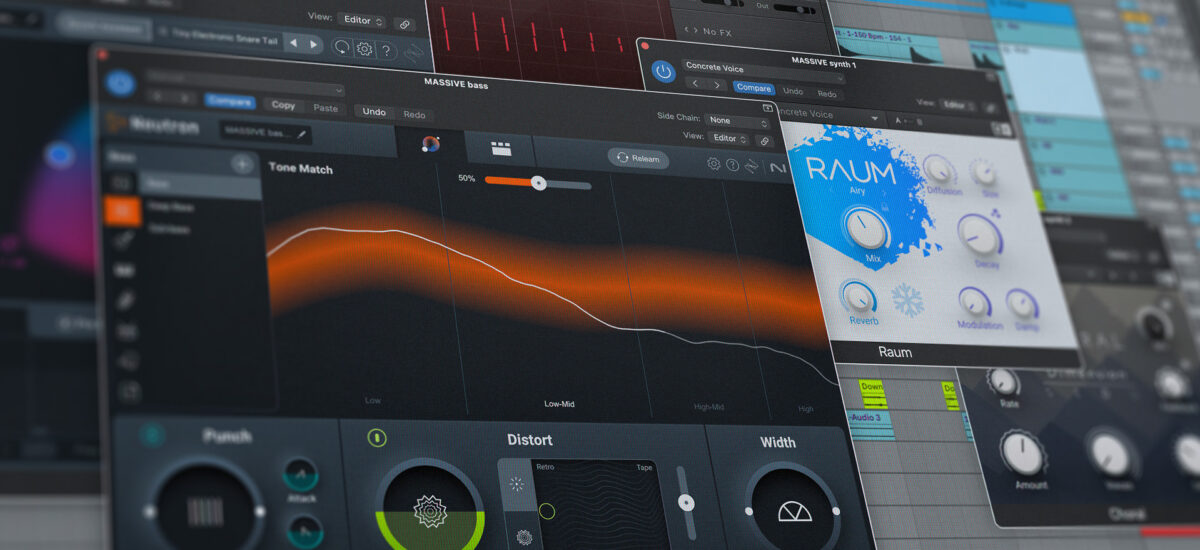
Make Instrument And Vocal Sit In The Mix: Master the Art

To make instruments and vocals sit in the mix, use EQ to carve out space for each element. Adjust levels to balance them effectively.


When creating a music mix, one of the key challenges is blending the instruments and vocals seamlessly. Achieving a well-balanced mix where each component stands out without overpowering the others requires skill and precision. By employing techniques such as EQ adjustments and proper level balancing, you can ensure that every instrument and vocal track has its own space in the mix.


We will explore strategies to help you achieve a cohesive and harmonious sound in your music productions by making instrument and vocal elements sit perfectly in the mix.


Understanding Instrument And Vocal Mix

Understanding Instrument and Vocal Mix:

Importance Of Instrument And Vocal Balance

Ensuring the right balance between instruments and vocals is crucial for a cohesive and pleasing sound.

Common Challenges In Mixing Instruments And Vocals

Dealing with conflicting frequencies and finding space for each element can be challenging in the mixing process.

Make Instrument And Vocal Sit In The Mix: Master the Art


Credit: blog.native-instruments.com


Techniques For Balancing Instruments And Vocals

To create a well-rounded mix, it’s crucial to balance instruments and vocals effectively. Utilizing EQ and frequency carving, panning, and spatial placement are key techniques to achieve this.

Eq And Frequency Carving

EQ and frequency carving involve adjusting the tonal qualities of individual instruments and vocals. By cutting frequencies that clash, a clearer and more defined sound is achieved.

Boosting specific frequencies can enhance the presence of vocals or instruments without overpowering the mix.

Panning And Spatial Placement

Panning refers to placing instruments and vocals within the stereo field. By panning instruments, a sense of depth and width is created in the mix.

Consider the spatial placement of vocals in relation to the instruments. Positioning vocals centrally can make them more prominent, while subtle panning effects can add dimension.

https://www.youtube.com/watch?v=q3EVvhlcCcE


Utilizing Dynamic Range And Compression

When it comes to creating a well-balanced and polished mix, utilizing dynamic range and compression is essential for achieving clarity, cohesiveness, and impact. By effectively managing the dynamic range and applying compression to both instruments and vocals, you can ensure that every element sits harmoniously within the mix, resulting in a professional and engaging sound.

Utilizing Compression For Instrument And Vocal Cohesion

Compression plays a crucial role in enhancing the cohesion and balance of both instruments and vocals within a mix. By utilizing compression, you can effectively control the dynamic range of each element, ensuring that softer and louder passages are brought closer in level, leading to a more consistent and even sound.

When applying compression to instruments, it’s important to consider the characteristics of each individual instrument and adjust the settings accordingly. For vocals, employing compression can help smooth out inconsistencies in the performance, resulting in a more controlled and polished sound.

Managing Dynamic Range In The Mix

Managing the dynamic range in a mix involves maintaining a balance between the quietest and loudest parts of the audio, ensuring that every element is audible and contributes to the overall impact of the track. By carefully adjusting the levels and applying dynamic range processing techniques, such as compression and expansion, you can achieve a cohesive and impactful mix.

Utilize the appropriate tools and techniques to manage the dynamic range of each instrument and vocal, allowing them to shine through without overpowering or getting lost in the mix. This strategic approach to dynamic range management will result in a well-defined and engaging mix that captivates the listener.

Reverb, Delay, And Time-based Effects In Mix

In the world of music production, the effective use of reverb, delay, and other time-based effects can elevate a mix from ordinary to extraordinary. These effects play a crucial role in creating depth, enhancing the overall sound, and giving instruments and vocals their rightful place in the mix. In this article, we will explore the various techniques and tricks to make instruments and vocals sit seamlessly within the mix, with a focus on the powerful effects of reverb, delay, and other time-based effects.

Creating Depth With Reverb And Delay

Effective use of reverb and delay allows for the creation of a sense of space and depth within the mix. By placing instruments or vocals in a virtual room or environment, we can make them sound more natural and organic. The key is to strike the right balance between the dry and wet signals, enabling the listener to feel immersed in the music without overpowering the overall mix.

One technique to achieve this is to adjust the decay time of the reverb. A shorter decay time can give a sense of proximity, with the sound appearing closer to the listener. On the other hand, a longer decay time creates a sense of distance and can be particularly effective for instruments that need to be situated further back in the mix.

When it comes to delay, the timing and feedback settings play a vital role. For vocals, a short delay with a low feedback setting can add thickness and depth, creating a sense of space around the vocal track. On the other hand, using longer delay times and higher feedback settings on instruments can create interesting rhythmic patterns and contribute to the overall energy of the mix.

Using Time-based Effects For A Cohesive Sound

Time-based effects, such as chorus, flanger, and phaser, can add a unique and cohesive sound to your mix. These effects work by modulating the original signal, creating subtle or pronounced variations that make the instruments and vocals stand out.

Chorus, for example, adds a shimmering and spacious quality to an instrument or vocal track, making it sound larger than life. This effect is achieved by duplicating the original signal and modulating it slightly with a delay and pitch variation. By adjusting the depth and rate parameters, we can control the intensity and speed of the chorus effect, enhancing the overall presence of the instrument or vocal.

Phaser and flanger are also useful tools for adding movement and character to individual tracks within the mix. These effects create sweeping and swirling sounds by modulating the phase or delaying portions of the signal. By carefully dialing in the right amount of these effects, we can make instruments and vocals pop out, giving them a unique sonic quality.

In conclusion, reverb, delay, and other time-based effects are powerful tools in the mixing process. By understanding their parameters and effectively using them, we can create depth, cohesion, and a sense of space within the mix. Experimenting with different settings and applying these effects judiciously can bring instruments and vocals to life, allowing them to sit harmoniously within the overall mix.

Fine-tuning The Mix With Automation

Fine-tuning the mix with automation is a powerful technique that can take your instrument and vocal sit in the mix to the next level. Automation allows you to precisely control various aspects of your mix, whether it’s emphasizing certain elements or subtly blending others. In this blog post, we will explore two essential techniques for utilizing automation in your mix: automating levels for emphasis and applying automation for subtle blending.

Automating Levels For Emphasis

One effective way to make instruments and vocals stand out in your mix is by automating their levels. By adjusting the volume levels at specific moments, you can draw attention to certain elements and create a more dynamic and engaging listening experience for your audience.

Here’s how you can implement this technique:

  1. Identify the sections of your mix where you want to emphasize certain instruments or vocals.
  2. Using automation tools in your digital audio workstation (DAW), such as volume or gain automation, make precise level adjustments during these sections.
  3. Consider the overall flow and energy of the track. Gradual volume fades or swells can create a more natural and musical effect.
  4. Experiment with different automation curves and shapes to achieve the desired impact.

Remember, the key is to be subtle and tasteful with your volume automation. Overdoing it can result in a mix that feels unnatural or forced.

Applying Automation For Subtle Blending

In addition to emphasizing specific elements, automation can also be used to subtly blend instruments and vocals into the mix. This technique is particularly useful when you want certain sounds to sit more naturally within the overall sonic landscape.

Here are some tips for applying automation for subtle blending:

  • Identify areas where certain instruments or vocals may need to be brought forward or pushed back in the mix.
  • Use automation to adjust the levels of these elements, effectively placing them in the desired sonic space.
  • Consider other parameters that can be automated, such as panning, EQ, or reverb settings, to further enhance the blending effect.
  • Take the time to listen critically and make subtle adjustments until the mix feels cohesive and balanced.

Remember, automation is a powerful tool, but it’s important to use it judiciously. Too much automation can lead to a mix that feels disjointed or lacking cohesion. The goal is to enhance the listening experience and create a mix that captures the essence of the song.

Make Instrument And Vocal Sit In The Mix: Master the Art


Credit: grammy.com


Make Instrument And Vocal Sit In The Mix: Master the Art


Credit: m.facebook.com


Frequently Asked Questions On Make Instrument And Vocal Sit In The Mix


How Do You Get Vocals To Sit Right In A Mix?


To get vocals to sit right in a mix, use EQ to remove muddiness, add compression for consistency, adjust volume levels, apply reverb and delay for depth, and consider panning for separation.


How Do You Make Vocals Stand Out In The Mix?


To make vocals stand out in the mix, use EQ to boost the high frequencies, compress to control dynamics, and add reverb or delay for depth and presence. Experiment with panning and volume to create balance and clarity.


How Do You Mix Vocals With Instruments?


To mix vocals with instruments, adjust levels for balance, use EQ to carve out space, apply reverb/delay for depth, and pan to create separation.


How Do You Make Vocals Sit In The Mix Garageband?


To make vocals sit in the mix in Garageband, adjust levels, use EQ to remove muddiness, add reverb or delay for depth, and consider compression. Adjust panning to create space. Experiment and trust your ears. Keep refining until vocals blend well with the rest of the track.


Conclusion


To bring together instrument and vocal in the mix, strive for clarity and balance. Utilize EQ, compression, and reverb to enhance the overall sound. Continuously tweak and listen to the mix to achieve cohesion. Incorporate automation to maintain consistency and create movement.


Mastering these techniques will elevate the quality of your music production.

Categories
Archive

Acoustic Panels for Walls: Enhance Your Space’s Acoustics!

Acoustic panels for walls are designed to improve sound quality by reducing noise and echo. These panels can enhance both aesthetics and acoustics in any room.


Acoustic panels come in a variety of materials, shapes, and sizes to fit different spaces and design preferences. They work by absorbing sound waves, which helps to minimize reverberation and unwanted sound reflections within a space. This makes them an essential element in settings such as recording studios, home theaters, offices, and classrooms where clear sound is important.


The right acoustic panels can not only contribute to the acoustic comfort of a room but also to its overall ambiance. Selecting the appropriate panels involves considering the specific acoustic needs of the space as well as the design coherence with the existing décor.


Credit: www.primacoustic.com


The Science Of Sound In Interior Spaces

Understanding sound behavior in interior spaces can transform a room’s comfort and usability. When spaces resonate with proper acoustic balance, they enhance our experiences. Whether in a home theater, office, or classroom, sound dynamics play a crucial role. Acoustic panels offer a solution, not only curbing noise pollution but also elevating the space’s aural landscape.

How Sound Travels Indoors

Sound moves in waves, bouncing off walls and objects. Without control, sound waves create echoes and reverberations, making a space sound busy or chaotic. Acoustic panels work to absorb these waves, reducing bounce back and clarifying sounds.

  • Waves reflect off hard surfaces, causing echo.
  • Soft materials like acoustic panels absorb sound.
  • Strategically placed panels optimize sound quality.

The Importance Of Acoustic Quality In Rooms

High acoustic quality is essential for clarity, privacy, and comfort. It’s crucial for spaces where focus is key, such as libraries and offices. Panels can dramatically reduce noise distractions, improving both productivity and well-being.

Area Benefits of Acoustic Panels
Home Theaters Enhanced sound clarity for a cinematic experience.
Conference Rooms Better speech intelligibility for effective communication.
Classrooms Improved learning environment through noise reduction.

Integrating acoustic treatments, such as panels, into interior design not only improves aesthetics but also significantly enhances the audio environment. In conclusion, acoustic panels serve as a functional asset in any space where sound matters.

Acoustic Panels for Walls: Enhance Your Space's Acoustics!


Credit: www.amazon.com


Introducing Acoustic Panels

Acoustic panels transform how we experience sound within a space. Whether in a recording studio, home theater, or bustling office, these panels help tame echo and noise. Let’s discover their secrets.

What Are Acoustic Panels?

Imagine a room where every sound is crisp and clear. Acoustic panels are the key. They absorb sound waves, reducing unwanted echoes and noise.

Rooms with hard surfaces reflect sound. This can be disruptive. Panels on walls fix this problem. They make listening and recording much better.

Types And Materials Used In Acoustic Panels

Different panels serve different purposes. All aim for clarity in sound. Here we list out the common types:

  • Fabric Wrapped Panels: For a clean look and sound control.
  • Perforated Acoustic Wood Panels: Combine aesthetics with noise reduction.
  • Foam Panels: Easy to install, great for echo.

Materials are central to performance. Below is a quick overview:

Material Properties
Fiberglass High sound absorption
Wood Natural look, moderate absorption
Foam Lightweight, easy to shape

Benefits Of Acoustic Panels For Walls

Acoustic panels add both style and function to your walls. They reduce noise and improve sound quality. Let’s dive into how these panels transform your space.

Noise Reduction And Sound Clarity

Noise levels drop, making rooms quiet and peaceful. Here’s how acoustic panels make a difference:

  • Echo elimination: Panels cut down on reverberation.
  • Focus enhancement: Less noise means better concentration.
  • Privacy increase: Conversations stay within walls.

Improvements In Room Aesthetics

Acoustic panels blend design with functionality. They come in various colors and patterns. Below are the aesthetic perks:

  • Bold statements: Panels become art pieces.
  • Custom themes: They match your room’s style.
  • Texture variety: Different materials add depth.

Selecting The Right Acoustic Panels

When it comes to the clarity of sound within a space, selecting the right acoustic panels is crucial. They not only reduce unwanted echo and reverb but also enhance the overall auditory experience. But how do you choose the perfect ones for your walls? Let’s dive into the aspects that will guide you in making an informed decision.

Considerations Based On Room Use

Different rooms serve different purposes and, as such, demand specific acoustic treatment. A home theater, for example, needs panels that absorb sound to prevent echoes. On the other hand, a recording studio might require panels that both absorb and diffuse sound for clear recordings. Recognize your room’s primary function to determine the type of acoustic panel necessary.

  • Home Theaters: High-performance sound absorption panels.
  • Recording Studios: Blend of absorption and diffusion panels.
  • Offices: Panels that reduce noise for better concentration.
  • Restaurants: Decorative panels that diminish ambient noise levels.

Matching Panels To Your Decor

Acoustic panels come in various colors, shapes, and sizes. They should complement the aesthetic of your room, not clash with it. For modern spaces, sleek, plain-colored panels may work best. In contrast, textured or patterned panels can add depth to more traditional decors. Tables showcasing various styles can help you visualize the potential match to your space.

Style Description Suitable for Room Style
Plain Solid color, no patterns Modern, Minimalistic
Textured 3D patterns, varying materials Rustic, Traditional
Artistic Printed designs, artwork Creative, Eclectic

Remember, the function doesn’t have to sacrifice form. Today’s market offers acoustic panels that are both effective and stylish. So, pick panels that will serve your auditory needs while also elevating your decor.

Installation Tips And Techniques

Embarking on the journey of installing acoustic panels can transform a noisy room into a peaceful sanctuary. The right installation techniques ensure your walls are not only soundproof but also visually appealing. Planning and precision during installation are key to getting the best performance from your acoustic panel investment. Thus, we delve into some valuable tips and techniques to help you install acoustic panels efficiently and effectively.

Preparing Your Walls

Before you start, ensure your walls are ready for acoustic panels. Clean surfaces lead to a stronger adhesive bond.

  • Clear the wall area of any furniture or wall hangings.
  • Use a mild cleaner to remove dirt and grime from the wall surface.
  • Dry the walls completely before proceeding.
  • Check the wall for any damages that need repair.
  • Measure and mark the positions where the panels will be placed.

Step-by-step Installation Guide

  1. Gather your tools: Measuring tape, level, chalk line, adhesive, and a drill if needed.
  2. Panel layout: Refer to the layout design and begin at the focal point.
  3. Apply adhesive: If using adhesive, apply it to the back of the panel in a zigzag pattern.
  4. Place the panel: Firmly press the panel against the wall for a few seconds.
  5. Use anchors if necessary: For heavier panels, use wall anchors to secure them in place.
  6. Check for alignment: Use your level to ensure panels are evenly aligned.
  7. Repeat: Continue placing each panel according to the layout you’ve mapped out.
  8. Finishing touches: Clean away any excess adhesive and touch up as required.

Adhering to these installation tips and techniques promotes optimal acoustic performance and a polished look for your space. Enjoy the quiet with your newly installed acoustic panels!

Maintenance And Upkeep Of Acoustic Panels

Maintenance and Upkeep of Acoustic Panels are crucial for ensuring they perform optimally. Proper care can extend their life and maintain their appearance. This guide delves into the best practices for maintaining acoustic panels, covering cleaning methods and knowing when an upgrade is necessary.

Cleaning And Care For Longevity

To keep acoustic panels in top condition, regular cleaning is vital. Dust and dirt can affect a panel’s sound-absorbing qualities. Use these steps:

  • Vacuum gently using an upholstery attachment.
  • Spot clean stains with a mild soap and damp cloth.
  • Avoid harsh chemicals which could damage the fabric or core material.
  • Inspect for any signs of wear or damage during cleaning.

Adhering to a maintenance schedule will help retain the panels’ effectiveness.

When To Replace Or Upgrade Panels

Acoustic panels have a lifespan, and recognising when to replace them is key:

Panel Age Signs to Replace
3-5 years Visible sagging, discoloration
5+ years Fabric tears, diminished sound quality

Consider upgrading if:

  1. New soundproofing technology emerges.
  2. Changes in room use require different acoustics.
  3. You’re revamping the space’s aesthetics.


Credit: loftwall.com


Frequently Asked Questions Of Acoustic Panels For Walls


Do Acoustic Panels For Walls Work?


Acoustic panels for walls effectively absorb and dampen sound, enhancing room acoustics and reducing unwanted noise. They are beneficial in both residential and commercial settings for improving sound quality.


Can You Put Acoustic Panels Inside Wall?


Yes, you can install acoustic panels inside walls for sound insulation, but this requires structural modifications.


What Is The Difference Between Soundproof Panel And Acoustic Panel?


Soundproof panels block noise from entering or exiting a space. Acoustic panels improve sound quality within a room by reducing echo and reverberation.


Are Acoustic Sound Panels Worth It?


Acoustic sound panels are worth it for improving audio clarity, reducing echo, and enhancing overall sound quality in a room. They’re ideal for home theaters, recording studios, and loud environments.


Conclusion


Acoustic panels are a game-changer for enhancing sound quality in any space. Their ability to minimize noise pollution transforms environments dramatically. Whether for professional studios or cozy living rooms, they offer both functionality and aesthetic appeal. Opt for these sound solutions, and embrace the harmony of a well-balanced acoustic setting.


https://www.youtube.com/watch?v=P62_waiHnro


Categories
Archive

How To Use An Reverb: Mastering the Art of Creating Breathtaking Sound Effects

To use a reverb, adjust settings to your preference for depth, decay, and mix. Reverb adds depth and ambiance to audio, enhancing overall sound quality and spatial presence.


Reverb is a versatile effect that can be used in various ways to enhance the sound of music, vocals, or any audio recordings. By fine-tuning the reverb settings, you can create a sense of space and richness in your audio productions.


Understanding how to effectively use reverb can greatly impact the clarity and immersive experience of your mixes. We will explore some tips and techniques on how to use reverb effectively in your audio projects.


Credit: www.amazon.com


Choosing The Right Reverb

Understanding Different Reverb Types

When selecting a reverb, it’s crucial to understand the various types available:

  • Room Reverb: Adds depth and spatial ambience.
  • Plate Reverb: Delivers a smooth, metallic texture.
  • Spring Reverb: Ideal for creating a bright and boingy effect.
  • Hall Reverb: Emulates the natural reverb of concert halls.

Considering The Sound Source

Match the reverb type to your sound source for optimal results:

  1. Vocals: Choose hall reverb for a lush and enveloping effect.
  2. Guitar: Plate reverb can add warmth and depth to guitar tracks.
  3. Drums: Opt for room reverb to enhance the natural ambience of drums.


Credit: reverb.com


Setting Up Your Reverb

When setting up your reverb, take the time to adjust key parameters that can greatly impact the sound you achieve. Two crucial settings to focus on are Adjusting Pre-Delay and Decay Time and Balancing Wet and Dry Signals.

Adjusting Pre-delay And Decay Time

Start by tweaking the pre-delay to control the time between the original sound and the onset of the reverb effect. Then adjust the decay time to fine-tune the length of the reverb tail.

Balancing Wet And Dry Signals

Finding the right balance between the wet (effected) and dry (original) signals is key. Try increasing the wet signal for a more pronounced reverb effect, or decrease it for a subtle touch.


Using Reverb Creatively


Explore the endless possibilities of reverb to add depth and dimension to your sound. With careful tweaking, reverb can transform your mix, creating lush textures and immersive spaces. Experiment with pre-delay, decay, and diffusion settings to craft unique and captivating sonic landscapes.

Using Reverb Creatively Reverb can be an essential tool to add depth and dimension to your audio. It’s not just about simulating a natural acoustic environment; you can also use reverb creatively to enhance your sounds and give them a unique character. Let’s explore some creative ways to utilize reverb in your audio productions. Creating Depth and Space One way to use reverb creatively is by using it to create depth and space in your mix. By applying different levels of reverb to various tracks, you can create a sense of distance and perspective within your audio. For example, using a longer reverb on background vocals can push them further back in the mix, while a shorter reverb on the lead vocals can bring them to the forefront. Experimenting with Modulation and EQ Another approach for creative reverb usage is to experiment with modulation and EQ. Modulation effects, such as chorus or flanger, can be applied to the reverb signal to add movement and dimension. Additionally, using EQ to shape the reverb tail can help to blend it more naturally with the original sound, or to create unique tonal textures. Incorporating reverb creatively in your audio productions can elevate your tracks and add a sense of depth and character. By leveraging different techniques and settings, you can achieve unique and compelling results that enhance your overall sound.

Avoiding Common Mistakes

When it comes to adding depth and space to your audio mix, using reverb can be a powerful tool. However, like any tool, it’s important to use it correctly to avoid common mistakes that can impact the quality of your audio. In this section, we will discuss two common mistakes to avoid when using reverb: overusing reverb and neglecting tailoring to the mix.

Overusing Reverb

While reverb can add a sense of ambiance and realism to your audio, overusing it can quickly turn your mix into a muddy mess. One common mistake is applying reverb to every track without considering the overall balance and clarity of the mix.

To avoid this mistake, consider the role of each track in your mix. Ask yourself if adding reverb to a particular track enhances or detracts from its intended impact. Remember, not every track needs excessive reverb. Sometimes, less is more.

If you find yourself going overboard with reverb, try reducing the wet/dry mix or adjusting the decay time. This way, you can still create a sense of space without overwhelming the mix with unwanted reverberation.

Neglecting Tailoring To The Mix

Another mistake to avoid is neglecting to tailor the reverb settings to fit the specific characteristics of your mix. Different genres and musical styles may require different types and amounts of reverb.

For example, a tight pop track may benefit from a shorter decay time and less noticeable reverb, while a spacious ballad might require a longer decay time to create a more ethereal atmosphere. It’s essential to consider the context and desired effect of each track when dialing in the reverb settings.

Additionally, take into account the placement of each instrument or vocal in the stereo field. Use stereo panning and spatial effects to enhance the sense of depth and position within the mix. By carefully tailoring the reverb settings to fit each element, you can ensure a cohesive and immersive audio experience.

In Conclusion

Reverb can add incredible depth and realism to your audio mix, but it’s crucial to avoid common mistakes that can impact the overall quality. Remember, overusing reverb can quickly muddy the mix, so use it judiciously. Tailoring the reverb settings to fit the specific characteristics of your mix is also essential for achieving a professional and cohesive sound.

Tips For Mastering Reverb

When it comes to creating professional-sounding audio mixes, mastering reverb is a crucial skill to have. Reverb is often used to add depth and dimension to sounds, creating a sense of space and realism. However, using reverb effectively requires a good understanding of its various parameters and how they can be manipulated.

Listening To Reference Tracks

One of the best ways to improve your reverb skills is by listening to reference tracks produced by professionals in the industry. These tracks can provide you with valuable insights into how reverb is used in different genres and styles of music. Pay close attention to the characteristics of the reverb, such as its decay time, room size, and wet/dry balance. Listening to a wide range of reference tracks can help you develop your own taste and preferences when it comes to using reverb in your mixes.

Understanding The Room Size Effect

The size of the room can have a significant impact on the sound of reverb. Larger rooms tend to have longer decay times, resulting in a more spacious and immersive sound. Conversely, smaller rooms have shorter decay times and can create a more intimate and focused sound. Understanding the room size effect can help you choose the right reverb settings for your mix, based on the desired mood and atmosphere. It’s important to experiment with different room sizes and find the perfect balance that complements your audio.

How To Use An Reverb: Mastering the Art of Creating Breathtaking Sound Effects


Credit: soundshoppe.nyc


Frequently Asked Questions Of How To Use An Reverb


How Do You Use Reverb Effectively?


To use reverb effectively, adjust the amount to fit the song, experiment with different types, and use pre-delay for clarity.


How Does A Reverb Work?


A reverb simulates the natural echo of sound in various spaces to create depth and ambience in audio recordings. Sound waves reflect off surfaces, blending with the original signal to produce a reverberant effect. This adds richness and spaciousness to music or voice recordings.


When Should You Use Reverb?


Use reverb to add depth and dimension to your audio, creating a sense of space. It enhances vocals, instruments, and entire mixes, giving them a natural ambiance. Use it sparingly for vocals and subtly for instruments to avoid muddiness and maintain clarity.


Reverb is effective for creating atmosphere and adding warmth to recordings.


How Do I Add Reverb To Audio?


To add reverb to audio, you can use audio editing software or plugins. Import the audio file, apply the reverb effect, adjust parameters like decay and wet/dry mix, and export the edited audio. Experiment with different settings to achieve the desired reverb effect.


Conclusion


To achieve professional sounding music, mastering the techniques of using reverb is essential. With the right settings and careful application, reverb can add depth and space to your tracks. Understanding the different types of reverb and experimenting with various plug-ins will help you achieve the perfect sound for your music.


Embrace the power of reverb and elevate your music to new levels.

Categories
Archive

How To Write A Song: Unleash Your Creative Power

To write a song, start with a catchy melody and lyrics that tell a compelling story. Use your emotions and personal experiences to create an authentic connection with the audience.


Writing a song is a creative process that allows you to express your thoughts and feelings through music. It requires a combination of melody, lyrics, and structure to resonate with listeners. To begin, focus on a central theme or message and develop it into a cohesive story.


Experiment with different chord progressions and song structures to find the right fit for your song. Remember to revise and edit your work to ensure it flows smoothly and conveys your intended message effectively. By following these steps, you can create a meaningful and impactful song that resonates with your audience.

How To Write A Song: Unleash Your Creative Power


Credit: songtown.com


The Art Of Songwriting

Songwriting is a creative expression that allows artists to convey emotions, stories, and experiences through music. It is the heart of any song and involves a delicate balance of lyrics, melody, and structure.

Understanding Song Structure

  • Songs typically consist of verses, choruses, bridges, and sometimes a pre-chorus or outro.
  • Verse: Sets the scene and advances the story.
  • Chorus: Contains the main message or theme of the song, often the most memorable part.
  • Bridge: Provides a contrast to the verses and choruses, adding depth and variety.

Exploring Songwriting Techniques

  1. Melody: Create a catchy and appealing melody that complements the lyrics.
  2. Rhyme Scheme: Experiment with different rhyme schemes to add flow and cohesion to your lyrics.
  3. Imagery: Use descriptive language and vivid imagery to paint a picture and evoke emotions in your listeners.
How To Write A Song: Unleash Your Creative Power


Credit: www.amazon.com


Finding Inspiration


Looking for inspiration to write a song? To start, take a walk outside or listen to your favorite music. Drawing from personal experiences and emotions can also help spark creativity. Additionally, trying out new instruments or collaborating with other musicians can provide fresh perspectives for songwriting.

Tapping Into Emotions

In songwriting, emotions are powerful fuel. Whenever you feel strongly, write it down. Express your feelings authentically in your lyrics.

Observing The World Around You

Unlock inspiration by observing the world. Pay attention to details others overlook. Nature, conversations, and daily life provide endless inspiration.

https://www.youtube.com/watch?v=yjYrxcGSWX4


Crafting Lyrics

Songwriting is a creative and personal process, and crafting engaging lyrics is a crucial aspect of creating a memorable song. Whether you’re a seasoned songwriter or a novice, honing your lyric-writing skills can make your songs more relatable and impactful. In this article, we will delve into the art of crafting lyrics, with a focus on creating catchy hooks and conveying authenticity.

Creating Catchy Hooks

Catchy hooks are the backbone of many successful songs. They are the memorable phrases or melodies that resonate with listeners and keep them coming back for more. When crafting a catchy hook, consider a relatable theme or an emotional connection that will draw in your audience. Keep the language simple yet impactful, and don’t be afraid to experiment with different melodies and rhythms to find the perfect hook for your song.

Conveying Authenticity

Authenticity is key to connecting with your audience through your lyrics. Conveying authenticity involves tapping into your own experiences and emotions to bring depth and sincerity to your songwriting. Avoid cliches and generic language, and instead, draw from your personal stories and perspectives. This genuine approach will resonate with listeners and make your songs more compelling and relatable.


Credit: deepgram.com


Composing Melodies


Crafting melodies is crucial in the songwriting process. Start by playing around with different notes on an instrument, focusing on creating a catchy tune that resonates with your message. Experiment with rhythm and structure to develop a unique and memorable song that connects with your audience.

Experimenting With Chord Progressions

When it comes to composing melodies, one of the key elements to focus on is experimenting with different chord progressions. These progressions form the underlying structure of a song and serve as a foundation for melodies to be built upon. It’s important to select chords that create the desired mood or emotion, whether it’s a happy and upbeat tune or a melancholic and introspective one.

In order to experiment with chord progressions, start by selecting a key for your song. This will determine the set of chords that can be used harmoniously. Take the time to explore different chord combinations within the chosen key and see how they sound together. Don’t be afraid to venture into unconventional or unique progressions; often, these can lead to the most interesting and memorable melodies.

Utilizing Rhythm And Harmony

Another crucial aspect of composing melodies is the careful balance between rhythm and harmony. Rhythm adds a dynamic and pulsating energy to a song, while harmony provides depth and richness. By utilizing these two elements effectively, you can create melodies that are both catchy and harmonically satisfying.

Consider the rhythmic patterns and accents within a melody, as they can have a significant impact on how it resonates with listeners. Explore different note durations, rests, and syncopation techniques to add variety and interest. Additionally, don’t underestimate the power of harmonizing your melodies. Experiment with harmonies that complement and enhance your main melody, either by adding chords or layering additional melodies.

Remember, a well-balanced blend of rhythm and harmony can elevate your melody to new heights and make it stand out.

Summary

– Experiment with different chord progressions to find the right mood for your melody. – Don’t be afraid to try unique and unconventional progressions. – Utilize rhythm to add energy and dynamic to your melody. – Consider different note durations, rests, and syncopation techniques. – Harmonize your melody to create depth and richness in your song. – Layer additional melodies or add chords to complement and enhance your main melody. – Find the right balance between rhythm and harmony to make your melody memorable.

Polishing Your Song

Once you have completed the initial draft of your song, it’s time to turn your attention to the polishing process. This is where you refine and enhance your song to make it shine. In this section, we will discuss two important aspects of polishing: refining the arrangement and fine-tuning the vocals.

Refining The Arrangement

The arrangement of a song refers to the way its different sections (verse, chorus, bridge, etc.) are organized and how the instruments and vocals interact with each other. To refine the arrangement of your song:

  1. Consider the overall structure: Examine your song’s structure and ensure it flows smoothly from one section to another. A well-structured song captures the listener’s attention and keeps them engaged.
  2. Trim the fat: Eliminate any unnecessary or repetitive parts. Sometimes, less is more, and removing unnecessary elements can make your song more focused and impactful.
  3. Experiment with dynamics: Explore different ways to create contrast and add dynamics to your song. This can involve adjusting the volume, intensity, and instrumentations in different sections to create a more dynamic listening experience.

Fine-tuning The Vocals

The vocals are often the centerpiece of a song, carrying the melody and delivering the lyrics. Fine-tuning the vocals can make a significant difference in the overall quality of your song. Here are some tips to help you achieve this:

  • Practice proper breathing and vocal techniques: Take the time to warm up your voice and practice proper breathing techniques. This helps improve your vocal control and sustain, allowing you to deliver a more polished and powerful performance.
  • Pay attention to pitch and tone: Ensure that you are hitting the right notes and maintaining a consistent tone throughout the song. Use pitch correction tools sparingly, as it’s important to maintain the authenticity and emotion in your vocals.
  • Add harmonies and layers: Consider incorporating harmonies and layered vocals to add depth and richness to your song. Experiment with different vocal arrangements to enhance the overall sound.

By refining the arrangement and fine-tuning the vocals, you can elevate your song to a new level of polish and professionalism. These steps may require some trial and error, but the end result will be a song that captivates and resonates with your audience.

Frequently Asked Questions Of How To Write A Song


How Do You Start Writing A Song?


To start writing a song, begin with a catchy melody, lyrics that resonate, and a strong emotional connection. Let creativity flow naturally and consider music structure, theme, and message for a well-crafted composition.


How To Write A Song With No Experience?


To write a song with no experience, start by listening to your favorite songs and analyzing their structure. Consider taking a songwriting class or finding a mentor for guidance. Experiment with different chords and melodies, and write about your own experiences and emotions.


Remember to revise and refine your lyrics.


What Should I Write A Song About For Beginners?


For beginners writing a song, choose a topic that resonates with your emotions or experiences. Explore love, friendship, personal growth, or everyday moments. Stay true to your own voice and be genuine in your lyrics. Allow your creativity to flow and enjoy the process of expressing yourself through music.


Is It Hard To Write A Song?


Writing a song can be challenging, but it’s not necessarily hard. With creativity and practice, anyone can write a song. It’s important to express emotions, create a catchy melody, and craft thoughtful lyrics that resonate with listeners. By working on your skills and putting in the effort, writing a song can be a rewarding and enjoyable process.


Conclusion


Writing a song is a beautiful and rewarding process that takes time and dedication. It requires honing your skills, expressing your emotions, and connecting with your audience. By understanding the essential components of songwriting and tapping into your creativity, you can craft a memorable and impactful piece of music that resonates with others.


Get ready to unleash your inner songwriter and share your unique voice with the world.

Categories
Archive

Where to Put Acoustic Panels: Optimize Your Sound Space

Acoustic panels should be placed at reflection points and where sound waves bounce. Focus on walls, ceilings, and corners to reduce echo and improve sound quality.


Determining the optimal placement for acoustic panels in a room is essential for achieving the best sound experience, whether it’s for a home theater, recording studio, or any space where audio clarity matters. These panels work by absorbing sound waves and reducing the amount of reverberation that can muddle audio clarity.


By strategically placing panels at key reflection points—typically where sound waves first make contact after leaving the source—you can effectively minimize echo and unwanted noise. Common areas to treat include walls directly opposite speakers, ceilings, especially over the listening area, and room corners, where bass frequencies tend to build up. By targeting these areas, you can enhance the overall acoustics and create a more pleasing auditory environment.


The Science Of Sound In Spaces

Understanding the science behind sound in your spaces can transform how you hear everything—from music to dialogue. Sound waves bounce off walls, ceilings, and furniture, leading to echoes and noise. To control sound, we must first grasp the basics of room acoustics and how acoustic panels play a vital role in improving sound quality.

Room Acoustics Basics

Sound travels in waves and reflects off hard surfaces. The size and shape of a room impact how sound waves travel within it. Room acoustics looks at how these sound waves behave.

  • Sound Reflection: Waves bounce off surfaces, creating reverberation.
  • Sound Absorption: Soft materials absorb sound, reducing echo.
  • Sound Diffusion: Spreading sound waves evenly in a space.

Proper room acoustics ensure clear sound by balancing reflection, absorption, and diffusion.

How Acoustic Panels Improve Sound Quality

Acoustic panels serve to enhance the listening experience. They are designed to absorb excess sound, preventing harsh echoes and reverberation.

  1. Control Echo: Panels reduce the travel of sound waves.
  2. Reduce Noise: They diminish background noise levels.
  3. Improve Clarity: Spoken words and music notes become crisper.

Strategically placed, these panels can transform a noisy room into a peaceful, sound-friendly space.

Identifying Your Acoustic Needs

Identifying Your Acoustic Needs is the first step to achieving the best sound experience in your space. The placement of acoustic panels can drastically improve sound quality, but knowing where to put them begins with understanding the specific needs of your room. Let’s dive in to figure out what you require for optimum acoustics.

Assessing Room Function And Usage

Every room serves a unique purpose and the function heavily influences acoustic needs. Are you optimizing a home theater, a recording studio, or an office space? A living room with a high-end audio system will have different acoustic demands compared to a conference room used for meetings. Let’s outline the uses:

  • Home Theaters: Focus on eliminating echoes for clear dialogue and soundtracks.
  • Recording Studios: Require precision in sound absorption for quality recordings.
  • Office Spaces: Aim for noise reduction to enhance concentration and communication.

Recognizing Common Acoustic Issues

Different rooms often face a variety of sound problems. Do you hear an echo when chatting? Is there a persistent humming from electronics? Identifying these issues is vital:

Acoustic Issue Common in Rooms
Echoes Larger spaces with hard surfaces
Background Noise Offices near streets or busy areas
Reverberation High ceilings or open-concept designs

Take into account the surfaces in your room. Hard surfaces reflect sound. Soft materials absorb it.

Strategic Placement For Maximum Effect

For anyone looking to enhance the sound quality of a room, the strategic placement of acoustic panels is key. Putting panels in the right places can drastically reduce unwanted echoes and reverberations. Let’s explore the best spots for maximum sound improvement.

Critical Listening Position Approach

The critical listening position is where sound needs to be perfect. This is often where you sit the most. To optimize this spot:

  • Identify your listening spot. This could be your couch or desk chair.
  • Set up panels directly across the room from the speakers. Aim for ear level.
  • Add panels on the ceiling above the listening position if possible.
  • Remember, acoustic panels behind you are as important as those in front.

Dealing With Reflection Points

Reflection points are where sound bounces off walls. To find these:

  • Have a friend slide a mirror along the wall while you sit in your listening spot.
  • Mark any point where you can see the speakers in the mirror.
  • These marks are where panels will be most effective.

Focus on these main areas:

Location Panel Placement
Sides Beside or behind the speakers
Back Wall Directly opposite the speakers
Ceiling Above the listening area

Getting the placement right reduces harmful echoes and makes your room sound great. Try these strategies to experience the best your room can sound!

Where to Put Acoustic Panels: Optimize Your Sound Space


Credit: arqen.com


Types Of Acoustic Panels And Their Placement

Understanding the types and positioning of acoustic panels is crucial for optimizing sound. The right placement can transform a noisy room into a haven of clarity and calm. Let’s explore the types of panels and find the best spots for them in any space.

Absorption Panels Vs. Diffusion Panels

Acoustic panels fall into two main categories: absorption and diffusion. Absorption panels reduce echoes by trapping sound. Diffusion panels scatter sound, promoting an even spread throughout the room. Here’s how:

  • Fabric-wrapped panels and foam panels excel in absorption.
  • Wooden diffusers and polycylindrical diffusers manage sound distribution.

Ceiling And Wall Placement Tips

Proper placement can maximize panel effectiveness.

Panel Type Ceiling Placement Wall Placement
Absorption Panels Directly above noise sources At ear level in critical listening areas
Diffusion Panels Spread strategically to avoid dead zones On rear and side walls for even sound distribution

Focusing on reflection points is key. These are areas where sound directly hits. Use a mirror test to identify them: simply move a mirror along the wall. Wherever you see speakers, place panels.

Implementing Acoustic Panels In Different Settings

Good acoustics are crucial for any space where sound clarity is key. Whether it’s for crisp music, clear dialogue, or an enveloping movie experience, knowing where to put acoustic panels can transform the audio landscape. Explore ways to utilize these sound solutions in various environments, from cozy home studios to high-end professional recording venues.

Home Studios And Entertainment Rooms

Home studios and entertainment areas gain immensely from well-placed acoustic panels. Here’s how to achieve the best sound:

  • Identify the sweet spot where most listening occurs, and target this area first.
  • Place panels at first reflection points to minimize echo.
  • Use bass traps in room corners to control low frequencies.
  • Covering at least 20-30% of the wall area with acoustic panels can significantly improve sound quality.

An effective layout would include panels:

Position Effect on Sound
Behind speakers Reduces sound reflection
Side walls Manages lateral echoes
Ceiling Controls vertical reverberation

Professional Recording And Broadcast Studios

High precision is essential in environments like professional studios. Here’s a guide:

  1. Place panels around the microphone area to prevent sound coloration.
  2. Install diffusers to preserve a room’s natural ambience while controlling excess reflections.
  3. Utilize isolation booths for pristine vocal or instrument recording.
  4. For broadcast studios, ensure the host’s background has sufficient acoustic treatment to prevent sound issues during live transmissions.

Remember, for professional settings, custom acoustic solutions may be necessary to meet specific audio requirements.

Where to Put Acoustic Panels: Optimize Your Sound Space


Credit: arqen.com


Do-it-yourself Vs. Professional Acoustic Solutions

Choosing the right approach for placing acoustic panels can be a challenge. You might want to create a quiet and sound-controlled environment. The options are to build your own panels or to hire professionals. Let’s explore both paths.

Building Your Own Acoustic Panels

Building acoustic panels can be a fulfilling project. You’ll need materials like acoustic foam, fabric, wood for frames, and basic tools. Follow these steps:

  1. Cut the wood to build a frame.
  2. Fit the acoustic foam in the frame.
  3. Wrap with fabric for a nice finish.
  4. Mount them on walls or ceilings where needed.

DIY panels let you save money. You can also tailor them to your space.

When To Hire An Acoustic Consultant

Hiring a professional might be best in certain situations. Look for signs like:

  • Complex room shapes
  • High sound quality needs
  • Large-scale projects.

Consultants study your space. They use tools to find the best spots for panels. Plus, they may suggest specialized solutions.

DIY Professional
Cost-effective More expensive
Custom design Expert advice
Fun project Professional installation

Decide based on your skills, budget, and the room’s needs. Whether it’s DIY or a pro, enhanced sound quality is the ultimate goal.


Where to Put Acoustic Panels: Optimize Your Sound Space


Credit: www.acousticfields.com


Frequently Asked Questions Of Where To Put Acoustic Panels


Where Is The Best Placement For Acoustic Panels?


The best placement for acoustic panels is on walls at ear level and on ceilings where it directly opposes noise sources. Focus on areas facing speakers for optimal sound absorption.


Does Placement Of Acoustic Panels Matter?


Yes, the placement of acoustic panels is crucial for optimal sound absorption and noise reduction. Proper positioning can enhance sound quality and reduce reverberation in a room.


Where Do You Put Acoustic Panels In A Home Theater?


Place acoustic panels at the first reflection points on walls, directly opposite speakers, and on the ceiling for optimal sound absorption. For enhanced bass control, install panels in room corners. Always ensure even distribution to maintain audio balance in your home theater.


What Height Should Acoustic Panels Be Placed?


Mount acoustic panels at ear level for optimal sound absorption, generally around 48-54 inches from the floor, to effectively manage mid to high-frequency reflections.


Conclusion


As you optimize your space for sound quality, remember the strategic placement of acoustic panels is key. Think ceilings, corners, and directly opposite noise sources. By doing so, you elevate the acoustic dynamics of any room. Embrace the harmony of a well-balanced sound environment, thanks to proper panel positioning.


Let your ears be the judge and enjoy the difference!

Categories
Archive

How To Get On Spotify Playlists: Ultimate Guide To Playlist Success

To get on Spotify playlists, submit your music to official Spotify curators or independent playlisters. Engage with fans and promote your music for playlist consideration.


Getting on playlists can help boost your music’s reach and visibility to new audiences. Artists can also utilize social media, networking, and music promotion services for playlist placement success. With the right strategy and persistence, landing on Spotify playlists can lead to increased streams and recognition for your music.

How To Get On Spotify Playlists: Ultimate Guide To Playlist Success


Credit: www.weareblahblahblah.com


Understanding Spotify Playlists

Understanding Spotify playlists is crucial for aspiring musicians and music enthusiasts. Spotify playlists are curated collections of songs that users can create or follow, helping listeners discover new music and artists.

The Importance Of Spotify Playlists

Spotify playlists play a significant role in music discovery and artist exposure. Getting featured on popular playlists can boost an artist’s visibility and increase their streams.

Types Of Spotify Playlists

  • Editorial Playlists
  • Personalized Playlists
  • Algorithmic Playlists

Editorial Playlists are curated by Spotify’s editorial team and can have millions of followers, while Personalized Playlists are tailored to individual user preferences. Algorithmic Playlists are generated by Spotify’s algorithm based on user listening habits.

How To Get On Spotify Playlists: Ultimate Guide To Playlist Success


Credit: blog.groover.co


Optimizing Your Profile And Music

Creating A Compelling Artist Profile

Use concise and captivating bio with keywords. Complete all profile sections.

Crafting Playlist-worthy Tracks

  • Focus on catchy hooks and memorable melodies.
  • Add diversity to appeal to various listener preferences.
  • Ensure professional mixing and mastering for quality sound.
https://www.youtube.com/watch?v=xfuIyol4YOw


Building Relationships With Curators

Building meaningful relationships with playlist curators is crucial for getting your music featured on Spotify playlists. These curators are the gatekeepers to a wider audience and can significantly boost your visibility on the platform. By understanding how to identify and connect with playlist curators, as well as adopting effective communication and proper etiquette, you can increase your chances of securing coveted placements on popular Spotify playlists.

Identifying And Contacting Playlist Curators

When seeking to connect with playlist curators, it’s essential to start by identifying the right individuals or organizations responsible for creating and maintaining playlists within your music genre or niche. You can begin by researching popular playlists related to your music style and genre. Utilize platforms such as Spotify, social media, and music industry websites to find curators who align with your musical style and have a history of promoting emerging artists.

Once you’ve identified potential curators, it’s time to reach out to them. Look for their contact information, which may be available on their social media profiles, websites, or through industry contacts. Craft a concise and personalized message expressing your admiration for their playlists and your genuine interest in being considered for inclusion. A tailored message showcasing your knowledge of their work and explaining how your music would complement their playlist can greatly increase your chances of catching their attention.

Effective Communication And Etiquette

When contacting playlist curators, always communicate in a respectful and professional manner. Clearly articulate why you believe your music would be a good fit for their playlist, highlighting your unique style and potential appeal to their audience. Keep your initial message brief and to the point, respecting the curator’s time and workload.

It’s important to avoid coming across as overly pushy or entitled. Instead, demonstrate genuine enthusiasm and humility, expressing gratitude for the opportunity to be considered. Remember that playlist curators receive numerous submissions, so standing out with a courteous and well-crafted communication can significantly improve your chances of success.

Promoting Your Music For Playlist Consideration

In order to get your music on Spotify playlists, you need to have a solid strategy for promoting your music. This involves utilizing social media and networking to gain exposure and engaging with your fans and supporters. By following these strategies, you can increase your chances of getting your music considered for Spotify playlists.

Utilizing Social Media And Networking

Social media is a powerful tool for promoting your music and gaining exposure. It allows you to connect with fans and industry professionals who can help you get on Spotify playlists. Here are some effective ways to utilize social media and networking:

  1. Create compelling and shareable content: Post engaging videos, photos, and behind-the-scenes footage to grab your audience’s attention and encourage them to share your music.
  2. Interact with your audience: Respond to comments, messages, and mentions to show your fans that you value their support. Engage in conversations and build relationships with influencers and industry professionals who may have influence over Spotify playlists.
  3. Collaborate with other artists: Partnering with other musicians can help expose your music to a wider audience. Consider collaborating on a song, doing a joint live stream, or promoting each other’s music.
  4. Use hashtags strategically: Research popular hashtags related to your music genre and use them in your social media posts. This can help you reach a broader audience and attract the attention of playlist curators.
  5. Attend music industry events: Networking at music festivals, conferences, and other industry events can help you make valuable connections with industry insiders. Be prepared with your elevator pitch and have your music readily available to share.

Engaging Fans And Supporters

Your fans and supporters are your greatest asset when it comes to getting your music on Spotify playlists. Here are some strategies for engaging with your fans and supporters:

  • Provide exclusive content: Reward your most loyal fans with exclusive content such as unreleased tracks, behind-the-scenes videos, or early access to new music. This fosters a deeper connection and encourages them to support and share your music.
  • Encourage user-generated content: Ask your fans to create their own content inspired by your music and share it on social media. This not only increases engagement but also helps spread the word about your music.
  • Run contests and giveaways: Hold contests or giveaways where fans can win merchandise, tickets to your shows, or even a chance to collaborate on a song. This creates excitement and buzz around your music.
  • Stay active on streaming platforms: Regularly update your Spotify profile with new releases, curated playlists, and artist updates. Engage with your fans by responding to comments and sharing their playlists on your social media accounts.
  • Show appreciation: Thank your fans and supporters for their continued support. Acknowledge their contributions and make them feel part of your journey. This helps build a loyal fan base that can vouch for your music when it comes to playlist consideration.

Measuring And Analyzing Playlist Impact


Discover the art of measuring and analyzing the impact of playlists to optimize your chances of getting on Spotify playlists. Uncover valuable insights to fine-tune your playlist strategy and boost your visibility on the platform. Elevate your music career by leveraging data-driven techniques to enhance your playlist presence.

Interpreting Spotify For Artists Data

One of the most valuable tools available to you as an artist on Spotify is Spotify for Artists. This platform provides you with detailed insights and metrics about your music’s performance, including how it is being featured on playlists. By analyzing this data, you can gain a clear understanding of the impact that playlists are having on your music’s visibility and popularity.

Here are some key metrics to focus on when interpreting your Spotify for Artists data:

  • Streams: Pay attention to the number of streams your songs are receiving on different playlists. This will help you identify which playlists are driving the most traction and engagement.
  • Listener Demographics: Analyzing the demographics of your listeners can provide useful insights into your target audience and help you refine your promotional strategies.
  • Followers: Keep an eye on how your playlist placements are impacting your follower count. Increased exposure may lead to a significant boost in followers.
  • Playlist Placement: Take note of which playlists your songs are getting placed on. Look for patterns and tendencies that could guide your future playlist pitching efforts.
Metric What to Look For
Streams Analyze the number of streams on different playlists to identify high-performing ones.
Listener Demographics Gain insights into your target audience and adjust promotional strategies accordingly.
Followers Monitor how playlist placements impact your follower count.
Playlist Placement Identify patterns and tendencies to guide your future playlist pitching efforts.

Tracking The Impact Of Playlist Adds

Once your music gets added to playlists, it’s important to track the impact this has on your streaming numbers and overall visibility. This will help you understand which playlists are having the most significant impact on your career and allow you to further optimize your playlist strategy.

Here are some steps you can take to effectively track the impact of playlist adds:

  1. Set up Google Analytics: By integrating Google Analytics with your Spotify for Artists account, you can track website traffic and conversions generated from playlist adds.
  2. Monitor Streaming Numbers: Keep a close eye on your streaming numbers after your music gets added to a playlist. Look for significant increases and try to identify the playlists responsible for these spikes.
  3. Engage with Fans: Interact with your fans through social media and other platforms. Pay attention to their feedback and monitor their engagement with your music after being exposed to it through playlists.

By continuously monitoring and evaluating the impact of playlist adds, you can make informed decisions on playlist pitching, promotional strategies, and target audience engagement, allowing you to maximize your reach and grow your fan base on Spotify.

How To Get On Spotify Playlists: Ultimate Guide To Playlist Success


Credit: blog.groover.co


Frequently Asked Questions For How To Get On Spotify Playlists


How Do You Get Featured On Spotify Playlists?


To get featured on Spotify playlists, engage with fans, pitch your music to curators, use social media for promotion.


How Do You Get Placed On Spotify Playlists?


To get placed on Spotify playlists, focus on engaging music, build relationships with curators, submit to official playlists, and promote your tracks.


Do You Pay To Get On Spotify Playlists?


No, you do not pay to get on Spotify playlists. Playlists are curated based on various factors like engagement and relevance.


How Can I Join A Spotify Playlist?


To join a Spotify playlist, follow these steps: 1. Open the Spotify app on your device. 2. Search for the playlist you want to join. 3. Once you find it, click the “Follow” button next to the playlist’s name. 4.


You will now be able to access and listen to the playlist in your Spotify library.


Conclusion


Getting on Spotify playlists requires a strategic approach and dedication. By building relationships with curators, engaging with fans, and promoting your music actively, you can enhance your chances of playlist placements. Stay consistent and authentic in your music, and remember to prioritize quality over quantity.


With the right strategies, you can increase your visibility and grow your audience on Spotify.

Categories
Archive

How To Write A Melody: The Ultimate Step-by-Step Guide

To write a melody, start by creating a simple, catchy tune with a memorable rhythm. Combine different notes to evoke emotion and establish a cohesive structure.


A well-crafted melody is crucial in engaging listeners and making a song memorable. When crafting a melody, consider the overall mood and message of the music you are creating. Remember to experiment with different musical patterns and intervals to find a unique and captivating melody that resonates with your audience.


By following these steps, you can create a compelling melody that stands out and leaves a lasting impression on listeners, elevating your musical composition to new heights.


Credit: www.ebay.com


Crafting Memorable Melodies


Learn the art of crafting unforgettable melodies by focusing on simple, catchy tunes that resonate with listeners. Incorporate repetition and variation to create a memorable and impactful melody that captures the essence of your song. By understanding the elements of a great melody, you can master the art of writing tunes that stick with your audience long after the music stops.

Crafting Memorable Melodies

Start With A Strong Musical Idea

Create a memorable melody by starting with a strong musical idea.

Utilize your creativity to come up with a catchy and unique melody.

Understanding Melodic Structure

Grasp the melodic structure to craft a cohesive and engaging melody.

Ensure your melody has a logical flow that captivates listeners.

Melody Writing Techniques

Exploring Melodic Contour

`Begin melodies by considering the ups and downs of the pitch.`

    ` `

  • `Utilize a combination of high and low notes for dynamic melodies.`
  • ` `

  • `Create interest by incorporating sudden leaps or smooth transitions.`
  • ` `

  • `Experiment with different shapes and patterns to convey emotion.`
  • ` `

Utilizing Motifs And Phrases

`Develop themes that repeat throughout the melody for cohesion.`

    ` `

  1. `Craft memorable motifs that can be varied and developed.`
  2. ` `

  3. `Construct phrases with a clear beginning, middle, and end.`
  4. ` `

  5. `Revisit motifs and phrases to create a cohesive melodic structure.`
  6. ` `

https://www.youtube.com/watch?v=T2OSx3KXnSE


Harmony And Melody Relationships

Understanding the relationship between harmony and melody is crucial in creating a compelling piece of music. By exploring harmonic support for melodies and embracing contrapuntal writing, songwriters can elevate the emotional impact of their compositions.

Creating Harmonic Support For Melodies

When crafting a melody, it’s essential to consider the underlying harmony that supports and complements it. Harmonic support serves as the foundation, enhancing the emotional depth and creating a cohesive musical experience.

  • Choose chord progressions that harmonize with the melody
  • Experiment with different harmonic structures to create tension and release
  • Utilize inversions and voicings to add color and depth to the harmony

Embracing Contrapuntal Writing

Embracing contrapuntal writing allows melodies and harmonies to interact in a dynamic and expressive manner. This approach leads to a rich sonic tapestry, engaging the listener on multiple levels.

  1. Explore counterpoint techniques to intertwine multiple melodies harmoniously
  2. Employ techniques such as imitation and augmentation to create intricate harmonic relationships
  3. Consider the interplay between melodic and harmonic lines to achieve a cohesive musical texture


Credit: www.walmart.com


Capturing Emotion Through Melody

When it comes to writing music, one of the most powerful tools at your disposal is melody. A well-crafted melody not only engages the listener but also has the ability to evoke a wide range of emotions. From joy and excitement to sadness and contemplation, melodies have the power to convey a myriad of feelings. In this section, we will explore how to capture and express emotions through melody, providing you with valuable techniques to enhance your songwriting skills.

Utilizing Melodic Development

One effective way to capture and convey emotion through melody is by utilizing melodic development. Melodic development refers to the process of expanding and transforming a musical idea throughout a piece of music. By developing and varying your melodic motifs, you can evoke different emotions and add depth to your composition.

Here are some techniques for utilizing melodic development:

  1. Variation: Experiment with altering the rhythm, pitch, or contour of your melody to create variations that evoke different emotions. For example, increasing the rhythm’s tempo can add a sense of urgency or excitement, while lowering the pitch can create a somber or melancholic mood.
  2. Repetition: Repeating a melodic phrase can reinforce a particular emotion and create a sense of familiarity. You can experiment with repeating entire phrases or specific motifs within your melody.
  3. Sequence: Creating melodic sequences involves repeating a melodic pattern at different pitch levels. This technique can build tension, create anticipation, or add a sense of progression to your melody.

Conveying Mood And Expression

In addition to melodic development, there are several other ways to effectively convey mood and expression through your melody:

  • Intervals: The intervals between the notes in your melody can greatly impact the emotional quality. For example, using larger intervals can create a sense of longing or excitement, while smaller intervals can evoke a more intimate or delicate mood.
  • Rhythm: The rhythm of your melody plays a crucial role in conveying emotion. Experiment with different rhythmic patterns to create tension, build anticipation, or establish a particular mood. Syncopation, for example, can add an element of surprise or excitement to your melody.
  • Dynamics: Varying the volume and intensity of your melody can enhance its emotional impact. Consider using crescendos and decrescendos to create a sense of tension and release or using sudden changes in dynamics to convey surprise or urgency.

By incorporating these techniques into your songwriting process, you can effectively capture and convey a wide range of emotions through melody. Remember to experiment, trust your instincts, and let your own emotions guide your musical choices.

Refining And Polishing Your Melody


Crafting a memorable melody requires refining and polishing to make it stand out. Focus on creating a catchy and emotive sequence of notes that resonates with your audience. Experiment with different harmonies and rhythms until you find the perfect combination that captures the essence of your compositions.

Structuring Your Melody

When crafting a melody, it’s crucial to consider its overall structure. By organizing your melody in a logical and pleasing manner, you can create a memorable and engaging musical journey.

One effective approach is to divide your melody into distinct sections, such as verses, choruses, and bridges. Each section should have a unique melodic motif or phrase that helps to differentiate it from the others.

Ensure that your melody flows smoothly from one section to the next, providing a sense of continuity. Consider using transitional phrases or connecting melodies to smoothly transition between different sections.

A popular structuring technique is the A-B-A format, where the melody starts with an initial section (A), followed by a contrasting section (B), and then returns to the original section (A) with slight variations or embellishments.

Remember, the key to structuring your melody lies in maintaining a balance between repetition and variation. Too much repetition can lead to monotony, while too much variation might make it challenging for listeners to follow along.

Now that you have a basic understanding of structuring your melody, let’s delve into adding nuance and variation to make it even more captivating.

Adding Nuance And Variation

Adding nuance and variation to your melody brings depth and interest that keeps listeners engaged. Here are some techniques to consider:

  1. Vary rhythm and note length: Experiment with rhythm by using syncopation or unexpected pauses. Vary the length of individual notes to create a sense of rhythm and flow.
  2. Play with dynamics: Examine how different dynamic levels can enhance your melody. Gradually increasing or decreasing the volume adds tension and release, making your melody more expressive.
  3. Explore different scales and modes: Step out of the familiar by experimenting with various scales and modes. This can give your melody a fresh and unique character.
  4. Experiment with ornamentation: Add embellishments such as trills, turns, or slides to enhance specific notes in your melody. These nuances add flair and personality to your composition.

Remember, every melody is unique, and the choice of nuance and variation should align with the emotions and mood you want to convey. By thoughtfully incorporating these elements, you can create a melody that captivates and resonates with your audience.


Credit: www.amazon.com


Frequently Asked Questions Of How To Write A Melody


How Do You Create A Melody?


To create a melody, start with a simple tune in your head. Experiment with different notes and rhythms to develop it further. Practice and refine until you have a catchy and memorable melody.


What Are The Rules Of Melody Writing?


The rules of melody writing include creating a memorable and singable tune, using a mix of scales and intervals, ensuring good rhythmic structure, and balancing repetition with variety. Melodies should also convey emotion and connect with the song’s lyrics or theme, while being easy to remember and perform.


How Do You Come Up With Catchy Melodies?


To create catchy melodies, experiment with different musical patterns and rhythms. Combine notes and chords creatively, and draw inspiration from a variety of sources. Keep experimenting until you find a melody that resonates with you and captures your desired mood or emotion.


Collaborating with others can also help in exploring fresh ideas and approaches.


Is It Hard To Write A Melody?


Writing a melody may be challenging for some, but with practice and creativity, it can become easier. It’s important to experiment, trust your intuition, and express your emotions through music.


Conclusion


Writing a melody is a creative process that requires patience and practice. By understanding the fundamentals of harmony, rhythm, and structure, you can craft a captivating melody that resonates with your audience. Experiment with different techniques and let your emotions guide the way.


With dedication and a little bit of inspiration, you can create melodies that leave a lasting impact.

Categories
Archive

How To Do Voice Overs : Master the Art of Voice Acting

To do voice overs, set up a quiet recording space, practice vocal clarity, and use professional equipment. Voice over work requires clear articulation and expression, along with good editing skills for the final product to be polished.


Every voice over project needs a proper script, a strong understanding of the target audience, and the ability to convey emotions effectively. An essential aspect is to match the tone of the voice over with the intended message, whether it be informative, enticing, or engaging.


With practice and dedication, mastering voice over techniques can lead to success in the competitive field of voice acting. Dedicate time to hone your skills, seek constructive feedback, and continuously improve your craft to stand out in this industry.


Finding Your Voice

When it comes to doing voice overs, finding your unique voice is essential for success. Your voice is your most powerful tool in the industry and Discovering Your Unique Style is the first step.

Discovering Your Unique Style

Explore different genres and scripts to determine what feels most natural to you. Experiment with various tones, speeds, and emotions to identify what resonates with your personality.

  • Try recording yourself in different scenarios
  • Listen back and analyze what style feels most authentic
  • Practice mimicking other voice actors to understand different techniques

Embracing Your Natural Tone

Your natural voice tone is what sets you apart from other voice actors. Embracing Your Natural Tone allows you to connect with your audience on a deeper level.

  1. Identify the unique qualities of your voice
  2. Don’t try to sound like someone else
  3. Practice speaking naturally and confidently

By honing in on your individuality and authenticity, you can create a voice over style that is truly your own.


Credit: www.alexmctavish.com


Voice Control And Techniques

Mastering voice control techniques is essential for a successful voiceover performance. By honing breath control and projection, as well as mastering tone and emotion, you can deliver impactful narrations that resonate with your audience.

Breath Control And Projection

Proper breath control ensures steady delivery and prevents running out of breath mid-sentence. Projecting your voice effectively enhances clarity and engagement.

Tone And Emotion Mastery

Perfecting your tone sets the mood for the narration. Embracing emotion mastery allows you to convey the intended feelings to captivate listeners.

Script Interpretation

In the world of voice overs, script interpretation is a critical skill that can make or break a performance. Understanding the nuances of the script, character development, and key phrases is essential for delivering a compelling and authentic rendition. Let’s delve into these important aspects of script interpretation and how to master them for your voice over work.

Understanding Character Development

When diving into a script, it’s crucial to grasp the intricacies of character development. Take the time to analyze the character’s backstory, motivations, and personality traits. Evoke empathy by delving into the character’s emotions and psyche, allowing you to portray them convincingly. Pay attention to the character’s journey and embody their essence to bring them to life through your voice.

Emphasizing Key Phrases

Identify the key phrases that carry significant weight within the script. These phrases often convey crucial emotions, pivotal plot points, or core messages. By highlighting these key phrases, you can effectively convey the intended emphasis and resonate with the audience. Mastering the art of emphasizing key phrases will elevate your overall performance and captivate your listeners.


Credit: m.facebook.com


Technical Skills


Learn how to do voice overs with technical skills. Mastering the art of controlling pitch, tone, and inflection is crucial for a successful voice over. Understanding recording software and equipment is also necessary for producing high-quality voice over work.

Using Recording Equipment

When it comes to the technical skills required for voice overs, having knowledge of recording equipment is crucial. Understanding how to set up and operate the necessary tools is the first step towards achieving professional-sounding voice overs.

To begin with, invest in a good quality microphone that suits your voice and recording environment. USB microphones are a popular choice for beginners due to their ease of use. Simply plug the microphone into your computer, and you’re ready to start recording. For those looking for higher audio quality, XLR microphones paired with an audio interface provide professional-grade results.

In addition to a microphone, you will need headphones to monitor your recordings. Closed-back headphones are recommended as they offer excellent sound isolation, allowing you to focus on your voice without distractions. It’s important to choose a pair that is comfortable for long recording sessions, as comfort can greatly impact your performance.

Lastly, consider acquiring a pop filter and a microphone stand or boom arm. A pop filter helps reduce plosive sounds caused by letters like “P” and “B,” ensuring your recordings sound clean and clear. A microphone stand or boom arm keeps your microphone steady while recording, allowing for consistently optimal sound quality.

Editing And Post-production

Once you have recorded your voice over, the next step is editing and post-production. This is where you bring your recordings to life and give them a professional touch. With the right software, you can enhance the audio, remove background noise, and make necessary adjustments to ensure a polished result.

There are various editing software options available, both free and paid, that offer a range of features suitable for voice over work. Audacity is a popular free option for beginners, while professionals often opt for software like Adobe Audition or Pro Tools for their advanced capabilities.

When editing your voice over, pay attention to factors such as volume levels, consistency, and pacing. Use audio editing tools to adjust these elements and eliminate any errors or imperfections. Additionally, experiment with EQ (equalization) to enhance the overall sound quality and make your voice stand out.

Post-production also involves adding music, sound effects, or any other additional elements that enhance your voice over. These can help create a more immersive experience for the listener and add depth to your recordings.

https://www.youtube.com/watch?v=UGULxhi3XFo


Building Your Voice Acting Career

One of the essential steps to kickstart your voice acting career is to create a compelling demo reel. A demo reel is a short audio clip showcasing your range and ability as a voice actor. Keep it concise, yet diverse, including different styles, tones, and character voices to demonstrate your versatility. Make sure your reel reflects your strengths and captures the attention of potential clients or casting directors. If you’re unsure how to put together an effective demo reel, consider seeking guidance from a professional in the industry.

Marketing plays a crucial role in establishing your voice acting career. To stand out in a competitive field, you need to promote yourself effectively. Start by creating a professional website or online portfolio where you can showcase your demo reel, list your training or experience, and provide contact information. Utilize social media platforms such as LinkedIn, Twitter, and Instagram to engage with potential clients and fellow voice actors. Network with industry professionals, attend voice acting workshops or conventions, and join online communities to expand your connections and gain visibility within the industry.


Credit: voice-masters.com


Frequently Asked Questions On How To Do Voice Overs


How Do I Start Doing Voice Overs?


To start doing voice overs, practice and improve your skills, invest in quality equipment, create a demo reel, and audition for opportunities online.


How Can I Do My Own Voice Over?


To do your own voice over, set up a quiet space, practice script reading, use a good microphone, edit the recording, and deliver confidently.


How Much Money Can You Make Doing Voice Overs?


Voice over earnings vary, ranging from $100 to $250 per hour for beginners. Experienced professionals can make $250 to $1000+ per hour. Factors include experience, demand, and the type of project.


Can You Be A Voice Actor With No Experience?


Yes, you can become a voice actor without previous experience. Many beginners start by taking acting classes, practicing voice techniques, and building a demo reel to showcase their skills. With dedication, persistence, and networking, you can pursue opportunities in the industry.


Conclusion


To sum up, mastering the art of voice overs requires practice, dedication, and a keen understanding of storytelling. With the right techniques and tools, anyone can excel in this field. Always strive to connect with your audience on a deeper level through authentic and compelling narration.


Remember, confidence and passion are key to delivering impactful voice overs. Keep honing your skills and never stop learning.

Categories
Archive

How To Write Songs Faster : Unlock Your Creative Speed

To write songs faster, focus on capturing ideas quickly and refining them efficiently without overthinking. Utilize songwriting tools and establish a routine to boost productivity.


Writing songs can be a rewarding creative process, but it can also be time-consuming. Whether you are a professional musician or a novice lyricist, finding ways to streamline your songwriting process can help you produce more music in less time.


In this guide, we will explore some effective strategies to help you write songs faster without sacrificing quality. By implementing these tips and techniques, you can maximize your efficiency and creativity, leading to a more fruitful songwriting experience.


Understanding Your Creative Process

Identify Your Creative Patterns

Recognize when and where you are most inspired to write songs.

Figure out the time of day you are most productive creatively.

Take note of emotions or situations that trigger creative bursts.

Analyzing Your Workflow

Break down your songwriting process into smaller tasks for better efficiency.

Identify any obstacles that may slow you down and find ways to overcome them.

Experiment with different approaches to see what works best for you.

How To Write Songs Faster : Unlock Your Creative Speed


Credit: www.amazon.com


Optimizing Your Writing Environment

Creating A Inspiring Space

Design a clutter-free and creative room with inspirational decor.

Utilizing Productivity Tools

Integrate efficient tools like lyric writing software and music production apps.

Harnessing Creative Techniques

Songwriting can sometimes feel like a race against the clock, with inspiration striking at the most unexpected moments. Harnessing creative techniques is a powerful way to streamline your songwriting process, enabling you to write songs faster without sacrificing quality. Embracing stream of consciousness and utilizing structured songwriting methods are two effective approaches to boost your creative output.

Embracing Stream Of Consciousness

Embracing stream of consciousness allows your ideas to flow organically, free from the constraints of overthinking. Sit down with your instrument and let the lyrics and melodies pour out without judgment. This technique encourages spontaneity and often leads to authentic, raw creativity.

Utilizing Structured Songwriting Methods

Structured songwriting methods provide a framework to harness creativity in a more organized manner. Techniques such as the ABAB rhyme scheme or the verse-chorus-verse structure can help guide your songwriting process, ensuring that ideas are developed cohesively and efficiently.

Overcoming Creative Blocks

Writer’s block can be frustrating when you’re eager to write songs and ideas just won’t come to you. But fear not, there are effective methods to overcome creative blocks and boost your songwriting productivity. In this article, we will explore brainstorming techniques and the benefits of collaborative songwriting to help unlock your creativity and write songs faster.

Exploring Brainstorming Techniques

Brainstorming is a powerful tool to generate ideas and ignite your creative flow. By employing various brainstorming techniques, you can stimulate your imagination and come up with fresh concepts for your songs. Here are some popular methods:

  • Mind Mapping: This technique involves creating a visual diagram where you jot down your main idea or theme in the center and branch out with related ideas, lyrics, melodies, or imagery.
  • Freewriting: Set a timer for a designated period, such as 10 minutes, and write continuously without pausing or worrying about grammar or structure. Let your thoughts flow and see what emerges.
  • Word Association: Choose a random word and write down as many associations as you can think of. These associations can inspire new ideas for lyrics, melodies, or themes.
  • Picture Prompts: Use visual cues such as photographs, paintings, or magazine clippings to spark your creativity. Look for images that resonate with you or evoke certain emotions, and let them guide your songwriting process.

Embracing Collaborative Songwriting

Collaborative songwriting can provide valuable insights and bring a fresh perspective to your creative process. Working with others can help you overcome creative blocks and fuel your inspiration. Consider the following benefits of collaborative songwriting:

  1. Sharing Ideas: Collaborating with other songwriters allows you to bounce ideas off each other, providing new insights and possibilities. An idea that may have seemed stale or uninteresting to you may blossom into something remarkable with the input of others.
  2. Expanding Your Style: Collaborating with songwriters from different musical backgrounds can expose you to new genres, styles, and techniques. This can expand your musical horizons and push you to experiment with fresh sounds and approaches.
  3. Accountability: When you collaborate with others, you have a commitment to contribute your ideas and follow through on the creative process. This accountability can help you stay motivated, accountable, and disciplined in your songwriting.
  4. Learning from Each Other: Working with other songwriters allows you to learn and grow from their experiences and skills. Each collaborator brings their own unique strengths and insights, which can enhance your songwriting abilities.

By embracing collaborative songwriting and exploring brainstorming techniques, you can overcome creative blocks and tap into your full songwriting potential. Try incorporating these methods into your creative routine and watch as your songs flow effortlessly onto the page.


Refining And Revising Efficiently

When it comes to writing songs faster, refining and revising efficiently is a crucial step. This process allows you to polish your ideas, strengthen your lyrics, and improve the overall quality of your song. By prioritizing key elements, utilizing feedback effectively, and adhering to a structured approach, you can streamline your songwriting process and produce songs more efficiently.

Prioritizing Key Elements

To write songs faster and avoid getting lost in a sea of ideas, it is essential to prioritize key elements. This involves determining the core message or emotion you want to convey and focusing on developing strong hooks, captivating melodies, and compelling lyrics. By identifying the essence of your song and honing in on these crucial aspects, you can strengthen the overall impact of your music.

Here’s a handy table to help you understand the key elements you should prioritize:

Key Elements Description
Hooks The catchy and memorable parts of your song that grab the listener’s attention.
Melodies The sequence of musical notes that forms the core structure of your song.
Lyrics The words that convey the message and emotions of your song.

Utilizing Feedback Effectively

Feedback plays a vital role in refining your songs quickly. Embrace feedback from trusted sources, such as fellow musicians, songwriters, or mentors who understand the craft. However, it’s important to utilize feedback effectively. Pay attention to constructive criticism and suggestions, but also trust your instincts and vision for the song. Remember, the feedback you receive should ultimately help you improve and not dilute your unique style.

To make the most of feedback, consider the following tips:

  1. Be open-minded and receptive to different perspectives.
  2. Take note of recurring feedback patterns to identify areas that need improvement.
  3. Experiment and incorporate suggested changes or ideas while staying true to your artistic vision.
  4. Test your revised song with a small audience to gauge their reactions and gather further feedback.

By utilizing feedback effectively, you can refine your songs efficiently and ensure they resonate with your intended audience.


Credit: reverb.com


Credit: www.ebay.com


Frequently Asked Questions On How To Write Songs Faster


How Long Should It Take To Write A Song?


Writing a song can take anywhere from a few hours to several months, depending on the songwriter’s process and inspiration. Some artists write quickly, while others take their time to perfect the lyrics and melody. Ultimately, there is no set time frame for creating a song.


How Can I Write A Quick Song?


To quickly write a song, start with a catchy melody, write simple and relatable lyrics, and focus on the chorus. Keep it concise and emotive while expressing your message effectively. Experiment with different song structures and let creativity flow. Practice and refine your songwriting skills regularly.


How Do You Write A Song In 10 Minutes?


To write a song in 10 minutes, start with a simple melody or chord progression. Focus on a catchy hook or chorus that sticks in your head. Keep lyrics concise and relatable. Don’t overthink it, let the creativity flow. Practice and repetition will improve your speed.


How Do You Write A Song In An Hour?


To write a song in an hour, start with a clear idea or feeling. Focus on catchy lyrics and a simple melody. Use a familiar chord progression and refrain from overthinking. Allow creative ideas to flow and don’t be afraid to make changes afterwards.


Practice makes perfect.


Conclusion


Learning how to write songs faster is a skill that can be developed with practice and dedication. By implementing the techniques and strategies discussed in this blog post, such as honing your lyrical and musical ideas, streamlining your creative process, and staying open to inspiration, you can make significant progress in your songwriting efficiency.


With patience and persistence, you can enhance your ability to create music quickly and effectively. Keep writing and refining your craft, and you will soon find yourself churning out songs with ease.

Categories
Archive

Electronic Music Production: Master the Art and Elevate Your Beats

Electronic Music Production involves creating music using electronic devices and software to produce unique sounds and compositions. It combines technology with creativity to craft innovative and engaging tracks that resonate with audiences.


In recent years, electronic music has gained immense popularity in the music industry, with many artists and producers harnessing the power of digital tools to push boundaries and explore new sonic territories. From synthesizers to digital audio workstations, electronic music production offers endless possibilities for experimentation and artistic expression.


Whether you’re a seasoned producer or a novice enthusiast, delving into the world of electronic music production opens up a world of sonic possibilities and artistic fulfillment.

Electronic Music Production: Master the Art and Elevate Your Beats


Credit: pyramind.com


The Art Of Electronic Music Production

Electronic music production is a creative process that combines technology, artistry, and innovation to craft unique and mesmerizing sounds. It involves manipulating digital audio to create music that pushes boundaries and explores new sonic landscapes.

History Of Electronic Music

Electronic music has a rich history dating back to the early 20th century, with pioneers such as Robert Moog and Karlheinz Stockhausen shaping the genre. From the experimental sounds of the 1950s to the rise of techno and house music in the 1980s, electronic music has constantly evolved and influenced mainstream music.

Fundamentals Of Electronic Music Production

  • Sound Design: Crafting unique sounds using synthesizers, samplers, and software.
  • Beat Making: Creating rhythmic patterns and drum loops using sequencers and drum machines.
  • Arrangement: Structuring tracks by arranging different elements like melodies, harmonies, and beats.

Music Production Software And Tools

Welcome to the exciting world of Electronic Music Production! One of the key elements that form the backbone of music production is Music Production Software and Tools.

Digital Audio Workstations (daws)

DAWs are the central hub for music producers to create, mix, and master their tracks.

A DAW provides features like multitrack recording, audio editing, virtual instruments, and effects plugins.

Virtual Instruments And Effects

Virtual instruments and effects add depth and creativity to music production.

  • Virtual instruments simulate traditional instruments digitally.
  • Effects plugins modify audio to achieve desired sounds.

Structure And Arrangement

Welcome to the world of electronic music production, where the art of crafting sonic masterpieces is a captivating journey. A crucial part of this journey is the structure and arrangement of your tracks, as it shapes the overall mood and impact of the music. In this guide, we will delve into the essential aspects of song structure and arrangement, as well as the techniques for creating dynamic transitions that elevate your productions to new heights.

Song Structure And Arrangement

When it comes to electronic music production, understanding the intricacies of song structure and arrangement is pivotal. A well-crafted arrangement can take the listener on a captivating sonic journey, ensuring that each section of the track seamlessly flows into the next.

Creating Dynamic Transitions

Dynamic transitions play a vital role in keeping the listener engaged and immersed in the music. Whether it’s a smooth shift between different sections or a climactic buildup, these transitions add an element of allure to the track, keeping it fresh and captivating throughout.

Sound Design And Synthesis

Sound design and synthesis are integral aspects of electronic music production. By exploring various synthesis techniques and creating unique soundscapes, producers can shape the sonic landscape of their tracks to captivate their audience.

Exploring Synthesis Techniques

Synthesis techniques are the building blocks of electronic music production. They allow producers to create and manipulate sounds in a virtually limitless way. Understanding different synthesis techniques is essential for designing various elements, such as basslines, melodies, and percussion.

There are several commonly used synthesis methods:

Technique Description
Subtractive Synthesis A process where harmonically rich sounds are created by filtering harmonic content from a complex waveform.
Additive Synthesis The construction of complex waveforms by adding together multiple sine waves of different frequencies and amplitudes.
FM Synthesis A method that uses frequency modulation to create rich and evolving sounds by modulating one oscillator’s frequency with another.
Granular Synthesis A technique involving the manipulation of tiny grains of sound to create complex textures and timbres.

These synthesis techniques can be used individually or in combination to achieve specific sonic results. By experimenting with different parameters and settings within these techniques, producers have infinite possibilities for sound design.

Creating Unique Soundscapes

Soundscapes play a crucial role in setting the mood and atmosphere of a track. By utilizing sound design techniques, producers can create unique and captivating sonic environments that transport listeners to different dimensions.

Here are a few tips for creating unique soundscapes:

  1. Layering – Combine multiple sound elements to add depth and complexity to the soundscape.
  2. Effects Processing – Use effects like reverb, delay, and modulation to transform sounds and add a sense of space.
  3. Sampling – Incorporate recorded sounds, field recordings, or pre-existing samples to add organic and unconventional elements.
  4. Movement – Utilize automation and modulation to introduce movement and evolution within the soundscapes.

By implementing these techniques, producers can create soundscapes that immerse listeners in a world of their own, elevating the overall listening experience.


Mixing And Mastering

When it comes to electronic music production, mixing and mastering play a crucial role in achieving professional-sounding tracks. Mixing involves balancing and processing individual tracks to create a cohesive and well-rounded sound, while mastering focuses on refining the final mix for clarity and impact. Let’s delve deeper into these essential stages of the production process.

Balancing And Processing Tracks

Before diving into the realm of mixing, it’s essential to ensure that each track is properly balanced and processed. Balancing involves setting appropriate volume levels for each element of the track, ensuring that they blend harmoniously and no element overpowers the rest. This step ensures that the mix sounds coherent and well-structured, allowing every element to shine in its rightful place.

Processing, on the other hand, involves applying various effects and techniques to shape individual tracks. Compression and EQ (equalization) are two fundamental tools used during processing. Compression helps control the dynamic range of a track, making the quiet parts louder and bringing down the peaks. EQ adjusts the frequency balance, allowing you to enhance or reduce specific frequencies to make the track sound more pleasing and balanced.

When processing tracks, it’s essential to approach each element with intention. Every decision made should contribute to the overall sound you’re trying to achieve. Avoid excessive processing, as it can lead to a cluttered and artificial-sounding mix. Instead, focus on enhancing the best qualities of each element while maintaining a sense of cohesion throughout the track.

Mastering For Clarity And Impact

Once the mixing is done, mastering takes the final mix to the next level by optimizing it for various playback systems and ensuring it translates well across different audio platforms. Mastering primarily involves fine-tuning the overall tonal balance, dynamics, and stereo width of the mix.

One essential goal of mastering is to achieve clarity. This is done by carefully examining and adjusting the frequency balance, ensuring that each element has its space within the mix without competing with others. Mastering also focuses on maintaining a consistent volume level throughout the track, ensuring that it stands out regardless of the playback system.

Another crucial aspect of mastering is creating impact. This involves enhancing the energy and intensity of the mix. It can be achieved through careful use of compression, saturation, and stereo imaging, among other techniques. The goal is to captivate the listener and create an engaging and immersive experience.

In addition to tone and dynamics, mastering also involves ensuring that the final mix meets technical standards for distribution. This includes checking for any potential issues such as clipping, excessive stereo width, or problematic frequencies that might cause problems during playback. By addressing these issues, the mastering process ensures that the track sounds its best across a wide range of audio systems.

In conclusion, mixing and mastering are vital stages in the process of electronic music production. Balancing and processing tracks create a cohesive mix, while mastering gives the final polish for clarity and impact. By mastering these essential techniques, you can elevate your productions and create tracks that sound professional and captivating to listeners.

Electronic Music Production: Master the Art and Elevate Your Beats


Credit: blog.native-instruments.com


Credit: www.amazon.com


Frequently Asked Questions For Electronic Music Production


What Is Electronic Music Production?


Electronic music production involves creating, editing, and arranging music using electronic devices and software. It encompasses sound design, recording, mixing, and mastering. This process allows artists to produce a wide range of electronic music genres.


How Do I Start Producing Electronic Music?


To start producing electronic music, begin by learning music production software, experimenting with sounds, and studying music theory basics. Practice creating melodies, beats, and arrangements, and seek feedback to improve your skills. Collaborate with other musicians, and keep exploring and expanding your creative possibilities.


Is It Hard To Make Edm?


Creating EDM can be challenging for beginners but with practice and dedication, it becomes easier. Mastering production tools and techniques is key.


How Can I Learn Edm?


To learn EDM, start by understanding music theory and production software. Study music production techniques and experiment with creating your own tracks. Collaborate with other producers, join online communities, and stay updated with industry trends. Practice consistently and seek feedback to improve your skills.


Conclusion


In the dynamic realm of electronic music production, creativity, innovation, and technology converge to sculpt the sounds of the future. Embracing the art of mixing beats and manipulating digital soundscapes, producers forge an immersive auditory experience for their listeners. With the potential to revolutionize the music industry, electronic music production continues to push boundaries and captivate audiences worldwide.