Categories
Archive

What is Spotify Artist Uri? Unveil the Digital Key

A Spotify Artist URI is a unique identifier for artists on the Spotify platform. It allows users to locate and follow specific artists easily.


Spotify has become an integral tool for music enthusiasts, offering a vast library of songs and personalized playlists. As a music streaming giant, it not only caters to listeners but also provides artists with a platform to showcase their work.


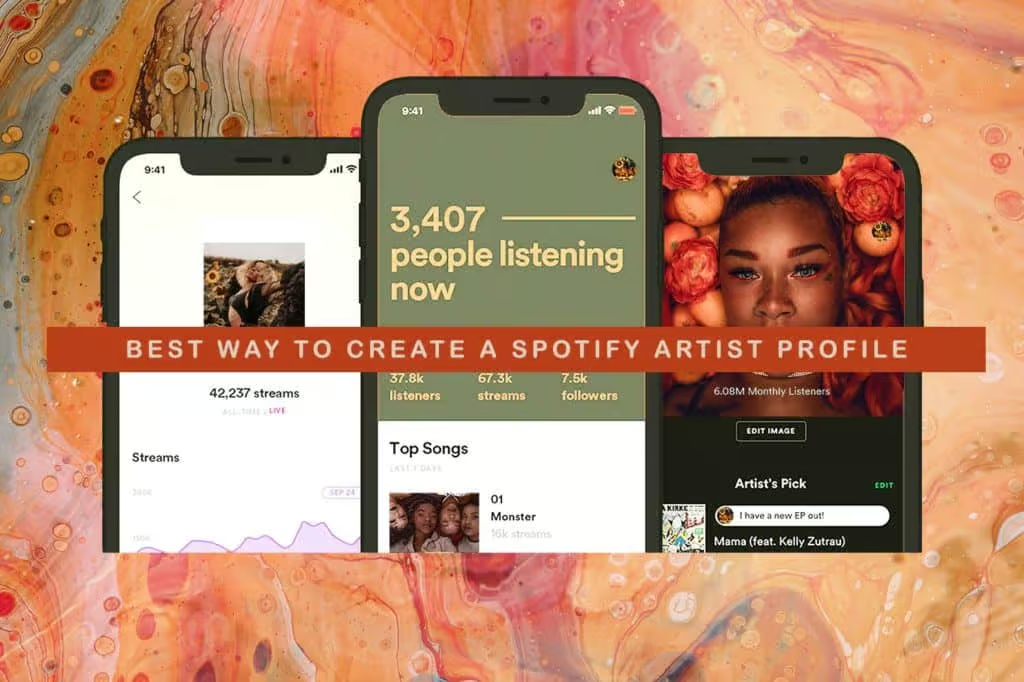
The Spotify Artist URI serves as a digital fingerprint, directing users straight to an artist’s profile, where one can explore albums, latest releases, and artist-curated playlists. Crafting an engaging online presence is crucial for musicians, and the Spotify Artist URI is a key component in achieving this. It unlocks the potential for artists to gain followers, increase their streams, and engage with their audience on one of the most popular music streaming services worldwide. With a simple click, fans can save their favorite artist’s profile, ensuring they never miss a beat.

What is Spotify Artist Uri? Unveil the Digital Key


Credit: d4musicmarketing.com

The Essence Of Spotify Artist Uri

The Spotify Artist URI is a key to unlocking music on the popular streaming platform. It is a unique identifier. It links directly to an artist’s page. This simple code is essential for both artists and fans.

Defining Uri In The Context Of Spotify

A URI, or Uniform Resource Identifier, is a string of characters. It helps to identify a specific resource on the internet. In this case, Spotify uses URIs to distinguish between multiple artists. A Spotify Artist URI is exclusive to each artist. The URI contains a mixture of numbers and letters. It begins with ‘spotify:artist:’. It is not the same as a URL, which is longer and used for web pages.

The Significance Of Artist Uri For Musicians And Listeners

For musicians, the Spotify Artist URI is crucial. It allows easy sharing of their music. Promotional tools and widgets require the URI to feature songs or albums. It also helps in tracking listener statistics.

For listeners, the URI simplifies music exploration. It provides a direct link to their favorite artists. It bypasses the need for searching. Fans can save or share these URIs. It’s great for creating playlists and sharing recommendations.


Spotify’s Digital Ecosystem

Welcome to the intricate ecosystem of Spotify, a musical universe teeming with tracks, artists, and albums. At the core of Spotify’s digital environment lies a powerful framework allowing users to navigate through millions of songs with ease. Understand how Spotify’s intricate system organizes its vast collection of melodies, and learn about the vital role of Spotify URIs in the world of music streaming.

The Role Of Uris In Music Streaming

In Spotify’s world, each song has a unique identifier, known as a URI. URIs, or Uniform Resource Identifiers, are essential for connecting users to their desired tracks quickly. Think of them as the DNA for songs. Without URIs, finding a specific tune in the vast library would be like searching for a needle in a haystack.

URIs serve several key functions:

  • Allow instant access to tracks or albums
  • Enable seamless sharing of music with others
  • Power playlist creation and music curation

How Spotify Organizes Its Music Library

Behind every successful streaming service is a meticulously organized library. Spotify excels in this area by categorizing every piece of music within its platform. This system ensures users can find their favorite genres, artists, and albums with a few clicks or taps.

This code is a sample Spotify URI. It leads you straight to a particular song. The structure of Spotify’s library revolves around these precise codes.

Spotify organizes its music using various data:

Element Description
Artists Bands or singers who create music
Albums Collections of songs
Playlists Groups of songs chosen by users or Spotify
Genres Styles or categories of music

Obtaining A Spotify Artist Uri

Knowing your Spotify Artist URI opens a world of opportunities for music promotion and sharing. It’s a unique identifier for artists on Spotify, making it simpler for fans to find you. Let’s dig into how to obtain your very own Spotify Artist URI.

Steps To Locate An Artist Uri

If you already have music on Spotify, finding your URI is straightforward. Here’s what to do:

  1. Open the Spotify app or website.
  2. Navigate to your artist profile.
  3. Click the three dots under your artist name.
  4. Select ‘Share’ and then choose ‘Copy Spotify URI’.

Your Artist URI is now copied and ready to be pasted wherever you need it.

Creating A Spotify Artist Profile

To get a URI, you need a profile. Here’s the process to create one:

  1. Have your music ready for upload.
  2. Choose a digital music distributor.
  3. Upload your tracks to Spotify through the distributor.
  4. Wait for Spotify to process and display your music.

Once live, you’ll have an artist profile along with your unique Spotify Artist URI.

Uses Of Artist Uris

Spotify Artist URIs are unique codes. They help users find your music easily. Think of it as a direct line to your work. Let’s explore how Artist URIs benefit creators.

Promoting Music And Sharing Tracks

Artist URIs make sharing your music a breeze. Share your URI with fans and they’re one click away from your tunes. No searching needed! This ease boosts your music visibility.

With Artist URIs, creating playlists for fans is simple. Host your curated lists with personal favorites or inspirations. Keep listeners engaged with your musical journey.

  • Embed URIs in emails for direct updates.
  • Post on social media to reach a wide audience.
  • Use in press kits for industry professionals.

Integrating With Tools And Platforms

Integrate Artist URIs into various platforms. Enhance your presence across the digital landscape.

Working with music analytics tools? Input your Artist URI. Gain insights into your music’s performance. Track listens and grow.

For merch and ticket sales, link your Artist URI. Fans can listen as they browse. Create a seamless shopping experience.

Tool/Platform Use of Artist URI
Music Analytics Track performance data
Merch Stores Combine listening with shopping
Concert Listings Encourage music discovery

The Link Between Uri And Artist Success

Spotify’s Artist URI plays a crucial role in music success today. It acts as a digital fingerprint for musicians on the platform. This unique identifier ensures that fans find the correct artist. It also helps measure the impact of promotional efforts. With URI, success becomes traceable and strategies more effective.

Tracking Plays And Analytics

Understanding listener habits proves vital for artists. Spotify’s URI offers clear insights through plays and analytics data. This data becomes a guide to what fans love. Artists and managers use it to tailor their creative output and interactions.

  • Total plays: Reveals the song’s reach
  • Listener demographics: Highlights who loves the music
  • Trending tracks: Shows which songs gain traction

Leveraging Uri In Marketing Efforts

Smart marketing turns good music into a great success. URIs make sharing songs across channels seamless. Artists include them in social media, emails, and websites. This strategy enhances fan engagement and grows their listener base. One link bridges various platforms, directing listeners to tunes effortlessly.

  1. Integration with social media: Easy song sharing on profiles and stories
  2. Embedding in websites: Fans find music with a single click
  3. Email campaigns: Direct links drive streams

What is Spotify Artist Uri? Unveil the Digital Key


Credit: artists.sonomusic.co

Troubleshooting Common Artist Uri Issues

Spotify Artist URIs are unique identifiers for musicians and bands on the popular streaming platform. They help fans find your music with ease. Yet, sometimes URIs can cause confusion. Duplication or incorrect information can steer listeners in the wrong direction. Solve these mishaps promptly to ensure your music reaches your audience without a hitch.

Resolving Incorrect Or Duplicate Uris

Artist URI issues on Spotify can range from duplications to inaccuracies. Spot an incorrect URI? Act fast. Stumble upon a duplicate? Don’t worry. Here’s how to tackle these concerns:

  • Contact Spotify’s Artist Support. They help fix URI mix-ups.
  • Verify your identity. This ensures the right artist gets assistance.
  • Submit the correct details. Accurate information is crucial.
  • Be patient. Changes might take time to reflect.

Updating Uri Information

Keeping your Spotify Artist URI updated is vital. Fresh info leads to accurate listener data and better exposure. To update your URI information:

  1. Access your Spotify for Artists account. This is your control center.
  2. Locate the ‘Profile’ section. It’s where edits are made.
  3. Request changes for incorrect data. Precise details are key.
  4. Wait for confirmation. Spotify will notify upon completion.

Expanding Reach With Artist Uri

Artist URIs are unique Spotify codes. They help artists stand out. These codes make sharing music easy. They lead fans straight to artists’ Spotify profiles. A well-used URI can boost an artist’s visibility. It opens doors to new listeners. Let’s dive into how URIs can expand an artist’s reach.

Collaborations And Playlist Inclusions

Collaborations multiply followers. Feature on another artist’s track. Share URI links to each other’s followers. Mutual benefits await! Playlist inclusions put your songs in the spotlight. Send your URI to playlist creators. Watch your streams grow.

  • Connect with users following related artists.
  • Join popular playlists via your URI.

Engaging With Fans Through Uri

Artists connect with fans using their unique URI. Share it on social media or websites. Make it easy for fans to find you. Offer exclusive content through URI links. Fans will come back for more.

Action Result
Share URI Direct fan engagement
Offer Exclusives Boost fan loyalty

Encourage fans to share your URI. Create a community around your music. Your reach will grow naturally.

The Future Of Music Identification

Imagine a world where every song has a unique digital fingerprint. Spotify’s Artist URI is paving the way. It’s a code that identifies music creators on the platform. It makes finding and sharing your favorite tunes effortless. As technology advances, URI could become the universal standard for identifying any song instantly.

Innovations In Music Metadata

Music metadata has come a long way from simple album credits. Spotify’s Artist URI is a major leap in digital music. It holds key information about songs and artists. This includes names, genres, and release dates. With time, more data points may join the framework.

  • Genres
  • Moods
  • Beats per minute
  • Associated images

Metadata innovation is vital. It enhances how we discover, share, and connect with music. Artists can expect better visibility and recognition.

Predicting Changes In Streaming Technology

Streaming technology is ever-evolving. Spotify Artist URI sets the stage for exciting changes. Machine learning could enhance music metadata. It can predict listener preferences and enhance recommendations.

We may witness advanced features like:

Feature Description
Smart Playlists Playlists that adapt to your mood and activity in real-time.
Interactive Experiences Live events and immersive album releases exclusive to streaming platforms.

Future streaming will enable seamless integration across devices. It supports artist engagement and offers an unmatched user experience. Prepare for a world where music adapts to you, personally curated by advanced algorithms.

Frequently Asked Questions Of What Is Spotify Artist Uri

What Is A Spotify Artist Uri?

A Spotify Artist URI is a unique identifier assigned to artists on Spotify, working like a musical fingerprint. It allows users and apps to find specific artists without confusion, directing them to the artist’s profile and music catalog on the platform.

How Do You Find An Artist’s Spotify Uri?

To find an Artist’s Spotify URI, navigate to their Spotify profile, click on the three dots (‘. . . ‘) to access more options, and select ‘Share’. You will find the URI in the menu, which can be copied for use.

Can Spotify Uris Be Used In Playlists?

Yes, Spotify URIs can be used to add specific artists or tracks directly into playlists. They enable precise selection, avoiding mix-ups with other artists or songs with similar names.

Is Spotify Artist Uri The Same As A Link?

No, Spotify Artist URI isn’t a typical clickable link. Instead, it is used within Spotify’s system for accurate identification and linking to an artist’s page or a specific track.

Conclusion

Understanding your Spotify Artist URI is pivotal for managing your music career effectively. Embrace this unique identifier to streamline sharing, promoting, and tracking your work on the platform. Armed with this knowledge, leap forward into the streaming landscape and let your tunes resonate with a global audience—your next big break could be just a click away.
Categories
Archive

What Is Dithering: Mastering’s Secret for Audio Clarity

Dithering is a process used during audio mastering to minimize quantization errors. It’s essential for preserving audio quality when reducing bit depth.


Mastering audio is a critical step for achieving professional sound quality and dithering plays a pivotal role in this process. It introduces a low-level noise to the signal, masking the quantization errors that occur when converting higher bit depth recordings to standard 16-bit CD format.


This technique ensures that the end result remains smooth and more analog-like, even after bit depth reduction. By carefully adding this noise, mastering engineers can avoid the harshness and audibility of these errors, creating a more pleasing listening experience. Dithering’s importance in mastering cannot be overstated as it directly affects the integrity of the final audio product.

What Is Dithering: Mastering's Secret for Audio Clarity


Credit: unison.audio

Introduction To Dithering In Audio Mastering

Dithering plays a crucial role in the mastering phase of music production. It’s a technique that enhances the quality of sound when reducing the bit depth of audio tracks. Mastering engineers use dithering to preserve audio details and minimize distortion during digital conversion.

The Quest For Audio Clarity

High fidelity is the goal in audio mastering. Sound clarity makes the music stand out. Dithering is a hero in this quest. It adds controlled noise to mask undesirable artifacts. This process ensures that the final audio output is as clear as it can be.

Brief History Of Dithering In Music Production

The concept of dithering dates back to the analog era. Its adoption in digital formats has evolved significantly. Pioneers in digital audio discovered that dithering could counteract the harshness caused by quantization. The history of dithering is a tale of constant improvement, aiming for perfect sound replication.

The Science Behind Dithering

Dithering is a crucial process in mastering digital audio. It maintains sound quality when reducing bit depth. It’s like a final polish for your sound, ensuring it shines on all systems.

Understanding Digital Audio And Bit Depth

Digital audio uses ‘bits’ to capture sound. The ‘bit depth’ is like a paintbrush’s size. More ‘bits’ mean a more detailed sound, like a higher-resolution picture.

  • CD-quality audio has a bit depth of 16-bit.
  • Professional recordings often use 24-bit or higher.

When we convert high bit depth files to CD quality, we can lose details. This is where dithering steps in. Dithering adds a tiny amount of noise. This noise helps reduce distortion and keeps audio smooth.

Noise Shaping And Psychoacoustics

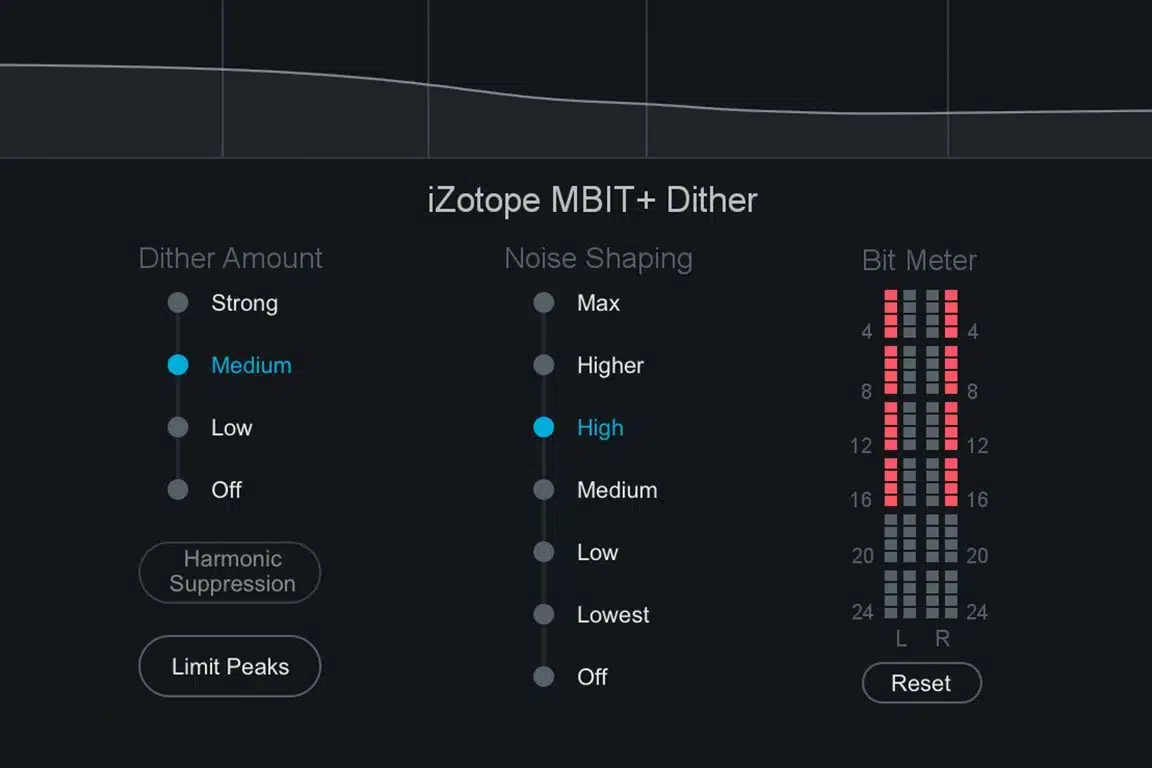
Dithering is more than just noise. It uses ‘noise shaping’. This means placing the noise where our ears can barely hear it.

Frequency Range Human Hearing Impact
Low Frequencies Easier to hear
High Frequencies Harder to hear, especially in music

This clever trick involves psychoacoustics, the science of how we hear. Dithering targets frequencies that don’t interfere much with the music. This hides the added noise.

By considering human hearing limits, dithering ensures a cleaner listening experience. It keeps those unwanted distortions from bit depth reduction away from your ears.

Types Of Dither

Dithering is an essential technique in audio mastering. It adds a gentle noise to a digital audio signal. This avoids distortion when reducing the bit depth of a track. Knowing the types of dither and their uses is vital. It ensures the best sound quality. Here’s a closer look at some common forms of dither.

Triangular Pdf Dither

Triangular Probability Density Function (PDF) dither is widely used. It works by distributing noise evenly across the frequency spectrum. This creates a more natural sound. Triangular PDF dither is great for general purposes. It is a go-to choice for many mastering engineers. Its uniform noise helps in maintaining audio integrity during bit depth reduction.

Gaussian Pdf Dither

Gaussian PDF dither takes a different approach. It generates noise with a probability curve. This is similar to natural acoustic noise. Gaussian PDF dither produces a warmer tone. It closely mimics the hiss of analog equipment. This type can be pleasing to the ear for certain musical styles.

Noise Shaping Variations

Noise shaping is more sophisticated. It manipulates the dithering noise to make it less audible. This process tailors the noise to the limitations of human hearing. The variations in noise shaping can greatly reduce perceived noise. This allows for a cleaner final product without altering the audio’s dynamic range.

Benefits of Noise Shaping:

  • Minimizes audible noise
  • Preserves audio quality at lower bit depths
  • Enhances listener experience

How Dithering Improves Audio Quality

Imagine sound as a beautiful painting. Dithering adds tiny dots of color to make this painting smoother. In the world of sound, it means clearer music with less distortion. Now let’s break down how dithering really enhances what we hear when listening to our favorite tunes.

Reducing Quantization Error

Dithering acts like a secret agent in the digital audio world. It sneaks into music files to tackle ‘quantization error’—a nasty gremlin that distorts sound. What does this mean? When audio is turned from analog to digital, sometimes the sound gets bumpy, not smooth.

Dithering scatters a gentle shower of noise to smooth out these bumps. Think of it as a magic wand that turns jagged edges into soft curves. This keeps the music sounding close to the original recording—a big win for audio buffs!

Preserving Low-level Signals

In quiet parts of songs, details can get lost. Dithering jumps in to make sure these whispers don’t vanish. It ensures that even the softest sounds are captured. When mastering audio, it’s like giving a microphone to the shyest voice in the room, making sure it’s heard loud and clear.

This process allows every part of the sound to come through, so you hear every pluck, tap, and breath in the music. Dithering guarantees the full experience, leaving no note behind.

Dithering In The Mastering Chain

Dithering is like a final polish for your audio masterpiece. In the mastering phase, it’s a crucial step. It helps maintain the audio’s quality when you convert it from a higher bit resolution to a lower one. It gently adds a sprinkle of noise to mask any unwanted sounds. Think of it as a skillful artist giving their painting subtle yet impactful final touches.

When to apply dither

When To Apply Dither

Apply dither during the final stage of mastering. Right before you convert your high-resolution audio to the format for CDs or digital platforms. Only use it once! Multiple instances can ruin the audio quality. Remember:

  • High resolution to low: Apply dither.
  • During edits or mixes: Skip dither.

Choosing the right dither settings

Choosing The Right Dither Settings

Settings matter. Choose them based on your audio. Each setting affects the noise level differently. Factor in:

Bit Depth Noise Shape Type
16, 24, or 32-bit A, B, C… 1, 2, 3…

Experiment and listen carefully. The right choice ensures optimal sound quality. Look for a setting that preserves the audio’s integrity without introducing noticeable noise.

What Is Dithering: Mastering's Secret for Audio Clarity


Credit: www.proaudiodesign.com

Myths And Misconceptions

Understanding dithering in audio mastering can be confusing. Many myths float around, muddying the waters. It’s vital to separate fact from fiction.

Debunking Common Dithering Myths

Myth: Dithering is unnecessary in modern music production.

Truth: Dithering remains essential, even with advanced technology. It ensures subtle detail during format conversion.

Myth: Dither always makes audio sound worse.

Truth: If applied correctly, dither can preserve quality. Without it, subtle distortions may occur in quieter sections.

Myth: Dither is just adding noise; it’s better to leave it out.

Truth: The noise added by dither is low-level and random. It masks quantization error, enhancing overall sound.

The Truth About Dither And Noise

Let’s tackle a key point: Dither adds a specific kind of noise. This noise is not your enemy. It’s finely tuned to work beneath the audio’s surface.

  • Subtle: The noise is generally inaudible during normal listening.
  • Purposeful: It prevents unwanted sounds called ‘quantization distortion.’ This distortion can happen when lowering bit depth.

Dither noise is so soft that it is rarely noticed. Yet, it’s strong enough to improve the quality of your final track.

The right dither can bring out clarity and depth in music. It makes the mastering process complete.

Listening Tests And Practical Examples

Exploring the nuances of dithering reveals its true worth in the mastering process. To understand dithering’s impact, listening tests and practical examples are crucial. Going beyond theory, we experience dithering firsthand. This helps discern the subtle changes it makes to an audio track.

Analyzing Dithering In Action

Imagine two paintings, one with a blend of minute colors, the other slightly blotchy. Dithering in audio acts similarly by adding low-level noise to minimize distortion. To witness this, consider these steps:

  • Select a quiet, mastered track.
  • Apply different dithering protocols.
  • Compare the original and dithered versions.

Notice how the noise floor behaves.

Critical Listening And A/b Testing

Sharp ears distinguish the finest details. Perform A/B testing with dithered and non-dithered tracks:

  1. Play the original track (A).
  2. Switch to the dithered track (B).
  3. Repeat and listen for texture and clarity.

Good headphones unveil intricacies.

Track Type Characteristics Noticed Listener Preference
Original Possible distortion at low levels Varies
Dithered Smoothed noise floor Varies

Dithering can be the defining touch that elevates your audio’s quality. When mastering, it plays a vital role in preserving sound integrity. Thus, attentive listening and practical examples cement its importance in the final product. Try it and hear the difference!

Best Practices For Producers And Engineers

Mastering is a critical phase in music production. A crucial aspect often discussed is dithering. Dithering adds low-level noise to a digital audio signal. This process masks quantization error when converting to a lower bit depth. Effective dithering practices ensure the highest sound quality.

Effective Dithering Techniques

Here are key techniques in applying dithering:

  • Select the correct dithering algorithm for the audio content.
  • Apply dithering once, during the final bit depth reduction.
  • Choose the appropriate dithering noise level; not too loud to be obtrusive, not too soft to be ineffective.
  • Do not process the signal further after dithering is applied.

Producers often use triangular or shaped dither. Shaped dither moves noise to frequency ranges less detectable by the human ear. Understanding the genre and distribution medium helps decide which technique to use.

Incorporating Dither Into The Workflow

Integrating dithering effectively into the mastering process involves the following steps:

  1. Mix down your track to the highest possible resolution.
  2. Carry out all audio processing, such as EQ and compression, before dithering.
  3. Add dither only during the encoding phase, converting your final master from high-resolution down to the target bit depth, like 16-bit for CD.

Remember, dithering is a once-and-done step. Use it as the very last stage of mastering. Automating the process within the mastering chain can prevent errors. Many digital audio workstations (DAWs) and mastering software offer built-in dithering tools to streamline this process.

Future Of Dithering And Advanced Techniques

The realm of audio mastering stands on the cusp of a technological renaissance. Dithering, a technique integral to the final touches in mastering, remains a vital component of this evolution. Understanding the future of dithering and the role of advanced techniques in this domain is crucial for those aiming to preserve audio integrity in the digital age. Let’s uncover the enhancements shaping this audio process.

Digital Audio Advancements

Modern systems transform the way we perceive digital audio. With every leap in processing power, dithering algorithms grow more sophisticated. Efficiency and precision set the bar higher for audio clarity, making dithering more relevant and critical to avoid quantization errors which can lead to distortion.

  • Higher bit-depth interfaces foster greater dynamic ranges, demanding more nuanced dithering.
  • Real-time dithering is now a reality with cutting-edge software applications.
  • Artificial Intelligence begins to play a role in optimizing dithering processes, ensuring the best possible sound.

Emerging Trends In Dither Technology

The future is bright for dither technology, with novel developments surfacing regularly. Innovation drives progress, bringing forth fresh ways to maintain audio fidelity through dithering.

Emerging Trend Impact on Dithering
Machine Learning Algorithms Customized dithering tailored to specific audio content.
Adaptive Noise-Shaping Spectral fine-tuning for more transparent dither.
High-Resolution Formats Enhanced dithering complementing the expanding dynamic range.

Embracing these advanced dithering techniques means giving listeners the most true-to-life audio experiences. As the digital soundscape grows, dithering secures its place as an essential mastering tool for pristine sound production.

Conclusion: Ensuring Optimal Sound

The mastering process gives your audio the final polish. Dithering plays a key role in this. It helps avoid unwanted noise when converting high-resolution recordings to standard formats. Ensuring optimal sound requires understanding and correctly applying dithering.

The Role Of Dithering In Mastering’s Future

Dithering will not fade away in audio mastering’s future. It adapts to new formats and remains important. High-resolution audio keeps growing, making dithering’s role crucial. This process ensures listeners enjoy clean, distortion-free sound regardless of the platform.

Final Tips For Mastering Audio Clarity

  • Choose the right dithering type based on your project.
  • Listen to your master on different systems to ensure consistency.
  • Keep levels in check to prevent digital clipping.
  • Use high-quality converters that complement your dithering technique.

Applying these tips will help maintain the clarity and quality of your audio. Remember that clarity in audio mastering can make or break the listener’s experience.


Frequently Asked Questions On What Is Dithering And How Important Is It When Mastering

What Exactly Is Dithering In Audio Processing?

Dithering in audio refers to adding low-level noise to a digital audio signal. It’s used during the conversion from a higher to a lower bit depth. Its purpose is to mask quantization error, which helps to maintain audio quality, especially in quieter sections.

Why Is Dithering Crucial In Audio Mastering?

Dithering during mastering is crucial as it preserves audio detail when reducing bit depth. Without dithering, you might hear distortion or artifacts, especially at low volumes. It ensures the final master sounds as intended on various playback systems.

How Does Dithering Improve Mastered Tracks?

Dithering improves mastered tracks by reducing quantization distortion. This makes for a smoother sound transition when converting digital files to their final format. It ensures subtle details and dynamics are preserved, enhancing the listening experience.

When Should You Apply Dithering In Mastering?

You should apply dithering only once during mastering, which is right before exporting the final audio file. If done at the correct stage, it prevents the accumulation of unnecessary noise and keeps the audio quality pristine.

Conclusion

To wrap up, mastering with dithering truly polishes audio tracks. It’s a subtle yet pivotal step for pristine sound quality. By reducing distortion and preserving details, dithering ensures listeners enjoy the best experience possible. Don’t overlook this crucial mastering process; it could be the defining factor in your audio production’s clarity.

Categories
Archive

Build A Team For Your Music Career: Unite & Conquer!

To build a team for your music career, start by identifying roles and finding passionate individuals. Focus on skills such as management, marketing, and production talent.


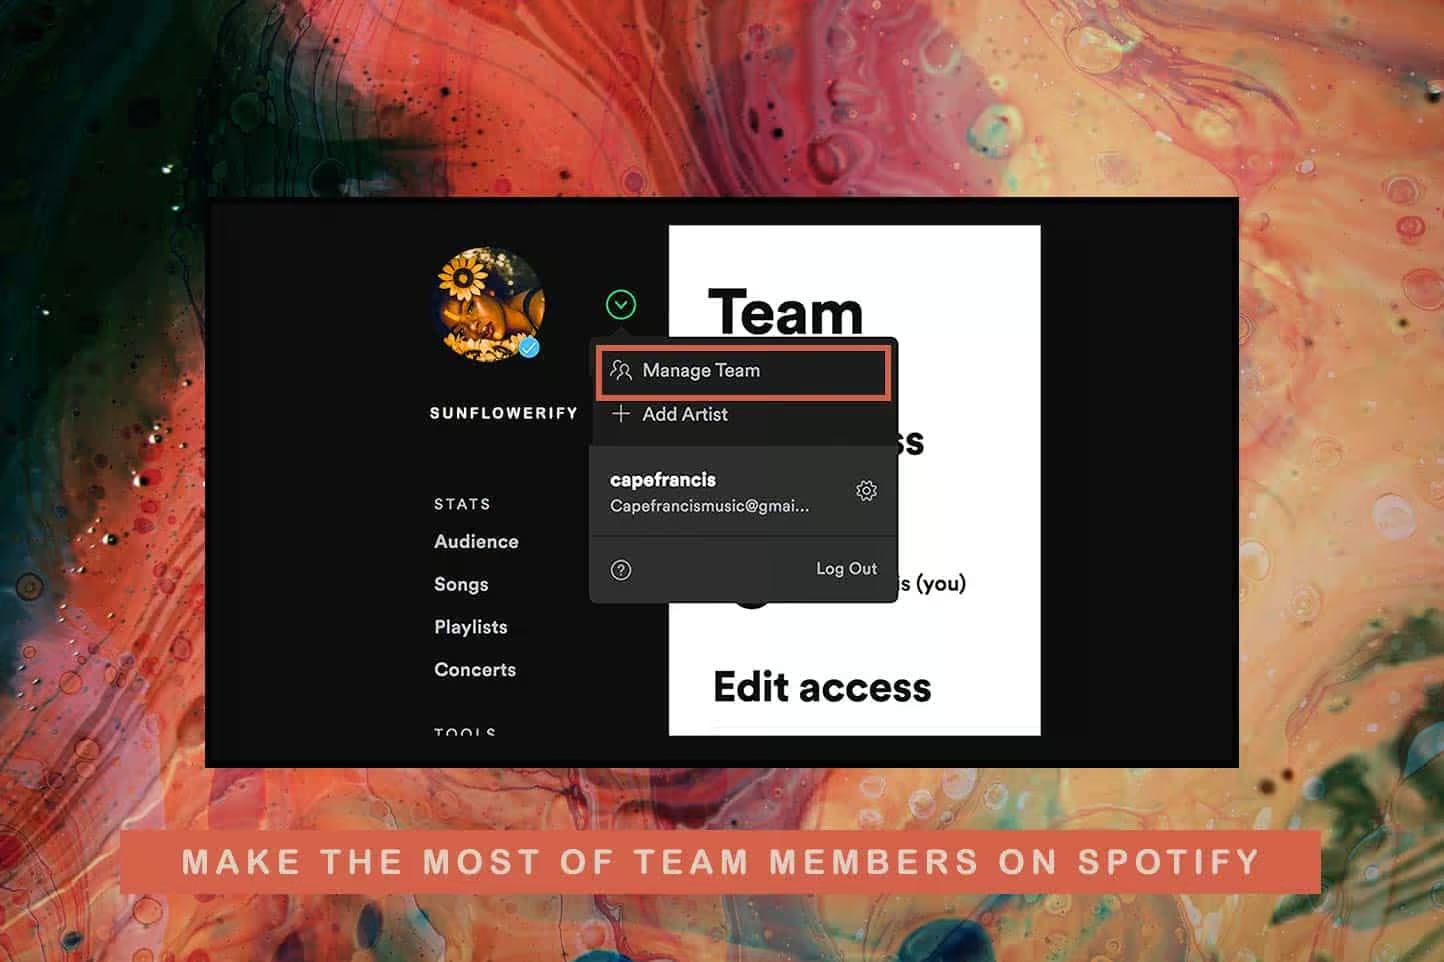
Building a team for your music career is essential as you navigate the complexities of the industry. By gathering a group of dedicated professionals, you can ensure that every aspect of your career gets the attention it deserves. A well-rounded team typically includes a manager to guide your career, a booking agent to secure live performances, a publicist to handle media relations, and a lawyer to manage contracts and legal issues.


Music production also demands skilled producers and sound engineers, while marketing experts can amplify your brand and online presence. Assembling a team that aligns with your artistic vision and professional goals can empower you to focus on your creativity while your team works to elevate and expand your reach in the music world.


Laying The Foundation For Your Music Squad

As you embark on your music career journey, building a solid team remains a cornerstone of success. Laying the foundation for your music squad can shape the trajectory of your endeavors. The right people provide support, insights, and expertise, allowing you to focus on your creativity.

The Importance Of Team Dynamics In Music

Harmony within a team transpires into success in the music industry. Bands like The Beatles and The Rolling Stones proved this. A cohesive unit amplifies creativity and manages the business side efficiently. Diverse talents unite, driving your music career forward, squarely hitting your goals.

Understanding individual strengths and weaknesses allows task allocation based on expertise. Regular meetings ensure everyone stays in sync. Positive team dynamics lead to effective collaboration and a support system through challenges.

Identifying Key Roles In Your Music Career Team

Your music career team is not a random assembly. It consists of key players who handle specific responsibilities:

  • Manager: The strategist who streamlines plans and focuses on growth opportunities.
  • Booking Agent: An expert in securing gigs that match your brand and audience.
  • Publicist: The voice behind your brand, ensuring your music reaches the masses.
  • Music Producer: The architect of your sound, fine-tuning your music for the audience.
  • Social Media Specialist: Connects you with fans and builds your online presence.
  • Merchandiser: Designs and sells your merchandise, adding revenue streams.

Charting a clear role for each team member sets the foundation for a seamless workflow. It reduces overlap and confusion, ensuring everyone knows their part. The structure of your team evolves as your career grows, so regular evaluations are necessary.


The Inner Circle: Starting With Core Members

Every music career has a beginning, and the right team can make all the difference.
Your inner circle should comprise a trio of experts who provide guidance, protection, and financial insight. Let’s meet these core members.

The Role Of A Personal Manager

A personal manager stands as your music career’s steering wheel. Key responsibilities include:

  • Guidance on career moves
  • Negotiation of contracts
  • Building connections

This professional should understand your vision and have the skills to push your career forward. A manager’s experience can open doors that might otherwise remain closed.

Why Every Musician Needs A Reliable Lawyer

Music law is complex. A reliable lawyer safeguards your interests. They handle:

  • Contract reviews to prevent unfair terms
  • Copyright protection for your music
  • Legal disputes resolution

Having a lawyer by your side ensures that your rights are always protected. This peace of mind is invaluable.

Financial Management: The Need For An Accountant

An accountant plays a critical role in your music career. Their expertise keeps finances in check and supports growth. Main tasks:

  1. Managing income and expenses
  2. Organizing tax documents
  3. Advising on financial decisions

An accountant with industry knowledge can help maximize your financial success and stability.

Expanding The Ensemble: Beyond The Basics

Every music career is a puzzle where each piece plays a vital role.

Understanding that each role is crucial, let’s explore how each team member can turn a solo act into a symphony of success.

Agent And Booking Partnerships

An agent is your music career’s compass, steering your ship to the right stages. They ensure your talent gets the attention it deserves.

Booking partnerships open doors to live gigs and shows. These partnerships can sky-rocket your exposure and fan base growth.

The Publicist: Crafting Your Image And Message

A publicist shapes your brand, crafting a public image that resonates. Their words turn your music into a story, enticing fans and media alike.

From interviews to press releases, they make sure the world hears your unique sound and story.

Social Media And Digital Presence Experts

Social media experts catapult your music into the digital realm. They navigate the ever-changing trends, making your tracks viral.

Digital presence is non-negotiable in this streaming age. A skilled team can turn streams into oceans of loyal listeners.

Creative Collaborators: Producers And Songwriters

Building a strong music career is not a solo journey. It involves collaboration with talented individuals who can enhance your musical identity. Two key players in this are producers and songwriters. They can turn raw talent into chart-topping hits. Getting the right mix of creativity and expertise is crucial. Read on to learn how to choose the right producer and how to foster creative synergy within a songwriting team.

Choosing The Right Producer For Your Sound

The producer plays a pivotal role in shaping your music’s sound. A great producer not only understands your vision but also adds their signature touch. Here are essential factors to consider:

  • Genre expertise: Does the producer have a track record in your genre?
  • Past projects: Analyze their previous work for quality and impact.
  • Studio environment: Is their studio equipped to bring your sound to life?
  • Chemistry: Are your personalities and work styles a match?

Always meet producers in person and discuss your vision. Listen to their suggestions and see how they elevate your ideas.

The Songwriting Team: Fostering Creative Synergy

A thriving songwriting team is like a well-oiled machine. Each member brings unique strength to the table. The aim is harmony in creativity. To foster this environment:

  1. Ensure everyone’s contributions are valued.
  2. Keep open communication to share ideas freely.
  3. Battle egos to maintain a balanced team dynamic.
  4. Set clear goals for each session to stay focused.

Successful songwriting comes from mutual respect and a shared vision. Building this synergy takes time, but the musical outcomes are worth it.

Hit The Stage: Working With Live Show And Tour Crew

As you step into the spotlight, your music career leads you to the thrilling world of live performances. The success of a show doesn’t just hinge on your talent; it relies heavily on a skilled live show and tour crew. They turn a performance from good to unforgettable. Let’s uncover the key players backstage who make the magic happen.

Sound Engineers And Roadies: The Unsung Heroes

Sound engineers and roadies work tirelessly behind the scenes. Their skills ensure every beat and note hit the mark. They set up equipment, manage sound checks, and keep the show running smoothly. Their role is critical:

  • Set up and test sound equipment before shows.
  • Monitor sound quality during the performance.
  • Pack up gear swiftly post-concert.

These experts handle unexpected challenges. They fix technical issues fast. They are your show’s backbone. Always thank them!

Harnessing The Power Of Merchandising

Merchandise is more than t-shirts and posters. It’s a connection to your fans. Selling merch can be a game-changer. Here’s how to power up your merch game:

Merch Type Benefits Tip
Apparel Walking billboards for your music. Offer a range of sizes.
Accessories Fans can use them daily. Think practical: keychains, hats.
Exclusive items Creates unique experiences. Sign items for extra value.

Keep your merch theme true to your brand. Engage with fans at your booth. Let them take home a piece of the show. Grow your presence, one sold item at a time.


Finding Talent: Recruitment And Networking

Building a successful music career often hinges on having a strong team. Discovering and persuading talented individuals to collaborate requires strategy. Recruitment and networking are key practices you must master. Let’s explore how to use modern tools and traditional methods to build your dream team.

Using Social Media For Team Building

Platforms like Twitter, Instagram, and LinkedIn can help you find industry professionals. Engage with content they share to get noticed. An impactful social media presence can attract potential team members. Consider these steps:

  • Create professional profiles to share your music journey.
  • Use hashtags relevant to the music industry to increase visibility.
  • Join music groups on Facebook and LinkedIn for direct connections.
  • Host live sessions to showcase your work and interact with viewers.
  • Share success stories and shoutouts to acknowledge existing team efforts.

Networking Events And Music Conferences

Face-to-face meetings can form stronger bonds than online interactions. Attend local gigs, showcases, and industry meetups to meet experts. Music conferences feature panels, workshops, and networking spaces. They help connect artists, producers, and other music professionals. Take these actions:

  1. Prepare business cards and digital portfolio for quick sharing.
  2. Plan meetings with key industry players in advance.
  3. Engage in discussions to demonstrate your knowledge and passion.
  4. Follow up after the event for lasting connections.

Remember, building a team is about quality, not quantity. Focus on cultivating meaningful relationships with talented individuals who share your vision.

Team Harmony: Managing Egos And Expectations

A music career is more than talent and hard work; it’s a collective effort. Harmony within your team can make or break your success. Balancing egos and expectations is vital. It’s like a band playing in sync. Each member’s unique strengths contribute to the rhythm of progress. But when egos clash and expectations misalign, the music turns into noise. Let’s explore ways to maintain balance and foster respect among your team players.

Conflict Resolution Within The Team

Disagreements are natural. The goal is to turn conflict into a positive force. Follow these steps for smooth conflict resolution:

  • Communicate: Encourage open, timely conversations about issues.
  • Understand: Listen to all sides. Try to grasp everyone’s perspective.
  • Compromise: Find common ground. Collaborate to satisfy all involved.
  • Resolve: Create solutions that propel the team forward.

The Balance Of Power And Mutual Respect

Power dynamics can shape your team’s interactions. Strive for a balanced structure where everyone feels valued. Ensure mutual respect is the foundation of your relationships. Here’s how:

Action Impact
Define Roles Clarify each member’s contribution to prevent power struggles.
Set Clear Goals Align the team towards a common vision to minimize conflict.
Give Credit Recognize efforts to boost morale and respect among peers.
Encourage Growth Support personal development to strengthen the team’s foundation.

Maintaining team harmony demands consistent effort. Prioritize transparent communication and respect. Embrace these principles to keep your team in tune and on track for success.

Sustainability And Growth Strategies

Building a team for a music career means planning for now and the future. A great team doesn’t just help an artist shine today. They make sure the artist grows over time. Teams need to think about how to stick around for many years. Let’s look at how they can do that.

Continuous Learning And Adaptation

Music changes fast. Your team must stay in the loop. They should always be learning. This keeps your music fresh and your fans excited.

  • Attend workshops to learn new skills.
  • Study trends to see what’s hot in music.
  • Try new technology to make cool sounds.

Stay open to change. This means trying new things. It’s okay to make mistakes. That’s how we get better.

Long-term Planning For Enduring Success

Big dreams need big plans. Set goals for one, five, even ten years ahead. Break these down into steps.

Time Goals
1 Year Release an album, play 20 shows
5 Years Win an award, tour internationally
10 Years Start a label, mentor new artists

Every step should aim to make your music career stronger. Work with your team to make sure everyone knows the plan. This will help your team stay focused on big goals.


Frequently Asked Questions Of Build A Team For Your Music Career

Who Should Be On Your Music Team?

A well-rounded music team typically includes a manager, booking agent, music producer, publicist, and a lawyer. Each brings a specialized skill set vital for navigating the industry, securing gigs, and protecting your work.

What Does A Music Manager Do?

A music manager guides the artist’s career, secures opportunities, negotiates contracts, and helps with branding and marketing strategies. They act as the liaison between the artist and industry professionals.

How To Find A Good Booking Agent?

Search for an agent with a solid reputation in your genre and a track record of successful shows. Networking, attending industry events, and getting referrals from fellow musicians can be effective strategies.

What Role Does A Publicist Play?

A publicist promotes your music, secures media coverage, and manages your public image. They craft press releases, pitch to media outlets, and help increase your visibility within the music scene.

Conclusion

Crafting a strong team can elevate your music career to new heights. Surround yourself with passion, expertise, and relentless support. As your journey unfolds, these allies will be invaluable. Embrace collaboration, and watch your artistic vision soar. Remember, the right ensemble behind you can turn your musical dreams into reality.

Categories
Archive

How Do I Claim an Artist Page on Spotify: A Step-by-Step Guide

To claim an artist page on Spotify, sign up for Spotify for Artists and follow the verification process. Once verified, you’ll have access to manage your page and music.


Establishing your presence on Spotify begins with claiming your artist page. Musicians can directly engage with their streaming audience through Spotify for Artists, an essential tool for promoting music and analyzing listener data. This portal empowers artists with the ability to control their profile, update bios, share playlists, and showcase their music in the best light possible.


By claiming your page, you’ll be able to make an impression on fans by customizing your image and story. This step is crucial for any artist aiming to maximize their visibility and impact on one of the world’s leading music streaming platforms. The process is straightforward, requiring just a few clicks to unlock the full potential of Spotify’s promotional features.


Introduction To Spotify Artist Pages

Spotify stands as a beacon in the digital music realm. The platform revolutionized how fans connect with music and artists. An important feature is the Spotify Artist Page. This page acts as a digital portfolio for musicians and bands, showcasing albums, singles, and playlists. Claiming your artist page is crucial. It unlocks a suite of tools designed to enhance your presence in the Spotify universe.

Importance Of Claiming Your Artist Page

Why claim your Spotify Artist Page? It’s simple. It’s about ownership, control, and connection. By claiming your page, you verify your identity as the artist. You gain access to personalizing your profile. This establishes a direct link to the millions of Spotify users. Your claimed page opens up metrics about your listeners. It helps you understand your audience.

Benefits For Musicians And Bands

Claiming your page does more than just confirm your identity on Spotify. It empowers you with data and tools. Here are a few perks musicians and bands enjoy:

  • Customize your profile image and bio to reflect your brand
  • Release music directly through Spotify for Artists
  • Access listener data, like demographics and song performance
  • Share playlists you’re featured in and promote tours
  • Use Spotify’s promotional tools to boost your tracks

All these benefits help you make informed decisions. They can skyrocket your music career on one of the world’s largest streaming platforms.

How Do I Claim an Artist Page on Spotify: A Step-by-Step Guide


Credit: songlifty.com

Prerequisites For Claiming Your Page

Before you can shine as an artist on Spotify, certain prerequisites are a must. Understanding and completing these steps are the keys to claiming your artist page. The process isn’t difficult. Start with the basics and move onward!

Requirements To Be Eligible

First things first, to claim your artist page, you must show you’re an artist with music on Spotify. You don’t need a huge following to start. You just need at least one song live on the platform. Once verified, your artist profile becomes your canvas. Personalize it and engage with fans. It’s simple, yet significant, to start your musical journey on Spotify.

Music Distribution Essentials

Your tracks need to be on Spotify for starters. This is where distributors come into play. Choose a reliable distributor to upload your music. They ensure your tunes reach Spotify and other platforms. Here’s a quick list of steps to follow:

  1. Work with a Spotify-approved distributor.
  2. Upload your original music through them.
  3. Confirm your music is live on Spotify.

You are set once your music is streaming. Fans can find you. Listeners can follow you. Your journey on Spotify officially begins.

Navigating Spotify For Artists

Are you an artist eager to take control of your Spotify presence?

Navigating Spotify for Artists is your first step towards that goal. This platform is essential for artists looking to manage their music and interact with their listeners. Let’s break down the process into simple, manageable parts.

Creating Your Account

The journey to claiming your artist page begins by creating a Spotify for Artists account. Follow these easy steps:

  • Visit the Spotify for Artists website.
  • Choose the ‘Sign Up’ option.
  • Log in with your existing Spotify account or create a new one.
  • Provide required information including your artist name.
  • Complete the signup process and await confirmation.

Accessing The Verification Portal

Once your account is set up, it’s time to verify your identity as an artist:

  1. Navigate to the verification section in your Spotify for Artists dashboard.
  2. Fill out the verification form with accurate information about your music and identity.
  3. Upload any necessary documentation to prove your identity and relationship to the music.
  4. Submit the form and patiently await verification.

Verification may take a few days. Spotify will inform you once they activate your verified artist profile.

How Do I Claim an Artist Page on Spotify: A Step-by-Step Guide


Credit: songlifty.com

The Verification Process

Claiming your Artist Page on Spotify is your passport to a global audience. Begin by verifying your identity as an artist. This unlocks tools to manage your presence. Let’s explore the steps involved.

Submitting necessary information

Submitting Necessary Information

Start by gathering essential details. Spotify requires specific information to confirm you’re the real deal. Enter this detail accurately to avoid delays.

  • Profile Details: Your artist name and bio are crucial.
  • Contact Information: Provide an email to stay updated.
  • Proof of Identity: Upload government-issued ID for verification.

Visit the official Spotify for Artists website and fill out their form. Attach your music files or links. Ensure your tracks represent your unique style.

Waiting period and what to expect

Waiting Period And What To Expect

After you submit, a waiting game begins. Spotify reviews applications carefully. Typically, this takes a few days. Patience here is your best friend.

Action What to Expect
Review Period Spotify will confirm authenticity. This step secures your artist brand.
Approval Notification You will receive an email. Watch your inbox for Spotify’s decision.

During this time, explore Spotify for Artists features. Familiarize yourself with analytics and promotional tools. Prepare to engage with listeners worldwide.

Optimizing Your Artist Profile

Once you’ve claimed your artist page on Spotify, it’s vital to make it shine. An optimized profile can attract new listeners and keep fans engaged. Here’s how to polish your Spotify presence to its brightest.

Best Practices For Your Profile Picture And Bio

Your profile picture is your first impression on Spotify. A great picture can grab attention and reflect your artist brand. Follow these guidelines:

  • Use high-resolution images to avoid pixelation.
  • Choose a current photo that reflects your latest look.
  • Make sure your face is visible, connecting you with listeners.
  • Avoid cluttered backgrounds; keep it simple and professional.

When it comes to your bio, storytelling is key.

  • Write a compelling narrative to engage fans.
  • Keep it updated with fresh information and milestones.
  • Include influences, accolades, and unique facts about your music.
  • Use clear, accessible language to connect with a broad audience.

Curating Your Discography

Your discography is a sonic journey through your artistry. Make sure each album and track is listed accurately. Pay attention to these points:

  1. Title your tracks and albums consistently to maintain a cohesive brand.
  2. Arrange songs thoughtfully to guide listeners through your work.
  3. Use high-quality audio files for the best listening experience.
  4. Regularly update your discography with new releases and hidden gems.

Remember, your music’s presentation on digital platforms speaks volumes. Keep it neat and true to your artistic vision.

Engaging With Your Audience

Claiming your Spotify Artist Page opens a new realm of possibilities. It’s a place where fans get to admire their favorite tracks and learn more about you. Engaging with your audience is crucial in growing your fanbase and keeping listeners hooked. Let’s explore how to maximize interaction and understand your listeners’ behavior using Spotify’s tools.

Using Spotify Analytics

Spotify for Artists gives you powerful analytics to understand your audience. This data is key to tailoring your engagement strategy.

  • Track plays over time to see which songs perform the best.
  • Discover listener demographics, including age, gender, and location.
  • Analyze playlists that feature your tracks to grow your network.

These insights help create a personalized experience for your fans, making each interaction count.

Crafting Playlists And Sharing Content

Creating playlists is a fun way to showcase your musical tastes and influence. Share playlists that inspire you, or feature your music alongside tracks from similar artists.

  • Regularly update playlists to keep content fresh.
  • Use descriptive titles and artwork for visibility.
  • Share your playlists across your social media platforms.

This not only engages fans but also encourages them to share your content, potentially increasing your reach.

Promoting Your Music On Spotify

Claiming your artist page on Spotify opens a world of opportunities for promotion. Spotify is a powerful platform for musicians around the globe. It helps you reach millions of listeners. Let’s delve into effective strategies to enhance your music’s presence on Spotify and how to leverage the platform’s own promotional tools.

Strategies For Increasing Streams

Crafting a strong Spotify strategy is key to increasing your music streams. Here are the top tactics:

  • Release music consistently to keep your audience engaged.
  • Design compelling playlist covers and write engaging descriptions.
  • Collaborate with other artists to tap into new fan bases.
  • Utilize Social media to drive traffic to your Spotify tracks.
  • Engage with your listeners by responding to comments and messages.

Leveraging Spotify’s Promotional Tools

Make the most out of Spotify’s built-in promotional tools:

Tool Description Benefits
Spotify for Artists Access analytics and manage your profile Insights into listener behavior
Spotify Ad Studio Create and manage ads on Spotify Target specific audiences
Spotify Codes Shareable codes for your music Easy sharing that drives listens
Spotify Pre-Save Let fans save music before release Builds anticipation & streams

Remember, engaging cover art, smart use of playlists, and an understanding of your analytics can skyrocket your Spotify success.

Solving Common Issues

Encountering snags while trying to claim your artist page on Spotify can be disheartening for both budding and established musicians. But fear not! Let’s troubleshoot common issues and guide you toward getting the support you need from Spotify to ensure your artist persona shines on the platform.

Troubleshooting Verification Hiccups

Verification on Spotify is your golden ticket to managing your artist profile. If this process goes awry, it’s crucial to:

  • Double-check the information you submitted for accuracy. Any mismatches can lead to delays or denials.
  • Ensure your music is already on Spotify. You can’t claim a profile without content.
  • Refresh your requests if you’ve waited over the expected response time.

Keep in mind that verification may take a few days, so patience plays a part in this process.

Getting Support From Spotify

Even with perfect following of processes, sometimes you still hit a wall. Here’s what you should do:

  1. Visit the Spotify for Artists help section. It has answers to many common concerns.
  2. If you’re still stuck, reach out through the ‘Contact Us’ form on their website.
  3. Connect with other artists through Spotify Community forums. They might have solutions too.

Spotify’s support team is responsive, and their community is active. You’re not alone on this journey!

Maintaining Your Artist Page

Once you claim your artist page on Spotify, keeping it updated is vital. A well-maintained artist page can attract more followers and keep fans engaged. Read on for tips on how to keep your Spotify artist page fresh and engaging.

Regular Updates And Profile Maintenance

Making regular updates is crucial for a lively Spotify presence.

  • Update your bio with recent achievements or releases.
  • Refresh profile and cover photos to reflect your current branding.
  • Ensure your discography is complete and up-to-date.
  • Add upcoming show dates to your events section.

Check your page weekly or bi-weekly. This way, fans always find something new. It also helps your page rank better in Spotify’s search results.

Staying Active And Engaging With Fans

Interaction with fans boosts your page’s visibility and creates a loyal fanbase.

  • Respond to comments and messages promptly.
  • Share exclusive content, like backstage photos or snippets of upcoming tracks.
  • Encourage fans to create and share playlists including your songs.
  • Regularly post updates about your music career.

Remember, an active Spotify page can make a huge difference. Keep your content personal and authentic, and always engage with your audience.


Frequently Asked Questions On How Do I Claim An Artist Page On Spotify

Who Can Claim An Artist Page On Spotify?

Anyone who releases music and has content on Spotify is eligible to claim their artist page. Record labels can’t claim pages, only individual artists or their representatives.

What Steps Are Involved In Claiming Your Spotify Artist Page?

To claim your artist page, visit Spotify for Artists website, search for your artist profile, and request access. Verification through the official process is required to manage your page.

How Long Does It Take To Claim Your Spotify Artist Page?

Claiming an artist page can take a few days. Spotify reviews each claim to ensure the person requesting access is the rightful artist or their manager.

Can You Customize Your Spotify Artist Profile After Claiming It?

Once claimed, artists can fully customize their profile. This includes profile images, bios, featured playlists, and promoting specific tracks or albums.

Conclusion

Wrapping up, claiming your artist page on Spotify is essential for managing your music career online. Follow the outlined steps to take control, and amplify your reach. Engage with fans, update your profile, and track progress to navigate the music industry with confidence.


Start your Spotify journey today.

Categories
Archive

How To Promote Your Music On TikTok: Viral Strategies!

Promote your music on TikTok by creating engaging content and leveraging hashtags. Collaborate with influencers and TikTok creators to expand your reach.


Harnessing the power of TikTok for music promotion offers an unparalleled opportunity due to its viral nature and the vibrant community eager for fresh sounds. As emerging artists or established musicians, TikTok provides a dynamic platform where creativity intersects with opportunity, enabling users to showcase their music to a global audience quickly.


Unlike other social media platforms, TikTok’s algorithm can make any video go viral, regardless of the user’s follower count, which means every piece of content has the chance to gain significant exposure. Crafting catchy snippets, aligning with the latest trends, and engaging directly with the community can propel your music to new heights. The key is to consistently deliver compelling, relatable, and visually appealing content that resonates with TikTok users and encourages them to share your sound across their networks.


The Rise Of Tiktok

Imagine a world where music and video collide, creating a symphony of trends and hits. This is the world that TikTok has crafted. Moving from a niche app to a global stage, TikTok is reshaping how music reaches the masses.

From Obscurity To Mainstream

TikTok’s journey begins as a small platform. Creatives and music lovers join, seeking an outlet to share their art. Suddenly, the platform grows. Teens and adults alike are now swiping through videos looped with catchy tunes.

Stars are born overnight. Unsigned musicians see their tracks go viral. TikTok turns obscurity into fame. Artists use creativity, tapping into challenges and trends to boost their music.

Impact On The Music Industry

TikTok has become a music powerhouse. Record labels now scout for talent on the app. Hit songs often start as background tracks for viral videos. Here’s how TikTok changes the game for musicians:

  • Discoverability: Small artists get noticed.
  • Engagement: Fans create videos with their favorite songs, amplifying reach.
  • Marketing: New releases can explode in popularity through creative TikTok campaigns.
  • Viral Hits: Songs often climb charts after trending on TikTok.

Charts now reflect TikTok’s influence. A catchy hook can dominate global playlists. TikTok has shifted power back into the hands of the creators.

Tiktok’s Unique Ecosystem

TikTok shines as the go-to stage for music promotion with its viral trends and global reach. To stand out in TikTok’s unique ecosystem, artists must grasp the platform’s fast-paced environment.

Understanding The Algorithm

TikTok’s algorithm is like a talent scout. It discovers and showcases fresh music to eager audiences around the world. To make the most of it:

  • Post regularly to stay visible.
  • Use trending hashtags and sounds to increase discoverability.
  • Engage with followers to boost interaction.
  • Collaborate with other TikTokers to tap into new audiences.

The Power Of Short-form Content

Short-form content rules TikTok. Its magic lies in its brevity, making every second count. Tips to leverage short-form content:

  • Create snappy, addictive clips that capture attention instantly.
  • Hook viewers in the first few seconds.
  • Use captivating visuals and editing tricks to keep eyes glued.
  • Encourage user-generated content with challenges and hashtags.

Creating Captivating Content

TikTok is a land of opportunity for musicians. Getting noticed, however, demands unique and engaging content. Let’s dive into how you can create content that resonates and captures the TikTok audience’s attention.

Crafting Your Tiktok Persona

Your TikTok success starts with your persona. Think of it as your musical brand. It should reflect who you are as an artist. Keep it consistent across your videos. This helps followers to recognize you instantly. Here are some tips to define your persona:

  • Choose a style: Pick a theme that suits your music genre.
  • Show personality: Let your unique traits shine through.
  • Be relatable: Connect with viewers by being yourself.

Quality Over Quantity

It’s tempting to post as often as possible on TikTok. Yet, quality can’t take a back seat. Focus on creating high-quality videos that leave a lasting impression. Here’s what to keep in mind:

  • Invest in good equipment: Use a good camera and clear audio.
  • Plan your content: Take time to brainstorm creative ideas.
  • Edit for impact: Trim and polish your videos for maximum effect.

Great videos stand out. They can turn viewers into fans and fans into ambassadors for your music. Keep it high-quality, and you’ll see greater engagement and growth.

How To Promote Your Music On TikTok: Viral Strategies!


Credit: bandzoogle.com


Music Promotion Basics

In the world of social media, TikTok stands out as a vibrant platform. Artists can showcase their music creatively. TikTok’s algorithm favors engaging, original content. Mastering the basics of music promotion on TikTok can make a difference. Discover how to elevate your music and connect with millions of users. Use smart strategies to boost your presence.

Leverage Hashtags Wisely

Hashtags are TikTok’s road signs, guiding users to your music. Select the right hashtags for better visibility. Blend popular and niche hashtags for a wider reach. Focus on three types of hashtags:

  • General Tags: Broad and trending, for large audiences.
  • Niche Tags: Specific to your music genre or theme.
  • Branded Tags: Personalized for your brand or release.

Monitor hashtag performance. Adjust your strategy for the best results.

Engage With Your Audience

Building a relationship with your followers is key. Interact with fans to instill loyalty. Respond promptly to comments and messages. Create content that sparks conversation. Use features like duets and stitches to collaborate with users.

Consider these tips for engagement:

  1. Host Q&A sessions to answer fan questions.
  2. Post behind-the-scenes content to share your process.
  3. Launch a challenge or contest with your music.

Recognize and appreciate your supporters. This fosters a loyal community around your music.

Collaboration Is Key

When diving into the vibrant world of TikTok, remember that Collaboration is Key. No musician is an island, and this platform thrives on shared creativity. Leveraging connections can turn your tune into a viral sensation.

Networking With Influencers

Building relationships with TikTok influencers can magnify your reach. Influencers have large followings, and they can introduce your music to a broader audience. Start by engaging with their content. Then, reach out for potential collaborations. Here’s how:

  • Comment regularly on their videos to get noticed.
  • Send a direct message with a personalized pitch.
  • Offer exclusive snippets of your music.

Duet And Stitch Features

TikTok’s Duet and Stitch features let you interact with content in creative ways. They can showcase your music alongside other creators’. This is perfect for reaching new ears.

Feature How It Helps Tips
Duet Song reactions, collaborations, or split-screen performances Use trending songs for greater exposure. Engage with fans and fellow musicians.
Stitch Clip and integrate scenes from other videos with your track Create a story or challenge involving your music. Invite participation.

Remember, staying active with these features keeps you visible and enhances engagement.

Hacking The Trends

Welcome to the electrifying world of TikTok promotion, where the key to viral success lies in mastering the ebb and flow of trends. Artists can hack TikTok’s trend-driven algorithm to rocket their music to stardom. Let’s break down strategies in ‘Hacking the Trends’ for musicians looking to amp up their TikTok game.

Jumping On The Bandwagon

Spotting a trend early can propel your music to TikTok fame. Use these tips:

  • Watch trending pages daily.
  • Listen to trending sounds cycling through the platform.
  • Analyze patterns in viral content.
  • Sync your track with a trend fast.

Remember, your track should meld seamlessly with the trend. A mismatch may hinder your reach.

Creating Original Challenge

Originality nets attention. Inspire TikTokers with your unique challenge:

  1. Combine catchy music with a simple dance or task.
  2. Name your challenge for easy sharing.
  3. Tag top creators to join in.
  4. Use hashtags to boost visibility.

Craft your challenge to be fun, shareable, and brand-aligned for the best results.

The Role Of Consistency

The Role of Consistency in promoting music on TikTok cannot be overstated. Like waves that continually shape the shoreline, consistent engagement with your audience can help carve out a significant presence on the platform. Musicians who succeed on TikTok don’t just appear overnight; they grow their fan base by regularly sharing their art. If you’re ready to take your music to new heights on TikTok, understanding the nuance of consistency is your starting block.

Maintaining A Posting Schedule

Setting up a regular posting schedule is a cornerstone of TikTok success. Think of your music as a series on television. Fans should know when to tune in. Here’s how to maintain a solid schedule:

  • Plan your content in advance.
  • Use TikTok’s scheduling feature to automate posts.
  • Track peak user times and align your posts accordingly.
  • Stay consistent but don’t sacrifice quality for quantity.

Consistency breeds familiarity, and familiarity breeds trust. Trust leads to a loyal following for your music on TikTok.

Staying True To Your Brand

Consistency isn’t just about frequency; it’s also about brand coherence. Your audience should recognize your unique style instantly. Here’s what to keep in mind:

  1. Define your musical and visual aesthetic.
  2. Ensure all content aligns with this aesthetic.
  3. Connect with your audience through storytelling.
  4. Be authentic; your fans can spot a fake.

Sticking to your brand builds an identity. An identity cultivates a community. A community catapults your music into the TikTok limelight.


Credit: blog.groover.co


From Tiktok To Other Platforms

Mastering TikTok is just the start. A smart move can take your music from TikTok fame to multi-platform success. Let’s explore powerful tactics that get your tunes buzzing everywhere!

Cross-promotion Strategies

Spread your TikTok magic across all social media. Snippets of your viral TikTok content can tease followers on Instagram, Twitter, or Facebook. Use these steps:

  • Share TikTok links on your social bios.
  • Post previews on Instagram Stories with a ‘Swipe Up’ to the full TikTok video.
  • Create Twitter threads that invite fans to discuss your TikTok content.

Always adapt your content for each platform’s unique style and audience. A great TikTok video could become a cool tweet or a catchy Instagram post.

Utilizing Analytics For Growth

Understand your audience with TikTok’s analytics. Here’s how to grow your fanbase:

  1. Check your TikTok analytics regularly.
  2. Identify which songs and videos gain the most traction.
  3. Analyze the demographics of your top viewers.

Then, use this data to shape campaigns on other platforms. If a dance challenge works on TikTok, a YouTube tutorial could catapult its popularity.

Platform Action Goal
Instagram Repurpose TikTok content for Reels Engage a broader audience
YouTube Create extended versions of TikTok videos Provide in-depth content
Twitter Tweet your TikTok video highlights Spark conversations


Dealing With Virality

TikTok has taken the world by storm, and musicians are getting viral overnight. One moment you’re making music in your bedroom, and the next, you’re a TikTok sensation. Dealing with virality can be thrilling yet overwhelming. Let’s discuss strategies for managing sudden fame and building a sustainable career keeping TikTok in the mix.

Managing Sudden Fame

Overnight fame on TikTok feels like a dream. You must stay grounded. Here’s how:

  • Engage with your audience: Always respond to comments and messages. It makes fans feel valued.
  • Consistency is key: Keep uploading content regularly to maintain interest.
  • Stay true to yourself: Don’t lose your originality in the chase for views.
  • Collaborate with other artists: It increases visibility and shows versatility.
  • Maintain quality: Your content represents you. Never compromise on it.

Building A Sustainable Career

To make a long-term career, plan beyond virality.

Strategy Benefits
Branch out to other platforms This diversifies your audience.
Create merchandise It’s an additional revenue stream.
Release on multiple music stores It improves accessibility to your music.
Play live shows This enhances fan experience.
Collaborate with brands It offers financial support and reaches new audiences.

Remember, success on TikTok is only the start. Build strong foundations with these strategies. Your music career will thank you for it.

Success Stories

TikTok has become a launchpad for many musicians around the world. It’s a place where a catchy tune paired with creative visuals can explode in popularity overnight. In the ‘Success Stories’ section, we share inspirational journeys of artists who found fame through TikTok. This glimpse into their soaring careers can teach hopeful musicians how to harness the platform’s power for their own success.

Artists Who Made It Big

  • Lil Nas X: His hit ‘Old Town Road’ went viral, breaking music records.
  • Doja Cat: TikTok users loved her song ‘Say So,’ leading to chart-topping fame.
  • Olivia Rodrigo: ‘drivers license’ became an instant success story on the app.

Learning From Their Strategies

What can aspiring artists learn from these TikTok success stories? Here are key strategies:

  1. Be Authentic: Show your true self to connect with your audience.
  2. Engage with Fans: Respond to comments and duet with followers.
  3. Create Challenges: Encourage users to create content with your music.

Troubleshooting Common Challenges

Are you facing roadblocks while promoting your music on TikTok? You’re not alone. Many artists encounter snags, but don’t worry. This guide is here to help you tackle common challenges and keep your music journey on track!

Overcoming Algorithmic Hurdles

Navigating TikTok’s algorithm can seem daunting. The platform’s algorithm favors content with high engagement. Here’s what you can do to boost your chances:

  • Post regularly to keep your audience engaged.
  • Use trending hashtags to increase visibility.
  • Collaborate with other users to reach a wider audience.
  • Engage with your followers by replying to comments.
  • Optimize the timing of your posts by analyzing peak hours.

Experiment with these strategies to discover what resonates with your audience and the TikTok algorithm.

Navigating Copyright Issues

TikTok has strict copyright rules. Protect your music while respecting others’ work with these tips:

  1. Verify you own the rights to the music you post.
  2. Use original sounds or obtain permission for covers.
  3. Report unauthorized use of your music immediately.
  4. Understand TikTok’s policies on fair use and copyright.
  5. Consider working with a music lawyer for complex issues.

Remember, prevention is better than cure. Secure your music’s rights to avoid setbacks.


Looking Ahead: The Future Of Music On Tiktok

As TikTok maintains its reign as a music powerhouse, understanding the platform’s trajectory can give artists the edge they need. The app’s evolving algorithms and user behaviors suggest a dynamic landscape for creators. Artists should keep a keen eye on TikTok’s future to harness its full potential for music promotion.

Emerging Trends

The music industry is witnessing a shift with TikTok at the fore. Here are key trends:

  • Micro-trends rise and fall quickly, demanding prompt utilization.
  • User engagement metrics influence the virality of songs.
  • Algorithms prioritize content with high interaction rates.
  • Collaborations with influencers can amplify reach.
  • Niche hashtags connect tracks to target audiences.
  • Artists create visual identifiers to make sounds memorable.

Preparing For The Next Big Thing

For musicians, staying ahead on TikTok involves strategic steps:

  1. Monitor TikTok analytics to understand audience preferences.
  2. Engage with fans to build a loyal community.
  3. Experiment with content to find the right formula for virality.
  4. Collaborate with other creators to expand reach.
  5. Train in TikTok’s tools, making the most of each feature.
  6. Watch for new features TikTok may roll out and adapt quickly.

Successful artists will blend trend-spotting with creativity. This forward-looking approach ensures music finds its listeners, establishing a presence that persists beyond fleeting trends.

Frequently Asked Questions Of How To Promote Your Music On Tiktok


What Is Tiktok’s Role In Music Promotion?


TikTok is a powerful platform for music promotion, capable of rapidly increasing a song’s visibility. Its algorithm favors engaging content, potentially giving any song a vast audience if it becomes tied to a popular video or challenge.


How Do Artists Go Viral On Tiktok?


Artists can go viral on TikTok by creating catchy, shareable content that encourages user interaction, like dances or challenges. Collaboration with popular TikTok creators and timely use of trending hashtags also boost virality chances.


Can Tiktok Influence Music Industry Success?


Absolutely, TikTok can drive songs to top charts and streaming platforms due to its massive reach and youth-oriented user base. Music that resonates with TikTokers often experiences increased downloads, streams, and mainstream media attention.


What Are Tiktok Music Promotion Best Practices?


Best practices include frequently posting original content, engaging with followers, leveraging trending sounds, and being authentic. Utilizing TikTok’s duet and stitch features can also facilitate collaboration and amplify reach.


Conclusion


Embracing the power of TikTok can catapult your music into the viral realm. Start by crafting engaging, authentic content and harness hashtags to broaden your reach. Network with influencers and stay consistent with your posts. Remember, each video could be your breakout moment, so keep creating and sharing your passion on TikTok.


Let the world hear your rhythm!

Categories
Archive

How Does Spotify Pay Artists: Unveiling the Secrets

Spotify pays artists and rights holders based on their share of total streams. Payments vary, influenced by factors like user subscriptions and ad revenues.


Understanding Spotify’s payment structure is key for artists looking to monetize their music on the platform. The streaming giant uses a royalty system, which allocates payments not at a fixed rate per stream, but as a proportion of the total revenue generated by subscriptions and advertising.


This model ensures that as the Spotify user base grows and more revenue comes in, the pool of money available for distribution to artists also increases. As creators compete for listeners’ attention, those who manage to secure more streams increase their potential earnings. Artists need to know how this system operates to maximize their profits and develop effective strategies to boost their presence on the service.


Spotify’s Business Model

Understanding how Spotify earns money is like uncovering the rhythms that keep the music streaming world in tune. With a melody composed of varied revenue sources and a chorus of different subscription plans, Spotify’s business model plays well in the fast-paced symphony of digital entertainment. Let’s turn up the volume and explore the financial tracks that make Spotify a hit.

Revenue Streams

Spotify’s revenue flows from multiple streams, harmonizing into a solid income. Primarily, there are two large streams. One comes from the premium subscribers who pay for ad-free listening. Another flows from ad-supported listening, where non-paying users hear advertisements between songs.

Companies pay Spotify to feature their ads. Such ads reach millions of ears weekly. These fees switch into a significant part of Spotify’s wallet. Here’s a quick look at how Spotify balances these streams:

  • Premium subscriptions infuse the bulk of Spotify’s income.
  • Ad-supported free tier contributes a smaller, yet impactful share.
  • Exclusive deals and partnerships add a melody to the mix.

Subscription Tiers And Advertisements

Spotify’s subscription model offers listeners choice. Each tier sings to a different audience. Below, the subscription tiers break down:

Tier Description Price
Free Limited skipping, ads play $0
Premium Individual No ads, unlimited skips Variable
Premium Family Multiple accounts, no ads Higher than Individual
Premium Student Discounted rate, no ads Less than Individual

Advertisements serve as the stage for the free tier. Companies keen to reach Spotify’s audience place ads. Each ad played sends a small payment to Spotify. Over millions of plays, this amasses to hefty earnings. Spotify smartly integrates ads, ensuring a smooth user experience while securing a steady flow of revenue.

Premium subscribers enjoy uninterrupted music for a monthly fee. User convenience supports this model while the income from it sustains Spotify’s extensive music library. It’s a simple yet effective tune. Spotify weaves together a melody of earnings, which funds its vast music collection and technological innovation.

Paying no mind to silence, Spotify creates a symphony of earnings through its cleverly constructed business model, which promises to keep the streaming giant humming along to the beat of a profitable drum.

Royalty Calculation

Understanding how Spotify calculates royalties is crucial for artists and enthusiasts alike. The system seems complex, but it breaks down into clear components. Each play of a song generates revenue, which then enters a collective pot. Spotify distributes this money based on specific models. This process ensures artists receive payment for their creative work. Let’s examine the components that affect this calculation.

Royalty Pool

The Royalty Pool represents the total sum available for payout. All subscription fees and ad revenues contribute to this pool. Every month, Spotify collects these earnings to share among rights holders. Geographic region, user subscriptions, and advertising rates influence this pool’s size. Here is a simple breakdown:

  • Subscription Revenue: Fees from Premium users.
  • Ad Revenue: Money from ad-supported tier.
  • Geographic Adjustments: Rates based on country economics.

Stream Share Model

The Stream Share Model dictates an artist’s slice of the Royalty Pool. Spotify calculates this by dividing an artist’s total streams by the global streams. This percentage determines their royalty share. More streams mean a larger slice. Here is a quick look at the factors:

Total Artist Streams Total Global Streams Artist’s Share (%)
Artist’s monthly streams Monthly global streams on Spotify Calculated percentage

Artist Payouts Breakdown

Spotify’s Artist Payouts Breakdown extends beyond just the artist. It includes labels, producers, and songwriters. An artist’s take-home pay is the final step in the royalty path. It involves contracts, rights ownership, and negotiations. Here’s a simplified payout process:

  1. Identify total royalty share from Stream Share Model.
  2. Divide royalty share among all rights holders.
  3. Deduct agreed contractual percentages.
  4. Artists receive their net payout.

Factors Influencing Payouts

Understanding Spotify’s payment structure is key for artists and labels. Multiple factors determine how much money flows from Spotify to those who own the music. Spotting what affects payouts leads to better insights into streaming earnings. Let’s explore these factors in detail.

Payouts from Spotify hinge on various elements. These factors shape the earnings from each stream. It’s not just about the number of plays. It’s about who listens, where they’re from, and their Spotify plan.

User’s Country And Subscription Plan

The location of listeners affects payouts. Every country has different streaming rates due to its economy. Countries with higher subscription fees typically yield higher payouts per stream. Moreover, the type of subscription plan impacts earnings. Premium subscribers generate more revenue than those on free plans due to ad support.

  • Location matters: Higher payouts often come from wealthier countries.
  • Plan type: Premium plans contribute more to artist earnings.

Number Of Streams

More streams usually mean more money. But it’s not as simple as a fixed rate per play. Spotify uses a pro-rata system where total payout pools are divided by the total number of streams. Your share depends on your stream count compared to others.

Streams Artist Share
Higher streams Greater share of payout pool
Lower streams Smaller share of payout pool

Rights Holders

Payouts also depend on agreements between Spotify and rights holders. Artists, songwriters, and labels all have a stake. They agree on payment terms with Spotify. These deals vary, influencing how much goes to each party.

  • Artists: Individual contracts with Spotify or labels determine their cut.
  • Songwriters: Royalties come from separate arrangements for compositions.
  • Labels: A label’s deal with Spotify can affect the artist’s payment.


The Role Of Record Labels

Record labels play a critical role in the music industry, especially when it comes to how artists earn money on platforms like Spotify. These labels are not just talent scouts and marketers; they are crucial in the business end of music, navigating the complex world of streaming revenues and ensuring that artists get paid. Let’s dive into how labels interact with Spotify and their artists.

Label Contracts

When an artist signs with a label, they enter into a contract that often defines royalties. It’s the label’s job to negotiate terms that benefit the artist while maintaining their own profit margins. These contracts can vary widely but typically include:

  • Advances
  • Recording costs
  • Marketing and promotion
  • Royalty percentages

Distribution Of Earnings

Spotify pays royalties based on streaming share. This means the total pool of money made from subscriptions and ads gets divided by total streams. Music labels collect these earnings and distribute them to artists, according to their contracts. Let’s break down how a dollar earned on Spotify might be split:

Party Percentage
Spotify 30%-50%
Record Label 50%-70%
Artist 10%-30%

The actual payment to artists can be complex, involving recoupment of advances, production costs, and more. Record labels use their experience to manage these finances, allowing artists to focus on creating great music.

Independent Vs. Signed Artists

Music streams like a river in the digital age, reaching every shore from the independent artist to the signed megastar. The way Spotify pays these creators can differ, much like the paths they carve in the industry. Let’s dive into the world of independent versus signed artists and uncover the intricacies behind their earnings on Spotify.

Differences In Payments

Independent and signed artists see different figures in their Spotify paychecks. Signed artists work with record labels, which take a portion of their earnings. Independents, or “indie” artists, often use aggregators to get their music on Spotify, which also requires a cut. However, the amount taken by aggregators is typically less than a record label’s share.

Artist Type Payment Recipient Revenue Share
Signed Artists Record Label Higher percentage
Independent Artists Aggregators Lower percentage

Advantages Of Independence

  • Creative Control: Independent artists maintain full creative direction over their music.
  • Ownership Rights: Indies keep the rights to their music, a significant long-term benefit.
  • Flexible Deals: Indie artists can choose from various distribution deals that suit their needs.

Independence breeds opportunity. Fans directly support their favorite indie artists, often leading to a more intimate fan-artist relationship.

While signed artists’ payouts may be subject to industry standards and contractual agreements, indie artists can often negotiate their own rates and keep a closer eye on their financial success. The right strategies and digital tools level the playing field, allowing indie musicians to thrive on platforms like Spotify.

Challenges Artists Face

For many artists, Spotify stands as a beacon of opportunity. Yet beneath the surface, challenges await. Discover the complexities artists must navigate to reap rewards from the streaming giant.

Payment Transparency

Understanding spills into complexity as artists attempt to dissect Spotify’s payment system. Notoriously intricate, it hides a maze of factors that determine payouts. Here’s a snapshot:

  • Total streams: A piece in the payout puzzle.
  • Subscriber revenue: Plays a part in the split.
  • Artist’s contract: Variances affect the final cut.

Artists are often in the dark about the per-stream rate they earn. This cloak of uncertainty breeds frustration. Moreover, changes in Spotify’s algorithms or policies can shift the ground without warning.

Streaming Fraud

Fraud in streaming is an escalating concern. Fake streams manipulate counts, muddling the pool of royalty distribution. Artists face a battle:

  1. Protecting their work from exploitation.
  2. Ensuring they’re paid for authentic streams.

Unscrupulous actors inflate numbers to siphon off money rightfully owed to genuine creators. Spotify fights such fraud, yet its prevalence remains a thorn for artists.

Evolution Of Streaming Payments

The way we experience music has changed drastically over the years, and nowhere is this more evident than in the evolution of streaming payments. Once, buying albums or singles was the norm, but today streaming services like Spotify have transformed not only how we listen to music but also how artists earn revenue. Below, we delve into the historical trends that shaped the current streaming payment models and ponder what the future might hold.

Historical Trends

Streaming services began altering the music industry’s financial landscape in the early 2000s. As these platforms flourished, a new revenue system emerged, forming the foundation for contemporary streaming payments.

Historical payment trends can be outlined as follows:

  • Per-Stream Model: Initially, artists were paid per stream, a fixed amount every time someone played their song.
  • Subscription Revenue: Over time, platforms shifted towards a subscription-based model where monthly fees fuel the revenue pot divided among artists.
  • User Centric Payment System: Debated but not widely implemented, this model proposes that payments should directly reflect the listening habits of paying subscribers.

These methods, while not exhaustive, highlight the primary mechanisms through which the streaming industry has operated.

Future Projections

With technology and user habits constantly evolving, so too will the methods through which streaming platforms compensate artists. The trajectory indicates a move towards more personalized and fair approaches.

Key projections for the future include:

  1. Blockchain Technology: Utilizing blockchain may lead to transparent, immediate royalty payments.
  2. Dynamic Pricing: Pay rates could become flexible based on factors like geographic location, artist popularity, or exclusive content deals.
  3. Direct User Payments: Concept of “tipping” or direct payments to artists by listeners could become more prevalent, providing additional revenue streams.

These potential advancements reveal an intriguing and promising future for artists and consumers in the music streaming economy.


Improving Artist Revenues

Artists always seek new ways to increase their earnings from music platforms. With digital streaming becoming the norm, it’s crucial to understand how platforms like Spotify contribute to improving artist revenues. Let’s delve into innovative strategies and technological advancements that can boost financial returns for musical talents around the world.

Alternative Revenue Sources

In today’s digital age, relying solely on streaming revenue is not enough. Artists must tap into various income streams to sustain their careers. Below are some effective strategies to enhance artists’ earning potential:

  • Merchandising: Selling branded items can significantly increase income.
  • Live Performances: Gigs and tours offer substantial revenue opportunities.
  • Fan Subscriptions: Exclusive content can encourage fans to pay a premium.
  • Licensing Deals: Use of music in ads or movies can be lucrative.

Tech Innovations In Royalty Distribution

Technology drives the future of royalty payments. As the digital landscape evolves, so do the methods of tracking and disbursing royalties to artists. Explore how tech innovations revolutionize payout systems:

  • Streamlined Payment Systems: Faster and more accurate royalty processing.
  • Blockchain Technology: Ensures transparency and fair distribution of revenue.
  • Data Analytics: Helps artists understand the performance and optimize earnings.
  • User-Centric Payment Models: More revenue for artists based on user listening habits.

Adopting these technological advancements will not only benefit artists but also empower the entire music ecosystem.


How Does Spotify Pay Artists: Unveiling the Secrets


Credit: www.analyticsvidhya.com


Frequently Asked Questions On How Does Spotify Pay


How Much Does Spotify Pay Per Stream?


Spotify generally pays between $0. 003 and $0. 005 per stream. This amount can vary based on factors such as the listener’s country and the artist’s royalty agreements. It’s important to note the pay-per-stream rate is subject to change.


What Factors Influence Spotify’s Payout Rates?


Spotify’s payout rates are influenced by the user’s subscription plan, the artist’s music streaming agreements, geographical location of streams, and the total number of streams. Ad-supported listens typically earn less than premium subscription listens.


Does Spotify Have A Uniform Payment System For Artists?


No, Spotify’s payment system for artists is not uniform. It operates on a streamshare model where payouts are based on the artist’s share of total streams. This can result in variations in payments to different artists.


Can Artists Negotiate Their Spotify Streaming Rates?


Artists, especially those signed with labels, may have some leverage to negotiate better rates. However, independent artists receive the standard payout. Negotiations are typically handled by record labels or distribution companies rather than the artists directly.


Conclusion


Understanding Spotify’s payment system enlightens artists and listeners alike. This platform compensates through a blend of streams and subscriber models. As we unravel the intricacies of Spotify royalties, it’s crucial for musicians to engage fans and maximize their streaming potential.


Knowledge empowers artists to thrive in the digital music landscape.

Categories
Archive

Can You Change Your Spotify Artist Name on DistroKid? Unveiling Secrets

You cannot change your Spotify artist name directly through DistroKid. To alter it, you must contact Spotify via their Spotify for Artists platform.


Navigating the music industry’s digital distribution can often feel complex and uncharted, especially when it comes down to managing your artist profile across different streaming platforms. One of the most frequent issues that artists encounter is the desire to change their artist name on Spotify.


While DistroKid streamlines the distribution of your music to platforms such as Spotify, it does not provide the functionality to update your artist name directly. This is because your artist name is a crucial part of your identity on streaming services, tied to many other factors such as your followers, play counts, and playlist placements. Changing your name can disrupt this data, which is why Spotify handles such requests with care to ensure a smooth transition for both artists and listeners.


Spotify Artist Name Significance

Your Spotify artist name is more than just a label. It’s a crucial aspect of how fans discover and identify your music. On platforms such as Spotify, your artist name stands as the defining beacon amongst the sea of musical talents. Working with services like DistroKid ensures your music is accessible, but the name you choose influences your entire music journey.

Impact On Branding And Recognition

The right Spotify artist name creates a lasting impression. It is the cornerstone of your brand identity in the music industry. A unique and memorable artist name can captivate potential listeners, prompting them to explore your music further. It’s the tag that will appear on every album, promotional material, and social media post. It is how fans recommend you to friends.

  • It defines how you are perceived.
  • It aids in marketing and promotions.
  • It propels your music’s shareability.

Consistency Across Music Platforms

A consistent name across all platforms, including Spotify, enhances your credibility and streamlines the search process for your audience. When your Spotify artist name aligns with those on Apple Music, YouTube, and other sites, you create a cohesive presence. This not only fosters brand loyalty but also eases your management tasks, letting you focus on creating amazing music.

  1. Fans can easily find you on any platform.
  2. It reduces confusion if there are similar names.
  3. It simplifies your digital presence management.

Remember, choosing a great name on Spotify can be game-changing. Through distributors like DistroKid, every artist should deliberate carefully when selecting that name that will be seen and heard across the globe.

Distrokid’s Role In Music Distribution

As a digital music service, DistroKid functions as a bridge between musicians and the world. This platform allows artists to upload their music easily, swiftly, and at an affordable rate. By doing so, DistroKid has revolutionized how music reaches fans globally.

How Distrokid Facilitates Artists

DistroKid streamlines the process of getting music into online stores and streaming platforms. They offer a single stop for distribution, making it simpler for artists to manage their tracks. Benefits include:

  • Unlimited uploads to major platforms
  • One-time fees for annual access to services
  • Simplified royalty collection and earnings tracking
  • Instant verification on streaming services like Spotify
  • Capability to change artist names directly via DistroKid’s dashboard

Distrokid And Streaming Services

DistroKid has partnerships with leading streaming services like Spotify. This allows for fast and reliable integration of new music. Artists can:

  1. Update their artist profile
  2. Customize the appearance of their catalog
  3. Change their artist name, subject to platform policies

Updating an artist name on Spotify through DistroKid involves a simple process. However, artist name changes are not instant and may need approval from Spotify.

To ensure brand consistency, artists should consider the impact of a name change. Aligning the artist name across all platforms is key to maintain a solid presence and fanbase connection.

Common Reasons For Name Changes

Artists often find themselves at a crossroads where changing their Spotify artist name on DistroKid becomes a strategic move. Let’s explore some of the key motivations behind such changes.

Rebranding And Artistic Evolution

Embarking on a new musical direction or refreshing one’s image can be crucial for continued success. The desire for a fresh start motivates many artists to rebrand. Artists evolve, and so too must their names. Consider the transformation of musical icons who shifted genres or matured stylistically.

  • New genre exploration
  • Artist growth
  • Reflecting a new artistic phase

Careful consideration is necessary to ensure that a new name truly reflects this evolution and appeals to both existing and potential fans.

Legal Issues And Trademarks

Legal complications often necessitate a name change. Artists must steer clear of names that are already trademarked to avoid infringement issues.

Legal Concern Action Required
Trademark conflicts Select a unique name
Disputes with former band members Choose a new moniker

Registering the new name as a trademark is a crucial step to secure an artist’s brand identity and avoid future legal issues.

The Process Of Changing Your Artist Name

Deciding to rebrand and change your artist name on Spotify can be a pivotal moment in your music career. Whether you are opting for a fresh start or correcting a creative direction, it is crucial to know how the process works, especially when using a distribution platform like DistroKid. Let’s dive into the steps involved and key considerations.

Before taking action, it’s vital to consider several points. Your artist name is your identity and changing it involves more than just updating a profile. Spotify links your name to your music, playlists, and monthly listeners. It affects your branded materials and marketing efforts. Think about these impacts. Weigh the pros and cons carefully.

  • Brand Consistency: Ensure your new name matches all your artistic material.
  • Market Research: Confirm the new name does not infringe on existing trademarks.
  • Fan Communication: Plan how to inform your following of the change to avoid confusion.

Ready to rebrand? Follow these simple steps to modify your artist name on DistroKid.

  1. Log into DistroKid: Access your account where your music is managed.
  2. Review Your Music: Identify all songs and albums associated with your old name.
  3. Contact Support: DistroKid requires you to reach out through their contact form.
  4. Specify Changes: Provide clear details on the current and new artist name.
  5. Wait for Confirmation: DistroKid will process your request and update Spotify.

It’s important to note that updates can take time to reflect on streaming platforms. Additionally, ensure you update all other social profiles and marketing materials to maintain brand uniformity. This process secures your new identity across all platforms and keeps your image consistent for fans and new listeners alike.

Challenges In Changing Your Spotify Name

Artists often ponder about altering their Spotify name. DistroKid facilitates this change. Yet, challenges may arise.

Potential Risks And Confusions

Changing a Spotify Artist name through DistroKid isn’t straightforward. A new moniker could lead to several risks:

  • Searchability Issues: Fans might struggle to find the artist’s music.
  • Algorithmic Setbacks: Spotify’s algorithm might not easily connect the new name with past data.
  • Branding Inconsistencies: Other platforms must sync with the new Spotify name to maintain brand coherence.
  • Verification Loss: Artists might have to re-apply for verification badges.
  • Playlist Drops: Curated playlists featuring the old name might not update automatically.

Impact On Existing Fans And Catalogue

A name switch impacts current followers and the music collection. Artists must consider:

  • Fan Confusion: Listeners could get confused, affecting loyalty and streams.
  • Marketing Materials: Promotional assets require updates to reflect the new name effectively.
  • Historical Data: Previous data associated with the old name may become harder to track.
  • Strategy Overhaul: A major rebranding campaign is essential for a smooth transition.

Distrokid’s Policies On Name Changes

As an artist, you’ve chosen a name that resonates with your brand and music. But, what if you decide it’s time for a change? If you’re using DistroKid for distributing your tracks, you’ll need to understand the nuances of their name change policies. This part of the blog post will guide you through everything you need to know about tweaking your artist name on DistroKid.

Understanding Terms And Conditions

Before you decide to alter your artist name, it’s critical to read DistroKid’s terms and conditions. These rules set the stage for what’s possible and what’s not. For instance, DistroKid restricts frequent changes to artist names to avoid confusion and misuse.

  • Name changes may affect your existing music catalogue.
  • Your music might be removed from playlists if you change your name.
  • Profile verification can be lost after a name update.

How To Navigate Policy Restrictions

To navigate policy restrictions, you need a clear strategy. If a name change is necessary, contact DistroKid support first. They can clarify the effects the change will have on your music and distribution. Provide valid reasons for the requested change, as this can help expedite the process.

  1. Gather all your music details and the proposed new name.
  2. Ensure no other artists are using your new name.
  3. Communicate your change clearly to your audience.

Success Stories: Artists Who Changed Names Successfully

Many Spotify artists have successfully changed their names by using DistroKid. This powerful tool helps artists update their brand across music platforms. Let’s explore some real-life success stories.

Case Studies

Artist transformations can lead to incredible success.

  • Artist A went from 1,000 to 100,000 monthly listeners after a name change.
  • Artist B gained a record deal thanks to a fresh identity and branding.

Lessons Learned From Artist Experiences

Changing an artist name is more than just a cosmetic update.

  1. Consistency across platforms creates a stronger presence.
  2. Rebranding can breathe new life into an artist’s career.
  3. Timing is crucial; coincide your name change with a new release for maximum impact.

Key takeaways include planning and strategy for a successful transition.


Alternatives To Name Changes

Changing your Spotify artist name on DistroKid might not always be the best choice. Instead, you could consider releasing new music under a different name. This opens up a fresh start without losing your existing fanbase. Before making this big decision, let’s delve into the pros and cons of this approach and discuss strategies for building a new artist identity.

Pros And Cons Of Releasing New Music Under A Different Name

Choosing a new artist name for your music is a significant step. Let’s look at what this entails.

Pros Cons
  • Fresh branding opportunities
  • New target audience engagement
  • Separation of musical genres
  • Divide existing fanbase
  • Extra marketing efforts
  • Slow initial growth

Strategies For Building A New Artist Identity

Creating a new persona in music requires careful planning and execution. Below are some actionable steps:

  1. Define your music brand’s vision and values.
  2. Design a distinctive visual image that resonates with this new identity.
  3. Develop a consistent and engaging social media presence.
  4. Collaborate with other artists and influencers to widen reach.
  5. Create a compelling story about your artist journey and share it with your fans.

Conclusion: A Well-thought-out Decision

Choosing your artist name on Spotify via DistroKid is an important step in your music career. It’s not just a name. It’s a brand that will define you in the world of music. Thus, ensuring it reflects your music style and persona is essential. Many artists ponder whether they can change their Spotify artist name on DistroKid. It’s a choice that demands careful consideration and strategizing.

Final Tips For Aspiring Artists

Before you settle on a name, remember these tips:

  • Research: Ensure the name is unique and not in use.
  • Keep it simple: Easy to remember and spell names stick better.
  • Future-proof: Consider how the name will grow with your music.
  • Availability: Check for domain and social media handle availability.
  • Future Considerations For Name Branding

    As you evolve as an artist, your brand does too. Keep these points in mind:

    • Consistency: Use the same name across all platforms.
    • Professionalism: A professional name helps with industry credibility.
    • Marketing: Your name should align with marketing efforts.
    • Visuals: Ensure your name complements your visual branding.


Frequently Asked Questions On Can You Change Your Spotify Artist Name On Distrokid

How To Modify Spotify Artist Name Through Distrokid?

DistroKid does not allow direct edits to your Spotify artist name. You must contact Spotify directly for such a change. DistroKid can assist if your music is incorrectly matched to another artist profile.

Is It Possible To Rebrand On Spotify Via Distrokid?

Rebranding on Spotify requires changing your artist name, which is not directly editable through DistroKid. You’ll need to create a new DistroKid account and release music under your new name. Consult Spotify for profile updates.

Can Distrokid Update Artist Information On Spotify?

DistroKid cannot update your artist bio, photos, or name directly on Spotify. Such updates are done through Spotify for Artists. DistroKid primarily distributes your music to platforms, including Spotify.

What Steps Are Required For Spotify Profile Changes?

To change your Spotify profile, use Spotify for Artists. There, you can edit your bio, photos, and playlists. For name changes, contact Spotify support directly.

Conclusion

To sum it up, changing your Spotify artist name through DistroKid is a fairly straightforward process. Follow their guidelines, and your artist profile will reflect your new name promptly. Embrace this fresh start and keep crafting the music that defines you.


Remember, a name change could reignite your brand, inviting new listeners to discover your sound.

Categories
Archive

Using the Sampler in Ableton Live for Sampling: Master Sampling Techniques

Sampling is a fundamental technique used in music production to capture and manipulate sounds from various sources. One of the most versatile and powerful sampling tools available is the Sampler in Ableton Live. Whether you’re a beginner or an experienced music producer, the Sampler can open up a world of creative possibilities.

Using the Sampler in Ableton Live for Sampling: Master Sampling Techniques

Credit: ask.video

Using the Sampler in Ableton Live for Sampling: Master Sampling Techniques

Credit: www.youtube.com

What is the Ableton Live Sampler?

The Sampler is a software instrument in Ableton Live specifically designed for sampling. It allows you to take small snippets of audio, or entire recordings, and transform them into playable instruments within your music. With the Sampler, you have full control over pitch, time, and other parameters, enabling you to shape and mold your samples to fit your sonic vision.

How to Use the Sampler in Ableton Live

First, let’s take a look at the main components of the Sampler:

Component Description
Sample Display Allows you to visualize your sample and set start and end points for playback.
Filter and Envelope Used to shape the frequency content and amplitude envelope of your sample.
Zone Editor Enables you to divide your sample into different zones and map them to different keys on your MIDI controller.
Modulation and FX Provides a variety of modulation options and effects to enhance your sample.

Once you have a sample loaded into the Sampler, you can start manipulating it. Here are some key features and techniques to get you started:

Adjusting Pitch And Time

The Sampler allows you to change the pitch of your sample while maintaining its original tempo or adjust the tempo without affecting the pitch. This can be useful for creating melodic elements or time-stretching loops to fit a particular BPM. Simply use the Pitch and Detune parameters to achieve the desired effect.

Applying Filters And Envelopes

The Filter and Envelope sections of the Sampler give you control over the frequency spectrum and volume contour of your sample. Experiment with different filter types, such as low-pass, high-pass, or band-pass, to shape the tonal characteristics. Adjust the attack, decay, sustain, and release parameters of the envelope to control the dynamic behavior of the sound over time.

Creating Multisampled Instruments

The Sampler allows you to create multisampled instruments by dividing your sample into multiple zones and assigning them to different keys on your MIDI controller. This enables you to play different parts of the sample across the keyboard, giving you a more expressive and realistic performance. Use the Zone Editor to define the key ranges and fine-tune the playback settings for each zone.

Modulating And Adding Effects

The Modulation and FX sections of the Sampler offer a range of options to further shape and modulate your samples. From LFOs and envelopes to chorus, reverb, and distortion, you can add depth, movement, and character to your samples. Experiment with different modulation sources and effects parameters to create unique and captivating sounds.

Tips for Working with the Sampler

Now that you have a basic understanding of how to use the Sampler in Ableton Live, here are a few tips to help you get the most out of this powerful tool:

  • Experiment with different sample sources and genres to explore new sonic territories.
  • Try layering multiple samples in the Sampler to create rich and textured sounds.
  • Use the Warp feature in Ableton Live to ensure your samples stay in time with your project’s tempo.
  • Explore the modulation and automation options in Ableton Live to add movement and variation to your samples.
  • Take advantage of the built-in effects and plugins in the Sampler to further enhance your sound.

Remember, practice and experimentation are key to mastering the art of sampling with the Sampler in Ableton Live. So dive in, tweak knobs, and let your creativity flow!

Frequently Asked Questions On Using The Sampler In Ableton Live For Sampling: Master Sampling Techniques


How Can I Use The Sampler In Ableton Live For Sampling?


You can use the Sampler by dragging and dropping audio directly onto its interface.


What Are The Key Features Of The Sampler In Ableton Live?


The Sampler in Ableton Live allows you to creatively manipulate and sample audio in real time.


Can I Adjust The Parameters Of The Sampler In Ableton Live?


Yes, you can adjust various parameters such as pitch, volume, and play mode to customize your samples.


Is It Possible To Slice And Re-sequence Samples In The Sampler Of Ableton Live?


Absolutely, you can easily slice samples and rearrange them to create unique and dynamic musical compositions.

Categories
Archive

The Haas Effect: How To Use It For Stereo Mixes : Enhance Your Mix

The Haas Effect enhances stereo mixes by introducing a slight delay between left and right audio channels. It creates a sense of spaciousness and directional cues for the listener.


The Haas Effect, also known as the precedence effect, is an intriguing psychoacoustic phenomenon that audio engineers and producers leverage to add depth and width to stereo sound. By carefully delaying one channel slightly (generally by 5 to 35 milliseconds), they craft a sonic illusion where the sound appears to emanate from the side that reaches the ears first.


This technique enriches the stereo image and can help localize instruments within the mix. Mastering the Haas Effect opens up a new dimension in audio mixing, allowing for more immersive and dynamic sonic experiences. Perfect for both studio work and live performance mixes, it’s a tool that, when used wisely, can transform a flat, two-dimensional mix into a three-dimensional auditory landscape.


Origins Of The Haas Effect

In the world of music production, the Haas Effect plays a crucial role. It’s all about creating a sense of space and depth in stereo mixes. This phenomenon takes its name from a key figure in audio engineering, Helmut Haas. Let’s dive into the early discoveries and the psychoacoustics that define this fascinating effect.

Early Discoveries By Helmut Haas

Helmut Haas unveiled this effect in 1949. He was a German audio engineer working on how we perceive sound.

His study shed light on a new dimension of auditory perception. It was simple but impactful:

  • Delays between sounds affect how we hear them.
  • Short gaps can create a single, rich audio experience.
  • These delays can make sounds seem to come from different directions.

Listeners were unaware that it was, in fact, a trick played by the timing of sounds.

Psychoacoustics Behind The Phenomenon

The psychoacoustic principle is central to the Haas Effect.

Our brains use timing cues to locate sounds. With precise timing, engineers can manipulate sound location.

The Haas Effect relies on a time window of up to 35 milliseconds. Within this window:

  1. When one ear hears a sound slightly earlier than the other,
  2. The brain perceives the sound as coming from the direction of the first ear.
  3. The sound must be identical and within the 35ms timing.

The effect can be used to create a sense of width and space in stereo sound.


Technical Breakdown Of The Haas Effect

Understanding the Haas Effect unlocks the potential to craft compelling stereo mixes. It’s a technique that manipulates the way we perceive sound direction and space, based on small timing differences. Below, we delve into the technical components that make this auditory illusion so powerful for mix engineers.

Time Delay And Spatial Perception

Our brains determine where a sound comes from by the timing of audio waves reaching our ears. The Haas Effect, also known as the Precedence Effect, relies on this natural process. It uses a simple but effective trick:

  • A sound is played into both ears.
  • One ear hears it slightly later than the other.
  • This delay causes us to sense depth and direction.

When sounds are delayed between 1 to 35 milliseconds, they appear to come from the direction of the first sound we hear. This can be expertly used in stereo mixes to create a sense of three-dimensional space without moving the sound sources themselves.

Thresholds Of Human Hearing

The effectiveness of the Haas Effect hinges on the sensitivity of human hearing. A tiny delay in the arrival of sounds can trick our brains into perceiving a sound stage. Key thresholds to note:

  • Below 1 millisecond: delay undetectable, sounds like one source.
  • Between 1 to 5 milliseconds: subtle, creates richness and fullness.
  • Between 5 to 35 milliseconds: the sweet spot for the Haas Effect, creating directional cues.
  • Above 35 milliseconds: delay evident as an echo.

Knowing these thresholds allows mixers to precisely shape the listeners’ sound experience. An understanding of this sensitivity can transform flat mixes into dynamic ones with careful timing adjustments.

Practical Applications In Music Production

The Haas Effect is magical in music production. It tricks our ears with slight delays. This creates a richer, fuller sound. Producers use it for lively and immersive tracks. Let’s explore practical uses of the Haas Effect in stereo mixing.

Widening Stereo Images

Creating a spacious stereo mix is essential for dynamic tracks. The Haas Effect comes in handy here. By delaying one channel slightly, a sound feels wider. Let’s break down how to use this technique:

  • Pick a mono track, like a vocal or a guitar riff.
  • Duplicate it to create a twin.
  • Pan one left and the other right. This sets the stage for the ‘wideness’.
  • Add a slight delay (5-30ms) to one channel. Listen for the change.

Be sure to keep things subtle for the best effect. Too much delay will cause the sound to feel disconnected.

Creating Depth In Mixes

A mix isn’t just left and right; it’s also front and back. The Haas Effect helps with depth. Here’s how to implement this technique:

  1. Add a delay to a track you want farther back in the mix.
  2. Dial the delay between 15-35ms to avoid echoing.
  3. Adjust the volume of the delayed track. The quieter it is, the further back it will seem.

The key is to experiment with delay and volume. This will place sounds at different depths, creating a 3D effect in the stereo field.


Implementing The Haas Effect In Your Daw

Exciting mixes often rely on the art of creating a sense of space. The Haas Effect, also known as the Precedence Effect, is a powerful tool for achieving stereo width. It involves slightly delaying a sound in one channel to trick the brain into perceiving a sense of direction and depth.

To harness this auditory illusion in your mix, follow these simple steps:

  1. Create duplicate tracks: Take the mono track you want to widen and duplicate it.
  2. Pan each track: Pan one version hard left, and the other hard right.
  3. Apply a delay: Insert a simple delay plugin on one of the tracks.
  4. Adjust delay settings: Set the delay to a range between 10 to 35 milliseconds. Higher values can make the effect more pronounced, but too much can lead to unwanted echo.
  5. Bypass feedback: Make sure the feedback parameter is set to 0% to avoid any repeating echoes.
  6. Blend to taste: Mix the delayed signal with the original until you achieve the desired spatial effect.

Remember, subtlety is key; even small adjustments can have a big impact on your track’s stereo image.

While most DAWs have stock delay plugins that can achieve the Haas Effect, some third-party plugins offer enhanced control and features:

  • Waves H-Delay: Offers a wide range of delay times and modulation options.
  • Soundtoys EchoBoy: Includes an array of delay styles and a dedicated ‘Haas’ preset.
  • Valhalla Delay: Provides versatile delay modes including unique spatial textures.
  • FabFilter Timeless: A modern take on delay with extensive modulation capabilities.

Equipped with these tools and a step-by-step guide, you can now transform your static mono track into a dynamic stereo soundscape.

Common Pitfalls When Using The Haas Effect

The Haas Effect is a powerful tool for creating stereo width in mixes. But it requires careful handling to avoid potential problems. Let’s explore some common pitfalls you might encounter.

Phase Cancellation Issues

Phase issues can ruin a mix. They occur when two sounds combine, leading to a loss of punch and clarity. With the Haas Effect, delays between left and right channels can cause this problem. To prevent phase cancellation:

  • Check your mix in mono. If sounds disappear, you likely have phase issues.
  • Use tools to visualize stereo imaging and phase relationships.
  • Apply minimal delay times, usually under 35 milliseconds, to lessen risks.

Overuse And Listener Fatigue

Too much of a good thing can be bad. Overusing the Haas Effect can lead to listener fatigue. Sounds may appear unnatural and tiring over time. Balance is key:

  • Use the effect sparingly and only where it enhances the mix.
  • Pay attention to feedback from fresh ears to gauge fatigue levels.
  • Audit the mix after a break to ensure the effect still serves the song.

The Haas Effect: How To Use It For Stereo Mixes  : Enhance Your Mix


Credit: www.avid.com

Creative Techniques For Enhanced Mixes

Unlock the secret behind engulfing stereo mixes using The Haas Effect. Producers and audio enthusiasts apply this sound phenomenon to create depth and movement. Let’s dive into how you can use The Haas Effect to take your mixes to another dimension.

Automation For Dynamic Movement

Bring your tracks to life with automation. It mimics the natural ebb and flow of sounds. Here’s how:

  • Automate Delays: Apply slight time variations to channels.
  • Vary Intensity: Gradually change the delay time for a moving audio sensation.
  • Diverse Patterns: Implement unique delay patterns on different instruments.

Combining With Eq And Panning

Integrate EQ and panning for a rich and spacious mix. Follow these steps:

Action Effect on Mix
EQ Tweaking Clarify and separate instruments.
Panning Adjustments Create a wider stereo image.
Cut and Boost Balances frequencies and adds space.

Tip: Use EQ to sculpt frequencies and pan to place sounds in the stereo field.

The Role Of The Haas Effect In Different Genres

The Haas Effect, or precedence effect, is a powerful audio tool for creating stereo width in mixes. Each music genre has unique characteristics in its mix. Understanding how to apply the Haas Effect can take a mix from good to great. Recognizing the role it plays across various genres is crucial. Let’s explore how to tailor the Haas Effect for distinctive genre-specific sounds.

Adjusting Techniques For Genre-specific Sounds

Applying the Haas Effect hinges on knowing your genre’s needs. In fast-paced genres, you want clarity. In more ambient ones, a sense of space is key. Precision is essential to maintain the genre’s integrity while using this technique. Here, we’ll break down these adaptations:

  • Pop and Hip-Hop: Subtle use enhances vocals.
  • Jazz and Blues: It adds depth to live-sounding instruments.
  • Electronic: It can exaggerate stereo effects for a dramatic feel.

Case Studies: Rock, Edm, And Classical

Genre Instrument Haas Effect Application
Rock Guitars, Drums Create a larger-than-life sound without muddying riffs and beats.
EDM Synths, Bass Broaden the soundscape for a more immersive dance experience.
Classical Strings, Winds Inject space while preserving the natural ambience of orchestral arrangements.

With rock, the Haas Effect can turn a flat mix into a dynamic listening experience. EDM tracks leverage the effect to make listeners feel surrounded by sound. In classical music, the technique must be applied with care to avoid losing the genre’s essence.

Beyond The Studio: The Haas Effect In Live Sound

Live sound takes on a new dimension with the Haas Effect. This powerful tool enhances listener experiences by adding depth and spatial awareness to performances. Let’s explore how engineers harness the Haas Effect to create immersive live soundscapes.

Adapting To Larger Spaces

Larger venues pose unique challenges. Sound waves travel further, causing potential delays. Employing the Haas Effect becomes pivotal. It ensures that the sound from speakers arrives at listeners’ ears with a natural sense of space. Here are key considerations:

  • Speaker placement: Proper alignment reduces phase issues.
  • Delay settings: These should compensate for speaker distance.
  • Reflection control: It’s vital to minimize echo.

Tips For Live Engineers

Live engineers can create stellar auditory experiences with the Haas Effect. Depth and clarity in live mixes become achievable. Follow these tips:

  1. Understand the space: Study the venue’s acoustics beforehand.
  2. Use subtle delays: Small delay differences can have huge impacts.
  3. Check levels persistently: Balance volumes for uniform sound coverage.
  4. Observe audience reactions: Adjust settings for the best live experience.

With the right approach, the Haas Effect transforms live sound, making every seat the best in the house.

Future Of Spatial Audio And The Haas Effect

Spatial audio is changing how we experience sound. The Haas Effect, or precedence effect, plays a big role. It makes sounds seem to come from one side by playing them slightly earlier in one ear.

Emerging Technologies In 3d Audio

New tech makes 3D sound better. It lets sounds move around us in all directions. Advanced headphones and speakers give a real-life feel to movies and music. We will see more uses in virtual reality (VR) and augmented reality (AR).

  • Virtual Reality Sound
  • Augmented Reality Environments
  • 3D Audio for Home Entertainment
  • Improvements in Headphone Technology

Incorporating The Haas Effect In Immersive Experiences

Creators use the Haas Effect to craft amazing virtual worlds. It helps match visuals and sounds in VR. This tricks our brains into thinking sounds are coming from different places.

Tech Use Benefit
Game Design Enhanced Soundscapes Real Presence
Music Production Layered Mixes Deep Immersion
Movie Soundtracks Directional Audio Cues Realistic Scenes

Expect more interactive experiences with sound. The Haas Effect will become key. Sound will make us feel like we are inside the story.

Frequently Asked Questions For The Haas Effect How To Use It For Stereo Mixes

What Is The Haas Effect In Audio Mixing?

The Haas Effect, also known as the precedence effect, is a psychoacoustic phenomenon where delay differences in stereo sound create a sense of spatial location. By delaying one channel slightly, audio engineers emulate natural sound cues, enhancing stereo width in mixes.

How Can You Apply The Haas Effect In Your Mix?

To apply the Haas Effect, duplicate a mono track and pan each one left and right. Then, delay one side by roughly 10-30 milliseconds. This creates a sensation of broader spatial presence without significantly altering pitch or timbre, adding depth to stereo mixes.

When Should You Avoid Using The Haas Effect?

Avoid using the Haas Effect when clarity and mono compatibility are critical. Excessive delay can cause phase issues, making tracks sound blurred or hollow, especially in a mono playback environment. This effect is also less suitable for low-frequency elements.

Does The Haas Effect Work On All Instruments?

The Haas Effect works best on percussive and mid to high-frequency instruments. It is less effective on low-frequency sounds, like bass and kick drums, as it can lead to muddiness and phase cancellation, potentially weakening the mix’s impact.

Conclusion

Exploring the Haas Effect transforms stereo mixing. It adds depth and dimension, captivating listeners with immersive sound. Embrace this technique to stand out in the audio production realm. Remember, subtlety is key—overuse can muddy your mix. Now, harness the Haas Effect and elevate your tracks to professional heights.

Categories
Archive

Why Can’t I Create a Fade in Ableton? Easy Fixes!

You may not be able to create a fade in Ableton if you lack understanding of the software’s envelope controls or haven’t selected the correct tools. Confusion might also stem from an outdated version of Ableton or disabled automation features.


Creating music involves not only talent but also a strong grasp of your chosen digital audio workstation (DAW). Ableton Live, a favorite among electronic music producers, offers a plethora of features, one being the ability to create smooth transitions in your tracks with fades.


Understanding this function is critical for seamless song creation. New users or those transitioning from other DAWs might face challenges while navigating the interface and utilizing the fade feature. This article helps musicians understand the potential stumbling blocks in creating fades within Ableton Live and provides insights into mastering this crucial production skill. With the right knowledge and a bit of practice, any Ableton user can deftly implement fades to polish their musical projects.


Introduction To Ableton’s Limitations

Ableton Live, known for its powerful music production tools, also has boundaries. One feature that may puzzle users is the act of creating fades. Fades are crucial for smoothing out transitions and ending tracks gracefully. Yet, users sometimes struggle to execute this seemingly simple task. Understanding Ableton’s constraints brings clarity to this issue.

Breaking Down The Fade Issue

Beginners often face a fade conundrum in Ableton Live. Creating a fade should be straightforward, yet there’s complexity hidden beneath the surface. It’s vital to dive into the specific conditions under which Ableton operates. This sheds light on why users might find it tricky.

  • Fades can’t be applied on the master track directly.
  • Audio clips have fade handles, but they’re not always obvious.
  • Automation might be necessary for certain fade effects.

Let’s unfold the factors that contribute to this fade dilemma.

Common Misconceptions Around Fades

Users think that there’s a one-click fade tool. In reality, Ableton requires a different approach.

Misconception Reality
Fades are automatic. User must manually adjust fade handles.
Fades work on all tracks equally. Fade options vary by track and clip type.
Any audio clip can be faded out. Some clips, especially MIDI, require extra steps.

The truth about fades in Ableton is less about limitations and more about learning how to use the tools provided effectively.

Why Can't I Create a Fade in Ableton?: Easy Fixes!


Credit: www.ac3filter.net


Is Your Ableton Version Current?

Is your Ableton version current? This might be the question lingering in your head as you attempt to add a seamless fade to your track. Fades are essential for blending and transitioning between sounds. Yet, they can prove elusive if your Ableton is not up-to-date or lacks the feature set you require. Let’s delve into ensuring your software is ready to give you the fading functionality you need for your projects.

Checking For Updates

To ensure optimal performance and feature access, updating Ableton is key.

  • Open Ableton Live on your computer.
  • Go to the ‘Help’ menu at the top.
  • Select ‘Check for Updates’.

This built-in feature makes it easy to determine whether you have the latest version or if an update is necessary. Keeping Ableton Live current is the first step to unlocking its full potential, including the ability to create smooth fades.

Version-specific Fade Capabilities

Different versions of Ableton Live come with varying features. Knowing your version’s capabilities is crucial. The fade feature became a native function in Ableton Live 10. Users with previous versions may need to find alternative methods.

Ableton Version Fade Capability
Live 9 and Earlier Manual fades with volume automation
Live 10 and Later Integrated fades with handle

If your project needs a fade and you are not seeing the options, it could be due to an outdated Ableton version. In that case, an upgrade might be the answer.

Audio Clip Essentials

Audio Clip Essentials are the backbone of creating seamless music experiences in Ableton. Before diving into the nuances of fades and transitions, understanding the types of audio clips and their preparation is a must. Let’s unravel the process step by step.

Understanding Audio Clip Formats

Different audio clip formats come with unique properties. To ensure smooth editing and transitioning, here’s what you need to know:

  • WAV – High-quality, uncompressed audio; ideal for professional mixing.
  • AIFF – Similar to WAV in quality, primarily used on Apple computers.
  • MP3 – Compressed format; maintains smaller file size at the expense of quality.
  • Ableton Live Pack – Ableton’s own packaged sets, perfect for integration into projects.

Bearing these formats in mind will guide your fading techniques and final sound output.

Clip Preparation For Fading

Proper clip preparation sets the stage for flawless fading. Follow these steps for readying your audio:

  1. Select your clip in the Arrangement View or Session View.
  2. Ensure the clip is warp-free; warping can affect the sound during fading.
  3. Check the clip’s start and end points; these define the fade’s range.
  4. Activate the fade handles by clicking on the clip’s top corners.
  5. Drag handles to create the desired fade-in or fade-out effect.

Simple procedures lead to powerful results in your audio production journey.

Arrangement View Versus Session View

When working in Ableton Live, two different views are at your disposal – Arrangement View and Session View. Each serves a unique purpose. Arrangement View offers a linear approach to music production, ideal for laying out entire tracks. Session View, on the other hand, provides a space for improvisation and live performance, where clips launch independently.

Choosing The Right View For Fades

To create seamless fades in Ableton, you must choose the right view. Let’s explore:

  • Arrangement View: This view allows for precise fades over time.
  • Session View: It doesn’t support traditional fades.
  • Technique: Opt for Arrangement to drag fade handles.

Selecting Arrangement View is crucial for traditional crossfading techniques. Fades become simple with drag-and-drop handles that appear on audio clips. In Session View, fading requires workarounds like automation.

Navigating View-specific Limitations

Understanding the limitations of each view ensures smooth workflow:

View Fades Capability Workaround
Arrangement Direct fades with handles N/A
Session Not Supported Volume Automation or use of effects

In Session View, fading isn’t intuitive.

Create fades with volume automation or effect racks.


Revealing Hidden Fade Handles

Revealing Hidden Fade Handles in Ableton Live can sometimes feel like searching for a needle in a haystack. These elusive controls are essential for smooth transitions and professional-sounding tracks. But fear not! Let’s uncover the mystery of the missing fade handles and empower you to take charge of your audio editing in Ableton.

Zooming Techniques For Better Visibility

Fade handles might remain out of sight due to zoom level issues. The key to bringing hidden fades into view? Zoom in closer!

  • Use the magnifying glass tool to get a closer look at your track.
  • Press ‘Z’ and click on your track to zoom in on a specific part.
  • Hold ‘ALT’ and use your mouse scroll to zoom in and out quickly.

Remember, navigation is key—after zooming in, use the horizontal scroll bar to find your fade handles.

Adjusting Automation Lane Displays

Another trick to reveal fade handles involves playing with the automation lanes.

  • Activate the automation view by pressing ‘A’ or clicking the automation button.
  • Choose the right automation lane—volume or track volume will usually house your fades.
  • Expand the lane to get a better view by dragging the lane’s border.

With automation lanes in full view, those fade handles won’t stand a chance of staying hidden.

Why Can't I Create a Fade in Ableton?: Easy Fixes!


Credit: www.groove3.com


The Role Of Automation In Fading

Mastering the art of creating perfect fades in Ableton can truly elevate your music production. Automation plays a pivotal role in manipulating the volume to smoothly transition between tracks or parts of your song. Understanding how to manipulate these features can remove any issues with adding fades and give you total control over the dynamics of your production.

Drawing Fade-in And Fade-out Envelopes

Drawing fade envelopes is a simple yet powerful technique to tailor the onset or conclusion of your sounds. Ableton’s arrangement view allows you to draw precise volume adjustments directly onto the audio track. Use these steps to create your fade:

  • Choose the audio track you want to fade.
  • Select the ‘Envelope’ section located in the clip view.
  • Search for the Volume envelop to adjust fades.
  • Create a point at the start and end of where you want your fade.
  • Drag points to craft the initial rise in volume for fade-ins or the reducing volume for fade-outs.

Fine-tuning Fade Curves

Once your fade envelope is in place, perfecting the curve is essential for a natural-sounding fade. Ableton provides the flexibility to tweak this to your heart’s content. To fine-tune your fade curves:

  1. Hover over the line between the two points of your fade.
  2. Click and hold to grab the line.
  3. Bend the curve by moving the mouse up or down.
  4. Experiment with different curves to suit the audio material.

Note that different curve shapes can infuse a unique feel into your transitions, so spend time discovering what works best for your track.

Utilizing Audio Effects For Enhanced Fades

Fades in Ableton are essential for smooth transitions. They help blend tracks or elements, creating a professional finish to your production. While the basic fade functionalities cover primary needs, sometimes the project requires something more customized. This is where audio effects come into play.

Advanced users might notice that default fades might not offer the precision or variation needed for certain scenarios. But don’t worry! There are ways to enhance your fades using different techniques and tools within Ableton, including audio effects and third-party plugins.

Selecting Third-party Fade Plugins

Finding the right third-party plugin can elevate your fades to the next level. Many plugins are specially designed to provide advanced fading capabilities. Here are some points to consider:

  • Compatibility: Ensure the plugin is compatible with Ableton.
  • User reviews: Look for plugins with positive feedback.
  • Features: Prioritize plugins with extensive fade options.

Crafting Advanced Fades With Audio Effects

Not ready to download new plugins? No problem! Ableton’s built-in audio effects can be your toolkit for crafting intricate fades. Check out these steps:

  1. Use Utility for precise volume control.
  2. Apply Equalization to fade specific frequencies.
  3. Experiment with Reverb for a natural-sounding fade-out.

Incorporating these methods with Ableton’s automation features creates custom fade effects tailored to your needs.

Why Can't I Create a Fade in Ableton?: Easy Fixes!


Credit: forums.steinberg.net


Troubleshooting Technical Glitches

Creating fades in Ableton is usually straightforward. But, sometimes technical glitches can occur. You may find yourself unable to create a fade. Don’t worry, there are a few steps that can help you identify and fix the issue.

Addressing Software Bugs

Software bugs can interrupt your music production flow. If you can’t create a fade in Ableton, try these steps:

  • Check for updates: Ensuring you have the latest Ableton version can resolve unseen issues and improve performance.
  • Reinstall: A fresh install of Ableton might be necessary if updates don’t fix the problem. Remember to back up your projects first.
  • Default settings: Return Ableton to its original settings. Sometimes, custom configurations can conflict with functionality.

If these steps fail, dig deeper into Ableton’s help resources. Their guides can be very fruitful.

Seeking Help From The Community

Many producers use Ableton, and some have faced your issues before. Reach out to the community online for insight:

  1. Visit Ableton user forums.
  2. Search for related threads or start a new one with your problem.
  3. Connect with other users on social media groups.
  4. Check out tutorial videos that might give you a clue.

Remember to share specific details. This helps others to provide accurate advice.

Strengthening Your Fading Skills

Strengthening Your Fading Skills in Ableton is essential for producing smooth transitions and dynamic changes in your tracks. While Ableton is a powerhouse for music producers, sometimes artists struggle to master the art of fading. By practicing consistently and experimenting with various techniques, you can enhance the emotional impact of your music and keep your listeners engaged.

Practice Exercises For Perfect Fades

Becoming proficient at fading requires practice. Here is a list of exercises:

  • Start simple: Create short clips and practice basic fades in and out.
  • Combine sounds: Overlap tracks and work on crossfading.
  • Vary duration: Experiment with the length of fades to feel their effect.
  • Use automation: Draw fade curves and listen to the results.

Exploring Creative Fade Techniques

To stand out, try these creative fade methods:

Fade Technique Description
Reverse Fades Apply a fade in the reverse direction to build tension.
Frequency Fades Fade certain frequencies using EQ automation.
Rhythmic Fades Sync your fades with the tempo for a rhythmic feel.
Envelope Tricks Manipulate volume envelopes for unique sound textures.

With consistent practice and a bit of creativity, your fade techniques will drastically improve, taking your production to the next level.

Frequently Asked Questions For Why Can’t I Create A Fade In Ableton


Why Does Ableton Fade Not Work?


Ableton Live may not allow fading if there’s no audio clip boundary. To create a fade, ensure you’re working with a distinct audio clip. Select the clip, then hover at its edge to access the fade handles. Drag these handles inwards to apply the fade.


How To Add Fade-in In Ableton Live?


To add a fade-in in Ableton Live, first select your audio clip. Then, hover over the clip’s start edge to reveal the fade handle. Click and drag the handle towards the clip’s center. Adjust the length to control the fade duration.


Can You Automate Fades In Ableton?


Yes, in Ableton Live, you can automate fades using the track’s automation feature. Show the automation lanes, find the volume control, and draw an automation curve at the beginning or end of the audio clip for a fade-in or fade-out effect.


What’s The Shortcut For Fade In Ableton?


Ableton Live doesn’t have a specific shortcut for fades. Instead, manually adjust fades by clicking and dragging the fade handles that appear at the edges of audio clips. Use the “A” key to toggle automation mode for more complex fading.


Conclusion


Mastering fades in Ableton can elevate your audio projects to new heights. Remember, initial hurdles are common, but they stem from manageable issues. Check your version, explore the manual, and practice diligently. Your persistence will soon result in seamless, professional-sounding fades that enhance your tracks beautifully.


Keep experimenting, and happy mixing!