Categories
Archive

How Much Does Spotify Pay Per Stream?: Unveil Earnings!

Spotify pays an average of $0.003 to $0.005 per stream to rights holders. This payout varies due to factors like country and user account type.


Spotify has revolutionized music consumption in the digital age, offering artists a platform to reach millions globally. While it’s a popular streaming service, understanding its payment system for artists is crucial. The per-stream rate is a rough average, and actual earnings can differ based on agreements and the distribution of subscription fees.


For artists looking to monetize their music, grasping Spotify’s royalty structure is essential. Despite the seemingly small payout per stream, cumulative plays can lead to substantial earnings, especially for those with a large following and high streaming numbers.


The Spotify Earnings Puzzle

Understanding Spotify’s payment model confuses many artists and listeners alike. The streaming giant doesn’t have a fixed “pay-per-stream” rate. Earnings vary due to multiple factors. Let’s unravel this puzzle together.

Factors Influencing Spotify Payouts

Several elements affect how much money artists make from Spotify streams:

  • User location: Where a listener streams a song can impact earnings.
  • Subscription type: Free or premium accounts generate different revenues.
  • Artist agreements: Labels and distribution deals dictate the final cut for artists.
  • Stream count: More streams can mean more money, but the rate isn’t constant.

Average Payment Per Stream

Spotify typically pays artists a fraction of a cent per stream. But this number isn’t set in stone. Here’s how it might break down:

User Type Estimated Payment Range Per Stream
Free Account $0.0006 to $0.0008
Premium Account $0.001 to $0.005

The average rate often cited is about $0.003 to $0.005 per stream. This range is a rough estimate. Real-world earnings may fall outside these figures.


Diving Into Spotify’s Payment Model

When artists contemplate streaming platforms, payouts often top their curiosity list. Spotify, the streaming giant, intrigues many with its unique payment model.
This model holds the key to understanding artist earnings per stream.
Today, let’s unpack the Spotify payment structure to see what creators really take home.

Stream Share Calculation

Spotify employs a complex process to calculate stream share.
It factors in total streams, user’s subscription type, and country-specific considerations.
Here’s a simple breakdown:

  • Count all the streams a song gathers.
  • Divide by total platform streams in the same period.
  • Adjust for premium or ad-supported plans.
  • Balance against varying rates in different markets.

Artist earnings depend on their share of total Spotify streams.

Pro Rata Payment System

Spotify’s payment structure relies on the ‘pro rata’ system.
It splits total revenue with artists based on their streaming percentages.

Here is a step-by-step guide of the pro rata payment flow:

  1. Spotify pools monthly subscription and ad revenue.
  2. The platform deducts its share, usually around 30%.
  3. The remaining 70% forms a royalties pot.
  4. Creative rights holders get paid from this pot.

Your share depends on the fraction of streams your music commands.

Recognizing the intricacies of Spotify’s payment model shines a light on the realities faced by artists in the digital age.
Understanding this model equips creators and fans alike with a clearer picture of the streaming economy.

Comparing Streaming Royalties

Understanding how much Spotify pays per stream is crucial for artists. It affects their earnings. Let’s dive into the world of streaming royalties and see how Spotify compares to other platforms.

Spotify Vs. Other Platforms

Streaming services all have unique pay models. Artists wonder where their music can earn the most. Spotify is popular, but how do its royalties stack up?

Service Average Pay Per Stream
Spotify $0.003 to $0.005
Apple Music $0.005 to $0.0075
Tidal $0.01
Amazon Music $0.004

Different platforms offer various incentives. Some platforms have higher payouts. Artists must choose wisely. Each platform’s audience is also important.

Impact On Artists

Spotify’s per-stream rates affect artist revenue. Payment calculations are complex. Artists earn via streams, but many factors play a role.

  • User subscriptions
  • Country of streams
  • Artist’s label agreements

Streaming numbers must be high for notable earnings. An artist needs millions of streams to make a living. This puts pressure on newer and indie artists.

With advances in technology, artists find new ways to earn. It can be merchandise, live performances, or exclusive content. Streaming is just one piece of their income puzzle.

Maximizing Earnings On Spotify

Artists often wonder how to boost their earnings on Spotify. Understanding Spotify’s pay-per-stream can be tricky. Yet, there are effective ways to potentially increase what you earn. Dive into strategies that aim to maximize your earnings on the popular streaming platform.

Strategies For Artists

Build a solid fanbase. A strong following means more streams. Use social media to connect with fans. Engage with your audience by sharing behind-the-scene glimpses.

Release music consistently. Regular releases keep listeners interested. It increases the chance of fans streaming your songs more often.

Get your tracks mastered. High-quality sound can lead to playlist adds. This can result in a higher stream count.

Leveraging Playlists

Research relevant playlists. Find playlists that fit your music style. Understand what curators look for.

Network with playlist curators. Build relationships with them. Offer your music as a potential addition to their playlists.

Create your own playlists. Include your tracks with other popular songs. This can increase your visibility.

Promote your playlist presence. Share on all platforms. Encourage your fans to follow and share.

The Artist’s Perspective

The Artist’s Perspective on Spotify’s pay-per-stream rate is a tale of two cities. While millions of users globally stream their favorite tracks, artists often find themselves navigating a complex landscape of royalties and earnings. Understanding how much an artist makes per stream is crucial for those looking to carve out a sustainable career in music.

Real-life Earnings

Let’s talk numbers. An artist’s earnings on Spotify are not fixed; they fluctuate based on several factors. Countries, subscriber plans, and total platform streams all play roles in this equation. It’s rumored that Spotify pays between $0.003 and $0.005 per stream, but let’s see what that means in real life.

Streams Estimated Earnings
1,000 $3 – $5
10,000 $30 – $50
100,000 $300 – $500
1,000,000 $3,000 – $5,000

Artists with millions of streams per month can see substantial earnings. Yet, for many others, the majority, these numbers highlight the challenge of making a living from streaming alone.

Voicing Concerns

Many artists voice concerns about the sustainability of Spotify’s streaming rates. The heart of the issue is fair compensation. With tales of multi-million streams yielding less than a month’s minimum wage, discontent is palpable.

  • Artists campaign for higher per-stream rates.
  • Music audiences are urged to support by attending live shows and purchasing merchandise.
  • Spotify faces increasing pressure to adjust its royalty model.

The conversation extends beyond Spotify, stirring debate about the music industry’s digital economy. Artists strive for a balance that recognizes their art and provides a viable income.


User Subscription And Revenue

Spotify’s payouts to artists hinge on subscription types and how fans listen. Premium users generate more revenue than ad-supported ones. Each stream’s value varies with different subscription plans. Let’s delve into how subscription plans affect payments and compare ad-supported streams to premium ones.

Subscription Plans Impact

Spotify offers several subscription options, each playing a role in artist revenue. The popular plans include:

  • Individual – Single account with highest per-stream rates.
  • Duo – Two accounts, lower rates than Individual.
  • Family – Multiple accounts, diluted per-stream value.
  • Student – Discounted rates, lower artist payout.

The more premium subscriptions in play, the higher the potential payout per stream.

Ad-supported Streams Versus Premium

Streams from free users and premium subscribers affect earnings differently:

Stream Type Revenue Contribution
Ad-Supported Minimal payouts, relies on ad revenue.
Premium Higher rates, subscription revenue driven.

Premium streams offer a consistent revenue stream, making them more lucrative for artists.

Spotify For Indie Artists

As an indie artist, the digital space can feel vast and daunting. Yet, within the streaming universe, Spotify emerges as a guiding star. This platform can be a great partner for indie musicians. Understanding how it pays per stream is vital.

Building An Audience

Success on Spotify starts with listeners. An engaged audience can make or break an indie artist’s career. Use the tools Spotify provides to connect with fans:

  • Create attractive playlists to catch your audience’s attention.
  • Engage with fans through Spotify’s Artist’s page.
  • Update your profile regularly with fresh content and tracks.

Gathering followers and getting your tracks saved will increase your Spotify algorithm visibility. This translates into more streams.

Spotlight on Streaming Earnings
Streams Earnings (Estimated)
1,000 $3-5
10,000 $30-50
100,000 $300-500

Using Spotify For Exposure

Spotify isn’t just about making money per stream. It’s a powerful tool for exposure. Here’s how you can use Spotify to get noticed:

  1. Submit tracks to Spotify-curated playlists.
  2. Take advantage of Spotify’s Promotional tools and insights.
  3. Cross-promote with other indie artists on collaborative playlists.

Remember, consistent growth will boost your presence on the platform. This can lead to more fans and, ultimately, more streams.


The Future Of Streaming Earnings

Understanding how artists make money on platforms like Spotify shapes our perspective on the music industry’s evolution. Per-stream payouts have been a hot topic, sparking debates about fairness and artists’ livelihoods. As we move forward, what changes can we expect in the realm of streaming earnings?

Predicted Trends

Digital media continues to grow rapidly, making streaming revenues critical for artists. Experts predict several trends that could influence future earnings from streaming services:

  • Increased Subscription Rates: To better support music creators, platforms may hike subscription fees.
  • User-Centric Payment Models: Earnings might be based more on individual user listening habits.
  • Emerging Markets Impact: As music streaming expands globally, new markets could reshape financial landscapes.

Innovations In Artist Compensation

New technologies and industry demands lead to creative solutions in how artists are compensated. Here are some anticipated innovations:

  1. Blockchain Technology: This could offer transparent, direct-to-artist payments.
  2. Smart Contracts: These ensure artists are paid automatically for streams and usage.
  3. Tiered Content Access: Fans might pay more for exclusive content, boosting artist revenue.

Apart from these, collaborative partnerships and direct fan contributions through virtual live events could also increase earnings.

Frequently Asked Questions On How Much Does Spotify Pay Per Stream

What’s The Average Payout Per Spotify Stream?

Spotify generally pays between $0. 003 and $0. 005 per stream. This amount can vary depending on the listener’s country and the artist’s royalty agreements.

How Can Artists Increase Spotify Streaming Revenue?

Artists can increase revenue by promoting their music to gain more streams, creating playlists, and encouraging fans to follow on Spotify. Engaging with fans on social media and releasing music consistently also helps.

Does Spotify Pay More For Premium Listeners?

Yes, Spotify does pay more for streams from Premium subscribers compared to ad-supported free users. This is because Premium subscribers contribute to a larger share of Spotify’s revenue.

What Factors Affect Spotify’s Per Stream Rate?

Factors affecting Spotify’s stream rate include the user’s subscription plan (Premium or Free), the country of the listener, and the specific royalty agreements with rights holders.

Conclusion

Understanding Spotify’s pay-per-stream model helps artists and fans alike navigate the streaming economy. Payouts vary, and myriad factors influence earnings. Artists seeking to boost their revenue must strategize to increase their streams and fan engagement. It’s a complex but navigable landscape for those well-informed and persistent in their efforts.

Categories
Archive

How to Fix Distortion Cubase: Clear Sound Tips

To fix distortion in Cubase, adjust the audio interface settings and check for any overloaded plugins or channels. Ensure proper gain staging and reduce levels where needed to prevent clipping.


Cubase by Steinberg is a powerful digital audio workstation, widely used by music producers and sound engineers. Distortion issues in Cubase can arise from a variety of sources, including hardware configuration problems, software glitches, or user error. A common method for troubleshooting distortion is the systematic process of elimination.


Users should examine each element in the signal chain, from the instrument input to the master output. Key tools within Cubase, such as mixers and meters, help identify the sources of unwanted noise. It’s important to have a fundamental understanding of digital audio principles to efficiently resolve audio distortion, ensuring a clean and professional sound is achieved. Crafting seamless audio without distortion is essential for a polished final product, and understanding Cubase’s functionality is critical for optimal audio fidelity.

How to Fix Distortion Cubase: Clear Sound Tips


Credit: www.sweetwater.com

Introduction To Clear Sound Production In Cubase

How to Fix Distortion in Cubase

Cubase stands out in the digital audio world for its pristine sound quality. Yet, sometimes users face the challenge of distortion. Fixing this ensures your music sounds professional. We’ll teach you to tackle distortion head-on. For crystal clear audio in Cubase, follow these steps.

The Importance Of High-quality Audio

High-quality audio is key to listener satisfaction. It can make or break your music production. It affects how listeners perceive your skills. Thus, maintaining audio integrity in Cubase is vital.

  • Listeners prefer clear sound
  • Quality audio keeps attention
  • Reduces listener fatigue

Brief On Common Issues With Distortion In Cubase

Distortion can sneak into your Cubase project in many forms. Be it clipping, overloaded plug-ins, or hardware issues, they tamper with sound clarity. Knowing these helps to prevent and fix them swiftly.

Type of Distortion Common Causes How to Identify
Clipping High levels in mixer channels Red peaks in meters
Plug-in Overload Too many active effects Stuttering audio playback
Hardware Issues Outdated drivers or faulty gear Noise when using external devices

Detect these early for a flawless audio experience. Knowing how to address each issue is crucial. The next sections will guide you through these solutions.

Identifying Distortion Sources

Pinpointing distortion in a Cubase project can restore crispness and clarity to your audio. To tackle this issue, divide and conquer is the method. First, identify the type of distortion you’re dealing with.

Recognizing Digital Versus Analog Distortion

Digital distortion often sounds harsh and may indicate a problem in Cubase or your computer. Analog distortion, however, has a warmer feel, likely stemming from external hardware. Keep your ears open for:

  • Clipping: Sounds like crackling, commonly due to hitting max volume.
  • Bit reduction: Produces a gritty texture, often from low-quality files.
  • Fizz or hiss: Can be due to cables, preamps or mics.

Analyzing The Signal Chain For Problem Areas

Track your audio’s path to find where the distortion sneaks in. Break it down step-by-step:

  1. Inspect plugins: Temporarily bypass effects to rule out software issues.
  2. Check external gear: Cables, outboard processors, and microphones can introduce noise.
  3. Monitor levels: Each stage of the chain should maintain optimal volume to avoid clipping.

Use this systematic approach to pinpoint distortion in Cubase. With these steps, audio cleanup gets a whole lot easier!

Setting Up Your Project For Success

Want a crystal-clear sound in Cubase without the irritating buzz of distortion? Setting up your project correctly is key! Here’s how to make sure your audio stays pristine from start to finish.

Optimal Project Settings To Minimize Distortion

Getting the settings right can prevent distortion. Quality sound starts with your project setup. Follow these steps:

  • Sample Rate: Choose at least 44.1kHz for CD quality.
  • Bit Depth: Set to 24-bit for high resolution.
  • Buffer Size: Adjust for minimal latency without crackles.

Check hardware settings to ensure everything aligns with the project.

Preparation Steps Before Recording Or Mixing

Before you hit record or dive into mixing, take these steps:

  1. Gain Staging: Keep levels conservative to avoid clipping.
  2. Headroom: Leave space in the mix to prevent overload.
  3. Monitoring: Use quality headphones or speakers for accurate sound.

Run checks on your cables and interfaces for any signs of damage. Good cables are crucial. Keep an eye on the meters during recording. They should never hit red!

Optimizing Cubase Settings

Fixing distortion in Cubase often comes down to optimizing your settings. Stitching together the perfect mix requires a blend of creativity and technical prowess. Ensuring Cubase runs smoothly is essential. Let’s dive into how you can tweak your DAW for the best sound without distortion.

Adjusting Buffer Sizes And Sample Rates

Buffer sizes and sample rates are like the heart of your audio set-up. They keep your tracks running smoothly without hiccups. If they’re not in check, you might face audio distortion.

  1. Go to Device Setup in Cubase.
  2. Select your audio interface.
  3. Locate the buffer size settings.

Adjusting buffer size is a game of balance. Lower buffer sizes decrease latency but can result in glitches if too low. Higher buffers reduce the strain on your CPU but increase latency. You have to find the sweet spot for your project.

Buffer Size Use Case
64-128 Recording
256-512 Mixing
1024 and above Mastering

Adjusting the sample rate also affects performance. Higher rates offer better quality but demand more from your computer. Aim for 44.1kHz for CD quality, or 48kHz for video.

Choosing The Right Plugins And Effects

Plugins and effects can make or break your mix. The quality of plugins is crucial. Choose plugins from reputable developers. This helps prevent distortion caused by poor coding or design.

  • Use VST3 plugins if available, they are more efficient.
  • Disable plugins you aren’t using to save CPU power.
  • Be wary of cheap or free plugins that may not be well-designed.

Consider the processing power needed for each plugin. Native plugins generally run more smoothly than third-party options. Limit the use of heavy effects like reverb or pitch correction. They can cause distortion if overused.

Bypass each effect to hear its impact. If distortion disappears when bypassed, you’ve found the culprit. Replace it or tweak its settings.

Utilizing Eq And Compression Effectively

Distortion in a Cubase project can dampen the clarity of your mix. Effective use of Equalization (EQ) and Compression may solve this. These tools help tidy up sound frequencies and manage volume levels. Knowing how to use them will improve your audio production.

Balancing Frequencies To Avoid Muddiness

Overlapping frequencies can cause a mix to sound muddy. It’s important to create space for each track. Use EQ to cut or boost frequencies wisely. This ensures instruments sit well together in the mix.

  • Cut low frequencies on non-bass instruments to prevent muddiness.
  • Identify and reduce competing frequencies between instruments.
  • Use High-Pass Filters to clean up unnecessary low end from tracks.

Applying Compression To Control Dynamics

Compression balances the dynamic range of your tracks. It keeps volumes consistent and prevents distortion. Proper compression settings avoid crushing your sound. They retain the natural feel of the music.

  1. Set the threshold to activate compression when needed.
  2. Adjust ratio to control the intensity of compression.
  3. Tweak attack and release to shape how compression behaves over time.
  4. Use make-up gain to compensate for any lost volume.


Advanced Techniques To Reduce Noise

An essential skill for music production is noise reduction. Advanced techniques to reduce noise can improve the clarity and quality of sound in Cubase. Here’s how to achieve pristine audio.

Using Noise Gates And Expanders

The correct use of noise gates and expanders can clean up your audio tracks. These tools help by lowering the volume of parts where noise exists without affecting the actual performance.

  • Noise gates shut off when the signal drops below a certain threshold. This stops soft noises from being heard.
  • Expanders work like noise gates but reduce the sound level rather than cutting it. They make quieter sounds even quieter, helping to keep the noise floor down.

To set them up:

  1. Locate the noisy portions of the track.
  2. Insert a noise gate or expander onto the track.
  3. Adjust the threshold to target the noise.
  4. Fine-tune the attack and release parameters to avoid cutting off wanted sound.

These devices are vital for a clean mix.

The Role Of Spectral Editing And Cleanup

Spectral editing goes deeper into noise reduction. It allows you to see and manipulate frequencies on a visual level, giving you control to remove unwanted sounds.

Step Action
1. Open the spectral editor in Cubase.
2. Identify noise within the frequency spectrum.
3. Select the unwanted noise.
4. Apply noise reduction or delete the selected frequencies.

The spectral editor can tackle issues like clicks, pops, and hiss that traditional methods might miss. It cleans up specific sound hiccups with precision.

Monitoring And Analyzing Audio Output

When working with Cubase, audio output is your end product. Your audience hears your final mix. Clarity is key. Behind every great mix is exceptional monitoring and precise audio analysis. Distortion can spoil a perfect track. Let’s explore how to ensure your Cubase project sounds impeccable.

The Importance Of High-quality Monitoring

Without a great monitoring system, detecting distortion is tough. Your speakers or headphones must reproduce sound accurately. It makes spotting audio issues easier. Aim for a clean and flat response in your monitoring setup. This enhances your ability to hear any distortion. Your ears can trust what they hear, leading to better decision-making during mixing.

Using Visual Tools To Identify Distortion

Visual aids in Cubase are lifesavers. These tools point out where distortion is present. They show which frequencies are peaking. Look at built-in spectrum analyzers and waveform viewers. They help see the problem areas your ears might miss.

  • Waveform displays: Show clipping clearly.
  • Spectrum analyzers: Help find troublesome frequencies.
  • Metering plugins: Offer detailed insights into levels and dynamics.

Combine your ears with these visual tools for the best results. Together, they make for a formidable mix-finishing toolkit.


Regular Maintenance For Optimal Performance

To ensure crisp and clear audio production in Cubase, regular system checks are crucial. Think of it like tuning a car. Proper care keeps your studio running smoothly. In this section, we’ll explore key steps to maintain your set-up and avoid unwanted distortion.

Updating Software And Drivers

Keeping software up-to-date can fix bugs and improve functionality. Follow these simple steps:

  1. Navigate to the Cubase help menu.
  2. Choose Check for Updates.
  3. Install any available updates for Cubase.

Don’t forget your sound card or audio interface drivers. Visit the manufacturer’s website:

  • Look for the Support or Downloads section.
  • Find the latest drivers for your model.
  • Download and install.

Physical Equipment Care To Prevent Distortion

Hardware issues can cause distortion. Perform these checks:

Equipment Care Tips
Cables Check for wear and tear. Replace if damaged.
Audio Interface Clean ports. Ensure connections are secure.
Speakers Position away from magnetic sources. Dust regularly.
Microphones Store in a dry place. Avoid drops and impacts.

Regular maintenance ensures long-lasting and reliable equipment.

Troubleshooting Persistent Issues

Ever hit play in Cubase and cringed at unexpected distortion? Even seasoned users face audio glitches. Let’s cut straight to the chase and resolve persistent distortion in Cubase. Spotting the source to nailing a fix, it’s all about the approach.

Common Pitfalls And How To Avoid Them

Clipping is a common culprit. This happens when the signal is too high. Check your meters. Are they in the red? Dial back the gain.

  • Inspect plugins—a bypass can reveal sneaky troublemakers.
  • Buffer size matters, too small causes dropouts, too large leads to latency. Balance is key!
  • Driver dance—update or switch to ASIO drivers for a smoother experience.
Issue Quick Fix
Overloaded CPU Freeze tracks, lower project complexity
Incorrect Routing Reset outputs and check connections
Sample Rate Conflict Align project and interface rates

When To Seek Professional Help

Sometimes, it’s best to call in the cavalry. Endless tweaks with no luck? Time to reach out.

  1. Connect with the Cubase community—forums are gold mines.
  2. Technical support is there for a reason, don’t hesitate.
  3. If hardware’s acting up, contact the manufacturer.

Consulting a seasoned engineer can also provide a fresh set of ears and solutions. Persistent issues may need a pro’s touch, don’t shy away from it!

Conclusion: Achieving Pristine Audio

Mastering the art of crystal-clear sound in Cubase is within your reach. With careful tweaks and a deep understanding of the tools at hand, distortion becomes a thing of the past. Let’s recap what it takes to get there.

Recap Of Key Strategies For Fixing Distortion

  • Check levels carefully to prevent clipping.
  • Use quality plugins designed for clean sound.
  • Apply EQ with precision to balance frequencies.
  • Opt for high-resolution settings when recording.
  • Keep buffer sizes optimal to avoid latency issues.

Encouragement To Experiment And Learn

Don’t shy away from trial and error: It’s key to mastering Cubase. Take risks with your audio. Discover new methods. Each mistake teaches you more about getting that perfect sound. Remember, learning never stops, so keep playing with your mixes!

Frequently Asked Questions On How To Fix Distortion Cubase

Why Does Distortion Occur In Cubase?

Distortion in Cubase can stem from several issues like overloaded signal levels, incorrect plugin settings, or hardware limitations. Ensure input levels are adequate and review each plugin’s settings to address distortion.

How Can I Reduce Cubase Audio Clipping?

To reduce clipping, lower the track’s volume or the gain on individual channels. Utilize Cubase’s built-in audio clip detection and rectification features. If necessary, apply a limiter on the master output to prevent peaks.

What Causes Cubase Sound Distortion After Export?

Distortion after export often occurs due to high master levels. Before exporting, check the master fader and ensure it’s not peaking. Utilize dithering options upon export for a cleaner sound and to reduce potential distortion artifacts.

Can Plugin Choice Affect Distortion In Cubase?

Yes, certain plugins can introduce or exacerbate distortion. Opt for high-quality plugins and adjust settings carefully. Bypass plugins to identify the source of distortion and replace or reconfigure as needed.

Conclusion

Ready to wave goodbye to distorted audio in Cubase? By now, you’ve learned the keys to troubleshoot and correct unwelcome noise. Tackling distortion isn’t just technical—it’s also about ensuring a pristine listening experience. Stick to these tips, and your tracks should remain crisp and clear.


Keep experimenting, and happy mixing!

Categories
Archive

What is the Difference: Ableton Live vs Lite Explained

Ableton Live Lite is a limited, introductory version of Ableton Live, with fewer tracks, effects, and features. While Ableton Live includes the full range of capabilities, Live Lite offers essential tools for music creation.

Ableton Live stands out as a powerhouse in the world of digital audio workstations (DAWs), providing artists and producers with a comprehensive suite of tools to create, produce, and perform music. This software’s versatility has made it a staple in studios and on stages worldwide, thanks to its intuitive workflow, robust feature set, and seamless live performance functionalities.

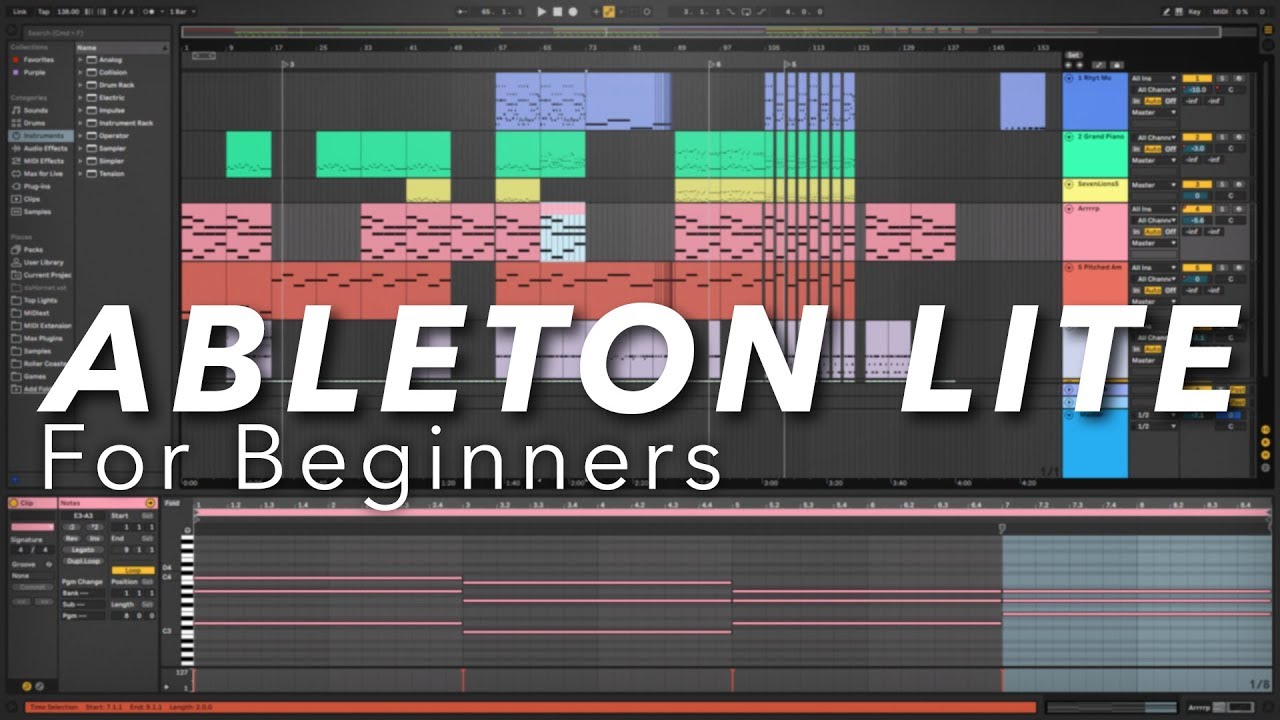
Ableton Live Lite, on the other hand, serves as an entry-level edition, catering to beginners or those who need a more streamlined version for simpler projects. Despite its limitations, Live Lite still embodies the core experience of the software, allowing users to get a taste of Ableton’s creative potential without the commitment to the full version’s price tag. Navigating through the sea of DAW options, the choice between Ableton Live and Ableton Live Lite depends largely on one’s needs and the scope of their musical endeavors.

Introduction To Ableton Live

Ableton Live: A Staple in Music Production

Ableton Live stands tall as a powerful tool in digital music production. Renowned for its flexibility, Live transforms musical ideas into reality. This software suits beginners and pros alike. Creators across the globe trust Live for its innovative features.

Popularity In Music Production

Ableton Live’s intuitive design makes it a go-to choice for artists. Its efficiency and versatility place it at the heart of studios everywhere. Live’s real-time capabilities allow for spontaneous composition and performance.

Versions And Choices

Ableton offers different versions of Live. Ableton Live Lite is the entry-level version. It provides essential features for new users. Full-featured versions like Ableton Live Standard and Ableton Live Suite contain advanced tools for in-depth music creation.

Feature Live Lite Live Standard Live Suite
Audio & MIDI Tracks Limited Unlimited Unlimited
Scenes Limited Unlimited Unlimited
Audio Effects Basic Extended Comprehensive
Software Instruments Few More Most
Max for Live Not Included Not Included Included
  • Live Lite is best for beginners.
  • Live Standard offers more for growing artists.
  • Live Suite provides complete tools for professionals.

Ableton Live: The Professional’s Choice

Ableton Live: The Professional’s Choice stands out as the music production software elite. Musicians, producers, and DJs often pick it for its robust features. Ableton Live Lite may introduce basics. The full version transforms visions into reality, offering much more depth.

Feature-rich Interface

Behind the scenes of each musical masterpiece lies a feature-rich interface. Full Ableton Live boasts a large array of tools. It hosts an expanded library. This library includes sounds, effects, and instruments. With unlimited tracks, your project complexity knows no bounds. Compare this to Lite’s more modest eight-track limit, and it’s clear. Full version users enjoy a boundless canvas for their audio creations.

Integrated Tools For Creatives

Integrated tools tailor to the needs of creatives. Ableton Live includes Max for Live. This expands the potential for sound design and customization. Imagine being able to twist and tweak sound to perfection. Live Lite has restrictions that limit such explorations.

Ableton Live Ableton Live Lite
Unlimited Audio & MIDI Tracks 8 Audio & MIDI Tracks
Extensive Sound Library Basic Sound Library
Max for Live Integration No Max for Live
Advanced Warping and Real-Time Time-Stretching Limited Warping Features
Complete Suite of Effects Basic Effects Suite
Professional Music Creation Entry-Level Music Creation

Ableton Live Lite: Entry-level Access

Ableton Live Lite gives new creators a taste of music production. Imagine it as a starter kit. It packs the core features of Ableton Live. It’s perfect for those starting their musical journey.

Simplified Workflow

Music creation should be fun, not complex. Ableton Live Lite’s design keeps it simple. Users can focus on making beats and tunes. The interface is clean and easy. It invites everyone to start crafting music right away.

Essential Functions For Beginners

  • Intuitive arrangement view: Drag and drop to make songs.
  • Basic MIDI and audio tracks: Learn without feeling overwhelmed.
  • Sound selection: Start with a good range of instruments and effects.
  • Export options: Share creations with the world.

With Ableton Live Lite, beginners get the crucial tools. It’s a solid foundation to build on. As skills grow, producers can consider upgrading to the full version of Ableton Live.

What is the Difference: Ableton Live vs. Lite Explained

Credit: www.levelsmusicproduction.com

Comparing The Interfaces

When diving into music production, choosing between Ableton Live and Ableton Live Lite can feel daunting. A crucial factor is their interfaces. By comparing them, producers can pick the version that aligns with their workflow and needs. Let’s explore the visual and usability differences that define these two powerhouses.

Layout And Usability

Ableton Live Lite boasts a streamlined layout, designed for ease of use. Its lightweight interface presents fewer options upfront, helping novices focus on the essentials. You’ll find:

  • Simplified view options
  • Limited tracks: up to 8 audio and 8 MIDI tracks
  • Basic session and arrangement views

In contrast, the full version of Ableton Live offers a comprehensive layout. It caters to professional needs with:

  • Advanced view options including Dual Monitor support
  • Unlimited tracks for complex projects
  • Enhanced session and arrangement views with more features
Feature Ableton Live Lite Ableton Live
Tracks Up to 8 audio & 8 MIDI Unlimited
View Options Limited Advanced

User Experience

The user experience of Ableton Live Lite is tailored to beginners. It provides a gentle learning curve with:

  • Essential tools and effects
  • Guided first steps for newcomers
  • Drag-and-drop functionality for intuitive use

Ableton Live, on the other hand, enriches the user’s journey with more depth. It allows for:

  • In-depth customization and control
  • A vast library of sounds and effects
  • Professional-grade tools for production and performance
Aspect Ableton Live Lite Ableton Live
User Friendliness Suitable for beginners Geared towards professionals
Toolset Essential tools Extensive professional tools

Functionality Face-off

When choosing between Ableton Live and Ableton Live Lite, it’s key to understand the features each offers. Let’s dive into the core aspects that set them apart in our “Functionality Face-Off.”

Instruments And Effects

Ableton Live shines with its vast collection of instruments and effects, vital for crafting unique sounds. It includes:

  • Comprehensive synthesizers.
  • Advanced sampling tools.
  • Diverse range of effects.

However, Ableton Live Lite comes with a limited set. You get:

  • Fewer synthesizers.
  • Basic sampling options.
  • Essential effects only.

This makes Lite a good starting point for new music producers.

Recording And Editing Capabilities

Ableton Live offers professional-level recording and editing. Features include:

  • Multi-track recording.
  • Unlimited audio and MIDI tracks.
  • Advanced warping and real-time stretching.

In contrast, Ableton Live Lite presents more basic recording features. These are:

  • Single-track recording at a time.
  • Limited audio and MIDI tracks support.
  • Standard warping features.

So, professionals tend to choose Ableton Live for its enhanced capabilities.

Performance And Live Use

When taking your music from the studio to the stage, Ableton Live and Ableton Live Lite serve different needs. Each software version offers unique features for performance use. Understanding their capabilities ensures an electrifying live experience. Let’s explore how both versions cater to performance and live use, focusing on stage presence and MIDI controller integration.

Stage Presence

Ableton Live boasts an extensive range of features enhancing stage presence. Full software use provides intricate visual setups and on-the-fly editing, essential for a dynamic performance.

  • Live Visuals: Customize your show with engaging visuals synced to your music.
  • Advanced Audio Effects: Manipulate tracks in real-time, keeping the audience on their toes.
  • Flexible Scene Launching: Spontaneously trigger different sections of your set without a hitch.

Contrastingly, Ableton Live Lite is a trimmed version. It suits performers seeking simplicity and those navigating the basics of live software.

  • Essential Audio Effects: Equip musicians with basic effects for a solid live performance.
  • Limited Scenes: Performers can still engage the crowd with a fewer number of scenes.

Midi Controller Integration

Both abled in linking with various MIDI controllers, they diverge in the scope of this integration.

Feature Ableton Live Ableton Live Lite
Number of MIDI mappings Unlimited Limited
Hardware Compatibility Extensive Basic
Custom MIDI Scripts Supported Not supported

In Ableton Live, the limitless MIDI mappings enable complex controller setups. This versatility is a game-changer for artists who want total control on stage. With Ableton Live Lite, the focus is on essential functionality. It supports straightforward performances with a hands-on approach to music creation.

Cost Considerations

Choosing between Ableton Live and Ableton Live Lite depends on your needs and wallet. While both offer powerful music creation tools, their costs differ. Think about spending more for extra features or saving money with a slimmer version. Let’s dive into how your choice aligns with your finances.

Investment Vs. Budget

Ableton Live is a full-fledged DAW, ideal for pros and serious musicians. Its price reflects its vast array of features. This investment secures a long-term music production suite. Ableton Live Lite, on the other hand, is budget-friendly. It is suitable for beginners or those who need just the basics.

Ableton Live Ableton Live Lite
Features Broad Limited
Price Higher Free or Bundle
Purpose Professional Work Learning & Small Projects

Upgrading From Lite To Full Version

If you start with Ableton Live Lite, an upgrade path to the full version is available. This is perfect when your skills outgrow the Lite limitations. Upgrading often comes at a discounted rate than purchasing outright. Keep an eye out for special deals from Ableton or its partners.

  • Start Small: Work with Lite and learn the ropes.
  • Upgrade Later: Jump to the full version when ready.
  • Save Money: Look for upgrade discounts and save.
What is the Difference: Ableton Live vs. Lite Explained

Credit: www.levelsmusicproduction.com

Making The Right Choice

Making the right choice between Ableton Live and Ableton Live Lite isn’t just about saving money—it’s about matching your music production software to your creative needs and future aspirations. Whether you’re just starting out or looking to expand your skills, understanding the differences can help you select the version that will best support your musical journey.

User Needs And Goals

Diving into the world of digital audio workstations (DAWs) brings up key considerations tied to what you aim to achieve. Here are essential aspects to ponder:

  • Track Count: Live Lite limits you to 8 audio and MIDI tracks
  • Scenes: Up to 8 scenes are available in Lite for live performances
  • Effects: Lite offers a curated selection of effect units
  • Stock Instruments: Fewer instruments in Lite mean a lighter toolset
  • Workflow: The full version allows more advanced editing options

If your aim is to experiment and learn, or if you manage smaller projects, Live Lite might suffice. For producing complex tracks and professional work, the full version stands out.

Future-proofing Music Creation

Considering your future in music creation requires a forward-thinking approach. Ableton Live Lite might be your starting block, but aspiring producers often outgrow its capabilities. Contrastingly, the full version offers:

Feature Live Lite Ableton Live
Max for Live Not included Included
Track Count Limited Unlimited
Audio Warping Basic Advanced
Audio Slicing Unavailable Available
Wrap and Morph Not possible Possible

To ensure your music production grows with you, assess whether the expanded features in Ableton Live align with your long-term goals. Keep in mind, the full version offers a smooth scalability that can be crucial as your projects become more complex.

User Stories And Testimonials

Ableton Live and Ableton Live Lite serve distinct user groups. Let’s dive deep into real-life stories from those who’ve tested both versions.

Professional Endorsements

Pros help us see these tools at their peak. They use Live for complex projects. Lite versions may not suffice. Let’s find out from the pro beat-makers themselves.

  • DJ Tiesto claims the full version offers endless innovation in his sets. His tracks enchant the crowd.
  • Grimes, a sonic adventurer, feels Live gives her the creative freedom Lite can’t match.

Success Stories From Beginners

New creators start somewhere, and often it’s with Lite. Their success tales teach us the real power of Lite.

Beginner Project Experience with Lite
Sam First EP “Lite’s simplicity taught me production basics.”
Alex Live DJ Set “A great start to understand workflow before upgrading.”
What is the Difference: Ableton Live vs. Lite Explained

Credit: www.youtube.com

Summing Up Live Vs. Lite

The battle of Ableton Live versus Ableton Live Lite rests on user needs and ambitions. Choosing the right digital audio workstation (DAW) shapes music creation paths. This section simplifies the choice for artists and producers.

Key Takeaways

  • Ableton Live Full Version offers unlimited tracks and scenes. It unleashes the full range of production tools.
  • Ableton Live Lite is a trimmed version. It includes essential features for beginners or light users.
  • The Lite version allows up to 8 audio and MIDI tracks. Live’s full version breaks these boundaries.
  • Live boasts more effects, instruments, and packs. Lite provides just enough to start.

Recommendations For Different Users

User Type Recommended Version Reason
New producers Ableton Live Lite Less complexity, easy start
Hobbyists Either version Depends on interest level
Professionals Ableton Live Full Version Full toolset for production
Performers Ableton Live Full Version Advanced live performance features

Frequently Asked Questions For What Is The Difference Between Ableton Live And Ableton Live Lite

What Features Are Exclusive To Ableton Live?

Ableton Live offers numerous advanced features such as unlimited audio and MIDI tracks, scenes, sends and returns, and audio slicing. It also includes a broader range of instruments, effects, and the ability to add custom external devices.

Can Ableton Live Lite Be Upgraded?

Yes, Ableton Live Lite can be upgraded to the full version of Ableton Live. Users looking to expand their production capabilities can purchase an upgrade directly from Ableton’s website or authorized retailers.

How Many Tracks Can Ableton Live Lite Handle?

Ableton Live Lite is limited to 8 audio and MIDI tracks. This constraint makes it suitable for basic projects and those learning the ropes of music production, but might be restrictive for complex arrangements.

Is Ableton Live Lite Suitable For Professionals?

Ableton Live Lite can be useful for professionals for sketching ideas or live performance setups. However, its feature limitations may necessitate an upgrade for full-scale production work and advanced functionality.

Conclusion

Choosing between Ableton Live and its Lite counterpart boils down to your needs. Live offers extensive features for professionals, while Lite is perfect for beginners getting their feet wet. Consider preferences, level, and project demands before deciding. Whichever you pick, creativity awaits.

Dive in and let your musical journey flourish.

Categories
Archive

Remixing Your Own Song: Unleash New Vibes!

Remixing your own song is often referred to as creating a “self-remix” or an “artist’s remix.” It’s a way to reinvent your original work.


Artists frequently explore new horizons with their music, and remixing their own songs provides a perfect avenue for creative reinvention. A self-remix lets musicians take their original compositions and inject fresh elements, adapting their work to different genres, trends, or audiences.


Unlike a cover or interpretation by another artist, a self-remix remains fully in the creator’s control, maintaining the original’s essence while allowing for experimental freedom. This process not only revives interest in the track but can also expose it to new listeners, making it a strategic move for artists seeking to broaden their reach while keeping their catalog dynamic and relevant. It’s a testament to the evolving nature of music and an artist’s perpetual journey of self-expression.


The Art Of Self-remixing

The Art of Self-Remixing breathes new life into music creation. Artists often revisit their work, discovering fresh perspectives and new beats within their original melodies. This process goes beyond simply tweaking a track; it’s about re-imagining the soundscape from the ground up. Let’s dive into how artists redefine their songs and the creative boons that come with it.

Redefining The Original Track

When producers tackle self-remixing, they’re not just altering a song – they’re redefining it. This involves dissecting the original elements and stitching them into an entirely different sonic fabric. Here’s what the transformation typically involves:

  • Tempo adjustments set a new pace for the track.
  • Harmonic modifications create unheard chord progressions.
  • Experimental sound design adds unique textures.

Such twists can turn a somber ballad into an upbeat dance hit or an electronic piece into an acoustic gem, demonstrating the track’s versatility.

Creative Benefits Of Remixing Your Work

Self-remixing offers a playground for experimentation and growth. It provides several creative benefits:

  1. Skills sharpening: Artists refine their craft as they explore new techniques.
  2. Inspiration boost: Familiar melodies spark unexpected creative ideas.
  3. Genre exploration: Creators venture into styles outside their comfort zones.

Whether for personal growth or public release, self-remixing proves a priceless tool in a musician’s arsenal, driving both innovation and mastery.

Remixing Your Own Song: Unleash New Vibes!


Credit: fastercapital.com

Selecting A Song For A Fresh Twist

Imagine taking a familiar tune and infusing it with new life. Remixing a song involves creativity and a keen ear. Selecting the right track to remix is the first step to creating a unique masterpiece. Find a song that resonates, and prepare to give it a fresh twist.

Criteria For Remix-worthy Tracks

Not all songs are ideal for a remix. Choosing the right one is crucial. Focus on these elements:

  • Memorable Melody: Pick a song with a catchy tune that listeners can’t forget.
  • Room for Creativity: Look for tracks with potential to be reshaped in new ways.
  • Emotional Connection: Choose music that sparks feelings and engages your audience.
  • Quality Elements: Songs with high-quality vocals and instrumentals offer a solid foundation.

Listening With A Remix Mindset

Active listening is key. Hear the song not just as it is, but as what it could be. Mind these tips:

  • Identify parts of the song that stand out and imagine them with a twist.
  • Visualize the song in a different genre or tempo.
  • Consider how you can highlight the song’s best features while adding your signature style.

Each song holds a new opportunity. Keep these strategies in mind, and you’re ready to remix with confidence.

Setting The Stage For Transformation

Remixing your own song breathes new life into your work, transforming the familiar into something fresh and exciting. This process, Setting the Stage for Transformation, begins with preparation and organization. Let’s dive into the essentials you need to reinvent your musical piece.

Tools And Software For Remix

Choosing the right tools and software is pivotal. The following are must-haves for any remix enthusiast:

  • DAW (Digital Audio Workstation): Acts as your main platform.
  • Plugins: Enhance sound with effects and synthesizers.
  • Sample Libraries: Provide additional sound options.
  • Beat Making Software: Helps in crafting new rhythms.

Moreover, explore free and paid versions to match your budget. Consider demo versions to test before purchase.

Organizing Your Source Materials

Efficient material organization ensures a smooth remix process. Follow these steps:

  1. Collect all audio files: Include stems, samples, and recordings.
  2. Create a backup: Protect your original work.
  3. Label everything: Makes navigation easy.
  4. Categorize: Group similar sounds together.

With materials organized, you’re set to embark on your creative journey. Your updated track awaits!

Dissecting The Elements

Remixing a track is an art. It’s like giving a painting a new splash of color. You take a song apart and put it back together. You create a new vibe. Your song can become something fresh. But first, you need to dissect it. Think of it as musical surgery. You separate the pieces. You figure out what makes your song tick. Let’s dive into isolating vocals and instruments. Let’s learn what to keep and what to tweak.

Isolating Vocals And Instruments

Creating a remix starts with isolation. You isolate vocals from instruments. This gives you free play. You can use them in new ways.

  • Extracting vocals: You can use software. It splits the voice from music.
  • Separating instruments: Each sound gets its own track. It’s like puzzles. You can move and change.

Think of your vocals and instruments as characters. They can tell new stories when solo.

Deciding What To Keep And What To Tweak

Now, you decide. What stays? What changes? This step is crucial.

  • Keep the soul: Some parts are the heart of the song. They might stay.
  • Tweak: Other parts can be different. Change tempos. Add effects. Play with sounds.

Choices make your remix unique. You shape it. Your song can become a whole new world.

Exploring Genres And Sounds

Remixing your own song unlocks a world of creativity. It means taking familiar tunes to new places. Artists often remix their songs to experiment with different styles. They use this chance to blend genres or add new flavors. Let’s dive into how remixing can break musical walls and spice up sound textures.

Breaking Genre Boundaries

Remixes offer a unique way to cross the lines between musical genres. A country ballad can transform into an upbeat pop anthem. Or an electronic track can gain a jazz twist. These surprising mixes create exciting sounds. They also help artists reach new audiences.

  • Fusing hip-hop with classical elements
  • Adding rock guitar riffs to an R&B hit
  • Blending Latin beats into electronic dance music

Incorporating Unconventional Sound Textures

Unconventional sounds give remixes a distinctive edge. They pull listeners into an unexpected audio journey. Sound textures can come from everyday objects or sophisticated software. Think of using kitchen noises or video game sounds in a song. The possibilities are endless.

Source Sound Example Music Genre
Nature Bird chirps Ambient
Urban Sirens Hip-Hop
Home Pots and pans Experimental


Rearrangement And Composition

When an artist decides to remix their own song, it’s a creative adventure. This process, known as rearrangement and composition, breathes new life into the original track. It’s like giving your song a second chance to make a first impression. Artists tweak melodies, add fresh beats, or change the song’s entire mood. The aim is to connect with audiences in a new way. Let’s dive into how to structure your remix and find the right balance for a sound that’s both fresh and familiar.

Structuring Your Remix

Structuring a remix is crucial for capturing listeners’ attention. You want to keep the core essence of the original song while introducing a new narrative. Start by deciding what elements of the original track you keep. Will it be the catchy chorus, the memorable hook, or the harmony structure?

  • Identify the key components of the original song you want to highlight
  • Decide on a tempo that complements the new style
  • Choose instruments that add a unique flavor
  • Create a layout for the intro, verse, chorus, and bridge
  • Experiment with layers and textures

Finding The Right Balance

Finding the perfect balance in your remix is like cooking a great meal. You must mix ingredients in just the right amounts. The aim is to have the new additions enhance the original flavors without overpowering them.

Original Element How to Balance
Vocals Adjust pitch/tempo to fit the new style
Melody Introduce countermelodies or harmonic changes
Rhythm Add new drum patterns or percussive sounds
Harmony Shift chords to alter the song’s mood

Remember to step back and listen critically to your remix. Are the new elements cohesive with the original? Is anything too dominant or too subtle? This reflection ensures you strike just the right note.

Adding Your Signature Touch

When you remix your own song, it’s like painting your personality across the canvas of sound. Adding your signature touch transforms the track into a unique masterpiece. This is your chance to showcase your style and make the song truly yours. With each tweak and alteration, listeners experience your creative voice shining through.

Personalizing With Effects And Synths

Exploring a world of audio embellishments breathes fresh life into your music. Personalize your remix with effects and synths that resonate with your essence.

  • Adjust reverb and delay for atmospheric depth.
  • Integrate distortion or bit-crushing for edgy textures.
  • Use synths to create fresh melodies or harmonies.

Remember, the right effect can turn a simple note into a statement.

Staying True To Your Artistic Identity

Your artistic identity is your musical fingerprint. Maintain that authenticity while remixing your track.

  1. Identify elements that define your sound.
  2. Stay cohesive with your previous work.
  3. Infuse the remix with your personal influences.

Consistency in your sound tells your story as an artist. It connects your work and makes it instantly recognizable.

From The Studio To The World

‘From the Studio to the World’ marks a journey unlike any other. This is when artists breathe new life into their original work. They transform their songs into fresh masterpieces. These remixed tracks blaze a trail from the secluded studio space out onto the global stage. It’s a thrilling venture for any musician. Let’s peer into this exhilarating process and dish out the essentials for dishing out your tune anew!

Finalizing And Mixing The Track

The path from raw sound to a polished remix demands precision. Finalizing and mixing shape the backbone of your fresh sound. Critics alike praise a well-mixed track. So, what steps are pivotal in this phase?

  • Select your best parts from the original track.
  • Experiment with different beats and harmonies.
  • Invite feedback from trusted ears.
  • Apply professional audio mastering.

Remember, remixing is about reinvention. Each adjustment should bolster the original essence while unveiling new energy. Your goal? Create a tune that resonates on every speaker it graces.

Promoting Your Remixed Creation

Once your track hits that sweet spot, it’s showtime. Promotion is key. You crafted an audio gem. Now, let’s make sure it shines far and wide. Effective promotion involves strategy and finesse.

Method Description
Online Platforms Share your song on music streaming sites.
Social Media Drop teasers and engage with listeners.
Email Campaigns Notify your subscriber base with enticing content.
Collaborations Partner with fellow artists or influencers.

A successful promotion can skyrocket your track’s reach. Get creative, stay authentic, and watch your remixed creation ripple across the globe.


Frequently Asked Questions On Remixing Your Own Song What Do You Call It

What Is Remixing Your Own Song Called?

Remixing your own song is often called a “self-remix,” “rework,” or “edit. ” The artist takes the original tracks and reimagines them to create a fresh, new version. This could involve altering the beat, melody, or arrangement.

Can Artists Legally Remix Their Own Music?

Yes, artists can legally remix their own music since they hold the rights to the original work. This gives them the freedom to alter and redistribute the song without legal repercussions, as long as they abide by any contractual agreements with record labels or collaborators.

Why Do Musicians Remix Their Own Songs?

Musicians remix their own songs for various reasons, such as refreshing the track for a new audience, showcasing a different style, or creatively expressing a song differently. It’s a way to expand the lifespan and reach of their music.

Does Remixing A Song Improve Its Success?

Remixing a song can potentially improve its success by introducing it to different genres and audiences. A well-crafted remix can boost a song’s popularity, especially if it resonates with the current musical trends or features prominent guest artists.

Conclusion

Breathing new life into your tracks through remixes can spark fresh excitement. Call it reimagining, reinventing, or remixing your own creation. This artistic pivot invites your audience to experience your music in a novel way. So go ahead, remix your own song; it’s a sign of creative evolution and engagement with your fans.


Embrace the process and watch your music flourish anew.

Categories
Archive

How to Make Your Own Sounds in Ableton: Unleash Creativity!

To make your own sounds in Ableton, start by exploring the built-in instruments and effects. Experiment with synthesizers, drum machines, and audio effects racks to craft unique sounds.

Creating your own sounds in Ableton Live is a rewarding experience that can set your music apart from the rest. This powerhouse DAW (Digital Audio Workstation) is equipped with a vast array of tools for sound design, from basic waveforms to complex modulation.

Musicians and producers can dive into the software’s synthesizers, such as Operator or Analog, to manipulate waveforms and filters. With drum machines like Impulse or the more advanced Drum Rack, beats become customizable down to the finest detail. Sound manipulation isn’t limited to instruments; using audio effect racks expands your sonic palette even further by adding depth, texture, and movement to your sounds. Understanding how to effectively utilize Ableton’s rich feature set is key to producing original audio content that resonates with your creative vision.

How to Make Your Own Sounds in Ableton: Unleash Creativity!

Credit: www.mind-flux.com

Introduction To Sound Creation In Ableton

Diving into the world of music production is thrilling, especially with tools like Ableton Live. This software offers an endless canvas to craft unique audio. Imagine painting with sound waves, shaping them to fit your vision perfectly. Through Ableton, you can transform your musical ideas into reality, adding that personal touch to your tracks. Let’s explore how you can harness the power of Ableton to create your very own sounds.

Why Create Your Own Sounds?

  • Originality: Adding a signature to your music makes it stand out.
  • Flexibility: Tailor sounds to fit your project perfectly.
  • Knowledge: Learning sound design sharpens your production skills.

The Potential Of Ableton Live

With Ableton Live, the potential for sound creation spans far and wide. The software equips you with everything needed to build sounds from the ground up. Ableton’s instrument rack teems with synthesizers, samplers, and effects, all at your fingertips. Manipulate waveforms, tweak filters, and employ modulation to breathe life into your sonic brainchild. Whether a pounding bass or a delicate melody, Ableton Live makes it possible.

Setting Up Your Workspace

Welcome to the ultimate guide for crafting your own unique sounds using Ableton! Setting up your workspace efficiently lays the foundation for a smooth sound design process. Creating the perfect environment is key. Let’s get your space ready!

Optimizing Ableton Preferences

Before diving into sound creation, adjust Ableton’s preferences for optimal performance. Go to Ableton’s Preferences menu to begin.

  • Audio Tab: Select your driver type and audio input/output device to ensure low latency.
  • CPU Load Meter: Enable this feature to monitor your CPU usage.
  • Default SR & Pitch Conversion: Set Sample Rate and Conversion Quality to get the best sound.

Remember to save these preferences for future sessions.

Essential Equipment For Sound Design

Your equipment is crucial for sound design. Here’s a list of what you’ll need:

Equipment Function
MIDI Controller Play and record notes.
Audio Interface Minimize latency.
Studio Monitors/Headphones Accurate sound feedback.
External Storage Save projects and samples.

Invest in quality gear to experience a significant difference in sound design.

Exploring Ableton’s Instruments

Creating unique sounds in Ableton Live is an adventure. This journey leads us through an impressive array of built-in instruments. Each one serves as your sonic paintbrush, ready to craft your next masterpiece. Let’s dive into the diverse world of Ableton’s synthesizers, samplers, and drum machines.

Synthesizers And Samplers

Ableton Live comes with a powerful set of synthesizers and samplers. These tools allow you to shape sound from scratch or manipulate existing samples.

  • Analog: Emulates classic analog synthesizers.
  • Operator: An FM synthesizer for dynamic sounds.
  • Wavetable: Offers intricate, evolving waveforms.
  • Sampler: A versatile sampling instrument.
  • Simpler: An easy-to-use sampler for quick edits.

Switch between these instruments to discover new textures and tones. The key to mastery lies in experimenting with their unique controls.

An Overview Of Drum Machines

Drum machines in Ableton Live provide a solid foundation for your tracks. They deliver a range of percussive sounds to drive rhythm and groove.

Drum Machine Features
Drum Rack Combine multiple drums and percussion in one kit.
Impulse Simple, effective 8-pad drum sampler.
Session Drums Multi-sampled acoustic drums for authentic beats.

Explore these machines to build beats from classic drum sounds or design entirely new percussive elements for your music.

Sound Shaping With Audio Effects

Sound shaping with audio effects is an art in Ableton Live. It lets you transform raw sounds into musical gems. With the right tools and techniques, custom sounds become your signature. Let’s dive into the world of EQ, filters, delays, and reverbs to unlock your sound design potential.

Using Eq And Filters

EQ and filters are key to carving out sonic space. In Ableton, these tools help in boosting or cutting frequencies. This adds clarity and punch to your sounds.

  • EQ Eight: Tweak multiple frequencies at once.
  • Auto Filter: Automate frequency sweeps for dynamic movements.
  • High-pass and low-pass filters clean up the mix.

Use Ableton’s EQ Three for live performances. It offers quick access to low, mid, and high frequencies. Boost or cut bands to make kicks thump or snares crack.

Creative Delays And Reverbs

Delays and reverbs add depth and space. Ableton’s arsenal includes tools to create vast soundscapes.

  1. Simple Delay: Sync it to the tempo for rhythmic echoes.
  2. Ping Pong Delay: Bounce sounds between left and right channels.
  3. Reverb: Place sounds in virtual spaces. From small rooms to grand halls.

Don’t forget to use automation. It helps in shaping delays and reverbs over time. This creates dynamic changes in your soundscape.

Effect Use for
Grain Delay Texture and atmosphere
Filter Delay Complex delay patterns
Convolution Reverb Realistic environmental effects

Layering Sounds For Depth

Creating rich, textured sounds in Ableton is an art. Layering sounds for depth transforms flat, single tracks into dynamic, full-bodied compositions. Let’s dive into the essential techniques to give your tracks that professional polish.

Techniques For Thickening Sounds

Ready to make your music sound huge? Here are some methods:

  • EQ Overlapping: Adjust the equalization (EQ) to make multiple sounds complement each other.
  • Compression: Use compression to even out levels and add punch.
  • Reverb and Delay: Apply these with moderation for a bigger soundscape without muddiness.
  • Harmonics: Add harmonic content with saturation for warmth and fullness.

The Art Of Sound Stacking

Sound stacking is about combining sounds wisely. Here’s how to do it:

  1. Select sounds that have different characteristics.
  2. Edit individual sounds to fit well together.
  3. Stack them in a way that highlights the best of each.
  4. Adjust volumes so no sound overpowers another.
  5. Group stacks together to process them as one unit.

This process creates a lush, cohesive sound palette for your tracks.

Recording External Sources

Creating your own sounds in Ableton isn’t just about digital tools. You can bring the outside world into your tracks. Record anything from city ambience to your pet’s purrs. Let’s dive into how you can enrich your music with external sources.

Incorporating Field Recordings

Incorporating Field Recordings

Capture the sounds that surround you and embed them into your project. Here’s how:

  • Choose a portable recorder for high-quality audio capture.
  • Explore your environment. Parks, urban settings, and nature can be goldmines of unique sounds.
  • Transfer your recordings into Ableton. Edit and warp them to fit your track.

Remember, even ambient noise can add depth to your music.

Integrating Hardware Synthesizers

Integrating Hardware Synthesizers

Hardware synthesizers offer rich sounds that can define your track. Here’s a simple process to integrate them:

  1. Connect your synthesizer’s output to your audio interface.
  2. Select the proper input channel in Ableton’s preferences.
  3. Record as you would a mic, capturing the raw synth sound.
  4. Shape the sound further using Ableton’s effects and processing tools.

This method generates unique audio that sets your music apart.

Manipulating Samples

Creating unique sounds in Ableton is exciting for any music producer.

Manipulating samples is a powerful way to craft original audio.

From twisting loops to playing with granules, options are endless.

Let’s dive into the art of sample manipulation!

Chopping And Looping

Chopping turns long samples into bite-sized pieces.

Looping makes these pieces repeat smoothly.

Use Ableton’s Simpler or Sampler to chop.

  • Load a sample into Simpler.
  • Select a section you like.
  • Adjust start and end points.
  • Trigger this new sound with your MIDI controller.

Looping is easy.

  1. Drag your chop into Arrangement View.
  2. Enable loop mode in the clip settings.
  3. Seamlessly blend the end into the start.

Granular Synthesis Basics

Granular Synthesis might sound technical.

It breaks sound into tiny grains.

You can then play these grains in new ways.

Ableton doesn’t have a granular synth built-in, but Max for Live does.

  • Get a Max for Live granular synth.
  • Load a sample into the device.
  • Change grain size, pitch, and spacing.
  • Create sounds never heard before!
How to Make Your Own Sounds in Ableton: Unleash Creativity!

Credit: www.facebook.com

Midi Effects And Automation

Transforming basic sounds into unique audio experiences defines modern music production. Ableton Live makes this incredibly easy, especially with the power of MIDI Effects and Automation. These tools help craft dynamic and personalized sounds that can set your tracks apart.

Creative Uses Of Midi Effects

MIDI Effects in Ableton serve as a playground for sound design. Think of them as the spices in a gourmet dish, adding distinct flavors and personality. Here’s how to add zest to your sounds:

  • Arpeggiator: Turns chords into rhythmically complex patterns.
  • Chord: Generates harmonies automatically from single notes.
  • Scale: Locks your MIDI to a specific musical scale; never hit a wrong note again.

Combine these effects, tweak their settings, and watch your MIDI transform in real-time. Unique sequences are right at your fingertips!

Automating Movement In Sounds

With Automation, you can breathe life into static sounds. Imagine your notes growing and evolving as your song progresses. Below is a simple guide to get you started:

  1. Select a Parameter: Choose a knob or slider to automate, like pitch or volume.
  2. Choose Your Range: Decide the highs and lows for your automation.
  3. Draw Your Curves: Use the pencil tool to create automation patterns.

Time your automation with rhythmic elements or transitions to make your sounds dance around the track. Experiment with different curves and timing to find what fits best.

Remember, there is no ‘one way’ to use MIDI effects and automation. Be bold, experiment, and you will surely make sounds that are entirely your own.

Mindful Experimentation

Welcome to the adventurous world of sound design in Ableton, where mindful experimentation is the key to unlocking your unique sonic landscapes. Transform the noise in your head into a symphony in the studio with intentional trial and error. Let’s dive into how you can harness this potent tool, refine your creativity, and craft sounds like a pro.

Embracing Happy Accidents

Discover beauty in the unexpected, where an ‘accident’ can lead to your next big sound. Allow these mishaps to guide your creativity.

  • Start by twisting knobs and pressing buttons without a plan.
  • Record everything, because mistakes can evolve into masterpieces.
  • Use built-in effects in unconventional ways to create surprising results.

Not every sound will be perfect, but every sound has potential.

Setting Limits For Focused Creativity

Limits can foster innovation. Choose a set of constraints to heighten your creative process.

  1. Pick a finite number of tools or effects.
  2. Limit your sound palette to specific synths or samples.
  3. Set a time boundary to make decisions quickly.

These constraints can turn scattered thoughts into cohesive outputs.

Finishing Touches

Now that you’ve crafted unique sounds in Ableton, it’s time for the final but crucial steps. The magic lies in refining your tracks with precision. To help them stand out, giving them a professional touch is key. With the right finishing touches, your creations will shine.

Mixing Considerations For Original Sounds

To ensure your sounds blend well, start with mixing. Balance is essential for clean and powerful tracks.

  • Use EQ (Equalization) to carve out space for each element.
  • Adjust levels and panning for a dynamic mix.
  • Apply compression carefully to enhance or tame dynamics.

Add effects like reverb or delay to create depth. Remember, less is often more, so be subtle!

Mastering And Exporting Your Creations

Mastering takes your track from good to great. It ensures consistency and loudness across various playback systems.

  1. Check the final mix balance once more before mastering.
  2. Use a limiter to achieve the desired loudness without distortion.

Export your track with the proper settings. Choose the right file format and bitrate. High-quality WAV or AIFF files are best for professional use.

With these steps, your tracks are now ready to impress listeners everywhere!

Collaboration And Community

Exploring the world of sound design in Ableton can be even more thrilling with friends and fellow creators. Collaboration and community are key to harnessing new ideas and expanding your musical palette. Sharing your creations and garnering feedback from other artists isn’t just fulfilling; it’s an essential step in the journey of sound exploration.

Sharing Sounds With Other Artists

Taking the plunge into sharing your sounds can spark engaging collaborations. Here’s how to start:

  • Upload your original sounds to cloud storage services or audio sharing platforms
  • Participate in forums or groups dedicated to Ableton users
  • Exchange project files with trusted producer friends for a fresh perspective

By sharing, you encourage creative exchange, leading to unique outcomes. Remember to respect copyright when sharing samples or project files.

Finding Inspiration In The Ableton Community

Joining the Ableton community puts a world of inspiration at your fingertips:

Community Resource Description
Ableton Forums Connect with users to discuss techniques and solutions.
Social Media Groups Facebook and Reddit have active Ableton communities for tips and support.
Meetups and Workshops Join local and online events for hands-on learning and networking.

Engaging with the community can lead to collaborative projects, learning opportunities, and even mentorship. Utilize these resources to fuel your sound design journey in Ableton.

How to Make Your Own Sounds in Ableton: Unleash Creativity!

Credit: recordingarts.com

Continuing The Sonic Adventure

Welcome to the next phase of your audio production journey with Ableton. ‘Continuing the Sonic Adventure’ isn’t just about mastering what you know; it’s about pushing boundaries and discovering the vast universe of sound that awaits. This section will guide you through further enhancing your sound-making prowess within Ableton, ensuring your creations stand out and tell a story. Let’s dive into expanding your toolkit and refining your craft.

Staying Updated With Ableton’s Tools

Ableton Live is an evolving platform, frequently updated with new features and enhancements. Keeping track of these updates is crucial for harnessing the full creative potential of the software. Here’s how to stay ahead:

  • Subscribe to Ableton newsletters.
  • Follow Ableton on social media for tips and updates.
  • Regularly visit the Ableton website for news and tutorials.
  • Participate in user forums and communities.
  • Explore new device packs and add-ons as they’re released.

Evolving Your Sound Design Skills

Improvement in sound design is an exciting, ongoing process. Understand your tools, experiment, and develop an ear for detail:

  1. Master Ableton’s synthesizers: Experiment with Operator, Analog, and Wavetable.

    Synth Features
    Operator Flexible FM synthesis
    Analog Warm, classic tones
    Wavetable Innovative sounds and textures
  2. Play with effects: Manipulate audio with reverb, delay, distortion, and more.
  3. Layer samples: Combine different sounds to design something unique.
  4. Use field recordings: Add real-world sounds to your digital palette.
  5. Revise and refine your tracks: Critical listening leads to quality output.

    // Pseudocode For Refinement Process listen(track) identifyAreasForImprovement() tweakEffects() adjustLevels() re-listen()

Continuous learning and application of new techniques will propel your sound design forward. Embrace change, welcome challenges, and stay curious. Your signature sound is within reach, and every step you take is a part of the sonic adventure that shapes it.

Frequently Asked Questions Of How To Make Your Own Sounds In Ableton

Can Beginners Create Sounds In Ableton?

Yes, beginners can create sounds in Ableton. The software offers user-friendly interfaces and ample tutorials to ease the learning curve. Even with no prior experience, new users can start experimenting and crafting basic sounds quickly.

What Tools Are Needed To Make Sounds In Ableton?

To make sounds in Ableton, you’ll need the Ableton Live software, a computer that meets the system requirements, and ideally a MIDI controller. Built-in instruments and effects within Ableton provide a robust toolkit for sound creation.

How To Synthesize Unique Sounds In Ableton?

Synthesizing unique sounds in Ableton involves using the software’s instruments like Operator or Analog. Experiment with different waveforms, envelopes, and modulation options. Twisting parameters and layering effects can yield novel sonic textures.

Is Sampling Important For Creating Sounds In Ableton?

Yes, sampling is a key technique in sound creation for Ableton users. It allows for manipulation and transformation of existing sounds into something entirely new, expanding the creative possibilities within your music production endeavors.

Conclusion

Unlock limitless sonic creativity with your newfound skills in Ableton. Craft original sounds that resonate with your unique musical style. Remember, practice and experimentation fuel mastery. Begin your journey to audible excellence today, and watch your productions transform. Step forth and let your sounds tell their story.


Categories
Archive

How To Use Spotify Playlists To Get More Fans: Boost Your Reach!

To use Spotify playlists for gaining more fans, actively curate engaging playlists and promote them online. Share your playlists on social media platforms to increase their visibility.


Spotify has become a powerhouse for music discovery, offering artists a dynamic platform to showcase their work and connect with fans. The strategic use of Spotify playlists can significantly boost an artist’s fan base by enhancing exposure. With millions of users curating and following playlists, your music stands a chance of reaching a global audience when included in popular collections.


Artists need to focus on creating compelling playlists that resonate with their brand and musical style, which encourages listeners to follow and share. This tactic not only increases your music’s reach but also establishes a stronger presence on one of the world’s leading music streaming services. Building relationships with playlist curators and leveraging promotional opportunities through the Spotify for Artists tool are key steps toward using playlists to expand your listener base.

How To Use Spotify Playlists To Get More Fans: Boost Your Reach!


Credit: blog.groover.co

Introduction To Spotify’s Influence


Boost Your Music Career with Spotify Playlists

Spotify reigns as a music giant with millions of tracks at your fingertips. It’s a game-changer for artists. This platform can skyrocket an unknown musician into a chart-topping sensation. Understanding Spotify’s ecosystem is vital for any music creator looking to expand their fanbase. Let’s explore the magic woven by playlists and how they can become your ladder to success.

The Power Of Playlists

Playlists are the heartbeat of Spotify. They’re more than just collections of songs; they’re pathways to new audiences. A feature on a popular playlist means exposure to millions of potential fans who are eager to discover their next favorite track. Think of playlists like modern-day radio stations, each one with its own flavor and fanbase.

Spotify’s Role In Music Discovery

Spotify isn’t just for listening; it’s for discovering. Its algorithms are like music matchmakers, connecting listeners to artists. When your music lands on a Spotify playlist, the platform’s discovery mechanism kicks into high gear, propelling your tunes into the spotlight. It’s a powerful tool for artists aiming to carve out their niche and grow their following.

Crafting Your Own Spotify Playlist

Spotify playlists stand as powerful tools to showcase musical taste. Playlists reach wider audiences. They also connect with fans on a deep, personal level. Crafting a playlist does more than just group songs. It shares a curated experience. It sparks engagement and grows your fanbase.

Selecting Tracks For Appeal

Start with understanding your audience. Think about their likes, moods, and activities. Aim for a blend of well-known hits and hidden gems. This approach keeps listeners intrigued and attached. Ensure a mix of:

  • Popular tracks: Songs with high streams
  • Underrated tunes: Quality tracks, less discovered
  • Your music: A few of your songs for exposure

Select tracks that flow. Cohesion keeps listeners. It encourages them to follow and share.

Organizing Your Playlist

Ordering songs shapes the listening journey. Aim for a vibe that transitions smoothly. An initial high energy song can captivate. Following with dynamic shifts maintains attention. Consider these steps:

  1. Start with an energetic track to grab attention
  2. Insert slower songs to create a narrative
  3. Use tempo changes to add excitement
  4. End with a memorable tune that lingers

Crafting a playlist is much like telling a story. It should have a clear beginning, middle, and end. The right structure makes it more likely for listeners to save and return to your playlist.

Remember to update your playlist regularly. Fresh content keeps it relevant. It gives people a reason to revisit. Regular updates show you’re active and engaged with your playlist.

Keep your playlist’s title, description, and image captivating. They should hint at the playlist’s mood and content. They should also include keywords for SEO.

Maximizing Playlist Exposure

Scaling your Spotify playlist’s reach can transform your music career. It’s about crafting the right message, sharing it creatively, and leveraging collaborations. Let’s dive into maximizing your Spotify playlist exposure to attract more fans.

Effective Use Of Social Media

Start by creating engaging content on platforms like Instagram, Twitter, and Facebook. Share your playlists with direct links to entice clicks. Use eye-catching graphics and compelling captions. Be consistent with your posts to keep your audience engaged. A great idea is to:

  • Create themed posts that relate to your playlist’s mood or genre.
  • Host live sessions discussing the songs and artists featured.
  • Interact with your followers by asking for their song suggestions.

Collaborating With Influencers

Influencer collaboration can elevate your playlist visibility. Identifying influencers who resonate with your music style is key. Reach out to them for shared efforts. Here’s how to approach collaboration:

  1. Shortlist influencers who engage with music similar to yours.
  2. Pitch a collaboration idea that benefits both parties.
  3. Create a unique hashtag for the campaign to track engagement.

Remember that authenticity shines through in all social media and influencer efforts.

How To Use Spotify Playlists To Get More Fans: Boost Your Reach!


Credit: dittomusic.com

Engaging With Your Audience

Engaging with your audience is key to expanding your music fan base on Spotify. It’s about forging a strong bond with listeners. This connection not only boosts your streams but can turn casual listeners into loyal fans. Your Spotify playlists are more than just collections of songs; they are tools to interact and grow your community. Use them to your advantage!

Encouraging Listener Interaction

To foster a vibrant community around your Spotify playlists, start with listener interaction. Make your fans feel like they are part of your musical journey. Here’s how you can encourage them:

  • Ask for song suggestions. Let fans feel involved by seeking their input on your next playlist update.
  • Share behind-the-scenes stories. Connect songs with personal anecdotes to deepen fan engagement.
  • Create themed playlists. Encourage fans to contribute to playlists for specific moods or occasions.
  • Organize contests. Excite fans with opportunities to feature their playlist ideas on your profile.

Personalizing Playlist Descriptions

Stand out by personalizing your playlist descriptions. This is your space to make a lasting impression. Let’s put your personality into words:

Tactic Impact
Inject your voice. Write as you speak to make descriptions feel more personal. Builds a genuine connection.
Use vivid imagery. Paint a picture of the playlist’s vibe. Enhances emotional appeal.
Tell a story. Link tracks with a narrative thread. Engages listeners more deeply.
Include fan shout-outs. Recognize fans who contribute to your playlists. Intensifies community feeling.

Remember, your playlists can be a powerful extension of your brand. Use these strategies to make them uniquely yours and engage your audience on a deeper level.

Leveraging Spotify’s Algorithm

Let’s dive into the intriguing world of Spotify’s algorithm— a powerful force that could be the ticket to amplifying your music reach. Understanding and using Spotify’s algorithm to your advantage can connect your tunes with countless new listeners. Ready to see how smart playlist strategies can turn the tide in your favor? Read on.

Understanding Spotify’s Music Algorithm

Spotify’s music algorithm acts like a matchmaker between songs and listeners. It analyzes listening habits, genre preferences, and countless other data points. To get noticed, your track must be on point.

  • Release music consistently to stay on the algorithm’s radar.
  • Encourage fans to save, share, and repeat your tracks.
  • Collaborate with artists in similar genres to cross-pollinate fan bases.

Every save, follow, and playlist add tells Spotify your music resonates with listeners. This feedback can boost your visibility on the platform.

Improving Your Playlist’s Discoverability

A well-curated playlist can work wonders for your visibility. Key pointers can elevate your playlist in the Spotify hierarchy. Here are smart tactics:

Tip Action Impact
Create a Catchy Title Include relevant keywords; avoid generic names Enhances searchability and appeal
Design an Eye-Catching Cover Use high-quality, unique images Attracts potential listeners
Curate with Care Mix popular with lesser-known tracks Increase playtime and engagement

Remember, Spotify favors playlists that keep listeners tuned in. Keep them up-to-date with fresh, relevant tunes. Aim for a diverse, dynamic selection that stands out.

Analyzing Listener Data

Analyzing Listener Data is a crucial step in using Spotify playlists to attract more fans. This data offers insights into who listens to your music and how they interact with it. By understanding listener behaviour, you can tailor your content to meet your audience’s preferences, helping to increase your fan base.

Interpreting Spotify Analytics

Spotify Analytics gives artists a glance into their music’s performance.

  • Streams: Count how often your songs are played.
  • Listeners: Show the number of people playing your tracks.
  • Followers: Reflect your growing fan base.

Look for trends in this data. High streams with low saves might suggest your track is catchy but not memorable.

Adapting To Audience Preferences

Adapt your content strategy to align with your audience’s tastes. Spot patterns in your analytics to understand what your listeners prefer.

Song Attributes Listener Feedback Action Plan
High Energy Tracks More Streams at Night Curate Playlists for Evening Listeners
Acoustic Versions High Saves Share More Acoustic Content

Remember to update your playlists with fan favorites and new finds that reflect their preferences.

Networking Within The Spotify Community

Spotify is not just a music streaming platform. It’s a social hub for artists and fans alike. For musicians looking to amplify their reach, effective networking within the Spotify community can create new fanbases. By engaging with playlist curators and music lovers, you raise your visibility. The secret sauce? Playlists. Let’s unpack how joining communities and befriending other curators can launch your music into the stratosphere.

Joining Playlist Exchange Forums

Delving into Spotify’s own Playlist Exchange is your first step. This forum allows you to share your playlists and discover others. Follow these simple tips:

  • Introduce yourself: Make sure to give a clear picture of your music style.
  • Share your playlists: Post them in the appropriate threads to reach the right audience.
  • Engage: Comment on other playlists, offer feedback, and suggest tracks. Brevity is key.

These forums are a goldmine for connecting with those who can help spread your sound.

Building Relationships With Other Playlist Curators

Fostering connections with playlist curators is crucial. Aim for authentic engagement:

  1. Research curators whose playlists resonate with your genre.
  2. Start a conversation. Compliment their playlist; authenticity shines.
  3. Propose a track exchange. Keep it relevant and respectful.

These relationships can lead to your music being featured on popular playlists, unlocking doors to legions of new listeners.


Continuous Playlist Improvement

Welcome to the world of Continuous Playlist Improvement, a crucial element for using Spotify playlists to gain more fans. A stellar playlist isn’t just about the initial curation; it’s about the art of keeping it fresh, relevant, and engaging over time.

Updating Your Playlist Content

To keep listeners coming back, regularly update your playlist. This signals active curation and can boost your playlist’s discoverability. Here are steps to keep your playlist exciting:

  • Assess tracks bi-weekly, ensuring they align with your playlist’s theme.
  • Remove songs that aren’t performing well or have been in the playlist for too long.
  • Add new, trending tracks to maintain freshness.
  • Promote emerging artists to give your playlist a unique edge.

Maintaining Engagement Over Time

It’s not just about the music; it’s about the community you build. Here’s how to maintain engagement:

  1. Interact with your listeners through playlist updates and comments.
  2. Encourage users to share the playlist, increasing its visibility.
  3. Connect your playlist to your social media to reach a wider audience.
  4. Consider creating themed series of playlists for different moods or seasons.

Remember, the goal is to keep fans invested by offering them a dynamic and interactive listening experience that has them hooked and coming back for more.

Success Stories

Discover the powerful impact of Spotify playlists through the experiences of artists who climbed the popularity ladder. Success on Spotify can seem elusive, but these stories shine a light on the transformative potential of a well-curated playlist.

Case Studies Of Successful Playlists

Real-world examples demonstrate the magic of playlist placement on Spotify. Here are tales of indie artists who soared to viral fame.

Artist Playlist Feature Outcome
Echo Dreamers New Indie Mix 10x stream boost
Melodic Rays Chill Tracks Featured on Radio
Sonic Journey Workout Hype Signed a record deal

Testimonials From Artists Who’ve Benefited

  • “Landing on a Spotify playlist was a game-changer. Our fan base skyrocketed overnight!” – The Chords

  • “Our streams doubled after featuring on a mood-based playlist. Unreal exposure!” – Harmony Grove

  • “We went from unknown to trending. All thanks to a summer hits playlist inclusion.” – Sunbeat

Conclusion: The Future Of Music Promotion On Spotify

The digital age has revolutionized the way artists connect with fans. As we gaze into the crystal ball of Spotify’s evolving platform, it’s clear that artists who harness the power of playlists will thrive. In this landscape, innovation and adaptability are key.

Embracing New Trends

Staying ahead means embracing the latest trends. Artists must explore new genres and curate playlists that reflect current listener preferences. Collaborations with influencers can skyrocket a song’s streams. Artists should keep an eye on Spotify’s algorithmic playlists like Discover Weekly. These are treasure troves for new fans.

  • Algorithm Exploration: Understand and use Spotify’s algorithms to your advantage.
  • Collaborative Playlists: Team up with other artists or influencers to reach wider audiences.
  • User-Curated vs. Spotify-Curated: Balance personal playlists with those generated by Spotify to maximize exposure.

Staying Adaptable And Engaged

Engagement is the currency on Spotify. Nimble artists swiftly respond to listener feedback. Artists should create interactive experiences. These might include playlist-related contests or virtual listening parties. The key is to build a community around your music, keeping fans engaged and coming back for more.

Engagement Strategy Description
Contests Drive interaction by hosting song contests.
Exclusive Content Offer sneak peeks or special versions of songs.
Feedback Loops Encourage and act on fan feedback.

As music promotion continues to evolve on Spotify, flexibility and innovation will be essential. Artists who recognize and adapt to these changes will stay at the forefront, captivating new audiences and keeping their fan base growing.

Frequently Asked Questions For How To Use Spotify Playlists To Get More Fans

How Do Spotify Playlists Increase Fan Engagement?

Spotify playlists help artists increase fan engagement by featuring their music alongside popular tracks. This placement can lead to new listeners discovering their work, potentially converting them into fans. Curated playlists also encourage repeat listens and shares on social media.

Can Spotify Playlists Boost An Artist’s Exposure?

Yes, being featured on a Spotify playlist can significantly boost an artist’s exposure. Playlists have a broad audience reach, which can introduce an artist to listeners worldwide. This can drive up stream counts and attract followers, growing an artist’s fan base.

What Are The Steps To Create A Spotify Playlist?

To create a Spotify playlist, open the Spotify app, click ‘Create Playlist,’ and give it a unique name. Add songs by searching for tracks or choosing from recommended songs. Customize with images and descriptions, then share your playlist to engage listeners and attract fans.

How Often Should I Update My Spotify Playlist?

Regular updates, ideally weekly or bi-weekly, keep a Spotify playlist fresh and engaging. Frequent updates encourage listeners to return, provide ongoing promotion for the featured artists, and maintain the playlist’s relevance, which can contribute to attracting more followers.

Conclusion

Harness the power of Spotify playlists effectively, and your fanbase could soar. Craft playlists with care, promote them creatively, and engage with your listeners consistently. By doing so, you’re not just sharing music; you’re building a community that resonates with your sound and your story.


Start curating, sharing, and connecting today for a more vibrant tomorrow.

Categories
Archive

The 4 Most Common Music Copyright Agreements: A Must-Know Guide

The four most common music copyright agreements are mechanical licenses, synchronization licenses, master licenses, and performance licenses. These agreements govern the reproduction, adaptation, recording, and public performance of music.


Understanding music copyright agreements is crucial for artists, producers, and content creators in the music industry. Navigating the complexities of these contracts ensures that all parties involved are fairly compensated and that their creative rights are protected. Mechanical licenses cover the audio-only reproduction of music, typically for physical or digital sale.


Synchronization licenses are necessary when music is paired with visual media, such as in movies or commercials. Master licenses grant permission to use a pre-recorded version of a song, whereas performance licenses are required for music played publicly, including on radio, in venues, or streamed online. Each agreement outlines specific terms for usage and distribution, which safeguard the economic rights of musicians and songwriters, and permit the legal dissemination of their work.


Introduction To Music Copyright Agreements

Introduction to Music Copyright Agreements shines light on the unseen scaffolds supporting creative melodies. Artists create; laws protect. This dance ensures that creators receive both credit and compensation for their work. Without a firm grasp of copyright agreements, even the most talented musicians might navigate the industry blindly, risking their art and income.

The Importance Of Knowing Your Rights

Musicians weave stories through sound; copyright law defends their narrative threads. Understanding these rights empowers artists. It guarantees protection and controls over their works, from radio play to online streaming. Knowledge shields against unauthorized use, ensuring artists reap rewards from their ingenuity.

  • Control over song distribution
  • Licensing deals aligning with artistic vision
  • Royalty collections sustaining creative careers

Navigating The Legal Landscape In Music

The legalities in music resemble a labyrinth. Tackling these complexities head-on demands vigilance. Contracts and agreements form the backbone of legal safety for artists. From sync licenses to recording contracts, these documents dictate the who, what, and how of music usage. Seasoned guidance simplifies this journey, clarifying terms and avoiding pitfalls.

Agreement Type Purpose Impact on Artist
Mechanical Licenses Music reproduction rights Royalties from sales
Performance Agreements Public performance rights Earnings from live venues
Sync Licenses Usage in visual media Control and payment for media use
Recording Contracts Record label artist agreements Career advancement potential

Mechanical Licenses

Mechanical Licenses are a cornerstone in the music industry, ensuring that composers and songwriters receive their due income. When a song plays on the radio, streams online, or sells as a physical copy, mechanical rights come into action. Dive into the world of mechanical licenses and discover how they safeguard musical works and enable profits.

Basics Of Mechanical Rights

Mechanical rights are legal permissions to reproduce and distribute a song. Without these rights, producing CDs, vinyl, or digital downloads would be impossible. Each time a song is duplicated, a mechanical royalty is due. Mechanical rights are essential for artists to thrive.

  • Mandatory for song reproduction
  • Trigger royalties with each copy
  • Controlled by copyright holders

How Mechanical Licenses Work For Artists And Writers

Mechanical licenses play a crucial role for artists and songwriters. They sign agreements with music publishers or licensing agencies to distribute their music. Every sale or stream leads to a royalty. This system helps creators get paid for their work.

  1. Song registration with a publishing entity
  2. Negotiation of mechanical rate per reproduction
  3. Royalties collected and paid out to rights owners

These licenses also empower collaboration. Cover versions or samples need mechanical licenses too. They grant the same protections, ensuring original creators earn from their music, no matter how it’s shared or sold.

Synchronization Licenses

Synchronization Licenses or “sync” licenses play a pivotal role in the music industry. They allow music to pair with visual media like films, TV shows, commercials, and video games. Understanding the intricacies of sync licenses ensures creators and rights holders properly manage and monetize their music alongside visual content.

Connecting Music With Visual Media

Sync licenses are essential when joining songs with visual elements. They ensure the legality of using tracks in various media. Creators seek the perfect song to enhance their visual stories, making this license a crucial step in creating impactful media experiences.

  • Music videos require synchronization between the song and the video.
  • Films use synced music to set the tone or mood.
  • Advertisements rely on music to create memorable commercials.
  • Video games integrate music to enrich gameplay.

The Synchronization Process And Negotiations

Obtaining a sync license involves a specific process with negotiations. The complexity of this process varies based on the music and media involved.

Step Action
1 Identify the right holder of the song.
2 Contact the holder for permission.
3 Negotiate terms and fees.
4 Finalize the agreement.

Fees for sync licenses vary based on factors like usage, duration, and exposure. The negotiation process can be complex and often requires legal expertise to ensure fair terms for both parties.

  1. Usage: How and where the music is used.
  2. Duration: Length of the music clip.
  3. Exposure: The expected reach of the visual media.

Performance Agreements

Artists and songwriters often wonder how their music translates into earnings when played live or broadcasted. Performance agreements are crucial contracts in the music industry. These contracts define how musicians get paid for live concerts and radio or TV broadcasts. Let’s dive into the intricacies of performance agreements and understand their importance.

Live And Broadcast Usage

Musicians sign performance agreements to earn money when their work is played. These agreements are negotiated with venues or broadcasters. The goal is to ensure fair compensation for artists during live events or when their music hits the airwaves.

  • Concerts: Musicians have agreements with event organizers. These agreements outline payments for live performances.
  • Radio Plays: Each time a song plays on the radio, artists earn. This is due to broadcast agreements.
  • TV Appearances: When music features on TV shows, artists receive payment. This is part of broadcast agreements as well.

Revenue Streams From Performances

Performance agreements open diverse revenue avenues for artists. Payments differ based on several factors. The size of the audience and the type of performance influence the revenue.

Type of Performance Revenue Example
Local Gigs Direct payments from smaller venues
Festivals Larger sums from event organizers
Radio Broadcast Performance royalties per play
Television Fees for using music on shows

Earnings from live shows are straightforward. Artists perform and get paid. Broadcast scenarios need a Rights Organization. This organization collects fees from broadcasters. Then, it pays artists their due royalties.

Master Use License

Understanding the Master Use License is key for any artist or producer looking to navigate the music industry’s legal landscape. This license is all about permission. It allows one to use a pre-existing piece of music, known as a master recording, in various forms of media. Securing a Master Use License is essential before reproducing or distributing someone else’s recorded song.

Master Recordings Control

The Master Use License is directly connected to the control of master recordings. The owner of the master recording—often a record label or artist—holds the rights to the original sound recording. This exclusive control means that anyone wishing to use the music in any commercial way must first obtain the owner’s explicit consent through a licensing agreement.

  • Without this license, using the music can lead to legal action.
  • The owner can set terms like duration, exclusivity, and territory.

Licensing For Reproduction And Distribution

When you obtain a Master Use License, you get the green light to reproduce and distribute the music. This can include:

  1. Using the song in a movie or TV show
  2. Incorporating the track in a commercial or video game
  3. Releasing a cover version of the song

The scope of the license can vary greatly. It can allow for anything from a one-time use in an indie film to a full-scale global advertising campaign. The terms are always up for negotiation, and fees will vary based on usage parameters.

Negotiating Copyright Agreements

Negotiating copyright agreements is a pivotal step for artists and music industry professionals. These agreements protect the rights of composers, musicians, record labels, and publishers. A well-negotiated contract ensures fair compensation and distribution of music. This section explores the essentials of negotiating music copyright agreements.

Common Terms And Clauses

In every copyright agreement, certain terms and clauses are critical. It’s important to understand these before signing.

  • Ownership Rights: Specifies who owns the music.
  • Royalties: Details how much and when you get paid.
  • Duration: Defines how long the agreement lasts.
  • Termination Rights: Explains how to end the agreement.

Other clauses may include rights to derivatives, sync rights for TV and movies, and performance rights. Each clause must serve your interests and career goals.

Seeking Legal Advice

It’s crucial to seek legal advice when reviewing a copyright agreement. Lawyers can help identify potential pitfalls and negotiate better terms.

Action Benefit
Review by a lawyer Ensures the agreement is fair and legal.
Negotiating May result in better compensation and rights.
Asking questions Clarifies any unclear terms in the agreement.

Understand that every contract is negotiable. Do not hesitate to ask for changes to terms that don’t favour your interests.

Copyright Infringement And Enforcement

Copyright Infringement and Enforcement is a vital topic for musicians, producers, and anyone involved in the music industry. Understanding these terms is crucial to protect music creations. In this section, we discuss recognizing infringements and legal measures to enforce copyright.

Recognizing And Responding To Infringements

Identifying an infringement involves knowing your rights. Any unauthorized use of protected music can be infringement. Quick action is essential. Follow these steps:

  1. Gather Evidence: Document the infringement with screenshots, URLs, and dates.
  2. Contact the Infringer: Send a cease and desist letter to stop the abuse.
  3. Seek Professional Help: Get in touch with a copyright lawyer for advice.
  4. File a Claim: Use DMCA takedowns or contact hosting services to remove content if necessary.

Legal Remedies And Protections

Several legal avenues are available to enforce copyright:

  • Copyright Registration: Register your work for stronger legal standing.
  • Litigation: File a lawsuit for serious cases of infringement.
  • Statutory Damages: Seek compensation for losses and punitive damages.
  • It’s important to act swiftly to minimize damage and uphold legal rights.

The 4 Most Common Music Copyright Agreements: A Must-Know Guide


Credit: store.nolo.com

The Role Of Collecting Societies

In the world of music, collecting societies play a key role. They exist to manage the rights of music creators and publishers. These societies license music on behalf of their members. They then collect and distribute royalties. This system is vital for ensuring artists and producers get paid for their work.

Collective Rights Management

Collective Rights Management is where collecting societies shine. These organizations track where and how music is used. This includes radio, TV, and online platforms. They negotiate agreements. This ensures fair compensation for the use of musical works.

  • Monitoring Usage: Societies keep tabs on music use across media.
  • Licensing: They issue licenses to music users, allowing legal use.
  • Collection of Fees: They collect fees from music users.
  • Distribution of Royalties: Royalties are paid to rights holders.

Benefits For Creators And Publishers

There are several Benefits for Creators and Publishers when it comes to collecting societies:

Benefit Description
Efficient Royalty Collection Societies streamline the process of collecting royalties.
Global Representation Musicians gain international representation for their works.
Legal Protection Collecting societies offer legal support against unauthorized use.
Focus on Art Artists can focus on creating music, leaving rights management to experts.

Adapting To The Digital Age

The music industry is changing. The rise of digital platforms has revolutionized how music finds its audience. In this fast-paced environment, understanding the most common music copyright agreements is critical. Adapting to the digital age means reimagining these agreements. Artists, producers, and labels must work in harmony with new technology. This ensures the fair distribution of revenues and the protection of rights in a digital world.

Emerging Technologies And Licensing

Music streaming services and digital downloads dominate the scene today. They require unique approaches to licensing. New technologies like blockchain and non-fungible tokens (NFTs) are now integral in tracking music ownership and usage. This supports artists and creators better. New music copyright agreements reflect these changes. They offer more flexible and transparent licensing terms.

  • Blockchain: This technology creates a secure and immutable ledger. It confirms ownership and licensing rights.
  • NFTs: Musicians and creators use NFTs to sell music directly. Fans own unique digital copies.
  • Micro-licensing: Short music clips find use in social media. New agreements cater to these micro-uses.

The Future Of Music Copyright Agreements

As the digital landscape evolves, so will the legal agreements that underpin the music industry. Expect to see copyright agreements that integrate with digital systems seamlessly. They may use algorithms to administer rights and payouts. This promises further empowerment for creators. The music copyright agreements of tomorrow will align with the artist’s and the audience’s needs.

Element Benefit
Automated Royalty Distribution Faster, error-free payments to artists
Real-Time Analytics Insightful data for decision-making
Smart Contracts Transparent, self-executing agreements

To conclude, emerging technologies open new doors. They shape how music is created, shared, and monetized. They even challenge the traditional legal frameworks. The music industry must embrace this change. This keeps the rights of all parties protected in the digital age.


Frequently Asked Questions For The 4 Most Common Music Copyright Agreements

What Are Music Copyright Agreements?

Music copyright agreements are legally binding contracts. They outline the rights, responsibilities, and royalties for music creators and users.

Types Of Music Copyright Contracts?

There are several types including synchronization, mechanical, performance, and master use licenses. Each governs different music usage rights.

How Does A Sync License Work?

A sync license permits the use of a song in audiovisual projects. It’s crucial for pairing music with commercials, films, or TV shows.

Can I Cover A Song Legally?

Covering a song legally requires a mechanical license. This agreement pays the original songwriters royalties.

Conclusion

Navigating music copyright agreements can be tricky. Understanding the core four is vital for artists and producers alike. Armed with this knowledge, you’re set to secure the rights and protections your music deserves. Remember, proper agreements are the bedrock of creative success and financial security in the industry.


Keep creating and protecting your work wisely.

Categories
Archive

There Was An Error When Closing The File Ableton Fixed: Quick Fix Guide

The “Error when closing the file” issue in Ableton can be resolved by updating to the latest version or resetting preferences. Users may encounter this error due to corrupted project files, outdated software, or configuration conflicts.


Ableton Live, the widely acclaimed digital audio workstation (DAW), is the go-to software for musicians and producers worldwide. Encountering errors like “There was an error when closing the file” can be a roadblock in the creative process. This error often points to issues within the software environment or project files themselves.


Addressing it promptly ensures that the creative flow remains uninterrupted, and the user can get back to producing music efficiently. By keeping the software up-to-date and checking system configurations, users can minimize occurrences of such errors, thereby maintaining a smooth production experience in Ableton Live.


Introduction To Ableton File Error

Ableton Live is a powerhouse for music creators, known for its robust features and seamless workflow. But sometimes, users face a dreaded hurdle: the error when closing a file. This glitch can disrupt the creative process, causing frustration and confusion. In essence, when this error pops up, saving progress becomes a tricky challenge, risking the loss of hard work and precious time.

Common Scenarios Triggering File Closing Error

Various triggers can lead to this save error. Some common scenarios include:

  • Insufficient User Permissions: Limited access can prevent file saving.
  • Corrupt Project Files: Damage to the project data may block closure.
  • Outdated Software: Running an older version of Ableton might cause issues.
  • Third-party Plug-ins: Conflicts with add-ons can lead to save errors.

Impact Of The Error On Music Production Workflow

Distracting and Disruptive: This error pulls artists away from their creative zone.

Time-Consuming: Fixing the error requires precious time, delaying projects.

Potential Data Loss: Unsaved changes might get lost if the error persists.

Accurately recognizing these triggers and understanding the impact they carry is vital for a smooth production experience. Producers need to address such errors swiftly to keep their workflow uninterrupted and their music projects safe.


Identifying The Error

Experiencing an error in Ableton can halt your creative flow. Identifying the error is the first step to a quick fix. Recognize what messages to watch for and when they’re likely to pop up. Let’s dive into understanding these Ableton hiccups.

Error Messages To Look Out For

Different messages may appear when there’s a hiccup with closing a file in Ableton. Here are common ones:

  • “Unexpected error occurred while closing.”
  • “Could not save the project.”
  • “The document could not be closed.”

Keep an eye out for these phrases. They suggest your work might not be saving properly.

When Does The Error Typically Occur?

Knowing when an error might strike helps you prepare. Common times include:

  • During project save operations – when you attempt to save your session.
  • While closing the program – particularly if the project hasn’t been saved.
  • When your system is under heavy load – too many tasks may overwhelm it.

Identify the patterns and stay ahead of errors.

Initial Quick Fixes

Experiencing the ‘There Was An Error When Closing The File’ message in Ableton Live can be frustrating. But don’t worry, quick fixes often solve the issue.

Let’s tackle common fixes to get Ableton back on track. Simple steps like restarting the program or updating can do wonders. Take a look below!

Restarting Ableton Live

First, close Ableton Live.

Then, wait a minute, and open it again.

This step can clear temporary glitches that cause errors.

Checking For Software Updates

  • Open Ableton Live.
  • Go to the Help menu.
  • Select Check for Updates.

Running the latest version prevents many known issues. Stay updated!

There Was An Error When Closing The File Ableton Fixed: Quick Fix Guide


Credit: www.reddit.com

File Management Solutions

Encountering an error when closing a file in Ableton can be frustrating. Crucial to avoiding this is good file management. This section covers key strategies for safe file handling and organization. These practices will help fix and prevent file closure errors in Ableton.

Proper file saving techniques

Proper File Saving Techniques

Saving your work correctly ensures no time spent on music production goes to waste. Learn how to save files in Ableton properly to avoid errors.

  • Use ‘Save Live Set As’ for new versions. This minimizes data loss risk.
  • Save frequently as you work. Shortcuts like Ctrl+S (Cmd+S on Mac) save time.
  • Choose proper file locations. Avoid saving to the desktop or temporary folders.
  • Backup your files regularly. Use external drives or cloud services for this purpose.

Organizing project files to prevent errors

Organizing Project Files To Prevent Errors

Well-organized project files reduce the risk of errors. Implement these tips to keep your Ableton projects tidy.

  • Create folders for each project. Label them clearly with the project name and date.
  • Keep all related files together. This includes samples, recordings, and presets.
  • Rename files logically. This helps you locate them quickly when needed.
  • Use ‘Collect All and Save’ in Ableton. It ensures all project components are in one folder.

System-level Troubleshooting

Ableton Live users have hit snags when closing files. Our focus forms on system-level solutions. These steps could turn the tide on that pesky error message.

Ensuring Compatible System Requirements

Your production journey should begin with confirming that your computer meets Ableton’s prescribed system specs. Compatibility reigns supreme when it comes to smooth operation.

OS Processor RAM Disk Space
Windows 10 or later / macOS X 10.13+ Intel® Core™ i5 processor or an AMD multi-core processor. 8 GB 3 GB free disk space on the system drive

Check the details against your setup to ensure your platform is primed for Ableton.

Update Drivers And Operating System

Out-of-date drivers or operating systems can lead to errors. Updating is essential for harmony between software and hardware.

  • Audio Interface Driver: Visit the manufacturer’s website for the latest version.
  • Graphics Driver: Use your system’s device manager or download directly from the GPU manufacturer.
  • Operating System: Check for updates in ‘Settings’ on Windows or ‘System Preferences’ on macOS.

Each update potentially clears glitches impeding Ableton’s performance.

Ableton Preferences Reset

Ableton users sometimes encounter file closing errors. A common solution: resetting Ableton Live preferences. This process can return the software to its default behavior. It often fixes glitches and errors that disrupt music production workflow. Below, find detailed instructions on how to reset preferences and steps to take afterward to maintain a smooth, error-free experience.

Steps To Reset Ableton Live Preferences

  1. Close Ableton Live to prepare for the reset process.
  2. Navigate to the preferences folder. Its location varies by operating system:
    • For Windows users, it’s typically found in C:Users[Username]AppDataRoamingAbletonLive x.x.xPreferences.
    • Mac users can find it under /Users/[Username]/Library/Preferences/Ableton/Live x.x.x/.
  3. Delete the Preferences.cfg file.
  4. Restart Ableton Live. It will create a new Preferences.cfg file.

Note: Always back up files before making changes to avoid data loss.

What To Do Post-reset To Avoid Future Errors

After resetting preferences, check these settings:

Setting Action
Audio Device Choose the correct driver and test for stable performance.
MIDI Settings Ensure devices are recognized and configured correctly.
Plug-ins Re-enable VSTs/AUs one at a time to pinpoint problematic ones.

Consider updating drivers and operating system to the latest versions. Regularly save and back up projects. Finally, keep your Ableton Live updated to access the latest fixes and enhancements.

Third-party Plug-ins And Vst Management

Ableton Live users often style their music with third-party plug-ins and VSTs. These tools add new sounds and effects. But they can cause errors. A common issue is ‘There was an error when closing the file’. Good plug-in management fixes this. Follow along to learn how.

Identifying Problematic Plug-ins

Spotting troublesome plug-ins is your first step.

  1. Start Ableton with no Third-party VSTs loaded.
  2. If no error, add plug-ins one by one.
  3. When the error appears, you found the culprit.

Keep a list of plug-ins that don’t work well. You may need to remove or update them.

Ensuring Compatibility And Updates For Vsts

Updates and compatibility checks keep VSTs running well.

Check your plug-ins:

  • Use only compatible plug-ins for your Ableton version.
  • Download the latest updates from the manufacturer’s site.
  • Run the VST’s dedicated update utility if available.

Regular plug-in maintenance avoids many errors. This keeps your music production smooth.

Advanced Solutions

Encountering an error when closing a file in Ableton Live can be frustrating. While basic troubleshooting works for many, some users may need advanced solutions. These steps address persistent issues potentially caused by deeper system or application conflicts.

Reinstalling Ableton Live

Sometimes, a clean installation is the key. It removes corrupt files and restores default settings. Here’s a guide to reinstall Ableton Live:

  1. Uninstall the current version of Ableton Live from your computer.
  2. Download the latest version from the official website.
  3. Install Ableton Live by following the on-screen instructions.
  4. Restart your computer to ensure changes take effect.

Reinstalling can refresh the software environment, clearing errors like the one encountered when closing files.

Contacting Support For Unresolved Issues

When all else fails, reaching out to Ableton support is a smart move. Provide them with:

  • Error messages and screenshots if possible.
  • Details about your computer’s operating system and hardware.
  • Recent changes you’ve made to your setup.
  • Steps you’ve already taken to fix the problem.

Ableton’s team can provide expert advice and tailored solutions. They ensure users get back to making music with minimal disruption.

Preventive Measures And Best Practices

Welcome to the essential guide on preventive measures and best practices to avoid the dreaded ‘There Was An Error When Closing The File’ message in Ableton Live. These steps are vital for any music producer looking to maintain a seamless workflow. Let’s jump right into keeping your sessions safe and sound!

Regular Backups And Versioning

Keeping your music projects secure starts with regular backups. Nothing is more heartbreaking than losing hours of work to unexpected errors. Adopt these habits to safeguard your creations:

  • Create daily backups of your projects.
  • Use external drives or cloud services for extra security.
  • Versioning tracks the progress and changes you make. It lets you go back to previous versions if needed.


File > Save Live Set As > Add Date/Version to File Name

Automate the process if you can. Software like Time Machine for Mac or File History on Windows can back up your files regularly.

Staying Informed About Updates And Bugs

No software is bug-free, and Ableton Live is no exception. To ensure a smoother experience:

  1. Always read patch notes for the latest updates.
  2. Check online forums and community boards for bug reports and fixes.
  3. Install updates as soon as they’re available.

By staying updated, you are less likely to encounter known issues, and you will be taking advantage of improvements and new features that can enhance your music production experience.

Action Reason
Update Regularly Fewer Bugs / Latest Features
Monitor Forums Community Insights
Read Patch Notes Stay Informed on Changes

Remember, taking these steps can not only prevent errors but also enhance your overall music production quality. Your creative workflow deserves the best defense strategy against potential data loss and software issues.

There Was An Error When Closing The File Ableton Fixed: Quick Fix Guide


Credit: www.whippedcreamsounds.com

Summary And Additional Resources

Experiencing an error when closing a file in Ableton can halt your creative flow. Our ‘Summary and Additional Resources’ section is here to ensure you conquer this hiccup effortlessly. Let’s dive into the essential fixes and discover where you can seek further assistance and connect with fellow Ableton users to keep your music production smooth and error-free.

Recap Of Fixes For The File Error Issue

Facing the file error in Ableton can be frustrating. You want a quick solution to get back to making music. Below is a recap of proven fixes:

  • Update Ableton Live: Ensure you have the latest version.
  • Check File Permissions: Modify permissions to allow full access.
  • Clean Up Disk Space: Free up your hard drive to prevent issues.
  • Reinstall Ableton: Sometimes a fresh install is the best fix.

Following these steps should resolve your file-saving concerns and improve your experience with Ableton Live.

Where To Find More Help And Community Forums

Don’t navigate these errors alone. There’s a wealth of resources available to help:

Resource How It Helps Location
Ableton Support Official assistance from the Ableton team ableton.com/support
User Forums Advice from experienced peers forum.ableton.com
Social Media Groups Real-time discussions and tips Facebook, Reddit

Reaching out to these platforms can provide solutions that are both insightful and practical.

Frequently Asked Questions On There Was An Error When Closing The File Ableton Fixed

Why Does Ableton Give File Closing Errors?

File closing errors in Ableton often happen due to issues with permissions, corrupt project files, or problems with external hardware. Ensure you have the proper write permissions, and check for software updates or hardware conflicts to resolve these errors.

How Can I Fix File Errors In Ableton?

To fix file errors in Ableton, try running the software as an administrator, checking for updates, or reinstalling Ableton. Also, consider removing any malfunctioning VST plugins and ensuring your file paths are correct and accessible.

What Causes Ableton To Not Close Files?

Ableton may not close files due to corrupted session data, conflicts with third-party plugins, or inadequate system resources. Closing other applications and freeing up RAM may help. Consistently save projects to prevent data loss.

Is There A Patch For Ableton File Closing Issues?

As of my knowledge cutoff in 2023, Ableton may release patches for known issues. Keep your software updated by downloading the latest version from the official website. This ensures that any known bugs, including file closing issues, are addressed.

Conclusion

Navigating Ableton’s file closure error can be frustrating. Our guide has aimed to equip you with practical fixes to resolve this annoyance efficiently. By applying the solutions discussed, you can return to creating music seamlessly. Remember, keeping Ableton up-to-date is key to preventing similar issues.


Happy music production!

Categories
Archive

What is Spotify Artist Radio?: Unveiling Audio Alchemy

Spotify Artist Radio is a feature within the Spotify platform that creates a station based on the music of a specific artist. It curates a playlist with tracks from that artist and related music.


Spotify has revolutionized the way we discover and enjoy music, with its Artist Radio feature playing a significant role. By selecting an artist you love, Spotify generates a personalized stream of songs tailored to your musical preferences. This seamless mix of the artist’s tracks and songs by similar artists ensures a continuous listening experience that helps you uncover new favorites while enjoying the tunes you already adore.


Ideal for both music aficionados and casual listeners, the Artist Radio function acts as your personal DJ, keeping the vibe going without interruption. It’s one of the many ways Spotify engages users and keeps them connected to an ever-evolving musical landscape.


Introduction To Spotify Artist Radio

Imagine a world where music flows seamlessly based on your taste. Spotify Artist Radio turns this dream into reality. It’s a personalized station with endless tracks from your favorite artists and others with a similar vibe. It’s your own musical journey, crafted just for you, with songs playing non-stop. This introduction explores the magical beginnings of personalized streaming and how Spotify revolutionizes the radio experience.

Beginnings Of Personalized Streaming

The concept of music tailored to your taste has a rich history. It started with mixtapes and grew with technology. Personalized streaming now lets algorithms create a unique listening experience. With every song you play, these algorithms learn more about what makes your feet tap.

Spotify’s Approach To Radio

Spotify Artist Radio digs into your music preferences. It builds a bridge between what you love and fresh tracks awaiting discovery. This radio feature stands out by blending your favorite artists’ sounds with new tunes, effortlessly. It’s like a friend who knows your music taste and always has great recommendations.


The Magic Behind Artist Radio

Have you ever wondered how Spotify seems to know exactly what you want to hear? The secret lies within their Artist Radio feature. It’s like a musical crystal ball, predicting songs you’ll love, based on your favorite artists. Balance curiosity and excitement as we dive into the world of algorithmic playlists and tailored tunes.

Algorithm At Play

Spotify’s Artist Radio isn’t just random; it’s a complex mix of technology and music know-how. An algorithm works tirelessly, scanning your music preferences and listening habits.

  • It examines the songs you play the most.
  • It spots patterns in genres and beats.
  • It pairs this data with songs from similar artists.

Together, these points create a playlist as unique as your own taste in music. Let’s peek at how this tech curates tracks especially for you.

Curating A Unique Listening Experience

Each Artist Radio station is a journey—an exclusive mix with your musical DNA as the blueprint.

Spotify considers more than your favorite tracks; it looks at what other listeners enjoy. The Artist Radio stitches together a playlist that includes:

Listening Elements What Spotify Does
Similar Artists Picks tracks from artists with a similar style.
New Releases Adds in fresh songs for a taste of the new.
Deep Cuts Incorporates lesser-known tracks for discovery.

The result is an ever-evolving soundtrack. Your Artist Radio morphs and grows with your musical journey. Dive in and let Spotify lead the way to your next favorite song.

Navigating Spotify’s Artist Radio

Imagine enjoying an endless mix of music tailored to your taste. Spotify’s Artist Radio offers just that. It crafts a personalized station with songs from similar artists, influenced by your chosen musician. This feature is perfect for discovering new tunes that resonate with your musical preferences.

Starting Your Musical Journey

Embarking on your musical adventure is simple.

  • Open Spotify and search for your favorite artist.
  • Click on the artist’s profile.
  • Look for the ‘Radio’ tab next to their top tracks.
  • Select ‘Go to Artist Radio’ to start streaming.

Spotify crafts a unique playlist combining the artist’s tracks with other similar music. The radio continuously evolves, adding new songs as your tastes develop.

Interacting With The Artist Radio

Interaction is key for a curated experience on Spotify’s Artist Radio.

  1. Use the thumbs up to ‘like’ a song. This tells Spotify to play more of that style.
  2. The thumbs down button removes a track from your station.
  3. Save any song you love to your personal playlists for easy access later.

Engage with your Artist Radio to fine-tune it to your liking, making it a reliable source for music you’ll love.

Benefits For Listeners

Spotify Artist Radio offers unique benefits for people who love music. Users enjoy endless streams of songs from their favorite artists. They also discover new tunes effortlessly. This service shapes a personal music experience. Let’s explore the advantages this feature provides.

Discovering New Music Seamlessly

Finding fresh sounds is thrilling. Spotify Artist Radio makes it simple. It’s like a music adventure where each track leads to another discovery. Listeners uncover hidden gems without searching for hours. Music lovers get a mix of familiar and new artists. It’s a surprise playlist, every time.

  • Never-ending variety: New songs keep playing.
  • Easy exploration: Just press play and find new favorites.
  • Smart suggestions: Spotify uses listening habits to suggest tracks.

Creating A Personally Tailored Soundtrack

Everyone loves music that speaks to them. Spotify Artist Radio curates playlists just for you. Your history, likes, and preferences shape this soundtrack. This personalized station evolves with your taste. Enjoy a soundtrack that fits every moment of your day.

  • Personal touch: Your likes craft the playlist.
  • Dynamic playlists: Songs change as your taste does.
  • All mood coverage: Music for every emotion and occasion.

Advantages For Artists

Spotify Artist Radio is a game changer for musicians. It turns Spotify into a powerful tool. Artists of all sizes can reap huge benefits. Think of it as your personal music wave, spreading your sounds across the ocean of listeners. It’s not just about playing your tunes. It’s a ladder for climbing the music charts.

Gaining Exposure And Fans

For artists, exposure is key. Spotify Artist Radio puts your music in the spotlight. Imagine having your tracks played alongside famous songs. Your sound reaches ears that may have never found you. This way, you don’t just get listeners; you earn fans.

  • Automatic playlisting of your music with similar genres
  • New listeners discover your tracks
  • Opportunity to be featured on various radios

Analytics And Feedback For Creators

Feedback powers growth. Spotify Artist Radio gives real-time insights. Artists like you can see who’s tuning in. You learn what works and what doesn’t.

Analytics Tool Benefits
Listener Demographics Understand your audience better
Track Performance See which songs are hits
Real-time Feedback Adapt quickly to listener trends

With this data, you tailor your music to fan taste. You also use this feedback to create even more engaging songs. It’s like having a compass that leads to musical success.

What is Spotify Artist Radio?: Unveiling Audio Alchemy


Credit: unitlondon.com

Spotify’s Competitive Edge In Streaming

Spotify leads the music streaming world for a reason. It offers unique features that others don’t. Users love its easy-to-use platform and the infinite music collection. Artist Radio is a crown jewel. It creates a personalized stream of songs. It’s for fans of a specific artist. Spotify adds songs that fit the style and vibe.

Comparison With Other Music Radio Services

Spotify stands out in the crowd. Other services like Pandora have their pros, but Spotify’s Artist Radio is different.

Feature Spotify Others
Personalization High Varies
Song Library Extensive Limited
User Control More interactive Less interactive

Innovative Features And User Engagement

Spotify knows how to keep users hooked. Its Artist Radio is a smart tool.

  • Daily Mixes: Tailored playlists for every mood
  • Discover Weekly: New music every week
  • Playlists: Endless with no repeats

Spotify engages users more. Interactivity is key. You can create, share, and enjoy endless mixes with ease.

Artist Radio’s Impact On The Music Industry

The music industry constantly evolves, and Spotify’s Artist Radio stands as a stark example of this continuous transformation. By offering personalized radio stations centered on individual artists, Spotify not only shifts how music lovers interact with their favorite tunes, but also how artists themselves approach the creation and distribution of their music.

Changing The Way We Discover Music

Spotify’s Artist Radio alters the landscape of musical discovery. Listeners now enjoy a seamless journey through an artist’s catalog, often stumbling upon new favorites. This feature leverages Spotify’s vast data, recommending songs with precision. Music fans dive deep into genres and subgenres, expanding their musical horizons with ease.

  • Endless Exploration: Tracks from similar artists weave into the radio, creating an unending mix.
  • Personalized Playlists: These radios adapt over time to match user preferences, offering a tailored experience.
  • Discovery for All: New and established artists gain exposure, connecting with potential fans around the globe.

Influence On Music Production And Release Strategies

Artist Radio not only touches listeners but also influences how artists create and release music. Data-driven insights shape the sound and strategy.

Area Impact
Production Artists analyze trends to craft songs that resonate with streaming audiences.
Release Timing Optimal drop times are chosen based on listener habits.
Marketing Campaigns target potential fans discovered through similar Artist Radios.

Artists now consider the digital ecosystem as part of their creative process. They fine-tune their music to fit into the streaming narrative. Spotify’s analytics provide a roadmap for success, guiding artists to meet listeners where they are most engaged.

Future Of Digital Music Curation

The Future of Digital Music Curation is transforming how we discover and enjoy new tunes. Spotify Artist Radio isn’t just a playlist; it represents the next wave in customized music enjoyment. By blending user preferences with complex algorithms, Spotify Artist Radio offers an endless stream of music tailored to your taste.

Technological Advances On The Horizon

The music industry is buzzing with the potential of upcoming tech. Innovative algorithms and artificial intelligence stand at the forefront of these advances. These technologies aim to enhance music discovery, making it a more personalized experience.

  • Machine Learning: Improves over time to fine-tune your music recommendations.
  • Smart Assistants: Use voice commands to discover new Artist Radios.
  • High-Fidelity Streaming: Offers studio-quality playback for the best sound.

Predicting Trends And Tailoring Experiences

Spotify’s analytical tools don’t just track what you listen to; they predict what you’ll love next. Anticipating music trends becomes effortless with data analytics.

Data Point Function
Listening History Creates a base for your music profile
User Engagement Identifies how you interact with tracks
Social Shares Links music preferences with your social circle

As the system learns your habits, the curation becomes more precise, leading to a deeply personalized listening experience.

Maximizing Your Artist Radio Experience

Maximizing Your Artist Radio Experience on Spotify is a journey into musical discovery. This personalized feature plays songs from various artists similar to the one you started with. It gives you an ever-evolving playlist based on your musical taste. Enhance your listening adventures or amplify your presence as an artist with targeted strategies for the best Spotify Artist Radio experience.

Tips For Listeners

For listeners eager to dive deeper into their favorite genres, here are ways to get the most from Artist Radio:

  • Start with your favorite. Choose an artist you love to kickstart a tailored radio stream.
  • Like and dislike songs. Use the thumbs up or down to refine your radio’s playlist.
  • Save favorites. Add songs you love to your personal playlists.
  • Discover new music. Artist Radio introduces you to tracks beyond your regular playlists.
  • Share the vibe. Send friends links to your Artist Radio for shared listening.

Strategies For Artists

Artists looking to maximize their reach can use these tactics:

  1. Engage your fanbase. Encourage fans to start a radio from your tracks.
  2. Update regularly. Keep releasing new music to stay relevant on radios.
  3. Share your radio. Promote your Artist Radio on social media and websites.
  4. Monitor your data. Use Spotify for Artists to see who’s tuning in.
  5. Cross-promote. Collaborate with similar artists to feature on each other’s radios.

Conclusion: The Essence Of Spotify Artist Radio

Spotify Artist Radio stands as a modern homage to traditional radio experiences. It adds a personal twist, tailoring music discoveries to individual tastes. It’s here where fans relive the anticipation of radio while enjoying sounds chosen just for them.

Recapturing The Magic Of Radio

Spotify Artist Radio breathes life into the classic radio concept. It picks up where old-school DJs left off. Listeners get a mix of familiar tunes and new ones. This blend rekindles the surprising element of radio’s golden days.

A look back to hit radio shows of the past:

  • Mix of chart-toppers with hidden gems
  • Music curated with the listener in mind
  • Seamless transitions between songs

Spotify replicates this experience, using algorithms and user data. It ensures every song resonates with the listener, creating a personalized soundtrack.

Embracing The Personalized Audio Journey

Personalization is the core of Spotify Artist Radio. Everyone’s audio journey is unique. Spotify honors this by crafting stations different for each user. It’s a music voyage that’s both personal and endless.

The personal touch of Spotify Artist Radio includes:

Feature Description
User Preferences Tailors selections to your likes
Discovery Introduces new artists and songs
Unlimited Skips Control what you listen to

Through its dynamic stations, Spotify ensures that the spirit of radio— discovery, nostalgia, and connection—thrives in the digital age. Spotify Artist Radio serves not merely as a listening platform. It’s an interactive journey shaped by each listener’s personal music narrative.


Frequently Asked Questions For What Is Spotify Artist Radio

What Is Spotify Artist Radio?

Spotify Artist Radio is a feature on Spotify that creates a personalized station. It includes songs by the selected artist and similar music by other artists. This is ideal for discovering new music tailored to your taste.

How To Start An Artist Radio On Spotify?

To start an Artist Radio on Spotify, go to the artist’s profile. Click on the ‘Radio’ tab or the ‘Go to Radio’ button. Spotify will automatically generate a playlist based on the artist’s style and influences.

Can You Save Spotify Artist Radios?

Yes, you can save Spotify Artist Radios by adding the radio playlist to your library. Simply click the ‘Follow’ button at the top of the Artist Radio playlist. This allows you to easily revisit and play it whenever you want.

Are Spotify Artist Radios Different For Each User?

Spotify Artist Radios are personalized for each user. They consider your listening history and preferences. This means two people may have different tracks in the same artist’s radio.

Conclusion

Spotify’s Artist Radio offers a personalized listening journey tailored to your tastes. It’s a gateway to new musical landscapes, fueled by your favorite artists. Dive in and let the algorithm curate a soundtrack that’s uniquely yours. Embrace the endless discovery; your next favorite song awaits.

Categories
Archive

Which One is Better Ableton or FL Studio? Ultimate Face-Off

Choosing between Ableton Live and FL Studio depends on your workflow and genre focus. Ableton excels in live performance and electronic music production, while FL Studio is praised for its intuitive pattern-based sequencing and comprehensive stock plugins.


Deciding on the right digital audio workstation (DAW) can be crucial for any music producer or live performer. Both Ableton Live and FL Studio are powerhouse tools, each with unique features that cater to different aspects of music production. Music creators often praise Ableton for its seamless live performance capabilities and its strong suit in handling electronic and experimental genres.


On the other hand, FL Studio is often recognized for its user-friendly interface, making it a favorite among new producers, as well as hip-hop and EDM creators. Each software has a loyal user base and an array of professional features that can take your music to the next level, so your personal preference in workflow and genre will largely dictate the better choice for your needs.

Which One is Better: Ableton or FL Studio? Ultimate Face-Off


Credit: www.sweetwater.com

Intro To The Titans: Ableton Vs Fl Studio

Welcome to the ultimate showdown in the digital audio workstation (DAW) arena ‘Intro to the Titans: Ableton vs FL Studio’. Steps into the ring two industry powerhouses: Ableton Live and FL Studio. Both have been instrumental in shaping the music production landscape, launching careers, and fueling creative expressions across genres. Join us as we unveil their strengths, differences, and impact on the music scene.

Initial Impressions

First encounters with a DAW can be daunting or inviting. Ableton Live boasts a streamlined interface, with its Session View providing an intuitive platform for improvisation and live performances. FL Studio, on the other hand, is often celebrated for its loop-based sequencer and easy grasp for newcomers with its pattern-based workflow.

Ableton Live FL Studio
Interface Streamlined, Intuitive Pattern-Based, User-Friendly
Workflow Nonlinear, Session View Linear, Pattern Sequencer
Best For Live Performance, Experimentation Beat Making, Beginners

Current Music Industry Impact

Both Ableton and FL Studio are vital cogs in today’s music production machinery. Ableton Live excels in live settings and is thus a favorite among performers. FL Studio’s user-friendly interface and robust features make it a go-to for beatmakers and producers, fostering innovation in hip hop and EDM. The preference often boils down to personal style and production needs.

  • Ableton Live: Preferred DAW for live artists and experimental producers.
  • FL Studio: Dominates the beat production scene, appealing to beginners and professionals alike.

A Deep Dive Into Ableton Live

Embarking on a musical journey often leads to a vital question: which software to choose? Ableton Live stands out in the digital audio workstation (DAW) landscape with its distinctive features. Geared towards both production and live performance, Ableton Live shines with its versatility.

Key Features

Ableton Live’s robust foundation springs from its various features.

  • Session View: A non-linear approach to music creation.
  • Warping: Seamless audio stretching and manipulation.
  • Automation: Precise control over parameters within clips.
  • Max for Live: Infuses customizable plugins and tools.

Ease Of Use And Workflow

A first glance at Ableton Live reveals a clean, intuitive interface.

  • Dual views catering to different stages of production.
  • Drag-and-drop functionality simplifies workflow.
  • Contextual info provides tips and tricks on-the-go.

Unique Tools And Integrations

What sets Ableton Live apart? Its arsenal of unique tools and integrations.

  • Built-in instruments and effects rival premium plugins.
  • Max for Live: Exponential potential for sound design.
  • Extensive MIDI controller support for seamless hardware integration.

Exploring The World Of Fl Studio

FL Studio shines as a powerhouse for electronic music production. Famous for its slick design and ease of use, learning curves bow down to its intuitiveness. Creators love its endless possibilities. Let’s dive into what makes FL Studio a go-to for many musicians and producers.

Signature Elements

Under the hood of FL Studio, you’ll find unique features setting it apart. It boasts:

  • Step Sequencer: For quick beat-making.
  • Piano Roll: For intricate note editing and control.
  • Mixer: With flexible routing and chains, sound shaping is limitless.

User Interface And Creativity

User-friendliness stands at the core of FL Studio’s UI. With its:

  1. Color-coded channel racks
  2. Drag-and-drop functionality
  3. Customizable layouts

Even beginners find expressing creativity effortless.

Expansion And Plugin Support

FL Studio’s flexibility shows in its expansion and plugin support:

  • Vast built-in plugin library
  • Support for VSTs, ensuring endless sound exploration
  • Free lifetime updates mean your setup grows with you

Whether you’re crafting beats, designing soundscapes, or composing melodies, FL Studio’s robust toolkit adapts to your evolving style and needs.

Performance And Efficiency Showdown

Welcome to the Performance and Efficiency Showdown between Ableton Live and FL Studio. These digital audio workstations (DAWs) are giants in the music production arena. We’re diving into how they manage CPU loads and latency, plus their suitability for live performances. Which will come out on top? Let’s break it down and see which DAW ensures a seamless creative process for producers.

Cpu Load And Latency

Both Ableton and FL Studio need to run smoothly to aid your music production. The CPU Load refers to how much of your computer’s processing power the software uses.

Ableton Live FL Studio
Moderate CPU usage Efficient CPU usage
Precise handling with simpler projects Handles complex projects with ease
Optimal with proper settings Optimized for various systems

Latency is the delay before a transfer of audio. It needs to be low for a good experience. Ableton Live offers built-in latency compensation. FL Studio has adjustable buffer lengths.

  • Ableton Live: Advanced latency management
  • FL Studio: Customizable for minimal delay

Live Performance Suitability

Live performance is where a DAW shows its true colors. Ableton Live is named for its onstage prowess. Its Session View lets you trigger clips on the fly. This makes it a powerhouse for live setups.

  • Session View for dynamic performance
  • Highly stable under pressure

FL Studio offers the Performance Mode. This feature allows for live triggering and clip manipulation. FL Studio is user-friendly but is less popular for stage performances.

  • Performance Mode designed for live use
  • Less commonly used in concert settings

Each DAW brings something special to the table. They cater to different aspects of performance and efficiency. Your choice might hinge on whether you are more studio-focused or stage-ready.

Pricing And Value For Money

Choosing between Ableton and FL Studio often comes down to cost. Both offer different versions, each with unique features. Knowing the pricing and value for money is essential when selecting a digital audio workstation (DAW). This will help you pick the right one for your music production needs without breaking the bank.

Investment Costs

Ableton and FL Studio both have tiered pricing structures. These allow users to buy according to their budget and needs.

  • Ableton Live Intro: Entry-level version suitable for beginners.
  • Ableton Live Standard: Includes more features than Intro for advanced users.
  • Ableton Live Suite: Complete package with all features and sounds.

Similarly, for FL Studio:

  • FL Studio Fruity: Basic edition for newcomers.
  • FL Studio Producer: More capabilities for serious producers.
  • FL Studio Signature: Adds more effects and instruments.

Ableton and FL Studio also offer demo versions. These demos let you try before you buy. Always check the latest prices on their websites. Sales and discounts can provide great value.

Long-term Value

Both DAWs are investments that grow with you. Think about your future needs and not just the present. Look at what each version offers and how it aligns with your goals.

Ableton FL Studio
Free Updates Limited to minor updates Life-time free updates
Community and Resources Vast Extensive
Expandability Yes, through Max for Live Yes, with plugins

FL Studio’s lifetime free updates give long-term value. Once you buy it, you own all future versions. Ableton charges for major updates. However, Ableton’s Suite version offers Max for Live. This feature brings endless creative possibilities.

Both DAWs come with support and educational materials. These enhance your skills and often outweigh initial costs. A community of users can also guide and inspire you. Your choice might be influenced by the style of music you want to make. Each DAW caters to different creative workflows.

The Community And Support Factor

The Community and Support Factor:
Choosing between Ableton and FL Studio often goes beyond software capabilities.
The community and support services available can heavily influence your user experience.
Let’s dive into the worlds of Ableton and FL Studio to see what community and support they offer.

Online Resources And Forums

Both Ableton and FL Studio boast a plethora of online resources ready to assist you on your music production journey.

  • Ableton offers:
    • An extensive knowledge base with tutorials.
    • Official Ableton forums for peer support.
    • Free project files from established artists.
  • FL Studio is known for:
    • A massive, active user forum for help and tips.
    • Countless YouTube tutorials, many from renowned producers.
    • Regular, community-driven beat-making contests.

The wealth of information ensures you’re never stuck without help for long.

Customer Support Services

Direct support from the developers can make a world of difference.

Service Ableton FL Studio
Email Support Yes, with detailed responses. Yes, known for quick replies.
Phone Support Limited to business hours. Not available.
Live Chat Not available. Yes, for instant help.

Ableton shines with in-depth email support, while FL Studio offers quick help through its live chat feature.

Success Stories And Industry Proponents

Exploring the high-tier terrain of digital audio workstations (DAWs) unleashes tales of musical grandeur. Ableton Live and FL Studio stand tall, their banners waving in the virtual winds of the music industry. Bursting with success stories, each DAW boasts an army of proponents formulating chart-topping hits and shaping the future of music.

Famous Ableton Users

Ableton Live has become the go-to canvas for many of music’s visionaries, known for its streamlined workflow and robust live performance capabilities. The software brims with features that make music creation feel intuitive, allowing artists to focus on innovation.

  • Deadmau5 – Legendary for progressive house tracks and spectacular live shows, Deadmau5 designs his sonic masterpieces using Ableton Live.
  • Diplo – This global superstar taps into Ableton’s power to forge his trademark beats, appealing to audiences worldwide.
  • Skrillex – The king of dubstep, Skrillex, harnesses Ableton’s prowess to deliver his earth-shattering drops and intricate sounds.

Fl Studio’s Championed Producers

FL Studio, with its rich palette of tools and hypnotic step sequencer, serves as the foundation for artists preferring a pattern-based approach. Renowned for its signature sound manipulation features, FL Studio excels in the hands of these maestros:

Producer Notable Works
Martin Garrix Animals, In the Name of Love
Metro Boomin Bad and Boujee, Congratulations
Avicii Levels, Wake Me Up

These epic tales paint a clear picture: choice of DAW intertwines with personal style and workflow preference. Whether opting for the live performance might of Ableton or the pattern-based precision of FL Studio, success stories abound, guiding new artists to their perfect DAW fit.


Personalizing The Experience: Which Suits You Best?

Welcome to the debate of the ages for producers and music enthusiasts alike – the classic showdown between Ableton and FL Studio. Each digital audio workstation has its strengths, but the best fit for you hinges on your personal production style and needs. Let’s break down the nuances of personalizing your music-making experience with these powerhouses.

Considering Music Genres

Your preferred music genre might steer you towards one platform over the other. Ableton, known for its stellar live performance features, is often the go-to choice for electronic and experimental composers. Its intuitive session view offers a playground for improvisation and live arrangement – perfect for DJs and live performers.

In contrast, FL Studio shines with its pattern-based sequencing, a favorite amongst hip-hop and EDM producers. It’s a powerhouse for beat-making and loop-creation, with an interface that makes intricate pattern and melody crafting a breeze.

Learning Curve And Skill Level

Add value to your music-making journey by selecting a DAW that aligns with your skill level. FL Studio is often praised for its user-friendly interface, making it a solid choice for beginners.

With a wide range of tutorials and a community willing to help, new users find FL Studio accessible and fun to explore.

Ableton’s deeper feature set caters to users with some experience. Its workflow is unique and may require a steeper learning curve. Yet, this complexity allows for greater customization, satisfying the hunger of the most seasoned music producers.

Conclusion: Making The Final Choice

Deciding between Ableton and FL Studio can shape your music production journey. Both offer unique features suitable for various needs and preferences.

Balanced Recap

Ableton Live stands out for live performance and workflow efficiency. Its Session View is unmatched for on-the-fly music creation.

FL Studio, famous for its piano roll and beat-making tools, is popular among producers who focus on electronic genres.

  • User Interface: FL Studio’s is more colorful and beginner-friendly.
  • Workflow: Ableton offers a slick, fast approach.
  • Stock Instruments/Effects: Both have a robust library, but your genre may tip the scales.
  • Price: FL Studio provides free lifetime updates, a major plus.

Looking Towards The Future

Predicting your future needs is key. Think long-term goals and project types.

Consideration Ableton FL Studio
Live Performances Excellent Good
Genre Flexibility Great Great
Software Updates Standard Free for Life
Community & Resources Extensive Extensive

Both DAWs evolve with the music industry. Your choice should align with where you see your music heading.

Which One is Better: Ableton or FL Studio? Ultimate Face-Off


Credit: www.production-expert.com

Frequently Asked Questions Of Which One Is Better Ableton Or Fl Studio

What Are The Key Differences Between Ableton And Fl Studio?

Ableton Live and FL Studio differ primarily in workflow and interface. Ableton’s Session View offers a unique approach to composition and live performance. Meanwhile, FL Studio’s pattern-based sequencing is favored for its simplicity and ease of use in beat-making. Both have robust feature sets tailored to different production styles.

Is Ableton Or Fl Studio More User-friendly For Beginners?

FL Studio is often considered more user-friendly for beginners due to its intuitive design and straightforward workflow. Its pattern-based approach simplifies beat creation, making it accessible for those starting out. However, user preference plays a significant role; some beginners may find Ableton’s layout and features more to their liking.

Which Daw Offers Better Value For Money?

Value for money is subjective and depends on the user’s needs. FL Studio offers lifetime free updates, which is a significant long-term saving. Ableton comes with different versions at varying price points, catering to different levels of producers. Consider which DAW’s features align better with your production goals when evaluating their value.

Can Ableton Live Integrate With Live Performances Better Than Fl Studio?

Ableton Live is widely recognized for its strengths in live performance integration. Its Session View enables DJs and performers to launch clips and loops in real-time, making it a preferred choice for on-stage use. FL Studio has made strides but is traditionally seen as more studio-centric.

Conclusion

Deciding between Ableton and FL Studio is a personal choice. Each offers distinct features catering to different production styles. Assess your needs, trial both platforms, and choose the one that resonates with your creative workflow. Your ultimate music production tool reflects your unique approach to crafting sounds.