Acoustic Room Treatment for Enhanced Sound Quality
When it comes to creating an optimal listening environment, acoustic treatment plays a crucial role. Whether you’re setting up a home recording studio, a media room, or a listening space, the acoustic properties of the room can significantly impact the quality of the sound.
The Importance of Acoustic Treatment
Acoustic treatment involves the use of specialized materials and techniques to manage sound reflections, reverberation, and overall acoustic characteristics within a space. By addressing issues such as unwanted echoes and excessive reverberation, acoustic treatment can enhance the clarity, definition, and accuracy of sound reproduction.
Without proper acoustic treatment, sound waves can reflect off hard surfaces, causing a range of issues such as comb filtering, flutter echoes, and standing waves. These problems can negatively affect the perceived frequency response and imaging of the audio, leading to an inferior listening experience.
Credit: www.amazon.com
Types of Acoustic Treatment
There are several types of acoustic treatment designed to address specific acoustic issues and improve the overall sonic performance of a room:
Bass Traps: These are designed to absorb low-frequency sound waves, reducing bass buildup and improving the clarity of the low end.
Diffusers: Diffusers scatter sound waves, helping to minimize acoustic problems such as standing waves and flutter echoes while maintaining a lively acoustic environment.
Acoustic Panels: These are used to absorb mid and high-frequency sound waves, reducing reflections and controlling the reverberation time in a room.
Credit: www.facebook.com
Placement and Configuration
Strategic placement of acoustic treatment is essential for achieving optimal results. The placement and configuration of bass traps, diffusers, and acoustic panels should be carefully planned to effectively manage the acoustic characteristics of the room.
For example, bass traps are typically placed in corners where low-frequency energy tends to accumulate, while diffusers and acoustic panels are positioned at primary reflection points to minimize early reflections and improve the listening experience.
DIY vs. Professional Installation
While there are many resources available for DIY acoustic treatment, seeking professional expertise can be beneficial, especially for complex listening environments. Professional acoustic consultants and installers can assess the unique acoustic challenges of a room and provide customized solutions for optimal results.
Professional installation ensures that the acoustic treatment is effectively integrated into the space, taking into account factors such as room dimensions, furnishings, and the specific listening requirements. This tailored approach can result in a more accurate and balanced sound reproduction.
Improving the Listening Environment
Acoustic treatment is not limited to recording studios and home theaters; it can greatly benefit any space where sound quality is important. Whether it’s a living room, a home office, or a dedicated listening room, implementing acoustic treatment can elevate the listening experience to a new level.
By addressing acoustic issues and optimizing the sonic characteristics of a room, acoustic treatment allows for a more immersive, accurate, and enjoyable listening experience. It enables a truer representation of the original sound, whether it’s music, movies, or any other audio content.
Frequently Asked Questions Of Acoustic Room Treatment: Unlocking The Power Of Sound Clarity
Why Is Acoustic Treatment Essential For Studio Setups?
Ensures accurate sound production, minimizes echo, and enhances audio quality.
How Does Acoustic Treatment Improve Sound Quality?
Reduces reverberation and echoes, enhancing clarity, detail, and overall sound experience.
What Are Common Types Of Acoustic Treatments Available?
Includes bass traps, diffusers, absorbers, and panels for sound optimization.
Conclusion
Acoustic treatment is a fundamental aspect of creating an ideal listening environment. By addressing acoustic issues such as sound reflections, reverberation, and frequency response, it enhances the overall sound quality and allows for a more accurate and enjoyable listening experience. Whether for professional audio production or recreational listening, the impact of acoustic treatment on the sonic performance of a room cannot be overstated.
Professional vocal recording is a critical aspect of creating high-quality music. Whether you’re a singer, podcaster, or voice-over artist, achieving great vocal recordings is essential for standing out in today’s competitive audio landscape. In this article, we will explore the best practices and techniques for professionally recording vocals in a studio environment.
Credit: blog.native-instruments.com
1. Setting Up Your Recording Space
A well-prepared recording space is the foundation for a successful vocal recording session. Soundproofing your studio or recording room is crucial to minimize external noise and ensure a clean vocal signal. Additionally, using acoustic treatment such as sound panels and diffusers can help control the reflections within the room, resulting in a more balanced and controlled sound.
2. Choosing the Right Microphone
Selecting the appropriate microphone for your voice and recording style is paramount. Condenser microphones are commonly used for vocal recording due to their sensitivity and ability to capture nuances in the voice. However, dynamic microphones can also be suitable for capturing powerful and intense vocal performances. It’s essential to test different microphones to find the one that best complements your voice and style.
Credit: www.acadecraft.com
3. Mic Placement and Pop Filter
Proper microphone placement is crucial for capturing a clean and balanced vocal take. Position the microphone at the ideal distance from your mouth to avoid distortion and sibilance. Additionally, using a pop filter to minimize plosives (p, t, b sounds) can significantly improve the overall quality of the recording. Experiment with mic placement and pop filter positioning to find the optimal setup for your voice.
4. Utilizing Preamps and Compression
Quality preamps are essential for capturing the nuances and details of the vocal performance. Whether you’re using outboard preamps or the preamps built into your audio interface, paying attention to preamp selection and settings can make a significant difference in the overall sound. Furthermore, applying gentle compression during the recording process can help smooth out dynamics and ensure a consistent vocal level.
5. Monitoring and Performance
Monitoring the vocal performance in real-time is crucial for delivering a top-notch recording. Using high-quality studio monitors or headphones will allow you to hear the nuances and subtleties of your performance accurately. Ensure that the artist is comfortable and in the right mindset for the recording session, as a relaxed and focused performance can make a substantial impact on the final recording.
6. Post-Processing and Editing
After capturing the vocal takes, it’s time to fine-tune and edit the recordings to perfection. Using EQ to enhance the tonal balance, applying subtle reverb or delay for spatial enhancement, and addressing any timing or pitch issues through editing software are essential steps in the post-recording process. It’s crucial to strike a balance between enhancing the vocal recording while preserving its natural character and emotion.
7. Mixing and Final Production
The final step in the process involves integrating the vocals into the overall mix. Properly blending the vocals with the instrumental tracks, adjusting levels, and adding automation for dynamic control are critical aspects of the mixing process. Collaborating with an experienced audio engineer can bring a fresh perspective and ensure that the vocals are seamlessly woven into the fabric of the song.
Frequently Asked Questions On Professionally Record Vocals: Master The Art Of Captivating Sound
What Is The Importance Of Professional Vocal Recording?
Professional vocal recording ensures high quality audio for your music or projects.
Why Is It Crucial To Hire A Professional For Vocal Recording?
Professionals have the expertise and equipment to capture top-notch vocal performances.
How Does Professional Vocal Recording Enhance The Overall Sound?
It adds clarity, depth, and professionalism, elevating the quality of your recordings.
Can Professional Vocal Recording Improve My Project’s Appeal?
Absolutely, it enhances the overall appeal and professionalism of your music or project.
Conclusion
Achieving professional vocal recordings involves a combination of technical expertise, creativity, and attention to detail. By implementing the best practices and techniques discussed in this article, you can elevate your vocal recordings to new heights and make a lasting impression with your audience. Whether you’re recording a heartfelt ballad, an energetic pop anthem, or a captivating podcast, the art of professional vocal recording will undoubtedly play a pivotal role in your creative endeavors.
In the highly competitive world of music, recording rap vocals that stand out from the crowd is crucial for artists looking to make an impact. Whether you’re a seasoned rapper or just starting out, understanding the ins and outs of recording rap vocals is essential for creating a professional and high-quality sound. This comprehensive guide will walk you through the entire process, from setting up your recording space to fine-tuning your vocal delivery.
Setting Up Your Recording Space
Creating the right environment for recording rap vocals is the first step towards a successful recording session. Find a quiet and acoustically treated space to minimize background noise and unwanted reflections. Invest in quality studio monitors or headphones to accurately assess your recordings. Additionally, consider utilizing soundproofing materials such as foam panels to improve the acoustics of your recording space.
Choosing the Right Microphone
Selecting the right microphone is crucial for capturing the unique nuances of rap vocals. Consider investing in a large-diaphragm condenser microphone, known for its ability to capture the full spectrum of vocal frequencies with exceptional clarity. Ensure proper positioning of the microphone to optimize the recording quality and minimize unwanted room noise.
Optimizing Your Recording Chain
Building a high-quality recording chain is essential for achieving professional-sounding rap vocals. Pair your microphone with a high-quality preamp to ensure a clean and transparent signal capture. Additionally, consider using a pop filter to reduce plosive sounds and a reflection filter to minimize room reflections, further enhancing the clarity of your vocal recordings.
Setting Levels and Monitoring
Calibrating your recording levels and monitoring the input signal is crucial for achieving optimal recording quality. Aim for a signal level that avoids clipping while still maximizing the signal-to-noise ratio. Use a quality audio interface to accurately monitor your recordings in real-time, allowing you to make necessary adjustments on the fly.
Credit: www.rollingstone.com
Optimizing Your Vocal Performance
Before hitting the record button, warm up your voice and practice your delivery to ensure a polished and confident performance. Experiment with mic positioning and find the sweet spot that best captures your unique vocal characteristics. Focus on conveying emotion and energy through your delivery, as these elements play a significant role in creating engaging rap vocals.
Credit: grammy.com
Embracing Post-Production Techniques
Once you’ve captured your rap vocals, the post-production phase presents an opportunity to further enhance your recordings. Use EQ to sculpt the tonal balance of your vocals, emphasizing the clarity and presence of the voice. Consider adding subtle compression to control dynamics and add consistency to your vocal performance. Experiment with reverb and delay effects to create a sense of space and depth within your vocal mix.
Collaborating with a Professional Engineer
If you’re striving for a truly polished and professional result, collaborating with a skilled audio engineer can take your rap vocal recordings to the next level. A professional engineer can offer valuable insights and expertise in optimizing the quality of your recordings, from fine-tuning the vocal sound to creating a cohesive and polished mix that complements your unique style as a rapper.
Frequently Asked Questions On Record Rap Vocals: Unleash Your Powerful Rhymes And Create Unforgettable Tracks
How To Set Up A Home Recording Studio For Rap Vocals?
To set up a home recording studio for rap vocals, you’ll need a mic, audio interface, headphones, and recording software.
What Are Some Tips For Improving Rap Vocal Recordings?
Improve your rap vocal recordings by staying hydrated, practicing breath control, and experimenting with different recording techniques.
Why Is Room Acoustics Important For Recording Rap Vocals?
Room acoustics affect the sound quality of rap vocals; treating your room with acoustic panels can minimize unwanted reflections.
What Microphone Is Best For Recording Rap Vocals?
A large-diaphragm condenser microphone is optimal for capturing the nuances and dynamics of rap vocals.
Conclusion
Recording rap vocals is an art form that requires a combination of technical skill, creative vision, and dedication. By following the steps outlined in this guide, you can elevate your rap vocal recordings to a professional standard, setting the stage for a successful music career. Remember, capturing compelling rap vocals is not just about technical prowess, but also about conveying authenticity, emotion, and storytelling through your artistry.
A standard drum set typically consists of five to seven drums, including a bass drum, snare drum, and multiple tom-toms. The exact number of drums can vary depending on the drummer’s preferences and playing style.
Drum sets are a crucial component of any band or musical performance, providing rhythm, tempo, and dynamics to the music. With their versatile range of sounds and capabilities, drum sets play a vital role in establishing the overall feel and energy of a song.
Whether in a rock band or a jazz ensemble, the drum set’s ability to drive the music forward makes it an essential instrument in any musical setting. Understanding the composition and versatility of a drum set is essential for appreciating its role in shaping the sounds and rhythms of various musical genres.
History Of Drum Sets
Drums have been an integral part of music for centuries, providing rhythm, energy, and depth to compositions. The history of drum sets is rich and fascinating, spanning several centuries and evolving with the development of musical styles and technology.
Invention Of The Drum Kit
The invention of the drum kit as we know it today can be traced back to the early 20th century. It is widely credited to jazz drummers who needed a more versatile and compact setup to accommodate the evolving sounds of the genre. By consolidating various percussion instruments into a single, easily accessible setup, the drum kit was born. This innovation revolutionized the way drummers played and contributed to the dynamic nature of modern music.
Evolution Of Drum Sets
The evolution of drum sets has been marked by continuous innovation and adaptation. Over the decades, drum kits have evolved to incorporate new materials, designs, and components to meet the demands of changing musical genres. From the addition of electronic components to the development of hybrid acoustic-electronic setups, drum sets have continued to evolve, embracing new sounds and capabilities while honoring their traditional roots.
Credit: poosh.com
Anatomy Of A Drum Set
A drum set, also known as a drum kit, is a collection of drums, cymbals, and percussion instruments played by a single drummer. The anatomy of a drum set consists of different types of drums, cymbals, and other percussion instruments that come together to create a dynamic and versatile musical experience. Let’s explore the components of a drum set in more detail.
Different Types Of Drums
Drums are the heart of a drum set, and there are several types of drums that contribute to its overall sound. The main drums found in a standard drum set include:
Bass drum
Snare drum
Tom-toms (high tom, mid tom, floor tom)
Cymbals And Percussion Instruments
In addition to drums, cymbals and other percussion instruments play a crucial role in defining the sound and character of a drum set. The cymbals and percussion instruments commonly found in a drum set include:
Hi-hat cymbals
Ride cymbal
Crash cymbal
Various auxiliary percussion instruments (cowbell, tambourine, etc.)
Standard Drum Set Configuration
A standard drum set typically consists of a bass drum, snare drum, tom-toms, hi-hat, crash cymbal, and ride cymbal. These drums, when combined, create a versatile and powerful set-up for drummers of all levels.
Components Of A Basic Drum Kit
A standard drum set, also known as a drum kit, typically consists of several key components. These components work together to produce the rhythmic beats and sounds that we associate with drumming. Understanding the pieces of a drum set is essential for any aspiring drummer or anyone interested in learning more about this versatile instrument.
The main components of a basic drum kit include:
Bass drum: This large drum is played with a foot pedal and provides the deep, low-end tones in a drum set.
Snare drum: Positioned between the drummer’s legs, the snare drum produces a sharp, crackling sound and is often used for accenting beats.
Toms: Toms are cylindrical drums of various sizes that can be mounted on stands or attached to the bass drum. They produce melodic and rhythmic tones.
Hi-hat: The hi-hat consists of two cymbals mounted on a stand that can be opened and closed using a foot pedal. It produces a crisp and distinct sound and is commonly used for creating rhythm.
Ride cymbal: The ride cymbal is a larger cymbal that produces a sustained, shimmering sound. It is often used for playing steady patterns or creating accents.
Crash cymbal: The crash cymbal is a smaller cymbal that produces a loud, explosive sound. It is commonly used to add emphasis and create climactic moments in a drumming performance.
Hardware: In addition to the drums and cymbals, a drum set also includes various hardware components. This includes stands, pedals, clamps, and other support mechanisms that hold the drums and cymbals in place.
These components combine to form the basic drum kit. However, it’s important to note that there is flexibility in drum set configurations, allowing drummers to customize their setup based on personal preferences and musical styles.
Variations In Drum Set Configurations
Drum set configurations can vary greatly depending on the drummer’s preferences, musical genre, and specific performance requirements. While the components listed above form a standard drum set, drummers may choose to add or remove certain elements to create a unique setup.
Common variations in drum set configurations include:
Double bass drum setup: In this configuration, two bass drums are used instead of one, allowing drummers to achieve faster and more complex bass drum patterns.
Additional toms or cymbals: Drummers may choose to add extra toms or cymbals to expand their tonal options and create more versatile drumming patterns.
Electronic drums: Some drummers opt for electronic drum kits, which use electronic pads and triggers to produce drum sounds. This allows for a greater range of sounds and effects.
Cocktail drum kit: This unique configuration features a smaller, compact drum set that combines elements of both a traditional drum set and a percussion setup.
Ultimately, a drummer’s choice of drum set configuration depends on their individual style, musical preferences, and performance needs. By exploring different setups and components, drummers can find their own unique sound and expression in the world of drumming.
Credit: reverb.com
Role Of Each Drum In A Drum Set
In a drum set, each drum has a specific role that contributes to the overall sound and rhythm. From the snare drum providing a steady backbone to the bass drum keeping the beat, and the tom-toms adding depth and texture, each drum plays a crucial part in creating dynamic and captivating music.
Snare Drum: The Backbone
The snare drum serves as the backbone of a drum set, providing a sharp and consistent sound that drives the rhythm forward.
Bass Drum: The Beatkeeper
The bass drum acts as the beatkeeper, anchoring the tempo with its deep and powerful thud, laying the foundation for the entire band to follow.
Tom-toms: Adding Depth And Texture
The tom-toms add depth and texture to the music, creating a melodic and tonal aspect that enhances the overall musical experience.
Drum Set Customization
Customizing your drum set allows you to create a personalized instrument that reflects your unique style and preferences. From choosing the right drum set sizes to selecting drum heads and adding accessories and hardware, each aspect contributes to the sound and performance of your kit.
Choosing Drum Set Sizes
Different drum sizes produce varying tones and serve different musical genres. Consider factors like shell dimensions and drum depths to create the desired sound and playability.
Selecting Drum Heads
Drum heads greatly impact the tonal quality of your drums. Decide between coated or clear heads, as well as different thicknesses, to achieve the desired level of resonance and tone.
Adding Accessories And Hardware
Enhance your drum set by adding accessories like cymbals, cowbells, or drum triggers. Select durable hardware such as pedal, stands, and mounts to ensure stability and ease of playing.
Credit: digitaldrummermag.com
Frequently Asked Questions For How Many Drums Are In A Drum Set
What Is A Full Drum Set Called?
A full drum set is commonly called a “drum kit. ” It typically includes drums, cymbals, and other percussion instruments.
What Are The 7 Parts Of A Drum Kit?
The 7 parts of a drum kit are the bass drum, snare drum, tom-toms, hi-hat, ride cymbal, crash cymbal, and hardware.
What Makes A Full Drum Kit?
A full drum kit typically includes a bass drum, snare drum, tom-toms, hi-hat cymbals, crash cymbals, a ride cymbal, and hardware such as stands and pedals. It provides a complete set of drums and cymbals needed for playing various styles of music.
How Many Pieces Are In A Drum?
A drum typically consists of several pieces, including the shell, hoops, tension rods, lugs, and drumheads.
Conclusion
To sum up, understanding the number of drums in a drum set is essential for both beginners and experienced musicians. By knowing the standard components, such as the bass drum, snare drum, toms, and cymbals, you can create a versatile and dynamic sound.
With this knowledge, you can confidently choose the right drum set for your musical needs and explore the endless possibilities of drumming. Keep drumming and discovering your unique rhythm!
Drums should be tuned every time they are played or at least once a month to maintain their optimal sound quality and performance. Regular tuning ensures that the drum head tension remains balanced and the drum produces the desired pitch and tone.
Tuning drums is an essential part of drum maintenance that directly impacts the sound quality and performance of the instrument. Whether you’re a professional drummer or a beginner, understanding how often drums need to be tuned is crucial. Proper tuning not only improves the sound quality but also prolongs the life of the drum heads and enhances the overall playing experience.
By following a regular tuning schedule, you can ensure that your drum kit always delivers the best performance. We will explore the importance of drum tuning and provide guidelines for how often drums need to be tuned to maintain their optimal sound quality.
Importance Of Drum Tuning
Drum tuning is a crucial aspect of maintaining the quality and performance of your drum set. When it comes to the importance of drum tuning, it goes beyond simply keeping your drums in good shape. A well-tuned drum not only enhances the sound quality but also improves responsiveness, providing a better playing experience overall. Let’s delve into the significance of drum tuning in more detail.
Enhances Sound Quality
Tuning your drums regularly contributes to achieving a consistent and pleasing sound. Properly tuned drums produce a rich, balanced tone, ensuring that your performances are of the highest quality. Whether you play in a band or simply for your pleasure, a well-tuned drum set significantly enhances the overall audio experience.
Improves Responsiveness
A well-tuned drum kit offers improved responsiveness, allowing for more dynamic and expressive playing. When each drumhead is precisely tuned, you’ll notice enhanced rebound and sensitivity, making it easier to control and manipulate the sound as you play. This results in a more enjoyable and effortless drumming experience, regardless of your skill level.
Factors Affecting Drum Tuning Frequency
Factors affecting drum tuning frequency can vary depending on various elements such as drumhead material, temperature, humidity, and playing style. These factors can determine how often drums need to be tuned for optimal sound and performance.
Factors Affecting Drum Tuning Frequency
Drum tuning frequency is influenced by several key factors that every drummer should consider to maintain optimal sound quality and performance. Being mindful of these factors will ensure that your drums consistently sound their best:
Environmental Conditions
The ambient temperature and humidity levels of your practice or performance space can significantly impact the tuning stability of your drums. Fluctuations in temperature and humidity can cause drumheads to expand or contract, leading to changes in tension and pitch. To mitigate these effects, consider investing in a dehumidifier or humidifier depending on your specific environmental conditions.
Frequency Of Use
The more frequently you play your drums, the more often they will require tuning. Regular use can gradually loosen the tension of the drumheads, leading to a loss of optimal sound quality. Drummers who play every day or perform regularly should schedule tuning sessions more frequently to maintain consistent tonal quality.
Drumhead Quality
The quality and condition of your drumheads also play a crucial role in determining the tuning frequency. High-quality drumheads tend to hold their tuning better and require less frequent adjustments compared to lower-quality alternatives. Additionally, the age and wear of the drumheads can impact the stability of the tuning. Regularly inspecting and replacing worn-out drumheads can help maintain optimal tuning stability.
By understanding and addressing these influential factors, drummers can effectively manage the tuning frequency of their drums, ensuring that they consistently produce the desired tones and maintain their overall performance.
Signs That Drums Need Tuning
Drums should be tuned regularly to maintain their sound quality. Signs that drums need tuning include inconsistent pitch, loose tension rods, and a dull, lifeless sound. Typically, drums should be tuned before every performance or recording session to ensure optimal performance.
Inconsistent Pitch
One of the signs that drums need tuning is an inconsistent pitch. When the drums are not properly tuned, you may notice that some of the drumheads produce higher or lower pitches compared to others. This can result in a dissonant and unpleasant sound, making it difficult to achieve a cohesive rhythm.
Lack Of Sustain
Another indication that your drums need tuning is a lack of sustain. If you hit the drum and the sound fades quickly, it may be a result of the drumheads being too loose or too tight. Properly tuned drums should have a sustained sound that resonates well, allowing the notes to ring out for a longer period.
Muffled Sound
A muffled sound is yet another sign that your drums are in need of tuning. When the drumheads are not properly tensioned, the sound produced can be dull and muted. This can happen when the drumheads are too loose, causing a lack of clarity and definition in the sound.
To ensure that your drums are always in optimal condition, it is important to pay attention to these signs and address any issues with tuning promptly. By regularly tuning your drums, you can maintain a consistent pitch, achieve a better sustain, and enjoy a clear and vibrant sound.
Credit: www.sweetwater.com
How Often To Tune Drums
Properly tuned drums are crucial for achieving optimal sound quality and performance. Understanding how often to tune drums can help maintain the integrity of your instrument and enhance your playing experience. Let’s explore the different aspects of drum tuning to keep your beats sounding their best.
Initial Tuning
When setting up a new drum kit, initial tuning is essential to ensure each drum produces the desired pitch and resonance. It is recommended to tune drums before the first use to establish a solid foundation for future adjustments.
Regular Maintenance
For consistent sound quality, regular maintenance through tuning is key. Drum heads can stretch and lose tension over time, affecting sound output. Aim to tune your drums every few weeks or whenever you notice a change in tone or feel.
Monitoring Changes
Stay attentive to changes in your drum sound or performance. Factors like temperature, humidity, and frequency of use can impact tuning. By monitoring these changes and adjusting accordingly, you can keep your drums sounding crisp and in top condition.
Drum Tuning Techniques
Drum Tuning Techniques:
Using A Drum Tuning Key
Insert the tuning key into the drum’s tension rods. Loosen or tighten the rods to adjust pitch.
Balancing Lug Tensions
Check each lug’s tension with a tension meter. Adjust to ensure even tension around the drum.
Fine-tuning With Ears
Tap the drumhead with a drumstick. Listen for consistent pitch across all lugs. Make adjustments as needed.
Credit: news.blizzard.com
Credit: www.facebook.com
Frequently Asked Questions For How Often Do Drums Need To Be Tuned
How Do You Know If Your Drum Is Out Of Tune?
You can tell if your drum is out of tune by listening for any off-pitch or unclear sounds. Additionally, you can use a drum tuner to make accurate adjustments. Regular maintenance and tuning contribute to improved sound quality and overall performance.
Can Drums Go Out Of Tune?
Yes, drums can go out of tune due to various factors such as temperature and humidity changes. Regular tuning and maintenance are necessary to keep drums sounding their best.
Does A Drum Set Need To Be Tuned?
Yes, a drum set needs to be tuned regularly to ensure optimal sound quality and performance.
How Often Do Drummers Change Heads?
Drummers typically change drum heads every 6-12 months depending on frequency of use and playing style.
Conclusion
Regular drum tuning is crucial for maintaining the best sound quality and performance. By tuning your drums frequently, you can ensure that they produce the desired pitch, resonance, and tone. This not only enhances the overall sound of your drum kit but also improves the playing experience.
Whether you’re a professional drummer or a beginner, taking the time to tune your drums regularly will help unleash their true potential. So, make sure to include drum tuning as a regular part of your drumming routine to achieve the best results.
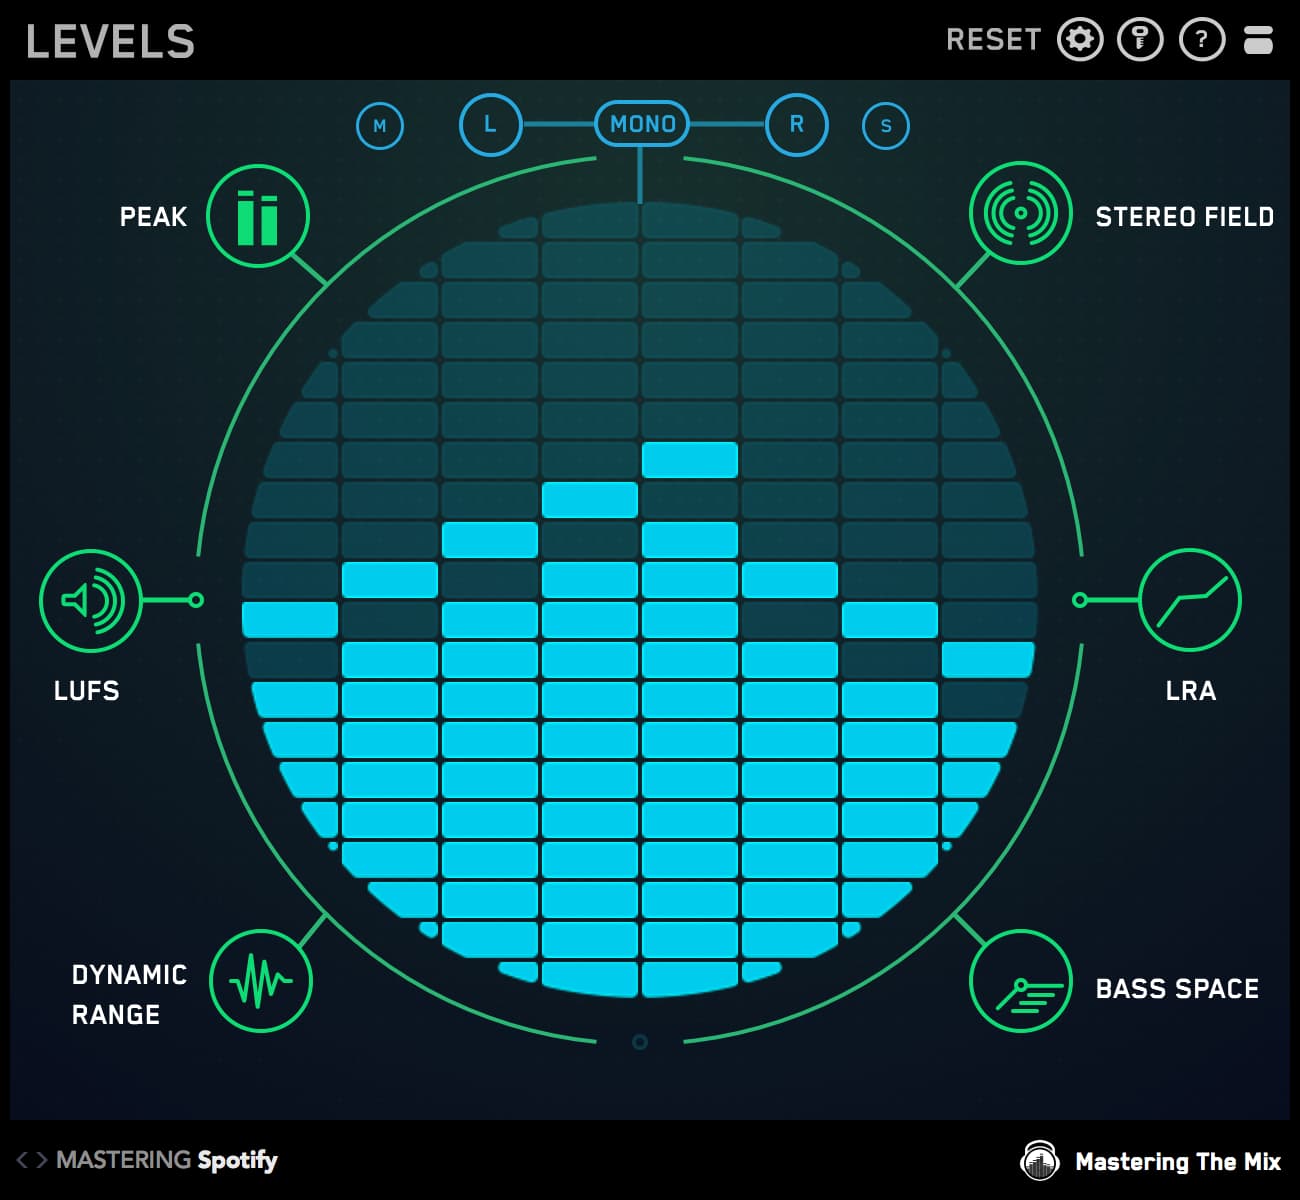
Sure, here’s the 1000-word SEO friendly article about “LUFs Metering System”.
If you’re involved in audio production, you’re likely familiar with the importance of audio levels and maintaining consistent loudness across your projects. This is where LUFS metering systems come into play. In this comprehensive guide, we’ll take an in-depth look at LUFS metering, its significance, and how it impacts audio production.
What is LUFS?
Also, LUFS stands for Loudness Unit Full Scale, which is a measure of loudness or perceived loudness. Also, peak meters only show the highest point of a signal. LUFS meters better reflect how humans perceive loudness. This is particularly crucial for broadcasting, streaming, and other mediums where a consistent listening experience is paramount.
Significance of LUFS Metering
Moreover, a loudness meter plays a critical role in ensuring that audio content complies with various loudness standards. In addition, different platforms and mediums have specific loudness targets to maintain a uniform listening experience for the audience. For instance, broadcast TV, streaming services, and music platforms have their own loudness standards, and loudness helps audio professionals meet these requirements.
How LUFS Impacts Audio Production
In addition, in audio production, managing loudness helps you meet industry standards. It also keeps listening consistent. For example, by utilizing loudness, audio engineers can ensure that their productions are loudness-optimized and compliant with the loudness targets set by various platforms.
Credit: www.klangfreund.com
Advantages of Using LUFS Metering
Furthermore, Using loudness systems offers several benefits, including:
Additionally, consistency: the meter helps maintain consistent loudness levels across different audio productions, ensuring a seamless listening experience.
Also, compliance: By adhering to specific loudness standards, content creators can ensure that their work meets the requirements of broadcast, streaming, and distribution platforms.
Enhanced User Experience: With optimized loudness levels, audiences can enjoy audio content without experiencing sudden volume changes or inconsistencies.
Implementing LUFS Metering in Audio Workflows
Integrating loudness into audio workflows involves using dedicated metering tools and software that provide accurate loudness measurements. As a result, these tools allow audio professionals to monitor and adjust the loudness levels of their projects. This ensures that they align with the required LUFS standards for different distribution channels.
LUFS Metering in Broadcasting
For broadcasting, adherence to loudness standards is crucial to provide a uniform listening experience for the audience. However, Loudness helps broadcasters maintain consistent loudness levels across their content, whether it’s commercials, programs, or promos. By utilizing loudness, broadcasters can ensure that their audio content meets the prescribed loudness targets.
LUFS Metering in Music Production
In music production, a loudness meter is valuable for achieving a balanced and consistent loudness across tracks. Then, by measuring and adjusting the loudness levels using loudness, music producers can ensure that their albums, singles, and EPs meet the loudness requirements of streaming platforms and digital distribution services.
Frequently Asked Questions For Lufs Metering System: Unlock The Power Of Accurate Audio Measurement
How Does Lufs Metering System Work?
The meter measures audio loudness levels for accurate audio mixing and mastering processes.
Why Is Lufs Metering Important?
A loudness meter ensures audio complies with broadcast standards for consistent audio delivery.
Can Lufs Metering Improve Audio Quality?
Yes, loudness helps optimize audio levels for better sound quality in recordings.
Is Lufs Metering Necessary For Podcasts?
Utilizing loudness can enhance podcast audio quality and listener experience significantly.
Conclusion
In conclusion, a loudness meter systems are indispensable tools for audio professionals seeking to maintain consistent loudness levels and comply with industry standards. By leveraging loudness, content creators can ensure that their audio productions offer a seamless and optimized listening experience for their audience across various platforms.
Stereo Microphone Techniques for High-Quality Audio Recording
When it comes to capturing high-quality audio for your recordings, using stereo microphone techniques can make all the difference. Whether you’re recording music, podcasts, or any other type of audio, understanding and utilizing stereo microphone techniques can take your sound to the next level.
What are Stereo Microphone Techniques?
Stereo microphone techniques involve using two microphones to capture a more immersive and realistic sound. By utilizing two microphones strategically placed in relation to the sound source, you can create a sense of depth and space in your recordings that’s simply not achievable with a single microphone. This can result in a more natural and engaging listening experience for your audience.
Types of Stereo Microphone Techniques
There are several common stereo microphone techniques that are widely used in the recording industry:
XY Technique: This technique involves placing two cardioid microphones at a 90-degree angle to each other, with the capsules as close together as possible. This method is great for capturing a strong center image and is relatively easy to set up.
ORTF Technique: Named after the French broadcasting organization, Office de Radiodiffusion Télévision Française, this technique uses a pair of cardioid microphones spaced 17 cm apart and angled at 110 degrees. The ORTF technique provides a wide stereo image and good mono compatibility.
Blumlein Technique: This technique involves using a pair of bidirectional microphones angled at 90 degrees to each other. The Blumlein technique is renowned for its ability to capture an incredibly natural and immersive stereo image.
Mid-Side (MS) Technique: The MS technique uses one cardioid microphone (mid) facing forward and one bidirectional microphone (side) positioned at a 90-degree angle. This method allows for precise control over the stereo width during post-production.
Tips for Using Stereo Microphone Techniques
Here are some important tips to keep in mind when using stereo microphone techniques for your recordings:
Microphone Placement: Positioning the microphones correctly is crucial for achieving the desired stereo image. Experiment with different placements to find the best sound for your specific recording environment and source.
Room Acoustics: Take into consideration the acoustics of the recording space, as they can greatly impact the quality of the stereo image. Use acoustic treatment and position the microphones to minimize unwanted reflections and reverberations.
Check Phase Relationships: Pay attention to the phase relationships between the two microphones to avoid cancellation or comb filtering issues that can compromise the stereo image. This is especially important when using spaced microphone techniques.
Monitor in Mono: Regularly listen to your recordings in mono to ensure compatibility and a cohesive sound. If the stereo image collapses when played in mono, adjustments may be needed to ensure a strong center image and overall clarity.
Benefits of Stereo Microphone Techniques
Using stereo microphone techniques offers a range of benefits that can significantly enhance the quality of your recordings:
Natural Sound: Stereo techniques can capture the natural spatial characteristics of sound sources, creating a more immersive and lifelike listening experience for your audience.
Enhanced Depth: By capturing sound from different angles, stereo techniques can add depth and dimension to your recordings, allowing for a more engaging and impactful sonic result.
Wider Soundstage: Stereo recordings can create a wider and more expansive soundstage, offering a more expansive and enveloping listening experience.
Mixing Flexibility: When it comes to mixing and post-production, stereo recordings provide greater flexibility and control, allowing for precise adjustments to the stereo width and spatial positioning of sound sources.
Listener Engagement: High-quality stereo recordings can captivate and engage listeners, drawing them into the audio experience and creating a more memorable impression.
Credit: www.walmart.com
Choosing the Right Microphones for Stereo Recording
When selecting microphones for stereo recording, it’s important to choose models that are well-suited to the specific techniques and applications you’ll be using. Consider factors such as frequency response, sensitivity, and polar pattern to ensure that the microphones will deliver the desired results for your recordings.
Credit: www.amazon.com
Frequently Asked Questions Of Stereo Microphone Techniques: Unlock The Power Of Immersive Sound
How To Position A Stereo Microphone Effectively?
Ensure proper distance and angle to capture balanced sound.
What Are The Benefits Of Stereo Microphone Techniques?
Enhanced spatial awareness and realistic audio reproduction.
Why Is Stereo Recording Preferable To Mono Recording?
Captures depth, width, and immersiveness of sound.
Can Stereo Microphone Techniques Improve Audio Quality?
Yes, by providing a more natural and dynamic sound capture.
Conclusion
Mastering the art of stereo microphone techniques can open up exciting possibilities for capturing high-quality audio with depth, realism, and impact. By understanding the different techniques, best practices, and benefits of stereo recording, you can take your recordings to new heights and create an immersive sonic experience that resonates with your audience.
Whether you’re recording music, podcasts, field recordings, or any other type of audio, exploring and implementing stereo microphone techniques can be a game-changer for achieving professional-grade audio recordings.
Understanding the different types of EQ is one of the most useful skills in music production. EQ, short for equalization, lets you boost or cut specific frequencies to shape tone, fix problems and give every element its own space in the mix. Different EQ types are built for different jobs, though. Knowing which to reach for saves time and leads to cleaner, more musical results.
Frequency: the point in the spectrum you’re adjusting, measured in hertz (Hz).
Gain: how much you boost or cut, measured in decibels (dB).
Q (bandwidth): how wide or narrow the affected range is. A high Q is narrow, and a low Q is broad.
Band: one adjustable section of an EQ. Many EQs have several bands.
Parametric EQ
A parametric EQ gives you full control over frequency, gain and Q on each band. It’s the most flexible and most widely used EQ type in modern production.
Use narrow bands to remove resonances, ringing or harsh tones.
Use broad bands for gentle tonal shaping.
Combine bands to sculpt a sound precisely.
Most DAW stock EQs are parametric, and many add a spectrum analyzer so you can see what you’re hearing.
Semi-Parametric EQ
A semi-parametric EQ lets you set frequency and gain, but Q is fixed or limited. It’s common on mixing consoles and hardware channel strips. It’s fast and musical, but less precise.
Graphic EQ
A graphic EQ has a row of fixed frequency bands, each controlled by a slider. The slider positions form a visual “graph” of the EQ curve. Common versions have 10, 15 or 31 bands.
Fast to use and easy to read at a glance.
Popular in live sound for tuning PA systems and reducing feedback.
Less precise than parametric EQ, because frequencies and Q are fixed.
Shelving EQ
A shelf EQ boosts or cuts everything above or below a chosen frequency by the same amount, forming a “shelf” shape.
Low shelf: adds or reduces weight and warmth in the low end.
High shelf: adds air and brightness, or softens harsh highs.
Shelves are great for broad tone changes, such as brightening a dull vocal or warming a thin guitar. Most parametric EQs let you switch the lowest and highest bands to shelf mode.
High-Pass and Low-Pass Filters
Filters remove frequencies rather than gently reducing them.
High-pass filter (low-cut): removes frequencies below a set point. It’s used to clean rumble and unnecessary low end from vocals, guitars, pads and cymbals.
Low-pass filter (high-cut): removes frequencies above a set point. It’s used to soften harshness or push sounds back in the mix.
Filter slope, measured in dB per octave (for example 12 or 24 dB/oct), sets how steeply the cut happens.
Band-Pass and Notch Filters
A band-pass filter keeps only a range of frequencies, which is great for telephone or radio effects. A notch filter removes a very narrow band, which is useful for hum or a single resonant frequency.
Dynamic EQ
A dynamic EQ only boosts or cuts when a frequency crosses a threshold, like a compressor working on one band. It’s ideal for problems that come and go, such as harsh vocal notes, boomy bass notes or sibilance. Learn more in our article on what a dynamic EQ plugin is.
Linear Phase vs Minimum Phase EQ
Standard (minimum phase) EQs shift phase slightly around the frequencies you change. That’s usually fine and often sounds natural.
Linear phase EQs avoid phase shift, which helps when processing parallel signals or mastering. The trade-offs are higher CPU use, added latency and possible “pre-ringing” artifacts on transients.
Analog-Modeled EQ
Many plugins emulate classic hardware EQs, such as Pultec-style program EQs or console-style channel EQs. They often have fewer controls but add character, with musical curves and subtle saturation. They’re popular for broad tonal shaping rather than surgical fixes.
Which Type of EQ Should You Use?
Removing problems: parametric with narrow Q, or dynamic EQ.
Cleaning low end: high-pass filter.
Broad tone changes: shelves or analog-modeled EQ.
Live sound tuning: graphic EQ.
Mastering: gentle parametric, shelves or linear phase EQ.
Professional mixes often use several EQ types on the same track. A vocal chain might start with a high-pass filter to clear rumble, then a parametric EQ to remove a boxy resonance. A dynamic EQ could tame harsh notes, and an analog-modeled EQ with a gentle high shelf would add air at the end. Each EQ does one job well, which keeps the processing clear and easy to adjust.
Frequently Asked Questions
What is the most common type of EQ?
Parametric EQ. Most DAW stock EQs are parametric, because it gives full control over frequency, gain and bandwidth.
What is the difference between graphic and parametric EQ?
A graphic EQ has fixed bands controlled by sliders. A parametric EQ lets you choose each band’s frequency, gain and width.
When should I use a dynamic EQ?
Use a dynamic EQ when a problem only happens sometimes, such as certain harsh vocal notes or occasional boomy bass notes.
Is linear phase EQ better?
Not always. It avoids phase shift, but it uses more CPU, adds latency and can cause pre-ringing. Many engineers use it mainly for mastering.
Sure, here is the HTML format of the requested article:
Welcome to the world of bass guitars, where the low-end rumble and groove come together to create the heartbeat of the band. As a beginner, picking an instrument is an exciting step toward becoming a skilled musician. Your first bass guitar matters. This guide covers everything you need to know about choosing and playing one.
Choosing the Right Bass Guitar
When choosing your your bass, it’s essential to consider factors such as budget, playing style, and personal preferences. Also, here are some key considerations:
Also, budget: Set a budget for the instrument plus an amp, cables and a tuner. There are budget-friendly options available for beginners that offer good quality and value for money.
Moreover, Playing Style: Consider the music genre and playing style you’re interested in. For example, if you aspire to play rock or metal, a bass with a robust, punchy tone may be ideal, whereas smooth jazz or funk players might prefer a bass with a warm, rounded sound.
In addition, comfort and Feel: Visit a music store to hold and play various bass guitars to determine which feels most comfortable in your hands. Pay attention to the neck width, weight, and overall ergonomics of the instrument.
Furthermore, several essential accessories will improve your playing:
Accessories
Description
Amplifier
An amplifier projects your sound so others hear you clearly in a band.
Tuner
A tuner keeps you in tune and helps you develop a good ear for pitch.
Strap
A comfortable strap spreads the weight so you can play standing up.
Cables
Good cables connect you to the amp with clear, reliable sound.
Getting Started with Playing for First Bass Guitar
Additionally, once you’ve selected your your bass and essential accessories, it’s time to start playing. In addition, here are some beginner tips to help you get started:
Also, Learn the Basics: Learn the anatomy of the instrument, including the frets, strings, and knobs. Understand how to hold the instrument and use proper playing technique.
Moreover, practice Regularly: Set aside time each day to practice. Consistent practice will help you develop finger strength, dexterity, and a sense of rhythm.
Explore Beginner Lessons: Consider beginner lessons with a local teacher or online. Structured lessons can provide valuable guidance and foundational knowledge.
Remember, learning bass is a rewarding journey that takes patience and dedication. For example, embrace each step of your progress, and enjoy the process of becoming a proficient bassist!
Frequently Asked Questions For First Bass Guitar: Unleash Your Musical Journey With The Power Of Rhythm
What Is The Best Beginner Bass Guitar?
The best beginner model is affordable, durable, and easy to play.
How To Choose The Right Bass Guitar Size?
Choose a size that feels comfortable to hold for long sessions.
Are Bass Guitars Easier To Learn Than Electric Guitars?
Bass guitars can be easier to learn for beginners due to their simpler playing technique.
What Accessories Do I Need For My First Bass Guitar?
Essential accessories include a tuner, strap, gig bag, cable, and extra strings for maintenance.
Drum and Bass is characterized by fast breakbeats and heavy basslines, with a focus on syncopation and complex rhythms. It also features high BPM, intricate drum patterns, and deep sub-bass lines.
These elements create a dynamic and energetic sound that is popular in electronic music. Drum and Bass music has gained widespread popularity for its high-energy and intense sound. With its fast-paced breakbeats and heavy basslines, it has become a staple in the electronic music scene.
The genre’s focus on complex rhythms and syncopation gives it a unique and dynamic feel that sets it apart from other electronic music styles. As a result, Drum and Bass has developed a dedicated global fan base and continues to influence modern electronic music production. We will explore the key features of Drum and Bass and its impact on the music industry.
Credit: www.sweetwater.com
Fast-paced Rhythms
Drum and bass is a high-energy genre known for its fast-paced rhythms, making it a mainstay in the electronic music scene. Its distinctive characteristics are what set it apart and capture the attention of both listeners and DJs. Let’s delve into the key features of drum and bass, with a focus on its exhilarating fast-paced rhythms.
Breakbeats
Breakbeats are a fundamental element of drum and bass, characterized by their rapid and syncopated pattern. These broken and shuffled rhythms serve as the backbone of the genre, driving the intense energy that electrifies dancefloors. The pulsating beats create an infectious momentum that is impossible to resist, propelling the music forward with unparalleled ferocity.
Syncopation
Syncopation in drum and bass adds an unpredictable and off-kilter essence to the rhythmic structure. The syncopated patterns create an intricate interplay of accents and off-beats, infusing the music with a sense of urgency and dynamism. The resulting syncopated grooves prompt an instinctive physical response, igniting a burst of movement and energy.
Credit: cyanite.ai
Heavy Basslines
When it comes to Drum and Bass music, one of the key features that define the genre is its heavy basslines. The heavy, pulsating bass is a fundamental element that sets Drum and Bass apart from other electronic music genres. In this section, we’ll explore the distinct characteristics of the heavy basslines in Drum and Bass, focusing on the subheadings: Reese Bass and Sub-bass.
Reese Bass
The Reese bass is a quintessential sound in Drum and Bass, known for its gritty and modulated texture. It is created by layering and detuning multiple sawtooth waveforms, resulting in a rich and complex bass sound that adds depth and intensity to the music. The Reese bass is often manipulated with various effects, such as distortion and filtering, to enhance its aggressive and profound presence in the mix.
Sub-bass
The sub-bass in Drum and Bass is characterized by its deep, low-frequency tones that create a powerful rumble, felt as much as it is heard. It forms the foundation of the track, driving the energy and providing a solid framework for the rhythmic elements of the music. The sub-bass is meticulously crafted to ensure that it delivers a visceral impact, enveloping the listener in its palpable force and adding an irresistible physicality to the music.
Chopped-up Vocals
Drum and Bass is characterized by its chopped-up vocals, which add a unique and dynamic element to the genre. These vocals are often manipulated and sliced into small fragments, creating a fast-paced and energetic sound that sets Drum and Bass apart from other genres.
Samples
The use of samples is a key feature of the drum and bass genre, and when it comes to chopped-up vocals, it takes this aspect to the next level. In drum and bass, producers often take snippets of vocal recordings, slice them into smaller pieces, and rearrange them in unique and creative ways. This technique adds a dynamic and rhythmic element to the music, giving it an energetic and futuristic vibe.
Vocoder Effects
Another technique commonly used in drum and bass music is the application of vocoder effects on vocals. The vocoder is an electronic effect that combines the characteristics of an instrument or a synthesizer with the human voice. It allows producers to manipulate and shape the vocals in ways that are not possible through traditional recording techniques. The result is a distinctive sound that blends seamlessly with the driving beats and basslines of drum and bass.
When it comes to the chopped-up vocals in drum and bass, the combination of vocoder effects takes it to a whole new level. The vocals are not only sliced and rearranged, but they are also processed through the vocoder, creating an otherworldly and robotic sound. This unique vocal treatment adds another layer of complexity and excitement to the music, making it instantly recognizable.
In addition to the creative use of samples and vocoder effects, drum and bass producers also incorporate various other techniques to enhance the chopped-up vocals. They may apply time-stretching, pitch-shifting, or even add harmonies and layers to create a fuller and more dynamic vocal texture.
Overall, the chopped-up vocals in drum and bass music are a testament to the creativity and innovation of the genre. The combination of samples, vocoder effects, and other techniques elevates the vocals to a whole new level, adding excitement and energy to the already dynamic soundscapes of drum and bass.
Credit: www.facebook.com
Energetic Atmosphere
Drum and Bass music is characterized by its vibrant and energetic atmosphere that captivates listeners.
Aggressive Synths
The use of aggressive synths in Drum and Bass music contributes to its high-energy and intense vibe.
Dynamic Builds
Dynamic builds in Drum and Bass tracks create anticipation and excitement for listeners, leading to a powerful climax.
Influence On Electronic Music Scene
Drum and Bass has had a significant impact on the electronic music scene, paving the way for subgenres that blend elements of various musical styles. Let’s explore how Drum and Bass influences subgenres like Drumstep and Neurofunk.
Drumstep
Drumstep combines the frenetic pace of Drum and Bass with the half-time feel of Dubstep, creating a unique and energetic sound that appeals to a wide audience.
Neurofunk
Neurofunk is characterized by intricate sound design, complex rhythms, and dark atmospheres, drawing inspiration from the experimental side of Drum and Bass.
Frequently Asked Questions For What Are The Key Features Of Drum And Bass
What Keys For Drum And Bass?
Drum and bass music often uses keys in the range of E, F, and G. These keys help create the energetic and vibrant sound characteristic of the genre.
What Are The Characteristics Of The Bass Drum Instrument?
The bass drum is a large drum with a deep and low sound. It is typically played with a pedal. It provides rhythmic foundation in various music genres.
What Is The Structure Of Drum And Bass?
The structure of drum and bass is characterized by fast-paced rhythms, syncopated beats, and heavy basslines. It typically consists of a drum break, bassline, and various elements like melodies, vocals, and samples. The genre often incorporates intricate drum patterns and distinctive bass drops, creating a high-energy and dynamic sound.
What Makes A Good Drum And Bass Track?
A good drum and bass track is characterized by a strong, driving beat, intricate basslines, and energetic melodies. It should have dynamic transitions, well-crafted sound design, and a unique, memorable hook that keeps listeners engaged. Effective use of drum patterns, sub-bass frequencies, and rhythmic syncopation are also key elements.
Conclusion
To sum up, drum and bass music has gained widespread popularity due to its energetic beats, intricate rhythms, and unique fusion of various genres. Its key features, including fast tempo, heavy basslines, and chopped-up samples, create a distinct and electrifying sound.
Whether you’re a fan of electronic music or not, the infectious energy of drum and bass is hard to resist. So, if you’re ready for an adrenaline-pumping musical experience, dive into the world of drum and bass and let the music take control.