Categories
Archive

Melody Harmony How To Make Your Music Memorable: Expert Tips for Songwriters

To make your music memorable, focus on creating strong melodies and harmonies that resonate with your audience. Catchy hooks and well-crafted arrangements will help leave a lasting impression on your listeners.

In the competitive music industry, it’s crucial for artists to create music that stands out and resonates with their audience. One effective way to achieve this is by crafting memorable melodies and harmonies. Catchy hooks and well-arranged compositions have the power to captivate listeners and leave a lasting impression.

This guide will explore various techniques and strategies for creating music that truly resonates, helping you connect with your audience on a deeper level. By taking the time to refine and develop your melodies and harmonies, you can greatly increase the impact and memorability of your music, setting yourself apart in a crowded market.

Importance Of Melody And Harmony

Melody and Harmony are essential elements in making music memorable. These two components work together to create a cohesive and impactful musical piece that resonates with the listener. Melody provides a recognizable and memorable tune, while harmony adds depth and richness to the overall sound. Understanding the significance of melody and harmony is crucial for creating captivating and engaging music that leaves a lasting impression.

Elements That Make Music Memorable

Melody and harmony are key elements that contribute to the memorability of music. Melody, in particular, is the sequence of single notes that creates a distinctive musical line. It serves as the primary hook that captures the listener’s attention and lingers in their mind long after the song has ended. On the other hand, harmony enriches the melody by providing a supporting structure of accompanying notes, creating pleasing chord progressions that elevate the emotional impact of the music.

Impact On The Listener

The effective use of melody and harmony in music has a profound impact on the listener. A well-crafted melody has the power to evoke emotions, trigger nostalgia, and create a sense of connection with the audience. When combined with harmonious accompaniment, the music becomes more immersive, leaving a lasting impression on the listener. The interplay between melody and harmony enhances the overall listening experience, making the music more meaningful and memorable.

Crafting Melodies That Stick

When it comes to creating memorable music, crafting melodies that stick is crucial. A catchy, memorable melody can elevate a song from good to great, making it more engaging and unforgettable for listeners. Here’s how to ensure your melodies leave a lasting impression.

Understanding Melodic Structure

For music to be memorable, it’s essential to understand the basic structure of a melody. A strong melodic structure typically includes a balance of repetition, variation, and rhythmic interest. By combining these elements effectively, you can create a melody that captivates your audience and resonates with them long after the music has stopped.

Creating Catchy Hooks

A catchy hook is the cornerstone of a memorable melody. It’s the part of the song that gets stuck in the listener’s head and keeps them coming back for more. Crafting a compelling hook involves using simple, memorable phrases or motifs that stand out and capture the listener’s attention. With a well-crafted hook, your music will leave a lasting impression on your audience.

Developing Harmonies That Enhance The Music

Develop harmonies that elevate your music, making it memorable and captivating. Discover how to create melodies and harmonies that enchant listeners and leave a lasting impression.

Choosing Chord Progressions

When it comes to developing harmonies that truly enhance your music, choosing the right chord progressions is essential. Chord progressions lay the foundation for the overall sound and mood of your composition. They create a framework that allows your melody to shine and captivate your listeners.

When selecting chord progressions, keep in mind the emotional impact you want to convey. Experiment with different combinations of chords to find the ones that evoke the desired feelings. For example, major chords can create a joyful and uplifting atmosphere, while minor chords often bring a sense of melancholy or introspection.

Consider using non-traditional chord progressions to add a unique touch to your music. Don’t be afraid to break the rules and try out unexpected progressions that challenge the listener’s expectations. These unconventional choices can make your harmonies more captivating and memorable.

Adding Layers And Textures

In addition to choosing the right chord progressions, adding layers and textures to your music can take your harmonies to the next level. Layering different instruments or voices can create depth and complexity, making your music more intriguing and rich.

Experiment with layering harmonies in different octaves to create interesting contrasts. Higher harmonies can add brightness and lift to your composition, while lower harmonies can add warmth and depth. This interplay of different voices can enhance the emotional impact of your music.

Don’t be afraid to explore different textures and timbres as well. Incorporate instruments with unique sounds or experiment with synthesizers and effects to add a touch of innovation to your harmonies. These subtle variations in texture can make your music more memorable and captivating for your audience.

Melody Harmony How To Make Your Music Memorable: Expert Tips for Songwriters

Credit: blog.daisie.com

Techniques For Making Your Music Memorable

Using Repetition To Reinforce Melodies

Repetition enhances melodies, making them stick in your listeners’ minds.


Emphasizing Important Phrases

Highlight crucial phrases, creating impact and resonance within your music.


Tips From Industry Experts

Exploring Melody And Harmony In Hit Songs

Melody and harmony are crucial elements in creating memorable music.

Analyzing Arrangements Of Successful Tracks

Successful tracks often have carefully crafted arrangements that enhance the overall impact of the song.
Melody Harmony How To Make Your Music Memorable: Expert Tips for Songwriters

Credit: grahamenglish.com

Melody Harmony How To Make Your Music Memorable: Expert Tips for Songwriters

Credit: www.amazon.com

Frequently Asked Questions For Melody Harmony How To Make Your Music Memorable

How Do You Make A Memorable Melody?

To make a memorable melody, focus on a catchy, easy-to-remember tune. Use repetition, simple rhythms, and unexpected twists. Create a strong hook and consider the emotional impact on the listener. Keep it simple and memorable, and test it with different audiences for feedback.

How Can I Make My Music Memorable?

To make your music memorable, focus on creating catchy melodies, relatable lyrics, and unique arrangements. Use storytelling and emotional elements to connect with listeners. Additionally, consider incorporating unexpected musical elements and memorable hooks to leave a lasting impression on your audience.

What Makes A Melody Particularly Memorable?

A memorable melody is typically characterized by catchy, simple yet distinct musical phrases that evoke emotion and stick in the listener’s mind. It often has a strong rhythmic pattern, repetition, and a balance between predictability and surprise. The use of hooks, melodic contours, and memorable intervals also contribute to its memorability.

What Makes A Melody Memorable What Are Some Melodies That Stick With You Why?

Memorable melodies often have catchy rhythms and simple yet unique tunes that resonate with listeners. Emotional connections, repetition, and cultural significance also contribute to their stickiness. Examples include “Happy Birthday,” “Twinkle, Twinkle, Little Star,” and “Can’t Help Falling in Love.

“

Conclusion

Incorporating melody and harmony into your music is essential for creating a memorable experience for your listeners. By understanding the principles of melody and harmony, and implementing them skillfully, you can evoke emotions and captivate your audience. With practice and creativity, you can craft music that resonates long after the last note fades away.

So go ahead and embrace the power of melody and harmony to elevate your music to new heights.

Categories
Archive

How to Make a Vst Plugin Folder: Expert Tips & Tricks

To create a VST plugin folder, simply navigate to your DAW’s plugin directory and create a new folder. Name it appropriately for organization.

Music producers and sound engineers often need to manage a variety of VST plugins for their digital audio work. Organizing these plugins into specific folders can streamline workflow and make it easier to find and use plugins when needed. In this guide, we will explore how to create a custom VST plugin folder within your digital audio workstation (DAW).

By following these steps, you can keep your plugins organized and easily accessible, saving you time and enhancing your creative process. Let’s delve into the simple yet crucial process of setting up a VST plugin folder.

Choosing The Right Location

To set up a VST plugin folder, it’s crucial to choose the right location on your computer. Prioritize a dedicated folder within the main VST plugin directory. This will streamline the organization and management of your plugins, ensuring easy access and efficient workflow.

Consider File Path Length

Keep the file path short to prevent compatibility issues.

Avoid deep nested folders for a seamless experience.

Short paths enhance performance and reduce errors.

Check For Read/write Permissions

Ensure the folder allows reading and writing functions.

Check permissions to prevent access restrictions.

Grant necessary permissions for proper plugin functioning.

How to Make a Vst Plugin Folder: Expert Tips & Tricks

Credit: m.youtube.com

Organizing Your Plugin Files

Organizing your plugin files is crucial for efficient workflow and easy access to your VST plugins. Follow these steps to properly structure your plugin folder:

Create Subfolders For Each Plugin

When storing your VST plugins, create a separate subfolder for each plugin. This helps in keeping the files organized and easily identifiable.

Use Descriptive Naming Conventions

Ensure you use clear and descriptive naming conventions for your plugin files and folders. This makes it simple to locate specific plugins and understand their purpose at a glance.

Integration With Daws

Integration with DAWs is a crucial aspect of utilizing VST plugins effectively. Seamless integration with Digital Audio Workstations (DAWs) ensures that your plugins can be easily accessed and utilized within your workflow, allowing for a smooth and efficient production process.

Understanding Vst Plugin Paths In Different Daws

Each DAW may have its own unique way of recognizing and organizing VST plugins. Understanding the specific plugin paths for different DAWs can help you ensure that your plugins are accessible and functional within each platform. Here’s a basic understanding of VST plugin paths in a few popular DAWs:

  • Pro Tools: VST plugins typically need to be placed in a designated folder within the Pro Tools directory.
  • Logic Pro: VST plugins can be installed in the default user library or a custom plugin folder.
  • Ableton Live: Ableton allows users to configure custom plugin paths within the preferences settings.

Configuring Custom Plugin Paths

Configuring custom plugin paths can be beneficial for streamlining your workflow and ensuring easy access to your VST plugins within your DAW. By setting custom paths, you can organize your plugins in a way that makes sense for your specific workflow and access them directly within your production environment. Here’s how you can configure custom plugin paths:

  1. Open your DAW’s preferences or settings menu.
  2. Navigate to the plugin or VST section within the preferences menu.
  3. Locate the option to add a custom plugin path and specify the directory where your plugins are located.
  4. Save your settings and restart your DAW to ensure that the custom paths are recognized.

Optimizing For Performance

When it comes to creating a VST plugin folder, optimizing it for performance is crucial. By implementing certain strategies, you can enhance the loading speed and overall efficiency of your plugin. In this section, we will explore two key techniques that will help you achieve this: utilizing shortcut paths for faster loading and minimizing file redundancy.

Utilizing Shortcut Paths For Faster Loading

One effective way to improve the loading speed of your VST plugin is by utilizing shortcut paths. These shortcuts provide a direct route to the required files, minimizing the time taken for the plugin to access them. By following the steps below, you will be able to implement shortcut paths and significantly boost the performance of your plugin:

  1. Create a separate folder within your VST plugin directory to store the frequently accessed files.
  2. Assign a unique name to this folder and ensure it accurately represents the purpose of the files stored within.
  3. Once the folder is created, move the necessary files to the shortcut folder.
  4. Update the file paths in your plugin code to point to the shortcut folder instead of the original location.
  5. Run tests to verify that the plugin is loading faster and functioning optimally.

By adopting this approach, you will eliminate the need for your plugin to search through multiple directories, saving precious milliseconds and providing a seamless user experience.

Minimizing File Redundancy

File redundancy can severely impact the performance of your VST plugin, leading to slower loading times and potential conflicts. To ensure your plugin runs smoothly, it is essential to minimize file redundancy. Follow these steps to achieve this:

  1. Review your plugin’s file structure to identify any duplicate files or unnecessary data.
  2. Remove any duplicated files or unused resources that are no longer required by the plugin.
  3. Avoid storing files in multiple locations within your VST plugin folder.
  4. Regularly update your plugin by deleting outdated or redundant files.

By minimizing file redundancy, you reduce the amount of unnecessary data your plugin needs to process, resulting in faster and more efficient performance.


Backup And Version Control

To create a VST plugin folder, follow these steps to ensure proper backup and version control. Organize plugins by type, keep track of updates, and maintain a designated repository for safekeeping. Regularly back up your plugin folder to prevent any data loss and maintain seamless version management.

When it comes to managing your VST plugin folder, it is essential to have a backup and version control system in place. These measures ensure the safety of your valuable plugins and allow you to easily revert back to previous versions if needed. In this section, we will explore how to implement regular backup protocols and leverage version control systems to keep your VST plugin folder organized and secure.

Implementing Regular Backup Protocols

Regular backups are a fundamental part of maintaining the integrity of your VST plugin folder. By creating copies of your plugins, you can protect against accidental deletion, hardware failures, or other unforeseen events. Here are some best practices for implementing regular backup protocols:

  1. Start by establishing a backup schedule that suits your workflow. Whether it’s daily, weekly, or monthly, consistency is key.
  2. Choose a reliable backup destination, such as an external hard drive, cloud storage, or a network-attached storage (NAS) device.
  3. Consider using backup software that offers incremental backups. This feature only saves changes made since the last backup, reducing the time and storage space required.
  4. Verify the integrity of your backups by periodically testing the restoration process. This step ensures that your backup files are not corrupted and can be used when needed.
  5. Store backups in multiple locations to prevent all copies from being lost in case of a disaster.

Leveraging Version Control Systems

Version control systems enable you to track changes made to your VST plugins and manage different versions of your files. This feature is especially useful when experimenting with different configurations or working on collaborative projects. Here are some tips to leverage version control systems effectively:

  • Choose a version control software that suits your needs. There are popular options like Git and Subversion that provide comprehensive functionalities.
  • Start by creating a repository for your VST plugin folder. This repository will store all versions of your files and allow you to track changes over time.
  • Commit your changes regularly to ensure a comprehensive history. This step helps you understand the progression of your plugin folder and easily roll back to previous versions if necessary.
  • Utilize branches to work on different features simultaneously without affecting the main version. Branches allow for experimentation while maintaining the stability of your VST plugin folder.
  • If collaborating with others, make sure to communicate and follow agreed-upon guidelines for committing changes. This practice promotes a streamlined workflow and minimizes conflicts.

By implementing regular backup protocols and leveraging version control systems, you can confidently manage your VST plugin folder. These practices ensure the safety of your plugins and provide a flexible environment to explore new configurations. Take the time to set up these measures, and you’ll have peace of mind knowing your plugins are protected and organized.

How to Make a Vst Plugin Folder: Expert Tips & Tricks

Credit: inmusician.com

How to Make a Vst Plugin Folder: Expert Tips & Tricks

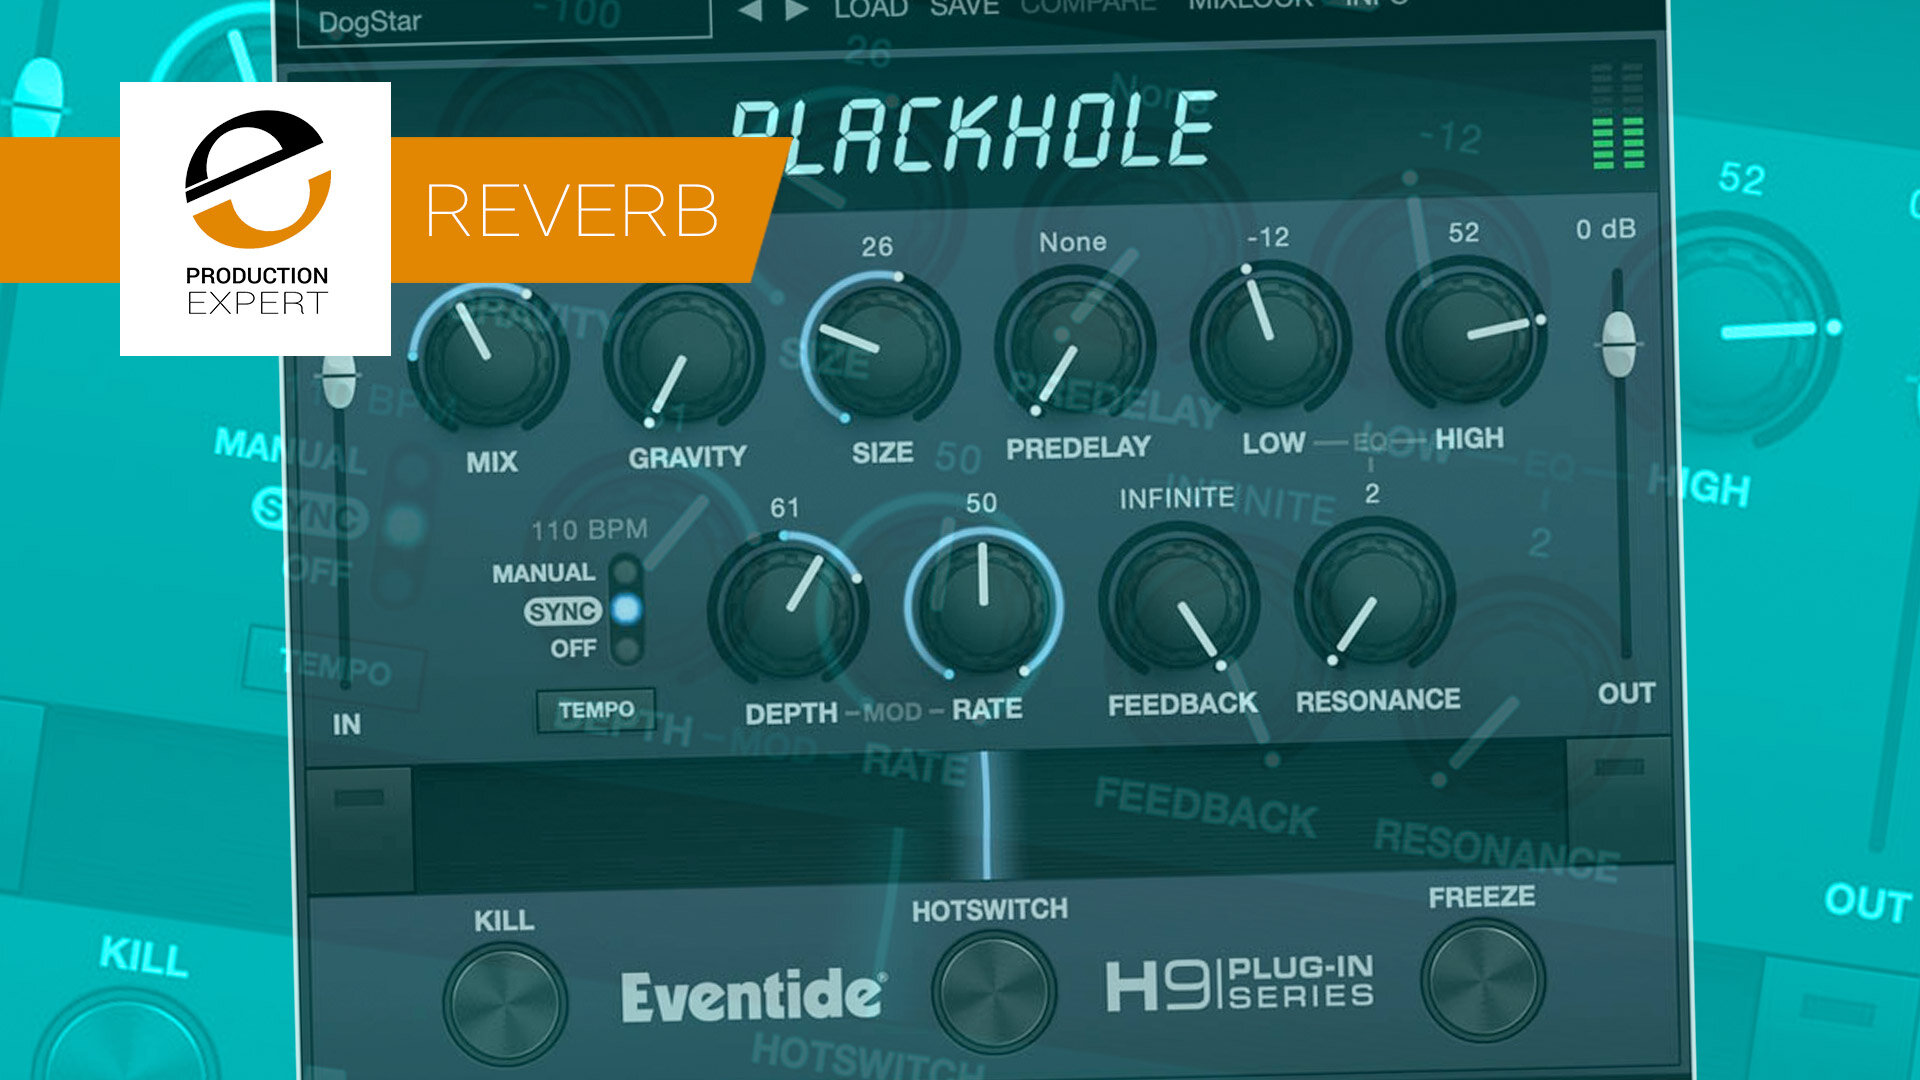
Credit: www.production-expert.com

Frequently Asked Questions For How To Make A Vst Plugin Folder

How Do I Create A Vst Folder?

To create a VST folder, simply make a new folder on your computer and name it “VST Plugins. ” That’s it!

How Do I Organize My Vst Plugins On My Computer?

To organize VST plugins on your computer, create specific folders for each plugin type. Label and organize them by category, such as EQ, reverb, or compression. Keep track of any updates or new installations to maintain an organized system.

How Do I Organize My Plugin Folder?

To organize your plugin folder, follow these steps: 1. Create a main folder for all your plugins. 2. Within this folder, create subfolders for each plugin. 3. Name the subfolders based on the plugin’s name or purpose. 4. Keep your plugin files, such as PHP and CSS, inside their respective subfolders.

5. Maintain a clean and structured organization to easily manage and update your plugins.

How Do I Manually Install Vst Plugins?

To manually install VST plugins, follow these steps: 1. Download the plugin from a reliable source. 2. Locate the plugin’s file on your computer. 3. Copy the file to the appropriate VST plugin folder. 4. Open your DAW software and scan for new plugins.

5. The VST plugin should now be ready to use.

Conclusion

In wrapping up, creating a dedicated VST plugin folder structure is vital for organization and efficiency. By following the steps outlined in this guide, you can ensure a seamless workflow for your music production endeavors. Remember to keep your plugins updated and regularly back up your files for a hassle-free experience in the long run.

Categories
Archive

Mac vs PC for Music Production: Unleashing Creativity and Precision

When it comes to music production, both Mac and PC have their pros and cons. A Mac offers a seamless integration with music software and a stable operating system, while a PC provides a wide range of hardware options and cost-effective customization for music production.

Mac and PC are two popular choices for music production, each with its own set of advantages and drawbacks. Both platforms have dedicated supporters who advocate for their preferred option, but understanding the specific needs and preferences of individual musicians and producers is crucial in making an informed decision.

We will explore the key factors to consider when choosing between Mac and PC for music production, including hardware, software compatibility, performance, and cost. By the end, you will have a clearer understanding of which platform may be best suited for your music production requirements.

Mac vs PC for Music Production: Unleashing Creativity and Precision

Credit: www.slickaudio.com

Innovative Features

When it comes to music production, the choice between Mac and PC can be a pivotal decision for any musician or producer. Innovative features play a crucial role in this decision-making process. Let’s dive deeper and explore how each platform brings innovative features to the table.

Performance Benefits

Mac and PC both offer remarkable performance benefits for music production. Mac systems are praised for their optimized hardware and software integration, providing seamless performance. On the other hand, PCs offer a wide range of customization options, allowing users to tailor their setups according to their specific production needs.

For superior processing power and low-latency audio performance, Mac systems with Thunderbolt 3 technology offer exceptional throughput and scalability for external devices, ideal for handling demanding audio processing tasks. On the other hand, PC users have the flexibility to upgrade their systems with the latest high-performance components, ensuring a tailored and powerful music production setup.

Software Compatibility

Both Mac and PC platforms support a vast array of music production software. Mac users benefit from a robust selection of renowned digital audio workstations (DAWs) and software instruments that are optimized for MacOS, offering a seamless and intuitive production experience. PC users, on the other hand, have access to a wide range of DAWs and music production software, ensuring compatibility with various plugins and tools for diverse production needs.

It’s crucial to note that the software compatibility aspect might sway the decision for producers, as each platform offers unique integration capabilities with specific music production software and hardware solutions.

Hardware Comparison

When it comes to music production, choosing between Mac and PC can be a tough decision, especially when it comes to the hardware comparison. Let’s delve into the nitty-gritty details of the hardware components of these two platforms to help you make an informed decision.

Processor And Ram

The processor and RAM are crucial components for music production. Mac systems are well-known for their optimized performance due to the synergy between the hardware and software.

  • Mac systems typically boast powerful Intel or Apple Silicon processors, such as the M1 chip, offering exceptional multitasking abilities, making them ideal for running resource-intensive music production software.
  • On the other hand, PCs provide a wide range of processor options from Intel and AMD, catering to various budget and performance requirements.
  • When it comes to RAM, Macs often come with ample memory, allowing for seamless handling of large audio projects, while PCs offer flexibility for users to customize and upgrade RAM based on their needs.
  • Both options can accommodate the demands of music production, but Mac systems are particularly reputed for their efficient utilization of processor power and RAM.

Storage And Connectivity

In terms of storage, Mac and PC offer various options catering to different needs.

Component Mac PC
Internal Storage Mac systems often feature fast and reliable SSDs as standard, providing ample storage options to accommodate the large file sizes incurred in music production. PCs offer a wide range of internal storage options, including affordable HDDs and high-performance SSDs, allowing users to tailor their storage solutions to their specific requirements and budget.

Connectivity is essential for seamless music production workflow, and both Mac and PC platforms provide a plethora of connectivity options.

  • Mac systems are renowned for their Thunderbolt connectivity, offering high-speed data transfer and daisy-chaining capabilities, which can be advantageous for connecting audio interfaces, external storage, and other peripherals.
  • PCs, on the other hand, provide diverse connectivity options, including USB, Thunderbolt, and various audio interfacing solutions, catering to the varied needs of music producers.

Software Ecosystem

For music production, the software ecosystem of Mac offers seamless integration and reliability. PC provides a diverse range of options and customization possibilities for music producers. Each platform has its strengths, catering to different needs and preferences in the music production industry.

Digital Audio Workstations (daws)

corecreateedit music.

Plug-ins And Virtual Instruments

essentialenhance the capabilities of a DAW. The software ecosystem in music production is a crucial factor when choosing between Mac and PC. softwarepivotalefficiencycreativity. Mac is renowned for its seamless integrationrobust environment for musicians. PC users, on the other hand, benefit from a widerDAWsplug-insvirtual instrumentsversatile compatibility. In essence, the choice between Mac and PC for music production ultimately hinges on the specific needsworkflows of the individual music producer.

User Experience

When it comes to music production, the user experience is of utmost importance. The technology we use should seamlessly integrate into our creative process, allowing us to produce our best work without any constraints or frustrations. In this article, we’ll dive into the user experience aspect of the Mac vs PC debate, focusing on two key areas: Ease of Use and Customization Options.

Ease Of Use

When it comes to ease of use, Mac has earned a reputation for its intuitive and user-friendly interface. The operating system, macOS, is designed to be simple and straightforward, making it a breeze for beginners to navigate and operate. Whether you’re a seasoned music producer or just starting out, Mac provides a seamless experience that allows you to focus on your music rather than getting lost in complex menus or settings.

On the other hand, PCs running Windows also offer a user-friendly experience, with a familiar interface that many people are already accustomed to. Windows has come a long way in terms of usability, and the latest versions offer a sleek and intuitive interface that is easy to navigate.

Customization Options

One area where PC shines is in its customization options. PCs are known for their flexibility, allowing users to choose from a wide range of hardware components to build a system that caters specifically to their music production needs. Whether it’s choosing a powerful processor, upgrading memory, or selecting a graphics card optimized for audio production, the options are vast.

Mac, on the other hand, offers a more streamlined and curated experience. While the hardware options may be limited compared to PCs, Mac computers are known for their reliability and optimized performance. Apple carefully selects hardware components that work seamlessly with their software, resulting in a stable and efficient system for music production.

Mac PC
Intuitive and user-friendly interface Familiar interface with customization options
Streamlined and curated experience Flexible hardware options for customization
Optimized performance for music production Vast range of hardware components to choose from

Ultimately, the choice between Mac and PC for music production comes down to personal preference and individual workflow. Both platforms offer a solid user experience, with Mac providing an intuitive and seamless interface, while PC offers more customization options. Whether you prioritize ease of use or customization, both Mac and PC can deliver exceptional results in your music production journey.

Final Verdict

When it comes to music production, choosing between a Mac and PC can be a tough decision. Both platforms have their pros and cons, and it ultimately depends on your budget considerations and personal preference. In this final verdict, we will analyze these factors and provide you with the information you need to make an informed decision.

Budget Considerations

Before making any purchase, it’s essential to consider your budget. PCs generally offer a wider range of price points, making them a more budget-friendly option. You can find powerful PCs at a lower price compared to Macs.

On the other hand, Macs are known for their premium build quality and performance. While they tend to be more expensive upfront, they often offer longevity and superior reliability, which may save you money in the long run.

Personal Preference

When it comes to music production, personal preference plays a crucial role. Some producers prefer the intuitive and streamlined experience offered by Macs. Macs are well-known for their user-friendly interface and optimized software, such as Logic Pro X, which is highly regarded in the music production industry.

However, PCs also have their advantages. They provide a wider range of software options, allowing you to choose from a variety of DAWs (Digital Audio Workstations) and plugins. Additionally, PCs offer more customization options, allowing you to tailor your setup to your specific needs or preferences.

Ultimately, the choice between a Mac and PC for music production comes down to your personal preference and budget considerations. Both platforms have their strengths and weaknesses, and what works best for one producer may not be the ideal choice for another.

Before making a decision, consider your budget, the software and hardware options available, and what you value most in a music production setup. Remember, there is no “right” or “wrong” choice. What matters most is finding the platform that empowers you to create the best music possible.

Mac vs PC for Music Production: Unleashing Creativity and Precision

Credit: www.amazon.com

Mac vs PC for Music Production: Unleashing Creativity and Precision

Credit: ise.edu.al

Frequently Asked Questions On Mac Vs Pc For Music Production

Which One Is Better For Music Production Mac Or Windows?

Both Mac and Windows are suitable for music production, but Mac is often preferred for its stability and user-friendly interface. However, Windows offers more flexibility and hardware options. Ultimately, the choice depends on individual preferences and software compatibility.

Do Musicians Use Mac Or Windows?

Musicians use both Mac and Windows for their music production, depending on personal preference and specific software compatibility. Both operating systems offer various tools and software for music creation, recording, and editing.

Is Pc Better For Music Production?

Yes, PC is better for music production due to its versatile software options and customization possibilities.

Is A Macbook Pro Worth It For Music Production?

Yes, a MacBook Pro is worth it for music production. Its powerful hardware and software capabilities make it a reliable choice. With its high-performance processor, ample storage, and professional audio tools, it offers a seamless experience for music producers.

Conclusion

Ultimately, both Mac and PC offer unique benefits for music production. The choice depends on individual preferences and needs. Consider factors like software compatibility and budget before deciding. Whichever you choose, focus on harnessing the tools that best suit your creative process and workflow.

Enjoy making music!

Categories
Archive

How to Run Vst Plugins: Mastering the Art

To run VST plugins, install them in your DAW’s plugin folder and open the DAW to access them. Incorporating VST plugins into your music production workflow can enhance your sound and creativity.

These digital tools allow you to add virtual instruments and effects to your audio projects to achieve professional-quality results. By understanding how to run VST plugins effectively, you can take your music production skills to the next level. Whether you are a beginner or an experienced producer, utilizing VST plugins can bring versatility and innovation to your music projects.

In this guide, we will explore the process of running VST plugins and provide insights to help you maximize their potential.

How to Run Vst Plugins: Mastering the Art

Credit: unison.audio

Choosing The Right Vst Plugins

Find the ideal VST plugins by assessing your music production needs and researching reputable brands. Ensure compatibility with your DAW and system requirements before making a purchase. Look for user reviews and demos to assess the plugin’s sound quality and features to enhance your music production experience.

Researching The Best Vst Plugins

When choosing the right VST plugins, researching is key. Start by exploring online reviews, user ratings and recommendations.

Consider the specific needs of your music production projects. Look for plugins tailored to your genre or production style.

Make use of demo versions and trial periods to test the plugins beforehand. This way, you can ensure they fit your workflow and meet your expectations.

Understanding Compatibility And System Requirements

Check compatibility with your DAW and operating system to avoid any technical issues. Verify the system requirements before making a purchase.

Ensure your computer specs meet the requirements for the VST plugins you intend to use. This will prevent performance and stability issues.

Some plugins may require specific hardware or software configurations. Always double-check this information before installation.

How to Run Vst Plugins: Mastering the Art

Credit: eightify.app

Setting Up Vst Plugins

Learn how to effectively set up VST plugins to enhance your audio production workflow. Running VST plugins can significantly elevate the quality of your sound output, allowing for a more dynamic and professional music creation experience. Master the process and unlock the full potential of your music production setup.

Setting Up VST Plugins

Installing Vst Plugins On Your Daw

When installing VST plugins on your digital audio workstation (DAW), follow these steps:

  1. Download the VST plugin from a reliable source.
  2. Locate the plugin file on your computer.
  3. Copy the plugin file to the VST plugins folder on your DAW.
  4. Restart your DAW to ensure the plugin is recognized.
  5. Open your DAW and locate the new VST plugin in the plugin list.

Organizing And Managing Your Vst Plugins

To keep your VST plugins organized and easily accessible, consider the following tips:

  • Create folders within the VST plugins directory to categorize your plugins.
  • Label each plugin folder with a clear and descriptive name.
  • Regularly update and maintain your VST plugins library.
  • Remove any unused or outdated plugins to declutter your workspace.
  • Utilize your DAW’s search function to quickly find specific plugins when needed.

By following these steps and best practices, you can efficiently set up and manage your VST plugins for seamless integration into your music production workflow.

Optimizing Vst Plugin Performance

When using VST plugins, optimizing their performance is crucial for achieving the best results. Through proper adjustments and management, you can ensure that your VST plugins run smoothly and efficiently, enhancing your music production experience.

Adjusting Buffer Size And Latency

To optimize VST plugin performance, adjusting the buffer size and latency settings is essential. The buffer size determines the amount of audio data processed, while latency refers to the delay between when an audio signal enters the system and when it emerges.

  • Set the buffer size to the lowest value your system can handle without experiencing audio glitches.
  • Adjust the latency settings to strike a balance between responsiveness and system performance.

Managing Cpu And Ram Usage

Efficient management of CPU and RAM usage is pivotal for the optimal performance of VST plugins. To ensure smooth operation and prevent system overload, consider the following:

  1. Monitor CPU and RAM usage in your digital audio workstation to identify any potential performance bottlenecks.
  2. Close unnecessary background applications to free up system resources for VST plugin processing.
  3. Upgrade your hardware if you frequently encounter performance issues due to insufficient CPU or RAM capabilities.

Exploring The Creative Potential

How to Run VST Plugins – Exploring the Creative Potential

Running VST plugins opens up a world of possibilities for music producers, allowing them to take their tracks to new heights of creativity. By integrating virtual instruments, synthesizers, and effects into their workflow, producers can experiment with different sounds, textures, and tones, resulting in unique and captivating musical compositions. In this blog post, we will explore how to harness the creative potential of VST plugins by diving into the various ways you can experiment with different effects and utilize virtual instruments and synthesizers.

Experimenting With Different Vst Effects

One of the most exciting aspects of running VST plugins is the ability to experiment with a wide range of effects. Whether you’re after lush reverbs, gritty distortions, or atmospheric delays, there are countless VST effects plugins available that can transform your tracks. To get started, simply insert the desired effect plugin onto a track in your digital audio workstation (DAW) and tweak the settings to manipulate the sound. With VST effects, you can take your tracks from ordinary to extraordinary, adding depth, character, and a professional polish. Some popular VST effects include:

  • Equalizers for shaping the tonal balance of your audio
  • Compressors for controlling dynamics and adding punch
  • Reverbs for creating realistic or dreamy spatial environments
  • Delays for adding depth and echo to your sounds
  • Distortions for adding grit, warmth, or aggressive tones

Utilizing Vst Instruments And Synthesizers

In addition to effects plugins, VST instruments and synthesizers are essential for unleashing your creative potential. Instead of relying solely on pre-recorded sounds, you can create your own melodies, harmonies, and rhythms using virtual instruments. These plugins emulate the sounds of real instruments such as pianos, guitars, drums, or offer unique synthetic sounds. By adding virtual instruments to your tracks, you can infuse them with emotion, energy, and personality. Whether you’re composing melodies, crafting intricate basslines, or designing atmospheric pads, VST instruments enable you to explore endless musical possibilities. Some popular VST instruments and synthesizers include:

  • Virtual pianos and guitars for realistic instrument emulation
  • Drum machines and samplers for creating beats and rhythms
  • Synthesizers for generating a wide range of electronic sounds
  • Samplers for manipulating and manipulating audio samples

Troubleshooting Common Issues

Running VST plugins can greatly enhance your audio production workflow, allowing you to access a wide variety of virtual instruments and effects. However, like any software, you may encounter some common issues while using VST plugins. These issues can range from compatibility problems with your DAW to audio glitches and crashes during playback. In this section, we will discuss some troubleshooting techniques to help you overcome these challenges and get the most out of your VST plugins.

Dealing With Plugin Compatibility Problems

One of the most common issues users face when running VST plugins is compatibility problems. Different VST plugins may have specific requirements in terms of operating system, processor type, and DAW compatibility. If you’re encountering compatibility problems, here are a few steps you can take:

  1. Check the system requirements: Ensure that your computer meets the necessary hardware and software specifications to run the VST plugin. This information is usually available on the plugin developer’s website or in the documentation.
  2. Update your DAW: Keep your digital audio workstation (DAW) up to date with the latest version and updates. DAW updates often include bug fixes and improvements that can help resolve compatibility issues.
  3. Disable conflicting plugins: Sometimes, certain plugins may conflict with each other, causing compatibility issues. Try disabling other plugins one by one to identify if a particular plugin is causing the problem.
  4. Reach out to the plugin developer: If you have tried the above steps and still experience compatibility issues, contact the plugin developer’s support team. They may be able to offer guidance or provide a solution to the problem.

Resolving Audio Glitches And Crashes

Audio glitches and crashes can be frustrating when you’re in the middle of a creative session. If you’re experiencing these issues while running VST plugins, here are some troubleshooting steps to mitigate them:

  • Adjust buffer size: Audio glitches can occur due to a mismatch between the buffer size set in your audio settings and the demands placed on your computer’s processing power. Try adjusting the buffer size to a higher value to alleviate the issue.
  • Update audio drivers: Outdated or incompatible audio drivers can cause audio glitches and crashes. Visit your sound card manufacturer’s website to download and install the latest drivers for your operating system.
  • Check for CPU overload: High CPU usage can lead to audio glitches and crashes. Close any unnecessary applications and plugins running in the background to free up system resources for your DAW.
  • Disable unnecessary features: Some VST plugins offer various features that may not be required for your project. Disable any unnecessary features, such as excessive modulation or excessive processing, to reduce the strain on your system.
  • Reinstall the plugin: If the above steps do not resolve the issue, try reinstalling the plugin. Sometimes, a corrupted installation can lead to audio glitches and crashes.

By following these troubleshooting techniques, you can overcome common issues that may arise when running VST plugins. Remember, finding the right solution may require some trial and error, but with persistence, you’ll be able to enjoy uninterrupted creativity and immersive audio production using VST plugins.

How to Run Vst Plugins: Mastering the Art

Credit: www.masteringthemix.com

Frequently Asked Questions On How To Run Vst Plugins

How Do You Use Vst Plugins?

To use VST plugins, install them in your digital audio workstation, then open the plugin interface to apply effects or virtual instruments to your audio tracks. Adjust settings and parameters to customize sound to fit your production needs.

How Do I Run A Vst File?

To run a VST file, you need a digital audio workstation (DAW) software that supports VST plugins. First, download and install the VST file. Then, open your DAW and navigate to the plugin section to locate and load the VST file for use in your music production.

What Runs Vst Plugins?

VST plugins are run by digital audio workstations (DAWs) such as Ableton Live, Logic Pro, and FL Studio. DAWs provide the platform for hosting and utilizing VST plugins for audio production and editing.

How Do I Manually Install Vst Plugins?

To manually install VST plugins, follow these steps: 1. Locate the downloaded VST plugin file on your computer. 2. Copy the file into the VST plugins folder of your digital audio workstation (DAW). 3. Open your DAW and go to the settings or preferences menu.

4. Look for the plugin scan or options section and click on it. 5. Make sure the VST plugin folder is selected for scanning, then click on the scan button. Once the scan is complete, the plugin should be available in your DAW’s plugin list.

Conclusion

Incorporating VST plugins into your music production workflow can elevate your creativity and add professional quality to your tracks. By following the steps outlined you can seamlessly run VST plugins and enhance your music projects with ease. Stay tuned for more tips and tricks to optimize your audio production!

Categories
Archive

How To Become A DJ: Master the Turntables

To become a DJ, learn basic DJ skills and techniques, practice mixing music regularly. Becoming a DJ involves mastering the art of mixing music and creating seamless transitions between tracks.

Start by learning basic DJ skills and techniques, such as beat matching and using DJ equipment. Practice mixing music regularly to develop your own unique style and sound. Additionally, familiarize yourself with different genres of music to cater to diverse audiences.

Networking with other DJs and industry professionals can also provide valuable opportunities for gigs and exposure. By continuously honing your skills and building a strong personal brand, you can carve out a successful career as a DJ.

How To Become A DJ: Master the Turntables

Credit: www.namm.org

Getting Started As A Dj

Looking to become a DJ? Learn the essential steps to kick-start your DJing career with practical tips, equipment recommendations, and guidance on building your music library and mixing skills.

Getting Started as a DJ H3 headings must be in HTML syntax. Choosing the Right Equipment Understanding Different DJ Setups Building Your Music Collection So, you want to become a DJ? Getting started in the world of DJing can be an exciting and rewarding experience. This section will provide you with the essential steps to kickstart your journey as a DJ. We will cover everything from choosing the right equipment, understanding different DJ setups, and building your music collection.

Choosing The Right Equipment

When it comes to becoming a DJ, choosing the right equipment is crucial. You will need to invest in high-quality gear that suits your style and budget. Consider turntables, DJ controllers, mixers, and headphones. Research and compare different brands and models to find what best fits your needs.

Understanding Different Dj Setups

Understanding the different DJ setups is essential to find the one that suits your style and preferences. Common setups include turntable setups, digital DJ setups, and hybrid setups. Each setup offers its unique features and capabilities, so it’s crucial to understand the pros and cons of each before investing in your equipment.

Building Your Music Collection

Building a diverse and extensive music collection is vital for any DJ. Explore various music genres and eras to cater to different audiences. Consider subscribing to digital music pools, record pools, and purchasing music from reputable online stores. Building a solid music collection will ensure you have the right tracks to create memorable DJ sets. As you delve into the world of DJing, remember that each step you take is a valuable part of your progression. By choosing the right equipment, understanding different DJ setups, and building a robust music collection, you’re setting yourself up for success in your exciting DJing journey.
How To Become A DJ: Master the Turntables

Credit: thereader.mitpress.mit.edu

Learning The Basics

When it comes to becoming a DJ, learning the basics is essential. This foundational knowledge forms the bedrock for your journey into the world of music and mixing. In this section, we will explore mastering beatmatching, understanding song structure, and mixing techniques.

Mastering Beatmatching

Beatmatching is the cornerstone of DJing. It’s the technique of aligning the tempos of two tracks so they play in sync. Practice this by listening carefully and adjusting the pitch and speed controls to match beats. Use the headphones to cue up the next track and match it seamlessly with the one playing for a smooth transition.

Understanding Song Structure

To create seamless transitions, it’s important to understand the structure of songs. This includes recognizing elements within the song such as intro, verse, chorus, bridge, and outro. Familiarize yourself with different genres and their typical song structures to anticipate where to mix and blend the tracks for a flawless performance.

Mixing Techniques

Mixing techniques involve smoothly transitioning from one track to another. Utilize techniques such as cutting, blending, and phrasing to seamlessly merge tracks together. Experiment with EQ controls, crossfaders, and effects to add depth and dynamics to your mixes.

Developing Your Dj Skills

Looking to become a DJ? Start by mastering the basics: beatmatching, music theory, and creating a unique sound. Expand your skills by experimenting with different genres and learning to read the crowd. Practice regularly and seek out mentorship opportunities to refine your craft.

Creating Seamless Transitions

Once you have mastered the basics of DJing, the next step in developing your DJ skills is to learn how to create seamless transitions between tracks. A seamless transition is essential to keep the energy flowing on the dancefloor and maintain the crowd’s excitement. Here are some tips to help you master the art of creating seamless transitions:
  1. Use the beatmatch technique: Ensure that the beats of the incoming track are perfectly aligned with the beats of the outgoing track. This can be done by adjusting the pitch and tempo of the tracks to match each other.
  2. Utilize the EQs: Experiment with the EQ (Equalizer) knobs on your mixer to blend the frequencies smoothly. By adjusting the bass, mid, and treble of each track, you can create a seamless transition that is pleasing to the ear.
  3. Fade In, Fade Out: Gradually increase the volume of the incoming track while simultaneously lowering the volume of the outgoing track. This fading technique helps in creating a smooth transition without any abrupt interruptions.

Adding Effects And Samples

Adding effects and samples can elevate your DJ performances to a whole new level. These creative elements can add excitement, variation, and personal flair to your mixes. Here are some ways to incorporate effects and samples into your DJ sets:
  • Experiment with different effects: Each DJ software or hardware usually offers various effects like reverb, delay, flanger, and more. Take the time to explore and understand how each effect can enhance your mix.
  • Layer samples with tracks: Spice up your mixes by layering samples, such as vocal snippets or percussion loops, on top of your tracks. This technique adds depth and can surprise and captivate your audience.
  • Use effects transitions: Transitioning between tracks can be made more exciting by applying effects to create dramatic build-ups, drops, or filters. This can create an engaging sonic journey for your listeners.

Reading The Crowd

Being able to read the crowd is a crucial skill for any DJ. Understanding the mood, energy level, and preferences of the audience allows you to curate a set that keeps them engaged and on their feet. Here are some tips for reading the crowd:
  1. Observe the dancefloor: Pay attention to how the audience is reacting to your current track. Are they dancing enthusiastically or are they starting to lose interest? Adjust your set accordingly to maintain their energy.
  2. Interact with the crowd: Engage with your audience by making eye contact, smiling, and responding to their energy. This connection can help you gauge their response and tailor your music selection to their tastes.
  3. Experiment and adapt: Don’t be afraid to try different tracks and genres while closely observing the crowd’s reaction. Adaptability is key to keeping the energy levels high and ensuring everyone has a great time.
As you continue to develop your DJ skills, remember that practice is key. The more you experiment, learn, and put these techniques into action, the better you will become at creating seamless transitions, adding effects and samples, and reading the crowd. So, keep honing your skills and watch your DJing journey take flight!

Building Your Brand

When it comes to becoming a successful DJ, building your brand is vital.

Creating A Dj Identity

  • Develop a unique DJ name that resonates with your style and genre.
  • Design a logo and visual identity that reflects your personality.
  • Set yourself apart by curating a distinct music style or persona.

Promoting Yourself Online

  • Utilize social media platforms to showcase your mixes and engage with your audience.
  • Create a professional website to showcase your work and bookings.
  • Collaborate with influencers or other artists to expand your reach.

Networking And Collaborating

  • Attend industry events, music festivals, and clubs to network with other DJs and industry professionals.
  • Collaborate with musicians, producers, and vocalists to create unique tracks and remixes.
  • Build relationships with event promoters and venue managers for more gig opportunities.

Navigating The Dj Industry

When it comes to navigating the DJ industry, understanding the key aspects of finding paid gigs, working with venues and promoters, and dealing with contracts and negotiations is crucial for success.

Finding Paid Gigs

Securing paid gigs as a DJ involves building a strong online presence, networking with industry professionals, and promoting your unique style and skills.

Working With Venues And Promoters

Collaborating with venues and promoters requires effective communication, professionalism, and flexibility to ensure a successful partnership and future opportunities.

Dealing With Contracts And Negotiations

When handling contracts and negotiations, understanding the terms, fees, and expectations is essential to protect your interests and ensure a fair and mutually beneficial agreement.

How To Become A DJ: Master the Turntables

Credit: www.wikihow.com

Frequently Asked Questions Of How To Become A Dj

How Do I Start A Dj Career?

To start a DJ career, learn to mix music, build a diverse playlist, and practice. Get equipment, create a brand, and network with venues and other DJs. Promote your work online and locally, and gain experience by performing at events and parties.

What Qualifications Do You Need To Be A Dj?

To be a DJ, you don’t need specific qualifications. However, having knowledge and skills in music production, mixing techniques, and using DJ equipment can be beneficial. Gaining experience through practice, attending workshops or courses, and building a portfolio can help in pursuing a career as a professional DJ.

How Do I Start Off As A Dj?

To start as a DJ, get essential equipment, practice, build a music collection, network with other DJs, and promote yourself online.

How Does A Beginner Dj Start?

To start DJing as a beginner, learn basic equipment, practice mixing music, create a unique style, and promote yourself online.

Conclusion

Becoming a DJ requires passion, dedication, and the right skills. By understanding the fundamentals of music, practicing regularly, and networking in the industry, you can embark on a successful DJ career. Remember to always stay up to date with the latest trends and technology.

Becoming a DJ is an exciting journey that allows you to express your creativity and connect with people through music. Start today and let your beats ignite the dance floor!


Categories
Archive

3 Reasons To Use Metronome: Enhance Your Musical Performance

Using a metronome helps maintain consistent tempo, improves timing and enhances rhythm accuracy, making it an essential tool for musicians. The metronome aids in developing a strong sense of rhythm and precision in musical performances.

Musicians can use it to track progress, maintain consistency, and stay in sync with other players during rehearsals and performances. Furthermore, it can be beneficial for practicing difficult passages and increasing overall musical proficiency. The metronome also enhances musical expressiveness and dynamics, resulting in more polished and impactful performances.

Incorporating a metronome into practice sessions can significantly improve a musician’s timing and overall musical performance.

3 Reasons To Use Metronome: Enhance Your Musical Performance

Credit: www.amazon.com

Improve Timing

When it comes to music, timing is everything. Using a metronome can be highly beneficial in improving your timing, keeping you in sync with the beat, and enhancing your overall performance. Here are three compelling reasons why it’s essential to use a metronome to improve your timing:

Developing A Steady Rhythm

A metronome serves as a reliable tool for honing your ability to maintain a steady rhythm. By practicing in tandem with its precise beats, you can gradually develop a consistent tempo, helping you play with accuracy and confidence.

Maintaining Tempo

One of the key advantages of utilizing a metronome is that it assists in maintaining a consistent tempo throughout your practice sessions and performances. This consistency is crucial for ensuring that your music flows smoothly and retains its intended feel and energy.

Enhancing Precision

Using a metronome promotes precision in your playing by helping you stay on beat, enabling you to execute intricate rhythms with accuracy. This precision is fundamental in enhancing the quality of your musical expression and creating a polished, professional sound.

Build Precision

When it comes to enhancing your musical skills, using a metronome can significantly improve your precision and timing. Here are three compelling reasons why incorporating a metronome into your practice routine can build precision in your playing:

Accurate Note Placement

With a metronome, you can ensure accurate note placement, as it helps you maintain a consistent tempo and rhythm throughout your performance. By following the steady beat of the metronome, you can develop a better sense of timing and improve the precision of your note placement.

Tighten Up Complex Sections

When practicing complex musical sections, a metronome allows you to tighten up your performance, ensuring that each note and beat align precisely. The ability to play complex passages with rhythmic accuracy is essential in developing precision and achieving a polished final result.

Consistency In Tempo

Using a metronome promotes consistency in tempo, helping you to maintain a steady pace throughout your playing. This consistency is crucial in building precision as it trains you to play with a dependable rhythm and timing, resulting in a more polished and professional performance.

Increase Speed

Using a metronome can help increase speed in your practice sessions. It provides a consistent beat, helping to develop timing, accuracy, and precision in your playing.

Increase Speed When it comes to improving your speed as a musician, a metronome can be an invaluable tool. It helps you stay on beat and maintain a consistent rhythm, pushing you to play faster and more accurately. In this section, we will explore three reasons why using a metronome can help you increase your speed. Gradually Pushing Your Limits One of the key benefits of using a metronome to increase your speed is the ability to gradually push your limits. By starting at a comfortable tempo and gradually increasing the speed, you can train your muscles to play at a faster pace over time. This gradual increase allows you to build endurance and improve your technical abilities without overwhelming yourself. Building Muscle Memory Another advantage of using a metronome is its ability to help you build muscle memory. When you practice a piece of music with a metronome, you train your muscles to perform specific movements at a consistent tempo. Over time, this muscle memory allows you to play faster passages with ease and precision. By consistently practicing with a metronome, you can develop the muscle memory needed to navigate complex musical passages at high speeds. Developing a Strong Sense of Timing Lastly, using a metronome helps you develop a strong sense of timing. As you practice with a metronome, you learn to internalize the beat and play in sync with it. This improves your ability to stay in time with other musicians and enhances your overall musicality. Whether you’re playing in a band, orchestra, or solo performance, having a solid sense of timing is essential for a captivating and polished performance. In conclusion, using a metronome can greatly benefit musicians who want to increase their speed. By gradually pushing your limits, building muscle memory, and developing a strong sense of timing, you can take your playing to the next level. So grab your metronome and start practicing – your speed and accuracy will thank you!
3 Reasons To Use Metronome: Enhance Your Musical Performance

Credit: www.facebook.com

Enhance Focus

3 Reasons To Use Metronome: Enhance Focus

Enhance your focus with a metronome by utilizing its powerful features that help improve concentration and productivity.

Eliminating Distractions

A metronome aids in eliminating distractions by keeping you on track with a consistent beat to follow.

Mindfully Concentrating

With a metronome, you can mindfully concentrate on the task at hand, enhancing your focus and productivity.


Practice More Efficiently

3 Reasons To Use Metronome

Break down your practice sessions into small achievable goals.

Use the metronome to work on specific sections to improve accuracy.

Setting clear objectives will enhance your progress.

Record your tempo variations to monitor improvement.

Identify areas that need more focus for efficient learning.

Track your metronome usage over time for consistent growth.

3 Reasons To Use Metronome: Enhance Your Musical Performance

Credit: www.adamrafferty.com

Frequently Asked Questions For 3 Reasons To Use Metronome

What Are The Benefits Of Using A Metronome?

A metronome helps to improve timing, rhythm, and precision in music performance. It enhances musical discipline and aids in developing a strong sense of tempo. Using a metronome can also help musicians to gradually increase their speed and accuracy while practicing.

Why Do People Use A Metronome?

People use a metronome to maintain a steady tempo while playing music. It helps improve rhythm, timing, and accuracy. Using a metronome can also aid in developing a better sense of timing and in practicing at varying speeds.

What Is The Purpose Of The Metronome?

The purpose of the metronome is to help musicians maintain a steady tempo when practicing or performing. It provides a consistent beat, allowing musicians to stay in sync and improve their timing and accuracy.

When Should You Use A Metronome?

Use a metronome to improve timing and rhythm during practice sessions for better musical performance. It helps with tempo control and consistency across different music pieces. A metronome is beneficial for musicians at all skill levels.

Conclusion

A metronome offers numerous benefits for musicians; it helps improve timing, synchronization, and overall musicality. By providing a steady beat, it allows artists to develop their sense of rhythm and precision. Whether you are a beginner or a professional, incorporating a metronome into your practice sessions can greatly enhance your musical abilities.

So why wait? Start using a metronome today and witness the transformative impact it can have on your playing.

Categories
Archive

Increase Your Efficiency with Plugin Presets: A Step-by-Step Guide

Plugin presets can be best utilized by saving and reusing settings for various projects, thus saving time and streamlining workflows. They allow for quick access to preferred configurations, enhancing productivity and consistency.

Plugin presets are a valuable tool that can optimize your workflow and boost efficiency, ultimately leading to better results. Whether you are a professional audio engineer, a graphic designer, or a video editor, utilizing plugin presets can help you achieve a more streamlined and effective working process.

By understanding the best ways to utilize these presets, you can take advantage of their benefits and maximize your creative output.

Getting Started

When starting with plugin presets, it’s important to choose the right plugins that offer preset functionality. Selecting reputable plugins with a wide range of presets can save time and effort in the long run. Look for plugins that align with the specific needs of your project, ensuring they have a user-friendly interface to manage and customize presets.

Before diving into using presets, it’s crucial to have a basic understanding of what they are and how they function. Plugin presets are pre-configured settings within a plugin, designed to streamline the process of creating a specific sound or effect. By grasping the concept of presets, users can make the most out of the available options and achieve desired results efficiently.

Increase Your Efficiency with Plugin Presets: A Step-by-Step Guide

Credit: www.headspin.io

Creating Custom Presets

Discover the ultimate guide on maximizing the potential of plugin presets by creating custom ones. Learn how to effectively utilize these presets and why they are essential for achieving the desired results in your creative projects.

Creating Custom Presets Plugin presets offer a convenient way to save and apply specific configurations within your plugins. While pre-built presets can be useful, creating custom presets allows you to tailor settings to your specific needs. This ensures that you can easily apply your preferred configurations across multiple instances without having to manually adjust each parameter. In this section, we will explore the process of creating custom presets, including how to select parameters and save your preset.

Selecting Parameters

When creating a custom preset, the first step is to determine which parameters you want to include. These parameters may vary depending on the plugin and its functionality. Whether it is adjusting visual elements, input/output settings, or other customizable features, carefully consider which parameters best suit your needs. Keep in mind that selecting the most relevant parameters will result in a more efficient and practical custom preset.

Saving Your Preset

Once you have selected the desired parameters, saving your custom preset is a straightforward process. Most plugins provide a dedicated interface for managing presets, allowing you to easily save your custom configuration. Simply navigate to the preset management section within the plugin and select the option to create a new preset. Give your preset a descriptive and recognizable name to facilitate future identification. Once saved, your custom preset will be readily available for application whenever needed. When using custom presets, the main benefit is the time saved on manually configuring the parameters, especially if you frequently apply the same setups. By creating custom presets, you can streamline your workflow, increase productivity, and maintain consistency in your plugin usage.

Utilizing Presets Effectively

Utilizing Presets Effectively

Plugin presets can be quickly applied to achieve desired effects without starting from scratch.

After applying presets, fine-tune parameters to customize the effect to your specific needs.

Increase Your Efficiency with Plugin Presets: A Step-by-Step Guide

Credit: blog.native-instruments.com

Advanced Tips And Tricks

When it comes to utilizing plugin presets to enhance your workflow, advanced techniques can take your productivity to a whole new level. In this section, we will explore two powerful methods that will revolutionize the way you use plugin presets: batch processing and sharing/importing presets.

Batch Processing With Presets

Batch processing allows you to apply the same plugin preset to multiple files at once, saving valuable time and effort. This is especially useful when you have a large number of files that require the same adjustments or effects.

In order to batch process with presets, follow these simple steps:

  1. Open your desired plugin and load the preset you wish to apply.
  2. Locate the batch processing feature within the plugin, usually found under a “Batch” or “Automate” menu option.
  3. Select the files you want to process using the preset. You can do this by either manually selecting the files or by specifying a folder containing the files.
  4. Review the chosen settings and apply the preset to all selected files.
  5. Sit back and let the plugin do the work for you, applying the preset to each file simultaneously.

By leveraging batch processing with presets, you can significantly speed up your workflow and achieve consistent results across multiple files in no time.

Sharing And Importing Presets

Sharing and importing presets allows you to easily collaborate with others and expand your creative options by accessing presets created by fellow users. This is especially useful when you want to achieve a specific look or style but lack the necessary expertise or time to create the preset yourself.

To share and import presets, follow these steps:

  1. Export the preset you want to share from your plugin. This will create a file with the .preset extension.
  2. Share the .preset file with others, either by email, file-sharing services, or by uploading it to popular preset libraries.
  3. To import a shared preset, simply download the .preset file and import it into your plugin.
  4. Once imported, the preset will be available in your plugin’s preset library, ready to be applied to your projects.

By sharing and importing presets, you can take advantage of the expertise and creativity of the wider community, expanding your options and pushing the boundaries of your own work.

Increase Your Efficiency with Plugin Presets: A Step-by-Step Guide

Credit: www.davemorrowphotography.com

Frequently Asked Questions Of Plugin Presets How To Best Utilize Them And Why

What Is A Plugin Preset?

A plugin preset is a preconfigured setting in a plugin to simplify customization and enhance functionality.

Where Do I Put Plugin Presets?

Place plugin presets in the designated folder within the plugin’s installation directory.

What Are Presets In Daw?

Presets in a DAW are pre-configured settings for instruments, effects, and mix parameters. They provide a starting point for sound design and production. Using presets can save time and offer inspiration for creating music.

How Do I Save A Plugin Preset?

To save a plugin preset, go to the plugin interface, adjust settings, then locate and click “Save Preset” option.

Conclusion

Maximizing plugin presets is crucial for efficiency & productivity. Embrace their power to streamline your workflow and elevate your creative output. With the right approach, presets can be a game-changer in achieving your desired results effortlessly. Unlock the full potential of your plugins with strategic preset utilization.

Elevate your production today!

Categories
Archive

Wav Or Mp3 What Should I Use? The Ultimate Guide

When deciding between WAV and MP3, consider your need for audio quality and file size. WAV files are uncompressed, offering the best sound quality but with larger file sizes, while MP3 files are compressed, sacrificing some quality for smaller sizes.

The choice depends on your priorities: if you prioritize audio fidelity, WAV is the better option, but if file size is a concern, MP3 may be more suitable. Professional audio production often favors WAV due to its high quality, while MP3 is popular for consumer use due to its smaller file size.

Understanding the differences between these formats will help you make an informed decision based on your specific audio needs.

Wav Or Mp3 What Should I Use? The Ultimate Guide

Credit: verbit.ai

Understanding Audio Formats

Choosing between WAV and MP3 audio formats depends on your specific needs. WAV files offer higher quality, ideal for professional recordings, but MP3 files are compressed for smaller size and easier sharing online. Consider your usage and desired audio quality when deciding between the two formats.

Understanding Audio Formats Audio formats play a crucial role in the quality and file size of digital audio. The most commonly used formats for audio files are WAV and MP3. It’s essential to understand the differences and benefits of each format to make an informed decision about which one to use for specific needs. Difference between WAV and MP3 WAV (Waveform Audio File Format) – Lossless audio format – Uncompressed, resulting in high-quality sound – Ideal for professional audio recording and editing – Large file size due to lack of compression MP3 (MPEG Audio Layer-3) – Lossy audio format – Compressed, leading to smaller file size – Suitable for online streaming and portable devices – Slight loss of audio quality due to compression Benefits of WAV – High Quality: WAV files retain the original audio quality, making them suitable for professional use such as music production and post-production. – Editing Flexibility: With no compression, WAV files allow for extensive editing without degrading the audio quality. – Archival Purposes: Ideal for archiving master recordings due to lossless nature, ensuring no degradation over time. Benefits of MP3 – Small File Size: MP3 files are significantly smaller in size, making them suitable for online distribution and portable devices. – Convenience: Easily shareable and playable on various devices, making it a popular choice for music enthusiasts and consumers. – Streaming Compatibility: MP3 format is widely supported for online streaming and downloading, providing easy access to a wide range of content. Understanding the differences and benefits of WAV and MP3 formats enables individuals to make an informed decision based on their specific audio needs and requirements.
Wav Or Mp3 What Should I Use? The Ultimate Guide

Credit: www.lammerfyr.com

When To Use Wav

WAV, or Waveform Audio File Format, is a format known for its higher audio quality and lossless compression. This format is ideal for professional use, ensuring the preservation of the original audio content without compromising on quality.

Higher Audio Quality

WAV files are known for their superior audio quality, making them the preferred choice for audio professionals, musicians, and sound engineers. The format preserves the full fidelity and accuracy of the original audio, ensuring that no quality is lost during the recording or playback process.

Lossless Compression

Unlike MP3, which uses lossy compression, WAV files employ a lossless compression technique. This means that the audio data is preserved in its entirety without any reduction in quality. As a result, WAV files are larger in size compared to MP3, but the trade-off is the uncompromising audio quality.

Ideal For Professional Use

Due to its high audio quality and lossless compression, WAV is the go-to format for professional audio projects such as music production, film soundtracks, and audio post-production. It ensures that every nuance of the sound is captured accurately, meeting the stringent demands of professional audio production.

When To Use Mp3

MP3 should be used when you need to compress audio files without losing too much quality, making it ideal for streaming or sharing online. In comparison, WAV files are uncompressed and maintain higher fidelity, but they are larger in size and may not be suitable for certain uses.

Smaller File Size

When it comes to file size, MP3 is the winner. One of the main advantages of MP3 is its ability to compress audio files while maintaining acceptable sound quality. This compression technology significantly reduces the file size, making it a preferred format for storing and transmitting audio data. The smaller file size is especially beneficial for those with limited storage space or bandwidth constraints.

Widespread Compatibility

MP3 has become the de facto standard for audio files across various platforms and devices. Its widespread compatibility ensures that you can play MP3 files on almost any device, including smartphones, tablets, computers, and even some older audio players. This universality makes MP3 a reliable choice when you need your audio files accessible and playable on multiple devices without any compatibility issues.

Suitable For Everyday Listening

If you’re using audio files for everyday listening purposes, MP3 is the ideal format. Its compressed nature allows for quick streaming and downloading, ensuring a smooth playback experience. Whether you’re listening to music, podcasts, audiobooks, or any other type of audio content, MP3 offers a seamless and efficient way to enjoy your files without compromising on quality. In addition to its smaller file size and widespread compatibility, MP3’s suitability for everyday listening makes it a popular choice among users. Whether you’re storing your entire music library or simply downloading podcast episodes, MP3 ensures a convenient and accessible audio experience. So, if you’re looking for a versatile and widely supported audio format, MP3 is the way to go.

Factors To Consider

When deciding between wav or mp3 formats, several key factors should guide your choice:

Device And Storage Limitations

  • Consider device compatibility and available storage space for your audio files.
  • Wav files are larger in size and may not be suitable for devices with limited storage capacity.
  • Mp3 files are compressed and take up less space, making them ideal for smaller devices.

Internet Bandwidth

Fast internet connection is crucial for streaming high-quality audio files:

  1. Wav files require more bandwidth due to their uncompressed nature.
  2. Mp3 files are smaller in size, making them easier to stream even with slower internet speeds.

Intended Usage

Consider how and where you plan to use the audio files:

Usage Recommended Format
Professional audio production Wav for highest quality
Casual listening or sharing Mp3 for convenience
Wav Or Mp3 What Should I Use? The Ultimate Guide

Credit: www.lammerfyr.com

Frequently Asked Questions For Wav Or Mp3 What Should I Use

Is It Better To Mix With Wav Or Mp3?

It’s better to mix with WAV for higher quality because MP3 is a compressed format.

Should You Master A Wav Or Mp3?

Mastering a WAV file provides higher quality than an MP3. WAV files are lossless, retaining original audio quality, ideal for professional use and for preserving audio. MP3s are compressed and lossy, suitable for streaming and online distribution. Consider the purpose and intended use when choosing between WAV and MP3 mastering.

Should I Bounce To Wav Or Mp3?

Bouncing to WAV is recommended for high-quality audio, while MP3 is suitable for file size compression. It depends on your needs and priorities.

Does Converting Mp3 To Wav Improve Quality?

Converting MP3 to WAV does not improve quality as it is a lossless conversion without enhancing audio fidelity.

Conclusion

To sum up, choosing between WAV and MP3 formats ultimately depends on your specific needs and preferences. WAV offers the highest audio quality but comes with larger file sizes, while MP3 provides compressed files ideal for online streaming or portable devices.

Consider the purpose, storage space, and playback requirements when deciding which format to go with. In the end, it’s about finding the balance between audio quality and practicality. Happy listening!


Categories
Archive

How Do VST Plugins Work: Unleashing the Power

VST plugins work by integrating with digital audio workstations to provide additional sound effects and virtual instruments. These plugins enhance music production by offering a wide range of customizable features and tools.

Musicians and producers can access various VST plugins to create unique sounds, improve audio quality, and experiment with different music styles. With the versatility and convenience they offer, VST plugins have become an essential part of modern music production. Whether you are a professional music producer or an aspiring musician, understanding how VST plugins work can elevate your creative process and help you achieve your desired sound.

We will dive deeper into the world of VST plugins, exploring their functionality and benefits in music production.

The Basics Of Vst Plugins

What Are Vst Plugins?

VST plugins are software components that add various audio effects or instruments to compatible audio software.

How Do Vst Plugins Function?

VST plugins work by processing audio signals in real-time, altering them according to the plugin’s specific design and parameters.

How Do VST Plugins Work: Unleashing the Power

Credit: bosshorn.com

Types Of Vst Plugins

Instrument Vst Plugins

Instrument VST plugins are digital tools that simulate musical instruments like pianos, guitars, or synthesizers.

Effect Vst Plugins

Effect VST plugins modify audio signals to add reverb, delay, distortion, or other effects to enhance the sound.

Installation And Integration

When it comes to integrating VST (Virtual Studio Technology) plugins into your digital audio workstation (DAW), installation and integration are crucial steps. Understanding how VST plugins work and seamlessly incorporating them into your workflow can dramatically enhance your music production experience. In this guide, we’ll delve into the process of installing and integrating VST plugins, offering insights into choosing the right host and the necessary steps for installation and configuration.

Choosing The Right Host

Before diving into the installation process, it’s essential to select a compatible host for your VST plugins. Popular DAWs like Ableton Live, Pro Tools, and FL Studio are commonly chosen for their robust support of VST technology. When choosing a host, consider factors such as workflow compatibility, user interface preferences, and the specific features required for your music production needs.

Installing And Configuring Vst Plugins

Once you’ve identified your preferred host, the next step is installing and configuring your VST plugins. The process typically involves the following steps:

  1. Download the VST plugins from a reputable source, ensuring they are compatible with your chosen host.
  2. Locate the VST plugin folder within your DAW’s directory. This is where you will copy or install the downloaded plugin files.
  3. After placing the plugin files in the designated folder, open your DAW and navigate to the plugin settings or preferences.
  4. Scan for new plugins within your DAW to detect and integrate the newly installed VST plugins into your workflow.
  5. Configure the settings and parameters of each VST plugin to align with your production requirements, ensuring optimal performance and compatibility.

By following these steps, you can seamlessly integrate VST plugins into your music production process, unlocking a world of creative possibilities and sonic enhancements.

Optimizing Performance

When it comes to using VST plugins, optimizing performance is crucial to ensure smooth and efficient workflow. By properly understanding the advanced settings and customization options, you can maximize the potential of your plugins and enhance your overall music production experience.

Advanced Settings And Customization

Customizing your VST plugins according to your specific needs allows you to fine-tune the performance and achieve the desired results. Most VST plugins come with advanced settings that offer various options to modify the sound output and behavior of the plugin.

Here are some essential tips to make the most of the advanced settings:

  • Experiment with presets: Many VST plugins provide pre-programmed presets that instantly change the plugin’s settings to achieve a specific sound or effect. Explore and experiment with different presets to find the one that suits your needs, and then customize it further if required.
  • Adjust latency settings: Latency refers to the delay between when you play a note or trigger a sound and when you hear it. Lower latency settings contribute to a more responsive feel, but they may require more processing power. Find the balance that works best for your system and performance needs.
  • Manage processing power: Some VST plugins can be resource-intensive, especially when using multiple instances simultaneously. Be mindful of your computer’s processing power and consider freezing or bouncing tracks to reduce the CPU load.
  • Master MIDI mapping: Most VST plugins allow you to map different parameters to your MIDI controllers. This customization enables you to control various aspects of the plugin in real-time, providing a more interactive and hands-on experience during performance or recording.
  • Utilize automation: Automation allows you to record and play back changes to plugin settings over time. By automating parameters such as volume, filters, or effects, you can add dynamic and evolving elements to your music without manually adjusting them at each point.

Tips For Efficient Workflow

In addition to the advanced settings and customization options, following these tips can further optimize your workflow when working with VST plugins:

  1. Organize your plugins: Keep your plugins categorized and easily accessible, ensuring a streamlined workflow. Create custom folders or use plugin management tools to efficiently locate and select the desired plugins.
  2. Maintain a clean project: Regularly remove any unused or unnecessary plugins from your project to declutter and free up resources. This practice can help enhance the overall performance and prevent any potential conflicts.
  3. Stay updated: Keep your VST plugins and DAW software up to date with the latest versions. Updates often include bug fixes, performance improvements, and new features that can enhance your overall experience.
  4. Experiment with signal routing: Understanding the signal flow in your project can help optimize the usage of your VST plugins. Experiment with different routing options to achieve the desired sound and minimize unnecessary processing.
  5. Regularly save your work: Save your project frequently to avoid losing any progress, especially after making significant changes to your VST plugin settings. This practice ensures a reliable backup and allows you to revert to previous versions if needed.

By exploring the advanced settings, customizing your plugins, and implementing efficient workflow techniques, you can optimize the performance of your VST plugins and elevate your music production to new heights.

Maximizing The Potential

VST plugins, or virtual studio technology plugins, work by integrating with digital audio workstations to enhance and expand the creative possibilities for music producers and sound engineers. The plugins offer a wide range of effects, instruments, and processors that can be easily integrated into the software, maximizing the potential for creating unique and professional-sounding music.

Exploring Creative Applications

Maximizing the potential of VST plugins opens up a world of creative possibilities for musicians, producers, and sound designers. With a wide range of plugins available, there are endless opportunities to enhance your sound and create unique musical experiences.Furthermore, when it comes to creative exploration, VST plugins are indispensable tools that allow you to experiment with different techniques and genres. For instance, VST plugins like synthesizers enable you to craft intricate melodies and mesmerizing soundscapes. Through parameter adjustments, you can manipulate the waveform, envelope, and modulation to achieve the desired sonic characteristics. Whether it’s emulating vintage analog synths or creating futuristic sound effects, the possibilities are truly limitless.
VST plugins like synthesizers enable you to craft intricate melodies and mesmerizing soundscapes.
In addition to synthesizers, there are VST plugins specifically designed for effects processing. These plugins let you shape your audio to create unique textures and atmospheres. From reverbs and delays to compressors and equalizers, these tools empower you to fine-tune the details and add depth to your mix.
VST plugins specifically designed for effects processing let you shape your audio to create unique textures and atmospheres.

Utilizing Vst Plugins In Production

When it comes to music production, VST plugins play a crucial role in shaping the final sound of your tracks. Their flexibility, ease of use, and ever-evolving capabilities make them an essential part of the production process. One way to maximize the potential of VST plugins in production is by utilizing them for virtual instrument integration. By connecting MIDI controllers to your software, you can play virtual instruments through the plugins directly. This not only saves time but also allows for precise control over the nuances of your performance.
Utilize VST plugins for virtual instrument integration to play virtual instruments through the plugins directly, saving time and allowing precise control over performance nuances.
Furthermore, VST plugins can be incorporated at various stages of the production process, including recording, mixing, and mastering. During recording, plugins can be used to shape the sound before it even enters the digital realm, ensuring the desired tonal quality right from the start. In the mixing phase, plugins assist in balancing the different elements of your track, enhancing clarity, and creating a cohesive sound. Lastly, in the mastering stage, plugins help optimize the final mix for different playback systems.
Incorporate VST plugins at various stages of the production process, including recording, mixing, and mastering, to shape the sound, balance elements, enhance clarity, and optimize the final mix.
In conclusion, maximizing the potential of VST plugins is about exploring their creative applications and utilizing them effectively in the production process. Whether you’re a musician or a producer, these powerful tools can take your music to new heights and unlock your artistic vision. So go ahead, immerse yourself in the world of VST plugins and unleash your sonic innovation.
How Do VST Plugins Work: Unleashing the Power

Credit: medium.com

How Do VST Plugins Work: Unleashing the Power

Credit: unison.audio

Frequently Asked Questions For How Do Vst Plugins Work

How Do I Use Vst Plugins?

To use VST plugins, first download and install them in your music production software. Then, open your software, locate the VST folder, and add the plugins to your project for editing and enhancing sound.

What Is A Vst And How Does It Work?

A VST (Virtual Studio Technology) is a software plugin used to create music on a computer. It works by simulating instruments and effects digitally for music production.

What’s The Difference Between A Plug-in And A Vst?

A plug-in is a software component that adds specific functionality to a larger software application. VST (Virtual Studio Technology) refers to a specific format for plug-ins used in music production software. In simpler terms, VST is a type of plug-in commonly associated with music production.

How Do Daw Plugins Work?

DAW plugins work by integrating seamlessly with digital audio workstations, allowing users to add a variety of effects, instruments, and processors to their audio projects. These plugins enhance the capabilities of the DAW software, providing users with a wide range of creative options and professional-quality results.

Conclusion

VST plugins are essential tools for music production. They provide a wide range of effects and instruments that enhance creativity and productivity. Understanding their functions and capabilities can significantly improve the quality of music production. Embracing VST plugins offers endless possibilities for musicians and producers to create innovative and captivating sound experiences.

Categories
Archive

8 Mastering Mistakes When Mastering Your Own Music: Avoid These Pitfalls!

Avoid these 8 mastering mistakes when working on your own music to ensure high-quality results. Mastering your own music can be challenging but with the right approach, you can achieve professional-sounding tracks.

Learning how to avoid common mistakes in the mastering process is crucial for achieving the best possible sound quality for your music. Whether you’re a beginner or an experienced musician, understanding these mastering mistakes is essential for creating polished and professional music.

By recognizing and addressing these issues, you can elevate the quality of your music and make a lasting impression on your audience. Understanding these common pitfalls will empower you to produce music that shines in the competitive music industry.

8 Mastering Mistakes When Mastering Your Own Music: Avoid These Pitfalls!

Credit: www.amazon.com

Mistake: Skipping A Proper Listening Environment

When it comes to mastering your own music, skipping a proper listening environment can lead to significant mistakes that may affect the overall quality of your final product. Investing in a proper acoustic treatment and using a combination of both speakers and headphones is crucial for achieving an accurate representation of your music’s sound.

Not Investing In Acoustic Treatment

Without proper acoustic treatment, the sound in your room can become muddied and uneven, making it difficult to make accurate mixing and mastering decisions. Consider investing in bass traps, diffusers, and absorbers to create a balanced sound environment.

Using Headphones Exclusively

Relying solely on headphones for mixing and mastering can result in an inaccurate representation of your music. While headphones are useful for detailed editing, the use of studio monitors is essential to ensure the mix translates well into other listening environments.

Mistake: Over-processing The Mix

Mastering Mistakes When Mastering Your Own Music

One of the most common mistakes in music mastering is over-processing the mix. Newcomers often fall into the trap of adding too many effects, plugins, and adjustments, resulting in a muddy, unbalanced sound. Over-processing can not only ruin the original character of the music but also lead to a loss of clarity and dynamics.

Using Too Many Plugins

It’s easy to get carried away with the abundance of available plugins, but using too many can degrade the quality of the mix. Limiting plugin usage can help maintain a clearer and more natural sound, allowing each effect to have a meaningful impact on the overall mix.

Overusing Eq And Compression

Overzealous use of EQ and compression can suck the life out of a mix. Moderation is key when applying these tools, as excessive use can result in an unnatural sound with reduced dynamics. It’s crucial to carefully assess and apply EQ and compression settings to avoid over-processing.

Mistake: Neglecting The Importance Of Reference Tracks

When it comes to mastering your own music, neglecting the importance of reference tracks is a common mistake that can hinder the quality of your final product. Reference tracks serve as benchmarks for your own mix, allowing you to compare your work to professional releases and ensure that it meets industry standards. By not utilizing reference tracks effectively, you run the risk of overlooking crucial aspects of the mastering process that could significantly impact the overall sound and production of your music.

Not Comparing Your Mix To Professional Releases

One mistake musicians often make is failing to compare their own mix to professional releases. This comparison is essential as it provides valuable insights into the overall balance, tonality, depth, and other crucial aspects of a well-mastered track. Without this comparison, you may miss out on understanding how your mix measures up against industry standards, and consequently miss opportunities for improvement.

Choosing Inappropriate Reference Tracks

Another mistake to avoid is choosing inappropriate reference tracks. When selecting reference tracks, it’s crucial to pick songs that are similar in genre, style, and sound to your own music. This allows for a more accurate comparison and ensures that the mastering decisions you make are relevant to your particular style and audience. Selecting unrelated or mismatched songs as reference tracks can lead to misguided judgments and ultimately affect the quality and coherence of your final mix.

Mistake: Ignoring Proper Gain Staging

Ignoring proper gain staging is a common mistake when mastering your own music. This oversight can lead to distorted or unbalanced sound, which can greatly impact the overall quality of your final product. Make sure to pay attention to gain levels to achieve optimal sound during the mastering process.

Not Paying Attention To Levels Throughout The Signal Chain

Ignoring proper gain staging can lead to compromised audio quality and a final mix that lacks clarity. Make sure to adjust levels consistently to maintain balance.

Clipping Or Distorting The Mix

Overloading signals can result in sound distortion. Maintain a safe headroom to prevent clipping and ensure a clean mix. In the music mastering process, one common mistake is ignoring proper gain staging. This error can significantly impact the overall sound quality of your music. Not paying attention to levels throughout the signal chain can cause imbalances and affect the final mix. To avoid clipping or distorting the mix, ensure each element has enough headroom.

Mistake: Failing To Take Breaks And Rest Your Ears

A common error when mastering your own music is listening for extended periods without breaks, leading to ear fatigue.

Listening For Extended Periods Without Breaks

Listening for too long without breaks can impair your ability to make accurate decisions about your music.

Not Resting Your Ears Before Making Critical Decisions

Resting your ears before final decisions is crucial as it ensures you are hearing your music accurately.

8 Mastering Mistakes When Mastering Your Own Music: Avoid These Pitfalls!

Credit: www.masteringbox.com

8 Mastering Mistakes When Mastering Your Own Music: Avoid These Pitfalls!

Credit: blog.daisie.com

Frequently Asked Questions For 8 Mastering Mistakes When Mastering Your Own Music

What Happens If You Master Too Loud?

Mastering too loud can result in audio distortion, loss of dynamic range, and lack of clarity. It can also cause ear fatigue and affect the overall quality of the sound. It’s important to ensure balanced levels and avoid over-compression for optimal sound quality.

How Do You Know If Your Mastering Is Good?

To determine if your mastering is good, listen for balance, clarity, and consistency in the audio. Ensure the levels are even, the dynamics are controlled, and the overall sound is polished. Compare your master to professional tracks and seek feedback from others in the industry.

Should You Compress Vocals Before Mastering?

Yes, compressing vocals before mastering can enhance the overall sound by evening out volume inconsistencies and adding presence. It helps create a balanced mix and brings out the vocals in a cohesive manner. However, the extent of compression should be applied judiciously to avoid excessive loss of dynamics and maintain a natural sound.

How Loud Should A Song Be Before Mastering?

A song should be around -6dB to -3dB before mastering to achieve optimal loudness levels.

Conclusion

By avoiding these mastering mistakes, you can greatly enhance the quality and impact of your own music. Remember to focus on the fundamentals, such as proper gain staging and balanced frequency distribution. Utilize reference tracks for guidance and maintain a critical listening environment.

Don’t underestimate the importance of using quality monitoring equipment and taking breaks to avoid ear fatigue. With careful attention to detail and a commitment to ongoing learning, you can master your own music like a pro. So go ahead and put these tips into practice, and watch your music come to life!