Categories
Archive Gear

How To Start Learning Daw

To start learning a DAW, first choose an agile DAW and utilize video tutorials for orientation. Learning a Digital Audio Workstation (DAW) can seem daunting at first, but with the right resources, it can be an enjoyable and rewarding experience.

A DAW is a software program used for recording, editing, and producing audio. Popular options include Logic Pro X, Ableton Live, and FL Studio. Once you have chosen a DAW, begin with video tutorials to learn the basics, such as setting up audio and MIDI devices, creating tracks, and navigating the interface.

From there, continue to build your knowledge of the software by experimenting with different features and tools. With practice and persistence, you will become more proficient in using a DAW and confident in your ability to create high-quality audio.

How To Start Learning Daw

Credit: www.youtube.com

Choose The Right Daw For You

If you want to start producing music, purchasing a digital audio workstation (DAW) is a necessary step. With so many options out there, it’s important to choose the right one for you. Consider the following factors:

Consider Your Music Production Needs

Think about the kind of music you want to make and your production style. Do you need MIDI sequencing capability or audio recording? Are you interested in live performance, DJing, or film score composition? Some DAWs are better suited for specific genres, so if you have a particular sound in mind, look into which platforms are most commonly used for that style.

Evaluate Your Computer’s Specs

Depending on the DAW you choose, you will need a computer with certain processing power, RAM, and storage capacity. Check the minimum and recommended system requirements for each DAW to ensure your computer can handle it. Keep in mind that larger and more complex projects will require more processing power and memory.

Once you’ve taken these factors into account, you’ll be better equipped to choose a DAW that fits your needs and budget. Some popular options include:

DAWPriceProsCons
Ableton Live$99-$799MIDI and audio capabilities, live performance modeSteep learning curve
FL Studio$99-$899Easy to use interface, strong community supportLess advanced audio recording features
Logic Pro X$199.99High-quality plugins and instruments, intuitive workflowOnly compatible with Mac computers

Ultimately, the best DAW for you will depend on your individual needs and preferences. Take the time to do your research and try out different platforms before making a purchase.

Set Up Your Daw

To start learning about Digital Audio Workstation (DAW), the first step is to set it up properly. This involves installing and configuring your software, connecting your audio interface and speakers, and creating your first project. With a good understanding of your DAW, you can begin to explore its features and create music or audio that meets your needs.

If you’re new to the world of digital audio production, it may seem daunting or even overwhelming to dive into a digital audio workstation (DAW). However, setting up your DAW is the first step in beginning to work with audio files and creating your own music or other audio productions.

Download And Install Your Daw Software

To get started with your DAW, you must first download and install the software on your computer. There are many different DAW software options available on the market today, including both free and paid versions, so it’s important to research and choose the one that fits your needs and budget best. Once you have your DAW software, simply download the installer file from the manufacturer’s website and run it to begin the installation process. Follow the prompts and be sure to carefully read any instructions or agreements that appear.

Configure Your Audio Settings

After installing your DAW software, it’s important to configure your audio settings before beginning to work with audio files. This will ensure that your audio inputs and outputs are properly set up and working correctly. In your DAW software, navigate to the settings or preferences menu and locate the audio settings. From here, you can select your audio input and output devices, as well as adjust settings such as buffer size and sample rate. It’s important to note that different audio projects may require different audio settings, so be sure to adjust accordingly as needed.

Organize Your Workspace

Finally, it can be helpful to organize your workspace within your DAW software to optimize your workflow and increase productivity. This may include setting up templates for frequently used project types, creating shortcuts for commonly used tools, or customizing your toolbar or menu options. By taking the time to set up your workspace and familiarize yourself with your DAW software, you’ll be well on your way to creating your own audio productions.

Learn The Basics

If you’re new to digital audio workstations (DAWs) and want to learn how to create music, familiarizing yourself with the basics is essential. Before we jump into the more advanced techniques, let’s start with learning the fundamentals.

Familiarize Yourself With The Interface

After downloading and installing your DAW, take the time to get to know the interface. Click around, explore the menus, and read the documentation. Understanding the layout is vital, as it’ll make everything else you do in the program easier. Ensure you familiarize yourself with these core components:

ComponentDescription
TracksWhere you record, edit, and mix audio and MIDI.
Transport barControls playback, recording, and other essential functions.
ToolsFor editing, trimming, and manipulating audio and MIDI.

Learn How To Create A Project

After familiarizing yourself with the interface, it’s time to create your project. Start by creating a new session/file and setting the appropriate preferences and settings related to sample rate, bit depth, file format, and so on. Ensure that your setup is optimized, your recording and processing chain is streamlined, and you have a reliable backup process.

Master Basic Editing Tools

Once you have your project set up and ready, it’s time to start editing. Here are the basic editing tools you need to master:

  • Selection tool – for selecting and moving audio or MIDI regions.
  • Trimming tool – for trimming and cutting audio or MIDI regions.
  • Drawing tool – for drawing and painting MIDI notes, automation and editing audio waveforms.
  • Zoom tool – for zooming in and out of audio or MIDI regions.
  • Loop tool – for creating and adjusting loops.

By mastering these tools, you’ll be able to cut, paste, move, and manipulate audio and MIDI with ease, allowing you to create polished and professional-sounding music.

By learning the basics of a DAW, you’ll be on your way to creating high-quality music in no time. Make sure to practice regularly, and keep experimenting with new techniques and plugins to enhance your music making process.

How To Start Learning Daw

Credit: www.amazon.com

Get To Know Your Virtual Instruments

To start learning DAW, it’s essential to understand your virtual instruments. Knowing how to use them correctly will help you create better music and sound designs. Spend some time getting familiar with your virtual instruments and experimenting with different sounds to unlock your creativity.

Virtual instruments are central to digital audio workstation (DAW) software. They come in various forms, such as synthesizers, samplers, and drum machines, and are used to create and produce musical soundscapes. Getting to know your virtual instruments is crucial to unlocking the full potential of your DAW. Here are some tips to help you explore your DAW’s available instruments.

Explore Available Instruments

Before you start using your virtual instruments, it’s essential to know what’s available on your DAW. Many DAWs come with a range of virtual instruments, including basic ones like piano keyboards, drum kits, and bass guitars. More advanced software may include synthesizers, wavetable generators, and plug-ins for various instrument effects. Take the time to explore these instruments, experiment with presets, and understand how each virtual instrument works.

Learn How To Use The Piano Roll

The piano roll is a critical component of virtual instruments, and it allows you to create and edit MIDI sequences. MIDI (Musical Instrument Digital Interface) is a standard protocol for communicating between electronic devices used to generate and play music. The piano roll displays note information in rows, with pitch on the vertical axis and timing on the horizontal axis. To use the piano roll, select a virtual instrument, and open the MIDI editor. From here, you can input and edit notes, change their duration, and adjust their velocity.

Experiment With Effects And Settings

Most virtual instruments come with various effects, including reverb, delay, chorus, and distortion. Experimenting with these effects will help you create and manipulate different sounds. For example, adding reverb can give your track a sense of space, while adding distortion makes it gritty and raw. Try out different settings within each effect and build your knowledge of how they affect the sound of your instrument.

Conclusion

Learning your virtual instruments is crucial to mastering a DAW and creating high-quality music. By exploring all the instruments available, experimenting with effects and settings, and learning how to use the piano roll, you can create music that is unique and personalized. Taking your time and understanding each virtual instrument will ultimately allow you to maximize your DAW’s potential.

Record And Edit Audio

Learning how to use a Digital Audio Workstation (DAW) is crucial for recording and editing high-quality audio. It allows you to create, edit, and mix music tracks, and offers tools for sound manipulation and effects. There are plenty of online tutorials and courses to help you get started with learning a DAW.

Learning how to record and edit audio is an essential skill when it comes to producing music with a DAW. Whether you’re working on vocals or other instruments, understanding how to create a clean and polished sound is crucial. Here’s how to configure your audio interface before recording and editing, as well as tips for achieving the best sound for your tracks.

Configure Your Audio Interface

Before you start recording, it’s important to ensure that your audio interface is properly configured. This will ensure that your recordings have a strong signal and don’t contain any unwanted noise. To get started:

  • Ensure the input levels are set correctly
  • Make sure your interface is set to the appropriate sample rate and bit depth
  • Use balanced cables to reduce interference
  • Check the preamp levels to ensure you’re getting a strong and clear signal

Record And Edit Vocals And Other Instruments

Once your audio interface is set up correctly, it’s time to start recording and editing your tracks. Here are some tips to get started:

  1. Start by recording a clean take. Make sure there are no unwanted background noises, and that the performer is clear and audible.
  2. If necessary, use EQ to remove any unwanted frequencies. This can help make your recordings sound cleaner and clearer.
  3. Use compression to even out the dynamic range of the recording. This can help prevent any sections from being too loud or too quiet.
  4. Add effects like reverb or delay to give your tracks more depth and character.
  5. When editing, make sure to listen carefully and focus on achieving a cohesive sound throughout your track.

By following these tips, you can achieve a professional-sounding track with clean recordings and polished editing. Whether you’re working on vocals or other instruments, these techniques will help you create a sound that stands out.

Learn Advanced Techniques

Are you ready to take your music production to the next level? Learning advanced techniques in Digital Audio Workstations (DAWs) is crucial. In this blog post, we will focus on tips to learn advanced DAW techniques, including studying mixing and mastering techniques and experimenting with effects plugins.

Study Mixing And Mastering Techniques

Mixing and mastering are essential aspects of music production that require precision and skill. To start, try creating a mix that sounds good on all sound systems. Once you have that, focus on enhancing the sound quality by adjusting levels, panning, and EQ. Additionally, learn to use compression, reverb, and delay to create a cohesive sound.

When it comes to mastering, it is crucial to know your target medium, such as streaming platforms or CDs. Mastering can be used to add volume, clarity, and balance to your tracks, ensuring that they sound professional on all mediums.

Experiment With Effects Plugins

Effects plugins are essential tools in music production. Experimenting with these tools can enhance your production skills and help you create unique and interesting sounds. Some popular plugins include:

PluginFunctionality
ReverbAdds space and depth to your tracks
DelayCreates echoes and repeats of sounds
CompressionReduces dynamic range and evens out volume levels

When experimenting with plugins, ensure that you are not overloading your mix with too many effects, and always keep in mind the intended sound and feel.

By following these tips, you can learn advanced DAW techniques and take your music production to the next level. So, start practicing, experiment with new approaches, and have fun creating unique sounds.

Practice Regularly And Seek Out Resources

If you want to learn any new skill, you need to devote time, practice regularly and look for relevant resources to supplement your learning. The same holds for learning a Digital Audio Workstation (DAW).

Create A Practice Routine

Learning a DAW requires a consistent practice routine. Set a realistic timeline for your learning goals and create a practice schedule that fits your daily routine.

TaskDay 1Day 2Day 3
Watch Tutorials1 Hour30 minutes30 minutes
Practice2 hours2.5 hours3 hours
Experiment30 minutes30 minutes45 minutes

For instance, watch tutorials for an hour on Day 1, practice for two hours, then experiment for 30 minutes. As you get comfortable with the fundamentals, increase your practice time and reduce tutorial-watching time. Use a spreadsheet to monitor and improve your progress.

Find Online Tutorials And Communities

There are numerous online tutorials and communities designed explicitly for those seeking to learn a DAW, including YouTube channels, forums, and Facebook groups. These resources contain an assortment of free and paid content covering various aspects of the DAW program.

  • Look for tutorials that explicitly cover the area you may be struggling with
  • Follow social media accounts of DAW software makers to stay updated on new features and functionalities
  • Join Facebook groups or forums in which you can ask relevant questions and receive answers from other users who have more experience with the DAW program

When exploring these online tutorials and communities, be selective. Choose resources that align with your learning goals and style. Also, ensure you supplement your learning with printed materials, such as product manuals, newsletters, and online articles, as these often contain essential tips and tricks.

By devoting time to practice consistently and tapping into various resources, anyone can learn to use a DAW. The keys to success are persistence, discipline, and an open-minded approach to learning.

How To Start Learning Daw

Credit: www.facebook.com

Frequently Asked Questions For How To Start Learning Daw

How Do I Get Started With A Daw?

To get started with a DAW, first choose one that suits your needs and budget. Learn the basic functions and tools, and experiment with different software settings. Take advantage of the tutorials and support materials provided by the DAW developer.

Practice, practice, practice! Eventually, you’ll develop your own workflow and style.

Can You Learn A Daw By Yourself?

Yes, you can learn a DAW (digital audio workstation) by yourself through online tutorials, video courses and practice. However, formal training or a mentor can speed up the learning process and provide deeper insights. Nevertheless, self-learning coupled with hands-on experience is still the most practical way for individuals to master a DAW.

What Daw Should A Beginner Use?

For beginners, a good digital audio workstation (DAW) is one that is user-friendly, has a clean interface, and offers good support. Some popular options include GarageBand, Audacity, and Ableton Live Lite. Ultimately, the best DAW for you will depend on your budget, the type of music you want to create, and your personal preferences.

It’s important to try out a few options before committing to one.

Are Daws Hard To Learn?

No, DAWs are not hard to learn. With the help of tutorials and practice, anyone can learn how to use them. It’s all about understanding the basics and gradually mastering the software. Additionally, some DAWs come with user-friendly interfaces, making them easier to use.

Conclusion

Learning how to use a Digital Audio Workstation (DAW) can feel overwhelming at first, but with dedication and the right resources, anyone can become proficient. Start with the basics, experiment fearlessly, and don’t be afraid to make mistakes. Use online tutorials, forums, and communities to expand your knowledge and connect with other aspiring music producers.

Keep practicing and building on your skills, and before you know it, you’ll be making professional-quality tracks that you can be proud of.
Categories
Archive

Best Plugins to Mix Vocals

The best plugins to mix vocals are Waves Tune Real-Time, iZotope Nectar 3, and FabFilter Pro-Q3. These plugins offer a range of features for vocal tuning, processing, and EQ.

Waves Tune Real-Time is a real-time pitch correction plugin that corrects any out-of-tune vocals. IZotope Nectar 3 offers various tools, including a pitch editor, to enhance vocal sound quality. FabFilter Pro-Q3 is a powerful EQ plugin that allows you to fine-tune the vocals’ frequencies.

Introducing the right plugins while mixing a vocal track is essential to produce a polished and professional sound. Plugins enhance vocals by adding creative effects, pitch correction, and EQ adjustments. Choosing the right plugin depends on the specific needs of each vocal track. We will take a look at the top three plugins that are perfect for mixing vocals: Waves Tune Real-Time, iZotope Nectar 3, and FabFilter Pro-Q3. Each plugin offers unique features that allow you to adjust vocals and enhance the overall sound quality of the track. Read on to learn more about these plugins and their functionality.

Types Of Vocals Mixing Plugins

Vocals mixing plugins are essential for music production. The best plugins to mix vocals include iZotope Nectar 3, FabFilter Pro-Q 3, Waves SSL E-Channel, and more. These plugins help to enhance the quality and clarity of vocals in a mix.

As an aspiring music producer or engineer, you’re certainly familiar with the importance of a refined vocals mix in your productions. Mixing vocals can be a bit challenging as it requires the use of specialized plugins that can affect various aspects of the vocals. In this section, we will explore the different types of vocal mixing plugins necessary for mixing vocals to create a professional sound that stands out from the crowd.

Equalizer (eq)

The equalizer is one of the most commonly used plugins when mixing vocals, and it comes built into most DAWs. The goal of an EQ is to adjust the frequency balance of the vocals. For instance, EQ can be used to boost the highs to bring out the airiness in a recording or to cut off some of the low-end bass to reduce muddiness in the track.

Compressor

A compressor is a plugin that is used to level out the volume of the vocals. It works by reducing the dynamic range between the loudest and softest parts of the recording. This plugin is especially important for vocal tracks that contain a wide range of dynamics, as it can help bring the quieter parts of the vocals up to a comparable level.

Reverb And Delay

Reverb and delay plugins come in handy when creating a sense of space within the vocals. Reverb can be used to create a sense of naturalness by simulating an acoustic space, while delay can be used to add some rhythmic interest to a vocal track. Both plugins help to create a fuller, more immersive sound to your vocal mixes, making them more enjoyable to listen to.

Saturation

Saturation plugins help to add warmth and character to the vocal, creating a more natural analog-like sound. Adding subtle saturation to a vocal track can help to smooth out any harshness or digital-sounding artifacts in the recorded audio.

De-esser

Vocal recordings can contain harsh ‘sss’ sounds that can be ear-piercing and reduce the overall quality of the track. A De-Esser plugin targets these sibilant frequencies and attenuates them. This plugin is commonly used on female vocals and can be very helpful in creating a more pleasant and refined sound.

Pitch Correction

Pitch correction plugins automatically adjust the pitch of the vocal to correct any off-key notes. This plugin is very useful for fixing pitch issues and achieving a more polished sound. However, it’s important to use it sparingly and with care as overuse of pitch correction can lead to an unnatural robotic-like sound in the vocals. In conclusion, the different types of vocal mixing plugins are essential in achieving professional-grade vocal recordings. Understanding the purposes of each plugin can help you to achieve a better balance and quality in your mixes. By utilizing the above vocal plugins, you’re sure to produce outstanding vocal tracks that stand out from the crowd.

Best Plugins to Mix Vocals

Credit: producelikeapro.com

Top 3 Eq Plugins For Mixing Vocals

Explore the top 3 EQ plugins for mixing vocals with precision and perfection. Elevate the quality of your vocal tracks with high-quality audio processing tools that offer improved clarity, warmth, and tonal balance.

Top 3 EQ Plugins for Mixing Vocals When it comes to mixing vocals, EQ plugins play a crucial role in enhancing the sound quality. They help in shaping the vocal tracks by removing unwanted frequencies, boosting certain ranges, and adding color to the sound. In this section, we will discuss the top 3 EQ plugins for mixing vocals – FabFilter Pro-Q 3, Waves SSL E-Channel, and Ableton EQ Eight. Let’s dive into the details of each plugin.

Fabfilter Pro-q 3

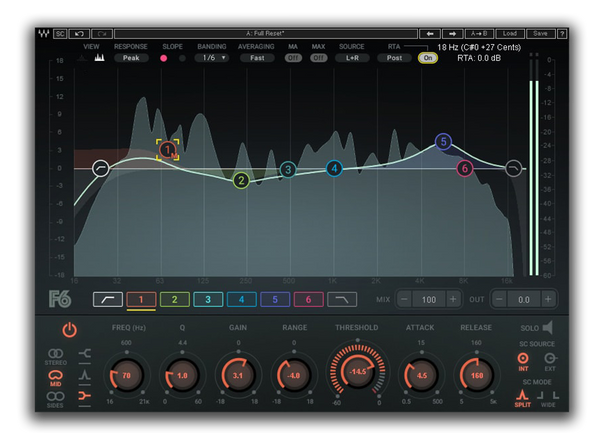
FabFilter Pro-Q 3 is a popular choice among music producers for its extensive features and user-friendly interface. The plugin offers up to 24 bands of EQ, dynamic EQ, mid-side processing, and much more. What makes it unique is its spectrum analyzer, which displays the frequency response in real-time. This helps in identifying problem areas and making precise adjustments. With its versatile options, FabFilter Pro-Q 3 is an excellent choice for mixing vocals.

Waves Ssl E-channel

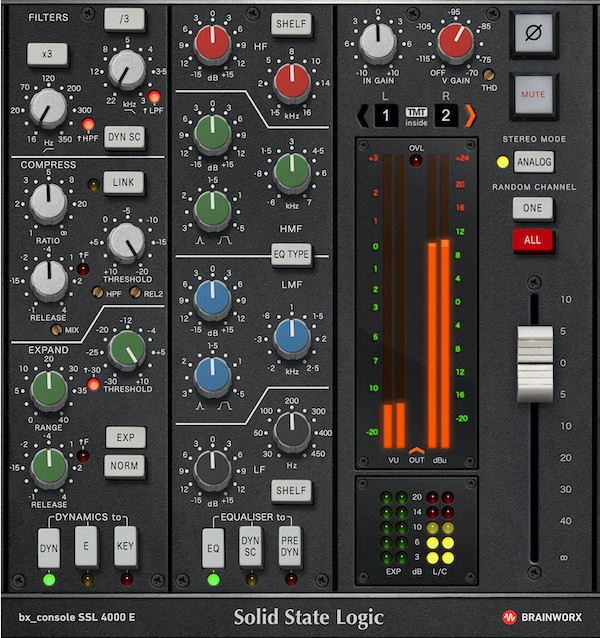
Waves SSL E-Channel is another EQ plugin that deserves a spot in the top 3. It is modeled after the legendary SSL 4000 console known for its warm and rich sound. The plugin offers a four-band EQ, high and low pass filters, and a switchable Q for precise adjustments. The SSL E-Channel also has a built-in compressor and gate for fine-tuning the vocal sound. With its classic analog sound and advanced controls, Waves SSL E-Channel is a favorite among professionals.

Ableton Eq Eight

Ableton EQ Eight is a native plugin in Ableton Live known for its simplicity and efficiency. It has eight bands of EQ, each with adjustable gain, frequency, and Q. The plugin also includes mid-side processing, stereo width, and a linear-phase mode for precise adjustments. What makes it stand out is its intuitive interface, making it easy for beginners to learn and professionals to work fast. For those using Ableton Live, the EQ Eight is an excellent choice for mixing vocals. In conclusion, these are the top 3 EQ plugins for mixing vocals. FabFilter Pro-Q 3, Waves SSL E-Channel, and Ableton EQ Eight are all unique in their ways and offer advanced features to enhance the vocal sound in a mix. Choose the one that best suits your needs and take your vocal mixing to the next level.

Top 3 Compressor Plugins For Mixing Vocals

Get the perfect vocal mix with these top 3 compressor plugins. From classic to modern, these plugins offer different features to enhance your vocals and make them stand out in the mix. Give your vocals the professional treatment they deserve with these top picks.

Top 3 Compressor plugins for mixing vocals Mixing vocals can be a tricky task, but using the right compressor plugin can make all the difference. Whether you are looking for a warm and vintage sound or a bright modern tone, there are many options available. Here are our top three compressor plugins for mixing vocals: H3: Waves CLA-2A Compressor / Limiter If you’re after a vintage sound, the Waves CLA-2A is a great option. Designed in collaboration with Chris Lord-Alge, this compressor plugin emulates the legendary Teletronix LA-2A Leveling Amplifier, which has been heavily used in the music industry for over 50 years. This plugin adds warmth and smoothness to your vocal mixes while still retaining their natural dynamic range. It’s a great option for vocals that need a gentle push to remain present in the mix. H3: iZotope Nectar 3 Compressor The iZotope Nectar 3 Compressor is a great all-around compressor plugin that gives you more control over your vocal sound. It has a variety of compressor modes, including Opto, VCA, and FET, giving you the ability to choose from multiple compression types. This plugin also comes with a variety of other features such as EQ, De-esser, and reverb, making it an all-in-one solution for vocal mixing. H3: Native Instruments Solid Bus Comp If you’re looking for a compressor plugin that gives you a punchy sound, the Native Instruments Solid Bus Comp is an excellent option. This plugin is modeled after a classic analog compressor, giving you a vintage sound with modern flexibility. It is excellent for tightening up low end and adding presence to your vocal mixes. It’s also great for bus compression, making it a versatile tool for your mixing arsenal. In conclusion, these are our top three compressor plugins for mixing vocals. Each plugin has its unique sound, and it’s up to you to choose which one best fits your style. Whether you’re looking for vintage warmth or modern punch, these plugins are fantastic options that can take your vocal mixes to the next level.

Best Plugins to Mix Vocals

Credit: www.productionmusiclive.com

Top 2 Reverb And Delay Plugins For Mixing Vocals

For a great vocal mix, consider the Valhalla VintageVerb plugin. Its vintage sound and ease of use make it a top choice. Another popular plugin is the Soundtoys EchoBoy, with its endless options to fine-tune reverb and delay times for the best vocal sound.

When it comes to mixing vocals, reverb and delay plugins are essential tools for creating a polished sound. In this post, we’ll cover the top 2 plugins for adding reverb and delay to your vocal tracks: Valhalla VintageVerb and Soundtoys EchoBoy.

Valhalla Vintageverb

Valhalla VintageVerb is a versatile plugin that can add a range of vintage-style reverbs to your vocals. With its simple interface and 17 different reverb algorithms, it’s easy to find the perfect sound for your mix. Whether you want a warm and smooth reverb or a bright and airy one, Valhalla VintageVerb has you covered. It also includes a modulation section that can add a subtle chorus or vibrato effect to your vocals.

Soundtoys Echoboy

Soundtoys EchoBoy is a powerful delay plugin that can be used to add depth and dimension to your vocal tracks. It offers a wide range of delay styles, from classic tape delays to modern digital delays. Its powerful filtering and modulation options allow you to create unique and creative delay effects that can make your vocals stand out in a mix. EchoBoy also includes a built-in saturation and distortion section that can add warmth and character to your vocals. In conclusion, Valhalla VintageVerb and Soundtoys EchoBoy are two of the best reverb and delay plugins for mixing vocals. With their intuitive interfaces and powerful features, they’re sure to take your vocal tracks to the next level.

https://www.youtube.com/watch?v=vBZSIXRxqlk

Top 2 Saturation Plugins For Mixing Vocals

Saturation plugins are essential for mixing vocal tracks and making them sound full-bodied. These plugins work by adding warmth and character to the vocals, giving them a more natural and warm sound. Two saturation plugins that stand out in the market are the Slate Digital Virtual Tape Machines and Waves Kramer Master Tape.

Slate Digital Virtual Tape Machines

The Slate Digital Virtual Tape Machines plugin is one of the best plugins for mixing vocals. This plugin emulates the sound of analog tape machines, which are known for adding warmth to recordings. The plugin features two different tape machine models, the 2-inch 16 track and the half-inch 2 track. You can choose between these two models to get the desired saturation effect and warmth for your vocals.

The Virtual Tape Machines also has different saturation modes, including Vintage, Modern, and Special. Choosing your preferred mode helps to shape the tonal characteristics of your vocals. The plugin also has various controls such as input, output, bias, and harmonic settings for further customizing the tape sound you want to achieve.

Waves Kramer Master Tape

The Waves Kramer Master Tape is another top plugin for mixing vocals. The plugin was created by Waves in collaboration with legendary producer Eddie Kramer, who has worked with iconic musicians such as Jimi Hendrix, Led Zeppelin, and The Beatles. The Kramer Master Tape is modeled after Kramer’s vintage tape machine, which was used for recording some of the classic albums of the 60s and 70s.

The plugin features controls such as tape speed, wow & flutter, hiss, and noise reduction, which help to control the amount of warmth and saturation in your vocals. You can also choose between two tape types, the 15 ips or the 30 ips, to achieve your desired sound. The Kramer Master Tape plugin is perfect for adding vintage warmth and depth to your vocal tracks.

Best Plugins to Mix Vocals

Credit: theproaudiofiles.com

Frequently Asked Questions Of Best Plugins To Mix Vocals

What Plug Ins Make Your Voice Sound Better?

The plug-ins that can make your voice sound better include Antares Auto-Tune Pro, Waves Tune Real-Time, iZotope Nectar 3, FabFilter Pro-Q3, and Soundtoys Little AlterBoy. These plug-ins help in pitch correction, sound enhancements, and vocal effects.

What Do You Add When Mixing Vocals?

When mixing vocals, you should add EQ to remove unwanted frequencies, compression to even out the levels, reverb to add space or dimension, and delay or chorus for additional effects. Proper mixing can enhance vocals and make them sound crisp and clear.

What Is The Best Vst Plugin For Vocals?

The best VST plugin for vocals depends on the specific needs of the user. Some popular options include Antares Auto-Tune, Waves Tune, and Celemony Melodyne. It’s important to research and experiment with different plugins to find the one that works best for your vocal style and preferences.

What Order Should Plugins Go In For Mixing Vocals?

To optimize vocals mixing, plugins should be arranged in a specific order. Begin with EQ, followed by compression, then de-essing, and then add effects like delay and reverb. Finally, use a limiter to prevent clipping and ensure that the vocals sit comfortably in the mix.

Conclusion

To sum up, mixing vocals is an essential part of creating high-quality music. With the help of the best plugins available, you can produce professional-sounding vocals that will captivate listeners. The right mix of effects such as compression, reverb, and EQ can enhance the clarity and richness of your vocal tracks.

With these plugins, you’ll be able to bring your vocals to life and take your music to the next level. Keep experimenting and discovering what works best for your unique sound and style.

Categories
Archive

How To Make Chords

To make chords, you need to know the notes in the key you want to play in and understand basic chord theory. With this knowledge, you can combine notes to create various types of chords.

Also, chords are the building blocks of music. They are a group of notes played together to create harmony and support a melody. Learning to make chords is essential for any musician, from beginner to professional. Understanding basic chord theory and the notes within a key will help you to create chords of your own.

Related reading: How To Make Melody From Chords and How To Draw Midi Chords.

Moreover, by combining different notes, intervals and chord shapes, you can create a range of chord progressions that form the backbone of any song. Practice and experimentation are key to mastering the art of making chord progressions, and in time, you’ll be able to effortlessly create beautiful music using your own unique chord progressions.

How To Make Chords

Credit: soundation.com

Importance Of Chords In Music

In addition, chords are the backbone of most music, providing depth and emotion to a song. Understanding how to make a chord is crucial for any musician looking to write their own music or play covers accurately. With the right knowledge and practice, anyone can master the skill of making chord progressions and unlock a world of musical possibilities.

An Introduction To Chords

Furthermore, chords are the backbone of music. They form the basis of most songs and allow musicians to create a range of different sounds and moods. Chord shapes are made up of two or more notes played simultaneously, and they can be played on a variety of instruments including guitar, piano, and keyboard. In this article, we will explore how to build chord shapes and why they are so important in music.

Why Chords Are Important In Music

Additionally, chords add richness and depth to a piece of music. Without chord shapes, songs would sound dull and one-dimensional. They provide the harmony and structure that support the melody, allowing the listener to feel the emotions of the music. Chord shapes are also used to create tension and release, adding drama and interest to the song. In essence, chords are the foundation of music.

The Benefits Of Understanding Chords

Also, understanding chords can improve your playing and songwriting skills. By learning how to create different chord progressions, you can elevate your playing to a new level. Whether you are a beginner or an experienced musician, understanding chord shapes is essential to becoming a better musician. By understanding the different combinations of notes that make up chord shapes, you can add variety and complexity to your music.

Conclusion

Moreover, now that we know the importance of chords in music, it’s time to start exploring how to make chords. In the next section, we will dive into the basics of chord construction and how to create a range of different chord shapes. So, let’s get started!

How To Make Chords

Credit: jenslarsen.nl

Basics Of Chords

In addition, learn the basics of chord making by understanding the relationship between notes. Start with building simple chord shapes and progress to more complex variations. Experiment with different combinations of notes and find what works for your music style.

Furthermore, chords are the foundation of any music piece, and every musician needs to have a good grasp of them. A chord is a combination of three or more notes played together, creating a beautiful harmony. The basics of chords are easy to understand, and as you progress, you will learn various types of chords and chord progressions. In this article, we will take a look at the essentials of chord shapes.

Chord Progression

Additionally, a chord progression is a series of chord shapes played in succession to create a melody. Each chord in a progression has a specific name, and their order is critical to how the melody sounds. A chord progression can be simple or complex, depending on the musician’s preference. The most basic chord progression is the I-IV-V, which is common in blues and rock music.

Types Of Chords

Also, there are several types of chords, including major, minor, diminished, and augmented chords. Major triads are bright and happy, while minor triads are sad and melancholic. Diminished triads are tense and unstable, and augmented triads are bright and dissonant. Each chord type has its unique characteristics, and as a musician, you should know when and how to use them in your compositions.

Major Vs. Minor Chords

Moreover, major and minor chords are the most common types of chords in music. The major chord is made up of the root note, the third note, and the fifth note. On the other hand, a minor chord is made up of the root note, flattened third note, and the fifth note. Major triads have a happy and bright sound, while minor triads have a sad and dark sound. As a musician, you should know when to use each chord type to convey the appropriate emotions. In conclusion, understanding the basics of chord shapes is crucial for any musician. Knowing the different types of chords and chord progressions will help you create beautiful melodies and harmonies in your compositions. So, take your time to learn the essentials of chord shapes, and you’ll be on your way to becoming a great musician.

Building Chords

In addition, learn how to make a chord with these simple steps for beginners: start with the root note, add the third and fifth notes, experiment with different voicings, and practice playing them in various progressions to create your own unique sound. Building chords isn’t as difficult as it may seem with proper guidance.

Furthermore, chord shapes are an essential part of any musician’s repertoire. They are the backbone of most songs and allow musicians to create a variety of sounds and emotions. Building a chord involves understanding the chord structure and identifying the root note, third note, fifth note and sometimes the seventh note. Let’s dive in!

Chord Structure

Chords are made up of multiple notes played together simultaneously and have a specific structure. Additionally, the notes in a chord are arranged in thirds, which means that every other note is played. For example, in a C Major Chord, the notes are C, E, and G.

Root Note

Also, the root note is the first and most important note in a chord. It’s the foundation upon which the rest of the chord is built. If you’re playing a C Major Chord, then the C note is the root note.

Third Note

Moreover, the third note in a chord is always a third interval above the root note. In a C Major Chord, the third note is E.

Fifth Note

In addition, the fifth note in a chord is always a fifth interval above the root note. In a C Major Chord, the fifth note is G.

Seventh Note

Some chord shapes may also include a seventh note, which is a seventh interval above the root note. Furthermore, in a C Major 7th Chord, the seventh note would be B. Building a chord can seem overwhelming at first, but with practice, it becomes easier. Understanding the chord structure and identifying the root note, third note, fifth note and seventh note will allow you to create complex chords and explore different sounds.

Popular Chord Progressions

Learning how to make a chord is an essential part of playing an instrument, especially for guitarists. Popular chord progressions, such as the I-IV-V and the ii-V-I, can help simplify the process and create a catchy tune.

Additionally, looking to learn how to make a chord? One essential aspect of understanding chord progressions. A chord progression refers to the pattern of chords that are played in a song. There are several popular chord progressions that you’ll commonly come across in music. Understanding these chord progressions will give you a foundation for building your chord progressions that develop into melodic lines or even entire songs.

I – Iv – V Progression

Also, this chord progression is one of the most commonly used in music. It consists of three chord shapes, the I, IV, and V triads, which are played in sequence. In the key of C major, for example, the I chord would be the C major chord, the IV chord would be the F major chord, and the V chord would be the G major chord.

  • Moreover, step 1: Choose a key for the song
  • In addition, step 2: Determine the I, IV and V triads for the key
  • Step 3: Play the chords in the order I-IV-V or C-F-G for the key of C major
  • Step 4: Experiment with different rhythm patterns and strumming styles to make the chord progression more interesting

Vi – Iv – I – V Progression

This chord progression is another popular one used in many songs. It starts with the vi chord, then follows with the IV, I and V triads in sequence. In the key of C major, the vi chord would be the A minor chord, the IV chord would be the F major chord, the I chord would be the C major chord, and the V chord would be the G major chord.

  1. Step 1: Choose a key for the song
  2. Furthermore, step 2: Determine the vi, IV, I and V triads for the key
  3. Step 3: Play the chords in the order vi-IV-I-V, or Amin-F-C-G for the key of C major
  4. Step 4: Experiment with different voicings or inversions to add variety

I – V – Vi – Iv Progression

This chord progression is also a popular one and is often referred to as the “Pachelbel progression”. It starts with the I chord, then follows with the V, vi, and IV triads in sequence. In the key of C major, the I chord would be the C major chord, the V chord would be the G major chord, the vi chord would be the A minor chord, and the IV chord would be the F major chord.

Step 1Step 2Step 3Step 4
Choose a key for the songDetermine the I, V, vi, IV chords for the keyPlay the chords in the order I-V-vi-IV or C-G-Am-F for the key of C majorExperiment with different fingerpicking patterns or strumming techniques to enhance the progression

In conclusion, understanding the popular chord progressions is an important aspect of learning how to make a chord. By mastering these chord progressions, you can start creating melodies and entire songs with ease!

Tips For Creating Chords

Creating chords may seem difficult, but with a few tips, anyone can do it. Experiment with different notes, try out different rhythms and don’t be afraid to change things up. With some practice, you’ll soon be making beautiful music.

Creating music is an enjoyable and creative pursuit that can take you on fantastic journeys. As a musician, one of the essential skills you must master is how to create a chord. Whether you are a beginner or a seasoned musician, you must have excellent chord skills. In this section, we will provide you with tips on how to create a chord that will bring your music to life.

Experimentation Is Key

When it comes to creating chords, experimentation is key. Do not be afraid to try new things and venture beyond the familiar. Start with the basics and gradually experiment with different chord progressions to create your own unique sound. Take your time to discover what works best for you, and do not be discouraged by the occasional failure. As you experiment, make notes of the combinations that produce the outcomes you like.

Creating Your Own Chord Progressions

Creating your chord progressions is the most exciting aspect of creating music. It can be essential to determine the key of your music and use that as a base to create your progressions. You can then add chord shapes that fit the scale. Also, experiment with different chord progressions using instruments and MIDI tracks. Try to create chord progressions that complement the melody you have envisioned in your mind.

Using Chord Templates

Using chord templates can be an effective way to create excellent chord progressions. You can use templates as a starting point to create your own chord progressions. Chord templates are pre-made chords that you can use in your music production. You can use chord templates as a foundation to create a chord progression, and then add your own touch to make it unique.

Benefits of Using Chord TemplatesDrawbacks of Using Chord Templates
Quick and EasyGreat for BeginnersStructured and OrganizedCan be LimitedNot UniqueMay Lack Creativity

Mistakes To Avoid

As you create chord progressions, there are few mistakes that you should always avoid. First, avoid using too many chord shapes in your progression. The more chords you use, the more complicated the progression gets. Secondly, it would help if you avoided using chord shapes that do not fit the key of your music. It makes the music sound discordant, and it may not be pleasant to listen to. Thirdly, try not to overthink your music. Overthinking can prevent you from expressing your creativity, and your music production can become stagnant. In conclusion, creating chord progressions is an essential skill for any musician. With the above tips, you will be creating excellent chords in no time. Remember to experiment, create your progressions, use templates when necessary, and avoid common mistakes. The more you practice, the better you become. So keep creating!

Tools For Making Chords

Mastering the art of chord progressions is easier with the help of chord-making tools. Online websites like Chordify and Hookpad let you generate and experiment with chord patterns until you find the perfect sound for your music.

Nowadays, there are several tools available for making chord progressions, such as online chord generators, music software and plugins, and chord books. Each of these tools comes with various features that can help you to create chord progressions effortlessly. In this blog post, we will discuss the various tools that you can use to make chords.

Online Chord Generators

Online chord generators are an excellent tool for beginners who want to learn to make chord progressions fast. These generators offer easy and user-friendly interfaces that allow you to create your own chords easily. There are several such platforms available, such as Chord finder, Chordify, and Chorderator, among others. You can use these platforms to find and create chord progressions by simply typing in the name of the song or selecting the notes.

Music Software And Plugins

If you prefer a more complex tool for making chords, you can try music software and plugins. Several music software and plugins in the market are geared towards creating chord progressions, such as Guitar Pro, Sibelius, Notion, and Finale, among others. These software and plugins come with more advanced and detailed features that allow you to create quality Chords and music notes. The applications also come with the options to add effects, sounds, and other musical elements, making them more versatile.

Chord Books

Chord books are also an excellent tool for creating chords. The books come with diagrams and visual representations of chord shapes and how to play them. You can use the books to learn different chords based on songs, styles, or your preferred genre of music. You can either buy physical copies of the book or download digital versions online. Some popular chord book options include the Ultimate Guitar Chords, Mel Bay’s Deluxe Encyclopedia of Guitar Chords, and The Guitar Handbook, among others. In conclusion, using the right tools can help you tremendously when creating chord shapes.

The right tool can make it easier to learn and master the Chords and ultimately develop your music skills. Whether you decide to use online chord generators, music software, and plugins, or chord books, ensure that you make the most out of it by consistently practicing and refining your Chord-making skills.

Learning To Play Chords

Learning to play chords is a fundamental part of playing the guitar. In fact, learning a few basic chord shapes will allow you to play hundreds of songs. It may seem challenging at first, but with practice and patience, you’ll be able to switch between chords and play smooth transitions.

Basic Chord Shapes

Chords are essentially two or more notes played together. The most basic chord shapes are made up of three notes, also known as triads. These triads are built on the first, third, and fifth notes of a major or minor scale.

The most fundamental chords you’ll come across are major and minor chords. Major chords sound happy and uplifting, while minor chords sound sad and melancholic. The five basic major triads are C, A, G, E, and D, while the five basic minor triads are Am, Dm, Em, Gm, and Cm.

It’s important to learn the basic chord shapes and practice them repeatedly until they become second nature. This will help with muscle memory and make it easier to switch between chords.

Strumming Techniques

After mastering the basic chord shapes, the next step is to learn different strumming patterns. Strumming patterns refer to the way you strum the strings with your pick or fingers.

One basic strumming pattern is the down strum. This involves hitting all the strings in a downward motion. Another common strumming pattern is the up-strum, where you hit the strings in an upward motion. You can also experiment with palm muting, where you use the palm of your strumming hand to mute the strings and create a percussive sound.

Tips For Switching Between Chords

Switching between chords can be challenging at first, but with practice, it’ll become easier. Here are a few tips to help:

  • Practice transitioning between chord shapes slowly, making sure each note is clear and ringing out.
  • Use a metronome to help with timing and keep a steady rhythm.
  • Don’t be afraid to lift your fingers off the fretboard and reposition them if you need to.
  • Focus on the chord shapes, rather than individual fingers. This will help with muscle memory.
  • Finally, be patient with yourself and don’t get discouraged if it takes time to master switching between chords.

By following these tips and practicing consistently, you’ll be able to switch between chords smoothly and seamlessly.

How To Make Chords

Credit: m.youtube.com

Putting Chords Into Practice

Learning how to make a chord is one thing, but putting it into practice is another. It takes dedication and practice to master playing chords correctly and with fluidity. Putting chords into practice requires patience and perseverance, but the end result is a beautiful melody that can be enjoyed by all.

Once you have learned how to make a chord, the next step is to put it into practice. This involves using chords in different musical contexts to create harmony and melody that complements the song or piece of music you are creating. In this section, we’ll explore how to write chord progressions for a song, using chords in improvisation, and collaborating with other musicians.

Writing Chord Progressions For A Song

When writing a song, the chord progression is the underlying sequence of chords that provide the foundation of the melody. The chord shapes give the listener a sense of rhythm, progression, and drive within the song. One approach to writing chord progressions is to start with a basic pattern like the 12-bar blues progression and build from there. Another way is to use a particular key signature to ensure that the chords are compatible with the melody.

Using Chords In Improvisation

Improvisation is the practice of playing music on the fly without prior preparation. This is where an understanding of chord progressions is essential for a musician. Using chords in improvisation means having a good knowledge of the chord structure and being able to identify the right chords to play so they harmonize with the melody. This can take time and practice, but it’s a skill that can bring new creative ideas to your music.

Collaborating With Other Musicians

Collaborating with other musicians is an excellent way to learn new techniques and approaches to using chord shapes in music. It requires an open mind and a willingness to learn from others. One approach is to have each musician focus on a specific chord pattern, creating a sequence that fits together like pieces of a puzzle. By working together, musicians can bring new life and energy to their music. In conclusion, putting chords into practice is all about experimentation and exploration. There are no hard and fast rules, but by understanding chord progressions and using them in different musical contexts, you can create memorable and meaningful music. Whether you are writing your own songs, improvising on the fly, or collaborating with other musicians, chords are an essential element of musical expression.

Frequently Asked Questions Of How To Make Chords

How Do You Make Your Own Chords?

To make your own chord shapes, start by learning basic music theory and familiarizing yourself with chord structures. Experiment with different chord progressions and combinations until you find ones that sound good to you. Use tools like chord charts and online resources to help you along the way.

Practice regularly to improve your skills and find your unique sound.

How Are Chords Created?

Chords are created by combining three or more notes played simultaneously. These notes are usually chosen from a specific scale and arranged in a specific way, resulting in a chord with a specific sound and emotion. Chords can be built using various methods, including triads, sevenths, and extended chords.

What Is The Formula For Making A Chord?

In music theory, the formula or structure of a chord is determined by its intervals, or the distance between the notes. The most basic chord is the triad, which consists of three notes played simultaneously: the root, the third, and the fifth.

The formula for a major triad is 1-3-5, while a minor triad has a formula of 1-b3-5.

How Do You Come Up With Chords For A Song?

Creating chord progressions for a song involves understanding music theory, experimenting with different progressions and notes, and considering the emotions or thoughts you want to convey. Start with a basic chord progression and build upon it, paying attention to melody and rhythm.

Practice and experimentation will help you find the right chords.

Conclusion

Learning how to make chords is an essential skill for anyone wanting to play music. With the right techniques and practice, beginners and experienced musicians alike can create beautiful harmonies and chord progressions that add depth and emotion to their music.

Whether you prefer guitar, piano, or any other instrument, mastering the art of chord-making can take your playing to the next level and allow you to express yourself in new and exciting ways. So why not start today and unlock your full musical potential?

For more background, see Chord (music) on Wikipedia.

Categories
Archive

Fabfilter Timeless Review

FabFilter Timeless is a versatile delay plugin that offers a range of high-quality effects. This plugin is popular among musicians and producers due to its intuitive interface, customizable workflow, and impressive sound quality.

With Timeless, users can create anything from subtle echoes to complex rhythmic patterns. FabFilter Timeless is a popular delay plugin that offers users an extensive range of high-quality effects. Its intuitive interface and customizable workflow have made it a popular choice among musicians and producers.

The plugin can be tailored to suit individual preferences, making it a versatile tool for creating anything from subtle echoes to complex rhythmic patterns. Additionally, Timeless features a range of modulation options, filters, and a stereo widener, adding further depth and dimension to the sound produced. Whether used on individual tracks or a full mix, FabFilter Timeless is a reliable and effective plugin that can help users achieve their desired sound.

Fabfilter Timeless Review

Credit: www.youtube.com

Key Features

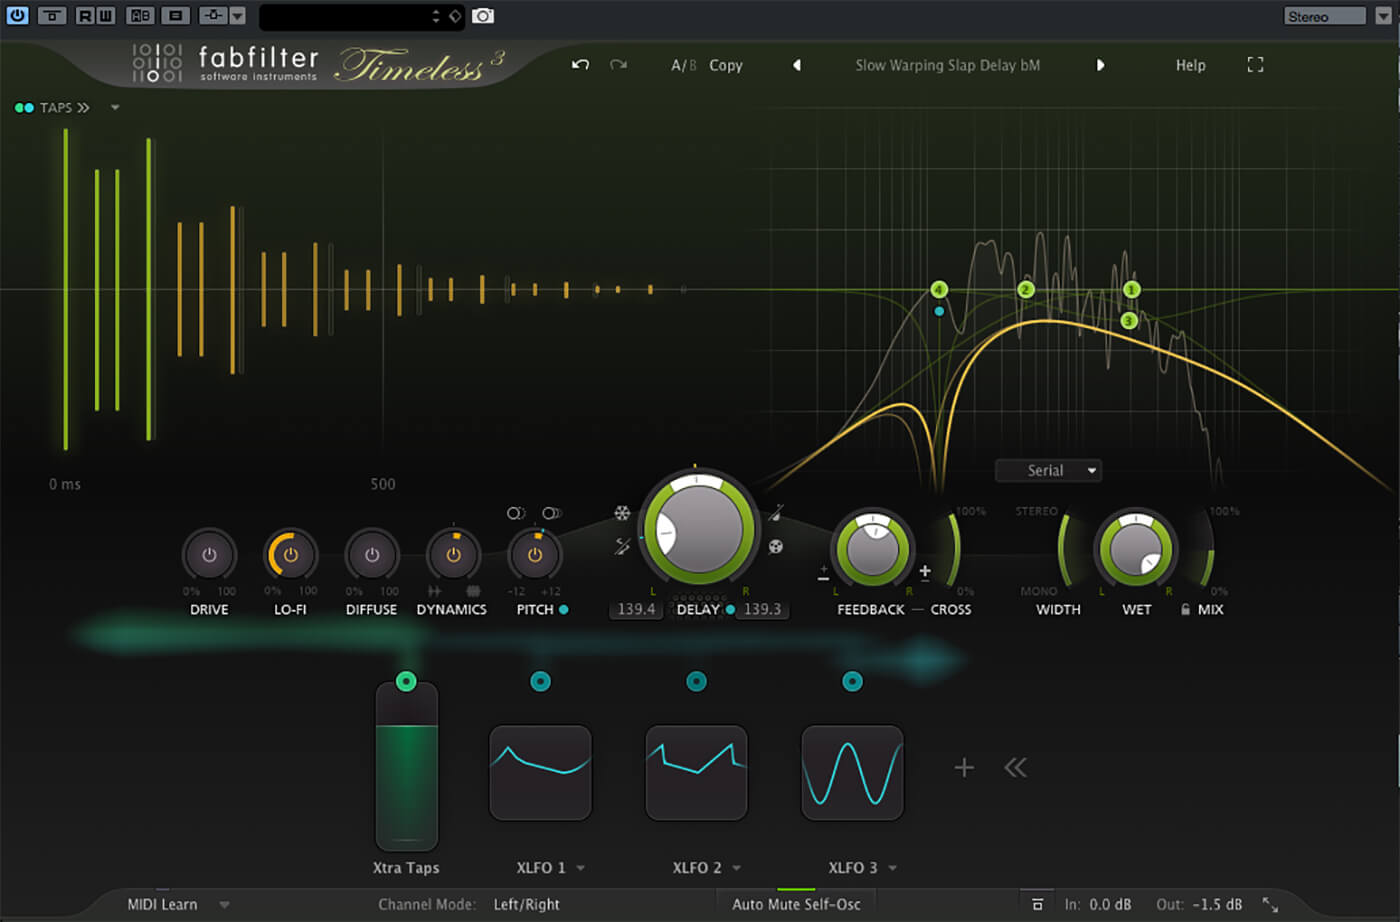
Fabfilter Timeless is a powerful and versatile delay plugin that offers a wide range of features to create immersive and engaging soundscapes. Let’s explore some of its key features:

Delay Settings

Fabfilter Timeless comes with a variety of delay settings that cater to different genres and styles. From simple delays to complex rhythms, you can easily create mesmerizing echoes and reverbs. With up to 7 seconds of delay time, you can experiment with long and short delays to add depth and space to your mix.

Modulation Options

Modulation options in Fabfilter Timeless allow you to add movement and character to your delays. You can choose between synchronized and free-running LFOs, and customize their shape, rate, and depth. The dedicated modulation matrix lets you control various parameters, including the delay time, feedback, filter cutoff, and more.

Filtering Capabilities

Fabfilter Timeless also boasts advanced filtering capabilities with high-pass, low-pass, band-pass, and notch filter modes. You can choose between four different filter types, including steep 48 dB/octave and gentle 6 dB/octave slopes. The filter can be modulated with the LFOs, envelope follower, and external sidechain input, giving you even more creative possibilities.

In conclusion, Fabfilter Timeless is an outstanding delay plugin that delivers exceptional sound quality and versatility. Whether you’re working on electronic music, sound design, or post-production, this plugin is a must-have in your toolbox.

Pros And Cons

Fabfilter Timeless is a go-to plugin for those who desire endless creativity and control over their sound. Its intuitive interface, stunning sound quality, and an extensive library of presets make it a desirable option, while its steep learning curve and high price tag can be a potential drawback.

Pros and Cons of FabFilter Timeless Review If you are looking for a highly versatile and efficient delay plugin, then FabFilter Timeless is undoubtedly worth considering. It is designed to provide you with a range of delay options, modulation, and filtering effects. In this article, we will discuss the pros and cons of FabFilter Timeless to help you determine whether it’s the ideal plugin for your needs. Advantages of using FabFilter Timeless: – Precise and high-quality sound: FabFilter Timeless provides crystal-clear sound with top-quality filtering options. It offers a wide range of delay effects, including chorus, reverb, flanging, and more. – Easy-to-navigate interface: With its intuitive user interface, FabFilter Timeless is very user-friendly and easy to operate, even for novice users. – High degree of control: With its comprehensive controls, you can fine-tune each effect to your requirements, and also automate it to create innovative soundscapes. – Flexibility: The plugin comes with an extensive range of presets that work well with different genres and styles of music. It is suitable for both production and mix workflows. – Integration: It is well integrated with most popular DAWs, making it an easy-to-use plugin that complements your workflow. Disadvantages of using FabFilter Timeless: – High cost: Compared to other plugins, FabFilter Timeless is relatively expensive. It may not be an affordable option for novice producers. – Steep learning curve: With its advanced features, it may take some time to master all the options provided by FabFilter Timeless. It can be overwhelming for new users. In conclusion, FabFilter Timeless is an outstanding plugin with a broad range of features and excellent sound quality. It certainly has more benefits than drawbacks. Its high price point may be an issue for some beginners, but it’s worth investing in if you are looking for a flexible and versatile delay plugin.

Sound Design

Fabfilter Timeless is a versatile sound design plugin that offers a wide range of features such as flexible routing, modulation options, and intuitive interface. The plugin’s delay and filtering capabilities allow for creative sound manipulation, suitable for audio production and music composition.

Creating Unique Sounds

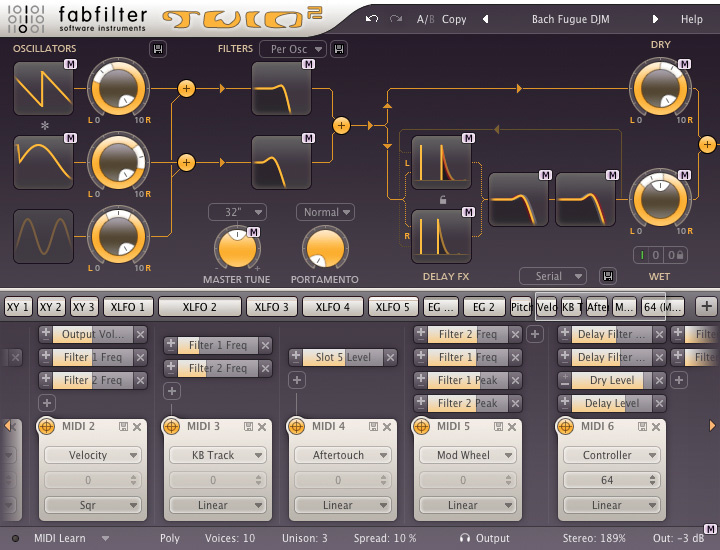
Sound design is a critical aspect of modern music production. By using the right plugins, producers can create unique sounds that set them apart from the competition. One such plugin that has been making waves in the music production community is the FabFilter Timeless 2 delay plugin. With its advanced features and intuitive interface, Timeless 2 is an excellent tool for sound designers looking to create something new and exciting. One of the most significant advantages of Timeless 2 is its ability to modulate virtually any parameter. The modulation features of this plugin allow producers to create evolving and complex sounds that would be difficult or impossible to achieve with other plugins. By using modulation sources such as LFOs or Envelope Followers, sound designers can create unique sounds that evolve over time.

Exploring Different Effects

Another essential aspect of sound design is the use of different effects. Timeless 2 comes equipped with several effects, including filters, distortions, and phasers, that can be used to modify the delay signal. The effects section of Timeless 2 is fully customizable, allowing producers to stack multiple effects together to create complex and interesting sounds. The filter section of Timeless 2 is particularly noteworthy. With its high-quality filters, producers can easily create sweeping and resonant filter sweeps that add depth and character to their sound design. The distortion and phaser effects can be used to add grit and texture to sounds, making them stand out in a mix.

Conclusion

In conclusion, FabFilter Timeless 2 is an excellent tool for sound designers looking to create unique and exciting sounds. Its intuitive interface, advanced modulation features, and customizable effects make it a must-have plugin for producers looking to stay ahead of the curve in the ever-changing landscape of modern music production. With its ability to create complex and evolving sounds, Timeless 2 is a plugin that every producer should have in their arsenal.

Ease Of Use

Fabfilter Timeless is an exceptional delay plugin that offers powerful features to users while maintaining ease of use. The plugin has an interface design that is not only visually pleasing but also highly functional, allowing users to understand and customize its features without much hassle. In this section, we will explore the simplicity of controls that make the plugin easy to use.

Interface Design

The Timeless plugin has a sleek and modern interface that is intuitive and user-friendly. It features an easy-to-navigate layout that encompasses all the essential functions of a delay plugin. The plugin’s interface design simplified workflow and allows users to concentrate on producing music creatively, instead of struggling with complex navigation.

Simplicity Of Controls

The plugin’s controls are straightforward, making it easy for users to tweak their sound without getting lost in a sea of complex parameters. All parameters are easily accessible and can be adjusted with a single click of the mouse, saving time and reducing frustration for users. The plugin’s interface also features tooltips that provide context-sensitive help to users, making it easy for them to understand the features of the plugin.

Conclusion

Fabfilter Timeless is an exceptional delay plugin that offers a perfect balance between powerful features and ease of use. Its interface design and simplicity of controls make the plugin a must-have for any music producer or sound designer. The plugin stands out among the competition, allowing users to create high-quality delay effects with ease.

Comparisons

Fabfilter Timeless is a powerful delay plugin that offers a wide range of features including filter effects and modulation. Compared to other delay plugins, its intuitive interface and advanced settings make it a popular choice for producers and engineers in the music industry.

Comparisons are a crucial aspect of any review, and when it comes to delay plugins, FabFilter Timeless is a cut above the rest. In this section, we’ll be discussing the different comparisons of FabFilter Timeless with other plugins and its similarities with other FabFilter plugins. ### Comparison to other delay plugins FabFilter Timeless stands out when compared to other delay plugins due to its intuitive interface, ease of use, and exceptional sound quality. Timeless takes a unique approach to delay processing, offering users an array of filter types and modulation options for creating dynamic delay effects. With its drag-and-drop interface, users can easily adjust the delay time, feedback, and wet/dry mix, making real-time adjustments a breeze. When compared to other delay plugins like Soundtoys EchoBoy or Waves H-Delay, Timeless offers users a powerful combination of modern and vintage delay sounds. The interface is straightforward and easy to navigate, allowing users to get started producing music quickly and efficiently. ### Similarities to other FabFilter plugins As expected, FabFilter Timeless shares many similarities with other plugins in the FabFilter suite, including the renowned Pro-Q 3 equalizer and the powerful Pro-L 2 limiter. Like other FabFilter plugins, Timeless offers users a professional-grade user interface, cutting-edge features, and an unparalleled sound quality. One of the most exciting similarities between FabFilter Timeless and other FabFilter plugins is the stunning visual feedback provided by its interface, making it easy to see how the sound changes as you adjust the plugin’s settings. Additionally, like other FabFilter plugins, Timeless comes equipped with a full suite of advanced features such as MIDI learn, undo/redo, A/B comparisons, and more. In conclusion, when it comes to delay plugins, FabFilter Timeless stands out from the pack in many ways. With its intuitive interface, cutting-edge features, and exceptional sound quality, Timeless is a vital tool for any producer serious about creating dynamic and professional-grade delay effects.

Fabfilter Timeless Review

Credit: www.soundonsound.com

Price And Value

Fabfilter Timeless is often regarded as one of the most versatile delay plugins in the market. But, with so many choices available, it’s important to consider the price and value of a plugin. In this Fabfilter Timeless review, we’ll explore the cost and benefits of this popular plugin.

Value For Money

When it comes to value for money, Fabfilter Timeless offers far more than just a basic delay plugin. This plugin is packed with features that allow you to create a wide range of sounds, from subtle echoes to complex soundscapes.

  • The versatile filters and modulation capabilities make it a great choice for sound design.
  • The intuitive interface and high-quality presets save you time and streamline your workflow.
  • The customizable routing options allow you to experiment with different processing chains.

All of these features make Fabfilter Timeless worth the investment and an excellent choice for musicians, producers, and sound designers of all levels.

Price Points For Different Versions

VersionPrice
Regular$129
Upgrade from Timeless 2$49
Student/Teacher$64.50

The Regular version of Fabfilter Timeless is priced at $129, which is in line with other high-end delay plugins in the market. If you are upgrading from Timeless 2, you can get a discounted price of $49. Additionally, students and teachers can purchase the plugin at a 50% discount for $64.50.

Overall, the price points are fair and reasonable, considering the features and quality of the plugin. It’s also worth noting that Fabfilter provides excellent customer support and regular updates, adding even more value to your purchase.

Fabfilter Timeless Review

Credit: musictech.com

Frequently Asked Questions Of Fabfilter Timeless Review

What Is Fabfilter Timeless?

FabFilter Timeless is a delay plug-in that offers filtered echoes and phaser effects for music production. Ideal for creating complex rhythms, you can fine-tune everything from the delay time and filtering to resonance and feedback with ease. It is available in VST, VST3, AU, and AAX formats for Windows and macOS.

What Is Fab Filter Micro?

FabFilter Micro is a basic filter plug-in that is part of the FabFilter family of audio processing tools. It provides a simple user interface and high-quality sound processing abilities. The FabFilter Micro is used by music producers and audio engineers to shape the sound of individual tracks or entire mixes.

What Is Fabfilter Timeless And What Does It Offer?

Fabfilter Timeless is a plugin for digital audio workstations that provides advanced filtering, delay, and distortion effects, along with high-quality sound and intuitive controls.

What Makes Fabfilter Timeless Stand Out Among Other Delay Plugins?

Fabfilter Timeless offers features like mid-side processing, modulated filters, and versatile distortion options that set it apart and give producers greater creative control.

Conclusion

Timeless 3 is a no-brainer for anyone looking to create an original and dynamic sound. Whether it’s for live performances or studio recordings, its intuitive interface and unique features make it a standout plugin. The additional presets provided give users a jumping-off point to explore new sonic territory.

Overall, FabFilter Timeless 3 is a well-rounded plugin that can elevate any project to the next level. Give it a try and discover its remarkable potential for yourself.

Categories
Archive

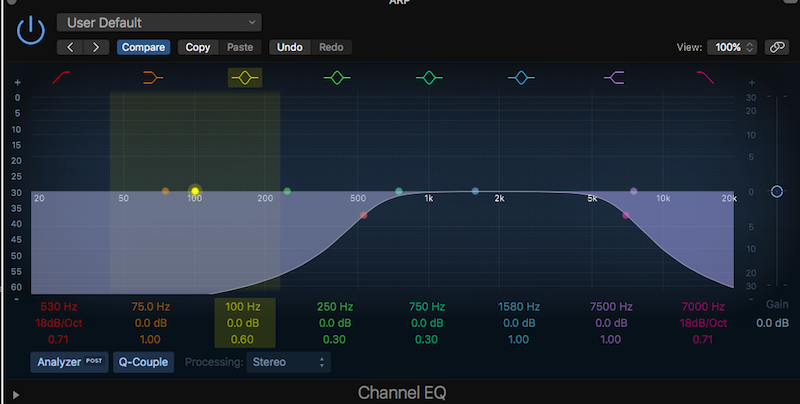
How To Eq Your Reverbs

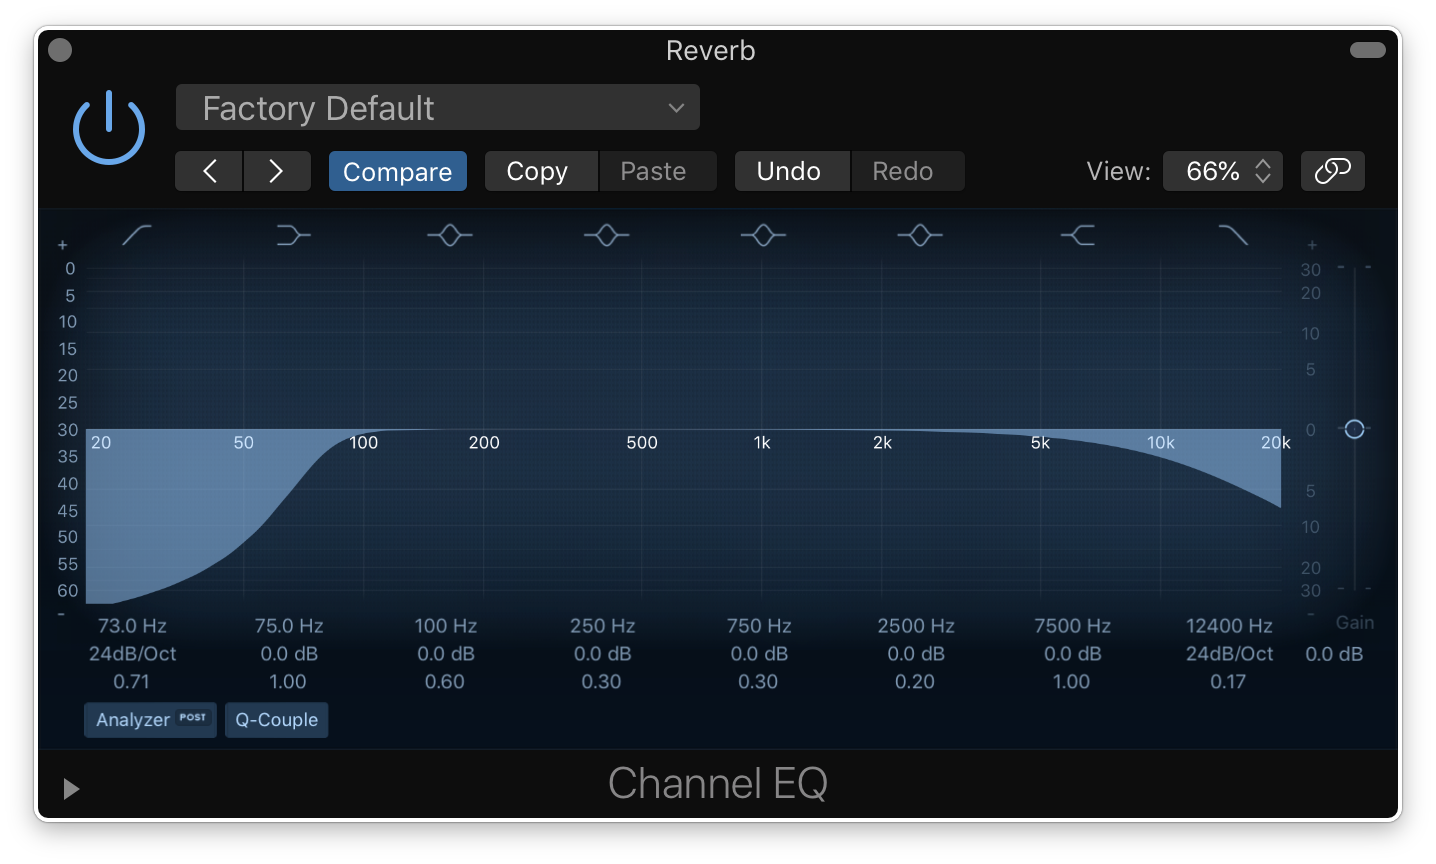
To EQ your reverbs, use a high-pass filter to remove unwanted low frequencies and a low-pass filter to tame high frequencies. Now, let’s dive into the world of reverb EQing.

Reverbs help to create a natural and rich sound space, but often, they come with unwanted frequencies that can ruin the mix. EQing is an important step to shape the reverb and make it sit well in the mix. EQing can help to cut low-end rumble, reduce harsh high-end, and adjust the mid-range to make it more pleasing to the ear.

We’ll look at some tips and tricks for EQing reverb to take your mix to the next level.

How To Eq Your Reverbs

Credit: www.mixinglessons.com

Eq Techniques For Reverbs

EQ techniques are essential to make reverb sound great. You can reduce unwanted frequencies, emphasize certain parts of the sound, and add clarity with EQing your reverbs. It is crucial to apply these techniques to make your overall mix sound polished and professional.

When it comes to mixing a track or creating a sonic space, reverb is an essential tool in the kit. However, simply applying a reverb plugin won’t cut it; you need to balance it with the rest of the mix. And that’s where EQ techniques for reverbs come in handy. EQ allows you to manipulate the frequencies of your reverb to make it sound better in your mix. Here are some of the most effective EQ techniques for reverbs.

Using High Pass Filters

One of the most common problems with reverb is that it can make your mix sound muddy. It’s especially true for lows because reverb love low-frequency sounds. If you want to fix that issue, then you need to use a high-pass filter. High-pass filters remove low-end frequencies from your reverb, clearing up the mud and leaving space for other instruments.

Using Low Pass Filters

Although high-pass filters can be a game-changer when it comes to reverbs, using low pass filters can also be effective. Using a low pass filter on your reverb can soften harsh high frequencies and tame cymbals. It also adds a sense of warmth and coziness to your reverb.

Notching Out Problematic Frequencies

Sometimes there are particular frequencies that just don’t work in your mix. They can be a nuisance and detract from the overall sound. With EQ notching, you can remove those frequencies altogether. Identify the problematic frequency and dip it with a notch filter. Doing so will clear up any issues and make your reverb sound smoother.

Boosting Desired Frequencies

While notching out problematic frequencies, you can also boost desirable frequencies in your reverb. For example, if you want to bring out the high-end of your reverb, boost the top-end frequencies using a bell filter. Similarly, if you want a boomy kick drum, boost the low-frequencies.

Using A Multiband Eq

Lastly, a multiband EQ is an excellent tool for EQing your reverbs. It allows you to separate frequencies and apply different EQ settings to each band. For example, you can use a multiband EQ to keep the low end of your reverb from interfering with your bass guitar. You can also boost the mid-range frequencies to add clarity and definition to a muddy reverb. In conclusion, using EQ techniques on your reverb can make a massive difference in the final mix. Apply high pass and low pass filters, notch out problematic frequencies, boost desirable ones, and use a multiband EQ to create a balanced and professional sound.

How To Eq Your Reverbs

Credit: www.tunecore.com

Eq-ing Specific Reverb Types

HTML response:

EQ-ing your reverb can make a huge difference to your mix. Every reverb type responds differently to EQ. Therefore, it is essential to understand how to EQ specific reverb types.

Plate Reverbs

Plate reverbs offer a unique metallic sound that is highly desirable in certain genres such as rock and metal. To EQ plate reverb, follow these steps:

  1. Start with cutting the low-end frequency as it can muddy up the mix.
  2. Boost the high-end frequency between 2-6 kHz to add more brightness.
  3. For more depth and warmth, increase the mid-frequency between 500-700 Hz.
  4. Adjust accordingly, balancing the reverb with the original track.

Spring Reverbs

Spring reverbs were originally used in guitar amps. Their characteristic sound is often associated with vintage rock records. To EQ spring reverbs, follow these steps:

  1. Start by cutting the low-end frequency to prevent excessive boomy bass.
  2. Add more high-end frequency between 2-4 kHz to make the reverb more present.
  3. For more warmth, increase the mid-frequency around 800-1 kHz.
  4. Adjust the parameters based on your preferences.

Chamber Reverbs

Chamber reverbs simulate a small room with a short reverb tail. They are commonly used in classical and orchestral recordings. To EQ chamber reverbs, follow these steps:

  1. Start by cutting the low-end frequency to prevent muddiness.
  2. Add some brightness by boosting the high-end frequency between 5-8 kHz.
  3. For more depth, increase the mid-frequency around 800 Hz.
  4. Adjust the parameters based on your preferences.

Hall Reverbs

Hall reverbs simulate large spaces like concert halls, stadiums, and cathedrals. They have a long reverb tail and are commonly used in ambient music. To EQ hall reverbs, follow these steps:

  1. Start by cutting the low-end frequency to prevent muddiness and clash with the bass.
  2. Boost the high-end frequency between 2-5 kHz to add more clarity and air.
  3. For more depth, increase the mid-frequency around 500 Hz.
  4. Adjust the EQ to match with the original track.

Room Reverbs

Room reverbs simulate a small room, giving a sense of space to your mix. To EQ room reverbs, follow these steps:

  1. Start by cutting the low-end frequency to prevent excessive mud.
  2. Boost the high-end frequency between 2-4 kHz to add more presence.
  3. For more depth and warmth, increase the mid-frequency around 800 Hz.
  4. Adjust the EQ to balance the reverb with the original track.

EQ-ing specific reverb types is an essential part of mixing. By following these guidelines, you can make your mix sound more professional and polished.

Advanced Eq Techniques For Reverbs

Equalization is an essential tool for shaping the tone of your reverb, and knowing how to EQ your reverb correctly can make a big difference in the clarity and space of your mix. In this post, we’ll delve into some advanced EQ techniques for reverb that will take your mix to the next level.

Side-chaining Eq

Side-chaining is a useful technique in mixing, but it can also be used for EQing your reverb. When you side-chain your reverb, you send a separate audio signal to the reverb that triggers it only when that signal is present. By using a side-chain EQ, you can apply EQ to the reverb signal based on the frequency content of another track. This technique can be helpful in reducing muddiness or harshness in your mix.

Parallel Processing With Eq

Parallel processing is the technique of blending multiple versions of the same track together to achieve a desired sound. When using parallel processing with EQ, you can create a separate copy of your reverb and apply different EQ settings to each copy. By blending the two versions together, you can achieve a more balanced and nuanced reverb sound.

Creating Depth With Eq

Creating depth in your mix is essential, and EQ can help you achieve that depth. By cutting the low frequencies of your reverb signal and boosting the highs, you can create the illusion of a more distant sound source. Applying a low-pass filter to your reverb can also create a sense of distance.

Other techniques for creating depth with EQ include using a parametric EQ to notch out certain frequencies that may be causing muddiness, or using a high-pass filter to remove low frequency buildup.

Conclusion

Using advanced EQ techniques for reverb can make a significant difference in the clarity and depth of your mix. Whether you use side-chaining, parallel processing, or create depth with EQ, taking the time to EQ your reverb properly will pay off in the end.

How To Eq Your Reverbs

Credit: producelikeapro.com

Frequently Asked Questions For How To Eq Your Reverbs

Can You Eq Out Reverb?

Yes, it is possible to EQ out reverb by reducing or cutting frequencies that are causing the reverb. However, this may also affect other aspects of the sound, so it is important to use the EQ sparingly and make adjustments carefully.

Should I Eq Before Or After Reverb?

EQ should be done before applying reverb. This is because reverb can amplify the unwanted frequencies created from the EQ process. EQing before applying reverb ensures a cleaner and more balanced sound.

How Do I Get Perfect Reverb Every Time?

To get perfect reverb every time, use proper microphone placement, adjust the input gain, select the right type of reverb, set the decay time, and adjust the dry/wet mix to preference. Experimentation and practice are key to achieving optimal results.

Should I Compress My Reverb?

Compressing your reverb is not necessary, but it may improve your final mix. It can help control excessive reverb tails and allow vocals or other instruments to be more present in the mix. However, be careful not to over-compress and eliminate the natural decay of the reverb.

Ultimately, it depends on your personal preference and the needs of the mix.

Conclusion

Incorporating EQ in your reverb can elevate your mixes and bring depth to your tracks. With a few simple steps, you can enhance the overall sound of your music. Understanding how each frequency affects your reverb is crucial, and experimenting with different EQ moves can help you achieve the perfect blend.

Remember to avoid over-EQing, use your ears, and trust your instincts. EQing your reverb is a process, but with practice and patience, you can create a professional-sounding mix that stands out. Happy mixing!

Categories
Archive

Mix With Headphones

When mixing with headphones, it is important to use high-quality headphones to ensure accuracy and balance in the mix. Using headphones can also help identify subtle details in the mix that may be missed on speakers.

Mixing with headphones has become increasingly popular in recent years, especially for those working in home studios or for artists recording on the go. Using headphones can provide a level of isolation and control that speakers simply cannot offer. However, it is crucial to use high-quality headphones that are specifically designed for mixing to achieve the most accurate and balanced mix possible.

Additionally, using headphones can help identify small details in the mix that may be missed on speakers, such as panning and stereo width. We will discuss some tips and techniques for mixing with headphones to help you achieve the best possible sound for your project.

Choosing The Right Headphones

Selecting the right headphones for mixing requires careful consideration. Look for flat, neutral sound profiles, a comfortable fit for long periods, and a closed-back design to limit sound bleed. Testing out multiple options and reading reviews can help ensure you find the perfect pair.

Headphones are an essential tool for any mix engineer or music producer. Whether you’re working in a studio or a home setup, choosing the right headphones is crucial to ensure the accuracy and quality of your mix. In this blog post, we’ll be covering the key factors you need to consider when selecting headphones for mixing.

Closed-back Vs Open-back Headphones

When it comes to selecting headphones for mixing, the first thing you need to decide is whether you want closed-back or open-back headphones. Closed-back headphones offer excellent sound isolation and prevent any sound leakage, making them ideal for tracking and recording. On the other hand, open-back headphones provide a more natural sound and improve the spatial depth of your mix. However, they tend to have less sound isolation, which may be a problem in noisy environments.

Frequency Response And Impedance

Another critical factor to consider when selecting headphones for mixing is their frequency response and impedance. Frequency response measures the range of frequencies that a pair of headphones can accurately reproduce. Look for headphones with a frequency range of 20 Hz to 20 kHz, which is the standard range of human hearing. Impedance refers to the resistance of an electrical signal as it passes through the headphones. Lower impedance headphones are more suited for portable devices like mobile phones, while higher impedance headphones are designed for dedicated audio equipment.

Comfort And Durability

Finally, you should consider the comfort and durability of the headphones you choose. If you’re going to be wearing headphones for long periods, it’s essential to pick a comfortable pair that won’t cause any fatigue or discomfort. Look for headphones with a padded headband and ear cups for maximum comfort. Durability is also important; you don’t want to have to replace your headphones every few months. Look for headphones with a solid construction and high-quality materials that can withstand regular use. In conclusion, selecting the right headphones for mixing is essential for ensuring an accurate and high-quality mix. Consider factors such as closed-back vs open-back design, frequency response, impedance, comfort, and durability before making your purchase. Whether you’re a professional mix engineer or a hobbyist music producer, investing in a good pair of headphones is an investment in the quality of your work.

Mix With Headphones

Credit: vintageking.com

Preparing Your Mix Environment

To get the best results when mixing with headphones, it’s important to prepare your environment properly. First, choose high-quality headphones that produce a flat sound, then ensure your listening environment is as quiet and distraction-free as possible. Finally, take frequent breaks to avoid ear fatigue and listen to your mix on different systems to ensure it translates well across various playback formats.

Mixing with headphones can be a daunting task, but with the right preparation, it can make all the difference. To get the best results, it’s important to set up your workspace correctly. Here’s how to prepare your mix environment using the following headings:

Eliminating External Noise

The first step in preparing your mix environment is to eliminate external noise. This can be done by turning off any fans or air conditioning units and closing windows and doors. Additionally, consider using noise-cancelling headphones or earplugs to block out any unwanted background noise. By reducing external noise, it will be easier to focus on your mix and make better decisions when making adjustments.

Setting Up Your Workspace

Next, it’s crucial to set up your workspace correctly. Sit in a comfortable chair at a desk, and make sure your equipment is within easy reach. Position your monitor at eye level and ensure your keyboard and mouse are at a comfortable distance. This will help you avoid fatigue and ensure you can focus on your mix with ease.

Acoustic Treatment

Finally, acoustic treatment is crucial for a high-quality mix. Consider investing in sound-absorbing panels to help control reflections and reduce the amount of sound bouncing around your room. This will help you make better decisions when panning and EQing, resulting in a more accurate and balanced mix. Alternatively, a pair of headphones with a flat frequency response can be a great option if you don’t have the space for acoustic treatment. In conclusion, by taking these steps to prepare your mix environment, you can achieve better results when mixing with headphones. By eliminating external noise, setting up your workspace correctly, and investing in acoustic treatment, you’ll create a better environment for making mix decisions.

Techniques For Mixing With Headphones

Mixing music with headphones is a trusty method for music producers, audio engineers and sound designers alike. Most headphones are designed with a flat frequency response and are very close to the ears, allowing you to hear finer details in a mix. This makes it easier to catch nuances you wouldn’t hear with regular speakers. Working with headphones requires specific techniques to make sure that the mix you create is of good quality and translates correctly to different platforms.

Using Reference Tracks

Using reference tracks is a powerful way to check how your mix is sounding using the same tools as professional engineers and producers. It allows you to compare your own mix with that of a commercial mix, switching back and forth until you achieve a similar sound. You can use reference tracks to check different elements of a mix. For example, you can use it to help with finding the right level for your bassline, or to check the stereo image of your mix. To use reference tracks, pick a few songs that are similar to your mix and listen to them through your headphones, adjusting your mix to match the reference tracks.

Adjusting Levels

When mixing with headphones, it’s important to adjust your levels correctly. You don’t want your mix to be too loud because listening to music at high levels for a prolonged period of time can cause ear fatigue. Ear fatigue will make it harder to hear the finer details of your mix, making it more difficult to get the mix sounding just right. Therefore, it’s important to monitor your mix at a lower volume than you would with speakers. You can also use a dB meter, sometimes built-in to your headphones or DAW, to ensure you’re monitoring at safe levels.

Avoiding Ear Fatigue

Ear fatigue is a common problem when mixing with headphones. As mentioned earlier, it happens when you listen to music at high levels for long periods. To avoid ear fatigue, take regular breaks, at least every 20 minutes. You can also switch between speakers and headphones, which can help avoid ear fatigue. If you’re working in a loud environment with many distractions, headphones can be a helpful way to focus on the sounds in your mix.

Utilizing Stereo Imagery

When mixing audio with headphones, stereo imagery is very important. Ensuring that all elements are in the right stereo position helps with creating a spacious and cohesive mix. Panning is particularly important when using headphones because it’s easy to get a sense of where each individual element sits in the mix. A simple technique is to listen to the mix on different headphones and see how it translates across devices. Another technique is to use a stereo imaging plugin that can help with creating a wider soundstage.

Mix With Headphones

Credit: www.sweetwater.com

Mixing Tips And Tricks

When mixing with headphones, it’s important to keep a few things in mind. Firstly, choose headphones that have a flat response so you can accurately hear all frequencies. Secondly, take frequent breaks to prevent ear fatigue and reduce the risk of making poor mixing decisions.

Mixing with headphones can be a great way to get the job done when you don’t have access to a high-quality studio environment. However, it comes with its own set of unique challenges. In this article, we’ll explore some essential mixing tips and tricks to help you get the best possible results when using headphones.

Mixing In Mono

One of the most important things to keep in mind when mixing with headphones is that they can create a very wide and exaggerated stereo image. This can sometimes lead to mixes that sound great on headphones but fall apart when played on other systems. To make sure your mix translates well across different playback environments, consider mixing in mono. By switching your headphones to mono mode, you can focus on the underlying balance and relationships between instruments and frequencies. You’ll also be able to identify any phase cancellation issues that may not be immediately apparent in stereo. Once you’re satisfied with the mono mix, switch back to stereo mode to add the desired stereo width.

Checking Your Mix On Multiple Systems

Another critical part of the mixing process is to check your mix on various playback systems, including speakers, earbuds, and other headphones. Each system has its own unique sound characteristics that can dramatically affect how your mix is perceived. However, before you do that, it’s essential to make sure that your mixing environment is acoustically treated or used with reference headphones, so your mix doesn’t pick up the sound characteristics of the room or the device, for accurate results. By listening to your mix on various systems, you can identify any potential problems that need to be addressed, such as overly dominant bass frequencies or harsh high-end sibilance. Take note of what you hear and make the necessary adjustments until your mix sounds good across all playback devices.

Matching Your Mix To Its Intended Playback Environment

It’s important to keep in mind the environment in which your music will be played back. For example, if you’re creating music for a nightclub, you’ll want to make sure your mix has plenty of bass frequencies. On the other hand, if you’re creating music for a podcast, you’ll want to ensure that your mix has clear and crisp dialogue, and all sound effects are well balanced. By understanding the environment your mix will be played back in, you can tailor your mix to fit that environment. You may also need to adjust the mastering of your music based on the medium it will be released on, such as CD, digital download, or streaming services, to ensure it sounds consistent across all platforms. In conclusion, mixing with headphones can produce great results with the right techniques and understanding of the limitations. Mixing in mono, checking your mix on multiple playback devices, and tailoring your mix to its intended environment will help you create professional-grade mixes that translate well across various platforms.

Final Thoughts

Overall, mixing with headphones can be a great option for many producers and engineers. However, it’s important to know the pros and cons of this method and when to switch to monitors for the most accurate mix.

The Pros And Cons Of Mixing With Headphones

ProsCons
Great for isolating individual tracks or instrumentsCan be more comfortable for longer mixing sessionsLess expensive than high-quality studio monitorsNo acoustic treatment neededDoesn’t replicate real-world listening environmentsHard to judge low-end and stereo imaging accuratelyCan cause ear fatigue or hearing damageHeadphone frequency response can vary greatly

Knowing When To Switch To Monitors

While mixing with headphones can be a valuable tool, it’s important to know when to switch to monitors to achieve the most accurate and balanced mix possible. Here are some guidelines:

  • Use headphones during the initial mixing stages to isolate individual tracks and make detailed adjustments
  • Switch to monitors during the final stages to check the overall balance and ensure the mix translates well on different playback systems
  • Use both headphones and monitors throughout the mixing process to gain different perspectives and ensure a well-rounded mix

In conclusion, using headphones to mix can be a cost-effective and efficient way to achieve a great-sounding mix, but it’s important to know the limitations and when to use monitors for the most accurate results.

Mix With Headphones

Credit: www.soundonsound.com

Frequently Asked Questions Of Mix With Headphones

Is It Ok To Mix On Headphones?

Yes, it is possible to mix on headphones, but it is not recommended as it may not provide an accurate representation of the sound. Mixing on headphones can result in an unbalanced mix and may not reveal any issues that may be present when played on other devices.

It is best to mix on studio monitors to achieve the best results.

Is It Better To Mix With Or Without Headphones?

It depends on the situation and personal preference. Mixing with headphones can provide a more isolated and accurate sound, while mixing without headphones can give a more natural sound and better sense of stereo imaging. Ultimately, it’s important to use both methods and trust your ears to achieve the best results.

How Do You Mix With Just Headphones?

To mix with just headphones, start by using high-quality headphones that allow you to hear all the nuances of the music. Next, adjust the volume to a comfortable level and use EQ settings to balance the sound. Make sure to take breaks to avoid ear fatigue and regularly reference on different systems to ensure the mix translates well.

Use panning and reverb effect to create depth in your mix and pay attention to the spectral balance and stereo image.

Why Does Mix Sound Better In Headphones?

Mixes sound better in headphones because they offer a more detailed and isolated audio experience compared to speakers. Headphones allow for a better monitoring of individual tracks and frequencies, resulting in a clearer and more defined sound.

Conclusion

Mixing with headphones is an essential tool for any music producer or engineer. Not only does it provide a different perspective, but it also allows for precise and accurate sound manipulation. However, it’s important to remember that headphones can’t replace monitoring on different systems, so it’s important to regularly check your mix on speakers.

Overall, incorporating headphones into your mixing process can greatly improve the quality of your final product. Try it out for yourself and see the difference!

Categories
Archive

What Audio Cable Is Best

The best audio cable depends on the intended use and equipment. Factors such as length, connectivity options, and shielding can affect the quality of the audio transmission.

Choosing the right audio cable for your equipment can make a significant difference in sound quality. Audio cables are an essential part of the connection system between your device and speaker or headphones. However, with so many options available, it can be challenging to determine which one is best for your setup.

We’ll explore the different types of audio cables, factors to consider when choosing the right cable, and the top picks for the best audio cables on the market. Whether you’re setting up a new sound system or looking to upgrade your existing one, this guide will help you make an informed decision.

Analog Vs. Digital Audio Cables

Analog and digital audio cables both have their advantages and disadvantages. While digital cables offer better sound quality and fewer interference issues, analog cables can provide a warmer, more natural sound. Ultimately, the best audio cable will depend on individual preferences and the equipment being used.

Analog vs. Digital Audio Cables The difference between analog and digital audio cables may seem confusing at first, but it’s not as complicated as you might think. When choosing an audio cable, you need to decide whether you want an analog or digital connection. Let’s take a closer look at each one. H3: What is an Analog Audio Cable? An analog audio cable transmits audio signals through electrical currents. It has been a standard method of audio transmission for decades. An analog connection is what you get when you plug a 3.5mm jack into your smartphone or MP3 player. Analog is also the preferred method of transmission for vinyl records and cassette tapes. The downside of analog audio is that it can be prone to interference and noise. Also, over longer distances, the signal strength may weaken, resulting in distortion. H3: What is a Digital Audio Cable? Digital audio cables use a method of encoding and decoding audio data into binary signals made up of ones and zeros. Digital connections are typically used for transmitting audio from a device to a home theater system or speaker that features a digital input. The advantage of digital audio is that it is not subject to interference or signal degradation. It also supports high-quality audio codecs like Dolby Digital and DTS. However, digital audio can be more expensive than analog, and the equipment that supports it can be more specialized. In conclusion, the choice between analog and digital audio cables ultimately depends on your specific needs. If you want to connect a portable device to a pair of headphones or speakers, analog is the way to go. If you want to transmit high-quality audio between devices over longer distances, digital audio is the better choice.

What Audio Cable Is Best

Credit: doctormix.com

Types Of Analog Audio Cables

Different types of analog audio cables are available, including RCA, XLR, and TRS cables. The best choice of cable largely depends on your equipment and the purpose of use. Some listeners prefer XLR cables for their balanced signals and lower noise levels, while others may prefer RCA cables for cost-effectiveness.

Analog audio cables are an essential component of any audio system, allowing you to connect all of your audio components together. There are different types of analog audio cables, each with its own unique features that affect audio quality. In this section, we’ll discuss the three most common types of analog audio cables – Coaxial Audio Cables, RCA Audio Cables, and TRS Audio Cables – that you may come across.

Coaxial Audio Cables

Coaxial audio cables are designed to carry high-frequency signals over short distances. These cables consist of a center conductor (usually made of copper) surrounded by a dielectric insulating material, which is then surrounded by a conductive shield. The dielectric material helps to keep the center conductor centered within the shield, which reduces interference and signal loss. Coaxial audio cables are commonly used to connect digital audio sources to digital audio receivers or processors. They can also carry composite video signals, making them an excellent choice for home theater setups where both audio and video signals need to be transmitted together.

Rca Audio Cables

RCA audio cables are the most common type of audio cable you’ll come across. They are typically used to connect analog audio sources (like CD players, turntables, or cassette decks) to audio receivers or processors. RCA cables consist of two cables, one for the left audio channel and one for the right audio channel. RCA audio cables have a relatively low bandwidth, which limits their audio fidelity. However, they also have a low noise level, which makes them an excellent choice for home stereo setups where audio quality is not critical.

Trs Audio Cables

TRS audio cables (short for Tip-Ring-Sleeve) are a type of audio cable commonly used in professional audio applications. They consist of a 1/4-inch phone plug (the same type of connector used on guitar cables) and can be used to carry balanced or unbalanced audio signals. Balanced TRS audio cables are designed to reduce noise and interference by using two conductors – one for the audio signal and one for the ground. They are commonly used to connect microphones, musical instruments, and other audio equipment to mixing consoles or audio interfaces. Unbalanced TRS audio cables, on the other hand, typically consist of only one conductor and are often used to connect headphones to amplifiers or audio interfaces. However, they can also be used to connect unbalanced analog audio sources to audio receivers or processors. In conclusion, choosing the right type of analog audio cable depends on the specific audio components you are connecting and your desired audio quality. Coaxial audio cables are ideal for digital audio sources, RCA audio cables are suitable for basic home stereo setups, while TRS audio cables are preferred for professional audio applications.

Types Of Digital Audio Cables

Digital audio cables come in various types, including optical, coaxial, and HDMI. The best type of audio cable depends on your audio system and the device you’re connecting to. It’s important to consider compatibility, bandwidth, and signal quality when selecting the best audio cable for your needs.

Types of Digital Audio Cables In today’s world, we have access to a wide range of digital devices for playing and recording sound. Whether it’s a home theatre system, a digital recording studio, or a smartphone, digital audio is everywhere. To ensure high-quality sound, we need the right digital audio cables. Here are three main types of digital audio cables that you should be aware of. Coaxial Digital Cables Coaxial digital cables are one of the most common types of cables used for transferring digital audio signals. They use coaxial technology that allows the transmission of a single digital signal through a single channel. Coaxial cables have a center conductor, which is surrounded by a layer of insulation, a metallic shield, and an outer jacket. The metallic shield helps minimize interference and noise, making them ideal for digital signals. Optical Digital Cables Optical digital cables, also known as TOSLINK, use light to transfer digital audio information. They are popular for connecting devices like DVD players, soundbars, and gaming consoles to TVs or other output devices. The cables are made up of a series of fiber-optic cables that provide high-quality audio with minimal interference. Unlike coaxial cables, the digital audio signal is carried as light rather than an electrical current, making them immune to electrical noise and interference. USB Audio Cables USB audio cables are a popular way of connecting digital audio devices to computers or other devices. They are used for recording audio or transferring files between two devices. USB audio cables come in different types, including USB Type-A, USB Type-B, USB Type-C, and others. The cables are plug-and-play, which means they don’t require any drivers or software. They are also versatile because they can carry both analog and digital signals. In conclusion, each digital audio cable has its advantages and disadvantages in terms of quality, compatibility, and price. Hence, it’s essential to choose the right cable type that best fits your audio device’s needs. Be sure to consider the length of your cable, the type of connector, and the type of vinyl jacket used. By taking all these factors into consideration, you can be confident that you get the right cable for your needs and enjoy the best sound quality.

What Audio Cable Is Best

Credit: www.bestbuy.com

Factors To Consider When Choosing An Audio Cable

When choosing an audio cable, it is important to consider the type and length of cable needed for your intended use. Factors such as conductivity, durability, and price can also help determine which audio cable is best for your needs.

Factors to Consider When Choosing an Audio Cable Choosing the right audio cable can greatly impact the quality of your audio output. But with so many options available in the market today, it can be overwhelming to decide which one to buy. To help you make an informed decision, here are some factors you need to consider when choosing an audio cable: Length of the Cable The length of the cable is an important factor to consider when buying an audio cable. Ideally, you should choose a cable that is just the right length for your needs. Too short and you might not be able to connect your devices, too long, and your audio quality may suffer. Always measure the distance between your audio equipment before making a purchase. Connector Type The connector type is another essential factor to evaluate when purchasing an audio cable. Different audio equipment may have varying input and output connector types. You must ensure that the cable you buy has the appropriate connectors for your devices. The most common types of audio connectors are RCA, 3.5 mm, and XLR connectors. Shielding Shielding is the protection of the cable from external interference, which can disturb the audio signal and reduce its quality. It’s one of the most important factors to take into consideration when buying an audio cable. Look for a cable with good shielding to prevent audio noise and distortion. The most popular types of cable shielding are braided, foil, and spiral. Price Price is an important consideration for most people when selecting an audio cable. Consider your budget before purchasing. In general, higher-priced cables often have better features and higher quality materials. Especially when the cable length is longer, it is worth considering investing a little extra in a good quality cable to experience a better audio output. Overall, when choosing an audio cable, keep in mind the length of the cable, connector type, shielding, and price. By considering these factors, you can make an informed decision and purchase an audio cable that will deliver superior sound quality and allow smooth audio transmissions.

Top Audio Cable Brands

Get the best audio experience with top audio cable brands such as Mogami, AudioQuest, and Canare. These cables offer superior quality and performance, ensuring that your audio signals are transmitted accurately.

If you are a music enthusiast, you understand the importance of high-quality audio cable. Having the right audio cable can take your music experience to a whole new level. Audio cables come in different brands with different features, making it a task to choose the right one. To help you out, we have listed some of the top audio cable brands, so you can have an easy time picking the best one for your needs.

Audioquest

AudioQuest is a leading brand in audio cables and has been in the market for over thirty years. This brand is known for its high-quality, durable, and reliable cables. AudioQuest cables are made with pure copper, which ensures superior conductivity. They come in different lengths and connectors to cater to different needs and are known for their crystal clear sound delivery. In addition to that, AudioQuest cables have a sleek design making them visually appealing.

Monster Cable

Monster Cable is another brand that has been in the market for over four decades. This brand is known for its commitment to producing high-quality audio cables. The cables are designed with heavy-duty shielding that reduces interference and noise, delivering clean, crisp sound quality. They come in different lengths and connector types such as XLR, RCA, and TRS. Monster Cables have a lifetime warranty, assuring users of their quality and durability.

Sennheiser

Sennheiser is a brand that specializes in audio equipment including headphones and microphones. This brand is known for producing high-quality audio cables that deliver superior sound quality. The cables come in different lengths and connector types such as XLR, TRS, and RCA. They are also designed to prevent tangling, making them easy to store and handle. Sennheiser audio cables are durable and reliable, making them suitable for both studio and home use. In conclusion, choosing the right audio cable brand is crucial for a top-notch music experience. The above brands are some of the best in the market that offer a range of options to cater to different needs. Always ensure you consider your setup and equipment before making a choice.

Faqs

Choosing the best audio cable depends on your specific needs. Consider factors such as length, type of connector, and insulation to ensure the highest quality sound. Shop around and compare prices to find the best option for your budget.

What Is The Difference Between Rca And Trs Audio Cables?

RCA cables are usually used for analog audio signals, such as those found in stereo systems, while TRS cables are commonly used for connecting audio devices, such as microphones, to recording equipment. The main difference between the two is the connector type used. RCA cables have a single, cylindrical jack that plugs directly into a device, while TRS cables have a two-pronged plug that ensures a more secure connection.

Do Expensive Audio Cables Really Make A Difference?

The answer to this question is subjective, as it depends on the individual’s preferences and needs. Expensive cables are often made of higher quality materials and are built to last longer than cheaper options. However, it doesn’t necessarily mean that they will produce better sound quality. A well-made, mid-range cable can perform just as well as a pricey one.

Do I Need A Digital Audio Cable For My System?

If your audio equipment is digital, such as DVD or Blu-ray players, then you will likely need a digital audio cable. Digital cables are designed to transmit digital information without any loss of quality, ensuring that your audio output remains crisp and clear. However, if your equipment is analog, then a digital cable is not necessary.

What Is The Maximum Length For An Audio Cable?

The length of an audio cable largely depends on the quality of the cable, the type of audio signal being transmitted, and the environment. However, for most applications, a cable length of up to 50 feet should be sufficient. Going beyond this length may result in audio quality loss due to electrical and magnetic interference. For longer lengths, amplifiers or signal boosters are recommended.

What Audio Cable Is Best

Credit: www.thebrokenrecord.net

Frequently Asked Questions For What Audio Cable Is Best

Which Cable Is Best For Sound Quality?

The quality of sound depends on several factors, and the cable used is one of them. When it comes to sound quality, the best cable depends on your audio needs and budget as different cables have different features. However, you can choose cables that have low resistance and high conductivity, like oxygen-free copper cables, to ensure better sound quality.

What Is The Best Audio Cord?

The best audio cord depends on your needs and preferences. For connecting headphones to an audio source, a 3. 5 mm aux cable may work well. For professional audio equipment or high-end systems, XLR cables offer superior sound quality and stability.

Consider factors such as length and durability when choosing an audio cord.

What Is The Best Wire For Audio Signal?

The best wire for audio signal is typically copper wire with oxygen-free high thermal conductivity (OFHC) or silver plating. These metals have low resistance and preserve signal quality, resulting in clearer and more accurate audio transmission.

Is Hdmi Or Optical Better For Sound?

HDMI is generally considered better for sound as it can transmit high-quality audio signals and video signals in one cable. Optical cables can only transmit audio signals and may have limitations in terms of audio quality.

Conclusion

After considering the various audio cable types available in the market, it ultimately comes down to personal preferences and individual needs. Factors such as sound quality, usage, and budget should be taken into account before making a purchase. Whether it is for professional or personal use, selecting the right audio cable can make all the difference in enhancing your listening experiences.

With the information presented in this post, selecting the best cable for your needs should be a breeze.

Categories
Archive

What Is Music Distribution

Music distribution is the process of making music available for sale or streaming through various platforms. This process involves delivering music to music stores, streaming services, and other digital media outlets.

Also, release delivery allows artists to reach a wider audience and generate revenue from their music. In today’s digital age, release delivery is crucial in the success of any artist. With the internet and various streaming services, release delivery has become more accessible and easier for artists to reach their fans.

Related reading: Landr Distribution: Unleash Your Music’s Full Potential and Cd Baby Distribution Review.

However, with the increase in the number of online platforms, choosing the right distribution company can be a daunting task. Moreover, it is essential to find a reputable distribution company that can market and promote the music effectively to ensure a successful release. We explore what release delivery is, the various types of distribution, and how artists can choose the right distribution company for their needs.

The Basics Of Music Distribution

Music Distribution Defined

In addition, release delivery refers to the process of making music available to the public. It involves the marketing, selling, and delivering of music to a mass audience. In the past, release delivery relied mostly on physical copies like CDs and vinyl records, but with the advent of the internet, digital distribution has become the primary method of getting music to the masses.

Why Music Distribution Is Important

Release delivery is important because it allows artists to reach a wider audience and increase their fan base. Furthermore, without distribution, an artist’s music would only be accessible to a small group of people. Distribution also helps artists to generate revenue from their music by making it available for purchase or streaming. Moreover, distribution ensures that an artist’s music gets to the fans in the format they prefer, which is critical in today’s music industry.

Types Of Music Distribution

Additionally, there are two primary types of music distribution: physical and digital. Physical distribution involves producing CDs, vinyl records, and other physical media and shipping them to stores for sale. This method is becoming less popular due to the rise of digital music distribution. Digital distribution involves making music available for download or streaming on digital platforms like iTunes, Spotify, and YouTube. Digital distribution is more efficient and cost-effective than physical distribution, and it allows artists to reach a wider audience with ease.

In conclusion, release delivery is essential for artists to reach a mass audience and generate revenue from their music. With the advent of digital distribution, it has become easier than ever for artists to get their music out to the masses.

How Music Distribution Works

Release delivery is the process of making music available to the public through various channels such as streaming platforms, physical copies (CDs, vinyl) and digital downloads. Also, this involves partnering with distributors and record labels, who collect royalties accurately and pay them to the appropriate parties.

Release delivery refers to the process of making recorded music available to the public through various channels, such as physical copies, online streaming, and downloads. Moreover, the distribution of music today is vastly different from how it used to be, where music was primarily distributed through physical copies that were available in record stores. The emergence of digital technology has revolutionized the music industry, and release delivery has evolved to keep up with the times.

The Role Of Record Labels

Record labels play a critical role in the music industry, particularly in release delivery. In addition, they are responsible for discovering and signing artists, producing and packaging music, and marketing and promoting music to the public. Record labels provide the resources necessary for creating and distributing music, such as recording studios, engineers, and producers. They also handle the licensing of music and ensure that artists are paid for their work.

The Role Of Distributors

Distributors are companies that specialize in getting music into stores and online platforms. They act as the bridge between record labels and music retailers, ensuring that music is available to purchase or stream by using various distribution channels. Distributors play a crucial role in getting music out to the public as they help independent artists access markets that they might not have access to otherwise.

Digital Music Distribution

The way music is distributed has evolved with technology, and digital music distribution has become the standard in recent years. Digital distribution is the process of delivering music to digital platforms, such as iTunes, Spotify, and Amazon Music, and making it available to consumers through streaming or downloading. Digital music distribution has made it easier for artists to reach a global audience as it is not confined to a particular geographical location. Overall, release delivery plays a significant role in the music industry, and its evolution has influenced how music is created, produced, and consumed. The combined efforts of record labels, distributors, and digital music platforms have made it easier for artists to showcase their work and for music lovers to access their favorite tunes.

Challenges Of Music Distribution

Release delivery can be an exciting prospect for artists who are looking to share their music with a wider audience. However, it also comes with its fair share of challenges. In this section, we will focus on three major challenges of release delivery:

Competing With Major Labels

The music industry is highly competitive, making it difficult for independent artists to gain exposure. Major labels often have more resources, bigger marketing budgets, and established relationships with key players in the industry. This puts independent artists at a disadvantage when it comes to distribution and promotion.

  • Major labels have established relationships with top streaming platforms and can negotiate favorable deals for their artists.
  • Independent artists may struggle to get their music featured on popular playlists or recommended to listeners.
  • Major labels often have more physical retail space and distribution channels than independent artists.

Navigating Streaming Platforms

Streaming platforms have become the primary method of music consumption, making it crucial for artists to have their music available on these platforms. However, navigating the various streaming platforms can be a challenge.

  • Each streaming platform has its own set of rules and guidelines for submitting and promoting music.
  • Artists may need to pay for premium features or promotional opportunities on certain platforms.
  • The algorithms used by streaming platforms can be complex, making it difficult for artists to predict how their music will be recommended to listeners.

Lack Of Physical Retail Space

In the past, physical retail space was a key component of release delivery. However, with the rise of streaming platforms, physical retail space has become less important. This can be a challenge for independent artists who may not have access to physical retail space.

  • Major labels often have more physical retail space and distribution channels than independent artists.
  • Independent artists may need to rely on online retailers or direct-to-consumer sales to distribute their music.
  • Without physical retail space, it can be more difficult for independent artists to build a fan base and gain exposure.
What Is Music Distribution

Credit: www.femnoise.com

Tips For Successful Music Distribution

Release delivery refers to the process of disseminating music tracks to various platforms or channels such as music stores, streaming sites, and radio stations. Effective music distribution involves selecting the right distribution service and marketing the music to the target audience.

Release delivery is the process of making music available to the public through different channels like online music stores, streaming services, and physical stores. It involves an agreement between an artist or record label and a music distributor. The music distributor then helps with the promotion and sale of the music to reach a wider audience.

Choosing The Right Distributor

Choosing the right music distributor is crucial for successful music distribution. The distribution company should provide an efficient, user-friendly platform that is compatible with various music platforms. Investigating the customer service and reviews of each distributor are important to determine their reputation and trustworthiness. To find the right distributor for your music, you should also consider the services or features they offer. Some distributors provide marketing support, promotion on social media, and assistance in setting up distribution accounts. Compare and contrast features before selecting a distributor that best aligns with your release delivery goals.

Designing Effective Cover Art

The cover art plays a crucial role in attracting the target audience and creating brand awareness. Your cover art should clearly communicate the genre, mood, and style of your music. Ensure it is unique, captivating, and eye-catching. Using high-resolution images and readable text is important so that it captures the customer’s attention.

Maximizing Metadata

Metadata is the information attached to an audio file that helps with organization and searchability. Accurate metadata increases the visibility of your music and helps it reach your target audience. It includes details such as the song title, artist name, album artwork, and genre. The metadata should be accurate, consistent and complete. Therefore, properly formatted metadata optimizes discoverability of your music and prevents any confusion during distribution. In conclusion, successful music distribution requires attention to key details such as choosing the right distributor, designing effective cover art, and maximizing metadata. By selecting the right distributor and adhering to effective metadata, your music can reach a wider audience. Therefore, creating appealing cover art sets the tone of the music and increases the likelihood of success.

Future Trends In Music Distribution

The future of release delivery is likely to focus on digital streaming services, such as Spotify and Apple Music, as these platforms continue to grow in popularity. While physical options, such as vinyl records and CDs, remain appealing to some fans, the convenience of streaming means it will likely remain the dominant method of release delivery for years to come.

Release delivery has significantly evolved over the last decade, adapting to the digital landscape and transforming the way music reaches consumers. Today, artists and music producers have access to advanced distribution tools that offer a more cost-effective and efficient way to distribute music. As technology continues to advance, the future of release delivery is promising. Here are some of the trends shaping the future of release delivery.

The Rise Of Independent Distribution

Independent distribution has been steadily gaining traction in the music industry over the years. With independent music distribution, artists and record labels have more control over their music’s distribution and can distribute their music directly to various streaming platforms. The rise of social media and other digital platforms has largely contributed to the growth of independent distribution. Through these platforms, artists can connect directly with their fans and distribute their music without having to go through a major record label.

Increased Emphasis On Data And Analytics

Data and analytics have always been essential elements in the release delivery process. They provide important insights into consumer behavior and help music distributors make data-driven distribution decisions. In the future, data and analytics are expected to play an even more significant role in release delivery. With the rise of artificial intelligence and machine learning, data analytics tools are becoming more sophisticated and accurate. This development will enable music producers to analyze consumer behavior more efficiently and make better-informed decisions regarding music distribution.

The Impact Of Emerging Technologies

As technology continues to evolve, it is transforming the music industry in various ways. One of the most significant impacts of emerging technologies is how music is distributed. Today, release delivery has shifted to digital platforms such as Spotify, Tidal, and Apple Music, and the future is expected to see more advancement in this area. For instance, blockchain technology is projected to revolutionize the music industry by providing a decentralized, transparent, and secure digital rights management system that reduces fraud and ensures artists are fairly compensated for their work.

In conclusion, the future of release delivery is exciting, with various trends shaping the landscape. Independent distribution is on the rise, data and analytics tools are becoming more sophisticated, and emerging technologies such as blockchain are expected to significantly impact the music industry. Music distributors and producers who stay up to date with these trends are more likely to succeed in the highly competitive music distribution space.

What Is Music Distribution

Credit: diymusician.cdbaby.com

What Is Music Distribution

Credit: playliststreams.com

Frequently Asked Questions For What Is Music Distribution

How Do Music Distributors Make Money?

Music distributors make money by taking a percentage of the revenue generated from the distribution of music. This can include income from streaming services, downloads, physical copies, and synchronization rights. Some distributors may also charge upfront fees or offer additional services for a fee.

What Does A Distributor Do In Music?

A music distributor is responsible for marketing and selling music to retailers and online stores. They work with record labels and independent artists to distribute their music to a wider audience and increase sales. The distributor also handles the logistics of shipping physical copies of the music and ensuring that the royalties are paid out correctly.

Do I Need A Distributor For My Music?

Yes, if you want your music to be available on various digital platforms such as Spotify, Apple Music, and Amazon Music, you need a distributor. They will help you to upload, promote, and distribute your music, and take care of licensing and royalties.

A distributor will also help you to reach a wider audience and increase your chances of getting noticed.

How Do I Distribute My Own Music?

To distribute your own music, you can choose from various online platforms. The most popular ones are Spotify, Apple Music, Amazon Music, and Google Play. You can also use social media platforms like Instagram and Facebook to promote your music.

Ensure that you have all the necessary licenses and rights to distribute your music.

Conclusion

Release delivery is the process of getting music to listeners through various channels like streaming platforms, physical copies, and radio stations. By using music distributors, artists can reach a wider audience without having to worry about logistics. It’s important for artists to choose their distributor carefully and ensure that their music is available on all major platforms.

With the increasing popularity of music streaming, release delivery has become a crucial aspect of the music industry, allowing artists to connect with fans all over the world.

For more background, see Music distribution on Wikipedia.

Categories
Archive

Jdk R22 Stereo Compressor

The JDK R22 is a stereo compressor that provides a transparent and warm sound with its Class A circuitry and dual VCA design. It has variable attack and release times and a VU meter for precise monitoring.

Designed for professional audio engineers and musicians, the JDK R22 stereo compressor is a versatile piece of equipment that provides exceptional sound quality and dynamic control. Its Class A circuitry and dual VCA design ensure a transparent and warm sound, while its variable attack and release times allow for precise shaping of the sound.

With its intuitive controls and a VU meter for precise monitoring, the JDK R22 is an excellent choice for anyone looking for a high-quality stereo compressor.

Jdk R22 Stereo Compressor

Credit: m.youtube.com

Features Of Jdk R22 Stereo Compressor

The JDK R22 Stereo Compressor offers a range of features that make it an ideal tool for audio processing. With high-quality sound, variable attack, and release controls, it is perfect for mastering and live sound applications. Additionally, it features a stereo link option and multiple metering options, making it a versatile addition to any audio setup.

JDK R22 Stereo Compressor by API is a versatile, two-channel unit widely used in professional audio production. This compressor is perfect for various applications, including tracking, mixing, and mastering. Here are some of the key features that make JDK R22 a reliable and highly sought-after compressor:

Ease Of Use

The JDK R22 Stereo Compressor comes with simple and intuitive controls that make it easy to use, even for beginners. The interface comprises two identical channels with individual controls, making it a breeze to adjust settings on each channel, independently. The Input Gain, Threshold, Ratio, Attack, and Release controls are strategically placed, allowing you quick access and easy tweaking of your audio. The VU meter on each channel provides reliable visual feedback on your audio levels and gain reduction.

Transparent Sound

One of the significant advantages of the JDK R22 Stereo Compressor is its transparent sound. The compressor processes your audio signals and ensures that they sound their best without introducing any noticeable coloration, thanks to its Class A design. The transparent sound is highly desirable in professional audio production as it preserves the tonal quality of the source material.

Versatility

The JDK R22 Stereo Compressor is highly versatile with a wide range of applications. It can handle any audio source, from vocals, drums, guitars, bass, and even full mixes. Additionally, this compressor operates in stereo or mono, giving you the flexibility to use it in various configurations, catering to your specific needs. Furthermore, the Sidechain EQ feature enables you to tweak the frequency range of your audio signals, helping you to tailor your compression more precisely. In summary, the JDK R22 Stereo Compressor offers straightforward controls and a transparent sound that sound engineers crave for professional audio production. Its versatility makes it highly useful in various applications, ensuring that you produce high-quality audio that resonates with your audience.

Jdk R22 Stereo Compressor

Credit: vintageking.com

Applications Of Jdk R22 Stereo Compressor

The JDK R22 Stereo Compressor is a highly regarded tool in the audio industry. It is commonly used in mastering and mixing applications to add warmth and character to recordings, as well as tame harsh high and low frequencies. Its dual-channel design provides versatile control over stereo material.

JDK R22 Stereo Compressor is a powerful tool for enhancing the overall quality of generated sound. Its numerous applications are making it a significant part of a sound engineer’s toolset. Let’s take a deeper look at some of the popular applications of this compressor.

Music Production

JDK R22 Stereo Compressor is widely used in music production for compressing audio signals without distorting the original sound. It helps to control the dynamic range of the audio signal by reducing the loud parts of the audio while amplifying the quiet parts, leading to a consistent and balanced sound. It is extensively used on drums, bass, and vocals and helps to bring out the nuances of the performance.

Live Sound

JDK R22 Stereo Compressor is also a great device for live sound applications. It can enhance the sound quality of live music by ensuring the consistency in sound even when sound dynamics change on the stage. It helps to control and manage the sound frequencies and prevents the feedback sounds from occurring. The use of JDK R22 Stereo Compressor enhances the overall performance quality and the listener’s overall experience.

Podcasts

JDK R22 Stereo Compressor has become an essential tool for podcast production. It is used widely for leveling the sound quality and bringing harmony to the podcast audio. This compressor is perfect for ensuring that all the speakers have the same volume level, making the podcast easy to listen to. It also helps to eliminate background noise and provides crisp and clear sound quality to ensure a pleasant listening experience for the audience. In conclusion, JDK R22 Stereo Compressor is a powerful tool that offers a wide range of applications, making it a must-have device for sound engineers. Its ability to enhance the overall sound quality of music production, live sound, and podcast production is essential in the entertainment industry.

Comparison With Other Compressors

The Jdk R22 Stereo Compressor is an exceptional device that delivers high-quality sound that matches no other. It is versatile and can handle various tasks such as leveling, shaping, and more. Many musicians and producers love the Jdk R22 Stereo Compressor because it is efficient and can produce different styles of compression, which makes it stand out among its peers.

Ssl G Master Buss Compressor

The SSL G Master Buss Compressor is a legendary device that has been in the market for many years. It has an incredible sound quality and dynamics control that make it a top choice for many music producers. However, the Jdk R22 Stereo Compressor is more versatile and has more features than the SSL G Master Buss Compressor, which makes it suitable for different styles of music.

Universal Audio 1176

The Universal Audio 1176 is another fantastic compressor that is popular among many music producers. It is known for its fast attack time, which makes it perfect for handling transient peaks. However, the Jdk R22 Stereo Compressor is better in terms of sound quality and functionality. The Jdk R22 Stereo Compressor can handle both soft and hard knee compression, which makes it easier to use compared to the Universal Audio 1176.

CompressorSound QualityFunctionalityPrice
Jdk R22 Stereo CompressorExceptionalVersatile and feature-richHigher end
SSL G Master Buss CompressorIncredibleLimited functionalityExpensive
Universal Audio 1176GoodFast attack timeMid-range
  • The Jdk R22 Stereo Compressor surpasses other compressors in terms of sound quality and functionality.
  • The SSL G Master Buss Compressor is a legendary compressor that has been used for many years but has limited functionality compared to the Jdk R22 Stereo Compressor.
  • The Universal Audio 1176 has a fast attack time and is suitable for handling transient peaks but is not as versatile as the Jdk R22 Stereo Compressor.

Overall, the Jdk R22 Stereo Compressor is a must-have device for any music producer who wants to produce high-quality sound. It is versatile, feature-rich, and has exceptional sound quality, which makes it stand out among its peers. With the Jdk R22 Stereo Compressor, you can easily shape and level your music to produce a professional touch.

Jdk R22 Stereo Compressor

Credit: reverb.com

User Reviews

The Jdk R22 Stereo Compressor has gained popularity in the world of audio engineering due to its exceptional features. The compressor is ideal for a variety of studio applications, from professional studios to home studios. In this section, we’ve outlined user reviews from professional audio engineers and home studio owners.

Professional Audio Engineers

The Jdk R22 Stereo Compressor is a game-changer for professional audio engineers. It offers a transparent compression, making it an exceptional tool for mastering and mixing. Most professionals appreciate the control it provides, allowing them to tweak each parameter to achieve the desired effect. The absence of unwanted artifacts and pumping make it an easy choice for many engineers.

Home Studio Owners

The Jdk R22 Stereo Compressor has also found a place in home recording studios. This compressor provides a cost-effective way for home studio owners to access high-quality studio equipment. It simplifies the mixing and mastering process, delivering professional results without costing a fortune. With clear instructions, even beginners can use it without any difficulties.

FeaturesProsCons
Transparent compressionExceptional controlExpensive
No unwanted artifacts and pumpingEasy to use
Cost-effectiveProfessional results
  • The Jdk R22 Stereo Compressor is a game-changer for professional audio engineers due to its transparent compression and exceptional control.
  • It offers high-quality studio equipment at a cost-effective price, making it suitable for home studio owners.
  • The compressor simplifies the mixing and mastering process, delivering professional results without costing a fortune.

Overall, the Jdk R22 Stereo Compressor has received positive reviews from both professional audio engineers and home studio owners. Its exceptional features make it a must-have tool in any studio. With its transparent compression, control, and affordability, this compressor is definitely worth considering.

Jdk R22 Stereo Compressor Settings

The JDK R22 Stereo Compressor settings allow for precise control of dynamic range. With adjustable threshold, ratio, and attack/release parameters, users can achieve a smooth and polished sound on stereo audio recordings.

If you are looking for enhancing the quality of your audio recordings, the JDK R22 Stereo Compressor is a tool you should consider. The JDK R22 Stereo Compressor has extensive settings that can help you achieve the perfect sound. In this post, we will dive into the JDK R22 Stereo Compressor settings, starting with the most important ones.

Threshold

The threshold is a crucial feature of the JDK R22 Stereo Compressor. It determines the point at which the compressor starts compressing the audio signal. The threshold setting measures the volume level that triggers the compression process. If the audio playback goes beyond the threshold, the JDK R22 Stereo Compressor will bring the volume levels down. A lower threshold setting means that the compressor will be more active.

Ratio

The ratio setting controls the amount of gain reduction that occurs once the threshold is exceeded. A higher ratio setting means that the JDK R22 Stereo Compressor will apply more compression to the audio signal. A lower ratio setting has less compression, giving a more natural sound. The JDK R22 Stereo Compressor has a ratio range of 1.5:1 to 5:1, meaning for every 1.5 to 5 dB above the threshold, you get 1dB of gain.

Attack Time

The attack time determines how fast the compressor responds to the audio level above the threshold. If you set a shorter attack time, the compressor responds faster to audio levels above the threshold. Whereas, a longer attack time gives more time for the audio level to rise above the threshold before the compressor kicks in. The JDK R22 Stereo Compressor’s attack time ranges from 0.5ms to 50ms.

Release Time

The release time determines how fast the compressor stops compressing once the audio goes below the threshold. If the release time is shorter, the compressor will respond faster to sudden changes in the audio. Whereas, if the release time is longer, the effect of the compressor will be more sustained. The JDK R22 Stereo Compressor’s release time ranges from 50ms to 3s.

Makeup Gain

Makeup gain compensates for the volume reduction caused by the compressor. When the compressor is compressing the audio, the overall volume level is reduced. Makeup gain plays a crucial role in restoring the lost volume. The JDK R22 Stereo Compressor’s makeup gain has a range of +/- 10dB. In conclusion, the JDK R22 Stereo Compressor settings have a massive impact on the quality of your audio recordings. Ensure that you use the settings that best suit your audio needs. With the above essential settings, you can achieve the ideal sound that fits your unique style.

Frequently Asked Questions Of Jdk R22 Stereo Compressor

What Is The Jdk R22 Stereo Compressor?

The Jdk R22 Stereo Compressor is a high-end rack-mounted audio compressor that is designed for professional recording studios and music production facilities. It is known for its superb sound quality, flexibility, and ease of use.

How Does The Jdk R22 Stereo Compressor Work?

The Jdk R22 Stereo Compressor uses advanced analog circuitry to compress the dynamic range of audio signals. This can help to even out the differences in volume between different parts of a recording, resulting in a smoother, more polished sound.

What Are Some Of The Key Features Of The Jdk R22 Stereo Compressor?

Some of the key features of the Jdk R22 Stereo Compressor include adjustable threshold levels, attack and release controls, and sidechain filtering. It also has a comprehensive metering system that provides real-time feedback on the level of compression being applied to the audio signal.

How Does The Jdk R22 Stereo Compressor Compare To Other Audio Compressors?

The Jdk R22 Stereo Compressor is widely regarded as one of the best audio compressors on the market, thanks to its exceptional sound quality and versatile feature set. It is particularly well-suited to use in professional recording studios and high-end music production facilities.

Conclusion

The JDK R22 Stereo Compressor is a powerful tool for achieving a polished, professional sound. Its dual channels provide both subtle and aggressive compression, while its VU meter adds a classic touch. With its sturdy build and versatile features, the R22 is a great investment for any studio setup.

Whether you’re a seasoned pro or just starting out, this compressor is an excellent choice for achieving the high-quality, dynamic sound you’re after.

For more background, see Dynamic range compression on Wikipedia. You may also like our guide: Top Stereo Width Plugins.

Categories
Archive

Mcdsp Apb16 Review

The McDSP APB16 is a high-quality analog processing box that features unique digitally controlled analog circuitry. This innovative product boasts impressive sound and flexibility, making it an excellent choice for audio engineers and music producers.

The APB16 combines vintage analog processing techniques with modern digital control and flexibility. Each one of its 16 analog channels features a high-quality digital control system that provides real-time recall and automation options, as well as high-precision calibration. This allows users to get the benefits of analog processing without the hassle of manual adjustments or drifting tolerances.

Additionally, the APB16 is equipped with digital control over analog input and output levels, as well as a built-in programmable noise generator, giving users further options for customizing their sound. All in all, the APB16 offers a great blend of classic analog warmth and modern digital convenience.

Mcdsp Apb16 Review

Credit: www.sweetwater.com

Apb-16 Overview

The McDSP APB-16 is a revolutionary audio processor, featuring 16 channel ADC and DAC converters and customizable analog processing. Ideal for audio engineers seeking a versatile, user-friendly solution for any professional audio application.

The McDSP APB-16 is a unique analog processing box that provides an integrated plug-in experience with the tactile feel of hardware. The APB-16 mark II provides sixteen channels of premium analog processing, powered by the patented McDSP technology. The APB-16 is nothing like your traditional outboard gear. It provides all the benefits of analog gear, combined with the flexibility and recall of digital processing.

Features Of The Apb-16

The APB-16 is a powerful audio processor that offers a wide range of features. Here are some of the most notable features that make it stand out from the rest.

  • 16 Channels of Analog Processing with Digital Recall
  • A/D and D/A Conversion at up to 192kHz
  • Patented McDSP Processing and Adjustable I/O Levels
  • Module Replaceable Sockets for Easy Maintenance
  • Auto Level Trim and Mono Maker for Consistent Mix Translation
  • Eighteen APB Modules Available, with More on the Way
  • One Mic Preamp Module, that features Clean Channel and Vintage Transformer Options
  • On-board Audio Signal Path for Tube Saturation or Tape Emulation Hint

Design And Build Quality

The APB-16 is a beautifully designed processor with excellent build quality. Each unit is housed in a sturdy 19-inch rack-mountable chassis, featuring module replaceable sockets for easy maintenance. Both the power supply and the modules are located inside the chassis, which means the APB-16 takes up minimal space in your recording setup. The front panel features an easy-to-use interface with a user-friendly control layout. The rugged knobs, switches, and buttons are all built to last. The APB-16 is a piece of gear that you can rely on for years of use. It is built with the highest quality components and features advanced circuitry that provides exceptional performance and reliability. It is the perfect combination of modern digital processing and vintage analog feel, making it a must-have addition to any recording studio or live sound setup. Get your hands on the APB-16, and you will not be disappointed.

Mcdsp Apb16 Review

Credit: www.audioanimals.co.uk

Audio Performance

The McDSP APB16 provides exceptional audio performance with its unique Analog Processing Box technology. With 16 circuit modeled plug-ins, this review finds the APB16 is a game changer for high-quality audio production.

Sound Quality

The sound quality of the McDSP APB16 is nothing short of exceptional. It boasts 16 channels of high-quality microphone preamps, analog processing, and digital connectivity. The unit is designed to deliver a clean, transparent sound that captures the full dynamic range of any instrument or vocal. Plus, with the APB16’s unique feature of letting the user select from 48V or analog phantom power on a per-channel basis, creating organic and rich vocal and instrument sounds is a breeze. This feature is hugely valuable for recording delicate instruments or noise-sensitive mics that require different phantom power levels to function properly.

Durability

The McDSP APB16 is built to last, featuring high-quality components and a sturdy design. The unit is manufactured with a rugged and reliable all-steel chassis that is designed to withstand any wear-and-tear. Plus, its compact size and easy-to-use interface make it a perfect fit for both studio and live applications. The APB16 is not only road-worthy but it’s also small enough to carry in your backpack which is a bonus for those always on the go. When it comes to audio performance, the McDSP APB16 is undoubtedly a top-of-the-line device that delivers outstanding sound quality and unmatched durability. Its compactness and convenience make it an ideal tool for recording studios and live sound stages alike. Opting for this device over others is always a smart choice, plus it comes with the peace of mind that McDSP products guarantee users with twice the warranty than what the industry standard offers.

Ease Of Use

If you are a music producer, you know how important it is to have reliable tools that simplify your work and increase your efficiency. That’s why McDSP created the APB16 – a game-changing piece of gear that combines analog processing with digital control. In this review, we’ll be discussing the ease of use of the McDSP APB16.

Navigation

The McDSP APB16 is designed to be simple and intuitive. The user interface is straightforward, and all the controls are easily accessible. Navigating through the menus is a breeze, thanks to the well-designed interface. The layout is intuitive and helps you find what you need quickly. You won’t waste time searching for the right knobs or parameters. Instead, you’ll be able to focus on the creative process.

Integration With Daws

The McDSP APB16 is compatible with most DAWs, including Pro Tools, Logic Pro X, and Ableton Live. Its seamless integration with these software programs makes it easy to incorporate into your workflow. You’ll be able to control the APB16’s analog processing from your DAW, without having to switch between different interfaces. This integration takes the guesswork out of the process and lets you focus on making great music.

Conclusion

The McDSP APB16 is a powerful tool that simplifies the music production process. Its ease of use, intuitive navigation, and seamless integration with DAWs make it a must-have for serious producers. With the APB16, you can focus on your creativity and leave the technical details to the machine. We highly recommend the McDSP APB16 and believe it’s a game-changer in the world of music production.

Apb-16 Vs Other Dsps

The Mcdsp Apb16 stands out from other DSPs due to its superior processing power, unique design and customization options. Its comprehensive interface makes digital signal processing easy and effective for all types of users.

Comparison With Other Dsps

McDSP APB-16 has been gaining popularity among the music production community because of its unique features and capabilities. Many professionals have praised its efficiency and effectiveness when compared to other Digital Signal Processors (DSPs) available in the market. Let us take a closer look at the comparison between APB-16 and other DSPs.

Pros And Cons

When it comes to comparing the APB-16 to other DSPs, it is essential to analyze the pros and cons of both. Here is a brief list of the advantages and disadvantages of APB-16 and other DSPs. APB-16 Pros:

  • Revolutionary approach to audio processing
  • 24 analog-to-digital converter channels
  • Dedicated DSP per channel
  • Flexible parallel processing
  • Completely customizable analog circuit emulation
  • Intuitive software control

APB-16 Cons:

  • Expensive compared to other DSPs
  • Requires a high-performance computer that can handle large amounts of clustering
  • Steep learning curve for beginners

Other DSPs Pros:

  • Relatively cheaper than APB-16
  • Suitable for small music production houses
  • Easier to use than APB-16
  • Can be integrated with a wide range of software

Other DSPs Cons:

  • Less efficient and effective than APB-16
  • Limited customizable analog circuit emulation
  • Limited channels and DSP
  • Can be less intuitive for advanced users
APB-16Other DSPs
Dedicated DSP per channelLimited channels and DSP
Flexible parallel processingLess effective
Completely customizable analog circuit emulationLimited analog emulation customization
Revolutionary approach to audio processingTraditional approach to audio processing

In conclusion, while the APB-16 is more expensive and requires a high-performance computer system than other DSPs, its efficiency, effectiveness, and customizable analog circuit emulation features make it stand out from the rest. However, other DSPs may be suitable in small music production houses with a lower budget.

Applications Of Apb-16

APB-16 is a versatile audio processor that provides extensive dynamic range control and creative effects options. The McDSP APB16 review showcases the functionality of this device and how it can be utilized for professional audio production in a variety of applications.

From subtle signal shaping to extreme sound manipulation, APB-16 offers a range of possibilities for audio engineers and enthusiasts alike.

The McDSP APB-16 is a revolutionary product that boasts of unparalleled audio processing capabilities. This review aims to shed light on the myriad applications of APB-16. From professional studios to home studios, this product promises to be a game-changer in the world of audio engineering.

Professional Studios

For professional studios that demand uncompromising audio quality, the APB-16 is a godsend. With its advanced processing algorithms, this product can handle even the most complex audio processing tasks with ease. Its flexibility and scalability make it the perfect addition to any professional audio setup. The APB-16 allows engineers to mix and match different analog processors and plugins seamlessly, resulting in unparalleled audio quality.

Home Studios

Home studios also stand to benefit significantly from the APB-16. This product has been designed with the needs of home studio owners in mind. The APB-16 takes up minimal desk space, making it an ideal choice for cramped home studios. Additionally, the product’s scalability means that it can grow and evolve with the studio, without the need for expensive upgrades. As you can see, the McDSP APB-16 is an incredibly versatile product that has applications across a wide range of audio processing tasks. Whether you’re a professional audio engineer or a home studio owner, the APB-16 promises to take your audio processing capabilities to a whole new level!

Mcdsp Apb16 Review

Credit: m.youtube.com

Faqs

If you’re considering the McDSP APB-16 for your audio processing needs, you may have some questions before making your purchase. Here are some of the most frequently asked questions and their answers:

What Is The Price Of Mcdsp Apb-16?

The McDSP APB-16 is an advanced audio processor and monitoring system that uses a unique processing scheme for dynamic range control. The price of this innovative solution varies depending on the package you choose. Currently, you can buy the Analog Processing Box, also known as APB-16A, for $4,499, whereas the version with the Digital Processing Box (APB16-AES) costs around $5,199.

Is The Apb-16 Compatible With My Daw?

The McDSP APB-16 is compatible with most DAWs, including Pro Tools, Logic Pro X, Ableton Live, and Cubase. You can use the APB-16 with your DAW by connecting it via Ethernet or USB and controlling it through the McDSP plug-in. The connection process is straightforward and well-documented in the user’s manual, and the plug-in includes a detailed guide on how to use it.

What Are The Benefits Of Using Apb-16?

The McDSP APB-16 comes with several benefits that make it an excellent investment for any sound engineer or audio producer. For instance:

  • The Analog Processing Box features 16 channels of analog I/O, including 8 mic preamps and 8 balanced analog inputs. It also features 16 ADC and DAC converters, allowing for high-quality conversions.
  • The Digital Processing Box includes 16 channels of AES3 I/O, which supports sample rates up to 192 kHZ. Additionally, it includes 8 channels of ADAT I/O and 64 channels of MADI I/O, making it suitable for most audio production workflows.
  • The McDSP plug-in suite provides a comprehensive set of audio processing tools that allow for precise dynamic control, EQ, and filtering. The plug-in integrates seamlessly with your DAW and the APB-16 system, providing a streamlined workflow.
  • You can add more analog or digital I/O I/O units as you need, making it easy to expand your audio production setup as your studio grows.

Overall, the McDSP APB-16 Review proves that it offers powerful processing capabilities that can enhance your audio production workflow and help you achieve professional quality sound. Whether you are a seasoned sound engineer or just starting in audio production, this system is an excellent investment to make.

Frequently Asked Questions For Mcdsp Apb16 Review

What Is The Mcdsp Apb16?

The Mcdsp Apb16 is a high-quality analog processing box that provides 16 channels of various processing modules, such as EQ, compression, and saturation. It is designed to bring analog-like warmth and character to digital recordings.

What Are The Benefits Of Using The Mcdsp Apb16?

Using the Mcdsp Apb16 can add depth, warmth, and character to your digital recordings. The analog-processing modules give you more control over your sound, allowing you to shape it to your liking. Additionally, the Mcdsp Apb16’s efficient design makes it a cost-effective solution for processing multiple channels at once.

How Does The Mcdsp Apb16 Compare To Other Analog Processing Tools?

Compared to traditional analog processing tools, the Mcdsp Apb16 offers the same warmth and character in a more compact, efficient package. It provides the benefits of analog processing without the added costs and maintenance associated with traditional hardware. Additionally, the Mcdsp Apb16’s digital control and recall features give you more flexibility and convenience.

Can The Mcdsp Apb16 Be Used For Live Sound?

While the Mcdsp Apb16 is primarily designed for studio use, it can also be used for live sound mixing. Its compact design and flexibility make it a great choice for live sound engineers who need high-quality analog processing tools on the go.

Conclusion

Overall, the Mcdsp Apb16 Analog processor box proved to be a valuable addition to any recording setup. With its combination of high-quality analog processing capabilities and flexible digital controls, it has the potential to bring out the best in any audio signal.

It’s no wonder that it has become a go-to tool for many professional audio engineers. So if you’re on the hunt for a versatile and powerful piece of hardware to help take your music production to the next level, the Mcdsp Apb16 is definitely worth considering.