Categories
Archive

How to Master the Art of Vocal Mixing on a Beat: Expert Techniques

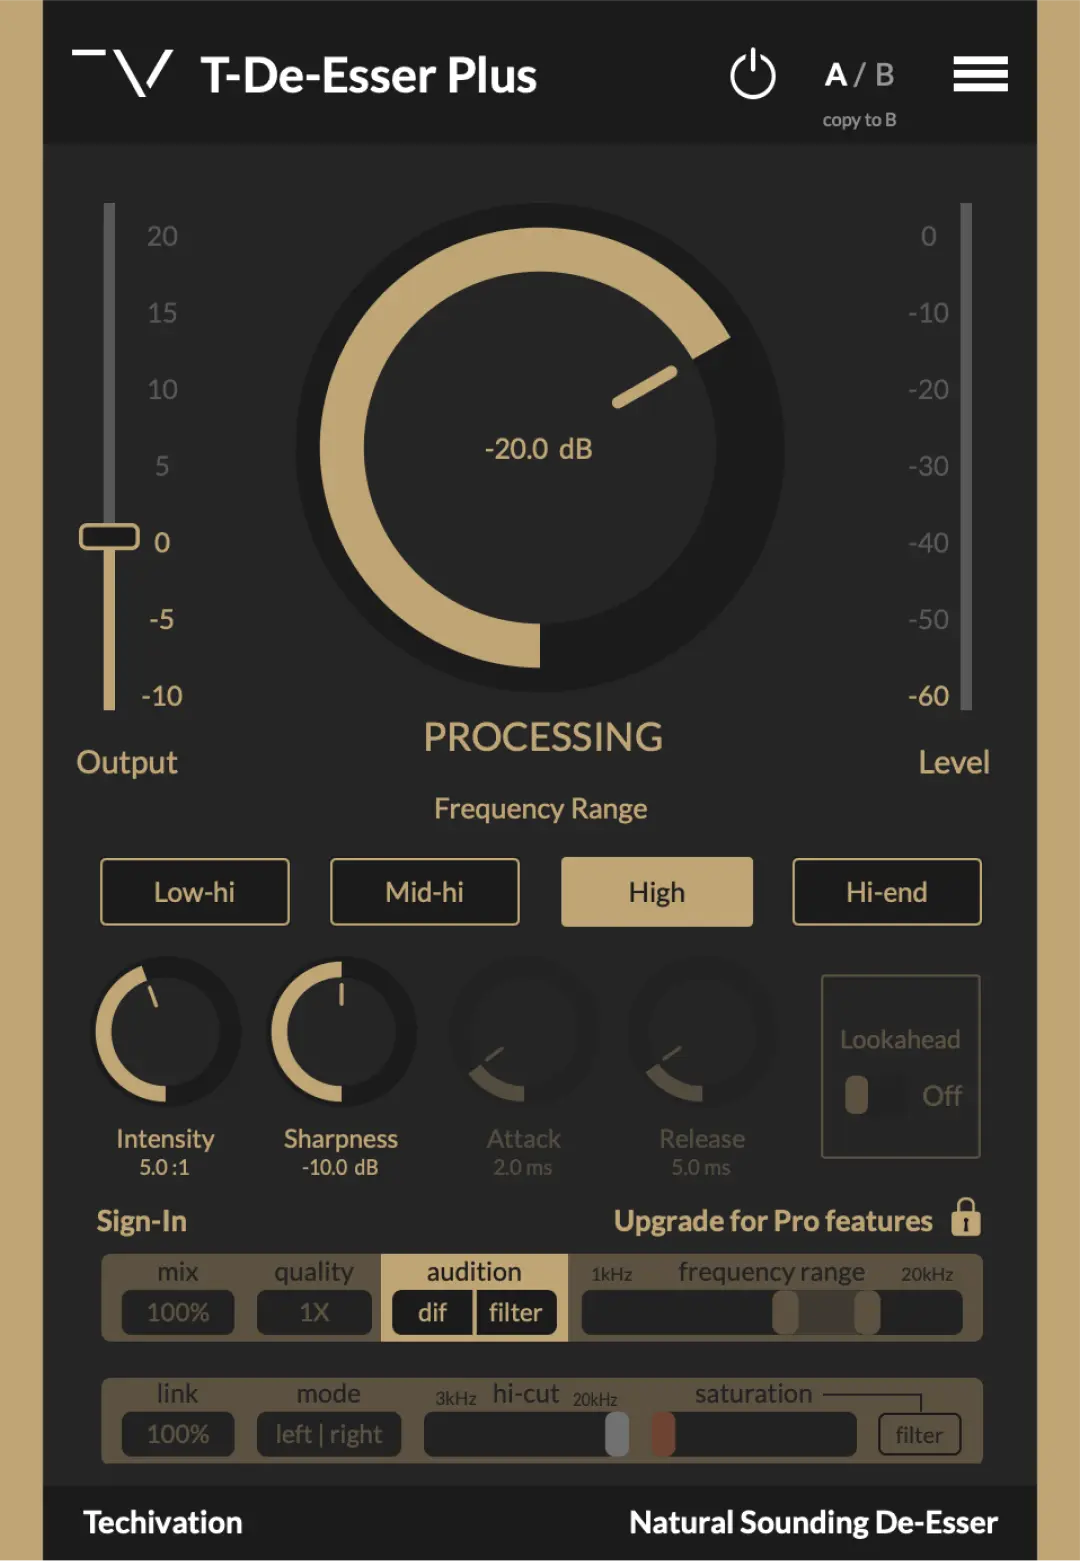
De-esser plugin used for vocal mixing on a beat

To mix vocals to a mastered beat, start by adjusting the gain levels of the vocal track to fit well with the beat. Use EQ to carve out space for the vocals in the mix and apply compression to control dynamics.


Then, add reverb and delay to create depth and ambiance. Also, Mixing vocals to a mastered beat requires careful attention to levels, EQ, compression, and effects. By following these steps, you can ensure that the vocals sit seamlessly within the beat, enhancing the overall sound of the track.

Related reading: Mixing Rap Vocals and Hip Hop Vocal Mixing. For background, see the Wikipedia article on Audio mixing.


Also, proper vocal mixing is essential for achieving a professional and polished sound that complements the beat and captivates the listener.


Understanding Vocal Mixing


Moreover, discover how to blend vocals seamlessly with a mastered beat. In addition, learn techniques to elevate vocal clarity and presence in your mix. Enhance your music production with expert vocal mixing skills.

In addition, understanding Vocal Mixing Vocal mixing is a crucial aspect of music production that involves blending the vocals with a mastered beat to create a cohesive and professional-sounding track. For example, it requires a deep understanding of various audio processing techniques and a keen ear for detail. Let’s delve into the intricacies of vocal mixing and explore its significance in the realm of music production. “`html

The Importance Of Vocal Mixing

“` Enhancing Clarity: Proper vocal mixing ensures that the vocals are clear and intelligible, allowing the listener to fully grasp the lyrical content and emotion conveyed in the song. Creating Balance: It enables the vocals to harmoniously complement the instrumental arrangement, striking a perfect balance in the overall sound of the track. Furthermore, emphasizing Emotions: Effective vocal mixing can enhance the emotional impact of the song. This allows the singer’s expression and delivery to resonate deeply with the audience. “`html

Common Challenges In Vocal Mixing

“` Frequency Competition: The vocals often compete with the underlying beat in the frequency spectrum, making it challenging to ensure both elements shine without overpowering each other. Dynamic Range Management: Balancing the dynamic range of vocals to maintain consistency throughout the performance while preserving the natural dynamics can be a complex task. Additionally, spatial Integration: Achieving spatial cohesion between the vocals and the beat. This ensures they occupy the same sonic space without clashing, requires meticulous attention and skillful processing techniques. In this world of digital music production, understanding vocal mixing is indispensable for delivering professional and captivating musical experiences.


Setting The Foundation for Vocal Mixing on a Beat

Preparing The Raw Vocal Tracks

Before you dive into mixing vocals with a mastered beat, ensure the raw vocal tracks are clean and ready.

Understanding The Beat

Get familiar with the nuances of the beat to enhance the vocal arrangement and overall cohesion.

Essential Techniques For Vocal Mixing


Learn essential techniques for vocal mixing with a focus on achieving the perfect balance when mixing vocals with a mastered beat. Discover how to use EQ, compression, reverb, and delay to make vocals stand out in the mix while maintaining clarity and presence.


Also, master the art of vocal mixing for professional-sounding tracks.

Balancing Vocal Levels

Moreover, one of the essential techniques for vocal mixing is balancing the vocal levels with the rest of the instruments in the mix. Then, this process ensures that the vocals can be heard clearly without overpowering or getting lost in the music.

In addition, to achieve a balanced mix, start by adjusting the volume fader of the vocal track. Increase the vocal level until it is audible but not dominating the other elements of the song. In short, keep in mind that the vocals should be the focal point of the track. But they still need to blend harmoniously with the instrumentation.

Another way to balance vocal levels is by using panning. Similarly, by placing the vocal track slightly to the left or right in the stereo field, you can create a sense of space and depth in the mix. Furthermore, experiment with different panning positions to find the sweet spot that works best for your song.

Applying Compression And Eq for Vocal Mixing on a Beat

Additionally, Compression and EQ are two powerful tools for shaping the sound of vocals in a mix. Also, Compression helps to control the dynamic range of the vocals, making the softer parts more audible and taming any harsh peaks.

Also, start by inserting a compressor on the vocal track and adjust the settings to achieve a balanced and controlled sound. In addition, set the threshold to catch the louder parts of the vocals and apply gentle compression with a ratio of around 2:1 to 4:1. This will help to even out the vocal performance and make it sit well in the mix.

Next, use EQ to enhance the clarity and tonal balance of the vocals. For example, identify any frequency buildup or harshness in the vocal track and use a narrow Q setting to cut or attenuate those frequencies. On the other hand, you can boost the presence or warmth of the vocals by gently increasing the desired frequencies.

Adding Creative Effects for Vocal Mixing on a Beat

Once you’ve achieved a balanced and polished vocal sound, it’s time to add creative effects to enhance the overall vibe of the track. As a result, effects like reverb, delay, and modulation can bring depth, space, and excitement to the vocals, making them more interesting and engaging for the listeners.

Experiment with different types and settings of reverb to create a sense of space that suits the song. Use delay to add rhythmic or atmospheric effects to certain parts of the vocals. Modulation effects like chorus or flanger can provide a unique character and movement to the vocals.

Remember to use these creative effects tastefully and in moderation. Overusing effects can clutter the mix and distract from the main focus, which is the vocals.

Advanced Tips And Tricks

When it comes to mixing vocals to a mastered beat, there are several advanced tips and tricks that can take your mixes to the next level. By utilizing automation for dynamic mixes and incorporating parallel processing for depth and impact, you can achieve professional-quality results. In this section, we will explore these techniques in detail.

Utilizing Automation For Dynamic Mixes for Vocal Mixing on a Beat

Automation is a powerful tool that allows you to control the volume, panning, and effect parameters of individual vocal tracks over time. By automating these settings, you can create a more dynamic and engaging mix that brings out the emotion and expression in the vocals.

Here are some key points to keep in mind when using automation for dynamic mixes:

  • Automate the volume: Adjusting the volume of the vocal tracks at different parts of the song can help highlight important phrases or create a sense of movement.
  • Pan automation: Experimenting with panning automation can add width and dimension to your vocals. Try gradually panning the vocals from left to right or vice versa to create a stereo effect.
  • Effect automation: Automation can also be used to control the parameters of effects such as reverb, delay, or modulation. By automating these effects, you can create interesting textures and enhance specific parts of the vocals.

Parallel Processing For Depth And Impact

Parallel processing is a technique that involves blending multiple instances of the same vocal track, each processed differently, to create a larger and more impactful sound. This approach can add depth, dimension, and presence to your vocal mix.

Here are some ways you can use parallel processing to enhance your vocals:

  • Parallel compression: Apply heavy compression to a duplicate of the vocal track and blend it with the original. This can help control the dynamic range of the vocals and add intensity and sustain.
  • Parallel saturation: Duplicate the vocal track and apply saturation or distortion effects to the duplicate. By blending this processed track with the original, you can add warmth, richness, and harmonics to the vocals.
  • Parallel reverb/delay: Create a duplicate of the vocal track and apply reverb or delay effects to the duplicate only. By blending this processed track with the dry vocals, you can add depth, ambience, and space to the vocals.

By implementing these advanced tips and tricks, you can elevate your vocal mixes and achieve a professional sound. Experiment with automation and parallel processing to add dynamics, depth, and impact to your vocals, and let your creativity shine.

Working With The Beat

When it comes to mixing vocals to a mastered beat, working with the beat is crucial. This involves integrating vocals seamlessly with the instrumental and ensuring clarity and presence.

Integrating Vocals With The Instrumental

  • Align vocal tracks to the rhythm of the beat.
  • Adjust the volume to ensure vocals complement the instrumental.
  • Use EQ to carve out space for vocals in the mix.

Ensuring Clarity And Presence for Vocal Mixing on a Beat

  1. Apply compression to even out vocal dynamics.
  2. Add reverb and delay to enhance vocals without overpowering the beat.
  3. Experiment with panning to create a balanced stereo image.


Refining The Mix for Vocal Mixing on a Beat

Refining the mix of vocals to a mastered beat is crucial to achieve a professional sound. After balancing the levels and ensuring the vocals sit nicely in the mix, the next step involves fine-tuning the EQ and dynamics, and creating vocal space with reverb and delay.

Fine-tuning Eq And Dynamics

Adjust the EQ to enhance the vocal tonality. Sweep for problematic frequencies and reduce them. Boost the presence frequencies for clarity. Work on the dynamics by using compression to even out the vocal performance.

Creating Vocal Space With Reverb And Delay

Apply reverb to create a sense of space. Adjust the reverb time to match the vibe of the track. Use delay to add depth and dimension to the vocals. Experiment with different delay times to find the sweet spot.

Collaborating With Producers for Vocal Mixing on a Beat

When mixing vocals to a mastered beat, collaborating with producers is key to achieving the best possible sound. The producer’s input and feedback can greatly enhance the final mix, resulting in a polished and professional sound.

Clear and effective communication with the producer is vital throughout the mixing process. It is crucial to understand their vision for the vocals and the desired outcome of the mix. Listen to their ideas, preferences, and suggestions attentively, and ask the right questions to clarify any uncertainties.

Regularly providing updates and seeking feedback from the producer ensures that you are on the same page and they are satisfied with the progress. Feedback from the producer will help you make necessary adjustments and improvements to achieve the desired sound, enhancing the overall quality of the mix.

To create a seamless blend between the vocals and the mastered beat, it is important to optimize the mix specifically for the beat. Consider the following tips:

  1. Balance the levels: Adjust the volume of the vocals and the beat so they complement each other. Ensure that neither one overpowers the other, creating a harmonious balance.
  2. Pan the vocals: Experiment with panning the vocals to create depth and width in the mix. This can add a sense of space and separation between the vocals and the beat.
  3. EQ and Compression: Use equalization to enhance the tonal qualities of the vocals and ensure they sit well within the mix. Compression can be used to control the dynamics and add consistency to the vocals.
  4. Add effects strategically: Consider using reverb, delay, and other effects to enhance the vocals and give them a sense of depth and character. However, be mindful not to overpower the vocals or the beat with excessive effects.
  5. Listen with fresh ears: Take breaks during the mixing process and come back to the mix with fresh ears. This will help you identify any areas that need improvement and make necessary adjustments to optimize the mix for the beat.

Practical Tips

By collaborating effectively with the producer and optimizing the mix specifically for the beat, you can ensure that the vocals blend seamlessly with the mastered beat, resulting in a professional and polished final product. Pay close attention to the producer’s feedback and vision, and use it as a guiding force in shaping the mix to perfection.

Mastering The Final Mix for Vocal Mixing on a Beat

The final step in mixing vocals to a mastered beat is mastering the final mix. This is where you fine-tune the overall sound and ensure that everything is balanced and ready for release. In this section, we will cover two important aspects of mastering the final mix: quality control and final adjustments, as well as exporting and delivering the mastered track.

Quality Control And Final Adjustments

Before exporting the final mix, it is crucial to conduct quality control and make any necessary final adjustments. This involves carefully listening to the entire track and identifying any issues or areas that need improvement. Here are some key steps to follow:

  1. Check for any noticeable audio glitches or artifacts that may have occurred during the mixing process. These could include clicks, pops, or unwanted noise.
  2. Ensure that the vocals are well-balanced with the beat and are sitting comfortably in the mix. Adjust the volume levels if necessary to achieve a cohesive sound.
  3. Listen for any EQ imbalances or frequency clashes that may be affecting the clarity and overall tonality of the vocals. Make subtle adjustments to the EQ settings to enhance the vocal presence.
  4. Pay attention to the dynamics of the vocals and make sure that they are consistent throughout the track. Use compression and automation to even out any volume variations.
  5. Apply any additional effects or processing that may be needed to enhance the vocals. This could include reverb, delay, or subtle saturation to add depth and character.

Exporting And Delivering The Mastered Track for Vocal Mixing on a Beat

Once the final adjustments have been made, it’s time to export and deliver the mastered track. This ensures that the track is ready for distribution and can be played on various platforms. Here’s how to do it:

  1. Ensure that the export settings are appropriate for the intended use. For example, if the track will be uploaded to streaming platforms, choose the recommended file format and bit rate.
  2. Consider creating different versions of the mastered track to accommodate different platforms or purposes. For example, you may want to create a radio edit or an instrumental version.
  3. Organize the exported files in a logical and consistent manner. Use clear file names and include any necessary metadata, such as artist name, track title, and album artwork.
  4. Double-check the exported files for any audio issues or glitches that may have occurred during the export process. Listen to the tracks on different devices to ensure they sound as intended.
  5. Finally, deliver the mastered track to the intended recipients or upload it to the desired platforms. This could involve sending the files to an engineer for further mastering or uploading them directly to streaming services or digital music stores.

By following these steps and paying attention to quality control and final adjustments, you can ensure that your vocals are mixed flawlessly with the mastered beat and that your final track is ready to make an impact.


Frequently Asked Questions On How To Mix Vocals To A Mastered Beat


How Can I Mix Vocals To A Mastered Beat?


To mix vocals to a mastered beat, start by setting the levels for the vocals and the beat. Use EQ to shape the sound and make sure the vocals stand out. Apply compression to control the dynamics, and add reverb and delay for depth and space.


Experiment and adjust until you achieve the desired balance and clarity.


Conclusion


Mastering the art of mixing vocals to a mastered beat is crucial for perfecting your music. By following these steps, you can enhance the overall quality of your tracks. Remember to adjust levels, carve out space, use effects strategically, and always trust your ears.


Elevate your sound today!


Categories
Archive

How to Make Vocals Blend With Music: Mastering the Art

To make vocals blend with music, use EQ to carve out space for vocals, apply reverb and delay for depth, and use compression to control dynamics. Ensuring the vocals are in the same space as the music can help create a cohesive sound.


Creating a seamless blend between vocals and music is crucial for a well-produced track. When vocals and music are properly integrated, it can elevate the overall quality of the song. By implementing specific techniques such as EQ adjustments, reverb and delay application, and compression for dynamic control, you can achieve a balanced and harmonious mix.


In this guide, we’ll delve into the essential strategies for making vocals blend seamlessly with music, offering practical tips to achieve a professional sound. Whether you’re an aspiring producer or a seasoned sound engineer, mastering the art of vocal integration is key to creating a captivating musical experience for your listeners.


Understanding Vocal Range And Music Genre


Understanding vocal range is crucial for blending vocals with different music genres. By knowing the vocal range, singers can adjust their voice to match the style of music, ensuring a harmonious blend. This knowledge helps singers to deliver their best performance while enhancing the overall musical experience.

Understanding Vocal Range and Music Genre The vocal range of a singer and the music genre being performed are critical aspects to consider when aiming to achieve a seamless blend of vocals with music. Matching Voices to Instruments and Consideration of Genre play a crucial role in this process. Matching Voices to Instruments When incorporating vocals into a piece of music, it’s essential to consider the range of the singer’s voice. For instance, a soprano voice might not harmonize as well with the deep resonance of a bass guitar compared to a tenor or alto voice. Similarly, for a song with a gentle, soothing melody, a voice with a lower tone may be more suitable, ensuring a harmonious fusion between the vocals and the instruments. Harnessing the power of matching voices to instruments is about creating cohesion throughout the composition. By aligning the vocal range with the instruments used in the arrangement, a smoother blend can be realized, captivating the audience with a seamlessly integrated performance. Consideration of Genre Another significant consideration in achieving the perfect blend between vocals and music is the genre of the music itself. Each genre comes with its own set of vocal characteristics that best complements the accompanying instrumentation. For instance, in a rock or metal genre, a powerful, bold vocal range with intense dynamics may be more fitting, while in a jazz or blues genre, the emphasis might be on emotional depth and tonal variety. Furthermore, understanding the essence of the music genre enables the selection of instruments and vocal styles that are inherently compatible, resulting in a harmonious and captivating musical experience for the audience. In conclusion, understanding vocal range and music genre is pivotal in creating a seamless blend between vocals and music. By matching voices to instruments and taking the genre into consideration, a harmonious integration can be achieved, elevating the overall quality of the musical composition.

How to Make Vocals Blend With Music: Mastering the Art


Credit: www.mellostudio.com


Techniques For Seamless Integration

Layering And Eq Adjustments

Layering vocals involves recording multiple takes of the same vocal part and blending them together to create a fuller, richer sound. When layering vocals, it’s important to consider the EQ adjustments to ensure each layer complements the others. By carving out space for each layer in the EQ spectrum, you can prevent muddiness and create a cohesive blend of vocals.

Use Of Effects Like Reverb And Delay

The use of effects such as reverb and delay can enhance the seamless integration of vocals with the music. Reverb can create a sense of space and depth, while delay can add a sense of movement and dimension to the vocals. By applying these effects judiciously, you can create a cohesive sonic landscape where the vocals are integrated seamlessly with the music.

Importance Of Mixing And Mastering

The Importance of Mixing and Mastering

Mixing and mastering play a crucial role in ensuring vocals blend seamlessly with music. To achieve a professional and polished sound, it is vital to focus on the meticulous process of mixing and mastering.

Balancing Levels And Panorama

Balancing levels of vocals and instruments is essential for a harmonious sound. Utilize the panorama to place different elements within the stereo field effectively.

Enhancing Clarity And Depth

Enhance the clarity and depth of vocals by using EQ and reverb. This creates a sense of space and brings out the nuances in the vocals.


Collaboration And Communication


To ensure seamless blending of vocals with music, effective collaboration and communication among the vocalist, producer, and sound engineer are crucial. Clear communication on desired vocal style and sound, along with regular feedback and adjustments, leads to a cohesive and harmonious final product.

Collaboration and communication play a crucial role in ensuring that vocals blend seamlessly with music. When working on a music project, it is essential to establish effective communication channels and foster a collaborative environment that brings together vocalists and musicians. This article explores two important aspects of collaboration and communication: working with vocalists and musicians and creating a feedback loop for continuous improvement.

Working With Vocalists And Musicians

Collaborating with vocalists and musicians requires clear communication and mutual understanding. Here are a few tips to make the process smoother:

  • Establish a shared vision: It’s important to align on the creative direction and goals of the project right from the start. This ensures that everyone is on the same page and working towards the same sonic vision.
  • Encourage open dialogue: Create an environment where vocalists and musicians feel comfortable expressing their ideas, concerns, and preferences. Encouraging open dialogue fosters creativity and helps to refine the musical arrangement.
  • Respect individual expertise: Each member of the team brings unique skills and talents to the table. Acknowledge and appreciate the expertise of vocalists and musicians, as their contributions will enhance the overall quality of the final product.
  • Collaborative decision-making: Involve vocalists and musicians in the decision-making process when it comes to melodies, harmonies, and arrangement choices. This ensures that everyone feels valued and has a sense of ownership over the project.
  • Regular check-ins: Schedule regular check-ins to discuss progress, address any challenges, and refine the vocal and musical elements. Consistent communication helps to foster a harmonious working relationship and avoids any misunderstandings along the way.

Feedback Loop For Improvement

Establishing a feedback loop enables continuous improvement in vocal and musical blending. Implementing the following strategies can help facilitate an effective feedback loop:

  1. Constructive feedback: Provide specific, constructive feedback to vocalists and musicians regarding their performance and how it fits within the overall musical composition. This helps them understand the desired outcome and improve their delivery.
  2. Encourage self-reflection: Encourage vocalists and musicians to reflect on their own performances and identify areas for improvement. By engaging in self-reflection, they can take ownership of their progress and actively work towards enhancing their vocals or musical skills.
  3. Objective evaluation: Create an objective evaluation process using clear criteria and benchmarks to assess the blending of vocals with music. This allows for consistent assessment and feedback that facilitates growth.
  4. Timely feedback: Offer feedback promptly after a performance or recording session. Timely feedback ensures that adjustments can be made quickly, minimizing the need for extensive rework in the later stages.
  5. Positive reinforcement: Recognize and highlight successful instances of vocal and musical blending. Celebrate achievements and provide positive reinforcement to motivate and inspire further improvement.

By embracing collaboration and communication, and establishing a feedback loop, you can enhance the cohesion between vocals and music, resulting in a harmonious and captivating sound that resonates with your audience.

Creative Approaches To Vocal-music Blending

When it comes to creating a well-balanced and cohesive sound in your music, blending vocals with the accompanying music is key. By carefully integrating the vocals with the instrumental elements, you can enhance the overall impact of your song. In this article, we will explore some creative techniques that can help you achieve a seamless blend between vocals and music.

Experimental Techniques

If you’re looking to add an unconventional and unique touch to your vocal-music blending, experimenting with different techniques can yield exciting results. Some experimental approaches you can try include:

  1. Reverse Reverb: This technique involves applying a reverb effect to the vocals, but in reverse. It creates a dreamy and ethereal sound, adding depth and atmosphere to your vocals.
  2. Vocal Chops: Shifting the pitch and time of vocal snippets can lead to interesting rhythmic patterns and textures. This technique is commonly used in genres like EDM and hip-hop.
  3. Vocal Sampling: Sampling fragments of vocal recordings and incorporating them throughout the song can create a cohesive and dynamic vocal-music blend.

Incorporating Harmonies

Adding harmonies to your vocals is a powerful way to enhance the richness and depth of your vocal-music blend. Here are some approaches to consider:

  • Layering Vocals: Record multiple vocal tracks performing the same melody, and experiment with different harmonies. This adds complexity and depth to the vocal sound.
  • Counter-Melodies: Instead of traditional harmonies, try introducing counter-melodies that complement the main vocal line. This can create a unique and captivating blend.
  • Call and Response: Incorporate call and response sections where the vocals interact with the music, creating a dynamic and engaging blend.

By incorporating harmonies and experimenting with unconventional techniques, you can take your vocal-music blending to new heights. Remember, the key is to let your creativity flow and find what works best for your unique sound. Dive into your creative process and explore the endless possibilities of vocal-music blending!


Challenges And Solutions

The challenges of blending vocals with music can be overcome through specific techniques and adjustments. Let’s delve into the common obstacles faced and the solutions that can help achieve a harmonious balance between vocals and music.

Dealing With Conflicting Frequencies

Conflicting frequencies between vocals and music can result in a muddy sound. To address this issue, eq utilise EQ to carve out space for vocals in the mix. Cut back Reduce frequencies in instruments that clash with the vocals. Use a spectrum analyzer to identify overlapping areas.

Adjusting For Live Performances

Live performances require different adjustments than studio recordings. Ensure that the soundcheck soundcheck is thorough. Adjust Adjust levels in real-time to account for the venue’s acoustics. Use Utilize vocal effects sparingly to prevent overpowering the live mix.

Frequently Asked Questions On How To Make Vocals Blend With Music


How Do You Blend Vocals With Music?


To blend vocals with music, start by using EQ to cut any frequencies that clash with the instruments. Apply compression to even out the vocal volume. Use reverb and delay to create depth and space for the vocals. Experiment with panning and stereo imaging to place the vocals in the mix.


Finally, adjust the levels to ensure the vocals sit well with the music.


What Is The Role Of Eq In Blending Vocals With Music?


EQ in blending vocals with music helps remove muddiness and frequency clashes. By cutting unwanted frequencies and boosting desired ones, EQ allows the vocals to occupy a clear space in the mix and blend harmoniously with the music.


How Does Compression Improve Vocal Blending?


Compression in vocal blending evens out the vocal volume, making it more consistent throughout the performance. By reducing the dynamic range, compression helps the vocals sit well in the mix and prevents them from getting lost or overpowering the music.


Conclusion


Achieving a seamless blend of vocals and music is essential for a captivating sound. By following these techniques, you can enhance the harmony and cohesiveness of your tracks effortlessly. Experiment with EQ, compression, and reverb to find the perfect balance that elevates your music production to the next level.


Categories
Archive

Best Way to Backup FL Studio Projects: Foolproof Strategies

The best way to back up FL Studio projects on Reddit is to use cloud storage options like Dropbox or Google Drive. These platforms offer secure and convenient storage for your files.


Also, for FL Studio users looking to ensure their projects are safeguarded and easily accessible, utilizing cloud storage solutions is a reliable and efficient method. Also, by uploading your projects to these platforms, you protect your work from data loss and hardware failures.

Related reading: Where Does Fl Studio Save Projects and FL Studio 21 – The Best Music Production Software?. For background, see the Wikipedia article on Backup.


Additionally, cloud storage allows for seamless collaboration among team members and convenient access from any device with an internet connection.


Manual Backup Methods

Moreover, manual backups protect your FL Studio projects from losing hours of hard work. In addition, these methods provide an extra layer of protection for your projects. This allows you to recover them if something goes wrong with your main files. In this post, we’ll outline the best manual backup methods for FL Studio projects. This ensures you can maintain your work’s integrity and creativity.

How To Save Projects Locally

In addition, saving your FL Studio projects locally on your computer ensures that you have a backup readily available in case of any unforeseen issues. For example, to do this, simply navigate to the File menu in FL Studio and select Save As . Choose a location on your computer, preferably an external hard drive or a dedicated folder, and click Save. It’s essential to do this regularly to keep your backup up to date with your latest changes.

Exporting Projects To External Drive

Another effective manual backup method is to export your FL Studio projects to an external drive. As a result, this provides an additional layer of security by keeping a copy of your projects separate from your computer’s local storage. To export your projects, select File and then Export. Furthermore, choose the location of your external drive and click Save . Consider creating a specific folder on the external drive for your FL Studio backups to keep them organized and easy to access.

Automated Backup Solutions

Additionally, Backing up your FL Studio projects is crucial to ensure that your hard work and creativity are protected from unforeseen events like computer crashes or accidental deletions. While manual backups can be time-consuming and easily forgotten, automated backup solutions offer a convenient and reliable way to safeguard your projects. However, in this blog post, we will explore the best automated backup options for FL Studio projects, starting with setting up scheduled backups.

Setting Up Scheduled Backups

Also, scheduling automatic backups can save you time and provide peace of mind, knowing that your FL Studio projects are regularly backed up. Then, with FL Studio’s built-in backup feature, you can easily configure scheduled backups.

Moreover, to set up scheduled backups, follow these simple steps:

  1. In addition, open FL Studio and navigate to the “Options” menu.
  2. Furthermore, select “File Settings” and click on the “Backup” tab.
  3. Additionally, enable the “Auto-Backup” option and specify the backup interval that suits your needs.
  4. Also, choose the location where you want to keep your backups.
  5. Click on “OK” to save the settings.

Once you have set up scheduled backups, FL Studio will automatically create backup files at the specified interval. In short, this ensures that your projects are always protected.

Cloud Storage Options for Backup FL Studio Projects

Cloud storage services provide an excellent solution for backing up your FL Studio projects, offering secure and off-site storage that can be accessed from anywhere. Similarly, here are some popular cloud storage options you can consider:

Cloud Storage Provider Storage Capacity Free Plan Available
Google Drive 15GB Yes
Dropbox 2GB Yes
OneDrive 5GB (Free) Yes

These cloud storage services offer seamless integration with FL Studio, allowing you to directly save your projects to the cloud. Your projects then sync and back up automatically, which adds another layer of protection.

Automated backup solutions, such as scheduled backups and utilizing cloud storage options, are essential for ensuring the safety and accessibility of your FL Studio projects. Also, by implementing these backup strategies, you can focus on your music production knowing that your hard work is secure.

Version Control For Fl Studio

Version control is an essential aspect of managing your FL Studio projects effectively. In addition, by implementing a version control system, you can ensure the integrity and safety of your project files. This enables you to efficiently manage changes and collaborate with others. One popular version control system for FL Studio is Git, a powerful and flexible tool that offers numerous benefits.

Benefits Of Version Control for Backup FL Studio Projects

Implementing version control for your FL Studio projects brings several advantages:

  • Keeps track of changes: Version control allows you to track and log every modification made to your project files. This makes it easy to identify who made the changes and when they were made.
  • Enables collaboration: With version control, multiple users can work on the same project simultaneously, seamlessly merging their changes without any conflicts.
  • Revert to previous versions: Made a mistake? Version control lets you roll back changes and restore an earlier state.
  • Backup and restore: Version control serves as a reliable backup mechanism. This ensures that your project files are safely stored and easily recoverable in case of data loss.
  • Branching and merging: Version control systems like Git allow you to create branches for experimenting or working on new features without affecting the main project. Once ready, you can merge these branches back into the main project.

Using Git With Fl Studio

Git is a popular version control system that is well-suited for managing FL Studio projects. For example, to use Git with FL Studio, you need to follow these steps:

  1. Install Git: Start by installing Git on your computer from the official website (https://git-scm.com/). Git is compatible with both Windows and macOS.
  2. Create a Git repository: Once Git is installed, navigate to your FL Studio project folder in the command line or a Git GUI tool and run the command “git init” to create a new Git repository.
  3. Add files to the repository: Use the command “git add ” to add your FL Studio project files to the repository. You can also use “git add .” to add all files in the current directory.
  4. Commit changes: After adding files, commit your changes using the command “git commit -m ””. This creates a new commit and saves the current state of your project.
  5. Collaborate and manage versions: Git lets you collaborate, create branches and merge changes in your FL Studio projects.

Collaborative Backup Strategies

Collaborative backup strategies are crucial for FL Studio users who want to ensure the safety and accessibility of their projects. As a result, working together on music production often requires a seamless way to share and back up projects, keeping them secure and organized. Utilizing online collaboration tools and establishing secure sharing methods is essential for safeguarding FL Studio projects and enhancing teamwork.

Online Collaboration Tools for Backup FL Studio Projects

When it comes to collaborating on FL Studio projects, using online collaboration tools can greatly streamline the process. However, utilizing platforms such as Splice and Google Drive allows multiple users to access, edit, and backup projects from anywhere with an internet connection. These tools provide essential version control and real-time syncing, ensuring that all collaborators are working with the latest project data.

Sharing Projects Securely

Sharing FL Studio projects securely is paramount to protecting intellectual property and preserving project integrity. When sharing project files, it’s important to utilize secure, encrypted file sharing services such as MEGA and WeTransfer. Before sending files, consider compressing them with RAR or ZIP formats and securing them with a password to add an extra layer of protection.

Disaster Recovery Planning for Backup FL Studio Projects


Disaster Recovery Planning is essential for backing up FL Studio projects on Reddit, ensuring the safe storage and accessibility of your work. Then, proper planning guarantees the protection and recovery of your valuable music projects in case of any unforeseen events.

Preparing For Data Loss for Backup FL Studio Projects

Create a backup plan to protect your FL Studio projects from unforeseen incidents.

Prepare for data loss by regularly backing up your projects to ensure continuity.

Creating Backup Redundancy

Ensure backup redundancy by saving copies of your projects in multiple locations.

Use external hard drives, cloud storage, or USB drives for added security and peace of mind.

Incorporate disaster recovery planning to safeguard your FL Studio projects.

Best Practices For Backup

Best Practices for Backup should be a top priority when handling FL Studio projects. In short, every FL Studio user should safeguard their projects against data loss.

Regularly Testing Backups

Test your backups regularly so you know you can restore them without issues. Perform test restores on a separate system to verify the integrity of the backup files.

Implementing A Backup Policy

Implementing a backup policy includes defining a schedule for backups based on the frequency of project updates. Establish clear guidelines for storing backups securely.

Frequently Asked Questions For Best Way To Backup Fl Studio Projects Reddit


How Can I Back Up Fl Studio Projects Effectively?


To your sessions, simply save them to a dedicated folder on an external hard drive regularly. Maintain a backup schedule to prevent data loss. You can also use cloud storage services for additional redundancy.


What Are The Benefits Of Backing Up Fl Studio Projects?


Backing up projects ensures you never lose your hard work due to file corruption or hardware failure. It provides peace of mind and allows easy access to previous project versions for future reference or collaborative work.


Is It Necessary To Backup Fl Studio Projects?


Yes, it is crucial to project files regularly to protect your work from unexpected data loss. By establishing a backup routine, you safeguard your creative endeavors and minimize the risk of losing valuable music projects.


Can I Automate The Backup Process For Fl Studio Projects?


Yes, you can automate the backup process by utilizing backup software or setting up scheduled tasks within Fl Studio itself. Automation streamlines the backup procedure, so your projects stay secure without manual work.


Conclusion


Backing up your FL Studio projects is crucial for safeguarding your work. By following the step-by-step guide from professionals and utilizing cloud storage solutions, you can ensure the security and accessibility of your projects. Embracing this approach will offer peace of mind and allow you to focus on your creativity without worrying about data loss.


Categories
Archive

How to Perfectly Mix Vocals to a Beat: Pro Tips for Stellar Sound

To mix vocals to a beat, start by adjusting the volume levels and panning to fit the music. Then, apply EQ and compression to enhance the vocal presence and dynamics.


Mixing vocals to a beat is a crucial step in producing music that sounds professional and polished. When done properly, it ensures that the vocals blend seamlessly with the instrumental track, creating a cohesive and harmonious sound. By following a few essential steps, you can achieve a balanced and impactful vocal mix that complements the beat.


In this guide, we will explore the techniques and strategies for effectively mixing vocals to a beat, helping you elevate the overall quality of your music productions. Whether you are a novice or an experienced producer, mastering the art of vocal mixing can greatly enhance the impact and appeal of your music.


Setting The Stage

Vocals can truly make or break a track, and when mixed properly, they can seamlessly blend with the beat to create a polished and professional sound. Setting the stage for a successful vocal mix involves careful preparation and attention to detail. In this guide, we’ll cover the essential steps to effectively mix vocals to a beat, starting with the crucial initial stages.

Preparing Your Daw

Before diving into the vocal mixing process, it’s essential to set up your Digital Audio Workstation (DAW) for optimal performance. Ensure that your project is organized and all necessary plugins and tools are readily accessible. This preparatory step will streamline the mixing process and contribute to a more efficient workflow.

Importance Of Good Recording

Quality starts at the source when it comes to vocal mixing. A well-recorded vocal track forms the foundation for a successful mix. Ensure that the vocalist is in a suitable environment, with minimal background noise and proper microphone technique. Additionally, encourage multiple takes to capture the best possible performance, as this allows for flexibility during the mixing stage.


Understanding Vocals And Beat

Analyzing Vocal Characteristics

When it comes to mixing vocals with a beat, it is essential to understand the unique characteristics of the vocals. Analyzing vocal characteristics involves paying close attention to the tonal quality, intensity, and dynamic range of the vocals. By identifying the unique nuances of the vocals, such as breathiness, raspiness, or smoothness, you can tailor the mixing process to enhance and showcase the vocal performance effectively.

Matching Vocals To The Beat

Matching vocals to the beat involves more than simply aligning the vocal track with the rhythm of the music. It’s about creating a harmonious fusion of vocals and beat that complements and elevates the overall listening experience. When matching vocals to the beat, it’s crucial to consider the tempo, groove, and emotional resonance of the vocals with the musical arrangement. By adjusting the timing and phrasing of the vocals, you can achieve seamless integration with the beat, ensuring that the vocals and beat work together cohesively to convey the intended mood and message of the song.

Tools Of The Trade

Essential Plugins for Vocal Mixing are crucial for achieving professional sound quality. These plugins offer various features to enhance vocals.

Equalizers

Equalizers help adjust the frequency balance of vocals for clarity. Parametric and graphic EQs are commonly used in vocal mixing.

Compressors

Compressors are essential for controlling dynamics and evening out vocal volume. Settings like threshold, ratio, attack, and release are important.

Advanced Techniques And Effects

Reverb And Delay

Reverb adds depth, while delay creates a sense of space in vocals. Adjusting these effects can enhance the vocal sound significantly.

Pitch Correction

Pitch correction plugins can fix pitch imperfections in vocals subtly or create vocal effects like robotic vocals.

Special Fx

Using special effects like distortion, modulation, and harmonizers can add creativity and uniqueness to vocal tracks.

How to Perfectly Mix Vocals to a Beat: Pro Tips for Stellar Sound


Credit: www.amazon.com

Balancing Act

In the world of music production, mixing vocals to a beat is a delicate balancing act. This crucial step ensures that both the vocals and the beat blend harmoniously, allowing the lyrics to shine while maintaining the energy and impact of the instrumental. To achieve this balance, you need to pay attention to two key areas: setting levels and panning, and achieving clarity with EQ. Let’s dive deeper into each of these techniques to help you master the art of mixing vocals to a beat.

Setting Levels And Panning

When it comes to setting levels for vocals, aim to achieve a sweet spot where the vocals are prominent enough to be heard clearly but not overpowering the beat. Start by adjusting the volume fader for the vocal track, gradually increasing or decreasing it until it sits comfortably in the mix. Remember, the vocals should be the focal point, but they should still blend seamlessly with the instrumental.

Panning is another powerful tool for balancing your mix. By placing certain elements, such as ad-libs or background vocals, slightly to the left or right of the stereo field, you can add depth and spaciousness to your mix. Experiment with panning these elements in a way that complements the main vocal track and the beat without overshadowing them.

Achieving Clarity With Eq

EQ, short for equalization, plays a crucial role in achieving clarity in your mix. Start by using a high-pass filter to remove any unnecessary low-end rumble or unwanted frequencies that may clash with the beat. This will ensure that the vocals sit cleanly on top of the instrumental without any muddiness.

Next, perform frequency carving using a parametric EQ. Identify any frequency areas that need adjustment, such as boosting the presence or cutting harshness in the vocals. Pay close attention to the context of the beat and the style of the vocals, making subtle adjustments to enhance the overall balance and clarity without altering the natural character of the sound.

By utilizing these techniques – setting levels and panning, and achieving clarity with EQ – you can achieve a well-balanced mix that showcases the vocals while complementing the beat. Remember to trust your ears and experiment with different settings until you find the perfect blend that brings your vocals to life and elevates your overall production.

Adding Depth And Dimension

When it comes to mixing vocals to a beat, adding depth and dimension is crucial. It helps create a sense of space and impact, elevating the overall sound quality. In this section, we will explore two powerful techniques that can take your vocal mixes to the next level: creating space with reverb and utilizing delay for impact.

Creating Space With Reverb

One of the most effective ways to add depth to vocals is through the use of reverb. Reverb adds a sense of space by simulating the reflections of sound in a room. By applying reverb to your vocal tracks, you can create a natural ambience that gives the impression of a larger space.

To create space with reverb, follow these steps:

  1. Insert a reverb plugin on your vocal track.
  2. Adjust the reverb settings to achieve the desired level of ambience. Experiment with parameters such as decay time, predelay, and mix to find the right balance.
  3. Consider the style of the song and the emotion you want to convey. For example, a longer decay time might work well for a ballad, while a shorter decay time could be suitable for a more upbeat track.
  4. Be mindful not to overdo it with reverb. Too much reverb can make the vocals sound distant and muddy. Use it subtly to enhance the vocals without overwhelming them.

Utilizing Delay For Impact

Delay is another powerful tool for adding dimension to your vocal mixes. It creates a sense of repetition, which can bring energy and impact to certain parts of the song. By carefully applying delay, you can make vocals stand out and grab the listener’s attention.

Here’s how you can utilize delay for impact:

  1. Insert a delay plugin on your vocal track.
  2. Adjust the delay settings to achieve the desired effect. Experiment with parameters such as delay time, feedback, and mix to find the right balance.
  3. Consider the timing and rhythm of the song. Syncing the delay to the beat can create a cohesive and rhythmic feel.
  4. Use delay strategically on specific phrases or words to emphasize them. This can add an extra layer of impact and catch the listener’s ear.

Remember, moderation is key when using delay. Too much delay can clutter the mix and distract from the vocals. Use it thoughtfully to enhance specific moments and make them shine.


Polishing The Mix

Fine-tuning Dynamics With Compression

Increase clarity by compressing vocals to even out loud and soft parts.

Adjust settings like threshold and ratio to control compression levels.

  • Check vocal levels before and after applying compression.
  • Experiment with attack and release times for desired effects.

Automation For A Professional Finish

Automate volume, EQ, and effects to enhance vocal presence in the mix.

Use automation to fix volume inconsistencies and add depth to vocals.

  1. Create automation points for precise control over vocal nuances.
  2. Smooth transitions between different vocal sections with automation.

Listening And Tweaking

When it comes to mixing vocals to a beat, the process of listening and tweaking is crucial. This is where the magic happens, as subtle adjustments can make a world of difference in achieving the perfect blend between the vocals and the instrumental track.

Tips For Critical Listening

Before getting into the nitty-gritty of tweaking, it’s essential to engage in critical listening. This involves actively focusing on the details of the vocal track and how it interacts with the beat. Here are some tips to enhance your critical listening skills:

  • Use high-quality studio monitors or headphones to accurately hear the nuances of the vocals and the beat.
  • Pay attention to the dynamics, tonal balance, and spatial placement of the vocals in relation to the beat.
  • Take frequent breaks to prevent ear fatigue and maintain a fresh perspective while listening.

Iterative Approach To Refinement

After gaining insights from critical listening, it’s time to adopt an iterative approach to refinement. This involves making incremental adjustments to the vocal mix and continuously evaluating the results. Here’s how to effectively refine the vocal mix:

  1. Start with basic level and panning adjustments to ensure the vocals sit well within the mix.
  2. Experiment with EQ settings to carve out space for the vocals and address any frequency clashes with the beat.
  3. Apply subtle compression and effects to enhance the vocal presence without overpowering the beat.
  4. Regularly compare the vocal mix with the beat, making fine-tuned tweaks to achieve seamless integration.

Frequently Asked Questions For How To Mix Vocals To A Beat

How Do You Mix Vocals To A Beat?

To mix vocals to a beat, start by EQing the vocals to remove unwanted frequencies. Then, apply compression to control dynamic range. Use reverb and delay to create space and depth. Finally, use automation to make the vocals sit well with the beat throughout the song.

What Is The Importance Of Eq In Vocal Mixing?

EQ is crucial in vocal mixing as it helps to remove unwanted frequencies, enhance desired frequencies, and create a balanced sound. By cutting out muddiness and boosting clarity, EQ allows the vocals to shine and fit better in the mix.

Why Is Compression Essential In Vocal Mixing?

Compression is vital in vocal mixing as it evens out the dynamic range of the vocals, making them more consistent and easier to control. It also helps to prevent peaking and ensures the vocals stand out in the mix without overpowering other elements.

Conclusion

To perfectly blend vocals with a beat, attention to detail is key. Remember to adjust levels, utilize EQ effectively, and experiment with reverb. By following these techniques, you can achieve a professional sound that enhances your music production. Practice and patience will lead to mastering vocal mixing skills.

Categories
Archive

How Do Professionals Mix Their Vocals: Expert Tips Revealed

Professionals mix vocals by using equalization, compression, reverb, and delay to enhance clarity and presence. Mixing vocals involves adjusting levels, adding effects, and fine-tuning frequencies to achieve a balanced and polished sound.


By following industry best practices and utilizing specialized software, professionals meticulously craft vocal mixes that emphasize the nuances of the singer’s performance. Professional vocal mixing requires attention to detail and a deep understanding of audio processing techniques. These experts leverage their skills to ensure the vocals blend seamlessly with the music, enhancing the overall sonic experience.


With a combination of technical expertise and artistic sensibility, professional vocal mixers produce captivating and impactful vocal tracks that resonate with the audience. Mastering the intricacies of vocal mixing is a hallmark of their craft, resulting in professional-quality recordings that elevate the artistry of the music.

How Do Professionals Mix Their Vocals: Expert Tips Revealed


Credit: www.nytimes.com

The Importance Of Vocal Mixing

Vocal mixing is a critical aspect of any music production. It is the process where professionals polish and enhance the vocals to ensure they shine through the mix and captivate the listeners. The importance of vocal mixing cannot be overstated, as it directly impacts the overall quality and appeal of a song.

Enhancing Clarity And Presence

Enhancing the clarity and presence of vocals is a key goal in vocal mixing. This involves adjusting the EQ to accentuate the desired frequencies and reduce any muddiness or harshness. Additionally, compression and reverb are employed to bring the vocals forward in the mix and create a sense of spaciousness.

Balancing Levels And Tonal Quality

Balancing the levels and tonal quality of vocals is essential to ensure they sit well within the mix. This includes adjusting the volume of individual tracks and ensuring a smooth transition between various vocal parts. Moreover, application of pitch correction and harmonization can further refine the tonal quality of vocals.

How Do Professionals Mix Their Vocals: Expert Tips Revealed


Credit: www.facebook.com

Setting Up For Vocal Mixing

Setting Up for Vocal Mixing is a crucial step in the process of achieving a professional and polished sound. Before diving into the nitty-gritty of vocal mixing, professionals prepare the vocal tracks and adjust gain staging to lay a strong foundation for the mixing process.

Preparing The Vocal Tracks

Preparing the vocal tracks involves several essential steps to ensure that the vocals are primed for the mixing process. This includes cleaning up any background noise or unwanted sounds, ensuring that the vocal recordings are properly edited and aligned to maintain consistency, and applying basic processing such as EQ, compression, and de-essing to address any issues that may affect the final mix. By ensuring that the vocal tracks are organized and processed appropriately, professionals set the stage for a more efficient and effective mixing process.

Adjusting Gain Staging

Adjusting gain staging is a critical aspect of setting up for vocal mixing. By ensuring that the levels of the vocal tracks are optimized and that there is sufficient headroom for further processing, professionals lay the groundwork for achieving a balanced and dynamic vocal mix. This entails managing the input and output levels of various audio components, such as preamps, compressors, and plugins, to maintain a healthy signal flow and prevent unwanted distortion or clipping. Proper gain staging sets the stage for a smoother and more controlled vocal mixing process.

Tools Of The Trade

Tools of the Trade:

Utilizing Equalization (eq)

Professionals carefully adjust frequencies to enhance vocal clarity and balance.

Applying Compression Techniques

By controlling dynamics, vocals maintain consistency and fit perfectly in the mix.


Creating Space In The Mix

When it comes to mixing vocals professionally, one of the key elements to consider is creating the right amount of space in the mix. This involves finding the perfect balance between the vocals and the instrumental tracks, allowing each element to shine through without overpowering the others. Two techniques that professionals often use to achieve this are using reverb and delay effects and positioning vocals in the stereo field.

Using Reverb And Delay Effects

Reverb and delay effects are powerful tools that can add depth and space to vocal recordings. Reverb creates a sense of space by adding a replication of the natural reflections that occur in different environments. Delay, on the other hand, repeats the original vocal signal after a set amount of time, which can give it a sense of spaciousness.

To use these effects effectively, it’s important to choose the right settings. A shorter reverb time can give the vocals a sense of intimacy, while a longer reverb time can create a bigger and more open sound. Similarly, adjusting the delay time can help in creating a sense of depth and separation in the mix.

However, it’s crucial to use these effects subtly and tastefully. Too much reverb or delay can make the vocals sound distant or washed out, resulting in a loss of clarity. Professionals carefully balance these effects to enhance the vocals without overwhelming them, ensuring that they fit seamlessly into the overall mix.

Positioning Vocals In The Stereo Field

Another technique professionals use to create space in the mix is by positioning the vocals in the stereo field. By placing the vocals at different points within the stereo image, they can give them a sense of dimension and separation.

To achieve this, panning is often employed. Panning refers to distributing the vocal tracks across the stereo spectrum. For example, placing a lead vocal track in the center can provide a focus and a solid anchor for the mix. Background vocals can be panned slightly to the left or right to create a wider presence and prevent them from clashing with the lead vocals.

Ultimately, the goal is to achieve a balanced and cohesive sound, where each vocal track occupies its own space within the mix. By using reverb and delay effects and strategically positioning vocals in the stereo field, professionals can create a spacious mix that allows every element, including the vocals, to shine.

Fine-tuning Techniques

Once the initial mixing of vocals is complete, professionals move on to the fine-tuning stage, where meticulous adjustments are made to ensure the vocals sound polished and professional. In this section, we will explore two key fine-tuning techniques: De-essing for Smoothness and Automation for Dynamic Changes.

One common issue that plagues vocal recordings is sibilance, which refers to the harsh, hissing sounds produced when pronouncing letters like ‘s,’ ‘sh,’ and ‘ch.’ To tackle this problem, professionals employ a technique known as de-essing. De-essing involves attenuating the high-frequency content in the vocal track, specifically targeting these sibilant sounds. By strategically reducing the volume of these harsh frequencies, vocals become smoother and more pleasing to the ear.

Several tools and plugins are available to assist with de-essing, such as Waves De-Esser and FabFilter Pro-DS. These plugins allow professionals to pinpoint the unwanted sibilant frequencies and control their reduction with precision. Through careful adjustment and experimentation, they strike the perfect balance, eliminating excessive sibilance while preserving the natural timbre of the vocals.

Another essential technique in vocal mixing is automation. Automation involves adjusting the volume levels of specific vocal phrases or words to create dynamic changes throughout the song. This technique is particularly effective in enhancing the emotional impact of a vocal performance and ensuring every word is heard clearly.

Using automation, professionals can highlight the important sections of a vocal track, such as the chorus or a particularly impactful line, by subtly increasing their volume. On the other hand, they can reduce the volume of certain phrases that may clash with other instruments or distract from the overall mix. This level of control allows for a more engaging and captivating listening experience.

To automate vocal levels, professionals rely on digital audio workstations (DAWs) like Pro Tools, Logic Pro, or Ableton Live. These DAWs provide powerful automation features, allowing precise manipulation of volume and other parameters over time. By carefully fine-tuning the automation settings, professionals can breathe life into the vocals, ensuring they seamlessly complement the music and convey the intended emotions.

Common Mistakes To Avoid

Vocal mixing is a critical aspect of producing high-quality audio, but professionals often encounter common mistakes that can negatively impact the final result. By being aware of these pitfalls, you can enhance the quality of your vocal mixes and achieve professional-level sound.

Over-processing Vocals

  • Applying too many effects such as reverb and compression can lead to a muddy and unnatural vocal sound.
  • It’s essential to strike a balance between adding enhancements and preserving the natural tone of the vocals.
  • Using excessive processing can result in a loss of clarity and dynamics in the vocal performance.

Ignoring Phase And Phase Alignment

  • Neglecting phase considerations can cause phase cancellation issues, leading to a thin and weak vocal sound.
  • Ensuring proper phase alignment between multiple vocal tracks is crucial for achieving a cohesive and full-bodied vocal mix.
  • Correcting phase issues can significantly improve the overall clarity and presence of the vocals in the mix.

Expert Tips From Professionals

Discover expert tips and techniques used by professionals for mixing vocals. Gain insights into the strategies employed by industry experts to achieve high-quality vocal productions. Master the art of vocal mixing with these invaluable professional insights.


Expert Tips from Professionals – How Do Professionals Mix Their Vocals

Finding The Vocal Sweet Spot

Vocal mixing professionals know the importance of finding the vocal sweet spot. This involves carefully adjusting the levels of different frequencies to enhance the clarity and presence of the vocals in the mix. It’s crucial to carve out space within the frequency spectrum to ensure the vocals stand out without competing with other elements in the track.

Experimenting With Different Processing Chains

Another key strategy employed by vocal mixing experts is experimenting with different processing chains. This entails trying out various combinations of compression, equalization, and effects to achieve the desired vocal sound. By testing different processing techniques, professionals can discover unique tonal qualities and textures that elevate the overall impact of the vocals.

Conclusion And Practice

In conclusion, mastering the art of vocal mixing requires consistent practice and a commitment to continuous learning for professionals. By incorporating practical application and dedicated practice into their routine, professionals can refine their skills and strive for continuous improvement.

Practical Application And Practice

Professionals apply their knowledge by using advanced vocal mixing techniques, such as parallel compression and frequency notching, to enhance clarity and emotion in the vocals. They also dedicate regular time to practice and experiment, honing their abilities to deliver exceptional vocal mixes.

Continuous Learning And Improvement

Professionals place emphasis on continuous learning, staying updated with the latest tools and technologies in the industry. They seek out mentorship opportunities and leverage online resources to expand their knowledge and skills, all in the quest for ongoing improvement.

Frequently Asked Questions For How Do Professionals Mix Their Vocals

How Do Professionals Mix Vocals?

Professionals mix vocals by adjusting volume levels, applying EQ to enhance tone, adding compression to control dynamics, and using effects like reverb and delay for ambiance. They also use techniques like panning and automation to create a balanced and cohesive vocal sound in the mix.

What Equipment Do Professionals Use For Vocal Mixing?

Professionals use high-quality studio gear for vocal mixing, such as a good microphone, preamp, audio interface, and studio monitors. They also rely on professional mixing software and plugins to shape the vocal sound. Additionally, acoustically treated rooms and reference headphones are common tools used by professionals.

How Can Professionals Achieve A Polished Vocal Sound?

Professionals achieve a polished vocal sound by using precise editing techniques to fix timing and pitch issues. They also employ advanced vocal processing, such as de-essing to control sibilance and saturation for warmth. Skillful automation and mastering techniques are applied to ensure the final mix achieves a polished and professional sound.

Conclusion

Mastering the art of vocal mixing is crucial for professional sound quality. By understanding the techniques discussed in this blog post, you can elevate your vocal mixing skills. Experiment, practice, and trust your ears to achieve the desired sound in your music productions.


Keep refining your craft!

Categories
Archive

Best Drum Mic Kits: Top Picks for Every Budget

As an Amazon Associate I earn from qualifying purchases.

The Shure SM57-LC Cardioid Dynamic Microphone is often hailed as the best drum mic kit for its versatility and quality. The Audix DP7 7-piece Drum Microphone Kit also tops the charts for its exceptional sound capture across the kit.


Selecting the best drum mic kit is crucial for capturing the full dynamic range of your drum set, whether for studio recordings or live performances. A top-quality drum mic kit ensures each component of the drum set, from the snappy snare to the booming kick drum, is picked up with clarity and definition.


Drummers and sound engineers seek kits that offer durability, ease of use, and the ability to withstand high sound pressure levels. These kits often come with a combination of dynamic and condenser microphones to provide a versatile solution tailored for the unique frequencies of drums. A well-rounded drum mic setup can elevate the overall sound of a band, ensuring that the energy and rhythm of the drums punch through mix with precision and power.


Introduction To Drum Mic Kits

Capturing the full power of a drum set calls for specialized equipment. Enter drum mic kits, the unsung heroes behind every great drum recording. The right set of mics can make a huge difference in sound quality. They pick up every beat with clarity. These kits are essential for studio recordings and live performances. Each piece in a drum mic kit has a role. From snare crackles to bass drum thumps, these kits handle it all.

Importance Of Quality Drum Mics

Good sound starts with a great microphone. Quality drum mics capture the true essence of the drums. They withstand high sound pressure levels. They bring out subtle nuances. Durability is also key for surviving the rigors of touring and frequent use. Investing in a superior drum mic kit ensures your drums sound their best every time.

What To Expect In 2023

Drum mic technology is always evolving. 2023 brings a focus on even more innovative features. Look for enhanced frequency responses and built-in DSP (Digital Signal Processing). This year, drummers can expect kits that offer better isolation and reduced crosstalk. Wireless options are on the rise, leading to cleaner setups on stage and in studio.

Feature 2023 Trend
Frequency Response Wider and more precise
Digital Signal Processing Advanced built-in DSP for superior sound shaping
Wireless Technology More prevalent for ease of use
Best Drum Mic Kits 2023: Top Picks for Every Budget


Credit: www.popsci.com


Types Of Drum Mics

When recording drums, choosing the right microphone is key. Different microphones capture the true essence of your drum sound. Understanding the types of drum mics helps in making an informed decision for your recording needs.

Dynamic Vs. Condenser Mics

Dynamic mics are known for their durability and ability to handle high sound pressure levels. They work well with snares, toms, and kick drums. Here’s a quick comparison:

  • Dynamic Mics:
    • Handle loud sounds without distortion
    • Rugged and durable
    • Ideal for live performances
  • Condenser Mics:
    • Sensitive, capturing finer details
    • Require phantom power
    • Better suited for studio applications

Individual Mics Vs. Mic Kits

When miking drums, you can choose individual mics or mic kits. Individual mics give you the freedom to select the perfect match for each drum component. Mic kits, however, offer convenience and consistency. Take a look at their features:

Individual Mics Mic Kits
Customizable selection All-in-one solution
Tailored to each drum’s sound Coherent sound across drums
Can be more expensive overall Cost-effective for beginners

Factors Affecting Mic Performance

Choosing the best drum mic kit is crucial for capturing exceptional drum sounds. But what makes a mic stand out?

Polar Patterns And Sensitivity

How a mic picks up sound and its sensitivity to noise shape audio quality. Let’s break down these factors:

  • Cardioid mics reject sound from the back and sides.
  • Omni mics capture from all angles without bias.

Sensitivity varies across mics. A highly sensitive mic catches subtle nuances. A less sensitive one may miss these details.

Frequency Response And Durability

A mic’s ability to handle frequencies defines its sound capture range. Drums demand wide frequency responses for a rich output.

Frequency Range Drum Type
50–15,000 Hz Snare
20-12,000 Hz Bass Drum

Durability matters in a live setting. Look for rugged designs that can withstand hits and high sound pressure levels (SPLs).


Budget Picks

When starting in the world of drum recording, costs add up quickly. Many new drummers need great sound without breaking the bank. Enter the budget drum mic kits. Let’s look at options that make quality recording accessible, even on a shoestring budget.

Affordable Options For Starters

Getting excellent drum sounds should not cost a fortune. Many brands offer mic kits aimed at those just beginning their drum recording journey. Bold features and price points make these kits attractive.

  • Pyle-Pro PDKM7: A 7-piece set with a rugged build.
  • Behringer Cymbal and Drum Mic Pack: Compact design with versatile clips.
  • Samson DK705: 5-piece combo for kick, snare, and toms.

Pros And Cons Of Budget Mic Kits

Budget mic kits come with benefits and trade-offs. Knowing these can help you make an informed choice.

Pros Cons
Cost-effective Lower build quality
Good starter features Limited frequency response
Simple setup Fewer customization options

Mid-range Favorites

Welcome to the sweet spot of drum mic kits – Mid-Range Favorites. Right here, drummers find that perfect blend of price and performance. Great sound doesn’t need to break the bank. Let’s explore the kits that hit all the right notes without hitting your wallet too hard.

Balancing Cost And Quality

It’s a myth that quality comes only at high prices. In the mid-range market, drum mic kits are no exception. These kits bring together robust build and clear sound. They cater to both budding drummers and seasoned performers.

  • Sturdy design meets affordability
  • Professional features without the premium tag
  • Clear audio capture, suitable for gigs and recording sessions

Most Reliable Mid-range Kits

Drum mic kits in the mid-range bracket are diverse. However, some stand out for their consistent performance and durability. These kits have become favorites among musicians for their reliability.

Brand Model Components User Rating
Audix DP7 7-piece drum mic kit 4.5/5
Shure PGADRUMKIT7 7-piece microphone set 4.4/5
AKG Drum Set Session I High-performance drum microphones 4.3/5

These mid-range kits include various mic types, tailored for each drum component. Snare, toms, and kick all receive specialized attention for the best sound.

Best Drum Mic Kits 2023: Top Picks for Every Budget


Credit: www.musicradar.com


High-end Choices

For drummers and sound engineers aiming for the best audio reproduction, high-end drum mic kits stand out. These kits embody precision, durability, and unparalleled sound quality. Expertly crafted for studio recordings and live performances, they promise an exceptional sonic experience. Professionals and audiophiles alike seek these superior kits for impeccable results.

Premium Features And Brands

Dive into the world of premium drum mic kits, and you’ll notice standout features that justify their prestige. Multi-pattern microphones, low noise circuitry, and robust construction come standard. You’ll encounter brands like Shure, Sennheiser, and AKG leading the pack, each offering kits that impress with their performance and reliability.

  • Built-in attenuators handle high sound pressure levels.
  • Advanced shock mounts reduce unwanted vibrations.
  • Hypercardioid patterns offer tight sound isolation.

When To Invest In High-end Mics

Knowing the right moment to upgrade to a high-end drum mic kit can elevate your sound tremendously. Acoustic environments demanding clarity, such as recording studios, typically warrant such an investment. Live performers seeking a consistent audio quality in varied venues will also benefit greatly. Seasoned professionals understand that high-end mics are not an expense but a long-term investment in their craft.

Scenario High-End Mic Benefits
Studio Recording Crucial audio fidelity and detail
Live Performance Consistent sound across venues
Professional Audio Work Durable and reliable for frequent use

Specialized Drum Mic Kits

Drum mic kits serve as the backbone for capturing the true essence of your drum sound. The right set boosts clarity, tone, and the overall punch of the kit. Specialized drum mic kits enhance recording and live performances, tailoring to specific needs and genres. They ensure every beat and rhythm resonates with the listener.

Mic Kits For Specific Genres

Each music genre demands a unique sound profile. Specially designed mic kits cater to these genre-specific subtleties. Jazz drumming seeks warmth and subtlety, while rock demands aggressive and punchy sound capture. Metal may need mics that handle high SPLs without distortion. Picking the right kit means better genre representation.

  • Jazz Kits: Small diaphragm condensers to capture the nuances.
  • Rock Kits: Dynamic mics ensure the raw power cuts through.
  • Metal Kits: Mics with high SPL capabilities to handle intense volume.

Customizable Mic Kits For Drummers

Flexibility in a mic kit allows drummers to tailor their sound. Customizable kits provide a mix of microphone types. Drummers can choose from dynamic, condenser, or ribbon mics to build their perfect setup. Versatility is key for drummers experimenting with different styles and techniques.

Mic Type Best For
Dynamic High volume, close miking
Condenser Capture the detail, overheads
Ribbon Warmth and natural sound

Mic Placement And Setup Tips

Setting up drum mics is an art form. It requires precision and a keen ear for detail. The right placement ensures each hit resonates perfectly through the speakers. Let’s dive into some expert advice on how to optimize your drum sound and dodge the common setup pitfalls.

Optimizing Drum Sound

The goal is clear: capture the true essence of your drums. The journey to that goal, though, is paved with careful considerations.

  • Kick Drum: Place the mic inside the drum, pointing towards the beater for a punchy sound.
  • Snare: Position the mic 2 inches above the rim, aimed at the center for a crisp snap.
  • Toms: Angle mics slightly towards the lower end of each tom to grab the full tone.
  • Overheads: Space them evenly above the set to catch cymbal crashes and the ensemble effect.

Avoiding Common Setup Mistakes

Many drum recording sessions fall flat due to simple oversights. Here’s what to watch out for:

Common Mistake How to Avoid
Ignoring Phase Issues Test and adjust mics to ensure all signals are in phase.
Too Much Gain Set gain levels to avoid distortion and maintain clarity.
Inconsistent Mic Angles Keep a uniform approach to capture a balanced sound.
Overlooking Room Acoustics Consider the room’s sound characteristics and adjust accordingly.

Accessories And Add-ons

Great drum mic kits capture every beat with clarity. But a great kit needs more than just microphones. Accessories and add-ons are key for a stellar recording setup. Proper stands, mounting options, and essential cables can make or break your audio quality. Let’s explore these quintessential additions.

Stands And Mounting Options

Stands and mounts keep microphones steady. They are vital for precise positioning.

  • Boom stands: Reach over drums without clutter.
  • Clamp mounts: Attach mics directly to drum rims.
  • Low-profile stands: Ideal for kick drums and floor toms.

Select mounts that offer flexibility and stability. Keep the setup easy to adjust.

Cables And Other Essentials

The right cables ensure clear signal transmission. Don’t overlook their quality.

Cable Type Use
Mic cables (XLR) Connect mics to audio interfaces or mixers.
Snake cables Group multiple XLR cables for organized setups.

Include some extra cables in case of unexpected failures. Consider cable organizers to prevent tangles and damage.

User Reviews And Testimonials

When choosing the best drum mic kits, feedback from fellow drummers is invaluable. User reviews and testimonials offer a goldmine of information, gathered from drummers who’ve tapped into the power of these kits. Below, we delve into the real-world experiences of musicians who’ve put these tools to the test.

Firsthand Experiences From Drummers

Whether it’s live performances or studio recordings, drummers from various genres share their stories. Here’s what they unveiled.

  • John M.: “The kit brought clarity to my kick and snares, a game-changer during gigs.”
  • Sarah T.: “I found the mics durable, reliable, and easy to set up for quick sessions.”
  • Carlos G.: “With this mic kit, I achieved a balanced sound that truly elevated my band’s music.”

Comparisons And Ratings

Different kits serve different needs. Here is a quick overview of how they stack up against each other.

Mic Kit Name Sound Quality Durability Value for Money Overall Rating
Kit A 4.5/5 4.7/5 4.3/5 4.5 Stars
Kit B 4.2/5 4.5/5 4.0/5 4.2 Stars
Kit C 3.9/5 3.8/5 4.1/5 4.0 Stars

Ratings synthesize multiple opinions into a simple score. They reflect quality and value, helping drummers make informed choices.


Where To Buy Drum Mic Kits

Finding the best drum mic kits is crucial for crisp, clear drum sounds. Good news! You can buy these kits from various places. Whether you favor the convenience of online shopping or the personal touch of a local store, there’s an option for everyone.

Online Vs. In-store Shopping

Choices are vast when it comes to purchasing drum mic kits. Let’s explore the pros and cons of both methods.

Online Shopping In-Store Shopping
  • Pros:
    • Shop anytime
    • More choices
    • Easy price comparisons
    • Straight to your door
  • Pros:
    • Test before buying
    • Get expert advice
    • No wait for delivery
  • Cons:
    • Can’t test before purchase
    • Shipping time
  • Cons:
    • Less variety
    • Store hours

Most musicians cherish the thrill of visiting a physical store. But, many have now embraced the ease of clicking and buying online.

Warranties And Return Policies

Remember to check these before buying your drum mic kit. They are super important.

  • Warranties cover repair or replacement of your kit if needed.
  • Return policies allow you to return the kit if you’re not happy.
  • Read the fine print so you know what’s covered.
  • Buying online usually provides easy access to this information.

Stores might offer additional services like tech support. Remember to ask the store staff. Secure the best deal for your musical journey with the right support behind your purchase.

Frequently Asked Questions Of Best Drum Mic Kits


What Are Features Of Top Drum Mic Kits?


When looking for top drum mic kits, consider durability, sound quality, versatility, and the number of mics included. High-quality kits resist wear, capture a full range of drum tones, work for various drum types, and usually include 4-8 mics.


How To Choose The Best Drum Mic Kit?


To choose the best drum mic kit, evaluate your drum sizes, preferred sound, and performance settings. Kits tailored for studio recording differ from those for live performances. Factor in the number of drums and cymbals, as well as your venue’s acoustics.


What’s Included In A Drum Mic Kit?


A typical drum mic kit includes microphones for the bass drum, snare, toms, and sometimes overheads for cymbals. Kits often come with mounting clips or stands, and higher-end options may include carrying cases for easy transportation and setup.


Are Drum Mic Kits Suitable For Recording And Live Performance?


Yes, drum mic kits are designed for both recording sessions and live performances. Some kits are specialized for one scenario over the other, offering either enhanced studio sound quality or more robust build for live stage use.


Conclusion


Selecting the right drum mic kit elevates your sound to professional heights. We’ve explored options suited for various needs and budgets, ensuring quality recordings and performances. Remember, your choice reflects your unique sound identity. Embrace these insights and hit the stage or studio with confidence.


Ready, set, mic!

Categories
Archive

Best Audio Interfaces for Guitar: Quality Picks

As an Amazon Associate I earn from qualifying purchases.

The Focusrite Scarlett 2i2 and Universal Audio Apollo Twin are top choices for guitar audio interfaces. These devices offer exceptional clarity and robust build quality.


Guitar players seeking to capture their music with studio-grade fidelity need a reliable audio interface. The right interface transforms your guitar’s analog signal into a digital format without losing tonal integrity. Brands like Focusrite, Universal Audio, and PreSonus dominate the market, known for their connectivity options and compatibility with various recording software.


For those on a budget, the Behringer U-PHORIA UMC204HD provides quality at an affordable price, while the avid enthusiast might lean towards a high-end unit like the Apogee Ensemble. Knowing the distinction between connection types, such as USB, Thunderbolt, and Firewire, is crucial in selecting an interface that integrates seamlessly with your existing setup. A good audio interface will not only record your guitar but also provide low-latency monitoring and the ability to expand your recording capabilities.

Best Audio Interfaces for Guitar: Studio-Quality Picks


Credit: www.nytimes.com


Striking The Right Chord With Audio Interfaces

Striking the Right Chord with Audio Interfaces can make or break the recording artist’s journey – especially for guitarists. With the vast array of tools on the market, finding the right one can feel like a solo on stage. But fear not, because plugging into a top-notch interface ensures that every riff and run hits the audience with full impact. Let’s explore how to make that happen.

The Importance Of Audio Quality

Exceptional audio quality is crucial for any guitarist who records. It breathes life into every track and preserves the soul of the performance. When the audio quality shines, listeners feel every string bend and every emotion behind a chord progression. Great sound can inspire both the artist and the audience, which is why the right interface is a game changer.

The Guitarist’s Guide To Interfaces

Choosing an audio interface for guitar recording is like finding the perfect amplifier. It must resonate with your sound and style. Important features include:

  • Low latency for real-time playing and recording
  • High resolution for capturing every nuance
  • Durable inputs that can take the regular plugging and unplugging of guitar cables
  • Software compatibility to integrate with your recording setup

Selecting the right interface can transform your guitar tracks from garage band quality to professional studio sound. Here’s a quick guide:

Interface Resolution Input/Output Notable Features
Focusrite Scarlett 2i2 24-bit/192kHz 2/2 Air mode, USB-C connectivity
Universal Audio Apollo Twin 24-bit/192kHz 2/6 Realtime UAD processing
Behringer U-PHORIA UMC204HD 24-bit/192kHz 2/4 MIDAS preamps, zero-latency monitoring

Remember, the perfect audio interface blends seamlessly with your setup, allowing you to capture every dynamic of your guitar’s voice. Whether you’re in a home studio or on the go, make sure your audio interface hits all the right notes.

Keys To A Superior Interface

The journey to perfect guitar recordings starts with choosing the right audio interface. The market teems with options, but not all are cut out for the task. Understanding the keys to a superior interface will guide you to the best choice. It’s about more than just connections; it’s about capturing the essence of your guitar with pristine clarity.

Sound Fidelity And Clarity

Sound fidelity is non-negotiable. An excellent audio interface must reproduce guitar tones accurately. The goal is crystal clear sound that mirrors a live performance. High-resolution converters are vital in this aspect, translating analog signals from your guitar into detailed digital audio. Look for interfaces that offer at least 24-bit depth and a 96 kHz sample rate. This ensures your recordings retain all the nuances of your playing.

Latency: The Make Or Break

Next to sound quality, latency hugely impacts your recording experience. It’s the delay between strumming your guitar and hearing the playback. Minimal latency means a seamless recording experience. The best interfaces offer low-latency monitoring, allowing you to record and listen in real time. Direct monitoring features can also bypass your computer’s processor to eliminate latency further. Make sure to pick an interface with robust drivers that are optimized for your recording setup.

Here’s a quick checklist for your interface hunt:

  • High-resolution audio fidelity
  • Low-latency performance
  • Quality preamps to boost your signal
  • Durable construction for longevity
  • Multiple input/output options for flexibility
  • Compatible with your recording software

Connectivity: Plugging Into Creativity

Imagine the magic of recording guitar tracks with ease. Picture a device that connects your guitar to a world of sounds. That device is the audio interface. It’s the bridge between your instrument and your computer. Audio interfaces vary in how they connect. Some use USB, others use Thunderbolt. Both offer unique benefits. Knowing which to choose can unlock your creativity.

Usb Vs. Thunderbolt

USB audio interfaces are popular. They are compatible with most computers. They are also easy to use. Simply plug in and start recording. USB interfaces range from basic to professional quality.

Thunderbolt audio interfaces provide faster speed. They offer low latency. This means no delay when you play. Thunderbolt connections require a compatible port. Check your computer before choosing.

Compatibility Across Devices

Before buying an audio interface, think about compatibility. Will it work with your computer?

  • Check operating system: Some interfaces work with Windows. Others work with macOS. Some work with both.
  • Check software: Ensure the interface works with your recording software.

Read the specs of the interface carefully. Look for compatible systems and software. Pick an audio interface that fits your current setup. This ensures you can connect and create without issues.

Best Audio Interfaces for Guitar: Studio-Quality Picks


Credit: audiosorcerer.com


Durability And Design

When searching for the best audio interfaces for guitar, you should consider how well it can handle the rigors of use. Audio interfaces must not only provide clear sound but also stand the test of time. Guitarists often move from gig to gig, and their gear must withstand travel. Good design is also crucial. It ensures that the device is both practical and pleasing to the eye. Let’s delve into the qualities that make an audio interface both durable and smartly designed.

Built To Last

The best audio interfaces boast sturdy construction. They can survive drops, knocks, and constant plugging and unplugging of cables. Quality materials are key.

  • Metal chassis for impact resistance
  • Solid knobs and switches that don’t wear out quickly
  • Reinforced cable connections to avoid audio dropouts

Look for interfaces that have these features and good warranties.

Mobility And Aesthetics

Design influences both how an audio interface looks and works. A well-designed interface is easy to use and carry around.

Feature Benefit
Lightweight Easier to transport between locations
Compact size Saves space in a gig bag or home studio
Sleek aesthetics Complements other gear and setups

In addition to being portable, a good interface should look great on your desk. Look for clean lines and a modern look.

I/o Capacities For The Guitarist

An essential aspect to consider for guitar recording is the I/O (Input/Output) capacity of an audio interface. Guitarists must ensure their interface can accommodate the specific needs of their instrument. Let’s dive into the various input and output options available and how they pertain to guitarists, especially those who wish to expand their setup for full band recording.

Input/output Options

When it comes to recording guitars, the number and type of inputs are critical. Most interfaces come with at least one instrument-level input designed for guitar or bass. Look for interfaces with high-impedance inputs, often labeled as ‘Hi-Z’, which provide the optimal electrical environment for your guitar’s signal.

  • Combo Jacks: Accept both XLR and 1/4-inch connections, versatile for guitars and mics.
  • Dedicated Instrument Inputs:
    • Designed specifically for instruments like electric guitar.
    • Usually feature a ‘Hi-Z’ switch.
  • Multiple Outputs: Allow for monitoring through speakers or headphones with separate control.

Expandability For Full Band Recording

If you plan on recording an entire band, you need an interface that can handle more than just a guitar. Expandability is key. Consider interfaces with ADAT or S/PDIF inputs, which allow you to increase your track count by connecting additional preamps or interfaces.

Interface Feature Benefit for Band Recording
ADAT Input Connect extra preamps for more channels
S/PDIF I/O Add digital devices without using analog inputs
Word Clock Synchronize multiple digital sources

Smaller interfaces might offer expandability through a simple daisy-chain using Thunderbolt, USB, or FireWire. This flexibility means your audio interface can grow alongside your studio setup and skill level, making it a worthy long-term investment for guitarists.

Software Synergy

Finding the right audio interface for guitar can amplify your music creation journey greatly. Software Synergy plays a crucial role in that. It ensures your audio interface and software work in perfect harmony, unleashing your guitar’s full potential. Let’s dive into how bundled software and plugin compatibility enhance this synergy.

Bundled Daws

Many audio interfaces come with Digital Audio Workstations (DAWs). These DAWs act as the control center for your recordings. Choosing an interface with a quality DAW can make a huge difference. Here’s what to look for:

  • User-friendly interfaces that make recording simple
  • Variety of built-in effects and instruments
  • Seamless integration with your audio interface

A good DAW can take your guitar tracks from good to great effortlessly.

Plugin Compatibility

Your audio interface should play well with various plugins. This flexibility allows for creative freedom in mixing and mastering guitar tracks. Here’s a checklist to ensure compatibility:

Feature Importance
VST Support Essential for most third-party plugins
Low Latency Crucial for real-time processing
Regular Updates Ensures ongoing compatibility

Compatibility means better sound and more options for your music.

Practical Features For Pro Performance

Practical Features for Pro Performance are what set apart high-quality audio interfaces for guitarists. Use the right tools to elevate your music production to studio-grade levels with ease.

Control Surfaces

Control Surfaces are a game-changer for guitarists seeking nuanced command over their recording process. These features allow you to adjust levels, fine-tune equalization, and manipulate plugins directly. Here’s what to look for:

  • Intuitive Knobs and Sliders: For real-time adjustments without a mouse.
  • Touch-sensitive Controls: Respond to the lightest of touches for precision.
  • Motorized Faders: Provide automatic syncing with your digital audio workstation (DAW).

On-board Dsp Effects

Utilize On-Board DSP (Digital Signal Processing) Effects to record with studio-quality sound. These built-in effects reduce the need for external processing. Look for:

Feature Benefit
Reverb and Compressor Adds depth and controls dynamics on-the-fly.
EQ Adjustments Shapes the tone right at the source.
Modulation Effects Enriches sound with chorus, flange, or delay.

With these practical features, pro performance is within reach. Level up your guitar recordings with interfaces boasting Control Surfaces and On-Board DSP Effects.

The Finest Picks For Guitarists

Every guitarist craves pristine audio quality for their recordings. The right audio interface can make all the difference! Whether you’re a hobbyist or a pro, there’s a perfect match for your guitar setup. This guide highlights top-tier choices for every budget. Bold sound begins with the ideal interface. Get ready to meet your musical match!

Budget-friendly Choices

Great sound doesn’t have to break the bank. Discover interfaces that deliver quality without the high price tag. They ensure smooth recordings and easy use. Take your pick and strum your way to amazing music!

  • Focusrite Scarlett Solo: A compact powerhouse, perfect for solo artists.
  • Behringer U-Phoria UM2: Offers clear sound on a shoestring budget.
  • PreSonus AudioBox USB 96: An all-rounder with high-grade preamps.

Premium Range Marvels

Investing a little more can take your sound to new heights. Premium interfaces boast top-notch components. These picks are for serious guitarists. Feel the magic as your guitar’s true voice comes alive!

Model Key Feature Input/Output
Universal Audio Apollo Twin Real-time UAD processing 2/4
RME Babyface Pro Ultra-low latency 12/12
Apogee Element 46 High-quality A/D conversion 4/6


User Experiences And Ratings

Choosing the right audio interface for guitar can seem daunting. Yet, user opinions cut through the noise. Real-world experiences provide the insight needed to make the perfect choice.

Testimonials From Professionals

Professional guitarists share their journey with different audio interfaces. Their feedback highlights key features, reliability, and performance. Here’s what they say:

  • Crystal-clear sound is a common compliment.
  • Low latency allows for seamless recording.
  • Durability stands out. Pros use these interfaces on tours.

“The best interface elevates my guitar’s tone.” – John, Session Guitarist

Community Feedback

The music community online is buzzing. Amateurs and semi-pros weigh in. They post ratings and in-depth reviews.

Audio Interface Model User Rating Notable Feature
Model X 4.7 High fidelity preamps
Model Y 4.5 Multiple output options
Model Z 4.8 User-friendly interface

Users appreciate reliable tech support the brands offer. Warranty becomes a sign of trust.

Setting The Stage For Recording

For guitar enthusiasts ready to capture their music, the right audio interface is key. Setting the Stage for Recording ensures that your guitar’s tone faithfully reaches your audience. This journey begins with choosing the perfect audio interface and correctly setting it up.

Installation And Setup

Getting your audio interface up and running is the first step. Follow these steps for a smooth installation:

  1. Unbox the audio interface and place it near your computer.
  2. Connect the interface to your computer using the provided USB or Thunderbolt cable.
  3. Install any necessary drivers or software from the manufacturer’s website.
  4. Plug in your guitar using a high-quality instrument cable.
  5. Power on the interface and adjust the gain level to avoid clipping.

With these steps, your audio interface will be ready for action.

Optimizing Recording Sessions

Now, fine-tune your setup for the best recording experience. Focus on these tips:

  • Use a pop filter to minimize unwanted noise.
  • Adjust the buffer size in your recording software for minimal latency.
  • Set the correct input level on the interface for your guitar.
  • Choose a high-quality recording format like 24-bit/48kHz.

Your recordings will shine with rich, clear, and crisp sound.

Future Strings: What’s Next In Audio Interfaces

Guitarists and music producers always seek the best gear to create amazing sounds. Audio interfaces for guitar evolved rapidly. We now look ahead to see what innovations the future holds.

Emerging Technologies

Audio interfaces for guitars are gaining smarter features. Here’s what’s on the horizon:

  • USB-C connectivity for faster data transfer
  • Wireless capabilities reducing clutter
  • High-resolution 24-bit/192kHz converters for clearer sound
  • Advanced DSPs for real-time effects processing

Next-gen devices may include A.I. technology. It will personalize guitar tones. Gear will become more compact but more powerful.

Predicting Market Trends

Here’s a look at possible trends in the audio interface market:

  1. An increase in the popularity of touchscreen interfaces
  2. Focus on eco-friendly manufacturing
  3. Greater integration with mobile devices and apps
  4. Virtual reality (VR) enhancements for immersive experiences

Up-and-coming artists and professionals will crave versatility. They’ll want more affordable, quality interfaces. User-friendly features will be a must.

Closing Encore

Every guitar virtuoso deserves an audio interface that captures the essence of their music. The right interface brings out the soul in each strum. It makes every pluck resonate with clarity. Finding that perfect match marks a milestone in a guitarist’s journey. Consider this a standing ovation to the search for the best audio interfaces for guitar.

Final Thoughts

Guitar audio interfaces are a bridge between your instrument and the digital world. Quality, flexibility, and usability come first. Whether for a home studio or on-the-go recording, options are plentiful. Each interface has its own charm. It might be the pristine preamps of one or the robust build of another. Look for the one that hits the right note with your artistic style.

Helpful Resources And Links

Beyond this guide lie vast resources. They will fine-tune your knowledge. The following list includes trusted sites and user-friendly forums where experts and peers discuss their firsthand experiences with various audio interfaces. Check out:

  • Gearslutz Forum: A community where sound engineers and music producers converse about equipment.
  • Sweetwater: An online retailer with extensive product guides and reviews.
  • YouTube Tech Review Channels: For video reviews and unboxings which show interfaces in action.
Best Audio Interfaces for Guitar: Studio-Quality Picks


Credit: mixingmonster.com


Frequently Asked Questions Of Best Audio Interfaces For Guitar


What Features To Consider In Guitar Audio Interfaces?


When choosing a guitar audio interface, consider latency, input/output count, preamp quality, resolution, and compatibility with your recording software. These factors directly impact recording quality and versatility.


Can You Find Budget-friendly Guitar Interfaces?


Absolutely, several brands offer quality guitar audio interfaces at budget-friendly prices. Look for models with essential features you need without the added cost of advanced professional features.


How Does Usb Connectivity Affect Recording?


USB connectivity affects the ease of use and setup for guitar interfaces. Interfaces with USB are typically plug-and-play, making them user-friendly for quick home studio recording sessions.


Are There Audio Interfaces For Ios/android Devices?


Yes, there are portable audio interfaces designed to work with iOS and Android devices, enabling recording and playback through your mobile device with minimal gear.


Conclusion


Selecting the right audio interface for your guitar sessions can elevate your music significantly. We’ve covered top-notch options suitable for various needs and budgets. Remember, the key is to match your interface choice with your specific recording requirements and sound aspirations.


Embrace your creative journey with the ideal gear—your guitar deserves it.

Categories
Archive

What Is Phase Cancellation?: Audio’s Hidden Enemy

Phase cancellation occurs when two sound waves of the same frequency interact destructively. This results in a reduction in the amplitude of the perceived sound.


Phase cancellation is a critical concept in audio engineering and music production that can impact the quality and clarity of sound. It happens when audio waves collide, having matched frequencies but opposite phases, effectively nullifying each other. This phenomenon affects various aspects of recording and live sound reinforcement, requiring astute attention to speaker placement, microphone techniques, and even room acoustics to prevent unwanted audio interference.


Understanding and managing phase cancellation is essential for sound technicians, as it can make or break the integrity of audio, from studio recordings to concert performances. Efficiently overcoming phase cancellation challenges ensures that audio content maintains fidelity, delivering an untainted listening experience.


Introduction To Phase Cancellation

Phase cancellation occurs in sound waves. It can make audio sound weak or even silent. This happens when sound waves with the same frequency meet in opposite phases. These waves then reduce or cancel each other out. Let’s explore the phenomenon, its effects on audio fidelity, and its implications in the world of sound.

The Basics Of Sound Waves

Sound travels in waves, much like ripples in a pond. These sound waves have peaks and troughs. When two waves are in phase, their peaks and troughs match. They make a stronger sound. But, out of phase waves have mismatched peaks and troughs. They can cancel each other’s sound. This is the heart of phase cancellation.

Impact On Audio Fidelity

Audio fidelity means how true to the original sound a recording is. Phase cancellation can harm this. It can remove parts of the sound. This makes the audio lose quality. For music producers and sound engineers, understanding and managing phase cancellation is crucial. It ensures the best possible sound quality.

The Physics Behind Phase Cancellation

The Physics Behind Phase Cancellation dives deep into the world of acoustics and wave dynamics. This phenomenon can be tricky to grasp, but understanding it is vital for anyone dealing with sound or signal processing. Here, we simplify the complex concept of phase cancellation.

Wave Interference Explained

To grasp phase cancellation, one must first comprehend wave interference. This occurs when two or more waves meet while traveling through the same medium. When waves superimpose, they form a new wave pattern. This pattern depends on the phase relationship between the original waves—a key concept in phase cancellation.

  • Constructive interference happens when waves meet in phase and combine to create a wave of greater amplitude.
  • Destructive interference occurs when waves meet out of phase, reducing the overall amplitude.

Positive Vs. Negative Interference

The terms positive and negative interference refer to constructive and destructive interference, respectively. During positive interference, the crests and troughs of two waves align and reinforce each other. In contrast, negative interference takes place when the crest of one wave meets the trough of another, essentially canceling out the waveform.

Type of Interference Phase Relationship Amplitude Result
Positive (Constructive) In phase Increased
Negative (Destructive) Out of phase Decreased or nullified

Understanding these phases is crucial for applications such as noise-cancelling headphones, audio recording, and many more. Recognizing the principles of wave behavior opens doors to manipulating sounds and signals for practical uses.

Identifying Phase Cancellation In Audio

Phase cancellation can cause your audio to lose punch and clarity. It occurs when waves with the same frequency are out of sync. When they meet, they can cancel each other out. Knowing the signs and tools to detect phase cancellation is vital for high-quality sound.

Symptoms In Sound

Weak or missing low frequencies: This often signals phase issues.

Thin-sounding recordings: Instruments may lack fullness, suggesting phase cancellation.

Vocals sound distant: Even if recorded closely, phase problems can create a roomy effect.

Tools For Detection

Phase meters: These show the phase relationship between left and right channels.

Software plugins: Many DAWs have built-in tools to detect phase issues.

Use audio editing programs with phase correction features to fix the problems.

  • Listen in mono – Some issues might only be heard this way.
  • Compare flipped phase – Switch the phase of one track and compare.

Real-world Examples

Let’s dive into the fascinating world of audio with some real-world examples of phase cancellation. This common issue pops up in various settings, from professional music studios to live concerts. Understanding these examples helps audio professionals and enthusiasts prevent unwanted sound quality issues. In the next sections, we’ll explore phase cancellation in studio recordings and live sound situations.

Studio Recording Challenges

In the realm of studio recording, phase cancellation can lead to thin-sounding tracks. It often occurs when:

  • Microphones are placed at different distances from a sound source
  • Multiple microphones pick up the same sound, out of sync

Sound engineers meticulously position microphones to prevent this. They also use techniques like:

  1. Checking microphone polarity
  2. Applying time-alignment to align waveforms

Correcting phase issues ensures the final mix sounds full and true to the intended recording.

Live Sound Scenario

During live performances, phase cancellation affects sound quality. Challenges include:

Issue Impact
Speakers too far apart Weak sound in certain areas
Incorrect speaker angle Sound waves clash, cancel out

Sound technicians tackle these by:

  • Aligning speaker positions strategically
  • Using equalization to minimize problematic frequencies

This careful setup allows the audience to experience clear, powerful sound across the venue.

Mitigating Phase Issues

Mitigating phase issues is crucial in audio production. It ensures clear sound. When sound waves from different sources combine, phase cancellation can happen. This weakens or silences part of the audio. Learning how to prevent this improves your recordings.

Mic Placement Techniques

Mic placement is vital to combat phase cancellation. Here are some methods:

  • Use the 3:1 rule: For every unit of distance from the source to the first mic, place the second mic three times farther.
  • Match microphone types: Similar mics pick up sound waves more alike.
  • Check polar patterns: Know your mics’ directions of sensitivity for optimal placement.

Time Alignment

Time alignment syncs audio signals from different mics. This prevents phase issues. Follow these steps for proper alignment:

  1. Measure distances: Check the distance from each sound source to its mic.
  2. Adjust track timing: Use audio software to align tracks.
  3. Listen carefully: Make small adjustments while listening for phase issues.

Consistent time alignment is crucial for a clean mix. These steps help avoid phase cancellation.


The Role Of Eq And Processing

The Role of EQ and Processing plays a pivotal part in shaping the sounds we hear. When dealing with audio, phase cancellation can cause some frequencies to disappear or diminish. Understanding how to use EQ and processing is key in preventing or fixing phase issues.

Filtering Frequencies

Using EQ effectively helps manage phase cancellation. Subtractive EQ can remove problematic frequencies that conflict between tracks. This technique ensures that important sounds stand out.

  • Cut overlapping bass frequencies to avoid muddiness.
  • Apply high-pass filters to non-bass instruments. It clears low-end clutter.

Phase Alignment Plugins

Phase alignment plugins are powerful tools to fix phase cancellation. They analyze and adjust audio tracks to line up the waveforms.

Plugin Feature Benefit
Automatic alignment Quick and easy fixes
Manual adjustment Precision and control
  • Use them on multi-miked setups, like drum kits.
  • They are handy for layers of synths and vocals.

Advanced Concepts In Phase Management

Phase cancellation can create challenges in sound recording and live performance. Advanced techniques in managing phase can prevent these issues. Two key methods are phase linear equalization and dynamic phase adjustments. They help us achieve clarity and fullness in audio output.

Phase Linear Equalization

Phase linear equalization tackles phase cancellation at the source. It modifies audio frequencies without affecting their wave alignment. This technique keeps sounds crisp and coherent. It’s a must for professional audio mixes.

  • Clearer audio: By maintaining phase coherence, the audio stays pure and uncolored.
  • Better stereo image: Phase integrity across channels creates a more realistic soundstage.
  • Accurate frequency response: Ensures equalizers only affect amplitude, not phase.

Dynamic Phase Adjustments

Dynamic phase adjustments are real-time changes to phase based on the audio content. They adapt to the sound to maintain quality.

Action Benefit
Tracking phase shifts Keeps different sound elements from canceling each other out.
Automated correction Fixes issues fast, often without manual input needed.

These advanced concepts in phase management are game-changers. They ensure every note hits as intended. With these tools, engineers craft impeccable sound landscapes.


Taking Control Of Phase Cancellation

Imagine two waves crashing into each other. Phase cancellation is similar, occurring when audio waves meet out-of-sync. This causes them to weaken or silence each other. Musicians and sound engineers often encounter this phenomenon. Control is key in maintaining the integrity of sound. Let’s explore the best ways to handle phase cancellation.

Best Practices For Engineers

  • Check microphone placement: Ensure microphones are positioned to avoid picking up out-of-phase signals.
  • Use the polarity switch: Hardware and software often include this function to instantly correct phase issues.
  • Analyze with tools: Software like spectrum analyzers helps identify phase cancellation visually.
  • Test with phase inversion: Inverting the phase of a track can confirm and resolve phase issues.

Continuous Learning And Adaptation

Staying updated with the latest audio techniques is crucial. Continuous learning ensures you adapt effectively to phase-related challenges. Subscribe to industry blogs, attend workshops, and practice regularly. Embrace each audio encounter as a chance to refine your skills in managing phase cancellation.

Frequently Asked Questions On What Is Phase Cancellation


What Causes Phase Cancellation In Audio?


Phase cancellation occurs when two sound waves of the same frequency meet out of phase, neutralizing each other. It’s due to waveforms with identical frequencies conflicting, resulting in a reduced or nullified audio signal.


How Can Phase Cancellation Impact Sound Quality?


Phase cancellation can severely degrade sound quality. It results in certain frequencies being diminished or completely lost, leading to a hollow or flat sound. Clarity and depth in music production or any audio work can be significantly affected.


Can Phase Phase Cancellation Be Beneficial?


Interestingly, phase cancellation can be purposefully used to eliminate unwanted noise or frequencies. It’s a technique often applied in noise-cancellation technology and can help in isolating vocals or instruments in a mix.


How Do You Fix Phase Cancellation Issues?


Fixing phase cancellation involves adjusting the timing or phase of the audio sources. This can be done manually by shifting the phase of one of the signals or using phase alignment tools in audio editing software.


Conclusion


Understanding phase cancellation is crucial for audio fidelity. It’s an audio phenomenon that can either enhance or degrade sound quality. Remember, recognizing this issue is the first step to mitigating its effects. So, apply this knowledge to create cleaner, more precise audio in your projects.


Embrace this as part of your sound engineering toolkit for best results.


Categories
Archive

Phase Alignment Plugins: Perfect Your Mix!

Phase Alignment Plugins are tools used to correct phase issues in audio recordings. These plugins ensure multiple tracks work together cohesively.


In audio production, maintaining phase coherence across multiple tracks is crucial for a clear and powerful sound. Phase Alignment Plugins address this by analyzing and correcting timing discrepancies that can cause phase cancellation. This is especially important when combining signals from microphones placed at different distances from a sound source, such as in a drum kit, where misalignment can lead to a thin or hollow sound.


By aligning the waveforms precisely, these tools help preserve the low-end punch and overall fullness of a mix. They are essential for both amateur and professional engineers aiming to achieve a polished final product. Sound engineers and producers rely on these plugins to ensure that their tracks are phase-coherent and that the audio quality is not compromised.

Phase Alignment Plugins: Perfect Your Audio Mix!


Credit: www.soundradix.com


Introduction To Phase Alignment

Imagine each sound in music as a wave. Sometimes, waves can clash. This clashing makes music sound fuzzy. Phase alignment fixes that fuzziness, making sounds work together perfectly. It’s like a team of rowers moving in sync.

The Role Of Phase In Audio Quality

Phase is vital in sound waves. It affects how clear and crisp music sounds. When waves are in phase, they boost each other. When out of phase, they cancel each other out. This leads to weak or hollow sounds in your mix. Understanding phase ensures the best audio quality.

The Need For Alignment In Mixing

  • Tracks blend neatly: Aligned phases mean instruments sound natural together.
  • Prevents phase cancellation: Removes the risk of sounds weakening or disappearing.
  • Enhances clarity: Each sound in a mix stands out clear and strong.
  • Provides depth: Aligning phases adds a sense of three-dimensional space to music.

Proper phase alignment is a game-changer in the mixing process. It’s key for that professional touch.

Phase Alignment Plugins: Perfect Your Audio Mix!


Credit: www.musicguymixing.com


Basics Of Sound Waves And Phase

Let’s dive into the Basics of Sound Waves and Phase. Knowing these concepts helps us understand why phase alignment plugins are vital in music production. Sound is all around us, in every song we love and every movie we watch. But to shape these sounds, we must first grasp their properties and the role of phase in audio.

Understanding Sound Wave Properties

Think of sound waves like ripples in a pond. When you drop a pebble, it creates waves that spread out. This is similar to how sound travels through the air. Here are key points about sound wave properties:

  • Frequency: It tells us the pitch of a sound. It’s like the number of ripples created in the pond.
  • Amplitude: This is the loudness of a sound. The bigger the ripple, the louder the sound.
  • Wavelength: The distance between two peaks of a wave.
  • Velocity: How fast the wave travels through a medium like air or water.

What Is Phase In Audio?

Now, let’s talk about phase. Imagine two pebbles dropped into a pond. The ripples might meet, making bigger waves together. This is called constructive interference. Or, they might cancel each other out. This is destructive interference, caused by opposite phases. In audio terms, phase is the position of a point in time on a waveform cycle. It’s crucial for these reasons:

  1. Phase affects how different sound waves interact.
  2. Sound quality can improve or worsen because of phase relationships.
  3. Correct phase alignment leads to a more balanced and professional mix.

See phase as the timing of your sound waves. If the timing is off, your sound could be too quiet or off beat. Plugins help align this timing, so everything sounds clean and punchy.

Common Phase Issues In Recording

Players in the studio often face an invisible foe: phase. Phase issues can muddle your sound, leaving mixes flat and lifeless. Understanding these common problems is key to crisp, clean, and punchy recordings.

Sources Of Phase Misalignment

Phase misalignment happens more often than we think. A few culprits include:

  • Multiple Microphones: Capturing a source with several mics can lead to phase cancellation.
  • Time Alignment: Small timing differences between mics can throw off the phase.
  • Signal Processing: Some processors affect phase when altering the signal.

Detecting Phase Problems

To spot phase issues, you will need to:

  1. Listen Carefully: Flipping the phase switch can reveal phase cancellation.
  2. Visual Inspection: Use a waveform view to see if waves are aligned.
  3. Phase Correlation Meters: These tools show phase relationships visually.

Effective mixing hinges on recognizing and fixing phase problems. Phase alignment plugins can become a game-changer in this regard.

The Impact Of Phase Misalignment

Phase misalignment in audio tracks can create a series of issues. This problem occurs when different sound waves do not line up properly. It can lead to a muddled sound quality. Let’s explore how phase misalignment impacts your sound.

Consequences On Sound Image

A solid sound image is crucial for a lifelike listening experience. Phase misalignment can ruin this.

  • Positional Clarity: Each instrument should have its own space in a mix. Misalignment blurs these positions.
  • Depth & Dimension: Misalignment flattens the depth, making the music feel less alive.
  • Stereo Spread: It reduces the width in stereo sound, leading to a less engaging experience.

Compromised Frequency Response

Frequency response defines how well a system reproduces all audio frequencies. Phase issues can create inconsistencies in this response.

Here are some effects:

Frequency Range Effect of Misalignment
Lows Causes low-end frequencies to cancel out, resulting in weak bass.
Mids Leads to hollow-sounding vocals and central instruments.
Highs Results in less sharpness and sparkle in the higher frequencies.

An unbalanced frequency response affects the overall texture of music. Phase-alignment plugins help restore these vital aspects of sound.


Exploring Phase Alignment Plugins

In music production, phase issues can muddy your sound. Phase alignment plugins tackle these problems, ensuring tracks mesh perfectly. These tools are magical for producers aiming for a polished mix.

How These Plugins Work

Phase alignment plugins are clever bits of software. They analyze audio tracks. They find misalignments. Then they correct them. It’s like aligning the wheels on a car. Everything runs smoother after.

Some work automatically. Others give you manual control. But all aim for one thing:

  • Clearer sound
  • Tighter bass
  • Balanced stereo image

Audio engineers love them. They save time. They make mixes professional.

Top Phase Alignment Tools For Producers

Producers need reliable tools. Here are the top phase alignment plugins:

Plugin Name Key Feature
Auto-Align Automatic mic alignment
InPhase Detailed wave alignment
Phase Mistress Analog-sounding adjustments
Sound Radix Pi Multi-track phase correction

These tools are game-changers. Use them to create clean, punchy mixes. Experience the difference in your music production today.

Practical Application Of Plugins

In the realm of audio production, phase alignment plugins are essential tools. They correct timing differences between tracks. The results? Tighter bass and focused recordings. But how do you use these plugins in a real-world scenario? This section will guide you through the steps and provide case studies for better understanding.

Step-by-step Guide To Aligning Phases

Phase issues can muddy your mix. Fixing this requires a straightforward approach:

  1. Identify the tracks with phase issues. Trust your ears!
  2. Insert a phase alignment plugin on each affected track.
  3. Adjust the plugin settings. Start with default presets.
  4. Use the phase correlation meter to gauge alignment.
  5. Tweak the settings until the tracks sound coherent.
  6. Listen to the mix. Ensure no aspect suffers from changes.

Real-world Examples And Case Studies

Understanding phase alignment is easier with actual examples. A detailed look into these scenarios can provide insight:

Scenario Challenge Solution
Drum Recording Snare and overhead mics out of phase Align overhead mics to the snare’s primary hit
Multi-Mic Guitar Cab Varying distances cause phase issues Adjust till both mics sound unified
Bass DI and Amp Timing misalignment between tracks Use plugin to align DI track to amp track

These examples show phase plugins in action. They prove the incredible impact on sound quality. Every mix can benefit from these precision adjustments.

Advanced Techniques In Phase Correction

Advanced Techniques in Phase Correction are essential tools for sound engineers. They ensure clear and high-quality audio. These techniques tackle phase issues that can muddy a mix. We explore innovative ways to fix phase problems in this section.

Multi-microphone Recording Solutions

Recording with multiple microphones presents challenges. Phase alignment plugins become crucial. These plugins analyze audio tracks. They find where waveforms are out of sync.

  • Time Adjustments: Plugins adjust timing variations between microphones.
  • Polarity Inversion: Flips waveforms to match phases.
  • Frequency Specific Correction: Targets phase issues within certain frequency ranges.

Creative Phase Manipulation Tricks

Beyond correction, phase can also be a creative tool. This is where creative phase manipulation tricks come in. Sound designers use them to shape unique sounds.

  1. Phaser Effects: Create swirling, dynamic textures.
  2. Haas Effect: Generate a sense of space by delaying one channel slightly.
  3. Dual-Mono Variations: Apply different EQ settings to left and right channels for stereo width.


Maintaining Phase Coherence In Your Mix

In the quest for a crisp, clean mix, phase coherence stands as a crucial factor. It ensures all sound elements work together, creating punch and clarity. Lack of phase coherence can make tracks feel weak or hollow. Enter phase alignment plugins, invaluable tools in preserving this sonic unity. Moving forward, let’s delve into practical tips for achieving consistent phase alignment and preventative measures for phase issues.

Tips For Consistent Phase Alignment

Phase alignment plugins are your go-to tools to ensure unity in your tracks. Consider these tips:

  • Check phases regularly: Use your ears. Listen for changes when you flip the phase.
  • Use visual aids: Spectrum analyzers help spot phase problems.
  • Align drums: For punchy drums, make sure overheads and close mics align.
  • Tackle low-end issues: Bass frequencies need special attention for phase alignment.
  • Trust the plugin, but verify: After using a plugin, confirm improvements by ear.

Preventing Future Phase Issues

To avoid phase problems in the future, follow these guidelines:

  1. Record with phase in mind: Place microphones carefully to prevent phase issues at the source.
  2. Organize elements: Keep instruments in their frequency space to minimize clashes.
  3. Be mindful with EQ: Boosting or cutting frequencies affects phase relationships.
  4. Review plugins: Some plugins may introduce phase shifts. Always test them.

In conclusion, preserving phase coherence is key to a balanced mix. Using phase alignment plugins effectively, and keeping an ear out for inconsistencies, will ensure your tracks hit all the right notes.

Frequently Asked Questions Of Phase Alignment Plugins


What Are Phase Alignment Plugins?


Phase alignment plugins are specialized software tools. They correct phase issues in audio recordings. Misalignments can cause frequency cancellations. These plugins ensure all audio tracks blend harmoniously.


How Do Phase Alignment Plugins Work?


Phase alignment plugins analyze audio signals. They detect phase discrepancies between tracks. Then, they align the waveform peaks. This process enhances coherency and clarity in the mix.


When Should You Use Phase Alignment Plugins?


Use phase alignment plugins during mixing sessions. They are crucial when combining multiple microphone recordings. Especially relevant for drums, guitar cabs, and vocal layers.


Can Phase Alignment Fix All Audio Issues?


Phase alignment can’t fix all audio problems. It’s effective for phase cancellation between tracks. However, it won’t solve issues like distortion, noise, or bad recording quality.


Conclusion


Wrapping up, phase alignment tools are indispensable for crystal-clear sound production. By choosing the right plugin, audio professionals can battle phase issues effectively. Remember to test different options and trust your ears for the best results. Elevate your tracks now with precise phase correction!

Categories
Archive

Best Mini Guitar Amps: Compact Amps Revealed!

The Yamaha THR10 is widely acclaimed for its versatility and Fender Mini Deluxe stands out for its portability. Blackstar Fly 3 offers excellent value with impressive sound in a small package.


Mini guitar amps are the perfect solution for musicians on the go or those with limited space. Offering a blend of portability, affordability, and quality, these little amps prove that great things can come in small packages. Suitable for practice sessions, jamming with headphones, or warming up backstage, mini amps have become a staple for guitarists of all levels.


They replicate the sound and feel of their full-sized counterparts without breaking the bank. Ideal for apartments or late-night practice, these compact devices allow for an uncompromised musical experience at lower volumes. With the rise of digital technology, some mini amps also integrate with mobile apps for even more tonal versatility. Selecting the right one from the multitude of options can significantly enhance your playing experience, while keeping the neighbors happy.


Small Amps, Big Sound

Small amps deliver big sound, proving that in the realm of guitar gear, bigger isn’t always better. The tiny titans of tone offer guitarists a portable solution without compromising on sound. Let’s dive into the miniature world of mini guitar amps that pack a punch.

The Rise Of Mini Guitar Amps

Mini guitar amps have become stars in their own right. These pint-sized powerhouses can deliver classic tones and sweet sustain from a package that fits on a bookshelf. Why are they popular?

  • Portability: They’re easy to carry.
  • Convenience: Perfect for small spaces and travel.
  • Practice-friendly: Ideal for bedroom jam sessions.

Why Size Isn’t Everything

Despite their stature, mini amps are no slouch in sound quality. Guitarists celebrate these amps for:

  1. Rich Tones: They emulate iconic amp sounds.
  2. Volume Control: High volume isn’t always necessary.
  3. Modern Features: Many have headphone outputs and effects.
Examples of Top Mini Guitar Amps
Amp Model Key Feature Wattage
Fender Mini Deluxe Classic Fender tone in miniature 1W
Marshall MS2 Crunchy overdrive 1W
Blackstar Fly3 Battery powered with tape delay effect 3W

Tiny Titans Of Tone

Think small is weak? Think again! Mini guitar amps pack a powerful punch. These compact wonders bring impressive sound quality and tone versatility. They fit almost anywhere, perfect for practice or on-the-go jams. They are the champions of convenience and masters of mobility. Let’s dive into what makes mini amps mighty!

Characteristics Of Top Mini Amps

  • Quality Sound: As size goes down, sound doesn’t. Top mini amps deliver clear, rich tones.
  • Durability: They boast a sturdy build to withstand travel demands.
  • Features: Many include effects and modulations for sound shaping.
  • Convenience: Built-in features, like tuners and metronomes, add value.
  • Battery Operation: The option to run on batteries allows for total mobility.

Power Versus Portability

Power (Watts) Portability Features Best For…
1-5W Ultra-lightweight, Handle for easy carrying Practice, Travel, Street Performance
5-10W Compact size, Optional battery support Small gigs, Group practice
10W+ Larger, but still manageable, More features Recording, Live performances

The balance between power and portability shapes a mini amp’s performance. Lower wattage amps shine in ease of transport and are great for intimate venues. As wattage increases, so does the amp’s capabilities, but they remain portable compared to full-sized amps. Find the sweet spot that matches your needs!

Pint-sized Powerhouses

Guitar amps don’t have to be big to be loud. Mini guitar amps pack a punch despite their size. They are perfect for practice, travel, and small gigs. Many have features found in larger amps. Some even connect to smartphones for effects and tracking. Let’s explore some top brands and models.

Brands Leading The Charge

  • Fender – A classic name with ranges like ‘Mini’ and ‘Mustang Micro’.
  • Marshall – Known for the ‘MS-2 Micro Amp’ series, they’re icons in rock.
  • Blackstar – The ‘Fly 3’ series combines portability with versatility.
  • Vox – Their ‘Mini’ series offers vintage tones in a modern package.
  • Roland – The ‘Micro Cube’ amps are loaded with effects and modeling tech.

Models That Make A Difference

Model Features Why It Stands Out
Marshall MS-2 Classic design, belt clip, and headphone jack. Its iconic stack design draws attention.
Fender Mustang Micro USB connectivity, amp modeling, and Bluetooth audio. It’s a full amp experience in a headphone amp form.
Blackstar Fly 3 Compact size, battery power, built-in effects. Great sound that can literally fit in a backpack.
Vox Mini5 Rhythm Diverse amp models, effects, and drum patterns. It’s a mini-amplifier with rhythm accompaniment.
Roland Micro Cube GX Ultra-durable, battery operation, iOS connectivity. Known for its longevity and tech integration.

The Traveling Musician’s Companion

The Traveling Musician’s Companion is not just a phrase; it’s a way of life. For musicians on the move, small gear is a big deal. A mini guitar amp epitomizes portability without sacrificing sound. Imagine carrying a concert in your backpack; that’s the magic of a top-notch mini amp.

Convenience On The Go

Musicians cherish freedom and flexibility. A mini guitar amp offers both. It’s lightweight, compact, and easy to carry. Forget the struggle with bulky equipment. Slip the amp into your gig bag, and you’re set for an impromptu session anywhere.

  • Compact Size: Fits in nearly any travel bag.
  • Light as a Feather: Easy to move without strain.
  • Battery Power Option: Play without needing an outlet.

Setting Up A Mobile Rig

Creating a sound system that moves with you is pure joy. With a mini amp, you plug in, and play starts. Setup is a breeze. Here’s a simple guide:

  1. Choose a mini guitar amp with the right features.
  2. Attach your guitar with a quality cable.
  3. Power up, adjust settings, and begin!

Some models feature built-in effects and metronomes. Others allow for external devices with AUX inputs. Regardless of your choice, the setup is effortless and rewarding.

Practicing With Compact Amps

Let’s turn the attention to Practicing with Compact Amps. When space and noise are a concern, small guitar amps are a must-have for every practicing guitarist. A perfect mini amp shouldn’t sacrifice tone for size, allowing you to jam without disturbing the peace. These little wonders are great for any home or apartment, keeping your sound alive in tight spots.

Maintaining Sound Quality In Small Spaces

Believe it or not, mighty sounds come from mini amps. Forget the days when small amps meant tinny tones. Modern technology packs rich, full sound into compact packages. This ensures a high-quality practice session, even in the coziest corner of your living room.

Tone control is key. Most mini amps offer a variety of dials to tweak your sound. Plus, many include effects. Reverb, delay, and even distortion come built-in with some models. This means you can explore and create without needing extra gear.

The Best Amps For Home Practice

Choosing the right mini amp can transform your practice. The top picks for home use combine quality, features, and volume control. Look for models with headphone jacks for silent practice. Also, consider amps with recording outputs to capture your sessions.

Here’s a quick list of fan favorites:

  • Yamaha THR10II: Offers a range of sounds, from clean to high-gain.
  • Blackstar Fly 3: Portable with impressive sound and an optional battery pack.
  • Boss Katana Mini: Delivers signature tones with custom-tuned speakers.
  • Fender Mustang Micro: A headphone amp with loads of effects and Bluetooth.
  • Roland Micro Cube GX: Features COSM amp models and a built-in tuner.

Test out different mini amps to find the one that fits your style and space. With the right choice, you can keep practicing whenever inspiration strikes.


Recording With Miniature Marvels

Guitars have thrilled audiences worldwide with their hypnotic strings. Small amps once labeled as toys have evolved. Enter the mini guitar amps, your recording studio heroes. The quest to produce big sounds in compact packages is over. Let’s discover how these tiny powerhouses are revolutionizing recording.

Achieving Professional Sounds

You might doubt a mini amp’s sonic punch. But push those doubts aside. These amps pack features almost reminiscent of their larger cousins. Think of tubes, modeling tech, and effects loops—all miniaturized. Equipped with appropriate mics, you can capture robust tones that belie their size. Listed below are the cornerstones for achieving professional-grade audio with mini amps:

  • Correct mic placement maximizes sound quality.
  • Isolation techniques prevent unwanted noise.
  • Layering multiple amp tracks builds richness.

Micro Amps In The Studio

It’s studio time, and space is a luxury. The mini amp stands out as the perfect companion. Its presence means more room and less clutter. A small footprint ensures ease of positioning for the best acoustics. Below showcases the role of micro amps during recording sessions:

Amplifier Features Use Case
Mini Tube Amp Warm tube sound, responsive dynamics. Blues, jazz, classic rock.
Modeling Mini Amp Wide range of effects, emulation profiles. Experimental sounds, diverse genres.
Solid-State Mini Amp Clean tones, reliability, low maintenance. Pop, funk, practice sessions.

Modding Mini Amps

Mini guitar amps pack a sonic punch in a small package. Guitar enthusiasts often crave customization to match their personal sound preferences. The art of modding compact amps grows more popular every day. Hobbyists and pros alike dive into the technical realm to infuse individuality into their gear. This section explores how modding mini guitar amps can elevate the music experience.

Customizing Your Compact

Modding a mini amp goes beyond aesthetics; it’s about fine-tuning the sound. Swapping out factory parts for higher quality components can profoundly impact tonal characteristics. Let’s look at ways to customize the compact dynamo that travels with you.

  • Swap out the speaker for one with a better frequency response.
  • Upgrade the pots (potentiometers) for more precise volume and tone control.
  • Modify the circuitry to increase headroom or distortion capabilities.

Upgrades Worth Considering

Choosing the right upgrades makes a significant difference in mini amp performance. A deep dive into amp guts may seem daunting. Focus on these key upgrades worth every guitarist’s consideration.

Upgrade Benefits
Tubes Warm, rich harmonics for a vintage sound
Capacitors Improved tone and smoother signal flow
ICs (Integrated Circuits) Better amplification and less noise

Connecting With The Community

Best mini guitar amps not only offer great sound but also connect you with a vibrant community of fellow enthusiasts. Whether you’re a novice seeking advice or an expert sharing tips, engaging with this community can enhance your musical journey. Let’s dive into the ways you can link up with others and enrich your experience.

Forums And Discussions

Music forums are treasure troves of insights and advice on mini amps. They’re perfect platforms to ask questions, get recommendations, and even learn about maintenance and DIY modifications.

  • Browse topics that interest you
  • Engage by replying or starting new discussions
  • Follow threads to stay updated

Here are some popular places to start:

Forum Name Focus Area
GuitarGear General Gear Talk
AmpLounge Amplifier Specifics
MiniAmpHub Portable Amps

Sharing Mini Amp Experiences

Joining the mini amp community goes beyond forums. Share your own stories and listen to others. It’s about mutual growth and enjoyment. Here are some engaging ways:

  1. Post video reviews or sound clips online.
  2. Write a blog detailing your mini amp journey.
  3. Attend or organize local meetups.

Making The Purchase

Ready to amplify your sound but space and budget call for something small? A mini guitar amp is your perfect ally. These tiny titans pack a punch for practice, portability, and price. In the next sections, discover the key features to look for and savvy picks that won’t break the bank.

What To Look For In A Mini Amp

Choosing a mini amp requires attention to a few crucial details:

  • Power Output: Decibels matter even in mini versions. A good range is 3 to 10 watts.
  • Size and Portability: Mini means mobile. Ensuring it fits your space and travel needs is key.
  • Sound Quality: Look for clear tone and minimal distortion at high volumes.
  • Features: Built-in effects and connectivity can enhance your play.
  • Battery Life: Longer battery life equals more unplugged playtime.

Best Buys On A Budget

High quality need not come with a high price tag. Here are top budget-friendly mini amps:

Model Watt Features Price
Blackstar Fly3 3W MP3/line in jack, battery-powered Under $100
Marshall MS2 1W Overdrive mode, battery-powered Under $50
Vox amPlug 2 N/A (headphone amp) 9 effects, folds for easy storage Under $50

Focus and research will ensure your mini amp purchase hits all the right notes!

Best Mini Guitar Amps: Compact Ax Icons Revealed!


Credit: guitargirlmag.com


Future Of Mini Guitar Amps

As technology races forward, so does the gear for guitar enthusiasts. Mini guitar amps have become a staple for musicians on the move, offering that perfect blend of portability and sound quality. The future appears bright and loud, with cutting-edge innovations that promise to revolutionize the way we play. Let’s delve into what lies ahead.

Advancements On The Horizon

The quest for the ultimate mini guitar amp is unending. Designers and engineers are hard at work crafting the next game-changer. Expect to see amps that are lighter, more powerful, and capable of mimicking a full-sized amp’s sound. Here’s what’s brewing:

  • Smarter Circuitry: New circuits that use less power but deliver higher fidelity sound.
  • Bluetooth Integration: Wireless connectivity for seamless audio streaming and app control.
  • Enhanced Effects: Built-in effects processors with expansive libraries and custom presets.

These innovations aim to equip mini amps with features once reserved for their larger counterparts, while still maintaining their travel-friendly appeal.

The Next Generations Of Mini Amps

Tomorrow’s mini amps won’t just be amplifiers. They’re set to become all-in-one solutions for recording, practicing, and gigging. With a focus on versatility, they’ll be able to:

  1. Interface directly with recording software, acting as both amp and audio interface.
  2. Offer a wide array of sounds, from classic tube warmth to modern high-gain crunch.
  3. Include built-in rhythm machines and loopers for full-band practice sessions.

These advancements signal a future where mini guitar amps are not just an accessory but the central hub for a guitarist’s performance and creativity.


Frequently Asked Questions On Best Mini Guitar Amps


What Are The Top-rated Mini Guitar Amps?


The top-rated mini guitar amps include the Fender Mini ’57 Twin, Blackstar Fly3, and the Roland Micro Cube GX. These compact amps are lauded for their sound quality, portability, and features, making them excellent choices for practice and small performances.


Are Mini Guitar Amps Good For Beginners?


Absolutely, mini guitar amps are perfect for beginners. They are user-friendly, affordable, and portable, allowing new players to practice comfortably without overwhelming power or complexity. The simplicity also encourages learning and experimentation.


How Do Mini Guitar Amps Compare In Sound Quality?


Mini guitar amps have made impressive advancements in sound quality, often using digital modeling to emulate larger amplifiers. While they may lack the sheer power of full-sized amps, they can produce surprisingly good tones that are sufficient for practice and small gigs.


Can You Gig With A Mini Guitar Amp?


Yes, some mini guitar amps are designed for gigging, especially in intimate venues. Models with higher output and connectivity features can adequately project to a small audience, making them gig-worthy in specific scenarios.


Conclusion


Navigating the sea of mini guitar amps can be daunting, yet rewarding. We’ve discussed top options that marry portability and quality. Your quest for the ultimate compact sound companion ends here. Remember, the right mini amp is waiting to amplify your musical journey.


Choose wisely and rock on!