Categories
Archive

How to Mix Vocals And Music in Audacity: Master the Art

To mix vocals and music in Audacity, import your vocals and music into separate tracks, adjust the volumes, apply any necessary effects, and then export the final mix. Mixing vocals and music in Audacity requires importing tracks, adjusting volumes, and applying effects before exporting the final mix.


Now, let’s dive into how to effectively mix vocals and music in Audacity for professional-quality sound. Achieving a well-balanced mix of vocals and music is essential for creating high-quality audio productions. Audacity, a popular and user-friendly audio editing software, provides various tools and features to help you seamlessly blend vocals with the accompanying music.


Whether you’re a podcaster, musician, or audio enthusiast, understanding how to effectively mix vocals and music in Audacity can elevate the overall quality of your audio projects. In this comprehensive guide, we’ll walk you through the step-by-step process of mixing vocals and music in Audacity, covering everything from importing tracks to applying effects and exporting the final mix. With these valuable insights, you’ll be equipped to create captivating audio compositions that showcase professional sound quality.


Setting Up Your Project

Before diving into the process of mixing vocals and music in Audacity, it’s crucial to properly set up your project to ensure a smooth and streamlined workflow. This stage involves the essential foundational steps of choosing the right audio settings, importing vocal and music tracks, and adjusting the initial project configurations. By focusing on these key aspects, you can lay the groundwork for a successful mixing process and achieve professional-quality results.

Choosing The Right Audio Settings

When beginning a new project in Audacity, it’s important to ensure that the audio settings are configured optimally. By navigating to the “Edit” tab and accessing the “Preferences” menu, you can customize various aspects such as sample rate, bit depth, and recording channels. Setting these parameters to align with the specifications of your audio files will help maintain the integrity and quality of the recordings throughout the mixing process.

Importing Vocal And Music Tracks

After configuring the appropriate audio settings, the next step involves importing the vocal and music tracks into your project. Utilizing the “File” menu and selecting the “Import” option allows you to seamlessly bring in the audio files that you intend to work with. It’s essential to organize and label the tracks accordingly, ensuring that they are easily accessible and identifiable within the project timeline.

Balancing Levels And Panning

Find out how to achieve the perfect balance between vocals and music using Audacity. Learn about effective techniques for leveling and panning to create a professional and well-rounded mix. Master the art of blending vocals and music seamlessly for a top-notch audio production.

Adjusting Volume Levels

Start by listening to vocals and music together.

Ensure vocals are clear and not drowned out by music.

Adjust volume levels using the sliders in Audacity.

Lower music volume if vocals seem quiet.

Avoid distortion by not going above the limit.

Understanding Panning For Spatial Depth

Panning helps create a three-dimensional sound.

Shift vocals or music left or right for balance.

Experiment with different panning settings for effect.

Enhance your mix by utilizing panning effectively.

Maintain a good balance between vocals and music.

Eq And Compression Techniques

Learn how to mix vocals and music seamlessly in Audacity with effective EQ and compression techniques. Achieve a professional sound by balancing frequencies and controlling dynamics, enhancing the overall audio quality in your tracks.

Utilizing Equalization For Clarity

Equalization, also known as EQ, is a powerful tool that can significantly enhance the clarity of vocals and music in Audacity. By adjusting the frequency bands, you can sharpen the vocals, bring out hidden details, and make them stand out in the mix. Here are some helpful techniques for utilizing EQ effectively:

  • Identify problematic frequencies: Start by listening carefully to the vocals and music to identify any frequencies that sound muddy, harsh, or boomy. These problem areas can vary depending on the recordings, so it’s important to identify them on a case-by-case basis.
  • Cut or reduce unwanted frequencies: Once you’ve identified the problematic frequencies, use the EQ controls to cut or reduce their intensity. For example, if the vocals sound muddy, you can make a gentle cut in the low-mid frequencies (around 200-400 Hz) to remove the muddiness.
  • Boost desired frequencies: On the other hand, you can also boost certain frequencies to enhance specific qualities of the vocals. For instance, if the vocals lack presence or brightness, you can apply a gentle boost in the high-frequency range (around 4-6 kHz) to make them feel more upfront and clearer.

Implementing Compression For Dynamics

Compression is a vital technique in the mixing process, especially for achieving a balanced and dynamic vocal performance. It helps control the dynamic range of the vocals, ensuring that soft parts are audible without overpowering louder sections. Here are some essential tips for implementing compression in Audacity:

  1. Set an appropriate threshold: Start by adjusting the threshold level, which determines when the compression kicks in. Set it in a way that the compressor gently kicks in when the vocals reach a certain volume level, without squashing the natural dynamics.
  2. Adjust the ratio: The ratio determines the amount of compression applied to the vocals. For a more transparent and subtle compression, try using a lower ratio (e.g., 2:1 or 3:1). If you want a more noticeable and pronounced compression effect, consider using a higher ratio (e.g., 4:1 or higher).
  3. Tweak attack and release times: The attack time determines how quickly the compressor responds to the incoming audio, while the release time sets how fast the compressor recovers after the audio falls below the threshold. Adjust these parameters to achieve the desired balance between control and naturalness.

How to Mix Vocals And Music in Audacity: Master the Art


Credit: producer.musicradiocreative.com

Adding Effects For Enhancement

Enhance your audio mixing in Audacity by adding effects to vocals and music. Elevate your sound quality with tools like reverb, compression, and equalization to achieve professional results. Experimenting with different effects can help create a unique and dynamic audio mix that stands out.

Utilizing Reverb And Delay

Adding effects to your vocals and music can greatly enhance the overall audio quality and make your mix more professional-sounding. Two popular effects that are commonly used are reverb and delay. These effects can add depth, space, and atmosphere to your vocals, making them sound more natural and pleasing to the ear.

Applying Other Creative Effects

While reverb and delay are great starting points, there are several other creative effects you can experiment with to further enhance your mix. These effects can help you achieve a unique and standout sound that sets your vocals apart from the rest. Let’s explore some of these effects:

  • Pitch Correction: Correcting pitch imperfections in vocals can make a huge difference in the final mix. Utilize pitch correction tools to fix any out-of-tune notes and ensure your vocals sound pitch-perfect.
  • Compression: Applying compression to your vocals can even out the volume levels, adding more consistency and presence to the overall mix. It helps to reduce any unwanted peaks and keeps the vocals sounding smooth and controlled.
  • Equalization (EQ): EQ is an essential tool for shaping the tonal characteristics of your vocals. By boosting or cutting specific frequencies, you can bring out the best qualities of your vocals and make them sit well in the mix.
  • Chorus: The chorus effect can add richness and depth by creating the illusion of multiple voices. It can make your vocals sound wider and fuller, providing a pleasant sense of thickness to the mix.
  • Flanger: A flanger effect can add a dynamic swirling or whooshing sound to your vocals, giving them an exciting and unique character. It can be used subtly for subtle movement or more prominently for a more pronounced effect.
  • Distortion: If you’re looking to add grit, edge, or a lo-fi vibe to your vocals, distortion can be a great effect to experiment with. It adds harmonics and saturation, transforming the vocal sound in interesting and creative ways.

When it comes to adding effects to your vocals and music in Audacity, the possibilities are endless. Don’t be afraid to experiment and try different combinations of effects to find the perfect sound for your mix. Remember, the key is to enhance the vocals without overwhelming them or taking away from the overall balance of the mix. With the right application of effects, you can take your mix to the next level and create a professional and polished sound.

Working With Vocal Enhancements

Introductory paragraph

In the world of music production, working with vocal enhancements plays a crucial role in achieving a polished and professional sound. Whether it’s pitch correction, harmonizing, or doubling techniques, knowing how to enhance vocals can take your tracks to the next level.

H3 Heading: Pitch Correction and Auto-Tune

Pitch Correction And Auto-tune

Pitch correction involves adjusting the pitch of vocals to ensure they are in tune with the music. Auto-Tune, a popular tool, can help achieve this seamlessly.

H3 Heading: Harmonizing and Doubling Techniques

Harmonizing And Doubling Techniques

Harmonizing adds depth and richness to vocals by layering different harmonies. Doubling techniques involve recording vocals multiple times to create a thicker sound.

Mixing For A Polished Outcome

When it comes to mixing vocals and music in Audacity, achieving a polished outcome involves refining the vocal and music balance and ensuring consistency throughout the track. These crucial steps are essential in creating a professional and high-quality audio production.

Refining The Vocal And Music Balance

Creating a balanced mix between vocals and music is vital for a seamless and polished result. Begin by adjusting the volume levels of the vocal and instrumental tracks. Utilize Audacity’s amplify and pan features to place the vocal at the forefront while ensuring the music complements without overpowering the vocals. A well-balanced mix enhances the overall clarity and cohesiveness of the audio.

Ensuring Consistency Throughout The Track

Consistency plays a significant role in achieving a polished outcome. Implementing consistent EQ settings and effects across vocal and music tracks establishes a cohesive sound. Use compressors to even out irregularities in the vocal performance and ensure a consistent audio level. Additionally, apply the same reverb and delay settings to create a unified sonic environment.

Finalizing And Exporting The Mix


How to Mix Vocals And Music in Audacity – Finalizing and Exporting the Mix

After spending time perfecting the vocals and music mix in Audacity, the final and crucial step is to master the mix and export it to ensure it’s ready for distribution or sharing.

Mastering The Final Mix

Mastering involves putting the finishing touches on the overall sound of the mix. Adjust the levels of different tracks to ensure a balanced sound, apply compression and equalization for consistency and clarity, and add reverb and other effects as needed. Listen to the mix on different devices and make necessary adjustments to ensure it sounds great across various platforms.

Exporting Your Masterpiece

Once you are satisfied with the mastered mix, it’s time to export your creation. In Audacity, simply navigate to the File menu, select Export, and choose the format you want to export in, such as MP3 or WAV. Specify the quality settings and any additional information, and click Export to save your masterpiece to your desired location.


Frequently Asked Questions For How To Mix Vocals And Music In Audacity

How To Import Vocals And Music Into Audacity?

To import vocals and music into Audacity, click on “File” and then “Import. ” Select the desired audio files to import them into the program for mixing.

What Are Some Vocal Mixing Tips In Audacity?

To mix vocals in Audacity, adjust levels, apply effects like EQ and compression, and use the “Amplify” tool for volume control. Experiment with different settings for the best results.

Can You Automate Volume Changes In Audacity For Vocals?

Yes, in Audacity, you can automate volume changes for vocals using the “Envelope Tool. ” Simply click and drag to create points on the volume envelope, allowing for customized volume adjustments throughout the track.

Conclusion

Mastering the art of mixing vocals and music in Audacity enhances the overall quality of your audio projects. Proper level adjustments and effects can bring out the best in your recordings. With these tips and tools, you can create professional-sounding tracks right from your own home studio.


Elevate your music production game today!
Categories
Archive

How to Master the Art of Live Vocal Mixing: Expert Techniques Revealed!

To mix vocals for live performance, adjust levels, apply EQ, and use effects subtly. Balance clarity and presence for optimal sound.


When performing live, achieving a well-mixed vocal can greatly enhance the overall impact of the performance. Properly mixing vocals involves adjusting the volume levels, applying equalization to enhance tonal quality, and incorporating effects like reverb or delay to add depth.


The key is to strike the right balance between clarity and presence to ensure that the vocals cut through the mix effectively. By following these techniques, you can elevate the live performance experience for both the performers and the audience. Let’s delve deeper into the art of mixing vocals for live settings.


Importance Of Live Vocal Mixing

When it comes to live performances, vocal mixing plays a crucial role in enhancing the overall quality of the sound. Properly mixed vocals can elevate a performance, making it more engaging and enjoyable for the audience. In this article, we will explore the significance of live vocal mixing and its impact on creating an immersive experience for both the performers and the audience.

Enhancing Live Performance

Efficient live vocal mixing can significantly enhance the overall performance, ensuring that the vocals are well-balanced with the instrumental accompaniment. By adjusting the levels, equalization, and effects in real-time, sound engineers can achieve a smooth and clear vocal sound that complements the live music. This not only elevates the quality of the performance but also creates a more enjoyable listening experience for the audience.

Creating Immersive Experience

Live vocal mixing is essential for creating an immersive experience for the audience. By utilizing spatial effects, such as reverb and delay, sound engineers can place the vocals within the performance space, adding depth and dimension to the sound. This immersive sonic environment captivates the audience and draws them into the performance, making it a memorable and engaging experience.


Understanding Live Vocal Mixing Basics

In live performances, mixing vocals is crucial for a captivating and professional sound. Understanding the live vocal mixing basics allows for a seamless and engaging performance. Let’s delve into the fundamentals of sound mixing for live vocals.

Fundamentals Of Sound Mixing

  • Begin with setting levels properly to ensure clear and balanced vocals.
  • Adjust panning to place vocals appropriately in the mix.
  • Utilize reverb and delay sparingly for a polished sound.

Key Role Of Eq And Compression

  • Employ EQ to enhance vocal clarity and remove unwanted frequencies.
  • Use compression to control dynamics and ensure consistent vocal levels.
  • Experiment with different settings to find the optimal balance for each performance.

Essential Equipment For Live Vocal Mixing

Mixing vocals for live performances requires the right equipment that allows you to control and enhance the vocal sound in real-time. By investing in high-quality microphones and having a well-designed mixer setup with control surfaces, you can ensure that your live vocal mixing is on point.

Microphones And Their Characteristics

When it comes to live vocal mixing, choosing the right microphone is crucial. It is essential to consider the microphone’s characteristics to achieve the desired sound quality and minimize feedback issues.

There are several popular types of microphones used for live vocals:

  1. Dynamic Microphones: Known for their durability and ability to handle high sound pressure levels. They are also less sensitive to ambient noise and are ideal for loud stage environments.
  2. Condenser Microphones: Offering a wider frequency response and higher sensitivity, condenser microphones capture intricate vocal details. They are commonly used in studio environments but can be suitable for controlled live performances.
  3. Ribbon Microphones: Offering a warm and vintage sound, ribbon microphones can be a great choice for live performances in certain genres. However, they are more delicate and require careful handling.
Common Microphone Characteristics
Characteristic Description
Polar Pattern Determines the microphone’s sensitivity to sound from different directions.
Frequency Response Shows the microphone’s range of frequencies it can accurately capture.
Sensitivity Indicates how effectively the microphone converts sound into an electrical signal.
Impedance Relates to the microphone’s resistance to the electrical current flowing through it.

Mixer Setup And Control Surfaces

Once you have selected the right microphone, the next step is to set up your mixer for live vocal mixing. A well-designed mixer setup and control surfaces will give you the necessary tools to adjust the vocal sound during performances.

Consider the following aspects when setting up your mixer:

  • Preamps and Gain: Ensure that your mixer has high-quality preamps to amplify the microphone signal without introducing noise. Adjust the gain settings to achieve the desired volume.
  • Equalizers (EQ): Use EQ to shape the vocal sound by controlling specific frequency ranges. Cutting or boosting frequencies can help address any tonal imbalances.
  • Effects and Reverb: Experiment with different effects like reverb to add depth and dimension to the vocals. However, use these effects judiciously so as not to overshadow the lead vocals.
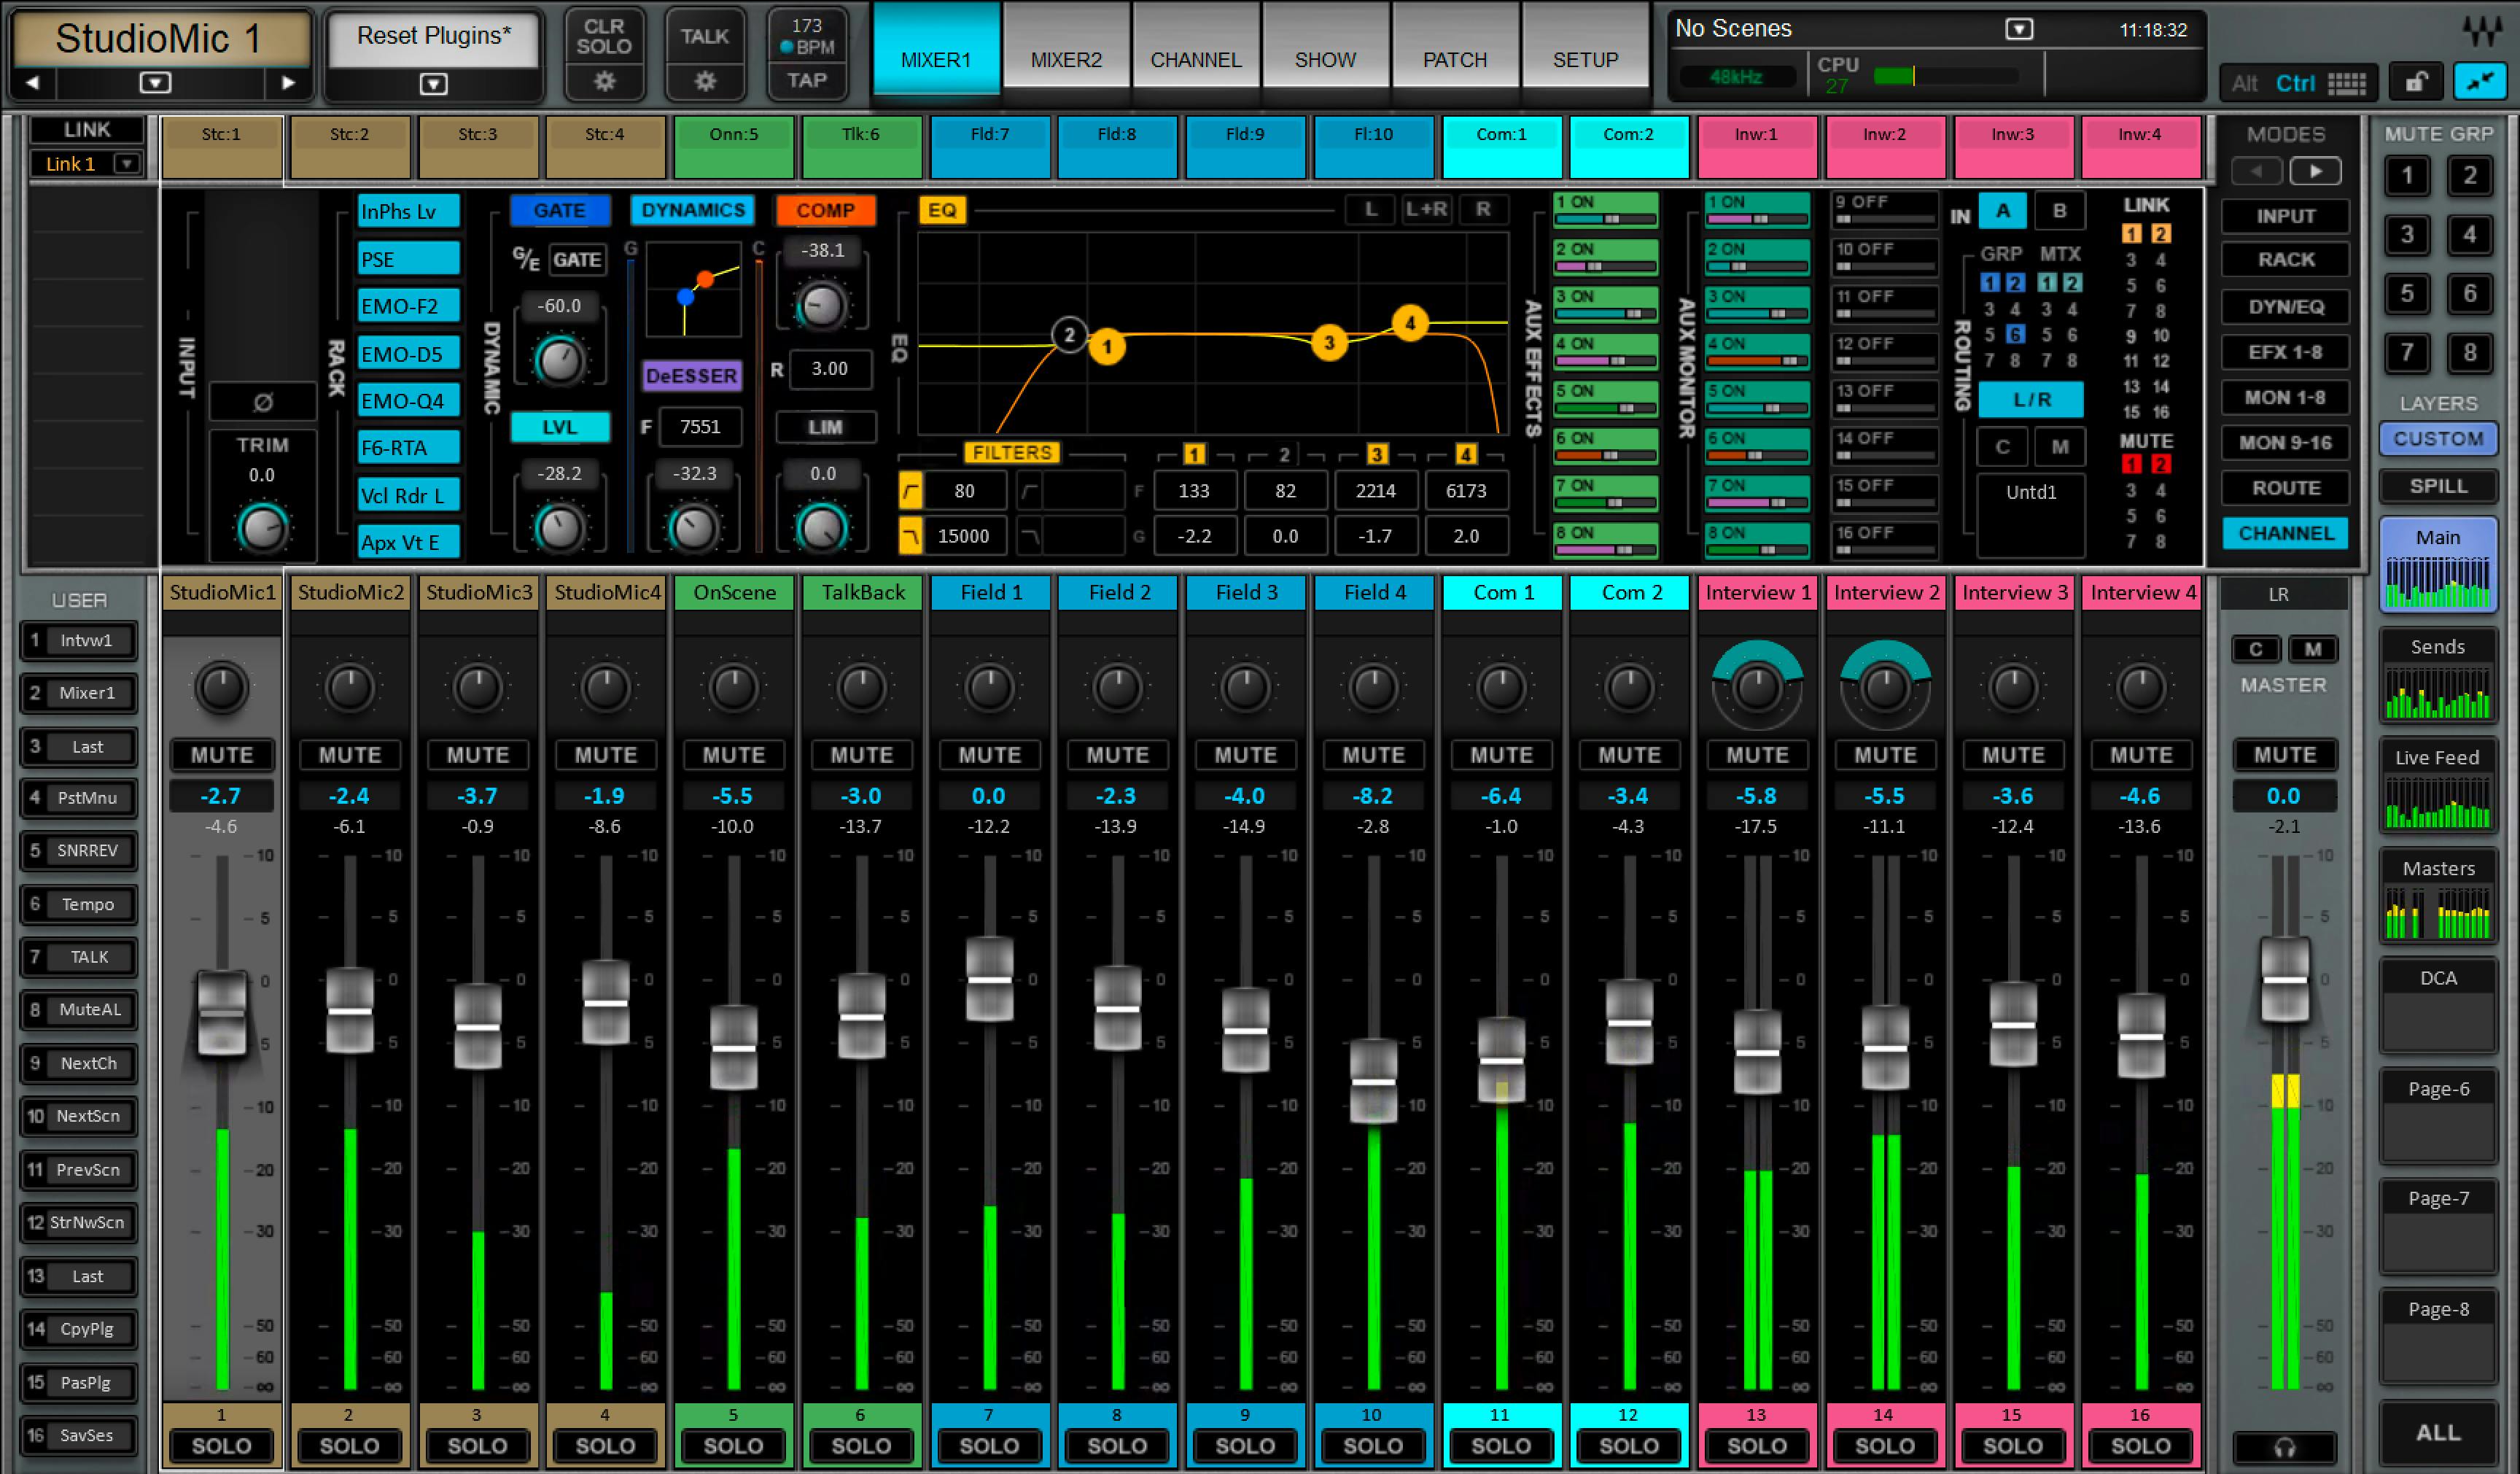
  • Control Surfaces: Control surfaces with motorized faders and dedicated knobs allow for precise adjustments during live performances. They enhance the ease of mixing and provide a more tactile experience.

By having a well-equipped mixer setup and control surfaces, you can ensure seamless vocal mixing during live performances, delivering exceptional sound quality to your audience.

How to Master the Art of Live Vocal Mixing: Expert Techniques Revealed!


Credit: www.waves.com


Advanced Techniques For Live Vocal Mixing

When it comes to live vocal mixing, advanced techniques can take your performance to the next level. Utilizing effects and sends, as well as managing feedback and room acoustics, are crucial aspects that can greatly enhance the sound quality of your vocals. In this blog post, we will explore these advanced techniques in detail.

Utilizing Effects And Sends

Adding effects to your live vocal mix can bring depth and character to your performance. By utilizing effects such as reverb, delay, chorus, and compression, you can create a more professional and polished sound. One effective way to incorporate these effects is through the use of sends.

By sending a portion of the vocal signal to an effects processor, you can control the amount of effect applied to the vocals while still maintaining the clarity of the original sound. This allows for a more balanced and controlled mix.

Effect Settings
Reverb Medium decay, low mix
Delay Short delay time, low feedback
Chorus Subtle modulation, low mix
Compression Medium ratio, fast attack

Experimenting with different effects settings can help you achieve the desired sound for your vocals. Remember to strike a balance between adding depth without overpowering the vocals.

Managing Feedback And Room Acoustics

Feedback is a common issue in live vocal mixing, but with proper techniques, it can be minimized or eliminated. One effective way to manage feedback is by using a graphic equalizer. By identifying and reducing frequencies that are prone to feedback, you can create a more balanced and feedback-free vocal mix.

Room acoustics also play a significant role in live vocal mixing. The characteristics of the venue can greatly impact the sound quality of your vocals. To optimize the room acoustics, consider using acoustic treatment such as diffusers and absorbers. These materials can help minimize unwanted reflections and create a more controlled sound environment.

  • Use a graphic equalizer to identify and reduce feedback-prone frequencies.
  • Consider using diffusers and absorbers to improve room acoustics.
  • Experiment with microphone placement to minimize feedback and optimize sound quality.

By implementing these advanced techniques for live vocal mixing, you can create a more professional and immersive experience for your audience. Don’t hesitate to experiment and fine-tune your settings to achieve the best possible sound for your vocals.

Optimizing Vocal Eq And Compression Settings

Optimizing Vocal EQ and Compression Settings: When mixing vocals for live performance, getting the right EQ and compression settings is crucial for a clear and dynamic sound.

Crafting Clear And Dynamic Vocal Presence

1. Utilize a parametric EQ to cut the low-end frequencies and boost the presence of the vocals.

2. Experiment with a gentle high-shelf boost to add brightness without making the vocals sound harsh.

Techniques For Controlling Dynamics

1. Apply a moderate compression ratio to even out the vocal performance and maintain consistent volume levels.

2. Adjust the attack and release settings to control how quickly the compressor reacts to variations in vocal intensity.


Mastering Monitor Mixing For Vocalists

Vocalists play a crucial role in live performances, and it is important to ensure their vocals are clear and balanced amidst the stage volume. Mastering monitor mixing for vocalists is a skill that can greatly enhance the overall sound quality of any live performance. In this blog post, we will explore two important aspects of monitor mixing for vocalists: balancing vocal clarity and stage volume, and incorporating in-ear monitors. Let’s dive in!

Balancing Vocal Clarity And Stage Volume

When it comes to live performances, finding the right balance between vocal clarity and stage volume is crucial. As a sound engineer or vocalist, it is important to ensure that the vocals are audible and distinct, while also considering the overall stage volume. Here are a few tips to help you achieve this balance:

  1. Position the vocalists near the front of the stage to maximize their projection and minimize the need for excessive volume.
  2. Use high-quality microphones and sound equipment to capture and amplify the vocals accurately.
  3. Apply equalization techniques to enhance the clarity and cut through the mix without increasing the overall volume.
  4. Consider using stage monitors strategically to provide the vocalists with a clear sound reference without interfering with the main mix.
  5. Communicate and collaborate with the sound engineer to fine-tune the vocal levels and make necessary adjustments during soundchecks.

Incorporating In-ear Monitors

In-ear monitors have revolutionized the way vocalists experience live performances. These personal monitoring devices offer a multitude of benefits, including improved clarity, reduced stage volume, and enhanced mobility on stage. Here’s how you can incorporate in-ear monitors effectively:

  1. Invest in high-quality in-ear monitors that provide accurate sound reproduction and a comfortable fit.
  2. Work closely with the sound engineer to customize the monitor mix for each vocalist, ensuring the right balance of vocals and instrumentals.
  3. Encourage vocalists to use their in-ear monitors as a tool to stay in tune and deliver consistent performances.
  4. Train vocalists on how to properly insert and wear in-ear monitors to maximize comfort and minimize audio leakage.
  5. Consider using wireless in-ear monitoring systems to further enhance mobility and freedom of movement on stage.

Troubleshooting Common Live Vocal Mixing Challenges


Learn how to overcome common challenges in live vocal mixing and create exceptional sound for live performances. Discover expert techniques for achieving a balanced and professional vocal mix in any live setting.

Dealing With Monitor Feedback

One of the most common challenges in live vocal mixing is dealing with monitor feedback. Feedback occurs when the sound from the monitors is picked up by the microphone, creating a loop that causes a high-pitched, disruptive noise. To troubleshoot this issue, start by positioning the monitors strategically to minimize the risk of feedback. Using in-ear monitors instead of traditional floor wedges can also help reduce the likelihood of feedback. Additionally, using a graphic equalizer to notch out frequencies that are prone to feedback can significantly improve your live vocal mix.

Balancing Vocals In A Loud Band Mix

Another challenge when mixing vocals live is balancing them in a loud band mix. In a high-volume environment, the vocals can easily get lost in the mix, making it crucial to find the right balance. To address this, consider using a high-quality dynamic microphone that offers good rejection of ambient noise. Applying compression to the vocal signal can also help maintain a consistent level, making the vocals more present in the overall mix. Additionally, adjusting the EQ to cut through the mix and adding a touch of reverb can give vocals the necessary clarity and presence.

The Art Of Emotional Vocal Mixing

Enhancing Expressiveness in Live Performance: To bring out the emotions in vocals, adjust reverb levels for depth.

Creating Intimate and Powerful Vocal Sound: Use compression to even out vocal dynamics for a professional sound.


Frequently Asked Questions On How To Mix Vocals For Live Performance


How Can I Improve Vocals For Live Performances?


To improve vocals for live performances, focus on microphone technique, use appropriate EQ settings, control feedback, and rehearse with the band. Experiment with different vocal effects and consider using in-ear monitors for better control over sound. Lastly, warm up your voice before performances to maintain vocal health.


What Are Some Common Vocal Mixing Mistakes?


Common vocal mixing mistakes include excessive reverb, improper EQ balance, ignoring plosive sounds, neglecting subtle pitch corrections, and over-compressing the vocals. It’s also important to pay attention to vocal levels and avoid excessive noise reduction, which can result in unnatural-sounding vocals.


How Can I Prevent Feedback During Live Vocal Performances?


To prevent feedback during live vocal performances, use a high-quality microphone that provides good isolation. Position the microphone correctly and use a pop filter to minimize plosive sounds. Adjust the monitor mix and carefully set the gain levels to avoid unnecessary feedback.


Soundcheck and practice with the band before the performance to address any potential issues.


Conclusion


Incorporating these vocal mixing tips will enhance your live performance sound effortlessly. Remember to practice, adjust levels, and use effects mindfully for optimal results. Consistently monitor and fine-tune your settings to ensure a top-notch vocal mix every time you hit the stage.


Your audience will thank you!

Categories
Archive

Why Can’t I Drag Files into Fl Studio: Discover More

Dragging files into FL Studio may not work if the program is running as administrator. This could inhibit file access.


Trying to drag files into FL Studio but it’s not working? There could be a simple solution. When FL Studio is running as an administrator, file dragging functionality may be disabled. This is a security measure to prevent unauthorized changes to program files.


We’ll explore the reasons why you can’t drag files into FL Studio and provide steps to resolve the issue so you can seamlessly import your files and focus on your music production. Let’s dive in and troubleshoot this problem together.


Common Reasons


One common reason why you can’t drag files into FL Studio could be due to the file format not being supported by the software. Another reason could be a possible software glitch that may need troubleshooting.

Incorrect File Type Selected

Ensure the file format is compatible with FL Studio to drag and drop successfully.

Drag And Drop Feature Disabled

Check if the drag and drop feature is enabled in the FL Studio settings. Common Reasons: Dragging incompatible file types. Disabling drag and drop feature accidentally.

Troubleshooting Steps


If you’re unable to drag files into FL Studio, first check if the software is running with administrative privileges. Ensure that the files you’re trying to drag are not in a read-only format or have restricted permissions. You should also confirm that the file format is compatible with FL Studio.

Check File Compatibility

If you’re unable to drag files into FL Studio, first ensure that the files you’re attempting to drag are compatible with the software. Supported file formats include WAV, MP3, OGG, and FLAC. FL Studio may not recognize certain file types, causing the drag and drop functionality to fail.

Enable Drag And Drop Functionality

To enable drag and drop functionality within FL Studio, go to the settings and ensure that the option for drag and drop is activated. Sometimes this feature might be disabled by default, preventing users from dragging files into the software.

Update Software Version

It’s important to keep FL Studio updated to the latest version as older versions may have bugs or lack certain functionality. Check for any available updates by accessing the software’s website or using the update feature within the software itself. An outdated version of the software could be causing issues with the drag and drop functionality. Once you’ve tried these troubleshooting steps, attempt to drag a file into FL Studio to see if the issue has been resolved. If problems persist, consider reaching out to customer support for further assistance with this issue.

Optimizing Performance

If you’re encountering difficulties when trying to drag files into FL Studio, it could be due to performance issues. By optimizing your system and making some adjustments, you can enhance FL Studio’s performance, making it easier for you to drag files without any interruptions. In this section, we will explore two key areas that can greatly improve the performance of FL Studio: Clearing Cache and Temporary Files, and Closing Unnecessary Applications.

Clear Cache And Temporary Files

Clearing cache and temporary files is a crucial step in optimizing FL Studio’s performance. These files can accumulate over time and unnecessarily consume system resources, causing delays and hindering file dragging capabilities. To clear cache and temporary files:

  1. Open FL Studio and navigate to the “Options” menu.
  2. Select “File Settings” and then click on the “Miscellaneous” tab.
  3. Locate the “Temporary Files” section and click on the “Clear Cache” button.

This process will remove any accumulated cache and temporary files, freeing up valuable system resources and potentially resolving the file dragging issue.

Close Unnecessary Applications

Running multiple applications simultaneously can strain your system’s resources and impact FL Studio’s performance. It is essential to close any unnecessary applications when working with FL Studio to ensure smooth file dragging. To close unnecessary applications:

  • Carefully review the applications running in the background of your computer.
  • Identify any non-essential applications that are not required for your current task.
  • Close these applications by right-clicking on their respective icons in the taskbar and selecting “Close” or using the “Task Manager” in Windows.

By closing unnecessary applications, you allocate more system resources to FL Studio, enabling it to process file dragging operations efficiently.

Advanced Solutions

If you’re unable to drag files into FL Studio, try reinstalling the software. This can often resolve any underlying issues that may be preventing you from performing this action. Follow these steps to reinstall FL Studio on your system:

  1. First, make sure to back up your projects and custom settings.
  2. Uninstall FL Studio from your computer by going to the Control Panel, selecting “Programs,” and then clicking on “Uninstall a Program.”
  3. After the uninstallation process is complete, restart your computer to ensure all FL Studio components are removed from your system.
  4. Take a moment to download the latest version of FL Studio from the official website.
  5. Once the download is complete, run the installer and follow the on-screen instructions to install FL Studio on your computer.
  6. After the installation process is finished, launch FL Studio and check if you can now drag files into the program.

If reinstalling FL Studio didn’t solve the problem, you may need to adjust the system preferences on your computer. The following steps will guide you on how to do this:

  1. Start by closing FL Studio and any other open applications.
  2. Next, access the File Explorer on your Windows computer.
  3. Navigate to the location where FL Studio is installed. Typically, this will be the “Program Files” or “Program Files (x86)” folder.
  4. Right-click on the FL Studio executable file (usually named “FL64.exe” or “FL32.exe”) and select “Properties” from the context menu.
  5. In the Properties window, go to the “Compatibility” tab.
  6. Check the box that says “Run this program as an administrator” and click on “Apply” to save the changes.
  7. Restart your computer and open FL Studio. Try dragging files into the program and see if the issue is resolved.

By following these advanced solutions, you can increase your chances of fixing the inability to drag files into FL Studio. Reinstalling the software or adjusting system preferences can often address any underlying issues and restore the drag and drop functionality.

Third-party Plugins

When it comes to working with files inside FL Studio, users may encounter issues when trying to drag files into the program. One common reason for this could be the presence of third-party plugins that may not be fully compatible with the software. Third-party plugins, while offering additional functionality, can sometimes lead to conflicts and cause issues with file management within FL Studio.

Verify Plugin Compatibility

To begin troubleshooting the issue of being unable to drag files into FL Studio, it is important to verify the compatibility of third-party plugins with the software. Some plugins may not be fully supported or may have compatibility issues with certain versions of FL Studio. It is recommended to check the developer’s website or support documentation for any known compatibility issues and potential workarounds.

Update Or Remove Conflicting Plugins

If an incompatible or conflicting plugin is identified as the cause of the issue, users should consider updating or removing the plugin to resolve the problem. Updating the plugin to the latest version may include fixes for compatibility issues, while removing the plugin entirely can eliminate the source of the problem. It is important to carefully manage third-party plugins to ensure smooth functionality within FL Studio.

Community Support

When you encounter difficulties in dragging files into FL Studio, it can be frustrating and time-consuming. However, the FL Studio community is here to help. With their wealth of knowledge and expertise, seeking help from online forums and connecting with FL Studio experts can be a game-changer.

Seeking Help From Online Forums

Online forums present an incredible opportunity to share your experiences, ask questions, and get advice from fellow FL Studio users. These communities are filled with passionate individuals eager to help one another overcome obstacles. By posting your specific issue and including relevant details, you increase your chances of getting valuable solutions in a short amount of time.

  • When posting on forums, remember to:
    • Provide a clear and concise description of the problem.
    • Include any error messages you might have encountered.
    • Specify the version of FL Studio you’re using.

Connecting With Fl Studio Experts

While online forums are a great resource, if you’re looking for more personal guidance, connecting with FL Studio experts can offer additional support. These experts have extensive knowledge and experience with the software and can provide tailored solutions to your specific problem.

  1. You can seek assistance from FL Studio experts by:
    1. Contacting the official FL Studio support team through their website.
    2. Joining online communities and groups where experts actively participate.
    3. Attending FL Studio events and workshops where you can interact directly with experts.

Remember, the FL Studio community is dedicated to helping each other succeed. So, don’t hesitate to reach out and take advantage of their expertise. Whether through online forums or direct connections with experts, you can find the support you need to overcome any obstacles you encounter when trying to drag files into FL Studio.


Preventing Future Issues

If you’ve been experiencing difficulties dragging files into FL Studio, it’s essential to take proactive steps to prevent future issues. By following some simple practices, you can ensure a smoother workflow and avoid similar inconveniences in the future.

Regular Software Updates

Regular software updates are crucial to maintain the functionality and compatibility of FL Studio. Ensure that you stay informed about the latest updates and promptly install them to benefit from bug fixes and performance enhancements.

Back Up Your Projects

Backing up your projects is critical in order to avoid data loss in case of any software glitches or technical issues. It’s advisable to regularly create backups of your FL Studio projects and store them on an external drive or a secure cloud storage platform.

Final Thoughts


Dragging files into FL Studio may be a frustrating experience for some users. This issue may occur due to technical limitations or compatibility issues with the software. However, there are alternative methods available, such as using the import feature, to bring files into FL Studio without dragging them directly.

Persistence Pays Off

When encountering challenges in dragging files into Fl Studio, it’s important to remember that persistence pays off. Keep trying and don’t give up! Even though it may seem frustrating at first, with each attempt you are getting closer to finding the solution. Perseverance is key!

Don’t be discouraged by initial setbacks. It’s common to encounter difficulties when trying to drag files into Fl Studio, but that doesn’t mean you should give up. Stay motivated and keep trying different approaches until you succeed. Remember, every failure is just another step toward success.

Experiment And Learn From Challenges

Embrace challenges as opportunities for growth. Instead of getting discouraged, view the difficulty of dragging files into Fl Studio as a chance to experiment and learn. Explore different techniques and approaches until you figure out a method that works for you.

Don’t be afraid to ask for help. Seek tutorials, join forums, or reach out to fellow music producers who might have experienced similar challenges. Learning from others is a valuable way to gain insights and discover solutions.

Remember, every challenge is an opportunity to expand your knowledge and enhance your skills. The more you explore and experiment, the better equipped you will be to overcome any obstacle that comes your way.

So, don’t let the difficulty of dragging files into Fl Studio deter you from pursuing your passion. Embrace the challenges, persist in finding a solution, and use the experience to grow as a music producer. You have the power to overcome any obstacle!

2026 Update: The Most Common Fix

If you see a “no” symbol (a circle with a line through it) when you drag a file from Windows into FL Studio, the most common cause is that FL Studio is running as administrator. Windows blocks drag and drop between normal apps like File Explorer and apps running with admin rights. Image-Line’s own support pages recommend this fix: right-click the FL Studio shortcut, choose Properties, open the Compatibility tab, untick Run this program as an administrator, click Apply, then launch FL Studio normally.

Also note: Fruity Edition has limited audio-clip support (no audio recording); if audio won’t drop onto the Playlist, drop it into the Browser or a Channel Rack sampler.

Frequently Asked Questions Of Why Can’t I Drag Files Into Fl Studio

Why Can’t I Drag Files Into Fl Studio?

FL Studio does support drag and drop. If it isn’t working, the most common cause on Windows is that FL Studio is running as administrator, which blocks dragging from File Explorer. Turn off “Run this program as an administrator” in the shortcut’s Compatibility settings. Fruity Edition has limited audio-clip support (no audio recording); if audio won’t drop onto the Playlist, drop it into the Browser or a Channel Rack sampler.

What Is The Alternative To Dragging Files Into Fl Studio?

Instead of dragging files, you can use the browser within FL Studio to navigate to the files you want to import. Simply locate the file on your system, select it, and then click “Open” to import the file into your FL Studio project.

Does FL Studio support drag and drop?

Yes. FL Studio supports dragging files in from your computer. When it fails, it is usually a Windows permissions issue (running as administrator). Fruity Edition has limited audio-clip support (no audio recording); if audio won’t drop onto the Playlist, drop it into the Browser or a Channel Rack sampler.

Why can’t I drag an MP3 into FL Studio?

Make sure FL Studio is not running as administrator, because Windows blocks drag and drop into elevated apps. Fruity Edition has limited audio-clip support (no audio recording); if audio won’t drop onto the Playlist, drop it into the Browser or a Channel Rack sampler.

Conclusion


Troubleshooting the issue of being unable to drag files into FL Studio can be frustrating. By following the steps outlined in this blog post, you can solve the problem and get back to creating music without interruption. Remember to check for software updates and explore different file formats to ensure compatibility.

Categories
Archive

How to Master Fl Studio Snap to Grid

To make FL Studio snap to the grid, go to the Options menu and enable the “Snap to Grid” option. This will align your audio clips to the grid for precise editing.


Also, FL Studio offers a range of powerful features for music production, one of which is the grid function. When working on a project, ensuring that your audio clips align perfectly with the grid can greatly enhance the overall quality of your music.

Related reading: FL Studio 21 – The Best Music Production Software? and Upgrade Fl Studio. For background, see the Wikipedia article on FL Studio.


Moreover, by enabling the quantizing option in the Options menu, you can easily create a more rhythmic and organized arrangement. Also, we will explore how to make FL Studio snap to the grid effectively. This allows you to streamline your workflow and create professional-sounding tracks with ease.


Getting Started With Snap To Grid

Understanding the timing tools feature: When using Fl Studio, Snap to Grid is a vital tool that helps align your musical elements precisely. In addition, the grid feature ensures that your notes, loops, or samples adhere to a consistent grid for a polished sound.

Customizing Snap To Grid Settings:

  • In addition, access the quantizing settings by clicking on the magnet icon in the toolbar.
  • Choose the grid resolution that fits your project requirements, such as beats, bars, or divisions.
  • Adjust the strength of the grid snapping to control the level of precision while arranging elements.
  • Furthermore, experiment with different grid settings to find the optimal setup for your workflow.

Mastering Snap To Grid Techniques

  • Additionally, open the piano roll in FL Studio.
  • Also, select the MIDI notes you want to quantize.
  • Right click and choose ‘Quantize’ to align notes to the grid.
  1. In addition, drag the audio clip to the Playlist.
  2. Right click on the clip and select ‘Align to Grid’.
  3. Additionally, adjust the snap settings for precise alignment.
Snap Setting Function
Bar Snaps objects to the beginning of each bar.
Step Snaps objects based on step value set.


Creative Tips And Tricks

When it comes to using FL Studio, mastering the grid settings can truly enhance your music production workflow. In this section, we’ll explore some creative tips and tricks that will elevate your rhythm game and provide you with the tools to create dynamic and unique rhythmic patterns.

Creating Rhythmic Patterns

Creating compelling rhythmic patterns in FL Studio involves more than just sticking to the default grid settings. As a result, experiment with different time signatures and note divisions to add complexity and depth to your beats. Utilize the piano roll to adjust the timing and duration of your notes, resulting in intricate and engaging rhythms.

Experimenting With Different Grid Settings

FL Studio offers a wide range of grid settings, allowing you to tailor your workflow to your specific needs. However, by exploring different grid options, such as triplet rhythms or irregular divisions, you can inject variety and unpredictability into your music. Embrace the flexibility of the grid settings to break away from rigid patterns and explore new creative avenues.

Incorporating Swing And Shuffle Effects

Adding swing or shuffle effects to your patterns can breathe life into your music, creating a natural and organic feel. Then, experiment with the swing parameter to introduce subtle timing variations, giving your beats a relaxed and groovy vibe . By incorporating swing and shuffle effects, you can infuse your tracks with a unique sense of rhythm and movement.

Advanced Snap To Grid Functions

Advanced Snap to Grid Functions:

When it comes to music production, precision and accuracy are key. And that’s where the advanced timing tools functions in FL Studio come into play. These powerful tools allow you to manipulate the timing and arrangement of your tracks with ease. This ensures that every note and beat falls exactly where you want it to.

Exploring Time Signature Changes

One of the most exciting aspects of FL Studio’s advanced quantizing functions is the ability to explore time signature changes. This feature allows you to create complex and dynamic arrangements by altering the number of beats per measure throughout your track. Whether you want to switch from a 4/4 time signature to a 7/8 time signature or experiment with more unconventional rhythms, FL Studio has got you covered.

Utilizing Snap To Grid For Complex Arrangements

Creating complex arrangements can be a challenging task, especially when you’re dealing with multiple layers of instruments and intricate melodies. That’s where FL Studio’s timing tools comes in handy. This function allows you to align the start and end points of your patterns and samples to the grid. This makes it easier to maintain a cohesive and organized structure in your tracks.

With timing tools, you can ensure that each element of your composition starts and ends at precise intervals, preventing any timing inconsistencies or overlapping sounds. By simply toggling the grid feature on and adjusting the grid size to fit your needs, you can effortlessly create intricate and complex arrangements that sound professional and polished.

Moreover, FL Studio’s quantizing functions also offer various options for customizing the behavior of the grid. You have the flexibility to choose between different snap settings, such as “line,” “beat,” or even “bar,” allowing you to align your elements at different resolutions depending on the complexity of your composition.

Practical Tips

In addition, you can also take advantage of the “snap offset” feature to fine-tune the timing of your elements. This allows you to shift the snapping position of each element forward or backward. This gives you even more control over the precise placement of your samples and patterns. This level of precision ensures that your arrangements stay locked to the grid, eliminating any inconsistencies or unintended timing variations.

Ultimately, FL Studio’s advanced timing tools functions empower you to take your music production to the next level. By exploring time signature changes and utilizing quantizing for complex arrangements, you can create tracks that are not only musically captivating but also perfectly timed and organized. So why settle for anything less? Dive into FL Studio’s advanced timing tools functions today and experience the power of precision firsthand.

Snap To Grid Workflow Enhancements


Discover the latest workflow enhancements in Fl Studio to easily enable quantizing functionality. Enhance your music production process with simple steps for snapping to the grid effortlessly. Elevate your creativity and precision with Fl studio’s upgraded timing tools features.

Efficient Workflow With Snap To Grid

When it comes to creating music in FL Studio, having an efficient workflow is essential. One feature that can greatly enhance your workflow is the ability to snap to the grid. This powerful tool allows you to align your musical elements perfectly to the beat. This ensures that your tracks sound polished and professional. In this article, we will explore how to make FL Studio snap to the grid and the various workflow enhancements it offers.

Integrating Snap To Grid With Other Fl Studio Features

FL Studio offers a wide range of features and tools to help you create music. The quantizing function can be seamlessly integrated with these features to provide a more robust music production experience. By combining the timing tools feature with other tools such as the piano roll, playlist, and step sequencer, you can streamline your workflow and achieve greater precision in your compositions.

1. Piano Roll

The piano roll in FL Studio is a powerful tool that allows you to create melodies, chords, and patterns with ease. When you enable quantizing in the piano roll, you can align your notes perfectly to the grid. This ensures that they are in time and in sync with the rest of your tracks. This is especially useful when working with complex rhythms or when layering multiple instruments together.

2. Playlist

The playlist is where you arrange your musical elements to create a complete song. By enabling timing tools in the playlist, you can easily align your patterns and audio clips to the grid. This makes it easier to create smooth transitions and precise arrangements. This feature is particularly useful when working on complex compositions with multiple tracks and sections.

3. Step Sequencer

The step sequencer is a staple tool in electronic music production, allowing you to create drum patterns and rhythmic sequences. When you combine the timing tools function with the step sequencer, you can accurately align your drum hits to the desired beats. This ensures that your drum patterns are tight and groove seamlessly with the rest of your tracks.

In conclusion, integrating the grid feature with other FL Studio tools and features can significantly enhance your workflow and help you achieve a more polished and professional sound. Whether you are composing melodies in the piano roll, arranging your tracks in the playlist, or working on intricate drum patterns in the step sequencer, enabling quantizing will ensure that your musical elements are perfectly aligned to the beat.

Troubleshooting Snap To Grid Issues

If you encounter grid snapping errors in FL Studio, it can be frustrating and disrupt your workflow. However, there are some simple troubleshooting steps you can take to resolve these issues.

One common issue is when the snap to grid function doesn’t align correctly with your intended placement. This can result in misaligned notes or beats, causing inconsistency in your music production.

Another frustrating problem is when the snap to grid function fails to respond at all, leaving you unable to effectively place and align objects within FL Studio.

When facing snap to grid challenges, there are several strategies to overcome these issues and ensure a smooth production process.

Firstly, checking your software settings is crucial. Make sure that the snap to grid function is enabled and set to the appropriate grid resolution for your project.

Additionally, consider adjusting the snap settings to better suit the specific requirements of your composition. Experiment with different grid resolutions to see what works best for your project.

Furthermore, understanding the snap to grid options and shortcuts provided by FL Studio can greatly assist in overcoming challenges. Familiarizing yourself with these features allows for more efficient and accurate placement of musical elements within your project.

Frequently Asked Questions On How To Make Fl Studio Snap To Grid


How Do You Enable Snap To Grid In Fl Studio?


To enable snap to grid in FL Studio, simply go to the Options menu, select General Settings, and check the “Snap” box. This will allow your audio and MIDI clips to snap to the grid, making it easier to create precise arrangements and edits in your projects.


Why Is Snap To Grid Important In Music Production?


Snap to grid is important in music production because it helps maintain precision and alignment in your tracks. It ensures that your sounds are perfectly synchronized with the beat, making your music sound more professional and polished. With snap to grid, you can easily create tight grooves and seamless transitions in your productions.


How Can Snap To Grid Improve My Workflow In Fl Studio?


Snap to grid can greatly improve your workflow in FL Studio by speeding up your editing and arrangement processes. With snap to grid enabled, you can quickly align and move your sound clips, MIDI notes, and automation events to the desired rhythm.


This allows for easier and more efficient creation and arrangement of your music.


Conclusion


In this blog post, we’ve learned how to make FL Studio snap to the grid, enabling us to create music with precision and ease. By following these simple steps, we can now enhance our workflow and produce professional-quality tracks. Embracing the power of the snap feature opens up a world of possibilities for music producers at all levels.


Elevate your music production game with this essential tool!

Categories
Archive

Should You Mix Vocals in Mono Or Stereo: Master the Sound Space

Mixing vocals in mono can help ensure better phase coherence and mono compatibility. However, mixing vocals in stereo allows for wider soundscapes and spatial effects, enhancing the overall depth of the mix.

Whether to mix vocals in mono or stereo depends on the specific needs and goals of the production. Understanding the differences, advantages, and potential drawbacks of each approach is crucial for achieving the desired sound and impact in the final mix.

By exploring these considerations, you can make informed decisions about how to best approach vocal mixing in your projects. This article will delve into the factors to consider when deciding whether to mix vocals in mono or stereo and provide insights to help you achieve the best results for your music.

Understanding Mono And Stereo

The decision to mix vocals in mono or stereo can significantly impact the overall sound of a recording. To make an informed choice, it’s crucial to understand the fundamental differences between the two – mono and stereo. Let’s delve into the intricacies of mono and stereo sound to gain insights into which one may be more suitable for mixing vocals.

Mono Vs Stereo

When it comes to audio production, mono refers to a single channel where all sounds are mixed together and output through a single speaker. Conversely, stereo involves two separate channels, allowing for a more spatial and immersive sound experience. Each channel may carry different elements of the audio, contributing to a multi-dimensional sonic landscape.

How Sound Space Is Created

Understanding how sound space is created is vital in deciding whether to mix vocals in mono or stereo. In mono, the sound is centered and has a narrower spatial presence, whereas stereo provides a richer, multi-directional sound. The spatial positioning of sounds in stereo can enhance the depth and realism of vocals, making them sound fuller and more engaging to the listener.

Benefits Of Mixing Vocals In Mono

Mixing vocals in mono can have several benefits. It can enhance the clarity and focus of the vocals, improve their presence in the mix, and ensure better compatibility across different playback systems. Additionally, mono mixing can make the vocals stand out in a crowded mix and create a more cohesive sound overall.

Clarity In The Mix


clarity in the mix is enhanced.


listener to enjoy.

Mono Compatibility


systems, eliminating any phase issues.

regardless of the device used to listen.

Challenges Of Mixing Vocals In Mono

Mixing vocals in mono poses challenges due to the lack of stereo width. It may affect the overall presence and depth of the vocals, making it crucial to make strategic EQ and effects adjustments for a balanced mono mix.

Mixing vocals in mono can present a set of challenges that may affect the overall quality of the sound. It is important to understand these challenges to make an informed decision on whether to mix vocals in mono or stereo. Two main challenges include limited spatial depth and potential loss of richness. Let’s explore each of these challenges in more detail:

Limited Spatial Depth

Mixing vocals in mono restricts the spatial depth of the sound. In stereo mixing, vocals can be panned across the stereo field, creating a sense of width and depth. However, in mono, all elements, including vocals, are projected from a single point, resulting in a narrower soundstage. This limited spatial depth can make the vocal performance feel less immersive and less dynamic. The vocals may lack the presence and clarity that can be achieved through stereo mixing, where different elements can be placed strategically across the stereo spectrum.

Potential Loss Of Richness

When vocals are mixed in mono, there is a potential for the sound to lose its richness and fullness. In stereo mixing, the vocals can be processed using effects like reverb and delay, which enhance the overall timbre and texture of the sound. These effects can add depth and dimension to the vocals, making them sound more vibrant and spacious. However, in mono mixing, the ability to apply such effects is limited. The mono signal captures the vocals in a more direct and straightforward manner, often resulting in a more upfront and centered sound. This can sometimes lead to a loss of the subtle nuances and intricate details that make the vocals truly captivating. To overcome these challenges, it is important to consider the context in which the vocals will be heard. If the intended medium is mono-compatible or if the spatial depth and richness are not crucial for the overall mix, mixing vocals in mono can be a viable option. However, if you aim for a more dynamic and immersive vocal sound, stereo mixing might be the way to go. Ultimately, the decision between mono and stereo mixing should be based on the desired sonic characteristics and the specific requirements of the project. It is important to weigh the advantages and challenges of each approach to ensure the vocals stand out in the mix and enhance the overall listening experience.
Should You Mix Vocals in Mono Or Stereo: Master the Sound Space

Credit: www.izotope.com

Advantages Of Mixing Vocals In Stereo

Mixing vocals in stereo can offer several advantages that can greatly enhance the overall quality of your music. By utilizing stereo panning and spatial effects, you can create a more immersive and dynamic listening experience for your audience. In addition, mixing vocals in stereo provides the opportunity for greater artistic freedom in shaping the sound of your vocals. Let’s explore these advantages in more detail:

Enhanced Spatial Representation

Mixing vocals in stereo allows for an enhanced spatial representation of the soundstage. By utilizing the stereo field, you can position the vocals in a way that simulates a live performance, with the vocals positioned in the center and other elements surrounding them. This creates a sense of depth and realism, giving the listener the feeling of being surrounded by the music. It can also help to distinguish the vocals from other elements in the mix, making them stand out and ensuring clarity and intelligibility.

Wider Artistic Freedom

Mixing vocals in stereo provides wider artistic freedom, allowing you to experiment with different effects and creative techniques. With stereo mixing, you have the ability to tailor the width of the vocals and create interesting spatial effects, such as widening the vocals to give them a larger-than-life presence or narrowing them to provide a more intimate and focused sound. This added versatility can help you express your artistic vision and bring your vocals to life in a unique and captivating way.

Overall, mixing vocals in stereo can significantly enhance the spatial representation and artistic freedom of your music. Utilizing the stereo field allows for a more immersive and dynamic listening experience, while opening up a world of creative possibilities. By harnessing the advantages of stereo mixing, you can take your vocals to new heights and create a truly memorable sonic experience for your audience.

Drawbacks Of Mixing Vocals In Stereo

Phase Issues

When vocals are mixed in stereo, phase issues can arise, leading to muddiness and loss of clarity.

Incompatibility With Mono Systems

Mixing vocals in stereo may cause problems on mono playback systems, resulting in imbalanced sound.

Finding The Balance

Discovering the right approach for mixing vocals can significantly impact the overall sound of your music. Understanding when to use mono or stereo can enhance the balance and clarity in your tracks. Experiment with both techniques to find what works best for your unique style and preferences.

Finding the Balance Utilizing Both Mono and Stereo Mixes When mixing vocals, utilizing both mono and stereo mixes adds depth and dimension to your sound. Taking advantage of the precise control of panning and spatial effects in stereo mixes can create a wide, immersive vocal presence. On the other hand, the tight focus and clarity of mono mixes can ensure that the vocals remain prominent and clear. By using both, you can strike a balance between a broad, spacious sound and a focused, impactful vocal performance. Adapting to Different Playback Systems Different playback systems and environments can have a significant impact on how your mixed vocals are perceived. For instance, while stereo mixes may sound impressive on headphones or high-quality speakers, they might lose their impact when played on mono devices such as smartphones or older car stereos. By adapting your mixes to accommodate both mono and stereo playback systems, you can ensure that your vocals sound consistent and impactful across a variety of listening environments. In conclusion, finding the right balance between mono and stereo mixes for your vocals can enhance the overall quality and impact of your audio productions. By utilizing both approaches and adapting to different playback systems, you can create versatile and impactful vocal mixes that sound great in any context. “`

Experimentation And Best Practices

Testing Mixes In Various Playback Environments

When testing your vocal mixes, it’s crucial to do so in a variety of playback environments. This includes listening in headphones, studio monitors, car stereo systems, and even smartphone speakers. The goal is to ensure that your vocal mix translates well across different platforms. By doing so, you can catch any potential issues and make necessary adjustments to optimize the vocals for a broad range of listening scenarios.

Utilizing Panning And Stereo Imaging

When deciding between mono and stereo mixing for vocals, it’s essential to leverage panning and stereo imaging techniques effectively. Utilizing panning can help create a sense of space and depth in your mix, giving the vocals the right placement within the overall soundstage. Experiment with different levels of panning to find the sweet spot for your vocals, ensuring they are well-balanced and complement the other elements of the mix.

Should You Mix Vocals in Mono Or Stereo: Master the Sound Space

Credit: www.masteringthemix.com

Should You Mix Vocals in Mono Or Stereo: Master the Sound Space

Credit: www.masteringthemix.com

Frequently Asked Questions On Should You Mix Vocals In Mono Or Stereo

Should Vocals Be Mixed In Mono Or Stereo?

Mixing vocals in mono can enhance clarity and focus, while stereo adds depth and width to the soundstage. Experiment with both options to find the best balance for your mix.

Is It Better To Mix Vocals In Mono For Compatibility?

Mixing vocals in mono ensures compatibility across various playback systems, making it a safer choice for ensuring a consistent listening experience for all listeners.

How Does Mixing Vocals In Stereo Affect The Overall Sound?

Mixing vocals in stereo can create a spacious and immersive sound but may also result in phasing issues if not properly managed. Careful attention to panning and stereo imaging is crucial.

Can Mixing Vocals In Mono Simplify The Mixing Process?

Mixing vocals in mono can simplify the mixing process by focusing on the core sound without distractions from stereo effects. This approach can help achieve a cleaner and more balanced mix.

Conclusion

Deciding whether to mix vocals in mono or stereo depends on the desired effect. Experiment and trust your ears for the best sound. Balance is key, so consider the overall mix and adjust accordingly. Remember, there is no one-size-fits-all approach – go with what suits the song best.


Categories
Archive

How to Make Vocals Stand Out in a Mix: Mastering the Art

To make vocals stand out in a mix, use EQ to remove low-end rumble and boost high frequencies for clarity and presence. Achieve balance with compression and adjust reverb and delay settings to create depth and space, enhancing the vocal’s impact and prominence in the mix.


When it comes to creating a professional-sounding music production, ensuring that the vocals stand out is crucial. A well-mixed vocal track can captivate listeners and elevate the overall quality of a song. Whether you’re a seasoned producer or just starting out, knowing how to effectively emphasize vocals can make a significant difference in the impact of your music.


We’ll delve into specific techniques and strategies for making vocals stand out in a mix, enabling you to create compelling and engaging audio productions. Let’s explore the essential steps to achieve a captivating vocal presence in your mixes.


Understanding Vocal Mixing

Understanding Vocal Mixing is a crucial aspect of music production. Achieving a balanced and professional sound requires careful attention to the vocals in a mix. By understanding the intricacies of vocal mixing, producers can ensure that the vocals stand out and communicate the emotional nuances of the song effectively.

The Importance Of Vocal Clarity

Vocal clarity is essential for ensuring that the lyrics are intelligible and that the emotional performance of the singer is conveyed to the listener. To achieve clarity, it is vital to pay attention to the EQ of the vocals, removing any frequencies that may cause muddiness or masking. Additionally, using a de-esser can help control sibilance, further enhancing the clarity of the vocals.

Balancing Vocals With Instrumentals

Balancing vocals with instrumentals is a delicate task that can greatly impact the overall sound of the mix. Proper panning and volume adjustments can create space for the vocals to shine without being overwhelmed by the instrumental elements. Utilizing techniques such as side-chain compression to momentarily lower the volume of the instruments when the vocals are present can also help in maintaining clarity and prominence of the vocals within the mix.


Preparing The Vocals

Editing And Compiling Vocal Takes

Run vocal recordings through editing software for cleanup and compilation.

Understanding Vocal Range And Key

Identify the vocal range and key to enhance the mix’s cohesiveness.

Utilizing Eq And Compression

When it comes to mixing vocals, using EQ (equalization) and compression techniques can make a significant difference in how the vocals stand out in a mix. These two powerful tools allow you to shape the sound of the vocals and ensure they sit perfectly in the overall mix, enhancing both their presence and consistency. Let’s dive into how you can utilize EQ and compression for optimal results.

Applying Eq To Enhance Vocal Presence

EQ is a crucial tool for enhancing the presence of vocals and giving them the necessary clarity and definition. By carefully selecting the right EQ settings, you can eliminate unwanted frequencies and emphasize the desirable ones, making the vocals cut through the mix. Here’s how you can use EQ effectively:

  1. Identify problem frequencies that muddy the vocal sound.
  2. Using a parametric EQ, attenuate or eliminate these problem frequencies.
  3. Boost the frequencies that contribute to the vocal’s presence and articulation.
  4. Experiment with a gentle high-frequency shelf boost to add airiness and sparkle to the vocals.
  5. Make subtle adjustments to find the sweet spot where the vocals sound clear and balanced, without sounding harsh or unnatural.

By applying these EQ techniques, you can enhance the vocal presence and ensure they stand out in the mix.

Using Compression For Consistency

Alongside EQ, compression is an essential tool for achieving a consistent and controlled vocal sound. Compression helps to even out the dynamic range of the vocals, making them sound more polished and professional. Here’s how you can effectively use compression on vocals:

  1. Start with a moderate threshold setting to catch the louder parts of the vocals.
  2. Set a ratio that balances the dynamic range without squashing the vocals.
  3. Adjust the attack and release times to control how quickly the compression is applied and released.
  4. Experiment with the makeup gain to bring up the overall level of the vocals.

By applying compression with care, you can achieve a consistent vocal sound throughout the mix, ensuring every word and phrase is heard clearly.

By utilizing EQ and compression techniques, you can take your vocal mixes to the next level. Remember to experiment and trust your ears to find the perfect balance, ultimately making the vocals stand out and shine in the overall mix.


Adding Effects For Enhancement

When it comes to making vocals stand out in a mix, adding effects for enhancement can play a crucial role. By implementing reverb and delay as well as using creative vocal effects, you can elevate the overall sound and create a distinctive vocal presence in your mix. Let’s explore these techniques in more detail.

Implementing Reverb And Delay

Reverb and delay are essential tools for enhancing vocals in a mix. They can add depth and space, creating a sense of ambiance and dimension. When using reverb, it’s important to adjust the decay time and pre-delay to suit the vocal track. For delay, experiment with different settings such as feedback and timing to achieve the desired effect.

Creative Use Of Vocal Effects

Aside from traditional reverb and delay, there are numerous creative vocal effects that can be utilized to make vocals stand out. This can include pitch shifting, chorus, flanging, and vocal doubling. These effects can add character and uniqueness to the vocals, making them more engaging and memorable in the mix.

Employing Automation Techniques

Vocals are often the centerpiece of a song, and it’s essential to make them stand out in a mix. One effective way to achieve this is by employing automation techniques. Automation allows you to control various aspects of the vocal track, such as volume, panning, and EQ adjustments, throughout the song. In this article, we will explore two powerful automation techniques – automating levels for emphasis and dynamic panning for depth.

Automating Levels For Emphasis

Automating levels is a technique that involves adjusting the volume of the vocal track at specific points in the song to create emphasis and highlight certain phrases or words. By carefully controlling the volume, you can draw the listener’s attention to the vocals and make them stand out.

To automate levels, you can use a digital audio workstation (DAW) like Ableton Live or Logic Pro. These DAWs provide automation lanes where you can draw or record volume changes over time. For example, during a chorus, you might increase the volume of the vocals to give them a more impactful presence. Conversely, you can decrease the volume in verses to create a sense of intimacy.

Remember, subtlety is key when automating levels. Gradual volume changes are usually more effective than sudden jumps. Take the time to experiment and find the right balance that complements the song.

Dynamic Panning For Depth

Dynamic panning is another automation technique that can add depth and dimension to vocals in a mix. By automating the panning position, you can create a sense of movement and space that enhances the overall listening experience.

When using dynamic panning, imagine the stereo field as a canvas where you can position the vocals anywhere within the soundstage. For example, you can pan the vocals slightly to the left during the verse to give them a focused presence, and then pan them wider during the chorus to create a sense of width and excitement.

Experiment with different panning movements to find what works best for your mix. Keep in mind that subtlety is often more effective than extreme panning. By dynamically panning the vocals, you can create a dynamic and engaging mix that keeps the listener captivated.

Ensuring Clarity In The Mix

Your vocals can easily get lost in the mix, but with the right techniques, you can make them stand out. Two essential methods for achieving clarity are de-essing and addressing frequency masking issues.

De-essing For Taming Harsh Sibilance

De-essing involves reducing the harsh “s” sounds that can distract from the vocals. Use a de-esser plugin to target and tame those sibilant frequencies.

Frequency Masking Solutions

Frequency masking occurs when certain frequencies overpower others, causing elements to compete in the mix. Utilize EQ to carve out space for your vocals and ensure they cut through clearly.


Harnessing Vocal Layering And Doubling

Creating a captivating vocal sound is crucial for a professional-sounding mix. By harnessing the power of vocal layering and doubling, you can take your vocals to the next level, making them stand out in a crowded mix. These techniques allow you to add depth, richness, and texture to your vocals, making them more interesting and impactful for your listeners.

Creating Depth With Vocal Layering

Vocal layering involves recording multiple vocal tracks and blending them together in the mix. This technique adds depth and dimension to your vocals, making them sound larger than life. To create depth with vocal layering, follow these steps:

  1. Start by recording your main vocal track, which will serve as the foundation.
  2. Record additional vocal tracks, experimenting with different harmonies or variations of the melody.
  3. Blend the additional vocal tracks with the main vocal, adjusting their volume levels to achieve the desired effect.
  4. Consider panning the additional vocal tracks slightly to the left or right, creating a sense of space and separation.
  5. Apply subtle effects, such as reverb or delay, to the additional vocal tracks to enhance their presence without overwhelming the mix.

By layering your vocals, you can create a rich and immersive sound that captures the listener’s attention and adds depth to your mix.

Utilizing Doubling For Richness

Doubling is another effective technique to make vocals stand out. It involves recording the same vocal part twice and panning the duplicated tracks to create a sense of width and thickness. Here’s how you can utilize doubling to enhance the richness of your vocals:

  1. Record your main vocal track as the foundation.
  2. Record a duplicate of the main vocal, trying to match the timing and tone as closely as possible.
  3. Pan the duplicated vocal tracks slightly to the left and right, widening the stereo image.
  4. Adjust the volume levels of the duplicated tracks to blend them with the main vocal, ensuring they complement each other.
  5. Consider applying subtle effects, such as chorus or modulation, to the duplicated tracks to create a sense of movement and depth.

By utilizing doubling, you can give your vocals a luscious and full-bodied sound that cuts through the mix and grabs the listener’s attention.

Mastering The Final Vocal Mix

When mixing vocals, it’s crucial to master the final vocal mix to make sure the vocals stand out in the overall sound. Achieving a well-balanced and impactful vocal mix requires attention to detail and meticulous final touches.

Balancing Vocal Effects In The Mix

Start by ensuring that the vocal effects such as reverb and delay are subtly balanced to enhance the vocals without overpowering them. Utilize EQ to carve out space for the vocals and ensure the effects complement the vocal performance.

Final Checks For Vocal Clarity And Impact

  • Check the overall EQ of the vocal track to address any frequency buildup or muddiness that may be affecting clarity.
  • Ensure that the vocals are properly leveled in the mix, staying consistent throughout the song to maintain impact and continuity.
  • Perform A/B comparisons with reference tracks to gauge the overall vocal presence and make necessary adjustments.
  • Finalize the vocal mix by applying subtle compression and automation to polish the dynamics and ensure a cohesive sound.
How to Make Vocals Stand Out in a Mix: Mastering the Art


Credit: blog.native-instruments.com


Frequently Asked Questions For How To Make Vocals Stand Out In A Mix


How Can I Make Vocals Stand Out In A Mix?


To make vocals stand out in a mix, use EQ to boost the vocal frequencies, add a touch of reverb to create depth, and use compression to even out the dynamic range.


Why Are Vocals Important In A Music Mix?


Vocals are the focal point of a song, conveying emotion and lyrics to the listener. Clear vocals enhance the overall impact and connection with the audience.


What Is The Role Of Effects In Vocal Mixing?


Effects like delay and chorus can add character and dimension to vocals, while subtle use of effects can enhance the overall sound without overpowering the vocals.


How Can I Prevent Vocals From Getting Lost In The Mix?


Adjust the volume levels of other instruments to create space for vocals, pan instruments to different positions in the stereo field, and use automation to emphasize important vocal parts.


Conclusion


Achieving a standout vocal mix involves balancing clarity, presence, and emotion. By implementing EQ, compression, and effects strategically, you can enhance vocals in your music production. Experiment with different techniques to find what works best for your unique style and sound.


Remember, practice makes perfect when it comes to creating impactful vocal mixes.

Categories
Archive

Can You Mix Vocals in FL Studio? Unleash Your Vocal-Producing Wizardry!

Yes, you can mix vocals in FL Studio. FL Studio is equipped with powerful tools to help you mix and enhance vocals for your audio projects.


From adjusting levels and adding effects to using automation and equalization, FL Studio provides all the necessary features for professional vocal mixing. FL Studio, a popular digital audio workstation, offers a comprehensive set of tools and features specifically designed for mixing vocals.


Whether you’re a beginner or an experienced producer, FL Studio provides a user-friendly interface and a wide range of effects and plugins to help you achieve the perfect vocal mix. We’ll explore the steps and techniques for mixing vocals in FL Studio, along with some tips to enhance the overall quality of your vocal recordings. Whether you’re working on music production, podcasting, or voiceover projects, mastering vocal mixing in FL Studio can take your audio quality to the next level.


Getting Started With Vocal Mixing

When it comes to mixing vocals in FL Studio, getting started can be a daunting process for beginners. It’s crucial to understand the fundamental aspects of vocal mixing, from setting up your FL Studio workspace to preparing your vocals for a professional sound.

Setting Up Your Fl Studio Workspace

Before diving into vocal mixing, it’s essential to organize your workspace in FL Studio for a seamless and efficient workflow. Here are some key points to consider:

  • Utilize multiple mixer tracks for vocals, effects, and buses to manage them independently.

Preparing Your Vocals For Mixing

Prior to mixing vocals, it’s imperative to prepare your vocal recordings to ensure optimal quality and compatibility with the mixing process. Here’s how to prepare your vocals:

  1. Record vocals with a quality microphone in a acoustically-treated space.

Essential Tools For Vocals In Fl Studio

When it comes to producing music in FL Studio, having a solid understanding of the essential tools for vocals is crucial for achieving professional-sounding results. With the right techniques and tools, you can elevate your vocal recordings and create a polished sound that stands out. Let’s explore the essential tools for vocals in FL Studio and how to effectively utilize them.

Understanding Eq And Compression For Vocals

EQ (Equalization) plays a vital role in shaping the tonal characteristics of vocals. In FL Studio, the Parametric EQ 2 is a powerful tool for adjusting the frequency spectrum of vocal recordings. Use it to boost or cut specific frequencies to enhance clarity, presence, and overall balance of the vocals. Additionally, compression is essential for controlling the dynamic range of vocals, ensuring a consistent level. The Fruity Limiter and Fruity Compressor plugins in FL Studio enable precise control over vocal dynamics, helping to smooth out inconsistencies in the vocal performance.

Working With Reverb And Delay Effects

Reverb and delay effects are indispensable for adding depth and dimension to vocal tracks. In FL Studio, the Fruity Reverb 2 and Fruity Delay 3 plugins offer a wide range of parameters to tailor the spatial characteristics of vocals. Adjust the decay time, pre-delay, and diffusion to create a convincing sense of space around the vocals. Experiment with different reverb types and delay timings to find the perfect balance between ambiance and clarity in your vocal mixes.

Advanced Techniques For Vocal Mixing

Discovering new and advanced techniques for achieving standout vocals in FL Studio can take your tracks to the next level.

Utilizing Automation For Dynamic Vocals

Automation brings dynamic movement and expression to vocals, enhancing their impact in the mix.

Exploring Vocal Tuning And Harmonization

Fine-tune vocals with precision and explore creative harmonization techniques for a polished sound.


Creating Depth And Space In Vocals

Vocals play a crucial role in any song, and giving them depth and space can elevate the overall mix. With FL Studio, you have a range of tools and techniques at your disposal to achieve this. In this section, we’ll explore two important methods: using panning and spatial effects, and incorporating vocal adlibs and background vocals. Let’s dive in!

Using Panning And Spatial Effects

Panning refers to the placement of sound across the stereo field, allowing you to create a sense of width and movement in your vocals. By strategically panning different vocal tracks, you can make the listener perceive the vocals as coming from different directions. This adds depth and dimension to the mix.

In FL Studio, you can easily adjust the panning of your vocal tracks using the mixer. Simply load your vocal tracks into individual mixer channels and use the pan knobs to position them in the stereo field. Experiment with different panning positions to find the balance that works best for your song.

In addition to panning, spatial effects like reverb and delay can further enhance the sense of depth in your vocals. Reverb adds a natural ambience, simulating the sound of a room or space. Delay creates echoes, adding an airy feel to the vocals. By tweaking the parameters of these effects, you can create a sense of space and make the vocals feel larger than life.

Incorporating Vocal Adlibs And Background Vocals

Vocal adlibs and background vocals are an excellent way to add richness and texture to your vocal mix. Adlibs are short, spontaneous vocal phrases or sounds that complement the main vocals. They can be placed strategically throughout the song to create interest and fill empty spaces.

In FL Studio, you can record adlibs separately and place them in the mix at appropriate moments. To ensure they don’t overpower the main vocals, adjust their volume and panning accordingly. Experiment with different adlib ideas and placements to find the ones that enhance your song the most.

Background vocals, on the other hand, are harmonies or supporting vocal lines that add depth to the main vocals. These can be recorded or programmed in FL Studio using virtual instruments or samples. By layering multiple vocal tracks and arranging harmonies, you can create a lush and dynamic vocal sound.

Remember, when incorporating adlibs and background vocals, pay attention to their positioning in the stereo field. Panning them slightly away from the main vocals will give them their own space and prevent muddiness in the mix.

Achieving Clarity And Balance

Mixing vocals effectively is crucial to creating a polished and professional-sounding track in FL Studio. By achieving clarity and balance in the vocals, you can ensure that the vocals sit well in the mix and are easy for listeners to engage with. In this article, we will discuss two important aspects of vocal mixing that contribute to clarity and balance: balancing levels and frequencies, and avoiding common pitfalls in vocal production.

Balancing Levels And Frequencies In Vocal Mixing

When it comes to mixing vocals, finding the right balance of levels is key. You want the vocals to be audible and clearly heard without overpowering other elements of the mix. To achieve this, start by adjusting the volume fader of the vocal track so that it sits well in relation to the rest of the instruments.

Here are some tips for balancing vocals:

  1. Use reference tracks to gauge how the vocal level should sound in relation to the other elements in the mix.
  2. When adjusting the vocal level, listen to the track as a whole to ensure that it still sounds balanced.
  3. Consider using automation to control vocal levels within individual phrases or sections of the song for greater control.

Beyond levels, paying attention to the frequencies in the vocal mix is equally important. Here are some techniques to achieve a balanced vocal sound:

  • Use equalization (EQ) to shape the tone of the vocal. Cut any unwanted frequencies that might introduce muddiness or harshness. Boosting the desirable frequencies can enhance the presence and clarity of the vocals.
  • Consider using a de-esser to tame sibilant sounds, which are the high-frequency “sss” or “shh” sounds that can be harsh or distracting.
  • Utilize compression to control the dynamic range of the vocals. This can help even out the inconsistencies in the vocal performance and make them sit more uniformly within the mix.

Remember, achieving a balanced vocal mix is an iterative process. Continuously listen and make adjustments until you achieve the desired clarity and balance.

Avoiding Common Pitfalls In Vocal Production

While working on vocal production in FL Studio, it’s important to be aware of common pitfalls that can hinder the clarity and balance of the vocals. Here are a few pitfalls to watch out for:

  1. Over-processing: Applying too many effects, such as excessive reverb or delay, can negatively impact the clarity of the vocals. Use effects sparingly and purposefully.
  2. Inadequate editing: Make sure to edit the vocal recordings to remove any unwanted noise, breaths, or mouth clicks. Also, correct any pitching or timing issues using tools like pitch correction and time stretching.
  3. Insufficient vocal comping: Vocal comping involves selecting the best parts from multiple takes to create a composite, flawless vocal performance. Take the time to comp the vocals for a more polished and refined result.
  4. Lack of attention to background vocals: If your track includes background vocals, pay attention to their levels, panning, and overall integration with the lead vocal.

Can You Mix Vocals in FL Studio? Unleash Your Vocal-Producing Wizardry!


Credit: www.sweetwater.com

Mastering Your Vocal Mix

In FL Studio, achieving a professional quality vocal mix is essential for an impactful and polished sound. Mastering your vocal mix involves meticulous attention to detail and fine-tuning to ensure that the vocals stand out and complement the overall track.

Finalizing Your Vocal Mix In Fl Studio

Finalizing your vocal mix in FL Studio is crucial for a cohesive sound. Utilize the built-in tools and effects to refine the vocals and create a well-balanced mix.

Tips For Polishing Your Vocals To Perfection

  • Utilize EQ to enhance vocal clarity and remove unwanted frequencies
  • Apply compression to control dynamics and ensure consistent volume
  • Add reverb and delay for depth and dimension
  • Experiment with vocal doubling and harmonies for a richer sound
  • Use automation to adjust levels and add movement to the vocals

Frequently Asked Questions Of Can You Mix Vocals In Fl Studio

Can You Mix Vocals In Fl Studio?

Yes, FL Studio is a versatile DAW that offers powerful mixing capabilities for vocals. With features like multi-track audio recording, mixer tracks, effects, and automation, you can achieve professional vocal mixes in FL Studio. Use EQ, compression, reverb, and other tools to enhance the vocals and create a polished sound.

How Do You Mix Vocals In Fl Studio?

To mix vocals in FL Studio, start by adjusting the levels of the vocal tracks to ensure they sit well in the mix. Then, use EQ to shape their tone and reduce any unwanted frequencies. Apply compression to control the dynamics and add consistency.


Experiment with effects like reverb and delay to give the vocals depth and space. Lastly, automate parameters to create movement and enhance certain parts.

What Plugins Are Best For Vocal Mixing In Fl Studio?

FL Studio offers a range of plugins that are great for vocal mixing. The Parametric EQ 2 is versatile for shaping the vocal tone, while the Fruity Compressor provides transparent dynamic control. For adding warmth and character, the Fruity Reverb and Fruity Delay 3 are excellent choices.


The Fruity Limiter is also helpful for maximizing loudness without distortion.

Conclusion

To sum up, mixing vocals in FL Studio can elevate your music production game. Experiment with different effects and techniques to enhance the sound. Don’t be afraid to get creative and trust your ears. With dedication and practice, you can achieve professional-sounding vocal mixes.


Keep honing your skills!

Categories
Archive

Unlock Your Musical Genius: Best Way to Get Fl Studio for Free

To get FL Studio for free, visit the official FL Studio website and download the trial version. FL Studio is a popular software choice for music producers due to its versatile features and user-friendly interface.


However, the full version comes with a price tag, leaving many aspiring musicians searching for ways to access the software without breaking the bank. While there are illegal methods to obtain FL Studio for free through torrents or cracked versions, these come with risks of viruses and legal consequences.


For a legitimate option, users can download the trial version from the official website, which offers limited functionality but can be a good starting point for beginners to explore the software before committing to a purchase.


The World Of Fl Studio

A Powerful Digital Audio Workstation

FL Studio is a powerful DAW used for music production.

It offers a wide range of features for creating music tracks.

FL Studio allows for seamless workflow and creativity.

Popularity Among Music Producers

FL Studio is highly popular among music producers worldwide.

It is favored for its user-friendly interface and versatility.

Many top producers rely on FL Studio for their music production needs.

With FL Studio, music production becomes accessible and efficient.

Understanding Fl Studio Licensing

Types Of Fl Studio Licenses

FL Studio offers several license types to cater to various user needs. These include:

  • FL Studio Demo Version
  • Fruity Edition
  • Producer Edition
  • Signature Bundle

Pricing And Restrictions

License Type Pricing Restrictions
FL Studio Demo Version Free Limited features and functionality
Fruity Edition $99 Basic features with some limitations
Producer Edition $199 Advanced features for music production
Signature Bundle $299 Includes all plugins and features

It’s important to choose the right FL Studio license based on your production requirements and budget.


Exploring Free Options

When it comes to exploring free options for FL Studio, there are several avenues to consider. Whether you’re not ready to commit to a purchase or simply want to try it out before investing, it’s possible to access FL Studio for free. This article explores different free options available for FL Studio, including trial versions and completely free FL Studio versions.

Trial Versions

FL Studio offers a free trial version, allowing users to experience the software’s capabilities before deciding to commit to a purchase. The trial version provides access to the full range of features, giving users a comprehensive understanding of what FL Studio has to offer.

Free Fl Studio Versions

For those looking for a completely free option, FL Studio also provides limited editions that offer essential features without the hefty price tag. These free versions are perfect for beginners or those on a tight budget, allowing them to explore FL Studio’s basic functionalities without any financial commitment.

Risks And Pitfalls

When it comes to getting FL Studio for free, there are a number of risks and pitfalls that you should be aware of. While the idea of getting a popular software for free may be tempting, it’s important to consider the potential consequences. In this article, we will discuss the legality and ethical concerns, as well as the security risks associated with obtaining FL Studio for free.

Legality And Ethical Concerns

Legally, acquiring FL Studio for free is considered piracy and is therefore illegal. Using pirated software violates copyright laws, which can lead to severe penalties, including fines and even imprisonment. Additionally, it’s important to recognize the ethical concerns associated with piracy. By using pirated software, you are depriving the creators and developers of their rightful income for their hard work.

Security Risks

Security risks should also be taken into consideration when obtaining FL Studio for free. Pirated software often comes bundled with malware, viruses, and other harmful programs that can compromise your computer’s security. These malicious programs can steal your personal information, damage your device, or even give hackers unauthorized access to your computer. It’s important to protect your privacy and security by avoiding pirated software.

Community And Support


Discover the best way to get FL Studio for free through a supportive community that offers tips, resources, and guidance every step of the way. Connect with fellow music enthusiasts to explore the vast possibilities of this popular music production software.

Community and Support are vital components when considering the best way to obtain Fl Studio for free. Being part of a community allows users to connect with like-minded individuals, exchange ideas, and seek assistance when faced with challenges or questions. Moreover, the support of the community contributes to a better understanding of the software and helps users maximize their experience. In this section, we will explore two key aspects of community and support: Online Forums and Communities, and Tutorials and Resources.

Online Forums And Communities

Online forums and communities play a crucial role in the Fl Studio user experience. These platforms provide a space where users can share their knowledge, ask questions, and exchange tips and tricks. Joining these communities not only provides an avenue for support but also promotes collaboration and learning from the experiences of others. When searching for online forums and communities related to Fl Studio, some notable options include:

  • The official Image-Line forum, where users can connect with other Fl Studio enthusiasts, professionals, and developers to share their experiences and seek help.
  • Reddit’s r/FL_Studio community offers a vibrant and active platform for users to engage in discussions, share their work, and seek guidance from experts.
  • Other popular online forums such as KVR Audio and Studio One Expert provide dedicated sections for Fl Studio users to interact, seek support, and stay updated with the latest news and updates.

By actively participating in these online forums and communities, Fl Studio users can tap into a vast network of knowledge and expertise, enhancing their skills and staying connected with the software’s ever-evolving community.

Tutorials And Resources

In addition to online forums and communities, tutorials and resources are another invaluable source of support for Fl Studio users. These tutorials can help users navigate through the software’s features, understand advanced techniques, and expand their creative boundaries. When it comes to finding tutorials and resources for Fl Studio, one can explore the following options:

  1. YouTube channels like “In The Mix” and “FL Studio Guru” offer in-depth tutorials, tips, and creative ideas to help users make the most out of the software.
  2. Image-Line’s official website provides an extensive collection of step-by-step tutorials, articles, and documentation for users at all skill levels.
  3. Websites like “Production Music Live” and “Busy Works Beats” offer comprehensive tutorial courses tailored to different genres and workflows.

These tutorials and resources provide a rich learning experience, equipping users with the necessary skills to navigate through Fl Studio and unleash their creativity. Regularly exploring these resources can help users stay updated with the latest features and techniques, keeping their production skills sharp and innovative. In conclusion, the community and support surrounding Fl Studio offer an extensive network of knowledge and assistance for users seeking the best way to obtain Fl Studio for free. Engaging with online forums and communities allows users to connect with experts, seek guidance, and learn from others’ experiences. Additionally, leveraging tutorials and resources helps users navigate the software’s features and expand their creative boundaries. By tapping into these valuable resources, users can enhance their Fl Studio experience and unlock their true potential.

Alternative Free Daws

Looking for a free, alternative digital audio workstation (DAW) to FL Studio? There are several robust options available that offer similar features and functionality without the price tag. In this section, we will explore the Comparison with Other Free Digital Audio Workstations and learn about their Features and Limitations.

Comparison With Other Free Digital Audio Workstations

When it comes to alternative free DAWs, it’s important to weigh the options and find the best fit for your music production needs. Here’s a comparison of some popular free DAWs:

DAW Features Limitations
Audacity Basic audio editing, recording, and mixing Limited MIDI capabilities, lacks advanced production tools
Cakewalk by BandLab Pro-level features, unlimited tracks, powerful audio editing Steep learning curve, high system requirements
Ardour Multichannel recording, flexible routing, plugin support Complex interface, lacks built-in virtual instruments

Features And Limitations

Each free DAW comes with its own set of features and limitations, offering a unique user experience. In addition to the Comparison with Other Free Digital Audio Workstations mentioned above, consider the following aspects when evaluating alternative DAWs:

  • Audacity: Intuitive interface, ideal for simple recording and editing tasks, but lacks complex production tools
  • Cakewalk by BandLab: Professional-grade features, but may require a powerful computer and a steep learning curve
  • Ardour: Suitable for multichannel recording and mixing, although beginners may find its interface challenging

Making The Decision


Discover the best way to access FL Studio for free and make your decision confidently. Get professional-level music production software without breaking the bank. Unleash your creativity today.

Personal Ethics And Values

Consider your moral compass when deciding how to obtain FL Studio for free.

Assess if the method aligns with your personal beliefs and values.

Ensure that you are comfortable with your chosen approach ethically.

Long-term Goals

Evaluate how getting FL Studio for free fits into your long-term objectives.

Consider if this method will support your music production ambitions.

Reflect on the potential consequences of your decision in the future.

Conclusion And Final Thoughts

Balancing Accessibility And Integrity

FL Studio offers a balance of accessibility and integrity, providing users with a free version that allows for exploration without compromising on quality.

Embracing Creativity Within Boundaries

With FL Studio, creativity is encouraged within boundaries, guiding users to explore and experiment while respecting the integrity of the software.

Frequently Asked Questions For Best Way To Get Fl Studio For Free


Can I Get Fl Studio For Free Legally?


Yes, you can get FL Studio for free legally by downloading the trial version from the official website. However, the trial version has a limited feature set and time restriction. To access the full version for free, there are illegal methods available, but we strongly discourage piracy and recommend supporting the developers by purchasing a genuine license.


Are There Any Alternative Free Software Similar To Fl Studio?


Yes, there are several free alternatives to FL Studio that offer similar functionality. Some popular options include Audacity, Cakewalk by BandLab, LMMS, and Tracktion T7. These programs provide a range of features for music production and are great options for those on a budget or looking to explore different software.


What Are The Risks Of Downloading Fl Studio From Unofficial Sources?


Downloading FL Studio from unofficial sources poses significant risks. These sources often distribute modified or infected versions of the software that may contain malware or other malicious elements. Additionally, using unauthorized copies of FL Studio is illegal and can result in serious legal consequences.


It is always best to download software directly from the official website to ensure safety and legality.


Can I Upgrade From The Trial Version To The Full Version Of Fl Studio?


Yes, you can upgrade from the trial version to the full version of FL Studio by purchasing a license. Once you have purchased a license, you will receive a registration key that can be used to unlock all the features of the software.


This allows you to continue using FL Studio without any limitations or time restrictions.


Conclusion


There are reliable ways to access FL Studio for free without compromising legality or safety. By utilizing trial versions, student discounts, or purchasing a license later, you can explore the software at minimal cost. Remember to also consider the ethical implications and potential consequences when seeking out free software options.


Happy music making!

Categories
Archive

Cubase Can’t Find VST Instrument: Troubleshooting Made Easy

If Cubase can’t find a VST instrument, check the plugin’s installation and scan for new plugins. Many beginners and even experienced users of Cubase often face the issue of the software not being able to locate a VST instrument.


This problem can be frustrating, but it can usually be resolved with a few simple steps. I will discuss the common reasons why Cubase can’t find VST instruments and provide solutions to troubleshoot and fix this issue. By following these tips, you’ll be able to successfully integrate VST instruments into your Cubase projects and enhance your music production experience.


Let’s dive into the troubleshooting process to ensure that Cubase recognizes and loads your VST instruments seamlessly.


Common Reasons For Vst Instrument Issues

Incorrect Installation

One of the common reasons for Cubase not finding VST instruments is an incorrect installation. This can occur if the VST plugin was not installed properly or if there was an error during the installation process. Incorrect installation can lead to the plugin not being recognized by Cubase, leading to issues in locating the instrument.

Compatibility Issues

Compatibility issues between the VST instrument and Cubase can also result in Cubase being unable to find the VST instrument. This can happen if the VST instrument is not compatible with the version of Cubase being used. Incompatibility can lead to the instrument not being detected by Cubase, causing it to not appear in the plugin list.

File Path Errors

File path errors can also contribute to Cubase not finding VST instruments. If the file path to the VST instrument is not correctly set within Cubase, the software will not be able to locate the instrument when attempting to load it into a project. This can result in the instrument not being found or failing to load properly.

Cubase Can't Find VST Instrument: Troubleshooting Made Easy


Credit: m.youtube.com


Checking Installation And Compatibility

Verifying Installation

To start troubleshooting the issue of Cubase not finding a VST instrument, it’s important to first verify the installation of the VST instrument. Ensure that the instrument has been properly installed in the correct directory within Cubase’s VST folder. This can be done by checking the installation path in the plugin manager. Additionally, ensuring that the VST instrument’s application files are located in the correct directory is crucial to its recognition by Cubase.

Checking System Requirements

Another aspect to consider is whether the VST instrument meets the system requirements of your Cubase software. Refer to the software documentation or the website of the VST instrument’s manufacturer to verify compatibility with your Cubase version. Checking that the system requirements for the VST instrument align with your computer’s specifications is essential to ensure seamless integration and functionality within Cubase.

Reviewing Plugin Compatibility

Compatibility issues can also arise if the VST instrument is not compatible with the version of Cubase being used. It’s essential to review the plugin compatibility with your specific version of Cubase. Furthermore, ensuring that the VST instrument is compatible with your operating system is crucial for a successful integration. Cross-referencing the compatibility of the VST instrument with both Cubase and your operating system can help troubleshoot any conflict that may be preventing it from being found within the software.

Resolving File Path Errors


Having trouble with Cubase not locating your VST instrument? Easily fix file path errors with these simple steps. Solve the issue and get your music production back on track.

Finding The Correct Vst Folder

When Cubase is unable to find a VST instrument, it often indicates a file path error. Don’t worry, though, resolving this issue is simpler than it may seem. To begin, let’s focus on finding the correct VST folder.

Follow these steps to locate the correct VST folder:

  1. Open Cubase and navigate to the “Studio” menu at the top of the screen.
  2. From the drop-down menu, select “VST Instruments”.
  3. A window will appear, displaying the current VST instruments and their file paths.
  4. Take note of the file path of the missing VST instrument.
  5. Next, open the “Devices” menu and select “Plug-in Information”.
  6. In the Plug-in Information window, locate the “VST 2 Plug-in Paths” section.
  7. In this section, you will find the file path that Cubase is currently scanning for VST instruments.

Setting Up Custom Vst Folder

If the missing VST instrument is located in a different folder than the one Cubase is scanning, you may need to set up a custom VST folder. Here’s how:

  1. Create a new folder in a convenient location on your computer, such as the Desktop or a dedicated folder for VST instruments.
  2. Name the folder something recognizable, like “Custom VST Folder”.
  3. Move the missing VST instrument file into the newly created folder.
  4. Now, go back to Cubase and open the “Devices” menu, followed by “Plug-in Information”.
  5. In the Plug-in Information window, click on the “VST 2 Plug-in Paths” tab.
  6. Click the “Add…” button and navigate to the custom VST folder you created.
  7. Select the folder and click “OK” to add it as a custom VST folder.
  8. Ensure the newly added folder is listed in the VST 2 Plug-in Paths section.

Rescanning Vst Plugins

Now that you have found the correct VST folder or set up a custom VST folder, it’s time to rescan the VST plugins in Cubase. Follow these steps:

  1. Close the Plug-in Information window if it’s still open.
  2. From the “Devices” menu, select “Plug-in Manager”.
  3. In the Plug-in Manager window, click on the “VST 2.x Plug-ins” tab.
  4. Click the “Update” button located at the bottom of the window.
  5. Cubase will now rescan the VST plugins, including the newly added or relocated ones.
  6. Once the rescan is complete, check the list of VST instruments in the “VST Instruments” window again.
  7. The missing VST instrument should now appear without any file path errors.

By following these steps, you can resolve file path errors and ensure Cubase finds your VST instrument without any issues. Now you can get back to creating music and enjoying the full potential of Cubase’s powerful features.

Cubase Can't Find VST Instrument: Troubleshooting Made Easy


Credit: forums.steinberg.net


Troubleshooting Within Cubase

When it comes to using Cubase, one common issue that users may encounter is when the program can’t find the VST instrument. This can be frustrating, especially when you’re in the middle of a creative session. However, fear not! There are several troubleshooting steps you can take within Cubase to resolve this issue and get back to making music.

Updating Cubase

If you’re experiencing trouble finding your VST instrument in Cubase, it might be due to an outdated version of the software. Updating Cubase to the latest version can often address compatibility issues and ensure that all features, including VST instruments, are working properly.

Resetting Plugin Information

Another troubleshooting step worth exploring is resetting the plugin information within Cubase. This can be done by following these simple steps:

  1. Open Cubase and go to the ‘Devices’ menu.
  2. Select ‘Plugin Manager’ from the dropdown menu.
  3. In the Plugin Manager window, click on the ‘Settings’ tab.
  4. Click on the ‘Update’ button to rescan your VST plugins.
  5. Once the scanning process is complete, restart Cubase and check if the VST instrument is now detected.

Checking Audio Connections

In some cases, the issue might not be with Cubase or the VST instrument itself but rather with the audio connections. It’s important to ensure that the audio inputs and outputs are correctly set up. Follow these steps to check your audio connections:

  1. Open Cubase and go to the ‘Devices’ menu.
  2. Select ‘Device Setup’ from the dropdown menu.
  3. In the Device Setup window, click on the ‘VST Audio System’ tab.
  4. Make sure that the correct audio device is selected as the ASIO driver.
  5. Check if the input and output connections are properly configured.

By following these troubleshooting steps within Cubase, you can often resolve the issue of the program not finding your VST instrument. Remember to keep your software updated, reset plugin information if needed, and double-check your audio connections. With these steps, you’ll be back to creating music in no time!

Managing Vst Instrument Dependencies

VST instruments can sometimes have trouble locating their required plugins. To manage these dependencies effectively, it’s crucial to understand plugin dependencies, try reinstalling VST instruments, and address missing DLL files.

Understanding Plugin Dependencies

Identifying which plugins are necessary for each VST instrument to function properly.

Knowing the dependencies helps in troubleshooting any issues that may arise.

Reinstalling VST Instruments

Reinstalling the VST instrument can help resolve dependency-related problems.

Resolving Missing DLL Files

Locate and replace missing DLL files to ensure VST instruments function correctly.

Utilizing Cubase Diagnostic Tools

Using Vst Plugin Manager

VST Plugin Manager: A feature in Cubase to manage VST instruments easily.

  • Access the VST Plugin Manager from the Devices menu.
  • Scan for new or updated plugins to ensure they are recognized by Cubase.

Analyzing Vst Performance

VST Performance: Monitor the performance of VST instruments in real-time.

  1. Check the VST Performance window for CPU and disk usage.
  2. Optimize settings and disable unnecessary plugins to improve performance.

Monitoring Vst Blacklist

VST Blacklist: Identify plugins causing issues and crashes in Cubase.

  1. Review the VST Blacklist to see which plugins are disabled.
  2. Update or remove blacklisted plugins to resolve compatibility problems.

Seeking Help From Community And Support

When you encounter the frustrating issue of Cubase not being able to find a VST instrument, don’t worry, you’re not alone. Many users have faced this problem before, and the good news is that there are community forums, customer support, and even VST developers who are ready to assist you. In this section, we will explore the various avenues you can take to seek help and resolve this issue.

Engaging Cubase Forums

One of the best resources for finding assistance is the Cubase forums. These forums are packed with experienced users and experts who have likely encountered and solved the same issue you’re facing. By posting a question or describing your problem on the forum, you open up the opportunity for others to share their knowledge and give valuable solutions. Make sure to provide clear and detailed information about the problem you’re facing so that the community can better understand your situation.

Here are some tips for engaging the Cubase forums effectively:

  1. Use a descriptive subject line that clearly summarizes your issue.
  2. Include relevant information such as your Cubase version and the VST instrument you are having trouble with.
  3. Provide any error messages or symptoms that you have encountered.
  4. Be polite and grateful when receiving responses and make sure to thank those who provide assistance.

Contacting Customer Support

If you prefer a more direct route, reaching out to Cubase customer support can be a viable option. The support team is trained to handle a wide range of issues, including problems with VST instruments. Whether you choose to contact them by email, phone, or through their website, make sure to provide them with all the necessary details regarding the issue you’re experiencing.

Here are some helpful pointers when contacting Cubase customer support:

  • Be prepared to provide information about your system specifications, Cubase version, and the specific VST instrument you are having trouble with.
  • Describe the steps you have already taken to troubleshoot the issue so that the support team can provide relevant guidance.
  • Take note of any error messages or unusual behavior you have noticed.
  • Be patient and understanding, as the support team may take some time to analyze and resolve your issue.

Seeking Assistance From Vst Developers

If the issue persists and you suspect that it may be related to the specific VST instrument, consider reaching out to the developers directly. VST developers are often dedicated to providing support to their users and can offer valuable insights into resolving compatibility or functionality problems.

Here is how you can seek assistance from VST developers:

Step Description
1 Visit the developer’s website and look for a support section or contact page.
2 Provide detailed information about your issue, including your Cubase version, system specifications, and any error messages you have encountered. Be specific and concise.
3 Attach any relevant screenshots or project files that may help the developer understand your problem better.
4 Check for any FAQs or user forums on the developer’s website, as they may already have solutions or workarounds for common issues.

Remember, seeking help from the community and support channels can greatly increase your chances of resolving the Cubase-VST instrument issue you are facing. By engaging the Cubase forums, contacting customer support, and seeking assistance from VST developers, you’ll have a better chance of getting back on track and unleashing the full potential of your Cubase software.

Preventive Measures For Future Vst Issues


To prevent future VST issues with Cubase not locating instruments, ensure all plugin folders are correctly set up and regularly updated. Double-check plugin paths and scan for any conflicting VST plugins or outdated versions. Regularly maintain and organize your VST library to avoid potential conflicts and streamline the workflow.

Encountering VST instrument issues can be frustrating, but with the right preventive measures, you can minimize the chances of running into these problems in the future. By following these simple tips, you can ensure a smooth and hassle-free experience with Cubase.

Regular System Maintenance

Maintaining your system regularly can go a long way in preventing VST instrument issues. Keeping your computer clean from unnecessary files and performing regular antivirus scans can help optimize your system’s performance and reduce the chances of encountering any VST-related problems.

Backup And Restore Vst Instruments

Backing up your VST instruments is crucial to avoid losing your valuable work in case of any unforeseen issues. Regularly create backups of your VST libraries and instruments, ensuring they are saved in a secure location. In the event of a VST instrument issue, you can easily restore your backups and continue working seamlessly.

Keeping Vst Plugins Updated

Regularly updating your VST plugins is essential to ensure compatibility with the latest software updates and improvements. Developers frequently release updates that address compatibility issues and enhance performance. By keeping your VST plugins up to date, you can prevent potential conflicts and bugs that could otherwise disrupt your workflow.

Remember, an ounce of prevention is worth a pound of cure. By incorporating these preventive measures into your workflow, you can minimize the risk of encountering VST instrument issues, allowing you to focus on creating music without any interruptions.

Frequently Asked Questions Of Cubase Can’t Find Vst Instrument


Why Is Cubase Unable To Find The Vst Instrument?


Cubase may not find the VST instrument due to incorrect plugin paths or missing installation. Check plugin settings in Cubase preferences to ensure the correct VST folder path is set.


How Can I Troubleshoot The Issue Of Cubase Not Detecting Vst Instruments?


To troubleshoot, rescan the plugin folders in Cubase, update the plugin database, and restart the software. Ensure the VST instrument is properly installed and compatible with your version of Cubase.


Is It Important To Regularly Update Cubase And Vst Plugins?


Yes, updating Cubase and VST plugins is crucial for compatibility, stability, and new features. Regular updates can also address any issues related to finding VST instruments within Cubase.


Conclusion


If Cubase can’t find VST instruments, try troubleshooting steps. Stay updated, backup files regularly. Reinstall software if needed. Contact customer support if issues persist. Remember, patience and persistence are key in resolving technical challenges. Keep making music seamlessly with Cubase.


Categories
Archive

How to Mix Vocals Step by Step: Master Your Vocal Mixing Skills

To mix vocals step by step, start by cleaning up the audio tracks and adjusting the volume levels. Then, apply EQ to enhance the clarity and remove unwanted frequencies, followed by compression to control the dynamics and add depth.


Next, add reverb and delay to create space and ambiance, and finish by automating the levels for a polished sound. If you want to achieve professional-quality vocal mixing, it’s essential to follow a systematic approach. By carefully addressing each aspect of the vocal track, including cleaning, EQ, compression, effects, and automation, you can enhance the overall sound and make the vocals stand out in the mix.


Whether you’re a beginner or an experienced music producer, mastering the art of vocal mixing can take your music to the next level.

How to Mix Vocals Step by Step: Master Your Vocal Mixing Skills


Credit: blog.native-instruments.com

Setting The Foundation

When it comes to mixing vocals, setting the foundation is crucial for achieving a professional sound. This stage involves preparing the recording environment and understanding the importance of a good recording.

Preparing The Recording Environment

The recording environment plays a vital role in capturing clean and clear vocals. Here are some key factors to consider:

  • Ensure the room is acoustically treated to minimize unwanted reflections.
  • Use a high-quality microphone and position it correctly to capture the best sound.
  • Eliminate background noise and distractions to maintain focus and clarity.

Understanding The Importance Of A Good Recording

A good recording forms the bedrock of a well-mixed vocal track. It sets the tone for the entire mixing process. Consider the following:

  1. Invest in a reliable audio interface to maintain a high-quality signal chain.
  2. Encourage the vocalist to deliver a consistent and emotive performance.
  3. Capture multiple takes to ensure there are options for comping and editing.

Editing And Comping

Editing and comping are crucial steps in mixing vocals to achieve a polished and professional sound. By cleaning up vocal takes and creating a comp of the best parts, you can ensure a seamless and cohesive vocal performance.

Cleaning Up Vocal Takes

  • Trim and remove any unwanted noise or breaths to enhance vocal clarity.
  • Use a noise gate to eliminate background noise between vocal phrases.
  • Apply corrective processes like pitch correction and time alignment if needed.
  • Normalize the vocal levels to ensure consistency across the recording.

Creating A Comp Of The Best Vocal Takes

  1. Listen to each vocal take and select the best sections from each.
  2. Arrange the chosen sections in a new track to create a composite or comp track.
  3. Smooth out transitions between different vocal takes for a natural sound.
  4. Enable crossfades between the sections to avoid any abrupt changes in vocals.

Adjusting Levels And Panning

Adjusting levels and panning is crucial when it comes to mixing vocals step by step. By carefully balancing the volume and placement of each vocal track, you can create a well-balanced and immersive sound experience.

Adjusting Levels and Panning are crucial steps in the process of mixing vocals. Balancing the vocal levels is the first step to achieving a clean and professional sound. Utilizing panning techniques is equally important as it allows for depth and width in the stereo image. Let’s explore each of these steps in detail.

Balancing The Vocal Levels

To start, it’s important to ensure that all the vocal tracks are balanced correctly. This involves adjusting the volume levels of each vocal track so that they blend seamlessly together. Here’s a step-by-step process to achieve the desired vocal balance:

1. Begin by soloing each vocal track individually and listening carefully to its volume level. Adjust the fader of each track until the vocals sound clear and prominent, but not overpowering.

2. Once you’ve set the individual levels, unmute all the vocal tracks and listen to them together. Pay close attention to any inconsistencies or imbalances in volume. Make small adjustments to the faders of each track to achieve a consistent and balanced overall vocal sound.

3. Check the vocals against the other elements in the mix, such as the music and any accompanying instruments. Ensure that the vocals are at an appropriate level and sit well within the mix.

Remember, balance is key when it comes to mixing vocals. Taking the time to properly level each individual track will result in a well-blended and professional vocal sound.

Utilizing Panning For Depth And Width

Panning is a powerful tool that allows you to create depth and width in the stereo image. By placing vocals at specific positions within the stereo field, you can add interest and dimension to your mix. Follow these steps to utilize panning effectively:

1. Start by selecting a lead vocal track or the primary vocal track in your mix. Experiment with panning the vocal slightly off-center to create a more centered and focused sound.

2. For backing vocals or harmonies, try panning them slightly to the left or right. This will create a sense of width and separation, making your vocals sound more immersive.

3. Avoid panning vocals too far to the left or right, as it can result in an unbalanced mix. Keep in mind that it’s essential to maintain a strong center image with the lead vocal always being the focal point.

4. Consider using automation to add movement and variation in the panning of vocals throughout the song. This can help to keep the listener engaged and add a dynamic element to the mix.

By utilizing panning techniques, you can create a spacious and immersive vocal sound. Experiment with different placements and find what works best for your mix. Remember, subtlety is often the key to achieving a natural and balanced stereo image.

In conclusion, adjusting levels and panning are essential steps in the process of mixing vocals. Balancing the vocal levels ensures that they blend well together, while panning adds depth and width to the overall sound. By following these step-by-step techniques, you can achieve a professional and polished vocal mix.


Adding Eq And Compression

Learn how to mix vocals step by step by incorporating EQ and compression techniques. These essential tools allow you to enhance the clarity and balance of the vocals, resulting in a polished and professional sound.

Understanding Eq For Vocals

Before diving into the process of adding EQ and compression to vocals, it’s essential to understand the role of EQ in achieving a clean and polished vocal sound. EQ, short for equalization, is a powerful tool that allows you to shape the frequency response of the vocals, enhancing certain frequencies and reducing others.

By doing so, you can create a balanced and clear vocal mix that stands out in the song while fitting seamlessly with the rest of the instruments. To effectively use EQ for vocals, follow these simple steps:

  1. Identify problematic frequencies: Analyze the vocal recording to determine any frequencies that need adjustment. This can be done by listening for harshness, muddiness, or any other unwanted tonal qualities.
  2. Apply subtractive EQ: Use a parametric EQ plugin to subtractively remove or reduce the problematic frequencies. Start by making narrow cuts or dips in the EQ curve, gradually sweeping across the frequency spectrum until you find the exact frequencies that need adjustment.
  3. Enhance desirable frequencies: Once you’ve eliminated the problematic frequencies, it’s time to enhance the desirable aspects of the vocal. Boosting the presence around 2-4 kHz can add clarity and definition, while gentle boosts in the low end can add warmth and body to the vocals.
  4. Use high-pass filters: To reduce low-frequency rumble or unwanted plosives, apply a high-pass filter in the EQ chain. This will help clean up the vocal mix and make room for other instruments in the lower frequency range.

Applying Compression Techniques

After fine-tuning the vocals using EQ, it’s time to move on to compression. Compression is a dynamic processing technique that ensures a consistent and controlled vocal performance throughout the song. Here are the steps to apply compression effectively:

  1. Set the threshold: Start by setting the threshold level at a point where the compression engages whenever the vocal exceeds that level. This allows you to control the dynamic range and keep the vocal performance balanced.
  2. Adjust the ratio: The compression ratio determines how much the vocal gets compressed once it crosses the threshold. Experiment with different ratios to find the right balance between controlling peaks and maintaining the natural dynamics of the vocals.
  3. Tweak attack and release: The attack time defines how quickly the compressor responds to the vocal transients, while the release time determines how long it takes for the compressor to stop compressing. Adjust these settings to achieve the desired level of transparency and control.
  4. Apply makeup gain: Since compression can reduce the overall level of the vocals, use the makeup gain control to bring the compressed vocals back up to the desired level.

Working With Reverb And Delay

Adding reverb to vocals can create a sense of space and depth.

Adjust the reverb amount to complement the vocal without overpowering it.

Using delay can add texture and a repeating effect to vocals.

Experiment with delay timing and feedback settings for different effects.

Applying Special Effects

When it comes to mixing vocals, applying special effects plays a crucial role in enhancing the overall sound. By utilizing creative effects and enhancing vocal dynamics, you can achieve a professional and polished result. In this section, we will explore the process of applying special effects in detail.

Utilizing Creative Effects

Applying creative effects to vocals can add depth and interest to the sound. Some popular creative effects include:

  • Delay: Delay can create an echo effect, adding a sense of space to the vocals.
  • Reverb: Reverb adds an ambient quality, making the vocals sound more natural and full.
  • Vocal Doubling: Vocal doubling creates a thicker vocal texture by adding a slightly delayed and pitch-shifted version of the original vocals.

Enhancing Vocal Dynamics

Enhancing vocal dynamics is essential for ensuring that the vocals stand out in the mix. Some techniques for enhancing vocal dynamics include:

  1. Compression: Compression helps to even out the volume of the vocals, making them more consistent and present in the mix.
  2. Automation: Automation allows you to manually adjust the volume and effects of the vocals throughout the song, ensuring that they fit seamlessly with the music.
  3. Equalization: Equalization can be used to boost or cut certain frequencies in the vocals, enhancing clarity and tonal balance.

Finalizing The Mix

Finalizing the vocal mix is a crucial step in achieving a professional sound. It involves fine-tuning the vocal balance and using automation to polish the overall sound. By applying these techniques, you can ensure that your vocals stand out and blend seamlessly with the rest of the mix.

Fine-tuning The Vocal Balance

To achieve the perfect vocal balance, adjust the levels of the lead and background vocals. Use EQ to enhance the clarity and presence of the lead vocal, while ensuring the background vocals provide support without overpowering the lead. Experiment with panning to create a sense of space and depth within the vocal mix.

Automation For A Polished Sound

Utilize automation to refine the dynamics of the vocals. Automate the volume levels to maintain a consistent presence throughout the song. Add subtle automation to elements such as reverb and delay sends, ensuring that the vocals evolve naturally without becoming distracting. Employ automation to highlight certain phrases or words for additional impact.

How to Mix Vocals Step by Step: Master Your Vocal Mixing Skills


Credit: www.renegadeproducer.com

Frequently Asked Questions For How To Mix Vocals Step By Step

How Can I Prepare Vocals For Mixing?

To prepare vocals, clean any unwanted noises, use proper gain staging, apply light compression, and ensure good microphone technique.

What Eq Settings Work Best For Vocals?

Start by cutting unwanted frequencies, enhance presence with a slight boost around 2-5kHz, and use a high-pass filter to remove rumble.

Why Is Parallel Compression Useful For Vocals?

Parallel compression helps maintain dynamics while adding punch and presence to vocals without sacrificing the original performance.

When Should I Use Reverb On Vocals?

Use reverb sparingly to create depth and space, but be careful not to drown out the vocals or make them sound too distant.

Conclusion

To sum up, mastering vocal mixing takes practice and patience. By following these steps, your vocals will sound professional and polished. Don’t forget to trust your ears and keep experimenting with different techniques. With time and dedication, you’ll achieve the perfect vocal mix for your music.