Categories
Archive

How To Get Great Sounding Vocals Using Reference Tracks

To get great sounding vocals using reference tracks, match the tone and overall sound of the vocals to the reference track. Reference tracks provide a benchmark for the sound you want to achieve in your vocals.


Also, by comparing and adjusting the tone, compression, and EQ based on the reference track, you can achieve professional sounding vocals. Before applying any effects or mixing, start by listening to the reference track and take notes on its characteristics. Then, play your own vocals and make adjustments until they match the reference track.

Related reading: Benefits Of Using Reference Tracks and Using Reference Tracks Whilst Mixing. For background, see the Wikipedia article on Audio mixing.


Moreover, keep in mind that the goal is not to copy the vocals. But to use them as a guide for achieving great sounding vocals that fit your unique style and voice. Also, with practice and experimentation, using reference tracks can be a valuable tool in improving your vocal recordings.

How To Get Great Sounding Vocals Using Reference Tracks


Credit: www.izotope.com


Selecting A Reference Track


In addition, to achieve great sounding vocals, it’s important to select a reference track that matches the desired tone and style. Listen to the reference track multiple times and analyze its overall sound, vocal performance, and effects used. In addition, use this as a guide to adjust your vocal recording and mixing process and achieve a professional sound.

Picking the right reference track is one of the most important steps when it comes to improving your vocals. For example, in simple terms, a reference track is a professional-grade song that you use as a guide for your vocal recording. Furthermore, it enables you to compare your singing to a well-mixed and well-mastered track. This helps to identify areas that need improvement.

Picking A Track In Your Genre for Vocals Using Reference Tracks

Additionally, the key to selecting a reference track is finding something that fits your vocal style and the style of your music. As a result, if you are a pop singer, your reference track should have a similar pop vibe. If you are a country artist, you should pick a country track. This helps you to understand the vocal techniques that work within your genre.

Choosing A Track With A Similar Vocal Style

In addition to selecting a track in your genre, it’s also important to find a reference track with a similar vocal style. However, if your voice is raspy, don’t choose a reference track with a clear tone. If you prefer to hold long notes, find a track where the vocalist also holds long notes. Also, this ensures that you’re comparing your vocals to a track that has a similar vocal color and style.

In Conclusion

Moreover, picking the right reference track is essential if you want to take your vocals to the next level. You need to choose a track in your genre that has a similar vocal style to yours. This will enable you to identify areas that need improvement and make the necessary corrections. Remember, your reference track should be a guide, not something to copy. Use it to inspire your creativity and help you develop your unique vocal sound.

How To Get Great Sounding Vocals Using Reference Tracks


Credit: www.izotope.com


Analyzing The Reference Track


In addition, analyzing the reference track is essential for achieving great sounding vocals. By carefully studying the vocal performance in the reference track, you can learn about the vocal techniques, register, dynamics, and effects used and incorporate them into your own vocal recordings.

Listening Critically To The Track for Vocals Using Reference Tracks

Furthermore, the first step in analyzing a reference track for vocal techniques is to listen to it critically. Don’t just let the music play in the background. Put on your headphones and give it your full attention. Listen for the different elements in the mix and try to distinguish between them. Focus on the vocals and pay attention to how they interact with the music. Make a note of the different sections of the song, such as the verses, choruses, and bridge. Notice how the producer treats the vocals in each section. Note any effects you hear, such as reverb or delay. Use all of this information to build a mental image of the track and how the vocals fit within it.

Breaking Down The Vocal Techniques Used for Vocals Using Reference Tracks

Once you have a good understanding of the reference track, it’s time to break down the vocal techniques that have been used. You can start by analyzing the different approaches the vocalist takes in different parts of the song. This might include changes in vocal delivery, tone, or intensity. You should also pay attention to the effects used on the vocals, as these can often be the key to achieving a similar sound. Note any EQ, compression, or other processing on the vocals.

Analyze how these effects affect the overall vocal sound and how they work with the rest of the mix. In addition, you may want to focus on the use of background vocals and harmonies. These can add depth and richness to the vocal performance, and can often be the difference between a good track and a great one. Analyze how these vocals have been recorded and mixed, and take note of any techniques that could be applied to your own recordings.

By following these steps and analyzing reference tracks in detail, you can gain valuable insights into vocal techniques and learn how to apply them to your own recordings. Whether you’re a new artist just starting out or an experienced producer looking to take your recordings to the next level, analyzing reference tracks is an essential part of the process.

Implementing Techniques In Your Vocals

Once you have done the hard work of selecting a relevant reference track and observing its techniques in your earlier recording sessions, the next step is to implement those techniques in your vocals. It requires you to practice and experiment with different singing techniques, apply the lessons from the reference track, and eventually find the right balance that fits your voice and style.

Experimenting With Different Singing Techniques in Vocals Using Reference Tracks

Experimenting with different singing techniques involves trying out various approaches to find out what works best for you. It can involve changing your posture, trying out different breathing techniques, or modifying your phrasing. Additionally, you can try other practices like recording yourself and listening to the result, or trying to sing in different styles to see what suits your voice best. The goal is to unlearn bad singing habits and develop better ones.

Applying The Lessons From The Reference Track

The reference track you’ve been using is vital when it comes to recording new music and vocals. It serves as a guide for your vocals, and you should apply the lessons learnt from it to every recording. Some of the lessons you can learn from the reference track include pitch control, rhythm, clarity, and smoothness of your vocals. As you record more vocals, you’ll get better at recognizing these aspects and improving them. Consistency in implementing these techniques will help you reach the full potential of your voice.

With the right approach, you can enhance the overall quality of your vocals and take your music career to new heights. Implementing techniques from reference tracks is a learning process that requires practice, patience, and persistence. The more you practice, the more you will learn and find the right balance that fits your voice and style.

How To Get Great Sounding Vocals Using Reference Tracks


Credit: www.masteringthemix.com


Recording Your Own Vocals


To get great sounding vocals when recording yourself, it’s important to use reference tracks. These can help you identify the tone, pitch, and delivery you should aim for. By listening to and practicing with reference tracks, you can improve the quality of your vocals and create professional-sounding recordings.

Getting The Right Microphone And Recording Environment

For great vocal recordings, you need a microphone that will capture every detail of your voice. A condenser microphone is the best choice for recording vocals. You should look for a cardioid or super-cardioid pattern to reduce background noise. Make sure to position the mic at the right distance from your mouth to avoid pops and hisses. In addition to the right microphone, you also need a good recording environment. A small, quiet room with minimal hard surfaces will give you the best results. You can improve the acoustics of the room by adding sound-absorbing materials like blankets or foam panels.

Tips For Stellar Vocal Performances for Vocals Using Reference Tracks

Recording great vocals requires more than just the right equipment and environment. Follow these tips for stellar vocal performances:

  • Warm-up before recording to avoid strain on your voice.
  • Stay hydrated to keep your vocal cords lubricated.
  • Practice proper breathing techniques to control your breath while singing.
  • Take breaks if you feel tired or hoarse.

Using reference tracks is also an effective way to improve your vocal performances. Listen to recordings of your favorite artists to get inspiration for your own vocal delivery. Pay attention to the timing, phrasing, and emotions in their performances and try to replicate those in your own recordings. By following these tips, you can create great sounding vocals that will stand out in any mix.

Mixing The Vocals


Achieving incredible vocal mixing can be challenging without the right reference track. Using an effective reference track will guide you in creating quality vocals, including tonal and dynamic adjustments, compression, and reverb settings, among other things.

When it comes to mixing vocals, one of the most effective ways to get great sounding vocals is by using reference tracks. Mixing vocals involves managing vocal levels, equalizing (EQ), and using compression to create both power and clarity.

Proper Vocal Levels And Eq for Vocals Using Reference Tracks

Setting proper vocal levels is essential to avoid distortion or clipping, which can ruin the vocal recording. EQ is necessary to eliminate unwanted frequencies, such as low-end rumble or harsh highs. Here are some tips to achieve proper levels and EQ:

  • Start by setting the vocal fader at 0 dB, listen to the track, and adjust the fader accordingly.
  • Eliminate any low-end rumble by rolling off the EQ at 100 Hz or lower.
  • Reduce harsh frequencies between 2-5 kHz using a wide Q setting.
  • Boost upper frequencies between 6-10 kHz to add brightness and clarity to the vocal.

Using Compression To Create Power And Clarity

Using compression can help bring out the power and clarity of the vocals. Here are some tips to use compression effectively:

  1. Start with a ratio of 2:1 with a fast attack and medium release.
  2. Use the threshold control to adjust the amount of compression being applied to the vocal track.
  3. Set the makeup gain to bring the level of the compressed signal back up.
  4. Use a multi-band compressor to compress only the specific frequency ranges that need it.

By using reference tracks and following these tips for managing vocal levels, EQ, and compression, you can achieve great sounding vocals that will help your music stand out.

Mastering Your Track for Vocals Using Reference Tracks


Learn how to master your track and get great sounding vocals using reference tracks. By using reference tracks, you can analyze and compare different aspects of your own vocal recording to those of successful songs and make necessary adjustments to achieve a professional sounding result.

The Final Steps Towards Vocal Brilliance for Vocals Using Reference Tracks

Mastering is the final step in the production process. It involves balancing levels, equalization, compression, stereo enhancement, and limiting to make the mix as loud, clear, and dynamic as possible. When mastering the vocals, you want to ensure that they are balanced with the other elements of the track. Remember, even the best vocals can sound terrible if the mix is not right.

Balancing Vocals With Other Elements Of The Track

You don’t want the vocals to be drowned out by the drums, bass, or any other instrument in the mix. At the same time, you don’t want the vocals to sound too loud and overpowering. Balancing the vocals with the rest of the track is the key to getting a professional sound. One way to do this is by using reference tracks. Reference tracks are professionally produced songs that have similar musical elements to your track. By comparing your mix to these reference tracks, you can hear how your vocals relate to the rest of the song. Here are some tips when using reference tracks to balance your vocals:

  • Choose a reference track that has a similar instrumentation and arrangement to your track
  • Listen to how the vocals sit in relation to the other elements of the mix
  • Use a spectrum analyzer to visually compare your mix to the reference track
  • Make adjustments to your mix until it sounds balanced and cohesive with the reference track

Following these steps should help you achieve great sounding vocals that complement the rest of your track. With proper mastering, your vocals will shine and take your track to the next level.


Frequently Asked Questions On How To Get Great Sounding Vocals Using Reference Tracks


Do Professionals Use Reference Tracks?


Yes, professionals use reference tracks to set a benchmark for their work, ensure consistency across devices and to get inspired by other successful tracks. It helps them to analyze the frequency balance, sound quality, dynamic range and other elements of the song.


They use reference tracks as a guide to mix and master their own tracks to make them sound industry standard.


What Makes A Good Reference Track?


A good reference track should have a similar style, tempo, and energy to the desired final product. It should showcase the desired mix and instrumentation while being recorded at a high quality. Additionally, the reference track should be from a successful artist or producer within the genre and recently released.


How Do You Get Crisp Vocals?


To achieve crisp vocals, you need to have the right microphone and recording equipment, choose the right recording space with good acoustics, position the microphone correctly, and adjust levels and EQ to reduce unwanted noise and enhance vocal clarity. Additionally, consider using pop filters, de-essers and compression to further refine the sound.


What Are Reference Vocals?


Reference vocals are recorded tracks used as a guide for a singer to follow while recording a new version of a song. These vocals can include the melody, lyrics, phrasing, and other important elements, and are used to ensure that the new recording matches the original as closely as possible.


Conclusion


Utilizing reference tracks is a powerful tool for achieving great sounding vocals in your music productions. By carefully analyzing and emulating the techniques used in professionally produced songs, you can elevate your own recordings to the next level. Remember to focus on identifying the key elements of the vocals, such as tone, dynamics, and effects, as well as understanding how they relate to the overall mix.


With some practice and experimentation, you can use reference tracks to achieve stunning vocal performances that really stand out. So why not give it a try and see the difference it can make in your music?

Categories
Archive

How To Transform A Messy Mix Into A Pristine Production

To transform a messy mix into a pristine production, start by isolating each track and assessing its levels and EQ. Then, use compression and reverb to create space and coherence in the mix.


Producing high-quality music requires more than just talent and good equipment. A professional mix is crucial to bring out the best in your tracks. That said, not all mixes come out perfect the first time around. If you find yourself with a messy-sounding production, don’t fret.


With some careful attention to detail and the right techniques, you can transform your mix into a pristine final product that will impress your listeners. We will explore some essential steps to follow to clean up a messy mix and achieve a professional sound. So, let’s get started.


Assessing The Mix Challenges


Transforming a messy mix into a pristine production is a challenging task. It requires a careful assessment of the mix while ensuring that the instruments and vocals are balanced in the mix. Using EQ, compression, and reverb can help bring clarity to the mix and make it sound professional.

Assessing The Mix Challenges Your mix may sound like a mess in your ears, but it doesn’t necessarily mean that it has to stay that way. The first step towards fixing a messy mix is to assess the challenges that come with it. Identifying the root cause of the muddiness will help you make informed decisions on how to clean it up better. In this post, we’ll explore the possible mix challenges and how to fix them. Identifying Distorted Tracks Distorted tracks can be caused by multiple factors, such as clipping, digital distortion, low-quality recordings, and so on. If you’re dealing with distorted tracks, it’s crucial to know the type of distortion you’re dealing with. For example, clipping distortion is usually caused by the recording levels hitting the maximum limit. On the other hand, digital distortion can occur during the mixing and mastering stage and is caused by over-compression or pushing the EQ levels too far. Once you’ve identified the type of distortion, you can fix it by either reducing the recording levels, using a de-clipper or repairing the damaged tracks, or by using EQ and compression to balance out the frequency levels. Finding The Right Frequencies Frequencies can be another reason for a messy mix. When too many different instruments are competing for similar frequencies, it can result in masking, phase cancellation, and a muddied mix. To address this issue, identifying the right frequencies for each instrument is vital. You can do this by using frequency analyzers, spectrum analyzers or a graphic EQ. Once you’ve identified the frequency that the instrument is adding to the mix, you can EQ to enhance it or cut it to make room for other instruments. It’s also essential to note that EQ should be used sparingly – too much of it can result in unnatural-sounding tracks. Conclusion Assessing the mix challenges is critical to transforming a messy mix into a pristine production. Identifying distorted tracks and the right frequencies for each instrument can take your mix to the next level. Remember, approach your mix with an open mind and willingness to experiment, and you’re likely to create a sound that’s pleasing to your ears.

Preparing The Mix

Mixing music is a delicate and complex process that can be overwhelming if you are a beginner. Transforming a chaotic mess into a polished and professional final product requires time, patience, and expertise. To achieve a clean sound, you need to take specific steps that will help you set the foundation for a smooth and harmonious mix. In this article, we will cover the first stage of the mixing process, which involves preparing the mix for further editing.

Track Volume Editing

Before you start editing individual tracks, you need to ensure that the volume of each track is balanced properly. Adjust the volume levels of each track so that they are playing at a similar volume. You can use the decibel meters that come with most digital audio workstations (DAWs) to help you with this task.

To avoid clipping, ensure that each track’s volume stays well below zero decibels (dB). If you have a track that is too loud or too soft, adjust the volume fader accordingly until it fits well into the mix. Keep in mind that volume levels can affect how the final mix will sound, so be mindful of the relative balance between tracks.

Track Panning

Panning is the process of placing each track in the left or right stereo field to create an immersive experience for the listener. Start by panning your key elements, such as lead vocals, drums, and bass, to the center. Once you have panned the center elements, you can pan the remaining tracks in the stereo field.

Try panning complementary instruments, such as guitars or backing vocals, in opposite directions. This will create more space in the mix and make it sound more dynamic. Remember to keep the relative volume balance between the left and right channels when you pan each track.

Track Eq Adjustments

Equalization (EQ) refers to the process of adjusting the frequency balance of each track. It involves boosting or reducing certain frequencies to make each track sound good on its own while also fitting well into the overall mix. Start by making broad EQ adjustments to each track to remove any unwanted frequencies that may be cluttering up the mix.

For example, use a high pass filter to cut out low-end rumble on non-bass instruments. After you have removed any unwanted frequencies, use more precise EQ adjustments to shape each track’s sound. You can boost the upper midrange of the vocal track to make it sound more present in the mix or reduce the high frequencies on the hi-hat drum track if it’s too harsh. Remember to make small adjustments and use your ears to guide your decisions.

By Preparing The Mix, you have set yourself up for a successful mixing experience. These important first steps will make your mix sound better faster and you can easily finish it now.

Effects Processing

When it comes to polishing up a mix and turning it into a professional-quality production, effects processing is a crucial step. By using the right effects in the right way, you can bring out the best in each element of your mix and create a cohesive, polished sound that’s ready for prime time.

Dynamic Compression

Dynamic compression is one of the most important tools in your mixing arsenal. By compressing the dynamic range of a track, you can even out the levels and make it easier to hear all the individual elements of the mix. However, compression can also be overdone, resulting in a flat, lifeless sound. To use compression effectively, start with a low ratio and threshold and adjust them gradually until you achieve the desired balance.

Reverb And Delay

Reverb and delay are two effects that can add depth, space, and dimension to your mix. Reverb simulates the sound of a space, while delay creates an echo effect. Both can be used creatively to enhance specific elements of your mix, such as adding a sense of space to a vocal or creating rhythmic interest on a percussion track. However, it’s important to use reverb and delay judiciously, as too much can result in a muddy or cluttered sound.

Automation

Automation is the process of adjusting the levels, panning, and other parameters of individual tracks over the course of a song. By automating the mix, you can create dynamics that keep the listener engaged and draw attention to important elements. For example, you might use automation to gradually bring in a guitar solo or to fade out a vocal at the end of a song. Additionally, automation can be used to fine-tune the effects on individual tracks, such as adjusting the amount of reverb or delay over time.

In conclusion, effects processing is a crucial step in transforming a messy mix into a polished, professional-quality production. By using dynamic compression, reverb and delay, and automation effectively, you can bring out the best in each element of your mix and create a cohesive, engaging sound that listeners will love.


Mastering The Final Mix

If you’re into audio production, then mastering the final mix is a crucial step that can make or break your effort. It’s the polishing stage of your audio production that brings out the best sound possible. This is where you apply the final touches to transform a messy mix into a pristine production. Two important processes in mastering the final mix are equalization and compression and loudness maximization. Let’s take a closer look at each process.

Equalization And Compression

Equalization and Compression are two of the most crucial audio plugins that you should use when you are mastering the final mix. They have a major impact on how your audio sounds and how it can be perceived by listeners.

Equalization (EQ) Compression
Equalization gives you the ability to adjust the balance between different frequencies in your mix. It helps you to balance out the sound and create clarity in your mix. Compression helps to even out the levels of your audio. It helps to bring the quiet parts of your audio up and the loud parts down. You should use compression to even out and balance the levels in your mix.

Using a combination of equalization and compression in your mastering process can make a world of difference to the finished product. Once you have used these processes, listen to your audio with fresh ears to check the level balance and clarity.

Loudness Maximization

Loudness maximization is the final stage of your mastering process. It helps your audio to stand out by making it louder and more noticeable. By applying loudness maximization, your track will be more competitive with other tracks in your genre.

When maximizing loudness, it is important not to overdo it, as this can lead to distortion. You should aim to achieve a loudness that is comparable to other tracks in your genre.

The best way to achieve good loudness maximization is by using a limiter. A limiter is a type of compressor that only reduces the level of the audio signal above a certain point. By setting the limiter threshold appropriately, you can achieve loudness without introducing distortion.

Mastering the final mix can be a daunting task, but it’s an essential one that can take your audio production to the next level. By applying equalization and compression, and using loudness maximization, you can bring your messy mix to a pristine production that is ready to be shared with the world.


Testing The Mix


Achieving a pristine production from a messy mix requires thorough testing of the mix. This involves identifying and fixing issues with individual tracks, ensuring proper panning and volume levels, and polishing the overall sound to deliver a professional-sounding final product.

Testing the mix is a crucial part of the production process that lets you discover any issues with your final product. Unless you spend time listening to your mix across various listening devices, you can’t be sure it will sound good to a broad audience. That’s why it’s important to pay attention to ‘Playback on Multiple Devices’ and ‘Listen for Clarity and Coherence’ when testing the mix. These steps can help you transform a messy mix into a pristine, professional production.

Playback On Multiple Devices

To ensure that your mix sounds good on various platforms, you need to test it on multiple playback devices. When testing the mix, listen to it on different devices, such as headphones, speakers, or car stereos. Doing so will help you notice any issues related to frequency range, stereo imaging, or overall balance. You can use the following table to keep track of your findings during testing:

Device Issue(s) Notes
Headphones Low end too muddy Boost bass frequencies to balance
Car stereo Inconsistent volume Adjust levels to ensure balanced sound

If you find any issues during the testing, it’s usually better to address them before continuing with the production process. Make sure to take notes of the issues you find and any corrective actions you take to ensure you can return to them later should you need to.

Listen For Clarity And Coherence

When testing your mix, be sure to focus on the overall clarity and coherence of the content. Pay attention especially to aspects such as vocals, background music, and effects. Ensure that each element is audible in the mix. Take the necessary time to listen to your mix several times. In between listening, give your ears a break and come back to it with fresh ears to ensure that you pick up on all details. Listen critically to the mix and identify any areas that require improvement. For instance, maybe the chorus is too soft, or the snare drum is not as pronounced as you would like. To avoid missing any issues, try not to listen to the mix too loudly or too quietly. A medium volume is usually best to hear all the details in the mix. Testing the mix is a crucial part of the overall production process. By focusing on issues such as ‘Playback on Multiple Devices’ and ‘Listen for Clarity and Coherence’, you can transform a messy mix into a pristine and professional production that sounds great to a broad audience.

How To Transform A Messy Mix Into A Pristine Production


Credit: www.masteringthemix.com


Frequently Asked Questions On How To Transform A Messy Mix Into A Pristine Production


How Do You Improve A Muddy Mix?


To improve a muddy mix, use EQ to cut frequency ranges that clash, enhance the vocal range, and add depth with reverb or delay effects. Adjust levels and panning to balance elements in the mix. A/B test with reference tracks to ensure optimal sound quality.


How Do You Get Rid Of Muddiness?


To get rid of muddiness, you need to apply EQ to the problematic area. You can cut the frequency range or adjust the levels until the mix sounds clear. Make sure to use a high-pass filter to eliminate any low-frequency sounds that don’t contribute to the mix.


Experiment with different settings until you find the perfect balance.


Why Do My Mixes Sound So Muddy?


Muddy mixes can be caused by overlapping frequencies, too many elements in a mix, or poor arrangement. You can fix it by EQing each track properly, cutting frequencies where they are not needed, addressing masking issues, and giving each element its own space in the mix.


How Do You Clean Muddy Audio?


To clean muddy audio, you can use noise reduction software like Audacity, Adobe Audition or RX 7. These programs have a built-in noise reduction tool which can eliminate noise or unwanted sound from your audio. Simply select the audio file > apply the noise reduction effect > preview and adjust settings > export the cleaned audio.


Conclusion


Getting a clean and polished production can be a time-consuming and challenging task. However, with the right approach and tools, it is achievable. By following the guidelines mentioned in this post, you can transform a messy mix into a pristine production.


Remember to take small incremental steps and try not to get overwhelmed. Keep practicing and experimenting until you achieve the results you desire. Lastly, be patient as it may take some time, but the results are worth it.

Categories
Archive

Creativity Boosting Morning Routines For Music Producers

Creativity boosting morning routines for music producers include focusing on mindfulness, setting intentions, doing stretching exercises, and starting the day with a healthy breakfast. As a music producer, starting the day with a positive mindset and energized body can set you up for a productive and creative day.


By incorporating certain morning routines into your daily schedule, you can enhance your creativity and overall well-being. Mindfulness practices such as meditation or deep breathing can help clear your mind and sharpen your focus. Intentions setting can help you stay motivated and on track with your goals.


Stretching can help improve circulation and flexibility, energizing you for your work ahead. And starting the day with a healthy breakfast can provide you with essential nutrients and energy to power through your creative process. By implementing these routines, you can become a more efficient and creative music producer.


Set The Mood For Creativity


Start your day with a creativity-boosting morning routine as a music producer. Set the mood by incorporating activities such as meditation, journaling, and listening exercises to spark inspiration and focus.

Wake Up Early And Avoid Distractions

Setting the right mood for a creatively productive morning commences with waking up early, as this gives music producers ample time to focus their energy on their craft. Avoid distractions such as checking your phone or email as soon as you wake up and instead use that time to ease into your morning routine. Strike a balance between solitude and networking, and avoid isolating yourself to the point where you miss out on valuable inspiration from other creatives.

Create A Positive Atmosphere

Creating a positive atmosphere in your studio can significantly influence your creativity. Arrange your workspace in a way that complements your workflow and gives you access to all the tools you need. Decorate your studio to evoke a sense of inspiration, meaning that you should invest in inspiring art, light fixtures, and sound equipment. You could also incorporate natural light sources such as large windows and plants that enhance the ambiance. This way, you’ll be sure to awake your senses and jump-start your creative juices.

Mindfulness Meditation

Meditation is a powerful tool that aligns your mind, body, and soul. By incorporating mindfulness practices into your morning routine, such as meditation, visualization, and deep breathing exercises, you will set your intentions for the day and cultivate the right mindset needed to succeed. Not only will you create balance and focus, but you will also improve your mental health and emotional well-being. Take about 10-15 minutes in the morning to meditate, and clear your mind with positive affirmations. This will ensure that your creativity flows seamlessly, and you work efficiently and effectively. In conclusion, setting the right mood for creativity starts with waking up early and avoiding distractions. Creating a positive atmosphere in your studio enhances inspiration, leading to improved creativity levels. Mindfulness meditation is also a crucial component of your morning routine, as it helps align your mind, body, and spirit, resulting in enhanced focus and productivity. Additionally, strive to maintain a healthy diet and exercise regularly to ensure you are in optimal physical condition. By following these morning routines, music producers can enhance their creativity, improve their workflow, and attain their goals.

Physical And Mental Preparation


Effective morning routines that boost creativity are crucial for music producers to prepare both their physical and mental state. From meditation to exercise, developing consistent habits can help inspire innovative music compositions throughout the day.

Drink Water And Do Light Exercise

Starting your day with a glass of water can help boost your creativity levels. It is essential to stay hydrated throughout the day to maintain focus and energy. Doing light exercises like stretching or yoga can also help to wake up your body and mind and get your creative juices flowing. A 10-minute exercise routine will help improve your blood circulation, which is vital for mental clarity and alertness.

Healthy Breakfast Options

Having a nutritious breakfast is crucial for starting your day off on the right foot. Breakfast foods high in protein, fiber, and healthy fats will keep you full and satisfied. Some excellent breakfast options for music producers include eggs, smoothies, oatmeal, and whole-grain bread with avocado. Avoid sugary cereals and greasy fast food, which can make you feel sluggish and drained.

Mental Warm-up Exercises

Mental warm-up exercises are essential to help music producers get in the right headspace for the day ahead. Simple breathing exercises, meditation, or visualization can help you reduce stress and anxiety while increasing your focus and creativity levels. Start by closing your eyes, taking a few deep breaths, and visualizing the music you want to create. This will help you to align your thoughts and set a clear intention for the day. In conclusion, having a morning routine that includes physical and mental preparation is crucial for music producers who want to maximize their creativity levels. By following these simple steps, you can create a healthy, positive mindset that will help you tackle any challenges that come your way. So, start your day with a glass of water, light exercise, a nutritious breakfast, and mental warm-up exercises and watch your creativity levels soar!

Music Production Exercises


To add some creativity into your mornings as a music producer, try some music production exercises. These exercises could include experimenting with different genres or rhythms, freestyling with different instruments or sounds, or collaborating with other producers. Incorporating these exercises into your morning routine can inspire new ideas and boost your creativity throughout the day.

Starting your day with productive morning routines can do wonders for a music producer’s creativity. A music producer needs to be in the right state of mind to get the ball rolling. This is where meditation, exercise, and creative exercises come in. Music production exercises can help a music producer start their day on the right note, and set the tone for the productive day ahead.

Free Writing And Brainstorming

Free writing and brainstorming can help a music producer unclog their minds, break down mental barriers, release creative blockages and generate new ideas. Start your day with a 10 minutes free write or brainstorming session. Clear your mind – jot down each and every idea, even if they don’t seem like winners. This simple exercise can yield unexpected results, and set you ahead of the pack.

Jamming Sessions

Playing music, especially with others, can instantly boost your creativity and inspire you to try something new. Set aside a 20-minute jamming session into your morning routine. This exercise not only improves your musical skills, but also helps you to break through creative blocks, and explore genre-bending opportunities.

Music Theory Practice

A music producer must have a good understanding of music theory to create a well-crafted composition. Start your day by practicing music theory fundamentals, such as major and minor scales, chord progressions, and harmony. This will help you to understand the technical aspects of music, and create a more polished and professional production.

Sound Design Exploration

Sound design is one of the fundamental aspects of music production. It helps you to create your own unique signature sound. Take the time each morning to experiment and explore with different sounds. This exercise will not only challenge you to go beyond your comfort zone but also help you to define your musical identity. To sum up, these simple morning routines will help music producers to boost their creativity and start their day off the right way. Incorporate these exercises into your daily routine, and you will notice a remarkable improvement in your musical output.

Tools And Equipment Readiness


For music producers looking to boost their creativity in the morning, having tools and equipment ready is crucial. Making sure everything is set up before starting can help eliminate distractions and ensure a smooth and productive session.

Music production is a demanding task that requires proper preparation. Starting your day with a creative mindset is quintessential, but it’s impossible to be creative with disorganized tools and equipment. Here are a few tips to organize your work tools and prepare your equipment before you start your morning routine.

Organize Your Work Tools

As a music producer, you must always keep your workstation organized to maximize productivity. It is essential to have a designated spot for each tool and keep them in the right place. Here are a few tips to keep your work tools organized.

  • Create a designated workspace for each tool.
  • Place each tool in its respective workspace after use.
  • Label drawers and cabinets to easily access the tools you need.

Check And Prepare Your Equipment

Before starting your day, it’s crucial to check your equipment and ensure that everything is in good condition. You don’t want to waste time troubleshooting equipment failure in the middle of a creative process. Here are a few things to check before you start to work.

Equipment Checklist
Computer/Laptop
  • Check for updates and install if required.
  • Run a virus scan.
Audio Interface
  • Check cables and connections.
  • Ensure drivers are updated.
Studio Monitors/Headphones
  • Check for power and connection.
  • Check for any damages or distortion.

Set Up Your Workspace

A comfortable and well-organized workspace can increase productivity and creativity. Here are a few things to consider when setting up your workspace.

  1. Choose a comfortable chair that helps you maintain good posture.
  2. Ensure proper lighting to avoid eye strain.
  3. Set your desk at the correct height to avoid strain on your arms and wrists.
  4. Remove distractions and keep only what’s necessary.

With these steps, you’re now ready to start your creative process with a clutter-free workspace and equipment that’s ready to go. Happy producing!

Engage With The Music Community

As a music producer, connecting with other professionals in the industry can help keep your creativity flowing. Engaging with the music community can offer new ideas and help you stay informed about emerging trends. Here are some ways music producers can engage with the music community:

Social Media Engagement

Social media platforms such as Instagram and Twitter offer an excellent opportunity to connect with fellow music producers and artists. By joining groups and following industry experts, you can stay informed about new initiatives, share ideas, and collaborate. Commenting and engaging with other musician’s contents can help increase your visibility and grow your network.

Collaboration Sessions

Collaborating with other artists is a great way to keep your creativity alive. Reach out to fellow music producers and artists either online or offline and schedule sessions to exchange ideas. You can share expertise, brainstorm new project ideas, and inspire each other to create better music productions. Collaborations can broaden your horizons, leading to new opportunities and success.

Attend Music Events And Workshops

Attending music events and workshops can prove beneficial for any music producer. It provides both opportunities to learn and network. Not only will you learn from the experts in your field, but you will also meet other professionals and potential collaborators. You might also discover groundbreaking trends that you can integrate into your music production process.

Engaging with the music community is a great way to fill your mind with new ideas and inspiration. It offers a chance to learn and grow, expand your knowledge, and meet other experts in your field. Through social media engagement, collaboration sessions, and attending music events and workshops, music producers can tap into new creative resources and ultimately produce better music.

Creativity Boosting Morning Routines For Music Producers


Credit: variety.com


Experimentation With New Approaches

If you are a music producer struggling with writer’s block, it’s time to shake things up with some experimentation with new approaches. Embracing a creative morning routine can help you kickstart your day with a fresh perspective and renewed energy. Here are a few ideas to consider:

Try New Instruments Or Genres

Don’t be afraid to step outside your usual style and try something different. Experimenting with new instruments or genres can help spark new ideas and inspire fresh creativity. Dedicate some time each morning to exploring new sounds and incorporating them into your workflow. This can open up a whole new world of possibilities for your music.

Push Yourself Out Of Comfort Zone

It’s easy to get stuck in a rut and rely on the same tired techniques day after day. However, stepping out of your comfort zone can help you grow as an artist and push your boundaries. Challenge yourself by trying a new software or plugin. Push yourself to achieve something you’ve never done before. You may surprise yourself with what you’re capable of achieving.

Break The Rules

Don’t be afraid to break the rules and experiment with unconventional techniques. This can help you find a unique sound and stand out from the crowd. Although it’s important to establish a strong foundation of technical knowledge, breaking rules from time to time and going against the norm can help you produce music that is truly unique and memorable.

https://www.youtube.com/watch?v=GH1ZxT4GyqY


Work And Productivity Hacks


To enhance creativity and productivity, music producers can adopt morning routines that include exercise, meditation, and goal setting. Incorporating these hacks into their daily routine can boost their creativity, energy, and overall wellbeing, resulting in more successful projects and a better work-life balance.

As a music producer, your creative peak typically happens during morning hours. Hence, it’s essential to make the best out of this time by incorporating morning routines that help boost your productivity and creativity. Below are some “Work and productivity hacks” to help you achieve this:

Set Achievable Goals

Starting your day with a clear and achievable goal helps set your focus and manage your time effectively. You can figure out what you want to accomplish for the day, week or month, keeping in mind the long-term objectives. Writing down your goals and placing them somewhere visible can help keep you motivated and accountable.

Time Management Techniques

Time management is crucial to your overall productivity. One technique is the Pomodoro technique, where you work for 25 minutes, then take a five-minute break. Utilizing reminders or timers can keep you on track to stick to specific daily tasks and deadlines.

Take Breaks To Avoid Burnout

Taking short breaks throughout the day gives your mind a chance to recharge and refocus. It allows you to come back to your work with fresh ideas. During breaks, stretching, taking a walk, or simply stepping away from your desk can help avoid burnout while keeping you energized and productive.

Power Of Delegation

Delegation is an important aspect of music production. It helps you utilize your strengths and delegate tasks that may be draining your time or keeping you from creating more music. This frees up your time to work on other tasks to improve productivity and can also provide opportunities to collaborate with other artists. Incorporating these “Work and Productivity Hacks” into your daily morning routine can help boost your productivity and creativity to produce better music.


End Your Day Creatively


Start your morning off on a creative note with these effective routines for music producers. Boost your creativity by taking a walk, journaling, setting goals, and focusing on mindset. These simple practices will help you end your day with a sense of accomplishment.

One of the best ways to boost your creativity and productivity as a music producer is to end your day on a creative note. This means that before you go to bed, you should engage in activities that allow you to tap into your creativity and keep your mind active. In this post, we’ll explore some simple yet effective ways to ensure that you end your day creatively.

Reflect On Your Progress And Achievements

Taking a few minutes to reflect on the progress you’ve made as a music producer can be an excellent way to keep yourself motivated and inspired. You can use a notebook or a simple app to record your achievements, or you can simply take some time to think about the progress you’ve made in your career. This can help you identify areas where you need to improve and also remind you of how far you’ve come.

Small Creative Activities

Doing small creative activities can be a great way to end your day on a positive note. You can try sketching, doodling, or writing a short story or poem. You don’t have to be an expert or spend hours doing these activities. Even a few minutes of creative expression can help you unwind and boost your creativity.

Rest And Recharge

It’s crucial to give your mind and body enough time to relax and recharge. If you’ve been working hard all day, it’s essential to take some time off to do something that you enjoy. This could be reading a book, watching a movie, taking a walk, or simply listening to your favorite music. Resting and recharging is essential for maintaining good mental health and keeping your creative juices flowing. In conclusion, you don’t have to spend hours engaging in creative activities to boost your creativity as a music producer. Simply taking a few minutes to reflect on your progress, engaging in small creative activities, and giving yourself time to rest and recharge can make a significant impact on your creative output. By incorporating these practices into your evening routine, you’ll set yourself up for a productive and fulfilling day ahead.

Frequently Asked Questions On Creativity Boosting Morning Routines For Music Producers


What Is The Daily Routine Of A Music Producer?


A music producer’s daily routine varies according to their priorities and work schedule. It may include reviewing demos, composing music, collaborating with artists, managing finances and schedules, mixing and mastering tracks, and overseeing marketing and distribution. They spend most of their time in the studio and work long hours to meet deadlines and deliver quality work.


How Can I Be More Creative In Music Production?


To be more creative in music production, try these tips: 1. Listen to different genres and styles of music. 2. Experiment with different instruments and software. 3. Collaborate with other musicians and producers. 4. Take breaks to avoid creative blocks.


5. Allow mistakes and imperfections, they can sometimes lead to unexpected ideas.


How Can I Be Creative In The Morning?


To be creative in the morning, try incorporating activities that stimulate your mind and inspire you, such as listening to music, journaling, or practicing mindfulness. Start your day with positive affirmations and set achievable goals. Give yourself time to wake up and avoid rushing.


Remember to stay hydrated and fuel your body with a nutritious breakfast.


How Are Music Producers So Creative?


Music producers are creative because they possess a deep passion for music and sound. They have a strong sense of musicality and are capable of bringing different musical elements together to create something unique and memorable. Producers also stay current with emerging music trends and are constantly experimenting with new sounds and techniques.


They leverage their technical skills and artistic vision to produce music that captivates listeners.


Conclusion


Being a music producer demands a lot of creativity, and it is essential to adopt a morning routine that effectively boosts this creative energy. Simple practices like rising early, meditating, exercising, and taking breaks throughout the day can make a significant impact on your creativity.


Adopt these habits to stimulate your mind, re-energize your creativity and increase productivity. Incorporating these healthy and creative morning habits into your routine is a step towards becoming a successful music producer. Let’s start today!

Categories
Archive

Making Amateur Vocals Sound Professional With Melodyne

Melodyne allows amateur vocals to sound more professional by editing pitch and timing imperfections for a more polished sound. Melodyne is the go-to software to refine and perfect vocal recordings.


The program allows the user to edit pitch and timing issues with ease to create a smoother and more polished sound. This capability has made it a game-changer in the music production world. If you are interested in learning more about how Melodyne can enhance your recordings or how to use it, keep reading.


We will discuss the various features of Melodyne and how it can take your vocal productions to the next level.


Understanding Melodyne


Melodyne is a powerful tool that can transform amateur vocals into professional-level recordings. By using its pitch correction and timing adjustment features, you can achieve a polished sound that was previously only possible with expensive studio equipment and a team of professionals.

What Is Melodyne?

Melodyne is a powerful and innovative software tool designed to help musicians and producers manipulate audio recordings. It allows users to edit pitch, timing, and rhythm in monophonic or polyphonic audio recordings, making it easier to correct off-key or off-time notes. The software can be used with a range of instruments, including vocals, guitar, drums, and piano.

Why Is Melodyne Important For Amateur Vocals?

For amateur vocalists, Melodyne can be a game-changer. It helps to correct pitch issues and timing errors, which can be especially important for beginners who are still developing their skills. In addition to correcting mistakes, the software can also be used to create new melodies and harmonies, making it an incredibly versatile tool. With Melodyne, even an amateur vocalist can achieve a professional sound. One of the key benefits of Melodyne is that it allows for very precise editing. Users can adjust individual notes, slide them up or down in pitch, and even change the length and timing of each note. This level of control is crucial for creating a polished, professional sound. Additionally, the software has a range of helpful features, including scale detection, time-stretching, and formant shifting, which can further enhance an amateur vocal performance. Using Melodyne to improve an amateur vocal performance requires some skill and understanding of the software’s capabilities. However, with a bit of practice, even beginners can achieve impressive results. Whether you’re looking to correct pitch issues, create a new melody, or simply enhance the overall sound of your recording, Melodyne is an incredibly powerful tool that can help you take your amateur vocals to the next level.

Making Amateur Vocals Sound Professional With Melodyne


Credit: mastering.com


Preparing Your Vocals For Melodyne

Melodyne is a powerful tool that can transform amateur vocals and make them sound professional. However, before you start using Melodyne, you need to prepare your vocals properly. In this section, we will discuss the different steps involved in preparing your vocals for Melodyne.

Recording Techniques

The first step in preparing your vocals for Melodyne is getting a good recording. This involves using the right recording techniques to capture a clear and crisp vocal. Some of the key recording techniques include:

  • Using a good quality microphone
  • Recording in a quiet environment
  • Using a pop filter to reduce plosives
  • Adjusting the gain and volume levels to avoid distortion

Cleaning Up The Audio

Once you have recorded your vocals, it’s time to clean up the audio. This involves removing any unwanted noise or artifacts that may have been picked up during recording. Some of the key techniques for cleaning up the audio include:

  • Using a noise reduction plugin to remove background noise
  • Using a de-esser to reduce sibilance
  • Fixing any reverb or echo issues
  • Removing any clicks or pops in the audio

Organization And Labeling

Before you start using Melodyne, it’s important to ensure that your vocals are properly organized and labeled. This involves naming each track and labeling each section of the vocal according to its key and pitch. Some of the key benefits of proper organization and labeling include:

  • Ensuring that you can easily find and work with specific sections of the vocal
  • Reducing the risk of errors or mistakes during the editing process
  • Making it easier to collaborate with other producers or musicians on the project

By following these steps, you can ensure that your vocals are ready for Melodyne and can be transformed into professional-quality recordings. With Melodyne, you can easily fix pitch issues, adjust timing, and perform a range of other corrective tasks to create a polished and professional-sounding vocal track.

Pitch Correction In Melodyne


Melodyne’s pitch correction feature can transform amateur vocals into professional-sounding recordings. By adjusting the pitch and timing of individual notes, Melodyne can enhance the performance and bring it to a higher level of quality.

Pitch correction with Melodyne is a game-changer for the music industry. With its advanced and intuitive features, the software allows amateur vocals to sound professional. Among the many features, pitch correction stands out as the most crucial. In this article, we will explore how to identify problem areas in vocals, how to use the pitch correction tool, and how to naturalize pitch corrections with Melodyne.

Identifying Problem Areas

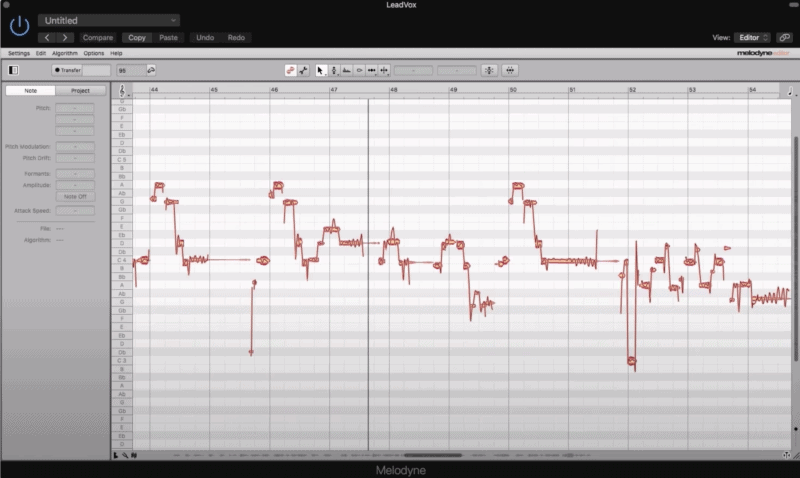
Identifying the trouble spots in your vocal recording is the first step towards using Melodyne’s pitch correction tools. Melodyne provides a visual representation of notes as blobs, color-coded to indicate pitch accuracy. Blue blobs represent notes that are flat, and red blobs represent notes that are sharp. With this configurable scale, you can quickly identify which notes need adjustments and the extent of those adjustments.

Using The Pitch Correction Tools

Melodyne’s pitch correction tools offer users multiple options to choose from, depending on their preferences. The most common ones are Note and Pitch Macro Correction. In Note Correction, you can choose to adjust the timing, pitch separation, or length of each note in isolation. In Pitch Macro Correction, you can apply adjustments to multiple notes simultaneously, speeding up the correction process significantly. Additionally, Melodyne allows you to move the pitch center of a note if needed.

Naturalizing Pitch Corrections

Once you’ve used the pitch correction tools of Melodyne, the final step is to naturalize the pitch corrections. This enables the pitch variations to remain in line with the natural prosody and melody of the song. To achieve this, Melodyne provides a few options, such as adjusting the pitch modulation speed, pitch drift, and formant correction. With these tools, even significant vocal edits will sound flawless and natural, without any audible artifacts. In conclusion, Melodyne is a crucial tool for every vocal recording. By identifying problem areas, using Melodyne’s pitch correction tools, and ensuring natural pitch correction, your amateur vocals will sound professional and polished.

Making Amateur Vocals Sound Professional With Melodyne


Credit: joeysturgistones.com


Timing Correction In Melodyne

Melodyne is a powerful tool for making amateur vocals sound professional. One of its most useful features is timing correction, enabling you to adjust the timing of individual notes and phrases to create a smoother, more polished performance. In this blog post, we’ll explore how to identify timing issues, adjust timing using Melodyne, and avoid over-correcting to prevent your vocals from sounding robotic.

Identifying Timing Issues

The first step in timing correction is identifying the notes and phrases that need adjustment. In Melodyne, this is easy to do thanks to the intuitive graphical interface. Simply load your vocal track into Melodyne, and you’ll see a visual representation of the notes and their timing. Look for areas where notes are noticeably out of time or where the rhythm feels awkward.

Adjusting Timing

Once you’ve identified the timing issues in your vocal track, the next step is to make adjustments using Melodyne. The software allows you to drag individual notes and phrases forwards or backwards in time, adjust the length of notes, and even divide or merge them to create a smoother rhythm. Use the built-in quantize function to snap notes to the nearest beat or adjust the swing to create a more laid-back feel. With Melodyne, the possibilities are endless.

Avoiding Robotic Corrections

While Melodyne makes it easy to correct timing issues in your vocal track, it’s important to avoid over-correcting and creating an unnatural, robotic sound. One way to do this is to adjust the timing of notes in small increments, rather than trying to fix everything at once. Use your ears as a guide and listen to how the timing adjustments affect the overall feel and flow of the performance. Remember, the goal is to create a polished, professional sound while retaining the natural character of the vocals.

In conclusion, timing correction in Melodyne is a game-changer for amateur vocal recordings. By identifying timing issues, adjusting timing with precision, and avoiding over-correction, you can transform amateur vocals into a polished, professional performance. Give it a try and see the difference for yourself!


Advanced Techniques With Melodyne


With the advanced techniques offered by Melodyne, it’s now possible to transform amateur vocals into professional-sounding tracks. Whether it’s pitch correction, timing or melodic alterations, Melodyne provides all the tools needed to create natural-sounding, polished vocals for your music productions.

Melodyne is a powerful tool for editing and correcting pitch and timing of vocals. However, it also offers advanced techniques for manipulating formants, creating harmonies, and fixing problematic vibrato.

Manipulating Formants

Formants are the resonant frequencies that give vocals their unique timbre. By manipulating them, you can subtly change the character of a vocal performance, making it sound more nasal or breathy, for example. In Melodyne, you can adjust formants by selecting the note or notes you want to modify and clicking “Show Formant” in the Note Inspector. From there, you can drag the formant curve up or down to adjust the emphasis of different harmonics.

Creating Harmonies

Melodyne’s harmony function allows you to create multiple vocal harmonies from a single recorded part. This can save a lot of time in the studio, as you don’t have to record multiple takes of the same part. To create harmonies in Melodyne, select the note or notes you want to harmonize and click “Create Harmony” from the toolbar. From there, you can choose the type of harmony you want (e.g. third, fifth, octave) and adjust the timing, pitch, and stereo placement of each harmony voice.

Fixing Problematic Vibrato

Vibrato can add emotional depth to a vocal performance, but excessive or erratic vibrato can be distracting. Using Melodyne, you can fix problematic vibrato without losing the natural feel of the performance. To fix vibrato in Melodyne, select the note or notes with problematic vibrato and click “Show Vibrato” in the Note Inspector. From there, you can adjust the speed, depth, and shape of the vibrato, or even remove it altogether. Overall, Melodyne’s advanced techniques offer a range of creative possibilities for making amateur vocals sound professional. By manipulating formants, creating harmonies, and fixing vibrato, you can transform a mediocre performance into a polished masterpiece.


Mixing Vocals After Melodyne


By using Melodyne, amateur vocals can be transformed to professional recordings. After editing the pitch and timing of the vocals using Melodyne, effective vocal mixing techniques such as compression, EQ, and reverb can turn the track into a polished and high-quality professional sound.

Making amateur vocals sound great is now relatively easy with the help of Melodyne, but what comes next? Mixing vocals after Melodyne is an essential step while producing music, and it can make a considerable difference in the final sound. In this section, we will explore three key steps in mixing vocals post-Melodyne. These steps are balancing the mix, adding effects, and compensating for any artifacts from Melodyne.

Balancing The Mix

After completing Melodyne, the first crucial step in mixing is to balance the mix. The main goal here is to ensure that all components of your track blend seamlessly to create a cohesive, high-quality mix. Balancing the mix requires adjusting the volume levels of each track in the vocal chain, including the lead vocal, backing vocals, and harmonies. Additionally, panning each track to its suitable location can contribute to a well-balanced mix.

Adding Effects

The next step in mixing vocals after Melodyne is to add effects to enhance the overall sound. Effects such as compression, reverb, delay, and equalization can improve the quality of the vocals. Applying compression enhances the vocals by smoothing out the dynamic range, and using reverb creates a sense of space. Delay and equalization are used to add depth, warmth and remove unwanted frequencies, respectively.

Compensating For Any Artifacts From Melodyne

Lastly, after Melodyne, there may be some artifacts such as weird harmonics, unnatural transitions and more. Addressing these issues is fundamental in mixing vocals. One approach is to use equalizers to target specific frequencies that sound unnatural or that have too much presence. Another approach is to use a de-esser, which is a tool that helps reduce sibilance and other similar vocal issues. Additionally, adding slight volume dips to the most affected areas can help to restore the natural feel of the vocals. In conclusion, mixing vocals after Melodyne is an essential process because it ensures that the final product is high-quality and coherent. Balancing the mix, adding effects, and compensating for any artifacts from Melodyne are the main steps in this process. By following these steps, you can produce great-sounding vocals without needing to hire a professional sound engineer.

Frequently Asked Questions On Making Amateur Vocals Sound Professional With Melodyne


Is Melodyne Good For Vocals?


Melodyne is an excellent tool for improving vocal recordings. Its pitch and timing editing features enable you to correct imperfections in your vocal takes. You can also manipulate the tone color and formants to enhance your vocal performances. Overall, Melodyne is a great tool for improving vocal production.


How Do You Make Raw Vocals Sound Professional?


To make raw vocals sound professional, ensure good microphone placement, use pop filters and good quality equipment, record in a soundproofed room, and apply EQ and compression during mixing. Practice good vocal techniques, such as breathing and enunciation, and consider hiring a professional mixing and mastering engineer for the final touch.


How Do You Mix And Master Vocals Like A Pro?


To mix and master vocals like a pro, follow these steps: 1. Use good recording equipment and techniques. 2. Balance the levels of the vocal tracks with the instrumental tracks. 3. Use EQ to remove unwanted frequencies and enhance desired ones.


4. Apply compression to even out the vocal volume and add sustain. 5. Use reverb and delay to create a sense of space and depth.


How Do You Get Crisp Vocals?


To get crisp vocals, you need to start with proper recording setup and microphone placement. Use a pop filter and make sure the vocalist is close enough to the microphone. EQ and compression are crucial for achieving clarity and emphasis in the vocals.


Remove any unwanted background noise and add reverb or other effects as necessary. Practice and skillful editing play an important role too.


Conclusion


With Melodyne, amateur vocals can be transformed into professional sounding performances through accurate pitch correction, time alignment, and modulation. The software’s intuitive interface and advanced features make it an essential tool for any vocal recording setup. By taking the time to fine-tune vocal tracks with Melodyne, you can elevate your production to a new level of quality.


Don’t settle for amateur sounding vocals when Melodyne can help you achieve the professional sound you’re looking for.

Categories
Archive

How To Think Like A Musician When You’Re Making Music

To think like a musician when making music, focus on melody, rhythm, and harmony. Incorporate musical theory and experiment with different sounds and instruments.


Making music requires creativity, intuition, and a willingness to experiment with different sounds and styles. To truly think like a musician, you need to embrace the principles of melody, rhythm, and harmony to guide your creative process. By incorporating basic musical theory into your creative approach, you can begin to explore different sounds, tempos, and timbres, experimenting with new instruments and techniques to create a unique musical signature.


From exploring the possibilities of polyrhythms to playing with dissonance and harmony, being a musician requires development of a unique artistic voice and style that allows you to express yourself through sound and rhythm. In the following paragraphs, we’ll explore different ways of thinking like a musician, and the principles that guide creativity in the world of music.


Focus On Emotion And Feeling


Thinking like a musician when creating music involves focusing on the emotion and feeling that you want to convey through your music. You must pay attention to how the notes and rhythms make you feel and aim to communicate that same feeling to your audience through your composition.

Using Music To Express Emotions

Music is a powerful tool for conveying emotions. As a musician, you have the ability to express a wide range of emotions through your music, including joy, sadness, anger, and love. By focusing on the emotion you want to convey, you can create music that resonates with your audience on a deeper level. To effectively express emotions through music, you must understand the emotions you want to express. Take time to connect with your own emotions and think about how you can translate those feelings into musical phrases and melodies. Experiment with different rhythms, chord progressions, and instrumentation to capture the mood you are trying to convey.

Connecting With Your Audience Emotionally

When creating music, it’s important to consider your audience. By understanding their emotions and experiences, you can create music that resonates with them on a deeper level. To connect with your audience emotionally, focus on creating music that is relatable, honest, and authentic. To ensure your music connects with your audience emotionally, consider the context in which they will be listening to it. Think about the emotions they may be feeling at that time and create music that speaks to those emotions. Consider the instrumentation, tempo, and overall feel of the music to create a mood that resonates with your audience. In conclusion, as a musician, your ability to express emotions through music is one of your most valuable assets. By focusing on the emotions you want to convey and connecting with your audience on an emotional level, you can create music that speaks to the hearts of your listeners. Use your music as a powerful tool for expressing emotions and connecting with your audience in a meaningful way.

How To Think Like A Musician When You'Re Making Music


Credit: tomhess.net


Experiment With Sounds And Arrangements


Experimenting with sounds and arrangements is a vital component of creating music. As a musician, you need to think outside the box and try different things to bring your ideas to life. By being open to exploration, you can craft unique and compelling pieces that engage your audience.

Don’t Be Afraid To Try New Things

When it comes to making music, it’s important to be open to trying new things. As a musician, you don’t want to stick to the same sounds and arrangements over and over again. This is why experimenting with different styles is essential.

Playing Around With Different Sounds And Instruments

One way to experiment with sounds and arrangements is by playing around with different instruments. Music is all about creating unique sounds, and playing around with different instruments will help you do that. You can also try mixing different genres, such as adding electronic beats to a classical piece.

Using Samples And Loops

Another way to experiment with sounds and arrangements is by using samples and loops. You can find these online or create your own. Samples and loops can help you create unique rhythms and melodies that you wouldn’t have thought of otherwise.

Building Layers

Building layers is another way to create interesting sounds and arrangements. You can start with a simple melody or beat and then add layers of sounds on top. This will help create depth and texture in your music.

Mixing And Mastering

Finally, after experimenting with different sounds and arrangements, it’s important to mix and master your music. Mixing is the process of combining all of your tracks into a single multi-track file. Mastering is the process of finalizing the mix by adjusting levels, EQ, and compression. In conclusion, as a musician, experimentation is key. Don’t be afraid to try new things, play around with different sounds and arrangements, use samples and loops, build layers, and mix and master your work. By doing this, you’ll be on your way to creating unique and interesting pieces of music.

Embrace Improvisation

Embracing improvisation is one of the top tips that musicians follow when making music. Creativity flows freely when musicians let go of their inhibitions and experiment with various musical ideas. Here’s how you can think like a musician when making music.

Allowing Your Creativity To Flow Freely

One of the best ways to let your creativity flow freely is to remove any preconceived notions about what your music should sound like. Don’t put too much pressure on yourself to create a masterpiece. Instead, focus on experimenting with different ideas. Play around with various chords, melodies, and beats until you find something that resonates with you.

When you’re making music, it’s essential to create a judgment-free zone, where you can let your imagination roam free. Listen to your inner voice, and don’t be afraid to take risks. Remember, even the most famous musicians made mistakes during their improvisations.

Building On Musical Ideas Spontaneously

One of the most exciting parts of improvisation is building on musical ideas spontaneously. It requires a unique skill set that musicians have honed over years of practice. When making music, ensure that you experiment with new ideas to create fresh sounds. You don’t want to repeat yourself and create a repetitive tune that sounds dull.

Being able to improvise spontaneously means that you can recognize a good idea instantly and build on it in real-time. You need to have an intuitive understanding of what sounds good and what doesn’t. This skill comes with practice, so don’t shy away from trying new things and experimenting with different musical elements.

Embracing improvisation is all about letting go of any preconceived notions of what you think your music should sound like and allowing space for creativity to flow. Building on your musical ideas spontaneously opens up the possibility of creating something truly unique. Remember, don’t be afraid of making mistakes. The beauty of improvisation is that it allows you to create something magical from the unexpected.

Master The Art Of Collaboration

If you want to create music that truly resonates with people beyond just a catchy tune, then you must learn how to think like a musician. One key aspect of being a musician is the ability to work collaboratively with others. Collaboration is not only essential in producing a great music track, but it also helps you grow as an artist.

Playing With Other Musicians

When it comes to working with other musicians, you must be respectful of each other’s skills and ideas. You cannot forcefully impose your ideas without considering what others can contribute to the composition.

A great way to start is by jamming with other musicians. Whether it’s in-person or virtually, having a session with other musicians is not only a great way to create music, but it also helps you develop a deeper understanding of your own skills and craft.

Listening Actively To Others’ Ideas And Feedback

Collaboration is not just about playing your instrument; it’s also about listening actively to others’ ideas and feedback. If you’re not open to others and don’t actively listen to their ideas, you will miss out on some great opportunities to improve your music.

Make sure that feedback is not taken personally. Instead, view it as constructive criticism that can help you grow as an artist. Consider the ideas of others and incorporate those that you feel will add value to your composition.

Ensuring Each Component Is In Harmony With The Others

When working with other musicians, it’s not enough to simply include all the great ideas into one composition. You must ensure that each component is in harmony with the others.

So, take time to rearrange the composition and make necessary modifications to ensure that everything is in sync. Remember that in music, the whole is always greater than the sum of its parts.

Mastering the art of collaboration takes time and practice, but it’s an essential skill for any musician who wants to be successful. Keep an open mind towards others’ ideas, listen actively, and ensure that each component of your composition is in harmony with the others.

Conclusion

Creating great music is a team sport. You cannot do it alone. So, collaborate, listen actively, and ensure that each component of your composition is in harmony with the others. These are the keys to thinking like a musician and creating music that resonates with people.


Incorporate Inspiration From Other Artists


Drawing inspiration from other artists is an important part of thinking like a musician when making music. Being open to various genres and styles, studying their works and adapting them to your own can lead to unique and creative compositions that showcase your individuality as an artist.

Learning From The Greats

As a musician, it’s important to draw inspiration from a variety of sources. One of the best ways to improve your own music is by studying the work of the greats. Whether you’re into classical, rock, or jazz, there are always legendary artists that paved the way for the music we know and love today. Take some time to listen to their music, study their techniques, and learn about their creative process. By doing so, you can gain valuable insights into what makes music truly great.

Adapting Others’ Techniques And Styles Into Your Music

Once you’ve familiarized yourself with the work of other artists, the next step is to adapt their techniques and styles into your own music. This doesn’t mean copying them outright, but rather incorporating elements of their sound and approach into your own work. For example, if you’re a guitarist, you might study the playing styles of Jimi Hendrix, Eddie Van Halen, and other guitar legends. By incorporating some of their techniques into your own playing, you can develop a unique sound that draws on their influence while still being your own.

Conclusion

By incorporating inspiration from other artists, you can elevate your music to new heights. Whether you’re learning from the greats or adapting others’ techniques and styles, there are always ways to improve your craft. So the next time you’re working on a new song or album, take some time to explore the work of other artists and see how you can incorporate their influence into your own music. With a little creativity and a lot of hard work, you can develop a sound that’s truly your own.


Tell A Story With Your Music


Creating music is not just about notes and chords; it’s about telling a story. As a musician, you must think beyond the technicalities and let your emotions shape the music. By incorporating your personality and experiences, you can write a song that resonates with your audience and conveys your message.

As a musician, creating a narrative through your compositions is an essential skill that can set your music apart and make it more engaging for your audience. Music has the power to transport people to different places, evoke emotions, and even tell stories without words. To make the most out of this power, it’s important to think like a storyteller. Here’s how you can use your music to tell a story that captivates your listeners:

Creating A Narrative Through Your Compositions

Every good story has a beginning, a middle, and an end. Similarly, your music should have a structure that takes the listener on a journey. This structure can be achieved through elements like melody, harmony, tempo, and dynamics. By using these elements strategically, you can create a musical narrative that moves from one point to another and tells a story.

Using Music To Convey A Message Or Theme

In addition to a narrative structure, you can use your music to convey a message or theme. This can be achieved through the use of lyrics, but it can also be achieved through the music itself. For example, you can use certain chord progressions or instrument combinations to evoke a specific emotion or mood. Similarly, using sounds or effects that are specific to a certain genre can help to communicate a particular message or idea.

Creating A Cohesive Album Or Performance

If you’re creating an album or planning a live performance, it’s important to think about how the music fits together as a whole. Each song can tell its own story, but it should also contribute to the overarching narrative of the album or performance. This requires careful consideration of elements like track sequencing, transitions, and song tempos. By thinking about the bigger picture, you can create a cohesive and engaging musical experience for your audience. In conclusion, telling a story with your music can make it more engaging and memorable for your listeners. By considering the narrative structure, message or theme, and overall cohesion of your music, you can create an experience that takes your audience on a journey they won’t forget.

Refine Your Technical Skills

If you want to create music that not only sounds great but also strikes a chord with your audience, it’s essential to think like a musician. While you don’t necessarily have to be a professional musician, understanding the basics of music theory and mastering your instrument or software can make all the difference. In this post, we’ll explore some tips to help you refine your technical skills and create music that truly resonates with your listeners.

Mastering Your Instrument Or Software

Whether you’re playing a physical instrument or using software to create music, mastering your equipment is essential. This means taking the time to learn the ins and outs of your instrument or software, practicing consistently, and challenging yourself to improve your skills.

Investing time in understanding the technical aspects of your instrument or software can help you achieve a greater level of control over the sounds you produce. Once you have a solid understanding of how your equipment works, you can experiment with different techniques, playing styles, and effects to create your unique sound.

Investing Time In Developing Your Technique

Developing your technique is another critical aspect of refining your technical skills. Technique refers to the mechanics of playing your instrument, such as finger placement, hand positioning, and breathing techniques. Excelling in technique requires practice, repetition, and a deep understanding of the fundamentals of music theory.

Scheduling time to practice each day can help you improve your technique faster. Set goals for your practice sessions and track your progress over time. You’ll be surprised how quickly you can improve your skills and develop your unique style.

Conclusion

Refining your technical skills takes time and dedication, but the results are well worth it. By mastering your instrument or software and investing time in developing your technique, you can create music that stands out from the crowd. Remember to approach your music-making process with the mindset of a musician and always strive to improve your skills.

Practice, Practice, Practice

When it comes to making music, it’s not just about having raw talent or a creative spark. Like any other craft, it requires practice, practice, practice. This means dedicating time, effort, and patience to honing your skills and polishing your sound. Here are some tips on how to think like a musician and incorporate this crucial element into your creative process.

Making Time To Hone Your Skills

One of the biggest challenges of practicing music is finding the time to do it consistently. In our busy lives, it’s easy to prioritize other activities and responsibilities. However, if you want to take your music to the next level, you need to make it a priority. Consider setting aside a specific time each day or week for practicing. This could be as little as 15 minutes or an hour, depending on your schedule. The key is to make it a regular habit so that it becomes ingrained into your routine.

Sticking To A Consistent Practice Routine

Another important aspect of practicing music is consistency. It’s not enough to practice sporadically or when you feel inspired. You need to commit to a routine and stick to it, even on days when you don’t feel motivated or inspired. This means putting in the effort even when you don’t see immediate results. By building up your skills over time, you’ll start to see progress and improvements in your sound.

Here are some additional tips for developing a consistent practice routine:

  • Set specific goals and targets for each practice session.
  • Mix up your routine to keep things interesting and prevent burnout.
  • Use tools and resources such as music theory books, online tutorials, or metronomes to help you stay on track.

Ultimately, practicing music requires discipline, focus, and resilience. By adopting a musician’s mindset and making practice a regular part of your creative process, you can take your music to new heights.

How To Think Like A Musician When You'Re Making Music


Credit: www.masteringthemix.com


Frequently Asked Questions Of How To Think Like A Musician When You’re Making Music


How Can I Be Good At Making Music?


To be good at making music, practice consistently, learn from successful musicians, broaden your musical knowledge, and be open to constructive criticism. Additionally, explore different styles and experiment with different instruments, sounds, and techniques. Remember to stay patient, persistent, and dedicated to honing your craft.


How Do You Build Yourself As A Musician?


To build yourself as a musician, you need to focus on your craft, network with other musicians, perform live, create an online presence, and get exposure. Improve your skills by practicing regularly and taking lessons. Attend concerts and music festivals to meet other musicians, and participate in jam sessions.


Create a website or social media accounts to showcase your music, and consider releasing your music on streaming platforms. Finally, make sure you’re getting gigs and performing as much as possible to build your reputation as a musician.


How Do Musicians Learn Music Theory?


Musicians learn music theory by taking classes or studying from materials like books and online tutorials. Many also learn by playing different instruments and experimenting with compositions. Some may also learn from other musicians or mentors who have experience in music theory.


Continuous practice is key to mastering music theory.


How Do You Get Heard As A Musician?


To get heard as a musician, you need to: 1. Create quality music 2. Promote yourself through social media 3. Build a fan base by performing live 4. Collaborate with other musicians 5. Network with industry professionals.


Conclusion


Music is an incredibly personal and emotional artform, which requires musicians to access a deeper layer of creative thinking. The ability to think like a musician is an incredibly valuable asset for producers and composers alike who strive to create authentic and unique sounds.


By adopting a musician’s mindset, we can approach our creations with greater creative confidence and certainty, and ultimately, create music that truly captures the essence of ourselves as artists. By constantly experimenting, reflecting, and exploring new possibilities, we can unlock a richness of creative potential that lies deep within us.


So, start thinking like a musician and watch your artistry soar to new heights!

Categories
Archive

What is the Difference between Oscillator And Synthesizer

An oscillator generates waveforms, while a synthesizer creates sounds from waveforms. Oscillators produce continuous signals of different shapes, frequencies, and amplitudes, whereas synthesizers can produce and modify different sounds based on an input waveform.


Oscillators and synthesizers are two essential components in electronic music production. They enable musicians and producers to create unique sounds, providing a diverse range of sounds required in various genres of electronic music. Understanding the difference between the two components is essential in creating electronic music and can help in designing and selecting the right equipment.


This article explores the differences between oscillators and synthesizers, providing an in-depth analysis of each component’s functionalities, purposes, and applications in electronic music production. Suppose you’re a music producer, enthusiast or curious about electronic music. In that case, you will find this article educational and informative.

What is the Difference between Oscillator And Synthesizer


Credit: support.apple.com


What Is An Oscillator?


An oscillator is an electronic device that generates a periodic signal. A synthesizer, on the other hand, is a musical instrument that produces sound by generating and combining different waveforms. The main difference between the two is that an oscillator is a basic electronic component used in various devices, while a synthesizer is a musical instrument specifically designed for music production purposes.

An oscillator is an electronic circuit that produces a repetitive signal without any external input. In other words, it generates a periodic signal on its own, usually a sine wave or a square wave. Oscillators are used in various electronic devices, including radios, televisions, and computers and are a fundamental building block of many electronic circuits.

Definition Of An Oscillator

An oscillator is an electronic circuit that produces a continuous output signal with a constant frequency and amplitude without any external input signal. In simpler terms, it is a device that vibrates or fluctuates at a specific frequency, producing an output signal that can be amplified and used for various purposes.

Types Of Oscillators

There are different types of oscillator circuits available, each having its own set of characteristics, and can be broadly classified as follows:

  • Harmonic Oscillator
  • Relaxation Oscillator
  • Crystal Oscillator
  • Tunable Oscillator

Harmonic and Relaxation oscillators generate periodic signals, while the crystal oscillator uses a quartz crystal resonator to generate a precise frequency. A tunable oscillator allows the frequency to be altered during operation.

Applications Of Oscillators

Oscillators are widely used in various electronic equipment and devices, including:

  • Radios and televisions
  • Computers and mobile devices
  • Clocks and watches
  • GPS systems
  • Radars and communication systems

Oscillators are also used in scientific experiments, such as in the measurement of time and frequency, and in the production of musical tones in electronic keyboards and synthesizers. Overall, oscillators play a crucial role in the electronic industry, and their precise and continuous signals are vital for the functioning of many electronic devices.

What is the Difference between Oscillator And Synthesizer


Credit: www.sweetwater.com


What Is A Synthesizer?

What is a Synthesizer?

A synthesizer is an electronic musical instrument that generates audio signals. It can mimic almost any sound to create new sounds by combining two or more frequencies. A synthesizer can be used to create a variety of sounds, including drums, bass, piano, and guitar. Synthesizers originally emerged in the 1960s as a way to create electronic music with greater complexity and variety.

Definition Of A Synthesizer

A synthesizer is an electronic musical instrument that generates audio signals. It produces sound by converting electronic signals into audio waves. These signals are generated using various methods, such as voltage-controlled oscillators or digital audio processing. The different components of a synthesizer work in tandem to create unique sounds that are distinct from traditional acoustic instruments.

Types Of Synthesizers

There are many types of synthesizers available that use different methods to produce sound. Some of the most popular types include:

  • Analog Synthesizer
  • FM Synthesizer
  • Modular Synthesizer
  • Sampling Synthesizer

Each type of synthesizer has its own set of advantages and disadvantages depending on the intended use and individual preferences. For example, an analog synthesizer is often favored by musicians who prefer a warm, organic sound, while a digital or sampling synthesizer is better suited for those who require a wider range of sounds and effects.

Applications Of Synthesizers

Synthesizers are widely used in music production, live performance, and sound design. They are particularly popular in electronic and dance music genres, where they are used to create complex, layered sounds that cannot be achieved with traditional instruments. Synthesizers are also used in film and television production, as well as in video game sound design. With the advancements in technology and software, musical compositions created using synthesizers are constantly evolving.


Differences Between Oscillators And Synthesizers


Oscillators and synthesizers are both commonly used in music production, but they serve different purposes. Oscillators generate a single waveform, while synthesizers use oscillators to create complex sounds by manipulating waveforms and adding effects. This results in a wider range of sound possibilities with synthesizers.

Differences between Oscillators and Synthesizers Basic functions of oscillators and synthesizers Oscillators and synthesizers are both electronic instruments used to generate soundwaves. Oscillators produce a basic waveform, while synthesizers combine multiple waveforms to create a more complex sound. Oscillators are often used in simple electronic devices such as alarm clocks, while synthesizers are more commonly found in professional or advanced musical instruments. Design and architecture of oscillators and synthesizers The design and architecture of oscillators and synthesizers are different. Oscillators may be simple or complex, while synthesizers must have a microprocessor and electronic components to generate multiple waveforms. Oscillators typically consist of a small electronic circuit that generates a waveform, while synthesizers have many additional components, such as an amplifier, filter, and envelope generator. Waveforms and frequency control The waveforms generated by oscillators are generally limited to simple ones such as sine waves, square waves, and sawtooth waves. On the other hand, synthesizers have the ability to produce a wider range of waveforms, including pulse waves, triangle waves, and sample-based waveforms. Oscillators have simple frequency control, while synthesizers have more advanced control over variables such as pitch, modulation, and filter settings. Output options of oscillators and synthesizers Oscillators typically have only a single output option, which is an audio signal that can be sent to a speaker or amplifier. Synthesizers, on the other hand, have multiple output options, including MIDI, USB, and recording capabilities. This added flexibility allows synthesizers to be used in a wider range of musical applications. In conclusion, oscillators and synthesizers may seem similar as they generate soundwaves, but their functions, architectures, waveforms, and output options differ significantly. While oscillators are better suited for simple electronic devices, synthesizers are better equipped for professional music production and advanced sound manipulation. Understanding the differences between these two electronic instruments can help you make an informed decision when choosing the right device for your specific application.

What is the Difference between Oscillator And Synthesizer


Credit: m.youtube.com


Frequently Asked Questions On What Is The Difference Between Oscillator And Synthesizer


What Is The Difference Between Oscillators And Synths?


Oscillators generate waveforms, while synths use oscillators to create and modify different sounds. Oscillators create basic wave shapes, while synths can use filters, effects, and envelopes to produce unique sounds.


What Are The Different Types Of Oscillators In Synthesizers?


Synthesizers have different types of oscillators that generate sound waves – the primary sound source. The most common types are analog, digital, and wavetable oscillators. Analog produces smooth and warm sounds while digital offers precise tuning and stability. Wavetable combines different waveforms and has a diverse range of sounds.


What Does An Oscillator Do?


An oscillator produces an electronic signal of a specific frequency. It is an electronic circuit that generates a repetitive waveform without an input signal. The output generated by an oscillator can be used for a variety of purposes, including timekeeping, radio wave emission, and electronic music.


What Do Oscillators Do In Music?


Oscillators in music generate electronic waveforms that help create sound. They produce a repeating signal at a constant frequency that can be manipulated to create different sounds, such as those produced by synthesizers. These signals can be used to create melodies, harmonies, or sound effects.


Conclusion


Overall, the difference between an oscillator and a synthesizer is quite significant. While both produce sound, an oscillator generates a waveform that can be manipulated through various parameters, while a synthesizer uses oscillators and other sound sources to create complex sounds through an intricate processing chain.


Understanding these differences is essential for selecting the right equipment and creating the desired sonic results. With this knowledge, sound designers and musicians can make informed choices about their equipment and produce dynamic, engaging music.

Categories
Archive

Creating Great Effects For Djing With Multiband Splitting

Multiband splitting is a great technique for creating effects during DJing. It allows for precise control over different frequency ranges, making it easier to EQ and add effects to specific parts of the mix.


DJing is more than just playing music – it’s about creating an experience for your audience. One way to enhance that experience is by using effects to add excitement, contrast, and texture to your mixes. Multiband splitting is a technique that can help you achieve this.


By dividing your audio signal into different frequency bands, you can process each band independently, allowing for precise control over EQ and effects. This can be particularly useful for adding impact to drops, creating build-ups, or emphasizing vocals or drums. We’ll explore some tips and tricks for using multiband splitting to create great effects in your DJ sets.


What Is Multiband Splitting?


Multiband splitting is a DJ effect that separates audio signals into different frequency bands to manipulate them individually. This technique provides more control over the sound and allows DJs to create unique and dynamic mixes. With multiband splitting, DJs can adjust the bass, midrange, and treble frequencies separately, creating great effects for their performances.

Definition Of Multiband Splitting

Multiband splitting is a technique used in DJing to enhance the overall sound quality of the music being played. Specifically, it involves splitting the audio signal into different frequency ranges or bands, each of which can be processed individually to achieve a desired effect. This allows DJs to apply different effects to different parts of the audio spectrum, resulting in a more dynamic and nuanced sound.

How Multiband Splitting Works

At its core, multiband splitting works by using a device or software to separate the audio signal into different frequency ranges. This is typically done using a series of bandpass filters, each of which only allows a specific frequency range to pass through. Once each band has been isolated, it can be processed independently using various effects and techniques. For example, a DJ may apply a delay effect to the mid-range frequencies in a track, while simultaneously applying a reverb effect to the high-end frequencies. This allows them to create a more complex and interesting sound that integrates seamlessly with the rest of the music. Some of the most common effects used in multiband splitting include compression, distortion, EQ, and filtering. DJs can experiment with different combinations of effects and frequency ranges to achieve the desired results, and many modern DJ controllers and software packages include built-in tools for multiband splitting. Overall, multiband splitting is a powerful technique that can help DJs take their performances to the next level. Whether you are a beginner or an experienced professional, it is definitely worth exploring this technique and experimenting with different effects and frequencies to find your own unique sound.


Why Multiband Splitting Is Important For Djing

DJing is a skill that requires more than just having a great taste in music and smooth transitions. It requires an understanding of sound engineering and the ability to manipulate sound to create the effects that make a performance truly exceptional. One technique that every DJ should have in their arsenal is multiband splitting. Multiband splitting is a method of separating an audio signal into different frequency bands, allowing for greater control over the specific elements of the sound. In this post, we’ll explore the many benefits of multiband splitting for DJing, including:

Improving Sound Quality

When you’re playing in a club or at a live event, the sound quality is essential. Multiband splitting allows you to target specific frequencies that may be causing interference or muddiness in the sound. By isolating these frequencies, you can adjust them independently to create a cleaner and more defined sound. This technique also allows for greater control over the dynamics of the track, allowing you to shape the sound in real-time to match the energy in the room.

Enhancing Performance

One of the most significant benefits of multiband splitting is the ability to enhance your performance. By isolating specific frequencies, you can create a range of different effects, such as filters, delays, and reverb. These effects can be applied to only specific elements of the track, such as the vocals or the bassline, creating a unique sonic landscape that adds depth and dimension to your performance.

Increasing Creativity

Multiband splitting is a technique that allows for endless creativity. With the ability to manipulate specific frequencies, you can experiment with different effects and create your unique sound. This technique is especially useful for DJs who produce their music as it allows for greater control over the individual elements of the tracks. By experimenting with different frequency combinations, you can create entirely new sounds and textures that will set you apart from other DJs.

Overall, multiband splitting is a crucial technique for any DJ looking to take their performances to the next level. Whether you’re looking to improve sound quality, enhance your performance, or increase your creativity, multiband splitting provides an avenue for greater control and a more exceptional experience for your audience.


Using Multiband Splitting In Djing


Multiband splitting is a game changer for DJs looking to create unique and dynamic effects. With the ability to isolate and manipulate different frequencies, this technique allows for endless possibilities in shaping the sound of a track. From enhancing the bassline to adding texture to the high end, multiband splitting is an essential tool for any DJ looking to elevate their performance.

Splitting audio into different frequency bands is essential for producing high-quality audio. DJs can make their music sound more professional by using Multiband Splitting techniques. Using these techniques, DJs can split audio frequencies into different bands and apply effects to these bands separately. This gives DJs more control over their music and enables them to create better effects.

Choosing The Right Multiband Splitting Plugin

Choosing the right plugin for Multiband Splitting can be a difficult task for DJs. The market is flooded with various plugins, making it hard to choose the right one. To choose the right plugin, DJs should consider the following factors:

  • The quality and clarity of sound
  • The ease of use and installation
  • The compatibility with their DJ software
  • The available features and customization options

Setting Up Multiband Splitting For Djing

After selecting the right Multiband Splitting plugin, the next step is to set it up for DJing. DJs should follow these steps to set up Multiband Splitting:

  1. Create a new channel for each frequency band.
  2. Insert the Multiband Splitting plugin into each channel.
  3. Select the frequency range for each channel.
  4. Apply the desired effects to each channel.
  5. Adjust the levels of each channel to achieve a balanced sound.

Tips For Using Multiband Splitting In Djing

Multiband Splitting can significantly enhance the DJing experience by providing more control over the sound. To get the most out of Multiband Splitting in DJing, DJs should keep the following tips in mind:

  • Focus on one or two effect parameters at a time.
  • Use Multiband Splitting to remove unwanted noise and enhance the overall sound quality.
  • Experiment with different frequency ranges and effects combinations to find the perfect sound.
  • Use automation to create dynamic effects.
  • Use Multiband Splitting to add density, depth, and energy to the music.

Multiband Splitting is a powerful technique that can take DJing to the next level. By using the right plugin and following the correct setup and tips, DJs can create great effects and produce high-quality music.

Different Effects That Can Be Achieved With Multiband Splitting


Multiband splitting is an excellent technique for creating unique and impressive effects for DJing. With the use of multiband splitting, different effects can be achieved, including enhancing individual frequency ranges, isolating specific sounds, and creating more spacious and dynamic sounds.


The possibilities are endless, and it’s up to the DJ’s creativity to explore the full potential of multiband splitting.

Different Effects That Can Be Achieved With Multiband Splitting Multiband splitting is a powerful technique used in DJing, allowing you to shape your sound by separating different frequencies and adding or subtracting effects as needed. With this technique, you can create a vast array of effects, transforming your mixes into something truly unique. Here are some different effects you can achieve with multiband splitting:

Sub-bass Amplification

Sub-bass frequencies are those that lie below around 60 Hz, and they have a unique power that can define your sound. By using multiband splitting, you can isolate these frequencies and boost them to create a more prominent sub-bass presence in your mix. This technique is perfect for genres like dubstep and trap, where a heavy sub-bass presence is essential.

Vocal Isolation

One of the most challenging things about mixing tracks with vocals is making sure the vocals cut through the mix without overpowering everything else. Using multiband splitting, you can isolate the vocal frequencies (usually around 2 kHz to 5 kHz) and process them separately, making them more prominent in the mix. This technique is great for remixing tracks or creating mashups, allowing you to use the vocal track from one song while mixing it with the instrumental track from another.

Mid-range Sculpting

The mid-range frequencies (usually around 500 Hz to 2 kHz) are the most crucial part of the frequency spectrum, as they contain the body and warmth of the sound. Using multiband splitting, you can shape these frequencies to create unique effects. For example, you can boost the mid-range frequencies on a guitar track to get a more prominent sound, or you can cut the mid-range frequencies on a vocal track to make it sound thinner and more distant.

High-end Sparkle

High-end frequencies (usually above 5 kHz) are responsible for the clarity and sparkle of a sound. By using multiband splitting, you can isolate these frequencies and add effects like reverb, delay or chorus to create a shimmering, ethereal sound. This technique is perfect for creating atmospheric tracks or for adding a touch of magic to your mix. In conclusion, multiband splitting is an essential technique that every DJ should have in their arsenal. By isolating different frequencies and processing them separately, you can create unique and exciting effects that will make your mixes stand out from the crowd. So next time you’re working on a mix, don’t forget to experiment with multiband splitting to take your sound to the next level.

Examples Of Artists Using Multiband Splitting In Their Dj Sets


Artists such as Carl Cox and Deadmau5 have used multiband splitting in their DJ sets to create unique and powerful effects. By splitting the audio into different frequency ranges, DJs can manipulate each band separately, resulting in a dynamic, layered sound that stands out from the crowd.

Examples of Artists Using Multiband Splitting in Their DJ Sets One of the most impressive tools for DJs in today’s world is multiband splitting. DJs use multiband splitting to accentuate specific frequencies in their music, creating unique effects that can wow audiences and leave them wanting more. Multiband splitting allows you to zero in on specific frequencies in a piece of music, and then modify those frequencies, either by increasing or decreasing their volume or applying effects specific to that frequency range. Below we have provided examples of artists using multiband splitting in their DJ sets, and how they take this technique to the next level.

Artist 1

One of the DJs who is well-known for using multiband splitting in his sets is Artist 1. He uses multiband splitting to apply different effects to distinctive frequency ranges, creating an impressive, layered effect. Artist 1 uses filters and delay effects to work on the low end of the spectrum (around 20 Hz to 200 Hz) to give it more depth and delay, while adding effects like reverb and distortion to the mid-range frequencies (200 Hz to 2 kHz) to make the music sound bigger. This approach creates distinct and powerful frequencies that leave the audience wanting more.

Artist 2

Another artist who has mastered multiband splitting is Artist 2. He takes the use of this technique to the next level, by using it to isolate the vocals of his tracks and apply different effects to them. Artist 2 employs multiband splitting to split the vocals of his tracks from the rest of the music, and then applies different effects, such as volume and pitch shifting, to create layers and textures. With the use of multiband splitting, he creates elements of a live performance and takes audiences on a unique sonic journey.

Artist 3

Finally, Artist 3 uses multiband splitting to separate and manipulate elements within his music, rather than just the whole tracks. He uses multiband splitting to separate different instruments and sounds within a track and modify them separately. This allows him to work with each element in the music in isolation, and create unique effects that are layered and add depth to his sets. In conclusion, multiband splitting is an impressive tool that allows DJs to add dynamic and exciting elements to their sets. Artists 1, 2, and 3 are just a few of the DJs who have mastered this technique and taken their performances to a new level.

Creating Great Effects For Djing With Multiband Splitting


Credit: www.ebay.com


Creating Great Effects For Djing With Multiband Splitting


Credit: www.sweetwater.com


Frequently Asked Questions Of Creating Great Effects For Djing With Multiband Splitting


What Is Multiband Splitting And How Does It Work?


Multiband splitting is a technique used in DJing to divide the audio frequencies into different bands. This technique isolates and enhances certain aspects of the audio without affecting the rest of the song. It works by splitting the frequencies into multiple bands and using different effects on each band.


This allows for more focused and intricate mixing.


What Are The Advantages Of Using Multiband Splitting?


Using multiband splitting gives DJs greater control over the audio they are mixing. It allows them to isolate and manipulate specific aspects of the song without affecting the overall sound quality. Multiband splitting also allows DJs to create unique and diverse effects that can add new dimensions to their mixes.


What Are Some Common Effects That Can Be Achieved With Multiband Splitting?


There are many effects that can be achieved with multiband splitting, such as adding a phaser to only the high end of a track, or a flanger to only the mids. DJs can also use multiband splitting to enhance the low end of a song with a bass boost or distortion.


These effects can create a more dynamic and polished mix.


Do I Need Special Equipment To Use Multiband Splitting?


No, most modern DJ software has built-in multiband splitting capabilities. However, some professional-grade mixers and controllers may offer more precise and nuanced control over the effect, allowing for greater customization.


Conclusion


Overall, multiband splitting is an incredibly effective tool for DJs who want to enhance their performances and provide a truly unforgettable experience for their audiences. By using this technique, DJs can create dynamic and engaging soundscapes that keep people dancing all night long.


However, it is important to approach multiband splitting with care and to experiment with different settings and parameters to find the best sound for each individual track. With practice, this technique can transform your DJing and make you stand out from the crowd.

Categories
Archive

What Is Analog Warmth Introduction To Harmonic Distortion

Analog warmth refers to the pleasant, natural sound produced by analog equipment, while harmonic distortion is the intentional introduction of subtle distortion to audio signals to enhance their character and warmth. These techniques are commonly used in audio production and are sought after by many enthusiasts who prefer the warmer, richer sounds produced by analog technology.


The use of harmonic distortion can also help to overcome the often sterile and digital-sounding audio produced by modern equipment, giving recordings a more natural, organic feel. We will explore the concept of analog warmth and harmonic distortion, discussing how they are achieved, what effects they have on sound quality, and how they are commonly used in audio production.

What Is Analog Warmth Introduction To Harmonic Distortion


Credit: vintagemaker.net


What Is Analog Warmth?


Analog warmth refers to the pleasing sound qualities produced by older analog audio equipment. This type of sound is characterized by a subtle distortion known as harmonic distortion, which adds richness and fullness to the sound.

Analog warmth is a term frequently used in music production but what does it actually mean? If you are one of those who are curious to learn about it, then you have come to the right place! In this article, we will discuss the definition, explanation, and examples of analog warmth. Let’s dive into it, shall we?

Definition And Explanation Of Analog Warmth

In simple terms, analog warmth refers to the pleasing sound quality produced by analog audio equipment. Analog equipment, unlike digital, adds a slight distortion to the audio signal that can be perceived as warm, rich, and full-bodied. The distortion is caused due to various factors such as harmonics, noise, and other imperfections in the circuitry of the analog equipment. This distortion creates a pleasant sound quality that is often favored by music producers and audiophiles for its unique character and warmth.

Examples Of Analog Warmth In Music Production

Analog warmth can be found in various genres of music from classic rock to modern pop. This pleasing sound quality can be achieved through the use of analog equipment such as vintage tube amplifiers, reel-to-reel tape machines, and analog mixing consoles. Here are some examples of how analog warmth can be heard in music production:

  • The slight distortion in the guitar solo of Led Zeppelin’s “Stairway to Heaven”
  • The full-bodied sound of the kick drum in Michael Jackson’s “Billie Jean”
  • The tape hiss and warmth of the vocals in The Beatles’ “Come Together”

In conclusion, analog warmth is a unique sound quality that can be achieved through the use of analog equipment. This pleasing distortion adds character and richness to the audio signal and is often favored by music producers and audiophiles.


Introduction To Harmonic Distortion


Harmonic distortion is an audio effect that gives analog warmth to music. It occurs when additional frequencies are introduced into the sound, creating a warmer, smoother tone. Harmonic distortion is often used in music production to add character and depth to recordings.

Harmonic distortion is an effect that is highly desired by music producers, especially when it comes to mixing and mastering audio tracks. In simple words, it’s an audio effect that occurs when the music signal passes through an amplifier or sound processor, and the resulting audio output contains harmonics that are not found in the original signal. This effect, when done correctly, can add warmth and character to the music, which is commonly referred to as ‘analog warmth’. This article will explore the types of harmonic distortion, examples of harmonic distortion in music production and an explanation of harmonic distortion.

Explanation Of Harmonic Distortion

Harmonic distortion happens when a non-linear device, such as an amplifier or processor, is applied in an audio signal chain. It occurs because the device amplifies or modifies the input signal disproportionately.The amount of harmonic distortion increases when the input signal’s amplitude strengthens, resulting in the distortion of the original signal. The resulting signal contains harmonics that were not present in the original signal. These harmonics can be odd or even and are multiples of the fundamental frequencies present in the original signal.

Types Of Harmonic Distortion

There are several types of harmonic distortion that audio engineers commonly use:

Type of Harmonic Distortion Description
Odd Order Harmonics Harmonics that are presented in odd multiples of the fundamental frequencies.
Even Order Harmonics Harmonics that are presented in even multiples of the fundamental frequencies.
Total Harmonic Distortion (THD) The total measure of harmonic distortion that includes both odd and even harmonics of the original signal.

Examples Of Harmonic Distortion In Music Production

Harmonic distortion is extensively used in music production to add character and warmth to the music. The following are some examples of harmonic distortion applications in music production:

  • Overdriving guitar amps to create desirable harmonics, widely found in rock music.
  • Distorting vocal on a chorus to add a bit of grit needed to cut through the mix.
  • Artificially introducing distortion in synthesizer patches to add richness and movement to the sound.

In conclusion, harmonic distortion is the unique sound produced by nonlinear devices that contain harmonics that are not present in the original signal. This effect is highly desirable in music production, as it adds a unique warmth and character to the music. Distortion should be used correctly and judiciously to achieve the desired effect, as the excessive use can lead to harsh results.


Frequently Asked Questions Of What Is Analog Warmth Introduction To Harmonic Distortion


What Is Analogue Warmth?


Analogue warmth refers to the unique and natural sound that is created when audio is processed or recorded using analogue equipment instead of digital. This is due to the subtle distortions and imperfections in the analogue signal that can add depth and character to the sound.


It is especially preferred by audio professionals in music production to achieve a more authentic and warmer sound.


What Is Analogue Distortion?


Analogue distortion is a type of sound distortion that occurs in analogue audio signals. It can create warm, gritty, or fuzzy effects in audio recordings, but can also produce unwanted noise and distortion. This is different from digital distortion which occurs in digital audio signals.


What Is Analog Sound In Music?


Analog sound in music refers to the sounds that were recorded or produced using non-digital methods. It involves capturing sound waves directly onto physical media, such as vinyl records, cassette tapes, or reel-to-reel tapes. Analog sound tends to have a warmer, richer, and more natural sound compared to digital recordings.


What Level Of Thd Is Audible?


The level of Total Harmonic Distortion (THD) that is audible varies depending on the application. Generally, THD below 1% is perceived as clean and distortion-free in audio systems. However, sensitive listeners can detect THD levels as low as 0. 1%.


The higher the THD value, the more audible the distortion will be.


Conclusion


Analog warmth and harmonic distortion have become buzzwords in the music industry, and for good reason. These concepts can significantly impact the overall sound quality of your recordings. By understanding how they work and utilizing them in your production process, you can achieve a more natural, warm, and organic sound that listeners will love.


Incorporating analog warmth and harmonic distortion into your music production is not just a trend, it’s becoming a necessity for artists looking to stand out in the digital age.


Categories
Archive

Mastering Tip What Are Inter Sample Peaks Why They Matter

Inter-sample peaks are brief spikes in audio that occur when converting audio from digital to analog. They can cause distortion in audio playback and must be managed carefully.


Mastering audio is an essential aspect of music production. By refining and enhancing the sound quality of audio recordings, a mastering engineer can create a more polished and professional final product. However, one of the challenges of mastering is managing inter-sample peaks.


These brief spikes in audio occur when converting digital audio to analog, causing distortion in playback. We will explore what inter-sample peaks are, why they matter, and how to prevent them from ruining your audio.


Inter Sample Peaks: What Are They?


Inter sample peaks occur when the peak of a digital audio waveform goes above 0dBFS. This can lead to distortion and affect the overall sound quality. Understanding inter sample peaks can improve the mastering process and result in a cleaner sound.

Definition Of Inter Sample Peaks

Inter Sample Peaks (ISPs) refer to the peak values that exceed the maximum threshold of a digital audio signal during the conversion process. In simpler terms, ISPs are the brief spikes in amplitude that occur when analog audio signals are converted to digital signals. ISPs occur cyclically and can cause distortion in audio playback as well as damage to amplifiers and speakers.

Causes Of Inter Sample Peaks

There are various causes of ISPs which include, but are not limited to:

  • The presence of transient peaks in the audio signal
  • Inadequate headroom during mixing and mastering
  • Improper use of digital signal processing (DSP) tools
  • Bit-depth and sample rate conversion

These causes all lead to issues of digital audio clipping which can be minimized by employing proper gain staging, utilizing high-quality DSP plugins, and carefully monitoring the digital signal levels.

The Effects Of Inter Sample Peaks

ISPs can have a detrimental effect on your audio signals, leading to reduced sound quality and, in some cases, permanent damage to your audio equipment. ISP can cause a reduction in dynamic range and can result in unwanted distortion that affects the clarity and volume of your audio. Furthermore, the effects of ISP show up most when the track is subjected to MP3 or AAC compression, leading to a poor listening experience for your audience. Therefore, it is important to understand and implement strategies to avoid ISPs to achieve optimum audio quality.

Mastering Tip What Are Inter Sample Peaks Why They Matter


Credit: hometheaterhifi.com


Why Do Inter Sample Peaks Matter?


Inter sample peaks (ISP) refer to the distortion that occurs when converting an analog signal to digital audio. ISPs matter because they can cause audio clipping and reduce the overall quality of the audio. Mastering engineers need to be aware of ISPs to avoid these issues and produce high-quality audio.

Inter-sample peaks are a common issue that can affect the quality of audio recordings. They occur when the level of a digital signal exceeds 0 dBFS, the maximum level that can be accurately represented in a digital audio system. Because of this, inter-sample peaks can lead to distortion and affect the overall quality of a recording.

Implications For Audio Quality

Inter-sample peaks can result in distortion, which can significantly reduce the audio quality. This issue can be particularly noticeable when the sound is played back on a digital audio player or system that has a different implementation of the digital-to-analog converter (DAC) than the one used during mixing and mastering. For audiophiles, this can be an unwelcome experience as the sound quality falls significantly with digital distortion.

Impact On Audio Processing

Inter-sample peaks can also make it difficult to apply certain types of audio processing, such as compression and limiting, during mixing and mastering. These processes can increase the overall level of the audio signal, potentially pushing it beyond 0 dBFS and causing inter-sample peaks. Alternatively, reducing signal levels can mean pushing up noise level, leading to another problem of increases in the noise level.

Why Mixing And Mastering Engineers Need To Be Aware Of Them

Given the potential impact on audio quality and processing, it’s essential for mixing and mastering engineers to be aware of inter-sample peaks. They need to ensure that the audio signal remains below 0 dBFS and the inter-sample peaks are in check by applying the proper signal level reduction or limiting when required. They have to make sure that no other processing tools are causing issues which can lead to digital distortion. In conclusion, inter-sample peaks are an issue that can significantly reduce the quality of digital audio. Mixing and mastering engineers need to be aware of this so they can take the necessary steps to minimize their occurrence. Staying vigilant about the correct techniques, tools, and configurations will lead to a high audio quality mix and master output.

How To Deal With Inter Sample Peaks


Inter sample peaks are sudden voltage spikes that occur at the interval between digital audio samples. These peaks can result in distortion or clipping, causing significant degradation in the quality of audio. As a mastering tip, it is vital to address inter-sample peaks to ensure a high-quality output.

Inter sample peaks are a common issue in audio recording and mastering that can cause distortion and clipping. Fortunately, there are various ways to deal with these peaks, from identifying them during recording and mixing to fixing them during mastering. Here are some tips on how to deal with inter sample peaks effectively.

Identifying Inter Sample Peaks

The first step in dealing with inter sample peaks is to identify them. Inter sample peaks occur when the waveform of an audio signal goes above 0dBFS (full scale) between samples, causing digital distortion. One way to identify inter sample peaks is to use a specialized metering plugin that can detect these peaks, such as the Waves L3-LL UltraMaximizer.

Preventing Inter Sample Peaks During Recording And Mixing

Preventing inter sample peaks is the best way to deal with them. When recording, it’s essential to keep levels below 0dBFS to avoid clipping and distortion. It’s also crucial to leave enough headroom to allow for mastering later on. During mixing, it’s advisable to use a limiter on the master bus to keep levels in check and avoid inter sample peaks.

Fixing Inter Sample Peaks During Mastering

If inter sample peaks are still present during mastering, there are several ways to fix them. One approach is to use a brickwall limiter, which controls the peaks by reducing the volume of the entire mix. Another technique is to use a clipper, which clips the waveform to avoid inter sample peaks. It’s worth noting that brickwall limiting and clipping can affect the dynamics and overall sound of the mix, so it’s essential to use these tools sparingly and carefully. In conclusion, inter sample peaks are a common issue in audio recording and mastering, but they can be dealt with effectively by identifying them, preventing them during recording and mixing, and fixing them during mastering. By following these tips, you can ensure that your audio recordings and mastered tracks sound clear, crisp, and distortion-free.

Tools And Techniques For Avoiding Inter Sample Peaks


Inter sample peaks are brief peaks in the audio signal that can cause distortion, affecting the quality of the final mix or master. To avoid these peaks, tools such as limiting and clipping can be used, while techniques such as gain staging and volume automation can help prevent them from occurring in the first place.

If you are in the audio production industry, you would have come across inter sample peaks, and you should know how to avoid them. Inter sample peaks happen when the peak amplitude exceeds the maximum limit resulting in distorted audio. However, you can avoid inter sample peaks using the following tools and techniques:

Limiters

Limiters are essential in preventing inter sample peaks. They work by analyzing the input audio signal and restricting the output signal from exceeding the maximum threshold level. Therefore, the limiter acts as a safeguard against distortion and helps you maintain a consistent sound level. It is advisable to use it at the end of your signal chain.

Clippers

Clippers work by preventing the audio signal from going over the maximum level limit. Once the signal level is higher than the limit, a clipper cuts off the waveform’s top portion, which results in transient distortion. They are efficient in preventing inter sample peaks when the input signal is unpredictable and fluctuates beyond the safe range.

Brickwall Filters

Brickwall filters are another way to avoid inter sample peaks. They are designed to remove peaks beyond a specific threshold level while maintaining the audio’s original sound and quality. The filter acts as a gatekeeper, letting desired frequency pass while blocking unwanted signals. It is advisable to use the brickwall filter before other processing tools to avoid overload and distortion. In conclusion, inter sample peaks could negatively impact the sound quality of your audio. Therefore, it is essential to avoid them at all costs. The tools and techniques mentioned above are effective ways of preventing inter sample peaks. By applying these techniques, you can improve the sound quality of your audio and keep it distortion-free.

Best Practices For Mastering Audio With Inter Sample Peaks


Mastering audio with inter-sample peaks is essential for achieving a clean and polished sound. Inter-sample peaks occur when the sample rate is exceeded, causing distortion and unwanted artifacts. By understanding these peaks and utilizing best practices, audio engineers can create high-quality recordings that sound great on any device.

Mastering is an important aspect of music production that can make or break the final sound quality of a track. Many mastering engineers have encountered inter-sample peaks- a phenomenon that can cause distortion in the final mix. Inter-sample peaks occur when digital audio devices produce a signal that exceeds the maximum amplitude that can be resolved by a digital-to-analog converter.

Balancing Attenuation And Preservation Of Dynamics

The key to managing inter-sample peaks in mastering is to strike a balance between attenuation and the preservation of dynamics. Attenuation involves lowering the peak volume of the audio signal while preserving dynamics refers to retaining the natural dynamics of the track. A delicate balance must be achieved to prevent clipping or distortion from inter-sample peaks.

Measuring Inter Sample Peaks Using Lufs

Measuring inter-sample peaks can help determine if they are present in your track. Loudness Units Full Scale (LUFS) is a measure of perceived loudness that considers the entire length of the track. The human ear cannot detect inter-sample peaks that last for a few samples, so using LUFS is a better way to measure the perceived loudness of the track.

Fine-tuning Mastering Techniques To Address Inter Sample Peaks

To fine-tune mastering techniques to address inter-sample peaks, use tools like limiters and compressors. The limiter can raise the quiet parts of the mix while maintaining the loudness, preventing inter-sample peaks. Compressors can be used to control the dynamic range of the mix, making it easier to attenuate the parts that contain inter-sample peaks. In conclusion, mastering audio with inter-sample peaks can be challenging, but with the right tools and techniques, it can be remedied. By balancing attenuation and preservation of dynamics, measuring inter-sample peaks using LUFS, and fine-tuning mastering techniques; any inter-sample peaks in your track can be prevented.

Mastering Tip What Are Inter Sample Peaks Why They Matter


Credit: www.productionmusiclive.com


Mastering Tip What Are Inter Sample Peaks Why They Matter


Credit: www.productionmusiclive.com


Frequently Asked Questions On Mastering Tip What Are Inter Sample Peaks Why They Matter


How Do You Avoid Intersample Peaks?


Avoid intersample peaks by keeping your levels below 0 dBFS, using a high-quality limiter, and avoiding excessive EQ boosts. Use dithering when converting to lower-resolution formats and avoid extreme compression.


What Is The Best True Peak Level For Mastering?


The best true peak level for mastering typically lies between -1 dBTP and -0. 5 dBTP. However, it largely depends on the genre of music and the preferences of the producer or mastering engineer. It’s important to avoid going above 0 dBTP to prevent distortion and preserve the quality of the audio.


What Is The Difference Between Peak And True Peak?


Peak is the highest signal level reached in an audio recording, while true peak is the highest waveform peak that results from the conversion from digital to analog. True peak values are crucial for ensuring that a recording will not experience any clipping or distortion when played back on different devices.


What Is Isp On A Limiter?


ISP on a limiter refers to the Internet Service Provider (ISP) limiting the bandwidth of a user’s internet connection. The ISP can slow down the speed of the internet connection for users who have exceeded their data limit or during peak hours to ensure equal sharing of network resources.


Conclusion


Understanding inter-sample peaks is essential to produce high-quality audio. Mastering engineers need to be aware of the potential issues that may arise from them and how to avoid them. Proper gain staging and limiting techniques can significantly reduce the risk of inter-sample peaks.


By keeping inter-sample peaks in check, you can create audio that meets industry standards and sounds great on any playback system. So, pay attention to inter-sample peaks, and take your mastering skills to the next level.


Categories
Archive

Turning Your 8 Bar Loop Idea Into A Fully Arranged Track

To turn your 8 bar loop idea into a fully arranged track, start by organizing your elements and creating a basic structure. From there, experiment with different variations and transitions until you have a complete composition.


To take your track to the next level, consider adding additional layers and effects to enhance the overall sound. Remember to keep the focus on your main idea while also allowing room for creativity and evolution. When developing a new track, it can be challenging to transform a simple 8 bar loop into a full arrangement.

Related reading: How To Separate A Drum Loop and Loopcloud Vs Splice : The Ultimate Showdown. For background, see the Wikipedia article on Loop.


However, with a little planning and experimentation, you can take your initial idea and turn it into a complete composition that showcases your musical vision. Also, we will explore some tips and tricks for turning your loop idea into a fully arranged track. Also, whether you’re a seasoned producer or just starting out, these techniques can help you develop your ideas and create dynamic and engaging music. Let’s get started!

Turning Your 8 Bar Loop Idea Into A Fully Arranged Track


Credit: m.youtube.com


Breaking Down The Loop

Moreover, Loop-based music production has made great strides in the industry over the years. It’s one of the easiest and most natural ways of making music, especially for beginners. However, it’s essential to take note that a loop is incomplete until it’s fully arranged to form a track.

Identifying The Key Elements for 8 Bar Loop

The first thing to do when breaking down a loop is to identify the key elements. In addition, it’s essential to determine the crucial parts of the loop and their roles in the track. For instance, a kick and bass line are the fundamental elements in a dance track. Conversely, the melody line is critical for a pop track.

Key Elements Genre
Kick, Bass Dance
Melody Pop
Guitar, Drums, Vocals Rock

Understanding What Makes A Loop Work

In addition, after identifying the key elements, the next step is to understand what makes the loop work. For example, it’s essential to be aware of what makes a loop interesting and compelling to the listeners. It could be the rhythm, melody, or even dynamics. Each element of the loop plays a role in the overall sound of the track.

  • Furthermore, rhythm: The rhythm provides the backbone of the track. It’s the foundation upon which everything else is built. A catchy rhythm can make a loop interesting to listen to.
  • Additionally, melody: A melody is the catchy part of a track that people hum along to. It’s the part that stays in the listener’s mind even after the song is over.
  • Also, dynamics: Dynamics refer to how loud or soft certain parts of the track are. It’s essential to create variation in dynamics to keep the listener engaged.

Moreover, by understanding what makes a loop work and identifying the key elements, it’s easy to arrange a loop into a fully realized track. As a result, keep in mind that each genre requires a specific approach to looping and arranging. Experimentation and practice are key in mastering the art of turning a loop into a full track.

Turning Your 8 Bar Loop Idea Into A Fully Arranged Track


Credit: www.renegadeproducer.com


Finding Inspiration For The Arrangement for 8 Bar Loop


In addition, to turn your 8 bar loop idea into a fully arranged track, finding inspiration for the arrangement is crucial. However, try listening to similar genres and analyzing their structure, or experiment with different chord progressions and melodies. Explore different arrangement techniques and take breaks to refresh your creativity.

Furthermore, once you have a solid 8 bar loop for your track, the next step is to turn it into a fully arranged song. Arranging music can be a challenging task, but with enough practice, you can turn your loop into a full-fledged track. Then, one of the most crucial aspects of the arrangement process is finding inspiration. In this post, we’ll explore a few ways to find inspiration for your arrangement.

Listening To Other Tracks for 8 Bar Loop

Additionally, one of the best ways to find inspiration for your arrangement is by listening to other tracks in your genre. This doesn’t mean that you should copy someone else’s music. But by analyzing what makes their track successful and noting the arrangement used, you can pick up ideas on how to structure your song. Listening to other tracks is also a good way to discover new sounds, patterns, and rhythms that can help you break out of your creative rut.

Experimenting With Different Structures for 8 Bar Loop

Don’t feel like you have to stick to a traditional song structure when arranging your track. Also, experiment with different structures to create a unique and dynamic sound. A typical song might have an intro, verse, chorus, verse, chorus, bridge, and outro. But you should feel free to explore different patterns that suit your music style and your creative vision. Here are some examples of different structures you could experiment with:

  • Moreover, Intro, verse, pre-chorus, chorus, verse, pre-chorus, chorus, bridge, chorus, outro
  • Verse, chorus, verse, chorus, breakdown, chorus, outro
  • Intro, verse, chorus, verse, chorus, breakdown, chorus, outro

Wrapping Up for 8 Bar Loop

Finding inspiration for the arrangement process is essential in turning your 8 bar loop into a fully arranged track. Listening to other tracks and experimenting with different structures are just a few ways to get started. Remember that arranging music takes practice. So don’t be afraid to make mistakes and keep trying until you find what works best for your music style. With time, patience, and effort, you can turn your initial loop into a full-fledged track that you can be proud of.


Creating A Basic Arrangement for 8 Bar Loop


To turn your 8 bar loop idea into a fully arranged track, creating a basic arrangement is essential. Start with the introduction, followed by the verse, chorus, bridge, and finally, the outro. Varying the section lengths and adding transitions will bring your track to life.

Creating a Basic Arrangement Turning your 8 bar loop idea into a fully arranged track can be a daunting task, especially if you don’t know where to start. However, by creating a basic arrangement, you can break down the process into manageable sections and focus on building your song structure. In this article, we will walk you through the steps of creating a basic arrangement, from starting with the intro to creating a breakdown and outro.

Starting with the Intro The intro is the first section of your track and sets the mood and tone for the rest of the song. To create a compelling intro, you can start with a simple drum beat or chords that gradually build up to the first verse. Begin by introducing the primary elements of your track and avoid adding too many layers, keeping it simple and clean. Building the First and Second Verses After the intro, it’s time to introduce the first and second verses.

Practical Tips

To create a variance between your verses, consider using different chords, melodies, or drum patterns. Remember to keep the listener engaged by introducing new elements throughout the verses. But keep the basics of your track the same. Adding the Build-Up and Drop The build-up and drop are critical elements of your track. There, you can showcase your creativity and musicality. To transition from your verse to the build-up, you need to create tension using a reverse cymbal, white noise, or any other creative transition element.

The drop is where your track reaches its peak and should always be the most energetic part of your song. Creating a Breakdown and Outro After the drop, the breakdown part of your track allows your listeners to catch their breath before ending the song. You can use the breakdown to switch the melody, chords, and drum patterns to create a new and fresh sound. After the breakdown, you can safely end your track with the outro, using the same elements of your intro, but in reverse order.

Putting It Into Practice

In conclusion, creating a basic arrangement is the backbone of your fully arranged track, and by following the steps we outlined in this article, you can easily create a professional-sounding song structure. Remember to keep your listener engaged throughout the track, use transitions to create tension and energy, and don’t be afraid to experiment with different elements and sounds.

Refining The Arrangement for 8 Bar Loop

You have finally created your 8 bar loop, and you are excited to turn it into a fully arranged track. The arrangement is key to creating a great track, and refining it can bring out the best of your musical creation. In this post, we will be discussing the importance of refining the arrangement and how to do it properly.

Fine-tuning The Transitions

The transitions between different sections of your track are essential to creating a good flow. Fine-tuning transitions enhances your musical ideas and makes your track more enjoyable to listen to. Consistency is key, so whether your transitions are sudden or gradual, ensure that they remain consistent throughout the track. To fine-tune transitions, pay attention to the flow and timing of the different sections and adjust to ensure that they blend seamlessly.

Adding Fills And Risers for 8 Bar Loop

Fills are passages of music that serve as a “bridge” between different sections of the track. On the other hand, Risers are musical elements that build up excitement and anticipation towards the next section of the track. Adding fills and risers to your track will create essential tension and release, keeping your audience on the edge of their seats. Ensure that the fills and risers match appropriately and are consistent with the rest of the track.

Layering In Additional Elements for 8 Bar Loop

Adding new and unique elements to your track can add new layers of depth and complexity. Layering additional elements such as percussion, synth, or other samples can enhance your track’s rhythm and soundscapes. This makes it more engaging and entertaining. But, be careful not to over-layer as doing so can make your track sound cluttered.

Creating Variation And Interest

Maintaining the listener’s attention throughout the length of your track is a crucial aspect of refining the arrangement. Creating variation and interest ensures that your audience never gets bored. Some ways to incorporate variation include a change in melody, rhythm, timing, or instrument. It is important to ensure that the variations complement each other seamlessly.

Fine-tune transitions, add fills and risers, and layer new elements. That variety turns your 8 bar loop into a full track your audience will love. It’s essential to remember, though, that the arrangement can make or break your track. So take your time and refine it until it sounds perfect.

Mixing And Mastering The Track


Turning an 8-bar loop into a fully arranged track involves the crucial process of mixing and mastering the track. By adjusting the levels, EQ, compression, and other effects, the track can have a cohesive sound and professional finish. Attention to detail and careful evaluation of the mix can make all the difference in producing a polished final product.

Balancing The Levels

To start the mixing process, focus on balancing the levels of all the elements in your track. This step is crucial to create a well-balanced mix. Use a volume fader to adjust the levels of each track, bringing out the essential elements and pushing non-essential ones into the background. Always keep the lead elements at the forefront and ensure that nothing overpowers the other.

Cleaning Up The Mix

Next, move on to cleaning up the mix. This step involves removing unwanted frequencies, clicks, and other noise that detracts from the sound. Utilize EQs to sculpt the tone of each element in the track. Take out unnecessary low-end frequencies of non-bass elements to avoid muddiness. Cut out high-end frequencies from non-treble instruments like kick drums to avoid piercing highs. Use noise reduction plugins to cut out unwanted background noise.

Adding Effects And Processing

Adding effects to your track is the stage where you can be creative and experiment with different soundscapes. You can add essential effects like reverb, delay, and compression to enhance the sources’ sound. For example, a reverberant piano sound should have different reverberation than a percussive sound. Be gentle with processing, don’t process the sound with too many effects, or you will risk muddying the mix.

Mastering The Final Version

The final stage is mastering, which is the process of finalizing the track. This makes it radio-ready, and ensuring its quality is consistent across different devices. Using equalizers and compressors to balance the overall sound of the mix, ensure nothing is too loud or has too much high or low frequency. Use a limiter plugin to maximize the volume without clipping. Listen on multiple devices to ensure the track sounds good on mobile phones, laptops, and high-end speakers. Once happy with the final result, export the track to your desired format.


Frequently Asked Questions For Turning Your 8 Bar Loop Idea Into A Fully Arranged Track


How Do I Turn A Loop Into A Full Song?


To turn a loop into a full song, you need to arrange and structure it properly by adding verses, chorus and bridge sections. Experiment with different melodies, rhythms and lyrics, and consider variations in tempo and instrumentation. Use reverb, delay and other effects to create dynamics and interest.


With practice and creativity, you can turn a simple loop into an engaging and well-crafted song.


Can You Use Loops To Make A Song?


Yes, loops can be used to create repetitive sections in a song, such as a chorus or an instrumental break. Using loops can save time and add a consistent sound to a song. However, it’s important to add variations and transitions to keep the song interesting.


What Is The 8 Bar Rule?


In music, the 8 bar rule says that something should change every 8 bars. A new element or variation keeps the listener engaged. This concept is based on the assumption that users tend to quickly scan websites and decide whether to continue exploring or leave within a few seconds.


How Do I Loop An Arrangement View In Ableton?


To loop an arrangement view in Ableton, first select the section you want to loop. Then, hit “CMD + L” on a Mac or “CTRL + L” on a PC to enable loop mode for the selected section. The section will now loop continuously until you disable loop mode.


Conclusion


To sum up, turning an 8 bar loop into a fully arranged track is no easy feat, but it’s achievable. Keep in mind the importance of song structure, variation, and dynamics when working on your track. Don’t be afraid to try new things and take risks with your music.


With practice and dedication, you can turn your loop idea into a fully realized and dynamic track that stands out in today’s competitive music industry. Happy producing!