Categories
Archive

How To Make A Track Stand Out Without Using Eq Boosts

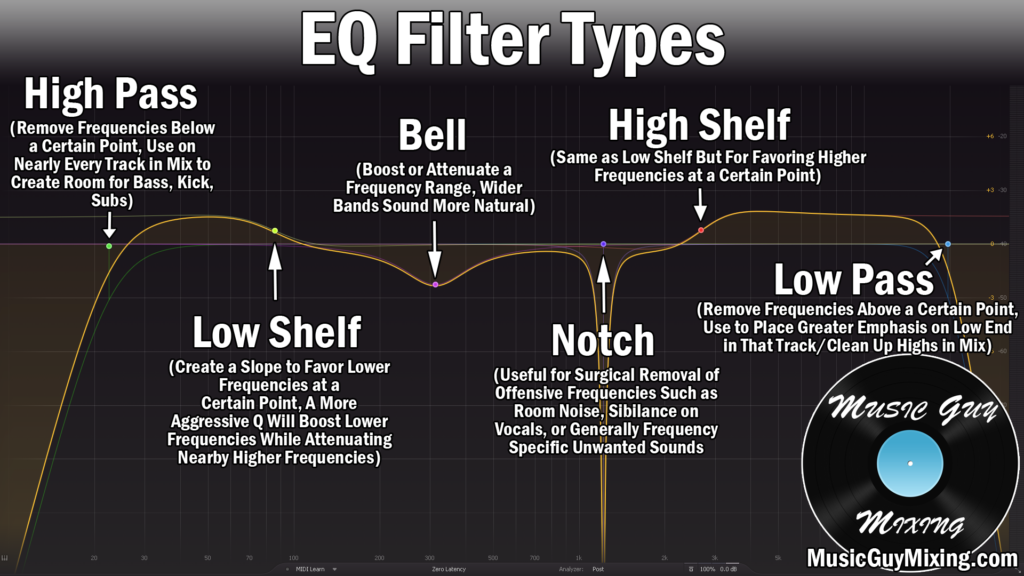
To make a track stand out without EQ boosts, use proper mixing techniques and focus on unique sound design. One of the biggest challenges in music production is making your tracks stand out from the millions of others being released.


While boosting the EQ can help achieve this, relying solely on EQ boosts is not enough. To truly make your track shine, it’s important to focus on proper mixing and sound design techniques. This can involve experimenting with different drum sounds, incorporating unique synthesis, and layering sounds to create a full and rich mix.


With careful attention to detail and a willingness to experiment, you can create a standout track that grabs listeners’ attention without relying on EQ boosts.


Focus On The Arrangement


To make a track stand out without using EQ boosts, it’s vital to focus on the arrangement. Proper use of musical elements like dynamics, structure, and texture can elevate a song and make it more memorable. By paying attention to these details, you can create a unique sound that grabs the listener’s attention without relying on EQ boosts.

Creating a music track that stands out from the rest isn’t easy, especially when you are not using EQ boosts. That’s where the importance of the arrangement comes in. The way you arrange your music has a significant impact on how well it will be received by the listeners. Here are a few tips to help you focus on the arrangement:

Use Silence To Your Advantage

Silence is often overlooked when it comes to making music, but it can be an incredibly powerful tool. By strategically placing moments of silence in your track, you can create tension and anticipation, making your listeners more engaged with the music. It also provides a break from the constant sound, allowing the listener to breathe and absorb the previous section.

Play With The Dynamics

Dynamics refer to the variations in volume and intensity that occur in a track. It’s essential to have a good mix of both loud and soft sections in your music. By varying the dynamics, you keep the listener engaged and prevent them from becoming bored with the track’s sound.

Experiment With Different Sections

A track’s arrangement should not be monotonous. Experimenting with various sections that contrast each other can create an exciting soundscape, providing the listener with an unexpected journey. Be creative and try different combinations of sounds and instruments, and let your imagination run wild. In conclusion, creating an outstanding track without using EQ boosts requires more focus on your arrangement. By utilizing silence, playing with dynamics, and experimenting with different sections, you can create a track that stands out from the rest. Remember to be creative, and don’t be afraid to step out of your comfort zone.

How To Make A Track Stand Out Without Using Eq Boosts


Credit: www.reddit.com


Get Creative With Fx Processing


Make your tracks stand out by using creative FX processing techniques instead of resorting to EQ boosts. Experiment with different effects like reverb, delay, distortion, and modulation to add depth, dimension, and interest to your mix. Get creative and experiment until you find a sound that enhances your track and sets it apart.

If you’re an aspiring music producer or someone who’s interested in mixing tracks, you probably know that EQ boosts can help make some elements of a track stand out. However, if you want to take your mix to the next level, you need to get creative with your FX processing. Here are some tips that can help you make a track stand out without using EQ boosts:

Try Different Reverbs

Reverb is an essential element of any well-produced track. It helps create an ambiance that makes the track sound like it’s being played in a real space. However, not all reverbs are created equal. Some may sound more natural, while others may sound more artificial. Experiment with different types of reverb plugins to find the one that best suits your track.

Explore Delay Effects

Delay is another essential element of any track. It helps create a sense of space and depth, making the track sound more interesting. There are various delay effects you can use, such as slapback, ping-pong, and stereo delay. Each of them can add a unique flavor to your track and make it stand out.

Experiment With Modulation

Modulation effects can help add movement and interest to your track. Some examples of modulation effects you can use include chorus, flanger, and phaser. These effects add a unique character to the track, making it more interesting to listen to. Overall, there are various ways to make a track stand out without using EQ boosts. Try out these tips and experiment with different FX processing techniques to find what works best for your track. Remember, the key to a great mix is creativity, so don’t be afraid to think outside the box.

Use Advanced Panning Techniques


To make your track stand out without using EQ boosts, advanced panning techniques can come in handy. By placing sounds in different locations in the stereo field, you can create a more dynamic and interesting mix, making your track sound more professional and unique.


Experiment with panning to add depth and dimension to your music.

When it comes to making your music tracks stand out in the crowd, there are several ways to achieve it. While EQ and compression are traditional methods to improve the sonic quality, advanced panning techniques can work wonders. Using advanced panning techniques, you can create a sense of space, depth, and movement, and ensure that each instrument sits in its own space without clashing with another. Here are some of the advanced panning techniques that you can use for your tracks.

Create Space With Stereo Panning

Stereo panning is a technique that involves placing different instruments in different places in the stereo field. By doing so, you can create a sense of space, depth, and separation between each instrument. For instance, you can pan guitars hard left and hard right to create a wide stereo spread, while keeping the bass and drums centered to maintain a strong low-end foundation. Similarly, you can pan the vocals slightly off-center to give them a wider stereo image and make them more prominent.

Try Mid-side Panning

Mid-side panning is a technique that involves separating the mid and side signals of a stereo track and panning them separately. By doing so, you can control the width and focus of the stereo image. For instance, you can pan the kick, bass, and snare in the center of the mid channel to keep them tight and focused, while panning the cymbals, percussion, and FX in the side channel to create a wider stereo spread. This technique can add depth and clarity to your mix.

Automate Panning For Movement

Automating panning can add movement and excitement to your track. By automating the panning of different instruments, you can create a sense of movement and space. For instance, you can pan the guitar from left to right during the intro to create an interest-grabbing effect, or you can pan the hi-hats from left to right during a breakdown to add tension and excitement. Automating panning can also help create a dynamic mix that keeps the listener engaged. Using advanced panning techniques, you can create a mix that sounds wider, clearer, more dynamic, and interesting. By exploring different panning techniques, you can add depth, space, and movement to your tracks and make them stand out without using EQ boosts.

Layer Sounds For Depth And Fullness


Give your tracks more depth and fullness by layering sounds instead of solely relying on EQ boosts. By adding layers of complementary sounds, you can make your track stand out without having to boost certain frequencies. Experiment with different sounds to find the perfect combination for your track.

If you want to make your track stand out without using EQ boosts, then layering sounds is a great option. Layering sounds can add depth and fullness to your track, resulting in a more complete and professional sound. There are a few techniques you can use when layering sounds to get the best results and make your track stand out.

Experiment With Different Timbres

One of the easiest ways to layer sounds is by experimenting with different timbres. Timbre refers to the quality of a sound and can vary depending on the instrument, the playing technique, or the way the sound is processed. By layering different timbres, you can create a more complex and interesting sound. For example, you can layer a sawtooth synth with a square wave synth to create a fuller and richer sound.

Use Octave And Harmonic Layers

Another way to layer sounds is by using octave and harmonic layers. Octaves are notes that are double or half the frequency of another note, and harmonics are multiples of the fundamental frequency. By layering sounds on different octaves or harmonics, you can create a more complex and full sound. For example, you could add a sub-bass layer that plays the same notes as your main bassline but an octave lower. This will give your track more depth and make it sound bigger.

Add Percussive Elements

Finally, adding percussive elements can also help make your track stand out. Percussive elements include drums, claps, and other rhythmic sounds that can add energy and excitement to your track. By layering these elements with your main instruments, you can create a more cohesive and dynamic sound. For example, you could add a shaker or tambourine layer to your main groove to add a subtle but effective element of percussive energy. In conclusion, layering sounds is an effective way to make your track stand out without using EQ boosts. Experimenting with different timbres, using octave and harmonic layers, and adding percussive elements can all add depth and fullness to your track and make it sound more professional. By using these techniques, you can create a track that is both unique and memorable.

Pay Attention To The Rhythmic Element


To make your track stand out without using EQ boosts, pay attention to the rhythmic element. Experiment with different rhythms and create unique patterns. This will make your track more interesting and memorable, and help it stand out in a crowded music scene.

Use Syncopation To Create Interest

One way to make a track stand out without relying on EQ boosts is to use syncopation. Syncopation is the deliberate placement of emphasis on beats that are not typically emphasized in a particular rhythm. By adding unexpected accents or syncopated rhythms, you can create more interest and groove in your track. This can be as simple as adding a snare hit on an offbeat or using a pattern that emphasizes different beats in each bar.

Add Drum Fills To Build Tension

Another way to make your track stand out is to use drum fills to build tension. Drum fills are short, improvised sections of drumming that provide variations to the grooves. They typically occur before a new section of a song or to mark a transition point. By using fills to create tension and resolution, you can keep your listeners engaged throughout the track.

Change Up The Groove With Breaks

Breaking up the groove by using breaks can also make your track more interesting. A break is a section of a song where all instruments drop out except for one or two. This can be achieved by using drum patterns with no other instrumentation, dropping out all the bass or swapping the bass for a different instrument. A break introduces novelty, brings drama and makes listeners look forward to hearing what happens next. By paying attention to the rhythmic elements in your tracks, you can make them stand out without reaching for EQ boosts. By using syncopation to create interest, adding drum fills to build tension, and changing up the groove with breaks, you can keep your listeners engaged and create a more dynamic song.

How To Make A Track Stand Out Without Using Eq Boosts


Credit: www.masteringthemix.com


Add Live Instrumentation


To make a track stand out without relying on EQ boosts, consider adding live instrumentation. Incorporating elements like guitar, piano or drums can bring a unique layer of depth and emotion to your song, making it more memorable to listeners.

Making a track stand out in a crowded music industry can be a challenging task. While EQ boosts can certainly help, there are other techniques that can breathe life into your music. One of the best ways to add depth and flavor to a mix is by incorporating live instrumentation. In this section, we will discuss three ways to add live instruments to your track: recording real instruments, using sampled instruments, and blending them with electronic elements.

Record Real Instruments

Recording real instruments adds an organic and personal touch to your music. Whether it’s a guitar, bass, piano, or even a drum kit, recording live instruments can make your mix sound more unique. When recording, it is important to consider the acoustics of the room, mic placement, and the performance itself. If you’re not an expert in recording live instruments, it may be handy to record professionals who will provide you with clear sounds and sharp videos.

Use Sampled Instruments

Using sampled instruments can be a cost-effective way to add live elements to your music. Unlike MIDI instruments, sampled instruments capture the sound and character of real instruments. These days, there are plenty of high-quality orchestral, brass, and string samples that can give your music the grandeur of a full orchestra. When using sampled instruments, there are a variety of plugins and virtual instruments available. These will empower you in previewing the samples that match your creative ideas.

Blend With Electronic Elements

Blending live instrumentation with electronic elements is a great way to create a unique and interesting sound. One of the best ways to achieve this is by using effects such as distortion, delay, and reverb. By adding these effects to live instruments, you can create something that sounds completely unique. You can also use synthesizers and other electronic instruments to support and enhance your live instrumentation. In conclusion, adding live instrumentation to your tracks can help set them apart from the rest, without relying on EQ boosts. Whether you choose to record real instruments, use sampled instruments or blend live instrumentation with electronic elements, each technique will contribute to creating a more dynamic and engaging sonic experience for your listeners.
 

How To Make A Track Stand Out Without Using Eq Boosts


Credit: www.musicguymixing.com


Frequently Asked Questions On How To Make A Track Stand Out Without Using Eq Boosts


Can You Mix Without Eq?


Yes, you can mix without EQ, but it may not produce the best possible sound. EQ allows you to adjust the balance and tone of individual instruments and sounds in a mix, resulting in a more polished and professional sound.


However, it is possible to create a mix using only volume and panning adjustments.


Do You Need To Eq Every Track?


No, you don’t have to EQ every track. It depends on the sound and what you’re trying to achieve. Some tracks may need just a little bit of EQ, while others may require more extensive adjustments. Use your ears to determine what’s necessary for each track.


What Is The Opposite Of Boost Eq?


The opposite of boost EQ is cut or reduce EQ.


Is It Better To Cut Or Boost Eq?


It depends on the specific situation. Cutting EQ can remove unwanted frequencies, while boosting can enhance desired frequencies. Careful use of both techniques can create a balanced and clear mix. Ultimately, the best approach depends on the individual track and the desired end result.


Conclusion


To make your track stand out without relying on EQ boosts, you need to focus on the fundamentals of music production. Start with choosing the right sounds, arranging them in an interesting way, and creating a clear and compelling mix.


Make use of dynamics, space, and subtle adjustments to elevate your track’s impact and give it a professional-level sheen. With a bit of experimentation and attention to detail, you can create tracks that truly stand out from the crowd.
Categories
Archive

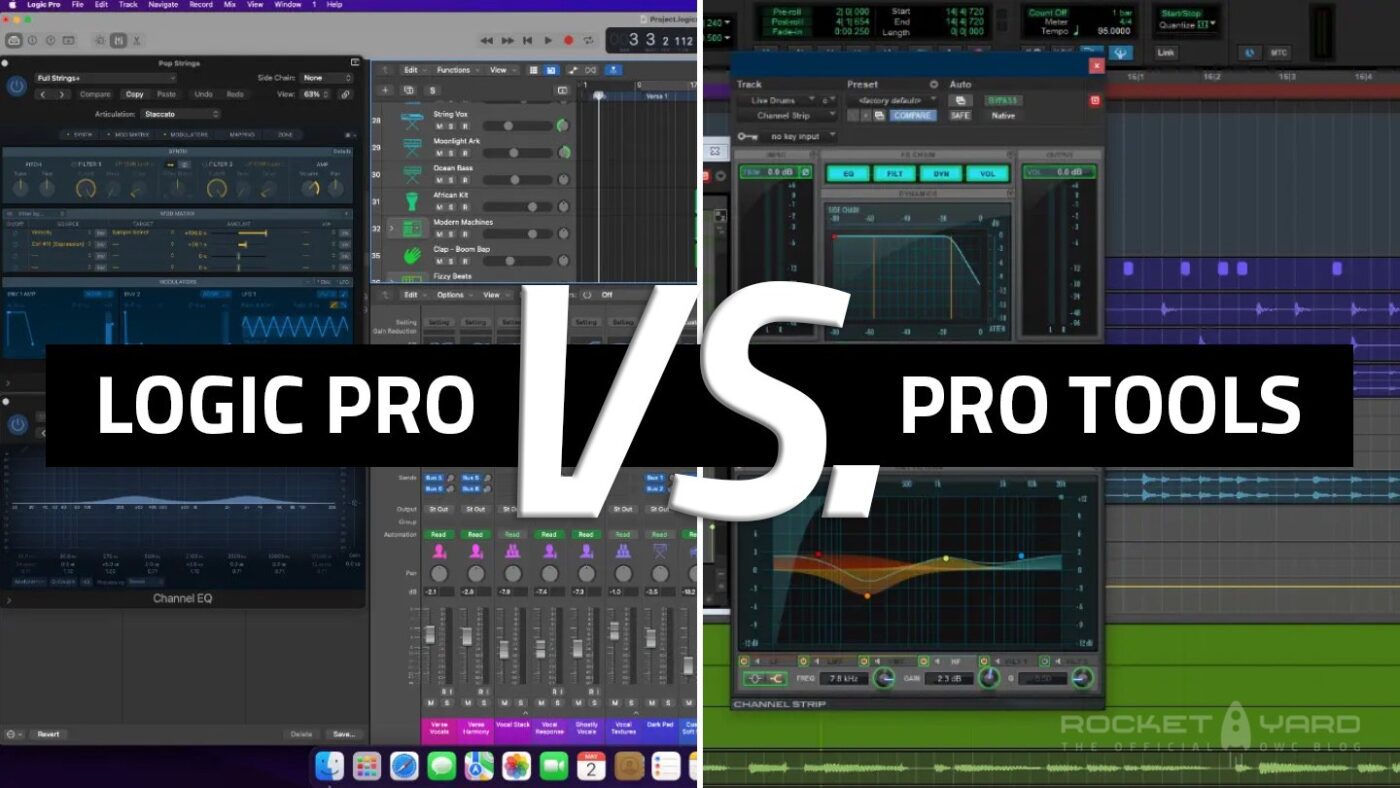
Pro Tools Vs Logic The Ultimate Comparison Guide

Pro Tools and Logic are two leading Digital Audio Workstations (DAWs) in the audio industry. In this guide, we will compare the strengths and weaknesses of each software to help you make an informed decision on which one is best suited for your needs.


From user interface to plugins, we will explore the similarities and differences between Pro Tools and Logic in depth. Whether you are a beginner or an experienced producer, this ultimate comparison guide will provide valuable insight to help you determine which software is the right fit for you and your projects.

Pro Tools Vs Logic The Ultimate Comparison Guide


Credit: eshop.macsales.com


History Of Pro Tools And Logic


Pro Tools and Logic are two widely used digital audio workstations in the music industry. Pro Tools was first introduced in the 1980s and has since become the industry standard, while Logic was developed by Apple and gained popularity in the early 2000s.


In this ultimate comparison guide, we will explore the similarities and differences between these two powerful tools for music production.

Pro Tools and Logic Pro are two of the most widely used digital audio workstations (DAWs) in the music industry. Understanding their history is crucial for anyone who wants to use these software programs to their full potential. This section will take you through the origins of Pro Tools and Logic, and the mergers and acquisitions that have shaped their development over the years.

Origins Of Pro Tools

Pro Tools was first developed in the late 1980s by Evan Brooks, an engineer at Digidesign, which was later acquired by Avid. Originally designed as a computer-based replacement for multitrack tape recorders, Pro Tools quickly became the industry standard for audio recording and editing. In the early years, Pro Tools was only available on dedicated hardware systems, but in 1991, the company released Pro Tools software for Macintosh computers. This change allowed the software to become more accessible to a wider audience, and it began to be used in studios all around the world.

Origins Of Logic

Logic was first created by C-Lab, a German software company, in the late 1980s. Originally developed for the Atari ST computer, the software was designed to be a MIDI sequencer that could help musicians create and edit their own music. In the early 1990s, Apple acquired the rights to Logic and rebranded it as Logic Pro. Since then, Apple has continued to develop and refine Logic into one of the most powerful DAWs on the market.

Mergers And Acquisitions

Avid’s acquisition of Digidesign in 1995 had a significant impact on the development of Pro Tools. The purchase allowed Pro Tools to become a more integrated, all-in-one system, with hardware and software designed to work seamlessly together. On the other hand, Apple’s acquisition of Logic in 2002 helped to expand the software’s audience and integrate it tightly with the Mac operating system. Since then, Logic has remained a Mac-exclusive DAW, while Pro Tools has become available on both Mac and Windows operating systems. Overall, the history of Pro Tools and Logic is intertwined with that of the music industry itself. These powerful software programs have played a significant role in enabling musicians and engineers to create and manipulate sound in ways that were previously impossible.

Workflow And User Experience

When it comes to music production software, workflow and user experience play a critical role in determining which one works best for a particular user. Pro Tools Vs Logic comparison is one of the top debates among music producers as each offers a unique set of features and capabilities. In this blog, we will dive deep into the comparison guide between Pro Tools and Logic, focusing on workflow and user experience.

Interface And Navigation

Pro Tools and Logic have different interfaces and navigation structures. Pro Tools is a little complicated to navigate, but once you get used to it, you’ll find the interface quite intuitive. On the other hand, Logic, with its simple interface and navigation structure, tends to be more accessible to users who are new to music production software.

The interface in Pro Tools mostly includes windows and several tabs that provide easy access to different views, functions, and tools. Docked menus and the floating transport bar help users to navigate between different features comfortably. The interface in Logic, on the other hand, favors a single window and a centralized workspace, making it easy to navigate different sections, views, and functions from one place.

File Management

Both Pro Tools and Logic make it easy to manage files. Pro Tools file management is not as sophisticated as Logic but is still adequately functional. It requires users to store files in specific folders and locations. The software has an autosave feature, which automatically backs up the project files every few minutes.

Logic, on the other hand, offers advanced file management that allows users to store files independently or within a single project file. The software also has an un-delete feature that enables users to recover deleted files effortlessly. Furthermore, it offers an autosave feature that users can customize to save files at specific intervals.

Customization And Shortcuts

Pro Tools and Logic offer customization and shortcut features that enable users to streamline their workflow and save time. Pro Tools customization allows users to rearrange and resize windows, modify menus, and reassign keyboard shortcuts to tailor the software to their preferences. The software also supports third-party plugins that enhance the functionality of the platform.

In Logic, users can customize the interface by enabling or disabling different tools and adding windows to the workspace. Users can also create unique shortcuts to speed up operations and save time. The software also supports plug-ins, which makes it possible to add additional features and functionality.

Audio Editing And Processing

Audio editing and processing is an integral part of music production. In this comparison guide, we will discuss the audio editing and processing features of Pro Tools and Logic Pro, two of the most popular Digital Audio Workstations (DAW) in the music industry. Let’s dive in and explore the recording and playback, flex time and pitch correction, and looping and sample editing features of Pro Tools and Logic Pro.

Recording And Playback

Both Pro Tools and Logic Pro offer industry-standard recording and playback capabilities. Pro Tools has a robust recording interface that allows you to record multiple takes and comp them together seamlessly. Logic Pro’s recording interface is also intuitive, with advanced features like automatic track creation and punch recording. Both DAWs support a wide range of audio file formats and offer low-latency monitoring for recording tracks in real-time.

Flex Time And Pitch

Flex Time and Pitch correction are essential features for any modern DAW. Pro Tools offers advanced flex time and pitch correction capabilities that allow for precise timing and pitch correction adjustments. Logic Pro also has a similar feature called Flex Time, which allows for flexible time adjustments and pitch correction. Both DAWs allow for non-destructive editing, meaning you can make changes without altering the original audio files.

Looping And Sample Editing

Looping and sample editing are crucial for creating electronic music and hip hop beats. Pro Tools has a sophisticated loop editing system that allows you to create and edit loops with ease. Logic Pro also has an advanced loop editor that lets you slice and manipulate audio samples seamlessly. Both DAWs have piano roll editors that allow you to edit MIDI notes for virtual instruments, making it easy to create complex arrangements.

Features Pro Tools Logic Pro
Recording and Playback Robust recording interface, low-latency monitoring Automatic track creation, punch recording
Flex Time and Pitch Correction Advanced flex time and pitch correction capabilities Flexible time adjustments and pitch correction
Looping and Sample Editing Sophisticated loop editing system Advanced loop editor with sample slicing

The Bottom Line

When it comes to audio editing and processing, both Pro Tools and Logic Pro have advanced features that can handle professional-level production. Your choice will ultimately depend on your workflow, preference, and the type of music you create. Regardless of which DAW you choose, both Pro Tools and Logic Pro offer a comprehensive range of tools to help you achieve your artistic vision.

Midi Capabilities

MIDI capabilities are crucial for any music composer or producer who wants to express their creativity with virtual instruments. The use of different digital audio workstations (DAWs) like Pro Tools and Logic can significantly affect how well a composer can use their MIDI capabilities. In this comparison guide, we will take an in-depth look at both Pro Tools and Logic MIDI capabilities to help you decide which one to use for your music production needs.

Overview Of Midi

Before diving into the MIDI capabilities that both Pro Tools and Logic offer, let’s first start with a brief overview of what MIDI is. MIDI is an acronym for Musical Instrument Digital Interface, a protocol that enables electronic musical instruments, computers, and other related devices to communicate with each other. The MIDI protocol communicates with virtual instruments and effects in the form of MIDI data.

Midi Instruments And Effects

Pro Tools and Logic have an extensive library of MIDI instruments and effects to choose from, including synthesizers, drum machines, sample libraries, and more. With Logic, you get access to a vast library of built-in plugins, while with Pro Tools, you will need to buy third-party plugins separately. Both DAWs have their own unique MIDI instruments and effects, which means you can experiment with different sounds and produce a unique masterpiece.

Pro Tools Logic
Has a wide range of third-party plugins Built-in plugins covering a wide range of genres
A wide range of MIDI plugins including Native Instruments Komplete MIDI plug-ins are numerous, including Sculpture and Alchemy

Recording And Editing Midi

Both Pro Tools and Logic have powerful MIDI recording and editing capabilities, meaning you can easily compose and record your MIDI data. Both DAWs also offer various MIDI editing tools, including quantization, velocity, pitch, and much more. In addition, both DAWs allow you to import MIDI files from other sources such as other DAWs and use them seamlessly.

  • Pro Tools has a dedicated MIDI editor window to access all the editing tools.
  • Logic’s MIDI editing tools are integrated into the main window.

In conclusion, both Pro Tools and Logic offer fantastic MIDI capabilities, making it difficult to choose one. However, with Logic’s extensive library of built-in plugins and Pro Tools’ range of third-party plugins, you are spoiled for choice. The efficiency of MIDI recording and editing is subjective, so we recommend trying both before making a final decision.

Mixing And Mastering

Mixing and mastering are two essential steps necessary for producing high-quality music. Generally, mixing is the process of combining different tracks by adjusting their levels and panning to create a balanced sound, while mastering is the final step that adds polish to a mix and prepares it for distribution. In this section, we’ll compare the mixing and mastering capabilities of Pro Tools and Logic, two popular digital audio workstations used by professional musicians and audio engineers.

Track Routing And Bussing

When it comes to track routing and bussing, both Pro Tools and Logic offer advanced features. Pro Tools has a more traditional approach, providing users with flexible routing options that allow them to send individual tracks to various buses and output channels. On the other hand, Logic offers a more intuitive routing system with a visual mixer that displays all tracks and busses at once. Logic also provides a unique feature known as Track Stacks, which allows users to group multiple tracks and process them as a single unit.

Eq And Dynamics Processing

EQ and dynamics processing are critical for achieving a balanced mix that’s tonally accurate. Pro Tools and Logic both offer extensive EQ and dynamics processing tools. Pro Tools provides advanced EQ options with its 7-band and 10-band EQs, while Logic includes a robust 31-band graphic EQ. In terms of dynamics processing, both DAWs offer compressor, limiter, and gate plug-ins with similar capabilities. However, Logic takes it a step further by including a unique feature that displays a dynamic range graph of the mix to help users identify problematic areas.

Automation And Control Surfaces

Automation is the process of programming a mix to adjust levels, panning, and other settings over time. Both Pro Tools and Logic have advanced automation capabilities with multiple modes, including latch, touch, and write. Pro Tools also offers multiple control surfaces that work seamlessly with the DAW, providing tactile control over mixing and editing. Logic, on the other hand, has a unique feature called Smart Controls that allows users to create customized control layouts for their MIDI controllers.

Overall, Pro Tools and Logic are both powerful DAWs that offer advanced mixing and mastering capabilities. Whether you prefer the traditional approach of Pro Tools or the more visual and intuitive workflow of Logic, both DAWs have their unique advantages that make them suitable for different types of users.

Pro Tools Vs Logic The Ultimate Comparison Guide


Credit: m.youtube.com


Compatibility And Integration


Pro Tools and Logic are two popular digital audio workstations used by music producers and sound engineers. While both have similar features, they differ in terms of compatibility and integration with other software and hardware. This guide will compare the two in detail to help users make an informed choice.

Are you struggling to decide whether you should go for Pro Tools or Logic for your music productions? One essential factor to consider when choosing a digital audio workstation is compatibility and integration, as it can affect your workflow efficiency and affect the quality of your project. Let’s compare Pro Tools Vs Logic to see which one has better compatibility and integration.

Supported Platforms And Operating Systems

Both Pro Tools and Logic offer excellent multi-platform compatibility. However, before deciding which one to choose, you must know which platforms and operating systems they support. Pro Tools software supports Windows and macOS operating systems, and the software is compatible with Avid-designed hardware systems. On the other hand, Logic is only compatible with macOS operating systems. In summary, if you are using a Windows operating system, Pro Tools would be the best option for compatibility and integration, while Mac users can go with either Pro Tools or Logic.

Plug-in Formats And Third-party Integration

Plug-in formats and third-party integration play a considerable role in the overall functionality of a digital audio workstation. Pro Tools offers support for AAX plugins, which are available exclusively on the Avid platform, while Logic supports Audio Unit plugins, which are created mainly for macOS and iOS platforms. Additionally, Pro Tools supports VST plugins on Windows platforms, giving users more flexibility in terms of third-party integration. In conclusion, if you are looking for a digital audio workstation with excellent third-party integration and multiple plug-in formats, Pro Tools is the way to go.

Project Exchange And Collaboration

Project exchange and collaboration are essential aspects of any digital audio workstation. A smooth collaborative workflow could make a significant difference in the speed and quality of your project. Pro Tools allows for seamless project exchange between different Pro Tools systems, as well as the easy integration of video editing within the software. On the other hand, Logic offers powerful integration with other Apple products, such as Final Cut Pro and GarageBand, making it a preferred digital audio workstation for many Mac users. In conclusion, both Pro Tools and Logic offer excellent project exchange and collaboration tools; the choice ultimately depends on your specific needs.

https://www.youtube.com/watch?v=ZA0O0t4CLPA


Frequently Asked Questions Of Pro Tools Vs Logic The Ultimate Comparison Guide


Is Pro Tools Really Better Than Logic?


Pro Tools and Logic are both great digital audio workstations with their own unique features and benefits. Ultimately, the choice between the two depends on individual needs and preferences. Some music professionals prefer the interface and tools provided by Pro Tools, while others find Logic more intuitive and easy to use.


It’s recommended to try both before deciding which one suits the project and workflow better.


What Is The Disadvantage Of Logic Pro?


Limited integration with third-party plugins and software is a disadvantage of Logic Pro.


Why Do All Studios Use Pro Tools?


Pro Tools is considered the industry standard digital audio workstation (DAW) used in music production. It offers advanced features such as high-quality audio processing, multi-track recording, and mixing capabilities. It is widely used in studios because it allows for efficient and streamlined workflows, as well as seamless integration with other studio hardware and software.


Can You Use Logic In Pro Tools?


Yes, logic can be used in Pro Tools. The software comes equipped with a variety of useful tools that allow users to manipulate audio and MIDI tracks in real-time, making it an ideal choice for music production, audio editing, and post-production work.


Conclusion


Both Pro Tools and Logic have distinct features and strengths that cater to different types of music producers. Your choice ultimately depends on your personal preferences, budget, and needs. By weighing the pros and cons of each program, you can determine which one is a better fit for you.


Keep in mind that regardless of which one you choose, both Pro Tools and Logic are powerful tools that can help you unleash your creativity and produce high-quality music.

Categories
Archive

Streamline Your Editing With Pro Tools Edit Modes

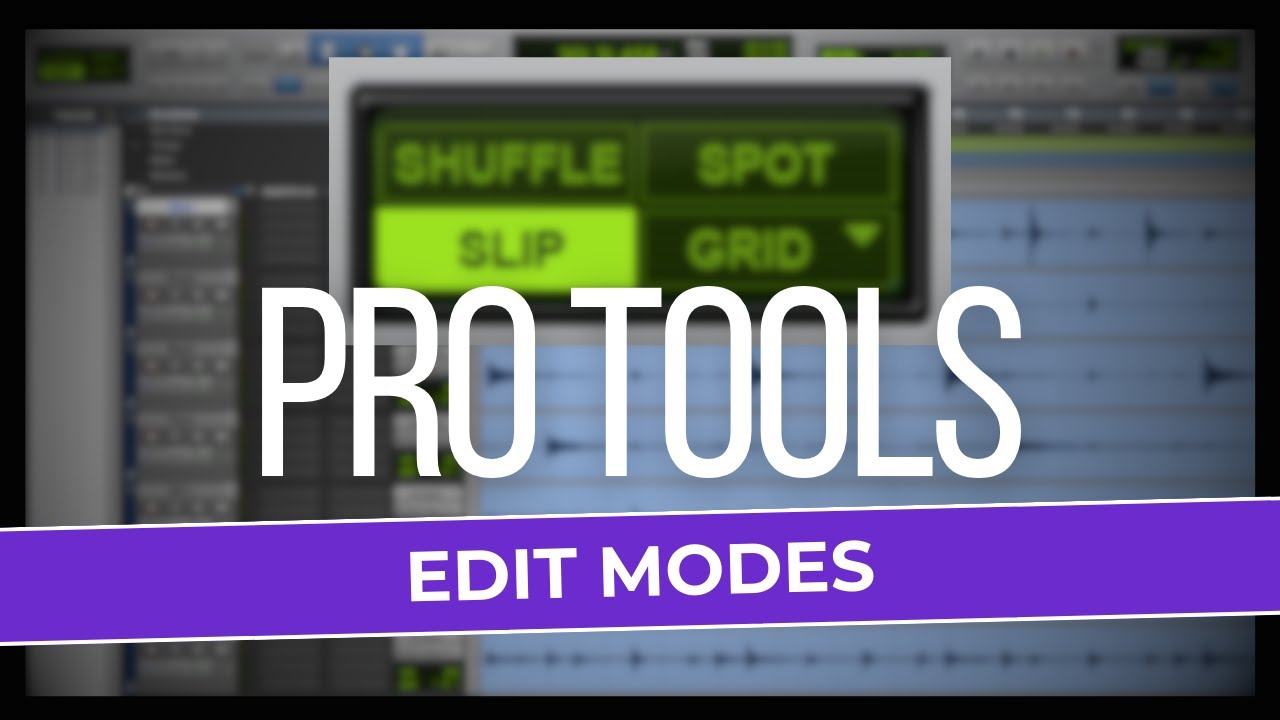
Pro Tools’ edit modes streamline your editing process, allowing for more precise and efficient edits. These modes provide specific editing tools and shortcuts, catering to different editing needs such as trimming, scrolling, and selecting clips.


Editing audio tracks can be a tedious task, especially when dealing with large amounts of audio. With Pro Tools’ edit modes, you can save a significant amount of time and effort, helping you work more efficiently. These editing modes provide a range of tools, from simple trimming and selecting to more complex editing techniques, allowing you to make precise cuts and edits quickly without interrupting your workflow.


We will explore the different edit modes available in Pro Tools and how to use them to streamline your editing process.

Streamline Your Editing With Pro Tools Edit Modes


Credit: m.youtube.com


Pro Tools Navigation Basics


For those looking to streamline their editing process with Pro Tools, mastering the different Pro Tools edit modes is crucial. With a good understanding of basic navigation, users can manipulate audio clips quickly and easily, improving workflow and productivity.

Pro Tools is a digital audio workstation used extensively in the music and audio industry. Its editing capabilities are second to none, and the navigation of the software is streamlined to ensure that users can move around the interface with ease. In this section, we will cover Pro Tools Navigation Basics to help you get started with this powerful software.

Getting Familiar With The Pro Tools Interface

The Pro Tools interface can be overwhelming when you first launch the software. However, by taking some time to familiarize yourself with the different windows and menus, you can navigate the software with ease. The main windows and menus are:

  • Mix Window
  • Edit Window
  • Transport Window
  • Window Menu
  • Toolbar

The Mix and Edit windows are where most work is done. The Mix window is where you can adjust levels, panning, and make changes to the mix. The Edit window is where you can see your audio tracks, MIDI data, and make edit changes.

Basic Navigation Shortcuts

Pro Tools has some basic navigation shortcuts that allow you to move around the software quickly. Here are some of the most commonly used shortcuts:

Shortcut Action
Tab Switch between Edit and Mix Windows
Spacebar Start or stop playback
Option + Click Set a marker
Command + E Edit Selection
Command + D Duplicate Selection

These navigation shortcuts can save you a significant amount of time when working with Pro Tools. By memorizing these shortcuts and using them frequently, you can streamline your editing process and increase productivity. In conclusion, getting familiar with the Pro Tools interface and using basic navigation shortcuts can help you move around the software more quickly and increase your efficiency. By taking time to master these basics, you’ll be able to focus on the creative aspects of editing and create better audio content.

Pro Tools Edit Modes


Pro Tools Edit Modes are a set of tools that enable you to work more efficiently when editing audio. They allow you to streamline your editing process by providing specific modes that enhance your ability to manipulate different types of audio content, such as pitch and rhythm, with precision and ease.

If working with audio editing is a regular part of your job, then you have probably come across Pro Tools. This digital audio workstation (DAW) software is considered to be the industry standard. One of the key features of Pro Tools is its edit modes. In this post, we’ll focus on Pro Tools edit modes and how they can help streamline your editing process.

What Are The Different Pro Tools Edit Modes?

Pro Tools edit modes are different ways of editing audio that allow you to perform specific tasks quickly and efficiently. The following are the different Pro Tools edit modes:

Edit Mode Description
Shuffle Mode Moves clips and fills gaps automatically, allowing you to quickly rearrange a mix.
Slip Mode Allows you to move the contents of a clip around within its boundaries, so you can quickly adjust timing without affecting other clips.
Grid Mode Makes it easy to make adjustments in time by snaping clips to a grid.
Spot Mode Precisely places the start time of a clip at an exact location in the timeline or at a specific timecode.
Slience Mode Removes audio segments from the timeline, replacing it with silence.
Elastic Audio Mode Allows you to manipulate audio without changing the pitch and time, so you can easily match the tempo and key of different clips.

When To Use Each Edit Mode

Knowing when to use each edit mode will help you streamline your editing process and create a more polished and cohesive mix. Here are some examples of when to use each edit mode:

  • Shuffle mode is useful when you want to quickly rearrange the order of clips and fill gaps automatically.
  • Slip mode is useful when you want to adjust the timing of a clip without affecting other clips.
  • Grid mode is useful when you want to make adjustments to the timing of clips based on a consistent grid.
  • Spot mode is useful when you want to precisely place the start time of a clip at a specific location or timecode.
  • Silence mode is useful when you want to remove audio segments from the timeline and replace them with silence.
  • Elastic Audio mode is useful when you want to manipulate audio without changing the pitch and time, so you can match the tempo and key of different clips.

Using the different Pro Tools edit modes will help you speed up your editing process and allow you to create a more polished and cohesive mix. Try experimenting with each edit mode to see which works best for each situation.


Slip And Grid Modes


Streamline your editing process in Pro Tools with Slip and Grid Modes. These editing modes allow for precise adjustments to your audio tracks, making it easier to perfect your project and achieve a polished final product.

Slip and Grid Mode are two of the most important and useful edit modes available in Pro Tools. Slip Mode is particularly useful for small adjustments, whereas Grid Mode allows for more precise editing. These modes can significantly streamline your audio editing workflow, saving you valuable time and effort. In this post, we will take a closer look at how to use Slip and Grid modes in Pro Tools.

How To Use Slip Mode

Slip Mode is a quick and easy way to make small adjustments to the timing of clips without affecting their overall position in the timeline. With slip mode, you can adjust the in and out points of a clip without changing its start or end position on the timeline. Here’s how you can use Slip Mode in Pro Tools:

  1. Select the Slip Mode from the Edit Modes selector.
  2. Click and drag the clip you wish to edit to the left or right.
  3. Release the clip once you have made the required adjustments.
  4. To make more precise adjustments, hold down the Option key and click and drag the clip.

How To Use Grid Mode

Grid Mode is used to make precise edits to the timing of clips. It moves clips to a specific point in the timeline, based on the defined grid value. Here’s how you can use Grid Mode in Pro Tools:

  1. Select Grid Mode in the Edit Modes selector.
  2. Set the grid value by clicking on the Grid Value button and selecting the required value.
  3. Click and drag the clip to move it to the required position on the grid.
  4. If you wish to make more precise adjustments, hold down the Option key and click and drag the clip.

In conclusion, Slip and Grid Modes are essential tools for anyone looking to streamline their audio editing workflow. With these modes, you can quickly and easily make small adjustments or precise edits to the timing of your clips. So, the next time you are working on a project in Pro Tools, be sure to try using Slip and Grid Mode to save yourself time and effort.

Streamline Your Editing With Pro Tools Edit Modes


Credit: m.youtube.com


Shuffle And Slip Shuffle Modes


Streamline your editing process in Pro Tools with Shuffle and Slip Shuffle Modes. These helpful tools allow for easy rearrangement and alignment of audio clips, making editing more efficient and accurate.

Editing audio tracks can be a time-consuming task, but Pro Tools Edit Modes makes editing a breeze. In this section, we will focus on the Shuffle and Slip Shuffle Modes used for streamlining your audio editing tasks.

How To Use Shuffle Mode

Shuffle mode is used to synchronize and rearrange clips on a track. It is widely used for radio production, music production, and sound design. Shuffle mode helps you edit tracks by inserting and deleting elements while ensuring that the gaps between clips remain closed. To use Shuffle mode, simply follow the steps outlined below:

  1. Select the Shuffle button on the edit window.
  2. Click on the region that you want to move and drag it to the desired position.
  3. Pro Tools will automatically close the gap between the clips and adjust the overall timeline of the track.

How To Use Slip Shuffle Mode

Slip Shuffle Mode allows you to freely adjust the content within a clip without affecting the surrounding clips. This is especially useful when you want to adjust the content of a clip without moving the start or end markers. To use Slip Shuffle Mode, simply follow the steps outlined below:

  1. Select the Slip Shuffle button on the edit window.
  2. Double click on the clip that you want to adjust.
  3. Drag the clip left or right to adjust it while viewing the waveform in the preview window.
  4. Release the mouse button to complete the adjustment.

In Conclusion

By using the Shuffle and Slip Shuffle Modes in Pro Tools, you can streamline your editing tasks and save time. These modes allow you to easily synchronize clips and adjust content without affecting the rest of the track. Give them a try and experience the benefits of efficient audio editing!

Spot Mode And Object Grabber Tool


The Spot Mode and Object Grabber Tool are two powerful editing modes in Pro Tools that can help streamline your editing process. With Spot Mode, you can easily move or replace audio clips with precision, while Object Grabber Tool allows you to manipulate multiple clips simultaneously.


These tools can save you time and effort, making your editing tasks more efficient and effective.

Editing audio files can be a time-consuming task, especially when dealing with complex projects. But with Pro Tools Edit Modes, you can simplify the process and work faster. Two of the most useful features are Spot Mode and the Object Grabber Tool.

What Is Spot Mode And How To Use It?

Spot mode is a Pro Tools Edit Mode that allows you to precisely place audio clips on the timeline. Using this mode, you can specify the exact start and end points of a clip and place it at any point in your session. To use Spot Mode:

  1. Select the clip you want to edit.
  2. Click on the Spot mode button on the toolbar, or press “F6” on your keyboard.
  3. Click on the timeline where you want to place the clip. Alternatively, you can enter the timecode manually in the Spot dialog box.
  4. Press “Enter” to place the clip in the selected location.

What Is Object Grabber Tool And How To Use It?

The Object Grabber Tool is another powerful feature of Pro Tools Edit Modes. It lets you easily move, duplicate or delete audio clips on your timeline, without accidentally affecting other tracks. To use the Object Grabber Tool:

  1. Select the Object Grabber Tool from the toolbar or press “F7” on your keyboard.
  2. Select the clip you want to edit by clicking on it.
  3. To move the clip, click and drag it to a new location on the timeline.
  4. To duplicate the clip, hold down the “Option” key (Mac) or “Alt” key (Windows) and click and drag the clip to a new location.
  5. To delete the clip, select it and press the “Delete” key on your keyboard.

In conclusion, by mastering Pro Tools Edit Modes like Spot Mode and the Object Grabber Tool, you can make editing audio clips in Pro Tools a breeze. Whether you’re a beginner or an experienced audio engineer, these features can help streamline your workflow and save you time and effort.

Using Edit Modes In Practice


To streamline your editing process in Pro Tools, it’s essential to master edit modes. With these modes, you can effectively edit audio clips, MIDI notes, and automation data, making the workflow much smoother and more efficient. By utilizing edit modes, you can take your audio editing skills to the next level and create high-quality audio projects.

Using Pro Tools edit modes can help streamline your editing process and increase your efficiency. However, it’s essential to understand how to use these modes in practice so that you can take full advantage of their benefits. In this section, we’ll cover how to edit audio with Pro Tools edit modes, and we’ll also share tips and tricks for efficient editing.

Editing Audio With Pro Tools Edit Modes

When editing audio in Pro Tools, it’s crucial to choose the right edit mode for the job. Here are some of the most commonly used edit modes you can use:

Edit Mode Description
Shuffle Mode Versatile for editing clips with or without other clips in tracks adjacent to the area you’re working on.
Slip Mode Allows you to move an audio clip’s head and tail independently.
Grid Mode Aligns audio clips to the session grid, making it ideal for quick and precise editing.
Spot Mode Allows you to specify the exact location where a clip will be placed during the editing process.

Tips And Tricks For Efficient Editing

Here are some tips and tricks for efficient editing when using Pro Tools edit modes:

  • Use keyboard shortcuts to switch between edit modes quickly.
  • Set up your keyboard shortcuts to move the insertion point to the start or end of a clip.
  • Use the zoom function to get closer to the waveform and make more precise edits.
  • Hold down the Option key (Mac) or Alt key (Windows) to make a copy of a clip while dragging it.
  • Reorder your clip list to suit your workflow by holding down the Shift key while clicking and dragging clips in the list.
  • Use the Auto-Select feature to automatically select tracks that a clip is on when you click on it.

In conclusion, using edit modes in Pro Tools can significantly enhance the efficiency of your editing process. By mastering the different edit modes, you can work more quickly and precisely, allowing you to focus on the creative aspects of your project.


Frequently Asked Questions For Streamline Your Editing With Pro Tools Edit Modes


What Are The 4 Editing Modes In Pro Tools?


Pro Tools offers four editing modes: Slip, Grid, Shuffle, and Spot. Slip mode allows adjusting audio within regions, Grid mode aligns audio to a predetermined tempo, Shuffle mode enables rearrangement of audio within a session, and Spot mode places audio precisely on a timeline.


How Do You Cycle Through Edit Modes In Pro Tools?


In Pro Tools, you can cycle through edit modes by pressing the F6 key.


What Are The Two Basic Editing Modes Used In Pro Tools?


The two basic editing modes used in Pro Tools are “shuffle mode” and “slip mode. ” Shuffle mode enables the user to move clips around in a track and shorten or lengthen them. Slip mode allows for adjusting the in and out points of a clip while keeping its overall length the same.


What Are The Four Edit Modes Available In The Edit Window?


The four edit modes available in the Edit window are Shuffle, Slip, Spot, and Grid.


Conclusion


Overall, Pro Tools Edit Modes offers a variety of options for streamlining your editing process. Whether you need to make precision edits or quickly select and move regions, the various modes provide a range of tools to help you work efficiently.


Utilizing these modes can save time and enable you to focus on the creative aspects of your work rather than getting bogged down in technical details. So why not give them a try and see how they can enhance your workflow?

Categories
Archive

The Perfect Monitoring Levels For Your Home Studio

To achieve the perfect monitoring levels for your home studio, it is necessary to strategically place the monitor speakers at ear level and create a symmetrical triangle with your head forming the apex. This will ensure an accurate and balanced sound.


When setting up a home studio, it’s essential to consider the monitoring levels to ensure that the recorded sound is top-notch. Experienced sound engineers and producers appreciate the importance of having reliable monitoring levels as it enables them to hear the sound as it truly is.


The right monitoring level is crucial to preventing having a mix that’s too bass-heavy or treble-heavy, creating negative effects on the final output. We’ll go over some significant guidelines to follow so that you can achieve the most accurate monitoring levels possible. We will examine topics such as monitor placement, eq settings, and acoustic treatment.


Importance Of Monitoring Levels


Proper monitoring levels are crucial for a home studio setup as it allows you to accurately hear and assess the sound quality of your recordings. It helps you to adjust your settings so that you can produce the best possible audio output and create professional-quality sound.


With the right monitoring levels, you can achieve excellent clarity and balance in your music productions.

Why It’s Important

Monitoring levels are the most important factor to consider when it comes to mixing music in a home studio environment. The reason behind this is quite straightforward: without efficient monitoring, your mix sounds will not translate well to other listening environments such as home theatres, car stereos, or even smartphones. Monitoring levels in the studio environment are crucial in creating a mix that sounds cleared and balanced in any listening environment. Therefore, it is crucial to optimize the monitoring levels in your home studio for an uncompromised hearing experience.

How It Affects Your Mix

The monitoring levels in your home studio can have a drastic impact on the quality of your mix. Whether you’re working on a beat, recording a vocal, or performing a mixdown, the quality of the sound you work on will always depend on your monitoring levels. If you’re listening too loudly, you’re damaging your hearing, which limits your ability to make nuanced mixing decisions. On the other hand, if you’re listening too quietly, you’re going to miss critical elements in your mix and make inaccurate mixing decisions. Therefore, optimal monitoring levels that you maintain in your home studio provide accurate feedback to make informed mixing decisions.

Optimizing Your Monitoring Levels

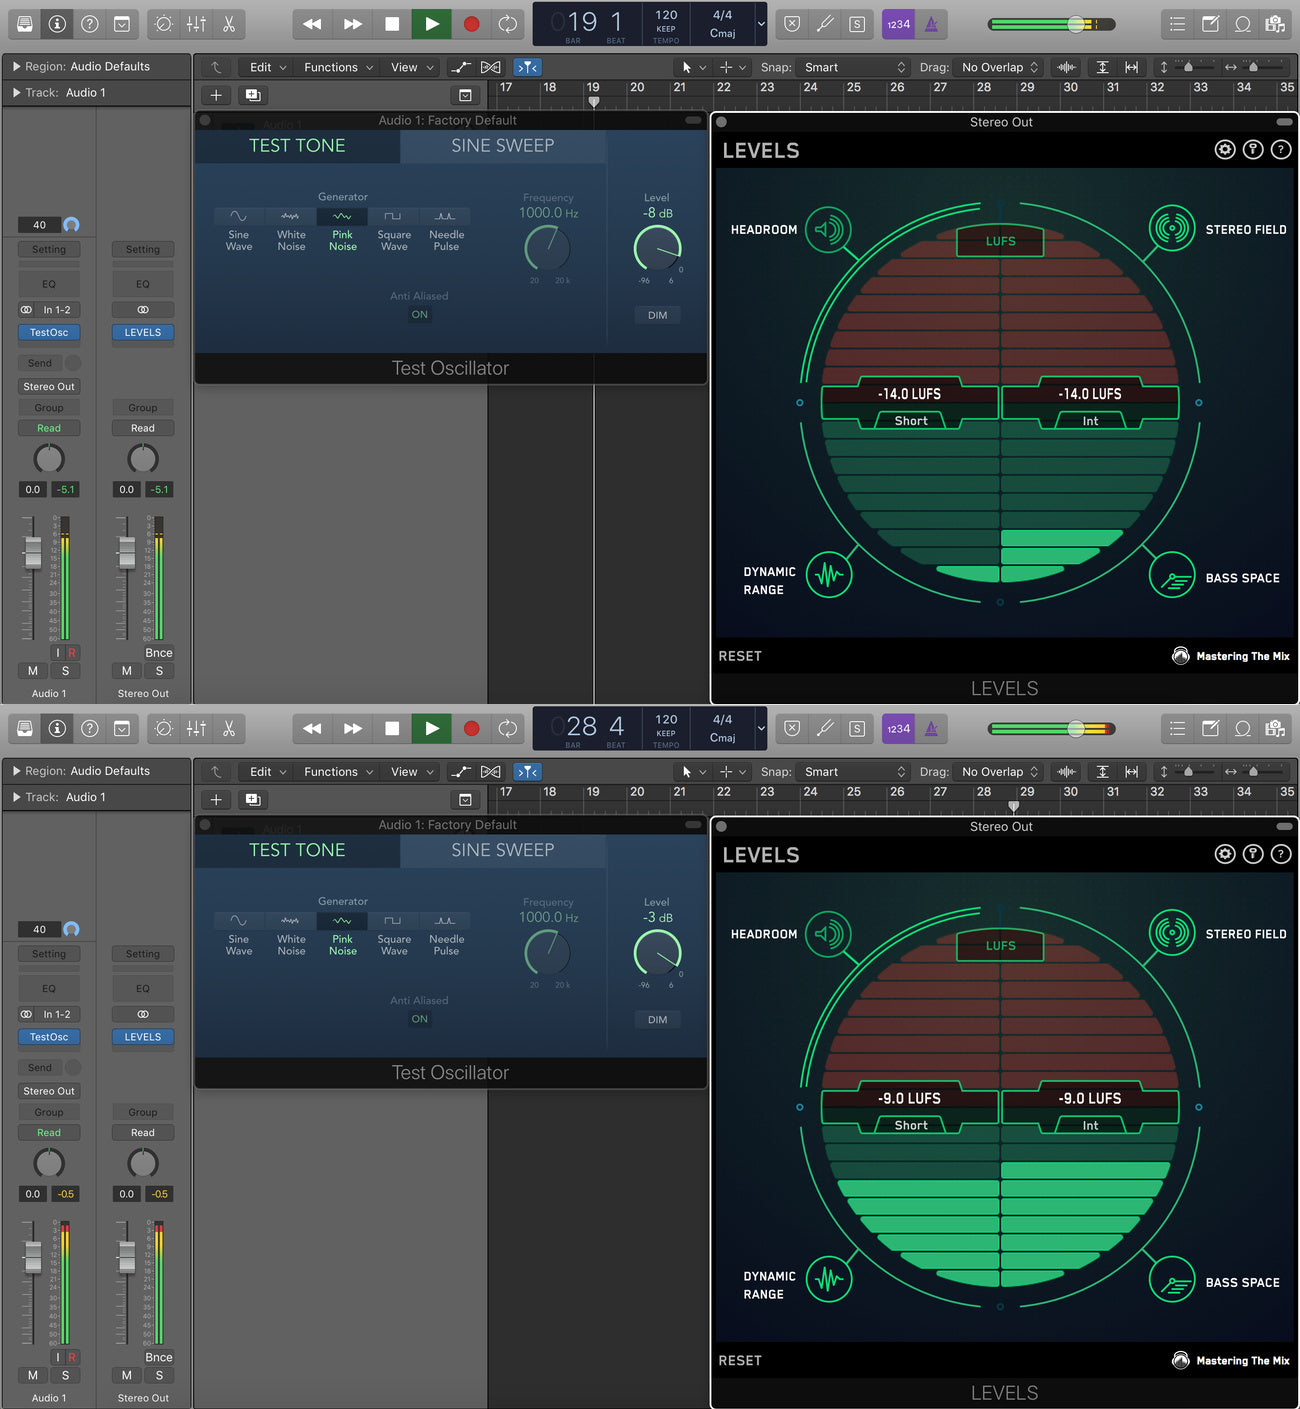
To optimize your monitoring levels, you want to aim for a balanced sound that is neither too quiet nor too loud. This level is usually between 75dB to 85dB, while peak levels should never exceed 100dB. Ideally, your monitors should be placed at an equal distance and at an equal angle from your listening position. Additionally, using high-quality monitors and acoustic treatment can improve your monitoring experience even more. Lastly, it’s best to have an all-rounded knowledge of the monitoring levels as well as using your ears to make informed mixing decisions.


Understanding Decibel (db) And Frequency (hz)


Understanding the relationship between decibel (dB) and frequency (Hz) is crucial in determining optimal monitoring levels for your home studio. By finding the perfect balance between these two factors, you can achieve a clear and accurate sound without damaging your hearing or equipment.

Understanding Decibel (dB) and frequency (Hz) When it comes to setting up the perfect monitoring levels for your home studio, it’s essential to understand decibel and frequency. Decibel (dB) is a measure of sound intensity, while frequency (Hz) refers to the number of sound cycles per second. To ensure the best listening experience in your home studio, it is crucial to understand decibels and frequency. ## Decibel explained A decibel is a unit that measures the intensity of sound. The human ear can hear a range of sounds from 0 dB (threshold of hearing) to 120 dB (threshold of pain). The sweet spot for monitoring levels in a home studio is usually between 85 dB and 90 dB. It’s important to remember that as the decibel level increases, the time limit on safe exposure decreases. So, it’s crucial to keep your ears safe and never exceed the recommended exposure time. ## Frequency explained Frequency refers to how high or low a sound is, measured in hertz (Hz). Every sound has a frequency, and the range of human hearing ranges from 20 Hz to 20,000 Hz. The most important frequencies for monitoring in a home studio are usually between 80 Hz and 10 kHz. This range ensures that you can hear all the critical details in your music, including bass, mid-range, and treble. To ensure the perfect monitoring levels for your home studio, it’s essential to understand decibel and frequency. By testing different levels, one can discover the optimum range for various tasks in the studio. Use a decibel meter to measure the volume level and a frequency analyzer to identify the range during the monitoring process.

Sound Pressure Level (spl) And Your Ears


Achieving the perfect monitoring levels in your home studio is crucial to avoid damaging your ears. Understanding sound pressure levels (SPL) and how they impact our hearing can help you achieve a well-balanced mix without causing harm.

Spl Effects On Ears

When it comes to operating a home studio, monitoring your sound pressure levels (SPL) is essential – not only to protect your ears but also to understand how noise impacts your audio quality. Sound can potentially damage your ears if you listen to it too loudly or for an extended period. Even sounds below the pain threshold can harm your hearing if you’re exposed to them frequently. It’s important to note that, if you expose your ears to sounds over 85 decibels (dB), it can damage your hearing. For reference, normal conversation is around 60 dB, traffic noise can be from 80 to 90 dB, and a rock concert can exceed 100 dB. Therefore, it’s crucial that you monitor your SPL levels to avoid hearing damage.

Protecting Your Ears

Protecting your ears when operating a home studio is essential. One way to keep track of sound levels is to use a sound level meter. This device can measure noise in decibels and provide readings that indicate when it’s time to take a break. It’s also a good idea to invest in a pair of quality over-ear headphones that block external noise and provide accurate audio reproduction without straining your ears. Remember that everyone’s hearing is unique, so what may be tolerable for one person may not be for another. It’s essential to trust your instincts and to ensure you’re comfortable with the volume levels you’re working with. In conclusion, monitoring your SPL levels and protecting your ears is vital for any home studio operator. By investing in the right tools and being attentive to how your ears respond to sound, you’ll be able to create excellent audio while avoiding some of the risks that can come with prolonged exposure to loud noises.

The Perfect Monitoring Levels For Your Home Studio


Credit: www.masteringthemix.com


Setting Up Your Home Studio For Monitoring


Achieving the perfect monitoring levels in your home studio is crucial for producing high-quality recordings. Setting up your home studio for monitoring involves ensuring that your equipment and environment are optimized to accurately represent the sound of your recordings. With proper attention to detail, you can create a monitoring setup that helps you achieve the best possible results.

Speaker Placement

Proper speaker placement in your home studio is critical in achieving accurate and balanced sound monitoring. The first step is to ensure that the speakers are placed at an equal distance from where you will be sitting. It is also essential to position them facing the mixing position with a slight angle towards the listening spot. Avoid placing speakers near walls and corners as this can cause the speakers to create frequencies that can cause phase cancellation and compromise the accuracy of your monitoring.

Acoustics

Acoustics are vital in ensuring that your monitoring environment is optimized for accurate sound reproduction. When it comes to acoustics, it is important to take into account the size and shape of your studio. For smaller studio spaces, you can consider adding bass traps and diffusers to absorb sound waves that can cause standing waves and other acoustic issues. Additionally, if your room has hard surfaces such as concrete or hardwood, consider adding sound-absorbing materials such as acoustic foam or carpet to prevent sound reflections.

Calibration

Once the speakers are appropriately placed and acoustic treatment is done, it is critical to calibrate your speakers to ensure that they are functioning optimally. Calibration ensures that the speakers are producing accurate and balanced sound performance. Many home studio monitoring systems come with room correction software that can help you calibrate your speakers to achieve the best results.

Conclusion

Setting up your home studio for monitoring is crucial to achieve accurate and balanced sound reproduction. Proper speaker placement, acoustics, and calibration of your monitoring system can make all the difference in producing a professional mix.

Calibrating Your Monitors


Achieving the perfect monitoring levels for your home studio requires proper calibration of your monitors. By using software and a calibrated measurement microphone, you can ensure accurate and balanced sound reproduction at all times.

Calibrating Your Monitors: Calibrating your monitors is one of the most crucial steps in setting up your home studio. The process ensures that your studio monitors produce the most accurate sound possible, which helps to make better decisions when mixing and mastering your tracks. In this section, we will discuss the tools you need to calibrate your studio monitors and the steps you should follow to ensure each H3 heading adheres to HTML syntax. Tools required: Before calibrating your monitors, you will need the following tools: – A quality sound meter – A ruler or tape measure – An EQ plugin The sound meter is essential for measuring the sound pressure level (SPL) of your monitors. A ruler or tape measure is required to measure the distance between your monitors correctly, while an EQ plugin helps to adjust the frequency response of your monitors. How to calibrate: Now that you have the necessary tools let’s dive into the calibration process. 1. Turn off any sound sources in your studio and ensure that there are no external noises that may interfere with the calibration process. 2. Place your sound meter at the position where your head will be while mixing. The position aligns with the listener’s perspective, which helps you to have an accurate reference point. 3. Set your meter to C-weighted and slow response settings, then play pink noise at a level of 75dB SPL. 4. Measure the SPL of each monitor and adjust the volume of each monitor to ensure that they match within ±0.5dB. 5. Once the volume levels have been correctly set, use your EQ plugin to adjust the frequency response of your monitors. Always use a reference track to ensure that you have calibrated your monitors correctly. 6. Lastly, measure the distance between your monitors and make adjustments if necessary. The ideal distance should be around 38% of the distance between your monitors and your head. Using these steps to calibrate your monitors will help you achieve the most accurate sound possible, making it easier to create high-quality mixes and masters.

Ideal Monitoring Levels For Your Home Studio


Achieving the perfect monitoring levels in your home studio can be a vital component for producing high-quality audio mixes. It’s important to consider factors such as room size, speaker placement, and listening volume to ensure accurate sound representation.

Achieving perfect monitoring levels in a home studio can be tricky. Monitoring levels are the sound levels that you listen to your mix at, and it’s important to get them right to avoid damaging your hearing, and producing a mix that translates well to other systems. In this post, we will cover the ideal monitoring levels for your home studio, recommended levels for different genres of music and how to achieve these levels.

Recommended Levels For Different Genres Of Music

Different genres of music have different monitoring levels. Below are the recommended monitoring levels for various types of music.

Music Genre Monitoring Levels (dB SPL)
Classical music 60 – 70
Pop, rock, and electronic music 80 – 90
Dance music and Hip-hop 100

How To Achieve These Levels

Now that you know the recommended monitoring levels, the next step is to achieve them. Here’s how:

  1. Invest in quality studio monitors that are designed for your studio size and shape.
  2. Place your studio monitors at the correct height and angle to reduce interference and enhance sound quality.
  3. Ensure that your audio interface is set up correctly and that you are using balanced output cables.
  4. Calibrate your studio monitors to get a flat frequency response
  5. Use a reliable sound meter to measure your monitoring levels
  6. Keep the volume at a comfortable level and avoid turning the volume higher than recommended levels to avoid hearing damage

In conclusion, achieving perfect monitoring levels can be a daunting task, but with the right equipment setup and proper knowledge of recommended levels for different genres of music, it’s achievable. Remember to always prioritize your hearing and avoid turning the volume to harmful levels.


Common Mistakes To Avoid


Achieving the perfect monitoring levels for your home studio can be a difficult task, but these common mistakes can be easily avoided. Ensuring that you properly calibrate your equipment, use high-quality speakers, and maintain consistent levels will help you achieve optimal sound quality in your recordings.

Common Mistakes to Avoid: When it comes to monitoring levels for your home studio, achieving the perfect balance is essential for producing high-quality sound. However, many people make common mistakes that can negatively impact the final outcome of their music. Here are some crucial errors to avoid when adjusting your monitoring levels. Over reliance on headphones: While headphones may seem like a convenient option for monitoring audio levels, relying on them entirely can have detrimental effects on your sound quality. Headphones emphasize certain frequencies and may not accurately reflect how your music sounds to the human ear. Instead, it’s best to use speakers alongside headphones to ensure your sound is well-balanced and mixed accurately. This way, you can listen to your music both in an isolated environment (through headphones) and in a room where you can hear natural acoustic sounds (through speakers). Ignoring room acoustics: One of the most common mistakes people make is ignoring room acoustics. Studio monitors function differently depending on your room’s dimensions, materials, and shapes. Without proper acoustic treatment, you may end up with muddy or distorted sound. To ensure optimal monitoring levels, invest in acoustic panels, bass traps, and diffusers to create an accurate listening environment. These treatments help reduce unwanted reflections and standing waves that can negatively impact your sound quality. In conclusion, it’s crucial to avoid these mistakes for achieving optimal balance and monitoring levels in your home studio. By keeping these tips in mind, you can produce high-quality music that accurately reflects your artistic vision.


Frequently Asked Questions Of The Perfect Monitoring Levels For Your Home Studio


What Level Should My Studio Monitors Be At?


Your studio monitors should be at a comfortable level, around 85dB SPL. This level is sufficient for a clear and accurate playback without causing ear fatigue. Make sure to calibrate your monitors to achieve a balanced frequency response and adjust the volume level accordingly to avoid distortion.


What Db Should By Studio Monitors Be?


The dB level of studio monitors depends on the size of the room and the volume needed. As a general rule, a range of 85 to 100 dB is recommended. However, it’s best to consult a professional to ensure optimal listening conditions.


Should My Studio Monitors Be At Full Volume?


No, your studio monitors should not be at full volume. Monitoring at high volumes can cause ear fatigue and compromise accurate sound reproduction. It’s recommended to monitor at a moderate volume to ensure balanced mixing and to prevent damage to both your ears and equipment.


What Angle Should My Studio Monitors Be?


For the best listening experience, your studio monitors should be angled towards your ears while sitting at your mixing desk. Aim them so the tweeters are at ear level and form an equilateral triangle with your ears and the monitors.


This helps to create an accurate and balanced sound for your mixes.


Conclusion


After considering the various monitoring levels and their impact on your home studio productions, it is clear that finding the right balance is crucial. It is important to invest in quality monitors to ensure accurate and reliable sound. Additionally, taking the time to calibrate your monitoring levels and learning to trust your ears will ultimately lead to better recordings and mixes.


By following these guidelines, you can create a home studio setup that provides the optimal monitoring environment for your music production.

More in our Headphones & monitors guide.

Categories
Archive

Project Files Ways They Make You A Better Producer

Project files help producers improve their skills by allowing them to analyze and learn from past projects quickly. Project files provide a reference point to see what worked and what didn’t, which helps producers make better decisions in future projects.


As a producer, there are many ways to improve your skills, from learning new techniques and tools to analyzing past projects to see what worked and what didn’t. One of the most effective ways to improve your skills is by using project files.


We will explore how project files can help you become a better producer. We will discuss what project files are, how they work, and the benefits of using them in your workflow. Whether you are a beginner or an experienced producer, project files can be a valuable tool in your quest to improve your skills.


Increasing Efficiency With Project Files

As a producer, your primary goal is to make sure you’re delivering the best results possible for your clients. A critical component of that is being efficient and organized in your work process. Project files can play an essential role in helping you achieve that goal.

Streamlining Workflow

Creating a set template for your work process and reusing it for every new project can save you a lot of time. With project files, you can create a master template that you can save for all future projects. This means that you don’t have to start from scratch every time you launch a new project, making it quicker and easier to stay on track.

Organization And Access

Storing all your files in one centralized location means that you can easily access everything you need for a particular project. This not only saves you time, but it also ensures that you aren’t wasting time searching for files, searching email, or communicating with colleagues for specific information. Your time can be better spent on tasks that add value to your work.

In addition to streamlining workflow and providing organization, project files can also help you maintain a consistent level of quality and efficiency across all your projects. To put it simply, efficient work processes are essential for any producer. Implementing project files can help you be more successful in your work by reducing the time and stress involved in managing projects. So, don’t underestimate the power of project files.


Collaboration Made Easy


Collaborating on project files can make you a better producer by allowing easy access to shared information and resources. Working together with team members improves efficiency, productivity, and ultimately leads to better outcomes.

Collaboration Made Easy One of the biggest challenges faced by producers and creative teams is collaborating effectively. With the increasing number of remote workers, freelancers, and outsourced talent, collaboration has become more complex and time-consuming than ever before. However, project files can offer a simple solution to this problem.

Sharing With Remote Team Members

When working with a remote team, sharing project files is a crucial aspect of successful collaboration. Whether it’s design files, audio tracks, or video footage, project files allow team members to access the same information in real-time, no matter where they are in the world. With cloud-based storage solutions like Google Drive or Dropbox, project files can be securely shared with remote team members in a matter of minutes. This allows for real-time collaboration, instant feedback, and faster turnaround times.

Effective File Management

Effective file management is key to successful collaboration. Keeping project files organized and accessible is crucial for keeping projects on track, avoiding confusion, and streamlining workflows. By keeping project files organized, producers can quickly find and share files, preventing delays and improving productivity. This also allows team members to focus on their specific tasks, maximizing their time and efficiency. Additionally, effective file management enables producers to easily track changes, collaborate with multiple team members simultaneously, and keep everyone on the same page. In conclusion, project files are a vital part of modern collaboration, enabling remote teams to work together seamlessly, and keeping projects organized and on track. By utilizing modern storage solutions and effective file management techniques, producers can streamline workflows, improve productivity, and deliver outstanding results.

Facilitating Creativity


Facilitating creativity through effective project file management helps producers optimize their workflow and achieve better results in less time. With well-organized project files, you can easily collaborate with team members, track changes, and streamline the creative process.

As a producer, your creativity can often be the key to creating successful and engaging projects. However, even the most experienced producers can struggle with creative blocks or a lack of ideas at times. This is where project files can really shine, facilitating creativity in a variety of ways.

Quick Access To Ideas And Inspiration

One of the biggest advantages of project files when it comes to creativity is the ability to quickly access an archive of ideas and inspiration. These might be incomplete projects that have potential, or snippets of ideas that you can use for something totally new. Having a project file that is well-organized and easy to navigate means you’re never stuck staring at a blank screen, trying to come up with something new.

Eliminating Creative Blocks

Getting stuck in a creative rut is something that happens to even the most experienced producers. With project files, however, you can help eliminate creative blocks by having a variety of projects and ideas available at your fingertips. Instead of feeling frustrated or stuck, you can simply switch gears and start working on another project. This can be a great way to help break through a creative block and get your productivity back on track. Overall, project files are an essential tool for any producer looking to facilitate creativity. By providing quick access to ideas and inspiration, as well as helping to eliminate creative blocks, project files can help you become a better, more productive producer in no time.

Project Files Ways They Make You A Better Producer


Credit: www.killingmylobster.com


Project File Essentials


Project files are essential for any producer, as they enable easier collaboration, organization and increased efficiency. By utilizing project files, producers have better control over their work and can easily track changes, create backups and streamline their workflow.

If you’re a music producer, you already know how important your project files are. They’re the essence of your work, representing countless hours of creativity, mixing, and mastering. However, not all project files are created equal. Some may be messy and disorganized, while others may be missing crucial elements. In this article, we’ll explore the project file essentials, including the importance of backup systems and choosing reliable storage solutions.

The Importance Of Backup Systems

When you’re working on a music project, whether a single or an album, it’s essential to have a robust backup system in place. Consider what would happen if your hard drive or computer crashed, and you lost all your work. It would be devastating, not to mention potentially costly. Therefore, it’s vital to back up your project files regularly. Store them on an external hard drive, cloud storage, or a backup server. By doing this, you’re ensuring that your files are safely stored and will be available to you if anything happens.

Choosing Reliable Storage Solutions

Choosing a reliable storage solution is equally important. Not all external hard drives or cloud storage providers are created equal. You need to choose the right one that’s secure, fast, and accessible. When selecting an external hard drive, consider one with a fast transfer rate and enough storage capacity to accommodate your project files. Cloud storage is also an excellent option since it offers the convenience of remote accessibility. However, ensure that you choose a reputable cloud storage provider with robust security measures in place.

Conclusion

By implementing these project file essentials, you’ll be on the right track to becoming a better producer. With a reliable backup system and storage solution in place, you’ll be able to focus on creating music without worrying about losing your precious work. Keep your project files organized and accessible, and you’ll be surprised how much time and effort you’ll save in the long run.


Maximizing Project File Benefits

Project files are a crucial element of the production process. They contain all the necessary information for a project, including assets, timelines, and notes. By leveraging their full potential, project files can increase your productivity and creativity. In this blog post, we will discuss how to maximize the benefits of project files with a focus on two key topics: common productivity tools and working with third-party file providers.

Common Productivity Tools

If you’re like most producers, you use a variety of productivity tools to manage your workflow and streamline the production process. But did you know that many of these tools can be integrated with your project files to maximize their benefits? Here are a few examples:

Tool Integration
Calendar Add project deadlines and milestones to your calendar app to stay on track and on schedule. Set reminders and alerts to ensure that you don’t miss anything important.
Task Management Link individual tasks in your task management app to specific project files. This allows you to track progress and ensure everything is being completed on time.
Collaboration Many collaboration tools, such as Google Drive or Dropbox, allow you to store, share and edit project files with your team from anywhere, at any time. This ensures consistent communication and easy access to all project files.

Working With Third-party File Providers

At times, you may need to work with third-party providers to access additional resources for your project. In such cases, it’s important to ensure that any files you receive from them are well-organized, properly named, and easily accessible. Here are three tips that can help:

  1. Use a file-sharing platform: Utilize a cloud-based file-sharing platform, like WeTransfer or Box, to transfer files from third-party providers to your team. This removes the risk of losing files or versions.
  2. Clarify file naming conventions: It’s best to establish a consistent naming convention that all parties understand — including any abbreviations or special characters to be used. This helps to avoid confusion, prevents lost files and optimizes searchability.
  3. File organization: Before adding third-party files into your project, it’s recommended to create a dedicated folder in your project directory, and subfolders if necessary. This ensures that the third-party files are organized and easy to access when needed.

By using these tips, you can ensure that you get the most out of your project files, whether you are working alone or collaborating with others.


Frequently Asked Questions Of Project Files Ways They Make You A Better Producer


How Can I Be A Better Producer?


To become a better producer you should focus on improving your time management, communication skills, and attention to detail. It’s important to stay up-to-date with industry trends and techniques, and to seek out feedback from peers and mentors. Lastly, always be open to learning and adapting your approach as necessary.


How Do You Become A Successful Producer?


To become a successful producer, you need to have a combination of technical knowledge, passion, and experience in the industry. You should also have excellent communication, problem-solving and management skills. Effective networking, staying up-to-date with trends and developing a unique style are also key.


Success comes from dedication, commitment and the ability to adapt to changes in the industry.


What Program Does Producers Use?


Producers use a variety of programs depending on their needs, such as Ableton Live, Logic Pro, Pro Tools, FL Studio, and Cubase.


Do Producers Use Templates?


Yes, producers often use templates to streamline their work process and ensure consistency in their content. Templates can include elements such as scripts, storyboards, and graphics, among others. Templates are commonly used in video production, graphic design, and other content creation fields.


Conclusion


Effective project file management is an indispensable part of a music producer’s job. From organizing samples and presets to tracking project progress, project files help producers stay on top of their game. In addition to making your life easier, project files can also help you become a better producer by enhancing your workflow, creativity, and time management skills.


By prioritizing organization and making the most of available digital tools, you can take your music production game to the next level. So, start creating concise and effective project files today and watch your productivity skyrocket!

Categories
Archive

Basics Of Vocal Tuning Using Pitch Correction Plugins

Pitch correction plugins are used to adjust the pitch of recorded vocals. Vocal tuning is possible through automated and manual methods.


Vocal tuning is the process of adjusting the pitch of recorded vocals. This process involves the use of tools such as pitch correction plugins which can adjust the pitch of a vocal track either automatically or through manual adjustment. Tuning vocals can help correct any pitch issues within a recording and can improve the overall quality of a song.


While some may argue that tuning vocals can take away from the authenticity of a performance, others see it as a necessary tool in modern recording and production. Understanding the basics of vocal tuning and how to use pitch correction plugins can help any musician or producer achieve the desired sound for their recordings.


What Is Vocal Tuning?


Vocal tuning is the process of using pitch correction plugins to correct pitch inaccuracies in recorded vocals. Using these plugins, producers and audio engineers can fine-tune vocal performances, ensuring that every note sounds in-tune and polished.

The Concept Of Pitch Correction

Vocal tuning or pitch correction is a process of altering the pitch of a recorded vocal performance to match the desired musical key or to fix out-of-tune notes. It involves correcting the pitch of a vocal track and making it sound more in-tune with the rest of the instruments in a song. Pitch correction has become an essential tool in modern music production as it ensures that the end product is free from pitch problems.

The Role Of Pitch Correction Plugins

Pitch correction plugins are software tools designed to help producers tune and correct vocal recordings easily. These plugins work by allowing producers to manipulate the pitch and timing of a recorded vocal performance and eliminate the need for re-recordings. They can also be used to creatively manipulate vocals, such as creating robotic or otherworldly effects. Ensuring that vocals are properly tuned with pitch correction plugins is a crucial step in achieving a professional-sounding mix. By removing any pitch imperfections or inconsistencies, pitch correction plugins enable producers to create a cohesive and harmonious musical composition that is pleasing to the listener’s ear. Here are some of the benefits of using pitch correction plugins:

  • Time-saving: Pitch correction plugins save producers a lot of time and effort that would otherwise be spent on re-recording vocals until the pitch is perfect.
  • Improved sound quality: By correcting pitch problems, pitch correction plugins help to achieve a clean, professional sound that is free from errors and inconsistencies.
  • Creative effects: Pitch correction plugins can be used to achieve creative effects such as pitch-shifting, harmonizing, and robotic vocals.
  • Consistency: Using pitch correction plugins ensures that all vocals in a mix are of the same pitch and consistently in-tune with each other, making for a polished final product.

In conclusion, pitch correction plugins are essential tools in modern music production. They allow producers to quickly and easily correct pitch problems while also allowing for creative experimentation. By using pitch correction plugins, producers can ensure that their final product is of high quality and free from pitch inconsistencies.

Common Pitch Correction Plugins

Vocal tuning is an essential part of music production. It involves adjusting the pitch of vocals to match the desired key of a song. In the past, this was done manually using various techniques, such as cutting and pasting notes, or recording several takes until the desired pitch was achieved. However, with the advent of technology, vocal tuning has become much easier and efficient thanks to pitch correction plugins.

Auto-tune

Auto-Tune is arguably the most well-known pitch correction plugin available today. It was developed by Antares Audio Technologies in 1997 and has since become a staple in the music industry. Auto-Tune works by analyzing the pitch of a vocal track and then automatically adjusting it to the desired pitch. The plugin has different modes, such as automatic mode, graphical mode, and classic mode, which provide users with various options for editing vocals.

Melodyne

Melodyne is another popular pitch correction plugin that is renowned for its precision. It was developed by Celemony Software and has been used by many artists to edit vocals. Melodyne uses a unique algorithm that allows users to edit individual notes within a vocal track. This means that users can correct pitch without affecting the natural feel of the performance. Melodyne also has other features such as time stretching and formant correction.

Waves Tune

Waves Tune is a pitch correction plugin developed by Waves Audio. It is designed to work on both individual tracks and entire mixes. Waves Tune offers users various pitch correction modes, such as natural, smooth, and corrected, which allow them to achieve the desired pitch in different ways. The plugin also has various controls, such as pitch deviation, vibrato, and formant, which give users greater control over the pitch editing process.

How To Prepare Vocals For Pitch Correction


Preparing vocals for pitch correction using plugins is a crucial step in achieving a polished sound. Start by selecting a suitable software and setting it up according to the track’s specifications. Then, analyze the vocals, identify the pitch issues, and correct them using the plugin’s tools.

Recording Best Practices

Before you even think about pitch correction, it’s important to have a clean and high-quality recording. Here are some best practices for recording vocals:

  • Use a high-quality microphone and preamp.
  • Record in a quiet environment, free from background noise.
  • Consider using a pop filter or windscreen to reduce plosives and sibilance.
  • Monitor your recording levels and ensure you’re not clipping or distorting.
  • If possible, record in a space with good acoustics, such as a treated vocal booth or a room with minimal reflections.

Importance Of A Guide Track

A guide track is a pre-recorded instrumental track that the vocalist sings along to during the recording process. Here’s why a guide track is important for pitch correction:

  • It helps the vocalist stay in tune and in time with the instrumental track.
  • It provides a reference point for pitch correction, as the software can measure the distance between the vocals and the guide track to determine how much pitch correction is needed.
  • It makes it easier to identify and correct pitch issues during the editing process.

In conclusion, if you want to achieve the best results with pitch correction, it’s essential to prepare your vocals properly. This means recording in a clean and high-quality environment and using a guide track to ensure accuracy and ease of editing.

Basics Of Vocal Tuning Using Pitch Correction Plugins


Credit: www.uaudio.com


Using Pitch Correction In Your Daw


Pitch correction plugins are a powerful tool for correcting vocals in digital audio workstations. By adjusting pitch, timing, and other parameters, these plugins help achieve a polished, professional sound. With the basics of vocal tuning, using pitch correction plugins can help produce high-quality audio tracks.

Pitch correction is an essential tool that helps vocalists hit the right notes and maintain pitch throughout a session. With the advancement of technology, pitch correction plugins have become widely available, making it easier to correct pitch inaccuracies and improve the quality of vocal performances. Using pitch correction in your DAW can be a bit daunting, especially for beginners. But don’t worry, this guide will help you get started with the basics of vocal tuning using pitch correction plugins.

Setting Up The Plugin On A Track

Before you can start using a pitch correction plugin, it’s essential to set it up correctly on your track. Here are the steps to set up the plugin on a track in your DAW:

  1. Open your mixing console and select the track you want to apply pitch correction to.
  2. Insert the pitch correction plugin on the track. Most DAWs have built-in pitch correction plugins, but you can also choose from various third-party plugins available in the market.
  3. Select the plugin and ensure it’s set to the correct pitch correction mode. Some plugins have manual and automatic pitch correction modes, so ensure you choose the one that best suits your needs.
  4. Adjust the plugin settings to your preference. Typically, pitch correction plugins have settings such as response time, correction range, and object pitch that affect how the plugin corrects pitch inaccuracies.

Automating Pitch Correction

Pitch correction can be a time-consuming task, even more so when working on a project with multiple vocalists. Thankfully, you can automate the pitch correction process in your DAW using automation. Here’s how to automate pitch correction:

  1. Select the pitch correction plugin on your vocal track.
  2. Locate the automation lane for the pitch correction plugin in your DAW and enable it.
  3. Draw automation points in the automation lane to adjust the pitch correction plugin’s settings over time as needed.
  4. Review your work to ensure that the pitch correction has been applied accurately and effectively.

In conclusion, using pitch correction in your DAW is essential to achieving a polished and professional-sounding vocal performance. By setting up the plugin correctly on your track and automating the pitch correction process, you can significantly improve the quality of your vocal recordings. Remember, practice makes perfect, so don’t be afraid to experiment with different settings and explore various pitch correction plugins to find what works best for your needs.

Fine-tuning Your Vocal Performance


Learn the basics of vocal tuning using pitch correction plugins to enhance your vocal performance and give your recordings a polished and professional sound. With these tools, you can improve your pitch accuracy, eliminate off-key notes, and fine-tune your vocals to perfection.

As a singer, trying to achieve a flawless performance can be a challenging task. While advanced equipment and expert engineer assistance can get you closer to the ideal performance, it is essential to work with pitch correction plugins to fine-tune your vocal output. Pitch correction plugins are an essential tool that helps smooth out any flaws or inconsistencies in your vocal performance, making it sound more polished and streamlined. In this blog post, we will discuss the basics of vocal tuning using pitch correction plugins, with a focus on the subheading “Fine-tuning Your Vocal Performance.”

Sliding Vs. Correcting Pitch

When it comes to pitch correction plugins, two primary methods can be used. You can either slide or correct pitch. Sliding refers to moving a note up or down by a few cents to ensure it is in tune. In contrast, correcting pitch aims to identify and adjust missed pitches accurately. When choosing between the two, your decision may depend on your musical preference or the specific type of music you’re producing. However, it is essential to make sure that the tuning is not overly commercial or robotic-sounding.

Avoiding Robotic-sounding Vocals

While pitch correction plugins can help smooth out issues in your vocal performance, it is essential to ensure your resulting output doesn’t sound robotic or unnatural. An excellent way to avoid this is by controlling the amount and rate of tweaking you use when fine-tuning your vocal performance. It is recommended not to look for perfection and make sure you find the right balance between pitch correction and your natural voice.

Wrapping Up

As a singer, using pitch correction plugins can help you polish your performance and improve your overall output. However, it is important to use the plugins responsibly to make sure your final vocal tuning effort sounds satisfying and natural. By keeping the above basics of vocal tuning in mind, you will be on track to produce a near-perfect output that is free of robotic-sounding vocals.

Advanced Techniques For Vocal Tuning


Learn advanced techniques for pitch correction using vocal tuning plugins. Perfect your vocals by manipulating pitch with ease and create a polished sound for your recordings.

Creating Harmonies With Pitch Correction

Pitch correction plugins can be used to create harmonies for a lead vocal. Duplicate the original vocal track and use the pitch correction plugin to pitch shift the duplicate track to the desired harmony. Adjust the timing, formant, and vibrato parameters in the plugin to make the duplicate track sound more natural.

Fixing Timing Issues

Timing issues can ruin an otherwise great vocal performance. Fortunately, pitch correction plugins can help to fix these issues. Use the time correction feature to align the vocals with the beat. Alternatively, you can use manual editing techniques, such as nudging individual notes in your DAW’s piano roll editor.

Formatting The Pitch Correction Plugin

Formatting the pitch correction plugin is crucial for achieving a natural sound. Start by setting the pitch detection algorithm to suit the vocalist’s performance. You can also adjust the speed of the correction to match the tempo of the song. For a more transparent sound, reduce the amount of correction applied or use a low ratio value. Finally, use EQ and compression to shape the sound of the vocal and make it sound more polished. Incorporating these advanced techniques for vocal tuning using pitch correction plugins can transform the quality of your vocal recordings. From creating harmonies to fixing timing issues, music producers can correct the pitch while maintaining the integrity of the vocalist’s performance. It takes time and practice to get the nuances right, but once you master it, you’ll be able to produce high-quality vocals that sound natural and polished.


Real-world Examples


Experience the magic of perfect pitch with pitch correction plugins that can help you tune your vocals like a pro. From prominent artists to amateur enthusiasts, pitch correction is not only easy to use but also an indispensable tool in the music industry.

Real-world Examples: Now that you have learned about the basics of vocal tuning using pitch correction plugins, let’s dive into some real-world examples. You’ll see how using a pitch correction plugin can transform a raw and unpolished vocal recording into a studio-quality professional sound. Before and after pitch correction: To better understand the impact of pitch correction, let’s explore two examples of a vocal recording before and after pitch correction. Before pitch correction: – The vocals are out of tune and sound flat or sharp. – The performance lacks consistency, making it challenging to listen to for an extended period. – The overall sound is unprofessional and very raw. After pitch correction: – The vocals are now in tune and sound polished and professional. – The performance is consistent and enjoyable to listen to for an extended period. – The overall sound is studio-quality, making it perfect for radio play or online streaming. Famous songs that use pitch correction: While some music purists argue against using pitch correction plugins, the fact is many famous songs wouldn’t exist without them. Here are few examples of famous songs that use pitch correction: 1. “Believe” by Cher 2. “I Will Always Love You” by Whitney Houston 3. “Since U Been Gone” by Kelly Clarkson 4. “Auto-Tune the News” by The Gregory Brothers 4. “Stronger” by Kanye West As you can see, pitch correction has been a crucial part of many memorable songs and contribute to the overall great sounding music industry. By using pitch correction plugins in the modern music industry, you can create unique and unforgettable music.

Basics Of Vocal Tuning Using Pitch Correction Plugins


Credit: bedroomproducersblog.com


Tips And Tricks


Learn the basics of vocal tuning using pitch correction plugins with these helpful tips and tricks. Utilize the tools available to improve the pitch and tone of any vocal performance, from subtle adjustments to complete transformations. With practice and patience, you can achieve professional-sounding results.

If you’re a music producer or sound engineer, you know how essential pitch correction plugins are to ensure your vocals sound on-point. However, using these plugins can become tricky as even slight adjustments can cause the vocals to sound unnatural. Here are some tips and tricks to avoid excessive pitch correction and utilize it effectively for a perfect vocal sound.

Avoiding Excessive Use Of Pitch Correction

When it comes to pitch correction, less is always more. Using too much correction can make the vocals sound robotic and unnatural. Here are some ways to avoid excessive pitch correction:

  • Start with a good recording. Ensure that the vocalist is in tune while recording to minimize pitch correction.
  • Adjust the correction setting gradually to ensure that the vocals sound natural.
  • Use pitch correction only where it is required. Not every note needs pitch correction and overusing it can make the vocals sound off.
  • Use automation to adjust the settings slowly at the required point to avoid sudden shifts in pitch.

Mixing With Pitch Correction In Mind

Before using pitch correction plugins, ensure that you mix the vocals with pitch correction in mind. This means you must:

  1. Use relative pitch when tuning vocals. Instead of quantizing to a specific pitch, it’s better to use relative pitch and tune the vocals according to the melody of the song.
  2. Adjust equalization and compression before pitch correction to minimize the need for heavy correction.
  3. Pay attention to timing and rhythm to ensure the vocals are tuned to match the tempo and groove of the song.
  4. Listen to the vocal track multiple times to analyze the pitch and the required amount of correction.

Remember, pitch correction plugins are tools to enhance the vocal performance, not to replace it. Use them wisely to achieve a natural and harmonious sound.

Basics Of Vocal Tuning Using Pitch Correction Plugins


Credit: www.waves.com


Frequently Asked Questions For Basics Of Vocal Tuning Using Pitch Correction Plugins


What Is The Difference Between Pitch Correction And Vocal Tuning?


Pitch correction is a process that involves adjusting the pitch of a recorded sound to the desired musical or tonal standard. Vocal tuning is a form of pitch correction that focuses specifically on the vocals in a recording. While both terms are used interchangeably, vocal tuning refers to the more meticulous process of correcting or modifying the vocal notes to match the intended melody.


Do Professional Singers Use Pitch Correction?


Yes, many professional singers use pitch correction software to enhance their vocal performance. It helps them correct minor pitch inaccuracies and refine their singing. However, some singers prefer not to use it and rely on their natural abilities.


What Is The Pitch Correction Algorithm?


The pitch correction algorithm is a digital signal processing technique used to modify or correct the pitch of audio recordings. It analyzes the pitch frequency of the recorded sound and adjusts it to a predetermined pitch value, improving the quality of the recording.


What Does Detune Do In Pitch Correction?


Detune in pitch correction adjusts the pitch of the input signal by slightly lowering or raising it. This creates a more natural and subtle effect, making the corrected pitch sound less robotic and more akin to a human’s natural singing.


Conclusion


Pitch correction plugins have made tuning vocals easier than ever before. It is important to remember that these tools are only aids and should not replace good singing technique. Understanding the basics of pitch correction and how to use the parameters effectively can greatly enhance the quality of a vocal recording.


With practice and a discerning ear, pitch correction can be an invaluable tool in the recording process. So give it a try and see how it elevates your vocal tracks!

More in our Plugin guides.

Categories
Archive

Sound Design Tricks That Make Your Listeners Go Wow

One of the best sound design tricks that will amaze your listeners is to use unexpected sounds or sound effects at strategic moments. These sounds can include anything from animal noises to random objects, and can add a unique flare to your music or audio project.

Sound wave graphic illustrating sound design tricks


Also, by combining these sounds with clever EQ and compression techniques, you can really make your tracks stand out and leave a lasting impression on your audience. Also, Sound design plays a vital role in creating immersive audio experiences, whether it’s for a film, video game, or music project.

Related reading: Sylenth1 Sound Design and Sound Design Tips Xfer Serum. For background, see the Wikipedia article on Sound design.


Moreover, with the right tricks and techniques, you can make your listeners go “wow” with the power of sound. In addition, we’ll explore some of the most effective tricks used by professional sound designers. This includes using unexpected sounds, manipulating EQ and compression, and creating unique textures and atmospheres. By mastering these techniques, you can take your sound design skills to the next level and create amazing audio that truly engages your listeners.


Incorporating Ambient Sounds


In addition, incorporating ambient sounds is an excellent sound design trick that can make your listeners go wow. For example, whether it’s the sound of birds chirping, rustling leaves or the sound of the wind. This adds ambient sounds can create an immersive experience that engages and captivates your audience.

Furthermore, as a sound designer, incorporating ambient sounds is an essential trick to make your listeners go wow. As a result, background sounds not only add depth and reality to your audio content. But they also create an immersive experience that keeps your audience engaged throughout the entire track. In this post, we’ll be discussing how to use ambient sounds effectively to take your audio content from ordinary to extraordinary.

Background Sounds Add Depth & Reality

Additionally, background sounds can help make your audio content sound more authentic and realistic. However, to achieve this, you need to select sounds that match the setting you’re creating. For example, if you’re creating an audio story set in a forest, incorporating the sounds of birds chirping, leaves rustling. The occasional crunch of twigs can make the listener feel like they’re really there.

Using Natural Sounds

Also, Natural sounds can be incredibly effective at creating a sense of place and time in your audio content. Then, the sound of the wind, water, and other nature sounds can evoke emotions and create a connection between the listener and the environment you’re trying to create.

White Noise Can Work Wonders for Sound Design Tricks

Moreover, white noise is a type of ambient sound that is generated by combining sounds of different frequencies. In short, it’s a great way to fill in the gaps in your audio content and create a steady flow of sound. White noise can mask unwanted sounds, such as background noise or static, and create a calming atmosphere for your listeners.

Designing Custom Ambient Tracks

In addition, if you want to take your sound design to the next level, consider designing custom ambient tracks. Similarly, this involves creating a soundscape that complements the setting or mood you’re trying to convey. Custom ambient tracks can be created using both natural and synthetic sounds and can create a unique listening experience that will keep your audience engaged and interested. Incorporating ambient sounds in your audio content is a simple but powerful way to make your listeners go wow. By using these sound design tricks, you can create an immersive listening experience that will transport your audience to another world.


Manipulating Sound Effects


Furthermore, by manipulating sound effects, you can create a unique and immersive audio experience for your listeners. Also, with sound design tricks like layering, eqing, and fx processing, you can make your sound effects stand out and leave a lasting impression on your audience.

Additionally, Manipulating sound effects is a sound design technique that can surprise your listeners and make them go wow. In addition, play with timing and pitch, reverse audio for impact, filter sounds, and layer them. The result is a unique and engaging soundscape. Let’s dive into each of these tricks and see how you can apply them to your projects.

Creative Use Of Timing & Pitch for Sound Design Tricks

Also, Timing and pitch are two crucial parameters to manipulate sound effects. For example, by tweaking the timing and pitch of a sound effect, you can create variations that add excitement and energy to your projects. For instance, a sound effect that is played slightly behind the beat can create a sense of tension or anticipation. On the other hand, a sound effect that is pitched up or down can make it sound otherworldly and unfamiliar. By experimenting with different combinations of timing and pitch, you can create dynamic and memorable sound effects that will leave your listeners in awe.

Reverse Audio For Impact for Sound Design Tricks

Another powerful sound design trick is to reverse audio for impact. As a result, this technique involves taking a sound effect and playing it in reverse. Moreover, the result is a sound that is unexpected and can create a sense of disorientation or surprise. For example, reversing a gunshot sound effect can create an eerie and chilling effect that can add drama to a scene. You can also use this technique to create a unique transition between two parts of your project or add a surreal touch to your sound design.

Applying Filters To Modify Sounds

In addition, the use of filters is a common practice in sound design. However, Filters allow you to modify the frequency content of sounds, essentially shaping their tone and character. For example, a low-pass filter can reduce the high-frequency content of a sound effect, making it sound muffled or distant. A high-pass filter, on the other hand, can remove the low-frequency content of a sound effect. This makes it sound thin or bright. By creatively combining different types of filters, you can create complex and nuanced sound effects that can elevate your project to new heights.

Layering Sounds For A Complex Effect

Furthermore, the final sound design trick we will discuss is layering sounds for a complex effect. Then, this technique involves combining multiple sound effects into one cohesive element. By layering sounds, you can create a rich and textured soundscape that is immersive and engaging. For example, layering a gunshot sound effect with a glass shattering sound effect can create a dramatic and explosive effect that captures the attention of your listeners. However, when layering sounds, it’s essential to ensure that each sound has its own space in the mix. So it doesn’t become cluttered or overwhelming.

In conclusion, manipulating sound effects is a crucial sound design technique that can make your listeners go wow. In short, by creatively using timing and pitch, reversing audio for impact, applying filters to modify sounds, and layering sounds for a complex effect, you can create a soundscape that is unique and engaging. Additionally, don’t be afraid to experiment with different combinations and techniques. The more you practice, the more you’ll refine your skills and create exceptional sound designs.

Playing With Stereo & Panning for Sound Design Tricks


Stereo and panning are powerful sound design tricks that can enhance your audio productions. Similarly, by experimenting with different panning techniques, you can create a more immersive soundstage and make your listeners go wow. Whether you’re working on music, podcasts, or video projects, playing with stereo and panning can help you achieve a more professional and engaging sound.

Playing with Stereo & Panning can take your sound design to another level. It’s not just about making your track sound bigger, but also creating a sense of space and direction. Also, with the right use of stereo and panning techniques, you can make your listeners go “Wow”. Here’s how:

Creating A Sense Of Space & Direction

Stereo image width is an essential factor in playing with space and direction. Wider stereo bases can make the sound feel more spacious, but it might also create a hollow feeling. In addition, if you’re looking for a centered and focused sound, narrow the stereo image width. In contrast, by widening the stereo base, you can create a rich and immersive feeling.

Using 3d Audio For Immersive Experience for Sound Design Tricks

3D audio technology creates an illusion in your ears that the sound is happening around you. For example, it emulates how we hear sound in real life, making it easier to place sounds accurately. So, instead of placing instruments on a flat plane, you can place them around the listeners. This creates a realistic and immersive experience.

Dynamic Panning To Draw Focus for Sound Design Tricks

Dynamic panning is a technique where you automate the panning position of the sound throughout the track to draw attention or create movement. It’s like putting a spotlight on a specific sound source, and when paired with volume automation, it can create an excellent effect as if the sound is moving around you. As a result, dynamic panning helps to bring a sense of direction and can keep the listeners engaged throughout the track.

Fading Between Channels To Build Tension for Sound Design Tricks

Fading between channels is a powerful tool for creating tension. By slowly fading from one channel to another, you can create an unsettling feeling, especially when you mix the channels differently. However, let’s say you have a sound in the left channel and the right channel. By fading the left channel slowly to the right channel, the listener will feel like the sound is moving towards them. This makes the listening experience more exciting. To sum it up, Playing with Stereo & Panning can be useful in creating a unique and immersive sound experience. By creating space, using 3D audio, dynamic panning, and fading between channels to build tension, you can make your music stand out from the rest.


Using Silence As A Tool for Sound Design Tricks

As a sound designer, your primary goal is to captivate the listener’s attention and evoke emotions. While sounds play a crucial role in achieving this, there’s another secret weapon you can use to make your sound designs more impactful – Silence. Then, learning to integrate silence in your sound designs can add a new dimension to your work. This creates memorable experiences for your listeners. In this blog post, we will explore some key techniques on how to use silence as a tool to make your listeners go wow!

Pauses Are As Significant As Sounds

A pause can be as significant as a sound in a composition or design. It can completely change the way the listener perceives a story or an emotion. By using well-timed pauses, you can provide the listener with the necessary space and time to process what they’ve just heard. This allows you to control the narrative and the listener’s response. A well-timed pause can make the difference between a great story and an amazing one.

Imposing Silence To Intensify Emotions for Sound Design Tricks

Silence can be used as a tool to intensify emotions. By creating a moment of silence after a significant sound, you can allow the listener to experience a deeper emotional response. This creates a powerful contrast between the two. Silence can also accentuate the beauty or significance of a particular sound. By removing all background noise, you can provide the listener with a moment to focus solely on the sound and appreciate its nuances.

Causing Suspense With Unexpected Pauses in Sound Design Tricks

One of the most effective ways to create suspense is by using unexpected pauses. When the listener is anticipating a sound or a particular rhythm. You create a pause, it can generate a feeling of uncertainty that keeps them on their toes. This technique can heighten the anticipation and build up tension, leaving the listener waiting for the next sound. Just like a suspenseful movie, you can keep your listeners engaged by keeping them guessing.

Creating Contrast With Silent Moments for Sound Design Tricks

Creating contrast with silent moments can provide your listeners with a refreshing change of pace in your sound design. By removing all sounds, you can create a moment of stillness, allowing the listener to appreciate the silence. This silence can build anticipation, leading up to a powerful sound that creates a noticeable contrast for the listener. By providing a change of pace, you can engage the listener in a new way. This makes your sound designs more memorable.


Constructing A Soundscape

Constructing a soundscape involves designing an immersive world in which sound tells a story. It’s an essential aspect of creating audio content that connects with audiences. Companies invest heavily in constructing a soundscape that resonates with their brand and values. In this post, we’ll outline several sound design tricks that will make your listeners go wow.

Designing A Sonic World For Storytelling

Sound design is the art of creating a unique audio world that communicates an intended message. It can involve combining sounds from different sources or recording them afresh. You can manipulate sounds, filtered or modulated to create unique effects that evoke emotion and transport listeners to alternate realms. Crafting a sonic world for storytelling requires careful consideration of every detail, from ambiance to sound effects.

Using Music To Enhance Atmosphere for Sound Design Tricks

Music can create powerful emotional responses from listeners. It can invoke memories, improve focus, and evoke feelings of happiness or sadness. In a soundscape, music can enhance atmosphere and the tone of a story. For example, somber music can create a moody, introspective atmosphere, while peppy music can be used to create a fun, carefree tone.

Mixing And Mastering For Effective Sound Levels

Mixing and mastering play an essential role in producing high-quality audio content. They ensure that the sound levels are consistent and that all the elements are balanced. Mixing involves combining multiple audio tracks to create a single track that is pleasing to listen to. Mastering involves fine-tuning the mixed track to achieve optimal sound quality. Mixing and mastering are crucial techniques that ensure the final soundscape is professional and engaging.

Using Audio Effects To Blend Sounds & Music

Audio effects can enhance or manipulate sounds and music to convey the intended meaning. They allow sound engineers to create unique and distinct effects that help listeners follow the story. For example, they can mimic a sound that isn’t present naturally or to blend sounds and music seamlessly. By blending sounds and music creatively, audiences can be immersed in the audio world created by the sound engineers.

In conclusion, constructing a soundscape involves creating an immersive audio world that tells a story. Use the tricks above: build a sonic world for the story and let music set the mood. Mix for clear levels and blend sounds with effects, and your audio will make listeners go wow.

Experimenting With Foley Sounds


Creating unique Foley sounds is a game-changer for sound design. It adds depth and character to any piece of work by emphasizing various actions, and creating more immersive environments. Incorporating Foley sounds into your audio design is a great way to captivate your audience and leave a lasting impression.

Foley sounds are the everyday sounds that we hear in our environment, from footsteps to the rustling of clothing to the sound of opening doors. Sound designers use these sounds to make their productions more immersive and realistic. Experimenting with Foley sounds is a great way to give your listeners an experience that they won’t forget. In this post, we will discuss how to create realistic everyday sounds, record your own sounds, break, manipulate, and layer sounds, and use Foley for unique and quirky sound effects.

Creating Realistic Everyday Sounds

Creating realistic everyday sounds is the foundation of Foley sound design. By including sounds that our brains are already used to hearing, we can create a more immersive experience for our listeners. Some tips for creating realistic everyday sounds include:

  • Research your sounds by watching videos and films that have similar scenarios.
  • Use the right equipment to capture the sound you want, such as microphones and recording software.
  • Embrace the imperfections, as it adds authenticity to the sound.

Recording Your Own Sounds

Recording your own sounds opens up a world of possibilities for your Foley sound design. With your own recordings, you can create unique sound effects and manipulate them in any way you desire. Here are some tips for recording your own sounds:

  • Use a high-quality microphone to capture the sound as accurately as possible.
  • Experiment with different recording techniques, such as adjusting the distance between the microphone and the object.
  • Record in a quiet environment to minimize background noise.

Breaking, Manipulating, And Layering Sounds

Breaking, manipulating, and layering sounds is where you can really get creative with your Foley sound design. By combining different sounds and manipulating them, you can create entirely new sounds that can’t be found in the real world. Here are some tips for breaking, manipulating, and layering sounds:

  • Use editing software to cut and rearrange sounds to your liking.
  • Adjust the pitch and speed of the sound to alter the tone.
  • Layer different sounds together to create a more complex and interesting sound effect.

Using Foley For Unique And Quirky Sound Effects

Foley sound design is not just about creating realistic sounds. You can also use Foley to create unique and quirky sound effects that will make your production stand out. Here are some tips for using Foley for unique and quirky sound effects:

  • Think outside the box and use unconventional objects to create sounds.
  • Experiment with different recording techniques, such as recording the sound underwater or in a large empty room.
  • Use layering and manipulation to create new and interesting sounds.

In conclusion, experimenting with Foley sounds can take your sound design to the next level. Record your own everyday sounds, then break, bend, and layer them. Add Foley for quirky effects, and listeners won’t forget the result.

Adding Human Touch To Sounds


Crafting impactful sounds requires more than just technical skills. By adding a human touch to sound design, you can create a powerful emotional connection with your audience. Use sound design tricks such as layering, Foley effects, and subtle automation to make your listeners go wow.

Adding Human Touch to Sounds: Imbuing elements of humanity to sounds makes them feel more relatable and grounded, even in fictional or animation work. Breaths, sighs, gasps, laughs, and grunts all add to the realism and depth of audio productions. Here are some tips: – Breaths, sighs, gasps, laughs, grunts. These sounds are often overlooked but can bring a character to life. Record yourself or a voice actor performing them to bring more authenticity into your production. – Vocalizations & lip smacks for realism: Think about how everyday speech includes more than just words.

Practical Tips for Sound Design Tricks

Characters and people add in sounds like lip smacks, tongue clicks, and throat clearings. Incorporating these sounds can make the audio production feel more like a real conversation. – Modifying vocal sounds to create characters: Using pitch shifting, time stretching, or other effect plugins, you can change the sound of a voice trackto create distinct characters. This is especially useful for animation or video game work where characters need to have unique voices and personalities. Overall, adding human touches to sounds can make a big difference in how your production is received. It helps ground the work in reality, making it feel more relatable and engaging for the listener.


Integrating Sound Design Into Production

Sound design is an integral part of any production and it can make all the difference in the final output. Whether it is a movie, a TV show, or a podcast, sound design can enhance the experience for the audience and leave a lasting impression.

Collaborating With Audio Engineers & Artists for Sound Design Tricks

Collaborating with audio engineers and artists can help produce a more polished sound design. They can assist in creating the right sound effects, music, and voiceovers to enhance the production of the project. They can also help create unique sounds that are tailored to specific scenes to create a more immersive experience for the audience.

Sound Design As A Part Of Pre-production

As sound design can make a significant difference to the final output, it is essential to plan it from the pre-production stage. Identifying the sounds needed, planning the music, sound effects, and voiceovers required can be worked out during the pre-production stage. This planning allows the sound designer to design, source and record sound effects to enhance the production.

Providing Detailed Sound Notes For Post-production

Involving the sound designer in the production process can help to capture the sounds required for the final output. Providing detailed sound notes can help sound designers create, search or find the required sounds that will suit specific scenes. Detailed notes will also help sound design teams work out the methods for mixing, organizing, and processing the sound files. That way, they can deliver high-quality sound designs.

Testing And Tweaking With Test Audience for Sound Design Tricks

Testing and tweaking with test audiences can help to identify changes that may need to be made to the sound design. It can help sound designers identify any issues and see if the intended mood and atmosphere are being conveyed correctly. This testing can help create a more immersive and exceptional experience for the listeners.

Careful integration of sound design in the production process can lead to an immersive and professional experience that will have your listeners going “wow.”

Frequently Asked Questions Of Sound Design Tricks That Make Your Listeners Go Wow


How Does Sound Affect Its Listeners?


Sound can affect listeners by triggering emotional responses, influencing mood, increasing focus and productivity, improving memory retention, and impacting physical response such as heart rate and blood pressure. Pleasant sounds can have a calming effect, while unpleasant sounds may cause stress or discomfort.


How Can I Improve My Sound Design Knowledge?


To improve your sound design knowledge, start by researching and studying various sound designs and techniques. Practice creating your own sound effects and experiment with different software and tools. Seek out mentorship or take courses online or in-person. Attend industry events and workshops to network and learn from professionals in the field.


Keep up with new developments and trends by reading industry publications and blogs.


How Is Sound Used To Change A Listener’s Experience?


Sound is used to change a listener’s experience by altering their emotions, perception, and behavior through various techniques such as frequency, amplitude, rhythm, and tone. These factors affect the way a listener interprets the sound and can lead to a different overall experience.


For example, calming sounds can decrease anxiety while upbeat music can increase motivation.


What Are Some Of The Techniques Used To Create Sound Effects?


Techniques used to create sound effects include foley recording, synthesizing, sampling, and digital signal processing. Foley involves recording everyday sounds, while synthesis involves creating sounds electronically. Sampling involves taking sounds from existing sources and DSP involves manipulating sounds with computer software.


Conclusion


Incorporating sound design tricks in your music can elevate your listeners’ experience to the next level. From using compression and EQ to incorporating Foley and creating unique soundscapes, these techniques can truly make your music stand out and leave a lasting impression.


By implementing these tricks with intention and creativity, you can create a sonic journey that takes your listeners on an unforgettable ride. So go ahead and experiment with these methods, and surprise your audience with sounds that make them go ‘wow’.

Categories
Archive

The Secret To Compressor Attack And Release Time

The secret to compressor attack and release time is finding the right balance between a smooth transition and noticeable effect. Compressors are essential tools for controlling dynamic range in audio production.


Attack time controls how quickly the compressor reacts to incoming signals, while release time determines how long it takes for the compressor to release its grip on the sound. Balancing these two settings is crucial for achieving a desirable outcome in terms of sound quality.


We will explore the optimal compressor settings, discuss how to set them, and provide examples of how they can be used to improve audio recordings.


The Basic Functionality Of Compressors


Compressors play a vital role in the production of music by controlling the dynamic range of sound. The attack and release time of compressors are the secret to achieving the desired sound, allowing for peak reduction and level control.

Compressors are an essential tool used by audio engineers and producers in the music industry. Compressors are used to control the dynamic range of audio signals. The dynamic range is the difference between the quietest and loudest parts of an audio signal. Compressors are used to reduce the dynamic range to make audio sound more even and consistent.

Attack Time

Attack time refers to the amount of time it takes for a compressor to respond to an incoming audio signal. When a compressor is applied to an audio signal, it begins to reduce the dynamic range when the input level exceeds the threshold level. The attack time determines how quickly the compressor reacts to the incoming signal. A faster attack time will cause the compressor to kick in sooner and reduce the dynamic range quicker. This can be useful when dealing with transient-heavy material such as drums or percussion. A slower attack time will allow the initial transient of a sound to pass through the compressor, resulting in a more natural-sounding audio signal.

Release Time

Release time refers to the amount of time it takes for the compressor to stop compressing the audio signal once the input level falls below the threshold. A shorter release time will cause the compressor to stop compressing the audio signal quickly, while a longer release time will cause the compressor to continue compressing the audio signal for a longer period. The release time is important because it can affect the character and tonality of the compressed sound. A shorter release time can result in a more aggressive sound with more noticeable pumping or breathing artifacts. A longer release time can result in a smoother and more natural sound. In conclusion, understanding the basic functionality of compressors and how to control the attack and release time can help enhance the sound quality of audio signals. It’s crucial to experiment with different settings to find the right balance for each specific situation.

Compressor Settings That Affect Attack Time


Compressor attack and release time is influenced by various settings, with attack time being particularly important. Attack time determines how quickly the compressor responds to incoming signals. Settings like ratio, threshold, and knee all impact attack time.

Compressors can help make recordings sound more polished and professional. Understanding compressor attack and release time is essential for using a compressor effectively. It is significant to understand how different compressor settings will affect the attack time to achieve the perfect-sounding mix. Here are some compressor settings that affect the compressor attack time.

Threshold

The threshold is the first control to set while adjusting attack time. It determines the point at which the compressor starts to work, reducing the signal level. For instance, if the threshold is set low, the compressor will start working immediately, and if the threshold is set too high, the compressor may not work at all. Lowering the threshold will result in a faster attack time as the compressor reduces the volume as soon as it detects the audio above the set threshold.

Ratio

Another setting that affects the compressor attack time is the ratio. The ratio specifies the amount of gain reduction that will be applied once the signal rises above the set threshold level. A high ratio, such as 10:1, will result in a faster attack time as the compressor immediately reduces the level of the signal above the threshold level.

Knee Type

The knee type determines how quickly the compressor starts to reduce the volume of sound that surpasses the threshold. A hard-knee setting will result in the compressor producing a sharp and sudden gain reduction once the audio signal rises above the threshold. Conversely, a soft-knee setting will produce a smoother gain reduction and a slower attack time. A soft-knee compressor will take more time to begin compressing the audio signal above the set threshold. In conclusion, understanding how compressor settings can affect the attack time is crucial for using a compressor effectively in music production. Use a low threshold, high ratio, and hard-knee settings to achieve the fastest attack time, and a high threshold, low ratio, and soft-knee settings to achieve the slowest attack time.

Compressor Settings That Affect Release Time


Understanding compressor settings that affect release time is essential in achieving the desired sound for music producers. Adjusting the release time can change the character of the sound, making it sustain longer or shorter, depending on the intended effect.

As a content creator, understanding compressor settings and how they affect the release time is essential. When set appropriately, the compressor effectively controls audio transients, making it one of the most critical tools in the audio engineer’s toolbox. The release time setting, in particular, determines how quickly the compressor returns to its original level after it has been triggered. However, several other settings influence the release time, such as hold time and push time.

Release Time

Release time, in simple terms, is the amount of time a compressor takes to return to its original state after it’s been activated. It determines how quickly the compressor ceases to compress audio once the level has reduced below the threshold value. When the release time is shorter, the compressor rapidly stops compression, enabling sound dynamics to recover quickly. A lengthier release time allows audio dynamics to remain compressed for a more extended period.

Hold Time

Hold time, on the other hand, determines how long the compressor sustains its compression ratio. It is specific to compressors that include a hold parameter, which is used to maintain the intended compression ratio after the sound drops below the threshold level. A long hold time ensures the compressor maintains its compression ratio for an extended period, while a brief hold time results in a less-sustained ratio.

Wrap Up

In conclusion, to achieve an optimum compressor release time, you should select settings that fit your particular audio needs. This includes choosing an appropriate release time, hold time, and push time. While it may be tempting to push the compressor’s ratio and attack controls to their extremes, this ultimately does more harm than good. Instead, a steady hand and careful monitoring of the sound Guitars, Basses, Vocals are what produces the best results.

The Secret To Compressor Attack And Release Time


Credit: www.audio-issues.com


Applying Attack And Release Time In Different Instruments

Compressor attack and release time play a significant role in shaping the dynamics of different instruments in a mix. By varying the attack and release time, one can control how quickly or slowly the compressor responds to the changes in the signal level. In this section, we will explore how to properly apply attack and release time to drums, vocals, and bass instruments to achieve the desired result.

Drums

When applying compression to drums, one of the goals is to achieve a consistent level and punchy sound. Depending on the style of music, different attack and release settings can be used to achieve the desired result.

  • Kick drum: A faster attack time can help to tame the initial transient of the kick drum and give it a tighter sound. A medium to fast release time can help to sustain the body of the kick drum.
  • Snare drum: A faster attack time can help to emphasize the initial transient of the snare drum and give it more snap. A medium release time can help to sustain the body of the snare drum.
  • Toms: A moderate attack time can help to preserve the natural attack of the tom and prevent it from sounding flat. A medium release time can help to sustain the body of the tom.

Vocals

With vocals, it is important to maintain a consistent level while still allowing for dynamic expression. Here are some settings that can be used:

  • Fast attack time: A fast attack time can help to control the peaks of the vocals and prevent them from getting too loud.
  • Medium release time: A medium release time can help to maintain the sustain of the vocals during quiet sections.

Bass

When it comes to bass instruments, the attack and release settings can have a significant impact on the overall sound of the mix.

Instrument Attack Time Release Time
Bass Guitar Fast Medium to Slow
Synth Bass Medium Fast to Medium

For bass guitar, a fast attack time can help to control the initial pluck of the string and give it a more defined sound, while a medium to slow release time can help to allow the note to sustain for longer. On the other hand, for synth bass, a medium attack time can help to preserve the natural character of the sound, while a fast to medium release time can help to maintain a consistent level.

Using Attack And Release Time To Shape The Mix

Using attack and release time is one of the most effective ways to shape the mix and bring out the desired results. Attack and release time are the two most essential parameters in compressor settings that are responsible for compressing or expanding audio signals. Changing the attack and release time of a compressor can have a significant impact on the final outcome of the mix.

Pumping Effect

Attack and release time can create an impactful pumping effect on the mix. The pumping effect is caused by the rapid change in gain during the release time. The pumping effect occurs when the compressor threshold is set relatively low, resulting in the compressor kicking in more frequently. Pumping effect can be used to create a desirable feel and groove in any mix, but it must be used in moderation, so it doesn’t cause a significant distortion.

Transient Shaping

Attack and release time is widely used to shape transients, which has a significant impact on the mix. Transients are an essential part of most instruments, and shaping them can significantly change the sonic character of the mix. Fast attack time can help tame the transients of an instrument like a snare drum or bass, while slow attack time can help add more weight and punch. Release time can be set to preserve the sustain and avoid any choppiness in the mix. Transient shaping can make all the difference between a good mix and a great one.

Glueing The Mix

The use of attack and release time can be excellent for gluing the mix. By setting the attack and release time to moderate settings, the compressor can act as a glue and make the mix sound cohesive. This technique is known as buss compression. For instance, setting a compressor on the drum buss with moderate attack and release time can help gel all the drum elements together and create a more natural sound. Buss compression should be applied with a light hand so that it doesn’t cause any adverse effects such as loss of dynamics or pumping.

The Secret To Compressor Attack And Release Time


Credit: www.masteringthemix.com


The Secret To Compressor Attack And Release Time


Credit: www.masteringthemix.com


Frequently Asked Questions For The Secret To Compressor Attack And Release Time


How Do You Calculate Attack And Release Time On A Compressor?


Attack and release time on a compressor can be calculated by adjusting the settings based on the material being compressed. It’s important to listen to the sound and adjust the attack time to catch the transient and release time to let go, without creating distortion.


What Should The Attack And Release Settings Be On A Mastering Compressor?


The attack and release settings on a mastering compressor vary based on the material being mastered. There is no one-size-fits-all approach. The settings will depend on the mix dynamic, genre, and mastering goals. Always trust your ears, use references, and make judicious use of compression to enhance the track’s musicality.


How Does Attack And Release Affect Compression?


Attack and release parameters in compression affect the way sounds are processed. Attack controls the speed at which compression is applied, which affects the initial impact of sound. Release controls the time it takes for the compressor to stop compressing after the sound has passed below the threshold.


Appropriate settings of attack and release parameters can enhance the perceived loudness, clarity, and texture of the audio signal.


What Is The Fastest Attack Time For A Compressor?


The fastest attack time for a compressor is around 0. 1 milliseconds, although some modern compressors can work even faster with a time of 0. 01 milliseconds. A compressor’s attack time is the period it takes to decrease the gain once the threshold is surpassed.


Conclusion


To master compressor attack and release time, it’s important to understand the science behind it. By adjusting these two features, you’re able to manipulate the sound and enhance the final product. Remember to consider your goals and input levels for each piece of audio when adjusting these parameters.


It takes some practice and experimentation, but once you get the hang of it, you’ll have a powerful tool in your arsenal. Remember, the key to successful compression is finding the sweet spot where the effect is unnoticeable, yet transformative.


Categories
Archive

Tips On How To Mix Drums Using Only Stock Plugins

To mix drums using only stock plugins, start with EQ and compression. Apply EQ to remove unwanted frequencies and boost the drums’ natural sound.


Then apply compression to control the dynamics and add sustain to the drums. When mixing drums, it’s essential to get the sound right as they form the backbone of any song. Understanding how to mix drums using stock plugins is a valuable skill that can help you get better results without relying on expensive plugins.


With the right approach, you can achieve a balanced and polished mix that will enhance your music productions. This article outlines a step-by-step process for mixing drums using only stock plugins. Whether you’re a beginner or a seasoned pro, you’ll find some tips and tricks that will help you take your drum mixing skills to the next level.

Tips On How To Mix Drums Using Only Stock Plugins


Credit: m.youtube.com


Setting Up Your Mixer Channel


Learn how to effectively mix drums using only stock plugins on your mixer channel with these helpful tips. Enhance your sound and create a professional-quality mix without the need for expensive third-party plugins.

Drum mixing can be a daunting task, but it doesn’t have to be. Setting up your mixer channels is the first and most important step towards achieving a perfect drum mix. In this post, we’ll show you how to use only stock plugins to mix drums, starting with setting up your mixer channel.

Inserting Stock Plugins

Before you start mixing, it’s essential to insert the right plugins into your channels. Most DAWs come with a selection of stock plugins that are perfect for drum mixing. Start by inserting any EQ or compression plugins that you’ll need. EQ plugins can help you shape the sound of your drums, while compression can help even out the levels. Be sure to experiment with different settings until you get the desired sound.

Signal Chain Order

The order in which you insert plugins can make a huge difference in your drum mix. The general rule of thumb is to start with EQ plugins, followed by compression plugins. You can then insert any other plugins like transient designers, reverb, or delay. However, keep in mind that the order of plugins can differ depending on your personal preference and the type of sound you want to achieve. Remember, mixing drums using only stock plugins can sound just as great as using expensive third-party plugins. The key is to experiment with different settings until you get the sound you’re after. And remember, always trust your ears.

Tips On How To Mix Drums Using Only Stock Plugins


Credit: www.productionmusiclive.com


Eqing Your Drums


Enhance the sound of your drums by utilizing stock plugins to mix them and achieve a professional-sounding mix. Use EQ to bring out the desired tones and frequencies, and experiment with different plugins to achieve a unique sound.

Drum mixing can make or break your music production. And EQ is one of the most crucial tools for drum mixing. With proper EQing, you can remove unwanted frequencies, boost desired tones, and balance frequencies for an overall pleasant sound. And the best part is that you don’t need any expensive third-party plugins for it. You can do all of the things with the stock plugins that come with your DAW. In this post, we will explore three tips on how to mix drums using only stock plugins, focusing on EQing your drums.

Removing Resonances

First and foremost, you need to identify and remove resonances from your drum recording. Resonances are unwanted frequencies that make your drums sound muddy and unclear. To remove them, you need to use a parametric EQ. A parametric EQ allows you to sweep through different frequencies and adjust the bandwidth to remove them. Here are the steps to follow:

  1. Insert a parametric EQ plugin on your drum track.
  2. Solo your drum track and start sweeping through different frequencies, listening for any boomy or muddy sounds.
  3. Once you’ve identified a resonance, reduce the gain of that frequency by a few decibels.
  4. Adjust the bandwidth to make the cut more precise.
  5. Repeat for all other resonances.

Enhancing Tone

After removing the resonances, you need to enhance the tone of your drums. Enhancing the tone means boosting certain frequencies that make your drums sound fuller and more defined. Here is how you can do it:

  • Insert a shelving EQ plugin on your drum track.
  • Boost the low-frequency range (around 60Hz) to make the kick drums sound heavier.
  • Boost the high-frequency range (around 5kHz) to make the snare drums sound more crisp and snappy.
  • Adjust the gain to taste.

Balancing Frequencies

The last step in EQing your drums is to balance the frequencies to make them work together harmoniously. Here’s how you can do it:

Drum Frequencies to Boost/Cut
Kick Boost at 60Hz, cut at 400Hz and above
Snare Boost at 200Hz-300Hz, cut at 800Hz-1000Hz
Toms Boost at 200Hz-400Hz, cut at 800Hz and above
Hi-hat and cymbals Cut at 1kHz and below

By following these tips, you can EQ your drum tracks using only stock plugins and achieve a balanced and pleasing sound for your music production.

Using Compression To Control Dynamics


Learn how to mix drums like a pro using only stock plugins by utilizing compression to control dynamics. With careful adjustments, you can achieve a well-balanced and polished sound without the need for expensive third-party plugins.

Drums are the backbone of a great mix, and proper drum mixing can make or break the sound quality of a song. Compression is one of the most important tools to control dynamics and achieve a polished drum mix. By using compression, you can even out the volume of different parts of the drum kit and add more punch to the drums. In this post, we will discuss how to use compression for better drum mixing.

Setting Thresholds

The first step to using compression is to set the threshold. This determines when the compression will kick in and reduce the level of the audio signal. The threshold should be set so that the compression engages only on the loudest parts of the drum hits. Generally, -6dB to -12dB is a good starting point for the threshold setting.

Adjusting Attack And Release Times

Once you have set the threshold, the next step is to adjust the attack and release times. Attack time controls how quickly the compressor reduces the level of the signal, and the release time controls how quickly the compressor stops reducing the level. For drums, a medium-slow attack time and a medium-fast release time work best. This allows the transients of the drum hits to come through but keeps the overall levels under control.

Sidechaining Kick And Snare

Lastly, to add more clarity and punch to the drum mix, you can sidechain the compressor to the kick and snare tracks. By doing this, the compressor will reduce the level of the other drum parts as soon as the kick or snare hits, allowing them to cut through the mix. Start by soloing the kick and snare tracks and then adding compression to the other drum parts, adjusting the sidechain until you get the desired effect. In conclusion, using compression is essential for achieving a balanced and polished drum mix. By setting the threshold, adjusting the attack and release times, and utilizing sidechain compression, you can control the dynamics of your drum tracks and add more punch to your mix.

Adding Depth With Reverb And Delay


Mixing drums can be challenging, but by using only stock plugins, you can still create a professional sound. Adding reverb and delay can help add depth and dimension to your mix, without needing any expensive external tools.

Adding Depth With Reverb and Delay is one of the most effective ways to take your drum mix to the next level. By using these two essential tools, you can make your drums sound fuller, more spacious, and more dynamic. In this post, we will focus on the subheading ‘Adding Depth With Reverb and Delay’ and cover some essential techniques to create depth in your drum mix.

Creating Space With Reverb

One of the best ways to create space in your drum mix is to use reverb. By adding reverb to your drums, you can create the illusion of space and depth. But make sure not to overuse reverb, as it may make your mix sound muddy. A good rule of thumb is to use a short decay time for the snare, toms, and kick drum, and a more extended decay time for the overheads and room mics. This technique will make your drums sound more realistic and add a sense of space to the entire mix.

Adding Punch With Delay

Another way to add depth to your drums is by using delay. A short delay can be used to add punch and impact to your drum sound by enhancing the attack of the drums. For example, adding a short delay to the snare drum can make it sound bigger and more powerful. Additionally, adding a longer delay to the cymbals can create more depth in the mix, making it sound more three-dimensional. Remember, adding depth to your drum mix is all about using the right tools at the right time. With the techniques covered in this post, you can use reverb and delay to create a more dynamic and spacious drum sound that will make your mix stand out.


Creative Mixing Techniques


Learn how to create dynamic and professional drum mixes using only stock plugins with these creative mixing techniques. Whether you’re a beginner or a seasoned pro, these tips will help you optimize your drum tracks for any genre or style of music.

If you are looking to take your drum mixes to the next level using only stock plugins, then you need to try some creative mixing techniques. One such technique is to use saturation, automation and parallel processing. In this article, we will take a closer look at each of these techniques and show you how they can help you to achieve a punchy and powerful drum sound that will wow your listeners.

Using Saturation

One of the easiest ways to add warmth, depth, and character to your drums is by using saturation. This technique involves adding harmonic distortion to your drum sound to create a more analog sound. One of the most popular saturation plugins is the Waves Abbey Road J37 Tape Saturation Plugin. This plugin emulates the sound of the famous tape machine used at Abbey Road Studios and adds a warm and vintage coloration to your drums.

Automation

Automation involves changing the level, panning, and other parameters of your drum tracks over time. This technique can help you to create dynamic and interesting drum parts that keep your listeners engaged. For example, you can automate the volume of your snare hits to make them louder during the chorus and quieter during the verses. The stock automation features in your DAW can be used to achieve this technique.

Parallel Processing

Parallel processing involves mixing a copy of your drum track with the original track to create a thicker and more powerful sound. This technique can be achieved using stock plugins such as the compressor and EQ. To achieve this, create a new channel, route your drum track to it, and apply compression and EQ to the new channel. Adjust the blend of the two channels to get the perfect balance between the original and processed track. Using these creative mixing techniques, you can achieve a drum sound that stands out from the crowd. Try experimenting with different plugins and settings to find the perfect combination for your drum mix.


Frequently Asked Questions For Tips On How To Mix Drums Using Only Stock Plugins


How Should I Mix My Drums?


To mix your drums effectively, start by setting levels for each drum sound. Use EQ to adjust the frequency balance, and compression to control dynamics. Apply reverb and delay sparingly to give depth to drums. Make sure everything fits within the mix and is balanced.


Always use high-quality samples and professional plugins for the best results.


Should You Mix Drums Separately?


Yes, it is recommended to mix drums separately to achieve better control over individual elements such as kick, snare, and other percussion instruments. This allows for greater clarity, balance, and separation in the overall mix, resulting in a more polished and professional sound.


What Is The Best Vst For Drum Processing?


Superior Drummer 3 by Toontrack is considered one of the best VST plugins for drum processing. It has a vast library of drum samples and also allows for customization of drum sound with its built-in mixing and sound shaping tools.


What Db Should Drums Be In A Mix?


Drums should typically be between -18dB and -10dB in a mix. The specific level will vary depending on the track and the individual elements within it. The best way to adjust the levels is to use your ears and listen to how the mix sounds.


Conclusion


Mixing drums using only stock plugins is an affordable and effective option for any music producer. By carefully selecting the right plugins and adjusting parameters such as EQ and compression, you can achieve a professional sound without breaking the bank.


Always remember to experiment and trust your ears, as ultimately, your creativity and intuition are your biggest strengths as a producer. With these tips, you can take your drum mixes to the next level and impress your listeners.

Categories
Archive

What is the Difference between Piano And Harpsichord

The main difference between a piano and harpsichord is the mechanism used to produce sound. The piano uses hammers striking strings, while harpsichords use plucking mechanisms.


Piano and harpsichord are two keyboard instruments that sometimes can be confused for each other. The piano is a widely used keyboard instrument since the eighteenth century, while harpsichords were prevalent during the Renaissance and Baroque periods. The main difference between the two instruments is the mechanism used to produce sound.


Pianos use hammers that strike the strings, while harpsichords use mechanisms known as plectrums that pluck the strings. The contrasting mechanisms produce diverse sounds and sustain. The piano is a dynamic instrument, and the musician can control the loudness and softness of the sound. On the other hand, harpsichords produce a less dynamic sound and even volume. Additionally, pianos have pedals that enable the musician to control the sustenance of the sound, unlike harpsichords that lack pedals.

What is the Difference between Piano And Harpsichord


Credit: www.wikihow.com


Construction


The piano and harpsichord differ in their mechanisms of sound production. Unlike the harpsichord, which plucks strings, a piano uses hammers to strike strings, enabling a greater range of dynamics and tone. Different construction and design elements yield distinct musical styles.

Construction is one of the major differences between the piano and harpsichord. While both instruments may seem similar to a beginner, an experienced eye will see various differences in their construction.

Piano Construction

Piano is a stringed keyboard instrument that produces sound by hammers striking the strings. It has three main components, namely the strings, the soundboard, and the keyboard. The strings are strung across a cast-iron frame and are struck by felt-covered hammers, which are activated by the keys on the keyboard. When the hammers strike the strings, they produce sound, which is then amplified by the soundboard, which is a large, wooden resonating chamber. The keys of the piano are made of wood, and each key is connected to a specific note.

Harpsichord Construction

On the other hand, the harpsichord is also a keyboard instrument that works on the principle of plucking the strings. The strings are connected to small metal strips called jacks, which are in turn connected to the keys. When a key is pressed, the jack plucks the string, and this produces sound. Unlike the piano, the strings of the harpsichord are not struck but plucked, which means that the sound it produces is softer. In conclusion, while both instruments produce sound by pressing keys, the construction of the piano and harpsichord is quite different. The piano uses hammers to strike the strings, whereas the harpsichord plucks the strings. Additionally, the piano has a larger soundboard compared to the harpsichord, creating a louder, richer sound.

What is the Difference between Piano And Harpsichord


Credit: www.classical-music.com


Playing Technique


Piano and harpsichord are both keyboard instruments, but their playing technique and sound differ significantly. Piano has dynamic range and allows for expressive and nuanced playing, while harpsichord produces a more uniform sound due to its plucking mechanism. A pianist strikes the keys to activate hammers that hit strings, whereas a harpsichordist presses keys that pluck strings with quills.

Piano Technique

Playing the piano involves different types of techniques. The first and foremost is the proper placement of the fingers on the keyboard. Players should learn to have a relaxed and light touch on the keys to avoid unnecessary tension on the fingers, which can reduce the accuracy and speed of playing. The use of the pedals is also an important part of playing the piano as it contributes to the overall sound and expression of the music. Another technique is the use of dynamics in playing the piano. The different dynamic levels include pianissimo (very soft), piano (soft), mezzo-piano (medium soft), mezzo-forte (medium loud), forte (loud), and fortissimo (very loud). Players should learn how to control the dynamics to convey the intended musical expression, which is critical in interpreting different music styles.

Harpsichord Technique

The harpsichord technique is different from piano technique as it is designed for the instrument’s unique features. Players of the harpsichord must learn how to produce a clear and consistent sound by pressing the keys firmly. Unlike the piano, the harpsichord keys produce sound when plucked by plectra. One of the unique features of harpsichord playing technique is the need to vary the articulation or attack of each note. This means that the player must learn how to play certain notes louder than others by plucking the strings with different force, creating a variety of sounds that add depth and dimension to the music. To do this, the player must adjust the wrist and knuckles, which requires time and practice. Overall, both piano and harpsichord require different techniques to produce their unique sound and style. It is important for players to learn and practice the appropriate techniques for the instrument they are playing to achieve the best possible performance.

Sound Production


The piano and harpsichord are two musical instruments that are commonly used in sound production. While both produce sound by plucking strings, the piano uses hammers to strike the strings, resulting in a louder and more dynamic sound, whereas the harpsichord uses a plucking mechanism that creates a more delicate and crisp sound.

Piano Sound Production

The piano uses hammers to hit the strings to produce sound. When the pianist presses a key, it lifts a felt-covered hammer which strikes the carefully tuned strings. The vibration of the strings produces a sound that projects through the soundboard and out of the piano. A piano can produce a wide range of sounds due to its dynamic range, which allows the performer to control the volume of the sound produced. The keys are weighted, making it possible to produce soft or loud notes and execute complex techniques such as staccato or legato.

Harpsichord Sound Production

Unlike the piano, the harpsichord uses a plucking mechanism to produce sound. When a key is pressed, a wooden jack covered in a strip of material called a quill, plucks a string causing it to vibrate and produce sound. Harpsichords produce a limited dynamic range, meaning the performer cannot control the volume of each note, but rather the overall volume of the instrument. It also has a less wide range of sound compared to a piano due to its inability to produce varying degrees of loudness and softness. In summary, the main difference between the sound production of a piano and a harpsichord lies in their mechanisms for producing sound. While the piano relies on hammers to strike the strings and produce a wide dynamic range of sound, the harpsichord uses a plucking mechanism resulting in limited dynamic range and a more limited range of sounds available.

Historical Context


The piano and harpsichord are both keyboard instruments, but the main difference lies in their sound and mechanics. The harpsichord has a plucking mechanism, while the piano has hammers that strike the strings, resulting in a richer and more dynamic sound.


Understanding the historical context of these instruments can shed light on their unique features and developments over time.

Piano Historical Context

Invented in early 1700, the piano is a percussion instrument that is played by pressing the keys with fingers. It has over 88 keys, and each key has a hammer that strikes the strings producing a melodious sound. Initially, it was known as the pianoforte because of its ability to produce both soft and loud sound. The invention of the piano led to the development of classical music that required a wide range of dynamics, rhythm, and tone variation.

Harpsichord Historical Context

Harpsichord is an old stringed instrument invented in the 15th century. It is played by plucking strings with a quill or plectrum attached to a jack, which makes it a plucking instrument. It has a keyboard similar to that of a piano, but instead of hammers, it uses quills to pluck the strings, producing a distinctive metallic sound. It was very popular during the baroque period, and its ability to produce a steady sound and consistent volume made it the preferred instrument for music composition during that time. During their time, both the piano and harpsichord were significant developments in music, and their popularity was influenced by the music styles of their respective periods.

Musical Styles


The main difference between piano and harpsichord is the mechanism that produces the sound. Piano has hammers that strike the strings, while harpsichord plucks the strings with quills. The result is a unique and distinct sound for each musical instrument.

Musical Styles: Piano and harpsichord are two different musical instruments that produce unique sounds. These instruments are played differently, feature different tones and belong to different eras. The difference in sound and style is rooted in their design and construction. When it comes to playing styles, both instruments have unique musical styles that are characteristic of the instruments. H3 – Piano Musical Styles: The piano is known for its versatility and is used in various genres of music, including classical, jazz, rock, and pop. In classical music, the piano is often used to play complex harmonies and is favored by composers who want a full range of notes and dynamic range. In jazz music, the piano is used as a solo instrument, and its ability to sustain notes is used to great effect in ballads. In pop and rock music, the piano is used to create a wide variety of sounds, and is often used to add an emotional element to songs. H3 – Harpsichord Musical Styles: The Harpsichord was a significant instrument in the Baroque era, and its unique sound is instantly recognizable. Its ability to play melodies with clarity and precision led it to become a popular instrument for Baroque music. Since the instrument cannot produce different dynamics, it was often used in an ensemble with other instruments such as the violin and the flute to create a contrasting texture. The harpsichord is also used in modern music, particularly in jazz and pop music, where it is prized for its unique sound. In conclusion, while the piano and harpsichord share many similarities, they are two distinct musical instruments that produce different sounds and have different musical styles. Understanding their differences is crucial in selecting the right instrument for the intended musical style.

Popularity And Usage


The popularity and usage of piano and harpsichord differ due to their unique features. While pianos produce sound by striking strings with hammers, harpsichords produce sound by plucking strings using quills. Additionally, pianos have more dynamic range and can play louder than harpsichords.

The piano and harpsichord are both keyboard instruments that have influenced music in their unique ways. While they may look similar, their sound and touch are quite different. In this section, we will explore the popularity and usage of both instruments.

Popularity Of Piano

The piano is one of the most popular and widely recognized instruments in the world. It was invented in the early 18th century and has since evolved into one of the most versatile instruments. The ability to play soft and loud, sustain notes for a long time, and play multiple notes at once has made it a hit with composers, performers, and music enthusiasts alike. The piano’s popularity can be seen in its use in various genres like classical, jazz, pop, and rock.

Popularity Of Harpsichord

The harpsichord is an older instrument that was commonly used in the baroque period. It was invented in the 14th century and became popular during the Renaissance and Baroque periods. Its sound is quite different from the piano’s, and its ability to play with different voices has made it a favorite of composers. Its popularity declined with the introduction of the piano in the late 18th century. The harpsichord is now primarily used in the performance of early music, especially baroque music.

Usage Of Piano

The piano is widely used in different genres of music. In classical music, it is often used as a solo instrument, or as an accompaniment to a singer or other instruments. Its versatility has made it a popular choice for composers who want to create complex arrangements. In popular music, it is used in different genres like rock, pop, and jazz, and its ability to play soft and loud has made it an instrument of choice in concerts.

Usage Of Harpsichord

The harpsichord is primarily used in the performance of early music, especially baroque music. Its unique sound has made it a favorite of composers, who use it to create intricate and complex compositions. The harpsichord is also used in chamber music and as an accompaniment to other instruments. While its usage is limited compared to the piano, it remains an important instrument in the performance of early music. In conclusion, both the piano and harpsichord have their unique sounds and usage. The piano is more versatile and widely used in different genres of music, while the harpsichord is primarily used in the performance of early music. Regardless of their differences, both instruments have contributed significantly to the world of music.

What is the Difference between Piano And Harpsichord


Credit: globalmusic.ph


Frequently Asked Questions On What Is The Difference Between Piano And Harpsichord


Why Was The Harpsichord Replaced By The Piano?


The piano replaced the harpsichord because it offered greater dynamic range. While the harpsichord could only produce one volume level, the piano allowed for variation in volume, making it more expressive. Additionally, the piano’s ability to sustain notes enabled composers to write music with more complex and emotional melodies.


Can A Piano Player Play The Harpsichord?


Yes, a piano player can play the harpsichord. Although there are differences between the instruments, including playing technique and sound production, many skills are transferable. A piano player would need to learn some new techniques and adjust to the harpsichord’s unique sound.


What Is The Primary Way The Piano Is Distinguished From The Harpsichord And Clavichord?


The primary way the piano is distinguished from the harpsichord and clavichord is that the piano has hammers that strike the strings, while the harpsichord and clavichord have plucking mechanisms. This allows for dynamic variation in volume and tone on the piano, unlike the other two instruments.


Which Is Older Harpsichord Or Piano?


The harpsichord is older than the piano. The harpsichord’s popularity began in the 16th century, while the piano emerged in the late 17th century. However, it was not until the 18th century that the piano began to replace the harpsichord in popularity.


Conclusion


To sum up, it is true that Piano and Harpsichord both generate beautiful melodies with the help of keys, but they are distinct in their sound, playing techniques, mechanism, and history. While the piano has become the most popular keyboard instrument, the harpsichord, with its unique character, has its own charm and holds a special place in the world of music.


Understanding the differences between these two beloved instruments can deepen one’s appreciation and enjoyment of music.