Categories
Archive

Everything You Need To Know About Mix Bus Processing

Mix bus processing refers to the process of grouping multiple tracks and applying effects to the entire group collectively. It is a technique used in audio mixing to enhance clarity and cohesiveness in a record.


Mix bus processing is an essential technique that can add an extra layer of polish and character to your recordings. It involves processing the mix bus, which is the final stereo mix that goes out to speakers or headphones. By using a combination of EQ, compression, saturation, and stereo enhancement, mix bus processors can help glue all the mix elements together and add depth and dimension to the final track.


The key to successful mix bus processing is to use it sparingly and to make subtle adjustments. Over-processing the mix bus can cause unwanted distortion and compromise the clarity of the audio.


What Is Mix Bus Processing?


Mix bus processing is a technique used during music production to enhance the overall sound of a mix. It involves applying various effects and EQ adjustments to the mix bus or master channel. This results in a more cohesive and polished sound for the final mix.

Introduction To Mix Bus Processing

Mix Bus Processing is a popular technique used to enhance the overall sonic qualities of an audio mix. It involves the manipulation of various effects on the mix bus, also known as the stereo bus or the master bus. The purpose of mix bus processing is to achieve a cohesive and polished sound that better represents the artistic vision of the mix. In this article, we will delve into the basics of mix bus processing and its advantages.

What Is The Mix Bus In A Mixer?

The mix bus in a mixer is the path where all tracks in a project converge and are then mixed down to a stereo track. It is where the final adjustments for level, panning, and effects are applied to create the finished product. The mix bus receives the outputs of all the channels in the mixer, and its output is what the listener hears. This makes it a crucial component in the mixing process.

What Is The Purpose Of Mix Bus Processing?

The primary purpose of mix bus processing is to enhance the overall sound of the mix. Mix bus processing allows for the manipulation of the stereo image, tonal balance, and dynamics of the mix as a whole. By processing all of the tracks together, the mix becomes more cohesive, and each instrument can be heard more clearly. Mix bus processing also adds a cohesive vibe to the overall sound and makes the mix sound more professional and polished.

Everything You Need To Know About Mix Bus Processing


Credit: m.youtube.com


Types Of Mix Bus Processing


Mix bus processing is an essential part of the music mixing process. It involves applying effects and adjustments to the entire mix, rather than individual tracks. Types of mix bus processing include compression, EQ, and saturation, each serving a unique purpose in achieving the desired sound.

Mix bus processing refers to the tools and techniques applied to the final stereo mix of a track or session, before it is exported or mastered. The mix bus is essentially the channel that combines all the instruments, vocals, and other elements of a mix into a cohesive whole. The following are the most common types of mix bus processing:

Equalization

EQ is a powerful tool for shaping the tone and character of a mix. It can be used to boost or cut frequencies in specific ranges, providing clarity, warmth, or brightness to the sound. When applied to the mix bus, EQ can also be used to correct any tonal imbalances and create more separation between the instruments.

Compression

Compression is another essential tool for mix bus processing. It can be used to balance the levels of different elements in a mix by reducing the dynamic range and bringing up lower-level signals. This makes it easier to hear individual instruments and vocals, and can also add cohesion and glue to the overall mix.

Saturation

Saturation refers to the process of adding harmonic distortion to a mix in order to warm it up and add character. This can be done using analog hardware, software plugins, or tape emulation software. Saturation can add a pleasing analog-style vibe to a mix, and can also help to tame harsh high frequencies.

Limiting

Limiting is a form of compression that is focused on preventing the peak levels of a mix from exceeding a certain threshold. This is important for ensuring that the mix doesn’t clip or distort when played back on different systems. Limiting can also add density and loudness to a mix, making it sound more polished and professional.

Stereo Imaging

Stereo imaging refers to the process of adjusting the width and placement of elements in a stereo mix. This can include panning individual instruments, adding stereo effects, and adjusting the overall stereo field. Stereo imaging is important for creating a sense of space and dimension in a mix, and can also help to separate individual elements and make them easier to hear. In conclusion, mix bus processing is essential for achieving a professional-sounding mix that translates well across different listening environments. By using a combination of EQ, compression, saturation, limiting, and stereo imaging techniques, you can create a balanced and cohesive sound that enhances the emotional impact of your music.


Mix Bus Processing Techniques


Mix bus processing techniques are an essential aspect of achieving a professional and refined sound in any music production. Using EQ, compression, saturation, and other effects on the mix bus enables sound engineers to refine the final mix and create a cohesive, impactful, and polished music track.

Mixing is an integral part of music production, and mix bus processing is a technique that can make or break your mix. The purpose of mix bus processing is to apply a final touch to your mix so that it can sound full, cohesive, and punchy.

Parallel Processing

Parallel processing is a technique that involves mixing a duplicate version of your stereo mix with the original track. The purpose of this technique is to add dynamic range, brightness, and clarity to your mix. By using parallel processing, you can apply different processing chains to your duplicate mix and blend it with the original mix to achieve a desired sound.

Serial Processing

Serial processing is a technique that involves applying a series of effects to your mix on a single channel. This technique is commonly used to achieve a polished, full-bodied sound. By using serial processing, you can apply different effects to your mix in the order that they should be applied, ensuring that you get the best possible sound.

Mid-side Processing

Mid-side processing is a technique that involves separating the mid (center) and the side (stereo) channels of your mix. The purpose of this technique is to give you greater control over the individual elements of your mix. By using mid-side processing, you can apply different processing chains to your mid and side channels and achieve a more dynamic and balanced sound.

Multiband Processing

Multiband processing is a technique that involves dividing your mix into different frequency bands and applying different effects to each band. The purpose of this technique is to give you greater control over the individual elements of your mix. By using multiband processing, you can apply different processing chains to your different frequency ranges and achieve a more consistent and balanced sound. In conclusion, mix bus processing can take your mix to the next level, and by using these techniques, you can achieve a professional-sounding mix. Whether you’re using parallel processing, serial processing, mid-side processing, or multiband processing, the key is to experiment and find the technique that works best for your mix.

Mix Bus Processing Tips


Discover the ins and outs of mix bus processing, from signal flow to how to properly use plugins, and the impact it can have on your overall mix. With these tips, you’ll be able to take your mixes to the next level and achieve a polished, professional sound.

Mix Bus processing, also known as Master Bus processing, is the art of processing all of the tracks in a mixdown before it hits the final stereo output. Proper Mix Bus processing can give your mixdown the final polish it needs to sound professional and cohesive. Here are some Mix Bus Processing tips to help you achieve that perfect mix.

Keep It Simple

When it comes to Mix Bus processing, less is often more. Your goal is to enhance your mix, not over-process it. Start with gentle EQ and compression settings and avoid processing for too long. Keep it simple by limiting your processing chain to a few plugins, and achieve subtle differences in your mix.

Gain Staging

Gain staging is about maintaining consistent levels throughout your mix. Ensure that your individual tracks are not too loud and avoid clipping your master fader. Always try to set your Mix Bus gain structure before you start processing. An excellent way to maintain pace and headroom is by using a gain plugin or a simple trim plugin.

Monitor At Low Volume

Mixing at high volume levels can cause ear fatigue which could lead to a mixdown that could potentially be over-processed. Mixing your tracks at a low volume level can help you to identify issues with balance and overall frequency content. It’s always important to reference your mixdown at a high volume level and compare it with commercial tracks using the same medium.

Use Reference Tracks

Reference tracks are essential for a balanced mixdown. Choose a few tracks that resemble the style and genre of your mix or a reference track from your client. Listen to the reference tracks and compare them to your Mix Bus processing. You can quickly identify problem areas, and adjust accordingly.

Mastering

Mix Bus processing is not a substitute for mastering. Even if your Mix Bus processing sounds great, it may still require additional processing during mastering. Ensure that you have rendered your mixdown at the highest possible quality before handing it over to a mastering engineer. Remember, when it comes to Mix Bus processing, it’s always a good idea to have a plan before you start. Try to avoid over-processing your mixdown and keep your Mix Bus processing subtle. Follow these Mix Bus processing tips to achieve a professional, polished-sounding mix.

Tools For Mix Bus Processing


Mix bus processing is an essential step to finalize your music mix. Tools such as compressors, EQs, and limiters help improve the overall sound, bringing balance, clarity and punch to your mix. With careful use of these tools, you can achieve a professional-sounding mix.

Tools for Mix Bus Processing provide the perfect final touch to your mix, giving it the polish and sheen it needs to stand out. The mixing process involves combining multiple tracks into a single stereo track, which requires specialized tools that improve the overall sound quality. This process is called Mix Bus Processing, and it’s crucial to improve the mix’s overall sound quality. There are two types of tools you can use for Mix Bus Processing: Analog Gear and Plugins.

Analog Gear

Analog gear refers to outboard equipment, which is usually connected to the mixer through patch cables. These gears are usually expensive and require a lot of space. However, they are known for their rich sound quality and are often preferred by experienced engineers. Analog gear such as tubes, equalizers, and compressors produces a warm and pleasing sound that many producers cannot resist. The analog gear is also non-linear, providing unique characteristics to the mix.

Plugins

Plugins are a digital alternative to hardware processing. They use specialized software to imitate the characteristics of analog gear, and they can be used without any additional hardware requirements. Plugins are popular among producers because they are cost-effective and less space-consuming than hardware. The software offers a wide array of powerful features that can help achieve the desired mix quality, including EQs, Compressors, Limiters, and Saturation plugins.

Hardware Vs. Software

Hardware and Software Produce differently. Analog gear produces its own unique, rich, and warm sound, while plugins produce a more precise, cleaner, and more controlled sound. One key benefit of hardware is that it adds some coloration and warmth to the mix, which is often sought-after by producers. However, hardware processing is also expensive, and some limitations come with it, getting in the way of achieving a perfect mix. On the other hand, plugins allow more precision and flexibility, which makes them cost-effective, easy to use, and a bit more user friendly than hardware. Nonetheless, the process may feel more tedious than hardware. Ultimately, the choice between hardware and software depends on your budget, workflow, and, of course, your taste. Many producers find a balance between both worlds, leveraging the benefits of each method to achieve a unique and excellent mix.

Everything You Need To Know About Mix Bus Processing


Credit: www.izotope.com


Mix Bus Processing Examples

When it comes to mixing, the mix bus is a crucial stage where all the channels come together. Mix Bus Processing is the processing applied to the stereo mix bus or master fader in a mix. It can help to glue together a mix, balance the frequency content, and add character to the overall sound. In this article, we’ll explore some classic and modern mix bus processing techniques with examples of mix bus processing chains.

Classic Mix Bus Processing Techniques

Classic mix bus processing techniques have been in use since the early days of music production. These techniques often involve using analog hardware to color the sound and achieve a cohesive mix.

Some of the classic mix bus processing techniques include:

  • Compression: Applying gentle compression to the stereo mix bus can help to smooth out peaks and balance the dynamics of the mix.
  • EQ: Applying gentle EQ can help to balance the frequency content of the mix, bringing out the best elements of each instrument.
  • Saturation: Adding saturation to the mix bus can help to add warmth and character to the sound.
  • Stereo Bus Compression: By applying stereo bus compression, you can help to create a cohesive, glued-together sound.

Modern Mix Bus Processing Techniques

Modern mix bus processing techniques often involve using digital processing tools such as plugins. These techniques help to achieve a transparent, clean sound with minimal coloration.

Some of the modern mix bus processing techniques include:

  • Multi-Band Compression: Unlike single-band compression, multi-band compression works on different frequency bands separately.
  • Linear Phase EQ: For precise EQ adjustment and minimal phase distortion, a Linear Phase EQ can be used.
  • Loudness Maximization: Using a loudness maximizer plugin on the mix bus can help to increase the overall volume of the mix while retaining dynamics.
  • Stereo Widening: Stereo widening plugins such as stereo imagers or stereo wideners can help to add a sense of space and width to the mix.

Example Mix Bus Processing Chains

Below are a few mix bus processing chains that use a combination of classic and modern techniques:

Mix Bus Processing Chain Description
Classic Chain: EQ+Compressor+Stereo Bus Compressor+Saturation
Modern Chain: Linear Phase EQ+Multi-Band Compressor+Loudness Maximizer+Stereo Widener
EDM Chain: Multi-Band Compressor+EQ+Loudness Maximizer+Saturation
Rock Chain: Stereo Bus Compressor+EQ+Saturation+Loudness Maximizer

Keep in mind that these chains are just examples, and the best mix bus processing chain depends on the specific mix and the desired outcome.

Common Mix Bus Processing Mistakes

If you want to make sure your final mix is polished and professional, mix bus processing is an essential step in the process. Mix bus processing, also known as stereo bus processing, involves applying processing effects to the final mix bus, which is the main output of your mixer or DAW. It’s important to keep in mind, however, that mix bus processing is a delicate and nuanced process, and there are several common mistakes that many beginners make when trying to achieve a polished final mix. Here are some of the most common mix bus processing mistakes to avoid:

Overprocessing

One of the most common mistakes that beginners make when applying mix bus processing is overprocessing. It can be tempting to apply a variety of processing effects to the final mix in an attempt to achieve a polished final sound, but too much processing can have the opposite effect and result in a muddy, cluttered final mix. Rather than overprocessing, focus on applying only the processing effects that are essential to achieving your desired sound.

Poor Gain Staging

Another common mix bus processing mistake that beginners often make is poor gain staging. Gain staging refers to the process of adjusting the volume levels at each stage of the mixing process to ensure that the levels are consistent and optimized for each processing effect. It’s important to make sure that you’re not pushing any of the processing effects too hard, as this can lead to distortion and other unwanted artifacts in the final mix. Take the time to properly set the gain levels for each processing effect to achieve a clean, polished final sound.

Not Monitoring At Low Volume

Monitoring at low volume levels is another important consideration when it comes to mix bus processing. It can be tempting to crank up the volume levels and focus on achieving a powerful, punchy final mix, but listening at high volume levels can actually lead to ear fatigue and make it more difficult to accurately judge the final mix. Instead, try listening to your final mix at low volume levels to ensure that it sounds good at all levels.

Not Using Reference Tracks

Another common mix bus processing mistake is neglecting to use reference tracks. A reference track is a professionally produced song that you use as a benchmark to compare your final mix against. By listening to a reference track, you can get a better sense of how your final mix stacks up against professionally produced music and make any necessary adjustments to achieve a polished, professional sound.

Neglecting The Mastering Process

Finally, it’s important to remember that mix bus processing is only one step in the overall mixing process. To achieve a truly polished and professional sound, you also need to pay close attention to the mastering process. Mastering involves applying a variety of processing effects to the final mix to ensure that it sounds consistent across different playback systems and achieves a balanced, polished final sound. Neglecting the mastering process can result in a final mix that sounds unbalanced or lacks the punch and polish of professionally produced music.

Everything You Need To Know About Mix Bus Processing


Credit: www.masteringthemix.com


Frequently Asked Questions For Everything You Need To Know About Mix Bus Processing


What Is Mix Bus Processing?


Mix bus processing refers to the application of audio processing on the main output track of a recording console. This allows the mixing engineer to apply a uniform processing to all the tracks in the mix. It can be used to improve the overall balance and coherence of the mix.


What To Do On Mix Bus?


While mixing a song, adding some processing on the Mix Bus can help bring all of the elements together and create a cohesive sound. Some common tools to use on the Mix Bus include EQ, compression, and saturation. It’s important to use these tools sparingly and be mindful of the overall impact on the mix.


How Do You Use A Mixer Bus?


To use a mixer bus, route audio from individual tracks or channels to the bus for processing and mixing. This allows for control over multiple tracks at once and can improve overall sound quality. Use the mixer’s routing or grouping functions to assign tracks to specific buses.


What Is The Difference Between Mix Bus And Mastering?


The mix bus is where individual tracks are combined to create a final mix. Mastering is the final step in the production process where the completed mix is processed to achieve a balanced and polished final product. The aim of mastering is to create a cohesive sound across all tracks and prepare the music for distribution.


Conclusion


Overall, mix bus processing is an essential aspect of music production that can significantly enhance the overall sound quality of your mix. By knowing the intricacies of mixing and mastering, you can achieve a full, rich, and balanced sound that can elevate your music to new heights.


With the right tools, a solid understanding of the mixing process, and some experimentation, you can create professional-sounding mixes that capture the essence of your music. So go ahead and start experimenting with mix bus processing today and unlock the full potential of your music!

Categories
Archive

How Nfts Could Revolutionize Royalties For Musicians

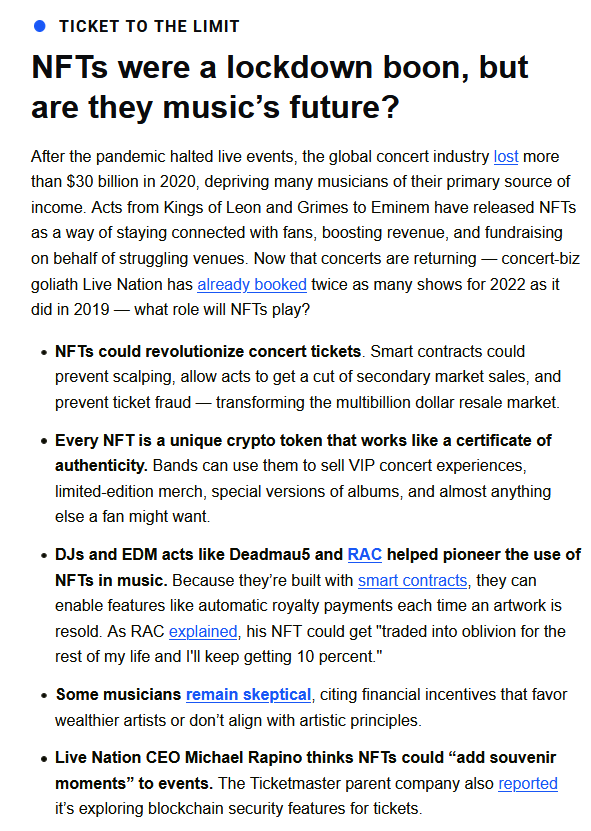
NFTs have the potential to innovate royalty payments for musicians. The rise of non-fungible tokens (NFTs) has the potential to revolutionize the way musicians receive royalties.


NFTs are digital tokens that represent ownership of a unique asset or piece of content, such as a song or album. With the use of NFTs, musicians can receive a percentage of the sale each time their music is sold, rather than collecting traditional royalties.


This allows for a more direct relationship between the artist and the buyer, bypassing intermediaries like record labels and streaming services. Additionally, NFTs can provide a way for musicians to offer exclusive content and merchandise to their fans, creating new revenue streams. Despite some challenges and criticisms, NFTs could prove to be a promising new way for musicians to monetize their work in the digital era.


How Nfts Can Benefit Musicians


NFTs are changing the landscape for musicians seeking fair royalties and greater control of their creative outputs. These unique digital assets enable artists to monetize their music and connect directly with fans, creating new opportunities for revenue generation while providing greater transparency and security.

NFTs or Non-Fungible Tokens are making headlines because of their potential to revolutionize the art industry. Beyond just art, NFTs could also open new opportunities for musicians who have struggled for years with the traditional music industry. In this post, we will explore how NFTs can benefit musicians, cutting out middlemen, creating a direct relationship between artists and fans, providing proof of authenticity and ownership, and offering opportunities for additional revenue streams.

Cutting Out Middlemen

The music industry is packed with intermediaries who act as a go-between for artists and music fans. The middlemen include labels, distributors, and royalty collection agencies that take a considerable share of the revenue generated. However, with NFTs, musicians can create and release their work directly to their audience without interference. By using blockchain technology, NFTs can enable musicians to sell their music directly to their fans, reducing the costs and complexities of the music industry.

Direct Relationship Between Artist And Fan

With NFTs, musicians can build a closer relationship with their fans by creating unique and personalized experiences. Fans can purchase NFTs that unlock exclusive content, experiences or allow them to own a piece of the artist’s work. NFTs can help to eliminate the barrier between artist and fan, creating a direct line of communication, and providing artists with the opportunity to better understand their fans’ preferences. The direct interaction allows for better feedback, loyalty, and insights, creating a win-win situation.

Proof Of Authenticity And Ownership

Musicians can benefit from NFTs in establishing proof of ownership and authenticity for their music. The smart contracts on the blockchain technology used in NFTs are unique to each piece of art, including music tracks. Each NFT is a digital certificate of ownership that cannot be replicated, and the blockchain technology ensures that the each verified copy is the original. Therefore, musicians can have the assurance that their work is not only authenticated but also traceable, which is essential in protecting their intellectual property rights.

Opportunities For Additional Revenue Streams

In the traditional music industry, the major revenue stream for musicians comes from the sales of their music. However, with NFTs, musicians can open doors for additional revenue streams. The exclusive, personalized, and unique experiences that come with owning NFTs can fetch a high value. Additionally, NFTs can help in promoting and selling merchandise, concert tickets, and other fan experiences. The potential to tap into new markets with NFTs is enormous, and musicians can earn more by branching out into other areas beyond sales of their music. Overall, NFTs have the potential to disrupt the traditional music industry by empowering musicians with more control over their work and the ability to forge a closer relationship with their fans. With NFTs, musicians can be more creative, experimental, and innovative while enjoying greater rewards from their work.

How Nfts Could Revolutionize Royalties For Musicians


Credit: twitter.com


Concerns Surrounding Nfts In The Music Industry

Non-fungible tokens (NFTs) present a unique opportunity for musicians to take control of their own careers and earn more for their work. However, the music industry has raised concerns about the implications of this new technology.

Accessibility And Inclusivity

One of the main concerns surrounding NFTs in the music industry is accessibility and inclusivity. While NFTs have the potential to provide a new revenue stream for musicians, it’s important to consider whether all fans will have access to this technology.

  • How can we ensure that fans with limited technical knowledge can participate in buying and selling NFTs?
  • What about fans who don’t have the financial means to purchase NFTs?

These are important questions that need to be addressed to ensure that NFTs do not create new barriers for music fans.

Environmental Impact

Another concern is the environmental impact of NFTs. The process of minting an NFT requires a significant amount of energy, which contributes to carbon emissions and exacerbates climate change.

NFT Minting vs Environmental Impact
NFT Minting Environmental Impact
High energy consumption Increased carbon emissions
Requires specialized hardware Contributes to e-waste

It’s important for the music industry to consider the environmental impact of NFTs and explore ways to minimize their carbon footprint.

Lack Of Standards And Regulations

Finally, there is a lack of standards and regulations surrounding NFTs in the music industry. Without clear guidelines, there is a risk of fraud, copyright infringement, and other legal issues.

  1. How can we ensure that NFTs are authentic and not counterfeit?
  2. What protections are in place to prevent artists from being exploited?

These are critical questions that need to be addressed by the music industry and regulatory bodies to ensure that NFTs provide a fair and transparent marketplace for all parties involved.

Examples Of Musicians Who Have Benefited From Nfts


Musicians have started to benefit from NFTs, with examples including 3LAU’s album sale earning over $11 million. Kings of Leon’s album became the first-ever NFT album sale, while DJ Premier sold exclusive beat NFTs. NFTs could be a game-changer for royalties in the music industry.

Examples of Musicians Who Have Benefited from NFTs NFTs or Non-Fungible Tokens are digital assets that offer ownership rights over unique pieces of digital content. Musicians can use NFTs to sell unique audio tracks, albums, and merchandise, allowing them to monetize their work without involving intermediaries. NFTs can revolutionize royalties for musicians, bringing in more revenue streams and rewarding creators for their hard work, creativity, and innovation. Grimes Grimes, the Canadian musician, sold $6 million worth of digital art as NFTs, including exclusive music and visual art pieces. She sold 10 different versions of her digital works, with each token representing ownership of one piece. This allows her to monetize her art in a way that was not possible before, bypassing traditional intermediaries and earning more money for her unique creations. Kings of Leon Kings of Leon, the American rock band, became the first band to release an album as an NFT. The band released a limited edition of their latest album, titled “When You See Yourself,” as three distinct NFT packages. These packages contained unique digital art, live show perks, and audiovisual art pieces in addition to exclusive music. Fans could purchase these packages using cryptocurrency and own a piece of the band’s history. Steve Aoki Steve Aoki, the DJ and producer, auctioned his first-ever NFT collection to benefit his Aoki Foundation. The collection included unique pieces of digital art, including unreleased music tracks and audiovisual art pieces. The winning bidder also received a real-life experience, such as a private DJ lesson, dinner with Aoki, or a trip to one of his shows. The auction raised over $4 million, with the proceeds going towards supporting brain science research and regenerative medicine. In conclusion, NFTs can revolutionize the way musicians monetize their work, offering new revenue streams and ownership rights over unique digital content. Grimes, Kings of Leon, and Steve Aoki are just some of the musicians who have benefited from NFTs. As more musicians adopt this technology, we can expect to see a shift in the music industry, empowering creators to take control of their art and earn more money from it.


How Nfts Could Revolutionize Royalties For Musicians


Credit: iamstevengarza.com


Frequently Asked Questions For How Nfts Could Revolutionize Royalties For Musicians


What Are Nfts And Why Are They Important For Musicians?


NFTs or non-fungible tokens are unique digital assets that cannot be replicated. Musicians can use them to sell music, art, and merchandise directly to fans without intermediaries. This approach offers more control over earnings, copyright, and royalties.


How Can Nfts Improve The Royalty System For Musicians?


Traditionally, musicians rely on streaming services and record labels to earn royalties, which often takes time and money. With NFTs, musicians can sell their music directly to fans and receive payment instantly. NFTs can also provide more transparency in revenue sharing and reduce the risk of piracy.


What Are The Challenges That Musicians Face With Nfts?


One of the main challenges musicians face with NFTs is the lack of education and understanding of how they work. Another challenge is the high energy consumption associated with the creation and sale of NFTs. Musicians also need to find a reliable and secure platform to sell their NFTs and ensure their fans are interested in buying them.


Conclusion


With NFTs, the music industry has realized the potential of blockchain technology to protect the digital rights of musicians, ensure they receive rightful compensation, and provide fans with a new way to engage with and invest in their favorite artists’ music.


This revolutionary technology could level the playing field for all musicians, especially those who struggle to navigate a complex industry. As NFTs continue to gain traction and evolve, it will be exciting to see how this innovation influences not only music, but also other areas of the entertainment industry and beyond.


Categories
Archive

How To Make A Future Bass Synth In Serum Beginners

To make a future bass synth in Serum for beginners, first select a wavetable and adjust the oscillator settings to create a sharp sound. From there, add effects such as reverb and delay to enhance the sound.


Making a future bass synth in Serum can seem daunting at first, but with some basic knowledge of the software, it can be achieved with ease. Serum is a digital audio workstation that enables users to create and manipulate sound waves to create a unique and personalized sound.


In this guide, we will provide step-by-step instructions on how to make a future bass synth in Serum for beginners. By following these steps, you’ll be able to create your own custom future bass synths that will elevate your music productions to the next level. So, let’s dive in!


Getting Started


Learn to create a Future Bass Synth in Serum with ease as a beginner. With step-by-step instructions and clear visuals, you’ll quickly be on your way to producing top-notch music.

If you’re new to making music, the process of creating your own sound can seem daunting. However, with the right tools and guidance, you can create your own unique sounds. Future Bass is one such genre of music that relies on a specific type of synth sound. In this tutorial, we’ll show you how to create Future Bass synth in Serum. Before we dive in, let’s get things set up.

Downloading Serum

Serum is a popular wavetable synthesizer that is widely used in the music industry. To get started, you’ll need to download the software and install it on your computer. You can purchase Serum from the official Xfer Records website. Once you’ve paid for the software, you’ll be able to download it instantly.

Understanding the Interface

Now that you’ve downloaded Serum, open the software and take a look at the interface. The interface may seem busy at first, but with a little explanation, it’s easy to understand. The main display area is where you’ll find the wavetables, effects, and modulation options. The small wave display at the bottom of the interface shows the current waveform. The various drop-down menus are where you’ll find additional settings and options.

Creating Your First Synth Sound

Now that you understand the basic interface, it’s time to create your first synth sound. To create a Future Bass synth, start by selecting a wavetable that is suitable for the genre. You can do this by clicking on the “Menu” button next to the wave display and selecting “Analog.” From there, you can select a wavetable that suits your needs. Next, you’ll need to adjust the envelope settings to get the right sound. The envelope controls the shape of the sound over time. For Future Bass, you’ll want to have a quick attack and a long release. Adjust the settings until you get the sound you want. Finally, add some effects to polish your sound. Some popular effects for Future Bass include reverb, chorus, and delay. Play around with the effects until you find something that sounds right.

Conclusion

That’s it! Creating your own Future Bass synth in Serum can seem overwhelming at first, but with a little bit of practice, you’ll be able to create your own unique sounds in no time. Remember to experiment with different settings and effects until you find something that sounds right. Good luck!

How To Make A Future Bass Synth In Serum Beginners


Credit: www.productionmusiclive.com


Creating The Oscillators


Learn how to create oscillators for a future bass synth in Serum with this beginner’s guide. Master the ins and outs of sound design, from waveform selection to filter modulation, to craft a unique and powerful sound.

Creating the Oscillators: Aspiring future bass producers, are you ready to learn how to make a future bass synth in Serum as a beginner? Excellent! Our first step is to create the oscillators. Let’s explore the key components by breaking down the process with three H3 headings. Choosing the Right Waveform: Firstly, let’s select the right waveform for the sound you wish to achieve. In Serum, we have a range of options: sine, square, sawtooth, and triangle waveforms, to name a few. Finding the perfect waveform is crucial to creating a unique and captivating sound. Here are some possible options: Sine Wave: Is a smooth waveform that produces a pure tone that’s great for basslines and leads. Square Wave: It generates a full-bodied sound that’s rich in harmonics and a good option for growling basses. Sawtooth Wave: This waveform is great for basses and chords, as it can produce a more retro sound. Triangle Wave: It’s often used as an alternative to the sine wave, producing a slightly rougher sound. Adjusting the Wavetable Position and Warp Modes: After selecting your desired waveform, it’s time to adjust the wavetable position. With Serum, you can modify the position and alter the sound’s entire tone. Try experimenting with the wavetable position on your chosen waveform to create a unique sound. Another factor to consider is the Warp Mode, which blends between wavetables. It adds a unique character to your sound and transforms it by altering the harmonics. Here is a brief overview of some of the most common warp modes: Sync: Produces a metallic sound that works well with synth leads. Bend: Changes the pitch of the sound and is emphasized at higher frequencies. FM: Generates a distorted, slightly robotic sound suitable for metallic bass lines. Formant: Provides a formant shaped sound, similar to a vocal. It’s good for creating unique leads. Adding Additional Voices: The final step is to add additional voices to the oscillator to form chords and enhance the sound’s fullness. You can experiment with up to sixteen voices in Serum. Adding extra voices creates a lush, rich and intricate sound. Play around and see if this technique enhances the mix, and if so, which notes work best together when using additional voices. That’s all there is to it! Follow these steps to create a unique future bass synth in Serum for your tracks. Keep experimenting, and most importantly, have fun. Happy producing!

Designing The Modulation

One of the key elements of future bass music is the use of complex synth sounds created through modulation. In this guide, we’ll walk you through the process of designing a future bass synth in Serum, starting with the modulation.

Creating Lfos And Envelopes

Modulation in Serum can be achieved through LFOs (Low-Frequency Oscillators) and envelopes. LFOs are used to create rhythmic patterns that can be linked to parameters such as pitch, filter cutoff, and wavetable position. Envelopes, on the other hand, are used to shape the sound over time, controlling parameters such as volume, filter cutoff, and resonance.

To create an LFO, simply click on the LFO tab in Serum and choose a waveform shape. You can adjust the rate, phase, and amount of modulation using the controls provided. To create an envelope, click on the envelope tab and draw in the shape you want using the nodes provided. You can adjust the attack, decay, sustain, and release using the controls in the envelope section.

Routing Modulation To Specific Parameters

Once you’ve created your LFOs and envelopes, you’ll need to route them to specific parameters in your synth patch. To do this, simply drag the LFO or envelope onto the parameter you want to modulate. You can adjust the intensity of the modulation using the knob next to the parameter name.

For example, you might want to use an LFO to modulate the filter cutoff frequency of your future bass synth. To do this, drag the LFO onto the filter cutoff knob and adjust the intensity to your liking. You can experiment with different LFO shapes and rates to create interesting rhythmic patterns.

Using Macro Controls For Quick Global Changes

Once you’ve designed your modulation, you can use macro controls to make quick global changes to your synth patch. Macro controls allow you to assign multiple parameters to a single knob, making it easy to create complex changes with just one movement.

To assign a parameter to a macro control, simply right-click on the parameter and choose “macro control”. You can then assign the parameter to a specific macro knob and adjust the range and intensity of the modulation. Repeat this process for multiple parameters to create a complex macro control.

For example, you might want to create a macro control that increases the intensity of the LFO modulation on the filter cutoff, while also increasing the resonance and adding a bit of distortion. With macro controls, you can create a complex sound with just one knob movement.

Adding Effects


Learn how to add effects and create a future bass synth in Serum for beginners. With the right techniques, you can achieve a unique sound that will make your music stand out. Follow step-by-step instructions and experiment with different effects to achieve the perfect sound for your future bass track.

After creating the desired sound for your future bass synth in Serum, the next step is to add effects to take it up a notch and add complexity to the sound. By adding effects, you can achieve a fuller, richer, and more dynamic sound that will set your music apart from the rest.

Choosing The Right Effects For Future Bass

The effects you choose will depend on the type of future bass sound you want to achieve. Some common effects for future bass include reverb, delay, chorus, and distortion. Reverb can help to create a sense of space and depth, while delay can add complexity and add a sense of rhythm. Chorus can add a sense of movement and flanger-like effects. Distortion is ideal for more aggressive basslines, as it can add grit, warmth, and saturation.

Setting Up An Effects Rack In Serum

To set up an effects rack, click on the pen icon in Serum’s effects tab. This will open up the effects menu, where you can add the desired effects. You can adjust the effect settings to create the desired sound. Click on the plus icon to add new effects. You can also rearrange the effects chain by dragging and dropping them.

Layering Effects To Create Complex Sounds

To create more complex sounds, try layering different effects. For example, try layering a delay effect with a reverb effect to create a more spacial sound. Or layer a chorus effect with a distortion effect to create a more unique sound. Experiment with different effects and their combinations to see what works best for the desired sound. By layering effects, you can create a sound that is rich, deep, and complex. In summary, adding effects to your future bass synth in Serum is an essential part of creating a unique and dynamic sound. Choose the right effects, set up the effects rack in Serum, and layer the effects to create a complex and unique sound. By experimenting with different effects and their combinations, you can create a future bass sound that is truly your own.

Fine-tuning Your Sound

If you’ve ever wondered how to make a future bass synth in Serum, then you’re in the right place. In the previous section, we discussed how to create the basic sound for your future bass synth using Serum. Now, it’s time to fine-tune it. By making some adjustments, you can take your basic sound and make it sound unique and professional. Let’s dive into fine-tuning your sound!

Using Eq And Compression To Shape Your Sound

Equalization is a powerful tool for shaping the sound of your synth. With EQ, you can boost or cut specific frequencies to achieve the desired tonal quality. Here’s how you can use EQ to shape your sound:

  1. Open an equalizer plugin in your DAW and loop your future bass synth sound.
  2. Choose the frequency range you want to tweak.
  3. Play around with the EQ controls, listening to the changes to your sound. Try to achieve a balanced and full sound.
  4. Next, we have compression, which can help to tame your synth’s dynamic range. Adding compression can also make your synth sound fuller and more polished.
  5. To achieve a proper balance of compression, loop your sound and use the compressor to adjust the attack, release, and threshold until you achieve the desired level of compression.

Adding Movement With Delay And Reverb

Now that you have your sound shaped and compressed, you can add movement with delay and reverb. Adding delay will create a delayed copy of your sound and repeat it for several milliseconds. The resulting effect can add depth and space to your sound. Here’s how you can add delay to your sound:

  1. Choose a delay plugin and add it to your synth track.
  2. Set the delay time, feedback, and level controls to your desired settings.
  3. Test the sound with your mix and adjust the delay settings as needed.
  4. Reverb is another effect that can add space and texture to your sound. Adding reverb will create the illusion of a bigger room or space. Here’s how to add reverb to your sound:
  5. Choose a reverb plugin and add it to your synth track.
  6. Adjust the reverb time, pre-delay, and damping controls until you get the desired level of reverb.
  7. Test your sound with your mix and adjust the reverb settings as needed.

Optimizing The Overall Mix For Maximum Impact

Finally, optimizing the overall mix can maximize the impact of your future bass synth sound. You can do this by:

  1. Listening to the mix and adjusting the levels of the tracks to achieve a balanced sound.
  2. Using panning to create spatial separation between tracks, giving each track its own space in the mix.
  3. Using automation to create dynamic changes in your sound over time.
  4. Using a limiter to make sure the mix doesn’t clip and the levels are consistent.
  5. Testing your sound on different systems to make sure it sounds good and consistent on all playback devices.

By following these steps and tweaking them to suit your needs, you’ll be able to create a powerful, unique, and professional future bass synth sound.

How To Make A Future Bass Synth In Serum Beginners


Credit: www.youtube.com


Presets And Sound Design

Presets and sound design are two important aspects of creating a future bass synth in Serum. While it’s easy to simply use a preset and call it a day, creating your own presets and experimenting with sound design can lead to unique and memorable sounds that stand out in the crowded world of music production.

Exploring Presets In Serum

One of the easiest ways to get started with making a future bass synth in Serum is to explore the built-in presets. Serum comes with a huge library of presets that can be used as a starting point for making your own sounds. The presets are organized by category, such as bass, lead, pad, and so on. You can also use the search function to find presets that match your desired sound.

Making Your Own Presets From Scratch

If you want to take your sound design to the next level, making your own presets from scratch is the way to go. This can be a daunting task for beginners, but it’s worth the effort. The key to making your own presets is to start with a basic sound and then experiment with the different parameters in Serum.

Parameter What it Does
Oscillator Determines the basic waveform of the sound
Filter Shapes the tone of the sound
Envelopes Controls how the sound changes over time

Experimenting with these parameters can lead to unique and interesting sounds that can’t be achieved with presets alone. Don’t be afraid to try out different combinations and see what works best for the sound you’re trying to create.

Tips And Tricks For Sound Design

  • Start with a basic sound and build upon it
  • Experiment with different waveforms and filters to find the right tone
  • Use modulation to add movement and interest to the sound
  • Layer different sounds to create a more complex sound
  • Utilize effects such as reverb and delay to add depth to the sound

By following these tips and using your creativity, you can create a future bass synth in Serum that is unique and memorable. Remember to have fun with the process and don’t be afraid to try new things.


Frequently Asked Questions For How To Make A Future Bass Synth In Serum Beginners


How Do You Start Making Future Bass?


To start making future bass, you need to familiarize yourself with the genre by listening to different artists. Learn about the different elements of future bass and how to create them using digital audio workstations such as FL Studio or Ableton Live.


Experiment with different sounds and effects to create your own unique sound. Stay updated on new techniques and trends in the genre by following music blogs and YouTube channels.


Is Future Bass Hard To Make?


Future bass can be challenging to make for beginners due to its intricate sound design, arrangement, and the combination of different genres. However, with proper practice, dedication, and knowledge of music production software, making future bass can be an enjoyable creative process.


How Do You Write Future Bass?


To write future bass, start by selecting the right tempo and using synths to create the characteristic sound. Create a chord progression, add drums, and establish the groove. Use automation to add interest and variation to your track. Lastly, remember to experiment and have fun with the process.


How Do You Make A Good Synth Bass?


To make a good synth bass, start with a solid foundation by selecting the right waveform and setting appropriate envelopes. Add effects like distortion, chorus, and delay to enhance the sound. Use modulation tools like LFOs and filters to create movement and interest.


Finally, adjust the mix to ensure the bass sits well in the overall track.


Conclusion


Creating a future bass synth in Serum as a beginner can be an exciting challenge. With the right techniques and knowledge, anyone can create a unique sound that stands out in the music industry. By following the steps provided and experimenting with different settings, you can produce a powerful and distinct sound that captures the essence of future bass music.


Start practicing and let your creativity soar with this incredible tool. The sky’s the limit!


More in our Synth guides.

Categories
Archive

How To Give Your Chorus A Bigger Impact

For a bigger impact in your chorus, add harmony and volume. Additionally, experiment with different rhythms and instrumentation to create a unique sound.


When it comes to songwriting, your chorus is the most important part. It’s the catchy, memorable section that will stick in your listener’s head and keep them coming back for more. But how do you make sure your chorus stands out from the rest of the song?


With a few simple techniques, you can give your chorus the impact it needs to be truly memorable. We’ll explore some tips and tricks for making your chorus bigger, better, and more impactful than ever before. From adding harmony and volume to experimenting with different rhythms and instrumentation, we’ll cover everything you need to know to take your chorus to the next level. So let’s get started!


Start With A Strong Foundation

Have you ever noticed that some choruses are just more impactful than others? It could be due to the melody, the lyrics, or even the instrumentation. However, one thing that is often overlooked is the foundation of a good chorus. Starting with a strong foundation can really help to amplify the impact of your chorus, and there are a few key elements to consider when building this foundation.

Choose The Right Key

The key of a song can play a huge role in its overall impact. Choosing the right key for your chorus can really help to make it stand out and feel more impactful. If your chorus feels weak or lacks energy, consider trying it in a different key to see if that helps to boost its impact.

Create Dynamic Chords

Powerful chords can make all the difference when it comes to building a strong foundation for your chorus. Consider using more complex or unexpected chord progressions to add depth and emotion to your chorus. Experiment with different chord inversions and voicings to find the perfect combination that really makes your chorus pop.

Add Rhythm And Syncopation

Rhythm is another important aspect of building a strong foundation for your chorus. Adding syncopation and other rhythmic elements can make your chorus feel more dynamic and exciting. Consider experimenting with different time signatures or adding rhythmic accents to really make your chorus stand out.

By starting with a strong foundation, you can give your chorus the impact it deserves. Choosing the right key, creating dynamic chords, and adding rhythm and syncopation are all important elements to consider when building this foundation. With a little experimentation and creativity, you can take your chorus to the next level and really make it shine.

How To Give Your Chorus A Bigger Impact


Credit: www.masteringthemix.com


Maximize Your Melody


Amplify the power of your chorus by incorporating dynamic changes in melody, volume, and lyrics. Experiment with different rhythms and cadences to create a memorable and impactful moment in your song. Maximize your melody and engage your listeners!

Crafting a memorable hook and investing in your melody can make a significant difference in giving your chorus a greater impact. Essentially, a melody is a sequence of single notes that work in harmony to create a tune. Melody is the most crucial aspect of a song as it’s the part that your listeners are most likely to sing along to. In this section, we’ll discuss how to fine-tune your melody, so your chorus is nothing less than remarkable.

Craft A Memorable Hook

A hook is a catchphrase or tune that makes a song memorable. It’s the thing people hum when they can’t remember the rest of the lyrics. Your hook has to stand out, be captivating, and make people want to sing along. It’s usually the melody that sets the tone for the hook. While writing your hook, focus on creating simple, singable, and catchy phrases that your audience can remember.

Vary Your Melodic Phrases

Repeating the same melodies can be monotonous and make your song a snooze fest. To avoid this, vary your melodic phrases as much as possible to keep your audience engaged and interested. You can accomplish this by adding rhythmic changes, vocal inflections, and melodic variations. Doing so makes your song more complex and dynamic, ensuring your chorus doesn’t go unnoticed.

Use Harmony To Enhance Impact

Harmony is a musical device that involves combining two or more notes simultaneously to create a chord. Introducing harmony into your chorus gives it a fuller, more significant impact. You can achieve this by introducing harmonies in the pre-chorus, chorus, and outro. When done right, harmonies can add depth and dimension to any melody. To summarize, a catchy hook, varied melodic phrases, and harmonies can make your chorus outstanding. With these tips, you’re sure to give your chorus the impact it deserves.


Make The Most Of Your Lyrics


Want to give your chorus a bigger impact? You can elevate your lyrics by using powerful and emotional words that resonate with listeners. Focus on creating a catchy hook that captures the essence of your song, and use repetition to make it stick in your audience’s minds.


Additionally, try varying the melody of your chorus to keep it interesting and engaging.

Are you tired of your chorus falling flat and not having the impact you desire? Look no further than your lyrics. Your lyrics have the power to elevate your chorus and give it the impact it deserves. Here are a few tips to make the most of your lyrics and take your chorus to the next level.

Tell A Compelling Story

Your chorus should tell a story and evoke emotion in your listeners. Use descriptive language to paint a picture and take your audience on a journey. Make them feel something and connect with your message.

Use Imagery And Metaphors

Imagery and metaphors are powerful tools to enhance your lyrics. They create a vivid mental image and provoke thought. Try using unexpected comparisons or associations to make your lyrics memorable.

Write Strong Rhymes And Wordplay

Strong rhymes and clever wordplay can add depth and complexity to your lyrics. Rhymes create a musicality and flow that can elevate your chorus. Use wordplay to add layers of meaning and intrigue to your lyrics. Incorporating these elements into your lyrics can give your chorus a bigger impact. Remember to tell a compelling story, use imagery and metaphors, and write strong rhymes and wordplay. Your lyrics have the power to connect with your audience and make your chorus unforgettable.

How To Give Your Chorus A Bigger Impact


Credit: www.masteringthemix.com


Focus On Vocal Techniques


To give your chorus a bigger impact, focus on vocal techniques such as breath control, projection, and harmonization. Vocal warm-ups, proper posture, and a healthy diet and lifestyle can also improve your singing abilities. Don’t underestimate the power of vocal training and practice to take your performance to the next level.

To make your chorus stand out, it’s important to focus on your vocal techniques. By emphasizing power and emotion, experimenting with different styles, and considering harmonies and backing vocals, you can take your chorus to the next level.

Emphasize Power And Emotion

One of the most important ways to give your chorus a bigger impact is to emphasize power and emotion. This means singing with passion and intensity, and really feeling the lyrics you’re singing. To achieve this, consider the following techniques:

  • Breath control: Take deep breaths before singing, and focus on breathing from your diaphragm instead of your chest.
  • Dynamics: Use changes in volume to add emphasis and emotion to your singing.
  • Inflection: Experiment with different ways of emphasizing certain words or phrases to convey different emotions.

Experiment With Different Styles

Another way to make your chorus more impactful is to experiment with different styles of singing. This can help to keep your chorus fresh and interesting, and can also help you to explore different aspects of your vocal range. Consider trying out different genres, or incorporating different vocal effects into your singing, such as vibrato or falsetto.

Consider Harmonies And Backing Vocals

Finally, don’t forget about harmonies and backing vocals. These can really enhance the impact of your chorus, by adding depth and richness to the overall sound. Experiment with different harmonies and backing vocal parts, and make sure each part complements the melody without overpowering it. By focusing on your vocal techniques, experimenting with different styles, and considering harmonies and backing vocals, you can give your chorus a bigger impact and make it truly unforgettable.

Experiment With Arrangement


Enhance the impact of your chorus by experimenting with arrangement. Shake up the dynamics by playing with instrumentals, vocals and length to create a contrast and build towards the climax. By trying out new arrangement options, you can add an exciting, fresh dimension to your music.

If you want to give your chorus a bigger impact, one way to achieve this is by experimenting with arrangement. Changing the arrangement can help in adding more interest to the track and making it more exciting to listen to. Here are some methods that you can try out:

Add Interesting Instrumentation

Adding unique instrumentation can make your chorus stand out. Consider adding something unexpected to the mix like a banjo, an accordion, or even a brass ensemble. This can provide an entirely new dimension to the song and make the chorus feel grander.

Explore Dynamics And Pacing

Dynamics and pacing are an essential part of any song. You can change the dynamics by playing with the volume levels of different instruments during the chorus. You can also play around with the pacing of the chorus by speeding up or slowing down the tempo or even adding some silence before the chorus comes in. This can create a sense of anticipation and make the chorus more impactful.

Consider Different Types Of Chorus Structures

Different chorus structures can also create impact. You can try out a repeating chorus structure, where the chorus is repeated several times, or a contrasting chorus structure, where the chorus contrasts the verse in terms of melody, harmony, or rhythm. A third option is a solo chorus, where a single voice sings the chorus, providing a unique twist to the arrangement. In conclusion, by experimenting with arrangement, you can give your chorus a bigger impact. Adding unique instrumentation, exploring dynamics and pacing, and trying different chorus structures can make your chorus stand out and leave a lasting impact on the listener.

Use Production Techniques To Enhance Impact

Music production is an essential part of any musician’s journey. A song must have a fantastic chorus to make a true impact on the listener. Production techniques play a crucial role in enhancing the chorus’s impact without making significant changes to the overall composition. Below are some of the production techniques to help give your chorus a bigger impact.

Layer Instruments And Vocals

Layering instruments and vocals is an excellent way to give your chorus a fuller and richer sound. For instance, adding backing vocals can help create a choir-like effect that can enhance the chorus’s significance. Similarly, adding some extra rhythm section instruments to the recording can make the chorus more exciting and dynamic.

Try Different Effects And Filters

Applying sound effects and filters to your chorus can also boost its impact. For example, distortion, reverb, and delay effects can add depth, character, and warmth to your sound. Experiment with various effects and filters to find the perfect mix that complements your chorus.

Focus On Clarity And Definition

A clear and defined sound can make a massive difference in how your chorus is perceived. Ensure that each instrument and vocal can be heard clearly. You can achieve this by adjusting the EQ, volume, and panning of each sound to fit perfectly in the mix. Clear articulation and pronunciation of your lyrics can also make your chorus stand out.

With the above production techniques, you are sure to give your chorus a bigger impact. Layering instruments and vocals, trying different effects and filters, and focusing on clarity and definition are excellent ways to enhance the chorus’s significance. Remember to experiment with different tools and techniques to tailor your sound to your liking.

Practice Performance And Delivery

If you want to make your chorus stand out and have a bigger impact on your audience, you need to focus on more than just your lyrics and melody. You need to keep your audience hooked by adding energy and passion to your performance, precision in your timing, and a visual experience that complements your sound. Here, we will be discussing how to enhance the impact of your chorus by practicing performance and delivery.

Bring Energy And Passion

No matter how good your song is, if you don’t deliver it with energy and passion, your audience won’t be hooked. You need to show your enthusiasm for the song through your body language, facial expressions, and gestures. Here’s an overview of what you can do to bring more energy and passion to your chorus performance:

  • Move around the stage
  • Make eye contact with your audience
  • Use hand gestures to emphasize key points of your song
  • Use facial expressions to convey emotion and feeling

Work On Timing And Precision

Timing and precision are essential for a powerful chorus delivery. You need to make sure your band members and you are in sync with each other. Here are a few tips to help you with timing and precision:

  1. Practice with a metronome
  2. Practice with your band members
  3. Focus on the rhythm of your song
  4. Make sure each instrument is properly tuned

Consider Staging And Visuals

Staging and visuals play a significant role in giving your chorus a bigger impact. They help to enhance the overall experience of the audience. Your stage presence and visuals should complement your performance and not distract from it. Here are a few tips to help you with staging and visuals:

Staging Visuals
Move around the stage Add lighting effects
Use props if necessary Use videos to enhance your performance
Have a powerful entrance and exit Use costumes/makeup when appropriate

By working on these aspects, you can give your chorus a bigger impact and leave a lasting impression on your audience. Practice these techniques and deliver with confidence to make your chorus stand out.

How To Give Your Chorus A Bigger Impact


Credit: www.youtube.com


Collaborate And Get Feedback


Collaborating with others and receiving feedback is crucial for giving your chorus a bigger impact. Working with fellow singers and music professionals can enhance the quality and performance of your chorus, while feedback can help you identify areas that need improvement and refine your technique.

Collaborate and Get Feedback Giving your chorus a bigger impact can be a daunting task, but collaborating with other musicians and producers and seeking feedback from peers and fans can help you achieve your goal. Work with Other Musicians and Producers Working with others can bring fresh perspectives and ideas. Collaborating with other musicians and producers can lead to a new and unique sound for your chorus. Each person brings their own strengths and skills to the table, and together, you can create something amazing. Consider partnering with someone who has different musical tastes, backgrounds, or skill sets. This could take your chorus to new heights you never thought possible. Solicit Feedback from Peers and Fans Feedback can be crucial when wanting to improve your chorus. Soliciting feedback from peers and fans can help you understand what works and what doesn’t. It can help you identify areas that need improvement and give you ideas on how to make your chorus even better. Share your work with others and ask for their honest opinion. You may not always get the feedback you want to hear, but it can help you grow as a musician and improve your chorus over time. Keep an Open Mind and Stay Flexible Being open to feedback and collaborating with others requires an open mind. It’s important to stay flexible and willing to try new things. Don’t be afraid to step outside your comfort zone and experiment with different ideas. Be open to suggestions, even if they challenge your initial thinking. Being flexible also means being willing to make changes along the way. Even if something doesn’t work at first, try adjusting it and see if it makes a difference in your chorus. In conclusion, by collaborating with others, seeking feedback, and staying flexible, you can give your chorus a bigger impact that resonates with your audience. Just remember to be open-minded and willing to experiment with new ideas along the way.

Frequently Asked Questions On How To Give Your Chorus A Bigger Impact


How Do I Make My Chorus More Impactful?


To make your chorus more impactful, focus on creating a catchy melody, memorable lyrics that resonate with your audience, and a strong emotional connection. Use dynamic changes in volume and instrumentation to keep the listener engaged, and consider adding harmony or backing vocals for added depth and impact.


Experiment with different arrangements and production techniques to find the right balance for your song.


What Makes A Strong Chorus?


A strong chorus should have a catchy and memorable melody, lyrics that are easy to sing along to, and a clear and powerful emotional message. The chorus should stand out from the verses and have a concise and repetitive structure that reinforces the song’s theme.


It should also have a dynamic and impactful arrangement that builds towards the climax of the song.


How Do You Make A Chorus Stand Out In Mix?


To make a chorus stand out in a mix, you can use techniques such as adjusting the volume and EQ, adding effects like reverb or delay, layering multiple vocal tracks, and creating contrast with the verses. It’s also important to ensure that the instruments and vocals in the chorus are balanced and not competing for the listener’s attention.


How Do You Make A Hit Chorus?


To create a hit chorus, focus on writing a catchy melody that people can easily sing along to. Use repetitive lyrics, but also add some variety and surprises to keep it interesting. Make sure the chorus stands out from the rest of the song and creates an emotional connection with the listener.


Collaborate with other songwriters and producers to get fresh ideas and perspectives. Finally, trust your instincts and keep experimenting until you find the perfect formula.


Conclusion


To make your chorus stand out and leave a lasting impact on your audience, it is essential to take the necessary steps to make it sound bigger. Incorporating harmony, dynamics, and rhythm can add depth and energy to your chorus.


Experiment with different melody and instrument combinations, and don’t be afraid to try new things. With these tips and tricks, you can elevate your chorus to the next level and captivate your listeners. So, go ahead, and give your chorus the bigger impact it deserves.

Categories
Archive

Things You Need To Build A Home Studio

To build a home studio, you will need a computer, recording software, an audio interface, and a microphone. Building a home studio requires essential equipment such as a computer that has the necessary specs to handle recording software, recording software such as Logic Pro X or Pro Tools, an audio interface that is needed to connect microphones to a computer, and a microphone that suits the needs of the individual’s project.


With the rise in technology, these items are becoming more affordable and accessible for individuals to build their home studio and record their music or podcasts. We will dive deeper into each item and explore suitable options for those looking to create a home studio.


Choose Your Space

Building a home recording studio is an attractive idea for music enthusiasts and professionals alike. Choosing the right space is the first step in creating a successful home studio. A properly selected area for the studio can make all the difference in producing high-quality music. In this post, we will provide you with some tips for finding and assessing the space you need for your home studio.

Finding The Space

The first step in building a home studio is finding the perfect space. The ideal space should be quiet, private, and free from outside noise. There should be no interruptions, allowing you to concentrate on sound recording and production. Below are a few things to consider when looking for the perfect space to house your home studio:

  • Choose a space that is large enough to accommodate your equipment and musical instruments.
  • Consider the amount of natural light that comes in the room, and whether it’s conducive to your work.
  • Ensure that the room is soundproofed for a more professional sound recording.
  • Check for adequate ventilation and air conditioning, as well as proper electrical outlets.

Assessing The Space

After finding an appropriate space for your home studio, you need to consider the acoustics of the room. Sound quality can be adversely affected by the shape of the room, the type of surfaces in the room, and the positioning of windows and doors. Therefore, you need to assess the space and make sure it meets your needs. Here are a few things to consider when assessing your chosen space:

  • Determine whether the size of the room is suitable for your recording needs.
  • Check for any noise sources outside the room and locate the room in a location where it’s isolated from external noise sources.
  • Check for any reflections from any surfaces that can affect sound quality.
  • Perform a frequency analysis of the room to know if there are any standing waves that can affect sound quality.

Remember, it’s essential to create a comfortable environment that meets all your requirements. The chosen space should inspire and motivate you to create your best work. Once you have assessed and optimized your home studio, you will be better equipped to produce high-quality music for your fans, clients, or yourself.

Things You Need To Build A Home Studio


Credit: academy.gray-spark.com


Acoustics


Great acoustics are essential for building a home studio. You need to consider the shape and size of the room, as well as soundproofing materials, diffusers, and bass traps to achieve optimal sound quality.

Why Acoustics Matter

Acoustics play a crucial role in any home studio setup. Sound quality is dependent on the acoustics of the room as it contributes to the ability to capture the purest sound with minimal background noise. Poor acoustics in a room can lead to reflections that cause echoes and muffled sounds. It is thus vital to have an understanding of the room’s acoustic performance.

Treating The Room

Treating the room means modifying it by adding materials that control acoustic problems. There are several ways to do this, including installing acoustic panels, diffusers and bass traps, and fixing soundproof curtains on windows and doors. Acoustic panels reduce excessive sound reflections while bass traps absorb low-frequency sound waves, reducing their impact on the room’s ambiance. Additionally, soundproof curtains aid in reducing external noise and reverberations caused between rooms.

Important Considerations

Several factors must be considered when treating a room for acoustics. One of the critical things to keep in mind is the room’s size; a larger room requires more treatment than a smaller one. Additionally, the placement of acoustic materials is crucial as incorrectly placed panels can create new acoustic problems. It is essential to test the treated room to ensure that the changes made have eliminated any sound problems and have provided the desired acoustic quality.

Acoustic Material Benefits
Acoustic Panels Enhance sound quality by deadening “live” sound
Bass Traps Absorb and control bass frequencies to prevent booming
Diffusers Scatter sound waves evenly throughout the room, creating a natural-sounding ambiance
Soundproof Curtains Reduce external noise and sound reflections within the room

In conclusion, acoustic treatment is a crucial step when building a home studio. Understanding the basics of acoustics and treating the room correctly ensures that you get the best sound quality possible. With the right treatment plan, your studio will provide excellent sound recording and playback that will take your music or podcasts to new heights.

Monitors


Monitors are an essential component for any home studio. They allow you to accurately hear the details of your recordings and ensure that your mixes are balanced. Be sure to invest in quality monitors for the best results.

Active vs. Passive Monitors
When building a home studio, choosing the right monitors is crucial to the quality of your sound output. Monitors come in two types – active and passive. Active monitors have an in-built amplifier, whereas passive monitors require an external amplifier to be powered. Active monitors are a popular choice among beginners because they are easier to set up and more compact. On the other hand, passive monitors provide greater customizability in terms of amplifiers and can be more cost-effective in the long run. Choosing Your First Pair
Your first pair of monitors should be carefully selected based on your budget and requirements. Factors to consider include the size of your room, the acoustic treatment you have in place, and the music genres you will be working with. For smaller rooms, smaller monitors would be suitable to prevent bass overloading the space. For larger rooms, larger monitors may be needed to fill the space. It’s important to note that the most expensive monitors don’t always provide the best sound quality. Each pair of monitors has its own unique sound signature, and it’s important to test out multiple options before making a final decision. Look for monitors that have a flat frequency response as this ensures that the sound output is as natural and uncolored as possible. Lastly, make sure your chosen monitors have sufficient power and are compatible with your audio interface.

Active Vs. Passive Monitors

  • Active monitors have a built-in amplifier
  • Passive monitors require an external amplifier
  • Active monitors are easy to set up and more compact
  • Passive monitors offer greater customizability

Choosing Your First Pair

  • Consider the size of your room and acoustic treatment
  • Choose monitors based on your budget and requirements
  • Test out multiple options before making a decision
  • Look for monitors with a flat frequency response
  • Ensure compatibility with your audio interface


Headphones


Quality headphones are a must-have for building a home studio. The right pair can help you accurately monitor your recordings and ensure your audio quality is top-notch.

Headphones are an essential piece of equipment to have in your home studio. They allow you to monitor your audio without disturbing others and can provide a more accurate representation of your music. When it comes to choosing headphones, there are a few things to consider such as open vs. closed-back and monitoring capabilities.

Open Vs. Closed-back

Open-back headphones allow air to flow through the ear cups which can result in a more natural sound, but can also lead to sound leakage. Closed-back headphones provide isolation from outside noise but can lead to ear fatigue over time. Ultimately, the choice between open and closed-back headphones will depend on your personal preferences and the type of music you will be producing.

Monitoring With Headphones

It’s important to note that while headphones are a great tool for monitoring your audio, they should not be the only tool you use. It’s recommended to use a combination of headphones and studio monitors to get a more accurate representation of your sound. When using headphones, it’s also important to take breaks to avoid ear fatigue and to reference your audio on different playback devices. In conclusion, headphones are an essential tool to have in your home studio. When choosing headphones, consider open vs. closed-back and always use them in conjunction with other monitoring tools. By using headphones correctly, you can achieve a more accurate representation of your music and improve the quality of your productions.

Interfaces


Effective interfaces are essential for a home studio. You’ll need quality components such as audio interfaces, MIDI controllers, and software to create the perfect mix.

If you are a music enthusiast and want to create music in the comfort of your own space, setting up a home studio is an excellent idea. However, to build a fully functional studio, you need a lot of equipment, and one of the most crucial equipment is the audio interface. In this article, we will discuss what an interface is, and how you can choose the best one for your home studio.

What Is An Interface?

An audio interface is a device that connects your equipment to your computer and converts analog signals into digital signals. It acts as the bridge between your microphones, instruments, monitors, and your computer, allowing you to record, mix and edit your music. It’s important to note that different interfaces perform different functions. Some interfaces are designed to perform simple recording tasks, while others can deliver high-quality audio output with low latency.

Choosing An Interface

Choosing an interface for your home studio can be daunting, but it doesn’t have to be. Here are some of the factors to consider when choosing an audio interface:

  • Number of channels: The number of channels you need will depend on the number of simultaneous recordings you plan to make. If you only need to record one instrument or vocal at a time, then a 2-channel interface will suffice. However, if you plan to record live sessions with a band, you might need a 8 or 16 channel interface.
  • Inputs and outputs: Consider the inputs and outputs you need. The most common input types are XLR and TRS. The output types include RCA, TRS, and SPDIF. Ensure that the interface you choose has enough inputs and outputs for your needs.
  • Sample rate and bit depth: The sample rate and bit depth determine the quality of the audio interface. Higher sample rates and bit depths mean better audio quality. Choose an interface with at least 24-bit depth and 48kHz sample rate.
  • Latency: Latency is the delay between the sound being produced and the time it takes to reach your ears. The lower the latency, the better the audio performance. Choose an interface with a low latency rate.
  • Price: Audio interfaces come in different price ranges. Choose one that fits your budget and meets your requirements.

In conclusion, choosing the right interface is crucial to setting up a functional home studio. It’s important to identify your needs and choose the interface that best suits them. Consider factors like the number of channels, inputs and outputs, sample rate and bit depth, latency, and price, to make an informed choice.

Microphones


Investing in a good quality microphone is essential when building a home studio. A microphone allows you to record your vocals or instruments with clarity and precision, making your recordings sound professional.

When it comes to building a home studio, the microphone is arguably the most important tool you need. A good microphone is essential to capture high-quality sound recordings of vocals, instruments, and other sounds. Microphones come in different types, shapes, and sizes, but the two most common types are dynamic and condenser mics.

Dynamic Vs. Condenser

Dynamic microphones are great for recording louder sounds, such as electric guitars and drums, while condenser microphones are ideal for capturing more delicate sounds like vocals and acoustic guitars. Dynamic microphones are less sensitive than condenser mics, which means they can handle high sound pressure levels without distorting the sound. On the other hand, condenser microphones are more sensitive, pick up more detail, and produce a more accurate sound.

Microphone Placement

Once you have selected the right microphone for your recording, it’s time to think about placement. Proper microphone placement is crucial to the quality of the sound recording. For instance, if you are recording vocals, make sure the mic is positioned at the right distance and angle from the singer’s mouth. The distance between the mic and the source affects the level of sound and the amount of background noise picked up. When recording instruments, microphone placement changes based on the instrument type. For instance, for an acoustic guitar, it’s best to place the microphone about six inches away from the soundhole. For drums, you can use multiple microphones to capture different parts of the kit to achieve the desired sound. In conclusion, knowing the difference between dynamic and condenser microphones and proper microphone placement can help you capture high-quality sound recordings in your home studio. It’s worth investing in a good microphone to ensure the best quality sound for your recordings.


Computer And Daw


To build a home studio, you will need a computer and Digital Audio Workstation (DAW). A computer with a fast processor and sufficient memory is crucial for running the DAW software smoothly.

Building a home studio requires careful consideration of the equipment you’ll need. Two critical components of your setup are the computer and the DAW. The computer serves as the hub of your recording operation, while your DAW is the software that you use to record and edit your tracks. It’s essential to choose these components wisely, as they’ll dictate the quality of your recordings. Let’s dive deeper into each of these components.

Computer Requirements

The computer you select will power your entire recording operation. You’ll need a computer that’s powerful enough to run your recording software and handle all the other demands of your setup. Here are some factors to consider when selecting a computer:

Processor Speed

The speed of your computer’s processor is one of the most critical factors to consider. A faster processor will allow you to record and mix audio tracks more efficiently. Generally, a processor with a clock speed of around 2GHz or higher should be sufficient.

RAM

Next, consider how much RAM your computer has. The more RAM your computer has, the better it will be able to handle processing-intensive tasks such as recording and editing multiple tracks. For most recording setups, 8GB of RAM should be enough.

Storage

Recording audio files can take up a lot of storage space. To ensure that you have enough space for all your recordings, you’ll want a hard drive that has at least 1TB of storage.

Choosing Your Daw

Once you’ve selected a computer, you’ll need to choose a DAW. This is the software that you’ll use to record, edit, and mix your tracks. There are several DAWs available, each with its own unique features and characteristics. Here are some factors to consider when selecting a DAW.

Price

The price of a DAW can range from free to several hundred dollars. Consider how much you’re willing to spend when selecting a DAW.

Features

Different DAWs offer different features. Consider what features you’ll need when selecting a DAW.

User Interface

Finally, consider the user interface of the DAW. You’ll be spending a lot of time in your DAW, so you’ll want to choose one that’s easy to use and navigate.

In Conclusion

Selecting the right computer and DAW is critical to building a successful home studio. Consider factors such as cost, features, and user interface when making your selections. With the right setup, you’ll be producing professional-quality tracks in no time.

Things You Need To Build A Home Studio


Credit: www.blastbeat.org


Cables And Accessories

When it comes to building a home studio, you need to consider cables and accessories. These items are essential as they help connect your equipment together, ensuring that your studio functions properly. Without them, your studio would be incomplete. Let’s delve into the different aspects of cables and accessories you need to know about.

Cable Management

  • Cable management is critical in any home studio setup.
  • It helps keep your workspace tidy and organized, promoting productivity.
  • You can use adhesive cable ties, velcro ties, or other cable management tools to keep cables organized.
  • Make sure to label each cable so you can easily identify which cable belongs to which equipment

Essential Accessories

In addition to cables, there are several essential accessories you need to complete your home studio setup.

Accessories Description
Headphones Used to monitor audio and helps isolate sounds for a better recording experience.
Microphone Stand Holds the mic in place so that you can record hands-free.
Pop Filter Helps reduce plosives and other unwanted sounds during vocal recordings.
USB Hub Used to expand your computer’s USB ports, allowing you to connect more equipment.
Shock Mount Helps isolate the microphone from unwanted vibrations and handling noise.

Investing in these accessories will help you achieve better sound quality and a more professional look for your home studio.

Frequently Asked Questions For Things You Need To Build A Home Studio


What Is Needed To Build A Home Studio?


To build a home studio, you’ll need a few key things. First, you’ll need a dedicated space with good acoustics. You’ll also need a computer with recording software, a microphone, headphones, and studio monitors. Finally, you might want to invest in some additional equipment like a MIDI controller or audio interface to improve your setup.


What Should I Buy For A Home Studio?


For a home studio, you should consider purchasing a good quality microphone, audio interface, headphones, and a computer. Also, invest in acoustic treatment for your room to ensure optimal sound quality.


How Much Does It Cost To Build A Home Studio?


The cost to build a home studio depends on various factors such as size, equipment, and acoustic treatment. On average, it can range from $1,000 to $10,000 or more. It is important to consider the purpose of the studio and budget accordingly.


What Do You Need To Own A Studio?


To own a studio, you need to have a space to set it up, the appropriate equipment and furniture (such as lighting, camera, backdrop, and props). Additionally, you might need to apply for permits and licenses, hire staff, and invest in marketing to grow your customer base.


Conclusion


Creating a home studio is a perfect solution for music lovers, podcasters, and video producers. With the right equipment and some planning, it is possible to have a professional-grade space right in your own home. From selecting the right microphones, choosing the equipment to record and mix, and designing soundproofing, every aspect is important.


Building a home studio requires an effort and an investment but the result is fulfilling and can be worth the investment. So, start planning and get ready to record your masterpiece.

Categories
Archive

Vocal Reversed Reverb Effect Ableton Live Tutorial

Learn how to create a vocal reversed reverb effect in Ableton Live with this tutorial. We will go through the step-by-step process of creating a unique vocal effect using Ableton Live.


Also, creating the reverse effect effect on a vocal track can add a unique and interesting touch to your music production. Also, this effect can be used to create a buildup or fill in a transition. You can also use this technique to add variation to an otherwise plain vocal track.

Related reading: Reverb Types and Why Use Reverb. For background, see the Wikipedia article on Reverberation.


Moreover, in this tutorial, we will explore how to create the effect using Ableton Live. The article will cover how to record a vocal track, reverse the audio, add reverb, and finally, reverse the audio once more to create the desired effect. In addition, read on to learn how to create a vocal reversed reverb effect in Ableton Live.


Getting Started for Reversed Reverb

In addition, if you are looking to add an interesting effect to your vocals, reversed reverb can be a great option. For example, this effect creates a unique sound by mixing the tail end of a reverb with the original vocal track played in reverse. In this Ableton Live tutorial, we will show you how to create this effect step-by-step.

Setting Up Your Project In Ableton Live

Before we start, make sure you have a project open with a vocal track in it. To create a new project, go to “File” and select “New Live Set”. Furthermore, if you have a project open, make sure that the vocal track is highlighted and selected.

Selecting The Vocal Track To Apply The Effect

After selecting the vocal track, create a new return track by clicking “Create” and selecting “Return Track”. Rename the new return track “Reverb” and drag Ableton’s “Reverb” audio effect onto the new track.

Also, once the reverb effect is on the return track, adjust the settings to your liking. Then, for reversed reverb, you will want to have a longer decay time and a moderate to high level of wetness. These settings will create a longer tail end on the reverb.

Next, right-click the vocal track and select “Freeze Track”. Once the track is frozen, right-click again and select “Flatten”. This creates a new audio clip that incorporates any effects you have applied to the track.

Now that the vocal track has been flattened, right-click the new clip and select “Reverse”.

Finally, click and drag your reversed vocal clip onto the reverb return track to create the reversed reverb effect.

You can further adjust the sound by adjusting the levels of the vocal track and the reverb track until you achieve the desired effect.

Conclusion

Furthermore, Reverse reverb is an interesting vocal effect that can add some extra character to your tracks. By following these simple steps, you can easily create this effect in Ableton Live.

Creating The Reversed Reverb Effect


Additionally, learn how to create the reversed reverb effect for your vocal tracks with this easy-to-follow Ableton Live tutorial. Similarly, perfect for creating a dreamy, ethereal sound, this effect is a must-try for music producers and sound engineers alike.

Also, creating the Reversed Reverb Effect: In the world of music production, the reversed reverb effect is a popular way to create a unique and mesmerizing sound. Also, with Ableton Live, you can easily create this effect on your vocal tracks and take your music to the next level. In this tutorial, we’ll walk you through the step-by-step process of creating the reversed reverb effect on your vocal tracks using Ableton Live. Reversing the chosen vocal track: To start, you need to choose the vocal track that you want to apply the reversed reverb effect to.

Once you have selected the track, simply right-click on it, and select “reverse” from the drop-down menu. In addition, this will reverse the audio of your vocal track and create a unique starting point for the reversed reverb effect. Applying reverb to the reversed track: Now that your vocal track is reversed, you need to apply reverb to it. To do this, you need to add a reverb effect to the reversed track. You can do this by dragging and dropping the reverb effect onto the track or by selecting the Reverb effect from the audio effects menu.

Practical Tips

Once the reverb is applied, adjust the parameters to achieve your desired sound. For example, here are a few tips for applying reverb to the reversed track: – Use high-quality reverb effects to get a clean and crisp sound – Carefully adjust parameters such as decay time and pre-delay to achieve the perfect balance – Experiment with different types of reverb effects such as plate, hall, or room to achieve the desired sound. Conclusion: Creating the reversed reverb effect in Ableton Live is a quick and easy process.

By reversing your vocal track and applying reverb, you can create a unique sound that will make your music stand out. As a result, with a little creativity and experimentation, you can take your music to the next level and create some truly mesmerizing tracks.

Adjusting The Effect


To achieve the desired vocal reversed reverb effect in Ableton Live, adjusting the effect is crucial. However, this tutorial will guide you step by step on how to fine-tune the effect to get the perfect sound.

Adjusting the Effect: The vocal reversed reverb effect is a powerful tool that can greatly enhance any vocal track. Then, to get the most from this effect, learn to adjust it for each project. In this tutorial, we will focus on two key adjustments: changing the length of the reverb and adjusting the dry/wet mix of the effect. Changing the length of the reverb: One of the primary ways to adjust the vocal reversed reverb effect is by changing the length of the reverb.

This will determine how much of the sound is affected by the effect and how long the reverb lasts after the vocal has stopped. In short, to adjust the length of the reverb in Ableton Live, follow these simple steps: 1. Click on the vocal track in the Arrangement View or Session View. 2. Navigate to the audio effects section of the browser and select the “Reverb” effect. 3. In the Reverb effect window, adjust the “Decay Time” and “Size” parameters to adjust the length of the reverb.

Putting It Into Practice

Adjusting the dry/wet mix of the effect: Another important adjustment to consider is the dry/wet mix of the effect. Similarly, this will determine how much of the dry, unaffected vocal is present in the final mix compared to the wet, affected reverb. To adjust the dry/wet mix in Ableton Live, follow these steps: 1. Click on the vocal track in the Arrangement View or Session View. 2. Navigate to the audio effects section of the browser and select the “Reverb” effect. 3. In the Reverb effect window, adjust the “Dry/Wet” parameter to adjust the balance between the dry and wet signals.

It is important to note that the ideal settings for these adjustments will vary depending on the specific project and goals. Also, try experimenting with different settings to find the perfect balance for your vocal reversed reverb effect.

Vocal Reversed Reverb Effect Ableton Live Tutorial


Credit: m.youtube.com


Adding Additional Effects

The Vocal Reversed Reverb Effect in Ableton Live is an excellent technique for creating unique sounds in your music. However, you can take it one step further by adding additional effects to enhance the overall sound and create depth. In addition, here are some tips to help you use EQ and delay to improve your Vocal Reversed Reverb Effect in Ableton Live.

Using Eq To Enhance The Effect for Reversed Reverb

EQ is a great tool for helping you shape the sound of your Vocal Reversed Reverb Effect. For example, by adjusting the EQ, you can cut out unwanted frequencies and boost the ones you want to emphasize. Here’s how to use EQ effectively:

  • Start by loading an EQ plugin into the effects rack.
  • Adjust the low frequencies to remove any mud or unwanted rumble.
  • Middle frequencies are ideal for creating presence in the mix, so adjust these carefully to get the desired effect.
  • High frequencies can sound harsh if overused, so be careful not to overdo it. Use them sparingly to add some sparkle to the mix.

Adding Delay For Depth

Delay is another powerful tool for adding depth to your Vocal Reversed Reverb Effect. As a result, by adding a delay effect, you can create an echo-like effect that adds depth and interest to the sound. Here are some tips to help you add delay:

  • Load a delay effect into your effects rack.
  • Adjust the delay time to match the tempo of your track.
  • Use feedback to adjust the number of repeats, but be careful not to overdo it.
  • Adjust the dry/wet balance to control the amount of delay in the mix.

By using EQ and delay, you can enhance the Vocal Reversed Reverb Effect in Ableton Live to create a unique and interesting sound. Experiment with the settings to find the right balance for your music, and your listeners will be sure to notice the difference.

Fine-tuning The Effect

In the previous section, we looked at how to create a vocal reversed reverb effect in Ableton Live. In this section, we’ll explore how to fine-tune the effect to ensure it sounds just right. By experimenting with different parameters and adding automation, we can create a dynamic effect that enhances our vocals.

Experimenting With Different Parameters

To fine-tune the effect, we need to experiment with different parameters. Ableton Live offers a range of options to customize the effect including:

Parameter Description
Decay Time Adjusts the length of the reverb tail
Dry/Wet Controls the balance of the dry source and the effect
Gain Amplifies or attenuates the effect
Pitch Changes the pitch of the reverb tail

Adding Automation For A Dynamic Effect

Now that we’ve experimented with the parameters, we can add automation to create a more dynamic effect. Adding automation allows us to modify the effect over time, ensuring our vocals blend seamlessly with the track. For example, we can automate the reverb tail length to increase as the vocal builds, or automate the pitch to create a surreal effect.

To add automation, we need to:

  1. Select the parameter we want to automate
  2. Click on the “A” button to enable automation mode
  3. Draw in or record the automation by clicking and dragging on the automation line

By experimenting with different parameters and adding automation, we can create a vocal reversed reverb effect that enhances our vocals and adds depth to our tracks.

Vocal Reversed Reverb Effect Ableton Live Tutorial


Credit: m.youtube.com


Vocal Reversed Reverb Effect Ableton Live Tutorial


Credit: www.productionmusiclive.com


Frequently Asked Questions On Vocal Reversed Reverb Effect Ableton Live Tutorial


How To Do Reverse Reverb On Ableton?


To do reverse reverb on Ableton, first record the audio you want to apply the effect to. Then, create a new audio track and add a reverb effect onto it. Reverse the audio clip by clicking “Reverse” under “Clip” in the Ableton toolbar.


Finally, drag the reversed audio clip onto the reverb audio track and adjust the settings as desired.


How Do You Reverse Vocal Effects?


Reverse vocal effects can be achieved by using audio editing software that has a reverse effect function. Simply select the section of audio with the vocal effect and apply the reverse effect. It’s important to note that this process can result in a completely different sound to the original effect, so experimentation is necessary.


How Do I Add Reverb To Vocals In Ableton?


To add reverb to vocals in Ableton, you first need to insert a reverb plugin onto the vocal track. Then adjust the reverb settings to your liking, such as decay time, wet/dry mix, and high/low cut filters. You can also experiment with different reverb types and presets until you find the desired effect.


How Do You Reverse Audio In Ableton?


To reverse audio in Ableton, select the audio clip and go to the Clip View window. Click on the “Reverse” button located under the “Sample” section. You can also use the shortcut “Ctrl+Alt+R” or “Cmd+Option+R” for Mac users.


Conclusion


The vocal reversed reverb effect is a unique technique that can add depth and texture to vocals in Ableton Live. By following the steps outlined in this tutorial, you can easily create this effect in your own music productions. Remember to experiment and tweak the settings to achieve the desired sound.


With practice, this technique can become a valuable tool in your production arsenal. Start using it today and take your vocals to the next level!


Categories
Archive

Equinox Progressive Melodic Techno Ableton Template

The Equinox Progressive Melodic Techno Ableton Template is a pre-made template for producing techno music in Ableton Live. This template gives you drums, basslines, synth patterns and more to get started.


If you’re an aspiring techno producer, then you know just how challenging it can be to create a track from scratch. Also, that’s where templates like this one come in handy, as they provide a solid foundation to work from. The Equinox template is particularly useful for those looking to create a progressive and melodic sound. Meanwhile, it includes instruments and effects built for this style of music.

Related reading: Setup Template Studio One and Where are Cubase Templates Stored?. For background, see the Wikipedia article on Techno.


Also, whether you’re a beginner or an experienced producer, the Equinox Progressive Melodic Techno Ableton Template is definitely worth checking out.


Overview Of Equinox Progressive Melodic Techno Ableton Template

Moreover, for a complete Ableton Live template for this genre, check out Equinox Progressive Melodic Techno Ableton Template. In addition, this template is designed in a way that it can help all producers in making the next level melody-driven tracks. The Equinox Progressive Melodic Techno Ableton Template is not only great for enhancing your skills but also it can save you a lot of time by providing you a pre-designed framework that’s ready to be filled and tweaks to your liking. Below, we will discuss the Features and Benefits of using the Equinox Progressive Melodic Techno Ableton Template.

Features Of The Template

In addition, the Equinox Progressive Melodic Techno Ableton Template has a plethora of features that make this template a must-have for budding producers. For example, below are some of the features of the Equinox Progressive Melodic Techno Ableton Template:

Features Benefits
The template is well-organized and fully customizable. Saves time and increases workflow by having a pre-designed framework that is easy to adjust and modify.
The template includes a full arrangement of a Progressive Melodic Techno track. Provides users with an easy-to-follow structure that acts as a foundation for their tracks, making the overall production process faster and more efficient.
The template comes with fully loaded instruments, effects, and samples. Users can experiment with a variety of effects, samples, and instruments to create their signature sound.
The template has a professional sound quality. Users can create tracks that have the same level of audio production quality as professional producers.

Benefits Of Using The Template

Using the Equinox Progressive Melodic Techno Ableton Template can significantly benefit producers at different stages of their music production careers. As a result, below are some of the advantages of using this template:

  1. Furthermore, enhances user’s skills: The template provides insightful knowledge into music composition and sound design. Producers can learn how to create a well-arranged track by studying the workflow and structure of the template.
  2. Additionally, saves time and money: The template saves time by providing a semi-finished track that can be edited to suit the producer’s taste. It saves money by eliminating the need to purchase expensive samples, synthesizers, and effects.
  3. Also, allows creativity to flow: The template acts as an outline. This allows producers to put their creativity into practice and develop their music styles..
  4. Moreover, produces high-quality tracks: The template has been designed and developed by professionals in the music industry to ensure that the tracks produced with it have a professional quality sound.

In addition, the Equinox Progressive Melodic Techno Ableton Template acts as a fast track to music composition and production. However, with its complete set of features and benefits, this template offers an excellent opportunity for producers to enhance their skills and catalyze their journey to the top.


How To Install The Template In Ableton


Furthermore, installing the Equinox Progressive Melodic Techno Ableton Template is a breeze. Then, simply drag and drop the template file into your Ableton Live session and you’re good to go! The template contains everything you need to create your own stunning melodic techno tracks. This includes MIDI files, loops, and custom effects.

Installing Ableton Live for Equinox

Before installing the template, make sure Ableton Live is on your computer. In short, to do this, simply go to the official Ableton website and download the version that suits your needs.

Locating And Installing The Template File for Equinox

After downloading and installing Ableton Live, let’s proceed to locate and install the Equinox Progressive Melodic Techno Ableton Template. Follow these simple steps:

  1. Open Ableton Live on your computer.
  2. Navigate to ‘File’.
  3. Select the ‘Open Project’ option.
  4. Find the folder where you downloaded the Equinox Progressive Melodic Techno Ableton Template file.
  5. Double-click on the file to open it in Ableton.

Conclusion

That’s it. Similarly, you can now enjoy exploring the Equinox Progressive Melodic Techno Ableton Template and create your own unique tracks in this genre. The installation process is straightforward and easy to follow. Start producing music like a pro with this Ableton Template.

Inside The Template


The Equinox Progressive Melodic Techno Ableton Template takes you on a journey inside its intricate and complex sound design. Also, this template provides inspiration for producers to create their unique take on the genre.

Equinox Progressive Melodic Techno Ableton Template is an excellent tool for electronic dance music enthusiasts who want to create their own quality tracks easily. In addition, this template will bring professional-level quality to your tracks with its well-organized structure and production-ready sounds. To give you an overview of what the template has to offer, let’s dive into the different aspects of the template in detail.

Breaking Down The Tracks for Equinox

This Ableton template includes eight tracks, each of which has been meticulously designed to give you a head start in your music production journey. For example, whether you’re a beginner or a professional, these tracks will save you a lot of time and effort. The template splits tracks into melodic, percussion, bass and FX groups.

Exploring The Instruments And Effects Used for Equinox

The Equinox template utilizes a plethora of synthesizers and samplers. As a result, all the instruments used in the template are placed in Instrument Racks which can be easily customized and edited to suit your preferences. The template also comes with various audio effects such as reverb, delay, and distortion which can add depth and complexity to your tracks.

Understanding The Audio And Midi Clips for Equinox

The Equinox Template consists of MIDI and audio clips that enable you to experiment with different sounds. However, the audio files follow the project’s BPM. This makes it easy to drop them into your tracks. The MIDI clips are also created with the same precision and can easily be edited to change the melody or instrument choice. In conclusion, the Equinox Progressive Melodic Techno Ableton Template has made the production process a lot easier for Producers. Even if you’re new to music production, this powerful template can help you create professional-quality tracks with ease. The template’s organized structure, production-ready sounds, and detailed worksheets make it an excellent tool for anyone serious about electronic dance music production.

Equinox Progressive Melodic Techno Ableton Template


Credit: www.productionmusiclive.com


Customizing The Template for Equinox

Equinox Progressive Melodic Techno Ableton Template is a great starting point for anyone wishing to create their own progressive techno track. While the template provides a solid foundation for your track, it is important to customize it to make your music stand out and reflect your unique style. Then, in this section, we will explore some tips on how to customize the template to make it your own.

Adding Your Own Melodies

The template comes with a set of great melodies. But if you really want to make your track your own, you should add your own melodies. In short, this will give your track a unique identity and help it stand out from others. To add your own melodies, simply drag and drop your MIDI files into Ableton Live and use them to control the instrument racks in the template.

Adjusting The Mix And Effects

The mix is the balance of all the different elements in your track. Similarly, to make your own track, you’ll want to adjust the mix to achieve the right balance that suits your style. The template comes with a set of effects that you can customize to your liking. This can include adjusting the stereo width, adding reverb or delay, and fine-tuning the EQ. The key is to experiment and find the right mix and effects that suit your track the best.

Changing The Song Structure

The template comes with a predefined structure, but you can change this according to your preferences. Also, you can create breakdowns, bridges, and other elements to make the song structure more dynamic. Changing the structure can also make the track more interesting and prevent it from becoming too repetitive. Experiment with different arrangements until you find the one that works best for your track.

Customizing the Equinox Progressive Melodic Techno Ableton Template is an excellent way to unleash your creativity and create something unique. In addition, add your own melodies, tweak the mix and change the structure. Your track will stand out to listeners.


Using The Template In Your Own Productions


The Equinox Progressive Melodic Techno Ableton Template can work in your own productions to create amazing techno tracks with ease. For example, the template features professionally mixed channels, MIDI clips, and advanced automation techniques. This makes it perfect for both beginners and experienced producers.


Start creating your own unique sound with the help of this powerful template today.

Are you ready to take your music production skills to the next level? As a result, the Equinox Progressive Melodic Techno Ableton Template is an excellent tool to help you achieve this goal. Using this template, you can instantly dive into producing high-quality music with a strong foundation to build upon. Here are some tips on how you can use this template in your own productions.

Building On The Foundation Of The Template

The Equinox Progressive Melodic Techno Ableton Template gives you a starting point for your own productions. It provides you with all the necessary elements to create a professional-sounding track. This includes a driving bassline, punchy drums, and atmospheric pads. However, you should not be afraid to experiment and build upon this foundation with your own ideas. You can add your own unique melodies, synths, and effects to create a sound that is truly your own.

Incorporating Your Own Style And Sound

One of the advantages of using a template is that it can save you time and effort in creating the basic structure of a track. With this extra time, you can incorporate your own style and sound into the production. You can experiment with different chord progressions, scales, and rhythms to create a track that reflects your individuality. By doing this, you can create a unique sound that sets you apart from other producers.

Exporting Your Own Track

Once you have built upon the template and incorporated your own style and sound, it’s time to export your track. You should take special care to ensure that your finished product is of the highest quality. Make sure to mix and master your track, so every element sits in balance. You should also check the overall volume levels and ensure that your track is suitable for different listening environments. By doing so, you can create a track that will impress both yourself and your audience. In conclusion, using Equinox Progressive Melodic Techno Ableton Template can be an excellent way to jumpstart your music production journey. By building on the template, incorporating your own style and sound, and exporting your final track, you can create high-quality music that reflects your individuality as an artist.


Frequently Asked Questions On Equinox Progressive Melodic Techno Ableton Template


Where To Find Ableton Templates?


You can find ableton templates on various websites such as Abletunes, Loopmasters, and Splice. They offer a variety of pre-made templates for different genres, styles and purposes. A quick search on Google or through the Ableton Live browser can also lead to numerous results for free or paid templates.


What Is Equinox Progressive Melodic Techno Ableton Template?


Equinox Progressive Melodic Techno Ableton Template is a pre-built music project for electronic music producers designed to help them create original techno music with a cutting-edge sound. It comes with all the necessary audio files, MIDI files, and plugins you need to produce high-quality techno music.


Is The Equinox Progressive Melodic Techno Ableton Template Beginner-friendly?


Yes, the Equinox Progressive Melodic Techno Ableton Template is beginner-friendly and suitable for producers of all skill levels. The template includes detailed documentation and support that helps you understand and use the product more effectively.


Can I Customize Equinox Progressive Melodic Techno Ableton Template To My Liking?


Yes, you can customize every aspect of the Equinox Progressive Melodic Techno Ableton Template to fit your style and preferences. The template stays flexible and adaptable. This allows you to easily modify the sounds, plugins, and other elements to create unique music.


Conclusion


To sum up, the Equinox Progressive Melodic Techno Ableton Template is an exceptional tool for producers looking to create powerful and intricate techno tracks. With its expertly crafted sounds and intuitive design, the template takes the headache out of starting a project from scratch.


By utilizing the included features and tweaking them to your liking, you can produce unique tracks that will stand out in today’s saturated techno market. Give the Equinox template a try and unlock your true creative potential!

Categories
Archive

Softube Console 1 Mk Iii Core Mixing Suite

The Softube Console 1 Mk III Core Mixing Suite is a high-quality mixing console for music producers and audio engineers. It features a versatile plug-in platform that provides several top-quality EQ, compressor, saturation, and channel strip modules.


The software offers advanced routing capabilities and tight integration with several digital audio workstations. With its intuitive user interface and critically acclaimed sound quality, the Softube Console 1 Mk III Core Mixing Suite is an excellent tool for professional mixing and mastering tasks.


We will explore the features, benefits, and drawbacks of this mixing suite and explain why it is a top choice for many music industry professionals.


Design & Features


Softube Console 1 Mk III Core mixing suite offers top-notch design and features. It includes high-quality emulations of famous console classics and offers an intuitive workflow with an ergonomic hardware controller. The suite provides exceptional sound and flexibility for recording and mixing professionals.

Design & Features: Physical Design The Softube Console 1 Mk III Core Mixing Suite has an ergonomic design that allows for easy and intuitive usage. Its compact body size (measuring only 40 x 33.5 x 10cm) is perfect for small studio spaces or home studios. It has a sleek black finish that looks seamlessly professional and is built with durability in mind. Workflow Enhancements The Softube Console 1 Mk III Core Mixing Suite boasts significant workflow enhancements over its predecessors. This new version features three new workflow enhancement features: the Insert Edit Mode, the Channel Strip Control Mode, and the Unassigned Mode. These enhancements make it easy for sound engineers to work with plug-ins and EQ settings. Plugin Compatibility The Softube Console 1 Mk III Core Mixing Suite is compatible with an extensive range of top-quality audio plugins from renowned brands, which gives users the flexibility to customize their sound to suit their specific preferences. This compatibility includes plugins from top brands such as Waves, Universal Audio, and Softube’s own plugins. In conclusion, the Softube Console 1 Mk III Core Mixing Suite is a game-changing mixing suite that offers tremendous value to sound engineers. Its ergonomic design, significant workflow enhancements, and plugin compatibility make it an excellent choice for professionals in the audio industry.

Softube Console 1 Mk Iii Core Mixing Suite


Credit: www.softube.com


Channel Strip


The Softube Console 1 Mk III Core Mixing Suite is a powerful channel strip designed for recording and mixing engineers. It features a collection of high-quality plugins and a hardware controller that allow you to easily shape and enhance your sound.


With its intuitive interface and analog-style workflow, it’s a must-have tool for any serious audio professional.

Softube Console 1 Mk III Core Mixing Suite brings the classic mixing console vibe right to your fingertips. Complete with the ‘Channel Strip’ in your software studio, Console 1 Mk III Core allows easy access to all the essential mixing tools that you need for superior sonic results. The Channel Strip comprises H3 headings of the EQ, Dynamics, Filter, and Saturation controls that make mixing and sound shaping effortless.

Eq

The Softube Console 1 Mk III Core EQ offers a classic, yet modern sound with eight bands – four of which are completely new and exclusive to Console 1 Mk III Core. These bands cover frequencies from 20 Hz to 20 kHz and include four bell filters, two shelf filters, and two filters with TUBE DRIVE. In addition, the EQ has a separate high-pass and low-pass filter section, and you can customize each filter band by adjusting their respective settings.

Dynamics

The Dynamics section of Softube Console 1 Mk III Core brings together the compressor and limiter, so you can achieve the right balance of dynamics and volume for your mix. The compressor is a flexible design that allows you to switch between VCA, FET, and opto, and it has all the essential parameters, including attack, release, ratio, and threshold. The limiter, on the other hand, allows you to control peaks, add color, and protect your mix from clipping.

Filter

The Softube Console 1 Mk III Core Filter features high-pass and low-pass filters as well as a unique ‘low-cut’ filter that helps clean up your audio by removing unwanted low-frequency rumble. The ‘low-cut’ filter allows you to adjust the cutoff frequency, and you can use the high-pass and low-pass filters to shape your musical elements to your desired frequency spectrum.

Saturation

The Saturation control of Softube Console 1 Mk III Core is the final piece of the Channel Strip. This feature allows for the addition of warmth, character, and harmonic distortion to individual channels and the mix bus. The Saturation control is especially effective when working with digital recordings as it helps to bring out the analog sound that is unique and warm. Overall, the Softube Console 1 Mk III Core Mixing Suite and its Channel Strip can help you achieve an authentic analog sound in your digital recordings. With intuitive controls and great sound quality, this software tool is a must-have for any mixing and mastering engineer.

Master Section


Softube Console 1 Mk III Core Mixing Suite enhances the mixing experience by providing hands-on control of your DAW. The Master Section allows for quick adjustments of key parameters, including volume, pan, mute, and solo. With the added functionality of plugins and effects, the Console 1 Mk III is an all-in-one solution for intuitive and efficient mixing.

Softube Console 1 Mk III Core Mixing Suite is an all-in-one mixing solution providing users with the feel of mixing on a console. One of the crucial aspects of the Softube Console 1 Mk III Core Mixing Suite is the Master section. It’s where the final touches are given to the mix, and it’s what elevates the track to its full potential. The Master section is divided into three parts – Bus Processing, Spatial Effects, and Metering, all of which play a significant role in delivering a great mix. Let’s delve into the details of these three parts below.

Bus Processing

The Bus Processing section of the Softube Console 1 Mk III Core Mixing Suite Master section is where users get to control the output levels of their mix. It gives users complete control over their mix’s levels, ensuring the output is loud enough to be heard without distorting the sound. With the Bus Processing section, users can add a touch of compression, which helps bring the overall mix together, making it sound cohesive. Additionally, the Bus Processing section includes side-chain filters that allow users to fine-tune the levels of their mix, making it sound more balanced.

Spatial Effects

The Spatial Effects section of Softube Console 1 Mk III Core Mixing Suite Master section helps users add a sense of space to their mix. It includes four different reverbs that give users the power to add depth and dimension to their tracks. The Spatial Effects section also includes a stereo enhancer that gives users the ability to widen their mix, making it sound more open. With the Spatial Effects section, users can get creative and add a unique touch to their mix, making it stand out from the crowd.

Metering

The last part of the Softube Console 1 Mk III Core Mixing Suite Master section is the Metering section. In this section, users can monitor the levels of their mix, ensuring the output is not too loud or too quiet. It includes a peak meter that helps users keep their mix from clipping, which can distort the sound. The Metering section also includes a LUFS meter, which displays the loudness levels of the mix, helping users optimize the output for different platforms. In conclusion, the Softube Console 1 Mk III Core Mixing Suite Master section is a powerful tool that helps users add the final touches to their mix. The Bus Processing, Spatial Effects, and Metering sections provide users with complete control over their mix’s levels and sound. With Softube Console 1 Mk III Core Mixing Suite Master section, users can create a mix that sounds great and stands out from the crowd.

Integration

If you are looking for a seamless mixing experience, then Softube Console 1 Mk III Core Mixing Suite is the way to go. This mixing suite boasts of incredible integration with various DAWs, providing complete control over your mix with an ergonomic and user-friendly interface. Moreover, the console has additional compatibility options for control surface integration, making it easier to work with a physical mixer and giving you the flexibility to switch between a traditional mixing setup and a digital one, without any loss of workflow.

Daw Compatibility

With Softube Console 1 Mk III Core Mixing Suite, you can be sure that your favorite DAW is compatible, with seamless integration. The Console 1 Mk III Core is compatible with leading DAWs like Pro Tools, Logic Pro X, Ableton Live, Cubase, and more. This integration allows you to control your mix using the Console 1 Mk III hardware, without reaching out for your mouse or keyboard.

Control Surface Integration

Softube Console 1 Mk III Core Mixing Suite is designed to provide you with the best of both worlds. The plugin’s hardware has sophisticated control surface integration options, making it easier for you to work with a mixing console. The hardware has pre-mapped controls for channel levels, EQ controls, and compression, allowing you to adjust settings quickly and efficiently. Moreover, the console can integrate with leading mixing consoles like SSL, Neve, and more. So if you prefer a traditional mixing setup, Softube Console 1 Mk III Core Mixing Suite gives you the flexibility to switch between a physical mixer and a digital workflow without losing your project settings.

Expandability Options

If you need a more extensive mixing setup, Softube Console 1 Mk III Core Mixing Suite provides you with expandability options. You can add more channels to your mix using add-on channel strips. The channel strips can integrate with the Console 1 Mk III hardware seamlessly, allowing you to have more control over your mix. Moreover, the console’s expandability options do not end there. You can also integrate the Console 1 Mk III Core with other Softube plugins for a more comprehensive mixing solution.

Sound Quality


Sound quality is ensured with the Softube Console 1 Mk III Core mixing suite. This suite offers a high level of precision and control over your sound, with a user-friendly interface that makes the audio mixing process a breeze. Whether you’re a professional or a beginner, this software suite can help you achieve the sound you’re looking for.

Softube Console 1 Mk III Core Mixing Suite is undoubtedly one of the most powerful mixing suites available in the market. Its incredible sound quality is something that attracts all budding and professional music producers alike.

Analog Emulation

Softube Console 1 Mk III Core Mixing Suite accurately emulates the sound of classic analog mixing consoles, adding warmth, color, and character to your mixes. The analog emulations are so precise that it’s hard to differentiate from the real analog console. This is achieved with the help of Softube’s meticulously crafted algorithms that replicate the sound of some of the most iconic analog mixing consoles ever made, such as the SSL 4000E and the Neve 1073.

Processing Power

Softube Console 1 Mk III Core Mixing Suite is loaded with powerful processing capabilities that make it the perfect tool for mixing music projects of any size. The Suite comes equipped with an FPGA-powered Console 1 system that offers zero-latency processing, ensuring that any changes made are immediately reflected in the mix. This way, you can work with precise accuracy and speed, making your workflow that much more efficient.

User Experience

Softube Console 1 Mk III Core Mixing Suite is designed to offer users the most intuitive and efficient music mixing experience possible. The Suite’s interface is clean, uncluttered and easy to navigate, with large, high-resolution screens that display all the necessary information at a glance. The software also features drag-and-drop functionality, making it easy to move and adjust plugins and effects within the mix. Additionally, with support for many DAWs, Console 1 Mk III is an excellent tool that can integrate seamlessly with your existing setup. In conclusion, Softube Console 1 Mk III Core Mixing Suite is a fantastic tool that can take your music production to the next level—whether you’re a professional mixing engineer or an amateur producer, this software can help you achieve your sonic goals.

Softube Console 1 Mk Iii Core Mixing Suite


Credit: www.softube.com


Softube Console 1 Mk Iii Core Mixing Suite


Credit: m.youtube.com


Frequently Asked Questions For Softube Console 1 Mk Iii Core Mixing Suite


Does Softube Console 1 Work With All Plugins?


Softube Console 1 is compatible with all Softube plugins, but it may not work with third-party plugins. It’s always worth checking the compatibility of individual plugins before purchasing them.


Does Softube Console 1 Work With Reaper?


Yes, Softube Console 1 is fully compatible with Reaper. You can easily integrate it into your workflow and use it as your go-to mixing console.


Does Softube Console 1 Work With Luna?


Yes, Softube Console 1 works with Luna. It allows easy and hands-on control of mixing in the Luna environment, providing users with the classic sound of analog gear.


What Is Softube Console?


Softube Console is a software plugin that emulates classic analog mixing consoles. It captures the distinct sound and feel of popular consoles and allows users to mix and process audio tracks within their preferred digital audio workstation (DAW). Its intuitive interface and authentic analog sound make it a go-to mixing tool for music producers and engineers.


Conclusion


The Softube Console 1 Mk III Core Mixing Suite is a powerful tool for both novice and professional audio engineers. Its intuitive interface, extensive range of plugins, and compatibility with a wide range of DAWs make it a must-have for anyone serious about producing high-quality mixes.


With its impeccable sound quality and versatile functionality, the Console 1 Mk III Core is an investment that can significantly elevate your music production game.


For more background, see Mixing console on Wikipedia. You may also like our guide: Use Softubes Console 1.

Categories
Archive

How To Make Your Kick Drum Sound Better Great Tricks

To make your kick drum sound better, try EQing, compression, and adding some distortion or saturation. These tricks can enhance the low-end punch and add warmth to your drum sound.


If you’re a music producer or sound engineer, you know how crucial the kick drum is to the foundation of your mix. It’s the backbone of your rhythm section, and if it doesn’t stand out, your entire track can feel lackluster.


Fortunately, there are some simple techniques to make your kick drum sound better. By tweaking the EQ, compressing it to control dynamics, and adding some distortion or saturation, you can give your kick drum that extra edge it needs to cut through the mix. This article will provide some great tips and tricks to take your kick drum sound to the next level.


Find The Right Sample

Kick drums play a critical role in any music production. Having a great sounding kick drum can be the difference between a bland track and a catchy one. One easy way to improve your kick drum sound is by using the right sample. In this article, we’ll discuss how to find the right sample for your music production.

Choose The Right Sample Type

When looking for the right kick drum sample, consider the type of sample that suits your music production. It’s essential to choose the right kick drum sample type like acoustic or electronic samples, depending on the genre of music you’re producing. Different genres of music require different types of kick drums, so it’s essential to choose the sample type wisely.

Understand Acoustic Vs. Electronic Samples

Acoustic and electronic kick drums have different characteristics that can affect your music production. An acoustic kick drum provides a more natural sound and works well with genres such as rock, metal, and blues. On the other hand, electronic kick drums have a synthetic sound and are perfect for genres such as EDM, techno, and hip-hop.

If you want a kick drum that feels more natural, then an acoustic sample is the way to go. But if you’re looking for a more synthetic sound, then electronic samples are the way to go. Regardless of the type, make sure the sample complements your music production.

Use Drum Replacement Plugins

If you can’t find the perfect sample for your music production, then drum replacement plugins can come in handy. These plugins allow you to replace your kick drum sound with a sample that suits your music production. You can choose from a wide array of samples and tweak them to match your track’s tonality.

Drum replacement plugins offer incredible flexibility, but it’s essential to use them with caution. Ensure that the sample you choose complements your track’s overall sound and doesn’t make it sound out of place.

In conclusion, finding the right sample is critical to improving your kick drum sound. By considering the sample type, understanding acoustic vs. electronic samples, and using drum replacement plugins, you can transform your bland kick drum sound into a catchy one that resonates with your audience.

Enhance The Attack


Want to enhance the attack of your kick drum? Check out these great tricks for making it sound better, including adjusting the EQ, adding compression, and experimenting with distortion. With a few simple tweaks, you can take your drum sound to the next level.

If you want to make your kick drum sound punchier, then it’s all about enhancing the attack. The attack is the initial point where the sound is amplified and really hits the listener’s ear. In this section, we will explore three ways you can enhance the attack of your kick drum: using EQ to boost high-end frequencies, adding compression to control the dynamic range, and using transient shaping plugins.

Use Eq To Boost High-end Frequencies

EQ is a great tool for enhancing the attack of your kick drum. The high frequencies in a kick drum are what provide the initial attack, so it’s important to boost these frequencies. However, too much high-end can make the kick drum sound too thin or harsh, so it’s crucial to EQ carefully. To enhance the attack with EQ, start by adding a high shelf filter to boost frequencies around 5-8 kHz. Then, add a narrow peak filter to boost frequencies around 2-4 kHz. Adjust the frequencies and the amount of boost until you find the sweet spot where the attack of the kick drum is enhanced without making the kick drum sound too thin.

Add Compression To Control Dynamic Range

Compression is another great tool for enhancing the attack of your kick drum. Compression allows you to control the dynamic range of the kick drum, making the quieter parts louder and the louder parts quieter, resulting in a more consistent and punchy sound. To enhance the attack with compression, start by setting a fast attack time to allow the initial transients to come through. Then, set a high ratio to compress the louder parts of the kick drum. Finally, adjust the threshold and makeup gain until you find the sweet spot where the attack of the kick drum is enhanced without making the kick drum sound too compressed or distorted.

Use Transient Shaping Plugins

Transient shaping plugins are a relatively new tool that can enhance the attack of your kick drum in a more precise way than EQ or compression. These plugins allow you to shape the initial transients of the kick drum, making them sound punchier or softer, depending on your desired effect. To enhance the attack with transient shaping plugins, start by choosing a plugin that allows you to shape the initial transients. Then, adjust the attack and sustain controls until you find the sweet spot where the attack of the kick drum is enhanced without making the kick drum sound too unnatural or distorted. In summary, enhancing the attack of your kick drum is crucial for making it sound punchier and more impactful in your mix. Use EQ to boost high-end frequencies, add compression to control dynamic range, and use transient shaping plugins for precise control over the initial transients. By applying these techniques, you can take your kick drum sound to the next level.

Add Sustain And Body

If you’re a drummer, you know how important it is to have a great sounding kick drum. It’s the heartbeat of your entire kit and sets the foundation for the rest of your sound. However, getting the perfect kick drum sound can be time-consuming and frustrating even with the best drum kits in the world. Luckily, there are several tricks you can use to add sustain and body to your kick drum, and we’re going to explore them in this article.

Use Eq To Boost Lower Frequencies

EQ is one of the most powerful tools at your disposal to enhance your kick drum sound. By selectively boosting or cutting certain frequencies, you can achieve a wide range of sounds with your kick drum. When it comes to adding more body and sustain to your kick drum, you’ll want to focus on boosting the lower frequencies.

A general rule of thumb is to boost somewhere around 60-80Hz to add more body and fullness to your kick drum. You might also want to experiment with boosting around 3-5kHz to bring out some of the attack and high-end harmonics. However, be careful not to overdo it, or your kick drum can start to sound muddy and indistinct.

Consider Using A Sub-kick Microphone

If you want to take your kick drum sound to the next level, consider using a sub-kick microphone. This type of microphone is specifically designed to capture the low-end frequencies of your kick drum and can add a significant amount of body and sustain to your sound.

The sub-kick microphone can be placed either inside or outside your kick drum, depending on your preference. Just like with EQ, be careful not to overdo it with the sub-kick microphone, or your kick drum can start to sound boomy and out of control.

Add Reverb And Delay Effects

If you want to add even more sustain and body to your kick drum sound, consider using some reverb and delay effects. These types of effects can help create the illusion of a larger space and add some extra depth and richness to your kick drum sound.

When it comes to using reverb and delay effects, be careful not to overdo it, or your kick drum can start to sound washed out and distant. Start with a subtle amount of reverb and delay and gradually increase the settings until you achieve the desired effect.

With these great tricks, you can easily make your kick drum sound better and enhance your overall sound. Experimenting with these techniques can help you find the perfect sound for your style and musical preferences.

How To Make Your Kick Drum Sound Better Great Tricks


Credit: www.youtube.com


Experiment With Tuning


Experimenting with tuning can greatly improve the sound of your kick drum. Try adjusting the drumhead tension and experimenting with different beater types for a unique sound.

Tuning your kick drum is an essential step in enhancing its sound. Your kick drum’s pitch should be in harmony with the other instruments in the mix, and it’s not just a matter of retuning it to the standard pitch. That said, experimenting with tuning and pitch can help you find an exceptional sound that fits your track.

Learn How Tuning Affects The Sound

Before you begin tuning your kick drum, it’s necessary to have a basic understanding of its impact on the sound. Tuning your drums to the key of the song can help your tracks sound more cohesive and will fix any frequency clashes. For example, lower tunings will give you a deeper and more resonant kick drum sound, while higher tunings will give you a punchier kick drum.

Use Tuning Tools To Fine-tune Your Kick Drum

Once you have a basic understanding of tuning and its effect on sound, you can use various tuning tools to get the perfect kick drum sound you desire. Tuning tools typically include devices like drum dial or lug-based tuners that provide a digital reading of each drum’s pitch. You can use these tuners to match the kick drum pitch with the song’s key and ensure your kick drum complements the overall mix.

Try Pitch-shifting Plugins For Creative Effect

Pitch-shifting is an excellent technique that creates a unique sound for your kick drum. If you want to experiment with pitch without impacting the pitch of the song, using pitch-shifting plugins is an excellent way to do it. These plugins allow you to change the pitch of the kick drum without affecting its timing and gain. You can use this technique to create different accents and transitions in the song, giving it a fresh and unique feel. In conclusion, tuning and pitch are critical elements in achieving your desired kick drum sound. By experimenting with tuning, using tools to fine-tune your kick drum and trying pitch-shifting plugins, you’ll be on your way to finding the perfect kick drum sound for your track.

Layer Your Sounds


Layering sounds can bring depth and complexity to your kick drum, making it sound fuller and more interesting. Experiment with adding different types of sounds, such as a high-pitched click or a low-end boom, to create a unique and professional sound.

Layering your kick drum sounds is a great way to enhance your track and give it a more unique and professional sound. To create a fuller and richer kick sound, you can layer multiple samples on top of each other. Here are some ways to layer your sounds effectively:

Layer Multiple Samples To Add Depth

Layering multiple samples of different frequencies and characteristics can add depth and complexity to your kick drum sound. For instance, using a low frequency sample for the sub-bass and a high frequency sample for the attack of the kick can create a sonic contrast that makes the sound more interesting. You can blend the samples together in your DAW until you find the perfect balance.

Use Different Sample Types For A Unique Sound

Using different types of samples can help you achieve a unique and interesting kick drum sound. For example, you can blend a clean kick sample with a distorted one, or layer an acoustic kick with an electronic one. This can add character and personality to your track, and make your kick stand out from the crowd.

Blend In Percussive Elements For Added Texture

By blending in percussive elements like shakers, tambourines, and claps, you can add texture and depth to your kick drum sound. These elements can also help your kick cut through the mix and make it more prominent. You can experiment with different percussive elements and find the ones that work best for your track. In conclusion, layering your kick drum sounds is an effective way to create a more interesting and dynamic track. By using multiple samples, different sample types, and percussive elements, you can enhance your kick drum sound and make it stand out. Try these techniques out in your next track and see how they can improve your sound!

How To Make Your Kick Drum Sound Better Great Tricks


Credit: www.wearevelveteen.com


Use Sidechain Compression

When it comes to making the perfect kick drum sound, utilizing sidechain compression is a great trick that can help create a more dynamic and professional-sounding track.

Understand Sidechain Compression

Firstly, it’s important to understand what sidechain compression actually is. Essentially, sidechain compression allows you to control the volume of one track based on the volume of another track. This means you can use it to create a “pumping effect” with other tracks, or to clean up any clashing frequencies between tracks.

Use It To Create A Pumping Effect With Other Tracks

If you want to use sidechain compression to create a pumping effect, you’ll first need to set it up on the track you want to control (usually a bass track). Then, you’ll need to choose the trigger track (usually the kick drum) and select it as the sidechain source. By doing this, you can control the volume of the bass track, creating a “pumping” effect that matches the rhythm of the kick drum track.

Steps to Create a Pumping Effect:
1. Set up sidechain compression on the track you want to control.
2. Choose the trigger track and select it as the sidechain source.
3. Control the volume of the bass track to create a matching rhythm with the kick drum track.

Use It To Clean Up Clashing Frequencies With Other Tracks

If you’re trying to clean up clashing frequencies between tracks, sidechain compression can also be incredibly useful. In this case, you may want to set up a sidechain compressor on the track that’s causing issues (usually a synth or vocal track) and choose the source track (again, usually the kick drum) as the sidechain source. By doing this, you can effectively “duck” the vocal or synth track every time the kick drum hits, minimizing any overlapping frequencies and cleaning up the overall sound of the mix.

Steps to Clean Up Clashing Frequencies:
1. Set up sidechain compression on the track that’s causing issues.
2. Choose the source track as the sidechain source (usually the kick drum).
3. “Duck” the vocal or synth track every time the kick drum hits to minimize any overlapping frequencies.

Consider Eq Matching


Consider using EQ matching to improve the sound of your kick drum. This technique allows you to match the frequency profile of your kick drum to that of a professionally mixed and mastered track, resulting in a more polished and professional sound.

Consider EQ Matching – Learn How EQ Matching Works One of the best techniques to make your kick drum sound great is to consider EQ matching. EQ matching is an effective way to match the tonal balance of a reference track to your kick drum. It can quickly improve the overall sound of the mix and make your kick drum sound better. To learn how EQ matching works, you need to understand that each audio track has a frequency spectrum. The frequency spectrum is the range of frequencies produced by any audio signal. EQ matching is a process where you adjust the frequencies and volume levels of your kick drum to match the reference track. Use it to Match Your Kick Drum to a Reference Track Now that you know how EQ matching works, it’s time to apply it to your kick drum. Start by finding a reference track with a kick drum that is similar to the sound you want to achieve. Import both your kick drum and reference track into your digital audio workstation (DAW). Open an EQ matching plugin and load the reference track into it. Next, insert an EQ plugin into your kick drum channel strip. Start by soloing your kick drum and listening to it together with the reference track. Now, adjust the EQ plugin on your kick drum channel to match the reference track frequency spectrum as closely as possible. Experiment with Different EQ Matching Plugins There are many EQ matching plugins available, so it’s worth experimenting with a few to find the one that works best for your needs. Each plugin has its own unique features and interface, so it’s essential to find the one that suits your workflow and produces the desired results. In conclusion, EQ matching is an excellent technique to make your kick drum sound better and blend nicely with the rest of your mix. It’s an effective way to match your kick drum to a reference track and achieve impressive results quickly. Try different EQ matching plugins and experiment until you find the one that works best for you.

Get Creative With Sound Design


Crafting the perfect kick drum sound can make all the difference in your music production. Get creative with sound design by using tricks like layering, EQing, and distortion to take your kick drum to the next level.

If you’re looking to take your kick drum sound to the next level, it’s time to get creative with sound design. Experimenting with different techniques can help you achieve a more unique and professional sound. Here are three tricks to try out:

Experiment With Synthesizing Your Own Kick Drum Sounds

One way to create a distinct kick drum sound is to synthesize it from scratch. Using a synthesizer or software plugin, you can generate your own unique tones and create a sound that is truly your own. Start by experimenting with different waveforms, envelopes, and filters to find the perfect combination.

Use Modulation And Effects To Create Unique Textures

Modulation and effects can be used to add more depth and texture to your kick drum sound. Try adding a bit of distortion, reverb, or delay to create a more dynamic and interesting sound. You can also experiment with manipulating the pitch or adding some sidechain compression to give the kick drum even more punch.

Incorporate Organic Elements For A Hybrid Sound

Another way to make your kick drum sound stand out is to incorporate organic elements into your sound design. This could include recording the sound of a kick drum or other percussive instruments and layering it with your synthesized kick drum sound. By blending these together, you can create a hybrid sound that has the best of both worlds. In conclusion, getting creative with sound design is the key to making your kick drum sound better. Experiment with synthesizing your own sounds, adding modulation and effects, and incorporating organic elements for a hybrid sound that is truly unique. With these techniques, you can create a professional and distinct sound that sets you apart from the rest.

How To Make Your Kick Drum Sound Better Great Tricks


Credit: www.productionmusiclive.com


Frequently Asked Questions For How To Make Your Kick Drum Sound Better Great Tricks


How Can I Improve My Kick Drum Sound?


To improve your kick drum sound, you can try the following tips: 1. Experiment with different drum heads and tuning techniques to find the right sound. 2. Use a dampening technique to control the resonance and sustain of the kick drum.


3. Use a quality microphone to capture a full and balanced sound. 4. Process the kick drum sound with EQ, compression, and possibly distortion to enhance its impact and clarity. 5. Consider using a trigger or sample replacement to enhance the consistency and punchiness of the sound.


How Can I Make My Drumming Sound Better?


To improve the sound of your drumming, try incorporating the following tips: practice regularly, focus on timing and rhythm, tune your drums properly, invest in quality drumsticks and heads, and experiment with different styles and techniques. These simple steps can help you enhance your drumming sound and take your skills to the next level.


How Do You Get A Good Live Kick Drum Sound?


To get a good live kick drum sound, you need to consider several aspects, such as the drummer’s playing technique, the drum’s hardware and tuning, and microphone selection and placement. Experiment with different microphones and positions until you find a combination that captures the kick drum’s natural tone with clarity and punch.


How Do I Make My Kick Drum More Punchy?


To make your kick drum more punchy, start by EQ’ing it to remove competing frequencies. Then, add compression to bring out the sustain and increase its attack. Using a transient shaper can also help add more punch to the attack.


Finally, consider using parallel processing or layering to add even more depth and impact to the sound.


Conclusion


So, these are some excellent tricks to make your kick drum sound better. Incorporating these techniques will take your music to the next level. By applying a combination of EQ and compression, adding samples, adjusting the attack and sustain, and incorporating parallel processing, you can get the perfect kick tone for your mix.


Practice, experiment, and most importantly, listen carefully to the sound, don’t give up until you find precisely what you’re looking for. Remember to revisit your kick drum after mixing everything else, as you’ll undoubtedly have new ideas for making it even better.


Give these techniques a try, and let your creativity soar.


More in our Drums & beats guide.

Categories
Archive

Should I Get a Midi Controller Or a Synth

For versatility in music production, get a MIDI controller for precise control over software instruments. A synth is best for creating unique analog sounds that can stand on its own, whether live or recorded.


Both have their advantages and it comes down to personal preference and music production needs. Musicians and producers are often faced with the question of whether to invest in a MIDI controller or a synth. Both can improve music production and lead the way to unique sounds.


A MIDI controller gives precise and fine-tuned control over software instruments and all the features of a DAW. On the other hand, a synth is best for producing analog sounds that can stand on their own. The decision depends on personal taste and your sound library. We will explore the benefits and features of both MIDI controllers and synths to help you make an informed decision.

Should I Get a Midi Controller Or a Synth


Credit: www.makeuseof.com


Defining Midi Controller And Synth

Midi Controller and Synth are two indispensable devices in the music industry. These devices help musicians and sound engineers manipulate sounds and create unique music tracks. Both devices are essential, but what is the difference between the two, and which one should you get?

Midi Controller

A MIDI (Musical Instrument Digital Interface) controller is an electronic device that sends MIDI messages to control sound parameters on an electronic device or software. It does not have built-in sound generators. Instead, it is designed to manipulate music software or other electronic devices that create sound. It resembles a keyboard and often features pads, knobs, faders, and other physical controls used to create MIDI signals to an external sound module or software.

Synth

A synthesizer, on the other hand, is an electronic device or software that generates sound signals. Synths can be analog or digital and are designed to produce different types of sounds such as pads, leads, bass, drums, FX and more. They are playable and often come with a built-in keyboard. Synthesizers are standalone devices that do not require interfaces to manipulate sounds.

If you are primarily interested in manipulating music software, then a midi controller is an excellent choice. If you want to create unique sounds, producing music from scratch without the use of a computer, then a synth is the best choice. However, both devices complement each other and can be used together to create complex compositions.

Conclusion

Whether you choose a midi controller or a synth largely depends on your specific needs. It is important to consider factors such as your budget, intended use, and preference. With the information provided above, you can now make an informed decision and select the device that better suits your workflow and style.

Benefits Of Midi Controller


A midi controller provides benefits such as versatility, portability, and affordability as compared to a synth. It allows you to manipulate sounds and create music using virtual instruments. With its compact size, it’s easy to carry and set up in any location, making it an ideal choice for music production and performances.

Versatility

Midi controllers are highly versatile and can be used to control any MIDI-compatible software or instrument. With a midi controller, you can easily switch between different sounds and adjust various parameters such as volume, pitch, and tone to create a unique sound. You can also use midi controllers to control virtual instruments, recording software, and hardware synthesizers.

Customization

Midi controllers offer a high level of customization. You can map the buttons, knobs, and faders to different functions and even create custom mappings. This allows you to have total control over your software or synthesizer, making it easy to create your own unique sounds and music.

Ease Of Use

Midi controllers are extremely easy to use, and they require very little setup. Simply plug in your controller, and you’re ready to start making music. With their intuitive interface, you can easily access different functions and settings, making it easy to experiment with different sounds and ideas. In conclusion, a midi controller offers versatility, customization, and ease of use, making it an excellent choice for musicians, producers, and anyone looking to create their own unique sounds and music.

Benefits Of Synth

If you’re thinking about investing in a MIDI controller or synth, you might be wondering about the benefits of choosing a synth. While a MIDI controller can be an excellent tool for controlling your digital audio workstation (DAW), a synth offers a different set of advantages. Let’s take a closer look at some of the benefits of choosing a synth over a MIDI controller.

Sound Creation

One of the biggest advantages of a synth is its ability to create unique sounds. While a MIDI controller can help you manipulate existing sounds, a synth allows you to create new ones. Synthesizers come with a vast array of sound engines that allow you to shape and sculpt your sounds in a way that a MIDI controller can’t. You can create everything from traditional analog-style synthesizer sounds to futuristic textures and soundscapes.

Built-in Effects

In addition to their unique sound creation abilities, synths typically come with built-in effects processors. This means you can add delay, reverb, distortion, and other effects to your sounds without needing to invest in additional hardware or plugins. Built-in effects also allow you to experiment with different sounds and effects without having to leave your synth’s interface.

Performance Features

Another benefit of choosing a synth is their performance features. Some synths have features like arpeggiators, sequencers, and even built-in keyboards, making them excellent tools for live performance. MIDI controllers, on the other hand, are typically designed for studio use and lack many of these live performance features.

In conclusion, while a MIDI controller can be an excellent tool for DAW control, if you’re looking to create unique sounds, experiment with effects, and perform live, a synth is a more versatile and powerful tool. With its unique sound creation abilities, built-in effects, and performance features, a synth can help you take your music production to the next level.

Factors To Consider

Choosing between a midi controller and a synth can be a challenging decision to make, especially for an amateur musician. The decision usually depends on several factors that you should consider carefully. These include your musical goals, budget, and musical preferences. In this post, we will explore these factors in more detail to help you decide which one works best for you.

Musical Goals

Your musical goals play a critical role in helping you choose between a midi controller and a synth. For instance, if you’re a beginner, a midi controller might be a better option because it allows you to create music using a computer-based digital audio workstation (DAW). On the other hand, if you’re an experienced musician, a synth may be a better fit because it allows you to experiment with various sounds and effects.

Budget

Another critical factor to consider when choosing between a midi controller and a synth is your budget. If you’re working on a tight budget, a midi controller might be a better option than a synth because it’s less expensive and still offers an excellent platform for music production. However, if you have enough money to spend, a synth would be a better fit because it offers more advanced features and sound quality.

Musical Preferences

Your musical preferences also play a crucial role in choosing between a midi controller and a synth. If you prefer creating sounds and experimenting with different effects, a synth would be a better fit. For instance, you can use a synth to create unique sounds from scratch that a midi controller might not offer. On the other hand, if you prefer using pre-existing sounds from different instruments, a midi controller would be a better choice.

In conclusion, whichever option you choose, whether a midi controller or a synth, ensure that it aligns with your musical goals, preferences, and budget. That way, you can be sure that it will serve you well in your music production endeavors.


Which Is Right For You?

Which is Right for You?

When it comes to choosing between a MIDI controller and a synth, it all depends on your personal preferences, goals, and budget. Whether you are a beginner or an experienced musician, choosing the right device can make all the difference in terms of productivity, creativity, and satisfaction. In this post, we will discuss the main factors that you need to consider before making your decision.

Choosing Based On Goals

If your goal is to create electronic music, then a synth is the way to go. Synths are versatile instruments that allow you to produce a wide range of sounds and textures, from classic analog tones to cutting-edge digital effects. You can use a synth to create melodies, chords, basslines, and other elements of your composition. On the other hand, if your goal is to control virtual instruments on your computer or DAW, then a MIDI controller is the ideal choice. A MIDI controller allows you to control the parameters of your virtual instruments with physical knobs, sliders, pads, and keys, giving you a more tactile and expressive experience.

Choosing Based On Budget

If you are on a tight budget, then a MIDI controller is a more affordable option. You can find a decent MIDI controller for less than $100, while a good quality synth can cost you several hundred dollars or even more. However, if you are willing to invest in a high-end synth, you can enjoy a richer and more authentic sound that can add a lot of value to your music. Additionally, some synths offer advanced features such as sequencers, arpeggiators, and effects that can enhance your creativity and workflow.

Choosing Based On Preferences

Your personal preferences also play a role in your decision-making process. If you prefer the feel and sound of analog hardware, then a synth might be the perfect fit for you. If you prefer the flexibility and mobility of digital devices, then a MIDI controller might be more suitable for your needs. Also, consider the size, weight, and design of the device, as well as its compatibility with your computer or DAW.

In conclusion, both MIDI controllers and synths have their own advantages and disadvantages, and the choice depends on your individual needs and preferences. Whether you choose a MIDI controller or a synth, make sure to do your research, try them out if possible, and invest in a device that fits your budget and goals.

Should I Get a Midi Controller Or a Synth


Credit: www.reddit.com


Should I Get a Midi Controller Or a Synth


Credit: blog.burtonacoustix.com


Frequently Asked Questions For Should I Get A Midi Controller Or A Synth


Do I Need A Midi Keyboard If I Have A Synth?


While a synth can work on its own, a MIDI keyboard can provide more flexibility and control over the sound. It allows for easier manipulation of parameters like pitch, volume, and modulation. So while not strictly necessary, a MIDI keyboard can enhance the overall experience of using a synth.


What Is The Difference Between A Midi Controller And A Synth?


A MIDI controller is used to control sounds from an external MIDI source, while a synth generates its own sounds. MIDI controllers are typically keyboards or pads, while synths can be standalone physical instruments or software-based. In short, a MIDI controller is a tool to control sounds, whereas a synth is an instrument itself.


Do I Really Need A Midi Controller?


Yes, a MIDI controller is essential for musicians and producers who want to create digital music using software. It allows for hands-on control over numerous aspects of the music-making process, resulting in a better workflow and a more creative output.


MIDI controllers come in various sizes and configurations to suit different needs and budgets.


Should I Buy A Midi Keyboard Or A Normal Keyboard?


Buy a MIDI keyboard if you want to make music using digital audio workstations and software. It allows you to create, edit, and manipulate sounds. Buy a normal keyboard if you want to play and learn traditional keyboard instruments and music theory.


It is essential for performance-oriented music.


Conclusion


After weighing the pros and cons of owning a MIDI controller versus a synth, the decision ultimately comes down to personal preference and individual needs. While MIDI controllers offer versatility and convenience, synths provide unique sounds and the ability to create music from scratch.


Regardless of which option is chosen, the most important aspect is to have fun with the music-making process. So, go ahead and invest in your musical journey and unleash your creativity with the tool that suits you best!