Categories
Archive

Tips For Getting Your Vocals To Cut Through The Mix

To get your vocals to cut through the mix, use EQ to increase presence and clarity while reducing competing frequencies. Getting your vocals to stand out in a mix can be challenging, especially when other instruments and frequencies are competing for attention.


However, using EQ to increase presence and clarity in the vocal range can help achieve a clearer and more defined sound. Additionally, addressing any problematic frequencies with cuts or filters can help reduce muddiness or harshness. Compression can also be used to even out dynamics and increase overall volume, making the vocals more audible.


By carefully balancing EQ, compression, and other processing techniques, you can achieve a professional-sounding vocal mix where the vocals are the star of the show.


Work On Vocal Technique


One of the most crucial things for a singer is to ensure their vocals cut through the mix. While EQ and compression can be used during mixing, the technique used in singing must also be focused on to make sure that the vocals stand out. Here are some ways to work on your vocal technique to ensure your voice cuts through the mix.

Breathing Exercises:


Proper breathing is the foundation for excellent vocals. It helps singers maintain correct pitch, tone, and vocal strength. Here are some breathing exercises that every singer should work on:

  • Deep breathing- Sit down, relax and take a long, deep breath. Slowly, exhale through your mouth.
  • Diaphragmatic breathing- Place one hand on your stomach and the other on your chest while standing or lying down. Inhale slowly, filling your lower lungs first, then your upper lungs. Exhale slowly.

Vocal Warm-ups:


Before a performance, warm up your vocals with exercises to avoid vocal strain and soreness. Here are some vocal warm-ups:

  • Tongue twisters- Repeat phrases like “unique New York” or “red lorry, yellow lorry.”
  • Lip rolls- Blow air through your lips as if it’s raspberry-making sounds

Articulation Practice:


Articulation practice is essential for developing a clearer and attractive tone. Here are some exercises:

  • Lip trills- Vibrate your lips together, producing a hum.
  • Pitch glides- Sing A-E-I-O-U while sliding from one pitch to the next.

By working on these techniques, you’ll develop strong and impressive vocals that cut through the mix with ease. Incorporate these exercises into your routine and consistently practice them to achieve your desired results.

Tips For Getting Your Vocals To Cut Through The Mix


Credit: makeyourmixesnotsuck.com


Consider Microphone Placement


Proper microphone placement is critical to achieve clear vocals in a mix. Experiment with different distances and angles to find the sweet spot that works best for your voice. Make sure to test your levels and EQ settings to achieve the desired effect.

When you’re recording vocals, one of the most crucial factors that determine the quality of your final output is microphone placement. Even if you have the best microphone that money can buy, it will not yield high-quality recordings if it’s not positioned correctly. Here are some tips on how to position your microphone to get the best possible sound:

Distance

The distance between your mouth and the microphone is a critical aspect of microphone placement. To achieve a clear and distinct vocal recording, place the microphone about 6 inches away from your mouth. This distance ensures that your vocals are not too loud or too soft, and it helps to minimize background noise.

Angle

The angle of the microphone placement is another aspect to consider. Ideally, you want to position the microphone directly in front of your mouth, pointed towards your chin. This way, the microphone captures the sound coming from your vocals and avoids picking up any unwanted sounds or ambient noise.

Off-axis Positioning

Off-axis positioning refers to angling the microphone slightly off-center from your mouth. This method can help to reduce sibilance (harsh and hissing sounds) and reduce plosive sounds (popping sounds). Angle the microphone slightly off-center so that it’s pointing towards the corner of your mouth. This positioning helps to reduce unwanted sounds and highlight the essential aspects of your vocals. In conclusion, microphone placement plays a significant role in ensuring high-quality vocal recordings. By considering the distance, angle, and off-axis positioning, you can achieve a clear and distinct vocal recording that cuts through the mix.

Use Eq To Boost Vocals


Using EQ is an effective way to make your vocals stand out in a mix. Boosting the right frequencies can give your voice more presence and clarity, making it easier to be heard over other instruments and sounds.

Getting your vocals to cut through the mix is crucial for a clear and powerful sound. One effective way to achieve this is by using EQ to boost vocals. Equalization, or EQ for short, adjusts the balance between frequencies in an audio signal. When applied correctly, EQ can bring out the best qualities in a vocal performance and help it stand out in the mix.

Identify Vocal Frequency Range

Before you can start boosting frequencies, it’s important to know which range your vocals lie in. Vocals typically span a frequency range of 80Hz to 16kHz, with the sweet spot being between 1kHz and 5kHz. However, every vocalist is unique, and their frequency range may differ. To identify the vocal frequency range, use an EQ plugin or hardware device and sweep through the frequencies until you hear the vocals clearly.

Apply Narrow Eq Boost

Once you’ve identified the vocal frequency range, it’s time to start enhancing it. Use a narrow EQ boost to emphasize the frequencies that make the vocals sound most prominent and clear. Typically, a boost of around 2dB to 6dB is enough to give vocals a subtle lift. Be careful not to overdo it, as too much boost can result in unnatural or harsh-sounding vocals. Keep the Q-factor narrow to target only the desired frequencies.

Experiment With Different Eq Techniques

Along with a narrow EQ boost, there are other EQ techniques you can try to make your vocals stand out, such as:

  • High-pass filtering: Removes frequencies below a certain point, allowing the vocals to sit more clearly in the mix.
  • Notch filtering: Removes a small, specific frequency to eliminate unwanted resonance or harshness.
  • Shelf EQ: Boosts or cuts a range of frequencies above or below a specified point, useful for giving vocals a brighter or darker tone.

Combining these EQ techniques can give you more control over your vocal sound and help you achieve a polished mix. Remember to always listen critically and make adjustments based on what sounds best for the song. With the right use of EQ, your vocals can take center stage and elevate your music to the next level.

Compression To Control Dynamics


Compression is an essential tool for controlling dynamics and getting vocals to cut through the mix. Using a compressor, you can even out the levels of your vocal track, making it easier to hear and understand amidst other instruments in the track.

Set Appropriate Threshold

When it comes to using compression to control dynamics, the first step is to set an appropriate threshold. This is the point at which the compressor begins to work. Set it too low, and the compressor will be triggered too often, making the vocals sound unnatural. Set it too high, and the compressor won’t be triggered enough, allowing the vocals to get lost in the mix. Finding the perfect balance takes some experimentation, but a good rule of thumb is to set the threshold so the compressor is triggered only during the loudest parts of the vocal performance.

Adjust Attack And Release Times

Once you’ve set your threshold, the next step is to adjust the attack and release times. The attack time is how quickly the compressor kicks in after the threshold has been crossed, and the release time is how quickly the compressor stops working after the volume drops below the threshold. Adjusting these settings can dramatically change the sound of the vocals. A fast attack time will allow the compressor to react quickly to sudden spikes in volume, while a slower release time will help smooth out any abrupt changes in volume. Experiment with different settings until you find the perfect balance for your vocals and mix. Using these compression tips will help you achieve a balanced and cohesive vocal sound that cuts through the mix. Remember to set an appropriate threshold and adjust the attack and release times to give your vocals the right amount of compression. With some experimentation and practice, you’ll be able to create a professional-sounding mix that highlights your vocals and enhances the overall sound of your music.

Double Tracking For Thicker Sound


Double tracking can thicken up your vocal sound and allow them to cut through the mix. By recording multiple takes of your vocals and layering them together, you can create a fuller and more powerful sound.

One effective technique for getting your vocals to stand out in a mix is double tracking. This method involves duplicating your vocal track and adjusting the timing and pitch slightly on the second track to create a thicker and more prominent sound. Here’s how to do it:

Duplicate Vocal Track

The first step to double tracking is to duplicate your vocal track. In your DAW, right-click on the track and select “duplicate”. Alternatively, you can copy and paste the vocal on a new track. This will create two identical tracks of your vocal.

Adjust Timing And Pitch Slightly

Next, you’ll want to adjust the timing and pitch slightly on the duplicated track. You can do this manually by dragging the waveform slightly off-beat or using a pitch correction plugin to vary the pitch slightly. The idea is to create a natural-sounding variation between the two tracks.

Experiment With Pan And Volume

Once you have your double-tracked vocals, experiment with panning and volume levels to create a balanced mix. You can pan each track slightly left and right to create a wider stereo image, or keep them centered for a more upfront sound. Adjust the volume levels so that the double-tracked vocals sit comfortably in the mix without overpowering the other elements.

Use On Selective Phrases

When using the double tracking technique, it’s often the selective phrases that are ideal for the process, rather than entire sections. This is because these parts can have a more prominent presence in the mix. Try double-tracking certain lines or phrases to give your vocals an extra boost without overdoing it.

Pay Attention To Reverb And Delay


Getting your vocals to stand out in a mix can be a challenging task, but paying attention to reverb and delay can make a big difference. Use just enough to enhance the vocals without overwhelming them, allowing them to shine through the mix with clarity.

One of the biggest challenges for vocalists recording in a studio is getting their vocals to cut through the mix. One crucial element to focus on in this regard is the use of reverb and delay effects. However, it’s essential to exercise caution when using these effects to avoid overloading the mix. Here are some tips to help your vocals stand out in the mix:

Use Effects Sparingly

Less is often more when it comes to using reverb and delay effects on your vocals. Applying too much of these effects can cause your vocals to sound washed out or overly processed and, as a result, get lost in the mix. Instead, try using just enough to give your vocals some space and depth without overwhelming the mix.

Adjust Wet/dry Ratio

One effective way to avoid overusing reverb and delay is to adjust the Wet/Dry ratio of your effects. The Wet/Dry ratio is the balance between the processed and unprocessed sounds, where the Wet signal is the amount of effect and Dry signal is the original, unprocessed sound. It’s important to find the right balance to give your vocals a sense of space without becoming overwhelmed by the effects. Try setting the Wet/Dry ratio at around 30% to achieve the right balance.

Experiment With Different Settings

It’s always a good idea to experiment with different settings on your reverb and delay effects to find the perfect fit for your vocals. Start by applying a small amount of effect and adjust accordingly. Try different types of reverb, such as hall or plate, and adjust the decay time to achieve the desired result. Similarly, experiment with different delay times and feedback settings to give your vocals the right amount of space in the mix.

Conclusion

By paying attention to your reverb and delay effects, you can easily make your vocals stand out in the mix without overwhelming the overall sound. Remember to use effects sparingly, adjust the wet/dry ratio, and experiment with different settings for the best results. With these tips, you’ll be producing professional-sounding vocals in no time.


Final Mixing Tips


Achieving clarity and balance in your final mix can be challenging, especially when it comes to getting your vocals to cut through. However, with the right techniques, it’s possible to bring your vocals to the forefront of the mix without drowning out other instruments.


Here are some tips to help you achieve a clear and dynamic vocal sound in your final mix.

Level Matching

Level matching is important to ensure your vocals are at the same volume as the rest of the instruments in the mix. You can do this by lowering the volume of the other elements by a few decibels or increasing the volume of the vocals until they blend well with the other sounds. A good way to check if the volumes are in sync is to use a metering plugin, which will help you visualize the levels of the various components in your mix.

Check Mix In Different Playback Systems

It’s important to check your mix in different playback systems to make sure the vocals are cutting through the mix in all types of environments. Play your mix on different systems like headphones, car stereos, or home speakers. This will help you catch any mixing mistakes or areas of the mix that need improvement.

Use Eq To Carve Out Space

EQ plays a critical role in mixing vocals to cut through the mix. Use EQ to carve out space in the frequency spectrum for the vocals. Start by identifying any frequency clashes between the vocals and other instruments in the mix. For example, if the guitar and vocals are fighting for space in the mid-range frequency, use EQ to carve out room for the vocals to shine through. You can also try cutting any frequencies below 100 Hz and above 16 kHz to make the vocals sound brighter and clearer.

Use Compression To Control Dynamics

Compression is another tool that can be used to help the vocals cut through the mix. Apply light compression to the vocal track to even out the dynamics and make sure the vocals are consistently present in the mix. Try different compression settings to find the perfect balance between clarity and natural sound.

Add Reverb And Delay

Adding reverb and delay can give your vocals depth and help them sit better in the mix. Be careful not to overuse them, though, as too much can make the vocals sound distant and obscure. Start with a small amount of reverb and delay and gradually increase them until you find the right balance.

By following these final mixing tips, you can ensure that your vocals cut through the mix and sound great in any playback system.

Tips For Getting Your Vocals To Cut Through The Mix


Credit: www.youtube.com


Tips For Getting Your Vocals To Cut Through The Mix


Credit: www.masteringthemix.com


Frequently Asked Questions For Tips For Getting Your Vocals To Cut Through The Mix


How Do You Cut Vocals Through Mix?


To cut vocals through the mix, first, use EQ to remove any unnecessary frequencies. Then, use compression to even out the dynamic range and make the vocals sit well in the mix. Finally, add reverb or delay to create a sense of space and depth.


Be careful not to overdo any effect and always listen to the mix as a whole to maintain balance.


How Do I Get My Vocals To Sit Better In The Mix?


To get your vocals to sit better in the mix, try adjusting the EQ to carve out some room in the frequency spectrum for the vocals. Reduce any competing frequencies in other instruments and use compression to even out the volume levels.


Panning and reverb can also give the vocals a sense of depth and help them blend better with the mix.


How Do You Make Vocals Pop In A Mix?


To make vocals pop in a mix, start by making sure they are recorded well and have little background noise. Then, use EQ to boost the desired frequencies and cut any unwanted ones. Use compression to even out the vocal volume and add some character.


Finally, add some reverb to create depth and add interest.


How Do You Make Vocals Clear In Mix?


To make vocals clear in mix, first, ensure that they are recorded properly. Use EQ to remove any unwanted frequencies, such as rumble or hiss, and boost the desired ones. Compress the vocals to balance the levels. Use a de-esser to control any sibilance or harshness.


Finally, consider adding a touch of reverb or delay for depth.


Conclusion


To sum up, getting your vocals to cut through the mix is an essential goal for any singer or recording artist. By following the tips mentioned above and using the right tools, you can ensure that your vocals sound clear, powerful, and expressive.


Remember to experiment with different techniques and never stop improving your craft. With time and practice, you’ll be able to produce professional-quality recordings and performances that leave a lasting impact on your audience. So go ahead and give these tips a try, and don’t forget to have fun and enjoy the process!

Categories
Archive

Common Mistakes To Avoid When Mastering In The Box

To avoid common mistakes when mastering in the box, be mindful of the importance of gain staging and leaving headroom before applying processing. It is also crucial to refrain from overdoing processing and using too many plugins to avoid a cluttered mix.


Mastering in the box, or the digital domain, has become the method of choice for many music producers and engineers due to its convenience and cost-effectiveness. However, it also comes with its own set of challenges. One of the most common mistakes people make when mastering in the box is overlooking the need for proper gain staging and headroom before applying processing.


Over-processing and using too many plugins can also lead to a cluttered mix lacking clarity and depth. We will explore some other common mistakes to avoid when mastering in the box and how to achieve a clean and balanced final mix.

Common Mistakes To Avoid When Mastering In The Box


Credit: www.masteringthemix.com


Mixing In The Box Mistakes


Mistakes can happen when mastering music in the box. Common errors include overuse of compression and EQ, not referencing the mix on multiple speakers, and failing to give each element in the mix sufficient space and clarity. Avoiding these mistakes can lead to a better final product.

Mixing in the box can be tricky, and without the right guidance, even experienced mixing engineers can make mistakes. In this article, we will explore common mixing in the box mistakes and how to avoid them. Mixing in the box means that the mixing process takes place entirely inside the computer, often using digital audio workstations (DAWs), with no external mixing hardware involved.

Overdoing The Plugins

One of the most common mixing in the box mistakes is overdoing the plugins. It can be tempting to add numerous plugins to your mix, but this can quickly lead to a cluttered and distorted sound. It is best to stick with the essential plugins and learn how to use them to get the sound you desire. When using plugins, be mindful of their impact on the overall mix and use them sparingly.

Ignoring The Gain Staging

Another common mixing in the box mistake is ignoring the gain staging. It’s important to properly set the gain levels between each stage of your mix to avoid clipping, distortion, and noise. Proper gain staging will also ensure that the final mix has the desired loudness and a focused sound.

Relying Too Much On Templates

Another mistake that mixing engineers make is relying too much on templates. Although templates can be useful, they are not a one-size-fits-all solution for every mix. Each mix is unique and requires a tailored approach. It’s essential to listen to each element of your mix and determine the best way to enhance it. This will ensure that your mix stands out and has its unique sound. In conclusion, mixing in the box can yield excellent results when done correctly. By avoiding these common mixing in the box mistakes, you’ll ensure that your mix sounds great and meets the desired specifications. Remember to keep it simple, focus on clean gain staging, and let your mix have its unique sound.

Mastering In The Box Mistakes


Mastering in the box can be a challenging process to get right, especially when it comes to avoiding common mistakes. Some common mistakes to avoid include over-compressing, over-limiting, and failing to check your mix in mono. However, with a careful approach and attention to detail, it’s possible to achieve great results mastering in the box.

Mastering in the box is a great way to achieve professional-sounding final tracks. However, there are some common mistakes that many beginners make with mastering in the box. These mistakes can hold you back from achieving the sound you want. In this post, we’ll dive into some common mastering in the box mistakes.

Using Too Much Compression

Compression is essential in mastering, but using too much can be a mistake. Too much compression can make the track sound unnatural and squeezed. When you use a lot of compression, parts of the track that should have dynamics end up sounding flat. You should use compression in moderation. Make sure to strike a balance between dynamics and volume.

Not Paying Attention To Eq Balance

Balancing the EQ in mastering is crucial. EQ affects the overall tonality of the track. If the EQ is imbalanced, then the entire mix can sound off. Make sure to use a proper reference track when mixing to get an idea of how your track can sound. Afterward, it’s vital to use spectrum analyzers to make sure your track falls in the same frequency range as professional tracks.

Ignoring The Loudness War

The “loudness war” is a term used to describe the competition for maximum loudness between different tracks on the market. This issue arose because of a technical flaw in digital audio signals that made loudness potential endless. Many mastering engineers mistakenly aim for maximum loudness, competing with other tracks. However, this can result in lack of dynamic range, and losing transients which make tracks sound lively. In conclusion, mastering in the box is a learning process that requires diligence and patience. It’s important to avoid the common mastering in the box mistakes outlined in this post – using too much compression, not paying attention to EQ balance, and ignoring the loudness war. By following a systematic approach and avoiding these issues, you’ll be able to achieve professional-level mastering at home.

Monitoring Mistakes

If you’re new to audio mastering and plan to tackle it in the box, you need to know the common monitoring mistakes that you should avoid.

Using Bad Quality Headphones

Using bad quality headphones is one of the most common monitoring mistakes. Headphones may be more convenient, but not all headphones are designed for audio mastering. Low-quality headphones tend to boost or cut certain frequency ranges, giving you an inaccurate representation of your mix.

When using headphones, always ensure that they are of high quality and specifically designed for audio engineering. Also, avoid using noise-canceling headphones as they can affect the perceived sound quality.

Not Calibrating Your Studio Monitors

Another common monitoring mistake is not calibrating your studio monitors. Failing to calibrate your monitors can lead to mixing and mastering in an unbalanced listening environment. Monitor calibration is the process of adjusting your speakers’ output to achieve a neutral, flat frequency response, providing an accurate representation of the audio.

Here are some steps to follow when calibrating your studio monitors:

  • Ensure that your room is equipped with acoustic treatment to minimize room reflections and standing waves.
  • Position your studio monitors at the correct height and distance from your ears.
  • Use a measurement microphone and software to measure your room’s frequency response and adjust the monitor’s output accordingly.
  • Periodically check the calibration to ensure the accuracy of your monitoring setup.

Mastering in the box needs a cautious ear and accurate monitoring, and avoiding monitoring mistakes is an essential part of achieving a professional-sounding mix. With the tips mentioned above, you can achieve an accurate representation of your mix and ensure that your mastering process yields the best possible results.

Common Mistakes To Avoid When Mastering In The Box


Credit: www.masteringthemix.com


Workflow Mistakes

When it comes to music production, mastering plays a crucial role in ensuring that your music sounds professional and polished. With the advent of digital audio workstations (DAWs), mastering in the box has become a popular choice for many producers. However, just like any other technique, mastering in the box has its fair share of mistakes that you should avoid. In this article, we’ll focus on workflow mistakes that can hinder your progress and affect the quality of your final mix.

Not Organizing Your Sessions

One of the biggest mistakes you can make when mastering in the box is not organizing your sessions. It’s easy to get carried away with plugins and effects, but if you’re not keeping track of what you’re doing, you can quickly lose sight of your original mix. That’s why it’s essential to create a system for organizing your sessions. This can include labeling tracks, grouping similar elements, and color-coding to make your workflow more efficient.

To keep your sessions organized, consider creating a template that you can use for all your mastering projects. This template should include all the plugins and effects you typically use and be set up with a consistent routing and naming convention. By doing this, you’ll save time and ensure that your workflow remains consistent, regardless of the project you’re working on.

Not Taking Breaks To Refresh Your Ears

When you’re working on a mix, it’s easy to get lost in the details and lose perspective on the big picture. This is especially true when mastering in the box, where you’re dealing with small changes that can have a significant impact on the final mix. That’s why it’s essential to take regular breaks to refresh your ears and give your brain a rest.

How often you take breaks depends on your personal preference, but a good rule of thumb is to take a five or ten-minute break every hour. During this time, step away from your computer and do something that doesn’t involve sound or music. This can be as simple as taking a walk, stretching, or closing your eyes and meditating. By taking regular breaks, you’ll be able to return to your mix with fresh ears and a clear mind.

Conclusion

Mastering in the box is a powerful technique that can help you achieve professional results. However, it’s essential to be aware of the mistakes that can affect your workflow and the quality of your final mix. By organizing your sessions and taking breaks to refresh your ears, you’ll be able to avoid these common mistakes and produce better results.


Common Mistakes To Avoid When Mastering In The Box


Credit: www.masteringthemix.com


Frequently Asked Questions Of Common Mistakes To Avoid When Mastering In The Box


At What Db Should Beat Be Before Mastering?


There is no specific dB level for beats before mastering as it depends on the track and desired sound. However, it is recommended to keep the levels below 0 dB to avoid distortion. It is important to have a balanced mix and use the right EQ and compression settings to achieve the desired sound.


What Is Too Loud For Mastering?


The loudness level that is too much for mastering can vary depending on the genre, but in general, it’s recommended to aim for a maximum peak level of -1 or -2dB and a loudness level of -16 to -14 LUFS.


Exceeding these levels can result in distortion, loss of dynamics, and poor sound quality.


How Do You Tell If Your Song Is Mastered Properly?


To tell if your song is mastered properly, listen to it on different devices and in different environments. Check if all the instruments and vocals are balanced and well-defined. Look for any distortion or clipping in the audio. Make sure the song’s volume and overall sound are consistent with other professional music.


How Do I Stop Distortion When Mastering?


To prevent distortion during mastering, you should ensure that your levels are not too loud, use equalization to balance frequencies, and consider using a limiter. Additionally, avoid excessive compression and saturation and test your master on various audio systems.


Conclusion


Mastering in the box can be a daunting task, especially for beginners. However, avoiding common mistakes can make the process much easier. Remember to take breaks, experiment with different techniques, and don’t be afraid to ask for help. With time and practice, you can become a pro at mastering in the box.


Avoiding these mistakes will allow you to elevate your skills and produce top-quality music. Keep these tips in mind and happy mastering!

Categories
Archive

The Essential Guide To The Best Daw For Beginners

The best DAW for beginners is Ableton Live or FL Studio. In this guide, we will explore the features and benefits of each DAW and provide recommendations based on your needs and preferences.


As an aspiring music producer, choosing the right DAW is a crucial decision. A DAW or Digital Audio Workstation is a software application used for recording, editing, and producing audio files. With the plethora of options available, it can be overwhelming to select a DAW that suits your style and needs, especially as a beginner.


In this essential guide, we will explore two of the most popular DAWs: Ableton Live and FL Studio. We will analyze their features, compare their pros and cons, and provide recommendations based on your genre, budget, and workflow preferences. Don’t let the abundance of options discourage or confuse you; read on, and discover the best DAW for your music production journey.


Why Choosing The Right Daw Matters


Choosing the right DAW is crucial for beginners to create quality music. A good DAW will facilitate easy navigation through recording and editing features, a user-friendly interface, and a sound library with virtual instruments, effects, and plugins.

The Impact Of A Good Daw On Your Music Production Journey

Choosing the right Digital Audio Workstation (DAW) is crucial for beginners starting their music production journey. A DAW is a software used by musicians, producers, and engineers for recording, editing, and mixing audio. The right DAW can greatly impact the quality of your music and enhance your creativity. With so many options available, it’s important to consider important features and factors that can improve your production. Here are some ways a good DAW can contribute to your music production journey:

  • Efficient workflow: A good DAW comes equipped with tools and features that can speed your workflow and save time. This allows you to focus on creativity and producing high-quality music.
  • High-quality sound: A good DAW has a variety of recording and editing effects, which can significantly improve the sound of your recordings. You can achieve professional-sounding tracks, even as a beginner.
  • Versatility: A good DAW allows you to work with a variety of instruments and genres, including MIDI, VST, and plug-ins. This versatility allows you to explore and discover new ways of creating music.

How A Great Daw Can Enhance Your Creativity

“Creativity is the key to success in the future, and primary education is where teachers can bring creativity in children at that level” – A.P.J. Abdul Kalam A great DAW opens up a world of possibilities, making it easy to explore your creativity without limitations. It allows you to compose and arrange audio recordings in different ways, even if you don’t have any previous experience. Here are some ways a great DAW can enhance your creativity:

  • Easy-to-use interface: A great DAW has an intuitive and user-friendly interface with clear, easy-to-understand menus and features. This allows you to focus on your production, rather than technicalities.
  • Integration: A great DAW allows you to integrate various software and plugins seamlessly, providing access to a wide range of sounds and effects.
  • Visualization: A great DAW has powerful visualizations. Vidualization helps musicians to see what they are hearing which enhances their creativity when they are creating music else it feels like creating music in the dark.

Overall, choosing the right DAW is paramount in your music production journey. Take your time and conduct research before settling on a choice. Remember that everyone’s music production journey is different, and one’s preferences may not be the same as the other.

Factors To Consider When Choosing A Daw


When starting out as a music producer, choosing the appropriate Digital Audio Workstation (DAW) is crucial. Key factors to consider include the type of music you want to produce, your budget, and your computer’s technical specifications. With so many options available, it’s important to do your research to find the best DAW for your needs as a beginner.

Choosing the right Digital Audio Workstation (DAW) can make or break your music production journey. With so many different options available, it can be overwhelming to decide which one is best for you. Before making a decision, it’s important to consider the following factors:

Compatibility With Your Hardware And Software

One of the most important factors to consider when choosing a DAW is compatibility. You want to ensure that your DAW of choice will work seamlessly with your computer’s hardware and software. It’s important to make sure that your computer meets the DAW’s system requirements and that any external hardware you plan to use is compatible with the software.

Ease Of Use For Beginners

As a beginner, you want to choose a DAW that is easy to use and doesn’t have a steep learning curve. Look for software that has a clean and user-friendly interface and offers tutorials or walkthroughs to help get you started. Choosing a DAW that is intuitive can make a big difference in your productivity and creativity.

Availability Of Tutorials And Support

Even if you’ve chosen an easy-to-use DAW, there may still be certain aspects or features that you need help with. Look for a DAW that offers a comprehensive manual, video tutorials, or a community forum where you can ask for help. When something goes wrong, having access to support can save you hours of frustration.

Pricing Options

DAWs come in a range of prices, from free software to several thousand dollars. As a beginner, you probably won’t need all the bells and whistles of the most expensive software. Choose a DAW that fits within your budget while still offering the features you need.

Features And Functionality

Lastly, you want to choose a DAW that meets your specific needs in terms of features and functionality. Look for a software that offers the tools you need to express your creativity, whether it’s the ability to record multiple tracks, add effects, or mix and master your tracks. In conclusion, choosing the right DAW is a decision that shouldn’t be taken lightly. Consider the above factors before making a decision, and remember that you can always switch to another software if needed.

Top Daws For Beginners


Newcomers to digital audio production would benefit from software such as Cakewalk and LMMS. Both enable multi-track recording, MIDI and VST support, and loops, making them a great starting point. Additionally, they are available for free, which is ideal for anyone on a budget.

Introduction To The Most Popular Daws In The Market

If you’re a beginner in music production, choosing the right Digital Audio Workstation (DAW) can be challenging. With so many options available, it’s easy to get overwhelmed. However, with this informative guide, you’ll be able to learn about different DAWs and their features to help you decide which one to choose.

Comparison Of Features And Pricing For Different Daws

Different DAWs come with different features, and their prices vary as well. While some DAWs offer a wide range of features and come with a professional price tag, others are more affordable and easier to use. Here’s a comparison chart to help you narrow down your options.

DAW Features Pricing
Ableton Live MIDI sequencing, Audio Warping, Session view, and more $449 (Standard), $749 (Suite)
Pro Tools Powerful mixer, Professional-grade plugins, Advanced automation, and more $599 (Standard), $2,499 (Ultimate)
FL Studio MIDI support, Mixer track grouping, Plugin delay compensation, and more $99 (Fruity Edition), $199 (Producer Edition), $299 (Signature Bundle)
Logic Pro X Smart Tempo, Flex Time, Music notation, and more $199.99

Recommended Daws Based On Your Music Production Goals

Before choosing a DAW, think about your music production goals. Are you a songwriter, beatmaker, or sound designer? Here are some recommended DAWs based on your music production needs.

  • For Songwriters – Logic Pro X or GarageBand (Mac OS only)
  • For Beatmakers – FL Studio or Ableton Live
  • For Sound Designers – Pro Tools or Ableton Live

Pros And Cons Of Each Daw

Here are some pros and cons of each DAW to help you make an informed decision.

Ableton Live

  • Pros: User-friendly interface, Session view, Excellent audio warping capabilities
  • Cons: Limited mixing capabilities, Fewer built-in plugins than other DAWs

Pro Tools

  • Pros: Professional-grade plugins, Advanced automation, Powerful mixing capabilities
  • Cons: Expensive, Steep learning curve, Requires hardware compatibility for some features

FL Studio

  • Pros: Affordable, Easy to use, Growing community of users
  • Cons: Limited compatibility with other DAWs, Windows only

Logic Pro X

  • Pros: Excellent MIDI capabilities, Powerful mixing and mastering tools, Good value for the price
  • Cons: Mac OS only, Some features are not beginner-friendly

Regardless of your music production goals or budget, there’s a DAW out there that can suit your needs. Hopefully, this guide has provided you with valuable information to help you make an informed decision when it comes to choosing the best DAW for beginners.


Getting Started With Your Chosen Daw

If you are new to the world of digital audio workstations (DAWs), it can be overwhelming to choose the best one for your needs. Once you have made your decision and downloaded or purchased your chosen DAW software, it’s time to get started with the setup process.

Setting Up Your Workspace

The first step in setting up your workspace is to choose a location where you will be working. It’s important to have a dedicated space for your music production where you can focus and eliminate distractions.

Tips: Choose a quiet space with good acoustics.
  Invest in a comfortable chair and a proper desk.

Once you have chosen your workspace, it’s time to configure your DAW preferences. This includes choosing your sample rate, buffer size, and other settings specific to your software. Be sure to consult your DAW’s documentation for the best settings to use for your computer and hardware.

Understanding Key Features And Tools

It’s important to take some time to familiarize yourself with the key features and tools of your chosen DAW. This will give you a solid foundation to build your music production skills upon.

  • Learn how to create and manipulate tracks.
  • Understand how to use effects such as reverb and delay.
  • Learn how to use MIDI and audio editing tools.

Learning the basics of your DAW will give you the confidence to experiment and develop your unique sound.

Tips And Tricks For Beginners

Here are some tips and tricks to help beginner music producers get started:

  1. Start small: Don’t overwhelm yourself by trying to create a masterpiece right away. Start with a simple beat or melody and build from there.
  2. Experiment: Don’t be afraid to try new things. Experimentation is the key to discovering your unique sound.
  3. Take breaks: It’s important to take regular breaks to prevent burnout and give your ears a rest.

Resources For Learning And Getting Support

There are plenty of resources available to help beginner music producers learn and get support as they develop their skills. Here are some popular options:

These resources can help beginners build their knowledge and connect with a supportive community as they embark on their music production journey.


Advanced Techniques For Using Your Daw

Learning how to use your DAW is just the beginning. To truly take advantage of all that it has to offer, you need to know some advanced techniques. Below, we’ll cover some of the most essential techniques to start using, including mastering plugins and effects, understanding MIDI and audio routing, automation, advanced editing techniques, and workflow optimization.

Mastering Plugins And Effects

Plugins and effects are essential tools that can make or break your music production. To get the most out of these tools, it’s important to understand how each one works and its potential for creative expression. Here are some tips for mastering plugins and effects:

  • Experiment with different types of plugins and effects to see what works best for your tracks
  • Know your signal chain and when to use certain effects before or after others
  • Learn how to tweak the settings of each effect to get the desired sound

Understanding Midi And Audio Routing

MIDI and audio routing can be complex, but they’re essential to creating a well-organized and efficient workflow. Here are some tips to understand these techniques:

  • Understand the difference between MIDI and audio signals and how to move them through your DAW
  • Know how to set up MIDI controllers to work with your DAW
  • Learn how to use aux channels to route audio to various places in your mix

Automation And Advanced Editing Techniques

Automation is a powerful tool that can add life and movement to your music. Additionally, advanced editing techniques can give you greater control over your tracks. Here are some tips to help you master automation and advanced editing techniques:

  • Learn how to use automation for volume, panning, and effects
  • Know how to use MIDI controllers to record automation in real-time
  • Understand how to use advanced editing techniques such as comping, slicing, and warping

Optimizing Your Workflow For Faster Production

Finally, optimizing your workflow is crucial for creating music quickly and efficiently. Here are some tips to help you optimize your workflow:

  • Set up keyboard shortcuts for the functions you use most frequently
  • Group your tracks for easier organization
  • Know when to use templates to save time and energy

By mastering these advanced techniques and incorporating them into your workflow, you’ll be well on your way to creating music like a pro using your DAW.

The Essential Guide To The Best Daw For Beginners


Credit: mixandmastermysong.com


Common Mistakes To Avoid When Using A Daw


When starting out with a DAW, beginners often make common mistakes. Some of these mistakes include not properly organizing files, using too many plugins, not practicing proper gain staging, and not taking breaks to rest their ears. To avoid these mistakes, it’s important for beginners to do their research and practice good habits from the beginning.

As a beginner using a DAW, it’s easy to make mistakes that can greatly affect the quality of your production. In this guide, we’ll take a look at some common mistakes to avoid when using a DAW.

Overloading Your Computer’s Processing Power

It is important to be mindful of your computer’s processing power when producing music via a DAW. Running too many effects and plugins can overload your computer, causing it to freeze or crash. To avoid this, make sure you have enough RAM and sufficient processing power. Also, keep an eye on your CPU usage meter in your DAW to ensure you’re not pushing your computer too hard.

Poor Organization And File Management

When producing music via a DAW, it is important to implement proper file management and organization. Poor organization can lead to lost or misplaced files, wasted time, and missed deadlines. Make sure to create folders for your different audio files, keep track of your project versions, and label your tracks clearly. This will help you stay organized and streamline your workflow.

Not Backing Up Your Project Files

Nothing is more frustrating than losing all of your hard work due to a computer malfunction or crash. It is important to always backup your project files, so you don’t lose all your progress. You can use cloud-based storage services like Dropbox, Google Drive, or OneDrive, or simply keep a copy of your project files on an external hard drive.

Skipping Important Steps In The Production Process

Skipping important steps in the production process can lead to a less polished and professional final product. Ensure to take your time and don’t rush the process. Also, make sure to adequately mix and master your tracks. Skipping these steps can lead to a lackluster final product. So, be patient, follow the production process, and always thoroughly review your work before finalizing. In conclusion, by avoiding these common mistakes, you can produce better-quality music using a DAW as a beginner. Always keep in mind the importance of your computer’s processing power, file management and organization, backing up your project files, and following the production process.


Frequently Asked Questions Of The Essential Guide To The Best Daw For Beginners


What Daw Should A Beginner Use?


For beginners, I recommend using GarageBand or FL Studio as they are both user-friendly and affordable options with a variety of features. Other popular choices include Ableton Live and Pro Tools, but they may have a steeper learning curve and higher cost.


Ultimately, it’s important to choose a DAW that fits your needs and preferences.


What Is The Best Daw To Start Producing With?


The best DAW to start producing with will depend on your goals, budget and operating system. Popular options include Ableton Live, Logic Pro X, FL Studio, Cubase, and Reaper. Consider the features, ease of use, and included instruments and effects before making a decision.


Can You Learn A Daw By Yourself?


Yes, you can learn a DAW (Digital Audio Workstation) by yourself through online tutorials, courses, and practice. But, taking professional guidance can help you navigate more quickly through complex software components and optimize your skills. Learning with a mentor helps you to clarify your doubts, gain immediate feedback, and personalizes your learning experience.


What Is The #1 Daw?


The #1 DAW, or Digital Audio Workstation, can vary depending on personal preference and usage. However, some of the most popular choices among professionals include Ableton Live, Logic Pro X, and Pro Tools. It ultimately comes down to the features and tools that work best for your specific needs and workflow.


Conclusion


As a beginner in the music production industry, choosing the right Digital Audio Workstation (DAW) can be daunting. This comprehensive guide has explored the top DAWs available for beginners and provided insight on their features and functionality. Ultimately, the perfect DAW is subjective and depends on individual preferences.


Therefore, take advantage of available trial versions and experiment with various options before deciding. Arm yourself with the right knowledge and tools and watch your music production skills soar.

Categories
Archive

Unlocking The Power Of Compression In Audio Mastering

Compression in audio mastering unlocks the power to improve the sound quality of your recordings. By applying compression techniques, you can bring out the best in your mixes, providing the necessary space and clarity for every instrument and vocal to shine.


Compression also evens out the dynamic range of your audio, allowing you to increase the level of your recordings without causing any distortion. Whether you are a recording artist, producer, or just starting out in the audio industry, understanding how compression works and how to use it can help you achieve professional-quality sound that stands out.


If you’re new to audio mastering, don’t worry. In this guide, we’ll take a closer look at how compression works and explore techniques for applying compression in your audio mastering projects. We’ll also share some tips to help you avoid common mistakes and get the most out of your compression tools. So, let’s dive in and unlock the power of compression in audio mastering!

Unlocking The Power Of Compression In Audio Mastering


Credit: musixon.org


What Is Audio Compression?


Audio compression is a technique used to balance the loudness of different parts of a song while enhancing its overall sound. In audio mastering, compression helps unlock the power of a song by increasing its clarity, depth, and punch.

Audio compression is a technique used in audio mastering to control the dynamic range of a musical track. In simple words, it’s a tool used to attenuate the loudest cues of the music so that the overall level of the track can be increased without clipping the peaks. Compression is one of the most important tools in a mastering engineer’s toolkit. It’s a vital component in producing a defined sound that helps to glue together all the different elements of a track and make it sound more polished and professional.

Dynamic Range

Dynamic range refers to the difference between the quietest and loudest parts of a musical track. It’s the difference between the sound of the hi-hat in the background and the singer’s voice in the foreground. Compression is the process used to reduce the dynamic range of a track. By compressing the louder parts of a track, we’re bringing up the quieter parts, which helps to make the overall sound of the track more consistent and balanced.

The Purpose Of Compression

The main purpose of compression is to make sure that the track doesn’t peak at a high level while still sounding loud enough. Compression is a powerful tool, and if used correctly, it can give the track that extra punch and presence that it needs. By compressing the audio track, we’re achieving two things: Firstly, we’re reducing the dynamics of the track, and secondly, we’re increasing the overall level of the track. Compression is a technique that can make the difference between a song that sounds ‘good’ and one that sounds ‘great.’ It’s an essential tool for any audio engineer who wants to produce professional-sounding music.

How Audio Compression Works


Audio compression is a crucial technique used in audio mastering that helps to control and balance the dynamics of a track. By reducing the dynamic range of an audio signal, compression makes it possible to increase the overall loudness of a track without causing distortion or clipping.

Audio compression is an essential tool for mastering engineers to adjust and polish the final mix of a recording. The process involves reducing the dynamic range of an audio signal, making the quieter parts louder and the louder parts quieter, to achieve a more balanced and consistent sound.

Threshold

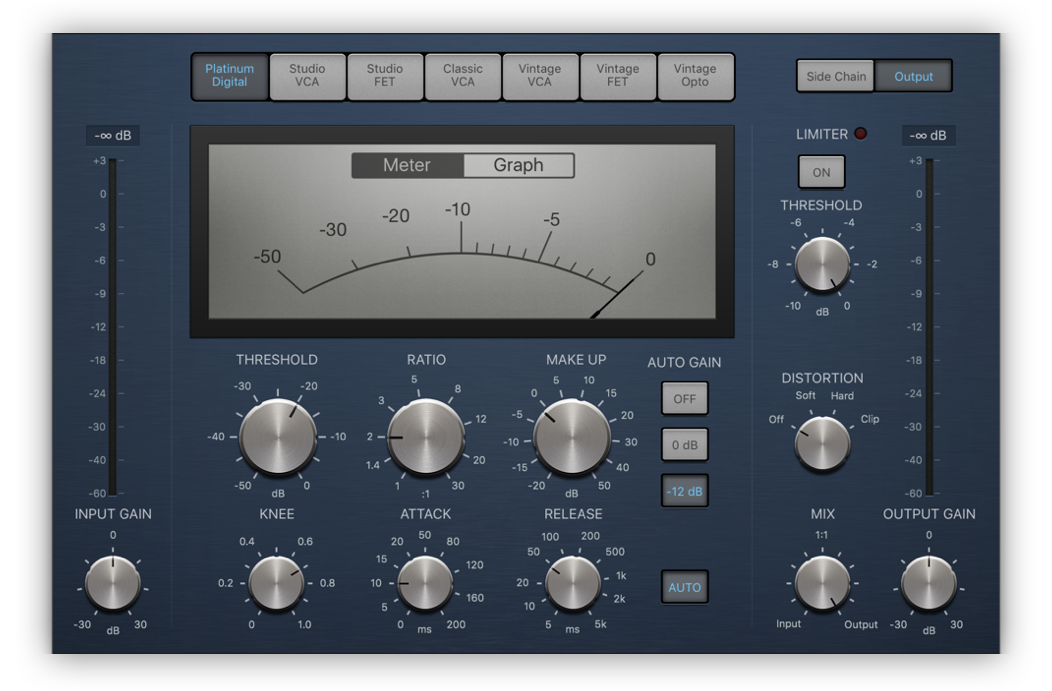
The threshold is the level at which the compressor begins to attenuate the input signal. If the input level exceeds this threshold, the compressor will reduce the level of the audio signal. The threshold can be adjusted to suit the specific needs of the track, allowing the mastering engineer to control the amount of compression applied.

Ratio

The ratio is the amount of gain reduction applied to the input signal once it surpasses the threshold. For example, a 2:1 ratio means that for every 2 decibels the signal goes above the threshold, the compressor will allow only 1 decibel to pass through. The higher the ratio, the more aggressive the compression.

Attack & Release

The attack and release settings determine how quickly the compressor begins and stops attenuating the signal. The attack time is how long it takes for the compressor to start working and the release time is how long it takes for the compressor to stop working. Adjusting these settings can have a significant impact on the character of the compressed signal.

Makeup Gain

The final stage of the compression process is to apply makeup gain, which is an increase in the level of the audio signal after compression has been applied. This compensates for any loss of volume caused by reducing the dynamic range and ensures that the overall level of the track remains consistent with the original recording. In conclusion, understanding how audio compression works is an essential part of the mastering process. By adjusting the threshold, ratio, attack and release settings, and applying makeup gain, mastering engineers can unlock the full power of compression and achieve a polished and professional sound for their recordings.

Different Types Of Audio Compressors


Audio compression is a key tool in audio mastering, but understanding the different types of compressors can be overwhelming. From optical to VCA to FET, each type of compressor has its own unique characteristics and offers different results. Unlocking the power of compression starts with understanding the nuances of each type.

Different Types Of Audio Compressors: Audio compression is a crucial aspect of mastering, and it is essential to understand the different types of audio compressors that are available. Each compressor type has its unique characteristics, and using the wrong type of compressor can detrimentally affect your audio quality. In this section, we will be discussing four different types of audio compressors: VCA, Optical, Tube, and FET.

Vca

Voltage-controlled amplifier compression, or VCA, is the most commonly used compressor in audio mastering. They are perfect for precise and quick compression, as they have a quick attack and release time. VCA compressors work by regulating the gain of an audio signal through voltage control. They are known for their transparent sound and are widely used in pop and rock music mastering.

Optical

Optical compressors utilize a photovoltaic cell and a light source to control gain reduction. They are known for their warm and dynamic sound and are ideal for smooth and musical compression. Optical compressors have a slow attack and release time, making them perfect for vocal and bass tracks. They are also widely used in jazz and classical music.

Tube

Tube compressors work through vacuum tubes, which give them their unique analog sound. They add a natural saturation to the audio signal and are perfect for adding warmth and character in mastering. Tube compressors have a slow attack and release time and are ideal for mastering vocals, acoustic guitars, and drums.

Fet

Field-effect transistor, or FET, compressors are known for their speedy attack and release time. They are perfect for fast and aggressive compression and are widely used in heavy rock and metal music. FET compressors have a transistor-based circuitry that adds a particular edge and punch to the audio signal. In summary, understanding the different types of compressors and their unique characteristics is essential for quality audio mastering. Whether you choose a VCA, optical, tube, or FET compressor, it is important to use the right one for your specific audio needs.

Compression In Audio Mastering

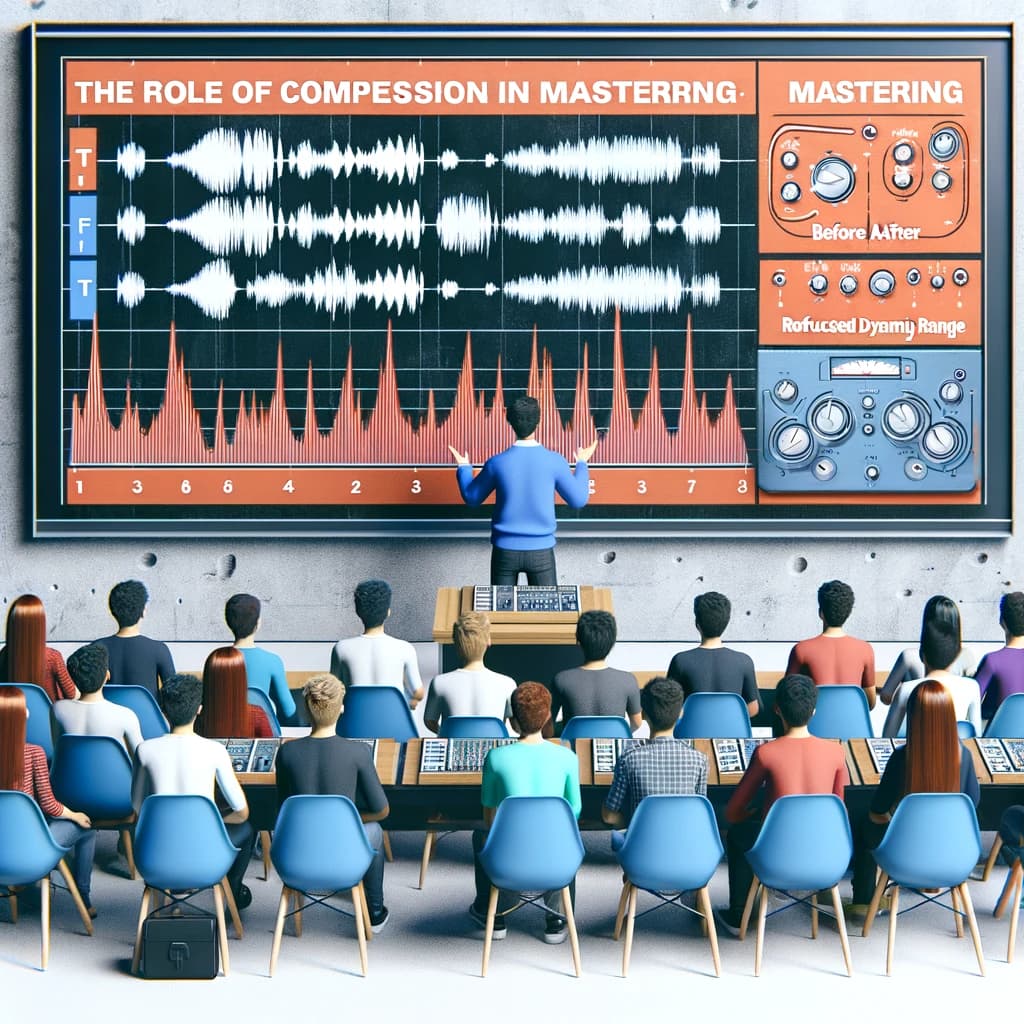
Compression in audio mastering is the process of altering the dynamic range of an audio signal. It’s an essential tool for balancing the levels of individual tracks in a mix while achieving a cohesive final product. When used correctly, compression can add punch, energy, and intensity to your music.

The Role Of Compression In Mastering

Compression plays a critical role in the mastering process. It allows you to control the overall volume and balance of your mix, making it sound more polished and professional. Mastering engineers use compression to even out the levels of individual tracks and to bring out the detail and character of the music.

However, it’s important to use compression with care. Overcompression can strip the life and energy out of a mix, so it’s crucial to find the right balance.

Pre-mastering Compression Tips

It’s important to note that compression should be used as a tool during mixing, as well as mastering. It’s essential to use compression during the mixing process to avoid overcompression in the mastering process.

When using compression during mixing, try these tips:

  • Set the threshold so that the compressor only engages during the loudest parts of the track.
  • Use a slow or medium attack time to allow the initial transients to pass through uncompressed.
  • Adjust the release time to allow the compressor to reset before the next transient.
  • Use a low ratio, typically around 2:1 to 4:1.
  • A/B test with and without compression to ensure you’re not overdoing it.

By following these tips during the mixing process, you can avoid overcompressing and achieve a more natural sound.

Lastly, during the mastering process, it’s important to keep the compressor’s settings conservative. The goal of mastering is to enhance the overall sound of your mix, not to drastically alter it.

https://www.youtube.com/watch?v=BJ1S0qqg2-M


Common Audio Compression Mistakes To Avoid


Avoiding common audio compression mistakes can improve the overall quality of audio mastering. Examples of common mistakes to avoid include over-compression, not leaving enough headroom, and applying too much compression to individual tracks. By unlocking the power of compression, you can enhance the dynamic range and clarity of your audio recordings.

Audio compression is an essential part of audio mastering used to control the dynamics of audio signals. However, it is easy to make mistakes when compressing audio, which may negatively affect the audio quality and musicality. To avoid these issues and achieve the best possible results, it’s crucial to know the common audio compression mistakes and how to avoid them. In this article, we’ll take a closer look at some of the most common audio compression mistakes to avoid.

Overuse Of Compression

One of the most common mistakes people make when applying compression to audio is overusing it. Using too much compression can cause the audio to sound unnaturally flat and lifeless. Compression should be used only where needed, to even out the audio’s dynamic range or add some character, without squashing the life out of your mix. To avoid overuse of compression, it’s crucial to consider the mix before applying the compression, determine the balance of the instruments, and then use compression to control the dynamics gradually, rather than attempting to fix everything at once.

Poor Threshold & Ratio Settings

Another common mistake is poor threshold and ratio settings. The threshold and ratio settings have a significant impact on how much compression is applied to the audio. Setting a low threshold or high ratio values will lead to over-compression or unnatural sound. The best approach is to start with conservative settings, adjust the threshold to match the audio’s level, and set a ratio that complements the musicality of the song. Also, it’s essential to ensure that the attack time is not too fast; otherwise, you will lose the audio’s transients.

Ignoring Makeup Gain

Makeup gain is another crucial parameter ignored when applying compression to audio. Makeup gain is a feature of the compressor that allows you to boost the overall gain of the compressed audio to match the level of the original audio source. After compression, the level of the audio may decrease slightly, so it’s necessary to adjust the makeup gain to compensate for the decrease. Failing to set the makeup gain correctly will lead to uneven levels in the mix, destroying the balance and integrity of the music.

Neglecting The Attack & Release

The attack and release settings are also essential when it comes to compression. The attack time determines how fast the compressor starts to react to the incoming signal, while the release time determines how long it takes for the compressor to stop compressing after the signal drops below the threshold. Neglecting the attack and release settings can lead to unnatural and unpleasant results. For example, setting the attack time too slow will result in lost transients, while setting the release time too fast will cause distortion and other unwanted audio artifacts. It’s best to experiment with different settings to find what works best for the audio and musicality of the song. In conclusion, audio compression is essential for controlling dynamics and adding character to the mix. However, it’s crucial to avoid the common mistakes discussed in this article to achieve the best results. Each mistake can affect the audio quality and musicality, so be sure to take your time when applying compression and experiment with different settings to find what works best for you!

Unlocking The Power Of Compression In Audio Mastering


Credit: mixingmonster.com


Advanced Technique: Multiband Compression


By utilizing advanced technique of multiband compression in audio mastering, you can unlock the true power of compression. This process allows for precise frequency control and ensures that the sound is consistent, balanced and full, giving a polished and professional result.

Advanced Technique: Multiband Compression In music production, compression is an essential tool for creating a polished and professional sound. It helps control the dynamic range of an audio signal, allowing the listener to hear every detail in the mix. And while regular compression techniques can do wonders for individual tracks, sometimes, they are just not enough. That’s where multiband compression comes in. This advanced technique allows you to apply different amounts of compression to different frequency bands of a track, making it a powerful tool for mastering. In this article, we’ll discuss what multiband compression is, when to use it, and how to set it up. We’ll also go over common multiband compression mistakes to avoid.

What Is Multiband Compression?

Multiband compression is a technique that divides the audio frequency spectrum into separate bands and applies compression to each band independently. Essentially, it’s like having multiple compressors working on different parts of the audio signal. By controlling the amount of gain reduction in each band, you can achieve a more balanced and polished sound.

When To Use Multiband Compression

Multiband compression is especially useful when working with complex, multi-layered tracks. For example, if you’re mastering a song that has a lot of instrumentation, vocals, and percussion, it can be challenging to get a balanced sound with regular compression. By using multiband compression, you can focus on problem areas in the mix and apply more targeted compression to those areas.

Setting Up Multiband Compression

To set up multiband compression, you’ll need a plugin that supports the technique. Most digital audio workstations come with a built-in multiband compressor, but there are also third-party options available. Once you have the plugin loaded onto your track, you’ll need to set the frequency bands. This can be done manually or using presets provided by the plugin. It’s crucial to listen to the track carefully and adjust the frequency bands until you find the right balance. Then you can set the compression ratio and threshold settings for each band, working to achieve a more balanced and polished sound.

Common Multiband Compression Mistakes To Avoid

Multiband compression can be a powerful tool, but it’s essential to use it correctly. Here are some common multiband compression mistakes to avoid: – Overuse: Don’t apply multiband compression to every track just because it’s there. Only use it when necessary to avoid over-compression. – Too much gain reduction: Using too much compression can suck the life out of your track. Be careful not to apply too much gain reduction or risk losing the dynamics and punch of the mix. – Ignoring the rest of the mix: Remember that multiband compression should be used in conjunction with regular compression techniques. Don’t rely solely on multiband compression to fix your mix. In conclusion, multiband compression is an advanced technique that can help you achieve a more balanced and polished sound in your audio mastering. By using this technique correctly, you can control the frequency spectrum of your audio tracks with precision and achieve a professional sound.

Choosing The Right Audio Compressor For Your Needs


Choosing the right audio compressor is crucial for unlocking the power of compression in audio mastering. It is important to consider the type of audio being compressed, the dynamic range, and the desired outcome in order to make the best choice for your needs.

Audio compression is an essential tool in the world of sound engineering. It helps to balance the dynamic range of a mix and achieve a final master that’s cohesive and sounds professional. However, choosing the right compressor can be tricky, especially if you’re new to the world of audio mastering. In this section, we’ll discuss the key considerations when shopping for a compressor and the top compressors on the market that you should consider.

Key Considerations When Shopping For A Compressor

When shopping for an audio compressor, there are a few factors you need to consider.

  1. The Type of Compressor: There are several types of compression, including VCA, FET, Optical, and Vari-Mu. Each of these compressors has its own unique sound and characteristics.
  2. The Controls: You need to consider the controls on the compressor, including the attack, release, ratio, and threshold. These controls affect how the compressor reacts to the audio signal.
  3. Single-Channel or Stereo: Depending on your needs, you may require a single-channel or stereo compressor. Consider your application and how you plan to use the compressor.
  4. The Price: Compressors can range in price from a couple of hundred dollars to several thousand dollars. Determine your budget and look for compressors that fall within that range.

Top Audio Compressors On The Market

Here are some of the top audio compressors on the market that you should consider:

Compressor Type Price
Universal Audio LA-2A Optical $4,000
Empirical Labs Distressor VCA $1,400
SSL G Series Bus Compressor VCA $5,000
API 2500 Stereo Bus Compressor VCA $3,600
dbx 160A VCA $400

These compressors are popular choices used by the best audio engineers globally and offer outstanding capabilities to enhance the sound of your mix. When shopping for a compressor, it’s crucial to understand the key considerations and choose the right one that aligns with your needs. Whether you’re looking for a single-channel or stereo compressor, one with a specific type of compression or something that fits within your budget, there are plenty of options available on the market. Take your time, do thorough research, and test out different compressors to ensure you’re getting the one that’s right for your needs.

Unlocking The Power Of Compression In Audio Mastering


Credit: www.masteringthemix.com


Frequently Asked Questions For Unlocking The Power Of Compression In Audio Mastering


How Do I Master Audio Compression?


To master audio compression, you need to understand the fundamentals of compression and how to adjust the various settings to achieve the desired result. Practice using different audio sources and experiment with different compression techniques. Use references and seek feedback from other experienced audio professionals to improve your skills.


Consistent practice and experimentation are key to mastering audio compression.


How Much Compression Should I Use When Mastering?


When mastering, the amount of compression to use varies depending on the track and what the desired outcome is. It’s important to avoid over-compression, as this can result in a loss of dynamics and overall sound quality. A good rule of thumb is to aim for a reduction of no more than 2-4dB in most cases.


However, ultimately, it depends on the individual track and what sounds best to the ears of the mastering engineer.


What Is The Release Time For Mastering Compression?


The release time for mastering compression varies depending on the specific type of compressor and the desired effect. It can range from fast release times for a more aggressive sound to slower release times to retain the natural dynamics of the audio.


It’s important to experiment and adjust the release time to achieve the desired result.


What Makes A Mastering Compressor?


A mastering compressor is a tool used by audio engineers to balance the levels of different audio sources in a mix. It smooths out peaks in the sound while preserving the dynamic range and ensuring that the overall volume of the mix is consistent.


The compressor is an essential part of the mastering process and helps to give the mix a polished and professional sound.


Conclusion


Compression is an immensely versatile and powerful tool used in audio mastering. From adding punch and warmth to your sound, to controlling dynamics and smoothing out inconsistencies; a compressor can take your mix to a whole new level. There’s no one-size-fits-all approach, but with the right techniques and practice, you can unlock the true potential of compression to deliver a polished, professional audio.


So, experiment, trust your ears, and make compression your new best friend. Happy mastering!

Categories
Archive

Why Use Ableton Live For Electronic Music Production

Ableton Live is a software widely used for electronic music production due to its user-friendly interface and live performance capabilities. Ableton Live has revolutionized the electronic music production industry by providing an innovative approach to music-making.


The software is designed to be user-friendly, intuitive and adaptable, making it easy for both beginners and professionals to create electronic music. One of the most significant features of Ableton Live is its live performance capabilities, making it a go-to choice for DJs, producers and musicians around the world.


The software’s unique session view allows for real-time manipulation of the tracks, which can be arranged and edited later in the arrangement view. In addition to these features, the software comes with a vast library of sounds, effects, and instruments, making it a one-stop-shop for all music production needs. The combination of its versatility, user-friendly interface, and live performance capabilities has made Ableton Live a must-have tool in every electronic music producer’s toolbox.

Why Use Ableton Live For Electronic Music Production


Credit: ny.garnishmusicproduction.com


Overview Of Ableton Live

Ableton Live is a popular Digital Audio Workstation (DAW) for electronic music producers, widely used for creating, recording, arranging, mixing, and mastering music. This software provides creative tools and features suitable for both beginners and professionals to create unique electronic music.

Interface

The interface of Ableton Live is intuitive, user-friendly and modern. The software is designed to keep the flow of music-making uninterrupted. The layout of the interface is split into two main views, the Session View and the Arrangement View. The session view allows producers to arrange their tracks into clips and play these clips in any order they wish using the intuitive drag and drop feature. The Arrangement view is used for organizing and recording song arrangements in a traditional linear timeline. This flexibility in Ableton empowers users to create music in a non-traditional way.

Workflow Advantages

The workflow of Ableton Live is unmatched, providing users with fast access to vital features and tools. It uses a non-linear approach that allows users to create music ideas quickly, providing the ability to create loops, hands-on control, and live improvisation. Live’s MIDI editing capabilities are unique in their speed, precision, and ease. It also has a powerful browser with a well-organized sample library that includes various packs and loops suitable for electronic music production. This results in quick and easy music production workflow.

Ableton Live is one of the best digital audio workstations for electronic music production with an intuitive interface and a unique workflow. It’s a must-have for anyone who wants to create unique electronic music.

Audio Editing And Manipulation


Ableton Live is a powerful tool for electronic music production due to its advanced audio editing and manipulation capabilities. It allows producers to easily create, manipulate and sequence their audio in real-time, making it an essential software for any electronic music production studio.

Ableton Live is a powerhouse for electronic music production with its user-friendly interface and unique features. Its audio editing and manipulation capabilities are particularly exceptional, making Ableton Live an essential tool for music producers. Here are some reasons why:

Clip Launching

Ableton Live’s clip launching feature allows producers to trigger and launch different clips, loops, and samples on the fly and in real-time, enabling them to create spontaneous and intuitive musical arrangements. Clip launching is an efficient way to experiment with different ideas and sounds, allowing producers to quickly record and manipulate their musical inspirations.

Warping

The warping feature in Ableton Live is a powerful tool that enables electronic music producers to sync audio files regardless of their original tempo and pitch. Producers can quickly warp and manipulate any audio clip, adjust its timing, or stretch it to fit any tempo, without altering its pitch or sound quality. With warping, producers have more creative control, making Ableton Live an excellent tool for crafting eclectic and dynamic electronic music.

Sampling

Sampling is an essential part of electronic music production, and Ableton Live offers a wide range of sampling capabilities. Producers can use Ableton Live to record and manipulate any sound or instrument, regardless of its source, and turn it into a unique sample or loop. Additionally, Ableton Live’s extensive library of sound samples and instruments makes it easy for producers to experiment and create new sounds quickly.

Automation

Ableton Live’s automation feature allows producers to create dynamic and changing musical arrangements effortlessly. By automating parameters such as volume, panning, filters, and effects, producers can create evolving musical landscapes. Automation is a great way to add textures, variations, and movement to a track, making it sound more interesting and engaging. In conclusion, Ableton Live’s audio editing and manipulation features make it an essential tool for electronic music producers of all levels. Its clip launching, warping, sampling, and automation capabilities offer producers more creative control and flexibility, enabling them to craft unique and dynamic electronic music with ease.


Built-in Synthesizers And Effects


Ableton Live is the go-to software for producers of electronic music due to its built-in synthesizers and effects. With features like Ableton’s Simpler and Sampler, creating unique and intricate sounds has never been easier.

If you are an electronic music producer or aspiring to be one, you probably know how important it is to have a powerful and versatile digital audio workstation (DAW) at your disposal. When it comes to electronic music production, Ableton Live is widely regarded as one of the best DAWs in the market. One of the key features that makes Ableton Live stand out from its competitors is the built-in synthesizers and effects that come with the software.

Operator

Operator is an FM (frequency modulation) synthesizer that allows you to create complex, yet dynamic sounds. It is particularly useful for creating metallic, percussive, and bell-like sounds. The synthesizer has four oscillators and various modulation options that give you a lot of control over the sound you want to create. You can create anything from subtle pad sounds to aggressive leads and basslines with Operator.

Wavetable

Wavetable is a synthesizer that uses the technique of wavetable synthesis. It allows you to create evolving and intricate sounds by interpolating between different waveforms. With Wavetable, you can create everything from lush pads to intricate leads and basslines. The synth comes with a large variety of built-in waveforms that you can experiment with.

Analog

Analog is a virtual analog synthesizer that emulates the classic sound of analog synthesizers. It is perfect for creating warm and fat basslines, leads, and pads. The synth comes with two oscillators that can be detuned to give you a fuller sound. It also has a sub-oscillator that helps you create even more massive sounds.

Guitar Amp

If you want to add some grit and distortion to your sound, then the Guitar Amp effect is perfect for you. It emulates the sound of various guitar amplifiers, from classic clean amps to modern high-gain ones. You can use it to add some warmth and character to your synth sounds or to create distorted guitar-like leads and basslines.

Audio Effects

Ableton Live comes with a wide variety of audio effects that you can use to shape your sound. From reverbs and delays to compressors and distortion, you have everything you need to create a polished and professional sound. One of the best things about the effects is that they are all optimized for real-time performance, which means you can use them live on stage. In conclusion, the built-in synthesizers and effects in Ableton Live are one of the most compelling reasons why you should consider using this DAW. With these tools at your disposal, you can create complex and dynamic sounds that are unique to your style and vision. Whether you are a beginner or a seasoned producer, Ableton Live is a powerful tool that can take your electronic music production to the next level.

Why Use Ableton Live For Electronic Music Production


Credit: davidjlowe.medium.com


Max For Live Integration


Ableton Live’s Max for Live integration is a game-changer for electronic music production. With endless possibilities for customization and creativity, Max for Live allows producers to push the boundaries of what’s possible in their tracks.

Ableton Live is the go-to software for electronic music producers everywhere. It is a digital audio workstation that revolutionized the way music is made. One of the features that make Ableton outstanding is its deep integration with Max for Live. Max for Live is a platform that enables developers to create custom instruments, effects, and devices that integrate seamlessly into Ableton Live. This section will discuss how Max for Live integration empowers producers to create music that is unique and personal.

Custom Instruments And Effects

Max for Live provides producers with a platform to create their own instruments and effects. The platform is easy to use, and producers can create anything their imagination allows. It allows users to create unique sounds that are not possible with traditional synthesizers and effects. With Max for Live, producers can create instruments and effects that suit their specific needs and expressions. The tools are customizable and provide endless possibilities for producers to explore.

Seamless Third-party Plugin Integration

Another benefit of Max for Live is its ability to integrate third-party plugins seamlessly into Ableton Live. This integration enables producers to use any of their favorite plugins within Ableton Live. They can mix and match plugins to create unique sounds that are not possible with stock plugins. The integration makes the workflow fast and efficient, and it eliminates the need to load separate applications.

Visuals And Audio Reactive Environments

Max for Live provides producers with a platform to create audio-reactive visuals, animations, and environments. The producers can create immersive audio-visual experiences that enhance the listener’s experience. The environment can react in real-time to the music, making the performance feel dynamic and interactive. The visuals and animations can add layers of depth and meaning to the music, making the whole experience memorable. In conclusion, Max for Live integration is a game-changer for electronic music producers. The customizable tools provide endless possibilities for producers to explore and create music that is unique and personal. The seamless third-party plugin integration and the ability to create audio-reactive visuals and environments make Ableton Live the go-to software for electronic music production.

Collaboration And Performance Capabilities


Ableton Live offers exceptional collaboration and performance capabilities for electronic music production. With its unique workflow, intuitive interface, and advanced features, producing music and performing live has never been easier.

Session View

One of the key reasons why Ableton Live is a popular choice amongst electronic music producers is its Session View. It provides a flexible and fluid way to create, organize, and perform with musical ideas, making it an ideal tool for live performances and collaborations. The Session View is structured around clips which can be triggered individually or grouped together in scenes. This feature gives producers the ability to manipulate and arrange different musical elements on the fly, creating new musical combinations and evolving soundscapes in real-time.

Link

Another significant advantage of using Ableton Live for collaborative work is the Link feature. It enables multiple devices to communicate with each other and stay in sync, making it easier for producers to collaborate on projects without the need for complicated setups or equipment. The Link feature allows users to collaborate with other musicians and producers in different locations, in real-time, without latency issues. All users need is an internet connection, and they can link their devices and collaborate on projects with ease.

Ableton Push

Ableton Push is a performance controller specifically designed for Ableton Live. It integrates seamlessly with the software, providing producers with an intuitive and tactile way to create and perform music. Push allows producers to trigger clips, play melodies and chords, program drums and percussion, and mix tracks all from one interface. This feature makes it easier for producers to experiment with different musical ideas and come up with new and exciting soundscapes. In conclusion, Ableton Live is an ideal choice for electronic music producers looking for collaboration and performance capabilities. With its Session View, Link feature, and Ableton Push, producers can create, arrange, and perform music with ease, making it an excellent choice for live performances and collaborations.

Why Use Ableton Live For Electronic Music Production


Credit: www.productionmusiclive.com


Frequently Asked Questions On Why Use Ableton Live For Electronic Music Production


Why Is Ableton Good For Electronic Music?


Ableton is great for electronic music due to its intuitive design, versatile features, and seamless integration with hardware. Its session view allows for easy experimentation and arrangement, while its audio and MIDI effects provide endless sound design possibilities. Additionally, its time-stretching and warping capabilities make it easy to manipulate audio to fit within a track.


Is Ableton Live Good For Music Production?


Yes, Ableton Live is good for music production. It is widely used by professional producers and offers features such as audio and MIDI sequencing, a vast library of sounds, real-time looping, and flexible editing tools. It also integrates well with other software and hardware, making it a popular choice for music production.


What Are The Benefits Of Ableton Live?


Ableton Live is a digital audio workstation that offers numerous benefits to musicians, producers, and DJs. These include real-time audio manipulation, intuitive session and arrangement views, MIDI sequencing, automation tools, and a vast library of effects and virtual instruments. Additionally, Ableton Live provides advanced features such as warp, clip-launching, and crossfading, making it an ideal choice for live performance and studio production.


Is Ableton Better Than Logic For Electronic Music Production?


Both Ableton and Logic are popular DAWs for electronic music production. The choice of which is better depends on personal preferences and workflow. Ableton excels at live performance and looping, while Logic is more traditional in its layout and mixing capabilities.


It’s best to try both and see which one suits your needs.


Conclusion


To summarize, Ableton Live is a top choice for electronic music production due to its unique features and user-friendly design. Its intuitive workflow allows for seamless experimentation with sound and composition. Its ability to integrate with various hardware and software options enhances the overall music-making experience.


Whether you are a beginner or seasoned electronic music producer, Ableton Live is a powerful tool to unleash your creativity and produce high-quality music. So, start exploring and have some fun with it!

Categories
Archive

How To Make Good Eq Decisions Without Expensive Gear

Good EQ decisions can be made without expensive gear by focusing on the basics and utilizing tools like EQ plugins and reference tracks. Learning to listen critically and understanding the frequencies that make up particular sounds is also key in making informed EQ decisions.


Also, as a music producer or audio engineer, one of the most important skills to master is equalization or EQ. EQ is the process of adjusting the balance of frequencies in a mix to achieve a desired sound. While it may be tempting to believe that you need expensive gear to achieve professional-sounding EQ, this is not necessarily true.

Related reading: EQ: The Complete Guide Hub and Piano Eq. For background, see the Wikipedia article on Equalization.


In fact, with a bit of knowledge and some practice, you can make good EQ decisions with basic gear and free or low-cost plugins. Moreover, we will explore some tips and techniques for making good EQ decisions without breaking the bank.


Working With What You Have for EQ Decisions


In addition, learn how to make high-quality recordings and produce outstanding tracks with the gear you already have on hand. The key is to make informed choices about how you use your equipment to achieve the best results. By focusing on creativity, imagination, resourcefulness, and understanding the fundamentals of recording and mixing, you can make high-quality music without breaking the bank.

Furthermore, if you’re a music producer or audio engineer, you’re probably aware of the importance of having good gear for EQing. However, not everyone can afford high-end equipment. The good news is that you don’t necessarily need expensive gear to make good EQ decisions. With a little bit of knowledge and creativity, you can achieve great results with the tools you have.

Learning Your Equipment

Additionally, the first step in making good EQ decisions is to get to know your equipment. Whether you’re working with a basic DAW or a mixing console, take the time to learn how to use its EQ features. Read the manual, watch tutorials, and experiment with different settings. By understanding your tools and how they work, you’ll be better equipped to make informed decisions.

Maximizing Your Daw’s Eq

Also, if you’re working with a DAW, you probably have access to a range of powerful EQ plugins. While these plugins may not have all the bells and whistles of high-end hardware EQs, they can still produce excellent results. To get the most out of your DAW’s EQ plugins, try using them in conjunction with other tools like compression and saturation. Don’t be afraid to experiment with different signal chains to find out what works best for your specific project.

Expert Tips For Eqing With Basic Tools

Even if you’re working with basic EQ tools, there are still plenty of tricks and techniques you can use to achieve great results. Here are a few expert tips:

  • Use a high-pass filter: By cutting frequencies below a certain point (usually around 20-30 Hz), you can remove unwanted low-end rumble and free up headroom for other elements.
  • Use subtractive EQing: Instead of boosting frequencies you want to emphasize, try cutting frequencies you want to de-emphasize. This can help create more space and clarity in your mix.
  • Use EQ sparingly: Remember, a little bit of EQ can go a long way. Don’t feel like you need to EQ every track in your mix. Instead, focus on fixing problem frequencies and enhancing the most important elements.

By following these tips and techniques, you’ll be well on your way to making good EQ decisions with even the most basic tools.

Tools And Techniques For Better Eq Decisions

Tools and techniques are essential for making good EQ decisions. But it doesn’t mean that you need to spend a lot of money on expensive gear. You can achieve better EQ decisions by using some simple tools and techniques and practicing them regularly.

Using Eq A/b Comparisons

One of the most effective techniques for making good EQ decisions is to use A/B comparisons. This technique involves comparing two versions of a mix with different EQ settings and analyzing which version sounds better.

Start by creating two copies of your mix and apply different EQ settings to each copy. Then, switch between the two versions while listening for differences in tonality, clarity, and presence. If you find that one version sounds better than the other, analyze the EQ settings and try to identify what caused the difference.

Ear Training Exercises For Eq

Another useful tool for making better EQ decisions is ear training exercises. These exercises will help you develop your ability to listen to and identify different frequencies in a mix.

You can start by practicing basic frequency recognition exercises. Play a sine wave at a specific frequency and try to identify it. Once you master this, try harder exercises. Spot overlapping frequency ranges, or name boosts and cuts by ear.

Applying Eq Techniques From The Pros

Lastly, you can improve your EQ skills by studying and applying the techniques used by professional audio engineers. This includes analyzing how EQ is used in popular recordings and trying to replicate the same techniques in your own mixes.

You can also learn from online tutorials and courses that cover specific EQ techniques used by top audio engineers. This will help you expand your knowledge and improve your skills.

Summary

Great EQ decisions are essential for producing high-quality mixes. But you don’t need to spend a fortune on gear to achieve them. By using these tools and techniques, you can improve your EQ skills and take your mixes to the next level.

Using Eq To Fix Common Problems


Learn how to make precise EQ decisions without having to spend big on professional equipment. This guide teaches you how to use EQ to fix common problems easily and accurately. This makes it possible to achieve high-quality sound without breaking the bank.

Identifying Frequency Issues for EQ Decisions

Identifying frequency issues is essential for producing quality sound in your mixes. But you don’t need expensive recording gear to do it. Generally, when you notice a frequency issue in a sound recording, it will have too much or too little of one or more frequencies. To fix this problem, pay attention to the frequency spectrum and use your EQ to reduce or boost the problematic frequency.

Dealing With Muddy Mixes for EQ Decisions

A muddy mix can ruin a song and make it sound amateurish regardless of the quality of the production. Fortunately, you can fix this problem by cutting frequencies that contribute to the mud, typically anywhere between 200Hz and 500Hz. You can also cut out some of the muffle in this range to give your mix more clarity.

Managing Harsh Or Shrill Sounds for EQ Decisions

Harsh or shrill sounds can result in listener fatigue, and most people prefer smooth and mellow sounds. To correct this, try using your EQ to decrease the range, typically in the upper midrange and a bit in the high end. Reducing levels in the 2kHz-4kHz range can tame shrill sounds, while reducing levels between 5kHz-8kHz can help to dampen a harsh sound.

Tackling Overly Boomy Or Thin Tracks for EQ Decisions

Tracks that are too boomy can cause issues with the instruments or vocal tracks, while thin tracks always lack weight and depth. For an overly boomy track, consider reducing the bass frequencies, typically anywhere from 100Hz to 200Hz. On the other hand, if you have a thin track, try boosting some low frequencies at about 100Hz.

These simple techniques can lead to a better overall sound in your mixes. Most importantly, you don’t need expensive gear to accomplish them.

How To Make Good Eq Decisions Without Expensive Gear


Credit: www.masteringthemix.com


Applying Eq Creatively


EQ decisions don’t need to break the bank. With some creativity, you can achieve good results without expensive gear. Here are some tips to help you make the most out of your EQ.

Sculpting Your Sound With Eq

When applying EQ creatively, it’s crucial to understand how to sculpt your sound. EQ gives you the power to boost or cut certain frequencies of your audio. So it’s essential to have a clear understanding of what frequencies dictate what sounds. Taking a moment to play around with EQ and experimenting with different frequencies can help you find your sound and create a more professional-sounding audio. Remember that less is always more when it comes to EQ, so avoid overdoing it and keep your changes subtle.

Creating Unique Effects With Eq

EQ can be used creatively to create unique effects for your audio. For example, a low-pass filter gives a lo-fi sound. A mid-range boost creates a radio-like tone. By experimenting and playing with different EQ settings, you can create a signature EQ sound that sets your content apart from the rest. Remember always to listen to your audio carefully, making small adjustments until you achieve the desired effect.

How To Eq Different Instruments And Vocal Styles

Understanding how to EQ different instruments and vocal styles is essential to creating professional-sounding audio. For example, when dealing with a guitar, you may want to cut out some frequencies to reduce the harshness of the recording, while boosting certain frequencies can help a kick drum stand out in the mix. Vocals can be tricky as they can have different ranges and qualities. So it’s essential to experiment with different EQ settings to get the best sound for the particular vocal style.

Remember always to listen and trust your ears when EQing different instruments and vocal styles to get the perfect sound. In conclusion, applying EQ creatively can enhance your sound while saving you money on expensive gear. Keep sculpting your sound and testing EQ settings on different instruments and voices. That’s how you get the best quality.

Putting It All Together for EQ Decisions


Learn how to make good EQ decisions without expensive gear by putting together the right techniques. With proper understanding of EQ frequencies, basic tools and strategies, you can achieve great results even with limited resources.

Listening To Your Mix With A Critical Ear

Once you have made EQ adjustments to your audio tracks, it is important to listen to the final mix with a critical ear. Listen to the mix on multiple devices to ensure that it translates well across different systems. While most of us cannot afford to invest in expensive monitoring gear, we can use headphones or nearfield monitors to check the mix for issues. Listen to the mix at different volumes to ensure that it sounds balanced and there are no harsh frequencies.

Using Eq In Combination With Other Processing Tools

EQ is just one of the many tools at your disposal when it comes to audio processing. It works best when used in combination with other tools such as compression, reverb, and delay. Each tool serves a unique purpose in the mix, and by understanding how they interact with each other, you can make more informed processing decisions. For instance, a high-frequency boost on a vocal plus compression makes it sound more present.

Balancing Technical Precision With Artistic Vision for EQ Decisions

While it is important to be technically precise when making EQ decisions, it is equally important to remember that music is an art form. As an artist, you have a unique creative vision that needs to be expressed through your music. It is important to strike a balance between the technical precision that is necessary for a good mix and the artistry that sets it apart. Remember that there is no one-size-fits-all approach to EQ, and what works for one track may not necessarily work for another.

In conclusion, while having expensive gear can be helpful in making good EQ decisions, it is not the be-all and end-all. Listen critically and pair EQ with other tools. Balance precision with vision, and you’ll make good EQ decisions cheaply.


Frequently Asked Questions For How To Make Good Eq Decisions Without Expensive Gear


How Do You Make A Good Eq?


To make a good EQ, take the time to properly identify the frequencies that need boosting or cutting. Start by lowering frequencies that sound muddled or boomy, and then experiment with boosting specific frequencies for clarity and definition. Aim for a balanced sound that complements the mix.


Use your ears and trust your instincts.


How Do You Eq Out Low End?


To EQ out low end, use a high-pass filter to remove frequencies below the intended threshold. Adjust the frequency and slope until you find the right balance. Keep in mind that removing too much low end can make the mix sound thin, so don’t go overboard.


Do I Really Need To Eq Vocals?


Yes, you should EQ vocals to make them sound better in the mix. Proper EQ can remove unwanted frequencies and enhance the desired characteristics of the vocals. This results in a polished and professional sound.


Can You Mix Without Eq?


Mixing without an EQ is possible but it depends on various factors like music genre, instruments, vocals and more. It’s always better to use an EQ to enhance clarity, depth and improve the sound quality. However, it’s up to the individual’s preference and the specific situation at hand.


Conclusion


To sum up, making good EQ decisions doesn’t have to cost you a fortune. By following the tips discussed above, you can achieve a pleasant sound mix without having to invest in expensive gear. Remember to trust your ears and take time to tweak your settings until you achieve the desired effect.


With practice and experimentation, you can become a master at making good EQ decisions with any equipment you have. Happy mixing!


Categories
Archive

Why You Dont Need Fancy Plug Ins To Get Great Mixes

Fancy plug-ins are not necessary for great mixes. Simple mixing techniques and quality tracks are enough to achieve excellent results.


When mixing music tracks, many believe that using a wealth of fancy plug-ins will make their work sound more professional. However, this is not always the case. You don’t need an expensive and extensive collection of plugins to achieve great mixes.

Related reading: Free Vocal Plugins and Using Trim Plugins. For background, see the Wikipedia article on Audio plug-in.


A lot of the time, the simpler the mix, the better it sounds. In fact, many professional producers and engineers believe that overusing plugins can actually worsen the quality of your mix. This article will discuss why you don’t need to rely on fancy plug-ins to get great mixes and provide some tips for achieving an outstanding sound without breaking the bank.


The Myth Of Fancy Plug-ins


Fancy plug-ins may seem like the key to perfect mixes, but in reality, they can be unnecessary and distracting. With the right techniques and a basic set of plug-ins, you can achieve professional-sounding mixes without breaking the bank or overwhelming yourself with unnecessary options.

Understanding The Trend Towards Fancy Plug-ins

The idea of fancy plug-ins has been around in the music industry for a while. With technology advancing at a rapid pace, it’s no surprise that newer plug-ins are being developed and marketed as the ultimate solution for audio professionals. As a result, many people feel that if they don’t have the latest and greatest tools at their disposal, they cannot produce high-quality mixes. This notion, however, is just a myth.

Why Fancy Plug-ins Are Not Required For Great Mixes

The truth is, most professional mixers do not rely on fancy plug-ins to achieve great mixes. Instead, they focus on using basic tools that have been tried and tested over the years. The key to a great mix is not about having the most sophisticated plug-ins; it’s about understanding the fundamentals of audio mixing and using the right tools in the right way. While there’s no denying the benefits of some of the newer plug-ins on the market, having access to expensive tools does not guarantee a great mix. It all depends on how effectively you use your skills and your knowledge of the basics of audio mixing.

Why Many Professional Mixers Still Use Basic Plug-ins

When it comes to audio mixing, the most important thing is to have the right set of tools that help you achieve your desired results. Many professional mixers still rely on basic plug-ins because they understand how to use them effectively. As they say, it’s not about the tools, it’s about the person using them. There’s no doubt that some of the newer plug-ins have features that can help you save time and make the process more efficient. However, investing in fancy plug-ins doesn’t make sense if you don’t have a solid understanding of the basics of audio mixing.

In conclusion, fancy plug-ins are not required for great mixes. If you understand the fundamentals of audio mixing, use the right tools, and have a good set of ears, you can achieve great results with basic plug-ins. Don’t fall for the myth that fancy plug-ins are necessary for success in audio mixing.

Why You Dont Need Fancy Plug Ins To Get Great Mixes


Credit: www.masteringthemix.com


Using The Power Of Basics in Fancy Plug-ins


You can achieve great mixes without using fancy plug-ins. By focusing on the basics such as levels, panning, and EQ adjustments, you can create a high-quality mix that sounds professional and polished. Stick to the essentials and you’ll find success with your mixes.

When it comes to mixing, many people believe that they need to have access to fancy plug-ins to create great-sounding tracks. However, the truth is that you can use the power of basics to achieve excellent results. In this blog post, we’ll take a closer look at how you can get fantastic mixes with simple plug-ins.

Importance Of Starting With The Basics in Fancy Plug-ins

Before you start adding more plug-ins to your mixing chain, it’s important to get the basics right. This means ensuring that levels are balanced, and each track sits in its own space in the stereo image. Once you have achieved these fundamentals, the next step is to focus on the processing.

The Beauty Of Simple Eq And Compression

One of the most essential tools in mixing is the equalizer. With just a few adjustments, you can make a huge impact on the overall sound of your track. Cutting any unwanted frequencies and boosting the right ones can help to give each instrument its place in the mix. Compression is another vital tool to create a dynamic and cohesive sound. Even with the simplest of compressors, you can effectively control transients and add excitement to your tracks.

How To Make The Most Of Basic Plug-ins

The best way to use basic plug-ins effectively is to experiment with them. Rather than using presets, take the time to learn how each plug-in works and what you can achieve with it. Use filters and EQ to shape the sound of each instrument before applying compression to reduce the dynamic range. You can also add saturation or distortion to add warmth and character to your tracks. In conclusion, you don’t need fancy plug-ins to get great mixes. By mastering the basics, you can achieve fantastic results with simple plug-ins. Remember to explore and experiment with each tool you have at your disposal. The results will amaze you.

Developing Your Ear for Fancy Plug-ins


Developing your ear is essential for getting great mixes. You don’t need fancy plug-ins to achieve this. Simply focusing on improving your listening skills will go a long way in improving your audio quality.

Developing Your Ear: Why developing your ear is crucial for great mixing. In today’s modern age of music production, it is tempting to rely solely on fancy plug-ins to achieve better mixes. While plug-ins can certainly be of assistance, they can never replace the most valuable tool available to any musician or producer – the ear. The ability to hear what makes a good mix great is vital for creating the best possible music productions. Developing your ear can be the secret ingredient to great mixing. It’s something you can achieve regardless of your technical skills. How to train your ear to hear subtle changes: Training your ear can be a time-consuming task, but it’s worth every second. Firstly, begin by listening closely to reference tracks from professional mixing engineers to recognize any subtle changes within their mixes. Secondly, start using the basic plug-ins that come with your DAW to make small adjustments on individual tracks. This hands-on experience will help you to identify minor changes in the sound and understand how they affect the overall mix.

Practical Tips

A straightforward technique is to try mixing with a low-quality monitoring system, such as headphones or basic speakers. This will force you to rely more heavily on your ear instead of technical aids. Why working with basic plug-ins can improve your ear: Working with basic plug-ins is one of the simplest ways to develop your ear. It helps you to fully comprehend each plug-in’s function, ensuring that it becomes second nature when making adjustments. This familiarity with basic plug-ins is vital during the mixing process when time is critical.

It is essential to remember to tweak the basics first instead of turning to high-performance plug-ins straight away. Working in this way won’t only amplify your confidence and skill set. But it will also make you a better mixer in the long run. Always prioritize honing your listening skills to take your mixes to the next level.

Why You Dont Need Fancy Plug Ins To Get Great Mixes


Credit: www.masteringthemix.com


Thinking Outside The Plug-in Box

As an audio engineer, it’s easy to get caught up in the latest fancy plug-ins and gear. We can end up relying too much on these tools and forgetting that there are other factors that affect the quality of our mixes beyond plug-ins. When we think outside the plug-in box and focus on these factors, we can create great mixes without needing all the bells and whistles.

Other Factors Affecting Mix Quality Beyond Plug-ins

There are many factors to consider when it comes to mixing, beyond the plug-ins and effects you use. Here are some of the most important:

Factors affecting mix quality Explanation
Arrangement The way a song is structured and arranged can make or break the mix. A cluttered arrangement with too many parts can lead to a muddy mix.
Recording quality You can’t make a poorly recorded instrument sound great with plug-ins. Proper mic placement, gain staging, and signal flow are all critical for capturing good sounds.
Performance A great performance can make a mix shine. The emotion and energy of the performance can be lost if it isn’t captured properly.
Musicality Understanding the song and its purpose is crucial to create a mix that complements it. It’s essential to know when to use dynamics and how to create space.
Monitoring environment A proper listening environment with accurate monitoring is critical to making unbiased decisions during the mix process.

Why Arrangement Can Make Or Break A Mix

You may have access to all the best plug-ins and gear, but if you don’t have a well-structured arrangement, your mix will suffer. You need to give each element in the mix its space to breathe and not overcrowd it. A cluttered arrangement can lead to masking, phasing, and imbalance. This gets hard to fix once you mix everything together.

Before diving into the mix, take some time to analyze the song and make sure that the arrangement is structured to support the emotion and message of the music.

Importance Of Capturing Sounds Correctly During Recording

One of the most significant factors affecting mix quality is the way the sounds are captured during recording. Whether it’s vocals, drums, guitars, or any other instrument, getting a good recording is essential. The goal is to capture the sound how you envision it in your mind and avoid the need to fix it later with plug-ins.

Make sure you have proper mic placement, use good quality gear, and ensure that your levels are optimal. Proper placement of the mic will help reduce bleed and give you better phase coherency. Be aware of the surrounding environment and avoid reflections, standing waves, or any other noise that can disturb the recording process.

Remember, mixing starts during the recording process. The better the recording quality, the easier it is to mix the track.

Why You Dont Need Fancy Plug Ins To Get Great Mixes


Credit: www.masteringthemix.com


Frequently Asked Questions On Why You Dont Need Fancy Plug Ins To Get Great Mixes


What Plugins Do I Need For Mixing?


The essential plugins for mixing include EQ, compressor, reverb, delay and saturation. These plugins help shape the sound, control dynamics, add depth, and enhance warmth or harmonic distortion. It’s also advisable to invest in quality plugins from reputable manufacturers for better results.


Are Vst Plugins Worth It?


Yes, VST plugins are worth it. They offer endless possibilities for enhancing and customizing your music production. This allows you to create unique sounds and produce professional tracks. With the vast array of plugins available, you can choose the ones best suited to your style and needs, resulting in top-quality music.


Do You Need Plugins To Make Music?


No, plugins are not a requirement to make music. However, they can enhance the production process and add unique effects to your creations. It ultimately depends on personal preference and the level of complexity desired in the music production.


Can You Have Too Many Plug-ins?


Yes, having too many plugins on your website can slow down your site, increase the risk of conflicts between plugins, and make your website more vulnerable to security threats. It’s important to only use necessary and reliable plugins to optimize website speed and functionality.


Conclusion


Good mixing skills do not require expensive plugins or gear. It’s about how you utilize the tools at hand. It’s important to focus on the foundational principles of mixing: balancing levels, EQing, panning, and dynamics. Always remember that the ultimate goal is to serve the song and to create a sonic space that enhances the emotional impact of the music.


So, don’t rely on fancy plugins, but rather focus on skillful use of the tools you have. Keep practicing and experimenting with your mixing techniques and soon you’ll have the great mixes you’ve been looking for.


Categories
Archive

How To Hear Compression While Mixing And Mastering

To hear compression while mixing and mastering, use A/B comparisons and soloing. EQ can also help bring out the effects of compression.


Compression is an essential tool in the creation of professional-sounding music. It evens out levels, adds volume, and can bring out the subtleties of a track. However, compression can also change the character of a track and affect its overall impact.


As a mixing and mastering engineer, being able to hear the effects of compression is crucial. We’ll explore some techniques to help you hear compression, including A/B comparisons, soloing, and EQ. With these tools, you can confidently use compression to take your tracks to the next level.


How To Hear Compression While Mixing


Learning how to hear compression while mixing is critical in producing clean, professional-sounding tracks. By using appropriate headphones, monitoring volume and adjusting ratio, attack and release settings, compression can become a vital component of pristine sound mastery.

Effects such as compression are essential tools in audio engineering. Compression regulates the dynamic range of mixes, bringing balance to recordings. Yet, understanding how to hear compression in a mix can be challenging. Here, we delve into compression basics and how to identify them while mixing and mastering, as well as A/B compression testing techniques. We will also explore how to use compression to enhance dynamic range in your mixes.

Compression Basics

Compression is the process of reducing the dynamic range of audio signals. This technique reduces the volume of loud sounds and elevates the volume of soft sounds. As a result, the audio becomes more balanced and audibly pleasing to the listener. Compressors adjust the audio signal’s amplitude level based on your settings and the input level it receives. Compression can be tricky to comprehend. Still, it’s essential to understand the basic settings on a compressor that impact the mix, including threshold, ratio, attack, release, and makeup gain.

Identifying Compression In A Mix

Hearing and identifying compression techniques in a mix requires a keen ear. One approach is to listen closely to the attack and release of instruments and vocals. For example, a snare drum that sounds more controlled than usual may have a compressor on it. Similarly, listen for a sustained bass, which could also indicate compression. Also, pay attention to instruments that sit upfront or remain constant in the mix. Compression can help give these instruments distinction and clarity. With a bit of experience, you’ll develop an ear for identifying compression in a mix.

A/b Testing Compression

A/B testing compression involves comparing two versions of a mix, one with compression and one without compression, to hear the differences. It helps you to identify whether you’ve over or under-compressed a mix. With the right tools, A/B testing compression is easy to do. There are various plugins on the market that can do this for you. Also, most DAWs allow you to swap plugins on and off, allowing you to A/B test compressor settings that way. A/B testing can help you decide when to use compression and what settings to go for in the mixing and mastering stages.

Using Compression To Create Dynamic Range

Compression can help in creating dynamic range, which is the difference between the softest and loudest sounds in a mix. Compression enables you to control clipping, where the audio signal exceeds the maximum signal level and thus distorts. Clipping can cause damage to speakers, which creates unpleasant listening experiences. Compression can control the dynamics of a mix by lifting the quieter parts while limiting the impact of the louder parts. This technique improves the overall balance and presence of the audio, leading to a polished sound in the final mix.

Conclusion

Hearing compression in a mix takes practice and patience. However, understanding compression basics, implementing A/B testing techniques, and using compression to create dynamic range is essential in producing professional mixes. With the right tools and techniques, you can elevate your mixes to new heights.

How To Hear Compression While Mixing And Mastering


Credit: www.reddit.com


How To Hear Compression While Mastering


To properly hear compression while mixing and mastering, it’s important to use reference tracks and A/B comparisons. Listen for differences in the dynamics and overall punch of the track with and without compression applied, and adjust accordingly. Focus on the perceived loudness and clarity of the individual elements within the mix to achieve a well-balanced final product.

Compression is an essential tool in the mastering process, and understanding its role can make a big difference in the final mix. When used correctly, compression can enhance the clarity and punch of a song, but if overused, it can stifle the dynamics and make tracks sound lifeless. One of the biggest challenges in mastering is learning to hear compression accurately and effectively. This article will discuss the role of compression in mastering, identifying compression in a mastered track, and using compression to enhance or reduce dynamics and balance the frequency spectrum.

The Role Of Compression In Mastering

Compression is used in mastering to control the levels of different elements in a mix to make it sound more polished. It helps to even out the dynamic range of the mix, ensuring that parts that are too loud do not overshadow the softer parts. Compression can also make a sound seem more present and lively by emphasizing its peak levels. It is essential to use compression carefully, as applying too much compression in the mastering stage will lead to a flat-sounding mix and may cause it to lose its impact.

Identifying Compression In A Mastered Track

To identify compression in a mastered track, it is necessary to listen carefully and critically. The most effective way to do this is to use a high-quality pair of headphones or studio monitors to listen to the mix. Compression is heard when there is a consistent, steady sound that is not fluctuating much in volume, even when the elements of the song, like the drums and vocals, get louder in some parts. Compression can sometimes also be identified by the audio’s texture, which may sound slightly squashed or flattened in areas where it has been applied.

Using Compression To Enhance Or Reduce Dynamics

Compression can be used effectively in mastering to enhance or reduce dynamics. If a song has sections that are too loud or too soft, compression can be applied to bring the levels into balance. For example, if a vocal is too dynamic, using compression can make the quieter parts louder and the loud parts quieter, smoothing out the vocal’s dynamics and emphasizing the words’ clarity. On the other hand, if the song lacks impact, compression can be used to make it sound more punchy.

Using Compression To Balance The Frequency Spectrum

Compression can also be used to balance the frequency spectrum in a mix. For example, if a bass guitar is too loud or too quiet in the mix, compression can be applied to make it sit more evenly in the frequency spectrum. Similarly, compression can be used to bring out the higher frequencies in a mix, such as making cymbals and hi-hats sound brighter and more present. In conclusion, mastering is a critical part of the music production process, and compression is an essential tool for achieving professional-sounding mixes. Identifying compression when listening to a mastered track requires careful attention to the mix’s dynamics and a critical ear. It is essential to use compression appropriately to enhance or reduce dynamics, balance the frequency spectrum and achieve clarity, and punch in a mix.


Tips For Improving Your Compression Skills


Improve your compression skills by actively listening for the changes it makes to your sound while mixing and mastering. Use your ears to identify how the compression affects the dynamics and adjust accordingly. Experiment with different settings and practice, practice, practice.

As a mixing and mastering engineer, understanding compression is crucial to achieve a professional-sounding track. However, hearing compression can be challenging, especially for beginners. In this blog post, we will discuss some tips for improving your compression skills.

Practice Listening To Compressed And Uncompressed Tracks

One of the best ways to improve your compression skills is by training your ears to distinguish between compressed and uncompressed tracks. Start by selecting a few tracks and listen to them carefully. Pay attention to the dynamics and volume changes in the song. Then, compare the original uncompressed track to the compressed version. Listen for any audible differences, such as reduced dynamic range, increased sustain, or volume changes.

Experiment With Different Compression Settings

Experimenting with different compression settings is crucial to develop a better understanding of how compression works. Try using different types of compressors, such as dynamic or optical compressors. Adjust the threshold, ratio, attack, and release time to understand how each setting affects the sound. Then, try to apply compression to different elements of the mix, such as drums, vocals, and bass.

Train Your Ears With Compression Plugins And Software

There are many compression plugins and software available that can help you train your ears and improve your compression skills. These plugins allow you to simulate different types of compressors and adjust the settings to understand how they affect the sound. Some examples of popular compression plugins include the Waves SSL G-Master Buss Compressor and the Universal Audio LA-2A. In conclusion, improving your compression skills is crucial to achieve a professional-sounding mix and master. Practice listening to compressed and uncompressed tracks, experiment with different compression settings, and train your ears with compression software. With time and practice, you will be able to hear compression more clearly and apply it effectively to your mixes and masters.

How To Hear Compression While Mixing And Mastering


Credit: www.reddit.com


How To Hear Compression While Mixing And Mastering


Credit: www.masteringthemix.com


Frequently Asked Questions On How To Hear Compression While Mixing And Mastering


How Do You Hear Compression Ratio?


Compression ratio is typically heard as a numerical value. It is the ratio of the volume of gas before compression to the volume of gas after compression. It is expressed as a decimal or fraction and is used to determine the efficiency of an engine.


How Do You Hear Release In Compression?


To hear release in compression, listen for a decrease in the volume of the compressed audio signal after a particular threshold. This is due to the compressor reducing the gain of the signal when it exceeds the threshold, consequently decreasing the dynamic range and resulting in a more consistent level of audio output.


How Do You Compress While Mastering?


To compress while mastering, use a multiband compressor to isolate frequencies and compress each band separately. Adjust the threshold and ratio settings to control dynamic range and minimize peaks. Ensure the overall mix remains balanced and maintain adequate headroom to avoid distortion.


How Can I Make My Compression Sound Better?


To make your compression sound better, try adjusting the attack and release times, use parallel compression, and set the ratio and threshold properly. Additionally, you can use sidechain compression and EQ to help create a clear and balanced mix. Practice and experimentation are key in finding what works best for your specific situation.


Conclusion


Compression is an integral part of mixing and mastering in music production. It gives your tracks the punch and clarity they need to stand out in the crowd. By following the guidelines you can take your compression skills to the next level.


Remember, practice makes perfect – keep honing your skills, and soon you’ll be able to hear compression like a pro! Happy mixing and mastering!

Categories
Archive

Things Holding You Back From The Finishers Mindset

Habits and limiting beliefs can hold you back from having a finisher’s mindset. To overcome these obstacles, you need to identify and change your habits and beliefs.


Developing a finisher’s mindset is crucial in achieving success in any aspect of life. It’s about committing to your goals, persevering through challenges, and seeing projects through to completion. However, many people struggle to adopt this mindset due to their habits and beliefs.


Negative self-talk, lack of focus, and fear of failure can all prevent you from achieving your full potential. To overcome these obstacles, you need to actively identify and change your habits and beliefs. We’ll explore some of the most common things that may be holding you back from having a finisher’s mindset and provide practical tips for overcoming them.


The Power Of A Finisher’s Mindset

A finisher’s mindset is a powerful tool that will help you to complete tasks despite the obstacles that come your way. It propels you to accomplish what you set out to do and helps you achieve your goals. Unfortunately, a lot of people find themselves hindered by things that hold them back from the finisher’s mindset. In this blog post, we will explore the importance of a finisher’s mindset and what can hinder it, as well as how to overcome these obstacles.

The Definition Of A Finisher’s Mindset

A finisher’s mindset is a mentality that focuses on completing tasks, goals, or projects as opposed to starting them. When you have a finisher’s mindset, you prioritize completing what you set out to do, even in the face of obstacles. It’s a mindset that motivates you to get up and keep working until you get the job done, whether it’s a personal goal or a work project.

Why A Finisher’s Mindset Matters

A finisher’s mindset is essential because it helps you stay focused on your goals and overcome obstacles along the way. It also gives you the confidence you need to tackle new challenges and make progress, even in the face of adversity. A finisher’s mindset matters because it is the key to achieving success and mastering any skill or task.

Table: Benefits of a Finisher’s Mindset

No. Benefits of a Finisher’s Mindset
1 Improved productivity and efficiency
2 Greater sense of accomplishment and fulfillment
3 Increased confidence and motivation
4 More opportunities for growth and advancement

However, there are a few things that can hinder the development of a finisher’s mindset. These include:

Hindrances To A Finisher’s Mindset

  1. Lack of motivation
  2. Procrastination
  3. Perfectionism
  4. Lack of focus
  5. Feeling overwhelmed

These hindrances can prevent you from developing a finisher’s mindset and keep you from achieving your goals. However, with the right mindset and strategies, you can overcome these obstacles and become a finisher.

Code: Strategies for Overcoming Hindrances to a Finisher’s Mindset


function overcomeFinisherHindrances() {
let motivation = "Set rewards for each completed task";
let procrastination = "Break tasks into smaller ones and start with the easiest one";
let perfectionism = "Set realistic goals and accept that mistakes happen";
let lackOfFocus = "Eliminate distractions and prioritize tasks";
let feelingOverwhelmed = "Ask for help or split the task with others";

console.log(motivation);
console.log(procrastination);
console.log(perfectionism);
console.log(lackOfFocus);
console.log(feelingOverwhelmed);
}

overcomeFinisherHindrances();

In conclusion, having a finisher’s mindset is crucial to achieving success and completing tasks. It’s a mentality that prioritizes completing goals and projects rather than starting them. However, there are hindrances that prevent the development of a finisher’s mindset. But with the right strategies, you can overcome them and become a finisher.

Things Holding You Back From The Finishers Mindset


Credit: www.amazon.com


Identifying Your Roadblocks

Identifying your roadblocks is the first step towards developing a finisher’s mindset. This means recognizing the things that are preventing you from fulfilling your goals and achieving your dreams. While many roadblocks can stand in your way, the most common include fear, procrastination, and perfectionism. Let’s take a deeper look at each of these issues and explore some effective strategies for overcoming them.

The Role Of Fear In Holding You Back

Fear is a powerful emotion that can prevent us from taking risks and pursuing our passions. Whether it’s fear of failure, fear of success, or just a general sense of anxiety, these feelings can hold you back and keep you from achieving your goals. To overcome fear, it’s important to acknowledge it and understand where it’s coming from. Try to identify the specific things that are causing your fear and break them down into smaller, more manageable steps. This will help you create a plan of action that allows you to move forward, even in the face of fear.

The Negative Impact Of Procrastination

Procrastination is another common roadblock that can prevent you from achieving your goals. Whether it’s putting off tasks until the last minute or getting distracted by other things, procrastination can have a negative impact on your productivity and progress. To overcome procrastination, try setting clear deadlines for yourself and breaking tasks down into smaller, more manageable steps. You may also find it helpful to create a schedule or routine that helps you stay focused and on track.

Overcoming The Need For Perfectionism

Perfectionism is often seen as a positive trait, but it can actually be a major roadblock to success. When we focus too much on achieving perfection, we become paralyzed by indecision and afraid to take action. To overcome perfectionism, it’s important to recognize that there is no such thing as perfect. Instead, focus on progress over perfection and celebrate small successes along the way. Remember that it’s okay to make mistakes and that they can often be valuable learning opportunities.

Identifying your roadblocks is the first step towards developing a finisher’s mindset. Whether it’s fear, procrastination, or perfectionism that’s holding you back, there are strategies you can use to overcome these obstacles and achieve your goals. By breaking things down into smaller, more manageable steps and staying focused on your progress, you can develop the resilience and persistence needed to become a true finisher.

Rethinking Your Relationship With Failure


Embracing failure is necessary to achieve a finisher’s mindset. It’s important to change your perspective and recognize that failure is an opportunity for growth rather than to be feared. Let go of the fear and reframe your mindset to learn and push forward.

Why Failure Is Necessary For Success

Failure is often seen as the antithesis to success, but in reality, it is an integral part of achieving success. The fact is that failure is unavoidable, and rather than fearing it, we should embrace it. Failure provides an opportunity to learn, grow, and ultimately achieve success. It teaches us what doesn’t work, which can be just as valuable as knowing what does. Failure is not the opposite of success; it is simply a stepping stone towards it. If you haven’t failed, then you haven’t tried anything new, and your growth potential will be severely limited. Successful people understand this, and they welcome failure as an opportunity to try again and approach a problem from a different angle.

How To Embrace Failure And Learn From It

The key to embracing failure is to reframe your mindset. Rather than seeing failure as a negative, consider it a positive. Look at the situation objectively, and try to identify what didn’t work and why. Once you have a clear understanding of what went wrong, you can take steps to rectify the situation and avoid making the same mistake again. It is also essential to recognize that failure is not a reflection of your worth as a person. No one is perfect, and everyone makes mistakes. Don’t let setbacks define you. Instead, use them as an opportunity to grow and become better. Along the same lines, it is crucial to avoid letting fear of failure hold you back. If you never try, you’ll never know, and you’ll never have the opportunity to succeed. Accept that failure is a natural part of the learning process and take calculated risks that will help you grow and achieve your goals. In conclusion, to develop a finisher’s mindset, it is essential to reframe your relationship with failure. Failure is an opportunity to learn and grow, and by embracing it, you’ll be one step closer to achieving your goals. Remember, it is not about not making mistakes; it’s about learning from them and using them to your advantage.

Developing Mental Toughness


Developing mental toughness requires overcoming the things that hold us back from adopting a finisher’s mindset. It’s important to tackle fear, procrastination, self-doubt, and negative self-talk to achieve our goals. With practice and discipline, we can cultivate the mental toughness necessary to push through obstacles and achieve success.

Developing mental toughness is a crucial factor in achieving the finishers’ mindset. It helps you build resilience, overcome obstacles, and stay motivated during difficult times. Mental toughness is not something that comes naturally to everyone; it is a skill that needs to be developed over time through discipline and perseverance.

The Importance Of Self-discipline

Self-discipline is the foundation upon which mental toughness is built. Self-discipline is all about being able to make decisions that are in line with your goals and objectives, even when faced with obstacles or distractions. When you have self-discipline, you can stay focused and motivated, even when the going gets tough. To develop self-discipline, you need to set clear goals and deadlines. This will help you stay focused and avoid distractions. You need to create a schedule that allows you to work on your goals consistently. This will help you develop the discipline and perseverance needed to achieve your objectives.

Building Resilience In The Face Of Adversity

Resilience is the ability to bounce back from setbacks, failures, and adversity. It is one of the essential traits of mental toughness. To build resilience, you need to learn to embrace failure and setbacks as learning opportunities. You need to develop a positive attitude that allows you to reframe setbacks as stepping stones towards success. Another way to build resilience is to develop a support network. Having a group of people who can provide emotional support, guidance, and feedback can help you stay motivated and focused, even during difficult times. You should also practice self-care, which includes getting enough rest, eating a balanced diet, and exercising regularly. In conclusion, developing mental toughness is crucial if you want to achieve the finishers’ mindset. Self-discipline and resilience are two traits that are essential in building mental toughness. With discipline, perseverance, and a positive attitude, you can overcome obstacles and achieve your goals.

Strategies For Maintaining Focus And Accountability


Learn and implement effective strategies to maintain focus and accountability, and overcome the common hurdles that hold you back from the finisher’s mindset. By adopting productive habits such as goal setting, time management, and reducing distractions, you can boost productivity and achieve your desired outcomes.

How To Stay Focused And Productive

Do you struggle with staying focused on your goals? It’s easy to become distracted and lose sight of what you’re working towards. To stay focused and productive, try these strategies:

  • Create a to-do list with specific tasks and deadlines
  • Break larger goals into smaller, manageable tasks
  • Eliminate distractions by turning off your phone and email notifications
  • Schedule regular breaks to refresh your mind and prevent burnout

The Benefits Of An Accountability Partner

Having an accountability partner can make a significant difference in achieving your goals. It allows for regular check-ins and support, resulting in increased motivation and a sense of accountability. Some benefits of having an accountability partner include:

  • Increased likelihood of achieving goals
  • Mutual support and encouragement
  • Feedback and constructive criticism
  • Extra motivation to keep going

Overall, staying focused and accountable are essential components of achieving a finishers mindset. By implementing these strategies, you can increase your productivity and achieve your goals more efficiently. Remember to stay focused on the end result and keep pushing towards success!


Frequently Asked Questions On Things Holding You Back From The Finishers Mindset


What Is The Mindset Of A Finisher?


The mindset of a finisher is one of determination, focus, and persistence. A finisher is someone who sets a goal and works relentlessly towards achieving it. They are not easily deterred by obstacles or setbacks and are committed to completing their tasks no matter what.


The key to the finisher mindset is having an unwavering belief in oneself and in the ability to overcome any challenge that comes their way.


How I Trained Myself To Be A Finisher Of Things?


To train yourself to be a finisher, set specific goals, create a plan with deadlines, break tasks into manageable pieces, eliminate distractions, and hold yourself accountable. Practice focusing on one task at a time, and celebrate small victories along the way.


Remember to be patient, persistent, and disciplined as you work towards becoming a more productive finisher.


What Is The Finishers Mindset?


The finishers mindset is a positive attitude and mental state that helps people accomplish their goals by staying motivated, focused and persistent. It refers to the mentality of someone who sets out to do something and then follows through with it until it’s completed no matter how hard or long it takes.


Why Is It Hard To Develop The Finishers Mindset?


Developing the finishers mindset is hard because it requires discipline, focus, and perseverance. It’s about pushing yourself beyond your limits and refusing to give up when things get tough. Most people struggle with this because they lack the motivation, patience, or self-discipline needed to maintain their focus over time.


Conclusion


The finisher’s mindset requires a shift in perspective and actions. Fear, doubt, procrastination, and lack of discipline are common roadblocks that must be addressed. It’s crucial to identify and overcome these limiting beliefs and behaviors in order to reach your goals.


By adopting a growth mindset and taking consistent, purposeful action, anyone can develop the habits and mindset of a finisher. So, commit to the journey and stay motivated- the finish line is in sight.


Categories
Archive

When And How To Use Compression In Music Production

Compression is used in music production to control dynamics and improve the overall sound quality. It should be used when there are noticeable differences in loudness between different parts of the audio.


Compression is an essential tool in music production to ensure that the audio sounds consistent and professional. It can be used to control the dynamics of individual tracks, improve the overall sound quality of a mix, and create a more polished final product.


However, compression can also be overused, leading to a flattened and lifeless sound. As such, it’s important to understand when and how to use compression effectively. We’ll discuss some essential tips for using compression in music production, including when to use it, how to set the parameters, and some common mistakes to avoid.

When And How To Use Compression In Music Production


Credit: splice.com


What Is Compression?


Compression in music production is the process of reducing the dynamic range of audio signals. It is used to smooth out uneven levels and add sustain to instruments like bass and drums. Applying compression at the right settings can enhance the overall mix and improve clarity.

The Basics Of Compression

Compression is a crucial tool in music production that is used to control the dynamic range of a sound recording. Simply put, it helps make the quiet parts of a recording louder, while keeping the louder parts from distorting. This makes for a more balanced and polished sound that is easier to listen to. When used correctly, compression can enhance the clarity and punchiness of a track.

Compression can be applied to any instrument or vocal track in a mix, and there are several parameters that can be adjusted to achieve the desired effect. These include:

  • Threshold: The level at which compression kicks in.
  • Ratio: Determines how much gain reduction is applied to the signal above the threshold.
  • Attack: Determines how quickly the compressor reacts to the signal above the threshold.
  • Release: Determines how quickly the compressor releases the signal once it falls below the threshold.
  • Makeup gain: Adds back the gain that was reduced by compression, bringing the overall level back up.

Different Types Of Compression

There are several types of compression that can be used in music production, each with its own unique characteristics. These include:

Type of Compression Description
Optical compression Uses a light source and a photoresistor to control gain reduction. Gives a smooth, transparent sound.
VCA compression Uses a voltage-controlled amplifier to control gain reduction. Gives a precise, punchy sound.
FET compression Uses a field-effect transistor to control gain reduction. Gives a warm, musical sound.
Tube compression Uses a vacuum tube to control gain reduction. Gives a rich, warm sound.
Multi-band compression Applies compression to different frequency bands independently. Allows for more precise control over the mix.

Understanding the different types of compression and their characteristics can help you choose the right compressor for your mix and achieve the desired effect.

When And How To Use Compression In Music Production


Credit: dittomusic.com


When To Use Compression


Compression is an essential tool in music production, used to balance the dynamic range of a recording. It can add sustain to the sound, increase its perceived loudness, and even out peaks. Use it on any individual track or in a mix to enhance its overall sound.

Compression is an essential tool for music producers to create dynamic and compelling music. Compression helps to control the sound of the instruments and vocals, making it sound polished and professional. However, knowing when and how to use compression can be tricky, so let’s take a closer look at when to use compression in music production.

Balancing Audio Levels

One of the primary reasons to use compression is to balance the audio levels in a mix. When recording different instruments, they can sometimes have varying volumes, which can make it challenging to mix and master. Using compression to balance the audio levels can help make the mix sound cohesive and professional.

Creating Punch And Impact

Compression can help create a punchy and impactful sound for your music. By using a compressor with a fast attack time, you can even out the dynamics of the instruments. This helps to create a more consistent sound and add impact to your tracks.

Managing Dynamic Range

Another crucial function of compression is managing the dynamic range of your mix. Dynamic range is the difference between the loudest and quietest parts of the song. While dynamic range can add interest and emotion to your music, too much dynamic range can make it difficult for your listeners to hear all the elements of the song. Using compression to manage the dynamic range of your mix can help to create a balanced and consistent sound. In conclusion, knowing when to use compression in music production is essential. Whether you’re balancing audio levels, creating punch and impact, or managing dynamic range, compression can help bring your music to the next level.

How To Use Compression


Compression is an important tool in music production to balance the levels of instruments and create a cohesive mix. It can be used to control dynamic range, add sustain or punch, and enhance the overall sound. When and how to use compression depends on the specific needs of the track and the desired outcome.

Using compression is a crucial element of music production that can enhance the overall sound quality of your tracks. Compression helps balance the levels of different elements in a mix, bringing out the details and increasing the overall clarity. It also gives you greater control over the dynamics of a track, enabling you to achieve a consistent and professional sound. However, knowing how to use compression correctly can be a daunting task, especially for novice producers. Here are some tips for how to use compression effectively:

Choosing The Right Threshold And Ratio

The threshold and ratio settings are the two main controls for compression. The threshold determines the level at which compression kicks in, while the ratio controls how much compression is applied. A higher ratio means more compression, and a lower ratio means less. For example, a 3:1 ratio means that for every 3dB over the threshold, the output level will only increase by 1dB. When choosing the right settings, it is essential to consider the dynamics of the material you are compressing and your desired outcome.

Adjusting Attack And Release Times

Attack and release times determine how quickly the compressor responds to transient events and how quickly it releases the compression effect. A fast attack time means that the compressor will react quickly to the input signal, bringing down the levels of loud transients. A slow attack time will let the transients through, preserving their character and impact. Likewise, a fast release time will let go of the compression effect quickly when the signal drops below the threshold, while a slow release time will keep the compressor engaged for longer, smoothing out the overall level.

Understanding Sidechain Compression

Sidechain compression is a technique used to create space in the mix by ducking one sound source when another is playing. It enables you to make the kick drum and bass guitar or synthesizer sound more prominent and clearer. To use sidechain compression, you need to send the trigger signal from the kick drum track to the compressor on the bass or synth track. Then, select the sidechain input on the compressor and adjust the threshold and ratio settings to taste. By doing this, every time the kick drum hits, the bass or synth will be momentarily reduced in volume, giving the kick drum more room to breathe. In conclusion, compression is a vital tool for music production that every producer should learn how to use. By choosing the right threshold and ratio, adjusting the attack and release times and utilizing sidechain compression, you can achieve a more polished and professional-sounding mix. Remember to trust your ears and experiment with different settings to find the sweet spot that works for your material.

When And How To Use Compression In Music Production


Credit: splice.com


Avoiding Common Compression Mistakes


Learn the when and how of using compression in music production to avoid common mistakes. Understanding the appropriate settings and parameters is key to achieving the desired results and preventing over-compression.

Compression is an essential tool in music production for controlling the dynamics of individual tracks and the overall mix. However, it is easy to make mistakes when using compression that can affect the sound quality. Here are three common compression mistakes to avoid at all costs:

Overcompressing Audio

Overcompression occurs when the dynamic range of the audio is squeezed too much, resulting in a flat and lifeless sound. It can also cause unwanted artifacts such as pumping and breathing. It’s essential to use compression judiciously and only on tracks that need it. Set the threshold, ratio, attack, and release carefully, keeping in mind the overall balance of the mix. If you’re unsure, use your ears as the final judge.

Using Compression As A Crutch

Using compression excessively to fix poor audio recordings, bad arrangement, and mixing issues is a common mistake. Compression cannot fix everything, and if you rely too much on it, you may end up making the mix worse instead of better. The best approach is to get the basics right, such as mic placement, gain staging, and EQ, before adding compression as the final touch.

Ignoring The Context Of The Mix

Compression is a context-specific tool, and what works for one mix may not work for another. The key is to use compression as a means to achieve musical goals rather than blindly following presets or rules. You must understand the genre, the artist’s vision, and the intended audience to make informed decisions about compression. Use reference tracks to get a sense of what works and what doesn’t. In summary, compression is a powerful tool that requires a careful and thoughtful approach. By avoiding common compression mistakes such as overcompression, using compression as a crutch, and ignoring the mix’s context, you can achieve a balanced and polished sound.

Tips And Tricks For Effective Compression


Learn how and when to use compression in music production with these effective tips and tricks. Discover the best ways to manipulate dynamics, achieve a balanced mix, and bring out the best in your tracks. Whether you’re a beginner or an experienced producer, this guide will help you use compression like a pro.

Compression is an essential tool in music production that helps improve the sound quality of your tracks. However, using compression effectively can be a daunting task, especially for beginners. In this section, we will discuss some tips and tricks for using compression in music production.

Using Parallel Compression

Parallel compression can help you achieve a balanced mix by blending the compressed and uncompressed signals of your audio track. To use parallel compression, duplicate your audio track and apply heavy compression to the duplicated track. Then, blend the compressed track with the original track to achieve a balanced sound.

Muting And Soloing Audio Tracks

Muting and soloing audio tracks are essential tools that can help you pinpoint problem areas in your mix. By muting specific tracks, you can determine which tracks are causing problems in your mix, while soloing tracks can help you hear the individual components of your mix. Using these tools in conjunction with compression can help you achieve a more balanced and nuanced mix.

Experimenting With Compression Settings

The key to effectively using compression lies in experimentation. To achieve the right sound, you need to experiment with different compression settings. Try adjusting the attack, release, threshold, and ratio settings until you achieve the right compression sound for your mix. Remember, compression is not a one-size-fits-all solution, so take your time and experiment with different settings. In conclusion, using compression effectively can help improve the sound quality of your tracks. By using parallel compression, muting and soloing audio tracks, and experimenting with compression settings, you can achieve a balanced and nuanced mix that will please you and your listeners.

Frequently Asked Questions Of When And How To Use Compression In Music Production


How Do You Use A Compressor In Music Production?


A compressor is used in music production to control the dynamic range of an audio signal. It reduces the volume of loud sounds and boosts softer sounds to create a more even sound. To use a compressor, set the threshold level, ratio, attack and release time, and adjust the output gain accordingly.


What Is The Rule For Compression?


When writing content, it’s important to follow these 5 guidelines for compression: keep sentences short (20 words or less), write in an SEO-friendly, human-like, and easy-to-understand style, avoid certain words and phrases, use active voice, and pass AI writing detection.


The answer to this question should be no more than 50 words.


Why Would You Use Compression?


Compression reduces the size of files, making them easier to transfer and store. It can also improve loading times for websites and applications.


Does Compression Make Music Sound Better?


Compression can make music sound louder and more polished, but it doesn’t necessarily make it better. In fact, overuse of compression can lead to a loss of dynamic range and nuance in the music, resulting in a less enjoyable listening experience.


Conclusion


Compression is an incredibly powerful tool in music production, allowing us to control the dynamics of our audio and create a more cohesive, polished sound. However, like any tool, it should be used thoughtfully and with intention in order to achieve the desired effect.


Whether you’re looking to add some punch to your drums, tame a particularly loud vocal, or simply glue your mix together, understanding when and how to use compression can take your productions to the next level. So experiment, trust your ears, and use compression wisely to enhance your music.