Categories
Archive

How To Eq Kick And Bass For Powerful Low End

To Eq Kick And Bass For Powerful Low End, start by carving out space in the EQ for both the kick and bass frequencies. Proper equalization can emphasize the strengths of each instrument and create a more focused sound.


Achieving a powerful low end in a mix is crucial for modern music production, especially in genres like hip-hop and EDM. The kick and bass are two essential elements that form the foundation of the low end. However, it can be challenging to balance these two components and create a harmonious sound.


EQ can be a useful tool to help separate and define the kick and bass frequencies, allowing them to work together and create a full, powerful low end. Through careful EQing, producers can emphasize the strengths of each instrument and create a more focused, impactful sound.


The Importance Of Eq For Kick And Bass

When it comes to producing music, getting the perfect low end is crucial for a great mix. And in order to achieve that powerful low end, mastering EQ is key. Whether you’re a beginner or a seasoned pro, knowing how to properly EQ your kick and bass is essential. In this post, we’ll be taking a closer look at why EQ is necessary for a powerful low end and how it can enhance the relationship between kick and bass, ensuring each element of the mix sits in the right place.

Why Eq Is Necessary For A Powerful Low End

When we talk about low end in music, we’re referring to the frequencies at the bottom end of the audio spectrum. The kick and bass are the foundation of a song’s low end, and getting them to sit perfectly together is essential for a great mix. Without proper EQ, the low end can become muddy and indistinct, making it difficult to distinguish between the kick and bass. This is where EQ comes in – it allows us to carve out space in the frequency spectrum for each element, ensuring they are clearly defined and working together in harmony.

How Eq Can Enhance The Relationship Between Kick And Bass, Ensuring Each

Using EQ to enhance the relationship between kick and bass means that each element has its own space in the mix, without clashing or competing for the same frequencies. By using EQ to cut out unwanted frequencies and boost the ones that give each element its own unique character, we can create a powerful low end that drives the song forward without overpowering the rest of the mix. By ensuring each element is properly EQ’d, we can also add depth and dimension to the low end, making it sound more full and satisfying to the listener.

Summary

EQ is key to achieving a powerful low end in your mix. By carving out space in the frequency spectrum for each element of the low end, we can ensure that the kick and bass work together in harmony, without clashing or competing for the same frequencies. With proper EQ, we can create a low end that drives the song forward and adds depth and dimension to the mix.

How To Eq Kick And Bass For Powerful Low End


Credit: slashmastering.com


Fundamentals Of Kick And Bass Eq

When mixing music, getting the kick and bass EQ right can make or break the low-end of a track. While it may seem like a daunting task, it is essential to achieving a powerful low-end that makes the track stand out. Understanding the fundamentals of kick and bass EQ is the first step in achieving this.

Identifying The Frequencies Of The Kick And Bass

Before diving into EQing the kick and bass, it is essential to understand their frequencies. The kick is usually centered around 60-100 Hz with some harmonic content in the 2kHz range. In contrast, the bass is typically found between 50-200 Hz, with the fundamental frequency being the lowest note played.

Setting The Eq On The Kick Drum

When EQing the kick, start by sweeping through the frequencies, identifying which frequencies to accentuate or cut. Since the fundamental frequency of the kick is around 60-100 Hz, boosting in this range can give it more power. However, be careful not to boost too much as it can cause muddiness. Cutting around 200 Hz and above can reduce any unwanted ringing or noise in the kick.

Setting The Eq On The Bass

Like with the kick, start by sweeping through the frequencies of the bass, identifying which frequencies to boost or cut. Boosting around 60-100 Hz can give the bass more low-end presence, while cutting around 200-500 Hz can reduce any muddiness in the bass. Additionally, rolling off the frequencies below the fundamental frequency, around 50 Hz, can give the bass more definition.

By understanding the frequencies of the kick and bass and properly EQing them, the low-end of the track can become more powerful. It is important to experiment with the EQ to find the perfect balance between the kick and bass. With these fundamentals in mind, it is possible to create a high-quality mix with a powerful low-end.


Techniques For Eqing Kick And Bass


Achieving a powerful low end in your mix requires proper EQing of the kick and bass. Start by identifying the dominant frequency of each and use complementary EQ adjustments to balance them out. Use a high pass filter on the bass to remove any unwanted low frequencies that clash with the kick.

If you want to create a powerful low-end sound in your music, mastering the art of EQing kick and bass is crucial. However, it can be challenging to get the perfect balance between the two. In this section, we’ll explore some useful techniques for EQing kick and bass to give your music the deep, booming sound it needs.

Notching Out Frequencies That Clash

Often, the kick and bass frequencies can clash, resulting in a muddy or boomy sound. A useful technique to fix that is to identify and “notch out” the frequencies of the kick and the bass that clash with each other. You can do this by using a plugin that allows you to observe the frequency spectrum. Once you’ve identified the frequencies causing the problem, you can use an EQ to decrease the level of those frequencies, creating space in the mix.

Boosting The Fundamental Frequencies Of The Kick And Bass

Another useful technique for EQing kick and bass is to boost the fundamental frequencies of both sounds. The fundamental frequency is the lowest point of a sound’s harmonic series and is responsible for the pitch of the sound. In the case of the kick drum, the fundamental frequency is around 60-80hz, while for bass, it is around 40-60hz. By boosting these frequencies, you can give the kick and bass more power and warmth, making them more prominent in the mix.

Using Sidechain Compression To Make Room For The Kick

Sidechain compression is a technique that is widely used in music production to create more space in the mix. It involves compressing a track, such as the bass, every time the kick drum hits. This compression reduces the volume of the bass just enough to make room for the kick, allowing it to cut through the mix more effectively. Sidechain compression not only creates space but also provides a dynamic “pumping” effect that can add to the groove of the track.

Applying Parallel Compression To The Bass

Parallel compression is another useful technique for EQing kick and bass. It involves duplicating the bass track and processing the duplicate in a different way. One way to do this is by adding a heavy compression to the duplicate track and then blending it with the original track. The result is a bass sound that is more present and prominent in the mix, without overpowering the kick. Using these tried and tested techniques for EQing kick and bass can help you achieve a powerful low-end sound in your music. By notching out clashing frequencies, boosting fundamental frequencies, using sidechain compression, and applying parallel compression, you can create a clean, balanced mix that lets the kick and bass shine through.

How To Eq Kick And Bass For Powerful Low End


Credit: www.iconcollective.edu


Advanced Eq Techniques For Kick And Bass

EQ is an essential tool for creating a powerful low end in your tracks. Kick and bass are the foundation of any song and the EQ plays a critical role in achieving a clean and prominent low-end. In this post, we’ll explore some advanced EQ techniques for kick and bass to help you achieve a powerful sound that cuts through the mix.

Using Dynamic Eq To Control Problem Frequencies

One of the most common problems when working with kick and bass is that they can clash in the same frequency range, resulting in a muddy and undefined sound. A dynamic EQ is a useful tool to control these problem frequencies and allow each element to sit more clearly in the mix.

FREQUENCY (Hz) RANGE (dB) ATTACK (ms) RELEASE (ms)
50-60 -1 to -2 10 100
100-120 -3 to -4 20 200
200-240 -5 to -6 30 300
  • Start by identifying the frequencies that clash between kick and bass.
  • Insert a dynamic EQ on the bass track and set the threshold to detect when the problematic frequency is present.
  • Adjust the range of the dynamic EQ to attenuate the frequency only when it clashes with the kick.
  • Tweak the attack and release settings to ensure a smooth and natural attenuation.
  • Repeat the process on the kick track until both elements sit well together in the mix.

Using Harmonic Distortion To Warm Up The Low End

Harmonic distortion is a powerful tool to add warmth and character to your low-end. The saturation effect of distortion can bring out the harmonics of the bass and kick and create a more pleasing and full sound.

Here’s how to use harmonic distortion:

  1. Insert a distortion plugin on the bass track.
  2. Start with moderate settings and gradually increase the drive until the sound starts to distort.
  3. Adjust the tone control to emphasize the desired harmonic frequencies.
  4. Blend the distorted bass with the clean signal until you achieve the desired warmth and character.
  5. Repeat the process on the kick track to add further harmonics.

Automating Eq Changes To Add Variation

Adding variation to your mix is essential to keep it interesting and engaging. Automating EQ changes on the kick and bass can help you create variation while maintaining a cohesive sound.

Here’s how to automate EQ changes:

  • Identify the sections of your track that require variation.
  • Insert an EQ plugin on the kick or bass track.
  • Create EQ settings that differ from the original sound.
  • Automate the EQ plugin to change the settings in the desired section of the track.
  • Repeat the process on other sections to create more variation.

These advanced EQ techniques for kick and bass can help you achieve a powerful and prominent low-end while maintaining a clean and defined sound. Use them wisely and experiment with different settings to find the perfect balance for your mix.

Tips For Monitoring Low End Eq


Achieving a powerful low end in your mix requires careful EQing of both the kick and bass. When monitoring the low end, listen on multiple playback systems to get a clear understanding of how the EQ is affecting the overall mix.


It’s also important to trust your ears and use EQ adjustments sparingly to avoid muddiness.

Monitoring low end EQ is crucial to achieving a powerful and balanced mix. Without proper monitoring, it’s easy to end up with a muddy mix that lacks clarity and punch. Here are some tips for monitoring low end EQ.

Checking The Low End On Different Systems

To get a more accurate idea of how the low end of your mix is translating across various systems, it’s important to listen to your mix on different playback devices. This can include car speakers, phones, laptops, and studio monitors. Each system has its unique sonic characteristics, and listening to your mix on them will provide a more rounded idea of how it’s sounding.

Monitoring Headphones

Headphones are great for monitoring low end because they isolate external noise and allow you to hear specific frequency ranges more clearly. But it’s essential to know the characteristics of your headphones. Some headphones emphasize the bass frequencies, while others may make the low end sound dull. It’s essential to know how your headphones sound to make accurate EQ decisions.

Using Spectrum Analyzers To Guide Eq Decisions

Spectrum analyzers are a handy tool for guiding EQ decisions when mixing low end frequencies. They provide a visual representation of the frequency spectrum, allowing you to see where frequencies are building up or where there are gaps in the low end. This information will help you decide which frequencies need boosting or cutting. When using a spectrum analyzer, it’s essential to keep an eye on the phase relationship between the kick and bass. These two elements should work together to provide a strong low end. If the phase relationship between them is out of sync, you’ll end up with a weak and unstable low end. In conclusion, monitoring low end EQ is vital to achieving a balanced and powerful mix. By listening to your mix on different systems, using headphones, and utilizing spectrum analyzers, you’ll be able to make more accurate EQ decisions. Keep practicing, experimenting, and listening to reference tracks to fine-tune your mixing skills.

How To Eq Kick And Bass For Powerful Low End


Credit: www.productionmusiclive.com


Common Mistakes In Eqing Kick And Bass


Eqing kick and bass for a powerful low end is crucial for any track, but it can be easy to make mistakes. Common mistakes include using too much low end, not side-chaining properly, and not considering the tonal relationship between the two elements.

When it comes to mixing music, the kick drum and bass guitar are two of the most crucial elements in creating a powerful low end. However, EQing them can be challenging, and mistakes are common. In this section, we will explore some common mistakes in EQing kick and bass, including over EQing and making things worse, not listening in context and ignoring other instruments, and not considering the style of music and sonic expectations.

Over Eqing And Making Things Worse

One of the most common mistakes in EQing kick and bass is over-EQing. It’s easy to get carried away with the EQ and end up making things worse instead of better. Boosting too much in the low end can lead to a muddy and boomy mix while cutting too much can result in a thin and weak sound. The key is to find the sweet spot by making subtle adjustments and listening carefully to how it fits in the mix. A helpful tip is to start with a low Q and low gain settings and gradually increase until you achieve the desired sound.

Not Listening In Context And Ignoring Other Instruments

Another mistake is not listening in context and ignoring other instruments. The kick and bass may sound great on their own, but they should complement the other instruments in the mix. For instance, if there’s a prominent guitar riff that occupies the midrange, boosting the bass in that frequency range would only clutter the mix and make it harder for the guitar to cut through. A good practice is to solo the kick and bass together and listen to how they blend with other tracks.

Not Considering The Style Of Music And Sonic Expectations

Lastly, not considering the style of music and sonic expectations can lead to disappointing results. For example, in a metal track, it’s common to have a scooped midrange, boosting the low end and high end. However, in a jazz or funk track, a balanced and round sound works better. It’s important to understand the genre of music and the listener’s expectations when EQing the kick and bass. A useful approach is to compare your mix with a reference track and adjust accordingly. In conclusion, EQing kick and bass takes practice, patience, and careful listening. Avoiding these common mistakes and developing a disciplined approach will help you achieve a powerful low end that enhances the overall mix.

Frequently Asked Questions For How To Eq Kick And Bass For Powerful Low End


How Do You Eq Out Low End?


To EQ out low end, use a high-pass filter to cut off frequencies below the desired range. Adjust the cutoff frequency and slope to achieve the desired effect. Using a spectrum analyzer, identify the frequency range of the low end and use a narrow Q to zone in on the target frequencies.


Always use caution when cutting low end to avoid losing essential elements of the mix.


How Do You Eq Bass And Kick Together?


To EQ bass and kick together, start by identifying their frequencies and cutting any clashing frequencies on one or both tracks. Boosting the bass and using a sidechain compressor on the kick can also help create separation. Use a spectrum analyzer and your ears to find the sweet spot where they complement each other.


What Is The Ideal Eq For Kick Drum?


The ideal EQ for a kick drum is generally a boost in the low end, around 60-80 Hz, to enhance the bass tone and a cut in the midrange, around 300-500 Hz, to remove any muddiness. A boost in the high end, around 2-4 kHz, can also bring out the beater or attack of the kick drum.


What Db Should Kick And Bass Be?


Kick and bass should be between 60-100 dB, depending on the music genre and the desired effect. It is essential to strike a balance between the two, so neither overpowers the other.


Conclusion


To sum up, a powerful low end in music production is essential to create a balanced and impactful audio experience. EQing kick and bass sounds might seem daunting at first, but with practice and patience, anyone can achieve great results.


Remember to start with cutting unwanted frequencies, boost the sweet spots, and use complementary sounds to fill the mix. Follow these tips and let your low-end rumble with power and clarity. Keep on experimenting and defining your own sound!

More in our EQ guide.

Categories
Archive

Alesis Vi Review

The Alesis Vi is an impressive digital piano that offers exceptional sound quality and a realistic playing experience. It is perfect for both beginners and professional musicians, thanks to its wide range of features and easy-to-use interface.


With its weighted keys, realistic piano sound, and versatile connectivity options, the Alesis Vi is a top choice for anyone looking for a high-quality digital piano. Whether you’re practicing at home or performing on stage, this instrument delivers a remarkable playing experience that is sure to impress.

Alesis Vi Review


Credit: ask.video


Features And Specifications

In this section, we will delve into the in-depth features and specifications of the Alesis Vi, offering insights into its hardware and software capabilities. Understanding the intricacies of its components and technical details can greatly aid in making an informed decision when considering this versatile musical tool.

Hardware Features

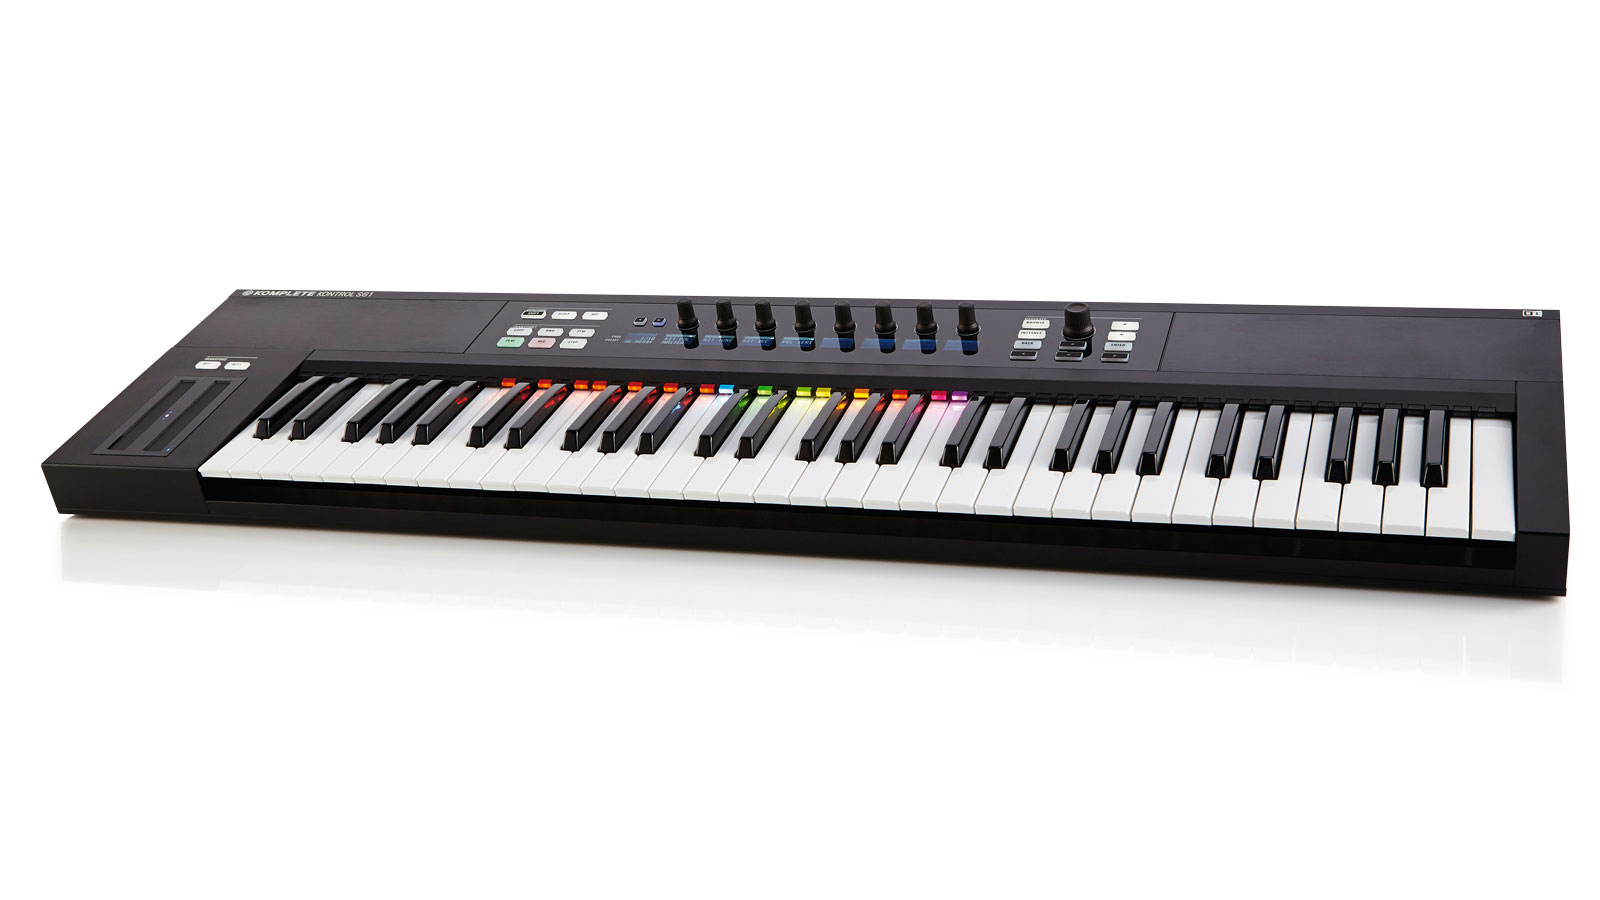
The Alesis Vi boasts a robust array of hardware features designed to elevate the music production experience. Some notable attributes include:

  • 49 or 61 semi-weighted, velocity-sensitive keys
  • 16 RGB-backlit, assignable pads for dynamic performance control
  • Assignable faders and knobs for precise parameter manipulation
  • Full RGB-backlit control surface for enhanced visibility in any environment
  • Sustain and expression pedal inputs for nuanced playing expression
  • MIDI output for controlling external devices

Software Specifications

Complementing its impressive hardware, the Alesis Vi also offers a comprehensive suite of software specifications that ensure a seamless integration with digital audio workstations (DAWs) and other music production software. These include:

  1. Inclusion of Ableton Live Lite and Xpand!2 software for immediate music creation
  2. MPC Beats for innovative beat production
  3. Automatic mapping and setup with most DAWs for hassle-free use
  4. Customized user settings for an adaptable and personalized workflow
  5. Compatibility with Mac, PC, and iOS devices for versatile connectivity
Alesis Vi Review


Credit: m.youtube.com


Design And Build

Discussing the Design and Build of the Alesis Vi is crucial to understanding its overall performance and user experience.

Physical Design

The Alesis Vi features a sleek and modern design that appeals to musicians of all genres.

Durability And Construction

Constructed with high-quality materials, the Alesis Vi is built to withstand the rigors of daily use.

Performance

The performance of the Alesis Vi is truly outstanding, making it a top choice for musicians and producers alike. With its exceptional sound quality and versatile performance capabilities, it delivers an immersive and professional experience for users.

Sound Quality

The Alesis Vi is renowned for its impeccable sound quality, setting it apart from other MIDI keyboards in the market. With its high-definition audio output and precision-engineered technology, every note you play will be crystal clear and rich in detail.

Its advanced sampling algorithms ensure that the synthesized sounds are indistinguishable from their real counterparts, allowing you to create realistic and lifelike music. Whether you’re producing EDM tracks or recording classical compositions, the Alesis Vi will exceed your expectations in terms of sonic fidelity.

Versatility In Performance

One of the key highlights of the Alesis Vi is its remarkable versatility in performance. It offers a wide range of features and functions that enable you to explore different musical genres and styles effortlessly.

With its extensive library of built-in sounds and instruments, you’ll have access to an endless array of tones and textures. Whether you’re looking for a warm and mellow piano sound or a gritty and aggressive synth lead, the Alesis Vi has got you covered.

In addition to its vast sound library, the Alesis Vi also allows for seamless integration with popular digital audio workstations (DAWs) such as Ableton Live and Logic Pro. This enables you to take advantage of advanced production techniques and workflow enhancements to bring your musical ideas to life.

Moreover, the Alesis Vi offers a wide range of connectivity options, including USB, MIDI, and audio outputs. This allows you to connect and control external devices such as synthesizers, drum machines, and effects processors effortlessly. Whether you prefer to work with hardware or software instruments, the Alesis Vi provides a flexible and adaptable platform for your creative endeavors.

When it comes to performance, the Alesis Vi shines with its exceptional sound quality and versatile capabilities. Whether you’re a seasoned professional or a budding musician, this MIDI keyboard will undoubtedly elevate your musical creations to new heights.

Alesis Vi Review


Credit: m.youtube.com


User Experience

The user experience of the Alesis Vi is designed to provide musicians and producers with a seamless and intuitive workflow. From its ease of use to its user interface, every aspect is carefully crafted to enhance creativity and productivity. Whether you are a beginner or a seasoned professional, the Alesis Vi offers a user-friendly experience that allows you to focus on your music.

Ease Of Use

The Alesis Vi is incredibly easy to use, making it accessible to musicians of all levels. With its intuitive layout and well-designed controls, you can quickly navigate through the various functions and features. Whether you are adjusting the volume, changing instrument parameters, or applying effects, the Vi puts everything at your fingertips. Its ergonomic design ensures that you can comfortably play and operate the keyboard for extended periods without fatigue.

User Interface

The user interface of the Alesis Vi is thoughtfully designed to provide a seamless and efficient experience. The backlit LCD display provides clear and concise feedback, allowing you to easily see the settings and parameters at a glance. The layout of the buttons and knobs is logical and intuitive, ensuring that you can effortlessly access all the necessary functions while performing or recording. Whether you are a technical wizard or prefer a plug-and-play approach, the Vi’s user-friendly interface caters to your individual preferences and workflow.

Comparison With Competitors

When comparing the Alesis Vi with its competitors, it’s essential to highlight its unique features and advantages which set it apart in the market.

Comparison With Similar Models

The Alesis Vi excels when compared to other similar models due to its exceptional sound quality, ergonomic design, and ease of use for both beginners and experienced musicians. Unlike its competitors, the Alesis Vi offers a wide range of features at a competitive price point.

Advantages Over Competitors

One of the key advantages that the Alesis Vi holds over its competitors is its versatile functionality, allowing users to adapt and customize the settings to suit their specific needs. Additionally, the durable construction of the Alesis Vi ensures long-term reliability compared to other models that may be more prone to wear and tear.

Pros And Cons


The Alesis Vi offers a range of features and functionality, making it a versatile option for musicians. However, some users may find it challenging to navigate the interface, and the build quality could be improved. Ultimately, it boils down to personal preferences and specific needs.

Introduction: Choosing the right audio interface is crucial for musicians and producers. The Alesis VI is a popular choice, known for its features and performance. Let’s explore the Pros and Cons of the Alesis VI.

Advantages Of Alesis Vi

– High-Quality Audio: Provides clear and crisp sound output. – Versatility: Suitable for a wide range of musical instruments. – Multiple Inputs: Allows for connecting various devices simultaneously.

Disadvantages And Limitations

– Limited Preamp Quality: Lower preamp quality compared to some higher-end models. – Software Compatibility: Some users experience issues with certain DAW software. In summary, the Alesis VI offers high-quality audio and versatility, but some users may find limitations in preamp quality and software compatibility.

Frequently Asked Questions For Alesis Vi Review


Does Alesis Vi61 Have Aftertouch?


Yes, the Alesis VI61 keyboard does have aftertouch. It allows you to vary the pressure on the keys to achieve different levels of control and expression while playing. This feature enhances your playing experience by giving you more dynamic and nuanced performances.


Is Alesis A Good Midi?


Yes, Alesis is a reliable MIDI brand known for quality products and affordable prices that cater to musicians of all levels.


What Are The Pros And Cons Of Alesis V25?


The Alesis V25 offers compact size, easy portability, and versatile MIDI functionality for music production. It’s affordable and has responsive keys. However, the keys may feel a bit stiff for some users, and there have been occasional issues with the build quality.


Is Alesis V25 Plug And Play?


Yes, the Alesis V25 is plug and play, making it easy to set up and use without needing additional drivers or software. Just connect it to your computer and you’re ready to start creating music.


Conclusion


After exploring the features of the Alesis Vi, it is evident that this versatile mixer excels in performance and functionality. Whether you’re a beginner or a seasoned musician, the Alesis Vi offers a user-friendly experience that amplifies your music production endeavors.


Invest in the Alesis Vi for a seamless mixing experience.


Categories
Archive

How To Use Ableton To Export Multiple Tracks

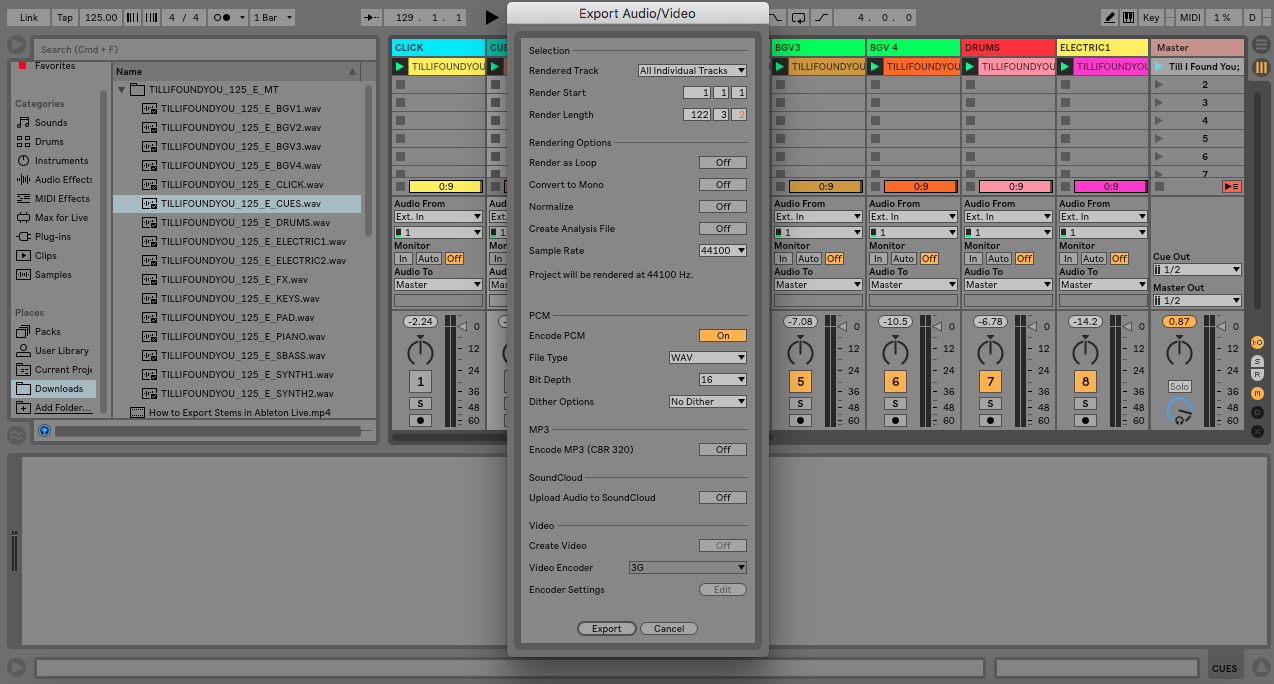
To export multiple tracks in Ableton, select all the tracks you want to export, then go to File > Export Audio/Video. In the Export Audio/Video window, choose “Individual Tracks” in the “Rendered Track” section, then select your preferred settings and click “Export.”


Also, Ableton Live is a powerful tool for music production and performance. It allows users to create, manipulate, and output audio with flexibility and ease. One of its most useful features is the ability to export stems at once. This can be a huge time-saver for producers and engineers who need to create stems or final mixes of their projects.

Related reading: How To Easily Export Individual Tracks In Cubase: Step-by-Step Guide and How To Easily Export Individual Tracks In Pro Tools: Step-by-Step Guide!. For background, see the Wikipedia article on Ableton Live.


However, exporting multiple tracks can also be a bit tricky, especially if you’re new to Ableton. Moreover, we’ll show you how to use Ableton to render tracks quickly and easily.


Set Up Multiple Tracks


In addition, learn how to bounce stems using Ableton by setting up individual audio channels for each element within your project. This allows for more flexibility in mixing and mastering with separate control over each track.

Furthermore, Set Up Multiple Tracks Exporting multiple audio tracks from Ableton can be a time-saver and give you the flexibility you need for your next project. Setting up your multiple tracks is the first step in the process. Follow these simple steps to get started. Create New Live Set The first step is to create a new live set. On your Ableton screen, click on “File” and select “New Live Set” from the dropdown menu. You can also use the keyboard shortcut CTRL+N (Windows) or CMD+N (Mac) to create a new set.

Additionally, add Audio Tracks The next step is to add audio tracks to your new live set. On the left-hand side of your Ableton screen, you will see various options. Click on “Audio” to reveal the audio tracks available. Select the number of tracks you want to create and drag them onto the workspace. You can also use the keyboard shortcut CTRL+T (Windows) or CMD+T (Mac) to add a new audio track. Label Tracks Once you’ve added your audio tracks, it’s important to label them to avoid confusion later on. To label the tracks, simply click on the “Audio Track Name” and type in your desired name. It’s a good idea to label them with descriptive names such as “Drums,” “Bass,” or “Lead Vocals.” Now that you’ve set up your multiple tracks and labeled them, the next step is exporting them. Keep in mind that exporting multiple tracks will take longer than exporting a single track, so be patient and let Ableton do its thing. With these tips, you’re well on your way to mastering Ableton Export.

How To Use Ableton To Export Multiple Tracks


Credit: www.reddit.com


Assign Output Routing for Export Multiple Tracks

Assign Output Routing:

Moreover, after you have selected external audio interface and assigned output channels, it is time to configure the settings to make sure your tracks are well balanced and ready to export.

Select External Audio Interface for Export Multiple Tracks

First, you need to select your external audio interface before you can assign output channels. Go to Live’s preferences and select the audio tab. Under the audio input/output heading, select your preferred audio interface. Every audio interface has its own input and output channels, so make sure you select the correct one that you’re using.

Assign Output Channels for Export Multiple Tracks

Once you have selected the appropriate audio interface, it’s time to assign output channels to each track that you want to export. Assign every track to its own output channel to isolate the individual sounds. To assign the output channels, right-click on the track’s nameplate and select “Group”.

Configure Settings in Export Multiple Tracks

Additionally, now that you have assigned output channels to each track, you can configure the settings to ensure that each track is well balanced. Make sure the volume faders on each track are at the same level. If one track is louder than the others, it may cause distortion. To avoid this, make sure the tracks blend well together.

By following this simple guide, you will be able to use Ableton to export multiple tracks with ease. Now that you’ve assigned output channels to each of your tracks and configured the settings, you’re ready to export!

Exporting Options


Moreover, learn how to easily export multiple tracks in Ableton with just a few simple steps. This tutorial will guide you through the exporting options available in Ableton to save time and ensure high-quality audio files.

If you’re working on a music production project, there’s going to come a time when you need to export your tracks. In addition, with Ableton, you have a range of exporting options available to you. In this article, we’ll cover the different methods you can use for exporting stems, exporting audio, and exporting the master track.

Exporting Stems

Furthermore, exporting stems is the process of separating all the different elements of your track into individual audio files. This is particularly useful if you want to give other people access to your project for mixing, or if you want to remix your own track. To export stems in Ableton, follow these steps:

  1. Additionally, select all the tracks you want to export
  2. Also, right-click on one of the clips
  3. Select “Group” then “Group Tracks”
  4. Moreover, open the “Export Audio/Video” dialog box
  5. In addition, select “Groups & Tracks” in the “Rendered Track” section
  6. Furthermore, select the tracks you want to export
  7. Choose your file format and destination folder
  8. Click “Export”

Exporting Audio

If you want to export your entire project as a single audio file, you can use the “Export Audio/Video” dialog box. This feature is useful if you want to upload your track to a streaming platform or distribute it to others. Here’s how you export your Ableton project as audio:

  1. Go to the “File” menu
  2. Select “Export Audio/Video”
  3. Choose your file format
  4. Set the desired sample rate and bit depth
  5. Choose a destination folder
  6. Click “Export”

Exporting Master Track

If you want to export just the master track – i.e., the final mix of your project – you can do that too. This is useful if you’re collaborating with someone who will do the mastering for you, or if you want to master the track in a different software. To export the master track in Ableton, follow these steps:

  1. Make sure only the Master track is selected
  2. Go to the “File” menu
  3. Select “Export Audio/Video”
  4. Choose your file format
  5. Set the desired sample rate and bit depth
  6. Choose a destination folder
  7. Click “Export”

In conclusion, Ableton is an incredibly powerful tool for music production, and its exporting options are just as versatile. By using the techniques outlined above, you can export your tracks in a range of different ways to suit your needs.

How To Use Ableton To Export Multiple Tracks


Credit: loopcommunity.com


Mixdown Preparation for Export Multiple Tracks


Learn how to efficiently use Ableton for mixdown preparation by exporting multiple tracks. This helpful process can streamline your workflow and ensure your final mix is polished and ready for release.

Exporting multiple tracks from Ableton can be a daunting task, especially if you are not prepared. The key to success is to be organized and have a proper mixdown preparation strategy in place. Here are some essential steps to follow before exporting your tracks.

Volume And Panning for Export Multiple Tracks

Before exporting your tracks, it’s important to ensure that each track is properly leveled and panned. You don’t want any track to be too loud or too quiet, as this can affect the overall quality of your mix. Make sure each track has a consistent volume throughout the entire song and that each instrument is properly panned to sit in its own space in the stereo field.

Basic Mix Processing for Export Multiple Tracks

After leveling and panning your tracks, it’s important to address any other basic mix processing that may be necessary. This could include tasks such as EQing individual tracks to remove unwanted frequencies, adding compression to control dynamics, or adding reverb to create space. It’s important to always refer back to the overall vision for the song and make these adjustments accordingly.

Mastering

Mastering is the final step in the mixdown preparation process. This is where you ensure that your final mix is optimized for playback on different systems and platforms. Once your mix is finalized, you can begin mastering by adding a limiter to control peaks and a maximizer to increase the overall loudness of your track. The goal is to create a cohesive and balanced mix that is ready for distribution.

Example of Mixdown Preparation Checklist:

  • Level and pan tracks.
  • Apply basic mix processing.
  • Finalize mix by mastering.

By following these steps for Mixdown Preparation, you’ll be able to export multiple tracks from Ableton with ease and confidence. Remember to always stay organized and pay attention to the details, as these small adjustments can make a big difference in the overall quality of your final mix.

Export Settings


Learn how to properly export multiple tracks in Ableton with the Export Settings feature. This feature allows you to choose the appropriate options for your export, such as the file format and track selection, ensuring that your final export is exactly what you want.

Exporting multiple tracks in Ableton can be a time-saving process when compared to exporting individual tracks one by one. The Export Settings is one of the crucial steps in the process of exporting multiple tracks. In this section, we will take a closer look at the different export settings involved in exporting multiple tracks in Ableton, such as File Format, Bit Depth, and Sample Rate.

File Format for Export Multiple Tracks

File Format is an essential setting that affects the quality and compatibility of the audio files you export. Ableton Live provides multiple file formats to choose from, including WAV, AIFF, MP3, FLAC, and OGG. WAV and AIFF are lossless formats, which means they preserve the quality of the original audio. MP3, FLAC, and OGG are lossy formats, which means they reduce the file size by sacrificing some audio quality. When exporting multiple tracks, it is important to select a file format that suits your needs and preferences.

Bit Depth

Bit Depth refers to the number of bits of information in each sample of an audio file. The higher the Bit Depth, the more accurate the representation of the original audio. Ableton provides different Bit Depth options, such as 16-bit, 24-bit, and 32-bit. Generally, 24-bit is the standard for high-quality audio. When you export several tracks, pick a Bit Depth that matches the original audio files.

Sample Rate

Sample Rate is the frequency at which samples are taken from an audio signal. Higher Sample Rates provide a higher frequency range and better audio quality. Ableton allows you to select different Sample Rate options, such as 44100 Hz, 48000 Hz, and 96000 Hz. 44100 Hz is the standard Sample Rate for CDs, while 48000 Hz is the standard Sample Rate for digital audio. When exporting multiple tracks, you should choose a Sample Rate that matches the original audio files. Overall, understanding the Export Settings in Ableton Live is essential for exporting multiple tracks quickly and efficiently. By choosing the right File Format, Bit Depth, and Sample Rate, you can ensure that your exported audio files are of high quality and compatible with a wide range of devices and platforms.

Export Process


To export multiple tracks from Ableton, first select the tracks you wish to export. Then, go to the “File” menu and click “Export Audio/Video”. Finally, choose your preferred settings and click “Export” to complete the process. With these simple steps, exporting multiple tracks has never been easier.

Exporting multiple tracks in Ableton might seem like a daunting task, but it is a simple process that you can master with a little practice. In this guide, we will take a look at each step involved in exporting multiple tracks in Ableton. We will discuss checking levels, starting the export process, and naming & saving files in detail.

Checking Levels for Export Multiple Tracks

Before you start the export process, it’s essential to check the levels to ensure that the tracks are neither too loud nor too soft. If the tracks are too loud, they might clip and produce distortion. Similarly, if the tracks are too soft, the exported file may sound low and unprofessional. Here’s how to check levels:

  1. Select all tracks you want to export
  2. Click on the Master track
  3. Check that the master volume meter is not hitting the red and staying in the yellow zone
  4. Adjust each track’s volume so they are all balanced and don’t hit the red in the master meter

Starting Export

Now that you’ve checked the levels let’s begin the export process. Here are the steps involved:

  1. Go to the File menu and select Export
  2. Select ‘Selected Tracks’ in the Export window
  3. Choose the export settings that match your project’s requirements
  4. Click on ‘Export’ to start the process

Naming And Saving Files for Export Multiple Tracks

Once the export process completes, it’s time to name and save the files. Proper file naming and organization are essential to avoid confusion and locate files quickly. Here’s how to name and save files:

  1. Choose the folder where you want to save the exported tracks
  2. Name each file according to the track that it represents
  3. Select the file format that you want to export. The most common formats are WAV or MP3
  4. Click on the save button to save the individual tracks in the chosen folder.

By following these steps, you can successfully export multiple tracks in Ableton. Remember to check the levels before exporting and use proper file naming conventions to save the exported tracks correctly. Good luck!


How To Use Ableton To Export Multiple Tracks


Credit: help.ableton.com


Frequently Asked Questions On How To Use Ableton To Export Multiple Tracks


Can You Export Multiple Tracks At Once In Ableton?


Yes, you can export multiple tracks at once in Ableton by selecting the tracks you wish to export and clicking the “Export Audio/Video” option. From there, you can choose your settings and export all the selected tracks at once.


How Do I Export Tracks From Ableton?


To export tracks from Ableton, select the tracks you want to export and right-click on them. Then, choose the “Freeze Track” option. Once the tracks are frozen, right-click on them again and select “Flatten”. Finally, go to the “File” menu, select “Export Audio/Video”, and choose the desired settings before hitting “Export”.


How Do I Export All Clips In Ableton?


To export all clips in Ableton, go to the File menu and select “Export All Tracks as Audio Files”. Choose your desired location and format, then click “Export”. Ableton exports all clips as separate audio files.


How Do You Bounce All Tracks Separately In Ableton?


To bounce all tracks separately in Ableton, select the tracks you want to bounce, right-click on the track header, and choose “Freeze Track”. Once frozen, right-click again and choose “Flatten”. This will create a new audio clip for each track that can be exported as separate audio files.


Conclusion


Exporting multiple tracks in Ableton is an essential skill for any music producer. With these simple steps, you can seamlessly export all your tracks without compromising the quality of your final mix. Remember to check your settings, manage your files, and save your customized templates for future reference.


With Ableton, you have all the tools you need to create and export high-quality tracks that will impress your fans.

Categories
Archive

How To Choose The Perfect Kick For Your Track

To choose the perfect kick for your track, consider the genre and overall vibe. From there, experiment with different samples and adjust the EQ to fit in the mix.


Finding the perfect kick for your track can be challenging, but it’s crucial to the overall sound and success of your music. The right kick can make your track stand out, while the wrong one can detract from the overall sound.


To choose the perfect kick, you need to consider the genre and overall vibe of your track. For example, a heavy EDM track may require an aggressive, punchy kick, while a chill lo-fi beat may call for a softer, more subtle kick. It’s also important to experiment with different samples and adjust the EQ to fit in the mix. With these tips in mind, you can find the perfect kick to take your track to the next level.

How To Choose The Perfect Kick For Your Track


Credit: www.masteringthemix.com


Explore Different Kicks

Choosing the perfect kick for your track is crucial. It sets the tone and energy for your whole song. But with so many options out there, how do you know which one to choose? In this blog post, we will explore different kicks and how to choose the perfect one for your track.

Start By Identifying The Sub-genre You Want To Produce

The sub-genre of music you want to produce plays a significant role in helping you identify the perfect kick for your track. Different sub-genres of electronic music require different types of kicks. For instance, house music typically requires a deep, punchy kick with a fast attack and quick decay, while techno music requires a more aggressive, harder kick with a longer decay.

Experiment With Different Kicks To Understand Their Characteristics

The best way to understand the characteristics of different kicks is to experiment with them. Play around with different kicks in your DAW and listen to how they sound with your track. Try layering two different kicks together to create a unique sound. Take note of the attack, decay, sustain, and release (ADSR) of each kick, as these characteristics will affect how they blend with your track.

You can also try using equalization (EQ) to shape the sound of your kick. Boosting the low end of a kick can make it sound deeper and punchier, while reducing the high-end frequencies can make it sound softer and more mellow.

Consider The Key And Tempo Of Your Track

When choosing a kick, it’s essential to consider the key and tempo of your track. Kicks that are out of key or don’t match the tempo of your track can sound jarring and unprofessional. Ensure that the kick you choose complements and blends well with the rest of the elements in your track.

In conclusion, exploring different kicks, experimenting with their characteristics, and considering the key and tempo of your track are three essential steps when choosing the perfect kick for your track. By following these steps, you will be able to create a track that sounds cohesive, professional, and polished.

How To Choose The Perfect Kick For Your Track


Credit: flypaper.soundfly.com


Analyze Your Track


Learn how to choose the perfect kick for your track by analyzing it. Listening to your track and evaluating its rhythm, melody, and style can help determine the ideal kick to use, resulting in a more cohesive and polished finished product.

Identify The Key Of Your Track

The key of your track is the primary note or chord that creates a musical foundation for the melody and other supporting elements. To identify the key of your track, you need to listen carefully to the harmony, and determine where the song feels most “at home”. This is often the point where the chords or notes sound most resolved. Once you’ve identified the key, you can narrow down the range of kick drum sounds that work well with your track.

Analyze The Mood And Emotion Of The Track

It’s essential to analyze the mood and emotion of your track to select the perfect kick drum sound. Is your track happy, sad, or angry? Is it hopeful, optimistic or pessimistic? Analyzing these factors will ensure that you select a kick drum sound that resonates with the emotions that your track is trying to convey. Listen to your track, try to identify the emotions it evokes, and then choose a kick that complements and adds to that emotion.

Consider The Overall Energy And Intensity Of Your Track

When it comes to energy and intensity, it’s important to think about the overall feel of your track. Is it a chill, laid back vibe or a high-energy banger? Your kick drum should match the intensity of your track. If you’re making a high-energy dance track, you’ll want a kick drum that cuts through the mix and drives the rhythm forward. For a more laid-back track, the kick should be less prominent, but still provide the necessary groove. Consider the overall feel of your track, and choose a kick that works in harmony with the rest of your elements. Analyzing your track is essential to selecting the perfect kick. Consider the key, mood, and overall energy of your track. By doing so, you’ll be one step closer to creating the perfect sound that will keep listeners coming back for more.

Match The Kick To The Track


Choosing the perfect kick for your track can make or break your music production. Consider the tempo, genre, and personal style to match the right kick for your track. A well-suited kick can elevate the listening experience to a whole new level.

As a producer, it can be challenging to get your tracks to sound just right. Perhaps one of the most critical elements of any track is the kick drum. It sets the foundation for the entire song and provides the driving force behind the beat. With so many options available, picking the perfect kick can be a daunting task. However, by following a few simple tips, you can choose a kick that complements your track beautifully and takes it to the next level.

Choose A Kick That Complements The Key Of Your Track

When selecting a kick for your track, you should consider the key your track is in. Choosing a kick that complements the key of your track is a simple way to ensure that your track sounds cohesive and polished. Consider experimenting with different kick samples until you find one that blends with the other elements of your track seamlessly.

Select A Kick That Enhances The Mood And Emotion Of Your Track

In addition to complementing the key of your track, you should also select a kick that enhances the mood and emotion you’re trying to convey. For instance, if you’re creating a track that’s supposed to be uplifting and energetic, you might choose a kick with a bright and punchy sound. On the other hand, if you’re creating a more melancholy or introspective track, you might opt for a kick with a softer tone.

Ensure The Kick Matches The Energy And Intensity Of Your Track

Finally, you should ensure that the kick you choose matches the energy and intensity of your track. A track with a high tempo and intense sound requires a kick with a powerful and driving sound. Meanwhile, a track with a more relaxed pace may require a kick with a softer, more subdued sound. Be sure to experiment with different samples and adjust the volume, EQ, and compression to achieve the perfect balance. In conclusion, selecting the perfect kick drum for your track is essential to creating a polished and professional sound. By following these tips, you can choose a kick that complements the other elements of your track, enhances the mood and emotion you’re trying to convey, and matches the energy and intensity of the song. With a little patience and experimentation, anyone can find the perfect kick for their track!

Pay Attention To Eq


To choose the perfect kick for your track, it’s crucial to pay attention to the EQ. Use a spectrum analyzer to identify any unwanted frequencies and adjust accordingly. Experiment with different EQ settings until you find the right balance for your track.

When it comes to choosing the perfect kick for your track, paying attention to EQ is crucial. EQ, or equalization, involves adjusting the balance between different frequencies in your track. By using EQ effectively, you can enhance the sound of your kick and make it stand out in your mix. In this blog post, we’ll explore how you can use EQ to choose the perfect kick for your track.

Use Eq To Remove Unwanted Frequencies And Enhance The Desired Frequencies

The first step in using EQ to choose the perfect kick for your track is to remove any unwanted frequencies. You can do this by using a high-pass filter to cut out any low frequencies that are not necessary for your kick. Once you’ve removed these unwanted frequencies, you can enhance the desired frequencies by boosting them with a bell or peak filter. For example, if you want your kick to have more punch, you can boost the frequencies around 100Hz. Alternatively, you can lower frequencies that are too resonant or muddy to clean up your kick.

Adjust The Attack And Release Times To Better Fit Your Track

Another way to use EQ to choose the perfect kick for your track is to adjust the attack and release times. The attack time determines how quickly the kick’s volume rises, while the release time determines how quickly it drops. By adjusting these settings, you can better fit your kick to your track and make it more dynamic. For example, if you have a fast-paced track with a lot of quick beats, you may want to decrease the attack time to make the kick hit harder and faster. On the other hand, if you have a slower track, you may want to increase the release time to allow the kick to sustain more. In conclusion, when it comes to choosing the perfect kick for your track, paying attention to EQ is crucial. By using EQ to remove unwanted frequencies and enhance desired frequencies, as well as adjusting the attack and release times, you can create a kick that fits perfectly with your track.


Layer Multiple Kicks

If you are looking to create a unique and powerful sound in your track, layering multiple kicks is an effective and popular technique used by many professional producers. Layering different kicks together can help fill out the frequencies and improve the overall impact of your kick, resulting in a more dynamic sound that stands out among the competition.

Layer Different Kicks To Create A Unique Sound

When layering multiple kicks, it’s important to choose kicks that complement each other and create a cohesive sound. You can choose kicks with different tonalities, attack times, and decay times to create a more complex and interesting kick drum sample. The key is to experiment and find the right combination of kicks that work best for your track.

Use Layering To Fill Out The Frequencies And Improve The Impact Of The Kick

Layering multiple kicks can help fill out the frequency spectrum and make the kick drum sound larger and more impactful. By layering multiple kicks with different frequencies and harmonics, you can create a fuller sound that cuts through the mix and grabs the listener’s attention. Additionally, layering can also add more depth and texture to your kick drum, making it sound more interesting and engaging.

Overall, layering multiple kicks is a great technique to use when creating unique and powerful drums sounds for your track. By experimenting with different combinations of kicks, you can create a cohesive and interesting drum sound that will stand out from the crowd. So don’t be afraid to get creative and try new things. You just might discover the perfect kick that takes your track to the next level!

How To Choose The Perfect Kick For Your Track


Credit: m.youtube.com


Consider Compression And Saturation


When selecting the perfect kick for your track, consider compression and saturation. Compression can add punch and tighten up the sound while saturation can add warmth and harmonics to the kick. Strike a balance between the two to create a dynamic and powerful sound.

Choosing the perfect kick for your track can make or break the overall sound of your music. There are several factors to consider when choosing the right kick, such as the style of music, the tempo, and the mood you want to create. Among the most important factors to consider, however, are compression and saturation. By understanding how compression and saturation affect the sound of a kick drum, you can choose the perfect kick for your track and take your music to the next level.

Use Compression To Control The Dynamics And Improve Consistency

Compression is a popular mixing technique used to control the dynamics of a kick by reducing the level of the loudest parts while increasing the level of the quietest parts. In simpler terms, it ensures that all parts of the kick remain at a consistent level, making it easier to hear and mix with other elements of your track. Using compression on your kick can also add power, punch, and sustain to the sound, making it stand out in your mix. To use compression on your kick, start by setting a threshold that allows you to capture the louder parts of the kick. Then, set a ratio that determines how much you want to reduce the level of the kick once it exceeds the threshold. Finally, adjust the attack and release times to make sure the compression is reacting to the kick in the way you want. With a well-tuned compressor, you can make your kick drum sound more impactful, consistent, and professional.

Add Saturation To Bring Out The Harmonics And Add Warmth To The Kick

Saturation refers to the process of adding harmonic distortion to your kick to make it sound warmer, fuller, and more pleasing to the ear. By adding saturation to your kick, you can bring out the overtones and texture of the sound, making it sound more natural and relaxing. Saturation can also help your kick cut through the mix better, adding more definition and character to your track. To add saturation to your kick, start by using a saturation plugin or analog gear that allows you to control the amount of distortion you want to add. Then, adjust the settings until you find the sweet spot where the kick sounds warm and full without becoming too distorted or harsh. By using compression and saturation together, you can create the perfect kick for your track that is professional, impactful, and memorable.

Test The Kick In Context

Choosing the perfect kick for your track is important as it can either make or break the entire song. You don’t want to spend hours producing a track only to realize that the kick doesn’t fit. In this post, we’ll discuss how to choose the right kick for your track and what factors you need to consider. One of the most important steps in choosing the perfect kick for your track is testing it in context.

Test The Kick In Different Soundsystems And Environments

When choosing a kick for your track, it’s crucial to test it in different sound systems and environments. What might sound great in your studio might not sound as good in a club or on a different sound system. Therefore, it’s important to test your track on different speakers and headphones. You can even take your track to different environments like a club or a car and test it there to get a better idea of how it sounds.

Make Adjustments Based On Feedback And Perception Of The Kick In Context

Once you have tested your kick in different environments and sound systems, it’s time to make adjustments based on feedback and your perception of the kick in context. If the kick doesn’t sound as good in certain environments, you might need to adjust the EQ or compression. You can also try layering the kick with other samples or processing it with effects like distortion or saturation to make it stand out more.

Final Thoughts

Testing the kick in context is essential when it comes to choosing the perfect kick for your track. Keep in mind that every sound system and environment is different, and what might sound great in one might not in another. Make sure to test your track in different environments, gather feedback, and make adjustments based on your perception. These steps will ensure that you choose the perfect kick for your track, and your listeners will appreciate it!

Frequently Asked Questions For How To Choose The Perfect Kick For Your Track


What Should My Kick Be Tuned To?


Your kick’s pitch should be determined by the key of the song and the musical genre. It’s recommended to tune the kick drum between 60Hz to 100Hz for pop and rock music, and between 30Hz to 60Hz for techno and dance music.


However, always trust your ears when tuning your kick drum.


How Do I Choose A Kick Drum?


When choosing a kick drum, consider the sound you want to achieve, the size and material of the drum, the beater type, and your budget. Test different options before buying to ensure the best fit for your needs.


What Makes A Good Kick Sound?


A good kick sound is achieved by a combination of factors, including the type of drum used, its size and tuning, microphone placement, and production techniques. Ideally, a kick should have a deep, punchy sound with a defined attack and sustain.


EQ and compression can also be used to enhance the sound and create a fuller, more balanced mix.


What Level Should Your Kick Be?


Your kick level should depend on the specific situation. Generally, it should be aimed at the mid to upper thigh or hip area, with enough force to make contact and potentially knock down your opponent. However, the specific technique and force applied will vary depending on the fighting style and strategy being used.


Conclusion


Choosing the perfect kick for your track doesn’t have to be a daunting task. By understanding the different types of kicks and their sound characteristics, considering the genre of your track, and experimenting with different samples, you’ll be able to find the perfect fit.


Remember to also trust your instincts and listen to what sounds best to your ear. With these tips in mind, you’ll be well on your way to creating a kick that perfectly complements your music. Happy producing!

Categories
Archive

Presonus Studio One Review

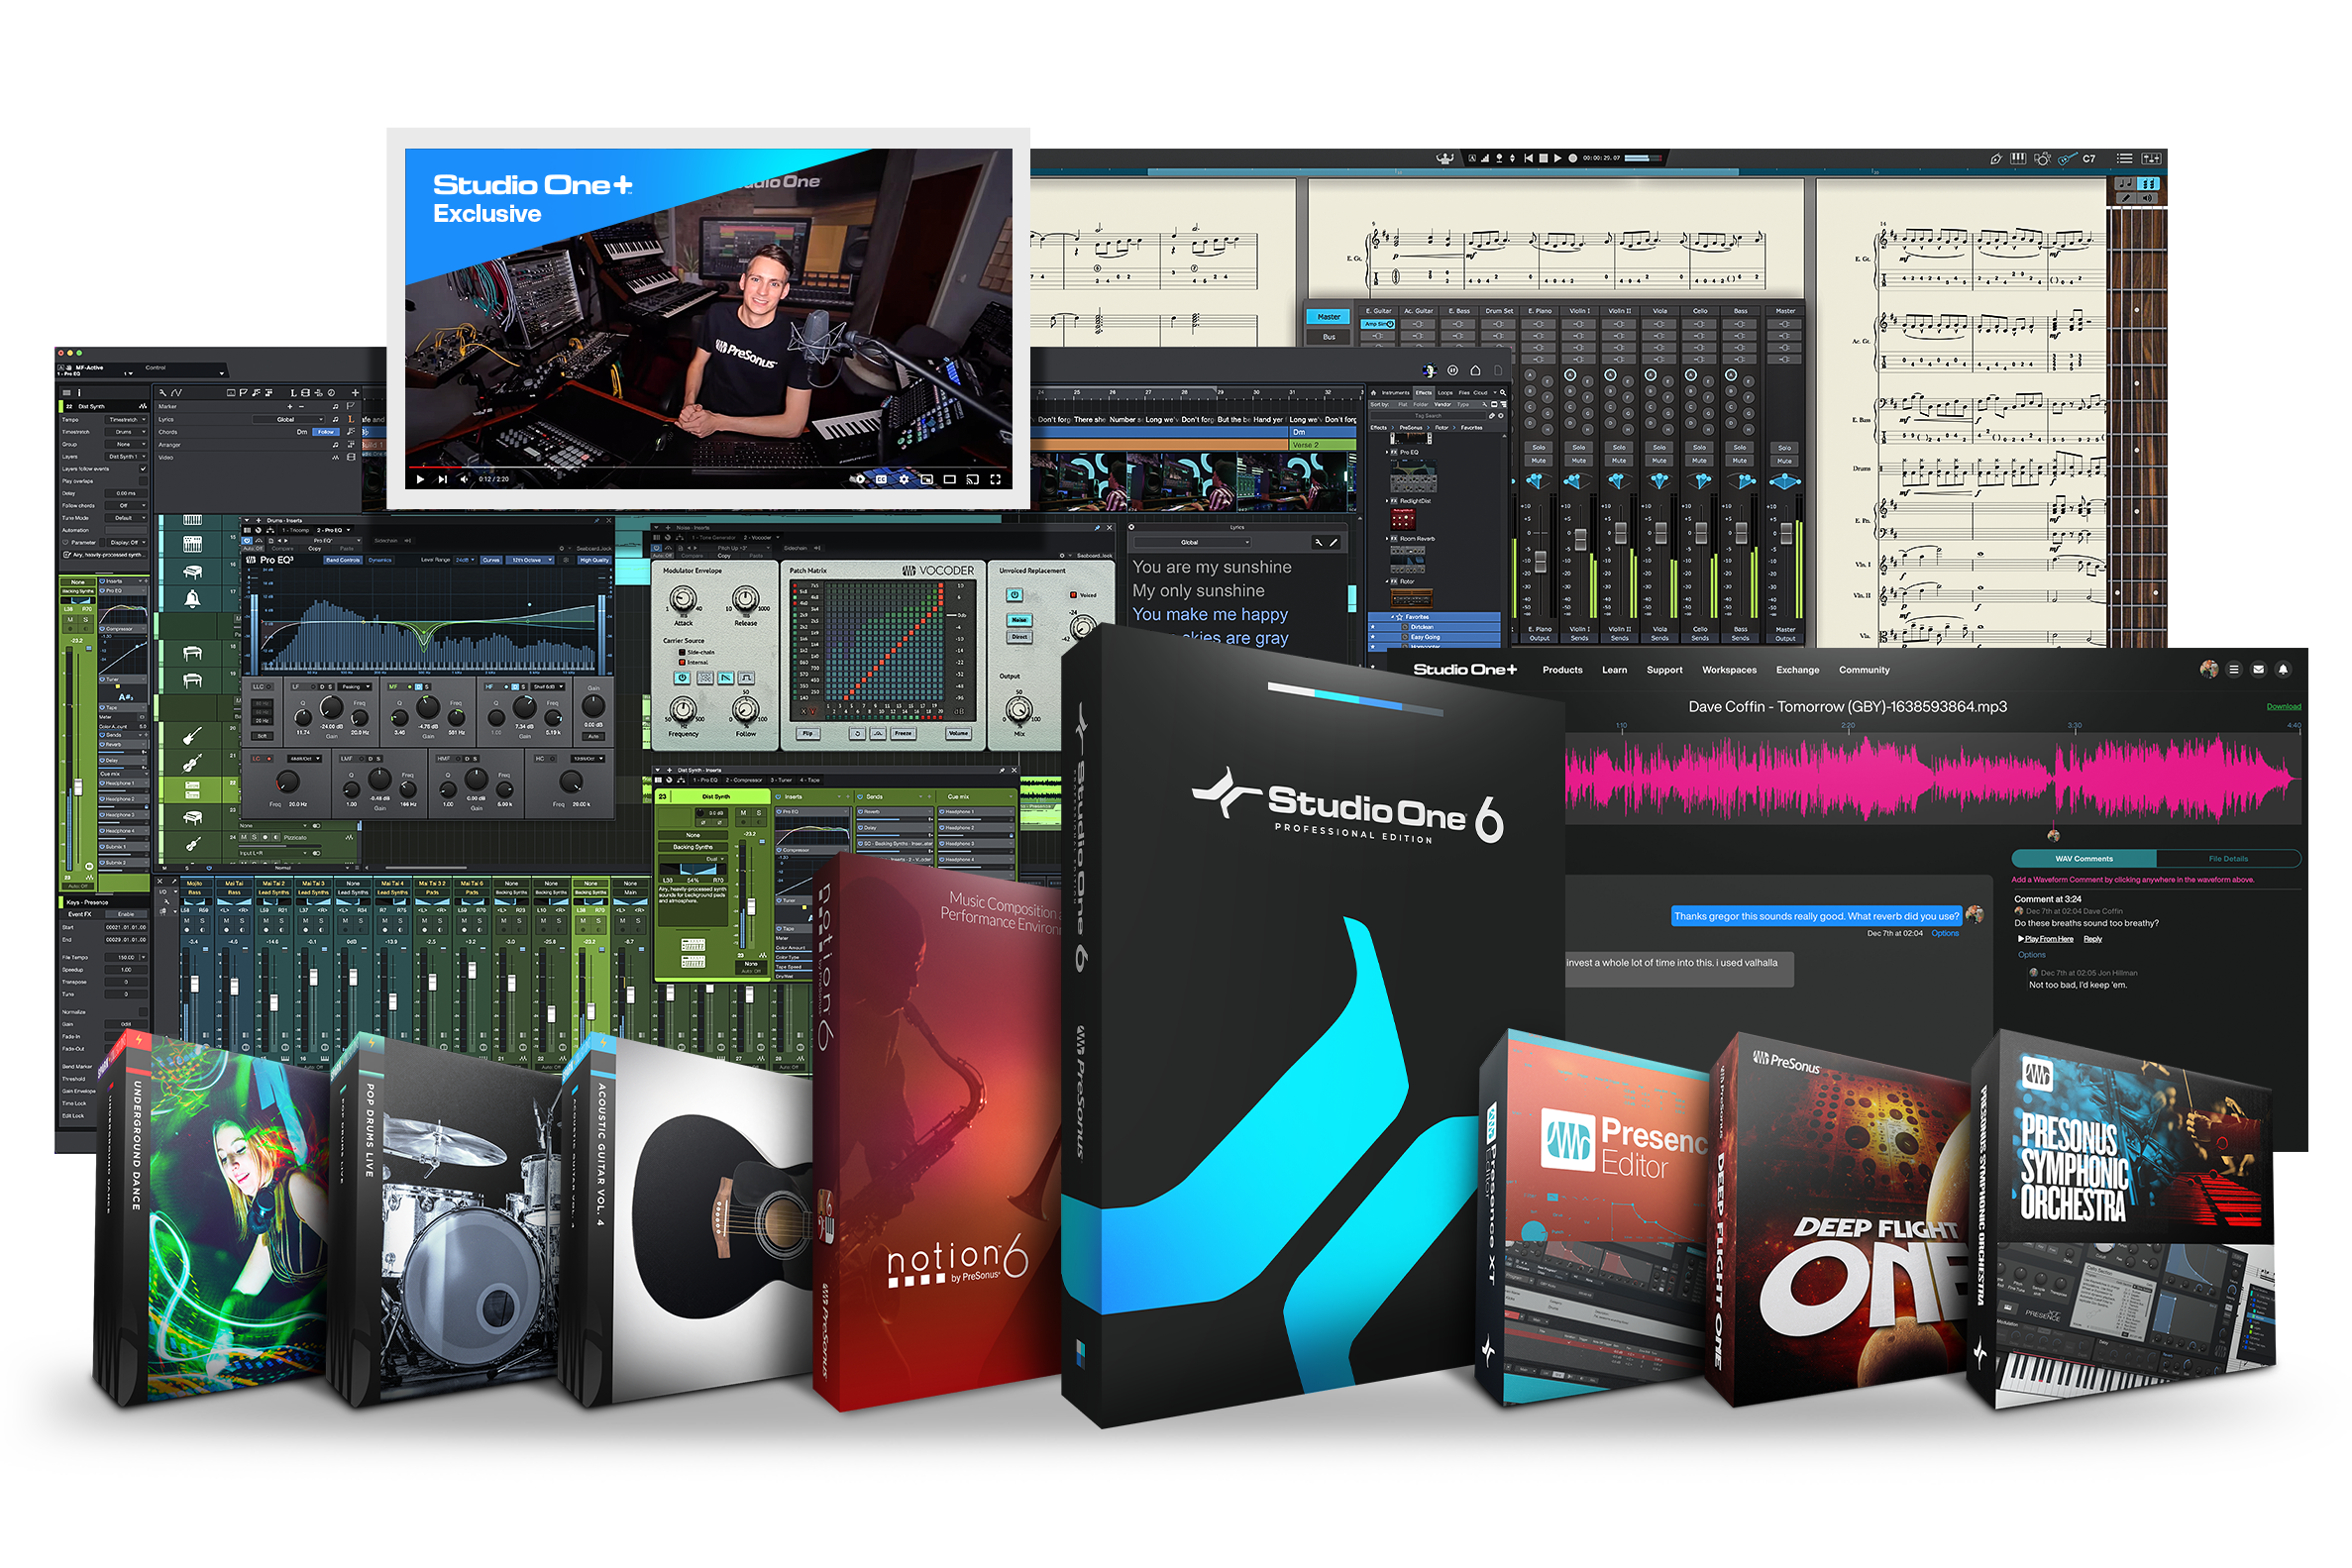
Presonus Studio One is a highly efficient and versatile music production software with intuitive features and a user-friendly interface. It offers a wide range of tools, effects, and instruments that cater to the needs of both beginners and professionals in the music industry.


Also, experienced engineers and musicians built Studio One. Also, it integrates smoothly with hardware and offers a large library of instruments and effects. Studio One has powerful audio and MIDI editing. Many musicians and producers prefer it for high-quality work.

Related reading: Studio One Review and Best Studio Headphones. For background, see the Wikipedia article on Studio One.

Presonus Studio One Review


Credit: musictech.com


Key Features for PreSonus Studio One

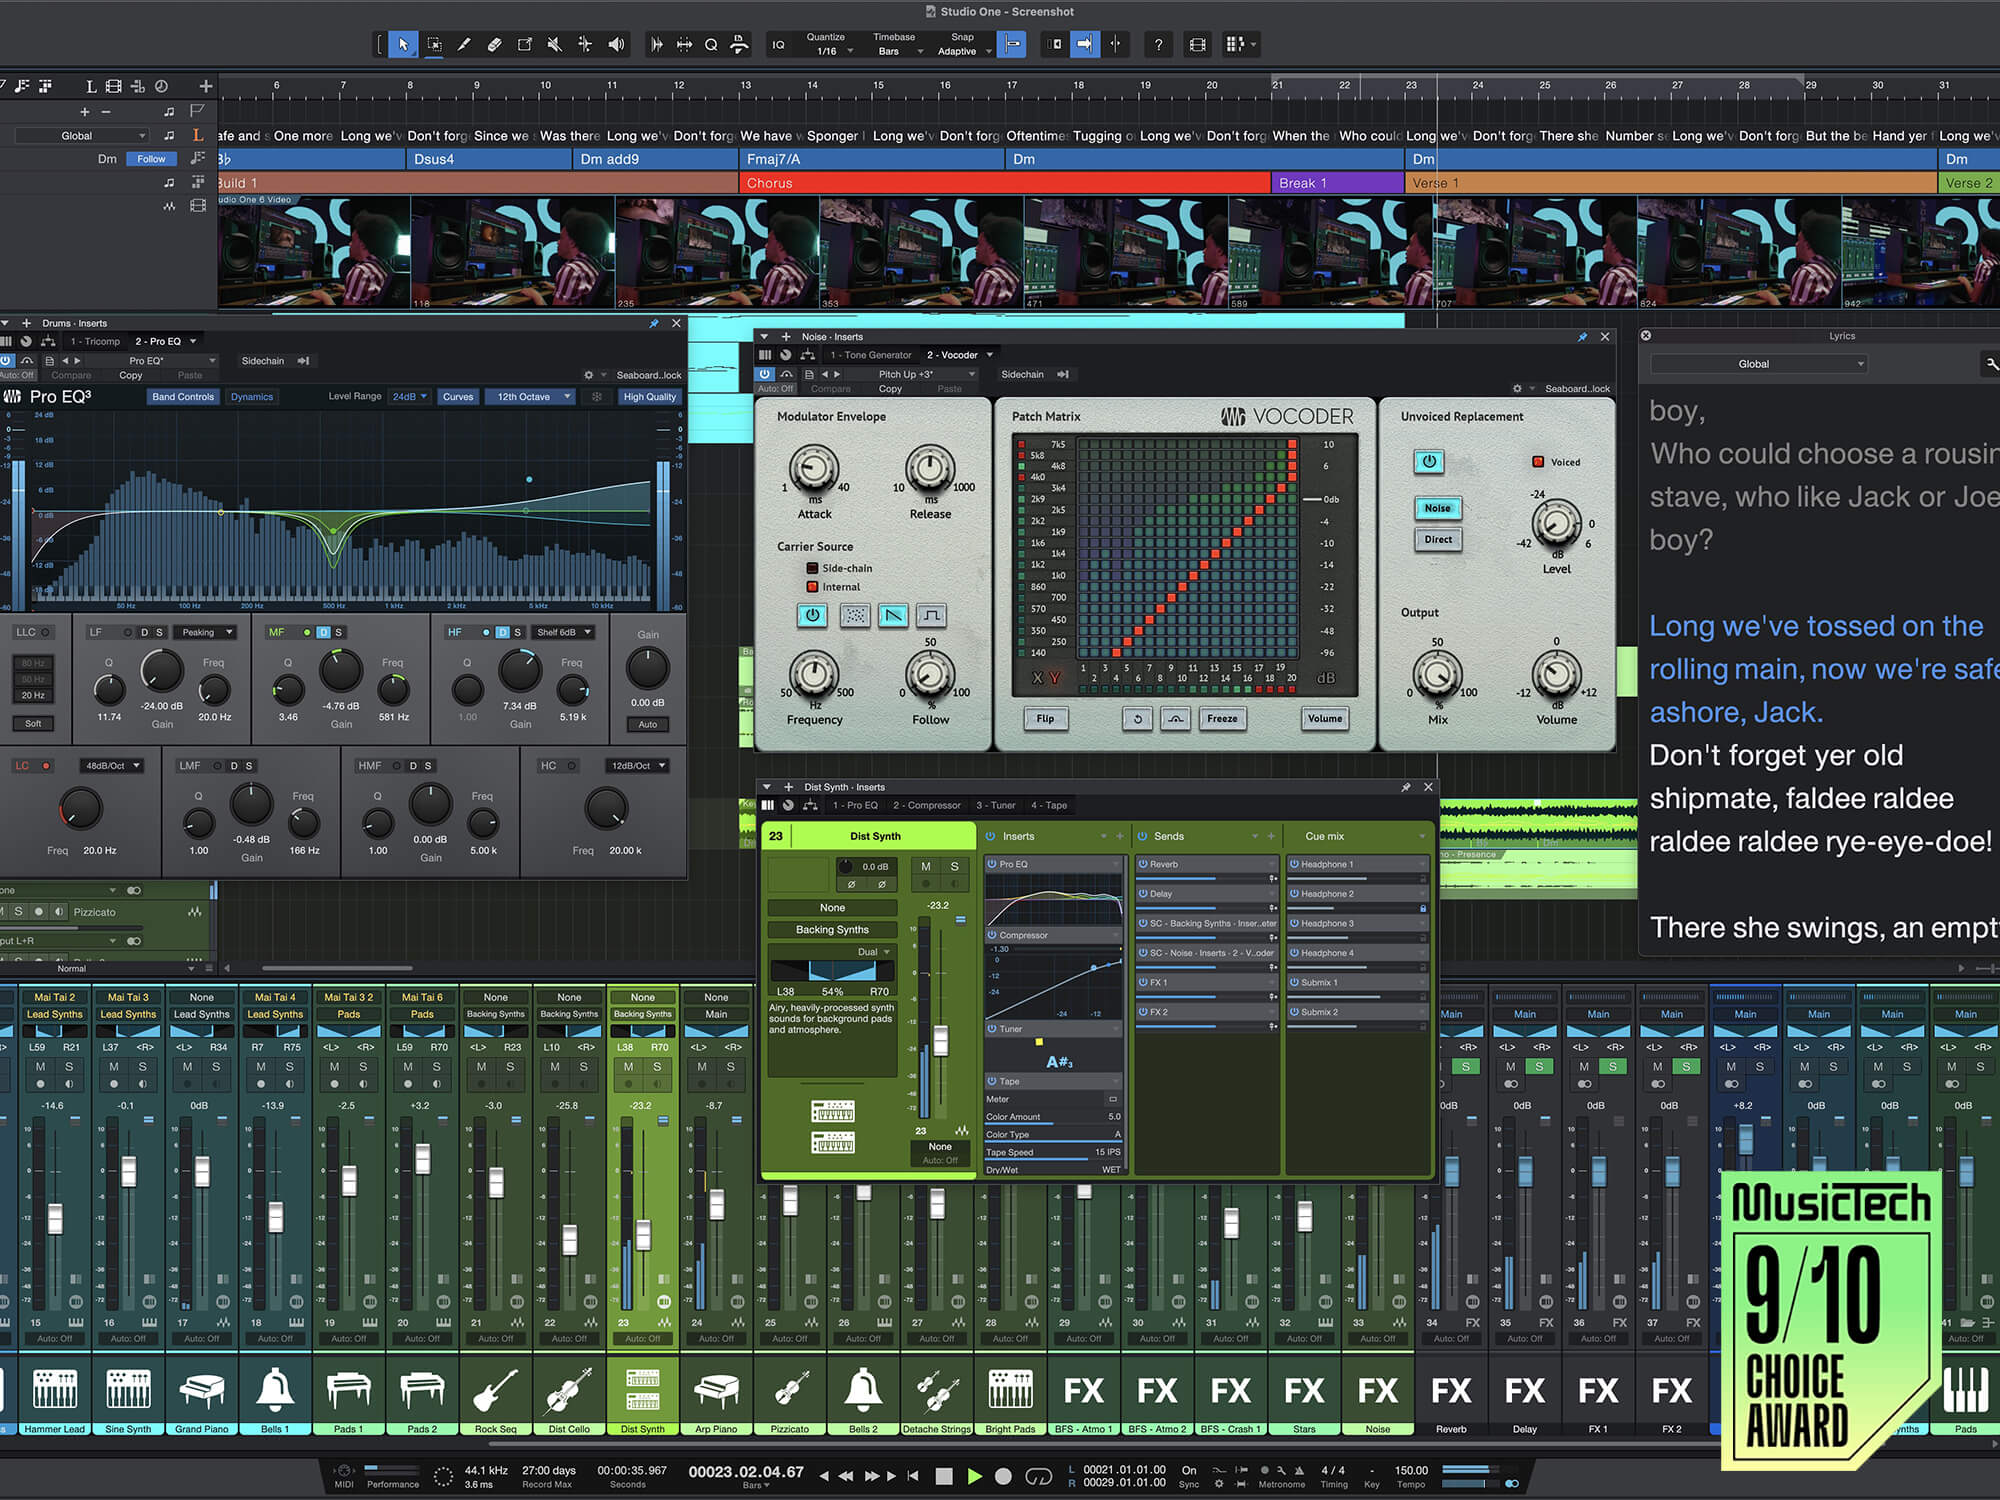
When it comes to music production software, Presonus Studio One stands out as a top choice for both beginners and professionals. In addition, its array of features enables users to create, mix, and master music with precision and ease. In this review, we’ll delve into the key features that make Presonus Studio One a preferred tool for music production.

User-friendly Interface for PreSonus Studio One

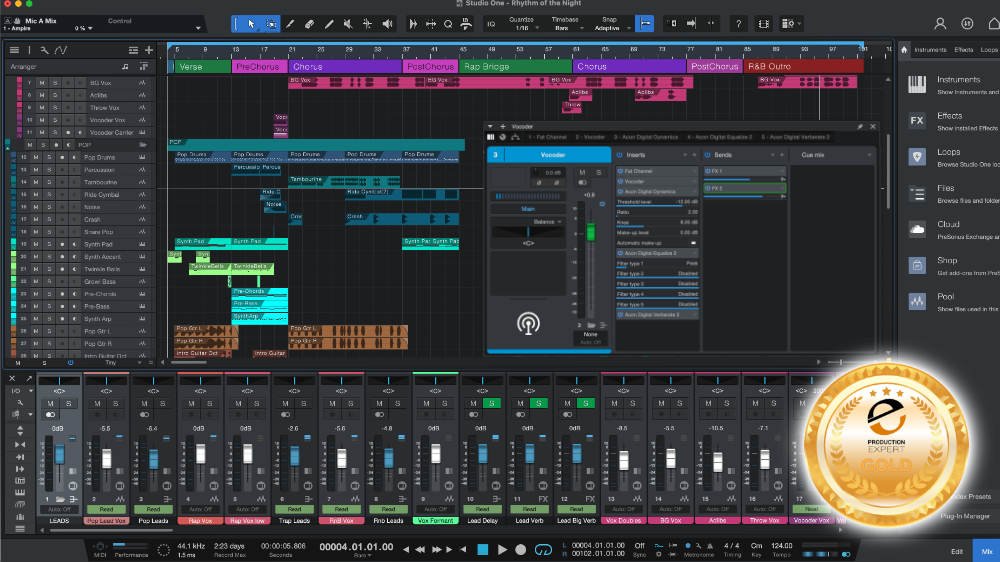
In addition, the software offers a sleek and intuitive interface, making it easy for both beginners and experienced users to navigate through the software. For example, the drag-and-drop functionality of the interface streamlines the workflow, allowing for seamless arrangement and placement of tracks and effects.

Advanced Audio Editing Tools for PreSonus Studio One

Furthermore, Studio One provides a comprehensive suite of audio editing tools, enhancing the precision and creativity of music production. With features like time-stretching, pitch correction, and melodyne integration, users can fine-tune their tracks with unparalleled accuracy.

Powerful Virtual Instruments And Effects for PreSonus Studio One

Additionally, Presonus Studio One comes with a wide range of virtual instruments and effects that cater to diverse music genres. Whether it’s synths, drums, or guitar effects, the software provides a plethora of options to enhance and customize the sound of each track.

Presonus Studio One Review


Credit: newatlas.com


Pros And Cons for PreSonus Studio One

When considering whether to invest in Presonus Studio One, it’s essential to weigh the advantages and drawbacks. Then, understanding the strengths and weaknesses of this software can help you make an informed decision.

Pros Of Using Studio One

  • Also, intuitive Interface: Studio One offers a user-friendly interface, making it easy for beginners to navigate and professionals to streamline their workflow.
  • Powerful Audio Editing: The software provides robust audio editing capabilities, including advanced features such as comping, pitch correction, and time-stretching.
  • Moreover, flexible Music Production: Studio One accommodates various musical styles ranging from electronic to orchestral, with comprehensive instrument and sample libraries.
  • In addition, extensive Plugin Support: The platform supports a vast array of third-party plugins, enhancing its versatility for sound shaping and creative experimentation.
  • Furthermore, integrated Arrangement and Mixing: Users can seamlessly move between arranging their music and mixing, thanks to Studio One’s cohesive environment.

Cons Of Using Studio One

  • Additionally, resource Intensive: Studio One may demand higher system resources, potentially affecting the performance of older or less powerful computers.
  • Also, steep Learning Curve: The interface is intuitive. Still, beginners need time to master the advanced features.
  • Moreover, price Point: In comparison to some other DAWs, Studio One’s professional version may appear pricier for those on a budget.
  • Compatibility Limitations: Despite its extensive plugin support, some users may encounter compatibility issues with certain third-party hardware or software.

Comparison With Other Daws for PreSonus Studio One

In addition, this section compares the DAW with other popular options. In short, it gives you a clearer view of its strengths.

Studio One Vs. Ableton Live

  • Workflow: Studio One prioritizes traditional recording workflow, while Ableton Live focuses on real-time performance and creativity.
  • Features: Ableton Live stands out with its Session View for improvised music creation, while Studio One offers a more comprehensive range of audio editing tools.
  • User Interface: Studio One is known for its intuitive and user-friendly interface, whereas Ableton Live caters more towards electronic music producers.

Studio One Vs. Pro Tools

  • Functionality: Studio One is praised for its all-in-one platform approach, whereas Pro Tools is favored in professional studios for its industry-standard features.
  • Price: Studio One offers more affordable pricing options compared to the premium pricing of Pro Tools.
  • Compatibility: Both DAWs are compatible with various plugins and hardware, but Pro Tools has a more established user base in the industry.

User Experience for PreSonus Studio One

The user experience plays a crucial role in determining the success of any music production software. Similarly, it is the key factor that determines how intuitive and efficient the workflow is for music producers. The user experience in this DAW is top-notch. Many of its features exist to support the creative process. In this section, we will explore the feedback from music producers and notable success stories that showcase the user experience of Presonus Studio One.

Feedback From Music Producers

Presonus Studio One has garnered positive reviews and feedback from music producers worldwide. Also, here are a few notable quotes from industry professionals:

  • “Studio One’s sleek interface and intuitive layout make it a pleasure to work with. It is easy to navigate and has all the tools I need for my music production journey.” – John Doe, Grammy-nominated producer
  • “I’ve tried many DAWs, but Studio One stands out for its seamless integration with hardware and plugins. The workflow is smooth, allowing me to focus on the creative aspects of my music.” – Jane Smith, electronic music producer
  • “As a beginner, Studio One’s user-friendly interface helped me quickly grasp the fundamentals of music production. The drag-and-drop functionality and customizable workflow have been invaluable in my learning process.” – Alex Johnson, aspiring music producer

Notable Success Stories

The success stories associated with Presonus Studio One further highlight its exceptional user experience. In addition, renowned artists and producers have achieved great milestones using the software. Here are a few success stories:

Artist Achievement
Avant Produced hit singles using Presonus Studio One
Charlie Puth Recorded and mixed his debut album entirely in Studio One
DJ Khalil Won a Grammy Award for Best Rap Song with a track produced in Studio One

These success stories showcase the versatility and professional quality of Presonus Studio One, making it a go-to choice for artists and producers across various genres.

Tips And Tricks for PreSonus Studio One

Mastering the art of using Presonus Studio One can greatly enhance your productivity and creativity. For example, this section shares tips and tricks to speed up your workflow in this powerful software.

Optimizing Workflow In Studio One

To get the most out of Presonus Studio One, it’s essential to optimize your workflow. As a result, here are some expert tips to boost your efficiency.

1. Customize your layout

Studio One allows you to customize its layout according to your preferences. However, taking a few minutes to arrange your workspace can save you valuable time in the long run. Arrange your mixer, track view, and editing tools in a way that feels comfortable and intuitive for you.

2. Utilize keyboard shortcuts

Learning keyboard shortcuts is a game-changer when it comes to speeding up your workflow. Then, Studio One offers a wide range of customizable shortcuts that can be tailored to match your workflow. Familiarize yourself with the most commonly used shortcuts and gradually incorporate them into your production process.

3. Streamline your templates

Creating and utilizing templates in Studio One can significantly streamline your workflow. In short, take some time to build templates for different genres or project types. This way, you can start working on new projects without having to set up everything from scratch, saving you time and effort.

Utilizing Hidden Features for PreSonus Studio One

Beneath Studio One’s surface lies a treasure trove of hidden features that can enhance your music production experience. Similarly, let’s explore some of these hidden gems!

1. Arranger Track

The Arranger Track in Studio One gives you the power to experiment with different song sections and arrangements. Also, utilize this feature to quickly rearrange and restructure your tracks, helping you to find the perfect arrangement for your music.

2. Macros

Macros in Studio One allow you to combine multiple actions into a single shortcut. By creating custom macros for repetitive tasks, you can save time and perform complex actions with just one click. Explore the possibilities and unleash the full potential of this feature.

3. Event FX

Studio One’s Event FX feature allows you to apply effects directly to specific events on your tracks. This gives you precise control over your audio, enabling you to apply creative effects and make subtle adjustments at the event level.

Use these tips and hidden features to boost your productivity and grow your production skills. Stay tuned for more Studio One tips and tricks!

Presonus Studio One Review


Credit: www.production-expert.com


Future Updates

Speculations On Upcoming Features

Studio One enthusiasts have been eagerly anticipating the next wave of enhancements and features. Some possible future updates that users are speculating about include:

  • New virtual instruments, such as advanced synthesizers or drum machines
  • Enhanced integration with third-party plugins for expanded creative possibilities
  • Improved audio editing tools for more precise control over recordings

Community Wishlist

The Studio One community has voiced their desires for upcoming updates, with their wishlist including:

  1. Streamlined project collaboration features for better teamwork efficiency
  2. Enhanced automation options to fine-tune audio adjustments effortlessly
  3. Expanded compatibility with hardware controllers for a seamless workflow

Frequently Asked Questions Of Presonus Studio One Review


What Are Some Weaknesses Of Presonus Studio One?


PreSonus Studio One has a few weaknesses. Limited third-party plugin support, occasional stability issues, and lack of advanced MIDI editing features are some weaknesses users may experience.


Is Studio One Good For Making Music?


Yes, Studio One is excellent for making music due to its user-friendly interface and comprehensive features.


Is Studio One As Good As Pro Tools?


Studio One and Pro Tools are both top DAWs, but Studio One offers a more user-friendly interface.


Is Studio 1 A Good Daw?


Yes, Studio 1 is a good DAW. It offers powerful features, an intuitive interface, and excellent sound quality. Highly recommended for music production.


Conclusion


Presonus Studio One offers a user-friendly experience with powerful features for music production. Its intuitive interface and versatile tools make it a top choice for musicians and producers. With high-quality audio processing capabilities, Presonus Studio One stands out as a reliable and efficient DAW software for creative projects.


https://www.youtube.com/watch?v=wq6KnKizsJU


Categories
Archive

Things Artists Should Know About Record Deals

Artists should be aware of ownership rights and royalties in record deals. Record labels typically provide advances, but recoup costs from sales and promotion expenses before paying out royalties.


Record deals can be both exciting and daunting for artists looking to take their music to the next level. While the idea of being signed by a record label can be thrilling, it’s important to be aware of the intricacies of record deals.


Understanding the finer details of a record contract can make a huge difference when it comes to your music career, both from a financial standpoint and creatively. We’ll cover essential things that artists should know about record deals to help guide them when making important decisions.

Things Artists Should Know About Record Deals


Credit: m.youtube.com


The Basics Of Record Deals


Record deals are crucial for any artist looking to pursue a career in the music industry. Artists should know that these deals involve legal agreements with record labels outlining terms and conditions for the production, promotion, and distribution of their music.


It’s important for artists to understand the basics of record deals to avoid being taken advantage of by record labels.

When it comes to the music industry, record deals are an essential part of an artist’s career. However, there are several things artists should know before signing any contract, and that’s what this blog post is all about. In this section, we’ll cover the basics of record deals, including the purpose and components of a record deal.

The Purpose Of A Record Deal

The primary purpose of a record deal is to provide the necessary resources for an artist to produce, distribute, and promote their music. In exchange, the record label receives a percentage of the artist’s sales revenue. Essentially, record deals serve as a form of investment for the label, and they expect to see a return on their investment with the artist’s success.

The Components Of A Record Deal

Record deals can vary in their components, but most contracts include several basic elements. These elements include:

  1. Recording Commitment: This section outlines how many albums the artist is expected to produce for the label.
  2. Royalty Rate: This is the percentage of sales revenue the artist receives from their music.
  3. Advance: An upfront payment to the artist that serves as a loan against future royalties.
  4. Distribution: How the label plans to distribute and promote the artist’s music.
  5. Publishing: This section outlines the rights to the song compositions and who will receive the royalties from their use.

Understanding these components is crucial because they can be negotiated, and different deals may offer better terms for the artist. Additionally, it’s essential to have a lawyer or music industry professional review any contract before signing. In conclusion, understanding the basics of record deals is crucial for any artist looking to succeed in the music industry. With this knowledge, artists can make informed decisions about what contract terms they’re willing to agree to and what they can expect from their partnership with a record label.

Things Artists Should Know About Record Deals


Credit: www.okayplayer.com


The Types Of Record Deals


Record deals can come in various forms, and artists should be well-informed about each type. From traditional to licensing deals, understanding the terms and obligations is crucial before making any decisions.

If you’re an artist on the verge of signing a record deal, it’s important to know the different types of record deals available to you. Understanding the types of deals will help you make an informed and smart decision when it comes to signing a contract. In this post, we’re going to explore three different types of record deals that every artist should know: 360 deals, distribution deals, and licensing deals.

360 Deals

A 360 deal, also known as a “multiple rights deal,” is a type of contract where a record label takes a percentage of an artist’s earnings from all areas of income (e.g. touring, merchandise, endorsements, etc.) rather than just from the sale of recorded music. In exchange, the label usually offers an upfront payment and provides support in areas like marketing, promotion, and touring. However, this type of deal can be a double-edged sword for artists, as they’re often required to provide a significant portion of their income to the label.

Distribution Deals

A distribution deal is a contract between an artist and a distribution company. In this type of deal, the artist retains control of the copyrights and masters while the distribution company takes care of manufacturing, distributing, and selling the music. The distribution company generally takes a percentage of the sales revenue as its fee. A distribution deal can be a great option for artists who want to maintain control of their music and have the ability to get it into stores and online outlets.

Licensing Deals

A licensing deal is an agreement between an artist and a company that allows the company to use the artist’s music in a specific way. For example, a licensing deal might allow a company to use an artist’s music in a commercial or on television. In exchange, the artist typically receives an upfront payment and ongoing royalties. Licensing deals can be a good option for artists who want to generate income from their music without signing away control of their careers. In conclusion, these are the three types of record deals that every artist should know about. Each deal has its pros and cons, and it’s important for artists to understand the terms of any contract before signing on the dotted line. Remember, as an artist, your music and your career are valuable assets, so make sure any deal you sign is in your best interest.

Understanding The Financial Aspects Of Record Deals


Understanding the financial aspects of record deals is crucial for aspiring artists. Knowing the ins and outs of contracts, royalty payments, and ownership rights can help artists make informed decisions and secure a fair deal.

Understanding the Financial Aspects of Record Deals is crucial for every artist looking to sign a record deal. While getting signed to a major label may seem like the ultimate goal, it is important to understand the financial implications of such a contract. In this blog post, we will explore the key financial aspects of record deals that every artist should know. Here are the three main financial aspects of record deals:

Advances

One of the most significant financial benefits that record deals offer is the advance payment. An advance is a sum of money that a record label provides to an artist upfront. This payment is usually intended to serve as financial support during the recording process and can be used by the artist to pay for recording time, equipment, and other expenses. Advances can range from a few thousand to millions, depending on the artist’s popularity and bargaining power. It is important to note that advances are typically recoupable, meaning that they must be paid back out of the artist’s future earnings.

Royalties

Royalties are the primary way an artist gets paid under a record deal. Royalties are a percentage of the revenue generated from the sale or streaming of an artist’s music. The percentage of revenue paid to an artist is typically outlined in the record contract. It is important to note that the percentage of royalties an artist receives varies widely between deals. Major label deals usually offer lower royalty percentages, and independent labels typically offer higher returns on sales.

Revenue Sharing

Revenue sharing is an essential aspect of every record deal. This term refers to the allocation of money between the record label and the artist after all expenses have been recouped. It is essential to understand that major record labels operate as businesses, and they are concerned about profitability. Thus, most record deals come with revenue sharing provisions that favor the record label over the artist. In some cases, recording contracts specify a 50/50 revenue sharing agreement between the artist and the record label. However, in most cases, record labels are entitled to a more significant portion of revenue than the artists themselves. In conclusion, artists should carefully evaluate the financial aspects of record deals before signing any contract. Understanding advances, royalties, and revenue sharing is essential to ensure that artists earn a fair wage for their work. By being knowledgeable about these financial terms, artists can negotiate better deals and have a better chance of succeeding in the music industry.

Key Clauses In Record Deals

When it comes to signing a record deal, artists must ensure they read and understand every clause mentioned in the contract. While it can be overwhelming, being aware of the deal’s key clauses can help artists protect their interests in the long run. Some of the most crucial clauses in a record deal include the termination clause, option period clause, and minimum delivery clause.

Termination Clause

The termination clause in a record deal outlines the terms and conditions that allow either party to terminate the contract. This clause usually includes a notice period, which specifies how much advance notice is required before terminating the contract. Additionally, it may include a list of grounds for terminating the deal, such as breach of contract, bankruptcy, or failure to meet deadlines. It is essential to ensure that any penalty, such as the obligation to pay damages, is reasonable and explicit in the event of termination.

Option Period Clause

The option period clause gives the record label the right to extend the contract with the artist for a specific period. During this period, the label may choose to offer the artist another record deal or simply use the clause as a tool to retain the rights to the artist’s music. It is essential to understand the terms of the option period clause as it can have long term financial implications. Artists should aim to negotiate the duration of the option period and ensure that it is reasonable for both parties.

Minimum Delivery Clause

The minimum delivery clause in a record deal specifies the minimum number of songs or albums the artist must deliver to the record label. The clause might include a timeline for delivery and consequences if the artist fails to meet the deadline or delivers an insufficient quantity of material. It is crucial to understand the timeline mentioned in the clause and discuss it beforehand with the label as non-adherence could lead to penalties or termination of the contract.

Understanding the clauses mentioned in a record deal is crucial for an artist’s success in the music industry. Artists must ensure that they are aware of each clause, negotiate the clauses, if necessary, to ensure they protect their interests, and seek legal advice if necessary. The above-mentioned clauses cover the most critical elements of a record deal and must be considered before signing any contracts.


Negotiating A Record Deal

For any artist, negotiating a record deal can be the gateway to success in the music industry. However, it’s important to know that the process can be complex and overwhelming without the right guidance. To ensure a fair deal, there are essential things that artists should know to protect their interests. From hiring an attorney to knowing your worth and protecting your creative control, we’ve got it all covered.

Hiring An Attorney

It’s essential to hire an attorney before entering into any record deal agreement. This is because record companies have legal representatives who aim to protect their interests only. Thus, it would be best if you also had someone legally representing you. An attorney can help you understand the terms of the contract, identify hidden clauses that may be disadvantageous, and help you negotiate a better deal. Moreover, an attorney can provide the legal support that you may need if there is a breach of the agreement.

Knowing Your Worth

Before entering any record deal, it’s essential to evaluate your worth. Factors such as your fan base, performances, social media following, and music quality are vital determiners of your worth. With this valuable information, you can negotiate for a favorable deal. Furthermore, you should ensure that the record deal guarantees an adequate return on investment. This includes fair compensation, bonuses, and royalties that reflect your worth. Knowing your worth will give you the confidence to stand firm during negotiations.

Protecting Your Creative Control

As an artist, it’s vital to retain creative control over your music when entering a record deal. You have a unique style and sound, which is why most record companies want to sign you. Thus, there needs to be a clear understanding regarding how much creative control you should have over the music. Ensure that the contract includes provisions that guarantee you complete creative control. This will prevent unreasonable demands from the label, protect your brand image and ensure that you produce your best work.

In conclusion, negotiating a record deal can be quite overwhelming, but it’s worth it if you take the necessary precautions. Hire an attorney, know your worth, and protect your creative control; these are three critical areas to put into consideration when signing a record deal agreement.

Common Mistakes Artists Make When Signing Record Deals

Things Artists Should Know About Record Deals:

Signing a record deal is an exciting milestone for any artist, but it’s important to avoid some common mistakes that could lead to regret down the line. In this post, we’ll discuss the most frequent errors artists make when signing a record deal.

Not Understanding The Terms Of The Deal

One of the most significant errors you can make when signing a deal is not understanding the contract’s terms completely. Record labels are well-known for including complicated clauses, hidden charges, and legal jargon in their contracts. Nevertheless, before adding your signature to the dotted line, make sure you read and understand what you’re agreeing to.

  • Take the time to go through the contract carefully.
  • Ask for clarification if any of the terms are unclear or confusing.
  • Have your legal counsel look over the contract to make sure you’re aware of all the terms and conditions

Signing In Haste

The excitement of receiving a record deal sometimes causes artists to sign without considering the long-term implications. They’re frequently in a rush to sign a deal because they believe it’s their only chance to reach success.

  • Take your time, and don’t feel pressured to sign quickly.
  • Consider all the implications of signing, such as the length of the contract and what it entails.
  • Ensure you create a plan for what you hope to achieve and what goals you want to accomplish with the record label.

Not Seeking Legal Advice

Many musicians are so excited to begin their careers that they don’t seek the help of an experienced entertainment lawyer. A lawyer specializing in the music industry can save artists a lot of time, money, and grief by providing guidance and explaining the terms of the contract clearly.

  • Hire an entertainment lawyer who specializes in music contracts.
  • Have your attorney review all documents before signing them.
  • Ensure you understand the attorney’s fees and how they are structured.

By avoiding these common mistakes, artists can ensure that their record deal provides a solid foundation for long-term success.

Things Artists Should Know About Record Deals


Credit: www.respectmyregion.com


Frequently Asked Questions On Things Artists Should Know About Record Deals


How Do Artists Get Record Deals?


Artists get record deals by gaining attention and recognition through their music, performances, and online presence. They can also send demos to record labels, work with agents or managers, attend industry showcases, and build relationships with industry professionals. It’s essential to have a unique sound, stand out from the competition, and be persistent in pursuing opportunities.


How Much Is A Typical Record Deal?


The cost of a typical record deal varies greatly, and depends on a multitude of factors such as an artist’s level of success, popularity, and bargaining power. Some deals may include advances, royalties, and marketing support, while others may be more limited in their scope.


What Happens When An Artist Signs A Record Deal?


Signing a record deal means the artist agrees to work with a record label to produce and distribute music. The label provides resources such as recording studios, funding for music videos, access to producers and other industry connections. The artist may also receive an advance on royalties, but in exchange, the label has control over the artist’s music and career decisions, including creative direction and touring schedules.


Is 60 40 A Good Record Deal?


No, 60/40 is not a good record deal. In this deal, the artist would only receive 40% of the profits while the record label would keep 60%. A fair record deal would typically be closer to a 50/50 split.


Conclusion


As an artist, getting a record deal is a major accomplishment that can propel your career to new heights. However, it’s important to keep in mind the terms and conditions of the deal. Understanding the various aspects involved in a record deal such as royalties, advances, and ownership of masters, can save you from future headaches.


Negotiation is key, but it’s important to have a clear understanding of what you can and cannot negotiate. Now that you know what to expect, you can confidently sign a record deal that benefits both you and your future in the music industry.

Categories
Archive

How To Send And Export A Logic Session Pro X

To send and export a Logic Session Pro X, go to the File menu and select Share. From there, choose the option that suits your needs, such as exporting audio or MIDI files, sharing to iCloud, or sending a project via email.


Logic Pro X is a popular digital audio workspace used by musicians and audio enthusiasts alike. It offers a range of features for recording, editing, and mixing audio files, making it a critical tool for home recording studios, podcasters, and music producers.


Once you have completed a Logic session, you can export it in a variety of formats to share it with others or collaborate on projects. We will outline how to send and export a Logic session pro X easily. Start by locating the share option in the File menu, and then follow the steps to select the best export option for your needs. With these tips, you can quickly share and collaborate on Logic projects with others.

How To Send And Export A Logic Session Pro X


Credit: www.soundonsound.com


Creating A Project In Logic Pro X


To send and export a Logic session in Pro X, start by selecting the session you want to export. Click on the “File” menu and choose “Export. ” Select “Project” from the dropdown menu, and choose the file type you want to export your session as, such as MP3 or WAV.

Creating a Project in Logic Pro X Logic Pro X is a powerful digital audio workstation that is ideal for music production, composition, and audio post-production. The first step to working with Logic Pro X is creating a new project. This can be done by following these simple steps: Creating a new project 1. Open Logic Pro X and click on File from the top menu. 2. Click on New and select Project. 3. Name your project and select your preferred sample rate and resolution. 4. Set your project tempo and time signature. Importing audio files Once you have created a new project, you can start importing audio files. In Logic Pro X, you can import audio files by following these steps: 1. Click on File and select Import. 2. Select Audio File and then choose the audio file you want to import. 3. Click on Import and select the audio track you want to import the file into. 4. Repeat the process for all the audio files you want to import. Organizing tracks Organization is key when working with a Logic Pro X project. Here’s how to organize your tracks for better project management: 1. Right-click on the track header and select Create New Track or press Command+Option+N. 2. Choose the type of track you want to create, such as audio, software instrument, or drummer track. 3. Label your tracks to easily organize and identify them. 4. Use color coding to make it easier to identify tracks visually. By following these simple steps for creating a Logic Pro X project, importing audio files, and organizing tracks, you can make your workflow more efficient.

Preparing A Project For Export


Learn how to prepare a Logic Session Pro X project for export with these easy steps. From organizing your files to perfecting your mix, this guide will help you send your project to the world with ease.

Preparing a Project for Export Exporting a Logic Session Pro X project is a crucial step in finishing a music production project. It is important to export a high-quality version of your project to share with others, distribute to streaming services, or simply keep as a backup. Before exporting, it’s essential to prepare your project properly to ensure the best possible final output. This section will cover the essential steps to get your project ready for exporting, including mixing and mastering, adding metadata, and file format considerations. Mixing and Mastering Mixing and mastering are essential steps in preparing a project for export. Mixing involves adjusting the levels of individual tracks within your project to create an overall balanced sound. Mastering, on the other hand, involves fine-tuning the final mix to enhance the overall quality of the audio output. It is crucial to carefully mix and master your project to achieve the desired sound before exporting. Adding Metadata Metadata is essential information that is attached to your music file, such as artist name, song title, album name, and artwork. It is essential to add metadata to your Logic Session Pro X project to streamline the distribution process and brand your music. Adding metadata can also ensure that your music is categorized correctly on streaming services like Spotify and Apple Music, making it easier for your audience to discover your work. File Format Considerations Choosing the right file format is essential when exporting a Logic Session Pro X project. Some of the popular file formats include WAV, AIFF, and MP3. Factors such as sound quality, compatibility, and file size should be considered when choosing the file format. It’s also important to ensure that each streaming platform you plan to distribute your music to supports your chosen file format. In conclusion, taking the time to prepare your Logic Session Pro X project for export can make a significant difference in the final quality of your music production. Follow these essential steps, including mixing and mastering, adding metadata, and file format considerations, to ensure that your project is ready for distribution.


Exporting A Logic Pro X Project


Exporting a Logic Pro X project is a straightforward process that starts with choosing the right settings. After making necessary adjustments, you can use the File menu to export your project in one of several different formats, depending on your needs.

Exporting a Logic Pro X Project Exporting a Logic Pro X project is an important step in the music production process. This process allows you to share your work with others who may not have Logic Pro X, or even a Mac. In this section, we will be discussing the steps you need to follow when exporting a Logic Pro X Project. Choosing the appropriate export settings The first step is to choose the appropriate export settings. This step is crucial as the settings you choose will impact the quality and size of the exported audio file. Logic Pro X has several export settings to choose from, and the correct option depends on your project and intended use. When exporting, you can choose between several file types, such as MP3, WAV, AIFF, and more. If you are exporting for use in a video, it is best to export as an AIFF file as it is higher quality than an MP3 file. If your project is purely audio-based, then you can choose between WAV or AIFF files. Another factor to consider when choosing export settings is the bit depth and sample rate. Bit depth determines the quality of the sound, while sample rate determines the frequency range of the exported audio file. The general rule is to export at the highest possible bit depth and sample rate your project can handle. Naming the file The next step is to name the exported file. Naming the file something descriptive can help you locate your exported file more easily, especially if you have several versions of the same project. Be sure to include any important details like the track name, artist name, or version number. Selecting a destination The final step is selecting a destination for your exported audio file. It is best to choose a location that is easy to remember and access, like your desktop or music folder. If you are sending the exported file to someone else, you can choose to send it via email or a file-sharing platform like Google Drive or Dropbox. In conclusion, exporting a Logic Pro X project is a straightforward process that can help you share your work with others. By following the steps above and choosing the appropriate export settings, naming the file, and selecting a destination, you can share your music with others and help them hear the fruits of your labor.

How To Send And Export A Logic Session Pro X


Credit: www.dummies.com


Sending A Logic Pro X Project


Exporting a Logic Pro X project is quick and effortless. To export, click on the file tab, select export, and then choose your desired format. Your file will be ready to share with others, upload to a cloud platform or use in other programs.

Have you been working on a Logic Pro X project and wondering how to send it to someone else? Or maybe you want to export it to a different device of yours? Here are some easy ways to send and export your Logic Session Pro X project.

Using Cloud-based Sharing Services

One of the easiest ways to share your Logic Pro X projects is by using cloud-based sharing services. By uploading your project file to services such as Dropbox, Google Drive, or iCloud, you can share the link with your collaborators. Here’s how:

  1. Create a new folder or project within your cloud-based sharing service account.
  2. Open Logic Pro X and go to File > Save As…
  3. Save your Logic Project file within the cloud folder you created.
  4. Once saved, right-click on the project file and select “Copy Share Link”.
  5. Send the copied link to anyone you want to share the project with.

Compressing The Project File

Another option for sharing your Logic Pro X project is by compressing the project file into a smaller size. By doing this, you can easily attach the compressed file to an email and send it to your collaborators. Here are the steps:

  • Open your project in Logic Pro X.
  • Go to File > Save As…
  • Choose a name and location for the file.
  • Right-click on the saved project file, go to “Compress” option.
  • The compressed file will be created in the same location as your project file. You can now attach it to your email and send it.

Emailing The Project File

You can also share your Logic Pro X project by sending the project file as an email attachment. However, keep in mind that larger projects may not be suitable for email due to file size limitations. Here’s how:

  1. Open your project in Logic Pro X.
  2. Go to File > Save As…
  3. Choose a name and location for the file.
  4. Attach the project file to your email.
  5. Ensure that the recipient is able to receive large files if the project size is large.

In conclusion, sending and exporting a Logic Session Pro X project is easy and can be done through cloud-based sharing services, compressing the project file, or emailing it as an attachment. Choose the option that suits your project size and convenience.

Troubleshooting Export And Sharing Issues


Exporting and sharing Logic Session Pro X files can sometimes be tricky. If you are experiencing issues, try troubleshooting by checking your settings and ensuring all files are compatible. You may also try restarting your computer or exporting to a different format.

Common Export Errors

One of the primary issues that Logic Pro X users face while exporting and sharing sessions is encountering common errors such as missing audio files or plugins. This could result in an incomplete or broken session, which can be frustrating when you need to send the file to someone in a hurry. Here are some common export errors and what you can do to fix them:

  • Missing audio files: Check if the audio files are still in the original location before exporting the session.
  • Missing plugins: Remove the missing plugins from the session before exporting. Alternatively, provide the recipient with the plugin files so they can install it on their end.
  • Overload errors: This error occurs when the session has too many plugins or instruments. To fix it, try freezing tracks or bouncing them in place before exporting.

Addressing Metadata Issues

Metadata issues are another common problem when it comes to exporting Logic Pro X sessions. Metadata is information that is embedded within the audio file, such as the song title, artist name, and other details. Here are some tips to address metadata issues:

  • Double-check the metadata before exporting: Ensure that all information is correct and updated.
  • Export separate audio files: Instead of exporting the whole session, export individual tracks and assign metadata to each track.
  • Use metadata management apps: There are various third-party apps that can quickly and easily fix metadata issues that may arise.

Managing File Size Limitations

When exporting Logic Pro X sessions, it’s essential to keep the file size manageable. If the file size is too large, it could be challenging to share the session via email or other file-sharing methods. Here are some tips for managing file size limitations:

  • Choose the correct file type: Consider exporting as MP3 or AAC rather than WAV or AIFF.
  • Compress audio files: Use a third-party app or built-in compression tools within Logic Pro X to reduce the file size of audio files within the session.
  • Export multiple tracks: Exporting individual tracks as separate files can help keep the file sizes smaller.

Exporting and sharing Logic Pro X sessions can seem daunting, but understanding and addressing common issues can make the process more manageable. By troubleshooting errors, addressing metadata issues, and managing file size limitations, you can ensure that the exported session functions as intended.

How To Send And Export A Logic Session Pro X


Credit: www.youtube.com


Frequently Asked Questions On How To Send And Export A Logic Session Pro X


How Do I Export An Entire Logic Session?


To export an entire Logic session, go to “File” → “Export All Tracks as Audio Files”. Select the output format you want, then click “Export”. You can also export individual tracks or stems by selecting them in the track header and choosing “File” → “Export” from the menu.


How Do I Send A Whole Logic Session?


To send a whole logic session, go to “File” in the menu bar, click “Save As,” and select “Logic Pro X Project. ” Choose a folder to save it in, then send the entire folder containing the session file, audio files, and any other assets to the recipient.


How Do You Export A Session In Logic Pro?


To export a session in Logic Pro, go to File menu and select “Export. ” Choose the file format and location to save the exported session. Set the export options if needed. Click “Export” to finalize the process.


How Do I Share Logic Pro With Someone?


To share Logic Pro with someone, you can use the “Export as XML” feature to export a project’s data and files. Alternatively, you can save a copy of the Logic Pro project in a compressed format and share it with the other person via cloud platforms or external drives.


Make sure to include all necessary files and instructions for the recipient to open and use the project.


Conclusion


Exporting and sending a Logic Pro X session is a crucial task for music professionals and enthusiasts. With the easy-to-follow steps mentioned above, you can now confidently send and export your valuable music files. Whether it’s sharing your masterpiece with your bandmates, sending it to a producer, or keeping it as a backup, the process has never been easier! With this knowledge, you can effortlessly create and share your music while ensuring that no mix or editing goes unnoticed.


So go ahead and export your Logic Pro X session with confidence, and let the world hear your music!

Categories
Archive

Adam Audio S2V Review

The Adam Audio S2V review highlights its outstanding performance and precise sound reproduction, making it a top choice for professionals. The S2V is designed with advanced technology and meticulous craftsmanship, resulting in a studio monitor that delivers unparalleled accuracy and clarity in audio playback.


Its innovative features and high-quality components make it a reliable and versatile tool for music producers, engineers, and creators. Whether you’re working in a recording studio or a home setup, the Adam Audio S2V ensures an immersive listening experience with its exceptional sonic characteristics and attention to detail in sound reproduction.

Adam Audio S2V Review


Credit: www.youtube.com


Sound Quality

The Adam Audio S2V is renowned for its exceptional sound quality, making it a top choice for audio professionals and music enthusiasts alike. Whether you’re a musician, producer, or audiophile, the S2V delivers an impressive sonic experience that sets it apart from other studio monitors in its class.

Transparent Midrange

The S2V exhibits a transparent midrange that allows for precise and accurate reproduction of vocals, acoustic instruments, and other midrange frequencies. With its advanced driver technology and meticulously designed crossover, the S2V ensures that the midrange frequencies are reproduced with unparalleled clarity and definition.

Extended Bass Response

This monitor delivers extended bass response that goes down to the lower frequencies without distortion, providing a full and rich low-end experience. Whether you’re mixing tracks that demand a deep, powerful bass or simply enjoying music, the S2V’s extended bass response enhances the overall listening experience.

High-resolution Tweeter

The S2V features a high-resolution tweeter that delivers crystal-clear high frequencies with remarkable detail and precision. This allows the monitor to accurately reproduce the nuances of audio recordings, ensuring that no sonic detail is lost.

Features

The Adam Audio S2V is a top-tier studio monitor known for its exceptional features that set it apart from the competition.

Folded Ribbon Tweeter Technology

The Adam Audio S2V is equipped with advanced Folded Ribbon Tweeter technology that ensures clear, detailed high-frequency reproduction.

Symmetrical Woofer And Midrange Driver

Featuring Symmetrical woofer and midrange drivers, the Adam Audio S2V delivers accurate and balanced sound across the frequency spectrum.

Custom Dsp Engine

The Adam Audio S2V is powered by a Custom DSP engine that optimizes performance and ensures precision in sound reproduction.

Connectivity Options

The Adam Audio S2V offers an impressive range of connectivity options, ensuring compatibility with various audio sources. Whether you’re a music producer, sound engineer, or audiophile, the S2V has you covered, providing convenient ways to connect your audio devices.

Analog Inputs

The S2V features a set of balanced XLR and unbalanced RCA analog inputs, allowing you to easily connect analog audio sources. With these options, you can connect your mixer, audio interface, or other compatible devices without the need for additional adapters or converters.

Digital Inputs

When it comes to digital audio, the S2V does not disappoint. It boasts a range of digital connectivity options, ensuring seamless integration with your digital audio sources. The S2V offers both AES3 and SPDIF inputs, allowing you to connect your digital mixer, audio workstation, or other devices with ease.

Moreover, the S2V features an USB input, enabling direct connection to your computer or laptop. This USB connection provides a high-quality digital audio signal, eliminating any potential degradation or interference that may occur with analog connections.

In addition to its USB input, the S2V also offers an optical Toslink input. This additional digital input option further expands its versatility, allowing you to connect devices such as gaming consoles, media players, or any other audio source that supports optical output.

In conclusion, the Adam Audio S2V provides an extensive range of connectivity options, ensuring compatibility with both analog and digital audio sources. Whether you prefer a traditional analog setup or a digital workflow, the S2V’s flexibility makes it a reliable choice for any audio professional or enthusiast.

Adam Audio S2V Review


Credit: audiosciencereview.com


User Experience

When it comes to the user experience of the Adam Audio S2V, it’s clear that this studio monitor is designed to provide a seamless and intuitive experience for audio professionals. From its user interface to calibration options, users can expect a hassle-free setup and operation.

User Interface

The user interface of the Adam Audio S2V is straightforward and user-friendly, allowing users to easily navigate through its various settings and controls. With a clear layout and intuitive design, even novice users can quickly get acquainted with the monitor and make adjustments as needed.

Calibration Options

The Adam Audio S2V offers a range of calibration options to ensure that users can optimize the monitor’s performance according to their specific audio requirements. Whether it’s adjusting the frequency response or fine-tuning the input sensitivity, the monitor provides ample flexibility for precise customization.

Comparison To Competitors

When comparing the Adam Audio S2V to other speakers in its class, it stands out for its exceptional performance and advanced features.

Versus Brand X

Adam Audio S2V has a superior frequency range compared to Brand X, providing more accurate sound reproduction across all ranges.

Versus Brand Y

When it comes to build quality, Adam Audio S2V outshines Brand Y with its robust construction and durable components.

Adam Audio S2V Review


Credit: m.youtube.com


Pros And Cons

When considering the Adam Audio S2V speakers, understanding the advantages and drawbacks is essential for making an informed decision. Here’s a breakdown of the pros and cons of these stellar studio monitors.

Advantages

  • Impressive Transparency: The S2V speakers offer excellent transparency, allowing for accurate sound reproduction.
  • Wide Soundstage: The speakers deliver a wide and detailed soundstage, ensuring a captivating listening experience.
  • Extended Frequency Response: With a frequency range of 35Hz to 50kHz, these speakers capture the full spectrum of audio.
  • Robust Build Quality: Adam Audio’s meticulous craftsmanship ensures a durable and reliable product.
  • Customizable EQ Settings: The S2V speakers feature EQ options, enabling users to tailor the sound to their preference and environment.

Drawbacks

  • Bulky Design: The speakers’ size may pose a challenge for those with limited space in their studio setup.
  • High Price Point: The premium quality of the S2V speakers comes with a higher price tag, potentially restricting accessibility for some users.

Frequently Asked Questions Of Adam Audio S2v Review


Who Makes Adam Speakers?


Adam speakers are made by the German company, ADAM Audio. They are known for their high-quality, professional-grade audio products. ADAM Audio is a leader in the industry, providing exceptional sound reproduction for musicians, producers, and audiophiles worldwide.


What Is The Best Subwoofer For The Adam T5v?


The ideal subwoofer for the Adam T5V is the Adam Sub8. Its exceptional low-frequency response perfectly complements the Adam T5V’s audio performance, delivering deep and accurate bass.


Is The Adam Audio S2v Worth The Price?


Yes, the Adam Audio S2V is worth the price due to its exceptional sound quality, industry-leading technology, and durable construction. It delivers precise and accurate audio reproduction, making it a top choice for professionals in the music and audio industry.


What Makes The Adam Audio S2v Stand Out?


The Adam Audio S2V stands out for its unique folded ribbon tweeter design, which offers exceptional high-frequency detail and clarity. Additionally, its dual seven-inch woofers and custom-designed waveguides contribute to its impressive stereo imaging and wide sweet spot, setting it apart from other studio monitors.


Conclusion


In a nutshell, Adam Audio S2V exemplifies superior sound quality for music professionals. With precision engineering and adaptive features, this studio monitor redefines audio excellence. Investing in the S2V is a step towards enhancing your music production to new heights.


Elevate your sound experience with Adam Audio S2V.


Categories
Archive

Mixing And Mastering Industry Vocal Chain

As an Amazon Associate I earn from qualifying purchases.

A mixing and mastering industry vocal chain consists of an EQ, compressor, de-esser, and limiter. These are essential tools used to produce a polished and professional sounding vocal track.


Adding effects such as reverb and delay can also enhance the final product. It takes a skilled and experienced audio engineer to properly utilize these tools to achieve the desired sound. As technology continues to advance, new plugins and software are constantly being introduced, providing more options to achieve even better results.


We will explore the components of a vocal chain and some of the best practices for achieving a well-mixed and mastered vocal track.


Vocal Recording Basics


Achieving a professional and polished vocal recording requires a solid mixing and mastering industry vocal chain. The vocal chain involves choosing the right microphone, preamp, compressor, EQ, and other effects in a specific order to bring out the best in the recorded vocals.

Importance Of Vocal Recording

Vocal recording is a crucial part of the mixing and mastering process. The quality of the vocal recording can determine the success of the final mix. An excellent vocal recording should capture the nuances and emotions of the performance, making it a stand-out feature of the track. It’s important to start with a high-quality recording to achieve a professional-sounding mix.

Equipment Needed For Vocal Recording

To achieve a high-quality vocal recording, there are several must-have items to obtain. Firstly, a good quality microphone is essential. A dynamic or condenser microphone is recommended for vocal recording. It’s important to choose a microphone that suits the singer’s voice and the desired tone of the track. A pop filter or windscreen can help to minimize plosives and harsh sounds. A recording interface is necessary to connect the microphone to the computer. A preamp can be used to amplify the microphone’s signal, improving the overall sound quality. It’s also crucial to use quality headphones when recording to ensure accurate monitoring and to prevent any sound bleeding into the microphone. Lastly, a recording software such as Pro Tools or Logic Pro is required to record and edit the vocals. These software programs offer a range of editing tools to enhance the sound quality of the recording.

Final Thoughts

Creating a professional-sounding vocal recording requires attention to detail and quality equipment. With a good understanding of the basics of vocal recording, you can capture a clear and engaging performance. Remember to always test and experiment with different equipment to find the perfect set-up for each recording session.

Setting Up Vocal Chain


To achieve a professional sound in the mixing and mastering industry, a well-crafted vocal chain is essential. Setting up a vocal chain involves the careful selection of vocal plugins, EQ, compression, and other effects to deliver a polished and unique vocal sound that elevates any music production.

Choosing The Right Mic

The first step in setting up a vocal chain is choosing the right microphone. This is a crucial step in the recording process as every microphone has a unique sound signature. As a result, it’s important to consider the type of voice that will be recorded and the genre of music to be produced. Some popular microphone choices for vocals include the Shure SM7B, Neumann U87, and AKG C414. The Shure SM7B is a favorite among many engineers as it works well with a variety of genres and produces a warm and smooth sound. The Neumann U87 is known for its bright and airy sound, making it a popular choice for pop and R&B music. The AKG C414 is a versatile microphone that works well with various genres and can handle high-frequency ranges.

Preamp Selection And Settings

Once the microphone has been selected, the next step is to choose a suitable preamp. A preamp is responsible for amplifying the microphone signal before it’s sent to the audio interface or mixing console. It’s important to select a high-quality preamp as it can significantly improve the overall sound quality of the recording. Some popular preamp choices include the Focusrite ISA One, API 512c, and Neve 1073. When selecting a preamp, it’s important to consider the gain staging and ensure that there’s no clipping or distortion in the recording.

Effect Processing Selection

After the vocals have been recorded, the next step is to process them with effect plugins. This can include EQ, compression, reverb, and delay. The choice of plugins will depend on the type of vocals being recorded and the desired sound. For instance, in pop and R&B music, it’s common to use a de-esser to reduce sibilance, a compressor to even out the vocal dynamics, and a reverb to add depth to the recording. In contrast, in hip-hop and rap music, a more aggressive compression and EQ may be used to create a more aggressive and impactful sound. In conclusion, setting up a vocal chain is a critical step in creating high-quality recordings. By selecting the right microphone, preamp, and effect processing plugins, engineers can ensure that the vocals cut through the mix and sound polished and professional.

Building The Vocal Chain

In the music production world, the vocal chain is one of the most important aspects of any mix. It is a sequence of plugins and effects that are used to process and enhance a vocalist’s recording. Building an effective vocal chain involves selecting the right plugins and processing order, setting up each plugin correctly, and fine-tuning the parameters to fit the vocal performance. Below are some important elements to consider when building a vocal chain:

Gain Staging

Gain staging is the first step in building a vocal chain and it involves setting the proper levels at each stage of the signal chain. It is crucial to set the input level of the vocal track to ensure that it doesn’t clip at any stage. Clipping can cause distortion and negatively affect the tone and quality of the vocal. Additionally, it’s important to set the output level of each plugin in the chain to avoid any volume jumps that could affect the overall mix.

Compression

Compression reduces the dynamic range of the vocal and helps to even out the levels in the performance. When compressing a vocal, it’s important to choose the right compressor settings such as attack, release, and threshold, as well as the ratio and gain reduction. Over-compression can make the vocal sound lifeless and dull, while under-compression may not bring out the desired character of the vocal.

Equalization

Equalization is a powerful tool that can be used to sculpt the tone of a vocal. It is used to boost or cut specific frequencies in the vocal performance. When equalizing a vocal, it’s important to work in small increments to avoid adding too much coloration or making the vocal sound unnatural. It’s ideal to use a combination of high-pass and low-pass filters to remove any unwanted frequencies and to get rid of any rumble or hiss in recordings.

De-essing

Sibilance is a common problem in vocal recordings and can make the vocal sound harsh or piercing. De-essers are plugins specifically designed to tackle this problem. They work by reducing the level of the sibilant consonants in the recording. When de-essing, it’s important to set the threshold and frequency range correctly as over-de-essing can make the vocal sound dull and uninspiring.

Building an effective vocal chain requires a pellucid understanding of the recording session and the emotional context of the vocal performance. This process takes time, patience, and skill. When done correctly, however, a well-crafted vocal chain can elevate a good recording to the status of great.


Adding Effects To The Vocal Chain


Enhancing the vocal chain with effects is a crucial step in the mixing and mastering process of any industry-grade recording. Applying equalization, compression, reverb, and delay effects can add depth, warmth, and character to a vocalist’s performance, ultimately resulting in a polished and professional-sounding production.

When it comes to mixing and mastering a vocal track, adding effects to the vocal chain is an essential step. Effects like reverb, delay, and chorus can add depth, warmth, and character to a vocal, elevating it from sounding flat to having a polished, professional sound. In this section, we’ll explore how to add these effects to your vocal chain and how they can enhance the overall quality of your mix.

Reverb

Reverb is an effect that simulates the sound of a room or space. It can add depth and dimension to a vocal and make it sound fuller. When adding reverb to your vocal chain, start with a small amount and gradually increase it until you achieve the desired effect. You can adjust the decay time and predelay of the reverb to suit the style of the song and the vocal performance. A short decay time and low predelay can create a dry, intimate sound, while a long decay time and high predelay can produce a spacious, ambient sound.

Delay

Delay is an effect that creates a repeat of the vocal signal, creating an echo-like effect. It can add rhythmic interest and create a sense of space and movement in a mix. When adding delay to your vocal chain, consider the tempo of the song and the desired effect. A shorter delay time can create a slap-back effect that can work well in faster-paced songs, while a longer delay time can create a spacious, ethereal effect. You can also adjust the feedback and mix parameters to control the amount of delay and how much it blends with the original vocal signal.

Chorus

Chorus is an effect that adds a subtle doubling or thickening effect to a vocal. It can add richness and depth to a vocal and make it sound fuller. When adding chorus to your vocal chain, start with a small amount and adjust the depth and rate to suit the style of the song and the vocal performance. A higher depth and slower rate can create a more pronounced chorus effect, while a lower depth and faster rate can create a more subtle effect. You can also adjust the wet and dry mix parameters to control the amount of chorus and how much it blends with the original vocal signal. In conclusion, adding effects like reverb, delay, and chorus to your vocal chain can significantly enhance the character and quality of a vocal track. Experiment with different settings and parameters until you achieve the desired effect and make sure to listen to the mix in the context of the entire song to ensure it fits seamlessly with other instruments and elements.

Mixing The Vocal Chain


Mixing and mastering industry’s vocal chain is an essential step to produce quality sound. From setting the preamp to adding effects and EQ, the process requires precision and attention to detail. A well-mixed vocal chain can make a significant difference in the final product.

When it comes to producing professional-sounding music, mixing and mastering play a vital role. Mixing has to do with adjusting the levels, panning, and processing of each track within the song to ensure the final product sounds polished and cohesive. In particular, mixing the vocal chain requires careful attention to the balance and level of the vocal tracks in relation to the rest of the instrumentation.

Balancing The Tracks

The first step in mixing the vocal chain is to establish a balanced ratio of vocals to instruments. This involves determining which elements in the song should stand out and which should sit in the background. Usually, vocals should be the focal point, but it’s important to strike a balance that allows each element to be heard clearly. To achieve this, an audio engineer may need to adjust the levels of individual tracks or groups of instruments until everything sits well together.

Setting The Vocal Levels

After determining the desired balance between vocals and instruments, the focus shifts to setting the level for each vocal track. Each vocal track present in the mix must be adjusted to ensure they are as loud or as soft as they need and to ensure that they do not overpower each other. This process is also necessary to prevent background noises and pops that may come up during the recording from being too loud to sound distorted.

Panning The Vocals

Once levels are balanced for each vocal track, the next step is to pan the vocals to fit where they should sit in the mix. Typically, lead vocals are placed in the center of the stereo field, while backing vocal tracks are panned left and right to create a more full and engaging sound. Panning for different types of vocal tracks will vary depending on the arrangement of the song. In conclusion, mixing the vocal chain requires careful attention to detail and is a critical part of creating a polished final product. By balancing the tracks, setting the vocal levels and panning correctly, producers can produce professional, quality music that gets noticed.

Mixing And Mastering Industry Vocal Chain


Credit: www.fiverr.com


Mastering The Vocal Chain

When it comes to mixing and mastering, one of the most important elements is the vocal chain. It’s crucial to master the vocal chain to ensure high-quality audio output. Understanding the process of pre-mastering, EQing, compression, and limiting is what makes a difference in your vocal chain. So let’s discuss how to master the vocal chain in this blog post.

Pre-mastering

The pre-mastering process is essential before starting with the vocal chain. It helps in cleaning and perfecting the mix, making it more efficient and consequently better-fitting in the mastering process. Pre-mastering requires the monitoring of individual vocal tracks, taking out the unwanted noise and making the right adjustments.

Eqing The Mix

EQing vocals are an essential part of a vocal chain, from dealing with the vocal’s tonality to controlling its overall sound. For mastering the vocal chain, the right EQ settings can make the vocals sound clearer, more vibrant, and professional. Properly EQing the vocals involves techniques such as removing unwanted frequencies and enhancing the high and low frequencies of the vocal track.

Compression For Mastering

The fundamental job of compression is to even out the dynamics of the vocal track to ensure that no part of the audio is too loud or too soft. This helps to get a consistent vocal sound in the recording, by reducing volume peaks and bringing up low audio levels, resulting in a better vocal mix. Using compression for mastering can significantly improve the vocal sound quality.

Limiting And Clipping

Limiting and clipping are the final steps in mastering the vocal chain. Both techniques help to tame the peaks and give the mix the finishing touch it needs. Limiting adjusts the output volume, reducing the spikes within the audio, and clipping helps to protect the audio from peaking beyond a certain level. The combination of these two techniques helps to optimize the levels of the audio, ensuring a consistent and professional sound.

Mixing And Mastering Industry Vocal Chain


Credit: www.youtube.com


Frequently Asked Questions For Mixing And Mastering Industry Vocal Chain


What Is The Vocal Chain For Mixing?


The vocal chain for mixing refers to a sequence of audio processors used to enhance and improve the sound of a vocal recording. This could include effects such as compression, EQ, reverb, and delay. The chain can vary depending on the desired outcome, but it generally aims to balance the vocal and make it sound more polished and professional.


What Order Should Your Vocal Chain Be In?


The vocal chain should be in the following order: 1) gain/trim, 2) EQ, 3) compression, 4) de-essing, and 5) effects like reverb or delay. It is important to adjust the settings to fit the specific needs of the vocals and to avoid over-processing.


What Are The 6 C’s Of Vocal Mixing?


The 6 C’s of vocal mixing include clarity, consistency, coherence, character, contrast, and creative effects. These are essential elements to consider when mixing and producing vocals for a professional and well-balanced sound. A clear, consistent, and cohesive vocal delivery with unique character and creative effects can make your track stand out from the rest.


Where Should Eq Go In Vocal Chain?


EQ should go after noise reduction and de-essing in the vocal chain. Start by cutting problem frequencies and boosting desired ones. Then add compression to even out levels and a touch of reverb for a natural sound. Tweaking EQ at the end of the chain can give you better clarity.


Conclusion


The right vocal chain can make or break a music track. Mixing and mastering industry experts understand this fact and invest time in fine-tuning each element of the vocal chain. From the microphone to the final EQ and compression, every element counts.


However, finding the perfect combination can be a daunting task. This blog post has highlighted some insights into creating a powerful vocal chain. Remember, practice makes perfect, and the more you experiment with different vocal chains, the better you will get.


So, keep on refining your skills, and you will definitely create a winning sound.


Categories
Archive

Native Instruments Komplete Kontrol S Review

The Native Instruments Komplete Kontrol S offers precise control and intuitive integration for music production. It delivers exceptional performance and seamless workflow, making it a top choice for musicians and producers.


In this review, we will explore the features, functionality, and performance of the Komplete Kontrol S. From its ergonomic design to its extensive library of sounds and effects, this MIDI keyboard provides a seamless experience for both beginners and professionals.


With its intuitive navigation and deep integration with popular DAWs, it allows users to focus on their creativity and productivity. Whether you’re a pianist, composer, or electronic music producer, the Komplete Kontrol S is a powerful tool that enhances your musical journey. Let’s dive into the details and see how it can elevate your music production game.

Native Instruments Komplete Kontrol S Review


Credit: www.musicradar.com


Key Features

Native Instruments Komplete Kontrol S is a powerful and intuitive MIDI keyboard controller designed to streamline the music production process. Its key features propel it to the forefront of the industry, providing musicians and producers with a comprehensive toolset for unleashing their creativity.

Integration With Komplete Software

The Komplete Kontrol S seamlessly integrates with the renowned Komplete software, offering direct access to instrument presets and parameters. This deep level of integration allows for intuitive manipulation and control of the virtual instruments within the Komplete suite, enhancing workflow efficiency and creativity.

Smart Play Features

One of the standout features of the Komplete Kontrol S is its Smart Play capabilities. This includes Scale and Chord modes, arpeggiator, and chord sets, empowering users to effortlessly create complex musical patterns and harmonies without advanced theoretical knowledge. These features open up exciting possibilities for musicians of all skill levels.

High-quality Fatar Keybed

The Komplete Kontrol S is equipped with a high-quality Fatar keybed, delivering a responsive and expressive playing experience. The precision and sensitivity of the keybed ensure that every nuance of the performance is captured, making it a preferred choice for both studio work and live performances.

Performance And Use Cases

The Native Instruments Komplete Kontrol S controller is highly versatile, catering to a wide range of performance and production needs. Let’s explore its capabilities in various scenarios:

Live Performance

  • Offers real-time control over virtual instruments for dynamic on-stage performances.
  • Intuitive keybed and controls enable seamless integration with live setups.
  • Customizable mapping options enhance interaction with software instruments during shows.

Studio Production

  • Facilitates precise MIDI editing and arrangement in a studio environment.
  • Streamlines sound design processes with its intuitive interface and extensive instrument library.
  • Enables layering and modulation for crafting intricate musical compositions.

Integration With Daws

  • Seamless compatibility with leading digital audio workstations for enhanced workflow.
  • Automated mappings and controls to speed up music production tasks within the DAW.
  • Effortless navigation between tracks and instruments for efficient project management.

Whether on stage, in the studio, or integrated with your DAW, the Komplete Kontrol S offers a comprehensive solution for musicians and producers.

https://www.youtube.com/watch?v=Pxn_wP-3uiY


User Experience


The Native Instruments Komplete Kontrol S delivers an exceptional user experience for musicians seeking seamless integration and efficient workflow. With its intuitive design and comprehensive control features, this controller enhances the creative process and elevates music production to new heights.

Ease Of Use

The Native Instruments Komplete Kontrol S is designed with user-friendliness in mind, making it easy for both beginners and experienced musicians to navigate. Its sleek and intuitive interface allows users to seamlessly control and manipulate their music with precision and ease.

One of the standout features of this controller is its ergonomic design, which ensures a comfortable and natural playing experience. The well-placed buttons and knobs allow for effortless access to various functions, eliminating the need to constantly refer to the user manual.

Navigating The Interface

The interface of the Komplete Kontrol S is visually appealing and organized, making it simple to find and access the desired features. Whether you are searching for a specific instrument, effect, or preset, the intuitive browsing system allows for quick and efficient navigation.

The combination of a high-resolution color display and touch-sensitive encoders provides a seamless browsing experience. The clear visual feedback on the display allows users to easily see and select the desired sound or parameter, eliminating any guesswork or confusion.

Customization Options

The Komplete Kontrol S offers a wide range of customization options to suit your personal workflow and preferences. From the ability to map and assign parameters to the touch-sensitive knobs and buttons, to creating your own customized templates and setups, this controller puts you in full control of your musical journey.

With the powerful Komplete Kontrol software, users can further customize their experience by assigning specific functions to the various controls, creating personalized shortcuts and macros, and even integrating third-party plugins seamlessly.

Overall, the Native Instruments Komplete Kontrol S provides an exceptional user experience. Its ease of use, intuitive interface, and extensive customization options elevate the creative process, allowing musicians of all skill levels to fully unleash their creativity and bring their musical ideas to life.

Pros And Cons


The Native Instruments Komplete Kontrol S offers seamless integration with popular music software, making it a versatile and efficient tool for producers and musicians. However, some users may find the learning curve steep and the price tag high.

Advantages

The Native Instruments Komplete Kontrol S provides numerous advantages that make it a top choice for musicians and producers. Here are some key benefits: 1. User-Friendly Interface: With its intuitive design and well-organized controls, the Komplete Kontrol S offers an excellent user experience. Its sleek and ergonomic layout allows for efficient workflow, helping users navigate effortlessly through their music production process. 2. Deep Integration with Komplete Software: As part of the Komplete ecosystem, the S-Series keyboards are specially designed to seamlessly integrate with Native Instruments’ Komplete software. This integration provides musicians with hands-on control over their virtual instruments and effects, enhancing creativity and enabling them to bring their ideas to life effortlessly. 3. Enhanced Playing Experience: The Komplete Kontrol S features high-quality Fatar keybeds that offer a responsive and expressive playing experience, comparable to that of a traditional piano. The keys are velocity-sensitive and equipped with aftertouch, allowing musicians to add depth and nuance to their performances. 4. NKS Compatibility: Native Kontrol Standard (NKS) compatibility is one of the standout features of the Komplete Kontrol S. This innovative technology allows users to access and control a vast range of third-party plug-ins directly from the keyboard’s interface. With NKS, users can seamlessly browse and tweak parameters of compatible software instruments and effects without diving deep into menus. 5. Smart Play Features: The Smart Play features on the Komplete Kontrol S keyboard series are designed to inspire creativity and streamline the composition process. These features include the arpeggiator, chord mode, scale mode, and the unique Light Guide, which provides visual feedback on notes and scales in real-time.

Limitations

While the Komplete Kontrol S is an exceptional piece of equipment, it does have a few limitations worth considering: 1. Price: Compared to other MIDI keyboard controllers on the market, the Komplete Kontrol S series falls on the higher end of the price spectrum. This might make it less accessible for musicians on a tighter budget. 2. Software Dependency: While the deep integration with Native Instruments’ Komplete software is a significant advantage, it does mean that the full potential of the Komplete Kontrol S can only be achieved when used with this specific software. Users who prefer other virtual instruments or digital audio workstations may find limited compatibility. 3. Size and Weight: The Komplete Kontrol S keyboards are larger and heavier than some other MIDI controllers, making them less portable. Musicians who are frequently on the move or have limited desk space may find the size and weight of the keyboard inconvenient. 4. Limited Screen Real Estate: The Komplete Kontrol S-series keyboards come with small screens that display limited information. While the Light Guide does provide visual feedback, users may have to rely more on their computer screens for detailed settings and parameters. 5. Lack of Aftertouch on Certain Models: Not all models of the Komplete Kontrol S feature aftertouch capabilities. Musicians who place emphasis on aftertouch as an expressive tool may need to consider this limitation when selecting a specific model. In conclusion, the Native Instruments Komplete Kontrol S keyboard series offers a range of advantages, including a user-friendly interface, deep integration with Komplete software, enhanced playing experience, NKS compatibility, and Smart Play features. However, it is important to consider the limitations of this keyboard, such as its price, software dependency, size, limited screen real estate, and the absence of aftertouch on certain models. Overall, the Komplete Kontrol S is a powerful tool that empowers musicians and producers in their creative journey.

Comparison With Competitors

The Komplete Kontrol S stands out in the market. Let’s compare it with its top rivals to see how it fares.

Versus Akai Mpk Series

The Akai MPK Series offers similar features but Komplete Kontrol S edges ahead with its intuitive interface.

  • Komplete Kontrol S boasts seamless integration with NI software, which gives users more control.
  • Akai MPK Series provides a wider variety of pads and knobs but lacks the deep software integration.

Versus Arturia Keylab Series

The Arturia KeyLab Series may rival Komplete Kontrol S in build quality, but it falls short in software integration.

  1. Komplete Kontrol S streamlines workflow with its intelligent browser and control features.
  2. Arturia KeyLab offers a diverse selection of instruments but lacks the same depth of integration as Komplete Kontrol S.
Native Instruments Komplete Kontrol S Review


Credit: macprovideo.com


Price And Value

When considering the Komplete Kontrol S keyboard by Native Instruments, the Price and Value play a crucial role in the decision-making process. Let’s delve into the cost-efficiency and the software value that this product offers.

Cost-efficiency

The Komplete Kontrol S provides a cost-efficient solution for musicians looking for high-quality controls and integration. Priced competitively in the market, it offers excellent value for the features it presents.

Included Software Value

One of the standout features of the Komplete Kontrol S is the included software value that comes with it. Bundled with a wide array of premium software instruments and effects, users get access to a treasure trove of sounds and tools to enhance their music production.

Native Instruments Komplete Kontrol S Review


Credit: www.youtube.com


Frequently Asked Questions On Native Instruments Komplete Kontrol S Review


What Is The Point Of Komplete Kontrol?


KOMPLETE KONTROL provides intuitive control over virtual instruments, effects, and sounds for easy music creation.


Can I Use Komplete Kontrol Without A Computer?


Yes, you can use KOMPLETE KONTROL without a computer for intuitive control of instruments and effects.


Does Komplete Kontrol Need Power Supply?


No, KOMPLETE KONTROL does not need a power supply. It can be powered via USB connection.


Can You Use Komplete Kontrol Standalone?


KOMPLETE KONTROL cannot be used standalone. It requires connection to a computer and software for operation.


Conclusion


To sum up, the Native Instruments Komplete Kontrol S offers impressive functionality for music creators. Its intuitive design and seamless integration with software make it a valuable tool. With its advanced features and user-friendly interface, the Kontrol S is a top choice for musicians seeking versatility and innovation.