Removing resonances during mastering depends on the specific track and the type of resonance. In some cases, it can improve the sound quality.
Mastering is an essential process in music production, where the final mix is optimized to sound professional and polished. One of the key elements of mastering is identifying and removing resonances in the mix. Resonances are frequencies that resonate or amplify in a particular space, creating an unpleasant and boomy sound.
However, removing resonances is not always necessary or beneficial. It ultimately depends on the individual track and the type of resonance present. We will explore the pros and cons of removing resonances in mastering and provide some tips for achieving a balanced and cohesive final mix.
Credit: flypaper.soundfly.com
Common Techniques For Removing Resonances
Removing resonances can be a useful technique during mastering. Common methods include using a parametric equalizer or a dynamic equalizer, but it is important to use these tools with care to avoid negatively impacting the overall mix.
If you’re into audio mastering, you know that resonances can be a pain to deal with. They can make your mix sound off-key or create unwanted frequencies that can ruin the overall sound. That’s why it’s important to know how to remove them. Here are three common techniques that you can use to remove resonances in mastering.
Dynamic Eq
Dynamic EQ is an effective technique to remove resonances. It works by using an EQ that can detect when a frequency is too loud and automatically lowers it. This ensures that the resonance is reduced without affecting the rest of the mix. Dynamic EQ can also boost frequencies automatically, so you can create a smoother, more balanced mix.
Multiband Compression
Multiband compression is another technique that you can use to remove resonances. It works by compressing only certain frequency ranges. By compressing just the frequency ranges that are causing the resonances, you can reduce the unwanted frequencies without affecting the rest of the mix. This technique is particularly useful for eliminating resonance from drum tracks.
Notch Filters
Notch filters are one of the simplest and most effective ways to remove resonances. They work by selectively removing a small band of frequencies from the mix, which can help to reduce resonances. Notch filters can be used to surgically remove unwanted frequencies without affecting the rest of the mix. This makes them a popular choice for mastering engineers. In conclusion, removing resonances in mastering is essential to creating a polished and professional-sounding mix. There are several techniques that you can use, including dynamic EQ, multiband compression, and notch filters. Try experimenting with each of these techniques to see which works best for you and your mix.
Credit: www.masteringthemix.com
How To Identify Problematic Resonances
Identifying problematic resonances in mastering is crucial for achieving a balanced sound. However, removing resonances should only be done if they are negatively impacting the overall mix. It is important to use a critical ear and understand when to address them or when to leave them as part of the natural sound.
Spectral Analysis
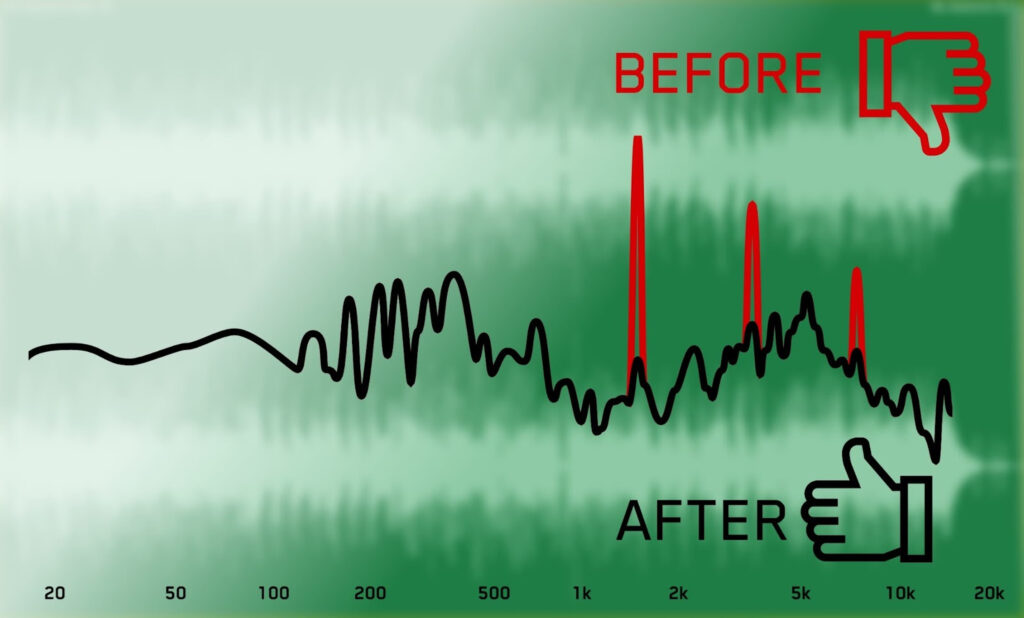
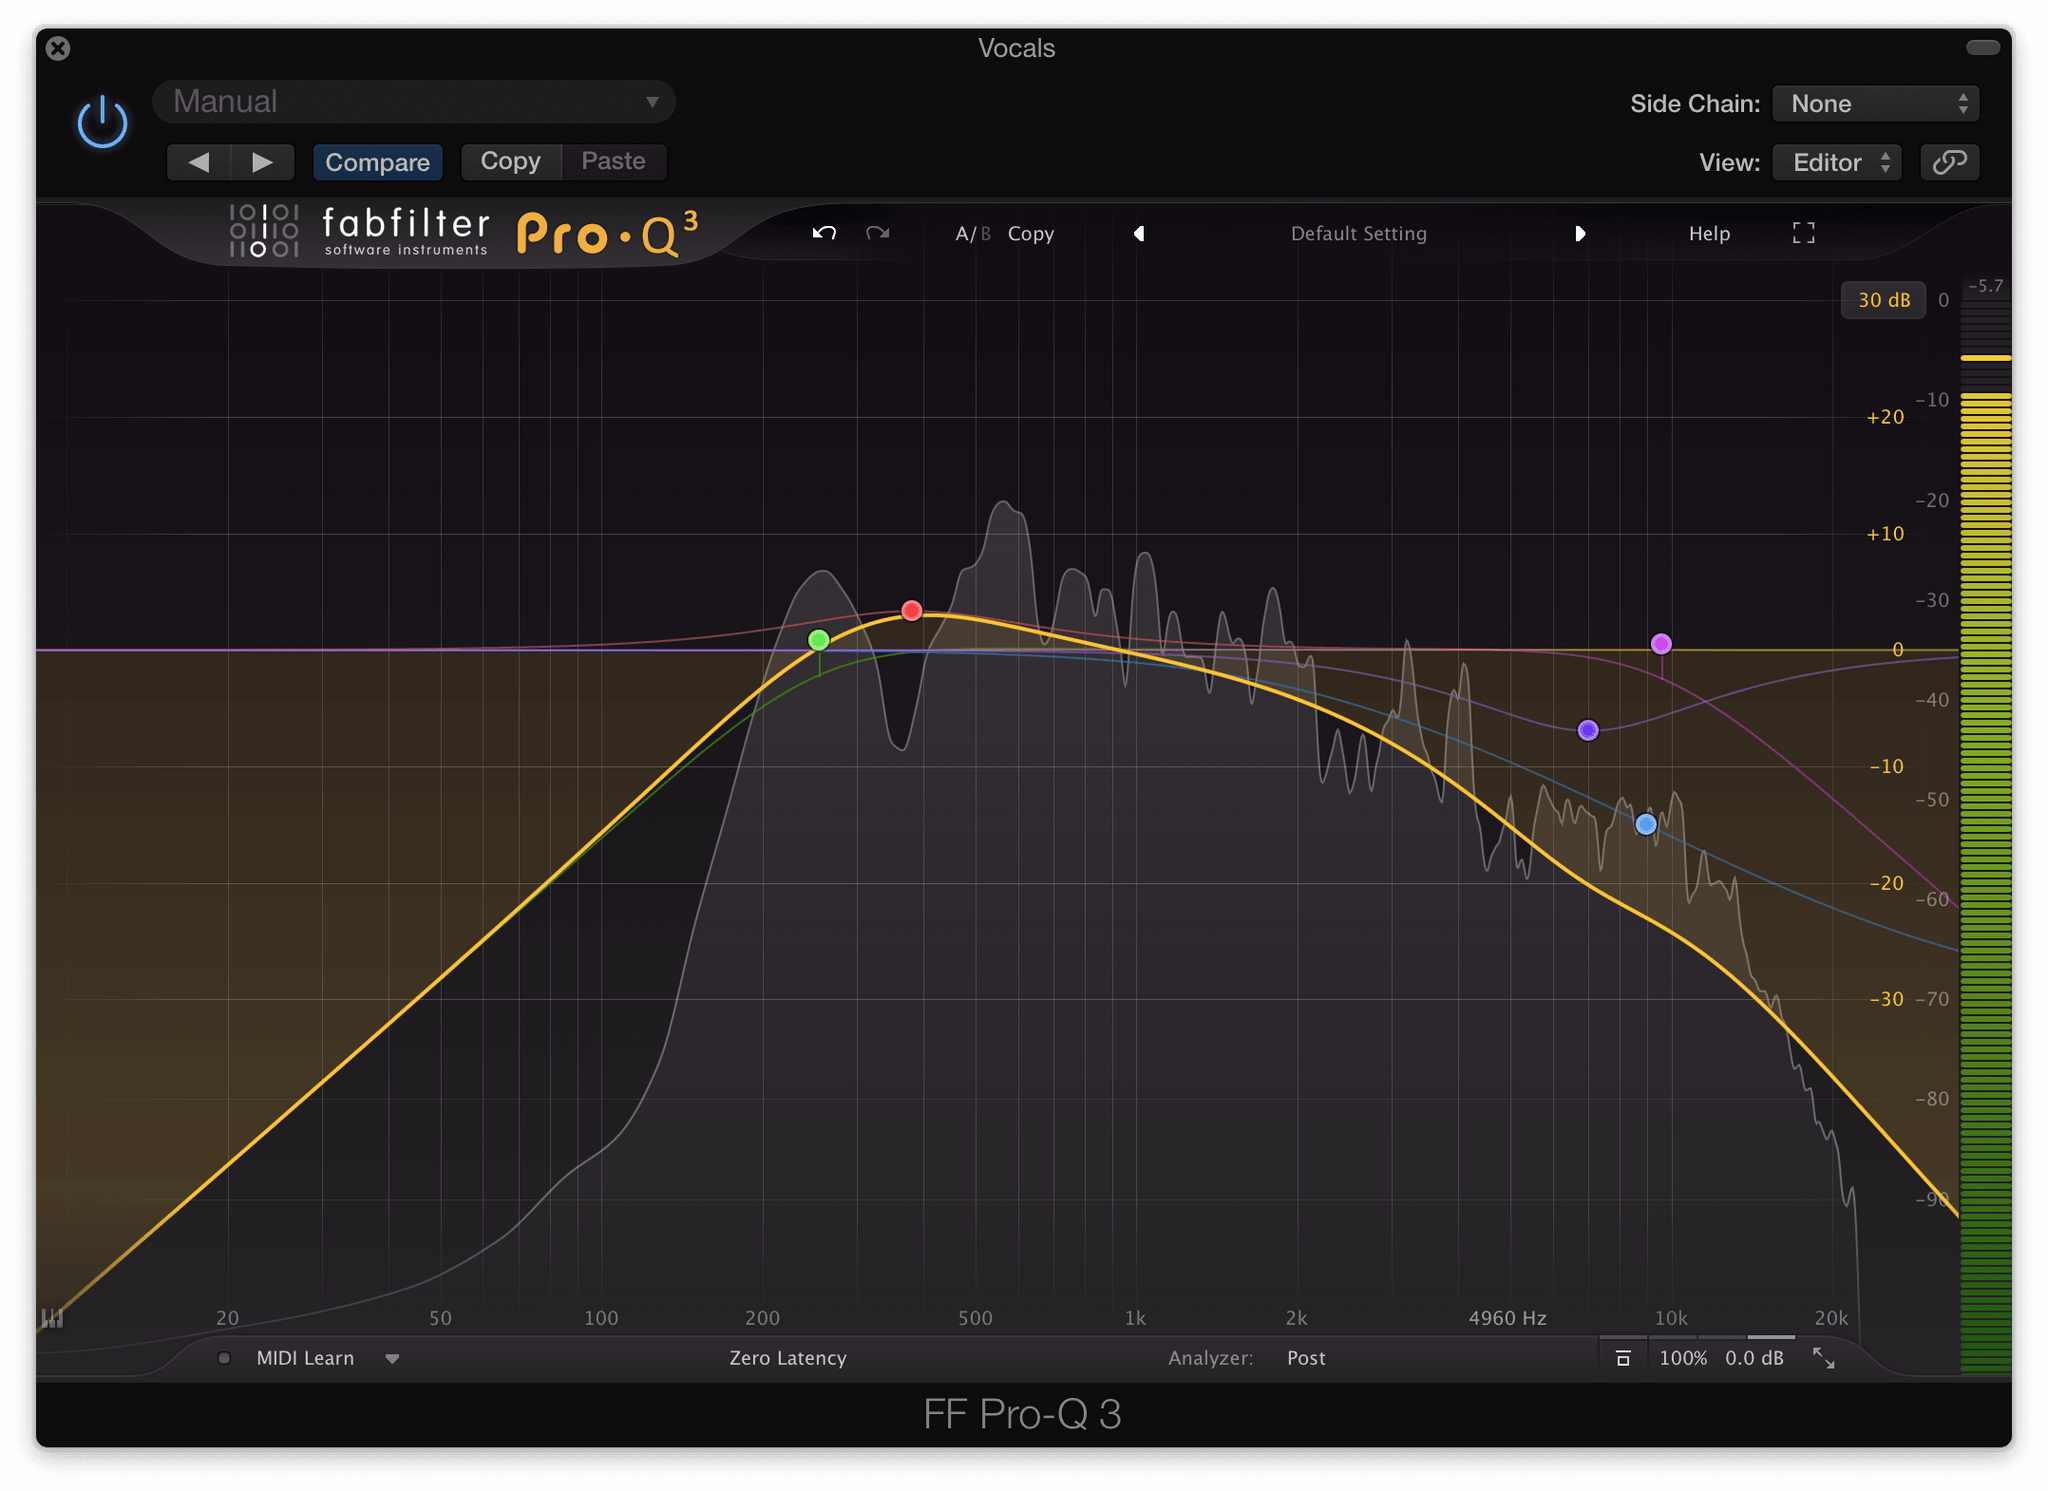
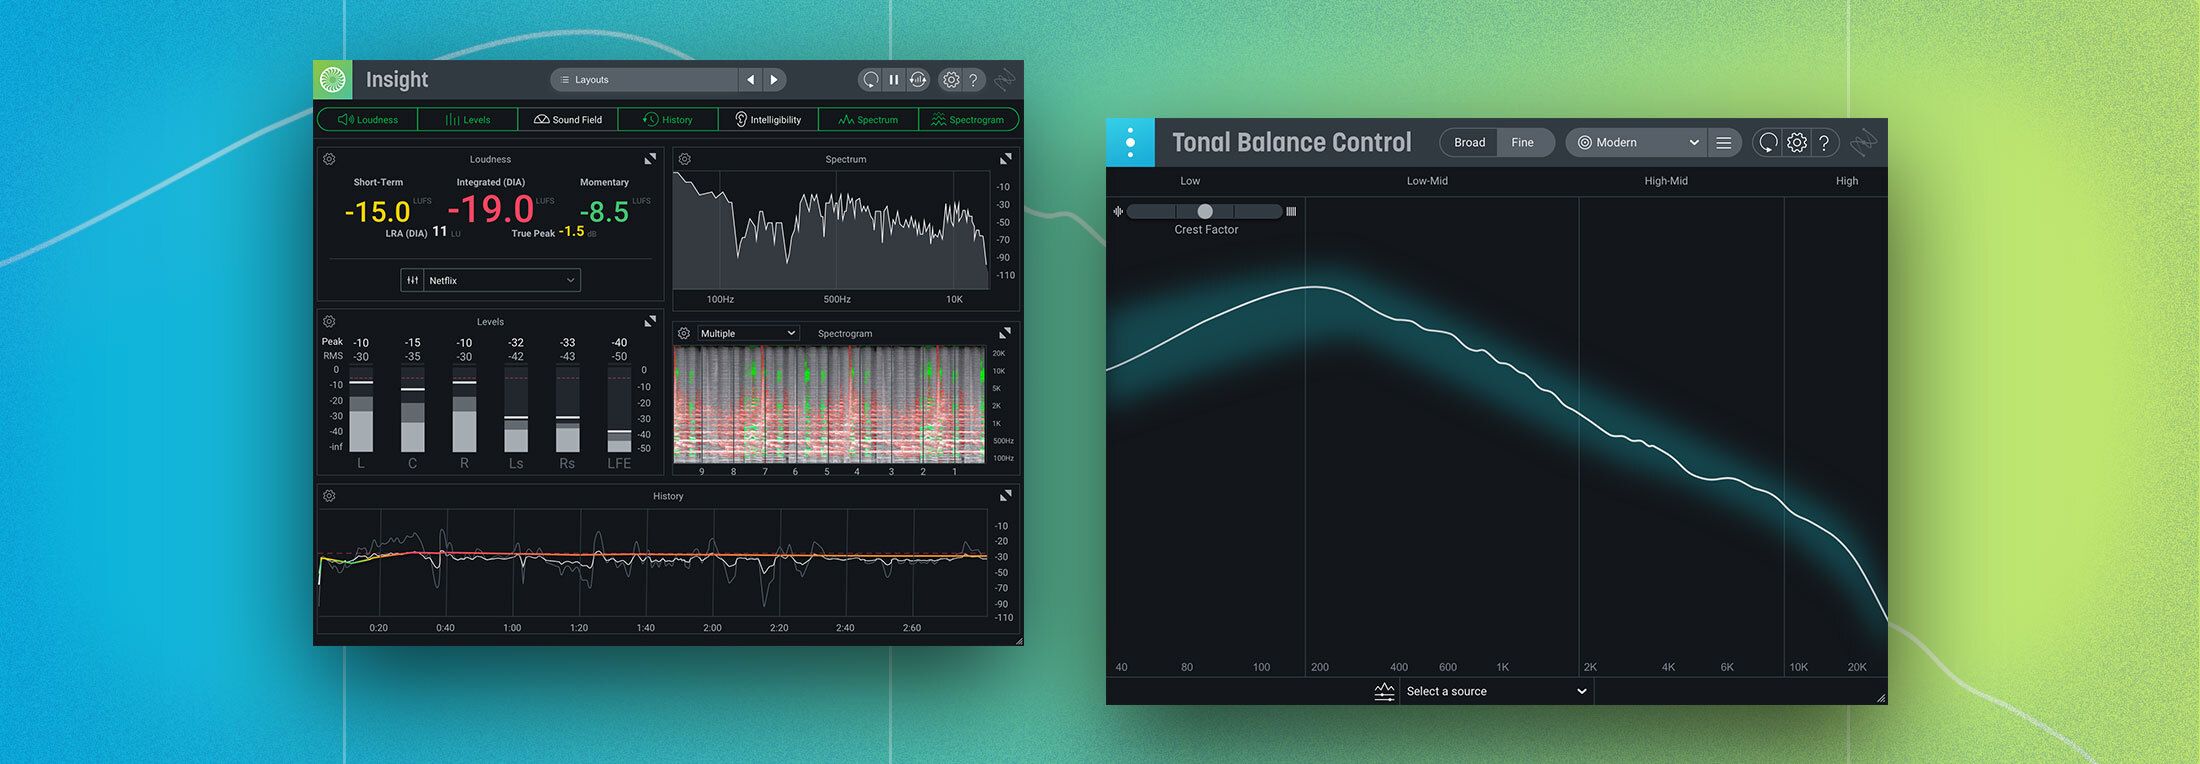
To remove resonances effectively requires identifying the problematic frequencies first. Spectral Analysis is one of the best ways to identify these problematic resonances. Spectral analysis is a graphical representation of the frequency spectrum of sound. During mastering, a spectral analysis tool can be used to identify peaks and dips in the frequency response of a mix. These peaks and dips can help locate the resonances that need to be addressed.
Listening Tests
Another way to identify problematic resonances is through listening tests. Although it is always recommended to use spectral analysis, listening tests are equally important, particularly to identify those resonances that do not appear in the frequency analysis. Listening tests involve the creation of an A/B comparison that helps in recognizing the rangy parts and the unbalanced regions of the audio mix.
Conclusion
Identifying problematic resonances accurately is highly important in mastering to ensure that the final mix sounds polished and professional. Spectral analysis and listening tests are the most recommended approach for identifying resonances that require correction. Combining these two methods will result in a better outcome for your tracks, but note that overdoing it may lead to an over-corrected mix that may sound unnatural and unconventional.
Credit: flypaper.soundfly.com
Frequently Asked Questions Of Should You Remove Resonances During Mastering
Where Resonance Should Be Avoided?
Resonance should be avoided in structures where vibration can cause damage or unwanted noise. This includes bridges, buildings, and machines. Resonance can also have negative effects on musical instruments and sound systems. It is important to understand and control resonance in order to prevent damage and maintain efficiency.
Why Resonance Is Avoided?
Resonance is avoided because it causes unwanted vibrations that can be harmful to structures or machinery. If left unchecked, resonance can lead to mechanical failure or damage over time. Avoiding resonance is important in maintaining the durability and longevity of equipment and structures.
What Frequencies To Cut When Mastering?
In mastering, there are no specific frequencies that must be cut. Rather, it depends on the specific mix and what needs to be addressed. However, some common areas to cut include low-end rumble, harsh highs, and muddy or resonant frequencies.
It’s important to use EQ sparingly and selectively, as cutting too much can negatively impact the overall sound.
How Do You Get Rid Of Resonant Frequency?
Resonant frequency can be eliminated by dampening vibrations and using vibration-absorbing materials. This can be done through the use of shock mounts, rubber feet, and acoustic foam. The goal is to reduce the vibration and prevent it from being amplified in resonance.
Conclusion
Removing resonances during mastering can result in a cleaner and more balanced sound. However, it’s important to keep in mind that not all resonances are bad and can add character to the mix. It’s key to make informed decisions based on the specific needs of the track and the desires of the artist.
With careful consideration and a trained ear, it’s possible to achieve a polished final product without sacrificing the unique qualities that make each track special. Ultimately, it’s up to the engineer to use their judgment and expertise to find the right balance between removing resonances and preserving the integrity of the mix.
Some of the best chorus VST plugins available for PC and Mac are Soundtoys MicroShift, Waves Doubler, and TAL-Chorus-LX. These plugins offer excellent sound quality and versatility for creating lush and immersive chorus effects.
Chorus effects can add a rich and spacious quality to your audio, making it sound larger-than-life and more dynamic. Whether you’re working on music production or audio post-production, a good chorus plugin can help take your sound to the next level.
We’ll explore some of the top chorus VST plugins available for PC and Mac. We’ll cover their key features, sound quality, and usability, so you can find the perfect chorus plugin to suit your needs.
Top Chorus Vst Plugins For Pc And Mac
HTML Syntax:
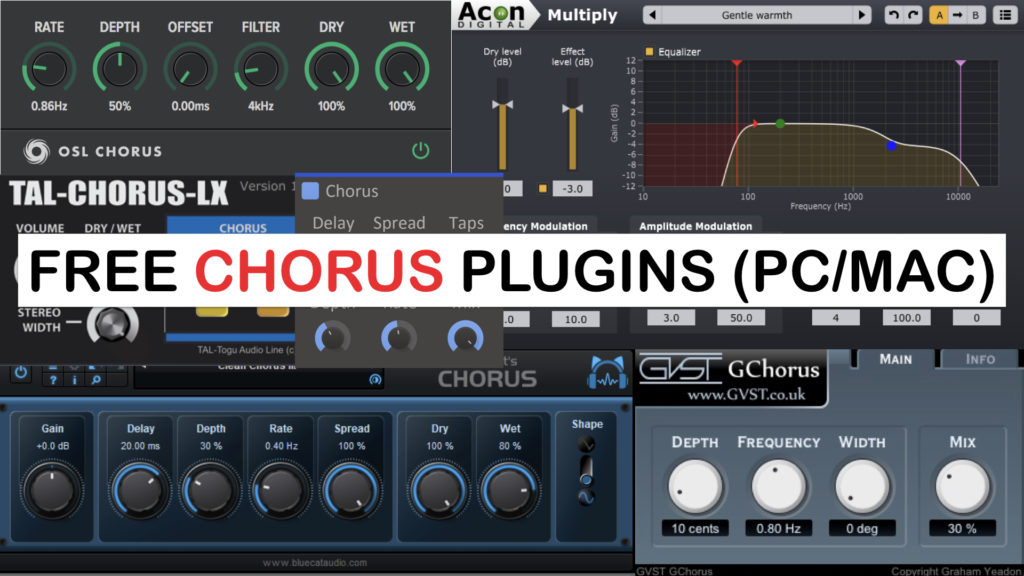
If you are a music producer or composer, you know the importance of a good chorus effect. The chorus effect can make a flat sound come to life and add depth and width to your mix. With so many options available, it can be overwhelming to find the perfect plugin for your needs. In this article, we have compiled a list of the top chorus VST plugins for both PC and Mac, so you can focus on creating your music.
Valhalla UberMod is a chorus and delay plugin that offers a range of modulation effects, from subtle to extreme. With up to five chorus voices, each with its own degree of detuning, spacing, and modulation, UberMod can create lush and complex sounds. The plugin features a clean, intuitive interface, and its CPU usage is low, even on older machines.
Soundtoys MicroShift is a pitch-shifting chorus effect that offers a unique stereo widening effect. It uses a special algorithm that shifts pitch differently for each of the left and right channels, creating a wider stereo image than traditional chorus effects. With intuitive controls and a simple interface, MicroShift is easy to use, yet offers a range of creative possibilities.
TAL-Chorus-LX is a free chorus plugin that offers a classic, analog-style chorus effect. It features a simple, intuitive interface and low CPU usage, making it a great choice for those looking for a no-frills, reliable chorus plugin. TAL-Chorus-LX also includes a built-in EQ and low-pass filter, allowing you to shape the sound to your liking.
Acon Digital Multiply is a versatile chorus effect that can create everything from subtle, spacey effects to heavy, metallic sounds. It features up to six voices, with adjustable modulation depth and rate, as well as a built-in EQ and delay. Acon Digital Multiply’s intuitive interface makes it easy to dial in the desired effect, and its low CPU usage makes it suitable for use in any project.
The Eventide H910 is a classic chorus and pitch-shifting plugin that has been used on countless recordings since its introduction in the 1970s. The plugin emulates the sound of the iconic Eventide H910 hardware unit, offering vintage-style modulation effects and pitch shifting. With a simple yet powerful interface, the Eventide H910 is a must-have for anyone looking to add a touch of vintage magic to their mix.
Credit: www.productionmusiclive.com
Valhalla Ubermod
Valhalla UberMod is a top-notch chorus VST plugin available for both PC and Mac users. Its unique features, such as the diffusion control and modulation rate, make it stand out among its competitors in the market.
Valhalla UberMod is one of the best chorus VST plugins available for both PC and Mac. Its unique features and sound quality make it stand out from the rest of the plugins in the market. In this section, we will discuss the features, pros, and cons of Valhalla UberMod.
Features
Valhalla UberMod is equipped with a range of features that make it a must-have plugin. Some of the features are:
It provides a wide range of modulation options for creating unique effects.
The plugin has a precise delay system that creates different delay lines for each channel.
Valhalla UberMod offers a variety of chorus and flanger modes, including dual choruses, granular choruses, and multi-voice choruses.
The plugin has advanced pitch shifting capabilities for creating various harmonies and effects.
Valhalla UberMod also has a built-in EQ that allows you to shape the sound of the modulation effect.
It offers a resizable interface that works well on both small and large screens.
Pros
Valhalla UberMod comes with several advantages that make it one of the best chorus VST plugins available today. Some of the pros are:
The plugin provides high-quality sound effects that can make any track stand out.
Valhalla UberMod’s extensive modulation options allow you to create unique effects and textures.
The plugin is user-friendly and easy to use, even for beginners.
It is compatible with both PC and Mac, making it ideal for any music producer.
Valhalla UberMod is inexpensive compared to other chorus VST plugins available in the market.
Cons
Although Valhalla UberMod is an excellent chorus VST plugin, there are some drawbacks you should consider before purchasing. Some of the cons are:
The plugin may consume a lot of CPU power, which can affect the performance of your computer.
Valhalla UberMod does not come with any presets, which means you have to create all your effects from scratch.
The plugin’s extensive options and settings can be overwhelming for some users.
Overall, Valhalla UberMod is a highly recommended chorus VST plugin for PC and Mac users who want to add unique modulation effects to their tracks. Its advanced features, user-friendly interface, and affordable price make it a must-have plugin for any music producer.
Soundtoys Microshift
For the best chorus VST plugins, Soundtoys MicroShift is a top contender. With its unique pitch shifting and stereo widening capabilities, it adds depth and dimension to any sound or instrument. Compatible with both PC and Mac operating systems.
If you’re looking for a chorus VST plugin that can deliver natural-sounding and classic chorus effects, then the Soundtoys MicroShift is worth considering. This plugin can add pitch-shifting and stereo-widening effect to your audio tracks which can help you add depth to your mix. Let’s take a look at some of its features, pros, and cons.
Features
The Soundtoys MicroShift is a pitch-shifting plugin that uses a unique algorithm to create a wide stereo sound. Here are some of its features:
Two pitch-shifted channels for a rich, chorus-like effect
Spread control to adjust the stereo width of the effect
Dual-mode, allowing users to switch between studio-quality for precision or live mode for a natural-sounding effect
Compatible with popular DAWs such as Logic Pro X, Ableton Live, Pro Tools, and more
Available for both PC and Mac
Pros
Here are some of the advantages of using Soundtoys MicroShift:
The plugin is user-friendly and easy to use, allowing you to add depth to your tracks with a few simple tweaks
It offers a natural-sounding chorus effect, making it perfect for adding some extra “oomph” to your tracks without making them sound too artificial or processed
The pitch-shifting feature allows users to create unique harmonies and melodies, making it ideal for producers looking to experiment with their sound
It offers excellent sound quality, which is expected from Soundtoys products
Cons
Despite its many advantages, Soundtoys MicroShift does have some shortcomings that you should be aware of:
The plugin doesn’t offer many customization options, which might be a disadvantage for experienced producers who prefer to have more control over their sound
The stereo-widening effect may not be suitable for every track, so it’s important to use it in moderation
It’s relatively expensive compared to other chorus VST plugins on the market, which might not be ideal for producers on a tight budget
In conclusion, the Soundtoys MicroShift can help you add depth and dimension to your tracks with its natural-sounding chorus effect. However, it may not be suitable for every track, and its relatively high price might be a disadvantage for some. Nonetheless, the plugin boasts several unique features and is definitely worth considering if you’re looking for a high-quality chorus VST plugin for your PC or Mac.
Credit: synthanatomy.com
Tal-chorus-lx
TAL-Chorus-LX is one of the best chorus VST plugins available for PC and Mac. With its easy-to-use interface and rich sound, it is perfect for adding depth and dimension to any track.
The TAL-Chorus-LX is a highly-rated chorus VST plugin designed for PC and Mac users. This plugin has gained popularity for its exceptional features that allow users to create rich and unique sounds. In this section, we’ll explore the features of this plugin, its pros and cons, and why it’s a must-have for music producers.
Features
The TAL-Chorus-LX boasts an array of features that enable users to produce high-quality sounds with ease. One notable feature of this plugin is its adjustable chorus depth, rate, and feedback, which allows musicians to create unique musical effects. Additionally, it comes equipped with a stereo width control that allows you to adjust the stereo field of your tracks. With a simple user interface that makes it easy to manipulate and create custom sounds, the TAL-Chorus-LX is an excellent choice for beginners and seasoned music producers alike.
Pros And Cons
When it comes to the TAL-Chorus-LX, there are many pros and cons to consider. One significant advantage of this plugin is that it’s free, making it accessible to musicians on a budget. Moreover, it’s compatible with both PC and Mac platforms, making it ideal for different producers. Another pro is that it produces rich and high-quality sounds that are perfect for creating unique musical effects. However, one drawback of this plugin is that it may not work as well with some DAWs as it does with others. Additionally, it lacks some features that are present in other paid chorus VST plugins. Overall, the TAL-Chorus-LX is an excellent choice for music producers who want a free and user-friendly chorus VST plugin. It’s a versatile tool that can help musicians create unique sounds and expand their music production capabilities.
Acon Digital Multiply
Acon Digital Multiply is one of the best chorus VST plugins for both PC and Mac. With its creative features and easy-to-use interface, this plugin can add depth and dimension to any sound.
Acon Digital Multiply is an impressive chorus VST plugin that offers a unique range of vocal effects and doubling sounds. With this plugin, vocalists and producers can create deep, lush, and spacious choruses that add depth and dimension to their tracks. Here are the features, pros, and cons of the Acon Digital Multiply plugin.
Features:
The Acon Digital Multiply plugin offers a range of versatile features that produce excellent results. Some of its notable features include:
Dual chorus section with independent parameters for the left and right channels
Built-in EQ section for shaping the chorus effect
Low CPU usage, making it suitable for large mixes
Sophisticated delay line algorithm that creates rich, natural-sounding chorus effects
Multiple control options for tweaking the time, feedback, modulation depth, and mix parameters
Pros:
The Acon Digital Multiply plugin is highly versatile and offers several benefits. Here are some of its advantages:
Simple and user-friendly interface
Produces natural and subtle sounding chorus effects
Offers a wide range of controls that make it easy to customize the sound
Low CPU usage that allows for multiple instances to be used in a mix
Affordable in comparison to other chorus plugins
Cons:
Despite its many benefits, the Acon Digital Multiply can also present some challenges, and some users may need to consider the following:
Limited range of presets in comparison to other chorus VST plugins
Requires basic knowledge of EQ and modulation to fully utilize its features
In conclusion, the Acon Digital Multiply is a versatile, user-friendly, and affordable chorus VST plugin that is loved by many users. While it may present some challenges for beginners, its sophisticated delay line algorithm, low CPU usage, and multiple control options make it a great choice for professionals who want to create unique and subtle chorus sounds on their tracks.
Eventide H910
Eventide H910 is a powerful chorus VST plugin compatible with both PC and Mac systems. It’s widely used by producers and engineers for its advanced features, including pitch shifting, modulation, and filtering capabilities that add a unique touch to any audio production.
Eventide H910: A Revolutionary Chorus VST Plugin The Eventide H910 is a powerful chorus VST plugin that offers an innovative and versatile collection of features for musicians and producers alike. Developed by Eventide, a renowned company that has been producing top-quality effects processors for decades, the H910 is an excellent choice for anyone looking to add an extra layer of depth and texture to their audio tracks.
Features
The Eventide H910 is packed with a wide range of features that make it a favorite among musicians and producers. Some of its key features include:
Dual harmonizer
MicroPitch shift
Chorus
Flange
Delay
Reverb
MIDI control
The H910’s dual harmonizer allows you to create rich, multi-layered harmonies with ease, while the MicroPitch shift feature enables you to add subtle pitch detuning effects to your tracks. The plugin’s chorus, flange, delay, and reverb effects are also excellent, providing a broad range of creative options for audio engineers.
Pros And Cons
As with any piece of software, the Eventide H910 has its share of advantages and disadvantages. Here are some of its pros and cons: Pros:
Excellent sound quality
User-friendly interface
Powerful MIDI control options
Cons:
Extra processing can be heavy on CPU usage
Relatively high price point
Overall, the pros of the Eventide H910 far outweigh its cons, making it an excellent choice for anyone looking for a versatile and powerful chorus VST plugin.
Credit: www.sweetwater.com
Frequently Asked Questions Of Best Chorus Vst Plugins For Pc And Mac
What Is The Best Chorus Plugin For Vocals?
The best chorus plugins for vocals include Waves Doubler, Soundtoys Microshift, and Eventide H3000 Factory. Each one offers unique features that enhance vocal tracks with a wide and pleasing stereo field and natural-sounding harmonies. These plugins are highly recommended for their reliability and effectiveness.
What Is A Chorus Vst?
A chorus VST is a digital audio plugin used to create chorus effects in music production. It can be added to a sound or instrument track to add depth and warmth by creating a slight detune effect, making it appear as if the sound is coming from different sources.
What Is The Chorus Effect On Vocals?
The chorus effect on vocals is a sound effect created by duplicating an audio signal and adding various time delays and pitch modulation to each copy. This results in a richer, fuller sound that resembles a choir or multiple singers.
The effect is commonly used in music production to enhance the vocals and add depth to the mix.
What Does Vintage Chorus Do?
Vintage chorus is a type of effect used on audio signals to create a rich, smooth and warm sound. It works by duplicating the original signal, delaying it slightly and altering its pitch before combining it with the original signal to produce a swirling, detuned effect.
Conclusion
To sum up, the chorus effect is a popular effect that enhances any music production. With the help of the best chorus VST plugins for PC and Mac, you can achieve amazing results that emulate the classic analog hardware. These plugins offer various features and intuitive controls that add depth and width to your sound.
Whether you are a beginner or a professional, these chorus plugins are a must-have for any music producer looking to elevate their tracks and take them to the next level. Try them out and see the difference yourself!
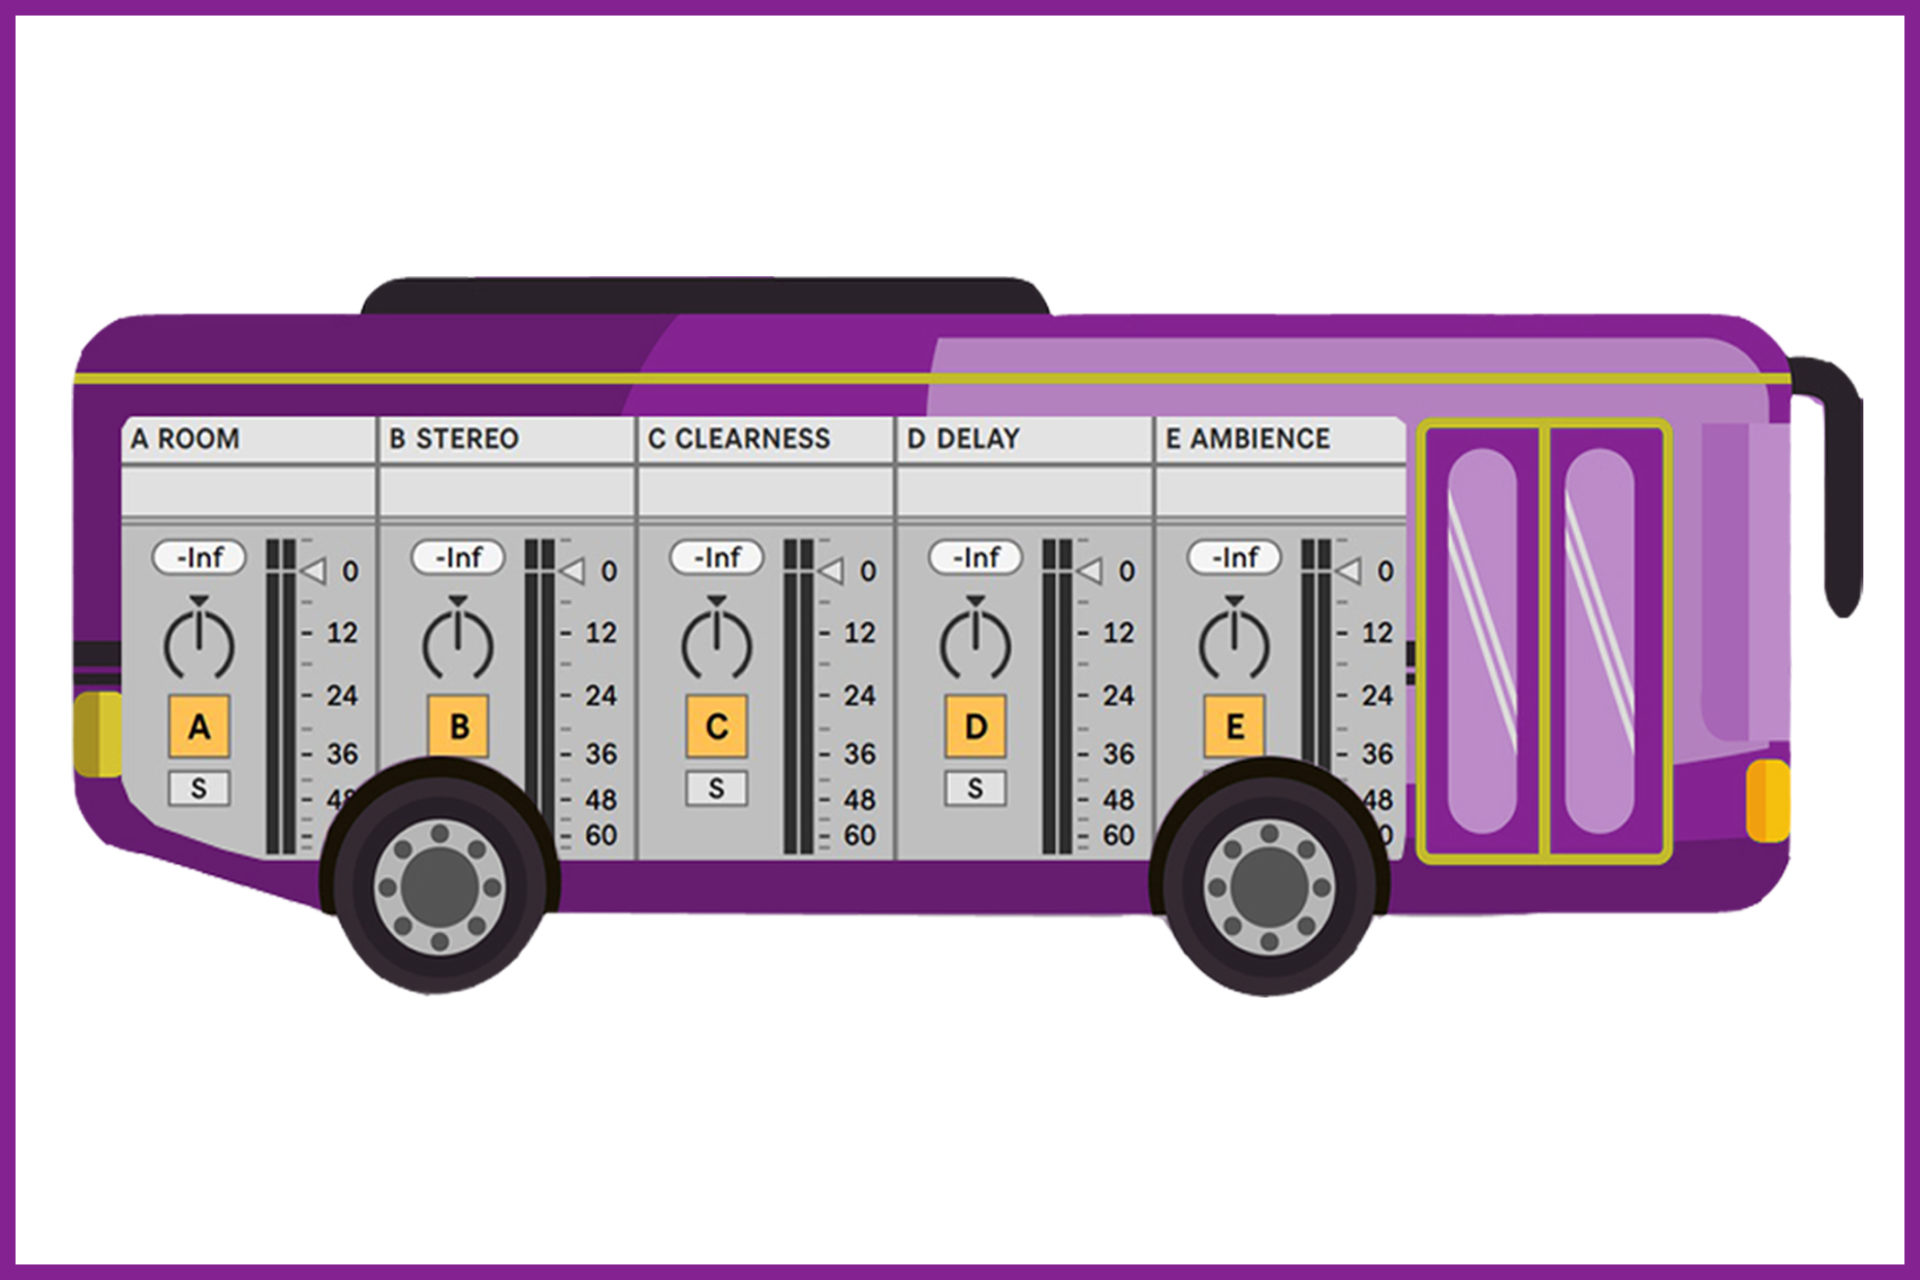
Setting up drum, guitar, and vocal buses helps to achieve a more cohesive and polished sound in a mix. These buses group together similar tracks and allow for easier processing and balance adjustments.
Drum, guitar, and vocal buses are crucial components when it comes to mixing audio tracks. With the help of these buses, a sound engineer can group together individual tracks that belong to a specific instrument or vocal section. This grouping can help to balance and control the levels of each section more easily.
It also allows for more efficient processing of effects. For example, applying reverb or delay to an entire drum mix instead of each individual track, maintaining the original tone and character of the drums. We will break down how to set up drum, guitar, and vocal buses in your DAW (Digital Audio Workstation) for a more cohesive and polished sound in your mix.
Credit: splice.com
Different Types Of Buses
Setting up drum, guitar and vocal buses is essential in a live sound reinforcement scenario. These separate buses allow for individual adjustments and level control, providing flexibility to the sound engineer.
Different Types of Buses: When it comes to mixing music, there are various types of buses that you can use to make adjustments to different parts of your track. These buses are used to group similar sounds and effects together so that you can manipulate them as a whole. The three most common types of buses are drum bus, guitar bus, and vocal bus. Let’s take a closer look at each of these different types of buses. Drum Bus: The drum bus is where you can find all your drum sounds and effects. This includes kick, snare, toms, cymbals and other percussion. You can use the drum bus to add depth, dimension and interest to your drum parts. You can also use it to add compression, reverb or other effects just to the drums. This will give you total control over the drum sounds and help them to sit better in the mix. Guitar Bus: The guitar bus is where you can find all the guitar parts in your track. This includes both rhythm and lead guitars. You can use the guitar bus to add chorus, delay, or other effects just to the guitars. This will help separate them from other instruments in the mix. By tweaking the guitar bus, you can make your guitar parts sound more cohesive, polished, and professional. Vocal Bus: The vocal bus is where you can find all your vocal parts. As the lead vocal is the most important part of any track, it is important to give it special treatment. You can use the vocal bus to apply compression, reverb, or other effects to the vocal track and adjust the volume in relation to the rest of the instruments. This will make the vocal part sound lush and unique. Using the vocal bus will make sure your vocal tracks sound natural and sit well within the mix. In Conclusion, using buses is an essential part of mixing your tracks, and understanding different types of buses and their specific purposes can improve the quality of your music. By enhancing drum, guitar, and vocal tracks you can make your songs sound cohesive and professional.
Credit: flypaper.soundfly.com
Setting Up Drum Bus
To get professional-sounding drum, guitar, and vocal recordings, you need to set up separate buses for each instrument. By setting up these buses, you can add effects to individual tracks, adjust their levels, and control their stereo panning to create a cohesive final mix.
Creating a drum bus in your DAW is an essential step to getting a polished mix. A drum bus is a channel where all of your individual drum tracks are routed, allowing you to process them as a single entity. This can help to glue your drums together and make them sound more cohesive. In this post, we’ll cover how to set up a drum bus in your DAW. We’ll go through the process step-by-step, so you can follow along even if you’re new to mixing.
Create An Audio Track
The first step to setting up a drum bus is to create an audio track in your DAW. This track will serve as the channel for your drum bus. In most DAWs, you can create a new audio track by going to the “Track” or “File” menu and selecting “New Audio Track”. Make sure to set the input of the track to “None”, as you won’t be recording any audio on this track.
Create A Bus Channel
Next, you’ll need to create a bus channel. A bus channel is a routing channel that allows you to send the audio from one or more tracks to a common destination. To create a bus channel in your DAW, go to the “Track” or “File” menu and select “New Bus Channel”. You’ll be prompted to name your bus channel, so give it a name that reflects what audio it will be used for.
Route Drum Tracks To The Bus
With your drum bus channel created, it’s time to route your individual drum tracks to it. The specific process for doing this will vary depending on your DAW, but the general principle is the same. Select each of your drum tracks and route them to the drum bus channel. This is usually done by using the “Output” or “Send” settings for each track and selecting the drum bus as the destination. Once all of your drum tracks are routed to the drum bus, you should hear them all playing through the drum bus channel. Finally, it’s time to add some processing to your drum bus. There are many ways to process a drum bus, but some common techniques include equalization, compression, and saturation. With your drum tracks routed to the drum bus, any processing you do on the drum bus will affect all of your drum tracks together. This can be a powerful tool for creating a cohesive drum sound. In conclusion, setting up a drum bus in your DAW is a key step to getting a polished drum sound in your mix. By following these simple steps, you’ll be able to create a drum bus channel and route your individual drum tracks to it. With your drum tracks playing through the drum bus, you can then add processing to create a cohesive and powerful drum sound.
Setting Up Guitar Bus
Setting up a guitar bus is an essential aspect of any music production with multiple instruments. To create a professional mix, setting up distinct drum and vocal buses can elevate your sound quality further. Properly routing and molding your audio signals can give you complete control, allowing you to fine tune your music to your liking.
If you’re a music producer or audio engineer, you understand the importance of creating a guitar bus. A guitar bus is a channel on your audio mixing board that allows you to group all your guitar tracks together, add effects, and adjust volumes. Here is a step-by-step guide on how to create your guitar bus.
Create An Audio Track
To create a guitar bus, you first need to create an audio track. Open up your digital audio workstation (DAW) and create a new audio track by clicking “File” and then “New Audio Track.” Ensure that the input and output of the audio track match the guitar track you want to add to it.
Create A Bus Channel
Next, create a bus channel to route your guitar tracks to. To create a bus channel, go to your mixing board and click “Add Channel” or the “+” sign. Select “Bus” as the channel type. Give your bus channel a name, such as “Guitar Bus,” for quick identification.
Route Guitar Tracks To The Bus
Once you’ve created your audio track and bus channel, it’s time to route your guitar tracks to the bus. To do this, click on each guitar track and select the output as the guitar bus channel. Ensure that all guitar tracks are routed to the bus by checking the routing on each track.
Pro Tip:
Once you have your guitar bus set up, you can add effects such as reverb, delay, or distortion. When you adjust the volume of the guitar bus, it will affect the volume of all the tracks routed to it. This makes it easier to mix the guitar tracks as a group. That’s it! You now have a guitar bus set up and ready to go. By creating a guitar bus, you’ll be able to mix your guitar tracks with ease as you continue to produce your music.
Credit: www.mixinglessons.com
Setting Up Vocal Bus
Setting up a vocal bus is an important step in achieving a professional-sounding mix for your music. A vocal bus allows you to control and manipulate the levels and effects of all your vocal tracks as a single entity. This means you can apply effects like reverb or compression to the entire vocal mix instead of individual tracks, resulting in a cohesive and polished sound.
Create An Audio Track
The first step in setting up your vocal bus is to create a new audio track in your Digital Audio Workstation (DAW). This track will act as your vocal bus, so be sure to label it appropriately. You can use a stereo or mono track depending on your preference.
Create A Bus Channel
After creating the audio track, the next step is to create a bus channel to route your vocal tracks. In your DAW, select the option to create a new bus or group channel. Label the bus channel as ‘Vocal Bus’ or any other name that makes sense to you.
Ensure that the bus channel is set to receive audio from the audio track you created in the previous step. Also, make sure the bus channel has no effects or plugins applied to it at this stage.
Route Vocal Tracks To The Bus
Once you have created the audio track and bus channel, the final step is to route your vocal tracks to the bus channel.
To do this, select all the vocal tracks that you want to be routed to the vocal bus. Then, in your DAW, choose the option to route the selected tracks to the bus channel you created in the previous step.
Ensure that the routing is set to ‘post-fader’, so that any level changes made to the individual vocal tracks will also affect the vocal bus channel.
Once you have routed all your vocal tracks to the bus channel, you can start applying effects and plugins to the vocal bus. This allows you to have greater control over the overall vocal mix, making it easier to achieve the desired sound for your music.
Frequently Asked Questions On Setting Up Drum Bus Guitar Bus Vocal Bus
Should You Eq The Drum Bus?
Yes, you should EQ the drum bus as it can help to refine the overall sound of the drums and create a more cohesive mix. EQing the drum bus gives you more control over the entire drum mix, allowing you to bring out specific frequencies and adjust the overall tone to your liking.
How Do You Process A Drum Bus?
To process a drum bus, start by ensuring the individual drum tracks are properly mixed. Afterwards, add compression to the drum bus to glue everything together and bring out the nuances. Next, use EQ to boost or cut certain frequencies and add reverb or delay for ambience.
Finally, adjust the volume levels and check to ensure the overall mix sounds balanced.
How Do I Create A Bus Track In Pro Tools?
To create a bus track in Pro Tools, navigate to the Track menu, select “New. . . ,” then choose “Stereo Auxiliary Input” and name it accordingly. Assign the desired input and output, then select “Bus” as the input source.
Finally, route the desired tracks to the newly created bus track to send them to the same effects processor.
What Effects Go On Drum Bus?
The drum bus typically includes effects such as compression, EQ, and reverb to enhance the overall sound of the drums and glue the individual drum tracks together. These effects help to control the dynamics, enhance the tone, and add depth and dimension to the drums in a mix.
Conclusion
Setting up Drum Bus, Guitar Bus, and Vocal Bus is a fundamental skill for any audio engineer. Properly routing and processing these buses can elevate the overall sound of any mix. By using the tips and techniques you can achieve a well-balanced and cohesive mix that sounds professional.
Remember to experiment and find what works best for your specific project. With these tools in hand, you are ready to create a sonic masterpiece.
No, a degree is not required to become an audio engineer. Practical experience and technical proficiency are more important factors for success in this field.
Audio engineering is a creatively demanding and technical profession. It requires a multitude of skills, including recording, mixing, editing, and mastering audio for various mediums, including music, film, television, and podcasts. Naturally, aspiring audio engineers ponder whether formal education is essential for this profession.
We will explore the options available to budding audio engineers and determine if they require academic qualifications to succeed in this field. Whether you want to make a career change, develop new skills, or become an expert in audio production, read on to learn more about the qualifications and skills necessary for becoming a successful audio engineer.
Credit: www.careersinmusic.com
The Importance Of Formal Education
Formal education plays an essential role in the audio engineering field, as it provides aspiring professionals with the necessary skills and knowledge. While it’s possible to gain experience and get started without a degree, having one offers numerous advantages such as better job prospects, industry credibility, and a comprehensive understanding of the craft.
As an aspiring audio engineer, you may wonder whether formal education is necessary to succeed in this field. While hands-on experience and natural talent are valuable assets, formal education provides many benefits that can help you establish a successful career in the industry. In this blog post, we will take a closer look at the importance of formal education for audio engineers, exploring the benefits of degree programs and how a degree can help you develop your skills.
Exploring The Benefits Of Degree Programs
Degree programs offer many benefits for aspiring audio engineers. One of the key advantages of a degree program is that it provides a structured learning environment. With a set curriculum and course materials, you can gain a comprehensive understanding of audio engineering concepts and techniques. Additionally, degree programs often give you access to state-of-the-art equipment and facilities, which can be expensive to acquire on your own. Through hands-on experience with professional equipment, you can develop the technical skills needed to succeed in the industry. Another benefit of degree programs is that they often provide opportunities to network with industry professionals. Your professors and classmates may have connections in the industry that can help you find job opportunities or gain valuable experience through internships. Additionally, attending a degree program can show potential employers that you are dedicated to your craft and have a deep understanding of audio engineering principles.
How A Degree Can Help You Develop Your Skills
Degree programs can help you develop a wide range of skills that will serve you well as an audio engineer. Through coursework in audio theory, signal flow, and recording techniques, you can gain a deep understanding of how sound works and how to manipulate it for different applications. Additionally, you can develop critical thinking and problem-solving skills as you work on projects and troubleshoot issues with your equipment. Another skill you can develop through a degree program is communication. As an audio engineer, it is important to be able to communicate effectively with clients and other team members. Through group projects, presentations, and other coursework, you can develop your ability to communicate technical concepts in a clear and concise manner. In conclusion, while a degree is not necessarily required to become an audio engineer, it can provide many benefits that can help you succeed in the industry. From a structured learning environment and access to professional equipment to the development of essential skills and networking opportunities, earning a degree can help you establish yourself as a skilled and knowledgeable professional in the field of audio engineering.
Alternative Educational Paths
When it comes to a career in audio engineering, many people wonder whether it’s necessary to obtain a degree in the field. While a degree in audio engineering can certainly be helpful, it’s not the only path to success. There are several alternative educational paths that aspiring audio engineers can take to gain the knowledge and experience they need to launch a successful career. These alternative paths can be especially beneficial for those who are looking to enter the field without incurring the high cost of a traditional degree program.
Self-education And Building A Portfolio
One alternative path to a career in audio engineering is to pursue self-education and build a portfolio of work. This path involves taking advantage of the many free or low-cost educational resources available online, such as YouTube tutorials, online forums, and virtual workshops. Through self-education, aspiring audio engineers can learn the technical skills and industry knowledge needed for success in the field.
Take advantage of free or low-cost educational resources online
YouTube tutorials offer a wealth of knowledge on recording techniques, mixing, and equipment
Join online audio forums to learn from experienced professionals
Create a portfolio of work to showcase personal skills and knowledge
Apprenticeships And Internships For Gaining Experience
Another option for aspiring audio engineers is to seek out apprenticeships or internships to gain hands-on experience. These opportunities can be found through local studios, music venues, or live events. Working under the guidance of experienced professionals can help aspiring audio engineers to hone their skills while also building valuable industry connections.
Seek out apprenticeships or internships at local studios or music venues
Look for opportunities to work on live events or shows to gain hands-on experience
Working under experienced professionals helps to hone skills and build valuable connections
The Pros And Cons Of Pursuing A Degree In Audio Engineering
Audio engineering is a profession that requires technical know-how and practical experience. Many people aspire to become audio engineers, and there are various paths to achieving this dream, including pursuing a degree in audio engineering. Though pursuing a degree in audio engineering can provide a strong foundation for the field, it is not the only way to become an audio engineer. There are pros and cons to attending college for audio engineering, and it is important to weigh the options before making a decision.
Pros Of Going To College For Audio Engineering
Attending college for audio engineering provides an opportunity to gain in-depth knowledge and a structured education that covers various aspects of the field. College programs offer a wide range of courses, from creative to technical, providing students with a well-rounded education. Students also have access to state-of-the-art equipment and technology, which is essential for hands-on learning.
Another significant advantage of attending college for audio engineering is building professional networks. College programs have industry experts as faculty members and guest lecturers, providing students with exposure to professionals and openings for internships. Building professional contacts while attending college can help secure employment opportunities later.
Cons: More Than Money – The Investment Of Pursuing A Degree
While college education has many advantages, there are also some drawbacks to pursuing a degree in audio engineering. One of the most significant is the cost of tuition. Attending college can prove expensive, and students may accrue significant debt by the end of the program. Furthermore, attending college can take up to four years, requiring a considerable investment of time and effort. This time could be spent building a portfolio and gaining practical experience.
Another con of attending college is that graduates may not receive higher salaries than those without a degree in audio engineering. Employers in the field primarily consider practical experience and skill rather than academic qualifications. Therefore, it is essential to evaluate if the expense and time investment of pursuing a degree is worth it in terms of employment and income opportunities.
Conclusion
Pros
Cons
Gain in-depth knowledge and a structured education
Expensive tuition
Access to state-of-the-art equipment and technology
Time-consuming – program can take up to four years
Professional networking opportunities
Graduates may not receive higher salaries
While attending college for audio engineering can provide numerous benefits, there are also some drawbacks to consider. It is essential to evaluate the expense and time investment against the potential employment and income opportunities. Ultimately, whether to pursue a degree in audio engineering or not depends on individual circumstances and goals in life.
Credit: recordingconnection.com
Credit: command-s-apparel.com
Frequently Asked Questions For Do You Need A Degree To Be A Audio Engineer
Can I Be An Audio Engineer Without A Degree?
Yes, you can become an audio engineer without a degree, as the industry mainly values talent and experience over formal education. Attend workshops, take internships or work as an assistant to experienced audio engineers to get experience and build a portfolio of work.
Keep learning and updating your skills to progress in your career.
What Do You Need To Become A Audio Engineer?
To become an audio engineer, you typically need a strong understanding of sound, music and recording equipment. Pursue education and experience in music theory, software applications, audio electronics, and production. Develop skills in editing and mixing tracks, live sound techniques, and industry-standard software programs used by professionals.
Who Qualifies As A Sound Engineer?
A sound engineer qualifies as an individual who has the necessary skills and knowledge to operate audio equipment and manipulate sound for music, film or television production, or live performance. They must have expertise in audio hardware and software, acoustics, and signal flow.
Additionally, a sound engineer should be proficient in troubleshooting any technical issues that may arise during various recording or performance sessions.
Is It Worth Going To College For Audio Engineering?
Yes, going to college for audio engineering is worth it if you want to increase your chances of getting a job in the industry, develop your technical skills and knowledge, and build contacts and connections in the field. The training and opportunities available in college can give you a competitive edge in the job market.
Conclusion
In this digital age, audio engineering offers a promising career path for aspiring individuals. The question remains: do you need a degree to become an audio engineer? While formal education can provide technical proficiency and industry connections, it’s not a prerequisite for success in this field.
With self-study, hands-on experience, networking, and a strong work ethic, anyone can become a skilled and sought-after audio engineer. So, whether you choose to enroll in a degree program or pursue an alternative route, the most critical ingredient is your passion and dedication.
To record electric guitar with a condenser mic, position the mic close to the amp’s speaker and adjust the distance and angle to achieve the desired sound. Achieving the right sound is crucial in recording electric guitar with a condenser mic.
As an Amazon Associate I earn from qualifying purchases.
By positioning the mic close enough to the amp’s speaker, the mic can capture a more focused sound. However, this can also result in unwanted feedback and distortion. This can be mitigated by adjusting the distance and angle of the mic until an optimal sound is achieved.
Once positioned, make sure to test the sound and make any necessary adjustments before recording. With the right setup, a condenser mic can effectively capture the clear and vibrant sound of an electric guitar.
Credit: www.mixinglessons.com
Choosing The Right Condenser Mic
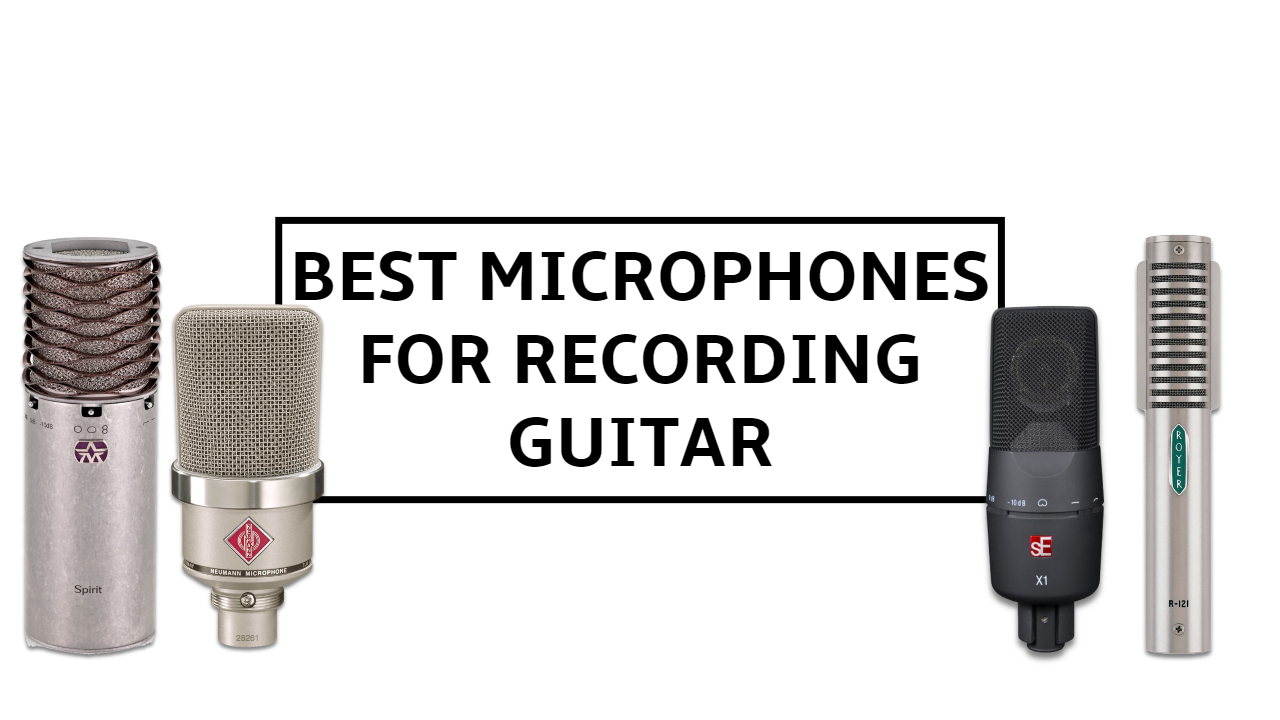
To record electric guitar with a condenser mic, it is important to choose the right one. Look for a mic with a good frequency response and sensitivity to capture the nuances of the instrument. Also, consider the polar pattern and noise floor to ensure the cleanest recording possible.
As a guitar player, recording your music can be an exciting and creative process. The right microphone is essential for capturing the true sound and quality of your electric guitar. A condenser microphone is a popular choice for recording electric guitars because it can pick up the sound with great clarity and detail. In this article, we’ll discuss the considerations for electric guitar recording and the types of condenser mics you can choose from.
Considerations For Electric Guitar Recording
Before you start recording, you need to consider some factors that could affect the sound quality of your guitar. Here are some questions to ask yourself:
What type of music do you play?
What is your playing style?
What sound are you trying to achieve?
What type of amplifier and effects pedals are you using?
Your answers to these questions will help you choose the right condenser mic that can complement your playing style and achieve the sound you want.
Types Of Condenser Mics
There are several types of condenser mics you can choose for recording electric guitars. Here are some of them:
Type
Pros
Cons
Large-Diaphragm Condenser Mic
Great for capturing a warm and rich sound
Sensitive to noise and room acoustics
Small-Diaphragm Condenser Mic
Good for capturing high-frequency details and fast attack
Less warmth and body compared to large-diaphragm mics
Ribbon Mic
Smooth and warm sound with natural roll-off
Fragile and sensitive to damage from high sound pressure levels
Each type of condenser mic has its own advantages and disadvantages, so it’s important to choose the one that suits your needs and preferences. You could also consider using a combination of mics to capture different aspects of your guitar’s sound. In conclusion, choosing the right condenser mic for recording electric guitars is crucial for achieving the best sound quality. By considering your playing style, music genre, and specific sound preferences, you can choose the right type of condenser mic that suits your needs.
Preparing For The Recording Session
To record electric guitar with condenser mic, start by selecting the right microphone and positioning it correctly. Test the equipment for any issues and ensure you have enough space and a quiet recording environment. Experiment with different amp settings and adjust until you find the perfect tone.
Preparing for the Recording Session: Record electric guitar with condenser mic can be both fun and nerve-wracking. It is essential to channel that nervous energy into preparing for the recording session. Here’s how you can ensure that the recording session goes smoothly: ### Setting Up Your Equipment: Setting up the equipment correctly is critical for the best recording output. Here are the crucial steps for setting up your equipment: 1. Connect the Condenser Mic: Connect the condenser mic to the audio interface and ensure that a phantom power supply is available. 2. Positioning of the Mic: Mount the condenser mic around the area of your guitar amp that sounds best. Experimenting with different positions can help you find the ideal spot for recording. 3. Connect the headphones: Plug your headphones in the audio interface to get the sound feed while you’re playing. 4. Check the levels: Adjust the input levels until you are getting an ideal tone. ### Optimizing Your Recording Space: Optimizing your space can help eliminate background noise and ensure that the recording reflects the best of your talent. Below are strategies to optimize your recording space: 1. Padding the Room: Hanging blankets or curtains on the walls can reduce reflection issues and keep the sound confined in a small area. 2. Soundproofing: You can arrange for soundproofing foam panels to minimize echoes and unwanted sound. 3. Eliminating External Noise: Avoid recording near areas with heavy traffic or neighbors with noisy appliances. Taking the time to prepare for recording sessions can produce great results. By following these steps, your recording session will be productive and successful, and you’ll be rewarded with a high-quality recording output.
Mic Placement Techniques
Positioning the condenser microphone in front of the guitar amp speaker is crucial for capturing the right tone and sound. Placing the mic at a 45-degree angle from the speaker cone and at a distance of 4-12 inches can help achieve the desired recording.
Experiment with the placement to find what works best for you.
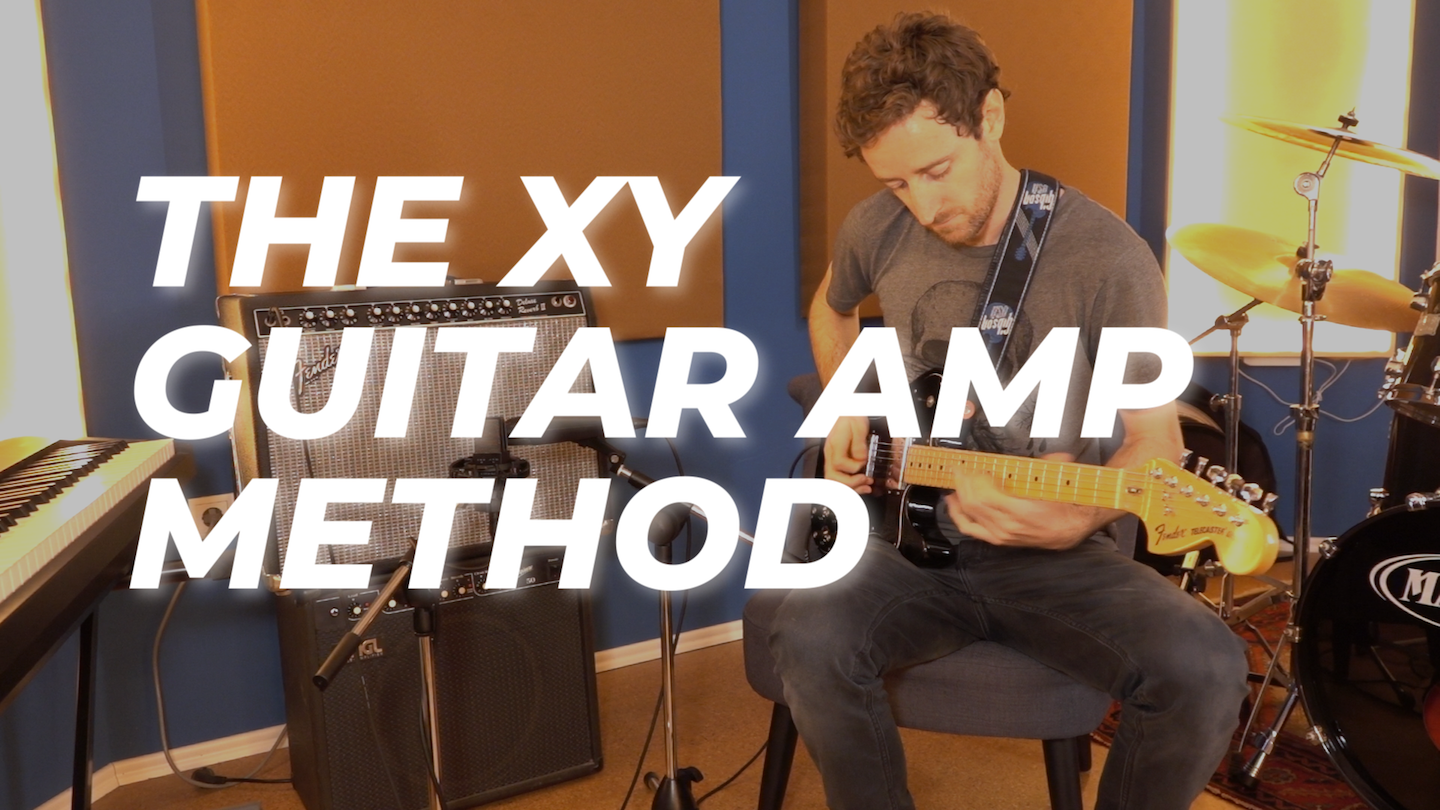
Mic Placement Techniques One of the essential aspects of recording electric guitars is getting the microphone placement right. The proper placement of the microphone contributes significantly to the guitar’s tone and overall sound quality. As a content writer expert on the topic, I have gathered some mic placement techniques to help you record your electric guitar with a condenser microphone successfully. H3: X-Y Stereo Pairing The X-Y stereo pairing technique is a popular method of mic placement used to capture the acoustic sound of an electric guitar. The technique involves using two microphones placed next to each other and angled at 90 degrees. The two microphones should be in a shock mount to avoid any vibrations and phase issues. This technique produces a stereo image that sounds open and natural, making the listener feel like they are sitting in front of the guitar. H3: Close Mic Technique The close mic technique involves placing the microphone as close to the electric guitar’s speaker as possible. This technique is suitable for achieving a punchy and focused sound of the guitar. The microphone should be placed at a 45-degree angle pointing towards the speaker cone’s center for better sound clarity. A pop shield should be used to avoid plosives and downward mic placement to prevent any sound leakage. This technique works best when you need to emphasize the guitar sound in the track. H3: Spaced Pairing Technique The spaced pairing technique involves using two microphones to capture the sound of your electric guitar’s amp. The microphones are placed at a distance of approximately six inches from the speaker cone and angled towards the outside of the speaker. The microphones’ spacing should be equal to the distance between the speaker and each mic, creating a perfect triangle. This technique enhances the natural tone of the guitar and adds a sense of depth and space to the overall sound. In conclusion, mic placement techniques are essential to achieve the desired sound when recording an electric guitar with a condenser microphone. The X-Y stereo pairing technique, the close mic technique, and the spaced pairing technique are the most common methods used to capture the guitar’s acoustic sound. Experimenting with various placements and microphone positions can help you find your unique guitar sound in your recordings.
Credit: upayasound.com
Eq And Compression Tips
Capture the perfect electric guitar sound with a condenser microphone by utilizing EQ and compression techniques. By reducing unwanted frequencies and enhancing the guitar’s natural tone, you can achieve a professional-level recording.
Using Eq To Enhance Your Tone
When recording electric guitar with a condenser mic, EQ helps you achieve a more natural and balanced sound. By adjusting the frequency of each tone, you can enhance your guitar’s sound and make it stand out. Here are some EQ tips to follow:
Start by cutting the low-end frequencies to avoid muddiness.
Boost the mid-range frequencies to increase the guitar’s presence.
Adjust the high-end frequencies to add brightness to the sound.
Adding Compression For Warmth And Sustain
Compression is an essential tool in the recording process, especially when it comes to electric guitar. It evens out the levels of the guitar playing and helps in achieving a consistent sound. Here are some compression tips to follow:
Set the attack low to preserve the initial transients
Set the release high to encourage the guitar’s natural decay.
Add a bit of makeup gain to bring the compressed guitar sound back up to its original level.
Remember that the EQ and compression settings will vary depending on the type of guitar you are using and your personal preference. Experiment and find what works best for your sound.
Effects And Post-processing
To achieve a professional electric guitar sound when recording, using a condenser microphone is optimal. Post-processing effects such as compression and EQ can also be used to enhance the sound and tailor it to the mix.
After recording your electric guitar with a condenser mic, you can elevate the sound quality by adding effects and post-processing techniques. This enhances the tone of your guitar and can make it sound fuller, richer and more professional. In this section, we’ll explore some of the popular effects and post-processing techniques that will help you take your recording to the next level.
Experimenting With Reverb And Delay
Reverb and delay are two of the most commonly used effects when it comes to recording electric guitar. Reverb adds a sense of space to the recording and creates a natural ambience while delay adds depth to the sound. Experimenting with these effects can help you achieve the desired level of spaciousness and depth.
Start with a small amount of reverb and gradually increase until you find the sweet spot – too much reverb can make the guitar sound muddy.
Delay can be used to create a variety of effects, such as slapback or echo. Start with a short delay time and gradually increase until you find the effect that suits your music.
Layering Multiple Tracks For Depth And Texture
Layering multiple guitar tracks can add depth and texture to your sound. This technique is particularly useful for solos or lead guitar parts. By layering two or more guitar tracks, you can create a fuller sound with more depth and tonal variation.
Record two or more guitar tracks with slightly different settings, such as pickup selection or tone settings.
Double-track the guitar parts by panning them slightly to the left and right channels to create a sense of width in the stereo field.
In conclusion, adding effects and post-processing techniques can significantly improve the sound quality of your electric guitar recordings. By experimenting with reverb, delay and layering multiple tracks, you can achieve a richer and more professional sound.
Troubleshooting Common Issues
To record electric guitar with a condenser mic, ensure the mic is placed around 3 inches away from the guitar’s speaker cone to capture the sound properly. Troubleshoot common issues that may arise such as background noise, distortion or a lack of clarity by adjusting mic placement or checking cable connections.
Recording electric guitar with a condenser mic is a popular method among musicians. However, it is not without its challenges. Noise, hum, and phase issues can all stand in the way of achieving great guitar tones. Here are some tips and techniques for troubleshooting these common problems.
Dealing With Noise And Hum
Noise and hum are unwelcome byproducts that can arise when recording electric guitar with a condenser mic. Here are some ways to deal with them:
Try different microphone positions to find the one that captures the best signal-to-noise ratio
Beware of magnetic fields from electronics and lighting, which can add unwanted hum
Use a noise gate, which can reduce hum and noise during quiet passages
Avoiding Phase Issues
Phase issues can make an otherwise great guitar tone sound thin or off-balance. Here are some tips for avoiding phase problems:
Use a single microphone whenever possible, as phase problems can arise when using multiple mics
Try different mic positions to find the one that produces the most balanced sound
Experiment with different polar patterns on the condenser mic to see which one sounds best
In conclusion, with just a few simple techniques, troubleshooting common issues when recording electric guitar with a condenser mic can be a breeze. Use these tips to ensure that your guitar tone shines through in your recordings.
Credit: www.guitarworld.com
Frequently Asked Questions For Record Electric Guitar With Condenser Mic
Can You Record Electric Guitar With A Condenser Mic?
Yes, you can record electric guitar with a condenser mic. Condenser mics are good at picking up detailed sounds, but you might need to experiment to find the best mic placement. You may also need a preamp or audio interface to connect the mic to your recording equipment.
Should I Use Condenser Or Dynamic Mic For Electric Guitar?
For electric guitar, it is recommended to use a dynamic microphone. Dynamic mics can handle loud sounds and have a warm tone, which is ideal for guitar amps. Conversely, condenser mics are more sensitive and may pick up unwanted noise.
Use a dynamic mic for optimal guitar sound quality.
What Mic Is Best For Recording Electric Guitar?
The best mic for recording electric guitar is a dynamic mic. The Shure SM57 and Sennheiser e609 are popular choices. Place the mic close to the speaker, off-center, slightly angled. Adjust distance and angle to find the right tone. Experiment with mic placement and the amp’s EQ.
Is A Condenser Mic Good For Recording?
Yes, a condenser mic is good for recording as it captures sound with high accuracy, sensitivity, and clarity. It is suitable for recording vocals, acoustic instruments, and capturing room ambience. Moreover, condenser mics are the preferred choice for professional studios because of their low noise and excellent sound quality.
Conclusion
To sum it up, recording an electric guitar with a condenser mic is a great way to capture the true essence of the instrument. By choosing the right mic and positioning it correctly, you can achieve an authentic and high-quality sound.
Remember to experiment with different techniques and setups to find what works best for you and your music. Keep these tips in mind and you’ll be on your way to recording a killer guitar track.
To create depth and height in your mix, consider using panning, reverb, EQ, compression, contrast, automation, arrangements, and volume. Depth and height are essential elements to consider when creating a mix, as they add dimension and texture to the overall sound.
By using these tips, you can create a more dynamic and layered mix, highlighting different sounds and instruments in the process. As a music producer or sound engineer, your main goal is to create a dynamic and well-balanced mix that captures the listener’s attention.
However, achieving depth and height can be a bit tricky, especially if you’re not familiar with the correct techniques. We’ll explore some helpful tips that you can use to create depth and height in your mix, for a more professional and polished sound. So, let’s dive right in!
Pan Your Tracks
Pan Your Tracks provides 8 helpful tips for creating depth and height in your mix. These tips include using panning, volume, reverb, EQ, compression, and more to make your mix sound fuller and dynamic. Follow these tips to improve the overall quality of your music productions.
Panning tracks is a vital technique for creating depth and height in your mix. Panning gives you control over the stereo image of your mix, allowing you to place individual tracks in different positions across the stereo field. This technique helps to create a sense of space and movement in your mix.
Use Panning To Widen Stereo Image
Panning is a great way to add width to your mix. When you pan individual tracks slightly to the left and right, it creates the illusion of a wider stereo image. For example, panning the guitar slightly to the left and the keyboard slightly to the right will create a wider stereo image.
Leave Center Positions For Important Elements
It’s important to remember that some instruments or elements in your mix are more important than others. These elements should be panned to center position, so they stand out in the mix. For example, the lead vocal, kick drum, and snare should be panned to the center position to ensure they’re heard clearly.
Experiment With Panning Different Tracks
Don’t be afraid to experiment with panning various tracks to different positions in your stereo field. This technique can help you create an interesting and dynamic mix. For example, you might pan the guitar to the left, the bass to the center, and the keyboard to the right to achieve a unique and balanced sound.
Be Careful Not To Overdo It
It’s important to use panning sparingly and strategically. Too much panning can make your mix sound unbalanced and disorienting. Keep in mind that a stereo image that is too wide can cause issues with playback on certain systems, particularly in mono.
Use Automation To Create Movement
Automation is a powerful tool that can help you create movement in your mix. Use automation to gradually pan specific tracks from one side of the stereo field to the other, creating an interesting sense of movement.
Consider Using Stereo Wideners
Stereo wideners are plugins that can enhance the stereo image of your mix. They can add width and depth to individual tracks or your entire mix, and can help to create a more interesting and dynamic mix.
Get Feedback And Adjust Accordingly
Once you’ve panned your tracks, it’s important to get feedback from other listeners or producers. They may be able to hear issues that you missed, and can help you fine-tune your mix to perfection.
Remember that panning is just one of many techniques you can use to create depth and height in your mix. Experiment with different techniques and find the ones that work best for you.
Credit: www.masteringthemix.com
Adjust Levels
Adjusting levels is a crucial step in creating depth and height in a mix. By adjusting the volume levels of different tracks, you can create a more dynamic and layered sound that adds depth to your music.
Adjusting levels can be a crucial step in creating depth and height in a mix. By manipulating the volume levels of different tracks, you can bring certain elements to the foreground or push others to the background. This can help create a sense of balance and dynamic movement in your mix. Below are some tips on how to effectively adjust levels in your mix to create depth and height. Balance Volume Levels Of Different Tracks: Ensure that all the tracks in your mix are balanced in terms of volume levels. This is important as it will prevent any one element from overpowering others. Balancing volume levels involves comparing the loudness of each track against each other and adjusting it up or down as needed. Use Volume Automation For Dynamic Control: Volume automation allows you to adjust the volume levels of individual tracks at different points in the mix. This can help create a sense of dynamics and movement in the mix. For example, you could fade a track in at certain parts of the song or gradually bring a track up or down to add emphasis. Try Panning Elements: Panning involves placing individual elements in a stereo field. By placing different elements to the left, right, or center of the stereo field, you can create a sense of depth and space in the mix. EQ The Tracks To Create Balance: Equalizing is an essential way to balance the different elements in your mix. This involves adjusting the frequency content of each track to ensure it’s clear and sits well in the mix. You can use EQ to carve out space for elements so that they don’t compete for sonic space. Cut Unnecessary Frequencies: Cutting unnecessary frequencies is important to maintain clarity in the mix. Low-pass and high-pass filters are commonly used techniques to cut frequencies that don’t belong to a sound. For instance, you can cut low frequencies from the vocal track to remove any hums or noise. Use Compression: Compression techniques help to even out the volume levels of a track. Compression ensures that all sounds are playing at comparable levels. It brings out the details from a mix, and helps glue everything together. Balance Stereo Field: Ensuring that the stereo field is balanced is also important in creating depth and height. You can use a stereo imaging plugin to either widen or narrow the stereo field to allow the elements in your mix to breathe. Check Mix On Different Systems: Finally, always check your mix on different sound systems, including headphones and different speakers, to make sure that the mix translates properly across all platforms. By adhering to these tips, you can effectively adjust levels in your mix to create depth and height, resulting in a professional and polished sounding mix.
Add Reverb
When it comes to creating a professional-sounding mix, adding depth and height is crucial. One of the most effective ways to achieve this is by adding reverb. Here are some tips for using reverb to create a more nuanced and dynamic mix:
Apply Reverb To Tracks To Create Depth
The most basic way to add reverb to a mix is by applying it to one or more individual tracks. This will create a sense of depth and space around each instrument or vocal. When applying reverb, be sure to adjust the settings to match the vibe you’re going for. A short decay time will create a tighter, more intimate sound, while a longer decay time will create a more atmospheric, ambient effect. Keep in mind that too much reverb can quickly muddy up a mix, so use it sparingly.
Use Multiple Reverbs To Create Different Depths
While adding reverb to individual tracks can help create a sense of space, using multiple reverbs can take your mix to the next level. By applying different reverb settings to different instrument groups or sections of the song, you can create a more dynamic and layered sound. For example, you might apply a shorter reverb to drums and percussion to create a tight, punchy sound, while using a longer reverb on the vocals to give them a more ethereal quality. Be creative and experiment with different combinations to find what works best for your mix.
In conclusion, reverb is an incredibly powerful tool for adding depth and height to your mixes. By applying it to individual tracks and using multiple reverbs to create different depths, you can create a more nuanced and dynamic sound that will stand out from the crowd.
Eq Your Tracks
Learn how to create depth and height in your music mix with these 8 essential EQ tips. From adjusting the low-end frequencies to adding reverb, these techniques will take your tracks to a new level.
When it comes to mixing, equalization or EQ is one of the most crucial tools at your disposal. EQ can help you add depth and height to your mix, making it sound fuller and more professional. However, it’s important to use EQ judiciously, as overdoing it can lead to a thin or harsh sound. Here are some EQ tips to keep in mind:
Cut Unwanted Frequencies To Reduce Muddiness
One of the most common problems with a mix is muddiness, where different instruments or sounds occupy the same frequency range and clash with each other. To avoid this, you can use EQ to cut frequencies that are not essential to a particular track. For example, you can cut some lows from a guitar track to make room for the bass, or cut some high frequencies from a vocal track to prevent it from sounding harsh. This will create more space in the mix and make it sound clearer.
Boost Vital Frequencies For Clarity And Punch
On the flip side, you can also use EQ to boost frequencies that are essential to a track. For example, boosting the high-end frequencies of a cymbal track can make it sound more present and shimmering, while boosting the low-end frequencies of a kick drum track can make it sound more powerful and punchy. However, be careful not to overdo it, as too much boosting can lead to distortion or clipping.
Other Eq Tips To Keep In Mind
Here are some other EQ tips to keep in mind as you work on your mix:
Use high-pass filters to cut low frequencies that are not essential to a track.
Use low-pass filters to cut high frequencies that are not essential to a track.
Use a spectrum analyzer to visualize frequency ranges and identify problem areas.
Use shelving EQ to boost or cut a broad range of frequencies at once.
Use parametric EQ to target specific frequencies and adjust their Q or width.
Use EQ sparingly and make subtle adjustments, rather than drastic ones.
Listen to your mix on different speakers or headphones to ensure it sounds good across different systems.
By using EQ in smart and subtle ways, you can create a mix that has depth and height, and sounds professional and polished.
Use Delays
Using delays can add depth and height to your mix by creating a sense of space and distance between the instruments and vocals. Experiment with different delay times, feedback levels, and panning to achieve the desired effect.
Create Space And Depth With Delay Effects
Using delays can be a great way to add depth to a mix, giving the impression of space and a fuller sound. By delaying a track’s sound, you can create an impression of distance even when it’s placed up close to the listener. Delays can also create a sense of space within a mix, allowing the listener to distinguish between different elements and appreciate them better. There are different types of delays, such as mono delay, stereo delay, and ping-pong delay. Stereo delay is particularly useful when trying to widen your mix, while ping-pong delay can help place individual elements of your audio more effectively.
Apply Feedback And Mix Delays To Add Texture
When you use feedback delay, it’s possible to add texture to your mix. Feedback delay is where a delay sound is fed back into itself, allowing multiple repetitions to occur. Doing this creates a distinct effect, and the texture it produces can add depth to your mix. Mix delays, on the other hand, help to smooth out uneven or unbalanced audio signals. Mix delays require some careful adjustments to get the perfect balance and avoid overwhelming other elements of the mix. When using delays, it’s important to be cautious in the number you apply, making sure the balance is right. Too many delays can end up masking or even completely hiding certain elements. Using the right type of delay, for the right device and with an appropriate setting, can make a huge difference in creating depth and height in your mix. So, experiment with different delay types and try to use them to create rhythm and complementary color to your audio elements.
Layer Sounds
Music production is an art that requires creativity and technical knowledge. One of the essential aspects of producing a great mix is creating depth and height in the mix. Layering sounds is one of the most effective techniques to achieve this. In this blog post, we’ll explore some tips to help you create depth and height in your mix.
Stack And Layer Different Sounds
Layering sounds involves adding multiple sounds together to form a single sound. It can be done by stacking similar sounds on top of each other. For example, stacking multiple guitar tracks to create a thicker, richer sound. Alternatively, try layering sounds that complement each other, such as combining a synth with a drum sound. Layering can immensely enhance the texture and depth of the mix, making it sound more interesting and engaging.
Use Different Instrumentations To Add Interest
Using different instrumentations can add interest and variety to your mix. It helps to break the monotony of having similar sounds throughout your mix. For instance, using horns or strings in the chorus instead of just guitars can create a dynamic shift in the music. Alternatively, you can use less common instruments like mellotrons or kalimbas to add a unique element to the mix. Using such blends and diversity also helps to keep the listener engaged throughout the song.
Use Contrasting Sounds
Using contrasting sounds is another great way to add depth and height to the mix. Contrasting sounds usually refer to a mixture of sounds that don’t often go together, like a heavy guitar riff with soft violins playing in the background. The idea is to add an element of surprise and catch the listener’s ear in a different way. Contrast helps bring out the best of each sound and makes the mix sound more interesting.
Make Use Of Panning
Panning is a technique used to create a sense of space in the mix. Using this technique, you can ‘place’ individual sounds in different positions around the stereo field. For instance, you could pan a guitar to the left and a piano to the right, separating sounds to form a wider stereo image. Panning helps to bring out individual sounds in a more prominent way making the mix sound more balanced and spacious.
Use Different Reverbs And Delays
Reverbs and Delays are time-based effects that can add depth and height to the mix. Using different types of reverbs and delays can help achieve a sense of space and dimensionality. For example, you could use a short delay effect on a vocal track to create a sense of ambience. Alternatively, you could use a long reverb to create a sense of decay and sustain the sound. Reverbs and Delays also help to create a cohesive sound throughout the mix.
Add Background Vocals
Adding Background vocals is an effective way to add depth and height to the mix. They create an element of depth to the mix. Consider adding harmonies to the chorus of a song or using a call-and-response technique. Even a simple “uh-huh” or “ooh” can hugely enhance a track. Background vocals generate a sense of grandeur and depth, making the mix sound larger than it is.
Use Automation
Automation is the process of adjusting various parameters in a mix over time. It’s a powerful way to add depth and movement to your mix. For example, you can automate the volume of a guitar solo to rise through the chorus gradually. Automation on reverb and delay parameters can emulate how sounds change in a real room. Automation can add a whole new dimension to the mix by enhancing the transitions and changing its dynamic range.
Choose The Right Arrangement
The arrangement is what brings all the individual elements together into a cohesive whole. It’s crucial to get the arrangement right to create depth and height in the mix. Ensure that you have a good balance between the different parts of the song, and that the instrumentation is aligned with the mood of the song. Arrangement can serve as the backbone that gives every other element importance, creating depth and harmony.
Create Contrasting Sections
To create depth and height in your mix, consider using contrasting sections. By incorporating different elements and dynamics, you can create a more dynamic and interesting sound. Experiment with varying instrumentation, playing styles, and effects to create a unique and compelling mix.
Creating depth and height in a mix is a crucial aspect that enhances the overall sound quality and makes it stand out. One way to achieve this is to create contrasting sections by using different instruments and sounds that vary in their tonal and dynamic characteristics. This approach helps to add depth, dimension, and interest to the mix. Here are some tips on how to create contrasting sections effectively:
Build Tension By Switching Between Sections
Switching between contrasting sections is an effective way to build tension in the mix and keep the listener engaged. By using different rhythms, tones, and instrumentation, you can create moments of suspense and release that add intrigue to the song. For example, you can alternate between a sparse verse section with a solo instrument and a dense chorus with a full band. This approach builds tension by creating moments of contrast and release, making the listener excited to hear what comes next.
Use Variety To Keep The Listener Engaged
Variety is an essential element in creating contrasting sections that keep the listener engaged throughout the song. By using a mix of timbres, instrumentation, and dynamics, you can keep the listener intrigued and excited. For instance, introduce new instruments or sounds in the chorus while using fewer instruments in the verses. You can also create variations in the harmony, melody and rhythm to make the song more interesting.
Layer Sounds To Add Depth And Height
Layering sounds is another excellent technique to create depth in the mix. By adding multiple tracks of an instrument or sound with different tonal and dynamic characteristics, you can create a fuller, richer sound. For example, you can layer a clean guitar track with a distorted one to create a wider and more interesting tonal color. This technique also helps to add height to the mix, making the sound seem more expansive and immersive.
Use Panning And Automation To Enhance The Effects
Panning and automation are powerful techniques that can help to enhance the effects of creating contrasting sections. By panning the tracks to different stereo positions, you can create a sense of space and depth in the mix. Automation can also be used to add variation to the sections. For example, you can automate the volume of the tracks to create a subtle buildup in the mix leading up to the chorus.
Keep The Mix Balanced
It’s essential to keep the levels balanced across the different instruments and sounds in the mix. If a particular instrument or track is too loud or too soft, it can disrupt the balance and coherence of the mix. Use EQ and compression to ensure that all the tracks sit well in the mix. You can use the high-pass filter to clean up the mix and remove unwanted frequencies that can obscure the clarity.
Pay Attention To The Arrangement
The arrangement of a song plays a vital role in creating contrasting sections that blend seamlessly. It’s important to consider the song’s structure and ensure that the sections flow smoothly and cohere with each other. For example, if there’s a sudden tempo change in one section, it might disrupt the flow of the song. Ensure that the transition is smooth and proportional to the song structure.
Don’t Overcrowd The Mix
While it’s tempting to add many tracks and instruments to create a fuller sound, overcrowding the mix can lead to confusion and muddiness. Focus on using only necessary instruments and arranging them effectively to create a balanced sound.
Final Thoughts
Creating depth and height in a mix is an art that requires a combination of techniques and skills. By using the above tips, you can create contrasting sections that engage the listener and enhance the overall sound quality. Remember to keep the mix balanced and avoid overcrowding it with too many tracks. These tips can help you take a mediocre mix and transform it into an exceptional piece of art.
Credit: www.masteringthemix.com
Master The Mix
Creating a mix with depth and height can take your audio production to the next level. But it can be challenging to balance all the elements of a mix without sacrificing one for the other. Here are 8 tips to help you create depth and height in your mix.
Trim Peaks And Boost Low-level Details
Mixing is about balancing the levels of all the elements in a track. Trimming peaks and boosting low-level details can help you to achieve this balance while also creating a sense of depth. Use EQ and compression to control the dynamic range of each element, and pay attention to the overall level of the mix.
Use Panning And Stereo Width To Create Space
Panning and stereo width are powerful tools for creating a sense of space in your mix. By placing elements in different positions in the stereo field, you can create a feeling of depth and width. Experiment with panning and stereo widening plugins to find the right balance for your mix.
Employ Reverb And Delay To Add Dimension
Reverb and delay are two essential effects for creating a sense of dimension in your mix. Use reverb to add space to individual elements, such as vocals or drums, and delay to create echoes and repeats. Be careful not to overuse these effects, as they can quickly muddy up your mix.
Layer Sounds To Build Texture
Layering sounds is a great way to build texture in your mix. By combining multiple sounds, you can create a more complex and interesting arrangement. Be creative with your layering and experiment with different combinations to find the right mix.
Focus On The Bass And Drum Relationship
The relationship between the bass and drums is crucial for creating a solid foundation for your mix. Make sure the bass and drums are in sync and complement each other. Use EQ and compression to control the levels and frequencies of each instrument and make sure they sit well in the mix.
Use Automation To Create Movement
Automation is a powerful tool for creating movement in your mix. Use it to make gradual changes to volume, panning, and other effects, to add interest and dynamics to your mix.
Add Final Touches To Create A Cohesive Mix
Once you have all the elements in place, it’s time to add the final touches to create a cohesive mix. Use EQ and compression to balance the overall sound, and pay attention to the levels and panning of each element. Finally, check your mix on different systems to make sure it sounds good across all platforms.
Take Breaks And Listen With Fresh Ears
When working on a mix, it’s easy to get lost in the details and lose perspective. That’s why it’s important to take breaks and listen with fresh ears. Step away from your mix for a while and come back later with a new perspective. You might be surprised by what you hear.
Credit: www.masteringthemix.com
Frequently Asked Questions For 8 Tips For Creating Depth And Height In The Mix
How Do You Create Width Height And Depth In A Mix?
To create width, height, and depth in a mix, you need to use a combination of various audio processing techniques and effects. These include EQ to enhance the frequency ranges, reverb to create a sense of space and depth, and panning to place elements within the stereo field.
Using compression and automation can also add to the overall balance and dynamics of the mix.
How Do I Add Depth To My Mix?
To add depth to your mix, you may consider utilizing volume, panning, EQ, reverb, and delay effects. Balance the levels of different instruments, create space by panning them, use EQ to reduce frequency clashes, and add reverb and delay to create a sense of depth and space.
How Do You Get More High End In A Mix?
To get more high end in a mix, try boosting frequencies above 2 kHz on individual tracks or using a shelving EQ to boost frequencies in the entire mix. Tweak the balance of instruments and vocals, and add a touch of saturation or distortion to add clarity to the high end.
Remember to use EQ sparingly and ensure that the high frequencies don’t become harsh or piercing.
How Do You Create Depth And Space With Reverb?
To create depth and space with reverb, adjust the wet/dry mix to create a balance between the original sound and the reverb effect. Increase the decay time to make the reverb trail longer and enhance the sense of space. Adjust the pre-delay time to create a sense of distance and adjust the EQ to create contrast between the original sound and the reverb.
Use reverb sparingly to avoid a muddy sound.
Conclusion
In order to achieve a mix with depth and height, it is important to keep in mind the different elements that contribute to the overall sound. Utilizing techniques such as panning, reverb, and EQ can help create a sense of space and dimension within the mix.
However, it is equally important to trust your ears and not get caught up in technicalities. Remember to stay true to the creative vision and utilize these tips as tools to enhance the overall sound. With these tips in mind, you can create a mix that is dynamic and engaging for your listeners.
The right arrangement can greatly improve your mix. A balanced and well-organized arrangement will enhance the clarity, impact, and emotion of your mix.
In fact, proper arrangement is one of the most critical elements of a successful mix. Arrangement is the process of structuring your mix in a way that creates a clear and seamless flow of sound. The right arrangement can bring out the best in your tracks and create a cohesive and engaging listening experience.
It involves organizing the different elements of your mix (including vocals, drums, bass, and instruments) in a way that complements each other. A good arrangement also ensures that every element has its own space and is given the opportunity to shine. Moreover, the arrangement plays a key role in establishing the emotional and dynamic range of your mix. A well-arranged mix will have a clear energy and progression that will captivate the listener from start to finish.
Why Arrangement Matters In Your Mix
Arranging a mix can be the difference between an average track and a great one. The right arrangement can improve the overall sound and flow of the mix. This makes it more engaging and captivating for the listener. A well-arranged mix can also help highlight the focal points of the track, creating anticipation and excitement.
When it comes to mixing a song, the arrangement of instruments and sounds is just as important as the levels and EQ. Proper mix arrangement can make a significant difference in the overall sound and impact of a track. In this post, we’ll discuss how mix arrangement affects the sound and why a well-organized mix is integral to a successful recording.
How Mix Arrangement Affects The Overall Sound
The arrangement of sounds in your mix can determine the overall clarity, depth, and impact of your recording. For instance, placing the bass too high in the mix can overpower the other instruments. This makes the overall sound muddy and unclear. Similarly, having all the elements play at the same time can cause the track to become cluttered and chaotic, losing its focus. On the other hand, organizing the elements based on their characteristics, frequency, and role can create a dynamic and balanced mix. Placing the main elements in the center with supporting sounds panned left and right can create width and depth. This allows each sound to be heard clearly.
Why A Well-organized Mix Makes A Difference
A well-organized mix not only sounds better but also enhances the listener’s experience. With a clear arrangement, the listener can follow the structure of the song, understand the dynamics, and appreciate the subtleties of each sound. Moreover, a well-organized mix makes it easier for the mastering engineer to work on the track. With clean and organized tracks, they can apply the appropriate processing and maintain the integrity of the mix. In conclusion, mix arrangement plays a significant role in the overall sound and impact of your recording. By organizing your elements based on their frequency, characteristics, and role, you can create a dynamic and balanced mix that enhances the listening experience.
Finding The Right Balance
Arrangement is a crucial step in the mixing process. It is what separates a mediocre mix from a great one. The right balance in arrangement is essential to achieving a perfect mix. The proper balance in frequency range, volume, panning, and using effects can bring clarity to each element of the mix and help them fit together seamlessly.
Balancing Frequency Range
The frequency range determines the overall sound of each instrument in the mix. Balancing the frequency range is a fundamental step in achieving a clear mix. When arranging, make sure that instruments in the same frequency range share the same space. This makes room for more prominent elements. If one element is taking up too much space, it can create clutter and make the mix sound muddy. Use EQ to reduce clashing frequencies and boost the essential frequencies to bring out the best in each element. Balancing frequency instruments is key to creating a well-arranged mix.
Volume And Panning
The volume and panning of each element in the mix must be appropriately placed. Elements that need to be prominent should be louder than the less important ones. When panning, arrange instruments in a way that creates space and separation, bringing balance to the overall mix. Sometimes, it’s better to place an instrument’s volume lower than you would think and give it space in the mix through panning. The balance of volume and panning allows every element to find its place in the mix.
Using Effects To Enhance The Mix
Effects can level up your mix in unimaginable ways. They are an excellent tool for adding depth and dimension. However, effects should not dominate the mix or drown out other important elements. Use effects sparingly and creatively, ensuring they enhance the mix rather than destroy it. Effects such as reverb, delay, and compression can create an immersive effect, bringing out the full potential of the mix. Properly utilized effects can turn a good mix into a great one; therefore, it is crucial to finding the right balance.
In Conclusion,
Arrangement is vital to achieving balance and clarity in a mix. Finding the right balance requires attention to detail and patience. Balancing the frequency range, volume, panning, and using effects to enhance the mix is essential to produce a professional-sounding finish. With the right arrangement, every element in the mix can shine, bringing out the best in the music.
Techniques For Effective Arrangement
Effective arrangement is crucial for improving the overall quality of a music mix. By paying attention to the placement of each element within the mix, you can create a more balanced and engaging sound. Experimenting with different arrangements and paying attention to the details can help you achieve a professional sounding mix.
Planning out the arrangement of your mix is crucial for achieving a well-balanced track. Taking the time to plan out the structure before diving into the mixing process can make all the difference. Here are some techniques for effective arrangement.
Planning Out The Arrangement
A well-organized arrangement can make the difference between a mediocre mix and a great one. Start by deciding on the structure of your track and the order of the different parts. This could include an intro, verses, choruses, bridge, and outro. Determine the length of each section and ensure they flow smoothly into each other. A useful tool for planning is to create a visual representation of the arrangement using a DAW (Digital Audio Workstation). Mapping out the various sections of the song allows you to see the flow of the track and make adjustments as needed.
Taking Breaks To Refresh Your Ears
Mixing for an extended period can cause ear fatigue, making it challenging to stay objective. It’s crucial to take regular breaks to rest your ears and maintain a fresh perspective. Stepping away from your mix for a while can be incredibly beneficial as it allows you to reset your ears, refocus your thoughts, and come back with renewed energy. On average, it’s recommended to take around ten minutes break every hour. Use this time to do something unrelated to mixing, such as taking a walk around the block or practicing some stretches. It can also be useful to listen to reference tracks during your break to help reset your ears and gain perspective.
Stepping Back And Listening To The Mix As A Whole
The process of mixing can be highly detailed and labor-intensive. But it’s essential to take a step back from time to time and listen to the mix as a whole. Listening to the entire track allows you to assess how each section fits together. This ensures there are no sonic clashes or inconsistencies. Pay attention to the levels, frequency balance, stereo image, and dynamics. A useful technique is to listen to the mix away from your studio environment.
This could be on a different set of speakers or headphones, or even on your phone or car stereo. This allows you to hear the song in different situations and identify any issues you may have missed in your studio. Implementing these techniques for effective arrangement can make a huge impact on the quality of your mixes. By taking the time to plan out the structure, taking regular breaks, and stepping back to listen to your mix as a whole, you can achieve a professional and well-balanced track.
Credit: www.masteringthemix.com
Tools And Strategies For Improving Mix Arrangement
The right arrangement of music can significantly improve the quality of your mix. The use of tools such as EQ, compression, panning, and volume balance can help in achieving the desired arrangement. Additionally, incorporating strategies such as experimenting with different instrument combinations and considering the emotions and intensity of the track can take your mix arrangement to the next level.
Mix arrangement is a crucial aspect of getting a great sound. It involves organizing and arranging each sound element in a track so that they fit together seamlessly. Without proper arrangements, your mix can easily become cluttered, noisy and uninteresting to listeners. Fortunately, numerous tools and strategies can help you improve your mix arrangement. In this article, we will be discussing some of the most effective ways to take your mix to the next level.
Eq And Compression Techniques
Using EQ and Compression Techniques is one of the most effective ways to improve your mix arrangement. While EQ helps you alter the tonal balance of different sound elements, compression can help you control the dynamic range of different sounds. A good sound mix requires a careful balance between low, mid and high-frequency sounds. EQ can be used to remove any unwanted frequencies and smooth out the sound. Compression is used to help even out the dynamics of different sounds, making them more even and less erratic.
Using Automation To Create Interest
By using automation, you can create interest in your mix by having certain sounds come and go at specific times. This technique can help create dynamic build-ups, breakdowns, and transitions that can keep the listener engaged. Automation can be used to control various parameters like volume, panning, and effects. By automating different parameters, you can create interesting rhythmic patterns that can add groove and excitement to your mix.
Identifying And Addressing Common Arrangement Mistakes
Even with the best mixing tools, improper arrangement can easily derail your mix. Identifying and addressing common arrangement mistakes is an effective way of improving your mix. Some of the most common arrangement mistakes include having too many elements playing at once, not leaving enough space in between sounds, and cluttering the mix by using too many effects. Addressing these issues involves using your ears and taking a pragmatic approach to your mix. By being deliberate and mindful, you can create a mix that sounds balanced and polished. In conclusion, having the right mix arrangement can make or break your sound. The tools and strategies mentioned above can help you improve your mix by using EQ and Compression techniques, automation, and addressing common arrangement mistakes. Apply these techniques to your mix appropriately, and you’ll have a mix that sounds polished and professional.
Frequently Asked Questions Of How The Right Arrangement Can Improve Your Mix
Why Is Arrangement Important In Music?
Arrangement is important in music as it determines the overall feel and structure of a piece. It creates contrast, dynamics, and adds interest. A well-arranged piece can guide the listener’s emotions and convey the intended message more effectively.
How Can I Improve My Mixing?
To improve your mixing skills, practice regularly and experiment with different techniques and equipment. Listen to other successful mixes in your genre and try to mimic their sound. Keep your workspace organized and mix in a well-treated room. Test your mix on different speakers and get feedback from other experienced mixers.
How Do You Make A Perfect Mix?
To make a perfect mix, first identify the genre and mood you want to convey. Then, select the appropriate songs and adjust their levels to create a balanced sound. Utilize EQ and effects to fine-tune the mix, and listen to it on different devices to ensure consistency.
Finally, make necessary changes until you achieve the desired result.
What Is The Difference Between Mix And Arrangement?
Mixing is the process of combining multiple audio tracks into a single stereo track. Meanwhile, arrangement refers to the organization of these tracks into a complete song. Mixing involves adjusting the levels, panning, and EQ of each track. Meanwhile, arrangement involves deciding what order the tracks should play in and how they should interact with each other.
Conclusion
To sum it up, the right arrangement is crucial for improving your mix. By giving each element enough space to breathe and shine through, you can ensure a balanced and well-crafted sound. Whether you’re working with vocals, instruments or both, taking the time to arrange them correctly can make all the difference.
Think about the song as a whole, experiment with different techniques and trust your ears – the results will speak for themselves. Happy arranging!
Professional audio mastering is necessary for a polished and cohesive sound. It enhances the overall quality and balance of the audio tracks, ensuring they sound great across different mediums and playback systems.
Audio mastering is one of the most crucial stages in the music production process. It involves refining and balancing the final mix to improve its overall quality and ensure a consistent sound across different platforms. The mastering process helps to enhance the clarity, depth, and dynamics of the audio tracks, making it sound polished and professional.
A professionally mastered audio track will also sound great on a variety of playback systems, including mobile devices, headphones, and home theater systems. In addition, mastering helps to normalize the audio levels, removing any unwanted noise or distortion. Overall, investing in professional audio mastering is essential for artists and producers who want to take their music to the next level and ensure their listeners have a high-quality experience.
Improved Sound Quality
Professional audio mastering can significantly improve the sound quality of your recordings. By using specialized equipment and techniques, master engineers can enhance your music’s clarity, balance and depth to create a professional-sounding mix that will impress your audience.
If you want to ensure that your music sounds crisp, clear, and at its best, then professional audio mastering is a must. One of the main reasons to choose professional audio mastering is to improve the sound quality. Professional audio engineers understand the intricacies of sound and have the tools and knowledge to make your music sound the best it can be. Let’s take a closer look at how professional audio mastering helps to improve the sound quality with the following H3 headings in HTML syntax.
Balancing Frequencies
One of the primary ways that professional audio mastering improves the sound quality is by balancing the frequencies in the mix. When mixing music, different frequencies can easily overpower each other, leading to an unbalanced sound. Professional audio engineers have the experience and tools to identify and fix these issues by equalizing each frequency band until the mix sounds well-balanced. They can identify which frequency bands to boost or cut to achieve the perfect balance, which in turn improves the overall sound quality.
Enhancing Dynamics
Another way professional audio mastering can improve sound quality is by enhancing dynamics. Dynamics refer to the difference in volume between the loudest and softest parts of the music. When mastering music, engineers use a variety of techniques to bring out the dynamics and make them more prominent. This process helps to improve the overall sound quality of the music as it creates a more interesting, engaging, and natural sound.
Improving Clarity
Professional audio engineers can also use a variety of tools and techniques to improve the clarity of your music. This process ensures that each instrument and vocal is clear and distinct in the mix. They can use de-essers to remove harsh S and T sounds, compressors to control the volume, and noise reduction to remove unwanted sounds. All of these techniques help to improve the overall clarity of the music, making it sound more polished, refined, and professional. In conclusion, professional audio mastering is essential for anyone looking to improve the sound quality of their music. Audio engineers use advanced techniques like balancing frequencies, enhancing dynamics, and improving clarity to create a crisp and professional sound that makes your music stand out. So if you want to create music that sounds as good as possible, investing in professional audio mastering is a must.
Credit: m.youtube.com
Compatibility With Different Devices
Professional audio mastering is crucial to ensure compatibility with different devices. With an expert touch, the audio is refined to achieve balance, clarity, and loudness, delivering the best quality output to every listener.
With the increase in the usage of different devices for listening to music, audio mastering has become more critical than ever before. Audio mastering involves the process of balancing, equalizing, and compressing audio tracks to ensure that the final mix sounds consistent across all playback devices. This section focuses on why audio mastering is essential for ensuring compatibility with different devices.
Ensuring Consistent Sound
One of the main reasons for mastering audio tracks is to ensure that the sound remains consistent across various playback devices. Different playback devices, such as speakers, headphones, and earbuds, have varying frequency responses and dynamic ranges. Therefore, mastering engineers use specialized tools and techniques to balance the audio tracks, so they sound good on all devices.
Preparing For Different Formats
Another reason why audio mastering is essential for compatibility with different devices is to prepare audio tracks for different formats such as mp3, WAV, or FLAC. Each audio format has its unique set of specifications that requires different mastering techniques to optimize the sound quality. By mastering your audio tracks, you can optimize them for different formats and ensure that they sound great on all playback devices. Mastering audio tracks for compatibility with different devices is crucial if you want your music to be heard by as many people as possible. By using professional mastering services, you can ensure that your music sounds consistent across all playback devices and formats. If you’re serious about producing high-quality music, then investing in professional audio mastering is a must.
Industry-standard Loudness
Professional audio mastering is vital to achieve industry-standard loudness. It ensures your music or podcast is polished and balanced with consistent levels, making it sound professional and ready for any platform.
Optimizing the volume levels of an audio track is vital, as it ensures the listener’s experience is smooth, consistent, and enjoyable. Industry-standard loudness levels dictate that your track should have a certain loudness level to ensure it sounds good across different audio devices. Therefore, a professional audio mastering service can help you achieve the desired loudness level.
Conforming To Broadcast Standards
Conforming to broadcast standards is crucial if you want your audio track to be played on radio, TV, or any other platform. Different countries might have their own set of broadcast standards, and a professional audio mastering service can guide you on how to adhere to these broadcast standards to ensure your track is broadcast-ready.
Removing Unwanted Frequencies
Unwanted frequencies in an audio track can make it sound muddy and unclear. A professional audio mastering service can help remove unwanted frequencies and create a cleaner, smoother audio track. By using specialized tools and years of experience, professional audio mastering engineers can help make your audio track sound more polished and professional. Overall, the benefits of professional audio mastering are many. It can help take your audio track to the next level, whether you want it to be played on the radio, in a movie, or just to be heard by your friends and family.
Credit: www.facebook.com
Brand Recognition
Professional audio mastering can significantly enhance your music and provide a competitive edge in brand recognition. With professionally mastered audio, your music will sound polished, balanced, and consistent across all platforms, leaving a lasting impression on your listeners.
Standing Out On Streaming Platforms
Mastering your audio tracks is crucial in today’s digital era where music is primarily consumed through streaming platforms. To compete against other artists in the music industry, your music needs to have a professional sound that can only be achieved through mastering. Professional mastering ensures that your music stands out amongst the sea of other tracks on streaming platforms. It helps your music to become memorable among the listeners and increases the chances of your brand recognition.
Creating A Cohesive Sound
Another advantage of professional audio mastering is that it ensures a cohesive sound throughout your album or EP. A cohesive sound can make sure that your listeners perceive your brand as a professional artist. Cohesive audio implies that every track is consistent in terms of volume, dynamics and tone which represent your identity as an artist. Professional mastering engineers use high-end software and hardware to ensure that your songs have a consistent sound quality throughout the entire project. Having a consistent and cohesive sound in your music is essential in establishing your brand recognition.
Improving Sound System Compatibility
Professional audio mastering engineers are equipped with the knowledge to optimize your music sound for different kinds of playback systems. They have the expertise to prepare your music in such a way that it can be played with the best possible quality on different platforms such as smartphones, radios, and sound systems. By having a sound that’s compatible with various systems, you are increasing the chances of building your brand recognition.
Conclusion
To make your mark in the music industry, you need to take your music production seriously. This includes professionally mastering your audio tracks. By doing so, you ensure that your music stands out on streaming platforms, creating a cohesive sound, and improving sound system compatibility which improves your chances of brand recognition. So make sure you invest in professional audio mastering to boost your music production.
Expert Advice
Expert audio mastering is essential for a professional sound quality. It can enhance the dynamics, clarity and tonal balance of your recording. Trusting a professional to master your audio can truly make a difference in the final product.
As with any creative endeavor, there are a lot of nuances and intricacies that go into producing a top-quality music track. Audio mastering, in particular, is a process that requires a lot of attention to detail and expertise. In this section, we’ll explore the importance of seeking expert advice from professional audio mastering engineers.
Consultation On Sound Goals
Before beginning the mastering process, it’s essential to have a clear idea of what your desired sound is. Working with a professional audio mastering engineer can help you define and refine your sound goals. They will ask you the right questions to get a sense of what you are trying to achieve and make expert recommendations on how to achieve the sound you want.
Professional Recommendations
Having access to a professional’s expertise is invaluable when it comes to audio mastering. Beyond technical prowess, professional mastering engineers have a wealth of industry experience and knowledge of the latest trends and best practices. They know how to apply their expertise to your specific needs. They can offer suggestions on everything from arrangement to effects processing, to achieve the best possible sound for your track.
Quality Assurance
Quality assurance is a crucial aspect of audio mastering. Professional mastering engineers have the skills and tools to audition your track in a range of listening environments, ensuring that the final product will sound consistent and polished, no matter where it’s played. They have the trained ear to spot potential problem areas and eliminate them before the finished product is delivered. In conclusion, seeking expert advice from professional audio mastering engineers is essential for anyone looking to achieve a high-quality, polished sound. From consultation on sound goals to professional recommendations and quality assurance, professional audio mastering can help take your music to the next level.
Credit: www.amazon.com
Frequently Asked Questions For Reasons Need Professional Audio Mastering
Why Is Mastering Audio Important?
Mastering audio is crucial because it enhances the overall quality of a track and ensures its compatibility with various listening platforms. It involves adjusting the levels of different frequencies, balancing stereo images, and adding final touches to make the track sound polished.
A well-mastered track stands out from the crowd and impresses listeners.
How Important Is A Mastering Engineer?
A mastering engineer is highly important for music production because they are responsible for ensuring the final product sounds polished and coherent. A mastering engineer can help eliminate any flaws in the mixing or recording process and can provide a professional edge to the final product.
Overall, hiring a mastering engineer can improve the overall quality of the music and make it sound more professional.
Does Mastering Improve Sound Quality?
Mastering can have a significant impact on sound quality by enhancing clarity, loudness, and consistency. By balancing frequencies, limiting distortion, and adjusting levels, mastering can give your music a polished finish. A precisely mastered track can make it sound more professional and stand out from the crowd.
Why Is The Mastering Process Essential To The Commercial Success Of A Track?
Mastering is essential for commercial success of a track as it enhances the overall quality of the audio, balances the levels, optimizes tonal balance, adds depth, clarity, and dimension, ensuring that the sound translates well across different platforms and devices.
It also helps in making the music appealing to the audience and standing out in a highly competitive industry.
Conclusion
Professional audio mastering is a crucial step in ensuring that your music sounds its best and stands out in today’s competitive industry. It can enhance the overall quality, balance, and clarity of your tracks and make them sound more polished and professional.
By investing in professional audio mastering, you can achieve a better sound and take your music to the next level. Don’t hesitate to work with an experienced audio mastering engineer so that you can get the best possible results for your music.
Independent music marketers can use several tools, including social media, email lists, and live performances to promote their music. To increase their reach, they should also collaborate with other indie artists and influencers in the music industry.
The music industry can be a challenging landscape for indie artists, but with the rise of digital platforms, marketing one’s own music has become easier than ever. Emerging artists must learn how to promote their work independently to build their audience and generate income.
Social media platforms, email lists, and live performances provide a solid foundation for reaching new listeners, but independent artists need to go beyond these basics to gain traction in a crowded market. Collaboration with other indie artists, music bloggers, and influencers in the industry can expedite the growth process for independent musicians. This guide provides a comprehensive overview of the tools, tactics, and strategies indie artists can use to market their music independently.
Create An Online Presence
Creating an online presence is essential for independent musicians to market their music in today’s digital age. Establishing social media accounts, building a website, and creating engaging content are effective ways to grow a fan base, attract new listeners, and increase overall exposure.
In today’s digital age, creating an online presence is crucial for any musician who wants to market their music independently. By having a strong online presence, you can reach a wider audience and connect with your fans. Here are a few simple steps to help you create an online presence:
Build A Website
One of the first steps you can take to create an online presence is to build a website. Your website should be the hub of all your online activity, where fans can learn more about you, listen to your music, and buy your merchandise. Make sure your website is easy to navigate, visually appealing, and mobile-friendly. You can use website builders such as Wix, Squarespace, or WordPress to create your own website without any coding.
Create Social Media Accounts
The next step is to create social media accounts on popular platforms such as Facebook, Instagram, and Twitter. Social media is an excellent way to connect with fans, share your music and updates, and promote your gigs. Make sure you choose platforms that are most relevant to your audience and post regularly to keep your followers engaged. Use hashtags and tagging to increase your reach and drive traffic to your website. Once you have your online presence set up, the key to success is to engage with your fans regularly. Respond to comments and messages, create engaging content such as videos and photos, and collaborate with other musicians and influencers. By interacting with your fans, you will create a loyal and dedicated following who can help spread the word about your music.
Conclusion
By creating an online presence, you can promote your music independently and reach a wider audience. Building a website, creating social media accounts, and engaging with your fans are simple steps you can take to get started. By staying consistent and authentic, you can build a strong online presence that will help you succeed as an independent musician.
Utilize Streaming Platforms
Streaming platforms like Spotify, Soundcloud and Apple Music are great tools for independent musicians to market their music. By creating a strong presence and engaging with fans through playlists, promotions, and collaborations, artists can gain valuable exposure and grow their fan base.
Upload Music To Multiple Platforms
Utilizing streaming platforms plays a crucial role when it comes to marketing your music independently. With millions of users, popular platforms like Spotify, Apple Music, Tidal, and more provide a massive audience for your music to reach. But, uploading your music on just one platform isn’t enough, and the more platforms you’re on, the better your chances of getting your music discovered. Consider uploading your music on as many platforms as possible, including smaller ones like SoundCloud, Bandcamp, or Audiomack – it increases your music’s chance to get discovered and increases your reach. With each platform you sign up for, make sure to list all your social media links so that people can follow and engage with you outside of the streaming platforms.
Get Featured On Playlists
Getting featured on playlists is one of the most effective ways to market your music. Playlists curated by editors or other users can generate a massive audience if your music is featured on them. Make sure to research and find playlists that match your genre and sound. Once you’ve identified them, reach out to the playlist curators or owners and try to get your music featured on them. Additionally, you can create your playlists on multiple platforms and add your own music to them. This is a great way to engage with your fans and increase your streams. Encourage your followers to follow your playlists and share them with their friends and family, increasing your reach even further. Every small step counts when it comes to building a fanbase. Utilizing multiple streaming platforms and getting featured on playlists are two powerful ways to market your music independently. With these methods, you have the power to reach a broader audience, build your fanbase, and eventually monetize your music career. Remember, consistency, and patience are key when it comes to marketing your music independently.
Collaborate With Other Musicians
Collaborating with other musicians is a great way to broaden your fan base and market your music independently. By teaming up with other artists, you can cross-promote on social media, combine your audiences at live shows, and even collaborate on new music that attracts a wider audience.
Collaborating with other musicians is a crucial step in marketing your music independently. Whether it’s working with local artists or teaming up with musicians online, collaboration can open doors to new opportunities and expand your audience base. Here are two ways you can collaborate with other musicians.
1. Work With Local Artists
Working with local artists is a great way to establish your presence in your community. You can start by attending open mic nights and reaching out to other musicians in your area. You can also join local music groups and attend music events to connect with other musicians. Once you have found musicians with whom you’d like to collaborate, you could record a cover or even a new original composition. It could be a song that you all wrote together or even a solo track featuring a guest artist. You can film a music video and promote it on social media platforms like YouTube, Instagram, and TikTok. Co-writing songs with other musicians can be a game-changer. With fresh ideas and new perspectives, you could create something unique that could capture more attention. Collaborating with local musicians also helps you create a network of support around you, which is critical as you move forward in your music career.
2. Team Up With Musicians Online
In today’s digital age, you’re no longer confined to working with local artists. The internet has made it easier than ever to collaborate with musicians from anywhere in the world. You can find talented and like-minded musicians on social media platforms like Instagram, Twitter, and Facebook. Collaborate with another musician, producer, or songwriter who shares your vision for a particular track, genre or music style. You can co-produce a beat with a producer or even create a remix of a song with another artist. Keep in mind, communication and shared vision are crucial when working with musicians online. Always make sure you have a clear understanding of where the project is headed before investing too much time. In Conclusion, Collaborating with other musicians online or locally can help you expand your network and reach new audiences. Joining forces with musicians allows you to pool creative ideas, resources and create something unique. These are just two ways to collaborate with other musicians, but there are endless opportunities for independent artists who are willing to reach out.
Credit: dittomusic.com
Engage With Your Fans
Engaging with your fans is crucial when it comes to marketing your music independently. Utilize social media platforms and interact with your audience by regularly posting updates, behind-the-scenes content, and responding to their comments and messages. This will not only foster a loyal fanbase but also increase your visibility and reach online.
As an independent musician, it’s essential to engage with your fans to build a loyal following. In this digital age, social media has made it easier than ever to connect with your audience. By using these platforms to your advantage, you can build a dedicated fanbase and increase your song plays. Here are two ways to engage with your fans:
Communicate On Social Media
Social media is a powerful tool for musicians to communicate directly with their fans. By regularly posting updates on your music and interacting with your followers, you can broaden your reach and connect with a wider audience. Here are some ways to effectively use social media:
Create and maintain profiles on popular platforms like Facebook, Twitter, Instagram, and TikTok.
Post updates on your upcoming shows, new releases, and behind-the-scenes glimpses of your creative process.
Respond to your followers’ comments and messages. Make your fans feel valued and appreciated.
Collaborate with other musicians and influencers to reach new audiences.
Offer Exclusive Content
Exclusive content can be a powerful tool to incentivize your fans to stay engaged. By offering exclusive content, you can create a sense of exclusivity and build a loyal fanbase. Here are some ideas for exclusive content:
Content Type
Description
Access to New Songs
Release your new tracks exclusively to your website or social media followers before it’s available on streaming platforms.
Behind-The-Scenes Content
Share your creative process with your fans by showing them behind-the-scenes photographs and videos.
Merchandise
Create exclusive merchandise or limited edition items for your fans.
Live Performances
Live stream performances or offer exclusive access to your concert recordings.
By engaging with your fans on social media and offering exclusive content, you can build a loyal following and increase your success as an independent musician. Don’t underestimate the power of connecting with your audience, no matter how small or large it may be.
Perform Live
Marketing your music independently can be challenging, but using social media, creating a website, reaching out to blogs, and performing live can help build your audience. By engaging with fans and promoting your brand, you can attract attention and expand your reach in the competitive music industry.
Performing live is an essential aspect of marketing your music independently. Live performances not only showcase your talent but also help you connect with your audience. In this article, we’ll discuss how you can book gigs and partner with venues to increase your chances of performing live.
Book Gigs
Booking gigs might seem like a daunting task, but it is an excellent way to network and build your fan base. Here are a few tips to help you book gigs independently:
Research local venues and determine which ones are suitable for your style of music.
Create a professional press kit that includes a biography, high-quality photos, and a demo recording or video of your performance.
Reach out to venue owners or event organizers with your press kit and a customized pitch that highlights why your music is a good fit for their audience.
Follow up with them after a few days to remind them of your interest in performing at their venue.
Partner With Venues
Partnering with a venue can be an effective way to establish yourself as a local musician and increase your exposure. Here’s are some ways you can partner with a venue:
Reach out to venues that regularly feature live music and offer them a revenue-sharing arrangement. This could mean you receive a percentage of the proceeds from ticket sales or food and drinks sold during your performance.
Collaborate with venue owners to host a regular live music night, where you perform along with other local musicians. This can be a mutually beneficial arrangement as it helps the venue attract more customers while giving you and other musicians a platform to showcase your talents.
Offer to perform for free in exchange for exposure and the opportunity to network with the venue’s regular patrons. This approach can be an excellent way to establish a relationship with the venue and eventually book paid gigs.
In conclusion, performing live is a crucial aspect of marketing your music independently. By booking gigs and partnering with venues, you can increase your exposure, build your fan base, and ultimately, establish yourself as a successful independent musician.
Invest In Promotion
To effectively market your music independently, investing in promotion is key. Utilize social media, email marketing, and collaborations with other artists, as well as offline marketing tactics like flyers and local shows. Consistency and creativity are vital for standing out in a crowded music industry.
Investing in promotion is crucial for independent musicians who want to build a career in the music industry. Without proper marketing, it’s nearly impossible to reach new fans and grow a loyal following. Luckily, there are several effective promotion strategies that musicians can try. One such strategy is to buy Ads on Social Media. Social media platforms like Facebook, Instagram, and Twitter are excellent places to promote your music and reach a wider audience.
Buy Ads On Social Media
Purchasing social media ads is an effective way to reach your target audience and achieve greater visibility. Social media platforms offer a variety of advertising options, including sponsored posts, targeted ads, and boosted content. The key is to identify your target audience and create ads that will appeal to them. You can also use ads to promote specific events such as album releases and live performances.
Reach Out To Music Blogs
Another effective promotion strategy is to reach out to music blogs. Music blogs are a great way to reach new fans and generate buzz around your music. Research blogs that cover your genre of music and send them a personalized email introducing yourself and your music. Offer to provide them with a sample of your music or an interview. Getting featured on a music blog can give your career a significant boost. Overall, investing in promotion is essential for independent musicians. Buying social media ads and reaching out to music blogs are just some of the effective marketing strategies. With the right promotion, independent musicians can build a loyal fan base and further their careers in the music industry.
Sell Merchandise
Learn how to market your music independently by selling merchandise. This is a great way to promote your brand, generate income and connect with fans. Use various social media platforms and create unique merchandise that stands out from the rest.
Selling merchandise is one of the best ways to earn extra revenue as an independent musician. Not only does it provide a source of income, but it also serves as a way for fans to support your music and show their love for your brand. Here are some tips on how to sell merchandise successfully:
Create Unique Designs
When designing merchandise for your brand, it’s important to create unique designs that represent your music and style. Consider hiring a graphic designer to create eye-catching designs, or use a website like Canva to create designs yourself. Make sure your designs incorporate your brand logo and are cohesive with your band’s overall aesthetic.
Sell Merchandise At Gigs And Online
Selling merchandise at your gigs is a great way to increase sales and promote your brand. Make sure to display your merchandise prominently on tables or racks so fans can easily see and purchase your products. Additionally, selling merchandise online through your website or social media accounts allows fans who couldn’t attend your gigs to purchase merchandise as well. Use platforms like Bandcamp, Shopify, or WooCommerce to set up an online store.
Offer Limited Edition Items
Creating limited edition merchandise items can create a sense of exclusivity for fans and drive sales. Consider creating limited edition t-shirts, vinyl records, or other items that are only available for a limited time or in limited quantities. Make sure to promote these items heavily on social media and at your gigs to generate buzz and increase demand.
Bundle Items For Better Value
Offering merchandise bundles allows fans to purchase multiple items at a discounted price, increasing sales for you and providing better value for your fans. Consider bundling items like t-shirts, CDs, or stickers together for a discounted price to encourage fans to purchase multiple items. In conclusion, selling merchandise can be a lucrative way to earn extra income and promote your brand as an independent musician. By creating unique designs, selling merchandise at gigs and online, offering limited edition items, and bundling items for better value, you can successfully market your music and create a loyal fan base.
Credit: blog.groover.co
Stay Dedicated And Consistent
Independent music marketing requires dedication and consistency. Without these two qualities, all other efforts will be futile. Creating a brand and building an audience takes time, effort, and patience. If you are an independent artist who wants to succeed in the music industry, you need to stay dedicated and consistent. In this post, we discuss how you can consistently market your music independently.
Set Realistic Goals
Setting realistic and achievable goals is the first step in marketing your music independently. Goals help you stay focused and motivated, allowing you to measure progress objectively. By defining a set of tangible, achievable, and time-bound goals, you can track your success and fine-tune your marketing strategy. Your goals should take into consideration the time, budget, and resources you have at your disposal. With realistic goals, you can minimize frustration and avoid burnout along the way.
Track Your Progress
Tracking your progress is essential when it comes to independent music marketing. Without tracking, you cannot determine what is working and what isn’t. There are many tools available that can help you track performance, including social media analytics, email marketing analytics, and website analytics. Choose the tools that are most suitable for your needs, and track your progress regularly. With this information, you can tweak your marketing strategy and optimize your efforts to achieve your goals.
Most importantly, staying dedicated and consistent is the key to success in independent music marketing. Create a schedule, and stick to it. Engage your fans on social media regularly. Release new music on a regular basis. Reach out to blogs, music websites, and influencers regularly. Consistency and dedication are essential to building momentum and growing your audience.
Follow these tips, and with dedication and persistence, you can successfully market your music independently.
Credit: www.linkfire.com
Frequently Asked Questions For How To Market Your Music Independently
How Can I Promote My Music By Myself?
To promote your music by yourself, you can create a website or social media accounts to showcase your music. Use email campaigns to share your music with your audience or collaborate with other musicians to gain more exposure. Additionally, you can offer free downloads or host a concert to attract new fans and generate buzz.
How Do I Sell My Music Independently?
To sell your music independently, you should first upload your songs to digital distribution platforms, such as Bandcamp or CD Baby. Create social media accounts to promote your music and build an audience. Consider creating a website and an email list to keep fans informed.
Collect royalties from streaming platforms such as Spotify. Collaborate with other artists to expand your reach and generate buzz.
How Do Music Artists Market Themselves?
Music artists can market themselves in various ways such as social media promotion, collaborations with other artists and brands, live performances, music videos, and releasing music on streaming platforms. It is also essential for artists to connect with their audience, engage with fans, and build a strong personal brand that reflects their music and message.
What Is The Right Way To Market Your Music?
The right way to market your music is by creating a strong online presence using social media, websites, and streaming platforms. Make sure to engage with your audience, collaborate with other artists, and promote your brand through merchandise and live events.
Utilize email marketing and targeted advertising to reach new fans and gain exposure. Remember to stay true to your unique sound and message to stand out in the competitive music industry.
Conclusion
After reading this post, you should have a better understanding of how to market your music independently. Starting with developing a strong online presence, utilizing social media platforms, and networking with fellow musicians and industry professionals can all contribute to your success.
Remember to prioritize authenticity and consistency in your branding, utilize available data to track your progress, and continuously innovate your marketing strategies. By taking the steps outlined in this post, you’re on your way to achieving your goals as an independent artist.
To get a great tonal balance in your mix, pay close attention to your levels and use EQ effectively. Achieving the desired balance requires careful listening and making small adjustments as needed.
Also, balancing the tonal elements of a mix is crucial to create a polished and professional sound. A mix with too much low end can sound muddy and indistinct. Meanwhile, a mix with too much high end can be harsh and fatiguing.
A balanced mix ensures that each instrument and element can be heard clearly and contributes to the overall sonic landscape. To achieve this ideal balance, you’ll need to focus on the levels of each element, as well as use EQ to cut or boost frequencies as needed. Effective use of panning and spatial effects can also help create a sense of depth and balance in your mix. Moreover, keep these techniques in mind as you work to achieve a great tonal balance in your mix.
Credit: www.masteringthemix.com
Start With A Solid Foundation for Tonal Balance
In addition, getting a great tonal balance in your mixes is a fundamental aspect of producing quality music. However, this can be a challenging task for many producers and engineers. The tonal balance is the even distribution of frequencies across the audible spectrum, and if the balance is not right, it can impact the clarity and impact of your mix. One way to ensure a great tonal balance is to start with a solid foundation.
Choose Sounds That Complement Each Other
When selecting sounds for your mix, it is essential to choose sounds that complement each other. It is necessary to choose sounds that add value and contribute to the overall sound you want to achieve. Furthermore, using sounds that do not work well together can create conflicts in the frequency spectrum. This makes it harder to achieve a balanced mix.
DO
DON’T
Add sounds that work together
Add sounds that clash with each other
Use sounds that add value
Use sounds that don’t fit the mix
Choose sounds that contribute to the overall sound you want to achieve
Choose sounds that don’t work with the rest of the arrangement
Set a foundation that allows every sound to shine
Overcrowd the mix with too many sounds
Set Levels And Panning for Tonal Balance
Additionally, once you have chosen the right sounds, the next step to a solid foundation is to set levels and panning. Set levels so that each sound is audible, plays its part, and has the right amount of space in the mix. Panning can also help with creating space and width and adds more depth to the mix. This makes individual instruments easier to pick up.
Also, adjust the volume of individual sounds
Avoid clipping and distortion
Moreover, use panning to make each instrument sit nicely in the mix
Avoid panning everything hard left or hard right
Create a balance in the mix so every element sits correctly
Start with a solid foundation, complementary sounds and correct levels and panning. That puts your mix in a strong position from the start. With these fundamental steps done correctly, you will be on your way towards a great tonal balance in your mix.
Use Appropriate Eq
The appropriate use of EQ is crucial in achieving a great tonal balance in your mix. It helps you to shape the overall sound of your mix by cutting unwanted frequencies, boosting desired frequencies, and sculpting the sound. Let’s dive deeper into how you can use the different EQ techniques to get a well-balanced mix.
Cut Unwanted Frequencies
The first step towards achieving a great tonal balance in your mix is to identify and cut any unnecessary or unwanted frequencies. Use a high-pass filter to remove low-frequency rumble and a low-pass filter to cut off high-frequency noise. Notch filters can also be used to eliminate specific frequencies that are causing problems. Remember to cut only a few dBs at a time and use your ears to determine the optimal amount of cutting.
Boost Desired Frequencies
After cutting unwanted frequencies, your next step is to boost the frequencies you want to highlight. To do this, use a bell EQ curve to increase the gain of the desired frequency range. If you want to add some warmth to the mix, boost the low end. If you want to add some sparkle, boost the high end. You can also use a shelf EQ curve to boost or cut the frequencies above or below a certain point. Again, use your ears to determine the optimal amount of boosting.
Sculpt The Sound
The final step towards achieving a great tonal balance in your mix is to sculpt the sound. This involves using a combination of cutting and boosting to create a unique sound. For example, you can use a bell curve to boost the mid-range frequencies of a guitar to make it stand out in the mix. You can also use a combination of a high-pass and low-pass filter to make a vocal track sound clear and isolated. Remember, the key to successful sound sculpting is to rely on your ears to determine the optimal amount of cutting and boosting for each frequency range.
Utilize Dynamic Processing for Tonal Balance
To achieve a great tonal balance in your mix, it’s important to utilize dynamic processing. This involves using techniques such as compression, limiting. EQ to control the levels of different frequencies in your mix and bring them into balance.
By carefully applying these techniques, you can create a mix that sounds clear, balanced, and professional.
One of the key elements to getting a great tonal balance in your mix is to utilize dynamic processing. While a static mix might sound decent on its own, dynamic processing can help you refine the mix even further. This allows you to control the levels of individual tracks and achieve a smoother, more balanced sound.
Compress To Control Levels
One of the most effective dynamic processors for controlling levels is compression. By compressing a track, you can bring the quieter elements up to a more audible level while simultaneously reigning in any peaks that might be too loud. This allows you to balance out the levels of individual tracks and create a more cohesive mix overall.
Use Multiband Compression
If you’re looking to take your compression game to the next level, consider using a multiband compressor. Unlike a standard compressor, a multiband compressor allows you to control the levels of specific frequency ranges. This allows you to more precisely shape the sound of individual tracks. This can be especially useful when working with instruments that have a lot of harmonic content, such as vocals or guitars.
De-ess To Control Harshness
Finally, another useful dynamic processing tool you might consider is de-essing. As the name suggests, de-essing allows you to remove or reduce harsh “s” and “t” sounds in vocals. By controlling these harsh frequencies, you can create a more polished, professional-sounding mix that’s easy on the ears. Compression, multiband compression and de-essing take your tonal balance further. They help you create a polished mix that sounds great anywhere. Remember, the key is to experiment with different settings and find what works best for each individual track in your mix.
Apply Reverb And Delay for Tonal Balance
If you’re struggling to get a great tonal balance in your mix, applying reverb and delay can be the solution you’re looking for. Reverb and delay are two powerful tools you can use to add character, depth, and space to your mix. Here are some tips on how to use them effectively:
Create Space And Depth
Reverb can help you create space and depth in your mix by simulating the natural reflections that occur in a real environment. By adding a subtle amount of reverb on a track, you can make it sound like it’s in a bigger space than it actually is. This gives your mix a sense of depth and dimension. To achieve a natural-sounding reverb, adjust the reverb’s decay time, pre-delay, and wet/dry balance until it blends well with the other tracks in your mix.
Use Delays For Rhythm And Texture for Tonal Balance
Delays can be used to add rhythm and texture to your mix. By applying a short delay on a track, you can create a rhythmic pattern that complements the song’s tempo. You can also use delays to make a track sound more interesting by adding subtle variations in timing and feedback. To achieve a cohesive sound, make sure the delays are in sync with the other elements in your mix.
When using reverb and delay, it’s important to pay attention to their level and placement in the mix. Too much reverb can make your mix sound muddy and washed out, while too much delay can make it sound cluttered and messy. Always listen critically and make adjustments until you achieve the perfect balance. With practice, applying reverb and delay in your mix can become second nature. This helps you create tracks with a professional-sounding tonal balance.
Consider Automation
When it comes to mixing, achieving the right tonal balance is crucial to make sure that each instrument and sound will stand out and contribute to the overall sound of the track. One effective way to achieve a great tonal balance in your mix is to consider automation. Automation gives you the ability to control different parameters of the tracks, such as volume, panning, effects, and sends, among others, over time. Here are some tips on how to use automation to get a great tonal balance in your mix.
Automate Volume And Panning
The volume and panning of the tracks are two essential components that you can automate to get a perfect tonal balance. Automating volume can help you control the dynamics of the track. This makes sure that each instrument or sound has its rightful spot in the mix. By automating the panning, you can create a more interesting sonic landscape. This can add a lot of depth and dimension to your mix.
For example, you can automate the volume of the lead vocals to make them stand out during the chorus or automate the panning of the guitar to move it from left to right. This makes the track sound more dynamic.
Automate Effects And Sends
The effects and sends are two other parameters that you can automate to add more depth and interest to your mix. Effects such as delay, reverb, and chorus can make the track sound more spacious and lively. By automating these effects, you can make sure that they don’t overshadow the other parts of the track, especially during important parts of the song, like the chorus or bridge.
Sends are also an essential element in the mix. This allows you to add additional processing or effects to a particular track. By automating the sends, you can add more interest or change the feel of the track, like sending a drum track to a reverb bus to create a more atmospheric sound.
In conclusion, automation can be a powerful tool when it comes to mixing. This allows you to control different parameters over time and achieve a great tonal balance. By automating volume, panning, effects, and sends, you can make sure that each sound in the mix has its rightful place and will contribute to the overall sound of the track.
Credit: bedroomproducersblog.com
Reference Your Mix
Mixing a song can be a daunting task. From fine-tuning each element to creating a cohesive whole, there are numerous factors to consider. One of the most essential aspects is getting a great tonal balance, which can make or break a mix. To achieve this, referencing your mix is crucial. Here’s how:
Use Reference Tracks for Tonal Balance
When mixing, it’s easy to get lost in the details and lose sight of the overall sound. This is where reference tracks come in. A reference track is a professionally mixed song in a similar genre or with a similar sound that you can use as a comparison to your mix. By listening to your mix alongside a reference track, you can better understand where your mix stands in terms of tonal balance, stereo width, and overall sound quality.
Reference tracks should be of high quality and chosen carefully, so they represent the sound you want to achieve. To use reference tracks, follow these simple steps:
Step
Action
Step 1
Choose a reference track that has a similar genre or style as your mix.
Step 2
Compare your mix to the reference track by listening to them both alternately and noting the differences.
Step 3
Adjust your mix accordingly to match or better the reference track.
Take Breaks And Listen With Fresh Ears
Another crucial factor to consider is how much time you spend in your mix. Listening to the same thing for hours on end can lead to ear fatigue and make it difficult to assess the tonal balance accurately. It’s essential to take regular breaks during your mixing process, so your ears can rest and reset before you resume.
When you come back to your mix, it’s essential to listen to it with fresh ears. To do this, consider the following tips:
Take a ten-minute break every hour to rest your ears.
Listen to your mix on different speakers or headphones, so you get varied perspectives on how it sounds.
Mute all the tracks except for the track you are working on. So you can focus on specific elements at a time.
By taking breaks and listening with fresh ears, you can ensure that your tonal balance is accurate and well-balanced.
Collaborate With Others
Collaborating with others is key to achieving a great tonal balance in your mix. Work with other professionals such as mastering engineers or musicians to achieve the sound you want. Communication and open-mindedness are key components of successful collaboration in music production.
Collaborating with others is key to getting a great tonal balance in your mix. Other engineers and artists bring fresh perspectives to your mix. They can help you reach a balance you might miss alone. Here are some ways to collaborate with others for a better tonal balance: ### Get Feedback From Other Engineers One way to collaborate with other engineers is to get feedback from them. This can be invaluable when it comes to achieving a great tonal balance in your mix.
Other engineers can offer fresh ears and different perspectives that can help you identify problem areas in your mix that you may have missed. Consider working with an engineer who has different specialties than you do. For example, if you specialize in mixing vocals, consider working with an engineer who specializes in mixing drums or guitars. This can provide a fresh perspective and bring out the best in all aspects of the mix. ### Collaborate With Artists Collaborating with artists is another way to achieve a great tonal balance in your mix.
Practical Tips for Tonal Balance
Artists often have a specific vision for their music, and their input can help you achieve the desired tonal balance. When collaborating with artists, start by having a conversation about their vision for the music and what they want to achieve. This can help you understand their goals and how to best achieve them through the mix. Consider asking for input on the mix from the artist throughout the process, rather than waiting until the end to get feedback. In conclusion, collaborating with others is a powerful tool for achieving a great tonal balance in your mix.
By working with other engineers and artists, you can gain fresh perspectives and insights that will help you achieve your goals. Whether you’re just starting out or a seasoned pro, collaborating with others is a great way to improve your skills and achieve better results.
Follow Your Instincts
Achieving a great tonal balance in your mix requires a combination of technical and artistic skills. Follow your instinct as you tweak levels, EQ, and compression to find that perfect sweet spot. Trust your ears and don’t be afraid to make bold choices in pursuit of a cohesive, balanced mix.
Trusting your instincts is key to achieving a great tonal balance in your mix. Remember that you are the final judge, and while you might not always be right, it’s important to rely on your ears and experience to guide you. When you’re mixing, it’s easy to get bogged down in details and start second-guessing yourself. However, if something sounds good, it probably is good. Trust your gut and go with it.
Trust Your Ears
Your ears are your most valuable tool when it comes to mixing. Be sure to take breaks often and give your ears a rest, so they don’t get fatigued. It’s also important to listen in a variety of environments to make sure your mix sounds good on different systems. Don’t rely too heavily on visual representations of sound, such as waveforms, as they can be misleading. Instead, close your eyes and focus on what you’re hearing.
Experiment With Different Techniques
Mixing is an environment that encourages experimentation. Keep an open mind and be willing to try new things, even if they feel counterintuitive. Every mix is different and requires different approaches. Here are a few techniques to try:
Use EQ sparingly. Instead of cutting frequencies, try boosting others to create more space.
Try using compression on individual tracks to create a more even mix.
Add reverb to create depth and space.
Pan individual tracks to create a sense of space and separation.
Use automation to create dynamic changes throughout the mix.
Remember, there’s no right or wrong way to mix. The most important thing is to trust your instincts and ears and to keep experimenting until you find what works for your mix.
Credit: www.izotope.com
Frequently Asked Questions For How To Get A Great Tonal Balance In Your Mix
How Do You Fix Tonal Balance In A Mix?
To fix tonal balance in a mix, use EQ to boost or cut specific frequencies and adjust volume levels. Start by identifying problem areas and focus on specific instruments or vocals that need adjusting. Use a reference track to help guide your decisions and listen on multiple systems to ensure a balanced mix.
How Do You Get A Good Mix Balance?
To get a good mix balance, you need to adjust the levels of each instrument and sound in the mix. Start by setting the levels for the most important elements, such as the vocals or lead instrument. Then, use equalization and panning to create space and separation between the different sounds.
Finally, apply compression and other effects to make the mix sound cohesive and polished. Continuously listen to the mix and make adjustments until it sounds balanced and clear.
What Is The Tonal Balance Of A Mix?
The tonal balance of a mix refers to the distribution of frequency ranges in a musical composition. It’s important to ensure that the different elements of the mix are balanced in terms of their volume, EQ and panning to create a cohesive and pleasing sound.
A well-balanced mix should have a good balance of lows, mids and highs and should be free from any harsh or overpowering frequencies.
What Does Good Tonal Balance Look Like?
Good tonal balance means that all of the different frequencies in a sound are present in the right proportions. It results in a clear and natural-sounding mix with no parts dominating over others. A good tonal balance produces an accurate representation of the recorded sound and allows all of the elements to be heard clearly.
Conclusion
Achieving a great tonal balance in your mix can make a significant difference in how your music is perceived by your audience. It takes time, patience, and the right tools to get it right. By using techniques like panning, EQ, and compression, you can bring out the best in each instrument and create a cohesive and balanced sound.
Remember, every track is different, so keep experimenting until you get the desired result. With practice and persistence, you can improve your mixing skills and make your music stand out. Happy mixing!