Categories
Archive

How Loud Should Vocals Be In A Mix: Achieving Perfect Harmony

In a mix, vocals should be loud enough to be clearly heard but not overpowering. Balancing is key.


When mixing music, achieving the right balance between the vocals and other elements is crucial for a professional result. Vocals play a central role in delivering the message and emotions of a song, so they need to be prominent enough to stand out.


However, vocals should not overshadow the instruments and other elements in the mix. Finding the right volume for vocals involves careful listening, adjusting levels, and ensuring they blend harmoniously with the rest of the music. A well-mixed track will have vocals that are clear, intelligible, and impactful, enhancing the overall listening experience for the audience.
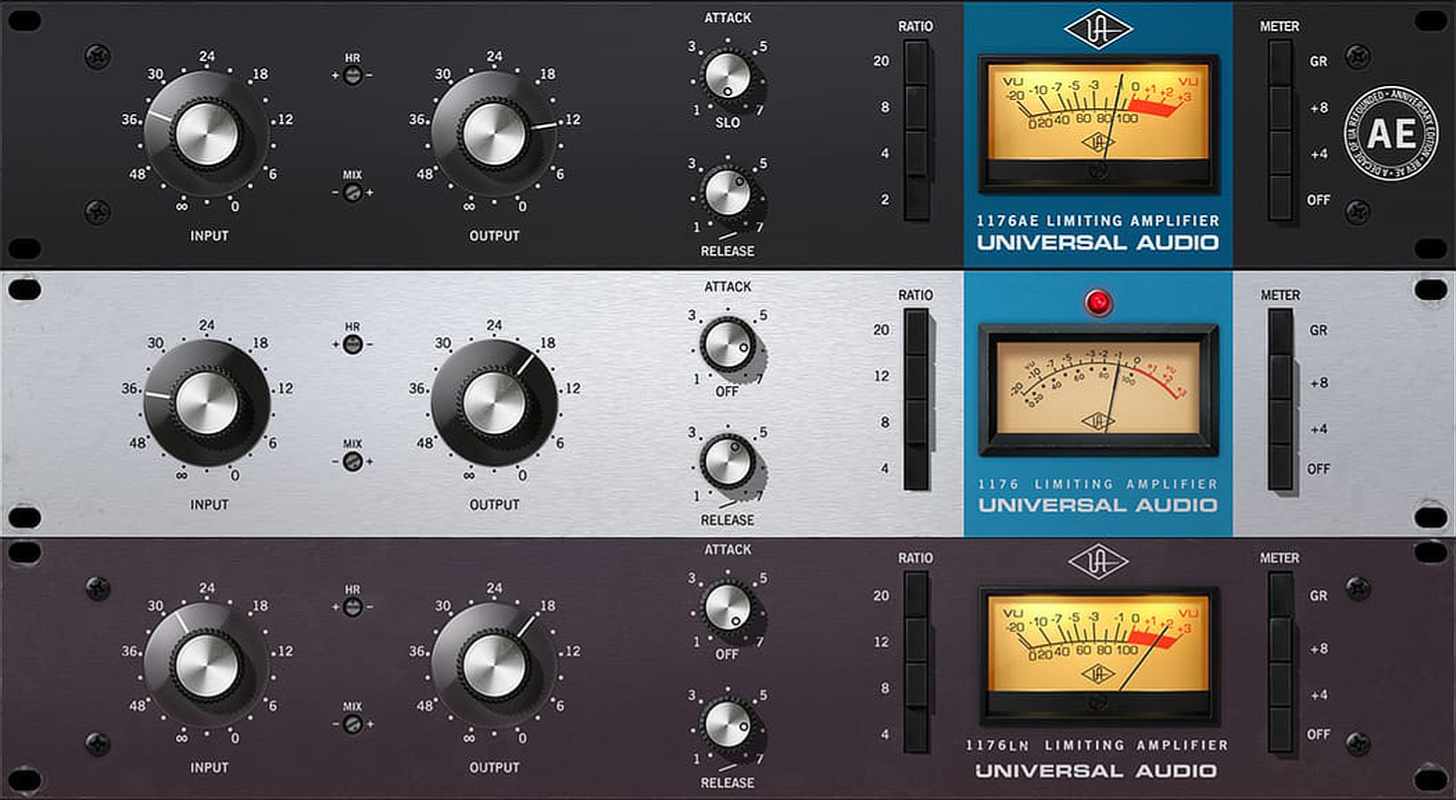
How Loud Should Vocals Be In A Mix: Achieving Perfect Harmony


Credit: www.sweetwater.com


The Importance Of Vocal Levels In Music Mix

Vocal levels are crucial for a perfect music mix. Finding the right balance ensures a song’s clarity and emotional impact. Let’s delve into why vocal levels are pivotal in producing exceptional music.

Clarity And Intelligibility

Clear vocals dominate a music mix. Proper levels allow lyrics to be heard distinctly, enhancing the listener’s experience. Equilibrium in vocal levels avoids overshadowing other instruments.

Emotional Impact

Vocal levels evoke emotions in a song. The right balance intensifies the message and connects with the audience on a deeper level. Effective levels capture and convey the intended mood of the music.

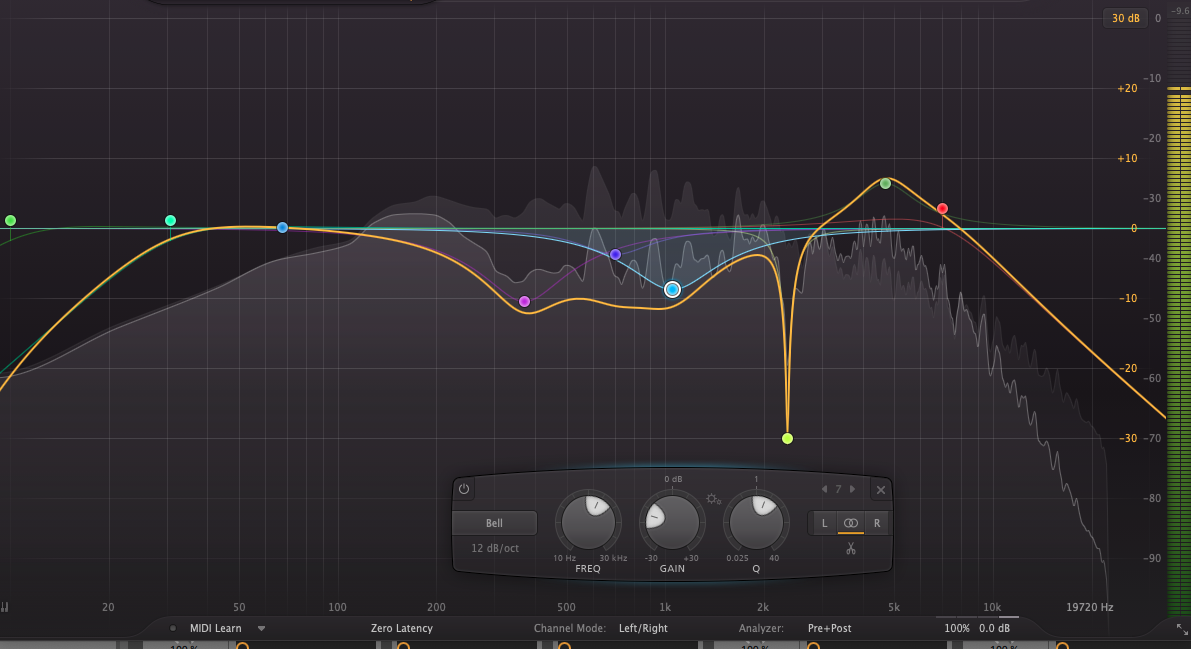
How Loud Should Vocals Be In A Mix: Achieving Perfect Harmony


Credit: mixprodmasters.com


Factors Affecting Vocal Level

When determining how loud vocals should be in a mix, it’s crucial to consider several factors that can impact the overall sound and feel of a song.

Genre Of Music

The genre of music plays a vital role in determining the ideal vocal level. In genres like rock, pop, and hip-hop, vocals tend to be more prominent and upfront in the mix. On the other hand, in ambient, acoustic, and classical genres, vocals may be more subdued and blend with the music.

Role Of Vocals In The Song

  • The role of the vocals in a song, whether they are the main focus or a supporting element, influences their volume level.
  • If the vocals are intended to drive the melody and convey the song’s message, they should be more prominent in the mix.
  • However, if the vocals are meant to complement the instrumentation and create a cohesive sound, they may be mixed at a lower level.

Technical Guidelines For Setting Vocal Levels

Setting vocal levels in a mix is a crucial aspect of producing a professional-sounding track. Understanding the technical guidelines for setting vocal levels can elevate the overall quality of the mix and ensure that the vocals sit harmoniously with the rest of the instrumentation. In this article, we will explore essential technical considerations for achieving optimal vocal levels in a mix, focusing on using reference tracks and understanding dynamic range.

Using Reference Tracks

Referencing tracks from established artists within the same genre can provide valuable insights into how vocals should be balanced within a mix. Compare the volume levels of the reference track’s vocals to your own mix and adjust accordingly. This allows for a more objective assessment of the vocal levels, helping you achieve a balanced and professional sound.

Understanding Dynamic Range

Dynamic range refers to the variation between the quietest and loudest parts of a vocal performance. Adjust the vocal levels to ensure that the quieter phrases are audible without being overpowering, while the louder sections maintain clarity and impact. Maintaining an appropriate dynamic range within the vocals can enhance the emotional delivery of the performance and contribute to a polished mix.

Balancing Vocals With Instrumentation

When mixing a song, one of the most crucial aspects is finding the right balance between the vocals and the instrumentation. After all, the vocals are often at the forefront of a song, carrying the message and connecting with the listeners emotionally. However, at the same time, it is also important for the vocals to blend seamlessly with the rest of the music, allowing all the elements to work together harmoniously.

Eq And Frequency Masking

One of the key techniques in balancing vocals with instrumentation is through the strategic use of EQ and addressing the issue of frequency masking. Frequency masking occurs when different elements in a mix are competing for the same sonic space, resulting in certain frequencies being overshadowed or lost in the mix. To combat this, it is necessary to apply EQ to both the vocals and the accompanying instruments.

Creating Vocal Space

Creating a dedicated space for the vocals is essential in maintaining clarity and ensuring that they cut through the mix effectively. By carving out a specific frequency range for the vocals, they can be given prominence and shine through without being overshadowed by other instruments. This can be achieved through careful EQ adjustments and utilizing techniques such as sidechain compression to make room for the vocals without sacrificing the impact of the instruments.

Additionally, panning can also play a crucial role in creating space for the vocals. By positioning the vocals in the center of the stereo field, they can stand out more prominently, while instruments are placed in the left and right channels. This spatial separation allows for a more balanced and dynamic mix, where both vocals and instrumentation can coexist without clashing.

Achieving The Perfect Vocal Mix


Balancing vocals in a mix is crucial for achieving the perfect sound. The optimal loudness of vocals depends on the genre and the overall instrumentation. Focus on clarity and intelligibility while blending vocals with the music, aiming to keep them prominent without overpowering the other elements.

Experimentation And Iteration

When it comes to achieving the perfect vocal mix, experimentation and iteration play a crucial role. As an audio engineer, it’s important to understand that finding the right balance and level for vocals requires fine-tuning and trying out different approaches. Here are some strategies to consider:

  • Start by setting the vocal level at an average or moderate volume.
  • Listen attentively to how the vocals interact with the other instruments in the mix.
  • Experiment by gradually increasing or decreasing the vocal level to hear the impact on the overall sound.
  • Make subtle adjustments to the EQ and compression settings to enhance the clarity and presence of the vocals.
  • Take breaks and come back with fresh ears to assess the mix objectively.
  • Repeat the process until you achieve a vocal level that seamlessly integrates with the rest of the elements.

Seeking Feedback

Seeking feedback is another vital aspect of achieving the perfect vocal mix. Although it’s essential to trust your ears and instincts as an audio engineer, receiving input from others can provide valuable insights and help you refine your mix. Here are some ways to gather feedback:

  1. Share the mix with trusted colleagues or fellow audio engineers for their opinions.
  2. Observe how listeners respond to the vocal mix during playback at various listening environments.
  3. Consider seeking input from the vocalist or artist themselves to ensure their expectations are met.
  4. Take note of any suggestions or criticisms and use them as guidelines to improve the vocal mix.

By combining experimentation, iteration, and seeking feedback, you can achieve a vocal mix that captivates listeners and effectively communicates the intended message of the song.

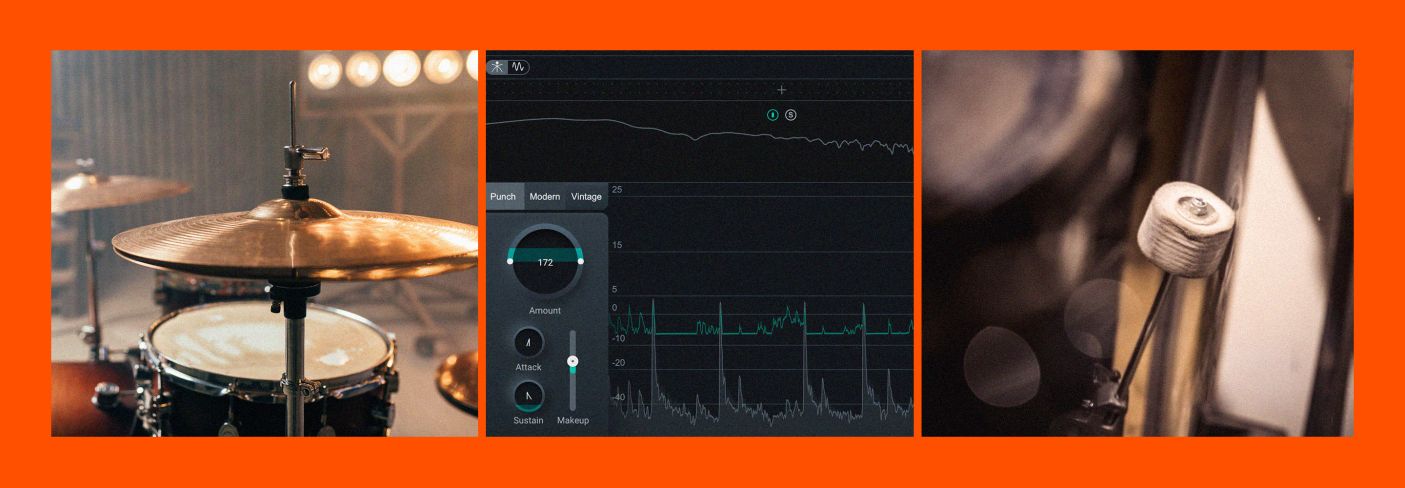
How Loud Should Vocals Be In A Mix: Achieving Perfect Harmony


Credit: www.izotope.com


Frequently Asked Questions For How Loud Should Vocals Be In A Mix


How Many Decibels Should Vocals Be In A Mix?


Vocal levels in a mix typically range from -6 dB to -3 dB for a balanced sound.


How Loud Should Vocals Be On Beat?


Vocals on beat should be just loud enough to stand out without overpowering the music. Aim for clarity and balance.


What Db Should Beat Be In A Mix?


The beat in a mix should typically range from -6dB to -3dB to ensure clarity and impact. Adjust the levels based on the genre and the overall dynamics of the track for a balanced sound.


How Loud Should Volume Be When Mixing?


When mixing, the volume should be set at a moderate level to ensure accurate sound representation and prevent excessive distortion. It is recommended to keep the volume around 85dB, which is roughly equivalent to normal conversation level. Maintaining a consistent volume will help you make precise adjustments and achieve a well-balanced mix.


Conclusion


To wrap it up, finding the right vocal balance in a mix is crucial for creating a professional and engaging sound. By carefully adjusting levels, using effective compression, and considering the song’s genre, you can achieve the perfect vocal presence in your mix.


Keep experimenting, trusting your ears, and refining your skills to achieve the best results.

 

https://www.youtube.com/watch?v=q3EVvhlcCcE


Categories
Archive

How To Rock Your Music Career: Setup A TikTok Account For Musicians

To set up a TikTok account for musicians, download the app, sign up, and choose a username related to your music. Introduce yourself in your bio and start creating engaging content to connect with fans and grow your audience.


TikTok offers a unique platform for musicians to showcase their talent, reach a global audience, and collaborate with other artists. By leveraging TikTok’s features like short music videos, challenges, and duets, musicians can increase their visibility and engage with fans in a fun and interactive way.


Setting up a TikTok account as a musician opens up endless opportunities for creative expression, networking, and building a loyal fan base.

How To Rock Your Music Career: Setup A TikTok Account For Musicians


Credit: www.businessinsider.com


Crafting Your Tiktok Strategy

To effectively establish your presence on TikTok as a musician, you need to craft a well-thought-out TikTok strategy. This will involve identifying your target audience and choosing content themes that resonate with them. Let’s delve into each aspect to help you maximize your impact on the platform.

Identifying Your Target Audience

Understanding your audience is key to success on TikTok. Start by defining the demographics of your ideal listeners, such as age, location, and music preferences. Utilize TikTok’s analytics to gain insights into your followers’ behavior and interests to tailor your content effectively.

Choosing Your Content Themes

Consistency is crucial in content creation on TikTok. Determine the themes that align with your music genre and resonate with your target audience. Mix up your content with behind-the-scenes footage, performance snippets, challenges, and engaging storytelling to keep your audience entertained and engaged.

How To Rock Your Music Career: Setup A TikTok Account For Musicians


Credit: bandzoogle.com


Optimizing Your Tiktok Profile

Optimizing Your TikTok profile is essential for musicians to make a strong first impression on potential fans and collaborators. By creating an engaging bio and choosing the right profile picture, you can attract followers and showcase your musical talent effectively.

Creating An Engaging Bio

Your TikTok bio is the first thing users see when they visit your profile. Make it catchy and concise, highlighting your music genre, personal interests, and any achievements. Use emojis to add personality and draw attention to key points.

Choosing Your Profile Picture

Your profile picture should be eye-catching and relevant to your music. A clear and high-quality image of yourself or your band is ideal. It should be easily recognizable, even in a small thumbnail size, to make it memorable for viewers.

Creating Captivating Content

Creating captivating content is key to engaging your audience and standing out on TikTok as a musician. With the platform’s emphasis on creativity and entertainment, it’s crucial to understand how to effectively showcase your music and personality. The following strategies will help you create compelling content that resonates with your audience and boosts your visibility on the platform.

Leveraging Trending Challenges

Trending challenges offer an excellent opportunity for musicians to reach a wider audience and connect with fans. By participating in popular challenges, you can leverage the existing momentum and gain exposure to new followers. Whether it’s a dance challenge or a lip-sync trend, incorporating your music into these challenges can help increase your visibility and engagement on TikTok.

Showcasing Behind-the-scenes

Showing behind-the-scenes glimpses of your music creation process can foster a deeper connection with your audience. Whether it’s recording in the studio, songwriting sessions, or rehearsals, sharing these authentic moments humanizes your brand and creates intrigue among your followers. This approach allows your audience to feel a part of your journey, leading to increased fan loyalty and interest in your music.

Building A Dedicated Fanbase

To succeed as a musician on TikTok, building a dedicated fanbase is crucial. Your fans are the key to your success, as they will support and promote your music to their own networks. In this section, we will explore two strategies to help you foster engagement and collaboration on TikTok: engaging with your audience and collaborating with other TikTok creators.

Engaging With Your Audience

Engaging with your audience is vital to build a dedicated fanbase on TikTok. When your fans feel seen and heard, they are more likely to become loyal followers and spread the word about your music.

Here are some effective ways to engage with your audience:

  • Respond to comments: Take the time to respond to comments on your videos. This shows your fans that you value their feedback and encourages them to continue engaging with your content.
  • Host Q&A sessions: Use the “Question and Answer” feature on TikTok to interact with your fans directly. This gives them the opportunity to ask you questions and fosters a sense of connection and intimacy.
  • Run contests and challenges: Encourage your fans to participate in contests or challenges related to your music. This not only boosts engagement but also spreads awareness about your TikTok account to a wider audience.
  • Show appreciation: Take the time to acknowledge and appreciate your fans in your videos or through shout-outs. This makes your fans feel valued and encourages them to continue supporting your music.

Collaborating With Other Tiktok Creators

An effective way to expand your reach on TikTok and build a dedicated fanbase is by collaborating with other TikTok creators.

Here’s how you can collaborate with other TikTok creators:

  1. Identify relevant creators: Look for TikTok creators whose content aligns with your musical style or audience. Collaboration with creators from a similar niche can help you tap into their established fanbase.
  2. Reach out and pitch ideas: Once you’ve found potential collaborators, reach out to them with a genuine and well-thought-out pitch. Highlight how collaboration can benefit both parties and provide some specific ideas that you can work on together.
  3. Create engaging duets or challenges: Collaborate on duets or challenges to create engaging and interactive content. This not only helps you reach a wider audience but also allows you to showcase your unique talents and style alongside other creators.
  4. Cross-promote each other’s content: Support and promote each other’s TikTok content by mentioning and linking to each other in captions or through collaborations. This cross-promotion exposes both artists to new audiences and can lead to an increase in followers and engagement.

By engaging with your audience and collaborating with other TikTok creators, you can effectively build a dedicated fanbase on the platform. Remember to stay consistent with your content and continue to provide value to your audience. With dedication and perseverance, you’ll be well on your way to achieving success as a musician on TikTok.

Promoting Your Music

If you are a musician looking to gain exposure and connect with a wider audience, TikTok is a powerful platform that can help you achieve those goals. With its massive user base and innovative features, TikTok provides a unique opportunity for musicians to showcase their talent and promote their music. In this article, we will explore some effective strategies that you can use to promote your music on TikTok.

Teasing New Releases

One of the most effective ways to promote your music on TikTok is by teasing new releases to your followers. Before you launch a new song or album, create short video clips that give your audience a taste of what’s to come. Use catchy captions and engaging visuals to capture their attention and generate excitement. By providing sneak peeks and behind-the-scenes footage, you can build anticipation and create buzz around your upcoming release.

Using Tiktok’s Music Features

TikTok offers a variety of music features that you can take advantage of to promote your music. One of these features is the ability to add your songs to the app’s music library. By doing so, you make it easy for TikTok users to create videos using your music, which can help increase your exposure and reach. Additionally, you can collaborate with other TikTok users by participating in challenges and duets. This not only allows you to showcase your musical talent but also helps you connect with a wider audience.

How To Rock Your Music Career: Setup A TikTok Account For Musicians


Credit: variety.com


Frequently Asked Questions For How To Setup A Tiktok Account For Musicians


How Do I Start Tiktok As A Musician?


To start on TikTok as a musician, create engaging music content, use trending sounds, and engage with your audience consistently. Collaborate with other creators, participate in challenges, and leverage TikTok’s algorithm by posting at optimal times. Utilize hashtags and engage with the TikTok community to grow your following.


How Do I Make My Tiktok Account An Artist Account?


To convert your TikTok account to an artist account, go to settings and select “Switch to Pro Account. ” Choose the artist category and customize your profile.


Should I Use A Business Account On Tiktok As A Musician?


Yes, using a business account on TikTok as a musician can help you reach a wider audience and promote your music effectively.


How Do You Get Verified As A Musician On Tiktok?


To get verified as a musician on TikTok, build a strong presence with engaging content. Focus on creating high-quality music-related posts and grow your fan base. Interact with your audience, and use hashtags and trending songs. Apply for the verification badge once you meet the eligibility criteria.


Conclusion


Setting up a TikTok account for musicians can be a game changer for their career. By optimizing your profile, creating engaging content, and leveraging TikTok’s features, you can connect with your fans and grow your fanbase. Embracing the platform’s unique opportunities can lead to increased visibility and new opportunities for musicians.


https://www.youtube.com/watch?v=_tPBTz3vGiM


Categories
Archive

Why Do You Need To Copyright Your Music? Discover the Power of Protection

Copyrighting your music protects your intellectual property rights and ensures proper recognition and compensation. It safeguards your work from unauthorized use and provides legal grounds for protection in case of dispute.


Artists should copyright their music to establish ownership and prevent potential theft or misuse. By securing copyright, artists can confidently share and distribute their work while retaining control and receiving proper credit. Establishing copyright for your music is a vital step in safeguarding your artistic integrity and financial interests.


It serves as a crucial tool in the music industry to protect creators’ rights and ensure fair treatment in the digital age. Copyrighting your music is a proactive measure that empowers you as an artist and safeguards your creativity from infringement.

Why Do You Need To Copyright Your Music? Discover the Power of Protection


Credit: store.nolo.com


Importance Of Copyrighting Music

If you’re a musician, protecting your artistic creations through copyrighting is crucial. By copyrighting your music, you establish legal ownership and enjoy various benefits. Here’s why it’s essential to copyright your music:

Legal Protection

Copyrighting your music offers protection against unauthorized use and helps you defend your rights in case of infringement.

Economic Benefits

Obtaining copyright for your music enhances your economic prospects, as you can generate income through licensing and royalties.

Why Do You Need To Copyright Your Music? Discover the Power of Protection


Credit: www.legalzoom.com


Understanding Copyright Laws

Copyright laws are essential for protecting your music creations from unauthorized use. Understanding these laws is crucial for every musician.

Basics Of Copyright

Copyright gives the creator exclusive rights to their work, such as music. It protects against unauthorized copying or distribution.

Rights And Permissions

As the copyright holder, you have the right to control who can use your music. Others need your permission to use it commercially or publicly.

Music copyright ensures you receive proper credit for your work and can benefit from royalties and licensing opportunities.

Process Of Copyrighting Music

Copyrighting your music is a crucial step to protect your intellectual property and ensure that you have the exclusive rights to your creations. The process of copyrighting music involves several key steps, including the registration process, duration, and renewal.

Registration Process

When you decide to copyright your music, the first step is to complete the registration process with the appropriate copyright office. In the United States, this is typically done through the U.S. Copyright Office. You will need to submit the required forms, a copy of your music, and the applicable filing fee. Once your application is reviewed and approved, you will receive a certificate of registration, officially establishing your copyright.

Duration And Renewal

Once your music is copyrighted, it is important to be aware of the duration of protection. In most countries, including the United States, music copyrights generally last for the life of the creator plus 70 years. It’s crucial to keep track of the expiration date and file for renewal if necessary to maintain the protection of your music.


Credit: www.aarp.org


Challenges Without Copyright Protection

Protecting your music is crucial in today’s digital age. Without copyright protection, you may face various challenges that can significantly impact your music career. In this article, we will explore two key challenges that musicians and artists often encounter without proper copyright protection: piracy and unauthorized use, and financial loss.

Piracy And Unauthorized Use

Piracy is a major threat to artists and musicians worldwide. Unscrupulous individuals or organizations may illegally distribute, copy, or sell your music without your consent or any form of compensation.

If your music isn’t copyrighted, it becomes vulnerable to piracy and unauthorized use. This means that anyone can reproduce your music, share it on various platforms, or even pass it off as their own.

As a result, you not only lose control over your intellectual property, but you may also miss out on potential revenue streams. With copyright protection, you establish legal rights over your music, deterring others from using it without permission.

It’s worth noting that unauthorized use can extend beyond simple piracy. Your music could be used in advertising campaigns, films, or other creative projects without your knowledge or consent. This can lead to a loss of creative control and potentially damage your reputation if your work is associated with something you don’t endorse.

Financial Loss

One of the significant challenges without copyright protection is the potential for financial loss. Without a copyright in place, it becomes difficult to prove ownership of your music. This can result in missed opportunities for licensing deals, royalties, and other income streams that can greatly contribute to your music career.

Without copyright protection, you may find it challenging to earn a fair and rightful income from your music. Others may use and profit from your work, leaving you with little or no compensation.

Furthermore, without copyright protection, it becomes harder to take legal action against those who infringe on your rights. This can lead to costly legal battles that drain your resources and time, exacerbating the financial loss.

Therefore, securing copyright protection not only safeguards your creative work but also ensures that you can maximize its financial potential.

Maximizing Copyright Benefits


Maximizing copyright benefits for your music is crucial to protecting your intellectual property and ensuring you receive proper recognition and compensation. Copyrighting your music gives you the legal rights to control how it’s used, distributed, and monetized, safeguarding your artistic work and potential income.

Licensing And Royalties

Maximizing copyright benefits begins with understanding the power of licensing and royalties. As a musician or songwriter, having your music copyrighted gives you exclusive rights to reproduce, distribute, perform, and display your creative work. This allows you to:

  1. License your music: By licensing your music, you can grant others permission to use your compositions, sound recordings, or both. This opens up opportunities for your music to be featured in films, TV shows, advertisements, video games, and more. Licensing not only generates additional income but also increases exposure and potential fanbase.
  2. Collect royalties: Copyright protection ensures that you are entitled to collect royalties whenever your music is used. Royalties come from various sources such as streaming platforms, radio stations, live performances, and synchronization licenses. Registering your copyrighted music allows collecting societies and performing rights organizations to track and distribute royalties owed to you.

Enforcement And Legal Recourse

Having your music copyrighted provides you with a solid foundation for enforcing your rights and seeking legal recourse. Here’s why:

  • Presumption of ownership: Registering your work creates a public record that you are the original creator. In case of copyright infringement, this presumption of ownership plays a crucial role in proving your rights and protecting your work.
  • Deterrence and prevention: A copyright registration acts as a deterrent against potential infringers. It shows that you are serious about protecting your music and sets a legal precedent for others to respect your rights. It also helps prevents accidental infringement by making your copyrighted work easily searchable.
  • Leveraging legal options: If someone unlawfully uses your music without permission, having a copyright registration strengthens your legal position. You can pursue legal action to stop the infringement, demand compensation for damages, and even secure injunctive relief to ensure the unauthorized use ceases.

In conclusion, maximizing the benefits of copyrighting your music is essential for any serious musician or songwriter. By understanding the power of licensing and royalties, as well as the enforcement and legal recourse that comes with copyright protection, you can effectively protect your rights, generate income, and ensure your creative work is respected and properly credited.

Frequently Asked Questions On Why Do You Need To Copyright Your Music


Why Should I Copyright My Music?


Copyrighting your music protects your intellectual property. It gives you legal rights and control over your work, preventing unauthorized use and ensuring you receive credit and compensation.


What Happens If You Don’t Copyright Your Music?


Failure to copyright your music may lead to others copying or profiting from your work without permission, decreasing potential earnings.


Do I Have To Get My Music Copyrighted?


Yes, it is recommended to copyright your music to protect your rights and prevent unauthorized use.


Is It Ok To Use No Copyright Music?


Yes, using no copyright music is acceptable as it ensures that you won’t infringe on anyone’s rights. It allows you to legally use the music for your personal or commercial purposes without facing any legal consequences.


Conclusion


As a musician, protecting your music with copyright is essential. It ensures legal rights and the ability to profit from your work. Copyrighting your music safeguards against unauthorized use and gives you control. By taking this step, you are securing your creative efforts and safeguarding your future success.


Don’t overlook the importance of copyright for your music.


https://www.youtube.com/watch?v=tQbJLvli9AY


Categories
Archive

When is a Good Time to Start Piano Lessons? Mastering the Keys at the Right Moment

The best time to start piano lessons is in early childhood to develop musical skills. A child’s brain is more receptive to learning music during this time.


Learning to play the piano is a rewarding and beneficial skill that can be enjoyed at any age. Whether you are a young child eager to explore the world of music or an adult looking to fulfill a lifelong dream, starting piano lessons at the right time can set you on the path to musical success.


Developing piano skills early on can lead to improved cognitive abilities, enhanced creativity, and increased confidence. Regardless of age, the key to success is starting with a qualified instructor who can guide you on your musical journey.

When is a Good Time to Start Piano Lessons? Mastering the Keys at the Right Moment


Credit: m.facebook.com


The Benefits Of Starting Piano Lessons Early


Early piano lessons offer numerous benefits for children, including improved cognitive development, enhanced motor skills, and increased discipline. Starting at a young age allows for better skill acquisition and the cultivation of a lifelong passion for music.

Developing Fine Motor Skills Enhancing Cognitive Development Starting piano lessons early can have a profound impact on a child’s development.

Developing Fine Motor Skills

Playing piano from a young age improves finger dexterity and coordination.

It enhances control over small movements, benefitting overall motor skills.

Enhancing Cognitive Development

Learning to play the piano early enhances memory retention and recall abilities.

It stimulates brain development, improving problem-solving skills.

Signs That Indicate Readiness For Piano Lessons

Signs That Indicate Readiness for Piano Lessons Interest and enthusiasm

Young learners ready for piano lessons display keen interest and strong enthusiasm for music.

Ability to Follow Instructions

Following instructions is crucial for piano lessons, aiding students in mastering basic concepts.

https://www.youtube.com/watch?v=a_kVafB-0C4


Considerations For Adult Beginners

When it comes to considering piano lessons for adults, there are several important considerations to keep in mind. Adult beginners have unique needs and circumstances that differ from those of younger students. Understanding these factors is crucial for making the most out of your piano learning journey.

Motivation And Commitment

Adults often have a higher level of motivation and commitment when starting piano lessons. They have a deeper understanding of why they want to learn and are more likely to stay focused and dedicated to their practice. This can lead to faster progress and greater satisfaction with their musical development.

Finding The Right Teacher Or Program

One of the key considerations for adult beginners is finding the right teacher or program that caters to their specific needs. Unlike children, adults may have different learning styles, goals, and schedules. It’s essential to find a teacher or program that understands these unique requirements and can provide tailored instruction to suit the individual adult learner.


Credit: www.amazon.com


Setting Realistic Expectations

When it comes to starting piano lessons, setting realistic expectations is crucial for both children and adults. Having a clear understanding of what progress looks like, how much practice time is necessary, and how to navigate frustration and plateaus can make the learning process much more enjoyable and fulfilling.

Progression And Practice Time

Learning to play the piano is a journey that requires patience and consistent effort. Progression may vary from person to person, but it is important to remember that Rome wasn’t built in a day. Initially, beginners focus on building a strong foundation of basic techniques and understanding musical concepts. As time goes on and skills improve, individuals can start tackling more complex pieces and exploring different genres.

Regular practice is essential to see progress in piano playing. While the amount of practice time required depends on personal goals and commitments, dedicating at least 30 minutes to an hour every day is recommended. Consistency is key, as regular practice allows muscle memory to develop and helps reinforce what has been learned during lessons.

Navigating Frustration And Plateaus

Learning any new skill comes with its fair share of frustration and plateaus. It’s important to remember that feeling stuck or encountering challenges is completely normal and a part of the learning process. When faced with frustration, it is crucial to embrace a positive mindset and view mistakes as opportunities for growth.

To navigate through plateaus, it can be helpful to break down big goals into smaller, achievable milestones. Celebrating small victories can help keep motivation high and provide a sense of progress. Additionally, seeking guidance and feedback from piano teachers can provide valuable insights and help overcome obstacles along the way.

Remember, learning the piano is a journey that requires time, dedication, and realistic expectations. By setting attainable goals, prioritizing regular practice, and embracing challenges, anyone can embark on a fulfilling musical adventure.

The Role Of Support And Encouragement


Support and encouragement are key factors in deciding the right time to start piano lessons. Beginning when the interest and motivation are high will lead to a more successful and enjoyable learning experience. It’s important to foster a positive environment to ensure progress and skill development.

Family Involvement

Family involvement plays a crucial role in the success of a child’s piano journey. By actively participating and showing support, parents can create a positive learning environment that motivates and encourages their child to progress.

Here are some ways family members can get involved:

  • Attend the child’s lessons and recitals
  • Practice together at home
  • Celebrate milestones and achievements
  • Provide a dedicated space for practice
  • Make time for regular discussions about progress

Creating A Positive Learning Environment

A positive learning environment is essential for fostering a child’s love for piano. When the atmosphere is encouraging and supportive, children are more likely to stay motivated and committed.

Here are some tips on creating a positive learning environment:

  1. Offer praise and constructive feedback
  2. Create a consistent practice schedule
  3. Set realistic goals and celebrate small victories
  4. Encourage a growth mindset and resilience
  5. Provide access to inspiring music and performances

By providing the necessary support and encouragement, families can help their children thrive in their piano lessons and develop a lifelong passion for music.

When is a Good Time to Start Piano Lessons? Mastering the Keys at the Right Moment


Credit: www.schoolofrock.com


Frequently Asked Questions For When Is A Good Time To Start Piano Lessons


Can A 3 Year Old Take Piano Lessons?


Yes, a 3-year-old can start taking piano lessons to introduce them to music fundamentals.


Can A 4 Year Old Play Piano?


Yes, a 4 year old can play the piano. Many children start learning the basics at this age. With proper guidance and practice, they can develop a love for music and skill in playing the instrument.


Is 3 Months Enough To Learn Piano?


Yes, three months can be enough to learn the basics of piano playing. Consistent practice and a structured learning plan will help you gain a good foundation. However, mastering the piano takes time and dedication, so further practice and continued learning will be needed beyond the initial three months.


What Is The Best Age To Start Music Lessons?


The best age to start music lessons varies for each individual but generally, children between 6 and 9 years old show great progress. Starting at a young age allows for better coordination and a faster learning curve. However, it’s never too late to begin, as adults can also enjoy and benefit from music lessons.


Conclusion


The decision to start piano lessons is a personal one. It’s never too early or too late to begin this musical journey. Finding the right timing depends on the individual’s readiness and passion for learning. Whether a child or an adult, the love for music should be the driving force in determining when to start piano lessons.

Categories
Archive

Why Can’t a Piano Be on an Outside Wall? 5 Reasons Why Outdoor Placement is Impractical

A piano cannot be placed on an outside wall due to the potential exposure to extreme temperature and humidity fluctuations, which can damage the instrument. Placing a piano on an outside wall may lead to tuning instability and structural damage over time.


It is essential to position a piano in a stable environment with consistent temperature and humidity levels to maintain its quality and longevity. Indoor locations, away from direct sunlight, drafty areas, and exterior walls, are ideal for preserving the integrity of a piano.


Proper care and placement of a piano will ensure optimal performance and sound quality for years to come.

Why Can't a Piano Be on an Outside Wall? 5 Reasons Why Outdoor Placement is Impractical


Credit: www.amazon.com


Weather Exposure


Placing a piano against an outside wall exposes it to fluctuating temperatures and humidity levels, which can lead to damage. The extreme conditions could cause the wood to warp or crack, affecting the instrument’s sound and overall performance. These environmental factors make it unsuitable for outdoor placement.

Temperature Fluctuations

Pianos are sensitive to temperature changes which can damage the wood and tuning stability.

Exposure to heat can cause the wood to warp, while cold can lead to tuning issues.

Humidity And Moisture

Humidity and moisture can wreak havoc on a piano, leading to swelling, sticking keys, and rust.

Avoid placing a piano near sources of moisture such as windows or doors to prevent damage.

Damage And Deterioration


Placing a piano on an outside wall can lead to damage and deterioration due to exposure to fluctuating temperatures and humidity levels. These conditions can impact the piano’s sound quality and structure over time, affecting its overall performance and longevity.

Sun Damage

Pest Infestation

Pianos placed on outside walls are susceptible to damage and deterioration due to various factors.

Sun Damage

The intense sunlight exposure on an outside wall can cause the piano’s wood to warp and its finish to fade.

Pest Infestation

Exposure to the elements on an outside wall can attract pests that may infest the piano, causing damage to its delicate components.

Sound Quality

When it comes to the sound quality of a piano, it is crucial to consider its placement in relation to exterior walls. Placing a piano on an outside wall can have a significant impact on the instrument’s sound quality and performance. There are several factors that contribute to this, including interference from outdoor noise and the acoustic impact of the surroundings.

Interference From Outdoor Noise

Placing a piano against an outside wall exposes it to potential interference from outdoor noise. Traffic, neighboring activities, and natural elements can all contribute to unwanted sound disturbances. This can affect the clarity and richness of the piano’s sound, detracting from the overall playing experience.

Acoustic Impact Of Surroundings

The acoustic properties of the surroundings play a crucial role in the sound quality of a piano. Exterior walls can reflect and absorb sound in ways that may not be favorable for the instrument. Hard surfaces can cause sound waves to reflect harshly, resulting in distortion and unwanted reverberations. Additionally, extreme temperatures and humidity levels associated with exterior walls can also affect the tuning stability and overall performance of the piano.

Why Can't a Piano Be on an Outside Wall? 5 Reasons Why Outdoor Placement is Impractical


Credit: www.vulture.com


Maintenance Challenges


Placing a piano against an outside wall can lead to maintenance challenges due to temperature fluctuations. The exposure to varying weather conditions can cause the wood and strings to expand or contract, affecting the sound and overall condition of the instrument.


It is recommended to keep pianos away from exterior walls for optimal preservation.

Regular Tuning Needs

Pianos, with their delicate and finely-tuned inner workings, require regular tuning to maintain their beautiful sound. When a piano is placed on an outside wall, it becomes exposed to constant changes in temperature and humidity, which can wreak havoc on its tuning stability. The fluctuations in temperature and humidity cause the wood and metal parts of the piano to expand and contract, affecting the tension of the strings and ultimately throwing the instrument out of tune.

Cleaning And Protection

Keeping a piano clean and protected is crucial to its longevity and performance. Placing a piano against an outside wall exposes it to dust, dirt, and other environmental elements that can accumulate over time. This buildup can affect the piano’s sound quality and cause damage to its delicate internal components. Moreover, an outside wall offers less protection from direct sunlight, which can fade and damage the piano’s polished finish. Regular cleaning and protecting a piano from such environmental factors becomes more challenging when it is positioned against an outside wall. To keep a piano in optimal condition, it’s recommended to position it away from exterior walls and in a climate-controlled environment. This helps to minimize the impact of temperature and humidity changes, benefiting the instrument’s tuning stability and overall lifespan. Despite these challenges, if there is no other choice than placing a piano against an outside wall, there are measures that can be taken to mitigate potential damage. For example, installing insulation and moisture barriers can help regulate temperature and humidity levels, reducing the impact on the piano. Additionally, using piano covers or cases can provide an extra layer of protection from dust, dirt, and sunlight exposure. When it comes to maintaining a piano’s condition, prevention is key. By understanding and addressing the maintenance challenges associated with placing a piano against an outside wall, piano owners can ensure their instrument remains in optimal playing condition for years to come.


Security Concerns


To protect a piano from security concerns, it’s best not to place it on an outside wall due to potential exposure to extreme weather conditions. The fluctuating temperatures and humidity levels can cause damage and affect the instrument’s tuning and overall performance over time.

Risk Of Theft Or Vandalism

Placing a piano on an outside wall may seem convenient, but it can present serious security concerns. One of the main risks is the possibility of theft or vandalism. Pianos, with their high value and timeless appeal, can be tempting targets for opportunistic thieves or mischievous individuals.

Here are a few reasons why a piano on an outside wall could be at a higher risk:

  1. Piano visibility: A piano placed near an outside wall is easily visible to passersby, making it an attractive target for thieves scouting for valuable items.
  2. Lack of supervision: When a piano is positioned on an outside wall, it can be more challenging to monitor and safeguard. This lack of supervision increases the risk of theft or vandalism going unnoticed.
  3. Exposure to potential vandals: Being close to the exterior of a building puts the instrument at a greater risk of encountering individuals who may deliberately damage or deface it. This could be through graffiti, scratching, or other destructive acts.

All of these factors emphasize the importance of protecting your piano from potential harm and ensuring it remains in a secure environment.

Safety Of The Instrument

Aside from the risks related to theft and vandalism, the safety of the piano itself is another critical concern when placing it on an outside wall. Numerous factors can potentially jeopardize the well-being of the instrument:

  • Temperature fluctuations: Exposure to outdoor elements, such as extreme heat, cold, or humidity, can significantly impact the piano’s structural integrity and affect its sound quality. These fluctuations put the instrument at risk of warping, cracking, or rusting internal components.
  • Moisture and water damage: An outside wall may expose the piano to moisture, whether in the form of rain, snow, or condensation. Excessive dampness can gradually seep into the wood, compromising its stability and causing potential damage to the inner workings of the piano.
  • Excessive sunlight: Continuous exposure to direct sunlight can cause fading of the piano’s finish, leading to aesthetic deterioration and potentially affecting the overall value of the instrument.

By keeping your piano away from outside walls, you can minimize the risks associated with these potential hazards and ensure its long-term safety and wellbeing.

Why Can't a Piano Be on an Outside Wall? 5 Reasons Why Outdoor Placement is Impractical


Credit: www.amazon.com


Frequently Asked Questions Of Why Can’t A Piano Be On An Outside Wall


Is It Ok To Put Piano On Outside Wall?


Yes, it is generally fine to put a piano on an outside wall. However, you need to consider the temperature and humidity fluctuations that may affect the piano. It is important to protect the piano from extreme weather conditions and ensure adequate insulation to prevent damage.


Where Not To Place A Piano?


Avoid placing a piano in areas with extreme temperature and humidity fluctuations, direct sunlight, near windows, doors, or vents, and on unstable surfaces.


Can You Keep A Piano Outdoors?


No, it’s not recommended to keep a piano outdoors. Exposure to elements can damage the instrument and affect its tuning and performance. A climate-controlled indoor environment is best for preserving the quality and lifespan of a piano.


Can A Piano Sit Outside?


No, it is not recommended to leave a piano outside due to potential damage from weather exposure.


Conclusion


To sum up, placing a piano on an outside wall could lead to potential damage from fluctuating temperatures and humidity. Understanding the risks involved in exposing a piano to outdoor elements is crucial in preserving its longevity and structural integrity.


By following these guidelines, you can ensure the preservation of your piano’s quality and sound.

Categories
Archive

Mid Side Mixing : Masterful Techniques for Impeccable Sound

Mid Side Mixing involves separating the mono (mid) and stereo (side) components of a mix to adjust their levels independently. This technique allows for precise control over the perceived width and focus of the mix, providing a dynamic and spatial audio experience for the listener.


Mid Side Mixing is a popular method used by audio engineers and producers to enhance the stereo image and depth of a mix. By isolating the center (mid) and side components of the audio signal, adjustments can be made to the mono compatibility and overall balance of the mix.


This technique is effective in creating a clear and defined soundstage, making instruments and vocals stand out while maintaining a balanced and cohesive mix. Mastering the art of Mid Side Mixing can take your audio productions to the next level, offering a professional sound quality that captivates listeners.


The Basics Of Mid Side Mixing

Mid Side Mixing is a technique used in audio engineering to separate the mono (center) and stereo (side) elements of a stereo signal for independent processing.

Benefits Of Mid Side Mixing

  • Greater Control: Allows precise manipulation of the mono and stereo aspects of a mix.
  • Enhanced Spatial Depth: Creates a wider soundstage and greater depth perception in the mix.
  • Improved Clarity: Helps in cleaning up the mix and balancing different elements effectively.
Mid Side Mixing  : Masterful Techniques for Impeccable Sound


Credit: www.elysia.com


Setting Up For Mid Side Mixing


Improve your audio mixes with mid-side mixing. Learn how to set it up for a balanced and dynamic sound. Discover the techniques to enhance your music production and achieve professional-sounding results.

Setting Up for Mid Side Mixing:

Understanding The Mid And Side Signals

Middle (Mid) and Side (Stereo) signals are different components in Mid Side Mixing.

Middle signal: contains mono or center audio information.

Side signal: contains stereo or atmospheric audio information.

Routing The Mid And Side Signals

To set up Mid Side Mixing, route the Mid signal to one channel and the Side signal to another.

Separate signal processing for each channel enables precise control over the mix.

Detailed routing ensures the correct placement and adjustment of audio elements.


Mid Side Mixing Techniques

Mid Side Mixing Techniques is a powerful method that allows engineers to have more control and creativity in their mixes. By separating the center (mid) and the stereo sides (side) of a stereo signal, engineers can manipulate the sound in ways that were previously impossible. This technique offers a new way to achieve balance and enhance the stereo image of a mix. In this article, we will explore the various Mid Side Mixing Techniques in detail to help you unlock the full potential of your mixes.

Balancing The Center And Stereo Spread

When implementing Mid Side Mixing Techniques, achieving a balanced center and stereo spread is crucial to maintaining a clear and impactful mix. The center or mid signal typically contains the elements that make up the core of the mix, such as lead vocals, kick drums, and basslines. The stereo spread or side signal, on the other hand, consists of the elements that contribute to the width and depth of the mix, including background instrumentation and ambient effects.

Processing The Mid And Side Signals

Processing the mid and side signals separately allows for precise adjustments and enhancements in the mix. Utilizing equalization and compression on the mid signal can help bring clarity and focus to the core elements, while processing the side signal can enhance the stereo width and ambience. Additionally, applying reverb and delay effects to the side signal can further expand the spatial dimensions of the mix, creating a more immersive listening experience.

Applications Of Mid Side Mixing

The use of Mid Side Mixing in audio production has a wide range of applications, making it an invaluable tool for achieving high-quality sound. By manipulating the stereo image of a mix, engineers can enhance depth and width, as well as fix common stereo imaging issues. Let’s take a closer look at these two key applications of Mid Side Mixing.

Enhancing Depth And Width

Mix engineers strive to create a three-dimensional sound experience that immerses the listener, and Mid Side Mixing can greatly contribute to this goal. By adjusting the levels and processing of the Mid and Side channels, the depth and width of the mix can be easily enhanced.

  • Adjusting the Mid channel allows for greater control over the centered elements of the mix, such as lead vocals, bass, and kick drums. Increasing the level of the Mid channel can bring these elements forward in the mix, giving them a sense of presence.
  • On the other hand, manipulating the Side channel can expand the stereo width of the mix. Widening the side information can create a more immersive listening experience, making the mix feel spacious and open.

All these adjustments can be made with precision using plugins designed specifically for Mid Side Mixing. These plugins allow engineers to shape the stereo image with precision, placing each element in the mix exactly where it needs to be.

Fixing Stereo Imaging Issues

Stereo imaging issues can often arise during the mixing process, such as phasing problems, imbalanced stereo width, or instruments clashing in the stereo field. Mid Side Mixing can be a powerful tool in fixing these issues and achieving a well-balanced stereo image.

  • One common issue is phasing, which occurs when the same audio signal reaches the microphones at slightly different times, resulting in cancellation and a loss of clarity. By adjusting the phase relationship between the Mid and Side channels, phasing issues can be minimized and the stereo image can be restored to its intended clarity.
  • Another problem that Mid Side Mixing can address is imbalanced stereo width. Sometimes, certain elements in the mix can sound overly wide or narrow, causing distractions for the listener. By adjusting the balance between the Mid and Side channels, engineers can effectively control the stereo width and ensure a more coherent and balanced sound.
  • Additionally, when multiple instruments and sounds share the same stereo field in a mix, conflicts can arise, resulting in a cluttered or messy sound. Using Mid Side Mixing techniques, engineers can place each element precisely in the stereo field, giving each instrument its own space and avoiding conflict.

Overall, Mid Side Mixing provides a powerful means of enhancing the depth and width of a mix, as well as fixing stereo imaging issues. By utilizing this technique, mix engineers can greatly improve the sonic experience for listeners, ensuring a well-balanced and immersive audio production.

Mastering Mid Side Mixing


Enhance your mixing skills by mastering Mid Side Mixing technique, which allows for precise control over the stereo field. By isolating the mid and side elements of a mix, you can achieve greater clarity and depth in your audio productions.


Mastering this method will elevate your sound engineering capabilities.

Practice And Experimentation

When it comes to mastering mid-side mixing, practice and experimentation are key. By dedicating time to actively engage in mid-side mixing techniques, you can refine your skills and achieve a more balanced and professional sound. Through practice, you’ll become more familiar with the intricacies of manipulating the mid and side components of a stereo mix to control the width and depth of your soundstage.

Refining The Listening Skills

Developing your listening skills is crucial in mastering mid-side mixing. Listening attentively and critically to each element of your mix helps identify any imbalance in the stereo field. With careful observation, you can identify if specific instruments or frequencies are dominating the mid or side channels, enabling you to make appropriate adjustments.

Here are some tips to refine your listening skills:

  • Take breaks: Give your ears regular breaks to avoid auditory fatigue. This allows you to maintain accurate perception of the stereo field.
  • Use reference tracks: Compare your mix with professional tracks that have a well-balanced stereo image. Pay attention to the width and placement of different elements.
  • Solo individual channels: Soloing specific channels can help identify any issues with the stereo imaging. Listen to each channel in both mono and stereo to evaluate their contribution to the overall mix.
  • Use metering plugins: Utilize metering tools to measure the stereo width of your mix. This can help in avoiding any unnatural widening of the stereo image.
Mid Side Mixing  : Masterful Techniques for Impeccable Sound


Credit: www.amazon.com


Mid Side Mixing  : Masterful Techniques for Impeccable Sound


Credit: theproaudiofiles.com


Frequently Asked Questions For Mid Side Mixing


What Is Mid Side Processing In Mixing?


Mid side processing in mixing separates the mono and stereo information for more control over the sound image.


What Is Midrange In Mixing?


Midrange in mixing refers to the frequency range that includes vocals, guitars, and other important instruments. It’s crucial for clarity and presence in a mix and typically ranges from 250 Hz to 2 kHz. Balancing midrange ensures a full, well-rounded sound without any muddiness.


What Does Mid Do On Mixer?


Mid on Mixer refers to the role of a middle laner in online games. It is a position typically played in multiplayer online battle arena (MOBA) games, where the mid laner focuses on controlling the central area of the map and gaining experience and gold to gain an advantage over the opponents.


When Should You Use Mid Side Eq?


Mid-side EQ is best used when you want to enhance the stereo image of your mix. It allows you to adjust the frequency balance of the mid and side components separately, giving you more control over the width and focus of the sound.


Conclusion


Mid-side mixing offers a powerful technique for adjusting the stereo field and enhancing the balance and clarity of a mix. By applying the principles of mid-side processing, audio engineers can achieve greater depth, dimension, and separation in their mixes, resulting in a more immersive and impactful listening experience for their audience.


Mastering mid-side mixing can, therefore, be a valuable tool in the modern music production toolkit.

Categories
Archive

Which Audio Interface Is Best For Beginners: Uncover the Top Choices!

As an Amazon Associate I earn from qualifying purchases.

The Focusrite Scarlett 2i2 is the best audio interface for beginners due to its simplicity and high-quality performance. With its user-friendly design and reliable sound quality, it is ideal for those starting in music production or recording.


Investing in a good audio interface is essential for capturing and processing audio signals effectively. A quality audio interface can make a significant difference in the overall sound and recording capabilities of your setup. Beginners will benefit from the easy setup and versatile features of the Focusrite Scarlett 2i2, providing a solid foundation for their journey into the world of audio production.


Credit: www.nytimes.com


The Importance Of Choosing The Right Audio Interface

When starting your journey into the world of audio recording, selecting the right audio interface is crucial. Here’s why:

Quality Sound Recording

An ideal audio interface ensures crystal-clear sound quality for your recordings, capturing every nuance of your music or vocals.

Versatility And Compatibility

Choose an audio interface that can work seamlessly with a variety of devices and software to support your creative process.

When making your decision, consider the features of each audio interface and how they align with your needs and goals. Remember, the right choice can elevate your entire recording experience.


Credit: www.calcalistech.com


Key Features To Look For

Number Of Inputs And Outputs

Having multiple inputs and outputs allows for connecting various devices simultaneously.

Sample Rate And Bit Depth

Higher sample rate and bit depth result in better audio quality and clarity.

Preamps And Phantom Power

Quality preamps enhance the input signal, while phantom power supports condenser microphones.

Top Audio Interface Choices For Beginners

When starting out as a beginner in the world of audio recording, choosing the right audio interface is crucial. A good audio interface will provide you with high-quality sound, low latency, and the flexibility to grow as your skills develop. Here are some top choices to consider:

Focusrite Scarlett 2i2

The Focusrite Scarlett 2i2 is a popular option for beginners. It offers two inputs for connecting microphones or instruments, along with high-quality preamps and low-latency performance. This makes it a versatile and reliable choice for home recording setups.

Presonus Audiobox Usb 96

The PreSonus AudioBox USB 96 is another excellent option for beginners. It offers two combo mic/instrument inputs, MIDI I/O, and high-quality audio conversion. Its sturdy build and affordable price make it a great choice for those just starting out.

Universal Audio Apollo Twin Mkii

The Universal Audio Apollo Twin MKII is a premium audio interface that offers top-notch sound quality and a range of professional features. While it may be a bit of an investment for beginners, its advanced capabilities and compatibility with UAD plugins make it a long-term investment for those serious about audio production.

Budget-friendly Options

When starting out as a beginner in the world of audio recording, it’s important to invest in equipment that fits your budget. Luckily, there are several budget-friendly options available when it comes to audio interfaces. In this article, we will explore two popular choices that are perfect for beginners: the Behringer U-Phoria UM2 and the M-Audio M-Track 2X2.

Behringer U-phoria Um2

The Behringer U-Phoria UM2 is an excellent choice for beginners who are on a tight budget but still want to achieve professional-level audio quality. With its affordable price tag, this audio interface offers great value for money. Despite its low price, the UM2 doesn’t skimp on features.

The UM2 boasts a combination of XLR and 1/4″ inputs, allowing you to connect both microphones and instruments. This versatility is crucial for beginners who may need to use various types of audio devices. The interface also includes a dedicated headphone output with independent level control, ensuring accurate monitoring during recording sessions.

Furthermore, the UM2 is equipped with a +48V phantom power supply, which is essential for powering condenser microphones. This functionality opens up a whole world of possibilities, enabling you to capture clear and detailed vocals or acoustic instruments.

M-audio M-track 2×2

Another top contender in the budget-friendly category is the M-Audio M-Track 2X2. This audio interface combines affordability with high-quality sound and a user-friendly design. It is an ideal choice for beginners who prioritize ease of use and excellent audio performance.

The M-Track 2X2 features two combo inputs that can accommodate both XLR and 1/4″ connections. This versatility allows you to connect a wide range of microphones, electric guitars, or keyboards. The interface also includes 24-bit/192kHz digital audio converters, ensuring pristine audio quality during recording and playback.

Additionally, the M-Track 2X2 offers zero-latency monitoring, allowing you to hear yourself in real-time without any annoying delay. This feature is indispensable for beginners who want to precisely monitor their recordings as they happen.

In terms of software, the M-Track 2X2 comes bundled with a comprehensive suite of creative programs, including Pro Tools | First M-Audio Edition and AIR Music Tech Xpand!2. These software packages provide beginners with powerful tools to kick-start their musical journey.

Conclusion And Final Thoughts

The conclusion and final thoughts regarding the best audio interface for beginners can be summarized by considering your specific needs and investing in quality for long-term value. By carefully assessing your requirements and understanding the importance of durability and performance, you can make an informed decision that will serve you well as you embark on your audio recording journey.

Consider Your Specific Needs

When deciding on an audio interface as a beginner, it is crucial to consider your specific needs. Determine the type and number of inputs and outputs you require, whether you’ll be recording vocals, instruments, or both. Choose an audio interface that aligns with your intended use to ensure optimal results. Additionally, pay attention to the connectivity options that are compatible with your computer or recording setup. USB, Thunderbolt, or Firewire connections often offer convenience and compatibility with most devices.

Invest In Quality For Long-term Value

Investing in a high-quality audio interface may seem daunting as a beginner, but it will save you time, money, and frustration in the long run. Don’t be lured by cheap alternatives that compromise on build quality and performance. A reliable audio interface with excellent preamps and converters will improve the overall sound quality of your recordings, giving you professional-grade results from the start. It is more cost-effective to make a one-time investment in a reliable audio interface that will last for years rather than constantly upgrading subpar equipment.

In conclusion, the best audio interface for beginners is one that aligns with your specific needs and offers superior quality for long-term value. Taking the time to research and understand your requirements will ensure that you start your audio recording journey on the right foot. Remember, a reliable audio interface tailored to your needs will enhance the quality of your recordings and ultimately contribute to your success as a beginner in the field of audio production.


Credit: www.ebay.com


Frequently Asked Questions On Which Audio Interface Is Best For Beginners


What Is The Best Audio Interface For Beginner?


The best audio interface for beginners is the Focusrite Scarlett 2i2. It offers high-quality audio input and output, easy setup, and comes with recording software. This interface is affordable and user-friendly, making it perfect for those new to recording and producing music.


How Do I Choose A Good Audio Interface?


To choose a good audio interface, consider your needs, connectability, audio quality, budget, and future expansion options.


Which Audio Interface Is Best?


The best audio interface depends on your specific needs, budget, and compatibility with your equipment. It’s best to research and compare different models before making a decision.


Is A Cheap Audio Interface Worth It?


Yes, a cheap audio interface can be worth it for beginners or hobbyists. It provides basic functionality at a lower cost. However, for professional use or high-quality recordings, investing in a more expensive interface may be necessary.


Conclusion


In short, choosing the best audio interface for beginners depends on your specific needs and budget. Consider factors like the number of inputs/outputs, connectivity options, and bundled software. Focus on finding a device that offers high-quality audio recording and playback capabilities while also being user-friendly.


Ultimately, the right audio interface can significantly enhance a beginner’s music production journey.


https://www.youtube.com/watch?v=O_L86wNbzi0


Categories
Archive

Protect Your Ears: Discover the Best Earplugs for Musicians

For musicians, the best earplugs offer noise reduction with clear sound quality, comfort, and durability. Finding the right earplugs is crucial to protect your hearing while performing or attending concerts.


High-quality earplugs designed specifically for musicians can help reduce damaging frequencies while still allowing you to hear music accurately. By investing in a reliable pair of earplugs, musicians can safeguard their ears without compromising on sound quality. We will explore the top earplug options for musicians that prioritize both protection and performance.

Protect Your Ears: Discover the Best Earplugs for Musicians


Credit: mixmagmena.com


The Importance Of Ear Protection

As a musician, safeguarding your hearing is paramount. The demands of performances and rehearsals expose you to loud noise levels that can lead to irreversible hearing damage. Choosing the right earplugs designed for musicians can help mitigate these risks.

Hearing Loss Risks

Regular exposure to loud music can result in permanent hearing loss. Musicians are particularly vulnerable due to prolonged exposure during practice sessions and live performances. Protecting your ears with quality earplugs is crucial in preventing long-term damage.

Impact Of Noise Exposure

Prolonged exposure to high sound levels can cause tinnitus and hearing loss. Musicians frequently face these risks due to the loud environments they work in. By investing in specialized earplugs, you can maintain your hearing health and continue pursuing your passion without compromise.

Protect Your Ears: Discover the Best Earplugs for Musicians


Credit: www.healthyhearing.com


Understanding Earplugs For Musicians


Musicians require high-quality earplugs to protect their hearing while performing or practicing. The best earplugs for musicians provide clear sound with reduced volume levels, ensuring that the music remains enjoyable and undistorted. These earplugs are designed to fit comfortably, offering optimal noise reduction without sacrificing the musical experience.

Understanding Earplugs for Musicians Earplugs are essential for musicians to protect their hearing while ensuring optimal performance. Types of Earplugs There are various types of earplugs designed for musicians, including custom-molded, universal fit, and high-fidelity models. Features to Look For When selecting earplugs for musicians, important features to consider are noise reduction rating (NRR), comfort, durability, and sound quality preservation.


Top Earplugs For Musicians

As a musician, protecting your hearing is paramount. The right earplugs not only safeguard your ears from potentially damaging sound levels but also ensure that you can hear a balanced representation of music without distortion. Here are some of the best options to consider:

Custom Molded Earplugs

Custom molded earplugs are highly recommended for musicians as they provide a personalized and comfortable fit. These earplugs are designed to match the exact shape of your ear canal, offering superior noise isolation without sacrificing sound quality. Custom molded earplugs are durable and reusable, making them a cost-effective choice for regular use.

High-fidelity Earplugs

High-fidelity earplugs are engineered to attenuate sound evenly across the frequency spectrum, preserving the clarity and richness of music while reducing overall volume levels. These earplugs are ideal for musicians who need to maintain the integrity of their music while protecting their hearing during live performances or rehearsals.

Protect Your Ears: Discover the Best Earplugs for Musicians


Credit: www.amazon.com


How To Use And Maintain Earplugs

Properly using and maintaining your earplugs is essential to ensure their effectiveness and longevity. By following these simple steps for proper insertion and removal, as well as cleaning and storage, you can maximize the benefits of your earplugs and prolong their lifespan.

Proper Insertion And Removal

Wearing earplugs correctly is crucial in order to achieve optimal noise reduction without causing discomfort or damage. Follow these steps for proper insertion and removal:

  1. Ensure your hands are clean before handling your earplugs.
  2. Gently roll the earplug between your thumb and index finger to compress it.
  3. Reach over your head with your opposite hand and pull your ear gently upwards and outwards to straighten your ear canal. This helps to create a clear pathway for the earplug.
  4. Insert the compressed earplug into your ear canal slowly and carefully. It should fit snugly without causing pain.
  5. Hold the earplug in place for a few seconds while it expands to fill your ear canal properly.
  6. To remove the earplug, gently twist and pull it out of your ear, ensuring a slow and steady motion to prevent any damage to your ear canal.

Cleaning And Storage Tips

Cleaning and storing your earplugs correctly will not only maintain their effectiveness but also prevent the growth of bacteria and prolong their lifespan. Here are some cleaning and storage tips to follow:

  • After each use, clean your earplugs with mild soap and warm water. Avoid using harsh chemicals or alcohol-based solutions as they may damage the material.
  • Rinse the earplugs thoroughly and allow them to air dry completely before storing them.
  • Store your earplugs in a clean and ventilated container to prevent dust, dirt, and moisture from accumulating.
  • Avoid exposing your earplugs to extreme temperatures or direct sunlight, as it can affect their performance and durability.
  • Regularly inspect your earplugs for signs of damage or wear. If you notice any cracks, tears, or changes in shape, it’s time to replace them with a new pair.

By following these simple guidelines for using and maintaining your earplugs, you can enjoy their noise reduction benefits while ensuring their longevity and effectiveness in the long run. Take care of your earplugs, and they will take care of your hearing!

Conclusion And Final Recommendations


Discover the top earplugs for musicians that strike the perfect balance of comfort and sound clarity, enhancing live performances. Our final recommendation showcases the ideal solution tailored to musicians, ensuring optimal hearing protection for prolonged music sessions.

Choosing The Right Earplugs

When it comes to choosing the right earplugs for musicians, there are a few key factors to consider. First and foremost, it’s important to find earplugs that provide a high level of hearing protection without sacrificing sound quality. Look for earplugs that have a high noise reduction rating (NRR) to ensure they effectively block out loud sounds while still allowing you to hear your music clearly.

Additionally, comfort is crucial when selecting earplugs. You’ll be wearing them for extended periods of time, so it’s essential that they fit securely and don’t cause any discomfort. Many earplugs come with different sizes of ear tips or are made from a flexible material that molds to the shape of your ear, ensuring a proper fit for maximum comfort.

It’s also worth considering the type of music you play and the environments in which you perform. Some genres, like rock or heavy metal, have extremely high sound levels that require earplugs with a higher NRR. On the other hand, if you play acoustic or classical music, you may want earplugs that provide a more balanced sound reduction across different frequencies.

Takeaway for Musicians:

As a musician, protecting your hearing is of utmost importance. Investing in a pair of high-quality earplugs is essential for preserving your long-term auditory health. By choosing earplugs with a high NRR and a comfortable fit, you can enjoy your music while reducing the risk of noise-induced hearing loss.

Remember, finding the right earplugs may require some trial and error. What works for one musician may not work for another, so don’t be afraid to experiment with different brands and styles until you find the perfect fit. Your ears will thank you in the long run!

Frequently Asked Questions On Best Earplugs For Musicians


What Earplugs Do Professional Musicians Use?


Professional musicians commonly use custom-molded earplugs for high-quality sound protection and clarity during performances.


What Are The Best Ear Plugs For Loud Music?


The best ear plugs for loud music are those with high noise reduction rating. Look for silicone or foam plugs, designed for musicians, and offering comfort and durability. Make sure they fit snugly in your ears to provide maximum protection without compromising sound quality.


Are Musician Earplugs Worth It?


Yes, musician earplugs are worth it. They protect your ears from loud music, reducing the risk of hearing damage.


Are Loop Earplugs Worth It For Musicians?


Loop earplugs can be worth it for musicians as they provide protection against loud music without compromising sound quality. They allow musicians to play at safe sound levels, reducing the risk of hearing damage. Using loop earplugs can help preserve the hearing health of musicians in the long run.


Conclusion


Finding the right earplugs for musicians is essential for protecting their hearing while still delivering an exceptional performance. With a wide range of options available, it’s crucial to consider comfort, sound quality, and durability when making a choice. By investing in high-quality earplugs, musicians can ensure long-term hearing health without compromising their music experience.

Categories
Archive

Kick Drum EQ: Mastering the Art of Powerful Beats

Kick drum EQ involves boosting low frequencies and cutting high frequencies for a punchy sound. It enhances the drum’s character and presence in the mix.


To achieve an impactful kick drum sound, proper EQ settings play a crucial role. By selectively boosting and cutting specific frequencies, you can shape the kick drum’s tone to cut through the mix clearly and provide the desired impact. Understanding how each frequency range affects the kick drum’s overall sound can help you achieve a balanced mix that emphasizes the low-end energy while maintaining clarity and definition.


With the right kick drum EQ techniques, you can create a professional-sounding mix with a powerful and well-defined kick drum sound.

Kick Drum EQ: Mastering the Art of Powerful Beats


Credit: mixedinkey.com


The Importance Of Kick Drum Eq

Kick drum EQ is crucial in achieving a well-balanced mix. By enhancing the low-end frequencies and shaping the sound, you can create a powerful foundation for your music. Understanding the role of kick drum EQ and choosing the right kick drum sound are key aspects of achieving professional-sounding mixes.

Choosing The Right Kick Drum Sound

Start by selecting a kick drum sample or mic that fits the genre and style of your music. Ensure it has a good balance of punch and low-end rumble to cut through the mix. Experiment with different samples and settings to find the perfect kick drum sound.

Understanding The Role Of Kick Drum In A Mix

The kick drum serves as the heartbeat of a song, providing rhythm and groove. Proper EQ can help define the kick drum’s presence in the mix, ensuring it complements other instruments without overpowering them. By sculpting the frequencies, you can achieve clarity and impact in your mixes.

Kick Drum EQ: Mastering the Art of Powerful Beats


Credit: apps.microsoft.com


Fundamentals Of Kick Drum Eq

The fundamentals of Kick Drum EQ involve understanding the frequency range and basic EQ techniques to effectively enhance the sound of a kick drum.

Frequency Range Of Kick Drum

A kick drum typically ranges from 50Hz to 5kHz, with the fundamental frequency around 50Hz for that deep low-end punch.

Basic Eq Techniques For Kick Drum

  • Boosting around 60-80Hz enhances the low-end thump of the kick drum.
  • Reducing frequencies around 200-400Hz helps minimize muddiness in the mid-range.
  • Adding a slight boost around 2-5kHz can improve the attack and presence of the kick drum.


Advanced Kick Drum Eq Techniques

In the world of audio engineering, crafting the perfect kick drum sound is essential for creating a powerful and defined low-end punch in your mix. While basic EQ techniques can help shape the character of the kick drum, advanced kick drum EQ techniques can take your sound to the next level. In this article, we’ll explore some advanced kick drum EQ techniques that can help you achieve punch, clarity, and overall impact in your mixes.

Using Dynamic Eq For Punch And Clarity

Dynamic EQ is a powerful tool for shaping the sound of a kick drum. By applying dynamic EQ to the kick drum, you can target specific frequency ranges and control them based on the input signal’s amplitude. This allows you to enhance the punch and clarity of the kick drum without compromising its natural sound. Using a dynamic EQ plugin, you can set thresholds and adjust gain reduction for different frequency bands, ensuring that the kick drum remains prominent and impactful in the mix.

Notching And Resonance Control

Notching and resonance control are indispensable techniques for addressing problematic frequencies in a kick drum. By using a precise parametric EQ, you can identify and notch out unwanted resonances that may muddy the sound of the kick drum. Additionally, applying a narrow notch filter can help in controlling any ringing or unwanted resonances that may occur at specific frequencies, allowing the kick drum to cut through the mix with clarity and definition.

Kick Drum EQ: Mastering the Art of Powerful Beats


Credit: www.izotope.com


Creative Kick Drum Eq Approaches

Kick drums are a foundational element of any music genre, and achieving the perfect kick sound can greatly impact the overall mix. While standard EQ techniques like boosting or cutting specific frequencies can be effective, taking a more creative approach to kick drum EQ can add depth, power, and excitement to your tracks. In this article, we’ll explore two unconventional methods for shaping your kick drum sound: enhancing subsonic frequencies for impact and adding character with harmonic saturation.

Enhancing Subsonic Frequencies For Impact

When it comes to kick drum EQ, it’s essential to pay attention not only to the audible frequencies but also to the subsonic range. Boosting the sub-bass frequencies can give your kick drum a powerful impact that can be felt by the listener – think of it as the “thump” you feel in your chest at a live concert. To enhance these subsonic frequencies:

  1. Start by identifying the fundamental frequency of your kick drum, usually around 60Hz to 80Hz.
  2. Apply a narrow boost in this frequency range to bring out the low-end punch.
  3. Experiment with different Q values to find the sweet spot that adds impact without causing muddiness in the mix.
  4. To further enhance the subsonic frequencies, consider using a harmonic exciter or a subharmonic synthesizer plugin.

Adding Character With Harmonic Saturation

In addition to boosting specific frequencies, adding harmonic saturation to your kick drum can introduce desirable distortion and warmth, giving it character and presence in the mix. Here’s how you can achieve this:

  1. Start by duplicating your kick drum track or sending it to an aux channel.
  2. Apply a saturation plugin, such as a tape emulator or a tube preamp, to the duplicated track or aux channel.
  3. Adjust the saturation parameters to taste, adding harmonic content and subtle distortion.
  4. Blend the saturated track or aux channel with the original kick drum, using a balance that complements the overall sound.

By creatively utilizing kick drum EQ techniques like enhancing subsonic frequencies and adding harmonic saturation, you can elevate your drum sound to new heights. These unconventional approaches allow you to shape the kick drum in unique ways that add impact and character, while still maintaining a balanced mix. Experiment with different settings, trust your ears, and let your creativity guide you in crafting the perfect kick drum sound for your music.

Mixing Tips For Kick Drum Eq


Enhance your kick drum sound with these mixing tips for EQ. Adjust the low frequencies to bring out the thump and experiment with the mid-range for punch and attack. Use a high-pass filter to remove unwanted low-end rumble and a low-pass filter to control the highs.

Kick drum is one of the most essential elements in a mix, providing the foundation and impact that helps drive the entire song. Properly applying EQ techniques to the kick drum can result in a more balanced and powerful mix. In this article, we will explore two important aspects of kick drum EQ: Balancing Kick Drum with Bass and Creating Space for Kick Drum in the Mix.

Balancing Kick Drum With Bass

Achieving the perfect balance between the kick drum and bass guitar is crucial for a tight and impactful low end. When mixing, it’s important to consider the frequencies that both instruments occupy to avoid clashing and muddiness in the mix. Here are some tips to help you achieve a balanced kick drum and bass: 1. Start by soloing the kick drum and bass to identify any conflicting frequencies. 2. Use an EQ plugin on both tracks to identify and reduce overlapping frequencies, such as boosting the kick drum’s attack around 2-4 kHz while cutting the same range on the bass. 3. Consider sidechain compression, where the bass is ducked slightly every time the kick drum hits, allowing the kick to cut through the mix without overpowering the bass.

Creating Space For Kick Drum In The Mix

In order for the kick drum to be heard clearly and stand out in the mix, it is important to create enough space for it. Here are some techniques to help you achieve this: 1. Use high-pass filtering on non-essential tracks to remove unnecessary low-frequency content. This will help prevent the kick drum from competing with instruments that don’t require a strong low end. 2. Consider using a low-shelving EQ curve on the master bus to gently reduce the low end of the entire mix, allowing the kick drum to occupy that space. 3. Experiment with panning other instruments or sounds that may clash with the kick drum slightly off-center, allowing the kick to sit more prominently in the center of the stereo image. Remember, the key to a successful kick drum EQ is to make subtle adjustments rather than drastic changes. Take your time to listen and analyze how each adjustment affects the overall mix, and trust your ears to guide you in achieving a balanced and impactful kick drum sound.

Frequently Asked Questions On Kick Drum Eq


What Is The Ideal Eq For Kick Drum?


The ideal EQ for a kick drum typically involves boosting the low frequencies around 60-80 Hz for warmth and punch, cutting the muddiness around 200-400 Hz, boosting the attack around 2-4 kHz for clarity, and adding a high shelf above 8 kHz for brightness.


Be cautious not to over-EQ.


How Do You Get A Punchy Bass Drum Eq?


Enhance bass drum punchiness by boosting frequencies between 60-80 Hz and cutting around 200-400 Hz. Experiment with different EQ settings to achieve desired impact.


What Frequency Should I Cut My Kick Drum?


Cut the kick drum at around 50-100 Hz for warmth and punch. Remove frequencies around 200-300 Hz for clarity. Avoid boosting below 50 Hz to prevent muddiness. Experiment to find the sweet spot for your kick drum’s sound.


What Frequency Is A Punchy Kick Drum?


A punchy kick drum typically has a frequency range between 60 Hz and 120 Hz.


Conclusion


In crafting the perfect kick drum EQ, precision is your ally. Don’t be afraid to experiment with different settings to find the sweet spot. Remember, a balanced mix is key to achieving a professional sound. With these techniques, you can take your drum tracks to the next level and ensure they stand out in the mix.

Categories
Archive

Mastering Time: Essential Tips for Busy Musicians

Busy musicians can improve time management by setting clear priorities and creating a structured schedule. Implementing effective time blocking techniques can also help in maximizing productivity.


As a musician with a packed schedule, finding time for everything can be challenging. However, by utilizing strategic time management strategies, you can make the most out of your day and ensure you are meeting your goals efficiently. We will explore practical tips and techniques that busy musicians can use to manage their time effectively, allowing them to balance their music career with other responsibilities.


Whether you are working on new music, gigging, or handling administrative tasks, these time management tips will help you stay organized and focused in a hectic industry.

Mastering Time: Essential Tips for Busy Musicians


Credit: imusician.pro


Maximizing Productivity


Learn essential time management tips for busy musicians to maximize productivity. Discover effective strategies to prioritize tasks, set specific goals, and optimize your schedule for peak performance in your music career.

Maximizing Productivity in the music industry is crucial for busy musicians to thrive.

Setting Clear Goals

Setting clear goals allows musicians to stay focused and organized.

Prioritizing Tasks

Prioritizing tasks ensures that important activities are completed efficiently.

Effective Time Management Techniques

Time management is crucial for busy musicians to stay organized and productive. Utilizing effective techniques can help musicians balance their schedules efficiently.

Time Blocking

Time blocking involves dividing your day into specific time slots for different tasks or responsibilities. By allocating dedicated time for activities like practicing, composing, and admin work, musicians can ensure they focus on each task without distractions.

Pomodoro Technique

The Pomodoro Technique is a time management method that breaks work into intervals, typically 25 minutes, separated by short breaks. This technique can help musicians maintain focus and enhance productivity during practice sessions or songwriting.

Utilizing Technology

Utilizing technology can greatly assist musicians in managing their time effectively, allowing them to focus on their craft and creative processes. By leveraging various digital tools and applications, musicians can streamline their schedules, improve communication, and enhance their productivity. In this guide, we’ll explore how musicians can harness the power of technology to optimize their time management strategies.

Calendar Apps

Calendar apps are indispensable tools for busy musicians. These applications allow users to organize their schedules, set reminders for upcoming events, and coordinate rehearsals and performances. Utilizing calendar apps enables musicians to efficiently manage their time and ensure that they never miss an important gig or studio session. Some popular calendar apps include Google Calendar, Microsoft Outlook Calendar, and Apple Calendar.

Task Management Tools

Task management tools are essential for musicians juggling multiple projects and responsibilities. These platforms enable users to create task lists, assign priorities to specific activities, and track their progress on various assignments. Trello, Asana, and Todoist are popular task management tools that offer collaborative features for bands and music teams to coordinate their tasks effectively.

Maintaining Mental And Emotional Well-being

As a busy musician, it is essential to prioritize your mental and emotional well-being to ensure longevity in your career. The pressures of performing, practicing, and managing your professional life can often lead to stress and burnout. In this section, we will explore two crucial aspects of maintaining your mental and emotional well-being: mindfulness practices and setting boundaries.

Mindfulness Practices

Mindfulness is a powerful tool that can help you stay present and focused in the midst of a busy schedule. By incorporating mindfulness practices into your daily routine, you can reduce stress, improve concentration, and enhance overall productivity. Consider the following mindfulness exercises:

  1. Deep Breathing: Take a moment to close your eyes and focus on your breath. Inhale deeply through your nose, hold for a few seconds, and exhale slowly through your mouth. Repeat this process several times, allowing yourself to relax and let go of any tension.
  2. Meditation: Find a quiet space where you can sit comfortably and undisturbed. Close your eyes and bring your attention to the present moment. Observe your thoughts without judgment and gently guide your attention back to your breath whenever your mind wanders.
  3. Gratitude Practice: Take a few minutes each day to reflect on and express gratitude for the things that bring you joy as a musician. This could be the support of your loved ones, the opportunity to perform on stage, or the ability to create beautiful music. Cultivating a sense of gratitude can shift your focus from stress to appreciation.

Setting Boundaries

Setting boundaries is crucial for maintaining a healthy work-life balance and protecting your mental and emotional well-being. Here are some strategies to help you establish effective boundaries:

  • Define your Priorities: Identify your most important commitments and establish clear boundaries around them. Determine how much time and energy you are willing to allocate to each aspect of your life, such as practicing, performing, and personal relationships.
  • Create a Schedule: Plan your days and weeks in advance to ensure you have dedicated time for both work and self-care. Stick to your schedule as much as possible, and avoid overloading yourself with too many commitments.
  • Learn to Say No: It’s okay to decline opportunities that don’t align with your priorities or overwhelm your schedule. Saying no allows you to prioritize your well-being and focus on the projects and performances that truly matter to you.
  • Unplug and Rest: Give yourself permission to disconnect from work and take regular breaks. Set boundaries around your digital devices, designating specific times when you will be offline to relax and recharge.

By incorporating mindfulness practices and setting boundaries, you can maintain your mental and emotional well-being as a busy musician. Remember, taking care of yourself is crucial for your long-term success and happiness in both your professional and personal life.

Creating A Sustainable Routine


Discover effective time management tips for busy musicians to establish a sustainable routine. Prioritize tasks, set clear goals, and utilize tools for efficient planning and productivity. By implementing these strategies, musicians can optimize their schedules and achieve a better work-life balance.

Creating a Sustainable Routine Balancing Work and Rest To create a sustainable routine, it’s crucial for busy musicians to find the right balance between work and rest. While it’s important to put in the hours and work on your music, it’s equally essential to take breaks and give your mind and body the rest they need. Balancing work and rest is not just about finding the right amount of time for each, but also about creating boundaries and prioritizing self-care. Consistent Practice Schedule One of the key factors in creating a sustainable routine as a busy musician is establishing a consistent practice schedule. By setting aside dedicated time for practice every day or week, you not only improve your skills but also ensure that you make progress in your musical journey. Consistency is key when it comes to mastering any craft, and the same applies to music. Having a consistent practice schedule helps you stay focused, motivated, and accountable. To create a sustainable practice schedule, start by identifying the best time of day for you to practice. Whether it’s early morning, during your lunch break, or in the evening, choose a time when you are most alert and able to focus. Remember, there is no one-size-fits-all approach, so find a schedule that works for you and stick to it. To stay organized and ensure you make the most of your practice sessions, it can be helpful to create a practice plan or schedule. This can include specific goals for each session, such as mastering a challenging piece or working on a particular technique. By breaking down your practice sessions into smaller, manageable tasks, you’re more likely to stay on track and make progress towards your musical goals. Prioritizing self-care and maintaining a healthy work-rest balance are essential for busy musicians to create a sustainable routine. Establishing a consistent practice schedule helps you stay focused, motivated, and accountable. By finding the right balance and sticking to your schedule, you’ll not only improve your musical skills but also maintain a healthy and fulfilling lifestyle. So, go ahead, carve out that practice time, and watch your musical journey thrive.

Mastering Time: Essential Tips for Busy Musicians


Credit: online.berklee.edu


Mastering Time: Essential Tips for Busy Musicians


Credit: imusician.pro


Frequently Asked Questions Of Time Management Tips For Busy Musicians


How Do Musicians Manage Their Time?


Musicians manage time by creating schedules, setting priorities, using calendars, and delegating tasks effectively. They also practice time management techniques and stay disciplined.


What Is The Typical Work Schedule Like For Musicians?


Musicians have varied work schedules, often including evenings and weekends for performances and rehearsals. They may also spend weekdays practicing, recording, and promoting their work. Overall, their schedules can be irregular and demanding.


How Do Musicians Spend Their Time?


Musicians spend their time practicing, writing songs, recording, performing at gigs, promoting themselves and their music, and collaborating with other artists. They also engage in activities like networking, attending rehearsals, and managing their social media presence.


What Is The Most Powerful Time Management Technique?


The Pomodoro Technique is the most powerful time management technique. It involves working for 25 minutes, then taking a short break. This helps to maintain focus, increase productivity, and prevent burnout.


Conclusion


Incorporating effective time management strategies into a musician’s busy schedule is crucial for achieving productivity and success in their craft. By implementing the tips outlined in this blog post, musicians can better organize their time, enhance their focus, and ultimately maximize their creativity and output.


Embracing these time management techniques can lead to a more balanced and thriving career in the music industry.


https://www.youtube.com/watch?v=Ikb0gPQbSaU