
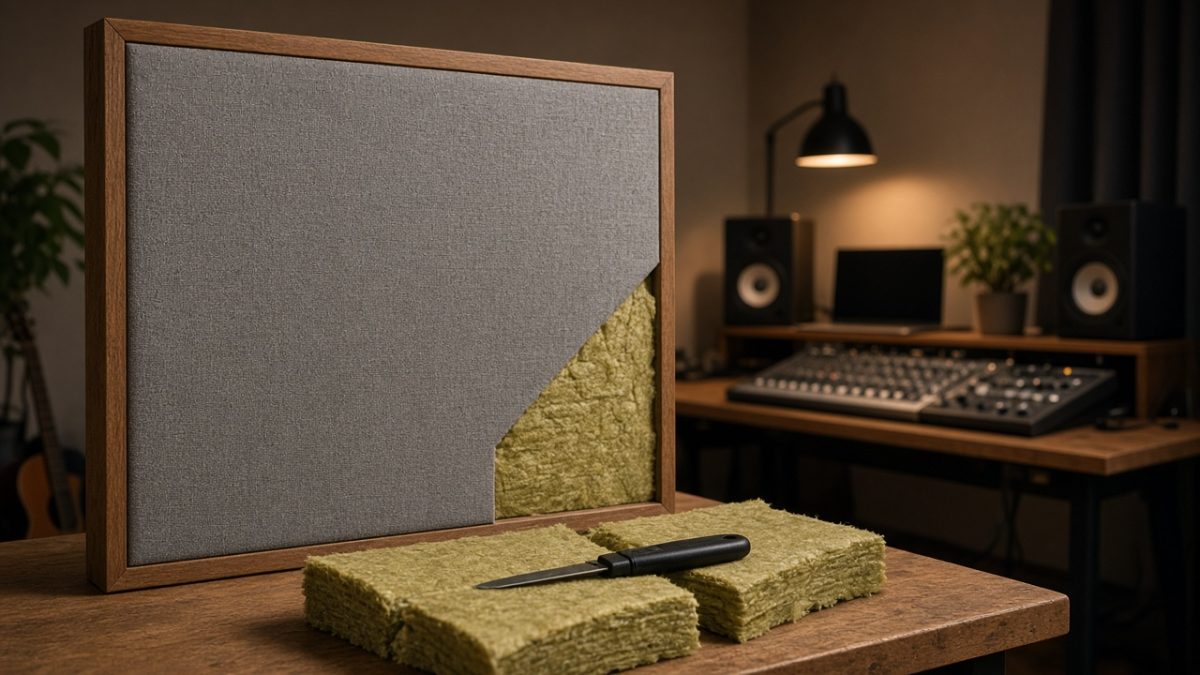
Rockwool acoustic panels are the cheapest way to make real studio treatment: a frame of 1×4 pine, a core of mineral wool such as ROCKWOOL Safe’n’Sound, and breathable fabric stretched over the front. This guide covers which mineral wool to buy, how Rockwool compares with Owens Corning 703 and 705 rigid fiberglass, how thick to build, and where to hang the finished panels so your mixes translate.
As an Amazon Associate I earn from qualifying purchases. This write-up is based on manufacturer specifications, published absorption data and retailer listings, not hands-on testing.
Why mineral wool beats foam
Thin foam tiles mostly absorb high frequencies. Below about 250 Hz they do very little. That’s where small rooms have their worst problems: boomy bass, notes that vanish at the mix position, and long low-end decay. Dense mineral wool and rigid fiberglass absorb across a much wider range, and they get better at low frequencies the thicker you build. One published comparison puts 2 in acoustic foam at 0.29 absorption at 250 Hz, against 0.67 for a 2 in mineral wool panel. If you are new to how absorption works, read how acoustic panels work first.
The best mineral wool for DIY panels
ROCKWOOL Safe’n’Sound (best value)
Safe’n’Sound is a 3 in stone wool batt sold in packs of 12 pieces at 15-1/4 × 47 in, covering 59.7 sq ft per pack. Big-box hardware stores stock it. At the time of writing Home Depot listed it at about $80–84 a pack, with a 4.6-star average from more than 1,100 reviews. It holds its shape well, cuts with a serrated bread knife, and is naturally water-repellent. That helps in basements and garages. It is sold as building insulation, not a rigid acoustic board, so it needs a frame to hold it.
Owens Corning 703 (classic studio board)
OC 703 is a rigid fiberglass board at about 3 lb/ft³. It has been the standard studio absorber for decades, and 4 in of 703 is published at roughly 0.56 absorption at 125 Hz. It usually comes from acoustic or insulation suppliers rather than hardware stores. One specialty retailer listed a six-panel case of 2 in 703 FRK (foil-faced) for about $146. The foil face reflects some high frequencies, so buy plain 703 for broadband panels. Use FRK only when you want a little top-end liveliness kept in the room.
Owens Corning 705 (denser board)
705 is the 6 lb/ft³ version: stiffer, heavier and easier to handle as a clean board. The same retailer listed a five-pack of 2 in 2×4 ft boards for about $136. At equal density, mineral wool and fiberglass perform similarly. Choose based on availability, budget and how much stiffness your frames need.
Rockwool and mineral wool options on Amazon
If you’d rather not haul batts home from a hardware store, these boards ship to your door. The three Lynn Manufacturing listings belong to the same listing family, which showed 4.6 stars from 57 ratings. Buyers generally report using them in 1×2 frames wrapped in burlap, and for bass traps and ceiling clouds. Prices and stock are as seen Oct 27, 2026, and may change.
- Lynn Manufacturing Rockwool ProRox SL960, 12×12×2 in, 3-pack: $37.90. Small squares for mini DIY panels, sound-absorbing art frames and corner tests.
- Lynn Manufacturing mineral wool board, 24×24×2 in, 5-pack: $105.90 ($21.18 each). Sold as a Rockwool/Thermafiber replacement. Only about 10 were in stock when checked.
- Rockwool ProRox SL960, 24×48×1 in, 10-pack (6 lb/ft³): $209.90 ($20.99 each), Amazon’s Choice. Full-size panels: stack two layers for 2 in, or more for a bass trap. Only 1 was left when checked. A 2×4 ft × 2 in version is also listed at $209.90.
- ATS Acoustics cotton denim and recycled fiber batts, 24×48×2 in, case of 6: $145.99, 4.4 stars from 58 ratings. This is the soft, non-itch alternative. It has a maker-claimed NRC of 1.05 and a density of 2.5 lb/ft³, thickness can vary by ±0.5 in, and it’s made in the USA. About 9 cases were left when checked.
| Product | Size | Count | Price | Per unit | Best for |
|---|---|---|---|---|---|
| ProRox SL960 squares | 12×12×2 in | 3 | $37.90 | $12.63 | Small panels, art frames, tests |
| Mineral wool board | 24×24×2 in | 5 | $105.90 | $21.18 | Mid-size panels, clouds |
| ProRox SL960 boards | 24×48×1 in | 10 | $209.90 | $20.99 | Full 2×4 panels, bass traps |
| ATS denim/recycled batts | 24×48×2 in | 6 | $145.99 | $24.33 | Soft, low-itch builds |
Quick pick guide
- Small DIY or a first test: the 12×12 ProRox 3-pack.
- Full-size Rockwool acoustic panels: the 24×48 ProRox 10-pack, doubled to 2 in. Use the 24×24 boards for square panels.
- Soft option: the ATS denim batts, if you want to avoid itchy mineral wool.
Density and thickness: what each size actually does
Thickness and density are the two numbers that matter most when you choose a core. In general, a thicker porous absorber reaches lower frequencies, and density mostly changes how stiff the board is and how much air resistance it offers. Very dense boards can even reflect a little more at the surface. For studio panels, medium-to-high density boards around the 3–6 lb/ft³ range are the common choice, which is why ProRox SL960 (6 lb/ft³) and Owens Corning 703/705 show up in so many builds.
1 inch boards
On its own, a 1 in board mostly tames high frequencies: harsh slap echo, hand-clap flutter and sibilant splash off a bare wall. It’s a good thickness for thin decor panels or for doubling up. Because the 24×48×1 ProRox pack is sold as 10 boards, the usual approach is to stack two boards per frame and get a 2 in panel.
2 inch panels
Two inches is the classic all-purpose panel. It handles speech and vocal frequencies well and deals with first reflections from your monitors, so it suits side walls and the wall behind your desk. It does much less in the low end, so don’t expect 2 in panels to fix a boomy room.
4 inch panels and deeper
At 4 in, absorption reaches noticeably lower, and that makes 4 in and deeper builds the usual choice for corners and the rear wall. You can get there by stacking boards: four 1 in ProRox boards or two 2 in boards in a deeper frame built from 1×6 lumber instead of 1×4.
Why an air gap helps
Spacing a panel a few inches off the wall is the cheapest upgrade in acoustics. Sound reaches the core at a point where air particles are moving faster, so a spaced panel generally works lower than the same panel mounted flat. Two to four inches of gap is a common, practical range for home studios. Simple wooden stand-off blocks or deep French cleats do the job, and they cost almost nothing extra.
Materials list for a Rockwool acoustic panel build
Here’s what a typical build of four 24×48 in panels needs. Quantities assume 2 in deep panels.
- Core: eight 24×48×1 in boards (stacked in pairs), four 24×48×2 in boards, or four batts from the ATS denim case
- Frame lumber: 1×4 pine or poplar for 2 in panels (1×2 if you skip side frames and wrap the board directly), or 1×6 for 4 in traps
- Fasteners: 1-1/4 in or 1-5/8 in wood screws, wood glue, and optional corner brackets
- Fabric: breathable acoustic fabric or burlap, about 2 yards per panel at 54–60 in wide
- Staples: a manual or electric staple gun with 3/8 in staples
- Backing (optional): landscape fabric or thin breathable cloth to contain fibers
- Hanging hardware: Z-clips, French cleats or picture wire, plus wall anchors rated for the weight
- Tools: tape measure, square, saw, drill, serrated bread knife or insulation knife, and scissors
- Protective gear: gloves, a dust mask, long sleeves and safety glasses
Step-by-step: how to build Rockwool acoustic panels
This tutorial builds a 24×48 in panel. The 24×24 version works exactly the same way with shorter rails.
Example cut list
| Panel size | Long rails | Short rails | Core |
|---|---|---|---|
| 24×48 in, 2 in deep | 2 × 48 in (1×4) | 2 × 22-1/2 in (1×4) | One 2 in board or two 1 in boards |
| 24×24 in, 2 in deep | 2 × 24 in (1×4) | 2 × 22-1/2 in (1×4) | One 24×24×2 in board |
These dimensions assume nominal 1× lumber at 3/4 in thick, with short rails butted between the long rails. That gives an inside opening of about 22-1/2 in, slightly narrower than the 24 in board. Measure your actual lumber and boards first, then adjust the short rails so the core fits snugly. Alternatively, cut the rails to wrap the outside of the board for a full 24 in opening.
- Measure the core. Mineral wool sizes can vary slightly, so measure the boards before cutting wood.
- Cut and assemble the frame. Cut the rails, add a bead of wood glue to each joint, and screw through the long rails into the short rails. Check the frame for square by measuring both diagonals.
- Add support strips. Screw a couple of thin strips across the back to stop the core falling out while leaving most of the back open.
- Fit the core. Put on your gloves and mask, then press the board into the frame. When stacking two 1 in boards, align the edges so there are no gaps.
- Cut the fabric. Leave 3–4 in of extra fabric on every side so you can pull it around to the back.
- Stretch and staple. Lay the fabric face down with the frame on top, then staple the center of each long side, then the center of each short side. Work outward toward the corners, keeping the tension even.
- Fold the corners. Fold them like wrapping a present, trim the excess and staple flat.
- Close the back. Optionally staple breathable backing fabric over the rear.
- Fit the hardware. Attach Z-clips, cleats or picture wire, plus stand-off blocks if you want an air gap.
For more frame styles and finishing ideas, see our DIY acoustic panels guide.
Choosing fabric for mineral wool panels
The fabric has one job: let sound through to the core. If you can’t breathe through it easily, it’s too tight and will reflect high frequencies back into the room.
- Acoustically transparent fabric: purpose-made panel fabric is the most reliable choice and comes in many colors. Some types carry a flame-resistance rating.
- Burlap: cheap, breathable and easy to find, although it can show staples and may fade or sag. Stretch it firmly.
- Avoid: vinyl, leather, tightly woven upholstery fabric and anything with a backing or coating.
Fire safety matters too. The mineral wool itself doesn’t burn easily, but fabric and wood do. If you’re treating a rental, a shared building or a client-facing space, look for fabric with a stated flame-resistance rating, and check local rules.
Safety when cutting mineral wool
Mineral wool and fiberglass fibers can irritate skin, eyes and airways, so treat them like any other insulation job. As general advice, wear gloves, a dust mask, long sleeves and safety glasses while cutting. Work in a ventilated area or outdoors, and vacuum offcuts and dust when you finish. Once a panel is fully wrapped, the fibers are contained. Always follow the manufacturer’s safety data sheet for the specific product.
Rockwool vs fiberglass vs cotton denim
All three work as porous absorbers, so the choice usually comes down to handling, sourcing and cost.
| Core | Example | Handling | Notes |
|---|---|---|---|
| Rockwool / stone wool | ProRox SL960, Lynn mineral wool board | Itchy, so wear protective gear | Rigid boards, naturally water-repellent |
| Rigid fiberglass | Owens Corning 703 / 705 | Itchy, so wear protective gear | Classic studio standard, usually from specialty suppliers |
| Cotton denim / recycled fiber | ATS denim batts | Soft, low-itch | Maker-claimed NRC 1.05; thickness can vary ±0.5 in |
In short, Rockwool boards give clean edges and easy framing. Fiberglass is the long-time studio standard, and denim is the friendliest to handle, which makes it a good choice for a bedroom or shared living space.
Where to place Rockwool panels
First reflection points
Sit in your mix position while a friend slides a mirror along each side wall. Wherever you can see a monitor in the mirror, place a panel. Repeat on the ceiling, and on the wall behind your monitors if your desk is close to it.
Corners and bass traps
Bass builds up in corners, so the deepest panels go there. Straddle a vertical corner with a 4 in or thicker panel and leave an air pocket behind it, or stack panels floor to ceiling.
Ceiling clouds
A panel hung flat above the space between you and your monitors catches the ceiling reflection. Use eye hooks and chain or cable rated well above the panel’s weight.
Room-size examples
These are examples only. Every room is different, so measure and adjust.
- Example: small bedroom studio (about 10×10 ft). Two 24×48 panels at the side-wall reflection points, plus two deeper panels in the front corners.
- Example: medium room (about 12×14 ft). Add a ceiling cloud and two panels on the rear wall to the four above.
- Example: vocal corner. Two or three 24×48 panels behind and beside the singer. Our guide to recording vocals in a closet alternative covers this setup.
Keep the layout symmetrical so the stereo image stays centered, and see how to install acoustic panels for mounting details. Once the panels are up, our studio monitor guide helps you get the most from a treated room.
Cost of a DIY 4-panel starter setup
Using the Amazon prices as seen Oct 27, 2026 (prices may change), here’s what the core material costs for four 24×48×2 in panels:
| Option | Buy | Pack price | Material per panel | Used for 4 panels | Leftover |
|---|---|---|---|---|---|
| ProRox SL960 24×48×1 (stack 2) | One 10-pack | $209.90 | $41.98 (2 boards) | $167.92 (8 boards) | 2 boards for a fifth panel |
| ATS denim batts 24×48×2 | One case of 6 | $145.99 | $24.33 | $97.33 | 2 batts for two more panels |
| Lynn board 24×24×2 (smaller panels) | One 5-pack | $105.90 | $21.18 | $84.72 | 1 board for a fifth 2×2 panel |
So the out-of-pocket cost for core material is $209.90, $145.99 or $105.90 depending on the option. Then add lumber, fabric, staples and hanging hardware at your local prices. For a first test before committing, the 12×12×2 ProRox 3-pack is $37.90. For more ways to stretch a budget, read our guide to improving production quality on a budget.
Common mistakes to avoid
- Using fabric that’s too tight. If you can’t breathe through it, it reflects highs. Test it before you buy a full roll.
- Treating only one side. Uneven treatment pulls the stereo image off center, so mirror every panel on the opposite wall.
- Relying only on 1 in boards. A room full of thin panels can sound dull up top while the bass stays boomy. Mix thin reflection panels with thick corner traps.
- Skipping the corners. Corners are where bass builds up, so they’re usually the most effective place for deep panels.
- Weak hanging hardware. Dense boards are heavier than they look. Use anchors and cleats rated well above the panel’s weight, especially overhead.
- Leaving gaps in the core. When stacking boards, butt the edges together tightly, and don’t compress the board into a frame that’s too small.
- Over-treating. Covering every wall can make a room feel lifeless. Treat the key points, listen, measure, and then add more panels if needed.
Finally, give your ears time. Live with the new setup for a few days of mixing before deciding what to add. Free measurement software and a basic measurement microphone can show which frequencies still ring, so the next panel goes where it helps most.
Rockwool acoustic panels FAQ
Are mineral wool panels better than foam?
For most studio problems, yes. Dense mineral wool absorbs over a wider frequency range than thin foam, especially toward the low mids.
How many panels do I need?
Start with the first reflection points and the front corners, which is usually four to six panels in a small room. Then measure and add more where needed.
Can I use 1 inch boards?
Yes. On their own they mostly control highs, so stack two for a 2 in panel or more for corner traps.
Do I need an air gap behind the panel?
It isn’t required, but spacing panels a few inches off the wall generally extends their low-frequency range for free.
Will acoustic panels soundproof my room?
No. Panels improve how a room sounds inside. Blocking sound from leaving takes mass, sealing and decoupling, which is a different job.
Is cotton denim as good as mineral wool?
It’s a soft, low-itch alternative. ATS claims an NRC of 1.05 for its 2 in batts, but that’s a maker claim and its thickness can vary by ±0.5 in.
Recap
- DIY mineral wool panels are the best-value way to treat a home studio properly.
- Use 2 in panels for reflections and 4 in or deeper with an air gap for corners.
- Build simple 1×4 frames, fill them with mineral wool and wrap them in breathable fabric.
- Place panels at the first reflection points, in the corners and as a ceiling cloud, symmetrically.
- Wear gloves, a mask and long sleeves when cutting, or choose denim for easy handling.
- A four-panel core-material kit runs about $106–210 at Oct 27, 2026 prices.
For the theory behind absorption ratings, see the noise reduction coefficient explainer. To plan the rest of your space, read our home studio setup for beginners and best room treatment tips.
One reply on “Rockwool Acoustic Panels: DIY Guide to Mineral Wool Panels”
[…] without breaking the bank. By selecting the right materials, such as dense fiberglass or rockwool acoustic panels, and wrapping them in acoustically transparent fabric, you can create panels that absorb excess […]