
To do parallel compression, duplicate a track, apply heavy compression to the duplicate, then blend the compressed track with the original. Parallel compression is an effective mixing technique that can add body and sustain to individual tracks or the entire mix.
Also, New York compression blends two different versions of the same track. One version receives heavy compression while the other stays uncompressed, which retains the dynamics. The compressed track is then blended in with the original track to add fullness without sacrificing the original dynamics.
Related reading: Compression Meters and What is Audio Compression?.
Moreover, we will discuss the steps to do parallel processing in detail.
Setting Up Parallel Compression
In addition, this technique is a popular technique used in audio mixing to enhance the dynamics of a track. Also, to set up parallel processing, start with duplicating the audio track, adding a compressor to the duplicated track, and blending it with the original track to achieve a fuller sound without losing the original dynamics.
Furthermore, Parallel processing is a widely used technique in music production that involves duplicating a track to create a separate channel for processing. In addition, this allows you to apply heavy compression to the duplicate track without affecting the original signal. Moreover, in this way, you can achieve a more balanced and dynamic mix. In this post, we’ll cover the basics of setting up parallel processing, including choosing the right audio, preparing your DAW, and creating a parallel compression channel.
Choosing The Right Audio
Before you begin the process of setting up New York compression, it’s important to choose the right audio. For example, this means selecting the track or mix bus that you want to process. Additionally, typically, you’ll want to choose a track or bus that has a broad dynamic range and that you want to bring forward in the mix. Drums, bass, and vocals are common choices for parallel processing.
Preparing Your Daw
Also, once you’ve selected the track or mix bus that you want to process, it’s time to prepare your DAW. This involves setting up your session so that you can easily create this technique channel. As a result, here’s how to do it:
- Moreover, create a new auxiliary channel in your DAW.
- In addition, insert a compressor plugin on this new channel.
- Furthermore, set the compressor to a high ratio and fast attack and release times.
- Adjust the threshold so that the compressor is heavily reducing the signal.
- Additionally, set the output gain of the compressor to unity gain.
- Also, send the audio from the original track to the new auxiliary channel.
- Adjust the send level to mix the processed and unprocessed signals to taste.
Creating A Parallel Compression Channel
Now that you have set up your DAW, it’s time to create the New York compression channel. However, here’s how to do it:
- Duplicate the original track and send the duplicate to the auxiliary channel with the compressor.
- Mute the duplicate track so that you only hear the compressed signal from the auxiliary channel.
- Adjust the compressor settings on the auxiliary channel to taste.
- Unmute the duplicate track and adjust the send level to mix the compressed and unprocessed signals to taste.
By following these steps, you’ll be able to set up New York compression in your DAW. Then, remember to experiment with different settings and find what works best for your mix. Happy mixing!
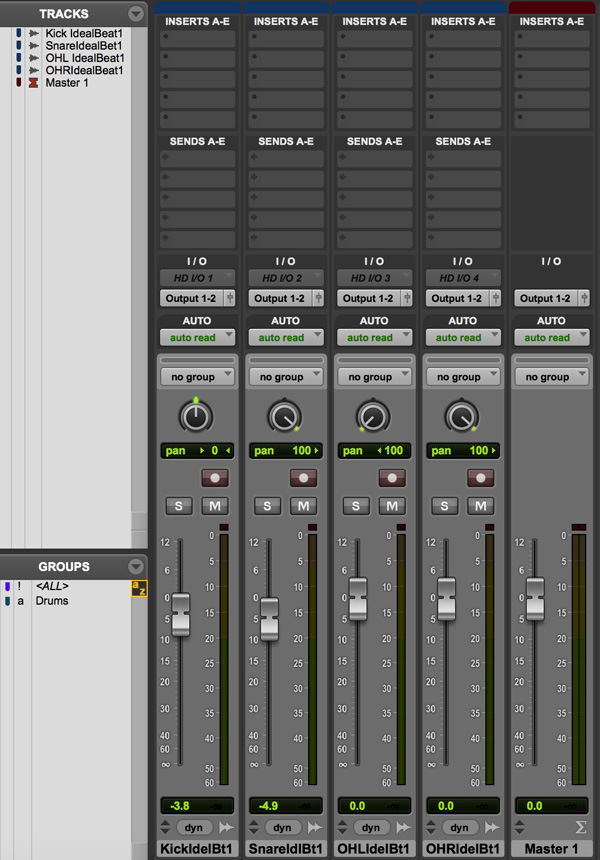
Credit: www.hairballaudio.com
Adjusting Parallel Compression Settings
This technique can add depth and power to your mixes. In short, adjust your settings carefully to control the amount of compression applied to your tracks, making sure to balance the wet and dry signals for maximum impact.
Adjusting Parallel Compression Settings is an essential part of getting the most out of your audio production. Similarly, once you have set up your New York compression chain and have a basic understanding of what is actually happening, you can start to make adjustments to tailor the sound to your preferences. Here are a few key areas to focus on when adjusting parallel processing settings:
Setting The Correct Ratio
The ratio in this technique refers to the difference between the uncompressed and compressed signals. A higher ratio will result in more compression, making quieter sounds louder, and louder sounds quieter. For New York compression, a ratio of around 2:1 or 3:1 is a good starting point. Finding the right ratio will depend on the type of audio you are processing and the effect you are looking to achieve.
Choosing The Attack And Release Times
Attack and release times determine how quickly the compressor kicks in once the sound reaches the set threshold and how quickly it stops compressing once the sound falls below the threshold again. A shorter attack time means the compressor will start working sooner, whereas a longer attack time will let more of the transients through before the compression kicks in. A longer release time will let the compressor slowly release the sound back to its original dynamics, whereas a shorter release time will make the sound bounce back quicker.
Maintaining The Right Mix
It’s important to blend the parallel processing track with the original track carefully. A common mistake is to add too much of the parallel compressed track, leading to a distorted or over-compressed sound. Aim to get the right balance between the original and compressed signal, listening carefully to the effect that each adjustment is having. The goal is to make the sound fuller and more dynamic, without sacrificing clarity or balance. It may take a few tweaks to find the sweet spot, but the results are worth it.
| Things to Consider When Adjusting Parallel Compression Settings: | |
|---|---|
| Ratio: | Aim for around 2:1 or 3:1 to start with |
| Attack Time: | Shorter attack times lead to quicker compression |
| Release Time: | Longer release times result in a slower return to the original dynamics |
| Mix: | Aim for a perfect balance between the original and compressed signal |
By adjusting the settings for this technique, you can achieve better control over the dynamics of your audio recording. Start by choosing the right ratio, then move on to adjusting the attack and release times to fine-tune the effect. Finally, balance the mix to achieve a more dynamic and fuller sound. With practice, you can soon become an expert in adjusting New York compression settings to enhance the quality of your audio production.
When To Use Parallel Compression
Parallel processing is best utilized when you want to add more punch or sustain to your mix without losing transparency. By sending a copy of your signal to this technique bus, you can apply heavy compression to the bus while keeping the original signal untouched.
This technique is particularly useful for drums, vocals, and bass.
Parallel compression, also known as New York compression, is a technique used in audio mixing to add depth, body, and energy to recordings. This technique works by blending the compressed signal with the original unprocessed signal. Producers widely use New York compression, especially in pop, rock, and hip hop. But, when should you use parallel processing? Below are some scenarios where parallel processing can be useful.
Mixing Drums
Drums are a critical part of music production, and they need to sound punchy and alive. Using New York compression on drums can help them stand out in a mix without sounding over-compressed. It can bring out the mid and low-end frequencies, enhancing the drum’s sound. Here’s how you can add parallel processing to your drum mix:
- Route your drum audio tracks to a bus.
- Insert a compressor plugin on the bus.
- Set your compressor to a high ratio, fast attack, and medium release.
- Add some gain to the compressed signal.
- Blend the compressed signal with the original unprocessed signal.
Adding Depth To Vocals
Vocals are the primary element of most musical productions, and they need to be well-balanced, present, and clear. This technique can help make vocals sound more upfront, without cluttering the mix. It can also add smoothness and depth to the vocals. Here’s how you can apply New York compression to your vocal mix:
- Duplicate your vocal track.
- Route the duplicate track to a bus.
- Insert a compressor plugin on the bus.
- Set your compressor to a high ratio, fast attack, and medium release.
- Add some gain to the compressed signal.
- Blend the compressed signal with the original vocal track.
Balancing Multiple Instruments
When you’re mixing multiple instruments, it can be hard to balance them in a way that makes them sound cohesive. Parallel processing can help glue the instruments together, making them sound like they belong together. Here’s how you can use this technique to balance multiple instruments:
- Route all your instruments to a bus.
- Insert a compressor plugin on the bus.
- Set your compressor to a high ratio, fast attack, and medium release.
- Add some gain to the compressed signal.
- Blend the compressed signal with the original unprocessed signal.
Tips And Tricks For Better Parallel Compression
This article provides valuable tips and tricks for achieving better New York compression in your audio production. Learn how to effectively apply parallel processing techniques to your tracks and achieve a fuller, more dynamic sound.
This technique is an essential mixing technique used by music producers and engineers to blend together dry and compressed signals resulting in a balanced and cohesive sound. Here are some tips and tricks to improve your parallel processing technique:
Experiment With Different Settings
The key to getting the perfect parallel compression sound is experimentation. Adjust the threshold, attack, release, and ratio settings to achieve the desired effect. For instance, a longer attack time can emphasise the attack of a sound and a longer release can sustain the tail.
Use Multiple Instances Of Parallel Compression
You can use more than one instance of parallel compression to achieve a denser sound. Use different settings for each instance to create a nuanced and interesting blend of sounds. For example, one instance can emphasise the attack of the kick drum, while another can add character to the overall mix.
Blend In Parallel Compression Gradually
Gradually blending in the compressed sound can result in a more natural-sounding mix. You can automate the dry/wet knob on the parallel compressor plugin to blend in the parallel compression gradually. Additionally, you can use a gain plugin or fader to raise or lower the volume. This technique helps prevent sudden jumps in volume, which can be jarring to the listener. In conclusion, using these tips and tricks will enable you to achieve better results when using parallel compression in your music production and mixing. Experiment with different settings, use multiple instances of parallel compression and blend in gradually to achieve a more cohesive sound.
Examples Of Parallel Compression In Popular Music
Parallel compression, also known as New York compression, is a technique used in music production to enhance the dynamics of a track. Popularized in the 1990s in New York, it’s widely used in different genres such as pop, hip hop, and rock. The principle behind parallel compression is simple; mix the compressed and uncompressed signals from a single source and blend them for better control of the dynamic range of the track. The result is a fuller and more defined sound that sits well in the mix.
Pop Music
In pop music, producers commonly use parallel compression to make vocals sound bigger and brighter. For example, pop engineers often blend parallel compression into lead vocals for presence and polish. The technique was also used on the drums in Lady Gaga’s “Poker Face” to give them more punch and clarity.
Hip Hop
Parallel compression is an essential technique in hip hop production. It’s used to achieve the characteristic punchy and aggressive sound of the genre. Hip-hop mixers often add parallel compression to drums for power and drive. They also use it on bass and vocals so both cut through the mix.
Rock
In rock, engineers use parallel compression to make guitars and bass sound bigger. Rock mixers use it on guitar tracks to make them bigger and more aggressive. On drums, the technique adds weight and depth.
Parallel compression is a powerful technique that can work in different genres of music production. By blending compressed and uncompressed signals, you can achieve a fuller, more defined sound that sits well in the mix. Whether you’re producing pop, hip hop, or rock, parallel compression is a must-know technique that can take your tracks to the next level.
Frequently Asked Questions For How To Do Parallel Compression
How Do You Do Parallel Compression?
You can do parallel compression by sending one track to two separate buses. One bus will have a compressed version of the track, while the other will have the dry, uncompressed track. These two buses are then mixed back together to create a balanced, punchy sound that retains the dynamics of the original track.
What Is The Ratio For Parallel Compression?
The ratio for parallel compression is typically 50/50 or 70/30, depending on the desired effect. The aim is to combine the uncompressed sound and the compressed sound to create a fuller, more dynamic sound.
Is Parallel Compression Worth It?
Yes, parallel compression is worth it as it allows for greater control and enhancement of the dynamic range of a mix without losing the natural dynamics of the individual tracks. It can add depth and sustain, improve clarity, and increase overall loudness while still maintaining a natural sound.
Should Parallel Compression Be Pre Or Post Fader?
Set parallel compression post fader, so you control how much of it reaches the overall mix. Post fader, the compressed signal drops as you turn the main signal down, which keeps the blend balanced.
Conclusion
Overall, parallel compression is a great tool for adding depth and character to your mix. The technique can work in a variety of ways, from adding warmth to drums and guitar tracks, to creating a more dynamic vocal sound.
With a little experimentation, anyone can master parallel compression and take their mixes to the next level. Remember to use it sparingly and always trust your ears. Happy mixing!
For more background, see Parallel compression on Wikipedia. You may also like our guide: compressing just the kick drum.