Categories
Archive

Pultec Eq Tips With Acustica Audios Purple

Acustica Audio’s Purple is a Pultec-style EQ plugin. It offers several tips for using the plugin effectively./ Acustica Audio’s Purple is a powerful Pultec-style EQ plugin that often intimidates new users.

The plugin has a complex interface, but it offers exceptional tonal shaping capabilities once you understand how to use it. This guide will explore several useful tips for getting the most out of the Purple EQ plugin. We’ll discuss which controls to use and how to use them, as well as some creative applications for the plugin.

Whether you are a seasoned audio engineer or just starting, the tips in this guide will help you unlock the full power of the Acustica Audio Purple plugin.

Pultec Eq Tips With Acustica Audios Purple

Credit: www.youtube.com

Introduction To Pultec Eq And Acustica Audio’s Purple

Discover the power of Pultec EQ combined with the Acustica Audio’s Purple plugin for an exceptional audio mixing experience. With Pultec EQ Tips, you can enhance your sound and achieve professional-grade quality without any hassle.

Pultec Equalizers have been loved by music producers for over half a century and remain popular today due to their unique sweeping filters, rich harmonics, and musical character. Acustica Audio, a company known for their cutting-edge software plugins, offers a plugin emulation of the Pultec EQ, called the Purple. This plugin has received widespread praise from audio engineers and music producers for accurately replicating the tonal characteristics of the original hardware Pultec EQs. In this post, we will explore the history of the Pultec EQ, and provide an overview of Acustica Audio’s Purple plugin.

Brief History Of Pultec Eq

The Pultec EQ was first introduced in the 1950s by the Pultec company. It was widely used in recording studios, mainly for shaping the sound of snare drums, kick drums, bass guitars, and vocals. The Pultec EQ operates differently from traditional EQs and relies on passive filters that add harmonics, thicken the sound, and add depth and dimension to the audio. The Pultec EQ became famous for its unique ‘low-end trick,’ which boosted and cut the low frequencies simultaneously, providing a punchy and tight bottom end. In the 1970s, the production of Pultec EQs ceased, but existing units remain highly sought after by music producers and engineers.

Overview Of Acustica Audio’s Purple Plugin

Acustica Audio’s Purple plugin is a software emulation of the Pultec EQ. The plugin models three versions of the original Pultec EQ hardware, including the MEQ-5, EQP-1A and HLF-3C. Purple convincingly replicates the unique musicality of the original hardware by modeling the distortion, saturation, and phase distortion characteristic of the vintage Pultec EQs. It is designed to work equally well on individual tracks or on a mix bus, and provides complete control over the low-end and high-end frequencies. The intuitive and simple-to-use interface is packed with features such as a mix knob, frequency-dependent Q, and an output stage with smooth and rich analog-style saturation. The Purple plugin has received rave reviews from music producers, engineers, and mastering experts for its warm and natural sound, and its authentic emulation of the Pultec EQ hardware.

Using Pultec Eq In Mixing

Achieving a top-notch mix involves using the right tools, and a Pultec EQ certainly fits the bill. By implementing Acustica Audio’s Purple EQ, tips and tricks can be employed to create an even more impressive and polished sound.

Using Pultec EQ in Mixing can be a game-changer when it comes to adding character, warmth, and clarity to your mix. Pultec EQs are known for their unique boost/cut filters and enhancing midrange and high-frequency spectrum with shelf filters. When combined with Acustica Audios Purple Plug-in, it can offer endless sonic possibilities.

Balancing Low-end With Pultec’s Unique Boost/cut Filters

Pultec EQs are popular for their “Trick” of boosting and cutting the same frequency range at the same time. This “Trick” enables you to balance and tighten up low-end that lacks punch and clarity. You can use Pultec’s low-frequency boost to add weight to the bass without muddying up the mix. This will help the bass to sit well with other instruments in the mix. Pultec’s unique boost and cut filters work differently than conventional EQ filters, which make it more effective in fixing low-end issues.

Enhancing Midrange With Pultec’s Presence Boost

Midrange frequencies are where vocals, guitars, and other critical instruments compete for space. That’s why Pultec EQ’s Presence Boost feature comes in handy. Presence Boost provides a subtle boost to midrange frequencies that can add richness, warmth, and clarity to your instruments. When you mix this with Acustica Audios Purple plug-in, you have an incredibly smooth, warm, and dynamic midrange that cuts through the mix effortlessly.

Adding Air And Sparkle To High Frequencies With Pultec’s Shelf Filters

Shelf filters are an excellent tool to add air and sparkle to high frequencies. Pultec EQ’s shelf filter works differently than other EQs, which adds subtle saturation and harmonic distortion to the sound. This subtle saturation enhances the high frequency by adding depth and dimension to your mix. The Pultec “Trick” of boosting and cutting the same frequency range comes in handy when it comes to Shelf Filters as well. You can use the high frequency cut of a Pultec EQ to tame any harshness or sibilance in the mix.

Acustica Audio’s Purple Plugin

Acustica Audio’s Purple plugin is a popular Pultec EQ tool that offers powerful tips to enhance your audio mixing experience. With its unique combination of vintage and modern elements, Purple can produce rich and warm tones that will impress even the toughest audio critics.

Acustica Audio’s Purple Plugin is a powerful tool for audio engineers and music producers. It is an emulation of the classic Pultec EQ that is highly popular among mixing professionals. The Purple plugin is designed to give you the vintage sound of the Pultec EQ with modern features. In this blog post, we will delve into a detailed review of Purple’s features, comparing it with other Pultec emulations and sharing tips and tricks for using Purple in your mixes.

Detailed Review Of Purple’s Features

Acustica Audio’s Purple Plugin comes with a plethora of features that enable users to get the best out of their audio mixing experience. From its high-quality filters to the harmonic distortion options, Purple’s features can help you achieve a warm and vintage sound similar to that of the Pultec EQ. Additionally, its intuitive user interface allows you to tweak and adjust different parameters easily and efficiently. With the Purple plugin, you are guaranteed the flexibility and improved sonic quality needed for a modern-day mix.

Comparing Purple With Other Pultec Emulations

When it comes to Pultec emulations, Acustica Audio’s Purple Plugin stands out from the rest. It packs a powerful punch with its advanced features and unique approach to mixing. Compared to other Pultec EQ emulations, Purple allows for a more fine-grained and precise tweak, making it easier to master your tracks. Additionally, its harmonics engine gives a truly authentic analog sound that other emulations can’t match. With the Purple plugin, you get a level of accuracy and detail that is unmatched in the market.

Tips And Tricks For Using Purple In Your Mixes

To get the most out of the Acustica Audio’s Purple Plugin, you need to apply the right tips and tricks to your mixing process. One of the most important is to understand the harmonic distortion options. By understanding how they work, you can increase the warmth and richness of your tracks without causing any issues. You should also experiment with different gain settings and filter options to find the right balance for your tracks. Additionally, you can use Purple to create space and separation in your mixes, making each instrument or sound occupy a unique sonic space. By using these tips and tricks, you can take full advantage of what Purple has to offer and achieve amazing results with your mixes. In conclusion, Acustica Audio’s Purple Plugin is undoubtedly a top-class Pultec EQ emulation that provides a warm, vintage sound with modern features. Its advanced features, intuitive interface, and excellent sound quality make it a compelling addition to your mixing arsenal. By following the tips and tricks outlined above and fully exploiting Purple’s features, you can transform your mixes and achieve outstanding results.

Advanced Techniques

Learn advanced Pultec EQ tips and techniques using Acustica Audio’s Purple plugin. Explore new ways to enhance your audio with the top-notch quality and functionality of this powerful equalizer.

Using Pultec In Parallel Processing

A great way to add depth and warmth to your mix is by using the Pultec EQ in parallel processing. When using parallel processing, you duplicate your track and apply a different effect to each one before blending them back together. By using the Pultec EQ on one of the duplicated tracks and blending it with the original track, you can achieve a full and dynamic sound.

Applying Pultec On Individual Tracks Vs. Buses

When using the Pultec EQ, you have the option to apply it on individual tracks or buses. Applying the EQ on individual tracks can help bring out specific frequencies that may be lacking. However, if you are trying to create a unified sound for multiple tracks, applying the EQ to a bus can be more effective. This way, you can control the levels of all the individual tracks with a single EQ.

Mastering With Pultec Eq

The Pultec EQ can be particularly useful during mastering to add the finishing touches to your mix. When mastering, it is important to ensure that your mix sounds as clean and balanced as possible. Use the Pultec EQ to gently boost and cut the necessary frequencies to get a smooth and consistent sound. Additionally, when mastering, ensure that you are using the Pultec EQ subtly to avoid over-processing your tracks. In conclusion, the Pultec EQ offers various advanced techniques that can elevate your mix to the next level. With Acustica Audio’s Purple, you can take things even further and achieve a unique and dynamic sound. Use these advanced techniques to improve your mix and stand out from the crowd.

Pultec Eq Tips With Acustica Audios Purple

Credit: www.youtube.com

Frequently Asked Questions For Pultec Eq Tips With Acustica Audios Purple

What Is The Pultec Trick?

The Pultec trick is a technique used in audio production to enhance the sound of recordings. It involves using a combination of a Pultec Equalizer and a high-pass filter to add warmth and depth to the low end of a track while cutting out unwanted frequencies.

This technique is popular among engineers and producers in the music industry.

What Is The Pultec Best For?

The Pultec is best for boosting and attenuating frequencies, creating warmth and natural sound, and shaping tone. Its unique passive equalization design makes it a popular choice for mastering and mixing engineers in music production.

How Do You Use Pultec Eq On Vocals?

Using Pultec EQ on vocals involves boosting the low and high frequencies simultaneously, while cutting a small amount at the midrange. Start by adjusting the low frequency attenuator and the boost knob to add warmth and presence to the vocals.

Then, adjust the high frequency boost to add air and clarity. Finally, adjust the midrange cut to remove any harsh frequencies.

What Is The Use Of Pultec Eqp-1a?

The Pultec EQP-1A is a type of audio equalizer that is widely used to produce warm tonal qualities in recorded music. It is known for its unique design that allows for mid-range frequency adjustment and has been favored by many top producers and engineers in the music industry for decades.

Conclusion

To sum up, Acustica Audio’s Purple plugin is a powerful tool that can enhance your sonic creations with the classic Pultec EQ sound. By utilizing its advanced features and techniques, you can help to bring out the best in your mix, and create a cohesive and polished final product.

Whether you are a seasoned professional or a new musician on the scene, the Purple plugin is a fantastic addition to your toolkit. Don’t hesitate to give it a try and see what it can do for you!

Categories
Archive

Tips On How To Make Your Music Sound Better

Make your music sound better by working on your recording quality, mixing techniques, mastering process and adding creative effects. In today’s digital age, everyone can make music but making it sound professional and better than the rest is a difficult task.

We will discuss some tips and tricks that can help you take your music quality to the next level. Whether you are a beginner or an experienced music producer, these tips will teach you how to enhance your production skills.

It all comes down to one thing – you need to have a good ear for music. So let’s begin with how to improve your recording quality.

Choose The Right Software

If you want to make your music sound better, one of the most important things to do is to choose the right music production software. There are a variety of different types of software out there that can help you with this process, so it’s important to understand the differences and choose the one that is right for you.

Understand The Different Types Of Software

Before you can choose the right software for your music production needs, it’s important to understand the different types that are available.

Type of SoftwareDescription
DAWs (Digital Audio Workstations)These are the most common types of music production software. DAWs allow you to record, edit, and mix your music all in one place.
Virtual InstrumentsThese are software versions of traditional musical instruments. They can be used in your music production to add variety and depth to your tracks.
Effects PluginsThese are software plugins that can be added to your DAW to add various effects to your music, such as reverb, delay, and compression.

Research Music Production Software

Once you understand the different types of software available for music production, you’ll want to research different music production software options available to you. Here are a few popular options:

  • Ableton Live: This software is known for its live performance capabilities, but it can also be used in the studio for recording and production.
  • Pro Tools: A professional-grade DAW with powerful editing and mixing capabilities.
  • Logic Pro X: A popular choice among Mac users, with a wide range of virtual instruments and effects included.

Consider The Features Provided

When choosing your music production software, it’s important to consider the features that are provided. Here are a few key features to look for:

  1. Recording Capabilities: Make sure your software has the ability to record audio and MIDI.
  2. Editing Capabilities: Look for software that allows for easy editing of your recordings.
  3. Mixing Capabilities: The ability to mix your tracks is crucial, so be sure your software has adequate mixing capabilities.
  4. Virtual Instruments: Consider the number and variety of virtual instruments that come with the software.
  5. Effects Plugins: Look for software that includes a variety of effects plugins.

By choosing the right music production software and understanding its features, you can take your music to the next level and ensure it sounds better than ever before.

Invest In Quality Equipment

Improving the quality of your music involves investing in quality equipment. Quality equipment not only enhances the sound of the music but also eliminates any background noise, resulting in a clean recording. With professional tools at your disposal, music recording can become an enjoyable and rewarding experience.

Good music needs quality equipment to sound great. No matter how talented you are as a musician, without the right equipment, your music will not be able to achieve its full potential. Investing in quality equipment is a must if you want to produce great music that people will enjoy listening to. In this post, we will explore some tips on how to make your music sound better by investing in quality equipment.

Get Good Quality Headphones

Good quality headphones are a must if you want to produce high-quality music. Headphones allow you to hear every little detail in your music, which is essential for mixing and mastering your tracks. When choosing headphones, look for a pair that is comfortable to wear for long periods and has a flat frequency response. A flat frequency response means that you can hear all the frequencies in your music equally, giving you the most accurate representation of your tracks.

Invest In Monitors And Speakers

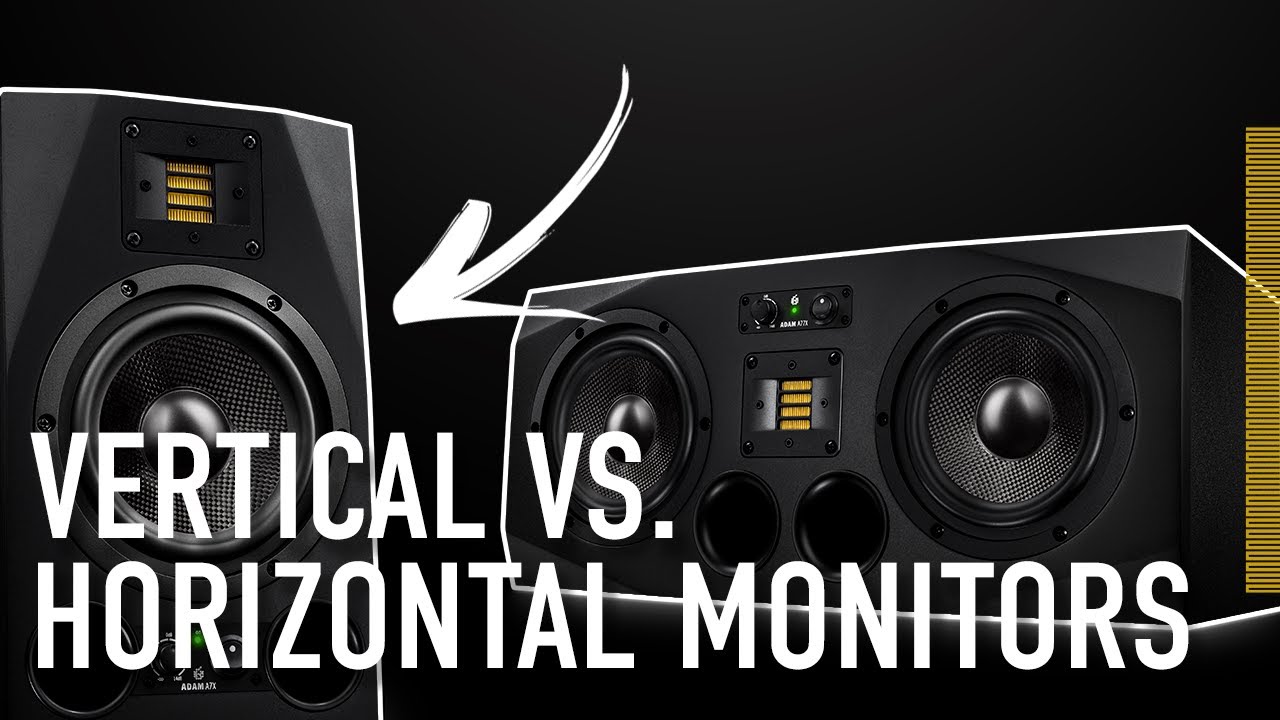
Monitors and speakers are essential tools for any music producer or musician. They allow you to hear your music in a way that headphones can’t. Monitors and speakers give you a better sense of the overall sound of your music and help you make more informed decisions when mixing and mastering your tracks. When choosing monitors and speakers, look for a pair that has a neutral sound and a flat frequency response. This will allow you to hear your music accurately and make the necessary adjustments.

Consider Audio Interfaces

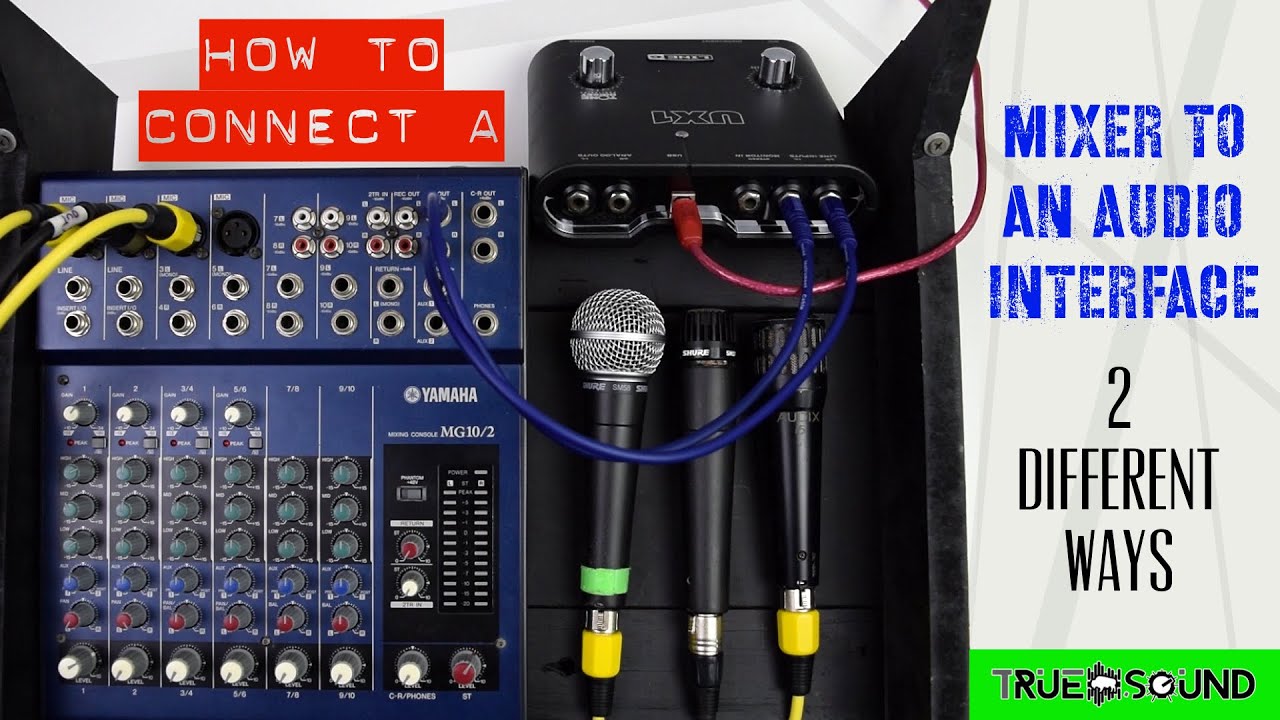
An audio interface is a device that connects your instruments or microphones to your computer. It is a crucial piece of equipment for recording music, as it helps ensure that the audio quality is as high as possible. When choosing an audio interface, look for one that has good preamps, high-quality converters and has low latency. A good audio interface will help you capture the nuances of your music and help you achieve a better mix. In conclusion, investing in quality equipment is a must if you want to make your music sound better. Good quality headphones, monitors and speakers, and audio interfaces can make a significant difference in the quality of your music. Remember to choose equipment that has a neutral sound and a flat frequency response, and always go for the best quality you can afford. With the right tools, you can produce high-quality music that people will love to listen to.

Understand Sound Mixing Techniques

Understanding sound mixing techniques is one of the key elements to make your music sound better. Sound mixing is a process where multiple audio tracks are combined to create a wholesome and cohesive sound. While each audio track may sound excellent on its own, combining them requires some knowledge of sound mixing techniques to ensure that the audio sounds balanced. In this post, we will look at some essential sound mixing techniques that every music producer should know.

Equalization

Equalization, or EQ, is the process of adjusting the balance between different frequency components within an audio signal. EQ can help to clean up a mix and make it sound more polished. Use EQ to boost or cut specific frequencies in your mix and create space for each instrument to stand out. It is crucial to note that excessive EQing can lead to a hollow-sounding mix, so always use it in moderation.

Compression

Compression is the process of reducing the dynamic range of an audio signal. Compression can help to make quiet sounds louder and loud sounds quieter, resulting in a more balanced and consistent sound. Use compression to smooth out vocals and control the attack and release of drums and other instruments. However, it’s important to use compression with caution since too much compression can make the mix sound flat and lifeless.

Reverb

Reverb is the process of adding artificial room sound to the audio. It can create a sense of space and depth in the mix and help to blend the sounds together. Use reverb to create a sense of cohesion in your mix and give the sense that all the instruments are played in a single space. However, be careful not to overdo it as excessive reverb can make the mix sound muddy and unclear.

Panning

Panning is the process of positioning audio signals in the stereo field. Use panning to create a sense of space and width in the mix. For example, you can pan the guitar to the left speaker and the drums to the right to create a more dynamic mix. However, be sure to use panning judiciously since excessive panning can lead to an unbalanced sound.

Volume

Volume balancing is the process of adjusting the volume levels of different instruments in the mix. Use volume to ensure that each instrument is audible and balanced within the mix. Quiet instruments should be louder, and loud instruments should be quieter. Remember to mix at a comfortable volume, and always check the mix at different volumes to ensure that it sounds good in different environments.

Tips On How To Make Your Music Sound Better

Credit: m.youtube.com

Improve Your Recording Environment

Enhancing your recording environment can make a huge difference in the quality of your music. By minimizing unwanted sounds and maximizing sound diffusion, you can achieve a cleaner and more professional sound. Some tips on achieving this include eliminating background noise, using acoustic panels and carpeting, and investing in high-quality recording equipment.

Improving your recording environment can dramatically enhance the quality of your music and take it to the next level. A well-designed studio can help in reducing noise, improving acoustics, and provide an isolated space for recording. In this section, we’ll be discussing some tips on how you can create an ideal recording environment for your music.

Choose A Quiet And Isolated Room

The first step in creating a perfect recording environment is to select a quiet and isolated room. The room you choose should be free of any external noise or sound that could disrupt your recording process. Selecting a room with minimal ambient noise from outside is essential to ensure the recording picks up the right sound.

Control Sound Reflections And Absorption

Once you have selected the room, the next step is to manage sound reflections and absorption. Unwanted sound reflections can lead to audio distortion and reduce the quality of your recording. Consider using materials that aid in absorbing sound like acoustic foam and fiberglass to control sound absorption. Also, adding sound diffusers like bookshelves, diffuser panels, or furniture can help break up reflections and improve your audio clarity.

Consider Room Treatment Options

An alternative option can be to treat the room itself with acoustic materials. Treatment options range from simple to complex and can include wall and ceiling panels, bass traps, and diffusers. Room treatment efforts should depend on the kind of music you are recording and the room’s size. A proper, well-treated room can give you a professional-grade recording studio feel at home. In conclusion, having an ideal recording environment is critical if you want your music to sound better. Choosing a quiet and isolated room, managing sound reflections, and treating the room with acoustic materials can make all the difference to your recording quality. Keep these tips in mind during your next recording session and enjoy a more polished and refined outcome.

Focus On Sound Design

Achieving great sound design is one of the keys to making your music stand out. A few tips to make your music sound better include using EQ to balance frequencies, experimenting with different effects, and layering sounds for depth and texture.

Music that sounds “good” is subjective and can vary depending on the individual’s preference. However, there are ways to make your music sound better by focusing on sound design. Sound design involves creating and manipulating sounds to fit the specific needs of a song. Here are some tips to help take your music to the next level.

Create Unique Sounds

One of the best ways to make your music stand out is by creating unique sounds that listeners haven’t heard before. This can be done by using uncommon instruments, manipulating samples, or creating entirely new sounds using virtual synthesizers. Experiment with different effects like reverb, delay, and modulation to achieve your desired result. Identify the key elements of your song and use them as a base for creating unique sounds that will create an impact.

Layer Sounds For Depth

Adding layers to your sounds can add depth to your music, making it sound fuller and more interesting. Layering involves stacking multiple sounds on top of each other to create a complex texture. This can be done by using similar sounds with different variations to add a sense of harmony. Combining different sounds and frequency ranges can help create wider sounds and emphasize certain parts of the song.

Consider Sound Modulation

Sound modulation is the process of altering the sound waves of a source to change its tonal qualities. This can be done with filters or effects such as chorus, flanger, and phaser. Modulating sounds can make them sound more interesting and dynamic. By incorporating sound modulation, one can change the characteristics of the sound and play with frequencies. It can make the song sound more vibrant and engaging. In conclusion, focusing on sound design is crucial in making your music sound better. With these tips to create unique sounds, layer multiple sounds, and to use sound modulation effects and techniques, you can improve the quality of your music and make it stand out. Keep in mind that the key to a good sound design is to let the music guide you, experiment with different techniques and effects, and stay creative.

Tips On How To Make Your Music Sound Better

Credit: www.audiophileon.com

Editing And Post-production Techniques

Improve the quality of your music by utilizing effective editing and post-production techniques. These tips include adjusting volume levels, adding harmonies or backing vocals, incorporating creative effects, and mastering for a polished final product. With careful attention to detail and a keen ear, you can create professional-sounding music that stands out from the crowd.

Editing and post-production are essential steps in producing high-quality music. These techniques involve removing unwanted background noise, enhancing sound quality, and creating smooth transitions between tracks. This section will discuss the most effective editing and post-production techniques to improve the overall sound quality of your music.

Get Rid Of Background Noise

Background noise can be a nuisance and can ruin the quality of your music. One of the best ways to get rid of background noise is to use noise reduction tools available in your software. You can also reduce background noise by recording in a soundproof room or using a noise gate. By eliminating unwanted sounds, you can give your music a clean and professional finish.

Quantize Your Tracks

Quantizing is a process that aligns the timing of musical notes with a set grid. It is an effective way to enhance the rhythm and groove of your music. Quantizing can be done manually or by using software that automatically adjusts the timing of each note. This technique ensures that all the notes in your music are in sync, giving your tracks a polished and professional sound.

Use Automations Effectively

Automation is a powerful tool that can add dynamics and expressiveness to your music. You can use automation to adjust various parameters such as volume, panning, and filters over time. By automating these parameters, you can create interesting and dynamic changes in your music. However, it’s important to use automation in moderation, as too much can lead to a cluttered sound.

Create Proper Transitions

Smooth transitions between tracks are essential for producing a seamless listening experience. To create proper transitions, you should focus on the arrangement of your tracks. You can use techniques such as fade-ins, fade-outs, and crossfades to create smooth transitions between tracks. Ensure that each track flows seamlessly into the next to keep your listener engaged and ready for what’s next. In conclusion, editing and post-production are crucial steps in creating high-quality music. By getting rid of unwanted background noise, quantizing your tracks, using automation effectively, and creating proper transitions, you can enhance the overall sound quality of your tracks. With practice, these techniques will become second nature, and you’ll achieve professional results that will help your music stand out.

Mastering Techniques

Improve the sound quality of your music by mastering techniques such as EQ, compression, and reverb. Experiment with different effects and change the settings until you achieve the desired results. Don’t be afraid to try new things and trust your ears to guide you in your musical journey.

When it comes to music production, mastering is one of the most crucial aspects that can help to make your music sound better. Mastering involves the use of various techniques to refine and enhance the final mix of your music before it is ready for release and distribution. In this blog post, we will discuss some mastering techniques that you can utilize to make your music sound amazing.

Get Your Track Ready For Release Or Distribution

Before you jump into mastering your music, it is essential to understand that your track must be ready for release or distribution. This means that you have completed the recording and mixing phase and have a final mix that you are happy with. It is crucial to ensure that your mix has enough headroom to accommodate the mastering process.

Equalization

Equalization or EQ is a crucial mastering technique that helps to balance the frequencies in your mix. EQ can enhance the clarity of different instruments and make them stand out. It is essential to use EQ subtly to avoid over-processing which may result in an unnatural sound. Highpass filters can be used to remove the low-end rumble, whereas a low-pass filter can be used to get rid of high-frequency noise.

Compression

Compression is another critical technique that can greatly enhance your music. Compression allows you to even out the dynamics of your mix, making it sound more polished and professional. Use compression subtly to avoid over-processing which can suck the life out of your music.

Limiting

Limiting is used to increase the volume of your mix and make it sound louder without causing distortion. It is essential to use limiting with caution as over-limiting can result in an unnatural sound. Ensure you do not overdo it as dynamics are essential in music.

Stereo Widening

Stereo widening can enhance the stereo width of your mix and make it sound more spacious. Use this technique to make a mono instrument sound wider without panning it to the left or right. However, use this technique with caution as overusing it can lead to a phase cancellation which results in an unnatural sound. In conclusion, mastering techniques are essential in making your music sound better. By understanding and utilizing the techniques mentioned, you can enhance the balance, clarity, dynamics, loudness, and stereo width of your mix. Remember, subtlety is key to avoid the over-processing which can transform your music into an unnatural sound.

Tips On How To Make Your Music Sound Better

Credit: www.renegadeproducer.com

Collaborate With Other Musicians And Producers

Collaborating with other musicians and producers can greatly enhance the quality of your music. From sharing ideas and techniques to learning from each other, collaborating allows for a more dynamic and comprehensive sound.

Collaborating with other musicians and producers can significantly enhance the quality of your music. Feedback from other people, learning new techniques and ideas, and networking are some of the benefits of collaborating with fellow musicians and producers.

Get Feedback From Other People

Receiving feedback from other musicians and producers can help you identify areas in your music that need improvement. Feedback given by music enthusiasts is particularly valuable because it helps you understand what your audience expects from your music. Take criticism constructively and work on improving your weaknesses.

Learn New Techniques And Ideas

Collaborating with other musicians and producers exposes you to new techniques and approaches to music production. You can learn from their skills and expertise, and expand your knowledge in music production. You can also exchange ideas and experiment with different styles, which can result in innovative music.

Network And Build Relationships

When you collaborate with other musicians and producers, you build long-lasting relationships that can benefit you in your music career. Networking with other music professionals provides opportunities for partnerships and gigs. You can also learn about new music trends and opportunities in the music industry. Collaborating with other musicians and producers is a sure way to improve the quality of your music. You can get valuable feedback, learn new techniques and ideas, and build lasting relationships. Don’t be afraid to collaborate with others and expand your musical horizons.

Frequently Asked Questions For Tips On How To Make Your Music Sound Better

How Can I Make My Song Good?

To make a good song, you should focus on creating catchy melodies and memorable lyrics. Find inspiration from your personal experiences or current events. Collaborate with other musicians and constantly seek feedback to improve. Record and produce the song with quality equipment and hire professionals if necessary.

Finally, promote your song through social media and live performances to build an audience.

How Can I Improve My Music Making?

To improve your music making, you should practice regularly, study music theory, listen to a wide variety of music, collaborate with other musicians, and seek feedback from both peers and professionals. Consistent effort and seeking improvement through experience and education will help you hone your skills and create better music.

How Can I Improve The Quality Of A Song?

To improve the quality of a song, consider refining the lyrics, melody, and arrangement. Ensure the song is polished, well-recorded, and mixed professionally. Consider collaborating with experienced musicians and producers to help bring your vision to life. Lastly, always take feedback from listeners and incorporate it to continuously improve your music.

How Can I Make My Music Sound More Professional?

To make your music sound more professional, ensure that all instruments and vocals are properly recorded and mixed. Use quality equipment and plugins for mixing and mastering. Pay close attention to the levels, EQ, compression, and reverb. Also, make sure your music is properly mastered for release.

Hire a professional if needed.

Conclusion

To truly make your music stand out, it’s important to focus on enhancing the quality of your sound. Whether you invest in high-quality equipment or simply fine-tune your mixing and mastering techniques, there are plenty of ways to elevate your music to the next level.

By keeping these tips in mind and taking the time to perfect your craft, you can create truly extraordinary music that captivates and inspires your listeners. Remember to always stay curious, experiment, and keep pushing yourself to grow and develop as an artist.

Categories
Archive

The Best Tape Stop Plugin For Studio One 4

“The best tape stop plugin for Studio One 4 is the HalfTime plugin by Cableguys. It offers smooth and glitch-free tape stop effects with a variety of customization options.”

Studio One 4 is an excellent digital audio workstation that offers a range of features and plugins. However, if you’re looking to add tape stop effects to your tracks, you might need a specialized plugin for that purpose. Tape stop effects add a unique touch to your music and can be used to introduce tension and excitement to your tracks.

We will discuss the best tape stop plugin for Studio One 4. We’ll look at its features, its pros and cons, and how it compares to other tape stop plugins available in the market. Whether you’re a seasoned producer or just starting, you’ll find this guide helpful in choosing the best tape stop plugin for your Studio One 4 projects.

The Best Tape Stop Plugin For Studio One 4

Credit: bedroomproducersblog.com

Top Tape Stop Plugins For Studio One 4

Discover the top tape stop plugins for Studio One 4. Enhance your music productions with the best tape stop effect plugin that adds a sense of nostalgia to your tracks. Choose from a range of options and elevate your music to the next level.

Studio One 4 is an excellent digital audio workstation that offers multiple features for music production and sound engineering. With the help of various plugins, users can create unique sound effects that make their music stand out from the rest. One such effect that has become increasingly popular is the tape stop effect. If you’re looking for the best tape stop plugin to use on Studio One 4, here are the top five options:

1. Halftime

HalfTime is a popular tape stop plugin that’s ideal for producing trap, R&B, and hip-hop beats. It’s known for its ability to create instant half-speed effects that can help add depth and texture to your music. The plugin is easy to use and comes with a range of parameters that allow users to fine-tune the effect to suit their needs. With HalfTime, you can create everything from subtle tape stop effects to more noticeable ones that can add a unique twist to your tracks.

2. Cableguys Timeshaper 2

Cableguys TimeShaper 2 is a versatile tape stop plugin that offers more than just tape stop effects. It’s ideal for producing electronic music and comes loaded with various features like stutter, reverse, and gate effects. Its interface is easy to use and allows users to create complex patterns of tape stop effects that can add a unique edge to their tracks. Cableguys TimeShaper 2 is perfect for producers looking to experiment with different sound textures and effects.

3. Dblue Tapestop

dBlue TapeStop is a free tape stop plugin that’s compatible with Studio One 4. It’s a simple plugin that’s easy to use and comes with a range of parameters that allow users to control the depth and length of the tape stop effect. The plugin is perfect for creating quick and easy tape stop effects that can help add a unique twist to your tracks.

4. Soundtoys Panman

Soundtoys PanMan is another versatile plugin that offers more than just tape stop effects. It’s ideal for producing electronic music and is known for its advanced panning effects. The plugin offers multiple modes that allow users to create complex tape stop patterns that can add a unique texture to their tracks. Soundtoys PanMan is perfect for producers looking to create spatially dynamic tracks with a touch of tape stop effects.

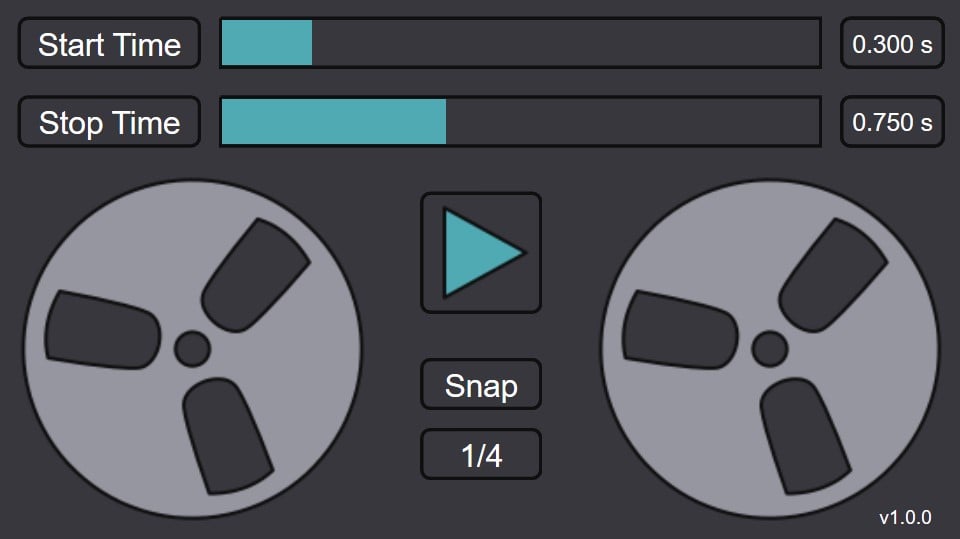
5. Kilohearts Tape Stop

Kilohearts Tape Stop is a simple plugin that’s perfect for creating quick and easy tape stop effects. It’s ideal for producers looking for a plugin that’s easy to use and offers multiple parameters to control the depth and length of the effect. Kilohearts Tape Stop is perfect for adding a unique texture to your tracks and can create everything from subtle tape stop effects to more noticeable ones that can make your music stand out. With these top tape stop plugins for Studio One 4, you can create unique sound textures that can help your music stand out from the crowd. Whether you’re looking for a simple plugin to create quick and easy tape stop effects or a more advanced one that offers a range of features, these top pickings can help take your music to the next level.

The Best Tape Stop Plugin For Studio One 4

Credit: mixandmastermysong.com

Halftime

HalfTime is a popular tape stop plugin that works seamlessly with Studio One 4, providing a unique way of creatively manipulating your audio tracks. Its intuitive design and high-quality features make it the go-to plugin for music production professionals and enthusiasts alike.

HalfTime is a plugin that provides time-altering effects to audio recordings. The plugin is popular for its ability to create halftime and reverse effects usually heard in Trap, Hip-hop, and Electronic Dance Music. If you’re a Studio One 4 user looking for an excellent tape stop plugin, you may want to check out HalfTime. In this article, we’ll take a closer look at the features, pros, and cons of HalfTime and explore how to use it in your Studio One 4 productions.

What Is Halftime?

HalfTime is a plugin from Cableguys that creates creative time-based effects in your audio recordings. The plugin is compatible with various digital audio workstations, including Studio One 4 and supports different types of input signals. HalfTime works by slowing down and stretching out your audio in real-time, making it easier to accent certain moments in your music composition.

Features Of Halftime

The HalfTime plugin boasts of several features that make it an excellent time-stretching and tape stop plugin for Studio One 4 users. Some of the standout features include:

  • Real-time audio processing
  • Ability to time-stretch and slow down audio by up to 50%
  • Built-in filters, LFO, and modulation controls
  • Works with different types of inputs (monophonic, polyphonic, etc.)
  • Supports automation and MIDI learning

Pros And Cons Of Halftime

Like any other plugin, HalfTime has its fair share of pros and cons. Here are some of them: Pros:

  • Easy to use and set up
  • Works with different types of input signals
  • Works well with other plugins and effects
  • High-quality audio processing with little to no artifacts
  • Offers creative sound design options for producers and music composers

Cons:

  • Can be CPU-intensive and slow down your computer
  • Not suitable for heavy time-stretching
  • May distort audio if used excessively
  • May take some time to get used to the controls

How To Use Halftime In Studio One 4

Using HalfTime in Studio One 4 is relatively straightforward. Here’s a step-by-step guide:

  1. Insert HalfTime as a plugin in your Studio One 4 session
  2. Select the audio track that you want to apply the time-stretching effect to
  3. Choose your preferred time-stretching algorithm from the plugin window (e.g., Slow, 2x, Reverse, etc.)
  4. Use the built-in LFO and modulation controls to add movement to your audio
  5. Review your audio in real-time to preview the effect before making the changes permanent.
  6. Automate or assign MIDI controls to control the plugin parameters as desired.

In conclusion, HalfTime is a fantastic tape stop plugin that offers creative time-stretching options for music producers and composers using Studio One 4. The plugin can add a unique sound design to your music productions and help you achieve that reverse or halftime effect with ease. With its easy-to-use controls and high-quality audio processing, HalfTime is undoubtedly one of the best tape stop plugins for Studio One 4 users.

Cableguys Timeshaper 2

Cableguys TimeShaper 2 is the ultimate tape stop plugin for Studio One 4. With its advanced features, it allows you to create unique and creative sounds by manipulating time and pitch in real-time. Its intuitive interface makes it easy to use, even for beginners.

Cableguys TimeShaper 2: The Best Tape Stop Plugin for Studio One 4 If you’re looking to add a creative effect to your music production, a tape stop plugin is a great choice. This effect is commonly used in electronic and hip hop music to create a sudden pause or slow-down in the music’s rhythm. There are many tape stop plugins available on the market, but Cableguys TimeShaper 2 stands out as one of the best options available for Studio One 4. Let’s take a closer look at this plugin and its features.

What Is Timeshaper 2?

TimeShaper 2 is a powerful audio effect plugin that allows you to bend, warp, and shape any audio signal in creative ways. It lets you combine multiple effects such as stutter, reverse, and glitch to create unique and out-of-the-box sound effects. Its user-friendly interface allows easy manipulation of sounds in real-time, and its advanced algorithms ensure smooth and seamless processing.

Features Of Timeshaper 2

TimeShaper 2 comes loaded with an array of features that make it a versatile and indispensable tool for music producers. Some of its notable features include:

  • Ability to apply various effects such as stutter, reverse, tape stop, and glitch.
  • Smooth real-time processing with no latency.
  • Precision controls for adjusting the modulation and timing parameters.
  • Snapshots feature to capture and recall your favorite effects settings.
  • Resizable and customizable interface for easy workflow management.

Pros And Cons Of Timeshaper 2

As great as this plugin is, there are also a few advantages and disadvantages to consider before purchasing. Pros:

  • Easy to use, with a user-friendly interface.
  • Offers a wide range of effects and modulation options.
  • Seamless real-time processing with no lag.
  • Resizable and customizable interface for easy workflow management.

Cons:

  • There is no free trial version available.
  • It may not be ideal for beginners who are still learning how to use audio effects.

How To Use Timeshaper 2 In Studio One 4

Using TimeShaper 2 in Studio One 4 is easy and straightforward. Here’s a quick guide:

  1. Open Studio One 4 and create a new audio track.
  2. On the track, add an instance of TimeShaper 2 plugin.
  3. Select the desired preset or manually adjust the effect parameters on the plugin interface.
  4. Play the track and listen to the effect in real-time.
  5. If necessary, make further adjustments to the effect settings to get the desired sound.

In conclusion, Cableguys TimeShaper 2 is an excellent tape stop plugin that offers a range of creative effects and easy-to-use interface. If you’re a music producer looking to add some unique creative flair to your music, then TimeShaper 2 is a plugin you should definitely consider.

Dblue Tapestop

DBlue TapeStop is the ultimate tape stop plugin for Studio One 4. It allows you to create that classic tape stop effect with a variety of different controls and parameters, giving you full creative control over your sound.

As a music producer, you may be familiar with the technique of using tape stops to create dramatic pauses or sudden shifts in your music. Luckily, with the use of plugins, achieving this effect has become much simpler than physically manipulating tape machines. One popular plugin that is frequently used for this purpose is dBlue TapeStop. In this article, we will discuss what dBlue TapeStop is, its features, pros and cons, and how to use it in Studio One 4.

What Is Dblue Tapestop?

dBlue TapeStop is a free VST plugin that simulates the effect of a stop in tape playback. This plugin is created by Illformed, the same software company that developed the popular glitch effect plugin, Glitch 2. TapeStop is a very simple plugin that can be used to create a range of effects from a simple slowdown to a complete halt in playback.

Features Of Dblue Tapestop

dBlue TapeStop is a simplistic plugin with only a handful of features. Some of the most noteworthy features of this plugin include:

  • Available as a free download
  • Easy to install on your DAW
  • Can be used on any track or effect within a project
  • Simple interface consisting of basic parameters like slowdown and time

Pros And Cons Of Dblue Tapestop

Like any plugin, dBlue TapeStop has its fair share of pros and cons. Some of the most notable pros and cons include:

ProsCons
Free to downloadEasy to useCreates realistic tape stop effectsLight on CPU usageOnly available as a VST plugin (no AU or AAX version)May not be suitable for more complex effectsOnly a few parameters to work with

How To Use Dblue Tapestop In Studio One 4

Using dBlue TapeStop in Studio One 4 is a quick and easy process. Here’s a step-by-step guide to getting started:

  1. First, download the plugin from the Illformed website and install it onto your computer.
  2. In Studio One 4, create a new audio or instrument track and add the plugin to the track as an insert.
  3. Adjust the parameters of the plugin to fine-tune the effect to your liking.
  4. Automate the plugin’s parameters to create a tape stop effect at a specific moment in your track.
  5. Repeat the process on any other tracks or effects that require the same effect.

In conclusion, dBlue TapeStop is an excellent plugin for anyone looking to create tape stop effects in their music. Its user-friendly interface and simple parameters make it a great option for beginners, while its ability to create authentic tape stop effects makes it a must-have for more experienced producers.

Soundtoys Panman

Soundtoys has introduced the A-list tape stop plug-in, PanMan. Its smooth panning capabilities make it the best tape stop plug-in for Studio One 4. The plug-in allows users to create custom panning curves, set up LFOs, and much more.

Soundtoys PanMan is a tape stop plugin that is gaining popularity among music producers and sound engineers. Its unique features and user-friendly interface make it a reliable tool for manipulating audio files. If you are a Studio One 4 user looking for a powerful tape stop plugin, then Soundtoys PanMan might be the perfect fit. In this article, we will be discussing what Soundtoys PanMan is, its features, and its pros and cons. We will also be showing you how to use it in Studio One 4.

1. What Is Soundtoys Panman?

Soundtoys PanMan is a powerful tape stop plugin that is designed for manipulating audio files. Its primary function is to create rhythmic movement and panning effects on your tracks, giving your music a unique feel. This plugin is compatible with most digital audio workstations, including Studio One 4. Soundtoys PanMan features a user-friendly interface, making it easy for beginners and seasoned professionals to use.

2. Features Of Soundtoys Panman

Soundtoys PanMan comes with several features that make it a reliable tool for manipulating audio files. Some of these features include:

  • Auto Pan – This feature allows you to create auto-panning effects, making your tracks sound more dynamic.
  • Rhythmic Pan – With this feature, you can create rhythmic pan effects that sync with your track’s tempo.
  • Shuffle – This feature adds a shuffle effect to your panning, making your tracks sound more groove-oriented.
  • Preset Library – Soundtoys PanMan comes with a comprehensive preset library, allowing you to quickly select the right sound for your needs.

3. Pros And Cons Of Soundtoys Panman

Before investing in Soundtoys PanMan, it is essential to consider the pros and cons. This will help you make an informed decision. Here are the pros and cons of Soundtoys PanMan:

ProsCons
-user-friendly interface– Expensive compared to other tape stop plugins
-Comes with several features– May be overwhelming for beginners
-Compatible with most digital audio workstations

4. How To Use Soundtoys Panman In Studio One 4

Using Soundtoys PanMan in Studio One 4 is easy. Here is a quick guide to help you get started:

  1. Open Studio One 4 and create a new project
  2. Import the audio file you want to edit
  3. Go to the mixer window and select the track you want to edit
  4. Click on the insert effects button and select Soundtoys PanMan from the drop-down menu
  5. Adjust the settings to your liking
  6. Hit the play button to preview your changes
  7. Once you are satisfied with your edits, export the audio file

Soundtoys PanMan is a powerful tape stop plugin that is perfect for Studio One 4 users looking to manipulate audio files. With its unique features and user-friendly interface, this plugin is an excellent investment for any sound engineer or music producer.

The Best Tape Stop Plugin For Studio One 4

Credit: www.youtube.com

Kilohearts Tape Stop

If you are a music producer, you understand the value of a good tape stop plugin. Kilohearts Tape Stop is a plugin that simulates the effect created by slowing down the tape machine, stopping it, and then speeding it up again. This plugin is popular among music producers as it adds a creative touch to their music. This post will explore Kilohearts Tape Stop, its features, pros and cons, and how to use it in Studio One 4.

What Is Kilohearts Tape Stop?

Kilohearts Tape Stop is a plugin that recreates the iconic tape stop effect in music production. The plugin works by slowing down the audio, stopping it completely, and then speeding it up again. This creates a scratching or slowing down sound effect that adds a creative touch to music. The Kilohearts Tape Stop plugin is compatible with major DAWs such as Studio One 4, Ableton Live, FL Studio, Logic Pro X, and more.

Features Of Kilohearts Tape Stop

FeatureDescription
AutomationKilohearts Tape Stop can be automated to create dynamic tape stop effects
Customizable SettingsThe plugin has customizable settings such as volume, pitch, and speed
Multiple PresetsKilohearts Tape Stop has multiple presets to choose from for added convenience
MIDI ControlThe plugin can be controlled using a MIDI controller for ease of use

Pros And Cons Of Kilohearts Tape Stop

Pros

  • Ease of use
  • Compatible with major DAWs
  • Customizable settings
  • Multiple presets available

Cons

  • Only one tape stop effect available
  • May not be suitable for all music genres

How To Use Kilohearts Tape Stop In Studio One 4

Using Kilohearts Tape Stop in Studio One 4 is simple. Here are the steps:

  1. Open your audio track in Studio One 4
  2. Locate “Kilohearts Tape Stop” in the effects list and add it to your track
  3. Select a preset or customize the settings to create your desired tape stop effect
  4. Automate the plugin to create dynamic tape stop effects

Kilohearts Tape Stop is a versatile plugin that can add creativity and depth to your music. With customizable settings and multiple presets, it is worth considering for your next production.

Frequently Asked Questions For The Best Tape Stop Plugin For Studio One 4

How Do You Tape Stop In Studio One?

To stop recording in Studio One, simply hit the stop button on the transport bar or use the shortcut key “spacebar”. This will immediately stop recording and return the playback head to the beginning of the timeline.

What Plugin Type Does Studio One Use?

Studio One uses a variety of plugin types including VST, AU, and AAX.

How Do I Organize My Studio One Plugins?

To organize your Studio One plugins, you can create custom folders and subfolders within the plugin manager. You can categorize your plugins based on function, instrument type, or any other criteria that make sense to you. This way, you can quickly find the plugins you need and keep your workflow organized.

Does Studio One 5 Artist Support Vst?

Yes, Studio One 5 Artist supports VST plugins. This allows for a wide range of possibilities when it comes to adding effects and instruments to your projects.

Conclusion

After assessing various tape stop plugins for Studio One 4, we have determined that the Waves J37 Tape Saturation is the best option. Its perfect blend of warm vintage tones and modern convenience make it an ideal choice for any producer or engineer looking to add some character and depth to their mixes.

The intuitive interface and easy-to-use features make it accessible to beginners while still offering advanced options for more experienced users. With the Waves J37 Tape Saturation plugin, you can achieve that classic tape stop effect seamlessly and efficiently.

More in our Plugin guides.

Categories
Archive

Best Vst Plugins For Professional Vocal Mixing

The best VST plugins for professional vocal mixing include Autotune, Waves Tune, Melodyne, and Nectar. If you’re a mixing engineer or music producer looking for top-quality VST plugins to enhance your vocal mixing, you’re in the right place.

We’ll explore some of the best VST plugins that can take your vocal production to the next level. These plugins offer various features such as pitch correction, vocal tuning, EQ, compression, reverb, and other effects. We’ll provide an in-depth analysis of each plugin’s capabilities and compatibility with different DAWs.

So, whether you’re new to the game or an experienced professional, let’s find out which VST plugins can help you achieve the perfect vocal mix!

1. Understanding Vst Plugins

Looking for the best VST plugins for professional vocal mixing? Understanding VST plugins is crucial for enhancing the quality of your recordings. Check out plugins like Waves Tune Real-Time, Nectar 3, and Auto-Tune Pro for top-notch vocal processing.

What Are Vst Plugins?

VST (Virtual Studio Technology) plugins are software programs that aid in creating music by enhancing its sound quality. They work as an add-on program to digital audio workstations and allow users to adjust parameters of sound, add effects and improve overall sound quality.

Why Are They Important For Vocal Mixing?

When it comes to vocal mixing, VST plugins are extremely valuable. They help to enhance a singer’s voice, allowing them to sound more natural and polished. These plugins can be used to eliminate unwanted background noise, add reverberation or delay effects, enhance vocal harmonies and even give singer’s voices an entirely new texture. One of the primary benefits of using these plugins for vocal mixing is the amount of control they provide. They enable sound professionals to adjust specific parameters of a voice, edit, and manipulate them in real-time. In addition, these plugins can help save time and money in post-production as they eliminate the need for additional equipment, reducing production and release time. Here are some of the best VST plugins for professional vocal mixing:

Plugin NameManufacturer
Antares Auto-Tune ProAntares Audio Technologies
Izotope Nectar 3Izotope
Waves Tune Real-TimeWaves Audio
Melodyne 5 EditorCelemony
Slate Digital Virtual Mix Rack (VMR)Slate Digital

Overall, VST plugins are essential for professional vocal mixing as they offer a wide range of benefits including enhanced sound quality, improved production efficiency, and flexibility. The plugins listed above are just a few examples of the many powerful tools available to music professionals today.

2. Top Vst Plugins For Professional Vocal Mixing

Discover the top VST plugins for professional vocal mixing to achieve perfect tone, clarity, and depth for your vocals. Essential plugins includes Antares Autotune Pro, Waves Vocal Rider, and FabFilter Pro-Q2 among others.

When it comes to professional vocal mixing, having the right tools is crucial. And with the numerous VST plugins available, it can be overwhelming to decide which ones to use. In this section, we’ve narrowed down the top plugins that can help achieve the best sound for your vocals.

1. Waves Tune Real-time

Waves Tune Real-Time is a pitch correction plugin that can be used for both live performances and studio recordings. This plugin enables you to correct slight pitch inaccuracies in real-time with minimal latency. The intuitive interface and automatic pitch detection make it easy to use, and it also includes a variety of creative features like vibrato control and formant correction.

2. Antares Autotune Pro

Antares Autotune Pro is a well-known plugin for its pitch correction capability. It allows for precise pitch adjustments, including natural-sounding retuning and quick fixes for pitchy recordings. This plugin also has advanced features like the Humanize function, which adds natural variations to pitch correction for a more realistic sound.

3. Izotope Nectar 3

iZotope Nectar 3 is a comprehensive vocal processing plugin that includes everything from pitch correction to harmonization and compression. This plugin also has AI-powered features like Vocal Assistant, which analyzes the vocal track and suggests optimal settings for EQ, compression, and more. Nectar 3 also includes additional modules like Breath Control, which helps eliminate unwanted breaths in a recording.

4. Waves Vocal Rider

Waves Vocal Rider is an innovative plugin that automatically levels the vocal volume in a mix. This plugin helps reduce the need for manual volume automation and saves time during the mixing process. Vocal Rider enables the vocals to sit perfectly in the mix, making them clearer and more prominent without sacrificing the overall balance of the track.

5. Soundtoys Little Alterboy

Soundtoys Little Alterboy is a vocal transformer plugin that can create unique vocal effects. This plugin allows for manipulation of vocal formants, pitch shifting, and distortion to create new and interesting sounds. Little Alterboy is also versatile and can be used for subtle processing or extreme effects. Overall, these top VST plugins are the perfect addition to any professional vocal mixing toolkit. Incorporating these plugins into your workflow can result in a polished and professional sound for your vocal recordings.

3. Advantages Of Using Vst Plugins For Vocal Mixing

With the best VST plugins for professional vocal mixing, the advantages are many. These plugins offer the ability to enhance and refine vocal tracks, with features like compression, EQ, reverb, and more. They are easy to use, affordable, and can help take your music production to the next level.

Mixing vocals is a critical part of producing any music track. It’s the process of equalizing, compressing, and processing the vocals to create a final polished sound that will resonate with the audience. The good news is that with the advancement in technology, you don’t have to be a professional sound engineer to get great-sounding vocals. By using the right VST plugins for mixing vocals, you can achieve a high-quality, professional vocal mix that will enhance your music production tenfold. Below are three advantages of using VST plugins for vocal mixing.

1. Time-saving

One of the main advantages of using VST plugins for vocal mixing is the time it saves. Mixing vocals can be a repetitive and time-consuming task, especially if you’re working on multiple tracks. But using VST plugins can cut your mixing time by half or even more. With VST plugins, you don’t have to manually tweak each vocal channel’s settings or dial in the right EQ. Instead, you can choose a preset that fits your needs or adjust the plugin’s parameters to your desired setting. As a result, using VST plugins for vocal mixing can speed up your workflow and give you more time to focus on other creative aspects of your music production.

2. Consistency & Accuracy

Another benefit of using VST plugins for vocal mixing is the consistency and accuracy they provide. When you’re mixing vocals, it’s crucial to maintain consistency across different tracks and takes. With VST plugins, you can achieve this by using the same settings and plugins across your vocal channels. This creates a uniform sound and helps avoid any unwanted variation or inconsistency. Additionally, VST plugins provide accurate and precise controls that allow you to fine-tune your vocal mix to your exact liking. This accuracy is key to achieving a professional-sounding vocal mix that will stand out in the music industry.

3. Wide Range Of Options

VST plugins for vocal mixing offer an extensive range of options that you can use to create your desired vocal sound. There are VST plugins for every stage of the vocal mixing process, from basic compression to advanced equalization. This range of options enables you to experiment and discover new sounds and techniques that can help set your music production apart. Furthermore, some VST plugins come with unique features that can add character to your vocal mix, such as distortion, saturation, and delay effects. By using VST plugins for vocal mixing, you have the freedom to create a unique vocal sound that will make your music production stand out from the rest.

4. Cost-effective

VST plugins for vocal mixing are cost-effective compared to traditional mixing methods. You no longer have to invest in expensive hardware or hire a professional engineer to achieve a great-sounding vocal mix. Instead, you can purchase high-quality VST plugins for a reasonable price or even use free plugins available online. This accessibility and affordability mean that anyone can get a professional-sounding vocal mix with minimal investment, making VST plugins a cost-effective option for music producers of all levels. In conclusion, using the right VST plugins for vocal mixing can save you time and money while providing consistency, accuracy, and a wide range of options. These advantages make VST plugins the go-to option for any music producer looking to achieve a high-quality, professional-sounding vocal mix.

Best Vst Plugins For Professional Vocal Mixing

Credit: medium.com

4. How To Choose The Right Vst Plugins For Your Vocal Mix

Choosing the right VST plugins is crucial for achieving a professional vocal mix. Look for plugins that offer a variety of effects and tools such as compressors, equalizers, and reverbs, to help you achieve the desired sound. Use high-quality plugins that cater to your specific needs.

1. Identify Your Vocal Needs

Before you start searching for VST plugins, it’s important to identify your vocal needs. Do you need help with pitch correction, EQ, dynamics processing, or all of the above? Being clear about what you’re looking for can help you narrow down your search and find the right plugins for your vocal mix.

2. Consider Your Budget

Investing in high-quality VST plugins can make a significant difference in the quality of your vocal mix. However, it’s important to consider your budget before making any purchases. Some plugins can be quite expensive, while others are more affordable. Consider how much you’re willing to spend and look for plugins that offer the features you need within your budget.

3. Read Reviews & Try Demo Versions

Before purchasing any VST plugins, it’s important to do your research. Read reviews from other producers and engineers to get an idea of the plugin’s effectiveness. Many companies also offer demo versions of their plugins for you to try before you buy. Take advantage of these opportunities to ensure that the plugin you’re considering is the right fit for your vocal mix.

4. Compatibility With Your Digital Audio Workstation

When choosing VST plugins, it’s important to consider compatibility with your digital audio workstation (DAW). Some plugins may only work with certain DAWs, so make sure you check the compatibility before purchasing. Using plugins that are not compatible can lead to technical difficulties and poor performance, so it’s important to choose plugins that will work seamlessly with your DAW. In conclusion, choosing the right VST plugins for your vocal mix can make a significant difference in the quality of your final product. By identifying your vocal needs, considering your budget, reading reviews, and checking compatibility with your DAW, you can find the plugins that will take your vocal mix to the next level.

5. Tips For Using Vst Plugins Effectively In Vocal Mixing

Improve your vocal mixing skills with these five tips for effectively using VST plugins. Discover the best plugins for a professional sound, including those for compression, EQ, reverb, and more. With the right tools and techniques, you can take your vocal mixes to the next level.

If you are seeking to become a professional music producer, mastering the art of vocal mixing is paramount. Using VST plugins appropriately is a significant factor that affects the quality of your mix. In this section, we will discuss 5 tips for using VST plugins effectively in vocal mixing.

1. Keep It Simple

The first tip for using VST plugins efficiently is to maintain simplicity. You may feel tempted to use multiple plugins, but it is essential to keep your chain of plugins minimal. If you find your mix being cluttered with multiple plugins, it may be challenging to fix it later. Strive to use only the necessary plugins to achieve a balanced mix.

2. Practice And Experiment

To become a great vocal mixer, you must practice and experiment with VST plugins regularly. Understanding each plugin’s functionality enables you to achieve your desired effect more efficiently. Spend time understanding how each plugin will affect your vocal track. This will help you identify which plugins will work best for your mix, and also help you add value to your client’s projects.

3. Use Presets As A Starting Point

When working with VST plugins for vocal mixing, it is recommendable to use presets as a starting point. Using presets saves time and, in many cases, yields professional-sounding results. Start with a preset, then adjust the settings later to achieve your desired outcome. Make sure to tailor the preset to get the desired effect.

4. Don’t Overuse Autotune

Autotune is a plugin that’s commonly used in vocal mixing, but overusing it can ruin your mix. Use Autotune wisely and make sure that it sounds natural. Remember, not every note needs to be corrected, and use the effect sparingly. The goal should be for the effect to enhance the track, not to hide the flaws of the vocals. To sum up, using VST plugins efficiently requires an understanding of each plugin’s functionality and its effect on the mix. Keep all the tips mentioned above in mind, practice, and experiment with VST plugins, and you will achieve a professional sound in your vocal mixing.

Best Vst Plugins For Professional Vocal Mixing

Credit: www.productionmusiclive.com

Frequently Asked Questions Of Best Vst Plugins For Professional Vocal Mixing

What Plugins Do Professionals Use For Vocals?

Pro professionals, some of the most popular plugins used for vocals include Antares Auto-Tune, Waves Tune, Melodyne, and Soundtoys Little AlterBoy. These plugins offer features such as pitch correction, vocal tuning, and effects processing to enhance the sound of vocals in different ways.

How Do You Professionally Mix Vocals?

To professionally mix vocals, follow these tips: 1. Use EQ to boost or cut frequencies on individual tracks. 2. Apply compression for a more consistent vocal level. 3. Add effects like reverb, delay, and chorus to enhance the vocal. 4.

Use automation to adjust volume levels throughout the song. 5. Use a reference track to compare your mix to professional ones.

What Are The Best Plugins For Pro Tools Mixing?

Some of the best plugins for Pro Tools mixing include Waves SSL E-Channel, FabFilter Pro-Q 3, Soundtoys Little Plate, and UAD Pultec EQP-1A. These plugins add powerful functionality and help you achieve professional-sounding mixes.

What Plugins Do Rappers Use For Vocals?

Rappers use various plugins for their vocals, but the most common ones are Auto-Tune, Melodyne, Waves Tune, Nectar, and iZotope RX. These plugins help fix pitch issues, enhance vocals, and add different effects to vocals, giving them a unique sound.

Conclusion

After considering various VST plugins for professional vocal mixing, we have concluded that the best options are those that offer high-quality effects and intuitive interfaces. From the Waves CLA Vocals to the iZotope Nectar 3, each plugin has unique strengths that cater to specific vocal mixing needs.

Ultimately, the key to achieving professional vocal mixing is to experiment with different plugins and find the ones that work best for your specific projects and preferences. With these plugins in your arsenal, your vocal mixes are sure to sound amazing.

Categories
Archive

How To Get A Pro Sounding Vocal With Eq

To get a pro sounding vocal with EQ, use a high-pass filter to remove unwanted low-frequency noise and boost high-frequency content. Then use a parametric EQ to shape the vocal’s tone and space in the mix.

A great vocal can make or break a song, but achieving a pro-sounding vocal can be challenging, especially if you are just starting out. Fortunately, EQ can help you get there. EQ is a powerful tool that allows you to shape the tone of your vocal tracks and make them sound polished and professional.

However, it’s important to use EQ carefully and with intention, as it’s easy to overdo it and make your vocals sound unnatural or thin. We’ll go over some simple tips and techniques to help you get a pro sounding vocal with EQ.

How To Get A Pro Sounding Vocal With Eq

Credit: www.charlescleyn.com

Understanding Eq For Vocals

Achieving a professional vocal sound is essential for any recording. One important tool to achieve this is EQ, which can help enhance the tonal quality and clarity of a vocalist’s performance. By understanding how to use EQ to sculpt a vocal track, you can elevate the overall quality of your productions.

What Is Eq?

EQ or Equalization is a powerful tool used to adjust and alter the frequency response of a recording. It enables you to balance the tonal quality of your audio, making it sound more natural and professional. EQ helps to eliminate unwanted sounds and enhances desired ones to create a better overall sound.

Different Types Of Eq Controls

There are different types of EQ controls that you can use to adjust the frequency response of a vocal recording. These include:

  • Low Pass Filter (LPF): Removes high frequencies above a specific cutoff point. Useful for removing unwanted hiss or hum in a vocal recording.
  • High Pass Filter (HPF): Removes low frequencies below a specific cutoff point. Useful for removing rumble or low-end noise in a vocal recording.
  • Parametric EQ: Offers control over the center frequency, bandwidth, and gain of a specific band. Useful for correcting and enhancing problematic frequencies in a vocal recording.
  • Graphic EQ: Offers control over multiple frequency bands at once. Useful for making broad tonal adjustments to a vocal recording.

With these EQ controls, you can enhance specific aspects of a vocalist’s performance and get a pro sounding vocal with ease. By removing unwanted frequency content, you can create space for the vocals in the mix, making them more prominent and easier to hear. Knowing and understanding how to use these EQ controls is crucial for achieving a well-balanced and professional sound.

Cleaning Up The Vocals

Achieving a professional sounding vocal with EQ starts with cleaning up the vocals. Removing unwanted noise and frequencies can make a huge difference and improve the overall quality of your vocal recording. Use EQ to carve out any problematic frequencies and enhance the clarity of the vocal track.

Removing Low-end Rumble

To get a professional sounding vocal with EQ, one of the important steps is to remove any low-end rumble in the recording. This can be achieved by using a high-pass filter, which allows the higher frequencies to pass through and attenuates the lower ones. The filter should be set at a frequency just below the lowest pitch in the vocal performance. By removing this unwanted rumble, you can create more space in the lower frequencies for other instruments to sit in the mix.

Cutting Harsh Frequencies

Harsh frequencies in a vocal performance can be jarring to the listener and make the vocal sound amateurish. These frequencies are usually found in the mid-range and can be attenuated using a notch filter. To find the offending frequency, sweep the filter across the mid-range until you hear the harshness, then reduce the gain at that frequency. Be careful not to remove too much of the mid-range, as it is an important part of the vocal sound. By cutting out the unwanted harsh frequencies, you can make the vocal performance sound smoother and more professional. Using EQ to clean up the vocals can make a big difference in the final mix, but it is important not to overdo it. A light touch can create a more natural and transparent sound, while too much EQ can make the vocal sound artificial. Experiment with the settings until you find the sweet spot where the vocal sounds clear and polished without losing its natural character.

Enhancing The Vocals

Achieving a professional vocal sound is possible with the right use of EQ. By cutting unwanted frequencies and boosting the desired ones, you can enhance the vocals and make them sound clear and crisp. It’s all about finding the right balance and using your ears to guide you.

Enhancing the vocals is an important part of producing any great track. With EQ, you can make sure that your vocals sound polished and professional. In this article, we’ll show you how to use EQ to enhance the vocals in your recordings.

Boosting Presence Frequencies

One way to enhance your vocals is by boosting the presence frequencies. These are the frequencies that make your vocals sound like they are present in the mix. To find these frequencies, use a parametric EQ and boost around 2-5kHz. This will add clarity and definition to your vocals.

Adding Air And Shimmer

Another way to enhance your vocals is by adding air and shimmer. This will give your vocals a sense of space and depth. To do this, use a shelving EQ and boost around 10kHz and above. This will add a sparkle to your vocals and make them sound more natural.

Conclusion

In conclusion, using EQ to enhance your vocals is a great way to make sure that your recordings sound polished and professional. By boosting the presence frequencies and adding air and shimmer, you can make your vocals sound more natural and present in the mix. Remember to experiment with different EQ settings to find the perfect sound for your vocals.

Creating Depth And Width

Achieving a professional sound for your vocal recordings involves proper equalization techniques. One effective method is to create depth and width by subtracting frequencies from the mid-range and adding subtle boosts to the high and low ends, resulting in a more balanced and spacious vocal mix.

Panning Tips

Panning can create a sense of space in your mix, giving the listener a feeling of being surrounded by the music. For vocals, try panning the lead vocal dead center and the backing vocals slightly to the left and right to create a wider stereo image.

Using Reverb And Delay

Reverb and delay can add depth to your vocal sound, creating the illusion of space. A short reverb with a quick decay time can add a sense of ambience to the vocal, while a longer reverb can add a sense of space. Similarly, a short delay can add a sense of depth, while a longer delay can create an echo effect. Experiment with the settings until you find the perfect balance for your track.

Eq For Depth And Width

EQ can also help create depth and width in your vocal sound. Use a high-pass filter to remove any low-end rumble that may muddy up the mix. Boosting the upper midrange of the vocal can help it cut through the mix and sound more present. Also, don’t be afraid to experiment with cutting or boosting certain frequencies to achieve the desired effect.

Conclusion

Creating depth and width in your vocals can make all the difference in getting a pro sounding vocal mix. By using panning, reverb, delay, and EQ, you can craft a sound that is both dynamic and engaging. Take your time and experiment with these techniques to find what works best for your track.

De-essing The Vocals

De-essing is a crucial part of getting a professional-sounding vocal. It’s the process of reducing or removing harsh and annoying “s” sounds that are often prominent in the vocal recording. These sounds, known as sibilance, can distract the listener and make the vocal sound amateurish. In this article, we will explain how to identify sibilant frequencies and share de-essing techniques to help you achieve a pro-quality vocal.

Identifying Sibilant Frequencies

Sibilant frequencies are typically found in the high midrange area of the frequency spectrum. Most commonly, they are concentrated between 4-6 kHz and can sometimes extend up to 10 kHz. To identify these frequencies, start by listening to the vocal recording and make note of any areas where the “s” sounds are particularly harsh or piercing. You can also use an equalizer to boost the frequencies in this range to make them more audible.

De-essing Techniques

Once you’ve identified the sibilant frequencies, it’s time to start de-essing. There are several de-essing techniques you can use:

  • Frequency-specific de-essing: Use a multiband compressor or dynamic equalizer to specifically target the sibilant frequencies and reduce their level.
  • Broadband de-essing: Use a de-esser plug-in that applies compression to the whole audio signal whenever a sibilant is detected.
  • Manual de-essing: Use volume automation to manually reduce the level of sibilant sounds in your recording.

It’s worth noting that de-essing should be done sparingly to avoid over-processing the vocal. You don’t want to completely remove the sibilance, just reduce it to a more manageable level. A good rule of thumb is to aim for a 3-6 dB reduction in the sibilant frequencies.

By following these de-essing techniques and identifying the sibilant frequencies, you can achieve a clean and polished vocal that sounds professional. Adding this step to your vocal processing workflow can make a huge difference in the overall sound of your recording.

How To Get A Pro Sounding Vocal With Eq

Credit: www.masteringthemix.com

Balancing The Vocal In The Mix

If you want your vocal to sound like they are recorded in a professional studio, then you need to know how to use EQ to balance the vocal in the mix. Balancing the vocal in the mix refers to the process of using EQ to adjust the levels of different frequencies in the vocal track to make sure it can be heard clearly in the mix without overpowering the other instruments.

Comparing To Reference Tracks

One of the most effective ways to ensure that your vocal tracks are properly balanced in the mix is by comparing them to other professionally mixed tracks that are similar to the style and genre of your music. This will help you to understand how different frequencies work together to make a great-sounding mix. Start by playing both tracks and observe what stands out in the professional mix. Can you hear the bass? Are the drums more prominent? What about the vocals? Try to balance the frequencies of your vocal until it’s on par with the reference tracks.

Using Automation

Another important aspect to consider when balancing the vocal in the mix is to make sure that it is consistent throughout the entire song. Using automation enables you to make adjustments that are tailored to a specific part of the song. As the song progresses, certain instruments may become more prominent, and you will need to adjust the frequency balance accordingly. Automating the EQ settings throughout the song ensures that the vocal remains audible without overpowering the other instruments.

Wrapping Up

If you want to achieve a professional-sounding vocal track, then you need to balance the frequency levels of your vocal in the mix. By comparing your tracks to professionally mixed ones and using automation, you can make sure that your vocals sound clear and audible throughout the song, and blend well with the other instruments in the mix.

Using Eq Creatively

Equalization (EQ) is a powerful tool in the hands of a skilled audio engineer. For vocals, EQ can be used to enhance the sound quality or create unique effects. In this post, we’ll explore using EQ creatively to take your vocal recordings to the next level.

Creating Vocal Effects

One of the most common uses of EQ is to create vocal effects. The following table outlines some common vocal effects and the EQ settings used to achieve them:

EffectFrequency RangeEQ Settings
Bright2 kHz – 5 kHzBoost 3 dB
Warm100 Hz – 300 HzBoost 3 dB
Radio-style1 kHz – 2 kHzBoost 6 dB
Vintage-style500 Hz – 1 kHzBoost 3 dB, cut below 500 Hz

Remember, these are just guidelines. Experiment with different frequency ranges and EQ settings to find the perfect vocal effect for your mix.

Adding Character To The Vocals

EQ can also be used to add character to vocal recordings. For example, boosting the mid-range frequencies can make vocals sound more present and intimate, while boosting the high-end frequencies can add air and clarity to the vocals. On the other hand, cutting certain frequencies can remove unwanted resonances and harshness from the vocals.

Here’s an example EQ curve that can add character to vocals:

  • Low frequencies: cut below 100 Hz
  • Mid-range frequencies: boost around 1 kHz – 3 kHz
  • High frequencies: boost around 8 kHz – 12 kHz

Again, experiment with different EQ settings to find the right character for your vocals.

Now that you know how to use EQ creatively, take some time to practice and experiment with different effects and settings. With a little bit of skill and creativity, you can create professional-sounding vocal recordings that stand out from the crowd.

How To Get A Pro Sounding Vocal With Eq

Credit: www.musicguymixing.com

Finalizing The Vocal Eq

Achieving a professional-sounding vocal with EQ requires finalizing the vocal EQ. To do this, you can start by making subtle adjustments to the EQ like rolling off low-end rumble and boosting upper-mid frequencies to enhance vocal clarity.

As a music producer or mixing engineer, one of your key responsibilities is to get the best sound out of the vocals in your track. EQ, or equalization, is an essential tool for this purpose. It involves adjusting the frequency balance of the vocal track to achieve a professional-sounding mix.

A/b Testing

Before finalizing the EQ, it is crucial to perform A/B testing to compare different versions of the mix. A/B testing allows you to identify subtle differences in the sound and evaluate which version sounds better. To perform A/B testing, you can use software plugins or simply switch between two different versions of the mix manually.

Making Small Adjustments

Once you have identified the version with the best sound, it is time to finalize the vocal EQ. Start by making small adjustments to the frequency balance of the vocal track. You can use a parametric EQ to adjust the individual frequency bands, or a graphic EQ to adjust the overall frequency balance. Pay attention to the different frequency ranges, such as low, mid, and high, and look for any unwanted frequencies that need to be removed or attenuated.

Testing And Refining

After making initial adjustments, it is essential to test and refine the vocal EQ further. Play the track through different devices and headphones to check how it sounds on different sound systems. Listen out for any inconsistencies or imbalances in the vocal sound and make further adjustments as needed.

Final Thoughts

Getting a pro-sounding vocal with EQ requires patience and attention to detail. It is essential to make small adjustments, test and refine the sound, and perform A/B testing to compare different versions. By following these steps, you can achieve a polished and professional-sounding vocal track that stands out in any mix.

Frequently Asked Questions On How To Get A Pro Sounding Vocal With Eq

How Do You Professionally Eq Vocals?

To EQ vocals professionally, start by using a high-pass filter to remove unwanted low frequencies. Then, use a parametric EQ to boost or cut specific frequencies to enhance the vocals. Use a de-esser to tame harsh sibilance. Lastly, use a compressor for smoothing out dynamics and adding warmth to the vocals.

What Is The Best Equalizer Setting For Vocals?

The best equalizer setting for vocals will depend on the singer’s voice and the song’s genre. Generally, vocals sound good when the frequencies between 1kHz and 6kHz are boosted slightly. You can also experiment by reducing mid-range frequencies that can make vocals sound muddy or boosting high frequencies to add clarity.

How Do You Eq Your Voice For Clarity?

To EQ your voice for clarity, focus on the midrange frequencies where the vowel sounds reside. Use a parametric EQ to boost the frequencies between 2-4kHz while cutting out any low frequencies that muddy the sound. Additionally, you can use a de-esser to prevent harsh sibilance and a compressor to smooth out any volume fluctuations.

Experiment with slight adjustments until you achieve the desired clarity.

What Are The Best Eq Settings For Voice Acting?

There is no universal EQ setting for voice acting as it varies based on factors such as mic type, acoustics, and voice tone. However, a general guideline is to boost frequencies between 250 and 500 Hz for warmth, reduce frequencies between 2 and 6 kHz for removing harshness, and increase high frequencies above 10 kHz for clarity.

Experimenting and adjusting based on individual needs is recommended.

Conclusion

To sum up, mastering the art of EQ is crucial to achieving a polished and professional-sounding vocal. With these helpful tips and techniques, you can fine-tune every element of the vocal recording to create a balance that truly shines. Keep in mind that EQ adjustments should always be made with care and intention, and practice and experimentation are key in finding the perfect sound.

With time and dedication, you can take your recorded vocals to the next level. Happy EQ-ing!

More in our EQ guide.

Categories
Archive

How To Mix Music Online The Audio Mixing Guide

To mix music online, follow this audio mixing guide for precise and effective results. Mixing music online involves a process of combining various audio tracks to create a cohesive sound.

The process requires technical expertise, a keen ear, and an arsenal of audio mixing tools to achieve a well-balanced sound. This guide will take you through some essential steps in mixing online, including using EQ, compression, panning, and automation to create the perfect sound.

Additionally, you will learn about different types of tools and plugins that can be used to shape your sound. Whether you’re a professional audio engineer or an aspiring musician, this guide will help you achieve the best possible result for your music mixing endeavors.

How To Mix Music Online The Audio Mixing Guide

Credit: blog.bandlab.com

Free Online Audio Mixing Courses

Learn audio mixing for free with online courses. Enhance your music mixing skills with our comprehensive audio mixing guide and produce high-quality audio tracks from the comfort of your own home.

Free Online Audio Mixing Courses: Are you looking to learn the art of mixing music online for free? You’ve come to the right place. Mixing music is an essential part of the music production process that has a significant impact on the final output. It combines different tracks, instruments, and vocals to create a polished and balanced mix. Taking free online audio mixing courses offers a great opportunity for aspiring musicians, producers, and sound engineers to learn and hone their craft. H3: Learn Audio Mixing Fundamentals The first step to mastering audio mixing is to understand the fundamentals. Free online audio mixing courses teach the basics of audio mixing, including equalization, compression, delay, reverb, and automation. You’ll learn how to use these tools to enhance the sound quality of your music. Also, you’ll learn about frequency spectra, decibels, and different types of audio devices to make informed mixing decisions. H3: Understand The Mixing Workflow Mixing music online can be a daunting task. A good understanding of the mixing workflow will help you stay organized and ensure that you achieve the desired results. You’ll learn how to set up a mixing session, import audio files, balance levels, pan tracks, and enhance the overall sound quality. The free online audio mixing courses also teach you how to use different plugins and effects to add depth, clarity, and character to your mixes. In conclusion, the internet has made it easier than ever to learn audio mixing online without paying a dime. Whether you’re a beginner or an experienced artist, taking free online audio mixing courses is a valuable investment in your career. Learning the fundamentals and understanding the mixing workflow will help you take your music to the next level.

Selecting The Right Audio Mixing Software

Selecting the right audio mixing software is essential for creating professional-quality music online. The key factors to consider include the features and capabilities of the software, ease of use, compatibility with your computer and audio equipment, as well as budget considerations.

Using this audio mixing guide, you’ll be able to make an informed decision on the right software for your needs.

Selecting the right audio mixing software can make all the difference in the final quality of your music. With so many options available, it can be overwhelming to choose the right one. However, there are several factors you can consider that will make your decision easier.

Factors To Consider

When choosing audio mixing software, you want to make sure it meets your specific needs and preferences. Here are some factors to consider:

  • Compatibility: Ensure the software is compatible with your computer’s operating system and meets the hardware requirements.
  • Price: Determine your budget beforehand and consider if the software can provide value to your investment.
  • Features and tools: Look for software that provides the features and tools you need for your music mixing needs.
  • User interface: Choose software with a user-friendly interface for ease of use and comfortable navigation.
  • Customer support: Check the availability of technical support and tutorials that can help you maximize the software’s potential.

Popular Audio Mixing Software Options

There are several audio mixing software options available in the market, and it can be challenging to choose the right one. Here are some popular options that are worth considering:

SoftwarePriceCompatibility
Ableton Live$449-$799Mac, Windows
Pro Tools$29.99-$599.99/monthMac, Windows
Logic Pro X$199.99Mac
FL Studio$99-$899Windows
Studio One$99.95-$399.95Mac, Windows

Each of these software options has its strengths and weaknesses and can cater to a particular style and preference. Make sure you take the time to research each one to determine which software will work best for you. In conclusion, selecting the right audio mixing software is crucial for creating high-quality music mixes. By considering factors such as compatibility, price, features, user interface, and customer support, you can make an informed decision. Additionally, researching popular options like Ableton Live and Pro Tools can be a great starting point to finding the best software for your music mixing needs.

Preparation Is Key

Preparation is a critical aspect when it comes to mixing music online. Adequate preparation can save you time and stress when it comes to the actual mixing process. This article explores how to prepare effectively for online audio mixing through organizing your mix project and preparing audio tracks and files.

Organizing Your Mix Project

Proper organization is essential when it comes to mixing any kind of music project, and the same applies when mixing music online. Here are crucial organizational tips to help you prepare for online audio mixing:

  1. Take time to listen to the raw tracks and familiarize yourself with the material
  2. Label and name the audio tracks accordingly to avoid confusion
  3. Create a chart to keep track of your plugins, effects, and filters used in each track
  4. Group similar instruments to make the mixing process more manageable
  5. Use color-coding to make the files more manageable and visually appealing

Preparing Audio Tracks And Files

Effective preparation of audio files can make the difference between a good and a great mix. Here are essential tips for preparing audio tracks and files:

  • Ensure the audio tracks start at the same point to avoid time alignment issues
  • Trim audio files correctly to avoid unwanted clicks and pops
  • Remove background noise and other unwanted sounds in the audio file
  • Normalize tracks to a consistent volume level before the final mix
  • Ensure all audio files are in the same format to avoid compatibility issues

Preparation is key to creating a successful online audio mix project. By following these tips for organizing your mix project and preparing your audio files, you will be well on your way to creating an exceptional online audio mix.

Mixing Techniques

Learn how to mix music online with this comprehensive audio mixing guide. With step-by-step instructions and tips on using mixing techniques, you can produce high-quality music from the comfort of your own home.

Mixing music is an art that requires a great deal of practice and patience to perfect. It involves balancing the individual tracks of a multitrack recording in a way that creates a cohesive and dynamic finished product. To achieve this, there are several techniques you can use: mixing levels, panning, EQ, using effects like reverb and compression, and arranging your mix.

Mixing Levels

Mixing levels involve adjusting the volume of each track to create a balanced and cohesive sound. One rule of thumb is to start with the loudest element in the mix and work around it. By adjusting the levels of different tracks, you can balance the sound and create the desired effect.

Panning

Panning refers to the placement of each track in the stereo field. Panning helps to create a sense of space and depth in the sound. For example, by panning certain tracks to the left or right, you can create a sense of separation between them, which can help the listener distinguish between the different instruments.

Eq

EQ refers to equalization, which involves adjusting the balance of frequencies within each track. By using EQ, you can emphasize certain frequencies and balance out others to create a more natural sound. For example, you could boost the low end of a bass track to give it more presence or cut the high end of a vocal track to reduce sibilance.

Using Effects Like Reverb And Compression

Effects like reverb and compression can be used to enhance the sound of individual tracks and create a more polished overall sound. Reverb can be used to create a sense of space and ambiance, while compression can be used to even out dynamic range and increase sustain. It’s important not to overuse effects, however, as this can lead to a muddy or cluttered sound.

Arranging Your Mix

Finally, arranging your mix involves deciding which elements will be featured prominently and which will be more subtle. It can involve making decisions about which instruments will play during which parts of the song and what the overall structure of the song will be. By arranging your mix carefully, you can create a more dynamic and emotionally engaging finished product. In conclusion, mixing music is a complex process that requires both technical know-how and a good ear. By using mixing levels, panning, EQ, effects, and arrangement, you can create a cohesive and dynamic finished product that will engage listeners and stand the test of time.

Mastering Your Mix

“Mastering Your Mix” is an audio mixing guide that teaches how to mix music online. The guide provides valuable information and tips on how to improve the sound quality of your music. By following the steps outlined in the guide, anyone can become an expert in mixing audio online.

Mastering is the final step of the mixing process and it’s where your song goes from a rough mix to a polished, professional sound. While mixing is all about balancing the different elements of your track, mastering is all about preparing your mix for distribution. It’s important to get it right as mastering can make or break a song’s final sound. In this section, we will discuss the mastering process for your mix and the best practices to follow to ensure your track sounds its best.

Mastering Fundamentals

The first step in mastering your mix is to understand the fundamentals of this process. Mastering involves altering your mix to make sure that it sounds the best it can on all types of systems, from high-end speakers to cheap earbuds. This includes balancing the levels of each element in your mix and ensuring that the frequency balance is right. In addition, mastering can also include adding subtle compression, EQ or limiting to further refine the sound.

Preparing Your Mix For Mastering

Before you start the mastering process, there are a few things you need to do to prepare your mix for mastering. These include:

  • Ensure that your mix is fully balanced and free from distortion or unwanted noise
  • Make sure that your mix has enough headroom for mastering
  • Export your mix in the highest quality possible
  • Remove all mastering plugins from your mix before sending it to a mastering engineer

By following these steps, you can ensure that your mix is ready for mastering and that the final result is the best it can be.

Mastering Workflow

The workflow of a mastering engineer often involves several steps. These steps include:

  1. First, the engineer will listen to the mix to get a feel for the overall sound and what adjustments will be needed
  2. Next, the engineer will adjust the levels of each element in the mix to ensure a balanced final sound
  3. The engineer will then use EQ and compression to further refine the sound and create the right frequency balance
  4. Finally, the engineer will add mastering plugins such as limiters or exciters to finalize the sound and prepare it for distribution

Having a clear workflow can help ensure that your mastering engineer is able to get the best possible results for your mix. So, understanding the workflow of a mastering engineer can be immensely helpful in achieving the desired sound for your music. In conclusion, mastering is an essential part of the production process and it’s worth investing time and effort into getting it right. By following these mastering fundamentals, preparing your mix for mastering, and understanding the workflow of a mastering engineer, you can ensure that your mix sounds the best it can be and stand out among the crowd.

How To Mix Music Online The Audio Mixing Guide

Credit: www.amazon.com

Collaborative Mixing

Collaborative mixing allows for multiple musicians or producers to work on a song from separate locations simultaneously. With online audio mixing, it’s easier than ever to collaborate on a professional-sounding track. This audio mixing guide will help you navigate the process.

One of the advantages of mixing music online is the ability to collaborate with other musicians across the globe. Collaborative mixing allows musicians to work together, share ideas and make music without ever leaving their homes. Here are two ways to work with other musicians online:

Working With Other Musicians Online

Collaborating with other musicians online can be a bit daunting, but it doesn’t have to be. The key is to establish good communication with the other musician(s) before you start working on the project. Here are some tips for working with other musicians online:

  • Establish clear communication channels, such as email, chat or phone.
  • Agree on the vision for the project and the goals you are trying to achieve.
  • Set clear deadlines and milestones for the project.
  • Share your work regularly, and be open to feedback and suggestions.
  • Be respectful and professional in your interactions with the other musician(s).

Remote Music Collaboration Tools

There are several remote music collaboration tools available that make it easier to work with other musicians online. These tools allow musicians to share tracks, collaborate on projects and communicate with each other. Here are some of the most popular remote music collaboration tools available:

ToolDescription
Spotify Collaborative PlaylistsA platform that allows musicians to create and share playlists with other users.
Ohm StudioA digital audio workstation that allows musicians to collaborate on music projects in real-time.
SpliceA cloud-based platform that allows musicians to share and collaborate on music projects.
BandLabA social music platform that allows musicians to create, collaborate and share their music online.

Collaborative mixing is an excellent way to work with other musicians online and create music together. With clear communication, agreed-upon goals, and remote music collaboration tools, the possibilities for making great music are endless.

How To Mix Music Online The Audio Mixing Guide

Credit: modernmixing.com

Frequently Asked Questions On How To Mix Music Online The Audio Mixing Guide

How To Make Music Mix Songs Online?

There are several online tools available to make music mix songs. You just need to upload your track and select the section you want to mix with another song. Then you can adjust the volume levels and add effects to improve the sound quality.

Some popular online music mixers are MixPad, Soundation, and AudioTool.

How Do You Mix Music Guide?

To mix music, you need to understand the basics of beatmatching, EQing, and track selection. Start by syncing the beats of two tracks, then use EQ to balance highs, mids, and lows. Adjust the levels and add effects as needed.

Practice and experiment to develop your own mixing style.

How Do I Learn To Mix Audio?

To learn how to mix audio, you can take online courses, watch videos and tutorials, practice mixing different tracks, and seek mentorship from experienced mixers. It is essential to learn about gain staging, EQ, compression, effects, and panning techniques to create a balanced and pleasing mix.

Keep practicing and listening to different genres of music to improve your skills.

What Program Do You Use To Mix Music?

The program commonly used to mix music is called a DJ software or Digital Audio Workstation (DAW). Some popular options include Ableton, Serato, Traktor, Virtual DJ, and Mixxx.

Conclusion

To sum it up, audio mixing involves combining different sounds to create a cohesive and balanced final product. By using online mixing tools, you have access to a wide range of functionalities that can be helpful in achieving the desired results.

However, it is essential to have a good understanding of the basic principles and techniques of mixing to make the most of these tools. With this guide, we hope you have gained a better understanding of the audio mixing process and can create stunning tracks that sound great on any device.

Categories
Archive

Unique Ways To Level Up Your Audio Mix

To level up your audio mix, try using EQ and dynamics processing in unconventional ways. A well-balanced mix can make or break any production.

Audio mixing is the process of blending together different audio tracks into a cohesive and balanced composition. A perfect mix requires skills and knowledge of audio engineering, music theory, and creativity. However, with the advancement in technology, there are various tools available that can make the process easier.

Still, it is essential to know some unique ways to level up your audio mix and make it stand out. We explore some unconventional techniques for shaping your mix by leveraging equalization (EQ) and dynamics processing. These methods can help you fine-tune your mix and deliver a better sonic experience. Let’s explore these techniques and learn how you can enhance your audio mix.

Discover The Basics

Discovering the basics of audio mixing is the first step towards becoming a pro. It pays off to develop a strong foundation for the more intricate strategies to follow. With that said, this post will delve into the fundamental ways of leveling up your audio mix.

Know Your Tools

Whether you are a seasoned audio engineer or just starting, it’s possible to get lost in the sea of audio gear out there. However, knowing your tools goes beyond the equipment in your studio; it starts with understanding the features of your digital audio workstation (DAW).

Your DAW is vital as it provides you with the essential tools required to improve your audio mix output. These tools include gain, equalizer, compressor, limiter, reverb, and delay. By learning how to use these tools and becoming comfortable with them, you can take your audio mix to the next level.

Understand The Building Blocks Of Audio

Whether you work in music production, broadcasting, or podcast production, understanding the basic building blocks of audio is crucial. These building blocks include frequency, amplitude, and phase.

Frequency refers to the pitch of the sound, measured in Hertz (Hz). Amplitude refers to the level of the sound, measured in decibels (dB). Phase refers to the timing relationship between sounds, measured in degrees.

By understanding these building blocks, you can manipulate them in your audio mix to create a clean, professional, and polished sound output.

Identify Common Audio Issues

Identifying and fixing the most common audio issues can improve your mix drastically. The most common issues are noise, hum, buzz, clicks, pops, and distortion.

Noise refers to unwanted, audible audio that often occurs during the recording process. Hum is a low-level and constant sound caused by electronics and other components in your audio system. Buzz is a similar but more annoying higher-frequency sound. Finally, clicks and pops are irregularities that can be caused by defective equipment or poor recording techniques. Distortion occurs when the audio signal exceeds the maximum capacity of a system, leading to a distorted or clipped sound.

By identifying and fixing these issues, you can achieve a professional-sounding audio mix.

Unique Ways To Level Up Your Audio Mix

Credit: m.youtube.com

Get Creative With Panning

Discover new ways to enhance the sound quality of your audio mix by incorporating creative panning techniques. Experiment with assigning different elements of your mix to different areas of the stereo field to add dimension and depth to your tracks.

Panning is a fundamental tool in audio mixing that allows musicians and producers to place sounds in the stereo field. By panning different audio tracks, you can create a sense of space and depth in your mix. But there are a few creative ways to use panning that can help you take your audio mix to the next level.

Create Spatial Awareness

One way to get creative with panning is to create spatial awareness in your mix. Instead of panning everything to the center, try to place different instruments in different areas of the stereo field. For example, you can pan the lead vocal to the center, pan the drums slightly to the left, and place the electric guitar to the right. This will create a sense of space and helps the listener differentiate between different elements in the mix.

Layer Sounds For Depth

Layering sounds is another technique that can help you add depth to your mix. You can either layer two or more instruments playing the same part, or add different elements to create a richer, fuller sound. To get creative with panning, try to pan each layer slightly differently. For example, you can pan the first layer to the left, the second layer to the right, and the third layer to the center. This will create a wide and immersive sound that draws the listener in.

Utilize Automation

Automation is a powerful tool that can help you get creative with panning. Instead of keeping the panning static throughout the song, try to automate it to create movement and interest. For example, you can automate the panning of a synth part to move from left to right throughout the chorus. Or, you can pan the snare drum slightly to the left in the verse, and to the right in the chorus. This will create a sense of movement and dynamics in your mix. Overall, getting creative with panning is an excellent way to level up your audio mix. By creating spatial awareness, layering sounds for depth, and utilizing automation, you can create a mix that sounds dynamic, interesting, and immersive. So, experiment with panning and have fun creating your own unique sound!

Use Equalization Effectively

Equalization is one of the most important mixing tools in the audio engineer’s arsenal. Used effectively, EQ can bring clarity, remove unwanted frequencies, and help create a cohesive mix. In this article, we’ll explore unique ways to use EQ to level up your audio mix.

Identify Frequency Issues

The first step in using EQ effectively is to identify frequency problems in your mix. This involves listening critically to each element of the mix and identifying areas that sound too thin, too boomy, or too harsh.

Make a list of the frequency ranges that need to be addressed and mark them in your DAW. This will help you hone in on these areas later when applying EQ.

Address Frequency Problems With Eq

Once you’ve identified the frequency issues in your mix, it’s time to address them using EQ. Start by applying broad strokes of EQ to shape the overall sound of each element.

Next, use more precise cuts and boosts to address specific problem areas. Don’t be afraid to make drastic cuts or boosts, but be sure to use your ears and not your eyes when making EQ decisions.

Use Creative Eq Techniques

Beyond simply fixing problems, EQ can also be used creatively to add character, depth, and interest to your mix. Try using EQ to create unique sounds by boosting or cutting extreme frequencies, or by using EQ to create filter effects.

Another creative use of EQ is to create space and separation in your mix. By cutting competing frequencies in different instruments, you can make each element stand out and be heard clearly.

Using EQ effectively takes time and practice, but with these unique techniques, you can take your audio mix to the next level.

Compress Your Audio

Optimize your audio mix by compressing your audio files. This technique reduces the dynamic range of your audio, making it sound more polished and professional. Implementing compression can help your audio stand out and increase engagement with your audience.

If you are looking for a simple way to improve your audio mix, consider utilizing compression to control dynamic range, create consistency, and bring out the best in your sound. With the right settings, compression can help you achieve a polished, professional sound that will make your music or podcasts stand out from the rest.

Control Dynamic Range

Dynamic range refers to the difference between the quietest and loudest parts of your audio signal. In music, this can be the difference between a soft acoustic guitar and a loud drum kit. Compression helps to control this range by reducing the volume of the loudest parts and boosting the volume of the quietest parts. This creates a more even, balanced sound that is easier to listen to and will sound better on a variety of playback systems.

Create Consistency

In addition to controlling dynamic range, compression can also help to create consistency in your audio mix. By reducing the volume of the loudest parts of your signal, you can bring up the volume of the quieter parts, making the overall level of your mix more consistent. This is especially important when mixing different instruments or vocals together, as it can help them to blend together more seamlessly.

Utilize Multiband Compression

While traditional compression works across the entire frequency spectrum of your audio, multiband compression allows you to apply different amounts of compression to different frequency ranges. This can be especially useful when mixing music, as it allows you to focus on specific frequency ranges and make them stand out more in the mix. For example, you can use multiband compression to bring out the warmth and richness of a bass guitar while still maintaining clarity in the rest of the mix. In conclusion, by compressing your audio, you can have greater control over the dynamic range, create consistency, and utilize multiband compression to bring out the best in your sound. So, don’t hesitate to give it a try and take your audio mix to the next level.

Add Depth With Reverb & Delay

Adding reverb and delay to your audio mix can add depth and richness to your sound. Experimenting with different types of reverb and delay can create unique and interesting textures in your recordings.

If you want to level up your audio mix and give it more depth, using reverb and delay is a great place to start. These two effects can make your audio sound like it is coming from a specific space or location. With reverb, you are creating an artificial reproduction of a room’s acoustic properties, while delay is an echo-like effect. Understanding the differences between the two and using them creatively can help you create a more interesting, immersive, and captivating audio experience.

Understand The Differences Between Reverb & Delay

Reverb and delay are both time-based effects, but they have different applications. Reverb adds space to a recording, making it sound like the audio is in a particular room. On the other hand, delay is more like an echo and is often used to create a sense of distance or to emphasize certain elements of the audio. It’s important to understand the differences between these two effects and how they can be used to enhance your audio mix.

Create A Sense Of Space

One of the most significant advantages of adding reverb and delay to your audio mix is creating a sense of space. You can use them to convey a particular environment or mood. For example, you can make a recording sound like it is outdoors by adding a bit of delay. On the other hand, you can make it sound like it is in a small room by adding more reverb. By carefully selecting the right settings, you can create the desired effect and transport your listener to a different environment.

Use Reverb & Delay Creatively

Once you understand the differences between reverb and delay and how they can be used to create space, you can use them creatively. For example, you can use reverb to emphasize a specific element of the audio or create a unique atmosphere. Likewise, you can use delay to replicate the effect of a guitar riff or vocal surfacing in a particular way. The possibilities are endless, and the key is experimenting with different settings and effects to find the right combination. Overall, adding depth to your audio mix is critical for creating a unique and engaging experience. Reverb and delay are just two of the many tools you can use to achieve that goal. Use them wisely, creatively, and strategically to take your audio experience to the next level.

Incorporate Distortion And Saturation

Incorporating distortion and saturation can be a unique way to level up your audio mix. By applying these effects to specific tracks, you can add warmth, character, and grit to your sound.

Create Harmonic Content

Adding distortion and saturation can create harmonic content that makes your audio mix sound unique and interesting. Harmonic content refers to additional frequencies that are created when you distort or add saturation to a sound. This can add depth and complexity to your mix, making it more exciting for listeners.

Add Character & Texture To Your Sounds

Distortion and saturation can help you add character and texture to your sounds. You can apply distortion to a vocal track to create a gritty, lo-fi sound or add saturation to a bass track to make it warmer and more defined. By experimenting with different levels of distortion and saturation, you can create unique sounds that help your mix stand out.

Use Distortion & Saturation In A Mix

When using distortion and saturation in a mix, it’s important to be strategic about where you apply these effects. Using too much distortion or saturation can result in a muddy mix, making it difficult to distinguish between individual sounds. Instead, try using distortion and saturation on specific tracks or elements within your mix to add interest and depth. To incorporate distortion and saturation into your mix, try using plugins or hardware that are specifically designed for these effects. You can also experiment with recording techniques, such as overdriving a preamp or mic to add natural distortion to your sounds. To sum up, distortion and saturation are powerful tools that can help you level up your audio mix. By creating harmonic content, adding character and texture to your sounds, and using these effects strategically in your mix, you can create a unique and exciting listening experience for your audience.

Maximize The Power Of Automation

Discover new techniques to enhance your audio mix with the power of automation. Unlock unique ways to level up your sound quality and create a professional audio experience for your listeners.

Automation has always been an essential tool in audio production, but it’s often underutilized. By automating your mix, you can create interesting movements and dynamic builds and drops that will take your sound to another level. Here are some unique ways to harness the power of automation and elevate your audio mix.

Automate Volume & Panning

Adjusting volume and panning manually can be a time-consuming process, especially when you’re dealing with multiple tracks. By automating these parameters, you can save time and achieve more precise adjustments. For example, you can automate volume to bring out certain elements of a track during a particular section, or use automated panning to create a sense of movement across the stereo field.

Use Automation To Create Interest & Movement

Automation is not just about saving time – it can also be used to create interest and movement in your mix. For instance, you can automate the cutoff frequency of a filter to create a sweeping effect or use automation to modulate the pitch of a synth to create a sense of tension or release. Small, subtle adjustments made through automation can make a significant impact on the overall listening experience.

Create Dynamic Builds & Drops

One of the most effective ways to use automation is to create dynamic builds and drops in your mix. By automating the volume of certain tracks or elements, you can create tension and release that will enhance the emotional impact of the music. For instance, you can automate the volume of a snare roll to create an explosive drop, or automate the filter cutoff of a bassline to build anticipation before a drop. In conclusion, automation is a powerful tool that can help musicians and producers take their audio mix to the next level. By experimenting with different automation techniques, you can create unique and exciting sounds that will capture your listeners’ attention and keep them engaged throughout the song.

Collaborate With Other Audio Engineers & Producers

Collaborating with other audio engineers and producers is a unique way to level up your audio mix. By working together, you can share techniques and learn from each other’s experiences, ultimately resulting in a more polished and professional product.

Collaborating with other audio engineers and producers is a great way to level up your audio mix. Many hands make light work, and the more people you have working on a project, the better the end result will be. In this section, we will explore the benefits of working with others, share tips and techniques, and learn from other musicians, composers, and sound designers.

Identify The Benefits Of Collaborating

Collaborating with other audio engineers and producers has many benefits. Firstly, you can bounce ideas off each other and get valuable feedback on your work. This feedback can be invaluable and can help you to improve your mixes and develop new techniques. Secondly, collaborating gives you the opportunity to work with people who have different skill sets and experiences, which can lead to a more diverse and interesting final product. Finally, working with others is a great way to build relationships and network within the industry.

Share Tips & Techniques With Others

Sharing tips and techniques is a great way to develop your skills as an audio engineer or producer. When collaborating with others, you should always be willing to share your knowledge and learn from others. This can be as simple as discussing your workflow or as complex as sharing your favourite mixing tricks and techniques. By sharing your knowledge, you can help others to develop their skills and build a strong community of audio professionals.

Learn From Other Musicians, Composers, & Sound Designers

Collaborating with other musicians, composers, and sound designers can be a great way to learn new skills and techniques. By working closely with these professionals, you can gain insights into their creative process and learn new ways to approach your work. This type of collaboration can lead to exciting new creative ideas and can help you to push your boundaries as an audio professional. In conclusion, collaborating with other audio engineers and producers is a great way to level up your audio mix. By identifying the benefits of collaboration, sharing tips and techniques, and learning from other musicians, composers, and sound designers, you can develop your skills and network within the industry. So next time you have the opportunity to collaborate with someone, take it!

Unique Ways To Level Up Your Audio Mix

Credit: www.crutchfield.com

Frequently Asked Questions Of Unique Ways To Level Up Your Audio Mix

How Can I Make My Mix Sound More Professional?

To make your mix sound more professional, focus on EQ, compression, and panning. Use EQ to cut any unnecessary frequencies and boost the important ones. Compression will help even out the levels of different tracks, while panning creates a sense of space.

Don’t overdo any of these techniques, as moderation is key to a clean and professional sound.

How Do I Level My Mix?

To level your mix, you need to ensure that all the audio elements are balanced. Use EQ to adjust each track’s frequencies, compression to control dynamic range, and volume faders to balance levels. Use reference tracks to compare your mix’s balance.

Don’t be afraid to use automation to make minor adjustments.

How Can I Get Better At Audio Mixing?

To get better at audio mixing, you can: 1. Practice regularly and experiment with different techniques 2. Learn from professionals and online tutorials 3. Invest in quality equipment and software 4. Develop your ear for detail and good listening skills 5. Be patient, persistent and open to feedback.

How Do You Balance Audio Mixing?

Balancing audio mixing involves adjusting the volume levels and applying equalization and compression to the tracks. Start by setting the overall level, then use EQ to cut frequencies that clash and boost those that add clarity. Apply compression to smooth out the dynamics.

Continuously compare with other reference tracks to keep everything balanced and avoid any excessive frequency.

Conclusion

There are numerous techniques you can use to enhance your audio mix. Take advantage of filters and panning, adjust levels and EQs, and be creative with reverb and delay effects. Remember to keep experimenting until you achieve the sound and vibe that you want.

By applying these unique tips, you’ll be bound to level up your audio mix and make it stand out.

Categories
Archive

Is Being a Professional Musician Worth It

Yes, being a professional musician is worth it if you have a genuine passion for music and are willing to put in the hard work to succeed. For those who are passionate about music, pursuing a career as a professional musician can be a dream come true.

However, the industry can be incredibly challenging and competitive, with many musicians struggling to make a living. Despite these challenges, many musicians thrive and find fulfillment in their careers. We also explore the pros and cons of the job, the skills you need and tips for building a music career.

Related reading: Ultimate Guide For Musicians On Spotify: Boost Your Music Career! and How To Rock Your Music Career: Setup A TikTok Account For Musicians. For background, see the Wikipedia article on Musician.

Whether you are an aspiring musician or simply curious about the industry, this guide will provide valuable insights into the world of professional music.

Qualities Of A Professional Musician

A professional musician possesses qualities such as discipline, creativity, and dedication that make them capable of producing great music. While it takes a lot of hard work and sacrifice to become a professional musician, the rewards can be fulfilling for those passionate about their craft.

Aspiring musicians often ask themselves if being a professional musician is worth all the hard work, dedication, and sacrifices. While the answer may differ from person to person, the following qualities are essential for a musician to become successful in the highly competitive music industry.

Musical Talent And Skill

A professional musician must possess natural musical talent and skill, coupled with endless hours of practice and training. Exceptional musicianship requires a deep understanding of music theory, advanced technical skills. The ability to improvise and create original music. Musicians who have these qualities can perform their music with ease, precision, and soulful expression, which are critical components to success in the industry.

Discipline And Hard Work

Discipline and hard work are key qualities that set successful musicians apart. To make a career in music, musicians must be self-motivated to practice and rehearse regularly, even when they don’t feel like it. Professional musicians have to put in a lot of hard work and dedication to hone their skills, write new music, record songs, and promote their work. The music industry is fiercely competitive, so only those who are willing to work harder than their peers can succeed.

Networking And Business Savvy

It’s not just the music that makes a musician successful. It’s also the ability to network and promote themselves in the industry. Professional musicians must be connected with music industry professionals, such as agents, producers, promoters, and other musicians. They need to build relationships with people who can help them get their music heard and marketed to the right audiences. Additionally, they must have a solid understanding of the business side of music, such as royalties, contracts, and copyright laws. Being business savvy can help a musician negotiate better deals, make informed decisions, and avoid legal disputes.

In conclusion, being a professional musician is not just a matter of being talented or skilled. It requires discipline, hard work, networking, and business savvy. These qualities are essential for any aspiring musician who wants to make a career out of their passion for music.

Is Being a Professional Musician Worth It

Credit: stereomonosunday.com

Challenges Of Being A Professional Musician

Becoming a professional musician is a dream for many music lovers out there. However, it’s not as glamorous as it looks from the outside. There are several challenges that a professional musician faces every day that can affect their personal and professional life.

Financial Instability As A Professional Musician

One of the most significant challenges that often come to mind when thinking of pursuing music as a career is financial instability. As a musician, you may not have a consistent salary or a regular income. Your earnings solely depend on gigs and other performances.

You may have to go through periods of unemployment, which can take a toll on your financial situation. This instability can also put your personal life at risk. Meanwhile, you may struggle to pay bills, rent, and other expenses.

Fierce Competition

The music industry is hugely competitive, with thousands of talented musicians trying to make a name for themselves. As such, it’s not always easy to land high-paying gigs or secure a record deal.

You’ll need to put in countless hours of practice and invest heavily in the time and energy required to network and build relationships to establish a foothold in the industry. Even then, the competition can be fierce, and you may never achieve the success you had hoped for.

Unpredictable Lifestyle And Schedule

Another challenge of being a professional musician is that the lifestyle and schedule can be unpredictable. While you may have some control over your time when you’re starting, as your career progresses, you may find yourself juggling multiple gigs, rehearsals, and tours simultaneously.

Moreover, you may not know about your next gig until a few hours or days before. This can be stressful if you have made other plans or commitments.

The strenuous workload and lifestyle can also take a toll on your physical and emotional well-being. Meanwhile, they can cause exhaustion, stress, and burnout.

Although being a professional musician can be a dream come true for many people with music in their heart, it’s important to recognize the challenges that come with the territory. Financial instability, fierce competition, and unpredictable lifestyles are some of the obstacles that musicians face every day. However, those who persevere and stay dedicated can realize their dreams of living a fulfilling career in music.

Advantages Of Being A Professional Musician

As a professional musician, you have the opportunity to fully immerse yourself in the world of music, hone your craft, and achieve your dreams. You can feel the high of playing for a live audience and connect with musicians and fans. You may even earn a comfortable living doing what you love.

Despite the challenges, the rewards of being a professional musician can make it all worth it.

HTML code: As a professional musician, you get to pursue your passion for music while earning a living. You have endless opportunities for growth and learning. You can express yourself creatively and explore different styles and genres of music. The advantages of being a professional musician are many. They make pursuing a career in music an attractive option for those passionate about it.

Pursuing Your Passion As A Professional Musician

When you are a professional musician, you get to do what you love every day. You get paid for playing your instrument and creating your music. This is one of the most fulfilling careers a music lover could hope for. The passion for music drives you to create new pieces of music, experiment with different combinations of notes, and collaborate with other musicians. When you pursue your passion, you never feel like you are working a day in your life.

Opportunities For Growth And Learning

As a professional musician, there are always new opportunities for growth and learning. You can attend music schools, workshops, and masterclasses to improve your skills and learn new techniques. Also, you can network with other musicians in the industry to collaborate on new projects and learn from their experience. You can also explore different genres of music and constantly challenge yourself to improve and innovate.

Expressing Yourself Creatively

Being a professional musician gives you the freedom to express yourself creatively. You can write and perform your own music, experiment with new sounds, and collaborate with other musicians to create unique and captivating pieces. You have the freedom to express your emotions and ideas through your music without any limits. This creative expression is what makes music so powerful and impactful and why so many people find it cathartic. Overall, being a professional musician can be a fulfilling and rewarding career. It offers opportunities for growth, learning, and creative expression. Pursuing a career as a musician might not be for everyone. But for those who are passionate about music, it can be a dream come true.

Is Being a Professional Musician Worth It

Credit: www.youtube.com

Career Paths For Professional Musicians

Professional musicians can pursue a variety of career paths, from performing and recording to teaching and composing. However, whether the profession is worth the time and effort depends on individual goals and passion for the craft. Success in the industry requires constant networking and perseverance.

Aspiring musicians often wonder whether becoming a professional musician is a worthwhile career choice. The music industry is challenging and competitive. Still, several career paths are open to driven, dedicated and passionate musicians. Here are three primary career paths that professional musicians often pursue.

Performing And Touring

Performing and touring is one of the most visible ways for musicians to make a name for themselves. Whether as a solo artist or a member of a band, performing live can be an exhilarating experience for both the musician and the audience. It’s important to note that musicians on tour spend much of their time on the road, in hotels, and performing in various venues. This can be both exciting and exhausting. Nonetheless, it remains one of the most common career paths for professional musicians.

Composing And Arranging

For those who prefer to work with music behind the scenes, composing and arranging can be a fulfilling career path. Composers and arrangers write, arrange, and produce music for various media, including film, television, and video games. These professionals have a keen understanding of music theory and can create music that evokes specific emotions and moods. This career path can offer a lot of creative freedom and flexibility.

Teaching As A Professional Musician

Many professional musicians choose to share their craft by teaching music to others. Music teachers can work in a variety of settings, including schools and universities, private lessons, and music academies. They teach students the fundamentals of music theory, how to play an instrument, and how to read music. This career path requires a deep passion for music and a desire to help others grow as musicians. In conclusion, the music industry offers a range of career paths for those considering a professional career in music. Whether it’s performing and touring, composing and arranging, or teaching and education, each career path requires a different set of skills and interests. By exploring these paths, aspiring musicians can determine which one best aligns with their goals, abilities, and interests.

Success Stories Of Professional Musicians

Discover the success stories of professional musicians and whether it’s worth pursuing a career in music. From overnight sensations to long-term performers, the music industry is a tough but rewarding journey filled with hard work, dedication, and talent.

Many people dream of pursuing a career in music, but the question remains: is it worth it? While some argue that the music industry is oversaturated and unpredictable, there are countless success stories of professional musicians who have made it big. In this post, we will explore some of these stories and examine the impact of music on popular culture.

Interview With A Professional Musician

To gain a firsthand perspective on the music industry, we spoke with a successful musician who has been in the business for over a decade. Joe Smith, a singer-songwriter and guitarist, has toured with major acts and played countless shows to thousands of fans. When asked about the challenges of being a professional musician, he emphasized the importance of hard work and perseverance. “It’s not easy,” he said. “But if you love what you do and are willing to put in the work, it can be incredibly rewarding.”

Case Study: How One Musician Made It Big

One inspiring success story is that of Adele, a British singer-songwriter who has sold over 120 million records worldwide. Adele’s career began in 2008 with the release of her debut album, 19. Despite a modest start, her breakthrough success came with her second album, 21, which won numerous awards and shattered sales records. Adele’s music has resonated with fans around the world. Her powerful voice and relatable lyrics have made her one of the most successful musicians of our time.

Impact Of Music On Popular Culture

Music has always played a significant role in popular culture, from the earliest folk songs to the latest pop hits. In today’s digital age, streaming services and social media have made it easier than ever for musicians to connect with fans and build a following. The impact of music on popular culture is evident in the way it shapes our emotions, attitudes, and even our fashion choices. From the Beatles to BeyoncĂ©, music has the power to inspire and unite people of all backgrounds. To sum up, the music industry is not an easy one to break into. But for those who are passionate and resilient, the rewards can be immense. The success stories of professional musicians such as Adele serve as inspiration for aspiring artists. The impact of music on popular culture is undeniable.

Frequently Asked Questions For Is Being A Professional Musician Worth It

Do Professional Musicians Make Good Money?

Yes, some professional musicians make good money through their music careers. The income of musicians varies depending on their genre, level of fame, experience, and performance venues. Successful musicians can earn from millions to thousands of dollars per show or per year through streaming, record sales, and merchandise sales.

What Are The Disadvantages Of Being A Professional Musician?

Being a professional musician has some drawbacks. This includes unstable income due to competition and low wages, long hours of practice and performance which can lead to mental and physical exhaustion. The difficulty of maintaining a work-life balance while touring.

Additionally, getting a break in the music industry can be tough.

How Hard Is It To Be A Professional Musician?

Becoming a professional musician takes a lot of dedication and hard work. The competition is high, and success is not guaranteed. However, if you are willing to put in the effort and continuously improve your skills, it is possible to make a career out of music.

What Is The Success Rate Of Becoming A Professional Musician?

The success rate of becoming a musician is highly subjective and depends on various factors, such as talent, dedication, networking, and opportunities. While some musicians achieve great success, many struggle to make a living from their art. Nevertheless, with hard work and perseverance, anyone can improve their chances of success in the music industry.

Conclusion

To conclude, a career in music is undoubtedly a challenging one. But if you have the passion for it, it can be highly rewarding. While it may not lead to instant success or financial stability, the fulfillment of pursuing your dreams and sharing your talent with the world can be priceless.

It may require hard work, dedication, perseverance, and perhaps some sacrifices. But ultimately, being a professional musician can be worth it if it brings you joy and a sense of purpose.

Categories
Archive

Condenser Mics Vs Dynamic Mics Vs Ribbon Mics

Condenser mics are more sensitive and require phantom power, dynamic mics are more rugged and better suited for high sound pressure levels, and ribbon mics are known for their warm, vintage tone. Each type has its own strengths and weaknesses, making them suitable for different recording situations.

We will take a closer look at the differences between these three types of microphones and how you can choose the right one for your needs. When it comes to recording audio, choosing the right microphone can make all the difference.

Not all microphones are created equal, and understanding their differences can help you achieve better results in your recordings. We will compare three popular types of microphones: condenser, dynamic, and ribbon. We will discuss their unique features, strengths, and weaknesses, as well as their typical uses in different recording scenarios. Whether you are a professional recording engineer or a beginner home studio owner, this guide will help you make an informed decision when choosing the right microphone for your needs.

Condenser Mics Vs Dynamic Mics Vs Ribbon Mics

Credit: www.perfectcircuit.com

Condenser Mics

Condenser mics, dynamic mics, and ribbon mics are the three main types of microphones used in recording. Condenser mics are known for their sensitivity, making them ideal for capturing subtle nuances in vocals and acoustic instruments. They require external power, but offer high quality sound in a compact size.

What Are Condenser Mics?

Condenser mics, also known as capacitor microphones, are a type of microphone that uses a diaphragm as a capacitor plate and a backplate as another capacitor plate to create an electrical charge in response to sound waves. These mics require an external power source, either through phantom power from an audio interface or battery power.

How Do They Work?

Condenser mics operate by using a thin conductive diaphragm that is suspended in front of a metal plate. When sound waves enter into the microphone, the diaphragm moves in response to the pressure changes caused by the sound wave, and its distance from the metal plate changes as well. This changes the capacitance between the two plates, creating an electrical signal that is amplified and sent to the output.

Advantages Of Using Condenser Mics

There are numerous advantages to using condenser microphones, including their ability to capture a broader frequency range, greater sensitivity, and low self-noise compared to other types of microphones. They are also suited for recording vocals, acoustic instruments, and ambient sound due to their high-frequency response and accurate transient response. Condenser mics also come in small-diaphragm and large-diaphragm types, providing versatility in microphone selection.

Disadvantages Of Using Condenser Mics

One key disadvantage of using condenser microphones is that they are sensitive to humidity, temperature, and rough handling. They may also require an external power source, increasing the complexity of the recording setup. Additionally, when recording in a noisy environment, condenser mics can easily pick up unwanted noise due to their high sensitivity. Lastly, they can be more expensive than dynamic or ribbon mics, particularly large-diaphragm versions. Overall, while there are some downsides to using condenser microphones, the advantages they offer in terms of frequency response, sensitivity, and accuracy make them a popular choice for recording music, voice-overs, and other audio applications where high-quality sound is essential.

Dynamic Mics

Dynamic mics are ideal for loud sources like drums and live performances, while condenser mics capture delicate sounds like acoustic guitars. Ribbon mics are known for their warm, vintage sound. Selecting the right type of microphone is crucial to achieve a high-quality recording.

Dynamic microphones are the workhorse of live and studio environments. They are also known as moving coil microphones, and they convert sound waves into electrical signals using electromagnetic induction. The design of dynamic mics is simple, which makes them affordable and rugged. They are suitable for capturing loud sounds and can handle high sound pressure levels. Dynamic microphones are perfect for recording instruments with a lot of depth and punch, such as drums or electric guitars.

What Are Dynamic Mics?

Dynamic microphones are a type of microphone that uses a moving coil to generate an electrical current. They are the most common type of microphone used in live sound and recording situations. Dynamic mics have a simple design and can handle high sound pressure levels, making them ideal for recording loud instruments or amplifiers.

How Do They Work?

Dynamic mics create an electrical signal using a thin, lightweight diaphragm made of mylar or other materials. When sound waves hit the diaphragm, it vibrates, causing a coil of wire to move back and forth inside a magnetic field. The motion of the coil generates an electrical current, which is then converted into an audio signal by the microphone’s electronics.

Advantages Of Using Dynamic Mics

Dynamic microphones have several advantages over other types of microphones. Some of the advantages are:

  • They can handle high sound pressure levels without distorting or clipping the sound.
  • They are durable and can withstand rough handling, making them suitable for live performances or use in harsh environments.
  • They are affordable, making them accessible to beginners or those on a tight budget.
  • They have a simple design, making them easy to use and maintain.

Disadvantages Of Using Dynamic Mics

While dynamic microphones have many benefits, they also have some limitations. Some of the disadvantages are:

  • Dynamic microphones have a limited frequency response and may not capture the full range of sound frequencies as accurately as other types of microphones.
  • They are less sensitive than other microphones and may require more gain to amplify quieter sounds.
  • Dynamic microphones may not be ideal for recording delicate or nuanced sounds, such as vocals or acoustic instruments.

Ribbon Mics

Condenser mics, dynamic mics, and ribbon mics are the three major types of microphones used in recording. Ribbon mics, the most sensitive and delicate type, have a unique sound that captures the natural essence of vocals and instruments. When choosing between these mics, many factors like budget, recording environment, and intended use must be considered.

What Are Ribbon Mics?

Ribbon mics are a type of microphone that uses a thin metal ribbon, typically made of aluminum, placed between the poles of a magnet to convert sound signals into electrical signals. These microphones are known for their ability to capture natural, warm and rich sounds that are not achievable with other types of microphones. The ribbon in the microphone functions as a diaphragm, moving in response to the sound waves to produce an electrical signal.

How Do They Work?

Ribbon microphones operate on a passive electrodynamic principle. The electromagnetic induction is used to generate an output signal. As the sound waves make the ribbon move between the magnetic fields, it generates an electrical signal. The signal is then transferred to the preamp, which amplifies the signal so it can be heard through speakers. The ribbon can be considered as a miniature generator of AC voltage. Ribbon microphones require a preamp with high gain capability to avoid picking up noise and any electromagnetic interference.

Advantages Of Using Ribbon Mics

  • Ribbon mics capture the most natural sound possible.
  • They have excellent transient response which makes them ideal for capturing fast transients.
  • They have a figure-8 pattern, which enables them to capture sound from both front and behind, making them ideal for recording instruments in larger spaces.
  • They have a warm, natural sound which makes them perfect for recording vocals, acoustic guitars, drums, and other instruments that require a more natural tone.

Disadvantages Of Using Ribbon Mics

  • Ribbon microphones are quite fragile, and the ribbon is susceptible to damage from strong plosives or wind blasts.
  • They require a preamp with high gain capabilities due to their relatively low output levels, which can add noise to your recording.
  • They are more expensive than other microphone types, such as condenser or dynamic microphones.
  • Ribbon microphones are not suitable for recording very loud sounds as they may get damaged.

Overall, ribbon microphones are incredibly versatile and can provide exceptional results when used correctly. However, they do require careful handling and appropriate preamp selection to avoid damage and minimize noise.

Sound Quality

When it comes to recording, sound quality is everything. The quality of microphone you choose can make or break your recording. Among all the microphones available in the market, condenser, dynamic and ribbon microphones are the most popular ones for both professional and personal use.

Comparison Of Sound Quality Between Condenser, Dynamic And Ribbon Mics

Sound quality can be subjective, but generally speaking, condenser microphones tend to capture a cleaner, more detailed sound than dynamic or ribbon mics. This is because they are more sensitive, and they respond better to high frequencies and transients.

Dynamic microphones, on the other hand, are known for their durability and versatility. They can handle high sound pressure levels (SPLs) and are often used for recording rock vocals, drums, and guitar amps. They tend to produce a warmer, more natural sound that is well-suited for live performances and recording in noisy environments.

Ribbon microphones have the reputation for delivering the most natural and accurate sound of all microphone types. They are well-suited for recording strings, woodwinds or vocals and other applications that require a more natural sound. Ribbon mic also has a very smooth sound as compared to dynamic microphone.

Which Mic Is Suitable For Which Type Of Recording?

Microphone TypeBest For
Condenser MicrophoneRecording vocals, acoustic guitars, pianos, and other acoustic instruments. They are also great for ASMR, podcasts, and voiceovers. But not suitable for recording loud instruments.
Dynamic MicrophoneUsed for loud instruments such as drums, guitar cabinets, bass guitar or electric guitar. They are often used for live sound reinforcement, on stage performances and podcasting. They have better durability as compared to condenser and ribbon mics.
Ribbon MicrophoneRecording classic jazz music, stringed instruments and choir. They are also used in radio broadcasting. But they can be more delicate as compared to other microphones due to the fragile nature of the ribbon, it can get damaged by phantom power or high SPLs.

Choosing the right microphone type for your recording purpose can make a huge difference in the sound quality of your recordings. Keep in mind the above information while choosing a microphone, and consider the source of your sound, the environment you’re recording in, and your budget before making any purchase.

Price Range

Condenser mics generally have a higher price range due to their sensitivity and ability to capture more detailed sound. Dynamic mics are more affordable and known for their durability, while ribbon mics can be quite pricey due to their delicate design and rich sound quality.

Comparison Of Prices Of Condenser, Dynamic And Ribbon Mics

When it comes to purchasing a microphone, price plays a critical role in decision making. Condenser mics are often the most expensive, followed by ribbon mics and then dynamic mics. One reason for the price difference is the technology utilized in each type of microphone. Condenser microphones have a thin diaphragm that moves in response to sound waves. They require an external power source and typically have more advanced circuitry, resulting in higher prices. Dynamic microphones have a thicker diaphragm and do not require an external power source, making them less expensive. Ribbon microphones also have thin diaphragms but are less popular and less commonly used, making them difficult to find and even more expensive than condenser microphones.

Are Expensive Mics Worth The Investment?

If you are a professional musician or audio engineer, then investing in a high-end microphone can be worth the price. Expensive microphones often have advanced features and better sound quality, making them a worthwhile investment for recording studios and live performances. Additionally, they typically have a longer lifespan and better durability than cheaper microphones, reducing the need for replacement. However, for those on a tight budget or those just starting, cheaper microphones can still produce decent sound quality. While they may not have advanced features or top-notch sound quality, they can still get the job done for a fraction of the cost. It’s important to weigh the pros and cons of each option and decide what works best for your specific needs and budget. Overall, it’s important to consider the price range when purchasing a microphone and how it fits into your overall recording or performance setup. Whether you decide to invest in a high-end condenser microphone or opt for a cheaper dynamic microphone, both have pros and cons that should be weighed based on your specific needs and budget.

Condenser Mics Vs Dynamic Mics Vs Ribbon Mics

Credit: behindthebridgeblog.tumblr.com

Applications

Condenser mics, dynamic mics, and ribbon mics are all different types of microphones with distinct features that determine their best use cases. Condenser mics work well for capturing vocals, while dynamic mics are better suited for loud environments and instruments.

Ribbon mics provide a vintage sound and are ideal for recording instruments with a warm tone.

Different applications require different types of microphones. Choosing the right type of microphone for the intended application is crucial for achieving the desired result. Condenser mics, dynamic mics, and ribbon mics are the three main types of microphones used for various applications.

Live Performances

Live performances require microphones that are rugged, durable, and can handle high sound pressure levels. Dynamic microphones are ideal for live performances as they can handle louder sounds without distortion. They are also less susceptible to feedback, making them perfect for concerts, stage performances, and public address systems.

Studio Recording

In studio recording, capturing the nuances and details of sound is of utmost importance. Generally, a condenser microphone is preferred for studio recordings. The sensitivity, accuracy, and frequency response of a condenser microphone make it an ideal choice for capturing vocals, acoustic instruments, and sound effects.

Podcasting

Podcasting requires a microphone that can capture clear, crisp audio with minimal background noise. A condenser microphone with a cardioid polar pattern is perfect for podcasting, as it can pick up sounds from the front while rejecting sounds from the rear and sides. This pattern helps to reduce background noise and echo, producing a high-quality audio output.

Different Applications

Type of MicIdeal Application
Condenser MicStudio Recording, Podcasting, Voiceover Work
Dynamic MicLive Performances, Public Address Systems, Recording Louder Instruments
Ribbon MicVintage Recordings, Jazz Recordings, Recording Delicate Instruments

Conclusion

Choosing the right microphone for the right application is essential to achieve the desired result. By having a basic understanding of the different types of microphones and their ideal applications, one can choose the best microphone suitable for their needs.

Condenser Mics Vs Dynamic Mics Vs Ribbon Mics

Credit: jackjefferys2.wixsite.com

Frequently Asked Questions Of Condenser Mics Vs Dynamic Mics Vs Ribbon Mics

What Is The Difference Between Dynamic Condenser And Ribbon Microphones?

Dynamic microphones are rugged and can handle high sound pressure levels, but have a limited frequency response. Ribbon microphones are more responsive, capturing subtler nuances, but are delicate and require low levels of sound.

Is A Condenser Mic A Ribbon Mic?

No, a condenser mic and a ribbon mic are not the same thing. The primary difference is in their design and the way they capture sound. While a condenser mic uses a diaphragm to convert sound waves into electrical signals, a ribbon mic uses a thin strip of metal to produce the same effect.

What Are Ribbon Mics Best For?

Ribbon mics are best for capturing natural and warm sounds in a recording studio. They work well for recording vocals, acoustic guitars, strings, brass instruments, and drums. The delicate and detailed sound they produce is ideal for capturing vintage tones or adding warmth to modern recordings.

What Are The Three Types Of Microphones?

The three types of microphones are dynamic, condenser, and ribbon. Dynamic microphones are durable and good for live use, while condenser mics are more sensitive and used for studio recording. Ribbon microphones have a unique sound and are also used for studio recording.

Conclusion

As we have seen, each type of microphone has its own unique characteristics that make it suited for different recording situations. Condenser mics are great for capturing detailed and sensitive sounds, dynamic mics are versatile and can handle high SPLs, and ribbon mics offer a warm and natural sound.

Ultimately, choosing the right microphone for your needs will depend on the specific requirements of your recording project. So, don’t be afraid to experiment and find the perfect mic for your sound!

https://www.youtube.com/watch?v=1CmxkO5ZlIE
Categories
Archive

Studio Monitors Sideways Or Vertical

Studio monitors can be used sideways or vertically, depending on the desired frequency response. Your choice should depend on the optimal listening position and environment.

As an Amazon Associate I earn from qualifying purchases.

Studio monitors are essential equipment for musicians and sound engineers who want to generate high-quality sound recordings or produce music. When setting up studio monitors, one of the questions that arise is whether to position them sideways or vertically. The answer lies in achieving the best frequency response in your ideal listening position.

We will delve deeper into the pros and cons of both positions and help you determine which one might be the best for your studio set-up. Ultimately, the decision will depend on a variety of factors, including the dimensions of your room, the acoustics, and the distance between the listener and the monitors.

Why Studio Monitor Placement Matters

Studio monitors are critical components of any recording studio, as they play a crucial role in delivering accurate and trustworthy sound. The placement of these speakers can significantly impact the quality of sound and, subsequently, affect the mixing and mastering process. Proper studio monitor placement is imperative to achieve optimal sound quality. This blog discusses the different monitor placements and their impact and the benefits of proper studio monitor placement.

Different Placements And Their Impact On Sound

There are two ways of placing studio monitors in a studio, horizontal or vertical. The placement has a significant impact on the way monitors project sound. A horizontal placement ensures that sound waves travel parallel to the mixing desk, while a vertical position sends sound waves to the ceiling and floor.

PlacementAdvantageDisadvantage
HorizontalDelivers accurate stereo imaging and the best frequency response.Increases the distance between the tweeter and the woofer, leading to possible alignment issues.
VerticalReduces the distance between the tweeter and the woofer, resulting in better alignment.Can cause sound waves to bounce off surfaces and create distortion, resulting in inaccurate mixing.

Benefits Of Proper Studio Monitor Placement

  • Ensures that the sound reproduction is accurate and transparent.
  • Minimizes the effect of acoustic issues in the room on the mixing process.
  • Reduces listening fatigue by providing an optimum listening position.
  • Enables better stereo imaging and accurate frequency response.
  • Improves the overall mixing and mastering process.

Therefore, it is essential to evaluate your studio’s acoustic layout and set up the monitor position that works for you. Investing time and effort to get the speaker placement right can significantly enhance the quality of your music production.

Sideways Placement

Sideways placement of studio monitors can have a significant impact on the overall sound quality of your audio recordings. Whether you choose to position them horizontally or vertically, it’s crucial to consider the acoustics of your room and experiment with placement to find the optimal positioning for your setup.

Explanation Of Sideways Placement

If you are setting up a home recording studio, one of the many decisions you will have to make regarding equipment is regarding the placement of your studio monitors. When it comes to monitoring placement, one of the most debated topics is whether the monitors should be vertical or horizontal.

Advantages And Disadvantages

Let’s take a closer look at the advantages and disadvantages of sideways placement. One of the main benefits of sideways placement is that it provides a wider soundstage and allows for better stereo imaging. This is because the sound waves are spread out more due to the increased distance between the speakers. Additionally, sideways placement can be beneficial if you have a small studio, as it allows you to save space on your desk or stands. However, there are also disadvantages. Sideways placement can lead to a loss of bass frequencies since the sound waves are projected out to the sides rather than directly at the listener. Additionally, the sound can be less focused, leading to a less accurate representation of your mix. Keep in mind that sideways placement works best for mixing and monitoring at moderate levels.

When To Consider Sideways Placement

If you are working in a small space or need to save desk space, sideways placement may be a viable option. Additionally, if you work with a lot of width in your mixes, then sideways placement can help to enhance the mixing experience. Ultimately, it comes down to your personal preferences and the space available in your studio. Using the right placement of your studio monitors is crucial to ensure that you can mix and monitor accurately, the overall sound quality is reflecting in the recording, and you are producing great recordings. Whether you choose to place your monitors sideways or vertically, be sure to experiment with different positions, listening levels, and EQ settings to find the best setup for you.

Vertical Placement

Opting for vertical placement for your studio monitors is a great choice. It provides a clearer stereo image and better sound dispersion, making it easier to hear small details. Also, it takes up less space on your desk or studio setup.

When it comes to setting up studio monitors, one of the key decisions you’ll need to make is whether to place them vertically or sideways. In this section, we’ll focus on the advantages and disadvantages of vertical placement, explain what it entails, and identify scenarios where you might consider it.

Explanation Of Vertical Placement

Vertical placement refers to positioning your studio monitor in an upright position, with the woofer at the bottom and the tweeter at the top. This placement has its pros and cons, and it’s essential to assess them before making a decision. First, let’s look at some of the advantages.

Advantages And Disadvantages

Advantages:

  • Vertical placement can help improve the stereo image. By positioning the tweeter closer to ear level, you can achieve more accurate and precise stereo imaging.
  • This placement can also help reduce the impact of any reflections from the console or mixing desk.

Disadvantages:

  • Vertical placement may compromise the tonal balance as some design factors in the speaker may be overlooked when that orientation is adopted.
  • If the placement places the monitor too close to a corner, boominess may occur due to bad sound propagation

When To Considervertical Placement

There are a few key scenarios where vertical placement might be ideal:

  • When the studio space is tight and horizontal placement isn’t an option.
  • When you want to achieve better stereo imaging in your mix. In this situation, placing the monitor vertically may work best.

Overall, vertical placement is a viable option for studio monitors, but it has its benefits and limitations. By examining the advantages and disadvantages, you can determine whether it would be an excellent option for your current workspace, have better stereo imaging while ensuring boominess or any adverse effects of that placement of the monitor is minimal.

Factors To Consider

If you want to set up a home recording studio, one of the most important things to consider is the orientation of your studio monitors. Should they be positioned sideways or vertically? This question has been the subject of many debates among audiophiles, music producers, and recording engineers. In this blog post, we’ll discuss some factors to consider when deciding between horizontal or vertical monitor orientation.

Room Acoustics

The acoustics of your recording room play a significant role in determining the optimal orientation of your studio monitors. The shape and size of your room affect the reflection and absorption of sound waves, which can impact the overall sound quality of your recordings. As a general rule, vertical monitor placement is ideal for a room with low ceilings, while horizontal monitors are better suited for rooms with high ceilings. Horizontal monitor positioning can help reduce floor-to-ceiling reflections and improve overall sound accuracy.

Monitor Size

The size of your monitors is also an important factor to consider. Smaller monitors typically work best in a horizontal position, while larger monitors may be better suited for vertical placement. This is because larger monitors typically have a narrower sweet spot, which means that the listening position needs to be more precise. Vertical monitoring can improve sound localization, making it easier to hear panning and other spatial effects.

Speaker Aim

The aim of your studio monitors also affects their orientation. Vertical placement is ideal for monitors that are aimed directly at the listener, while horizontal monitors are better suited for off-axis listening. In general, tilted monitors should be positioned in a vertical orientation to ensure that the tweeter is aimed directly at the listener’s ear.

Vertical Monitor PlacementHorizontal Monitor Placement
Room with low ceilingsRoom with high ceilings
Larger monitorsSmaller monitors
Tilted monitors aimed directly at listenerMonitors aimed off-axis
  • Vertical monitors for improved sound localization
  • Horizontal monitors reduce floor-to-ceiling reflections
  • Ensure tilted monitors are positioned vertically

In conclusion, the orientation of your studio monitors plays an important role in the overall sound quality of your recordings. By considering factors such as room acoustics, monitor size, and speaker aim, you can determine whether vertical or horizontal placement is best for your setup.

Set-up Tips

Studio monitors can be set up either sideways or vertically, depending on personal preference and the layout of your workspace. Mounting them vertically can save desk space and provide a better sound stage, while placing them sideways may enhance stereo imaging and minimize reflection.

Set-Up Tips: Optimizing your studio monitor speaker placement is a vital step in achieving the perfect mix and sound quality. Even a slight change in positioning can adversely affect the sound, leading to frequency dips and nulls. Therefore, it’s crucial to get the placement right. In this section, we’ll give you some guidelines, testing methods, and accessories that can help you with the set-up. Optimal Placement Guidelines: To set up your studio monitors, you need to place them away from the wall and at equal distances from each other. For optimal results, place them at an angle of 60 degrees to form an equilateral triangle with your listening position. Ensure you avoid any potential obstacles in between the speakers and your ears that can interfere with the soundwaves. Moreover, it’s essential to avoid placing your speakers in corners or against walls as this can lead to bass buildup. How To Test Placement: Once you have placed your studio monitors according to the above guidelines, it’s time to analyze whether or not they are well-positioned. The simplest test is to sit on your sweet spot and listen to your favorite music. If the sound is clear and balanced, your placement is good. However, if you detect any frequency dips or peaks, you might need to move your speakers by a few inches and test again until you achieve the desired sound. Accessories To Help With Placement: Several accessories can help you set up your studio monitors correctly. The most common one is foam isolation pads that can provide a stable base for your speakers, isolate them from vibration, and slightly angle them upwards, ensuring the sound is directed to your ears correctly. Using monitor stands is another option, especially if you need to raise your speakers above your desk or optimize their placement. Finally, some monitor controllers, like the Mackie Big Knob, come with built-in acoustic tuning capabilities that can help you achieve accurate studio monitor placement. In conclusion, correctly setting up your studio monitors is essential for achieving your desired sound quality. By following the guidelines, testing your placement, and using accessories such as isolation pads or stands, you can ensure optimal placement, leading to a balanced and accurate sound output.

Studio Monitors Sideways Or Vertical

Credit: www.youtube.com

Studio Monitors Sideways Or Vertical

Credit: producelikeapro.com

Frequently Asked Questions On Studio Monitors Sideways Or Vertical

Does It Matter If Speakers Are Vertical Or Horizontal?

No, it doesn’t matter if speakers are vertical or horizontal. It won’t affect the sound quality as long as they are in the correct position. However, it’s important to follow the manufacturer’s recommendations for placement to get the best sound experience.

Is It Better To Tilt Studio Monitors Up Or Down?

Tilting studio monitors either up or down depends on personal preference and the placement of the monitors. Angling them upwards improves clarity of the mid and high frequencies while angling downwards enhances the bass response. It is recommended to experiment with both positions to find the optimal tilt for your specific setup.

How Should My Studio Monitors Be Positioned?

Position your studio monitors at an equilateral triangle with the listener, ensuring that they are at ear level and angled towards your ears. Keep them away from walls and corners to avoid reflections and bass buildup. Finally, make sure they are placed on stable and isolated stands.

Can You Put Hs8 Sideways?

Yes, the Yamaha HS8 studio monitor can be placed sideways. However, it is recommended to keep it upright for optimal sound quality and performance.

Conclusion

After a thorough analysis, it is clear that both vertical and sideways configurations have their own benefits and drawbacks. However, the decision ultimately depends on your individual needs and goals. Whether you choose to mount your studio monitors vertically or sideways, make sure to consider your room layout, listening position, and personal preference.

Ultimately, choosing the right position for your studio monitors is crucial for achieving the best possible sound quality in your mixing and mastering process.