Categories
Archive

How to Make Your Song Louder

To make your song louder, increase the gain and compression while reducing the dynamic range. This will boost the overall volume without sacrificing quality or creating distortion.

As a music lover, you are always trying to find ways to take your tracks to the next level. However, you may be struggling to make your song louder without damaging its quality. There is a lot of misinformation out there about the best ways to boost your volume levels, but the truth is that it’s all about balance.

We will explore the most effective methods for increasing the volume of your tracks while maintaining their clarity and musicality. Whether you are a beginner or an experienced producer, mastering these techniques will help you create professional-quality music that sounds great on any system.

Step 1: Eq Your Track

If you want your song to sound louder, it’s important to use EQ (equalization) to balance and shape the overall sound of your track. EQ is used to adjust the frequencies of different instruments and sounds in your mix, making sure each one sits well together and nothing is fighting for space. In this step-by-step guide, we’ll show you how to EQ your track to make it sound louder and more professional.

Using A High Pass Filter

One of the first things you should do when EQing your track is to use a high-pass filter to cut out any low-frequency rumble or noise that can muddy up your mix and eat up headroom. Headroom is the amount of space you have left before your mix clips and distorts, so it’s important to free up as much of it as possible.

FrequencyInstrument/Effect
20-40HzKick drum
60-120HzBass guitar, low-end vocals
120-250HzSnare drum, guitar power chords, male vocals
250-500HzToms, guitar mid-range, female vocals
500-2kHzGuitars, keyboards, horns, mid-range vocals
2-4kHzPiano, cymbals, high-end vocals
4-20kHzCymbals, high-end percussion

As a general rule of thumb, you can use a high-pass filter to remove anything below 20Hz or so, but this will depend on your mix. Use your ears to find any rumble or noise that doesn’t add anything to the overall sound and cut it out.

Using A Low Shelf Filter

Another trick for making your track sound louder is to use a low-shelf filter to boost the low-frequency range. This can give your mix a sense of weight and power without making it sound muddy or boomy.

  1. First, set your low-shelf filter to around 100Hz and boost it by a few dB.
  2. Listen to your mix and adjust the boost until you find a sweet spot.
  3. Be careful not to overdo it, as too much bass can make your mix sound flabby or distorted.

Remember, these EQ techniques are just the beginning. Experiment with different settings and adjustments to find the right sound for your mix. With a little patience and practice, you can make your song sound louder, clearer, and more professional.

How to Make Your Song Louder

Credit: www.youtube.com

Step 2: Compress Your Track

In step one, we discussed how to equalize the different audio levels of your song. After this step, your track will already be louder than before, but it’s not enough to make your song loud enough to grab the listener’s attention. In this post, we will discuss Step 2 of making your song louder – Compressing Your Track.

Setting The Threshold

The first step to compressing your track is to set the threshold. Threshold is the point at which compression begins and is the most crucial setting in compression. By reducing the threshold, you can increase the apparent volume of the entire track.

However, be cautious when adjusting the threshold. Too much compression can produce unwanted distortion and cause your song to sound unnatural. Remember, the purpose of compression is to make the track louder but still retain a natural and dynamic sound.

Adjusting Attack And Release

Once you have set your threshold, the next step is to adjust the attack and release. Attack is the time it takes for the compressor to start working on the audio, while release is the time it takes for the compressor to stop working on the audio. These settings can make a significant difference in the overall sound of your song.

If the attack time is too long, it will take too long for the compressor to start working, and too short an attack time can cause unwanted distortion. Similarly, a long release time can cause your song to sound unnatural, whereas a short release time can lead to over-compression. Finding the right balance is key.

Using A Limiter

Finally, to maximize the loudness of your song, use a limiter. A limiter is a type of compressor that limits the maximum volume of your song. By setting the gain of the limiter to the maximum possible, you can increase the perceived loudness of your song without distorting it.

However, like compression, be cautious when using a limiter as too much limiting can cause “pumping,” which is the unpleasant effect of the audio level continuously increasing and decreasing. You want to aim for a perfect balance of loudness and dynamics.

In conclusion, compressing your track is a vital step in making your song louder. Make sure to start by setting the threshold correctly, adjust the attack and release to your preference, and use a limiter to maximize the loudness of your track while retaining its dynamics.

Step 3: Add Harmonic Saturation

One effective way to make your song louder is by adding harmonic saturation. This technique adds character and warmth to your mix, making it sound more vibrant and full-bodied. Harmonic saturation also helps to enhance the perceived loudness of your song without actually increasing its volume, making it perfect for creating a fuller, more impactful sound.

If you’ve already used compression and EQ techniques to make your song as loud as possible, but it still lacks that final oomph, then it’s time to consider adding harmonic saturation. This process involves introducing subtle distortion to your audio signal, creating additional harmonics that enhance the perceived loudness and fullness of your mix. Here are two popular ways to add harmonic saturation:

Using A Tape Simulator

Tape simulation plugins have become increasingly popular in recent years, as producers have rediscovered the warmth and character of analog recording techniques. Many of these plugins also include options for adding harmonic saturation, allowing you to mimic the sound of tape saturation without the need for physical tape. By applying small amounts of saturation to individual tracks or to the overall mix, you can add harmonics and warmth that enhance the perceived loudness without sacrificing clarity.

Using A Harmonic Exciter

Harmonic exciters are another popular way to add saturation and warmth to your mix. These plugins work by analyzing your audio signal and adding additional harmonic content at specific frequencies, creating a fuller and brighter sound. Some exciters also offer control over the amount and type of saturation applied, allowing you to fine-tune the effect to fit your mix. When using an exciter, it’s important to be subtle – too much saturation can quickly lead to a harsh and unpleasant sound. By experimenting with different types and amounts of harmonic saturation, you can achieve a fuller and louder mix without sacrificing clarity or dynamics. Just remember to use these techniques sparingly and always trust your ears when making adjustments to your mix.

How to Make Your Song Louder

Credit: www.mixinglessons.com

Step 4: Use Stereo Imaging

One effective way to make your song sound louder is by using stereo imaging. By panning different elements of the mix to the left or right channels, you can create a wider, more dynamic sound that fills up the sonic space and grabs the listener’s attention.

If you want to make your song louder, stereo imaging can help. This technique adds depth to your track by creating a more complex stereo image. Instead of a narrow or mono-sounding track, listeners will hear a wide and expansive soundscape that fully surrounds them. Here are two ways to use stereo imaging:

Adjusting The Width

One way to make your song louder using stereo imaging is to adjust the width. You can make your track wider using a stereo enhancement tool found in most DAWs. This tool separates the sound into two channels, left and right, and allows you to adjust the level of each channel. By increasing the level of one channel and decreasing the other, you create a wider sound. For instance, you can take the lead vocal and pan it slightly to the left ear, while placing the guitar on the right ear. You can also widen the reverb or delay on the snare or vocal. A wider track can greatly enhance your song and make it sound larger than life.

Using A Stereo Enhancer

Another way to make your song louder with stereo imaging is to use a stereo enhancer. This plugin is designed to add more stereo width, depth, and presence to your mix. It can also help to bring out the individual elements and improve the overall clarity of your track. You can use this plugin to further enhance the stereo information in your tracks. For example, you can use it to add a subtle amount of stereo reverb to your vocal or widen the stereo image of your drum overheads. However, it is important to use this tool with caution because too much stereo widening can create phasing and other undesirable artifacts. In summary, using stereo imaging is a great way to make your song louder and give it a more spacious and detailed sound. By adjusting the width and using a stereo enhancer, you can enhance the stereo image of your tracks and add more depth to your overall mix.

Step 5: Maximize Loudness With A Brickwall Limiter

To make your song louder, maximize loudness with a brickwall limiter. This tool will help you reach the desired volume for your track while preventing clipping and distortion. Ensure that you use it appropriately and sparingly to get the best results.

If you want your song to stand out and be heard, you need to ensure that it is properly mastered and maximized for loudness. By using a brickwall limiter, you can push the volume of your song to its maximum level without causing any distortion. Here’s how you can use a brickwall limiter to maximize loudness for your song:

Setting Your Levels

Before applying a brickwall limiter to your track, it’s important to ensure that the levels are set correctly. This means you need to adjust the volume of each element in the mix, such as drums, vocals, bass, and other instruments, so that they are balanced and sit well with each other. To do this, you can use a level meter to monitor the volume of each element and adjust accordingly.

Using A True Peak Limiter

A true peak limiter is a type of brickwall limiter that ensures the output does not exceed the maximum peak level allowed by digital audio. This is important because if the peak level exceeds the limit, it can cause distortion and clipping in your song. By using a true peak limiter, you can ensure that your song is maximized for loudness without compromising on quality.

Adjusting The Threshold And Ceiling

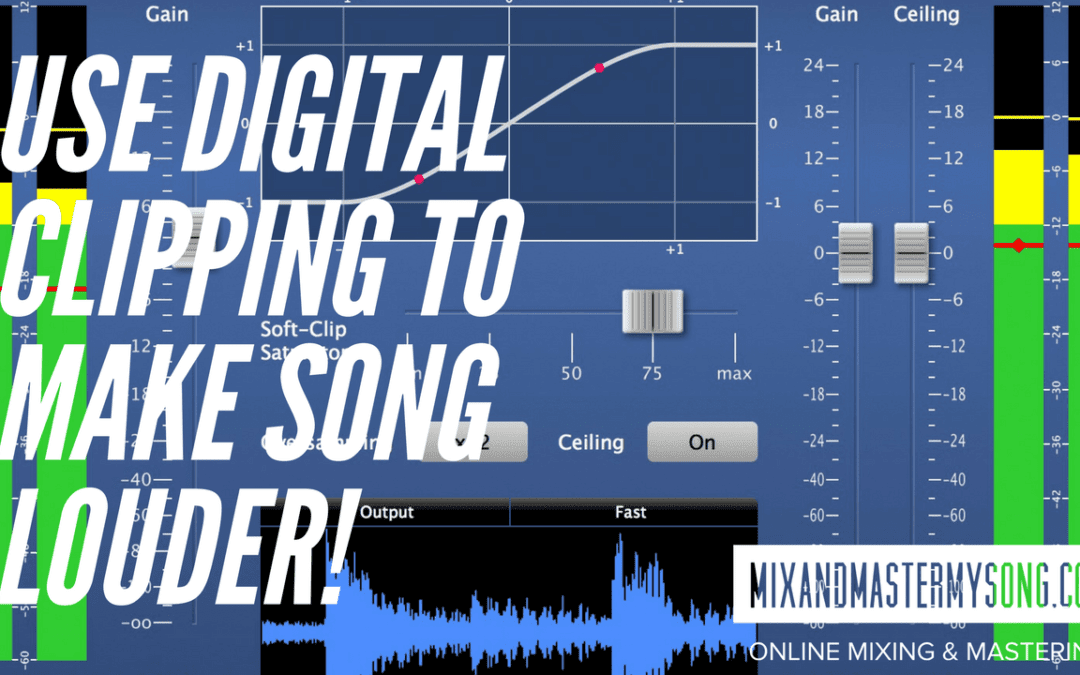
When using a brickwall limiter, it’s important to adjust the threshold and ceiling settings to achieve the desired level of loudness. The threshold determines at what point the limiter will start affecting the volume of your track, while the ceiling sets the maximum level that the limiter will allow your track to reach. It’s important to experiment with these settings to find the sweet spot that provides the right amount of loudness without causing any distortion.

Using Multiband Compression In Combination With A Brickwall Limiter

If you want to achieve even greater loudness, you can use multiband compression in combination with a brickwall limiter. Multiband compression allows you to target specific frequency ranges, such as the bass, midrange, and treble, and apply compression to those ranges individually. This can help to further enhance the loudness of your track while maintaining its overall balance and clarity. To summarize, by using a brickwall limiter, you can maximize the loudness of your song without causing any distortion or compromising on quality. By adjusting the threshold and ceiling settings, using a true peak limiter, and experimenting with multiband compression, you can achieve the perfect balance of loudness and clarity for your track.
How to Make Your Song Louder

Credit: mixandmastermysong.com

Frequently Asked Questions On How To Make Your Song Louder

How Can I Increase The Loudness Of A Song?

To increase the loudness of a song, you can use various tools and techniques like dynamic range compression, limiting, EQ adjustments, and volume normalization. But it’s important to use them judiciously and avoid overcompression and distortion. It’s also advisable to mix and master your tracks at a higher volume to begin with.

What Makes Music Louder?

Music can be made louder by increasing the volume or amplitude of the sound waves produced. This is typically achieved through the use of amplifiers, speakers, or sound systems. Louder music creates greater auditory stimulation and can be perceived as more exciting or energetic.

However, prolonged exposure to excessive noise levels can also lead to hearing damage.

Why Are My Songs Not Loud Enough?

Your songs may not be loud enough because of several reasons like low-quality equipment, improper gain staging, lack of compression, and mastering. These issues can impact the levels of your tracks, making it sound weak. Consider investing in high-quality gear, adjusting gain levels, compressing the tracks, and mastering them before release.

How Do I Make My Volume Louder?

To make your volume louder, you can try increasing the volume directly on the device or using an external speaker. Another option is to adjust the equalizer settings to boost the volume. Some devices also have a loudness option or a volume boost feature that can be turned on to increase the volume.

Conclusion

All in all, enhancing the loudness of your song may seem like a daunting task, but with the right use of tools and techniques, it can be a breeze. Whether you want your song to stand out in a crowded music market or simply want a better listening experience, following these steps will truly make a difference.

Remember to have patience and experiment until you find the perfect balance. So go ahead, let your music speak louder than words!

Categories
Archive

Find Spotify Playlist Curators

To find Spotify playlist curators, use resources like PlaylistPush, SubmitHub, and Soundplate. These platforms connect artists with relevant playlist curators in their genre.

Also, Spotify has become a go-to music streaming platform, and for artists, getting their tracks featured on popular playlists can lead to wider exposure and more streams. However, finding the right curators can be a daunting task. Fortunately, there are several resources available online that can help connect artists with relevant playlist editors.

Related reading: Different Types Of Spotify Playlists and How To Get Your Music Featured On Spotify Playlists. For background, see the official Artists website.

Moreover, PlaylistPush, SubmitHub, and Soundplate are just a few examples of platforms that offer opportunities for artists to submit their music and pitch to curators in their genre. We’ll dive deep into how these platforms work. You’ll also get tips for using them to land your music on a Spotify playlist.

Find Spotify Playlist Curators

Credit: www.youtube.com

How To Find Spotify Playlist Curators

If you’re an artist or a new music enthusiast, Spotify playlists can be your ultimate ticket to gaining exposure and finding new music. In this blog post, we’ll explore the best ways to find Spotify playlist curators to get your music heard by millions. Here are some effective methods to find Spotify playlist curators:

Using Spotify Playlist Search

Furthermore, Spotify has an in-built search function that allows anyone to search for playlists that match their interests. You can use keywords that describe your music genre, mood, tempo, and more to narrow down your search results. This method is ideal for those who have a clear idea of what type of playlists they want to feature in.

Looking For Online Directories

Additionally, several online directories have a list of Spotify playlist curators. These directories usually categorize playlists according to music genres. This makes it easier for you to find which playlists align with your music genre. Some of the most popular directories include Soundplate, Indiemono, and Playlist Push.

Using Playlist Curator Websites

Also, several websites help artists find and connect with Spotify playlist curators. These sites act as intermediaries between artists and curators and can be a great way to gain exposure. Examples of these websites include Playlist Pump, Submithub, and SubmitHub.

Using Social Media Platforms

Moreover, Social media platforms are an excellent way to make new connections. You can use them to find new playlist curators. Use hashtags related to your music genre. You may end up stumbling upon a curator’s profile, making it an excellent way to find and connect with new people.

Find Spotify Playlist Curators

Credit: blog.boostcollective.ca

Things To Consider When Finding Spotify Playlist Curators

In addition, Do you want your music heard on Spotify? One of the best ways to grow streams and followers is a spot on playlists curated by influencers. However, finding the right playlist curators can be a daunting task. Here are some tips to help you find the best playlists for your music.

Relevance

  • Furthermore, make sure the playlist is relevant to your genre and style.
  • Additionally, check if the playlist has a specific theme or mood that matches your music.
  • Also, research the curator’s profile and see if they have a history of curating playlists similar to your music.

Popularity

  • Moreover, Search for playlists with a large number of followers as they are more likely to generate more streams for your music.
  • In addition, look for playlists that have a significant number of likes and shares as it indicates that the curator has a strong fan base.

Engagement

  • Check if the curator interacts with their followers and responds to comments or messages.
  • Look for playlists that are updated frequently as it means that the curator is actively engaging with their audience.
  • Look at the number of plays and audience engagement of the playlists to see if the followers are active and engaged with the playlist.

Terms And Conditions

Before submitting your music to a playlist curator, make sure you read and understand their terms and conditions. Some curators may charge a fee for submissions, while others may have specific criteria that need to be met.

Remember, playlist curators differ a lot in quality and reach. Make sure you do your research and find the ones that are relevant, popular, engaging, and have fair terms and conditions.

How To Approach Spotify Playlist Curators

Approaching Spotify Playlist curators can be a bit tricky, but with the right steps, you can increase your chances of success. The first step is to find them. You can do this through Spotify’s search function, social media, or third-party websites.

Once you’ve found the curators, it’s important to personalize your pitch, provide a brief introduction, and clearly explain why your music would be a good fit for their playlist.

Creating a playlist on Spotify can have great benefits for musicians and their team. But it’s often tough to get noticed. Connecting with Spotify playlist curators can be an effective way to reach new listeners. However, it’s important to approach these curators in the right way.

Customize Your Approach

One thing to keep in mind is that not all Spotify playlist curators are the same. Each of these curators has their own interests and motivations when it comes to adding tracks to their playlists. When reaching out, it’s essential to understand their preferences. Take the time to review their playlists, read their bios, and learn about their overall vibe. Then, customize the approach accordingly.

Show Genuine Interest

Before pitching anything, it’s essential to build rapport with Spotify playlist curators. A great way to do this is by showing genuine interest in their playlists. Start by leaving meaningful comments on their playlists, sharing their playlists on social media, or engaging with them on their preferred platform. If curators see that you appreciate their curation skills, they’re more likely to consider your music for their playlist.

Pitch Your Playlist

When it comes time to pitch your playlist, be strategic and creative. Begin by introducing yourself and your music. Keep it simple and straightforward. Then, pitch your playlist in detail. Talk about what inspired the playlist, what kind of music it features, and how it aligns with the curator’s interests. Be specific and avoid buzzwords. Finally, include a call to action politely asking the curator to consider adding your tracks to their playlist.

Conclusion

In conclusion, reaching out to Spotify playlist curators can be a great way to get your music in front of new audiences. However, it’s essential to do it the right way. Customizing your approach, showing genuine interest, and pitching your playlist creatively can be the key to success. So, start building relationships and reach out to the curators that you feel are the best fit for your music.

Find Spotify Playlist Curators

Credit: twostorymelody.com

Benefits Of Working With Spotify Playlist Curators

Working with Spotify playlist curators can significantly increase your chances of getting your music heard by a wider audience. Find the right curators for your genre, and you can boost your plays and followers. That also raises your chances of getting noticed by record labels and industry professionals.

Looking to increase visibility, gain credibility, and get more streams on Spotify? Working with Spotify playlist curators may be your answer. These curators are individuals who create and manage playlists on this popular music streaming platform. Collaborating with these curators can have tremendous benefits for your music career and get your music in front of the right audience.

Increased Visibility

When you work with Spotify playlist curators, you get more visibility for your music. Playlists are an excellent way to get discovered by users who might not have heard of you before. When your songs are added to playlists, they become more discoverable. This gives them a higher chance of being played and shared by the listener. This can result in more streams and gaining new followers.

Credibility Boost

Getting your music added to a popular playlist can help boost your credibility. A playlist curator’s stamp of approval can show your music is worthy of being recognized, increasing your chances of gaining more followers and getting noticed by other curators on the platform.

More Streams And Followers

When you work with Spotify playlist curators, you get the chance to reach a wider audience, leading to more streams and followers. By collaborating with curators that cater to your desired niche, you can get your music in front of people who are interested in it, making it more likely for them to follow your account and share your music with others. In conclusion, working with Spotify playlist curators can have significant benefits for music artists looking to increase their visibility, boost their credibility, and gain more streams and followers on the platform. By collaborating with curators that cater to your niche, you can reach a new audience, increase your chances of being discovered, and gain credibility in the industry.

Frequently Asked Questions On Find Spotify Playlist Curators

How Do I Contact A Spotify Playlist Curator?

To contact a Spotify playlist curator, you can search for their contact information on social media or other online platforms. Some curators also provide contact details on their playlist descriptions. Additionally, you can submit your music through Spotify for Artists or a third-party playlist pitching service.

How Do I Find Editorial Curators On Spotify?

To find editorial curators on Spotify, simply go to the Browse tab, then select ‘Discover’ and click on ‘Playlists. ‘ Here you can browse through playlists created by Spotify’s editorial team, as well as guest curators like artists and tastemakers.

Who Curates Official Spotify Playlists?

Spotify curates its official playlists through its in-house editorial team, who work to find and share new, popular, and emerging music across various genres and moods. They also collaborate with outside partners, such as record labels, artists, and other music industry professionals, to create the best playlists possible for its users.

How Do You Get On Spotify Curated Playlist?

To get on a Spotify curated playlist, you must follow these guidelines: 1. Have great music. 2. Ensure your artist profile on Spotify is complete and verified. 3. Promote your music and engage with listeners. 4. Pitch your music to Spotify curators through Spotify for Artists.

5. Build your own following and playlist presence on the platform.

Conclusion

Finding Spotify playlist curators can be a challenging task but with these methods, it can be made easier. Utilizing social media, playlist submission websites, and other online resources can help you connect with the right curators for your music. Remember to personalize your outreach and always remain professional.

By incorporating these tips, you can increase your chances of getting your music featured on popular Spotify playlists and gain more exposure for your work.

Categories
Archive

Stem Mastering A Country Rock Track

To stem master a country rock track, mix the individual tracks of the song into a stereo file without adding any processing to maintain the integrity of the mix. Stem mastering is an effective technique used in music production to achieve a balanced and polished sound.

It involves grouping and exporting individual tracks of a song, such as the drums, bass, guitars, vocals, and other instruments, and mixing them together into a stereo file. By doing this, engineers can apply a few final adjustments and tweaks to the mix without altering the original sound significantly.

For background, see audio mastering on Wikipedia and our guide to mastering vs stem mastering. You may also like mixing country music and stem mastering a pop song.

Stem mastering a country rock track requires particular attention to detail to bring out the unique country rock sound’s characteristics while keeping in mind the genre’s warmth and style. We will explore some tips and tricks to stem master a country rock track and make it sound professional yet authentic.

Preparation For Stem Mastering

To prepare a country rock track for stem mastering, first make sure you recorded every track cleanly and that all tracks stay in sync. Next, process each track to remove unwanted noise and refine the tonal balance. The result is a polished, professional-sounding mix.

Track Analysis

Before beginning the stem mastering process for a country rock track, it is essential to conduct a thorough track analysis. Listen to every part of the track and note any issues you need to fix. Some of the factors to consider during track analysis are:

  • Clipping or distortion in individual channels.
  • Imbalances in levels across different sections of the track.
  • Issues with the arrangement or timing of different parts of the track.
  • Possible use of automation to improve the dynamics of the mix.

Mix Analysis

Once you have conducted a thorough track analysis, the next step is to analyze the mix. This involves listening to the overall balance of the mix and addressing any problems. Some of the factors to consider during mix analysis are:

  • Checking that the EQ settings are appropriate for each instrument and for the overall mix.
  • Making sure the compression settings suit each instrument and the overall mix.
  • Checking for any phase issues in the mix.
  • Reviewing the stereo image and adjusting panning if necessary.

Stem Preparation

After completing the track and mix analysis, it is time to prepare the stems for mastering. This involves grouping related tracks together, such as all the drums or all the guitars, and exporting them as separate files. Some tips for preparing the stems include:

  • Exporting the stems at the same volume level to avoid any sudden changes in levels during the mastering process.
  • Adding a small amount of headroom to each stem to avoid any clipping during the mastering process.
  • Naming the files clearly and consistently to avoid confusion during the mastering process.

By completing a thorough track analysis, mix analysis, and stem preparation, you can ensure the best possible results from the stem mastering process for your country rock track.

Stem Mastering Process

Stem Mastering is the process of creating a final mix by processing groups of related audio tracks, called “stems.” It allows engineers to have more flexibility in the mastering stage. This gives them greater control of the final sound. In this blog post, we will explore the Stem Mastering process of a Country Rock track.

Setting Up Your Session

Before starting the Stem Mastering process, set up your session by importing the individual audio tracks into your DAW. Group together related tracks such as drums, bass, guitars, vocals, and backing vocals. Once you have grouped the tracks, route them to auxiliary bus channels and create a stereo mix for each group. This will allow you to apply processing to each group independently during the Stem Mastering process.

Eq Processing

EQ Processing is essential for balancing and enhancing the sound of each stem group. Use high-pass filters on non-bass instruments to remove low-end rumble. Then boost the upper-mids for vocals and guitars, and reduce the lower-mids for bass and kick. Be careful not to overdo the EQ, as it can result in an unnatural sound.

Compression Processing

Compression Processing evens out the dynamics of each stem group and brings a more consistent volume level. Use a gentle compression ratio to ensure the integrity of the original performance is not lost. Compression can also bring out the sustain in vocals and help glue the instruments together.

Stereo Widening

Stereo Widening is a technique used to create more spaciousness in your mix. Use stereo wideners to enhance stereo imaging for guitars and vocals, and make a subtle difference that truly makes a difference.

Harmonic Excitement

Harmonic Excitement adds warmth and character to your music. Use saturation plugins to inject subtle harmonics into stems such as vocals, guitars, and drums. This process enhances the overall texture of the track and creates a more exciting, engaging sound.

Limiting

Limiting is the final step in the mastering chain. It prevents clipping and keeps the overall volume consistent. Use a limiter to bring up the overall volume and allow the track to compete with commercial-level releases.

Adding Analog Warmth

Adding Analog Warmth can be a loved concept as it brings a more ‘analog’ sound to the final mix. Use tube amp simulation plugins or tape saturation plugins to inject warmth into the different stem groups. This gives more character, color, and depth to your mix.

The Stem Mastering process in Country Rock music brings out the best in each stem group. This creates a final mix that is balanced, consistent, and exciting. By following the steps outlined above, you can create a dynamic, engaging track that will stand out in a crowded musical landscape.

Tips For Successful Stem Mastering Of Country Rock Track

Achieving a successful stem mastering of a country rock track requires attention to detail. Keep the stem balance consistent and the tonal balance correct. Also, set an appropriate stereo width and control the dynamic range. Attention to these factors will produce a polished, cohesive mix.

Stem mastering is an effective way of refining and polishing your country rock tracks. This makes them sound professional and polished. It breaks the audio into stems, such as drums, vocals, and guitars. You then process each one separately for greater control and flexibility. In this post, we’ll share some essential tips for a successful stem mastering of your country rock track.

Setting Up Your Studio Environment

Before diving into stem mastering, it is crucial to ensure that your studio environment is suitable. That includes your acoustics, reference monitors, and listening environment. An untreated room gives you inaccurate sound. As a result, it is hard to make the right mastering decisions. Therefore, invest in soundproofing and acoustic treatment to optimize your environment.

Getting the Right Stem Mixes

The quality of your stem mixes can significantly impact the overall sound quality of your master. Consider sending your tracks to a professional mix engineer, who can balance, EQ, and compress them correctly. This should result in a smoother and more natural sounding master while also making the stem mastering process more manageable. Also, don’t forget to import your stems into your DAW at the correct level to avoid clipping or distortion.

Maintaining Clarity and Balance

One of the main goals of stem mastering is to ensure clarity and balance in your track.

Pay attention to the levels of each stem and how they interact with the others. This can help you maintain a consistent and appealing balance, allowing your mix to breathe. Also, avoid overdoing any processing, including compression and limiting, as it can affect the overall clarity.

Identifying and Addressing Problematic Frequencies

Country rock tracks tend to have specific frequency ranges that are most vital to their sound. Identifying and addressing problematic frequencies is a vital step in getting a fantastic master. Use EQ to carefully cut or boost these frequencies. However, avoid over-processing, because it can make the mix harsh or distorted.

Avoiding Over-processing

Over-processing can be a pitfall to stem mastering. So, watch how much processing you apply to each stem. Over-processing can result in an unnatural, over-compressed sound with a reduced dynamic range. Therefore, process each stem only as much as it needs to keep its natural sound.

In conclusion, mastering your country rock track using stem mastering techniques can significantly enhance its overall sound quality and presence. By following the tips above, you can ensure that your tracks are clear, balanced, and professional sounding. Put these tips to work, and you’ll be well on your way to a fantastic country rock master.

stem mastering — Stem Mastering A Country Rock Track

Credit: www.masteringthemix.com

Frequently Asked Questions Of Stem Mastering A Country Rock Track

Is Stem Mastering Better?

Stem mastering is a technique where individual tracks or “stems” are mixed down and then mastered. It can offer more control and flexibility, particularly in genres that have a lot of layers and complex arrangements. However, whether it is better or not depends on various factors like the genre of music, the quality of the recordings, and the experience of the mastering engineer.

How Do You Stem Master A Song?

To stem master a song, you need to isolate the instrumental parts, vocals, and other elements using a digital audio workstation. Then, adjust the levels, EQ, and compression to create a balanced mix. Finally, export the stereo mix and the individual stems for future editing.

What Is Stem Mastering?

Stem mastering is a process of mastering a track with the use of stems instead of a stereo mix. Stems are individual audio files that consist of multitrack recordings of vocals, drums, guitars, etc. This technique gives more control to the mastering engineer and leads to better sound quality.

What Are The Benefits Of Stem Mastering?

Stem mastering allows for better control over the mix and can help fix issues that were not detected during mixing. It also provides more flexibility for the mastering engineer to enhance each element of the track. Stem mastering helps to achieve a professional sound for your music.

Conclusion

The process of stem mastering a country rock track has proven to be highly effective in bringing out the best in a mix. By dividing the mix into manageable stems, audio engineers can carefully balance and enhance each component of the song.

With more control over the mix, you get a higher-quality final product that has a real impact on the listener. So if you’re looking to create a polished, professional-sounding track, consider stem mastering as a valuable tool in your mixing arsenal.

Categories
Archive

Ssl Xlogic G Series Compressor

The SSL Xlogic G Series Compressor is a high-quality studio compressor designed for professional audio processing. It offers excellent sound quality and precise control over your audio signal.

This compressor is ideal for a wide range of applications, from mixing and mastering to live sound reinforcement and broadcast applications. When used in conjunction with the SSL G-Series console, this compressor provides an exceptionally warm and punchy sound that many engineers and producers have come to love.

It features an intuitive interface with simple controls for easy operation and an LED metering system for accurate level monitoring. Whether you’re a professional engineer or a home studio enthusiast, the SSL Xlogic G Series Compressor is an excellent tool for any audio processing task.

Ssl Xlogic G Series Compressor

Credit: www.sweetwater.com

Technical Specifications

The SSL XLogic G Series Compressor is a high-quality compressor designed for professional audio applications. It features a Class-A design with a variable ratio, attack, and release time, making it a versatile and powerful tool for any audio engineer. With its advanced technical specifications, the SSL XLogic G Series Compressor is trusted by top engineers in the industry.

When it comes to professional audio equipment, the SSL Xlogic G Series Compressor is one of the most sought-after compressor units in the market. It is packed with features that provide exceptional audio quality and a wealth of options that allow sound engineers to fine-tune their work to perfection. In this section, we’ll take a closer look at the technical specifications of this compressor and examine the design, controls, and connectivity.

Design

The SSL Xlogic G Series Compressor is a rack-mounted unit that is built to last. Its all-metal chassis is rugged and durable, able to withstand the rigors of daily use. The unit’s dimensions are 483mm x 44mm x 225mm (WxHxD), making it a standard 19-inch size that can fit in most racks. The front panel features a classic G Series design with a large VU meter, five LEDs, and several controls.

Controls

One of the standout features of the SSL Xlogic G Series Compressor is its extensive selection of controls. It offers attack and release times that range from 0.1ms to 30ms, a high-pass filter with a frequency range of 30Hz to 400Hz, and a variable ratio that can be set from 1:1 to 8:1. The threshold control can be set from -20dB to +20dB, and the makeup gain can be adjusted from 0dB to 20dB. There is also a switchable side-chain filter that allows engineers to apply compression selectively.

Connectivity

The SSL Xlogic G Series Compressor offers a wide range of connectivity options that make it easy to integrate into any studio setup. It features balanced XLR inputs and outputs, as well as unbalanced TRS inputs and outputs. There is also a 1/4-inch external side chain input that can be used to trigger the compressor from an external source. The unit operates on standard 120V or 230V AC power and consumes 10 watts. In conclusion, the SSL Xlogic G Series Compressor is a formidable piece of equipment that delivers exceptional audio quality and a wealth of options for sound engineers. Its rugged design, extensive controls, and wide range of connectivity options make it a popular choice in professional recording studios worldwide.

Ssl Xlogic G Series Compressor

Credit: reverb.com

Features Of Ssl Xlogic G Series Compressor

The SSL Xlogic G Series Compressor boasts a range of features, including adjustable attack and release times, a high-pass filter and bypass switch, making it a versatile tool for mixing and mastering engineers. Its VCA-based compression provides a transparent sound that can add warmth and depth to any audio signal.

SSL Xlogic G Series Compressor is an excellent equipment known for its impressive audio performance and reliable features. The compressor stands out from its competitors thanks to its versatile settings, which make it ideal for different recording situations and styles.

Vca Compression

One of the most prominent features of SSL Xlogic G Series Compressor is its Voltage Controlled Amplifier compression, or VCA. This feature allows you to adjust the compression level based on the audio signal’s volume, resulting in a consistent output. VCA compression is a popular technique widely used in professional recording studios worldwide.

External Sidechain

Another excellent feature of SSL Xlogic G Series Compressor is its external sidechain. This feature allows you to use an external signal to trigger the compressor, enhancing the compressed audio’s accuracy and flexibility. The compressor’s external sidechain feature gives you more control over audio dynamics, allowing you to create more expressive and powerful sounds.

Auto Release Function

SSL Xlogic G Series Compressor also features an Auto Release function, which automatically adjusts the compression release time to match the audio signal’s characteristics. This feature ensures that the compressor operates smoothly and efficiently without causing distortion or other unwanted audio artifacts. Additionally, the Auto Release function is a perfect tool for novices and professionals alike, allowing them to focus more on the recording process. In conclusion, SSL Xlogic G Series Compressor is a versatile and reliable equipment that can help you achieve studio-quality recordings. Its VCA compression, external sidechain, and Auto Release function are just some of the features that make it stand out from the competition. If you’re looking for a compressor that can help you create the perfect audio, then the SSL Xlogic G Series Compressor should be at the top of your list.

Benefits Of Ssl Xlogic G Series Compressor

If you are an audio professional looking for an exceptional compression unit for your recording or mixing studio, SSL Xlogic G Series Compressor is the perfect tool. This compressor delivers unparalleled sound quality and ease of use that you won’t find in any other compressor unit in the market. Below are some key benefits of using the SSL Xlogic G Series Compressor:

Improved Sound Quality

The SSL Xlogic G Series Compressor has an impeccable reputation in the audio industry for its amazing sound quality. It is meticulously designed to preserve the original character of the audio signal while effectively controlling dynamic range. It creates a cohesive sound by controlling the peak signals while blending them with the softest signals. The compressor enhances the warmth, depth, and presence of the sound by adding subtle harmonics, which gives it an analog feel.

Ease Of Use

The SSL Xlogic G Series Compressor is remarkably user-friendly, both in terms of hardware and software. The user interface of the hardware unit is intuitively designed, enabling you to fine-tune the compression settings with ease. The control knobs are strategically placed for ease of reach and can be turned with a delicate touch, allowing you to adjust the settings accurately. Moreover, the compressor comes with easy-to-use software, giving you total control over the settings, and allowing you to make corrections quickly.

The SSL Xlogic G Series Compressor is an audio professional’s dream come true. The combination of its exceptional sound quality and ease of use makes it a must-have tool for every studio. Invest in the SSL Xlogic G series compressor, and you’ll be sure to enhance your sound quality by leaps and bounds.

Ssl Xlogic G Series Compressor

Credit: www.musicstore.de

Ssl Xlogic G Series Compressor Applications

The SSL Xlogic G Series Compressor is a versatile tool for a range of audio applications, from transparent compression to intense “glueing” of mix elements. Its variable attack and release times, as well as threshold and ratio controls, make it ideal for use in mixing and mastering studios, as well as live sound environments.

The SSL Xlogic G Series Compressor is a versatile tool that has made its way to professional recording studios and live sound production. Its unique features and superior sound quality make it stand out from the rest of the compressors in the market. In this section, we will dive into the different applications of this compressor in the music industry.

Recording Studios

SSL Xlogic G Series Compressor is an excellent tool for recording studios. It is perfect for shaping sound and adding dynamics to a track, which is why it has become an indispensable tool in modern music production. The compressor’s superior sound and clarity have made it the go-to compressor for many professional audio engineers. The SSL Xlogic G Series Compressor can be used in multiple ways in the recording studio:

  • As a master compressor for the mixing console
  • On a stereo drum bus to compress the whole mix
  • On bass and guitar tracks to add sustain and warmth to the sound
  • On vocals to achieve warm and consistent levels

The SSL Xlogic G Series Compressor adds a unique character to the sound, and its versatile features make it an essential tool in every recording studio.

Live Sound Production

The SSL Xlogic G Series Compressor is not only limited to recording studios—it’s also an excellent tool for live sound production. The compressor’s fast attack and release times make it ideal for live sound applications, where it can help control dynamic range and prevent feedback. The SSL Xlogic G Series Compressor can be used in the following ways in live sound:

  • On the main mix bus to keep the levels consistent
  • On individual channels to control sudden spikes in volume
  • On drum channels to achieve a tight and punchy sound
  • On vocals to control feedback and achieve consistent levels

The SSL Xlogic G Series Compressor is ideal for live sound applications due to its superior sound quality and fast response times.

Conclusion

The SSL Xlogic G Series Compressor is a versatile tool that has found its application in modern music production. Its superior sound quality and versatile features make it an indispensable tool in recording studios and live sound production. Whether it’s shaping sound or adding dynamics to a track, the SSL Xlogic G Series Compressor gets the job done with superior precision and sound quality.

Frequently Asked Questions For Ssl Xlogic G Series Compressor

What Type Of Compressor Is The Ssl Bus Compressor?

The SSL bus compressor is a type of VCA (Voltage Controlled Amplifier) stereo bus compressor, originally produced by Solid State Logic for their mixing consoles. It is renowned for its smooth and transparent compression, and is widely used in professional music production.

What Type Of Compressor Is The Neve 33609?

The Neve 33609 is a classic analog compressor that uses discrete transistor technology.

What Is The Ssl Xlogic G Series Compressor?

The SSL Xlogic G Series Compressor is a studio-grade signal
processor designed for use in professional recording and mixing environments. It is known for its exceptional sound quality, versatility, and reliability.

How Does The Ssl Xlogic G Series Compressor Work?

The SSL Xlogic G Series Compressor works by reducing the dynamic range of the
audio signal passing through it. This results in a more consistent and controlled
sound, making it easier to mix and master the audio.

Conclusion

As we conclude our analysis of the SSL XLogic G Series compressor, it is clear that this device is a top-notch piece of audio equipment. Its versatile functionality, transparent sound quality, and simple-to-use interface make it an industry standard among music producers and engineers.

With its robust build and reliable performance, the SSL XLogic G Series compressor is a must-have for anyone looking to take their music productions to the next level. So, if you’re looking to enhance your music production workflow, give the SSL XLogic G Series compressor a try!

For more background, see Solid State Logic on Wikipedia.

Categories
Archive

Lynx Hilo Mastering Converter

The Lynx Hilo Mastering Converter is a high-quality audio interface and converter that offers exceptional sound quality and a range of powerful features. Featuring precision audio conversion and a range of input and output options, the Hilo is a versatile and reliable solution for mastering engineers, recording studios, and audiophiles.

If you’re looking for a premium, professional-grade audio interface for your studio or mastering setup, the Lynx Hilo Mastering Converter is an excellent choice. With exceptional sound quality, powerful conversion capabilities, and a range of input and output options, the Hilo offers everything you need to create top-quality recordings and audio masters.

Whether you’re a professional mastering engineer or a serious audiophile, the Hilo is a versatile and reliable solution that delivers exceptional value and performance.

Lynx Hilo Mastering Converter

Credit: www.youtube.com

Benefits Of The Lynx Hilo Mastering Converter

If you’re in the market for a mastering converter, the Lynx Hilo should be on your radar. Not only does it offer superior sound quality, but it also provides flexible connectivity options and precise metering capabilities.

Superior Sound Quality

The Lynx Hilo’s sound quality is unparalleled. It boasts a dynamic range of 120dB and a THD+N of -114dB, making it one of the cleanest and most transparent converters on the market. The Hilo also features SynchroLock technology, which eliminates jitter and provides a stable clock source, resulting in a more accurate and detailed sound.

Flexible Connectivity

The Lynx Hilo offers a wide range of connectivity options, making it a versatile tool in any studio setup. It can connect to your computer via USB, Thunderbolt, FireWire, or even an optional Dante module. In addition, it has two sets of analog inputs and outputs, as well as digital I/O, allowing you to integrate it seamlessly with your existing gear.

Precise Metering

The Lynx Hilo features a high-resolution LCD display that provides accurate metering of input and output levels, as well as sample rate, clock source, and other important parameters. The Hilo also has a built-in spectrum analyzer and real-time analyzer, which can help you diagnose and fix any issues in your audio signal.

Overall, the Lynx Hilo is a powerful and reliable mastering converter that will help you achieve the best possible sound quality in your recordings. Its superior sound quality, flexible connectivity options, and precise metering capabilities make it a must-have tool for any serious audio professional.

Features Of The Lynx Hilo Mastering Converter

The Lynx Hilo Mastering Converter is a high-quality audio interface that is widely considered to be one of the best options out there. It offers exceptional sound quality and a range of features that make it ideal for professional audio work. Here are some of the key features of this incredible piece of audio equipment.

Analog And Digital I/o

The Lynx Hilo Mastering Converter features a wide range of analog and digital inputs and outputs, making it incredibly versatile and perfect for use in a variety of different settings. The analog inputs and outputs include XLR, TRS, and RCA connectors, making it easy to connect the Lynx Hilo to a range of different audio devices. The digital inputs and outputs include AES/EBU, S/PDIF, and USB connections, ensuring that the Lynx Hilo is compatible with a wide range of digital audio equipment.

Headphone Amp With Volume Control

The Lynx Hilo Mastering Converter also features a powerful headphone amplifier that provides exceptional clarity and fidelity. The headphone amplifier is built into the Lynx Hilo and features its own volume control, allowing you to easily adjust the volume of your headphones without having to adjust the overall volume of your audio system. This makes it perfect for use in busy recording studios or other environments where it may be difficult to hear your audio output over background noise.

Assignable Touch Screen Controls

The Lynx Hilo Mastering Converter features an intuitive touch screen interface that allows you to easily navigate through its various features and settings. The touch screen controls are assignable, allowing you to customize the Lynx Hilo to your specific needs and preferences. This makes it incredibly easy to use, even if you are not familiar with audio equipment or mixing consoles.

Overall, the Lynx Hilo Mastering Converter is an exceptional piece of audio equipment that is packed full of features and offers exceptional sound quality. Whether you are a professional audio engineer or a hobbyist, the Lynx Hilo is an excellent choice that is sure to exceed your expectations.

Lynx Hilo Vs Other Mastering Converters

When it comes to audio mastering, having a high-quality converter is essential for achieving the best possible sound. The Lynx Hilo Mastering Converter is a popular option among audio engineers, but how does it compare to other mastering converters on the market?

Sound Quality

The Lynx Hilo is known for its pristine sound quality. It boasts a dynamic range of 120 dB and a low distortion rate of 0.0004%, making it one of the most transparent converters available. This means that the audio signal is passed through the converter without any added coloration or distortion, resulting in a pure and natural sound.

Versatility

Not only is the Lynx Hilo a mastering converter, but it also functions as a preamp, headphone amplifier, and monitor controller. This added versatility makes it a convenient and practical tool for any audio engineer. It supports multiple input and output formats, including USB, AES/EBU, S/PDIF, and analog, making it easy to integrate into any studio setup.

Ease Of Use

The Lynx Hilo’s user interface is intuitive and straightforward. Its large LCD screen and rotary encoder make it easy to navigate and adjust settings. It also comes with a software application that allows for even more precise control and customization.

In conclusion, the Lynx Hilo Mastering Converter stands out from other mastering converters for its exceptional sound quality, versatility, and ease of use. Whether you’re a professional audio engineer or a home studio enthusiast, the Lynx Hilo is a great investment for achieving high-quality audio mastering.

Lynx Hilo Mastering Converter

Credit: www.frontendaudio.com

Tips For Using The Lynx Hilo Mastering Converter

Discover the full potential of the Lynx Hilo Mastering Converter with these essential tips. From optimizing your signal flow to fine-tuning the signal levels, this versatile tool will help you achieve studio-quality sound on your projects.

Are you ready to take your music productions to the next level? Look no further than the Lynx Hilo Mastering Converter. This high-end piece of audio equipment gives you unparalleled control over your sound, allowing you to fine-tune your mixes with precision and accuracy. To help you make the most of this powerful tool, we’ve put together some tips for using the Lynx Hilo Mastering Converter:

Calibrating Your System

Before you start using the Lynx Hilo Mastering Converter, it’s important to calibrate your system. This will ensure that your audio is as accurate and transparent as possible, so you can make informed decisions about your mix. To calibrate your system, you’ll need to set the output level of your Lynx Hilo to match the reference level of your studio monitors. You can do this using the calibration feature in the Lynx Hilo Control Panel. Make sure to follow the instructions carefully to achieve the best results.

Optimizing Signal Flow

Another key consideration when using the Lynx Hilo Mastering Converter is signal flow. You want to make sure that your audio is flowing through the device in the most efficient and effective way possible, to minimize any potential distortion or noise. One way to optimize your signal flow is to use balanced cables wherever possible. Balanced cables help minimize interference and reduce noise, resulting in cleaner audio. You should also pay close attention to the gain staging of your audio. Make sure your levels are set appropriately throughout your signal chain, so you’re not overloading any components or introducing unnecessary noise.

Using The Touch Screen

Finally, the Lynx Hilo Mastering Converter comes equipped with a full-color touch screen, which gives you quick and easy access to all your controls and settings. Take the time to familiarize yourself with the touch screen interface, so you can navigate it with ease. One great feature of the touch screen is the ability to save and recall preset configurations. This can be incredibly useful if you have multiple projects with different requirements, as you can quickly switch between setups at the touch of a button. With these tips and tricks, you’ll be well on your way to mastering your audio like a pro with the Lynx Hilo Mastering Converter!

Frequently Asked Questions For Lynx Hilo Mastering Converter

Is Lynx Hilo Worth It?

Yes, Lynx Hilo is definitely worth it. It is a high-end digital-to-analog converter that delivers exceptional sound quality. Its versatile features make it perfect for both professional and home use. Plus, the device is reliable, durable and long-lasting, which makes it a great investment for audiophiles and music enthusiasts.

What Is The Input Level Of Lynx Hilo?

The input level of Lynx Hilo could be either +4dBu or -10dBV, which is selectable via software.

What Is Lynx Hilo?

Lynx Hilo is a high-end audio converter that is suitable for professional studio recordings, mastering, and audio post-production. It offers easy connectivity with various digital interfaces, including USB, AES/EBU, SPDIF, and ADAT. It also features a built-in headphone amplifier, on-board mixer, and a touch screen for easy control.

What Is Lynx Hilo Mastering Converter?

The Lynx Hilo Mastering Converter is a high-performance audio converter that offers premium sound quality, a wide range of connectivity options and advanced audio features.

Conclusion

The Lynx Hilo Mastering Converter is a true powerhouse when it comes to audio conversion. Its sleek design and high-quality components make it a top-performing option for any professional audio engineer. With its ability to work with various digital audio workstations and formats, the Lynx Hilo Mastering Converter stands out as a versatile and reliable tool in the industry.

Its ability to handle multiple functions and produce high-quality sound makes it a valuable investment for any recording studio or musician.

Categories
Archive

Vocal Chopping And Editing Tutorial

Vocal chopping and editing allow you to slice and manipulate vocal recordings to create a rhythmic and dynamic feel to your music. In this tutorial, we will explore the techniques and tools necessary to achieve this effect.

Vocal chopping and editing is a popular technique used in modern music genres like trap, hip hop, and electronic dance music. It involves slicing up vocal recordings into small snippets or “chops” and rearranging them to create a new melody or rhythm.

By using tools like time-stretching, pitch-shifting, and effects like reverb and delay, you can create unique and dynamic vocal performances. In this tutorial, we will guide you through the process of vocal chopping and editing, from selecting the right recording to finalizing your chopped and edited vocals. Whether you’re a novice or a seasoned producer, this tutorial will help you take your music to the next level.

Vocal Chopping And Editing Tutorial

Credit: www.youtube.com

Preparation Before Vocal Chopping

Before starting the vocal chopping process, it’s important to prepare the audio tracks properly. This includes cleaning up any unwanted noise, removing any breaths or background vocals, and ensuring that the timing is synced correctly. By doing this, you’ll be able to create a more polished and professional final product.

When it comes to creating a great piece of music, vocal chops can add a unique flair to the mix. Vocal chopping has gained popularity over the years and is now commonly used in various genres of music. Vocal chop is the process of taking a small portion of a vocal sample and creating a melody or rhythm from it. If you are a beginner, this vocal chopping and editing tutorial will help you learn the basics of the technique.

Choose The Right Sample

The first step to vocal chopping is choosing the right sample. Whether you choose a solo or a group vocal, you should avoid using a sample with too much background noise. A clean sample with a clear vocal tone will create a better result. You can also look for a sample with a bit of breathing or foley sound as it adds more depth to the sample.

Select The Right Editing Tools

Once you have the perfect vocal sample, the next step is to choose the right editing tools. There are several editing tools out there, including free software, but it is always best to invest in high-end software. Adobe Audition and Ableton Live are two of the most popular software for vocal chopping. If you are looking for a free option, Audacity is the best choice. After deciding on your software, you should familiarize yourself with the tools. You will typically be working with the cut, paste, and trim tools. However, some software comes with unique features such as time-stretching, pitch-shifting, and equalizing.

ProsCons
Using a clean vocal sample will give a desired resultIt can be challenging to find the right sample
Investing in high-quality software will give better resultsHigh-end software can be expensive
It is recommended to familiarize yourself with editing toolsSome editing tools can be tricky to use

Now that you’ve learned about preparing the vocal chops let’s move on to the next section: How To Create Rhythms With Vocal Chops.

Vocal Chopping And Editing Tutorial

Credit: www.groove3.com

Vocal Chopping Techniques

Learn essential vocal chopping techniques to elevate your music productions with this comprehensive vocal chopping and editing tutorial. Explore various creative ways to manipulate vocal samples and construct unique rhythms that add depth and character to your music tracks.

Vocal chopping has become a popular technique in modern music production, particularly in electronic dance music. The technique involves taking vocal recordings and chopping them up into smaller, more manageable pieces that can be arranged and manipulated to create new melodies, rhythms, and textures.

Chopped Phrases

One of the most common ways of using vocal chops is by taking a longer vocal phrase and chopping it up into smaller sections. These sections can then be rearranged to create a new melody or rhythm. It is important to choose a phrase that has a clear pitch and rhythmic pattern to make it easier to chop and manipulate.

One-shots

Another useful vocal chopping technique is using the one-shot method. This involves cutting individual notes or syllables from a vocal recording and using them as single samples. One-shots can be played like an instrument or sequenced to create new melodies and harmonies.

Melodic Vocal Chops

Melodic vocal chops are created by taking a vocal recording and using it to create a melody. This can be achieved by chopping up different notes from the recording and arranging them to create a new melody. Alternatively, a single note can be used and then pitched up or down to create a melody. Using these vocal chopping techniques can add depth and interest to any track. Experimenting with different chopping methods and combining them with other production techniques can lead to unique and exciting results.

Step By Step Vocal Chopping And Editing Tutorial

Learn how to chop and edit vocals like a pro with this step-by-step tutorial. From slicing to processing, this guide covers everything you need to know to create unique and polished vocal samples.

Are you interested in learning how to edit vocals like a pro? Vocal chopping is a popular technique used by music producers to create dynamic and unique sound effects. In this tutorial, we will guide you through the step by step process of vocal chopping and editing. This tutorial is perfect for both beginners and advanced producers who want to improve their editing skills. So, let’s get started!

Step 1: Adding The Vocal Sample To The Daw

The first step in vocal chopping is to add your vocal sample to your Digital Audio Workstation (DAW). You can choose any vocal sample you like or record your own. Once the sample is loaded into your DAW, you can adjust the tempo and pitch to match the tempo and key of your project. This ensures that the vocal sample fits perfectly with the instrumental track.

Step 2: Adjusting The Timing

The next step is to adjust the timing of the vocal sample. This is important to ensure that the vocal chop follows the rhythm of your track. To adjust the timing, you can use the Time Stretch feature in your DAW. This allows you to stretch or shrink the sample to fit the rhythm and tempo of your project.

Step 3: Chopping The Vocal Sample

Once the timing is adjusted, it’s time to start chopping the vocal sample. This can be done manually or with the help of a plugin. To manually chop the vocal sample, simply identify the parts that you want to use and cut them out. You can use the Split or Cut tool in your DAW to achieve this. Alternatively, you can use a plugin specifically designed for vocal chopping, such as the Slicex plugin in FL Studio.

Step 4: Arranging The Vocal Chops

After you have chopped the vocal sample, it’s time to arrange the vocal chops in a pattern that fits your track. You can use your DAW’s playlist or arrangement view to achieve this. Experiment with different arrangements until you find the perfect one. This is where your creativity comes into play!

Step 5: Applying Effects

Finally, it’s time to apply effects to the vocal chops. This enhances the sound and adds depth to your track. Some popular effects used in vocal chopping include reverb, delay, and distortion. Experiment with different effects until you find the perfect combination for your track. Once you are satisfied with the final product, save your project and export the track. In conclusion, vocal chopping is a fun and creative technique used by music producers to create unique sound effects. By following this step by step tutorial, you can master the skill of vocal chopping and take your productions to the next level. So, what are you waiting for? Start chopping today!

Vocal Chopping And Editing Tutorial

Credit: www.youtube.com

Advanced Editing Techniques

Advanced Editing Techniques:

Vocal chopping is an effective technique that adds uniqueness and depth to any track. But did you know that you can take vocal chops to the next level by using advanced editing techniques? In this vocal chopping and editing tutorial, we will discuss the top advanced editing techniques that you can use to create versatile and engaging vocal chops that stand out.

Reverse Vocal Chops

If you want a unique twist on your vocal chops, consider using reverse vocal chops. This technique involves flipping a vocal chop and reversing it to create a reverse effect. Reverse vocal chops can add a haunting or eerie atmosphere to your track and can be used to create buildup or tension.

Glitch Vocal Chops

Glitch vocal chops are a trendy technique that involves adding stutter and glitch effects to a vocal chop. This technique creates a robotic or futuristic atmosphere, and creates a unique bounce to your track. To create a glitch vocal chop, use effects such as stutter, glitch, and delay.

Pitch Shifting Vocal Chops

If you want to create a melody with your vocal chops, pitch shifting is a great technique to use. Pitch shifting vocal chops involve changing the pitch of a vocal chop to create melodic movements. This technique can add a dynamic atmosphere to your track and can create a catchy hook. To pitch shift a vocal chop, use a pitch shifter effect and experiment with different pitches and patterns.

By implementing these advanced editing techniques, you can take your vocal chops to the next level. Remember to experiment with different effects and techniques to create your unique sound. Use what you have learned in this tutorial to enhance your tracks and take your music production to the next level.

Common Mistakes To Avoid

Avoid common errors when vocal chopping and editing by taking your time and being deliberate. Don’t rush through the process, and make sure to properly slice and arrange your samples. Additionally, avoid overusing effects and make sure your final product is well balanced and cohesive.

Using Too Much Reverb

One of the most common mistakes while creating vocal chops and editing is overusing reverb. While reverb is an essential tool in creating a sense of space and depth, too much can drown out the vocals and make the track sound washed out and muddy.

While it may be tempting to add reverb to every vocal chop, this can quickly become overwhelming, leading to a “wall of sound” effect that can obscure the vocals entirely. A good rule of thumb is to use reverb sparingly and only on specific chops that need a little extra depth.

Overusing Vocal Chops

Another common mistake is overusing vocal chords in a track. Vocal chops can sound great when used sparingly, but too many can quickly become monotonous and tiresome.

One way to avoid this mistake is to create a melody from the vocal chops, rather than simply layering them on top of each other. Turning vocal chops into a melody can take time, but it can also add a new level of creativity to your track.

Not Paying Attention To Timing

Vocal chops are an excellent way to add rhythm to your track, but if you don’t pay attention to timing, they can quickly become out of sync with the rest of your instruments. This can lead to an overall messy sound.

When creating vocal chops, take the time to carefully line them up with the beat of the track. This will help ensure that they don’t sound out of place and will help maintain the overall rhythm and flow of the track.

Avoiding these common mistakes when creating vocal chops and editing can take your production to the next level. By being mindful of reverb use, avoiding overuse of vocal chops, and paying attention to timing, you can create a track that is both complex and cohesive.

Frequently Asked Questions Of Vocal Chopping And Editing Tutorial

How Do You Do Vocal Chops?

To do vocal chops, you need to first choose the vocal sample you want. Next, you should chop the sample into small, loopable sections and assign those sections to different keys on a sampler or MIDI controller. Finally, use your sampler or controller to play back the chopped vocal sections in a melody or pattern.

How Do I Edit Raw Vocals?

To edit raw vocals, you need to first listen to them carefully and identify the areas that need improvement. You can use audio software such as Audacity or Adobe Audition to adjust the volume levels, remove unwanted background noise, and add various effects like reverb and EQ.

It is also important to pay attention to the timing and rhythm of the vocals.

What Is A Chopped Vocal?

A chopped vocal is a technique used in music production to manipulate a recorded vocal by slicing it into small pieces and rearranging them in a different order or sequence. This creates a new melody or rhythm that can be used as a background or foreground element in a song.

How Do I Crop Vocals In Fl Studio?

To crop vocals in FL Studio, use the “Edison” tool to select the portion of the vocal track that you want to keep. Right-click and choose “Crop Sample. ” This will remove everything outside of the selected area.

Conclusion

A vocal chop could be a stand-alone creative tool or a supplementary instrument in a production. While it isn’t the easiest technique to master, this tutorial provided some valuable insights and tips on how to approach vocal chopping in a way that elevates your production to the next level.

It’s crucial to experiment and find the right combination of sampling, editing, and processing tools to get the sound you’re looking for. With enough practice, vocal chopping could become your go-to technique for creating interesting and unique music.

Categories
Archive

Fl Studio Mixer Effects Not Working

To resolve Fl Studio Mixer Effects Not Working, ensure that the effects are turned on and routed properly. Check if the mixer track routing is correct and if the effects are enabled in the mixer track.

Fl Studio Mixer Effects Not Working is a common issue that can occur when using the digital audio workstation. It can be frustrating when the effects fail to function, but there are several troubleshooting steps that you can take to fix the problem.

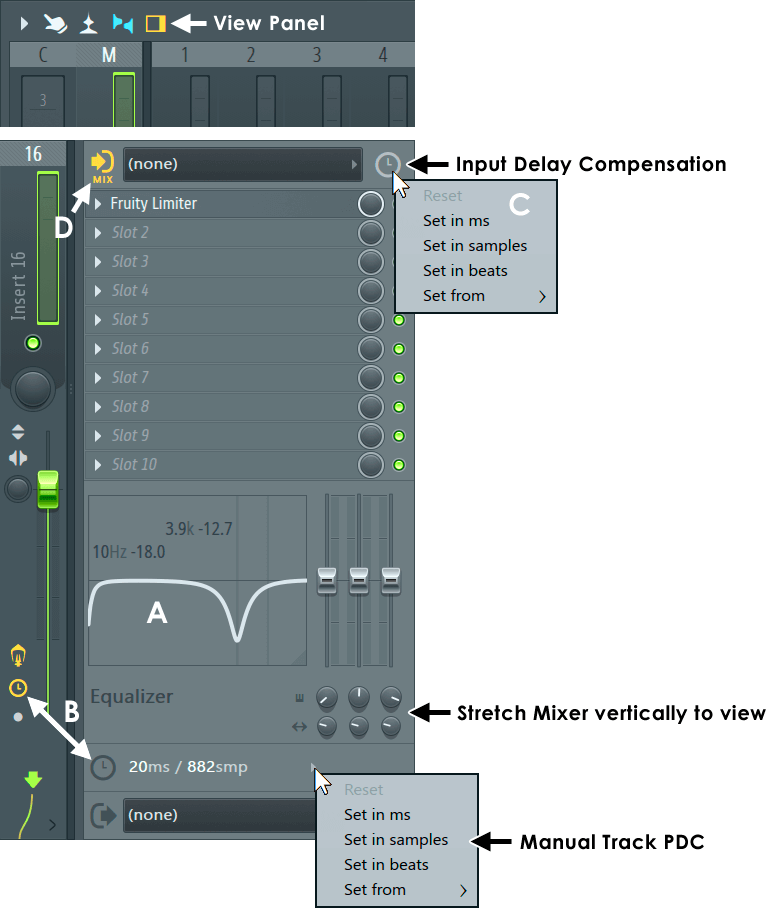
One of the most common causes of this problem is incorrect routing. You should ensure that the effects are enabled in the mixer track, and the routing is correct. This guide will explain the different steps you can take to resolve this issue and ensure that your Fl Studio Mixer Effects are working correctly.

Fl Studio Mixer Effects Not Working

Credit: www.reddit.com

Common Mixer Effects Issues

If you are an FL Studio user, you may have come across mixer effects not working properly. This can be frustrating when you are in the middle of a project and suddenly, the mixer effects stop functioning. The good news is that most of these issues are easy to fix with minimal effort. Let’s take a look at some common mixer effects issues and how to solve them.

Effect Plugins Not Installed Properly

If you are experiencing problems with your mixer effects, it could be that they are not installed properly. Sometimes, during installation, the default location of the plugin may not be selected. To solve this issue, you need to check if the plugin is installed in the correct folder. FL Studio comes with a default folder for plugin installation, known as the VST plugins folder. If you have installed the plugin in a different location, you will need to direct FL Studio to the folder where it is located.

Track Volume Muted Or Set Too Low

Another common cause of mixer effects not working is the volume of the track being muted or set too low. To solve this issue, you need to check the track’s volume settings to ensure that it is not muted or set too low. You can do this by going to the mixer and checking the fader settings for the problematic track. Ensure that the volume is set at an optimal level where the mixer effects can function effectively.

Track Sends Not Routed Correctly

Track sends are an essential component of FL Studio’s mixing process. When not routed correctly, they can cause mixer effects not to work. To solve this issue, you will need to check if the track that the effect is applied to is routed to the intended destination via the sends. FL Studio has an inbuilt routing system that allows you to route several tracks to a single destination. To ensure that the effect is working correctly, you need to ensure that the track is routed through the intended send channel.

Effect Plugin Not Inserted Into Mixer Chain

Lastly, if your mixer effects are not working, it is possible that the plugin is not inserted correctly into the mixer chain. To solve this issue, confirm that the effect plugin is inserted into the correct mixer channel. FL Studio provides a mixer insert feature, enabling you to add effects to individual tracks or groups of channels. By default, plugin effects are inserted into the effect slot of the intended channel. Ensure that the effects slot is not empty or replaced by other plugins, as this may cause mixer effects not to work.

Fl Studio Mixer Effects Not Working

Credit: www.image-line.com

Troubleshooting Mixer Effects

FL Studio is a powerful music production software, but at times, you may encounter problems with the mixer effects not working as they should. The mixer is an essential part of the software and is used to apply various effects to your tracks, including compression, equalization, reverb, and delay. In this article, we will discuss some troubleshooting steps you can follow to get your FL Studio mixer effects back up and running.

Checking Effect Plugin Installation

The first step in troubleshooting your mixer effects is to check if the effect plugin is installed correctly. To do this, you need to go to the plugin manager and see if the plugin is listed under the effects tab. If it is not, you need to install the plugin and rescan for plugins. Make sure to follow the installation instructions carefully. Also, ensure that the plugin version is compatible with your FL Studio version.

Adjusting Track Volume And Sends

The track volume and sends play an essential role in applying mixer effects. If the track volume is too low, the effect applied may not be noticeable. On the other hand, if the track volume is too high, it may result in distortion. Similarly, if the send volume is too high or low, it may affect the effect’s overall performance. Adjust the volume levels and sends to optimal levels to get the best results.

Inserting Effect Plugin Into Mixer Chain

Another reason why mixer effects may not be working is that the effect plugin is not inserted into the mixer chain. To insert the effect plugin into the mixer chain, click on the effect slot in the mixer and choose the effect plugin from the list. Make sure to turn on the effect processing button for the channel to apply the effect. Also, ensure that the effect plugin is not bypassed by mistake.

Resetting Mixer Settings

Finally, if all the above steps fail to work, you can try resetting the mixer settings. To do this, open the mixer options and choose the reset mixer option. This will reset the mixer’s settings to default and may help to fix any issues that may be causing the mixer effects not to work.

By following these steps, you can troubleshoot any issues you may have with FL Studio mixer effects not working. Remember to save your project before making any changes and to double-check the mixer settings before rendering your project.

Advanced Troubleshooting

If you’re experiencing issues with your FL Studio mixer effects, don’t worry. There are ways to troubleshoot and fix the problem. Start by checking your audio settings and making sure the correct audio interface is selected. Then, try resetting or reloading your mixer effects and plugins.

Still having trouble? Reach out to the FL Studio community for additional support and advice.

If you have been using FL Studio for a while, you may have experienced some mixer effects not working. This can be quite frustrating especially if you are in the middle of a production project. Thankfully, there are some advanced troubleshooting techniques that can help you fix the issue. Below are some solutions that you can try.

Updating Fl Studio And Plugins

One of the first things you can do when troubleshooting FL Studio mixer effects is to check for updates for both the software and any plugins you have installed. Outdated plugins can cause compatibility issues leading to mixer effects not working as expected. To check for updates, go to the ‘Help’ menu and select ‘Check for updates.’ For plugins, you’ll need to visit the website of the plugin manufacturer and download any available updates from there.

Checking For Conflicting Plugins

Plugins can conflict with one another, causing mixer effects to stop working properly. To check if this is the case, disable all plugins and start enabling them one by one until you find the one that is causing the conflict. Once you identify the conflicting plugin, you can either remove it or try updating it to the latest version.

Repairing Or Reinstalling Fl Studio

If updating your FL Studio and plugins or disabling conflicting plugins doesn’t fix the mixer effects problem, you may need to repair or reinstall the software. To do this, go to the ‘Control Panel’ on your computer and select ‘Programs and Features.’ Find FL Studio, right-click on it, and select ‘Repair’ or ‘Uninstall.’ If you choose to uninstall, ensure that you also delete any leftover files before reinstalling FL Studio.

Contacting Fl Studio Support

If all else fails, you can always contact FL Studio support. They have a team of technical experts who can help you with any issues you may be experiencing with FL Studio and its mixer effects. You can find their contact information on the Image-Line website. Don’t hesitate to reach out to them for help in resolving any issues that you may be facing. In conclusion, there are several advanced troubleshooting techniques you can use to fix FL Studio mixer effects not working issue. Follow these solutions one by one until you identify the cause of the problem.

Frequently Asked Questions For Fl Studio Mixer Effects Not Working

How Do I Open Mixer Effects In Fl Studio?

To open mixer effects in FL Studio, click on the mixer icon at the top of the screen or press F9 on your keyboard. This will bring up the mixer window where you can adjust settings for individual tracks and add effects to your mix.

How Do I Reset My Mixer Settings In Fl Studio?

To reset mixer settings in FL Studio, click on Options and then choose ‘File Settings’. Next, click on ‘Manage extra search paths’ and then select ‘Reset’. The Mixer Channels will then reset to their default state in FL Studio.

Why Are My Plugins Not Working Fl Studio?

Your plugins may not be working in FL Studio due to various reasons such as compatibility issues, incorrect installation, outdated versions, or conflicts with other plugins or software. Check for updates, re-install the plugins or FL Studio, and make sure they are compatible with your system.

Why Is There No Output On My Fl Studio Mixer?

There may be several reasons why you’re not receiving any output from your FL Studio mixer. Ensure that the audio input and output devices are selected correctly, the mixer tracks are armed, and the master fader is not muted. Additionally, check if there are any plugins or effects that may be causing the issue.

Conclusion

Troubleshooting FL Studio mixer effects can be a daunting task, but it’s essential to uncover and fix any issues to create high-quality music. By following the steps we outlined, you can resolve most problems and get back to creating your art.

Don’t forget to update your software and plugins regularly to avoid any compatibility issues. If you still experience trouble, reach out to the FL Studio community for additional assistance. Keep experimenting and making music!

Categories
Archive

Free Vst Effects For Creative Mixing

There are several free VST effects plugins available for creative mixing, such as TDR Nova, Reviber, and Tal Reverb 4. As a music producer, engineer or mixing enthusiast, you know that equally important as having top level plugins, is having access to some quality free VST effects for mixing in your DAW software.

Working with a tight budget can be a hurdle for both beginners and pros in the music production industry but finding the right free VST effects that will enhance your mixes is always a good idea. We will explore some popular plugins that can help take your mixes to the next level without breaking your bank account.

From the parametric equalizer TDR Nova to the Reverb Tal Reverb 4, and more, we will also examine some of the pros and cons of each software. So, let’s get started!

Free Vst Effects For Creative Mixing

Credit: www.productionmusiclive.com

Top 5 Free Vst Effects For Creative Mixing

If you’re a music enthusiast looking to take your mixing game to the next level, then you’ve come to the right place. Mixing is a crucial aspect of music production, and utilizing the right VST effects can make all the difference in achieving the sound that you’re after. In this post, we’ll be sharing our top 5 picks for free VST effects that will help you take your mixing to the next level. Whether you’re a recording artist, producer, or an audio engineer, these VST effects are sure to inspire your creativity and enhance your sound.

Mda Talkbox

One of the most fun VST effects, MDA Talkbox, is a must-have for any mixing enthusiast. This free VST emulates the effect of a talkbox, which allows you to use your mouth to shape the sound of the musical instrument. This effect can be achieved using any musical instrument and can help you produce unique sounds that stand out from the crowd.

Tal Reverb 4

TAL Reverb 4 is a high-quality reverb plugin that holds its own against some of the most expensive reverb plugins out there. This plugin features a straightforward interface and allows you to create smooth, natural-sounding reverbs that can help bring your mix to life. The plugin also features a range of controls that allow you to fine-tune your reverb settings to achieve the desired effect.

Voxengo Oldskoolverb

Voxengo OldSkoolVerb is a classic reverb plugin that is perfect for those looking to create a vintage effect. This free VST has a simple interface that allows you to adjust the decay time, pre-delay, and stereo width of the reverb effect. The plugin also comes with a range of presets that you can use to get started, making it a great choice for beginners.

Spitfish Deesser

SPITFISH DeEsser is a useful plugin for anyone looking to get rid of harsh sibilants in their mix. This free VST comes with an intuitive interface that allows you to adjust the threshold and depth of the DeEsser effect. The plugin also features a range of presets that you can use to get started, making it a great choice for beginners.

Ott Compressor

OTT Compressor is a free multiband compressor plugin that is perfect for those looking to add brightness and clarity to their mix. This plugin features a simple interface that allows you to adjust the amount of compression, release time, and makeup gain. The plugin also comes with a range of presets that you can use to get started, making it a great choice for beginners.

Free Vst Effects For Creative Mixing

Credit: blog.native-instruments.com

Free Vst Effects For Creative Mixing

Credit: process.audio

Frequently Asked Questions Of Free Vst Effects For Creative Mixing

What Are The Best Plugins For Mixing Vocals Free?

There are several plugins available for mixing vocals for free. Some of the best options include Tal Reverb, OrilRiver, Mautopitch, and GVerb. Each of these plugins offers unique features and effects that can enhance the quality of your vocal mixes.

What Are The Best Plugins For Mixing?

Some of the best plugins for mixing are Waves SSL E-Channel Strip, Izotope Alloy 2, FabFilter Pro-Q 3, Soundtoys 5’s Radiator and Decapitator, and Universal Audio UAD SSL 4000 G Bus Compressor. These plugins provide powerful tools for equalization, compression, and dynamic control to help achieve a polished and professional mix.

Are There Any Free Vst?

Yes, there are numerous free VSTs available online. Many companies offer a selection of free VST plugins with limited features, while others offer completely free versions. Some popular sites where you can find free VSTs include VST4Free, Bedroom Producers Blog, and Plugin Boutique.

Is The Halftime Plugin Free?

Yes, the HalfTime plugin is not free. But it comes with a 3-day free trial, after which you’ll have to purchase it for $12. 97. It’s a time-stretching plugin that halves the speed of audio playback and creates a halftime effect.

Conclusion

There are plenty of free VST effects available in the market that can bring your music mixing to the next level. Whether you are a beginner or a professional, using these tools can enhance your creativity and boost your productivity.

With so many options to choose from, you can experiment with different effects until you find the perfect sound for your music. Remember to always keep an eye out for new plugins and updates to ensure that your music sounds fresh and unique.

Happy mixing!

Categories
Archive

Music Streaming Royalties Calculator

The Music Streaming Royalties Calculator calculates royalties earned from music stream services in two steps. Firstly, select the streaming’s service and tier of income.

Subsequently, insert the number of streams and unit price to determine the earnings. Streaming royalties are payments earned by artists and songwriters based on the number of times their recorded or written music is played on various digital platforms. In the era of the digital age, music streaming has become the dominant mode of music consumption.

As a result, calculating streaming royalties has become an essential aspect of any musician or record label’s financial management. The Music Streaming Royalties Calculator is a digital tool developed to assist artists and music industry professionals in better understanding how much they will earn in royalties from various digital channels. This calculator works by taking into account the number of times a song was streamed and multiplying it by the average payout rate of the chosen streaming service. This tool offers transparency and clarity regarding royalty payments, making it easier for creators, songwriters, and producers to plan and budget their earnings.

Music Streaming Royalties Calculator

Credit: www.cinemasound.com

Frequently Asked Questions For Music Streaming Royalties Calculator

How Much Royalties From $1 Million Spotify Streams?

For $1 million Spotify streams, you can earn around $4,000 to $7,000 in royalties. The final amount depends on several factors, such as the country, artist-aggregator deal, and individual agreement.

How Are Music Streaming Royalties Calculated?

Music streaming royalties are calculated based on several factors, including the subscription fee and each song’s total number of plays. The total revenue from the streaming service is divided among the rights holders based on their percentage of plays. The amount of royalties varies between services and depends on the popularity of the artist and song.

How Many Music Streams To Make $1,000?

To make $1,000 from music streams, it depends on the streaming platform and the royalty rates being paid per stream. Generally, it takes around 250,000 streams on Spotify and 100,000 streams on Apple Music. But keep in mind that these values are estimates and subject to change.

How Much Money Is 2 Million Streams On Spotify?

2 million streams on Spotify can earn anywhere between $4,000 to $40,000 depending on several factors like location, genre, and the streaming revenue share. The average payout per stream is about $0. 003 to $0. 005.

Conclusion

Calculating music streaming royalties can be a daunting task for artists and music industry professionals alike. By utilizing a music streaming royalties calculator, you can easily identify and analyze your earnings to make informed decisions and negotiate fair deals. With features such as multi-platform support and customizable parameters, these calculators are an essential tool for anyone looking to maximize their streaming revenue.

Streamline your royalty calculations today and take control of your music career.

Categories
Archive

Kiive Audio Nfuse Vs Analog Hardware

Kiive Audio Nfuse provides the user with emulated analog sound, while Analog Hardware provides true analog sound. Kiive Audio Nfuse is a plugin that provides emulated analog sound to digital recordings.

On the other hand, Analog Hardware provides true analog sound through the use of physical devices and equipment. Whether to use plugins or physical hardware can be a controversial topic in the audio production community. While some prefer the convenience and flexibility of using plugins, others believe that the warmth and character of analog hardware cannot be fully replicated.

We will explore the differences between Kiive Audio Nfuse and Analog Hardware to help you make an informed decision on which to choose for your audio production needs.

Kiive Audio Nfuse Vs Analog Hardware

Credit: m.youtube.com

Kiive Audio Nfuse

Kiive Audio Nfuse offers exceptional audio quality to compete with analog hardware. With its advanced algorithms and precise digital processing, Nfuse is a perfect alternative to analog hardware, providing quality sound for your audio projects.

What Is Kiive Audio Nfuse?

Kiive Audio Nfuse is a software plug-in that is designed for digital audio workstations (DAWs) to simulate analog hardware. It allows audio engineers to add analog sound to digital recordings for a more natural, warm, and dynamic audio experience. Using advanced algorithms, Kiive Audio Nfuse accurately imitates classic analog gear, including mic preamps, compressors, equalizers, and more.

Features Of Kiive Audio Nfuse

Kiive Audio Nfuse comes with a host of features that make it an excellent choice for digital music producers. Some of the notable features include:

  • High-quality algorithms that simulate classic analog hardware
  • User-friendly interface and intuitive controls
  • Easy to switch between different analog gear simulations
  • Allows you to blend the wet/dry signal to achieve the desired sound
  • Can be used on individual tracks or on the master mix for an overall analog feel

Pros Of Using Kiive Audio Nfuse

The advantages of using Kiive Audio Nfuse are numerous. Here are a few pros of using this software:

  • It saves you a lot of money as you don’t have to spend on actual analog gear
  • Kiive Audio Nfuse can be used on any DAW, making it universally compatible
  • It is lightweight and takes up minimal processor resources, ensuring smooth performance
  • It has unlimited instances, which means you can use as many plug-ins as your computer can handle
  • The software provides endless customization options, tweaking the signal easily to your preference

Cons Of Using Kiive Audio Nfuse

Like every other software, Kiive Audio Nfuse has a few drawbacks. Here are some cons of using this software:

  • It can be challenging to get the same exact sound as a particular analog hardware every time
  • Although the software is lightweight, it can still take up considerable processing resources when multiple instances are in use.
  • The software can be relatively expensive compared to other plug-ins, although the cost is still significantly lower than actual analog gear.

In conclusion, Kiive Audio Nfuse is an innovative software plug-in that can help music producers achieve analog sound from digital recordings. While it may not entirely replace actual analog gear, it is a much cheaper and convenient option without sacrificing much of the sound quality.

Kiive Audio Nfuse Vs Analog Hardware

Credit: www.kiiveaudio.com

Analog Hardware

Kiive Audio’s Nfuse plugins are a popular alternative to traditional analog hardware, offering users the ability to achieve a similar sound without the heavy expense and maintenance that comes with using physical equipment. However, some audio engineers still prefer the warmth and depth that can only be achieved through analog hardware.

What Is Analog Hardware?

Analog hardware refers to equipment that processes electrical signals in the form of analog waves to reproduce sound. It is a traditional form of audio processing that has been used for decades and is still preferred by many professionals in music production. Unlike digital hardware, which processes signals in binary code, analog hardware operates on a continuous signal. This gives analog hardware a unique sound that cannot be replicated by digital hardware.

Different Types Of Analog Hardware

There are several types of analog hardware used in music production, including:

  • Equalizers
  • Compressors
  • Tube preamps
  • Analog mixing consoles

Pros Of Using Analog Hardware

Analog hardware provides a warm, rich sound that is often preferred by audiophiles and music producers. The equipment has a unique tonality that is not possible to simulate digitally. Analog hardware can also be used to achieve a specific sound that can be difficult to produce with digital equipment. The equipment is also incredibly durable and long-lasting, making it a reliable investment.

Cons Of Using Analog Hardware

Analog hardware is expensive and requires a significant amount of upkeep. The equipment is also bulky and can take up a lot of space. The processing power of analog equipment is limited compared to digital hardware. Additionally, analog hardware is often difficult to find and may require specialized maintenance, which can result in longer downtime for repairs or replacements.

Comparison

When it comes to audio production, finding the right tools is crucial to achieving the desired results. The debate between digital and analog audio production has been ongoing, with both methods having their pros and cons. In this article, we will compare Kiive Audio Nfuse and Analog Hardware in terms of Sound Quality, Connectivity and Compatibility, Cost, Convenience, Workflow, Flexibility, Learning Curve, and Reliability.

Sound Quality

One of the most significant aspects of audio production is the sound quality. Analog hardware is known to produce warm, natural sounds that can be hard to replicate through digital means. However, Kiive Audio Nfuse uses advanced algorithms to recreate analog warmth and character, providing high-quality sound without the need for expensive analog hardware.

Connectivity And Compatibility

Analog hardware usually requires specialized cables and connectors, making it challenging to connect to digital audio workstations. In contrast, Kiive Audio Nfuse connects easily through USB, making it compatible with a wide range of DAWs and other audio equipment.

Cost

Analog hardware can be expensive, with prices ranging from hundreds to thousands of dollars. Kiive Audio Nfuse provides high-quality analog emulation at a more affordable price, making it a great option for those on a tight budget.

Convenience

Analog hardware can take up a lot of space and require regular maintenance. Kiive Audio Nfuse is compact and requires no maintenance, making it a convenient and practical choice for home studios and small production spaces.

Workflow

One advantage of Kiive Audio Nfuse is its ability to save presets and recall them instantly. Analog hardware requires manual adjustments and can be time-consuming to set up and tweak. With Kiive Audio Nfuse, you can speed up your workflow and focus on being creative.

Flexibility

Kiive Audio Nfuse provides a range of analog emulation options, giving you the flexibility to choose the sound that best suits your needs. Analog hardware, on the other hand, provides a fixed sound and can be limiting in terms of the types of sounds it can produce.

Learning Curve

Using analog hardware requires a certain level of experience and knowledge. Kiive Audio Nfuse, on the other hand, is easy to use and requires no special training or expertise. It is a great option for beginners who want to achieve professional-sounding results without the hassle of learning analog production techniques.

Reliability

Analog hardware is vulnerable to wear and tear and can break down over time. Kiive Audio Nfuse is digital and does not suffer from the same issues, making it a reliable and long-lasting option for audio production.

Kiive Audio Nfuse Vs Analog Hardware

Credit: www.youtube.com

Frequently Asked Questions For Kiive Audio Nfuse Vs Analog Hardware

How Does Kiive Audio Nfuse Compare To Analog Hardware?

Kiive Audio Nfuse is a digital audio plug-in that accurately models the sound of analog hardware. Analog hardware is renowned for its warmth and character, but it can be expensive and difficult to maintain. With Nfuse, you can enjoy the benefits of analog modeling in a digital format without the hassle and cost of traditional analog equipment.

What Are The Benefits Of Using Kiive Audio Nfuse?

Kiive Audio Nfuse provides users with the rich, warm sound associated with analog hardware. Unlike traditional analog hardware, Nfuse is easy to use and doesn’t require regular maintenance. Additionally, Nfuse offers users the ability to customize and fine-tune their sounds, allowing for greater creative control.

Can Kiive Audio Nfuse Be Used In A Live Setting?

Yes, Kiive Audio Nfuse can be used in both live and studio settings. The plug-in is compatible with most digital audio workstations and can be used with a variety of hardware, such as audio interfaces, mixers, and controllers.

Is Kiive Audio Nfuse Affordable?

Compared to traditional analog equipment, Kiive Audio Nfuse is an affordable alternative. The plug-in offers the same warmth and character as analog hardware without the high cost of purchasing and maintaining traditional gear. Additionally, Nfuse can be used on any computer with a compatible digital audio workstation, eliminating the need for expensive additional hardware.

Conclusion

After comparing Kiive Audio Nfuse with Analog Hardware, it can be concluded that both have their own unique set of advantages and disadvantages. Nfuse provides convenience and affordability, while Analog Hardware offers a more authentic and dynamic sound. The choice ultimately depends on the user’s needs and preferences.

However, it is important to remember that no matter what system is used, the key to great sound is a combination of proper equipment, technique, and balance.