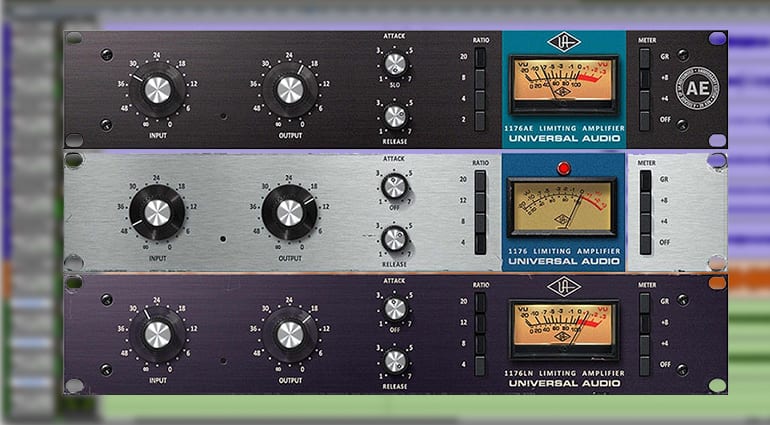
Compression release is the control that decides how quickly a compressor lets go once the signal falls back below the threshold. Attack gets most of the attention, yet the release time often has a bigger effect on how natural, punchy or squashed a track feels.
Getting compression release right is what separates gain control that feels invisible from compression that draws attention to itself. This guide explains what the control does, what typical values sound like, and how to pick a setting for common sources.
What Compression Release Actually Does
A compressor watches the level of the incoming signal. When that level crosses the threshold, the unit turns the gain down by an amount set by the ratio. When the level drops again, the gain has to come back up to unity. The release time is how long that recovery takes. On most designs it is quoted in milliseconds, and many manufacturers define it as the time needed to recover a set portion of the gain reduction rather than all of it, so two units with the same number on the dial can still sound different.
The general theory of dynamic range control, including attack, release, knee and ratio, is covered well in the Wikipedia article on dynamic range compression. The short version: attack shapes the front of each note, while release shapes everything after it.
Think of compression release as the tail end of the gain envelope. It also affects how much the effect is heard on quiet material, since slow recovery keeps quieter passages turned down too.
Fast Versus Slow Release
A fast setting, roughly 5 to 50 ms, lets the gain bounce back almost immediately. That raises quiet details between hits, such as room tone, breaths and ghost notes, which can make a source sound louder and more aggressive. Push it too far and the gain starts following individual cycles of low-frequency waveforms, which produces audible distortion on bass and kick drums.
A slow setting, roughly 300 ms to over a second, keeps the gain turned down for longer. The result is smoother and more even, but the compressor may never fully recover before the next note arrives. When that happens, gain reduction piles up, the track sits permanently quieter, and transients lose their impact.
Medium values, roughly 80 to 250 ms, are where many engineers start, because they recover between most musical events without chasing the waveform.
Reading the Gain Reduction Meter
The meter is the most reliable guide. Play the loudest section and watch the needle or LED bar. With a sensible setting, the meter should move with the music: it dips on each hit and comes back toward zero before the next one. If it hovers at a fixed amount and barely moves, the setting is probably too slow. If it flickers wildly and the sound gets grainy, it is probably too fast.
Setting Release to the Tempo
Timing the recovery to the song helps the compressor breathe with the groove. One beat at a given tempo lasts 60,000 divided by the BPM, in milliseconds. At 120 BPM a quarter note is 500 ms, an eighth note is 250 ms and a sixteenth note is 125 ms. A useful starting point is to choose a note value so the gain is back near zero just before the next important hit, then fine-tune by ear. Treat the maths as a starting point rather than a rule, because the shape of the recovery curve differs from unit to unit.
Tempo-matched compression release is especially effective on drum buses and loops, where every hit lands on the grid.
Auto-Release and Program-Dependent Designs
Many compressors offer an auto setting. Instead of one fixed time, the unit varies its recovery based on the material: short peaks get a quick recovery while sustained loud passages get a slower one. Some classic optical and bus compressors behave this way naturally, often with a two-stage curve that recovers part of the gain quickly and the rest slowly. Auto modes are a good choice for mix buses, vocals and any source with a wide mix of short and long events, because they reduce pumping without making the compressor sluggish.
Compression Release Settings by Source
The values below are starting points, not presets. Always adjust while listening in context.
Lead vocals: 40 to 150 ms. Faster settings bring up breaths and consonants; slower settings keep the vocal level steady through long phrases.
Kick drum: 50 to 150 ms, timed so the gain recovers before the next kick. Too fast on a long, boomy kick can distort the low end.
Snare: 50 to 120 ms. A faster recovery lifts the body and ring after the crack.
Drum room mics: fast settings around 20 to 60 ms combined with a high ratio give the classic exploding room sound.
Bass guitar: 100 to 300 ms. Very fast values can follow the waveform and add unwanted grit.
Acoustic guitar: 100 to 250 ms for an even strum without obvious movement.
Mix bus: 100 to 600 ms or auto, with only 1 to 3 dB of gain reduction.
Common Mistakes
Setting it with the track soloed only. Pumping that sounds obvious alone may disappear in the mix, and vice versa.
Ignoring the attack. Attack and release interact. A slow attack with a fast recovery behaves very differently from a fast attack with a slow one.
Chasing loudness. A very fast release makes things louder, and louder often sounds better at first. Match levels with the makeup gain before judging.
Over-compressing to fix arrangement problems. If a part only works with heavy gain reduction, the fix might be in the performance or the edit.
A Quick Workflow
Set the ratio and threshold so you see 3 to 6 dB of gain reduction on the loudest parts.
Start at the slowest release and turn it faster until the sound starts to breathe with the groove.
Back off slightly when you hear pumping or distortion you did not intend.
Check the meter: it should return close to zero between phrases or hits.
Bypass and level-match to confirm the change is an improvement.
Using Pumping on Purpose
Not every audible movement is a problem. Dance, hip-hop and rock productions often use deliberate pumping, where the whole mix ducks on each kick and swells back up. To get it, set a fast attack, a release timed to a quarter or eighth note, and enough gain reduction for the movement to be clear. Sidechain the compressor from the kick if you want the effect to stay tied to the beat even when other parts change.
Release and Attack Work Together
Because the two controls interact, it helps to adjust them as a pair. Our guide to the compressor attack setting explains how the front of the envelope works, and pairing that with the advice above covers the full shape of what a compressor does to a note.
Final Thoughts
Compression release is less about a magic number and more about matching the recovery of the compressor to the rhythm and decay of the source. Use the tempo maths for a starting point, watch the gain reduction meter, and let your ears make the final call. Once the release breathes with the music, the compressor stops sounding like an effect and starts sounding like part of the performance.
Music Producer Cheat Sheets are quick-reference guides, often in PDF format, aimed at helping producers master audio engineering, composition and production concepts. These cheat sheets typically provide a condensed, easy-to-understand summary of production processes that users can consult for guidance while working on music production projects.
Also, Music production can be a complicated process that requires a high level of technical expertise and creative skills. Even experienced producers can find themselves stumped when working on large and complex projects. Also, this is where reference charts come in. They provide a quick and easy way for music producers to reference key concepts when they need them.
Moreover, we will explore what music producer quick guides are, what they can do for producers. In addition, some of the best cheat sheets available today.
Want the full set? Download our free 390+ Producer Cheat Sheets, a library collected over four years covering mixing, mastering, production, plugins, DAWs, vocals, techniques and workflow. In addition, sign up for a free account and download the whole collection.
Credit: www.productionmusiclive.com
Popular Music Producer Cheat Sheets
Furthermore, popular music producer quick guides are essential tools for producers who want to create high-quality music. As a result, these reference charts contain shortcuts, tips and tricks, and essential information that can help music producers to improve their music production skills and create better music.
As a music producer, getting the best sound can be challenging since there are a lot of factors to consider. While experience and creativity are essential, having some quick guides can significantly help in speeding up the production process without compromising quality. However, here are some of the most popular cheat sheets for music producers.
Mixing Cheat Sheet
Additionally, the mixing process can be overwhelming, and it’s easy to get lost in the sea of plugins and controls. Then, a mixing cheat sheet can help by outlining the essential steps and techniques to get the desired sound. Some of the topics covered in mixing cheat sheets usually include EQ, compression, and reverb. Some examples of mixing cheat sheets include:
A Step-by-Step Mixing Checklist
Basic Mixing Techniques
Mixing Tips and Tricks
Mastering Cheat Sheet
Also, mastering is the final stage of the production process. It’s essential to get it right since it determines how the final product sounds. In short, mastering cheat sheets provide a detailed guide on how to master your tracks effectively. Some of the topics that are included in mastering cheat sheets include compression, equalization, and loudness optimization. Some examples of mastering cheat sheets include:
Mastering Essentials
Mastering Checklist
How to Master Your Music
Eq Cheat Sheet
Equalization is a crucial technique in music production since it allows you to shape the sound by emphasizing or reducing specific frequencies. Similarly, an EQ cheat sheet provides a frequency chart that outlines the fundamental frequencies of different instruments and vocal ranges, making it easier to equalize them effectively. Moreover, some examples of EQ cheat sheets include:
Instrument
Fundamental Frequency
Kick
60-80 Hz
Snare
200-250Hz & 800-1000Hz
Acoustic Guitar
80-100Hz & 2-3kHz
Compression Cheat Sheet
In addition, Compression is an indispensable tool in music production that allows you to control the dynamic range of your audio. Also, a compression cheat sheet provides a guide on how to use compressors effectively, including recommended settings and techniques. Some examples of compression cheat sheets include:
Compression Settings for Different Instruments
Sidechain Compression Techniques
Parallel Compression Tips
Vocal Processing Cheat Sheet
Furthermore, Vocals are usually the focal point of most songs, and it’s essential to get them right. A vocal processing cheat sheet provides tips and techniques on how to record, edit, and process vocals effectively. Some examples of vocal processing cheat sheets include:
Recording Tips for Vocals
How to Edit Vocals
Advanced Vocal Processing Techniques
Additionally, using cheat sheets in music production can help you save time and achieve better results. By familiarizing yourself with these popular music producer cheat sheets, you can significantly improve your music production skills.
Credit: www.pinterest.ca
How To Create Your Own Music Producer Cheat Sheet?
Creating a music producer cheat sheet can be helpful for both beginners and experienced producers. Include basic and advanced tips, shortcuts, and technical details that can serve as a quick reference guide. Use clear and concise language, and consider organizing the information in categories or subtopics.
Creating your own music producer cheat sheet is a valuable asset that can help you improve your skills as a music producer. By identifying the areas of music production in which you struggle, you can create a cheat sheet tailored to your specific needs. In this blog post, we will discuss the three essential steps you need to take to create your own music producer cheat sheet. These steps include identifying your weaknesses, collating high-quality information, and organizing information in a manner that suits you.
Identify Your Weaknesses
Before creating your cheat sheet, it’s crucial to identify the areas in which you need improvement. This may include mixing, mastering, or even music theory. Take some time to assess your skills and pinpoint the areas where you lack confidence.
Collate High-quality Information
Once you’ve identified your weaknesses, it’s time to gather high-quality information to include in your cheat sheet. The internet is a vast resource for information on music production, but it’s important to ensure that the information you gather is accurate and reliable. Seek out trusted sources, such as industry blogs, forums, and tutorial videos.
Organize Information In A Manner That Suits You
Now that you’ve gathered high-quality information, it’s time to organize it in a manner that suits your learning style. Consider using bullet points, tables, or an ordered list to make the information more digestible. It’s also essential to keep your cheat sheet brief and concise. Use short sentences and avoid unnecessary information. In conclusion, creating your own music producer cheat sheet is an excellent way to improve your skills as a music producer. By identifying your weaknesses, collating high-quality information, and organizing it in a manner that suits your learning style, you can create a valuable asset that will help you in your music production journey.
How To Effectively Incorporate Music Producer Cheat Sheets In Your Workflow?
If you are a music producer, you understand the importance of staying organized and efficient during the production process. In such a creative field, there are often moments of inspiration that can quickly lead to distractions and derail your progress.
Fortunately, music producer cheat sheets can be a valuable tool to help you stay on track and streamline your workflow. Here are some ways you can effectively incorporate cheat sheets into your production process:
Read Them Before Starting A Session
One effective way to use music producer cheat sheets is to review them before starting a production session. This can help you refresh your knowledge on a particular technique or process, allowing you to jump into the session with a clear understanding of what needs to be done.
Some popular cheat sheets for music producers include ones for EQ and compression settings, audio file formats, and MIDI keyboard shortcuts. By reviewing these cheat sheets beforehand, you can save time and increase your productivity in the session.
Use Them As References In Your Daw
Another way to incorporate cheat sheets into your production workflow is to use them as references while working in your DAW (Digital Audio Workstation). Having quick access to parameters, formulas, and keyboard shortcuts can speed up your workflow without having to leave your DAW and search the internet.
You can also print out cheat sheets and keep them near your workstation for easy reference. This way, you can quickly glance at them while you are working on a particular track.
Quiz Yourself With Your Cheat Sheets
Finally, a fun way to incorporate cheat sheets into your workflow is to quiz yourself on their contents. This may sound daunting, but it can be an effective way to improve your memory and retention of music production techniques.
As you quiz yourself, consider making notes on particularly challenging concepts or processes. These notes can then be used to create your own custom cheat sheets tailored to your individual needs.
By incorporating music producer cheat sheets into your workflow, you can stay organized, efficient, and focused during your production sessions. Whether you read them beforehand, use them as references, or quiz yourself on their contents, cheat sheets can be an effective tool in the creative process. Try incorporating them into your workflow and see how they can benefit your music production.
Credit: www.productionmusiclive.com
Frequently Asked Questions For Music Producer Cheat Sheets
How Do I Prepare To Be A Music Producer?
To prepare to become a music producer, you can take courses in audio engineering and music theory, practice with music production software, network and collaborate with other music industry professionals, and work on developing your own unique sound. It’s also important to stay up-to-date with current music trends and incorporate them into your productions.
How Can I Be The Best Music Producer?
To be the best music producer, focus on developing your technical skills, keep up with industry trends, network with industry professionals, experiment with different sounds and genres, and constantly create and innovate. Dedication and hard work are key to improving your craft and getting ahead in the competitive industry.
How Much Money Does A Music Producer Make?
The amount of money a music producer makes varies greatly depending on their level of experience, successes, and industry rates. Top producers can make millions, while those just starting out may earn very little or work for free to gain exposure.
Ultimately, a producer’s income is based on their talent, work ethic, and networking abilities.
What Are The Stages Of Music Production?
The stages of music production include pre-production, recording, editing, mixing, and mastering. Pre-production involves planning and preparation. Recording is the actual capturing of the music. Editing involves refining the recorded music. Mixing is where the individual tracks are combined. Mastering is the final polish to the entire mix.
Conclusion
As a music producer, it can be difficult to keep track of all the technicalities that go into producing quality tunes. Fortunately, by utilizing a music producer cheat sheet, you can streamline the process and make sure you’re hitting all the necessary points to make your music shine.
From mixing tips to mastering techniques, these cheat sheets are a lifesaver for any producer looking to improve their sound. So go ahead and take advantage of this invaluable tool to create the best possible music you can.
Successful musicians establish a daily practice routine and prioritize their goals. To achieve success in the music industry, consistency is key.
Creating a career in the world of music can be challenging, to say the least. Whether you aspire to be a professional musician, songwriter, producer, or music manager, the journey to achieving success is a long and winding road. Despite the difficulties, there are many habits that successful musicians practice to help them stay focused and achieve their goals.
These habits include establishing a daily practice routine, setting goals and priorities, seeking out feedback from others, and continually pushing themselves out of their comfort zones. We will delve deeper into these habits and explore how they can help aspiring musicians to attain success in their musical career.
Credit: giamusic.com
Set Goals
Set goals and establish routines are essential habits of successful musicians. Successful musicians do not leave their achievements to chance; they plan and set goals for themselves, ensuring that they stay focused and dedicated to their craft. These habits help them achieve their aspirations and stay productive.
Successful musicians didn’t get to where they are by accident; they set goals and worked tirelessly to achieve them. Having clear-cut objectives makes it easier to measure progress and stay motivated. Here are some tips on how to set goals for your music career.
Create A Vision For Your Career
Before you set your goals, you need to have a vision for your career. What kind of musician do you want to be? What are your core values as a performer? What sets you apart from other artists? Once you have a clear understanding of who you are as an artist, you’ll be able to set goals that align with your vision.
Break Down Long-term Goals Into Actionable Steps
Long-term goals can be overwhelming, and you may not know where to start. That’s why it’s essential to break them down into smaller, actionable steps. For instance, if your goal is to record an album, you can break it down into steps like writing the songs, rehearsing with your band, finding a recording studio, and mastering the final product.
Track Your Progress
Setting goals is the easy part; the hard part is sticking to them. One way to stay on track is to monitor your progress regularly. Set up a system to measure your progress weekly or monthly, depending on the type of goal. For instance, if your goal is to learn a new instrument, you can track your progress by recording yourself playing and reviewing the videos regularly.
Stay Accountable
Having a support system can be helpful in holding yourself accountable. Share your goals with your bandmates, friends, or family, and ask them to check in on your progress regularly. You can also find an accountability partner who has similar goals, and you can support each other as you work towards your objectives.
Celebrate Achievements
When you achieve your goals, take time to celebrate your achievements. Celebrating your success serves as motivation to keep pushing towards future goals. You can celebrate by throwing a small party with friends, treating yourself to a special item, or simply acknowledging your achievement and taking pride in it. Setting goals is a crucial first step in the journey to becoming a successful musician. By creating a vision of your career, breaking down long-term goals, tracking your progress, staying accountable, and celebrating your achievements, you’ll be well on your way to achieving success as a musician.
Practice Consistently
One of the most important habits of successful musicians is practicing consistently. This means setting aside a specific time each day or week to focus on improving your musical skills. By doing so, you’ll be able to develop your abilities and produce better results over time. In this post, we’ll be discussing how to build a regular practice routine and focus on technique and skill-building.
Build A Regular Practice Routine
In order to practice consistently, it’s important to build a regular routine. This means finding a time of day or week that works best for you and sticking to it. Whether it’s early in the morning or late at night, find a time when you can focus on your music without any distractions. By doing so, you’ll be able to develop your skills more effectively and efficiently.
Focus On Technique And Skill-building
When practicing regularly, it’s important to focus your efforts on technique and skill-building. This means working on specific skills and exercises that will help you improve your musical abilities. By doing so, you’ll be able to perform more effectively and confidently. Make sure to set specific goals and track your progress to keep yourself motivated.
In conclusion, practicing consistently is one of the most important habits of successful musicians. By developing a regular practice routine and focusing on technique and skill-building, you’ll be able to improve your musical abilities and achieve your goals.
Seek Out Opportunities
Successful musicians cultivate the habit of seeking out opportunities to showcase their talents, whether it’s through gigs, collaborations, or networking with industry professionals. By constantly putting themselves out there, they increase their chances of getting noticed and elevating their careers to the next level.
Be Proactive About Finding Gigs And Opportunities To Perform
A successful musician knows the value of being proactive in seeking out opportunities to perform gigs. Waiting for opportunities to come knocking at your door may not be the best approach. Instead, you should be actively looking for gigs and seeking opportunities to showcase your skills to new audiences.
How to be proactive in finding gigs?
Make connections with local talent agencies, booking agents, and event planners. Be sure to keep in touch with them regularly, so you’re always top of mind when new opportunities arise.
Join local musician groups and forums. They are an excellent source of information, and you may come across gigs that you wouldn’t have found otherwise.
Attend music festivals and industry events to network with other musicians and to learn about upcoming gigs or opportunities.
Take Advantage Of Social Media And Online Platforms To Reach New Audiences
In today’s digital age, social media and online platforms provide a fantastic opportunity for musicians to showcase their talents to a broad audience. Many musicians have found success using social media platforms to promote their music, connect with fans, and even book gigs.
How to use social media to reach new audiences?
Create a professional profile on social media platforms such as Facebook, Instagram, and Twitter, with high-quality images/videos and an engaging bio.
Regularly share high-quality videos of your performances, behind-the-scenes content, and new music to engage your existing followers and to attract new ones.
Utilize online platforms to get gigs
Join online talent agencies such as GigSalad, GigMasters, and The Bash to create a professional profile and find gigs.
Use YouTube to showcase your abilities and connect with fans and talent scouts.
Collaborate with other musicians and create music videos that can be shared on YouTube and other online platforms.
The key to success is to continuously seek out new opportunities and utilize all available resources to reach new audiences. By being proactive and using social media and online platforms, musicians can take their careers to the next level.
Credit: giamusic.com
Collaborate And Network
Successful musicians know the value of collaboration and networking. By working with others, they can exchange ideas, gain new perspectives and create unique sounds. Networking helps them connect with industry professionals and expand their opportunities for growth.
Work With Other Musicians And Artists To Expand Your Reach
Successful musicians understand the importance of collaborating with other musicians and artists. Collaborations not only expose your music to new audiences but also provide you with an opportunity to learn from other talented professionals in the industry. When you work with others, you can bring new perspectives to your music and create something truly unique and innovative. Moreover, collaborations can open doors to new opportunities and expand your reach as a musician.
Attend Industry Events And Connect With Other Professionals In The Music Industry
Networking is another crucial aspect of building a successful music career. Attending industry events like music festivals, conferences, and workshops can help you connect with other professionals in the music industry. Through networking, you can build relationships with people who can help you grow your career, including producers, managers, agents, or other musicians. Additionally, attending events provides you with an opportunity to showcase your talent, meet potential collaborators, and get exposure to new audiences.
Maximize Your Online Presence
In today’s digital age, it’s crucial to have a strong online presence to build a successful music career. This includes having an up-to-date website, social media accounts, and regularly releasing music on streaming platforms. A well-designed website can showcase your music and help fans discover your work. Social media platforms like Instagram, Twitter, and Facebook can provide a platform for you to connect with fans, other musicians, and industry professionals. By regularly releasing music on streaming services like Spotify, Apple Music, and Tidal, you can attract more listeners and grow your fan base.
Foster A Strong Work Ethic
Finally, successful musicians understand the importance of maintaining a strong work ethic. This means dedicating time and effort to your craft, regularly practicing, and being open to criticism and feedback. It’s also crucial to set realistic goals and stay focused on achieving them. Building a successful music career takes hard work, persistence, and patience. By staying motivated and disciplined, you can achieve your goals and make a name for yourself in the music industry.
Be Adaptable
One of the most significant habits of successful musicians is their ability to be adaptable. In a constantly evolving industry, it’s crucial to constantly develop and refine your craft to stay relevant and appeal to diverse audiences.
Be Open To New Genres And Styles Of Music
Opening yourself up to new genres and styles of music is essential for growth as an artist. By exposing yourself to new sounds, rhythms, and techniques, you can broaden your musical knowledge and incorporate new elements into your own work. For example, you can experiment with blending different genres or infusing traditional sounds with modern elements.
Embrace New Technologies And Tools To Enhance Your Music
Advancements in technology have revolutionized the way music is created and consumed. Successful musicians embrace new tools and technologies to enhance their music and stay ahead of the game. For example, you can use digital tools to produce, record, and distribute your music, collaborate with other artists, and engage with fans.
Remember, being adaptable means constantly evolving and exploring new avenues. By staying open-minded and embracing change, you’ll be better equipped to navigate the ever-changing landscape of the music industry and achieve success as a musician.
Credit: giamusic.com
Stay Organized
Successful musicians understand the importance of staying organized in their daily routines. From scheduling practice sessions to managing their finances, organization allows musicians to maximize their productivity and focus on their craft. Adopting this habit can lead to greater success in the music industry.
Being a musician goes beyond creating great music. As a musician, you are your brand, and like any business owner, you need to manage your activities to be successful. Staying organized is an essential trait that every successful musician possesses. In this section, we will discuss the various ways to stay organized as a musician.
Keep Track Of Bookings, Finances, And Other Important Details With A Management System
To stay on top of your music career, you need to have a management system in place. This system should help you track all essential details, such as bookings, finances, contracts, and other important details. A good management system will help you stay organized, save time, and ensure that none of the details fall through cracks. One of the best management systems for musicians is the artist management software. This software provides an all-in-one solution that helps you manage your music career. With this software, you can track bookings, contracts, finances, and even communicate with your fans. Additionally, you can get reports that give you insights into your music business.
Use Scheduling Tools To Maintain Balance
Musicians need to find a balance between their career and personal life. With so many activities to manage, it’s easy to lose track of what’s important. Scheduling tools can help keep you on track and maintain balance. Tools like Google Calendar, Trello boards, and Asana help you schedule your activities and track your progress. With these tools, you can create a to-do list, set deadlines, and create reminders. Additionally, they help you prioritize your activities and ensure that you don’t miss out on anything important.
Conclusion
As a musician, staying organized is critical to your success. By keeping track of your bookings, finances, and other important details, you can focus on creating great music. Additionally, by using scheduling tools, you can maintain balance and manage your time effectively. Remember, successful musicians are not just great artists, but they are also great managers who know how to stay organized.
Take Care Of Your Health
Successful musicians understand the importance of maintaining good health habits. Regular exercise, healthy eating, and adequate rest are all crucial for performing at their best on stage. By taking care of their physical and mental health, musicians can continue creating music that speaks to audiences around the world.
As a musician, it’s easy to get caught up in the demands of your craft and neglect your health. However, taking care of your body and mind is vital to your success. Here are some habits of successful musicians to ensure you prioritize your health:
Maintain Physical And Mental Health Through Exercise And Stress-management Techniques
One of the best ways to stay healthy as a musician is by exercising regularly. This not only improves your physical health but also your mental well-being. Stress-management techniques such as meditation and yoga can also help keep your mind calm and your body relaxed. Take a walk between recording sessions or practice stretching exercises to reduce stiffness.
Prioritize Self-care To Prevent Burnout
Musicians are often juggling an array of commitments, from rehearsals to gigs to recording sessions. It’s essential to set boundaries and prioritize self-care to prevent burnout. This can include taking regular breaks, getting enough sleep, and spending time with loved ones. Seek out activities that bring joy and relaxation to your life. To sum up, taking care of yourself should always be a top priority. Prioritizing your physical and mental health will ultimately lead to greater success both professionally and personally. Incorporate these habits of successful musicians into your daily routine to maintain a healthy and fulfilling life.
Continuously Learn And Improve
Successful musicians continuously learn and improve their skills. They take up new challenges, attend workshops, and practice consistently to enhance their musical abilities, which sets them apart from the rest.
Successful musicians are always looking for ways to enhance their skills and grow their careers. They understand that the music industry is constantly evolving, and to stay relevant, they need to continuously learn and improve. This section will highlight two ways successful musicians achieve this.
Stay Up-to-date With Industry Trends And Advancements
To succeed in the music industry, musicians must be aware of the latest trends and technology. They need to be aware of new promotional tactics, how to use social media to their advantage, and the latest music production software. One way they keep up to date with industry advancements is by attending conferences and workshops, reading industry publications, and following industry experts on social media platforms. Successful musicians also collaborate and network with their industry peers to learn from their experiences and stay informed about new opportunities. With this approach, they can stay ahead of the game and take advantage of new trends and opportunities before their competition.
Focus On Constant Self-improvement And Growth
Successful musicians understand that they must always work on improving their skills and knowledge to stand out in their industry. They consistently reflect on their performances, identify areas that need improvement, and find ways to address those areas. Self-improvement requires setting realistic goals and creating action plans that enable musicians to achieve them. They might, for instance, schedule regular practice sessions, hire a vocal coach or producer to refine their skills, or enroll in online courses to learn new skills. In conclusion, staying up-to-date with industry trends and advancements, focusing on constant self-improvement, and developing resilience and a positive attitude are crucial for success in the music industry. With these habits, musicians can keep their fans entertained and enhance their careers.
Frequently Asked Questions For Habits Of Successful Musicians
What Is The Habits Of A Successful Musician Series?
The Habits of a successful musician series is a collection of informative videos that covers essential topics on the music industry, including music production, performance, marketing, and more. The series aims to help aspiring musicians develop effective habits that can lead to success in their careers.
What Defines A Successful Musician?
A successful musician is someone who has achieved their personal goals and has established a strong fan base. They have honed their craft, created quality music and made a name for themselves in the industry. They also possess good business skills and effectively manage their career, creating new opportunities and maintaining a positive public image.
How Do Musicians Get So Good?
Musicians get good by practicing consistently, listening to and studying different styles of music, and striving for perfection. They also learn from more experienced musicians and attend music schools or workshops. It takes dedication, discipline and hard work to become a skilled musician.
What Is The Lifestyle Of A Musician?
The lifestyle of a musician can vary greatly depending on their level of success and work style. They may travel frequently for gigs, work long and irregular hours, network with other musicians and industry professionals, and balance pursuing their passion with financial responsibilities.
They must also constantly practice and hone their craft.
Conclusion
In short, successful musicians have certain habits that contribute to their success. From consistent practice and dedication, to networking and marketing themselves effectively, they put in the hard work required to achieve their goals. However, it’s important to remember that success looks different for everyone, and what works for one person may not work for another.
Ultimately, finding your own path and staying true to your passion are key components of success in the music industry.
To fix Cubase record button not working, try resetting preferences or checking audio device settings. Cubase is a popular digital audio workstation that offers a range of features and tools for music production and recording.
However, sometimes users may face issues with the record button not working, which can be frustrating. If you’re experiencing this problem, it can be caused by various factors such as corrupted preferences, outdated drivers, or incorrect audio device settings. We will discuss some tips and tricks that you can use to resolve the issue and get back to recording your music.
Whether you’re a beginner or an experienced user, these solutions can help you fix the problem and ensure that your recording workflow is smooth and efficient.
Possible Causes
If you are a musician or a music producer, and you use Cubase software for recording, you might encounter an issue where the record button in Cubase does not work, and you are unable to record your audio. This can be a frustrating problem, especially when you are in the middle of a recording session. There can be several causes of this issue, and in this article, we will discuss them in detail.
Incorrect Audio Driver Selection
One of the most common causes of the Cubase record button not working is the incorrect audio driver selection. When you install Cubase, it detects the existing audio drivers on your system and selects the most appropriate one. However, if you have recently installed new hardware or updated your operating system, the audio driver settings might have changed, causing the record button to stop working. To solve this problem, you need to go to the ‘Device Setup’ menu in Cubase and select the correct audio driver for your system.
Disabled Recording Track
Another possible cause of the Cubase record button not working is the disabled recording track. When you create a new project in Cubase, you need to create a new recording track to record your audio. Sometimes, you might accidentally disable the recording track, which can cause the record button to stop working. To fix this issue, you need to go to the ‘Track List’ menu in Cubase and enable the recording track.
Incorrect Audio Input Selection
The third possible cause of the Cubase record button not working is the incorrect audio input selection. When you record audio in Cubase, you need to select the correct audio input for your system. If you have multiple audio inputs, such as a microphone and a guitar, you need to select the correct input before recording. Sometimes, you might accidentally select the wrong input, which can cause the record button to stop working. To solve this issue, you need to go to the ‘Device Setup’ menu in Cubase and select the correct audio input for your system.
By understanding these possible causes, you can troubleshoot the Cubase record button not working issue and continue to record your music without any interruptions.
Credit: m.youtube.com
Basic Checks
Cubase is a powerful digital audio workstation that is widely used by musicians, producers, and engineers. However, it’s not uncommon for users to experience issues with the software, such as the record button not working. If you’re one of them, don’t worry! Before you start worrying about complicated fixes, there are some basic checks you can perform to see what’s causing the problem. In this post, we’ll guide you through the process of checking inputs and outputs as well as recording settings, two common culprits behind the Cubase record button malfunction.
Checking Inputs And Outputs
The first thing you should verify when experiencing recording issues in Cubase is whether your inputs and outputs are correctly set up. This is especially important if you’re using external hardware, such as a microphone or an audio interface. Follow these steps to make sure everything is in order:
Open your Cubase project and select “Devices” from the top menu.
Click on “Device Setup” and select “VST Audio System”.
Make sure the correct input/output buses and ASIO driver are selected. If you’re not sure what to choose, refer to your hardware manual or contact the manufacturer for assistance.
Close the Device Setup window and go to “Studio” in the top menu.
Choose “Audio Connections” and check that the inputs and outputs are correctly assigned. You should see the name of your device and the corresponding channels in the connections tabs.
If everything looks fine but you still can’t record, try testing with a simple audio file to confirm the issue is not with your hardware or cable connections.
Checking Recording Settings
If the inputs and outputs are properly configured but you still can’t record, it’s possible that your recording settings are not set up correctly. Follow these steps to check your recording settings:
Go to “Project” in the top menu and select “Project Setup”.
Click on the “Record” tab and check the settings for “Record File Type”, “Record Mode”, “Record on Selected Track only”, and “Record on any MIDI Channel”.
Make sure the “Record on Selected Track only” option is unchecked, unless you want to record on a specific track.
Verify that the “Record in Editor” option is checked if you’re recording MIDI data.
If you’re recording audio, make sure the “Record Mode” is set to “Mix” or “Overdub” and not “Replace”.
Lastly, check that the “Record File Type” is set to an appropriate format for your needs, such as WAV or MP3.
If all settings are correct, try restarting Cubase and attempting to record again. If the problem persists, you may need to troubleshoot further or seek help from the Cubase community or technical support.
Troubleshooting Tips
Are you experiencing problems with the Cubase Record Button Not Working? Don’t worry, we’ve got you covered. This troubleshooting guide provides tips that can help you fix the issue and get back to making music.
Updating And Reinstalling Audio Drivers
If the Cubase Record Button Not Working is due to audio drivers, updating or reinstalling them might help fix the problem. Here are the steps:
Go to the Device Manager by pressing the Windows Key + X and selecting Device Manager.
Expand the Sound, Video, and Game Controllers tab and locate your audio device.
Right-click on the device and select Update Driver or Uninstall Device.
If you update the driver and the problem persists, try uninstalling and reinstalling the driver.
Restart your computer.
Checking Third-party Plugins
Third-party plugins can sometimes cause conflicts with Cubase and prevent the Record Button from working as expected. To check for conflicts:
Go to Devices > Plugin Information and select the VST Plug-Ins tab.
Disable all third-party plugins and restart Cubase.
If the Record Button starts working, enable your plugins one by one until you identify the problematic one.
Remove the problematic plugin or consider updating it to a newer version.
Resetting Preferences
If the Record Button Not Working issue persists, resetting preferences can sometimes help. Here’s how:
Close Cubase and go to the following folder: C:\Users\[user name]\AppData\Roaming\Steinberg\Cubase[X]\_preferences.
Backup and remove all the files in this folder.
Restart Cubase, which will create fresh preferences.
These tips should help you fix the Cubase Record Button Not Working issue. If none of these tips works, it’s recommended to contact the Cubase support team for further assistance.
Working With Cubase
If you are a musician or music producer, then you must have heard of Cubase. Cubase is one of the most popular digital audio workstations (DAWs) available in the market. It offers an extensive range of features and tools to help users create, record, edit, and mix music. However, like any other software, Cubase can have its share of issues. One of the most common problems that users face while using Cubase is the record button not working.
Using Alternative Recording Methods
If you encounter an issue with the record button in Cubase, one of the best solutions is to try using alternative recording methods. You can try recording using the “punch in” and “punch out” features. This method allows you to start recording after a certain point and stop recording before a specific point. If that doesn’t work, you can try using a different audio interface or routing your audio inputs and outputs differently.
Working With Midi Recordings
If you are having trouble recording MIDI data in Cubase, there could be several reasons that the record button is not working. One of the most common solutions to this issue is to check your MIDI connections and settings. Ensure that your MIDI controller is connected and configured correctly. Additionally, you may also try resetting your MIDI preferences or updating your drivers to resolve the MIDI recording problem.
Cubase Support
If you are having trouble with Cubase’s record button not working, our Cubase support team can assist you. We provide expert guidance on resolving this issue so you can get back to producing your music with ease. Contact us today for immediate assistance.
Cubase is a popular Digital Audio Workstation (DAW) that allows musicians and sound engineers to create, record, and edit music. Though Cubase is known for its reliability, sometimes users face issues such as the Cubase Record button not working. In such cases, the Cubase Support team can be of great help in resolving the issue. Here are some ways to connect with the support team and get your Cubase issues resolved quickly.
Contacting Tech Support
If you encounter a problem while working with Cubase, contacting the tech support team is the fastest way to get a resolution. You can submit a support ticket through the Cubase website or directly send an email to support@steinberg.de. Make sure to provide detailed information about the issue, including the version of Cubase you are using, your operating system, and any error messages you have received. This will help the support team identify and resolve the issue quickly.
Using Cubase Forums And User Groups
Another way to get help with Cubase-related issues is to join online forums and user groups. These communities have experienced Cubase users who are willing to offer support and advice to those who need it. The Cubase forums hosted by Steinberg have sections dedicated to different aspects of the software, including recording, editing, and mixing. You can also find Cubase user groups on social media platforms such as Facebook and LinkedIn, where you can connect with other Cubase users and seek their advice.
Cubase Support: Conclusion
In conclusion, if you are facing issues with Cubase, don’t panic. The software has a dedicated support team to help you resolve any issues you might be facing. Additionally, you can always seek assistance from online communities such as forums and user groups. By following the above-mentioned steps, you can get your Cubase issues resolved quickly and get back to focusing on your music creation process.
Frequently Asked Questions For Cubase Record Button Not Working
Why Can’t I Record In Cubase?
Cubase may not record due to several reasons such as incorrect audio driver selection, a lack of disk space, or incorrect configuration of input/output devices. Check your settings and ensure that you have selected the correct audio driver and there is enough disk space.
How Do I Enable Recording In Cubase?
To enable recording in Cubase, you need to click on the “+” icon in the audio track list, select “Audio” or “Instrument” track, arm the track by clicking on the “R” button, and start recording by hitting the record button.
You can also set up your inputs and outputs in the project setup window before recording.
Where Is The Record Button On Cubase?
To access the record button in Cubase, locate the transport panel at the top of the interface. The record button is denoted by a small red circle. Click on it to begin recording audio or MIDI.
How Do I Record Audio In Cubase?
To record audio in Cubase, first, create an audio track by going to Project > Add Track > Audio. Then, select your audio interface from the Devices menu. Choose the input source for the track, arm the track for recording, and press the record button.
Adjust the input gain levels to ensure optimal recording quality.
Conclusion
To sum up, the Cubase record button not working can be frustrating for music producers and engineers. However, there are several solutions to this issue, including checking device connections, updating software, and resetting the program preferences. By following these steps, it is possible to fix the issue and continue creating high-quality music tracks using Cubase.
Remember, taking time to troubleshoot problems can save valuable time and money in the long run.
Musician earplugs work by reducing the overall level of sound without sacrificing sound quality. They achieve this by using filters that attenuate specific frequencies, allowing the user to hear all frequencies at a lower volume.
For musicians, hearing damage is a real concern due to exposure to loud sound levels during rehearsals and performances. Traditional earplugs often distort sound, but musician earplugs allow for a more balanced sound experience while offering protection. These earplugs come in different filter strengths that allow for customization depending on the musician’s individual needs.
In addition, they are typically more comfortable and durable, making them a worthwhile investment for musicians looking to protect their hearing without sacrificing sound quality. The use of musician earplugs has become increasingly popular and is a wise choice for anyone seeking long-term hearing protection.
Credit: www.quora.com
How Musician Earplugs Work
Musician earplugs are crafted to protect the ears of professional musicians while performing to extremely high decibels. The level of noise during a musical performance can reach up to 120 decibels, which poses a significant threat to the ears of the artists and the audience. To safeguard hearing while showcasing their talent, most musicians wear earplugs. These plugs work in a unique manner to provide quality sound while reducing the risk of hearing damage.
Design And Construction
These earplugs come with a specialized design and construction process that allows for convenient and comfortable use. Most earplugs have interchangeable, detachable, and washable ear tips that can fit any ear size. The tips sit comfortably in the ear canal and utilize soft, pliable materials to prevent irritation and accommodate better placement. The plugs are also hypoallergenic and manufactured with medically approved and safe materials for sensitive skin. Additionally, the earplugs feature a unique design that creates a seal that helps to reduce the loudness of sound that reaches the inner ear and protects hearing.
Noise Reduction Rating (nrr)
The noise reduction rating (NRR) is an essential measure of the effectiveness of musician earplugs in lowering decibel exposure levels. The NRR represents the level of sound reduction that the plugs provide. Commonly, musician earplugs have a range of NRR from 9 to 25 decibels, which is a perfect range for reducing the noise in the environment and preventing hearing damage. The range also preserves the delicate nuances of sound, making music sound natural and preserving the ear’s sensitivity and accuracy despite lower volumes.
Frequency Response
Musician earplugs are made specifically to lower the loudness of high-frequency sounds while leaving low-frequency sounds intact. They provide a flat attenuation response, which reduces the volume of sound across different frequency bands and results in the natural sound of music while protecting hearing. Even better, they reduce the level of potentially harmful sound to non-damaging levels, which allows musicians to perform with ease while minimizing the risks of lasting hearing damage.
Sound Quality
One of the primary goals of musician earplugs is to maintain the quality of sound while reducing the decibel levels. Whether on-stage or in the audience, wearing musician earplugs reduces the risk of hearing damage while providing an accurate and trustworthy sound experience without distortion. Therefore, the plugs facilitate excellent sound quality – clear, undistorted, and true to the source; without causing discomfort or hearing fatigue even after prolonged use.
Credit: www.earmarkhc.com
Different Types Of Musician Earplugs
Musician earplugs come in different types such as filtered, non-linear, and custom-fitted. They work by reducing sound levels without distortion, allowing musicians to hear clearly and protect their hearing.
Different types of musician earplugs are available in the market today, each with their unique features and functionalities. As a musician or music enthusiast, protecting your hearing while enjoying the sweet melodies of your favorite tunes is important. In this article, we’ll take a closer look at the different types of musician earplugs you can choose from.
Custom Earplugs
Custom earplugs offer a personalized fit for your ears, hence the name “custom”. They are designed to fit your ear canals for maximum protection and comfort. The process of making custom earplugs involves taking an impression of your ears and using it to create a mold for your custom earplugs. The benefits of custom earplugs include superior noise reduction, comfortable and secure fit, and durability. Custom earplugs are ideal for musicians who frequently perform on stage or music lovers who frequently attend concerts.
Non-custom Earplugs
Non-custom earplugs are available in a range of configurations and sizes, and you can buy them from various online and physical stores. They are constructed to insert into your ear canal, and they come in different materials, such as foam or silicone. Non-custom earplugs come with different noise reduction ratings, so it’s important to choose one that best suits your needs. Non-custom earplugs are affordable and easy to carry around, so they’re ideal for music lovers who are always on the move.
In-ear Monitors
In-ear monitors are ideal for musicians who perform regularly on stage, especially in loud environments. In-ear monitors offer a custom fit and provide a range of options for sound quality. They first model your ear canals to create a mold that will fit your ears, and you can choose from a single driver or multiple driver monitors to deliver different frequencies. In-ear monitors reduce sound levels without affecting the sound quality, making them ideal for musicians who want to customize their sound.
Electronic Earplugs
Electronic earplugs are designed to protect your ears from loud sounds while still allowing you to hear conversations and music. They have a microphone and speakers, which allow you to adjust the sound levels, so you don’t miss any details. They are particularly beneficial for musicians as they help them maintain sound quality while still protecting their hearing. Electronic earplugs are also ideal for music enthusiasts who want to maintain the sound quality of their music while protecting their hearing. In conclusion, the type of musician earplug you choose will depend on your lifestyle, needs, and budget. Whether you choose custom earplugs, non-custom earplugs, in-ear monitors, or electronic earplugs, it’s important to understand the features and functionality of each option to make the best decision. With the right musician earplugs, you can protect your ear health and enjoy your favorite music for years to come!
Benefits Of Using Musician Earplugs
Musician earplugs work by reducing the overall volume of sound entering the ear while still maintaining the quality of the sound. This helps musicians and concert-goers to protect their hearing and avoid potential hearing loss and tinnitus. Additionally, musician earplugs can also improve the clarity of sound and enhance the overall listening experience.
Musician earplugs work by reducing the volume of sound that enters the ear canal while maintaining the sound quality. They are designed to filter out harmful noise levels without distorting the sound of music. Generally, they come with varied levels of noise attenuation so that musicians can choose the level of noise protection that they need. Musician earplugs work based on a filter mechanism that allows soundwaves to enter the ear while blocking harmful noise levels.
Protection Against Hearing Loss
Musician earplugs protect users against hearing loss by reducing the amount of noise that enters the ear. This is important because extended exposure to high sound levels can damage the hair cells in the ear, causing irreversible damage to hearing abilities. Musician earplugs offer varying degrees of protection against noise-induced hearing loss, and they are an essential accessory for any musician or music enthusiast.
Improved Sound Quality
One of the benefits of using musician earplugs is that they maintain the sound quality while reducing noise levels. The earplugs act as a filter, allowing only a safe level of sound to enter the ear canal. This ensures that the music is not distorted and that users can enjoy the full experience of the music without harming their hearing.
Reduced Risk Of Tinnitus
Musician earplugs reduce the risk of tinnitus by filtering out harmful noise levels. Tinnitus is a condition characterized by a ringing or buzzing noise in the ear, which can be caused by prolonged exposure to loud sounds. Musicians and music enthusiasts are particularly vulnerable to this condition, as they are often exposed to high sound levels. By reducing the risk of tinnitus, musician earplugs help users maintain their hearing health and enjoy music for years to come.
Increased Comfort And Wearability
Musician earplugs are designed to be comfortable, lightweight, and easy to wear. They come in a variety of sizes, shapes, and materials to fit different ear types. The earplugs are also adjustable, allowing users to find the perfect fit for their ears. This ensures that users can wear the earplugs comfortably for extended periods without experiencing discomfort or pain. In conclusion, musician earplugs are an essential accessory for anyone who loves music and cares about their hearing health. They protect users against hearing loss and tinnitus, improve sound quality, and are comfortable and easy to wear.
How To Choose The Right Musician Earplugs
If you’re a musician, you know how important it is to protect your hearing. But not all earplugs are created equal. In fact, there are musician-specific earplugs that are designed to protect your ears without distorting the sound quality. Here’s how to choose the right musician earplugs:
Consider Your Needs
Before you invest in musician earplugs, you need to consider your needs. What type of music do you play? Where do you perform? How often do you perform? These are all important questions to ask yourself before selecting the right earplugs. For example, if you’re a drummer, you may need heavier-duty earplugs than if you’re a singer.
Consult With An Audiologist
It’s a good idea to consult with an audiologist before selecting musician earplugs. An audiologist can perform a hearing test to assess your current hearing levels and make recommendations based on your individual needs. They may also be able to provide custom fitted musician earplugs that offer superior protection and comfort.
Try Different Types Of Earplugs
Not all musician earplugs are the same, so it’s important to try different types to find what works best for you. Some earplugs are made with different materials, while others have different shapes and sizes. Experiment with different options until you find the earplugs that offer the best protection and sound quality.
Read Reviews And Ask For Recommendations
Lastly, it’s a good idea to read reviews and ask for recommendations before purchasing musician earplugs. Look for reviews from other musicians who have similar needs and styles of music. You can also ask for recommendations from other performers or your audiologist. By doing your research and taking the time to find the right earplugs, you can protect your hearing while still enjoying the music you love.
Credit: www.hearing-center.net
Frequently Asked Questions Of How Do Musician Earplugs Work
How Do Musicians Ear Plugs Work?
Musicians ear plugs work by reducing the volume of sound that enters the ear without altering its quality. They contain filters that cut down on harmful noise while allowing for a clear listening experience. This in turn helps protect the ear from damage caused by exposure to loud music and noise.
What Do Musicians Hear In Their Earpieces?
Musicians hear themselves, other band members, and potentially a click track (metronome) and other sound effects in their earpieces.
Are Musician Earplugs Better Than Regular Earplugs?
Yes, musician earplugs are better than regular earplugs because they provide better sound quality, reduce the risk of hearing damage, and are specifically designed for musicians who need to protect their ears while still being able to hear music accurately.
Can You Still Hear The Music At Concerts With Earplugs?
Yes, you can still hear the music at concerts with earplugs. Earplugs are designed to reduce the volume of sound without distorting it. Therefore, you can still hear the music, but at a safer volume level that won’t cause damage to your ears.
Conclusion
To sum up, musician earplugs are designed specifically to provide maximum protection to musicians’ ears without compromising the quality of sound they produce. They work by reducing the volume of external noise entering the ear canal, thus reducing the risk of hearing damage.
By choosing the right type of earplugs, musicians can protect their hearing while still enjoying their music performance. It is essential that they invest in good quality earplugs and have their hearing regularly checked to prevent long-term hearing loss.
To record vocals from home, you need a good quality microphone and recording software. Connect the microphone to your computer, open the software, and press record to start.
Recording vocals from the comfort of your own home has become the norm in recent years. It’s a convenient and cost-effective method for singers and songwriters to create music without having to book expensive recording studios. However, it’s essential to ensure that the recording quality meets industry standards.
We’ll discuss what equipment you’ll need to get started, how to set up your recording space, and some tips for getting the best sound possible. By following these steps, you’ll be on your way to recording professional-quality vocals from the comfort of your own home.
Credit: dittomusic.com
Create A Recording Space
The first step in recording professional-sounding vocals from home is to create a recording space. With the right setup, you can minimize outside noise, prevent echoes, and get the cleanest possible recordings. Here are three key steps for creating a recording space:
Choose A Quiet Area
The first thing to consider when creating a recording space is where you’re going to record. Choose a quiet area of your home, like a spare bedroom or a closet. Stay away from rooms with hard surfaces like tile floors or glass windows since they reflect sound and can add unwanted reverb to your vocals. Carpeted floors and drapes can help absorb sound and reduce unwanted noise. Once you’ve found the right space, clear it out and prepare it for soundproofing.
Soundproof The Recording Space
Soundproofing is essential for creating a recording space that captures clean vocals. You can either hire a professional to soundproof your recording space or do it yourself. Some methods for soundproofing include:
Install acoustic panels on the walls
Use a room divider to create a smaller space
Hang heavy curtains or blankets
Put a rug on the floor
By soundproofing your recording space, you’ll eliminate unwanted sounds and create a more controlled environment for capturing your vocals.
Eliminate Echoes
Once your space is soundproofed, the final step is to eliminate echoes. This can be achieved by using items in the room to absorb sound. Some ways to do this include:
Adding foam tiles to the walls and ceiling
Placing bookshelves filled with books in the space
Using furniture like couches or cushions to absorb sound
Hanging acoustic blankets or sound-absorbing curtains
By employing these methods, you’ll reduce the amount of sound bouncing around the room and create a more controlled vocal recording environment. Don’t be afraid to experiment with different options to see what works best for your space!
Choose The Right Microphone
If you’re planning on recording vocals from home, one of the most important things to consider is choosing the right microphone. The right microphone can make all the difference in the world when it comes to the quality of your recording. Here are a few things to keep in mind when making your selection.
Dynamic Microphone Vs. Condenser Microphone
The first thing you’ll need to decide is whether you want a dynamic or condenser microphone. A dynamic microphone is generally more rugged and durable, making it a good choice if you plan on using it in a variety of different settings. However, if you’re looking for a microphone that can capture more detail and nuance in your vocal performance, a condenser microphone is probably the way to go.
Cardioid Vs. Omni-directional Microphone
Another important consideration is the directionality of your microphone. A cardioid microphone is designed to pick up sound from a single direction (typically the front of the microphone), while an omni-directional microphone can pick up sound from all directions. If you’re recording vocals, you’ll probably want to go with a cardioid microphone, as it will help to isolate and focus on your voice.
Usb Microphone Vs. Xlr Microphone
Finally, you’ll need to decide whether you want to use a USB microphone or an XLR microphone. A USB microphone is great for beginners, as it can be plugged directly into your computer and doesn’t require any additional hardware. However, if you’re looking for the best possible sound quality, an XLR microphone is the way to go. XLR microphones require an audio interface or mixing console to connect to your computer, but they offer greater flexibility and control over your recording.
Now that you have a better understanding of the different types of microphones available, you can make an informed decision about which one is right for you. Keep in mind that the microphone you choose will have a huge impact on the sound quality of your recording, so don’t skimp on this important piece of equipment.
Set Up Your Recording Equipment
Equip your recording area with a microphone, headphones, audio interface and pop filter. Ensure that your recording space is quiet and free of echoes by using foam panels or blankets. Set up your equipment properly and enjoy recording vocals from the comfort of your own home.
Recording vocals at home is an affordable and convenient way to create your music. But, before you begin, let’s discuss how you can set up your recording equipment. To record vocals from home, you’ll need a microphone, a computer, and software. Here’s a step-by-step guide to setting up your recording equipment.
Connect Your Microphone To Your Computer
To connect your microphone to your computer, you can use an XLR cable or a USB cable. An XLR cable is recommended for professional quality sound. Here’s how you can connect your microphone to your computer:
Plug the XLR cable into the microphone.
Plug the other end of the XLR cable into the audio interface.
Plug the USB cable into the audio interface.
Plug the other end of the USB cable into the computer.
Install A Digital Audio Workstation (daw) Software
To record your vocals, you’ll need a Digital Audio Workstation (DAW) software. A DAW is a program that allows you to record, mix, and edit your audio. There are many DAWs available, and some are free while others require a purchase. Here’s how you can install a DAW software:
Visit the website of your chosen DAW software.
Click on the download button, and the installation process will begin.
Follow the instructions to install the software.
Once installed, open the software.
Select The Correct Audio Interface
An audio interface allows you to connect your microphone and other audio equipment to your computer. When selecting an audio interface for your home recording studio, consider the following factors: number of inputs and outputs, preamp quality, and connectivity. Here’s how you can select the correct audio interface:
Research and compare audio interfaces online.
Determine how many inputs and outputs you need.
Read reviews and consider user ratings.
Choose an audio interface that fits your budget.
Setting up your recording equipment is a crucial step in recording vocals from home. By following these steps, you’ll be on your way to creating professional-quality music in no time.
Prepare Your Vocals
To achieve high-quality vocal recordings from home, it’s essential to prepare your voice. Spend some time warming up, hydrating, and experimenting with mic placement until you find the best sound. With these preparations, you can produce professional recordings without leaving the house.
Preparing your vocals is an important step to achieving high-quality recordings from your home studio. In this section, we focus on three crucial aspects of preparing your vocals: warming up your voice, choosing the right song key, and practicing before recording.
Warm Up Your Voice
Before recording, it’s essential to warm up your voice to avoid vocal strain and fatigue during long recording sessions. Warm-ups help loosen up your muscles and improve your vocal range. Here are some effective warm-up exercises:
Humming or lip trills to loosen up your muscles
Scales to improve your pitch and vocal range
Tongue twisters to improve your diction and enunciation
Choose The Right Song Key
Choosing the right key is vital to a successful recording. The key you select will determine whether the song is in your optimal vocal range or not. Singing in a key that’s too high or low for your voice will affect your pitch, tone, and overall performance. Here’s how to choose the right key:
Find your comfortable vocal range
Transcribe the song into several keys
Test each key by singing along to the track
Select the key that feels the most comfortable and sounds the best
Practice Before Recording
The more you practice, the better your recording will be. Practice singing the song with the instrumental track and without it. Pay close attention to your pitch, tone, and phrasing. You can record yourself and listen back to identify any areas that need improvement. Here are some tips on how to practice effectively:
Use a metronome to keep time
Sing with a clear and consistent tone
Focus on your breath control and phrasing
Record and listen back to your performance to identify areas that need improvement
By preparing your vocals using these techniques, you’ll be well on your way to recording high-quality vocals from your home studio. Remember, warming up your voice, choosing the right key, and practicing before recording are essential steps to achieving a successful recording.
Record Your Vocals
Recording vocals at home can be daunting, especially if you’re new to audio engineering. However, it’s entirely possible to get a professional-sounding recording with some basic equipment and know-how. Throughout this guide, we will discuss how to choose the right recording technique, adjust microphone settings, and record multiple takes to ensure the best possible recording.
Choose The Right Recording Technique
The recording technique you choose will depend on the equipment you have and the type of sound you’re looking to achieve. Here are some popular recording techniques:
Technique
Description
Close mic
Place the microphone about 6 inches away from your mouth to capture a clear and detailed sound.
Room mic
Place the microphone about 3 ft away from you to capture the natural ambience of the room. This technique works well for acoustic recordings.
Vocal booth
If you have access to a vocal booth, use it! It’s ideal for isolating your voice from any external noise.
Adjust Microphone Settings
Adjusting microphone settings is critical for achieving a good vocal recording. Here are a few things to keep in mind when setting up your microphone:
Position the microphone directly in front of your mouth
Use a pop filter to eliminate popping sounds
Check the microphone levels to make sure they’re not too high or too low
Experiment with the proximity effect – the closer you get to the microphone, the deeper your voice will sound
Record Multiple Takes
Trust us when we say that recording multiple takes is essential to creating a high-quality vocal recording. Recording multiple takes allows you to choose the best parts of each recording and piece them together to create the perfect track. When recording, try the following:
Record at least three takes of each section
Take breaks if you need them, especially if you’re experiencing vocal fatigue
Encourage experimentation – try different pitches, tempos, and inflections to give yourself more options in post-production
In conclusion, recording vocals from home can be a challenging task, but it is not impossible. With these tips, you’ll be on your way to creating professional-sounding vocal recordings in no time.
Credit: www.supremetracks.com
Edit Your Vocals
Recording high-quality vocals from home is possible with the right techniques. After recording, editing your vocals is crucial for a polished final product. Use EQ, compression and reverb to enhance your recordings.
Now that you have recorded your vocals, the next step is to edit them. Editing helps to refine the sound quality and make it perfect for publication. Here are some editing tips to polish your vocals and make them stand out from the crowd.
Remove Unwanted Sounds
The first step in editing your vocals is removing any unwanted sounds. This includes background noise, pops, clicks, and breaths. You can use a noise reduction plugin to remove any hisses or buzzing sounds. To remove pops and clicks, you can use a de-clicker plugin. You can also manually remove any unwanted breaths using an audio editing software like Audacity.
Adjust Volume And Equalization
The next step is to adjust the volume and equalization. This is important for balancing the vocal with the instrumental track. You can use a compressor plugin to even out the volume fluctuations and make the vocal sound consistent. Equalization helps to enhance the vocal by making it clear and crisp. You can use EQ plugins to adjust the frequencies of the vocal to make it sound better.
Add Reverb And Echo
The last step in editing your vocals is to add some effects like reverb and echo. Reverb is used to create a sense of space while echo adds depth to the vocal. You can use a reverb plugin to simulate different environments like a concert hall or a studio. You can also use an echo plugin to create a delay effect. But make sure not to overuse these effects as it can make the vocals sound unnatural. In conclusion, editing your vocals is an essential part of the recording process. By removing unwanted sounds, adjusting the volume and equalization, and adding effects like reverb and echo, you can make your vocals sound professional and polished.
Mix And Master Your Vocals
Record professional-quality vocals from home by learning how to mix and master them. With the right techniques and equipment, you can achieve a polished sound that rivals studio recordings.
Recording vocals from home is one thing, but making them sound professional with a perfect mix is a whole different story. After recording your vocals, you need to mix and master them to get the perfect sound quality that will make your listeners keep coming back for more. In this section, we’ll show you how to create a balanced mix, apply compression, and add effects and enhancements to your vocals.
Balance The Audio Levels
Before applying any effects or enhancements to your vocals, it’s important to ensure that the audio levels are balanced. You can do this by adjusting the volume levels of each track in your mix. You should aim to balance the levels so that all tracks are audible without one overpowering the other. This will prevent any distortion or clipping and provide a clear and clean sound. You can use a tool like the fader in your DAW to balance the levels.
Steps to Balance Audio Levels:
1. Open your DAW and load your vocal track.
2. Adjust the volume fader until the vocal track’s volume is similar to the other tracks in the mix.
3. Listen to the mix, and if your vocal is overpowering or too quiet, adjust the volume fader accordingly.
Apply Compression
Compression is a powerful tool that can help make your vocals sound more polished and professional. It helps to keep the volume levels consistent throughout the song, making the vocals sound more controlled. Compression can also bring out the details in the vocal performance, making it more dynamic and expressive. To apply compression to your vocals, you can use a compressor plugin in your DAW.
Steps to Apply Compression:
1. Open the compressor plugin and insert it on your vocal track.
2. Adjust the threshold, ratio, and attack and release settings until you achieve the desired compression effect.
3. Listen to the mix and adjust the settings as necessary to achieve a balanced sound.
Add Effects And Enhancements
Once you have a balanced mix and applied compression to your vocals, you can add effects and enhancements to make the vocals sound even better. There are many effects you can add, including reverb, delay, and EQ, to help your vocals stand out and blend better with the rest of the mix.
Steps to Add Effects and Enhancements:
1. Open the effects or enhancements plugin and insert it on your vocal track.
2. Adjust the settings to achieve the desired effect or enhancement.
3. Listen to the mix and adjust the settings as necessary to achieve the desired sound.
With these steps, you can easily mix and master your vocals from home and achieve a professional sound. Just remember to balance the audio levels, apply compression, and add effects and enhancements to create the perfect mix.
Finalize Your Recording
Record vocals from your home like a pro by finalizing your recording. This involves listening to your recording and making any necessary adjustments to the volume, pitch, and timing. Use effects to enhance the sound quality and export the final product.
Finalize Your Recording: Recording vocals from home can be a daunting task, but with the right equipment and setup, it is entirely possible to achieve professional-sounding results. Once you’ve recorded your vocals, it’s time to finalize your recording. In this section, we’ll cover the essential steps you need to take after recording to ensure your vocals are polished and ready for distribution. H3 heading (Export Your Recording): Firstly, export your recording. This is the process of saving your vocals as a file that can be played on different devices or uploaded to various platforms. To export your recording, you need to locate the option “Export” in your recording software. Once you’ve done that, choose a format that suits your needs. For instance, if you want to upload your vocals to SoundCloud, choose the “.wav” format. If you wish to send it over for further editing, you can opt for the “.mp3” format. H3 heading (Listen to Your Recording): Next, listen to your recording. Before you start editing, you need to listen to your recording objectively. Use good quality headphones or speakers and listen to your recording multiple times. While listening, look out for issues like unwanted noise, uneven volume levels, or any pops and clicks. Take notes of everything that needs to be fixed to ensure you do not miss anything during the editing process. H3 heading (Get Feedback from Others): Finally, get feedback from others. After listening to your recording, get the input and thoughts of other people. Ask them what they think of your track and if there’s anything that needs to be improved. If possible, reach out to someone who’s an audio expert; this way, you can get objective feedback that can improve the overall quality of your track. Taking note of their suggestions and comments can help to refine your track and enhance its appeal to your audience. In conclusion, exporting your recording, listening to your recording, and getting feedback from others are the three critical steps to finalize your recording. Once you’ve completed these steps, you can rest assured that your home-recorded vocal will sound professional and ready to take on the world.
Credit: m.youtube.com
Frequently Asked Questions Of How To Record Vocals From Home
What Do I Need To Record Vocals At Home?
To record vocals at home, you will need a computer with recording software, a microphone, an audio interface, headphones, and a quiet recording space. Make sure to choose a quality microphone that suits your voice and recording needs. Plan carefully to ensure the best results for your recording session.
How Can I Record My Voice At Home?
To record your voice at home, you need a microphone, a computer, and audio recording software. You can use a USB microphone or a phone app to record your voice. Place your microphone in a quiet room and speak clearly into it.
Save your recording and edit it as needed using free audio editing software like Audacity.
How Can I Track My Vocals At Home?
To track your vocals at home, you will need a microphone, audio interface, and recording software. Set up your equipment in a quiet room and adjust your microphone settings. Start recording yourself singing and listen back to make adjustments as needed.
Use headphones to monitor your recordings for the best results.
What Is The Best Way To Record Yourself Singing?
To record yourself singing, you will need a good quality microphone, a quiet recording environment, and a software to edit and mix your vocals. Find a room with good acoustics, reduce noise, and adjust mic settings to fit your voice.
Experiment with different recording techniques and take multiple takes to get the best result.
Conclusion
Recording vocals from the comfort of your home isn’t as daunting as you may think. With the right equipment and these tips, you can create professional-grade recordings. From setting up your recording space to selecting the right microphone, this guide has covered everything you need to know to get started.
Remember to experiment and discover what works best for you. Happy recording!
The best 1176 compressor plugin is the Universal Audio 1176LN. This plugin is a faithful software emulation of the classic hardware compressor that has been used in countless music productions.
The Universal Audio 1176LN plugin is the ideal solution for producers and audio engineers who want to add that smooth and warm sound to their tracks. This plugin accurately reproduces the sound of the original 1176LN, which is known for its ability to make vocals and instruments sit perfectly in a mix.
The plugin features all the controls of the original hardware unit, including the famous ratio, attack, release, and input/output gain, which make it easy to dial in the perfect compression. Additionally, the Universal Audio 1176LN plugin is well-known for its flexibility, enabling users to achieve both subtle and heavy compression effects, making it a must-have tool for any recording studio or home setup.
Credit: www.gearnews.com
Top Features To Look For In A 1176 Compressor Plugin
A great 1176 compressor plugin should have features such as an accurate emulation of the original hardware, adjustable attack and release times, and parallel compression. Look for plugins with high-quality sound and versatility in different audio applications.
When it comes to music production, one of the most important tools in a producer’s arsenal is a compressor plugin. And when it comes to compressors, the 1176 is a classic. The best 1176 compressor plugin should have key features that emulate the sound of the original hardware. Here are some top features to look for in an 1176 compressor plugin:
Authentic Sound
The most important feature of an 1176 compressor plugin is its ability to authentically recreate the sound of the original hardware. The best plugins use advanced circuit modeling algorithms to accurately replicate the sound of the analog 1176 compressor. This gives you the same character, warmth, and tone that the original hardware is known for.
Variable Ratio Control
The 1176 compressor is known for its unique ratio control, which varies the compression ratio based on the input signal level. The best 1176 compressor plugins should offer this same variable ratio control, allowing you to dial in just the right amount of compression for your audio.
Attack And Release Time Controls
Another key feature to look for in an 1176 compressor plugin is the ability to adjust the attack and release time controls. These controls determine how quickly the compressor engages and disengages, and can have a significant impact on the sound of your audio. Being able to adjust these controls gives you more flexibility to achieve the exact sound you’re looking for.
Input And Output Gain Controls
An 1176 compressor plugin should also offer adjustable input and output gain controls. The input gain allows you to adjust the level of the audio going into the compressor, while the output gain lets you set the level of the compressed audio coming out of the plugin. These controls are essential for fine-tuning the compression and ensuring the best possible sound.
Mid Side Processing Capability
Finally, the best 1176 compressor plugins offer mid-side processing capability. This allows you to compress the mid and side signals separately, giving you more control over the stereo image and allowing you to achieve a more balanced sound. This feature is particularly useful for mastering applications. In conclusion, when looking for the best 1176 compressor plugin, make sure you select one that has an authentic sound, variable ratio control, attack and release time controls, input and output gain controls, and mid side processing capability. These features will give you maximum flexibility and control over your compression, allowing you to achieve the best possible sound for your audio recordings.
The Best 1176 Compressor Plugin On The Market
The 1176 compressor plugin has been a staple tool in music production for decades, providing a classic analog warmth and punch to tracks. With so many options on the market, it can be overwhelming to know which one to choose.
Plugin A
Plugin A is a popular choice among producers and engineers alike. With its accurate emulation of the original hardware, it provides users with the signature sound that made the 1176 famous. Its intuitive interface and easy-to-use features make it a favorite for beginners and experts alike.
Plugin B
Plugin B offers a unique twist on the classic 1176 sound. With its added saturation and distortion, it adds a gritty edge to tracks that many producers crave. Its advanced features and customizable controls make it a great choice for those looking to fine-tune their compression settings.
Plugin C
Plugin C is the newcomer to the 1176 plugin market, but don’t let that fool you. Its innovative design and cutting-edge technology make it stand out from the competition. With its transparent compression and low CPU usage, it’s a great option for producers who need to work quickly without sacrificing quality.
Plugin
Pros
Cons
Plugin A
Accurate emulation of original hardware Intuitive interface Easy-to-use features
May not offer enough customization for some Slightly more expensive than other options
Plugin B
Unique distortion/saturation Advanced features Customizable controls
May not be suitable for all genres More complex interface
Plugin C
Innovative design Transparent compression Low CPU usage
Newcomer to 1176 plugin market May not offer enough customization for some
Ultimately, the best 1176 compressor plugin for you will depend on your personal preferences and workflow. It’s important to consider factors such as price, customization options, and compatibility with your DAW. No matter which option you choose, you can’t go wrong with the classic sound of the 1176 compressor.
Plugin Comparison
In this plugin comparison, we explore the best 1176 compressor plugins available for audio mixing. Each plugin offers unique features and performance, making it easier for users to choose the one that meets their music production needs. Get ready to enhance your tracks with powerful 1176 compressor plugins.
If you’re looking for the best 1176 compressor plugin, you might be overwhelmed with all the options available. To make things easier, we’ll compare different plugins based on their sound quality, ease of use, compatibility, and price.
Sound Quality
When it comes to sound quality, the Waves CLA-76 is a popular choice among engineers. It’s known for its authentic analog sound and modeled after the legendary Universal Audio 1176. The UAD 1176LN is also a top pick among audio enthusiasts because of its smooth and warm sound.
Ease Of Use
If simplicity is what you’re after, the Black Rooster Audio VLA-2A might be your best bet. This compressor plugin is intuitive and straightforward to use, making it a perfect option for beginners. The Waves CLA-76 also features a streamlined interface, with options for different styles and modes.
Compatibility
For maximum compatibility, the UAD 1176LN is a great option as it can be used with both Mac and Windows. Additionally, it can be integrated with all major DAWs, including Logic Pro, Cubase, and Ableton Live. The Waves CLA-76 is also compatible with all major DAWs, but it does require iLok authorization.
Price
When it comes to price, the IK Multimedia Black 76 is a highly affordable option, retailing at only $99. It offers excellent value for money, considering its outstanding features and dynamic range. The Waves CLA-76 is more expensive, but it’s still reasonably priced and an excellent option for those on a budget. In conclusion, there are several excellent 1176 compressor plugins out there, each with its unique features and capabilities. Your choice depends on your needs and budget, so it’s crucial to consider all factors before making a final decision.
Credit: www.sonicacademy.com
Credit: sonicscoop.com
Frequently Asked Questions On The Best 1176 Compressor Plugin
What Is The Best 1176 Plugin?
The Universal Audio’s 1176 plugin is considered the best 1176 plugin by most professionals due to its accuracy and quality emulation of the original hardware. The plugin provides classic analog character, versatile compression modes, and a simple yet intuitive interface that makes it easy to use.
What Is The Best Compression Plug In?
The best compression plugin depends on your website’s specific needs. Popular options include WP Rocket, W3 Total Cache, and WP Fastest Cache. It’s important to trial a few options to find the best fit for your site.
Why Is 1176 Compressor So Good?
The 1176 compressor is highly regarded for its fast attack and release times, making it ideal for vocal and instrument recordings. Its sound is described as warm, colorful, and musical, with a vintage character that adds character and depth to recordings.
Its simple controls make it easy to use, even for novice audio engineers. Overall, its unique sound and ease of use make it a favorite among professionals in the recording industry.
What Is The Most Famous Fet Compressor?
The most famous FET compressor is the Universal Audio 1176. It is a popular choice for its fast attack time and high-quality sound, particularly for vocals and drums.
Conclusion
Overall, the 1176 compressor plugin is an essential tool for achieving that classic sound and feel that many producers and musicians desire. It offers a range of features and settings that make it versatile and adaptable to any musical genre or style.
Choosing the best option for your specific needs can be a daunting task, but by considering factors such as budget, personal preference, and intended use, you can find the perfect fit. With the right 1176 compressor plugin, you can take your mixes to the next level and create professional-quality recordings that will stand the test of time.
Panning and stereo width are crucial aspects of music production. They help create a sense of space and depth in a mix, allowing the listener to hear each element in its own space.
In this guide, we will explore the techniques and tools used to achieve the perfect placement of sounds in the stereo field. From understanding the basics of panning to using stereo imaging plugins, this guide will provide a comprehensive overview of panning and stereo width for both beginners and experienced producers.
Whether your goal is to create a wide and spacious mix or create an intimate and focused sound, this guide will walk you through the steps to achieve your desired results.
Why Panning And Stereo Width Are Important?
Panning and stereo width are crucial elements in music production as they allow the sound to be spread across the stereo field. By using careful panning techniques, it’s possible to create a more dynamic and interesting listening experience, whilst stereo width can add depth and spaciousness to the mix.
Creating Space In The Mix
Panning and stereo width are crucial to creating a sense of space and dimensionality in your mix. By panning different instruments and sounds to different positions in the stereo field, you can create a more immersive listening experience for your audience. This allows each element to be heard more clearly, reducing clutter and making it easier to hear individual parts.
Enhancing Listener Experience
Panning and stereo width can also enhance the listener experience by creating movement and interest in the mix. This can be achieved by automating panning or using stereo effects like stereo wideners, which can create a wider and more spacious feel to your mix. This ensures that the mix doesn’t become boring or tiresome to the listener.
Balancing The Audio Spectrum
Another key advantage of using panning and stereo width is that it allows you to balance the audio spectrum. By spreading sounds across the stereo field, you can keep the mix balanced without creating a frequency buildup in any single area of the mix. Additionally, you can use panning to separate different instruments that occupy similar frequency ranges, reducing the chance of them clashing with each other. Overall, panning and stereo width are important tools for creating a well-balanced and engaging mix. Whether you’re mixing music or audio for film and TV, understanding how to use these techniques effectively can make a significant impact on the final result.
Credit: www.masteringthemix.com
Panning Techniques
Learn the guide to panning and stereo width techniques for better audio mixing and production. Discover how to manipulate the stereo image, widen the track, and create depth in your mix.
Panning is the process of distributing audio signals across a stereo field. Panning techniques create space and dimension within a mix, and it is a crucial process for creating a balanced stereo mix. There are several panning techniques, some of which are Hard Panning Vs. Soft Panning, Balance Panning, Pan and Volume Automations, and Mid-Side Processing Panning.
Hard Panning Vs. Soft Panning
Hard panning signifies placing an audio signal entirely on either the left or the right channel, whereas soft panning involves distributing the audio signal between the two channels. Hard panning creates a clear separation between the left and the right channels but may sound unnatural and unbalanced. Soft panning, on the other hand, can add depth and spaciousness to the mix.
Balance Panning
Balance panning means panning audio signals so that the mix sounds balanced and centered. Care should be taken to balance the levels between the left and the right channels. This technique makes the mix sound spacious, with each sound occupying its own space.
Pan And Volume Automations
Automating panning and volume changes throughout the mix can add excitement and interest to the mix. For instance, panning a guitar solo from left to right can make the mix feel more dynamic and exciting. Volume automations can help to emphasize critical elements of a song.
Mid-side Processing Panning
Mid-Side processing panning is a technique used to control the center and the width of the mix. This process separates the center of the mix (the mono element) from the sides (the stereo element). Mid-Side processing allows the engineer to adjust the stereo width of each track independently, opening up space in the mix and making it sound more spacious. Panning techniques are vital to achieve a well-balanced stereo mix. Using hard panning, soft panning, balance panning, pan and volume automations, and mid-side processing can significantly add depth, space, and dimension to your mix.
Stereo Width Techniques
Learn how to create a more expansive sound and add dimension to your mix with panning and stereo width techniques. This guide covers different methods to achieve a wider stereo image, enhancing the listener’s experience.
As a music producer, understanding stereo imaging and width can greatly improve the quality of your mix. In this article, we will focus on the different techniques of stereo width and how they can be used to create a more spacious and immersive sound.
Haas Effect
The Haas Effect is a popular technique used for creating a sense of width in a mix. It involves playing the same audio signal through two speakers with a slight delay in one of the channels. The delay time is typically between 1-30 milliseconds and is usually achieved using a delay plugin. This technique creates a psychoacoustic effect that tricks our ears into perceiving the sound as being wider than it actually is. To avoid phase cancellation and ensure mono compatibility, always check the mix in mono before finalizing.
Stereo Width Plugin
Using a stereo width plugin is another effective technique for enhancing the stereo image of your mix. These plugins work by manipulating the stereo information of the audio signal, making it wider or narrower. Examples of stereo width plugins include Waves S1 Imager, Ozone Imager, and Soundtoys Microshift. It is important to use these plugins judiciously and not to overdo it, as excessive application can create phasing issues and reduce overall clarity of the mix.
Ms Processing For Stereo Width
Mid/Side (MS) processing is another powerful approach for creating a wider stereo image. The technique involves separating the mono and stereo elements of the audio signal and processing them independently. The mono element, which is usually the center of the mix, is mono-compatible and should remain unchanged. On the other hand, the stereo element can be widened using a stereo width plugin or other stereo imaging techniques. This approach allows for greater control over the stereo image and can help produce a more defined and spatially aware mix. In conclusion, understanding and utilizing stereo width techniques can help take your mix to the next level, creating a more immersive and engaging experience for the listener. Always monitor your mix in different playback systems to ensure it translates well across different devices and platforms.
Credit: www.masteringthemix.com
Importance Of Monitoring
A crucial aspect of panning and stereo width is monitoring. It ensures accurate adjustment and balance of sound between the left and right speakers for a well-rounded audio experience. Effective monitoring helps to identify and eliminate any problems early on, resulting in an optimal final mix.
Choosing The Right Monitors
Room Treatment
Essential Plugins For Monitoring
When it comes to mixing music or any other kind of audio content, having a proper monitoring setup is essential. Monitoring refers to the process of listening to the audio being mixed in real-time so that the engineer can make informed decisions about levels, panning, EQ, and more. In this guide, we’ll cover the importance of monitoring in the mixing process and some tips for choosing the right monitors, treating your room acoustically, and using plugins for more accurate monitoring.
Choosing The Right Monitors
The first step in setting up a good monitoring system is to choose the right monitors for your needs. Monitors come in various sizes, shapes, and designs, and they can vary widely in price. However, the most expensive monitors aren’t always the best ones for your specific needs. When selecting monitors, consider the kind of content you’ll be mixing and the acoustic properties of the room you’ll be working in. Some popular types of monitors include nearfield monitors, mid-field monitors, and far-field monitors. Nearfield monitors are typically used in small rooms for working on music or other audio content up close. Mid-field monitors are suitable for slightly larger rooms, while far-field monitors are suited for large rooms or commercial studios.
Room Treatment
Once you’ve selected your monitors, you’ll need to make sure your listening environment is acoustically sound. This means the room should be treated to reduce or eliminate any unwanted reflections, resonances, or other distortions that can interfere with your ability to hear the audio accurately. Common room treatments might include acoustic foam, bass traps, or diffusers. Preventing standing waves, which can create crazy echo-like effects that interfere with monitoring, is essential.
Essential Plugins For Monitoring
In addition to your monitors and room treatment, you may wish to consider using plugins for monitoring. These are software-based tools that can help you assess frequency response, stereo width, and other parameters of your audio, giving you a more detailed and accurate assessment of your mix. Some options for plugins include stereo wideners, spectrum analyzers, and phase correlation meters. It’s essential to use those plugins to aid your mixing process, but note that overusing them can lead to poor judgments because they seldom reflect real-world audio or consumer playback devices. In conclusion, monitoring is a crucial aspect of audio mixing. It ensures that the audio being mixed sounds great on a variety of systems and environments rather than only sounding good on your particular device. By selecting the right monitors, treating your room acoustically, and using plugins for monitoring, you’ll be able to make informed decisions about levels, panning, EQ, and more, leading to better mixes that will sound great no matter where they’re played.
Common Mistakes To Avoid
To avoid common mistakes in panning and stereo width, remember to balance both the left and right channels, avoid hard panning, and focus on the center for vocals and drums. Additionally, use reverbs and delays to create depth and avoid cluttering the mix.
When it comes to mixing music tracks, panning and stereo width play a crucial role. Panning refers to the placement of instruments in the stereo field while stereo width determines the width of the mix. However, there are common mistakes to avoid for better mix quality. Here are some of them.
Over-panning
Over-panning is usually common with beginners who want to create a spacious sound mix. Over-panning creates a sound mix that feels unbalanced and chaotic. The purpose of panning is to create a stereo image for each element in the mix. Therefore, instead of over-panning, utilize the stereo field such that you have a balance between left, center, and right.
Neglecting Mono Compatibility
Neglecting mono compatibility is a common mistake that adversely affects the sound mix. Mono compatibility refers to how the mix sounds when played back in mono. When elements of the stereo mix clash, they create phase cancellation. Phase cancellation produces anemic and thin mix, therefore, always test your mix in mono and ensure it sounds good in both cases.
Excessive Stereo Widening
Excessive stereo widening is another common mistake in stereo mixing. When mixing, avoid pushing elements too far in either direction in the stereo field. While widening helps create a stereo effect, excessive use can result in the loss of mono compatibility, subsequently diminishing the mix’s quality. Moderation is key when widening the stereo field.
Ignoring Phasing Issues
If you have two identical signals playing back on top of each other, but out of phase, they will cancel each other out. This phenomenon is known as phase cancellation. Phasing issues usually happen when a single sound source is recorded twice, and when you pan each recording differently, they cancel each other out. The result is a weak and thin mix. Therefore, always check for phasing issues in your mix by listening to it in mono. In conclusion, avoiding the common mistakes in panning and stereo width ensures better mix quality. By taking note of Over-panning, Mono Compatibility, Excessive Stereo widening, and Phasing Issues, you can create a sound mix that is balanced, clear, and pleasant to the listener’s ears.
Credit: www.avid.com
Frequently Asked Questions For Guide To Panning And Stereo Width
What Is Stereo Panning Width?
Stereo panning width is the amount of space that a sound occupies in the stereo field. This can be adjusted by panning the sound left or right, making it seem closer or farther away and widening or narrowing the stereo image.
What Does Increasing Stereo Width Do?
Increasing stereo width widens the stereo image of a audio track by boosting the side signals in the mix, making it sound wider. This can enhance the overall listening experience and increase the perceived space of the sound, but can also potentially cause phase issues and mono compatibility problems if not used carefully.
Should You Pan In Mono Or Stereo?
For optimal sound quality, it is recommended to pan in stereo. By doing so, you can create a fuller, more dynamic sound while allowing each instrument or track to have its own space in the stereo spectrum. However, it ultimately depends on the desired effect and the type of music being produced.
How Do You Pan A Stereo Signal?
To pan a stereo signal, adjust the levels of the left and right channels to create a sense of space and depth. This can be done using a panning knob or setting the levels manually. Panning can enhance the clarity and balance of a mix, resulting in a more enjoyable listening experience.
Conclusion
To sum up, panning and stereo width are two important techniques that can enhance the quality of your music production. By understanding these concepts, you’ll be able to create a more immersive and balanced mix that sounds great on any playback system.
Whether you’re working on a professional studio or a home setup, experimenting with panning and stereo width is a must for any music producer. So go ahead and get creative with your stereo image and make your music stand out!
Yes, music industry marketing is a legitimate practice. The music industry heavily relies on marketing to promote new artists and their music to a larger audience.
With the rise of digital platforms and streaming services, marketing has become even more essential in the music industry. Record labels and music promotion companies utilize various marketing techniques such as social media campaigns, influencer marketing, and traditional advertising to raise brand awareness and generate interest.
As a result, emerging artists with compelling marketing strategies can gain more exposure, which often results in increased streams and album sales. While some may argue that the music industry is oversaturated, there are still ample opportunities for creative marketing campaigns to make a difference and propel artists to success.
Defining Music Industry Marketing
The music industry marketing is a legitimate way for artists to promote their music and reach a wider audience. It involves strategic planning, promotion, and branding to increase music sales and streams. With the rise of digital platforms, music marketing has become more accessible and efficient.
The Basics Of Music Industry Marketing
In simple terms, music industry marketing refers to any action that promotes and sells music. It is the process of identifying and creating a target audience for your music and finding ways to reach them. There are several basics of music industry marketing that every artist or marketer needs to understand before creating their marketing plan. Firstly, music industry marketing involves identifying your target audience. This can be done by considering the demographic, location, and interests of your fanbase. Once you know your audience, you can tailor your marketing efforts towards their preferences and needs. Secondly, having a strong online presence is essential in music industry marketing. Social media platforms like Instagram and TikTok have become powerful marketing tools for artists to connect with their fans. Thirdly, one of the foundations of music industry marketing is building a strong brand. A brand is the identity of the artist or group, and it defines their values, image, and message.
Understanding Music Industry Marketing Techniques
Music industry marketing techniques include a wide range of tactics that are used to promote and sell music. These techniques are designed to help artists reach their target audience and create a buzz around their music. Here are some common music industry marketing techniques that you need to know: 1. Content Marketing: This technique involves creating and sharing valuable content such as blog posts, videos, and podcasts that attract and engage your audience. 2. Influencer Marketing: This technique involves partnering with influencers (people who have a large following on social media) to promote your music to their audience. 3. Email Marketing: This technique involves sending promotional emails to your fans and subscribers about upcoming releases, tours, and other music-related news. 4. Event Marketing: This technique involves organizing events such as concerts, live shows, and meet-and-greets to promote and sell music. 5. Search Engine Optimization (SEO): This technique involves optimizing your website and online content to rank higher in search engine results, making it easier for fans to find your music. Understanding these music industry marketing techniques is essential for creating a successful marketing plan that promotes your music and grows your fanbase.
Credit: www.researchgate.net
The Legitimacy Of Music Industry Marketing
Music industry marketing has become increasingly important as the industry evolves and adapts to new technologies. With the rise of digital streaming services and social media, there are more opportunities for musicians to connect with fans and promote their music than ever before. However, some have questioned the legitimacy of music industry marketing and its impact on the industry as a whole.
Examining The Positive Impact Of Music Industry Marketing
Despite some controversies surrounding music industry marketing, there are many positive aspects to consider. For one, music industry marketing helps musicians increase their exposure and reach new audiences. This can lead to increased album and ticket sales, as well as other revenue streams such as merchandise sales and sponsorships.
Additionally, music industry marketing helps create buzz and excitement around new releases, concerts, and other events. This can generate interest and anticipation among fans, ultimately leading to a more successful launch or performance.
Benefits of Music Industry Marketing
Increase exposure and reach new audiences
Generate excitement and anticipation
Increase revenue streams such as album sales and merchandise
Controversies Surrounding Music Industry Marketing
While there are many benefits to music industry marketing, some have raised concerns about its potential negative impact on the industry. For example, some critics argue that music industry marketing can create an unfair advantage for larger, more established artists, who may have more resources to invest in marketing and promotion.
There are also concerns about the role of social media influencers in music industry marketing, with some questioning the authenticity of their endorsements and whether they are truly representative of their followers’ preferences.
Some argue music industry marketing can create an unfair advantage for larger, established artists
Concerns about the role of social media influencers in music industry marketing
Overall, while there are certainly legitimate concerns about music industry marketing, it is clear that this practice plays an important role in the success of many musicians and the industry as a whole.
Music industry marketing plays a vital role in promoting artists and their work, particularly in the digital age. From social media campaigns to targeted advertising, these tactics can legitimize an artist’s brand and attract a wider audience to their music.
Why Music Industry Marketing Is Essential To Business Growth
Music industry marketing plays a significant role in the growth and development of businesses. In the digital era, where every business wants to stand out from its competitors and attract more customers, music can help make this possible. Music has the power to evoke emotions and connect with people in a way that mere words cannot. Therefore, incorporating music in your marketing strategy can make a huge difference in your business’s success.
How Music Industry Marketing Drives Revenue And Brand Awareness
When businesses incorporate music in their marketing strategies, they can achieve several benefits, including increased brand awareness, improved customer engagement, and higher revenue. Here are some reasons why music industry marketing drives revenue and brand awareness:
Engaging Content – Music can be an excellent source of engaging content that can attract potential customers to your business.
Increased Brand Awareness – Music can help your business connect with people on a deeper level, leading to increased brand awareness and customer loyalty.
Strong Emotional Connection – When you use music in your marketing, it can evoke strong emotions that can lead to stronger customer relationships and higher sales.
Enhanced Customer Experience – By incorporating music in your marketing, you can create a more enjoyable and memorable experience for your customers, encouraging them to return and recommend your business to others.
Higher Revenue – With increased customer engagement and stronger emotional connections, businesses can generate higher revenue and achieve sustainable growth.
In conclusion, music industry marketing is an essential aspect of every business’s growth strategy. It can help you connect with your customers on a deeper level, evoke strong emotions, drive revenue, and increase brand awareness. By incorporating music into your marketing strategy, you can achieve long-term success and thrive in a competitive business landscape.
The Future Of Music Industry Marketing
The music industry marketing is a legitimate and crucial factor for the future of the industry. With the rise of digital platforms and social media, marketing has become a necessary tool for promoting music and engaging with fans. As technology continues to develop, the evolution of music industry marketing will keep on shaping the future of the business.
Emerging Trends In Music Industry Marketing
Music industry marketing has always been a crucial element in promoting new artists and music content. With the ever-changing landscape of technology, music marketing is rapidly evolving to keep up with the digital world. As we move forward, there are several emerging trends to look out for.
The rise of influencer marketing in the music industry
Increased use of artificial intelligence
Personalized marketing strategies to target unique audience segments
Expansion of virtual and augmented reality technologies for enhanced music experiences
Integration of social media platforms as a powerful tool for music marketing
How Music Industry Marketing Will Change In The Next Decade
The music industry has undergone considerable changes in the past decade and will continue to evolve at a rapid pace. The introduction of innovative technologies and social media platforms has given artists and music marketers a plethora of options to promote their content.
Decade
Change
2010s
The rise of digital streaming platforms
2020s
More emphasis on social media marketing to increase audience engagement
With the gradual shift to a digital-based music industry, marketing strategies will need to be optimized for online platforms. The future of music industry marketing will be centered around data-driven insights, personalized marketing tactics, and virtual reality experiences to engage today’s consumers.
Conclusion
The future of music industry marketing is full of possibilities as technology continues to shape the music landscape. With the integration of advanced technologies, music marketers can promote and distribute music more effectively to wider audiences, making it easier for emerging artists to make a breakthrough in their careers.
The Dark Side Of Music Industry Marketing
The world of music is alluring, and many people aspire to be part of it. With the rise of social media, the music industry has become more accessible than ever, and music marketing has become an essential aspect of promoting artists and their work. However, with this accessibility and the increasing pressure to be successful, there is a dark side to music industry marketing that many people don’t know about.
Exploring The Negative Effects Of Music Industry Marketing
The music industry is known for its cut-throat nature, and marketing is no different. The desire to make money is the driving force behind most music industry marketing campaigns, and it can often lead to negative consequences. The pressure to succeed can cause artists to compromise their artistic vision and authenticity, leading to generic and formulaic music that caters to popular trends and goes against the artist’s original vision.
Moreover, the constant pressure to maintain a certain image can cause artists to develop unhealthy habits such as substance abuse, depression, and even suicide. In some cases, music industry marketing can become so aggressive that it can alienate fans and drive away potential listeners.
The Ethical Implications Of Music Industry Marketing
Aside from the negative effects, there are also ethical implications to consider. For instance, music industry marketing can create unrealistic body standards and beauty standards, leading to a toxic and unhealthy culture. It can perpetuate gender, race, and sexuality stereotypes, and even exploit these identities for commercial gain.
Another ethical issue is the use of subliminal messaging and psychological manipulation to influence consumers into purchasing products. This type of marketing can be misleading and manipulative, leading to false impressions and unfulfilled promises.
Overall, while music industry marketing can be a powerful tool for promoting artists and their work, it is essential to be aware of its negative effects and ethical implications. As consumers, it is essential to be vigilant and informed and to support artists whose values align with our own.
Frequently Asked Questions On Is Music Industry Marketing Legit
Are There Any Legit Music Promotion Services?
Yes, there are legit music promotion services available online. However, it’s crucial to do your research before choosing one. Look for services that have positive reviews, clear pricing, and a proven track record of helping artists grow their audiences. Be wary of services that promise quick results or seem too good to be true.
What Is The Best Music Marketing Agency?
As a AI language model, I cannot provide a personal opinion on which is the best music marketing agency. However, some top agencies in the industry include Universal Music Group, Sony Music Entertainment, Warner Music Group, and Republic Records. It is important to research each agency’s services, clientele, and track record before making a decision.
What Does A Music Marketing Company Do?
A music marketing company specializes in promoting musicians and their music to potential listeners. They use various digital marketing strategies such as social media, email marketing, influencer marketing, and advertising to generate buzz and increase visibility for musicians. Their goal is to help artists gain a larger fan base and ultimately boost their career in the music industry.
How Do I Get A Marketing Job In The Music Industry?
To get a marketing job in the music industry, start by researching companies and job openings. Build a strong network and gain experience through internships or volunteering in the industry. Stay up to date on music industry trends and technologies to demonstrate your expertise.
Tailor your resume and cover letter to showcase relevant skills and experience. Attend industry events and conferences to network and make connections.
Conclusion
After analyzing the music industry marketing tactics, we can conclude that it is a legit and necessary approach for the promotion of artists and their music. It allows for broader recognition, enhanced visibility, and higher chances of success for the artist.
By understanding and implementing the right marketing strategies, music industry marketing can prove to be a valuable asset for both emerging and established artists. Therefore, it is crucial for artists to collaborate with professionals who understand the intricacies of music industry marketing to achieve their desired goals.
To choose the right synth sounds, consider the genre, context, and sonic palette. Here’s a guide on how to pick the ideal synth sounds for your music production.
As a music producer or composer, you understand that choosing the right synth sounds is crucial to the success of your music project. Synthesizers offer a diverse range of possibilities and create new sounds that were unthinkable a few decades ago.
Although the vast array of sounds allows you to be creative as a producer, it can be challenging to pick the right sounds that fit your style and music genre. Factors like context, genre, mood, and style influence the sounds you choose. To help you navigate the overwhelming world of synth sounds, here is a comprehensive guide to choosing the right synth sounds for your music.
Credit: m.youtube.com
Why Synth Sounds Matter
Choosing the right synth sounds is essential for creating music that engages listeners. With numerous soundscapes to select from, it is important to consider tone, texture, and rhythm. The right choices enhance the overall sound quality of a composition.
The Role Of Synths In Music
When it comes to creating music, synths have become an essential tool for music producers. The versatility of a synthesizer allows for the creation of a wide variety of sounds that can add depth and interest to any song. Synthesizers can create everything from lush pads to pounding bass sounds, and even mimic the sound of traditional instruments. The ability to create unique sounds and textures is what makes synths such a popular choice for music producers across all genres.
How Synths Enhance Musical Expression
One of the main reasons why synth sounds matter so much is the way they enhance musical expression. Synths offer a level of creativity and control that traditional instruments simply cannot match. With a synthesizer, a musician can create sounds that are completely unique and tailor them to fit their exact needs. This allows for a level of musical expression that goes far beyond what is possible with physical instruments.
The Importance Of Choosing The Right Synth Sounds
When it comes to choosing the right synth sounds, there are a few important things to consider. Firstly, it’s important to consider the style of music you’re creating and choose sounds that complement that style. For example, if you’re creating a dance track, you’ll want to focus on choosing synth sounds that have a strong, driving rhythm. Secondly, it’s important to consider the role that the synth sound will play in the song and choose a sound that fits that role. And finally, it’s important to experiment and push the boundaries of what’s possible with your synth to create sounds that are truly unique and memorable.
Important Points
Synths are versatile and can create a wide variety of sounds
Synths enhance musical expression beyond what’s possible with traditional instruments
Choosing the right synth sound requires considering the style of music and the role of the sound within the song
Experimentation is important for creating unique and memorable synth sounds
In conclusion, synth sounds are an essential element in modern music production. They offer a level of versatility, creativity, and control that traditional instruments simply cannot match. By choosing the right synth sounds, music producers can create memorable and unique sounds that enhance the overall musical experience.
Types Of Synth Sounds
Selecting the appropriate synth sounds can be challenging. Synths offer several types of sounds, including leads, basses, pads, and arpeggios. To select the appropriate sound, the preferred genre and musical context must be considered.
Synthesizers, or synths for short, are electronic instruments that can produce a wide variety of sounds. They are widely used in music production for adding texture, tone, and character to a track. When it comes to choosing the right synth sounds, there are different types of synth sounds available to choose from. In this post, we will explore the different types of synth sounds and how you can choose the right synth sounds for your music production needs.
Analog Synths Vs Digital Synths
Analog Synths Analog synths use purely analog circuits to generate sound waves. They are known for their warm and rich tones. They are ideal for creating classic synth sounds that are heard in many genres of music. Analog synths may require periodic calibration but they offer more flexibility in sound design. Digital Synths Digital synths use digital signal processing techniques to generate sounds. They offer more versatility as they can produce a wide range of sounds, including realistic instrument sounds and sound effects. Digital synths are easy to use and maintain, but some musicians find their sound less warm compared to analog synths.
Virtual Synths Vs Hardware Synths
Virtual Synths Virtual synths are software-based synthesizers that run on a computer. They can be used in a Digital Audio Workstation (DAW) to produce music. They offer more convenience and portability and can produce high-quality sounds in a cost-effective way. Virtual synths can be further classified into two main types: sample-based and synthesis-based. Hardware Synths Hardware synths are standalone physical instruments. They offer more tactile control for sound design than virtual synths. They come in different sizes and shapes and can produce a wide range of sounds. They may require more investment upfront compared to virtual synths but many musicians prefer them for their unique sound character. In conclusion, choosing the right synth sounds depends on various factors such as your music production needs, budget, and personal preference. Analog synths offer warm and classic sounds, whereas digital synths provide versatility. Virtual synths are convenient and portable while hardware synths offer more tactile control. Understanding the pros and cons of each type of synth sound will allow you to make an informed decision when selecting the most suitable synth sounds for your music production.
Factors To Consider
If you are a music creator, you must know how challenging it can be to choose the right synth sounds for your track. It is not easy to make a decision that will define the entire tone of your song. However, there are some factors you can consider that will make the choice easier.
Genre And Mood Of Music
The genre of the music you are creating will play a significant role in deciding which synth sound to choose. For instance, if you are making electronic music, you may want to choose synth sounds with more modern and synthesized tones. On the other hand, if you are creating a track with an acoustic guitar, you may want to choose a synth sound that emulates a plucked acoustic guitar string. Additionally, you should consider the mood of the music and choose synth sounds that complement it. If the song has a dark or sad tone, you may want to select synth sounds with a minor key or sustained tones.
Arrangement Of The Song
The arrangement of the song also plays a crucial role in selecting the right synth sounds. If you have added a lot of instruments to your track, you may want to choose synth sounds that are less prominent and provide background support to other instruments. Conversely, if there is a minimalist arrangement, you may want to choose synth sounds that will serve as the focal point of the track.
Acoustic Vs Electronic Instruments
You should also consider whether you want to use acoustic or electronic synth sounds for your track. Acoustic synth sounds mimic real-life instruments, whereas electronic ones are artificial, with no reference to physical instruments. While acoustic synth sounds are excellent for providing a natural atmosphere to the track, electronic synth sounds offer more versatility and variety, and can often create unique sounds that cannot be replicated by any physical instrument.
So, consider these factors when selecting synth sounds and experiment with different combinations to see what works best for you. By keeping these aspects in mind, you can easily choose the right synth sounds for your next song.
Credit: www.masteringthemix.com
Choosing Synth Sounds For Different Parts
When it comes to choosing synth sounds for different parts of a song, it is crucial to select the right sound to bring out the emotion and highlight the melody. The sound you select can transform a simple melody into something magical and memorable. In this blog post, we will discuss how to choose synth sounds for different parts, including basslines, lead melodies, pads, and atmospheres, and arpeggios and sequences.
Basslines
The bassline is the foundation of the song and creates the groove and rhythm. When selecting a synth sound for basslines, it’s essential to choose a sound that is punchy, powerful, and sits well in the mix. A sound with a strong attack and a defined sustain will work well as a bass sound. A filtered saw wave or a deep sine wave can create a perfect bassline sound.
Lead Melodies
The lead melody is the most memorable part of a song, and it’s crucial to select a synth sound that creates a catchy and memorable tune. It’s important to choose a sound with a clear and defined attack that stands out in the mix. Try experimenting with different waveform shapes, filters, and effects to create a unique sound that complements the melody and enhances the emotion of the song.
Pads And Atmospheres
Pads and atmospheres are used to create ambient and emotional backgrounds to a song. When selecting a synth sound for pads and atmospheres, it’s important to choose a sound with a slow attack and a long sustain. This creates a smooth and evolving sound that adds depth to the song. Try experimenting with reverb, delay, and other effects to add more space and atmosphere to the sound.
Arpeggios And Sequences
Arpeggios and sequences are used to add movement and rhythm to a song. When selecting a synth sound for arpeggios and sequences, it’s essential to choose a sound with a fast attack and a short sustain. A sound with a simple waveform shape like square, saw, or triangle will work well for arpeggios. Try experimenting with different patterns and rhythms to create a unique and memorable sound.
Methods For Tweaking Synth Sounds
Create interesting and unique synth sounds by experimenting with different parameters such as filters, envelopes, and oscillators. Pay close attention to the characteristics of the sound you want to achieve and tailor your choices accordingly. It may take some time, but with practice, you can become a master at creating unique and captivating synth sounds.
When using a synthesizer, tweaking the sound is crucial in creating a unique and interesting composition. While choosing the right preset is a good starting point, there are several ways to modify and customize the sound to suit your requirements.
Using Effects Processing
One way to add unique characteristics to your synth sound is by utilizing effects processing. Effects processing gives you more options to manipulate your sound by adding extra layers of effects. There are several effects, including filters, reverb, chorus and delay, which can enhance the texture and depth of your sound. For instance, reverb can extend the length of the synth, while delay adds echo that can give a sense of space and ambiance. It is important to experiment with different settings in effects processing because they allow for more creative sound design.
Modulating Filters And Envelope Settings
Filters and envelope settings are two critical synthesize functions that provide a foundation for shaping your sound to your preference. Filters are utilized to adjust the harmonic content, decreasing or increasing the sound tone. Modulating filters and envelopes can be accomplished in various ways, including LFOs, key tracking, and automation. By modulating the filter, you can produce interesting sound effects such as frequency sweeps or modulation effects. Similarly, envelope settings regulate the attack, decay, sustain and release of the sound. Changing the envelope settings can make a difference in resulting sounds.
Incorporating Lfos
LFOs, or low-frequency oscillators, produces a waveform that repeats at a slow speed below the human hearing range. These oscillators are commonly used to create vibrato effects, tremolo, and the impression of the sound pulsating. LFOs can also be employed in modulation routing to dynamically adjust effects or filter settings in response to the keys you play. In conclusion, manipulating synth sounds is an integral part of producing music with synthesizers. From using effects processing, modulating filters and envelope settings to incorporating LFOs, there are several avenues to experiment with to develop your sound. Utilizing these methods can provide endless possibilities to create a unique signature sound that matches your creative vision.
Tips For Experimentation And Creativity
Discovering the right synth sounds can be a challenging task, but with some experimentation and creativity, it’s possible to find the perfect match for your music. It’s important to listen to a variety of sounds, tweak them to your liking, and trust your ear to guide you towards the best option.
Synthesizers offer numerous options to create a unique sound. As a music producer or sound designer, it can be overwhelming and challenging to choose the right synth sounds. Experimenting with different settings and techniques can help you find creative sounds that fit your production. Here are some tips for experimentation and creativity when choosing synth sounds:
Trying Unconventional Settings And Techniques
Exploring the synth settings beyond the default patches can help you achieve unique and unexpected sounds. Experiment with LFOs, filters, envelopes, and oscillators to create your sound. Start by trying to push the settings beyond the default or slightly tweaking them to create a different sound. Don’t be afraid to try new settings and let your ears be the judge.
Emulating Sounds Of Other Instruments
Synthesizers can create sounds that emulate other instruments, such as guitar, piano, or vocals, among others. You don’t have to be a virtuoso in playing these instruments; you can create the sounds using a synth. This technique is useful in genres like electronic dance music, where creating sounds that imitate acoustic instruments is common. Experimenting with different settings can help you achieve the desired sound. Using these tips can help you find the right synth sounds for your tracks. Don’t shy away from experimenting; it can be the gateway to discovering unique sounds.
Resources For Finding High-quality Synth Sounds
Discovering high-quality synth sounds requires proper research that includes checking out sound libraries, demo videos, and user forums. Understanding the different types of synths and their sound capabilities is crucial in making the right choice for your music production needs.
When producing music with a synthesizer, the importance of choosing the right sounds cannot be understated. While it is possible to create your own synth patches and samples, it can be time-consuming and not always necessary. Fortunately, there are a multitude of commercial and free sound libraries available, suitable for any genre of music. Additionally, creating your own samples and presets is a great way to add a personal touch to your music productions. In this article, we will delve into the resources available for finding high-quality synth sounds.
Commercial And Free Sound Libraries
A commercial sound library is a collection of synth sounds that have been created by professional sound designers. These libraries are often designed for specific genres, such as EDM or hip-hop, and are suitable for those who don’t want to spend time creating their own sounds from scratch. Some popular commercial sound library options include Spitfire Audio, Native Instruments, and Loopmasters. For those on a tight budget, free sound libraries can also provide high-quality sounds. Often created by independent developers, these libraries can be found on websites such as GitHub and KVR Audio. Some popular free options include u-he, KORG, and SampleScience.
Creating Your Own Samples And Presets
Creating your own samples and presets is a fantastic way to add uniqueness to your music productions. By sampling different instruments or creating entirely new sounds, you can generate a personalized library of sounds that reflects your own style. Additionally, by learning how to create your own presets, you can gain a deeper understanding of how your synth works. To begin creating your own samples and presets, there are a few things you will need. Firstly, a DAW (digital audio workstation) such as Ableton or Logic Pro will be required. Secondly, it is recommended that you invest in a MIDI keyboard to aid in sound creation. Lastly, some form of sound manipulation software, such as Serum or Massive, will be a great help in creating new sounds. In conclusion, the choice between commercial or free sound libraries versus creating your own sounds is entirely up to personal preference. Both methods have their advantages and disadvantages, and ultimately the decision will come down to the time and budget available to you. By exploring the resources available for finding high-quality synth sounds, you can elevate your music productions and create sounds that stand out from the crowd.
Credit: m.youtube.com
Conclusion: Personalizing Your Synth Sound Choice
To choose the perfect synth sound, personalize your choice by considering the genre, mood, and texture of the music. Experiment with various presets and adjust filters, envelopes, and LFOs until you achieve the desired sound. Trust your ears and intuition to create a unique and compelling sound that complements your music.
Finding Your Own Voice Through Synthesis
Synthesizers have the power to create some truly unique and amazing sounds. But with so many different options available, it can be tough to narrow down your choices and find the right sound for your music. That’s why it’s important to take the time to experiment and find your own voice. Start by exploring different waveforms, filters, and modulation options. Experiment with different vibrato, pitch bend, and portamento settings. Don’t be afraid to push the limits and try something new. It’s through experimentation that you’ll begin to develop your own personal synth sound.
Pushing The Boundaries Of Synth Sounds
Once you’ve found your own personal sound, it’s time to push the boundaries and keep exploring. Try layering different sounds together to create unique textures and complexity. Experiment with different effects such as delay, reverb, and distortion to add depth and character to your sound. And don’t forget to explore the power of automation. By automating different settings, you can create evolving and dynamic sounds that add interest and intrigue to your music. By taking the time to personalize your synth sound and push the boundaries of what’s possible, you’ll be able to create truly unique and captivating music that stands out from the crowd. So experiment, play, and have fun with your synthesizer, and see where your creativity can take you.
Frequently Asked Questions On How To Choose The Right Synth Sounds
What Should My First Synth Be?
Your first synth depends on your needs and budget. Start with affordable, user-friendly models like the Korg Volca series or the Arturia MicroBrute. More advanced options include the Moog Mother-32 or the Dave Smith Instruments Prophet Rev2. Research and experiment to find the synth that fits your playing style and budget.
What Is The Easiest Synth To Learn?
The easiest synth to learn varies from person to person, but some popular options include the Korg Volca series and the Roland Boutique line. Both of these synths have intuitive interfaces and are great for beginners. Ultimately, the best synth to learn on depends on personal preferences and skill level.
Do All Synths Sound The Same?
No, not all synths sound the same. Each one has its own unique characteristics and sound capabilities depending on their specifications and functionalities. Some synths may have different oscillators, filter types, and modulation options that make them sound distinct from others.
What To Look For When Buying A Synthesizer?
When buying a synthesizer, consider the sound quality, type of synthesis, number of keys, portability, and budget. Look for a synthesizer that fits your music style and needs, and has the features you require. Consider whether you need a basic or advanced synthesizer, and whether you want a digital or analog model.
Additionally, read reviews and test the synthesizer before purchasing to ensure it meets your expectations.
Conclusion
From creating ambient soundscapes to composing full music productions, choosing the right synth sounds is essential in music-making. By understanding the different sound parameters and utilizing various sound sources, one can unleash their creative potential and produce unique, standout pieces.
Remember to experiment and play around with different settings and combinations to discover your own signature sound. With these tips in mind, you can confidently navigate the world of synth sounds and enhance your music-making experience.